3. Circular fashion
In this week we were introduced to circularity and open value chains in the fashion sector. One of the ways to be achieve circularity in fashion is through Modular fashion. This refers to an approach to the production of accessories and garments using vector graphic design of biodimensional lasercu modules. They are interlocked to create complex 3D seamless geometries. For this week the assignment is to create modular elements that allow the user to change the shape, resize or replace certain elements. An the work flow is as follows, 2D design > Testing > laser cutting.
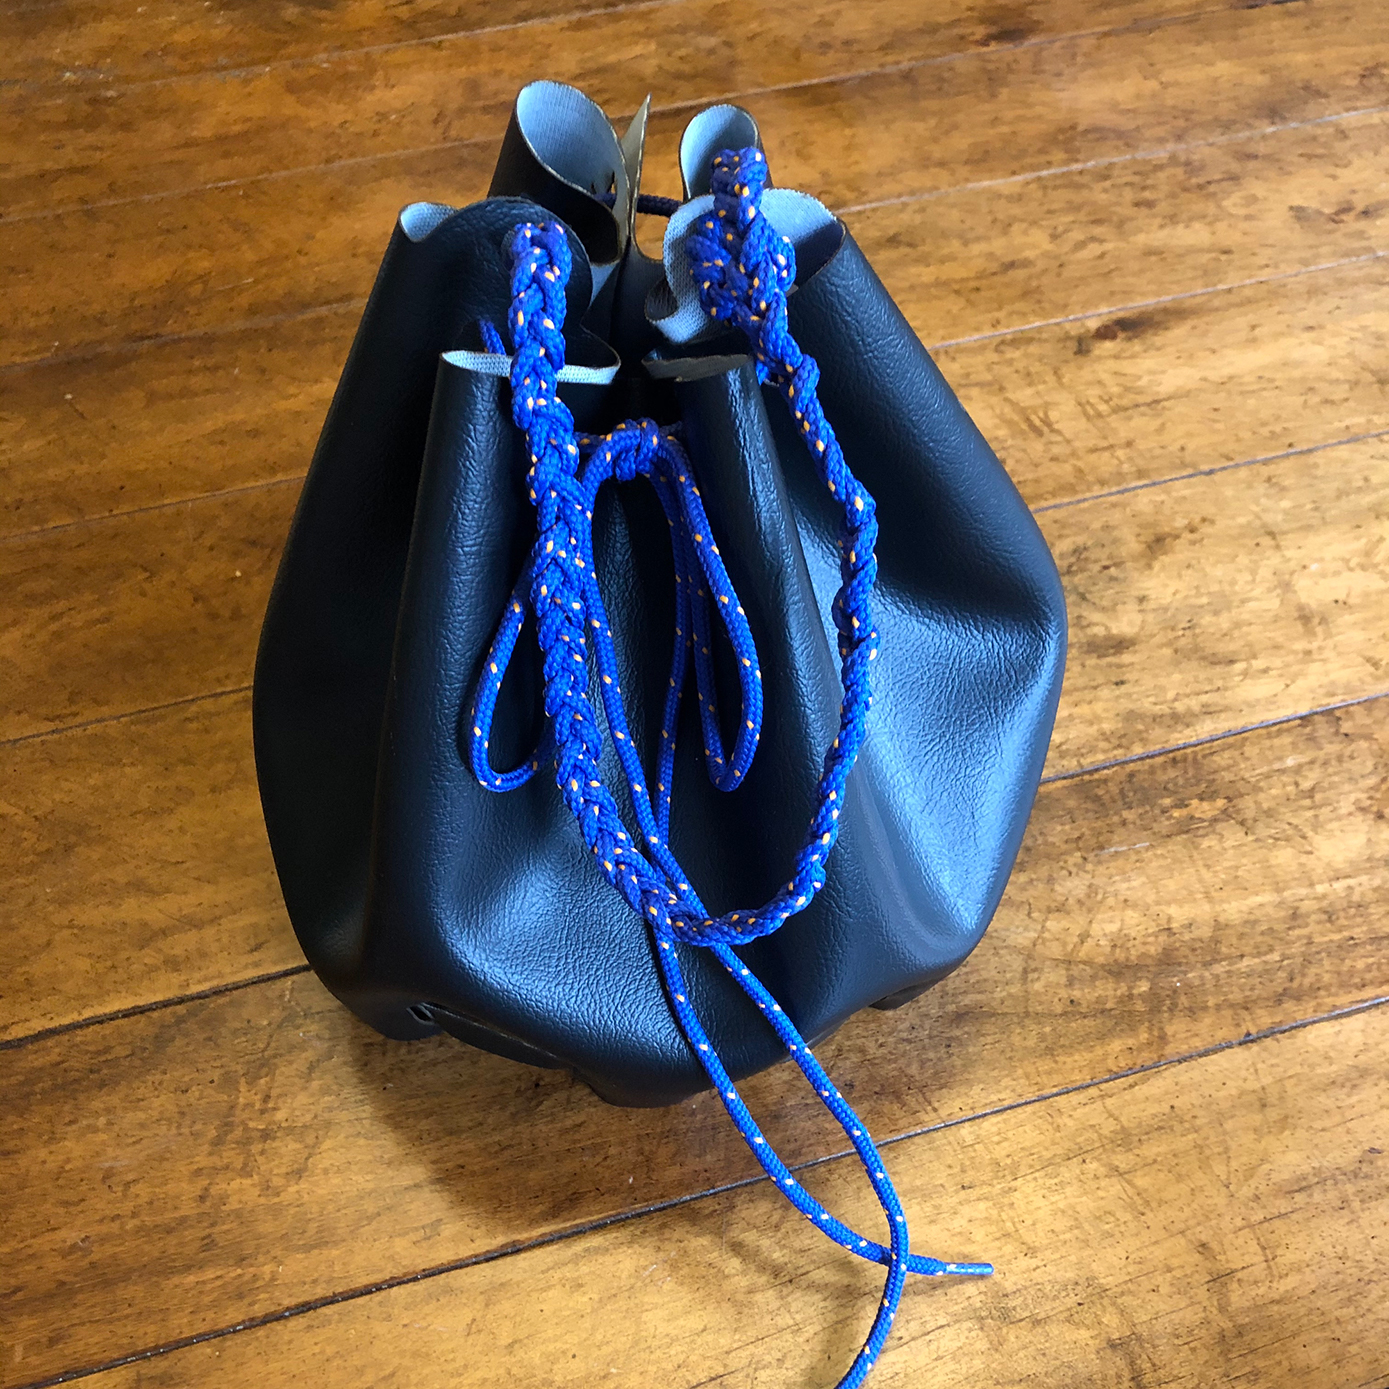
FINAL OUTCOME
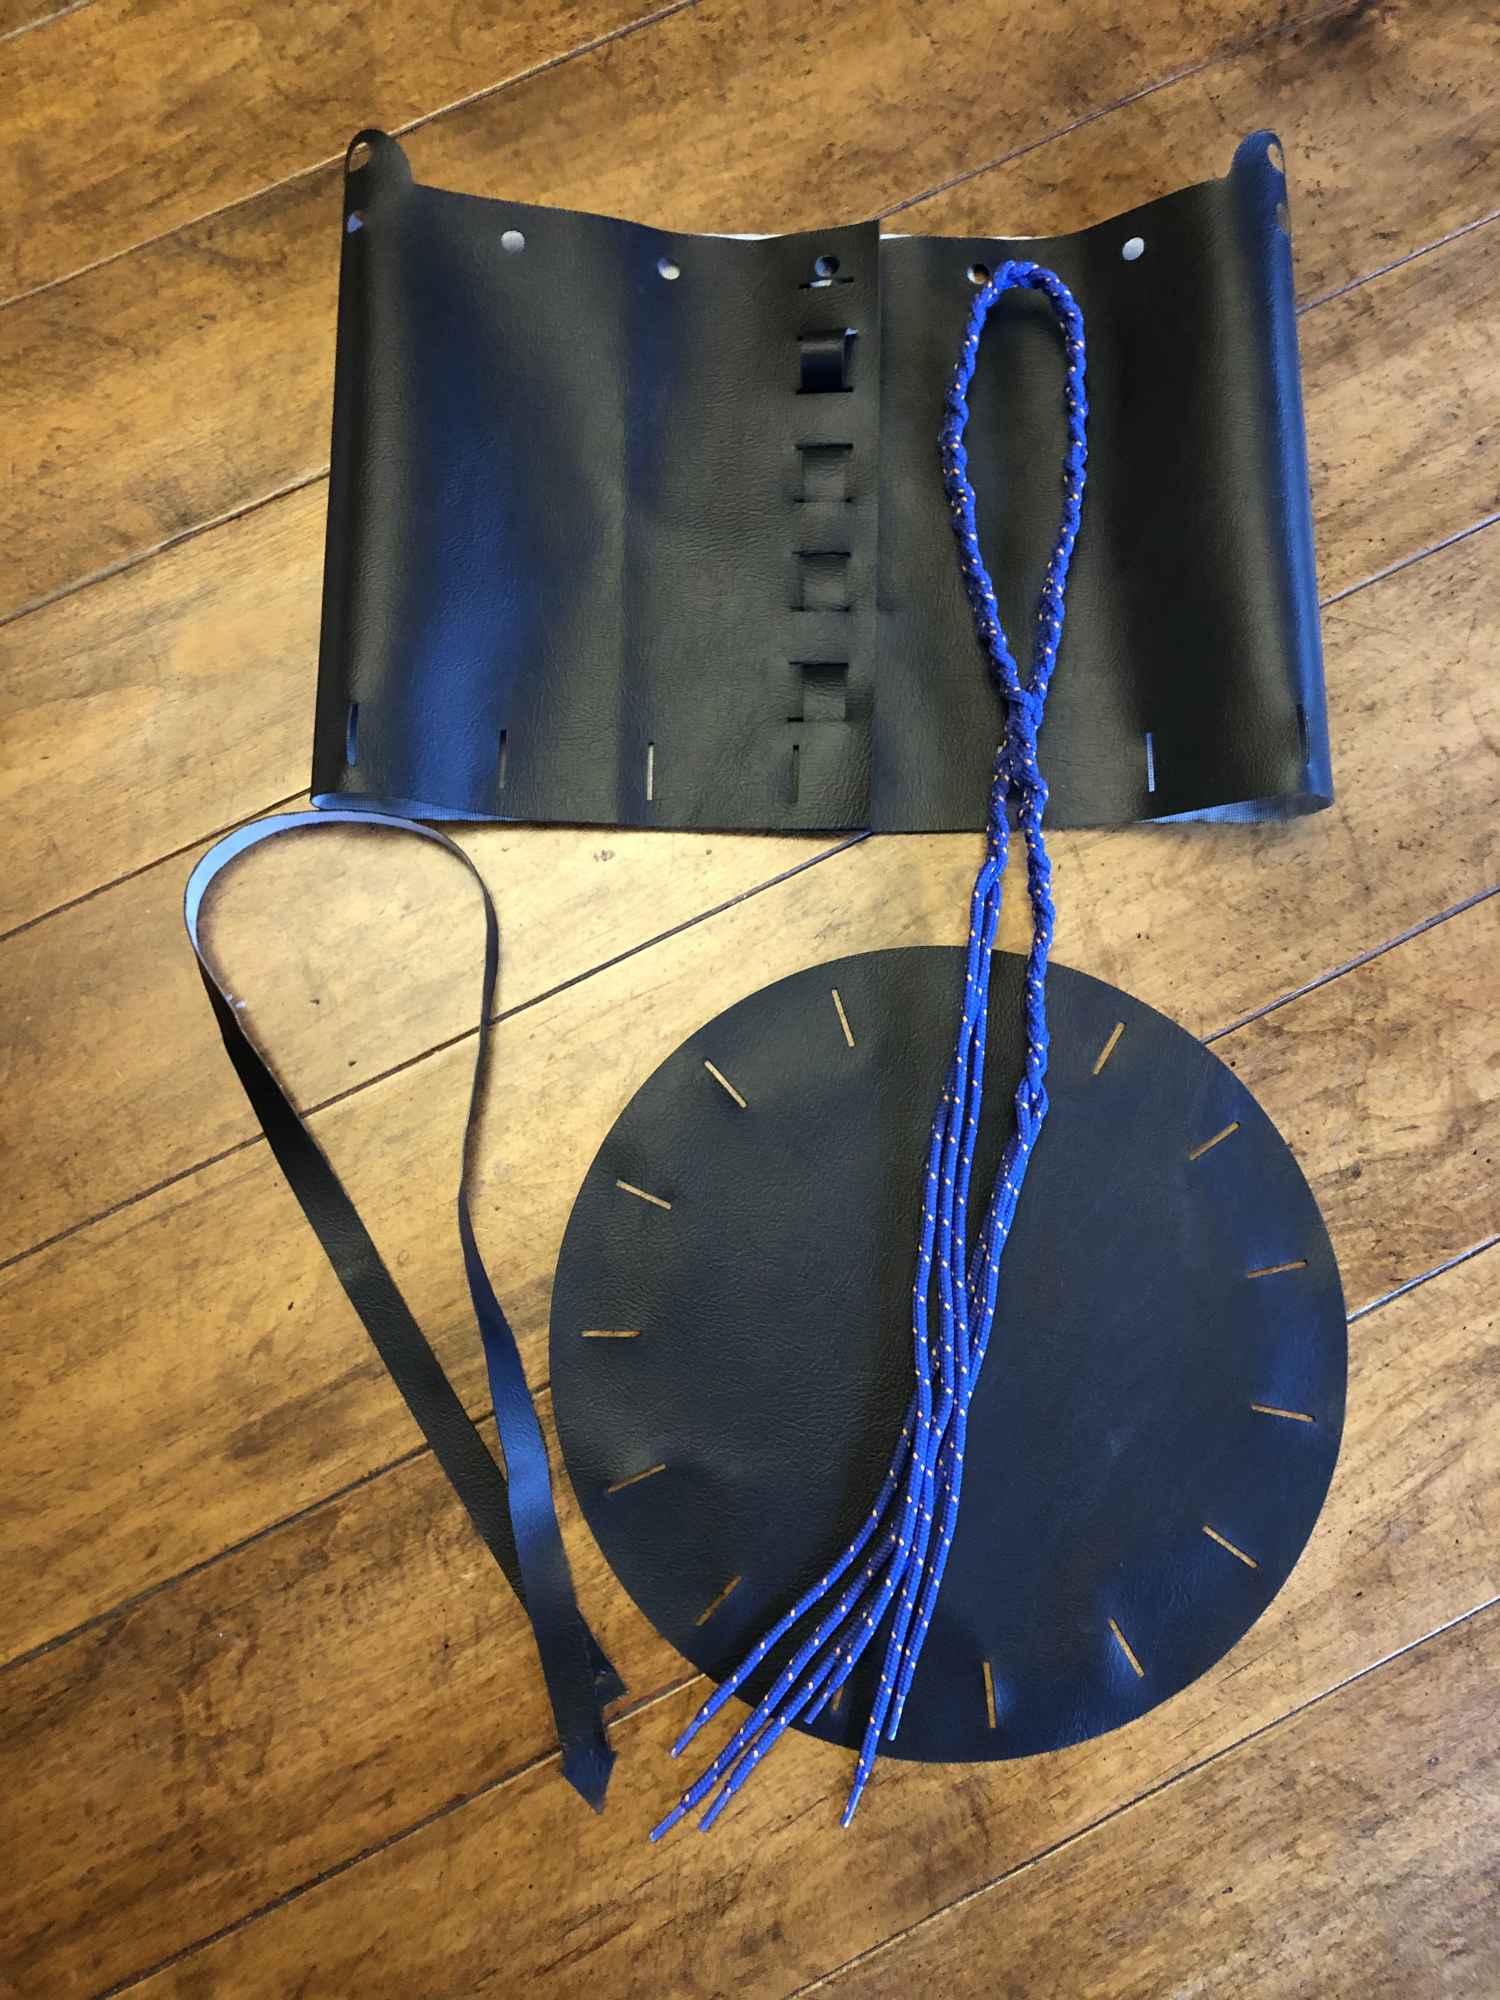
My final piece is a self assembly, seamless bucket bag. You can adjust laces or cords to the preferred straps lenght. Also you cand use other materials, colors, and braiding techniques.
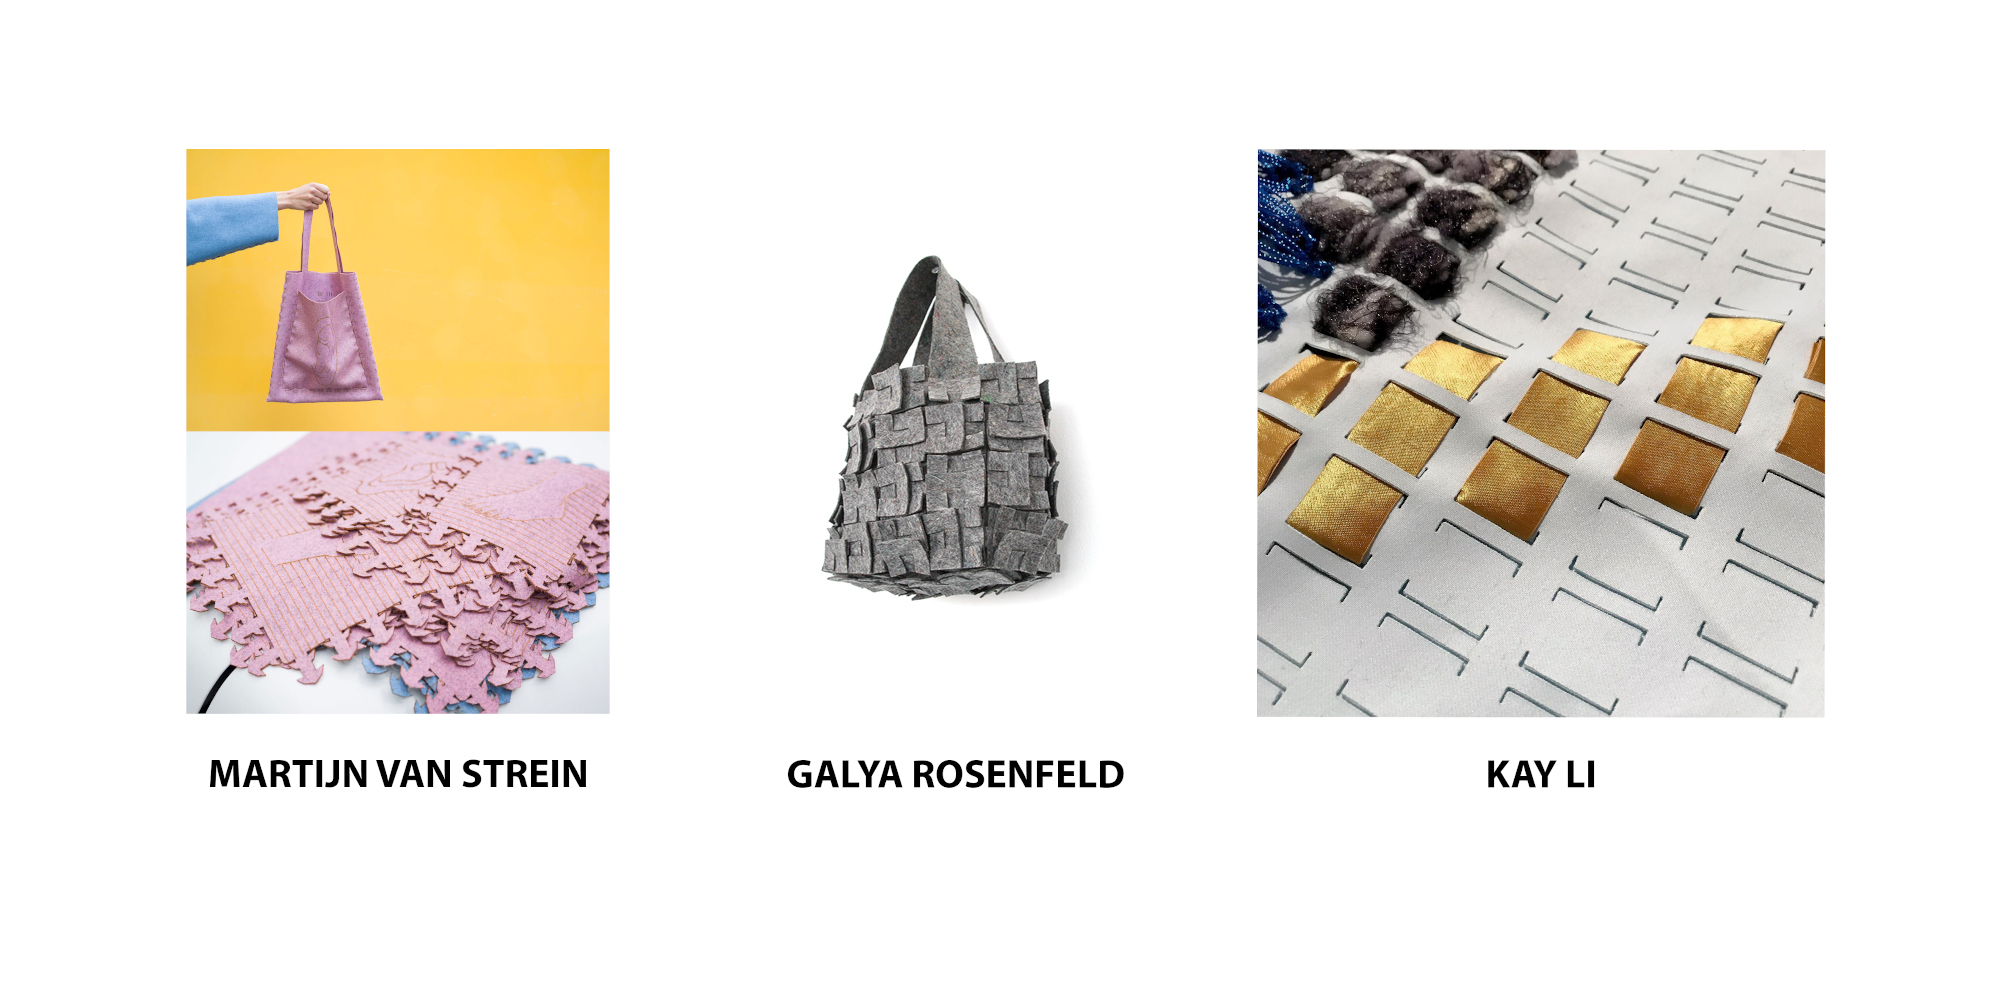
INSPIRATION
HOW TO
2D PROCESS AND TESTING
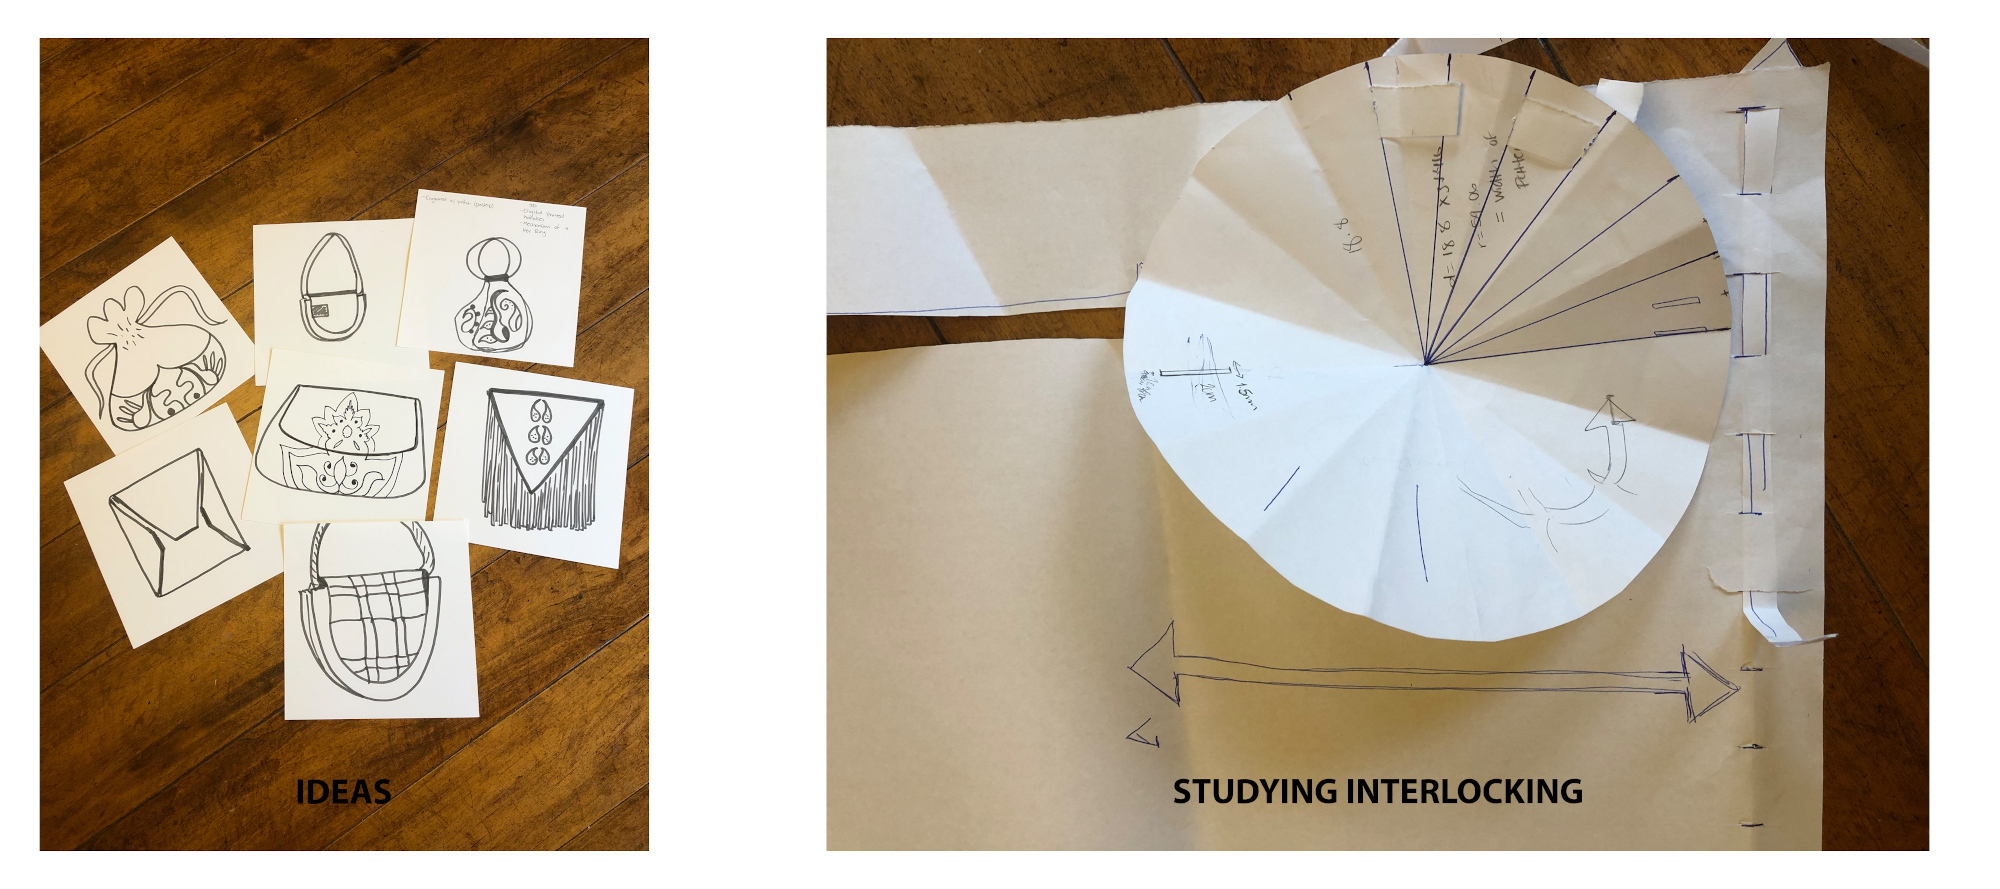
First step to start your deisgn is to look for inspirational artists and works, visually study what shapes you like and how they interlock, start experimenting with paper interlocking and ideas of the design you want to achieve. I started by drawing some initial ideas and when I chose one that I like I paper cut to see how I could achieve a successful interlocking. You can go to my USEFUL LINKS where you will find a tutorial on how to make a bucket bag pattern.
PROTOTYPING
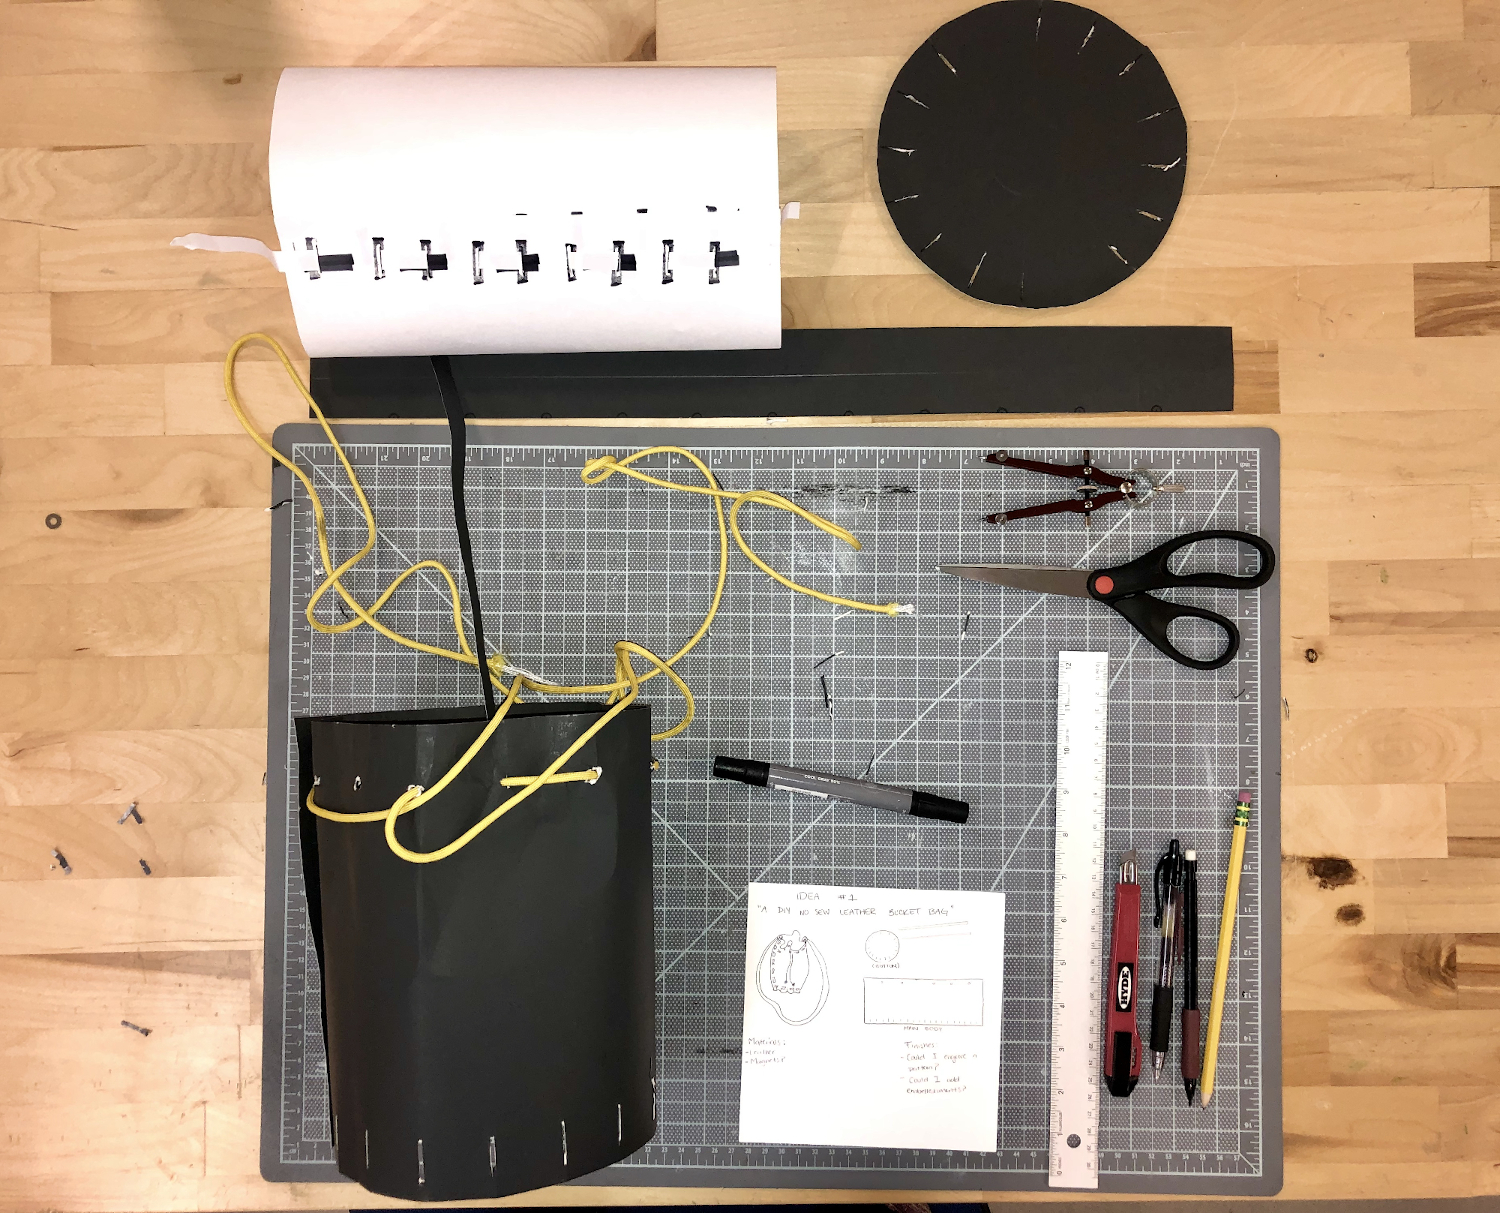
2D VECTORIAL SOFTWARE. I used solidworks to give it a try at a new software named SOLIDWORKS, which later was exported into an Ai file to laser cut.
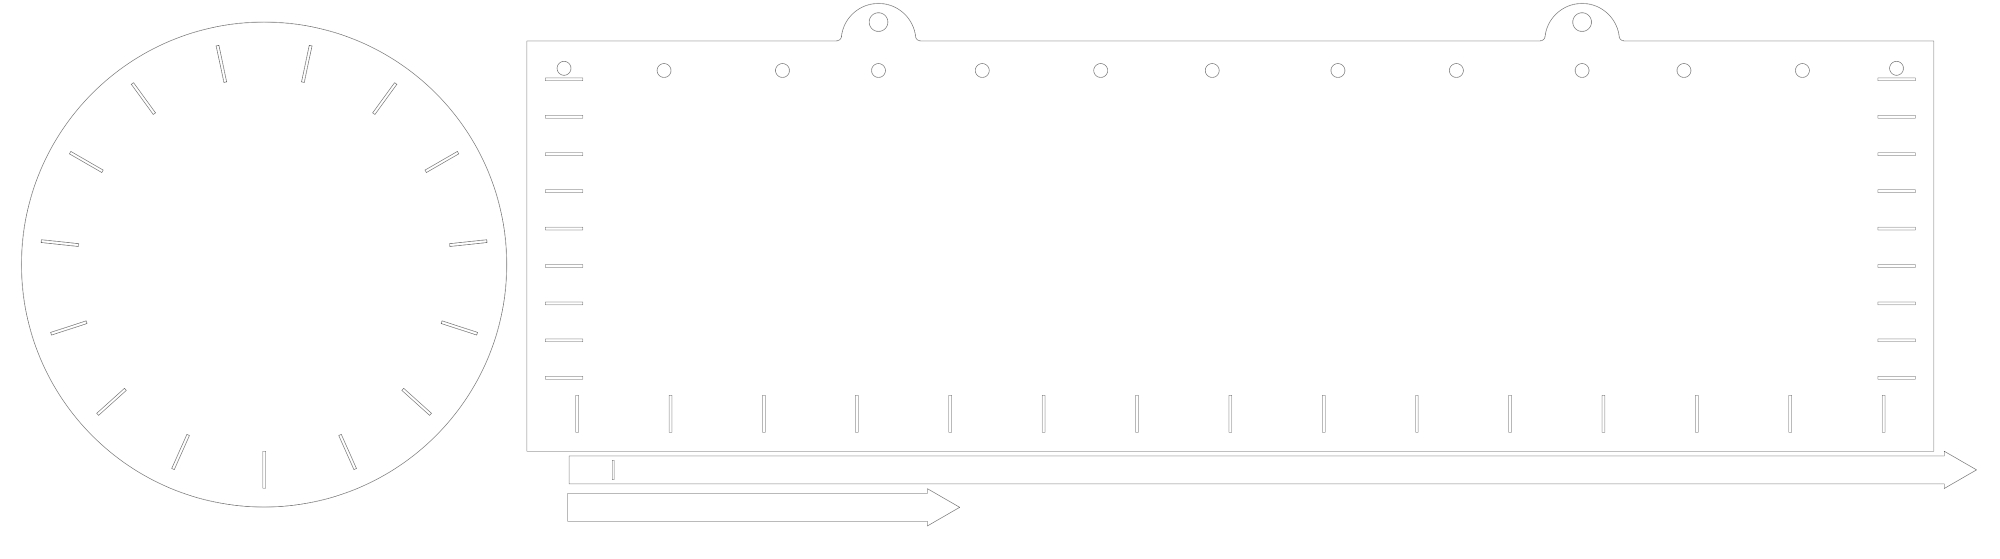
The final pattern looks like this in vectors.
Solid works steps
- Open a new file.
- View your sketch in Top plane.
- Create a circle in the dimensions you need, really think how you wish your design to look, to consider the dimensions of holes and shapes. In my case I needed to have cuts all throughout the circle leaving a seam allowance, which will make the right shape of the bottom part of the bag.
- For this, I had to create the cuts or holes into an inner circle. The best way to do it in SOLIDWORKS is to create the shape of the cut, select Circular Sketch Pattern, and this will allow you to mirror anything 360 degrees.
- Linear pattern worked for me while doing the cuts of the rectangle, you can edit the spacing in between shapes and you can also edit the number of the repetitions by double clicking the pattern while it is still selected in yellow. Then click the check mark.
Afer you have your complete pattern, now you have to laser cut it. Here are some guidelines for using the Trotec Laser Cutter.
- Check the equipment, including honeycomb, flat metal, clean lenses
- Get the right stock material and avoid these materials
- Check line settings in your file
- Thickness 0.071 pt or 0.001 in or 0.025 mm
- Default color settings. Engraving is Black (RGB 0,0,0) and for cut Red (RGB 255, 0 ,0)
- Set up print
- Choose Trotec as your printer
- Go to Setup>Preferences
- Enter the document size
- Assign the correct material
- Confirm a few times until you get back to the print dialog where you now need to choose "User Defined" under paper size
- Press Print, this will send the job to Trotecs Job Control
- Connect the equipment to Job Control
- Press the USB button in the lower right of the Job Control UI
- Press play in the lower right to begin the cutting.
- NEVER leave the lasr cutter when it is running.
LASER CUT PATTERN FOR BUCKET BAG
ASSEMBLY
- The first step to assemble the bag is by starting to join or interclock the rectangular pattern, which will be the main body, with the short cord. Start from bottom to the top. The bottom part is where all the cuts are rectangular and the top part is where the holes are. Do as shown in the video below.
USEFUL LINKS
- ROUND BUCKET BAG PATTERN MAKING
- CIRCULAR SKETCH PATTERN IN SOLIDWORKS
- CIRCULAR SKETCH PATTERN IN ILLUSTRATOR