8. Open Source Hardware - From Fibers to Fabric
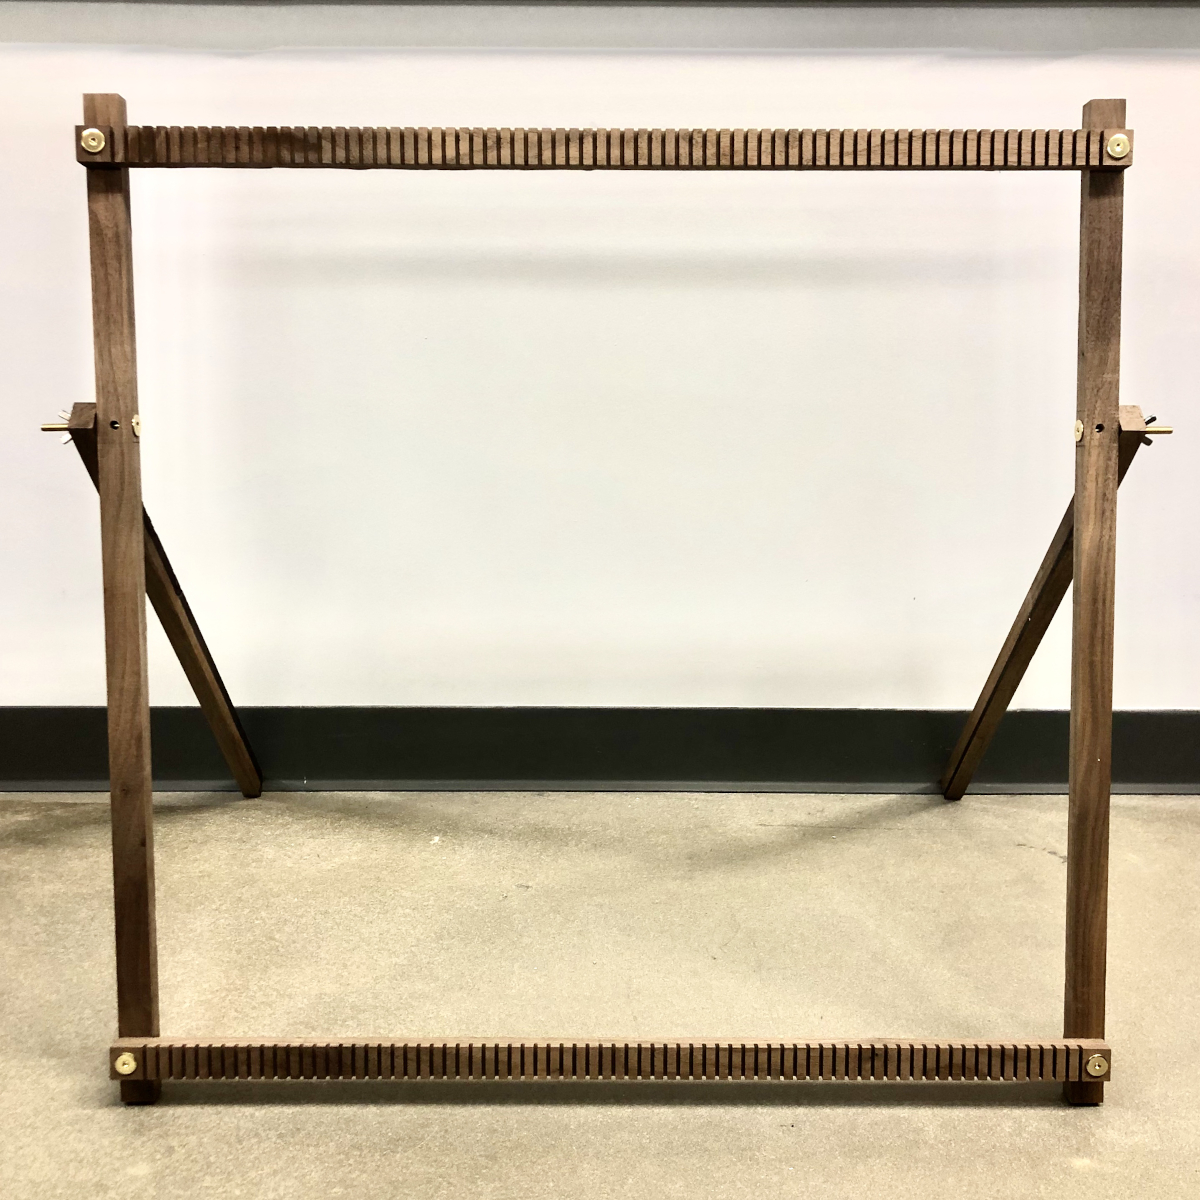
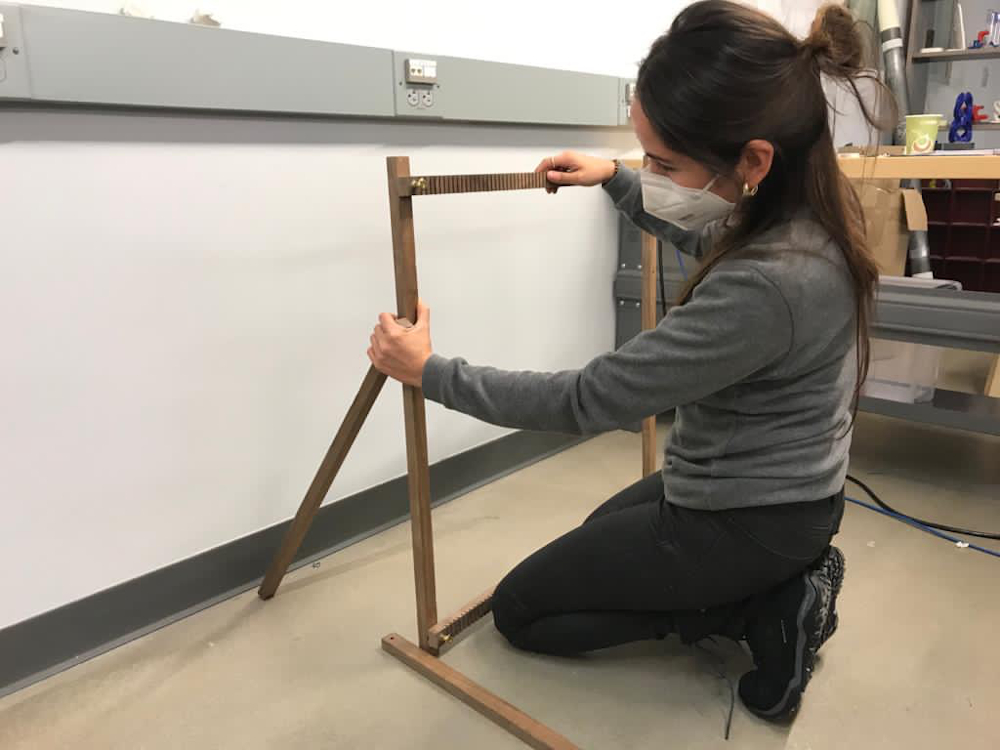
This week our assinment was to create a machine, and I designed a weaving loom. This is what it looks like:
RESEARCH
First lets start by explaining what weaving is. Weaving is a way to create fabric, this method consists in having two sets of threads or yarns that are interlaced at right angles. The threads that are placed vertically, as a whole, are called warp, and the vertical threads are called the weft or filling. The way the warp and the weft interlaced or interwoven will affect how thet cloth will look like, and that interlaced is also called the weave. Here is an example of how it looks like:

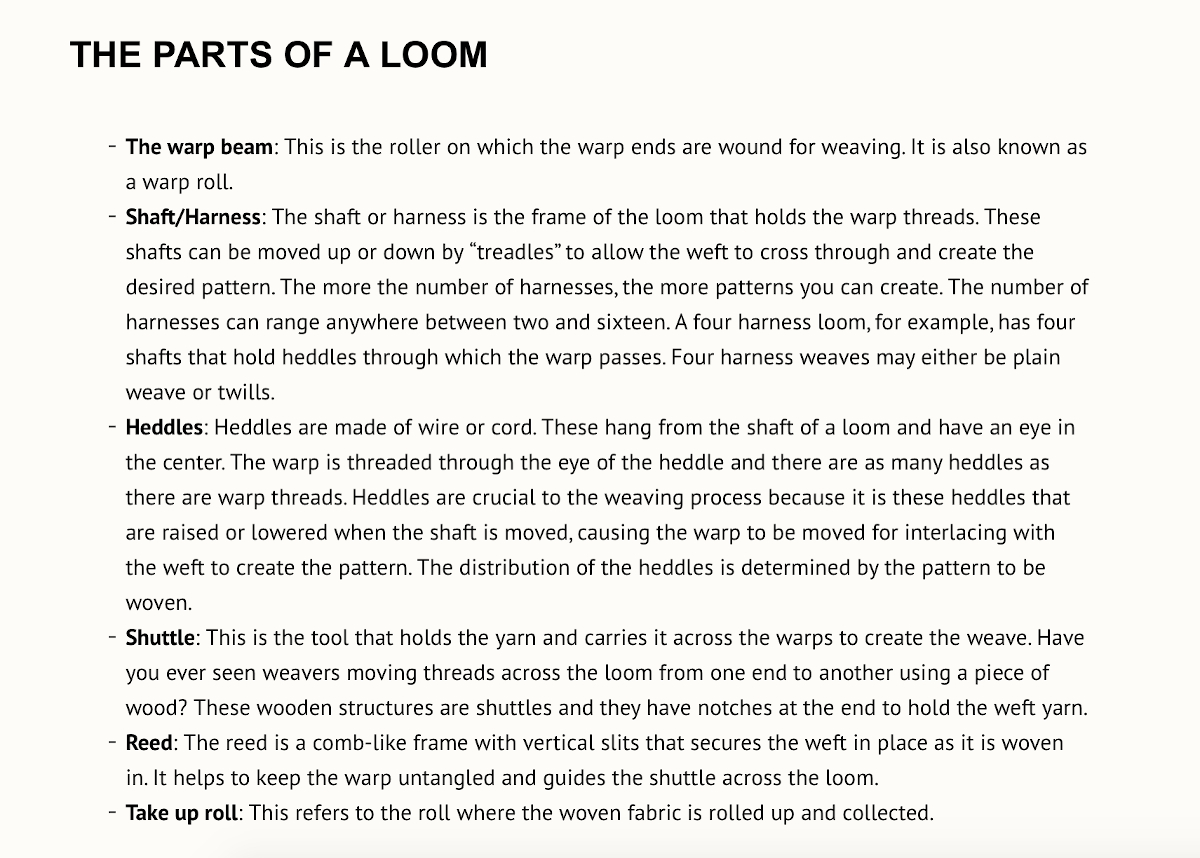
The looms are the devices in which you actually weave, and here is an example of a loom and bellow the different parts of a standard loom.

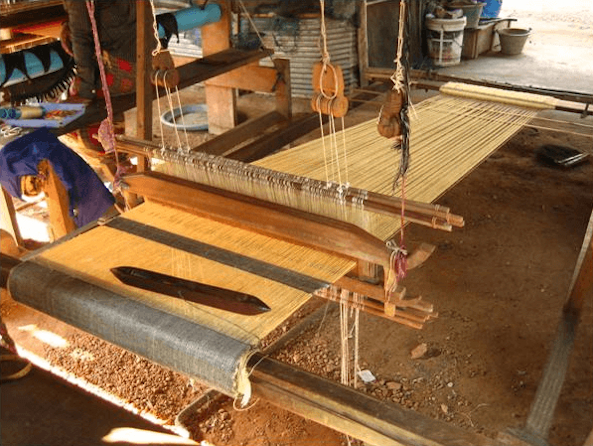
There are many types of looms, of all styles, methods and sizes, but we are going to focus on a hand loom, which is the one I did for this assignment. Below is a picture of a handloom, which will be the exammple that Charlie Bradley Ross uses when discrabing a handloom. Charlie explains what a hand loom works and is in her article Understanding Weaving: what are looms? "A hand loom is simple machine used for weaving. A typical handloom is a wooden "vertical-shaft" loom.Here, the heddles are fixed in place in the shaft. The warp threeads pass alternately through a heddle, and through a space between the heddles (the shed), so that raising the shaft raises half the threads (those passing through the heddles), and lowering the shaft lowers the same threads, the threads passing through the spaces between the heddles remain in place."
PROCESS
I fisrt watched searched for a lot of DIY looms, and examples of looms out there. There are quite a lot of options depending on the type of work you wish to do like tapestries, cushions, small or big artsy wall hangs, etc. I came up with the design based on this project DIY weaving loom. If you are planning to do this project, remember that you can always change things that will work better for you in terms of price, size or the things you will make with your loom.
What is neccessary, as you can see in the link above, is that, in order for you to make a basic hand loom, you need a frame, the frame needs to have either notches or screws in which the thread will stay as support for your warp. You will need a comb to move and stack the threads, a needle to make your life easier when passing the thread between threads, and a shed stick. There are other elemtents that you can do to make your process easier like having a dowel or a stick shuttle.
For my loom I decided to only do the loom, the shed stick, a comb and a needle. I used the laser cutter and the Shopbot to cut my wood in the exact measurements I needed. You can also do a loom based on a picture frame or canvas like this or even make one out of cardboard.
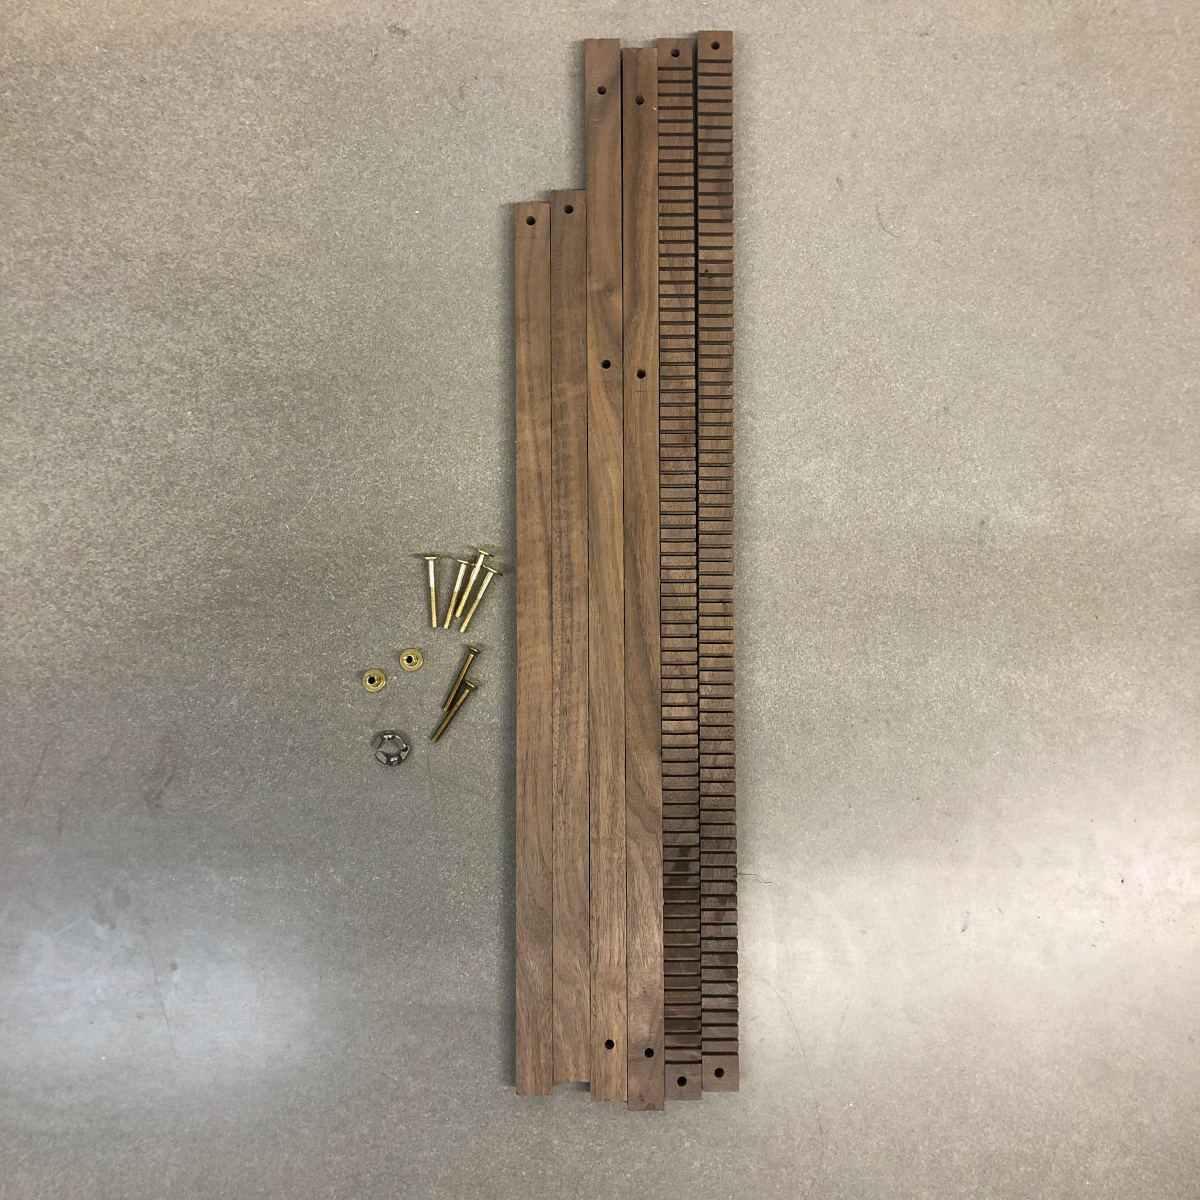
For this specific design I used this list of MATERIALS:
- 4 hardwood square of 30in by 1in for the frame
- 2 hardwood square of 25in by 1in for the legs
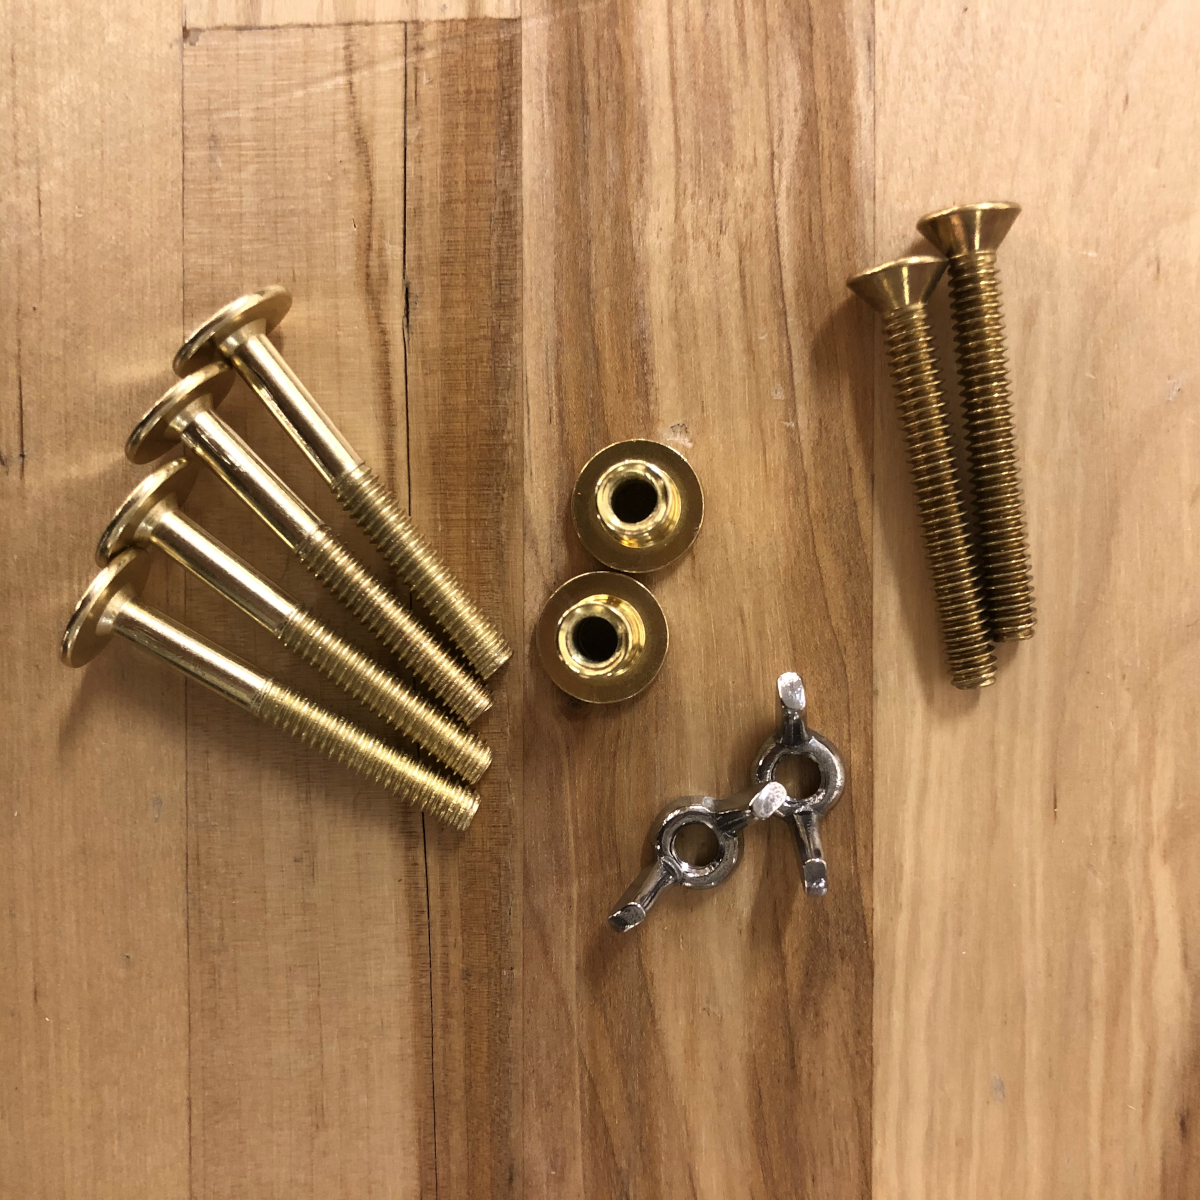
- Screws and butterfly screws
- Ruler
- Pencil
For the loom I designed, I wanted to used whatever I had available in the lab, so I took advantage of the pile of wood we have and used a ShopBot CNC tool. Let me introduced you to this topic if you are not acquainted. First I will explain what CNC is. A CNC (computer numeric control) tool is used in prototyping and full priduction for cutting, carving, machining and milling in a variety of materials including wood, mdf, plastics, foams and aluminium. With a ShopBot CNC tool, you can use the included software to design in your own computer, then like a robot, the computer controls the cutter to precisely cut your parts.
The ShopBot moves a cutter around a big table (X and Y axes) and moves up and down as well (Z axis) allowing it to make 3D movements and cut all sorts of shapes. The cutter looks like a drill and cut all sorts of shapes. The cutter looks like a drill and is spun by a motor called router or spindle. For a 2D design, basic like mine you can either draw your design with a CAD program or any vector program, in my case I used Illustrator.
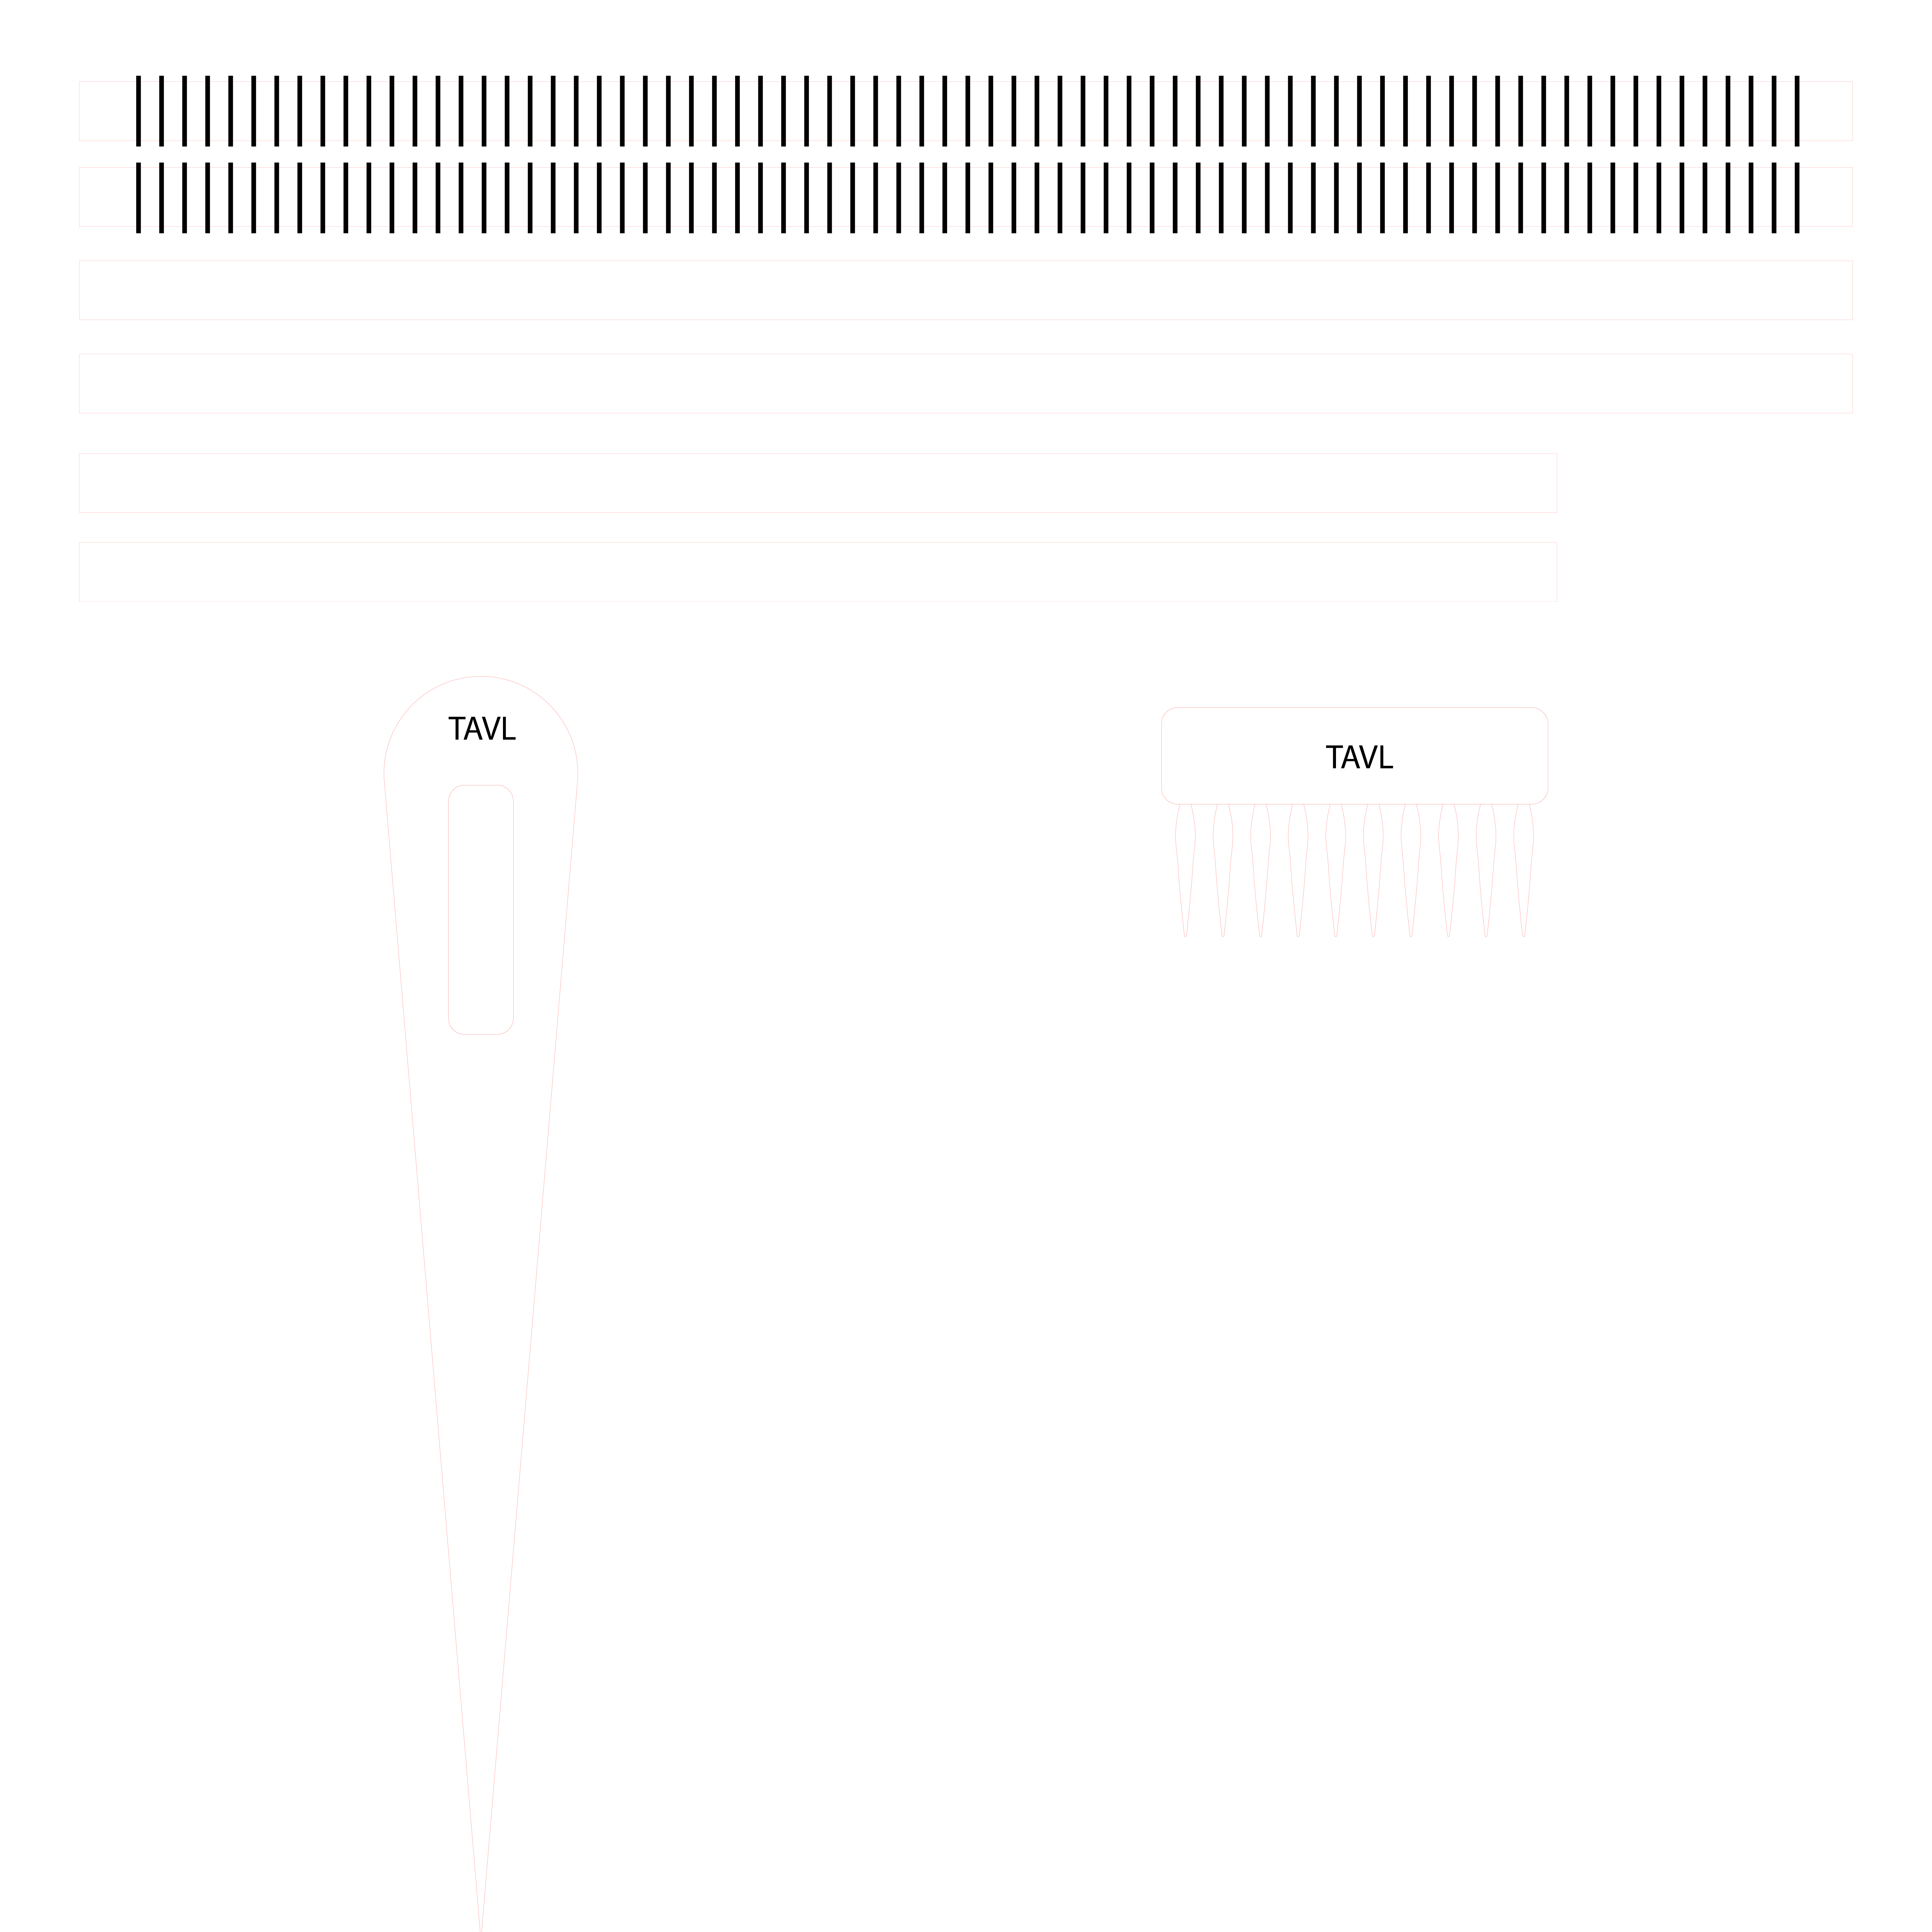
This is how my files for a 30in by 30in loom look:
DESIGN/MAKING
After I finished designing my files, I used the ShopBot and here are the steps to use it.
- Measure your wood and place in bed by securing it with screws over the wood table, this will help it stays in place while its getting cut.
- The first thing to do once you have your wood placed is to tell the software where will it cut, so you need to mark where x, y and z is. X and Y will be according to the size of your wood and to level the Z (whch is the top) you will have to do it by using placing the metal flat rectangular piece over the wood and connect the connector in the bit. This is basically a circuit and this is how it measures where Z is, you only have to click the option to Zero and it will do it automatically.
- Open file in Vcarve Pro software (the one the ShopBot uses)
- As in the laser cut you will engrave first before cutting. So I first send the directions of the nocthes. Select Tools > Profile toolpath > Cutting depths
- Start depth > 0.0 in - Cut depth > .25 in
- Select 1/8" ball nose, this wool is great for detail because it is quite small and is teh perfect size for the notches of the loom.
- Go to machine vectors and select ON
- Press calculate then preview slected toolpath. Then it will show you it will cut the design
- Do the same steps for the cutting pieces, for this I changed my cut depth to .75 (which is the actual thickness of the wood I used. It is important because this is how you ensure it will cut all the way ).
- Add tabs on the sides. This will help that it doesnt move when cutting, they are easy to cut, so dont worry.
- ALL SET!!! Turn on the machine with the key, turn vaccum on. Save your file, which will instantly send to cut, Press ok. It will ask you about X, Y and Z being and place, if so, click ok.
- Reset by clicking blue button. 🙌🏻
After using the Shopbot, I used a disc sander. This machine is basically a small tool that has a round sand paper at the top and when is on it spin, making any wood edge perfectly smooth. Then I measured and marked where I wanted the holes for the screws and join the frame. For this I used the drill press. This machine consist of having a drill bit descends to a certain level and makes in a very smooth way a nice hole.
Here is a little video of the process of cutting with the huge help and mentoring from Alexandra, the intern in the Lab.
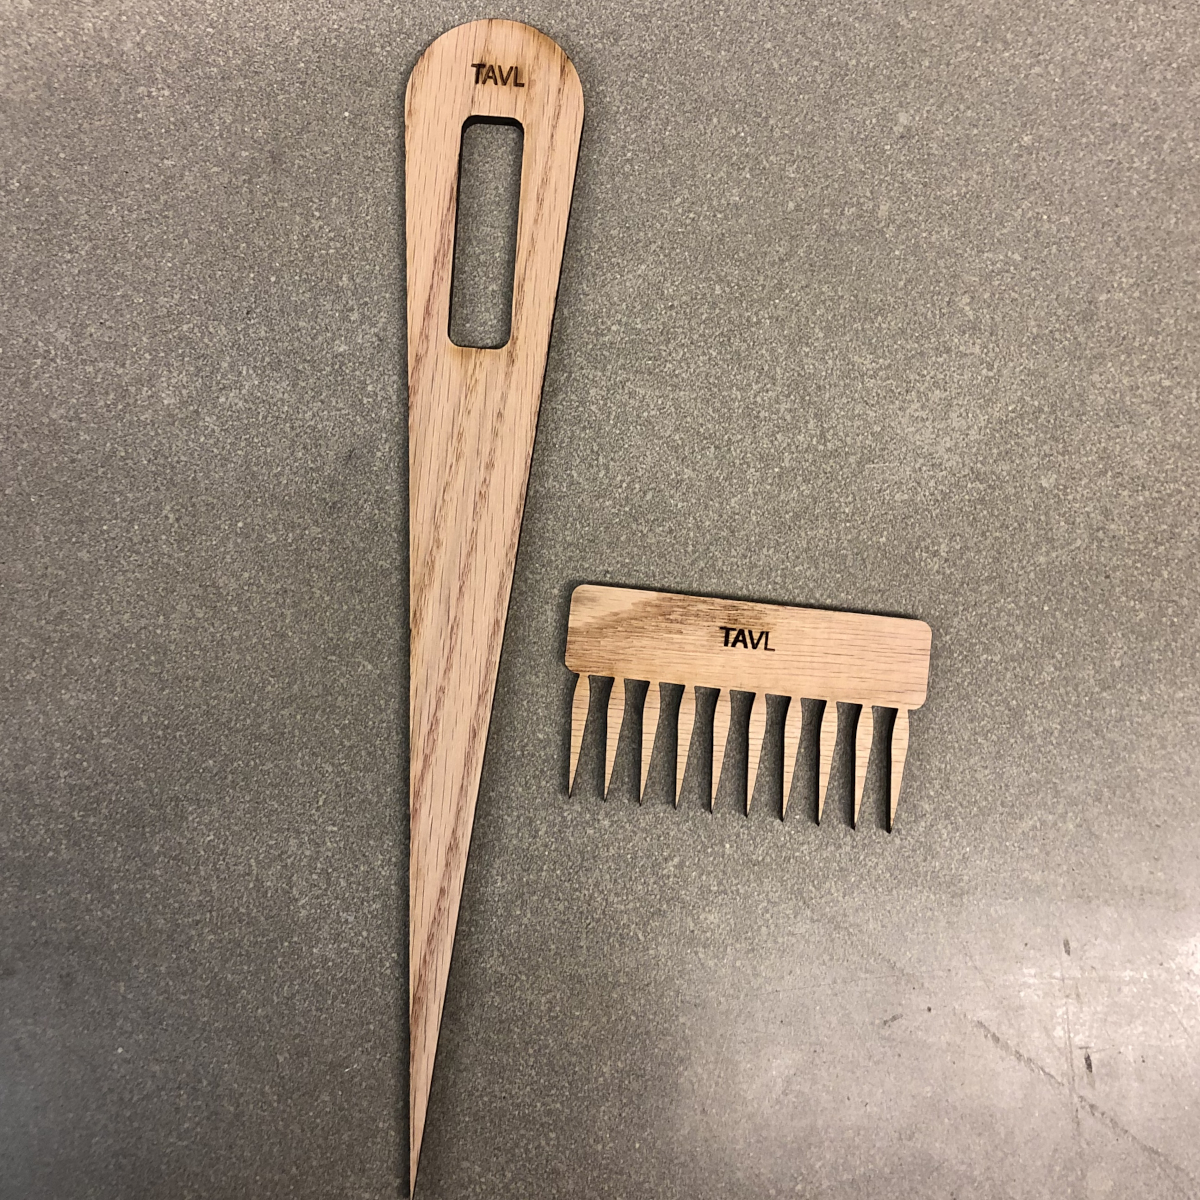
I then used the laser cutted to make the comb and the needle, and engraved my initials to the tools to make it even more personal. If it is a gift, or for a lab, you could engrave those names instead. This is how they turned out:
ASSEMBLY
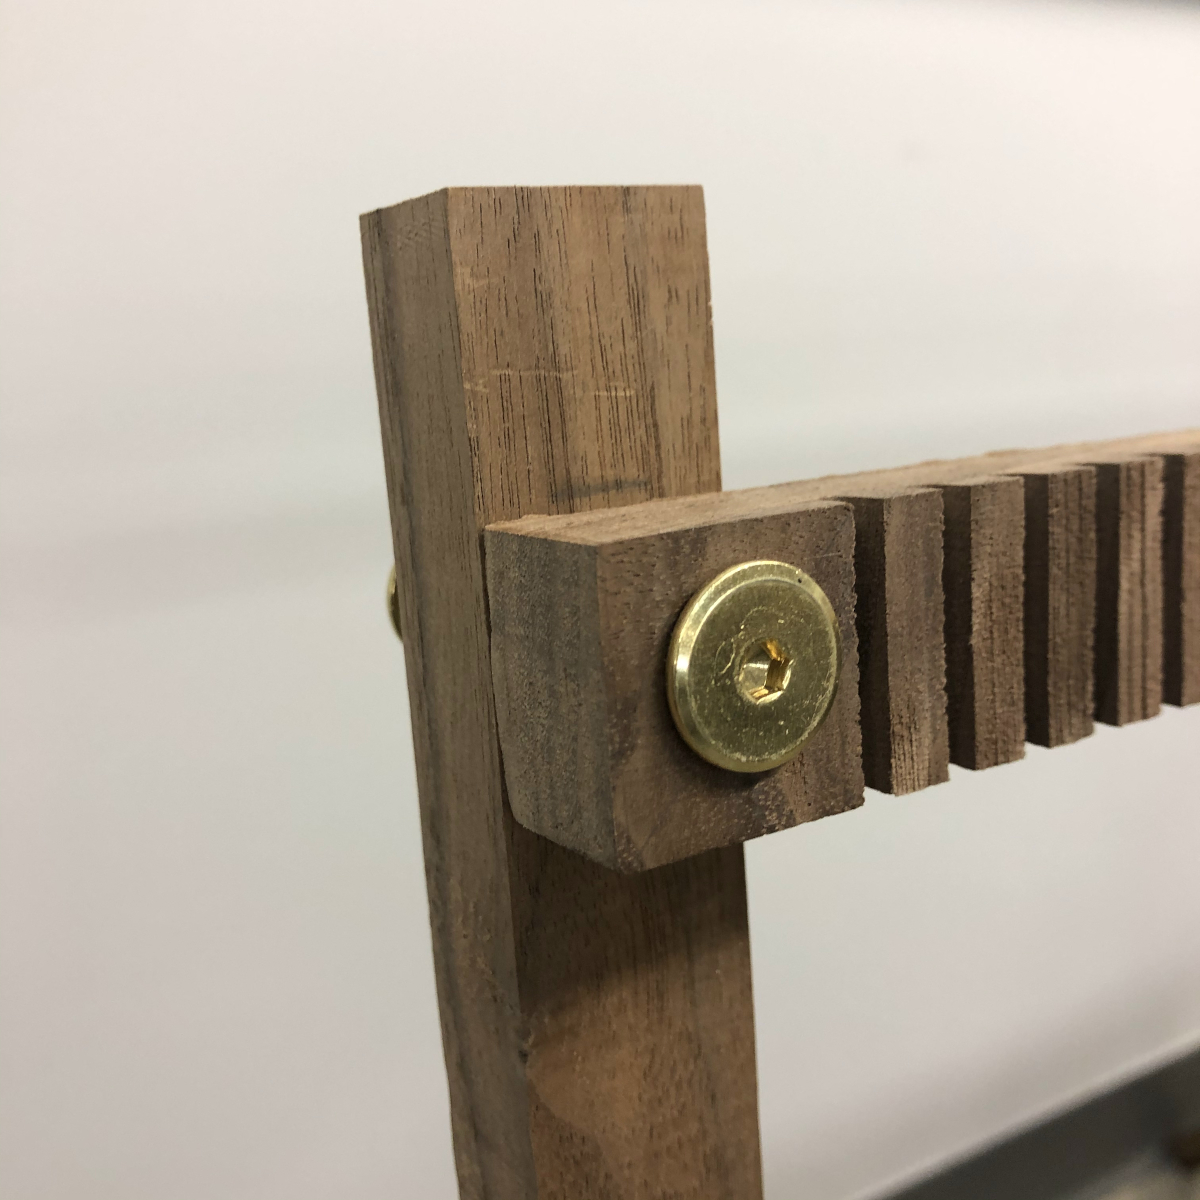
Once I have all my pieces, I started to assembly everything. First by constructing the frame, joining one normal rectangle to one that has notches, until all for corners are connected. Then add the legs in the sides using your regular and butterlfy screws.

NOTES:
-
I used the regular screws in the pictures, but they werent holding the frame perfectly. Every time that I grabbed the frame from one wood quare side it woul fold. I then tried the butterfly screws, and those were a better option, they definitely hold the frame in place and a lot more tighter.
-
I noticed that the needle I made it was a little too big and thick to pass through the threads. So I might consider doing a smaller version.
-
I made a mistake by cutting a hole in the wrong face of the wood square. This had the consequence of not being able to join the leg and the frame correctly.
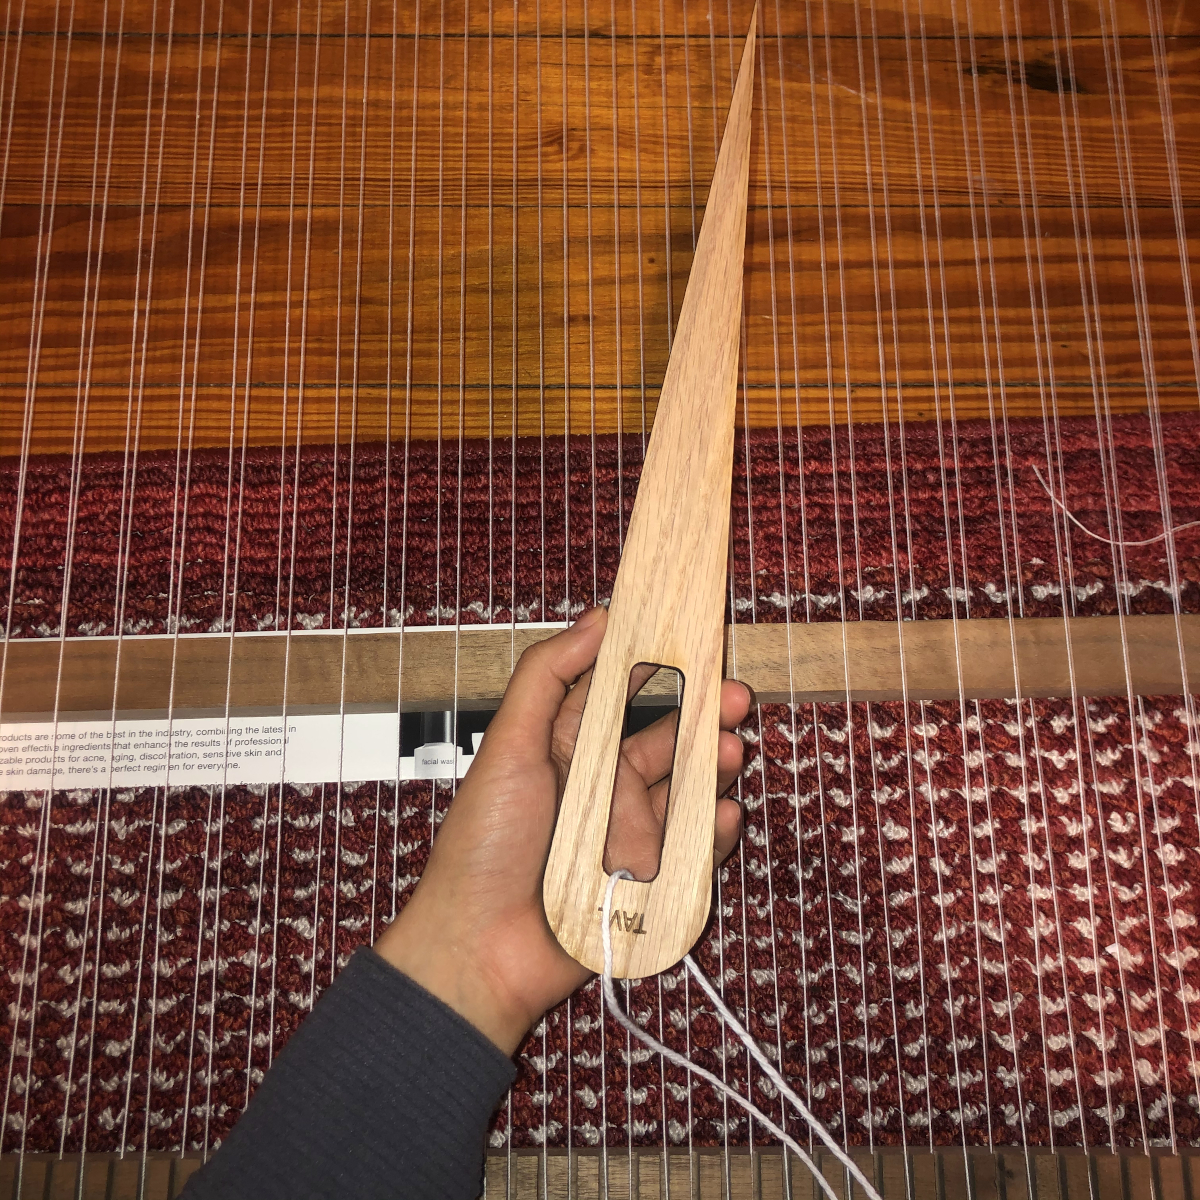
Once I had my loom assembled, I did the warp of the loom to start a new project. So far it looks like this:
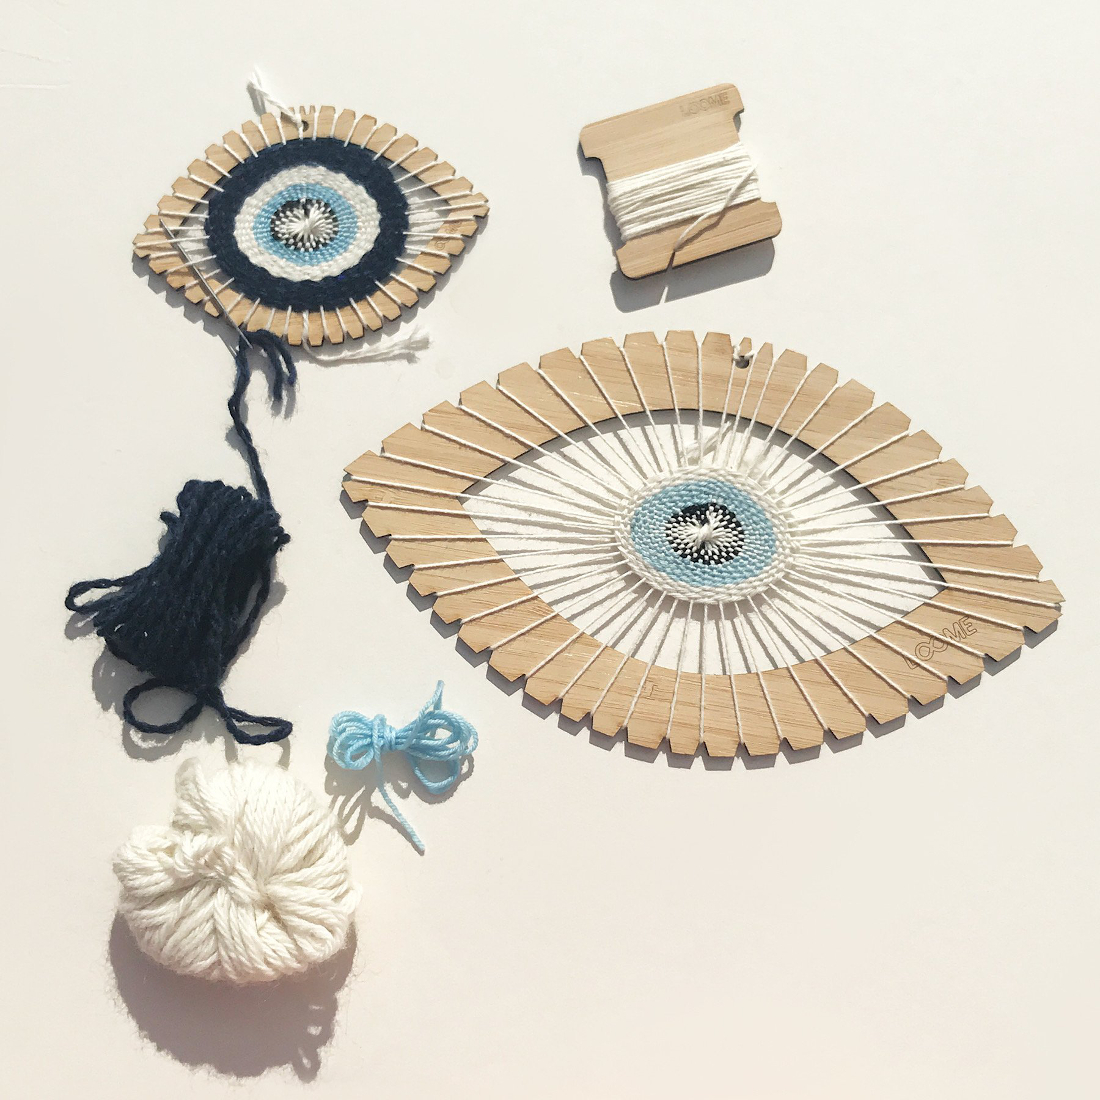
Besides this and many other types of loom, while I was researching I found this idea of a loom in the shape of an eye, and I found it very clever and creative. I think I will try to replicate that loom too.