5. E-textiles
INTRODUCTION
This week we were introduced to E-Textiles, which can be defined as the practice of embedding electronics into textiles. The way to do so is by using a circuit. A circuit is a path for electricity to flow, and in order for the electricity to move it needs to have an electrical current. An electrical current is created when a steam of electrons are moving, for this you will need a source, and it cabn be either a battery or a generator. Electrons will always want to move from greater to less electrical energy, another way to say it and see it is that it will move from power to ground or from positive (+) to negative (-).
A circuit then, will need a source, wire as a conductive medium and a load in which case we will be using a LED. In summary the battery provides the required energy for the electrons to flow or move to then light the LED.
Lets get deeper now. As mentioned before the elctricity can flow, just like the flow of a liquid in a pipe, and the term flow refers to Current and is the rate at which electrical charge flows, quick or slow, and is represented with "I" Now, Voltage is the pressure or force between two points. When speaking of a certtain amount of voltage in a circuit, it is referring to how much potential energy exists to move from point 1 to point 2, and is represented with "V". The current usually moves with some friction or opposition to motion, this opposition is referred as Resistance it is the amount of material that resists the flow of current. For example, if electricity wants to move in a material like wood, it will have a very high resistance because wood is not as very conductive material, whereas metal will have a low resistance, since it is a very conductive material. Resistance is represented with "R".
Another important definition, is what we are going to refer as sensor which is used to detect events or changes in its environment and send information. This information or data that enters a system can be a button press or a heatstroke for example. There are two types, one is Digital which is bionary, either the led is on or off. And Analog sensors have a range in their values. Lets explore those types of sensors.
The Digital type works with with switches, these represent a break in a circuit and there are types of switches:
- Momentary: best known as push buttons. They stay open as long as you hold the two pieces of conductive fabric sandwoched between a piece of foam, which will have small cutouts where the two pieces can touch.
- Toggle: Two pieces of conductive material that stay together. They are open in one position and closed in other. (snaps and zippers).
- Tilt: A conductive bead or pompon makes contact with conductive fabric patches based on its position.
- Stroke: Close the circuit by pressing conductive materials into contact.
The Analog type works with sensors (also variable resistors), they use resistance to get a broader. range of values. More currrent will allow to change the brightness of an LED, frequency of sound, or the speed or a motor. Resistance can be changed in 3 ways:
- Distance, resistance increases over distance, 4/5 ohms, limit is 2 ft
- Contact: some materials are pressure sensitive, will decrease in resistance when pressure is applied to them, so it means it will allow more electrical energy through.
- Surface area: increasing the size of the area for electricity to flow will decrease the resistance.
These are a few materials you can use if you want to design an analog sensor: 1. Velostat, which is non stretchy 1. EeonTex, resists between 10 OHMS to 10,000 ohms 1. Polysense, best for pressure sensors.
WHAT TYPES OF SENSORS YOU CAN CREATE
Pressure: Use this to track pressure or weight on an interface or object. Bend: Decreases when bent and more contact is made better for measuring joint movement. Is better if you use conductive thread and not conductive fabric. Potentiometer: Adjust resistance by connecting conductive and resistive material through a wiper (electrical contact which moves across a surface) at different pointsin the circuit. The further away, the more resistance. Stretch: The more a resistive material is stretched, the more its resistance will decrease because it has more surface area to cover. Accelerometic: The weight at the end pulls and stretches the crochet or knitted structure as it gets accelerated.
DIGITAL SENSOR
For this project I decided to give it a try at making a TILT SWITCH. This is the the textile swatch:
PROCESS
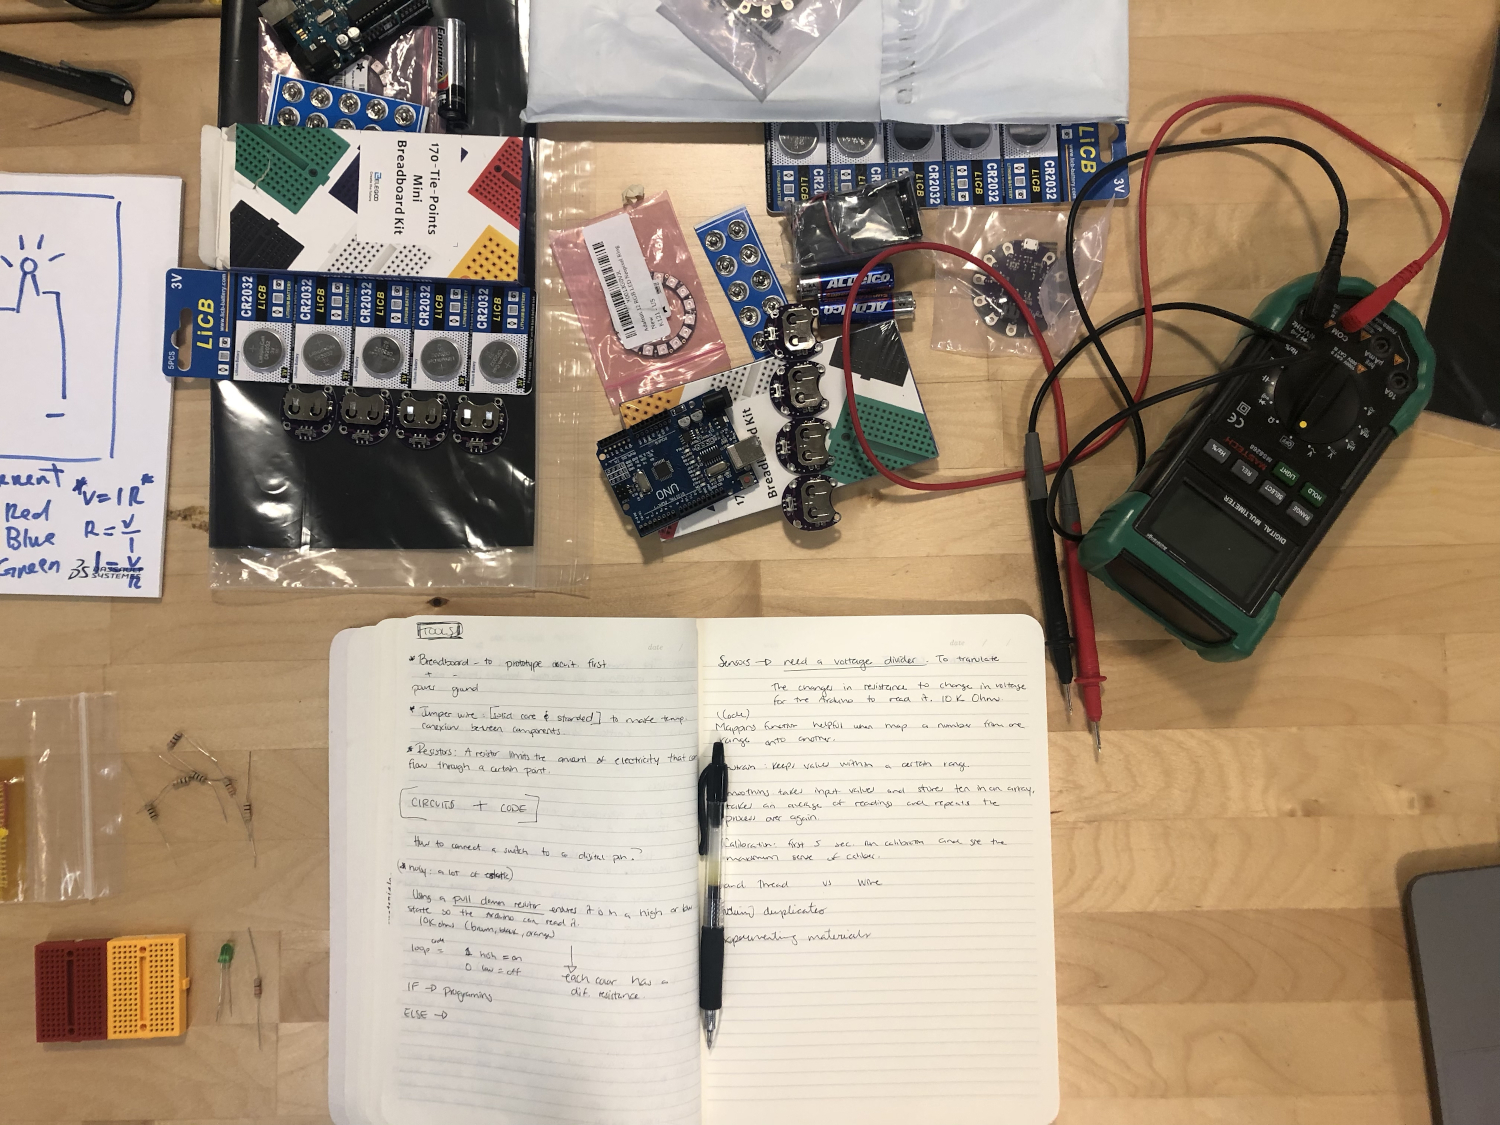
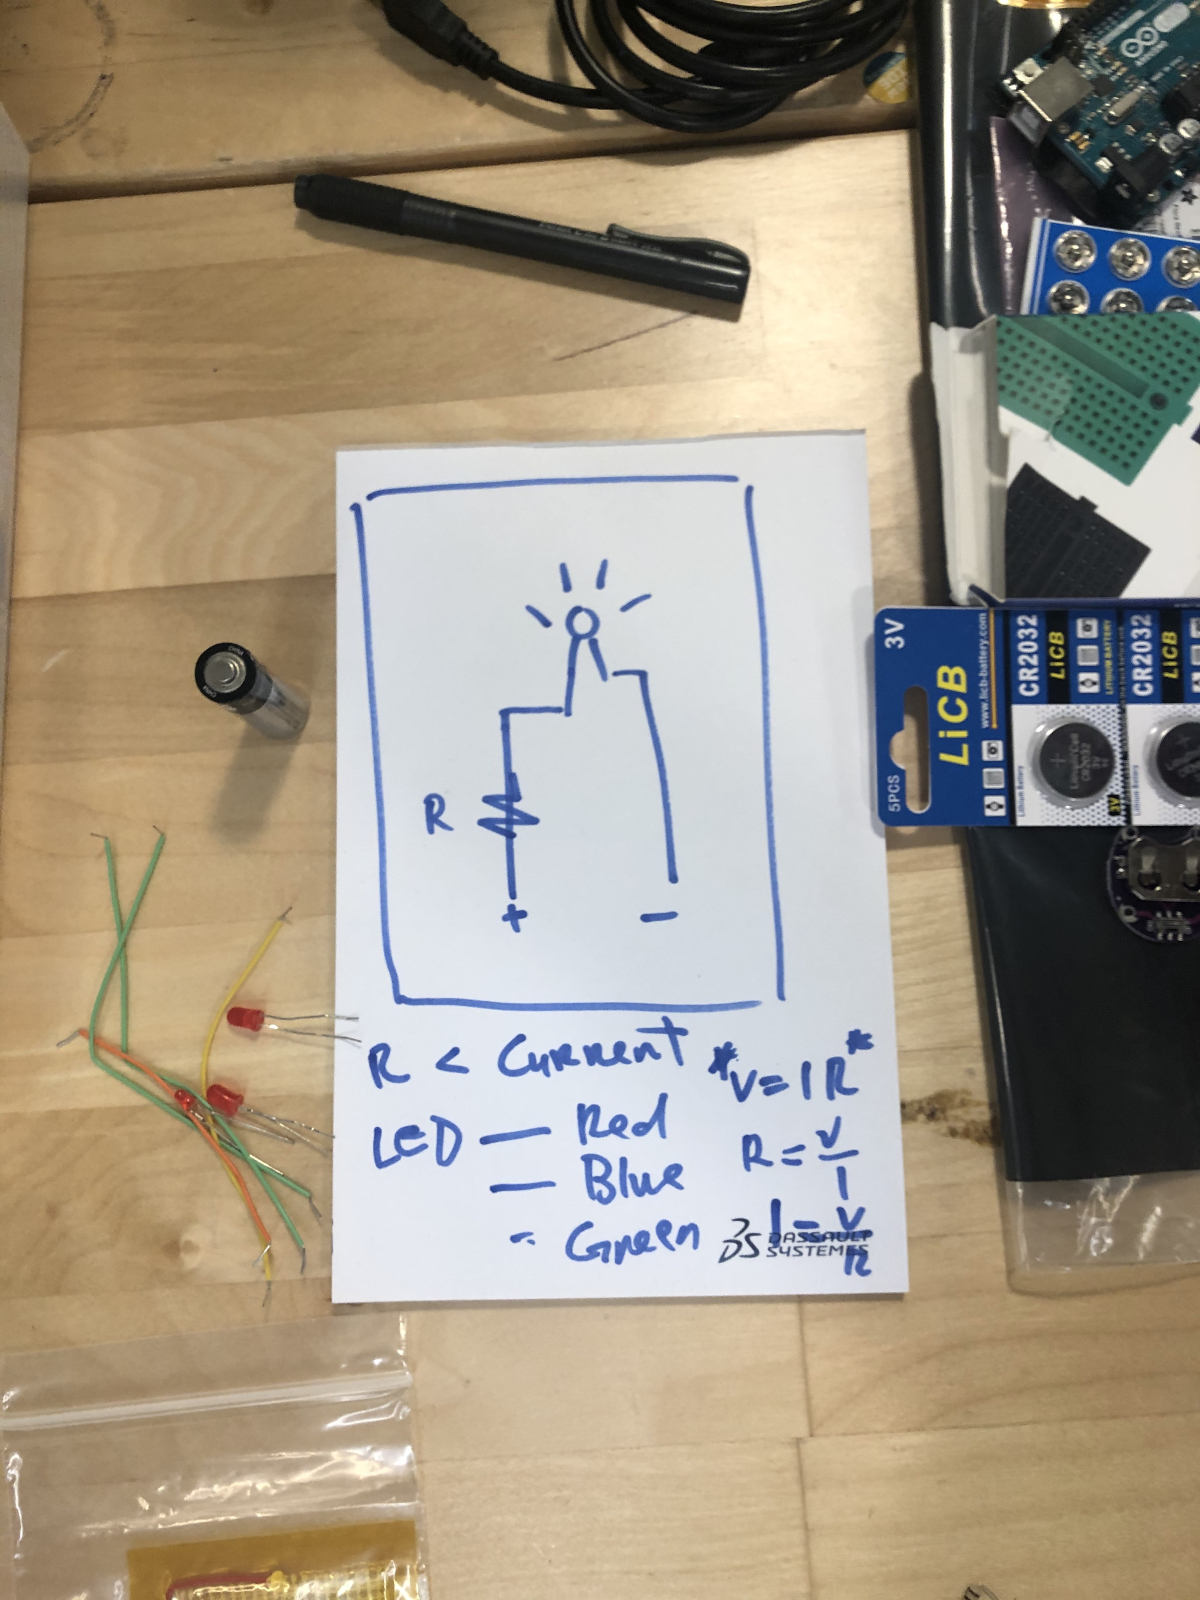
The first thing to do was to draw a diagram circuit to better undertand all the components needed to make the circuit. In the sketch you can see what a regular circuit would look like and then did a trial with a breadboard. So as you can tell in a normal circuit just to be able to transport electricity and turn the LED on, I needed a battery or source, a medium which in this case were the wires connected to the breadboard, and a load, that in this case was the LED. We also used a resistor (the object with orange and black lines) to limit the amount of electricity that can flow through a certain point.
Then I added to the prototype the switch, a small button to turn on or off the LED. It was a little hard to understand how to connect the wires at first, but little by little I started to understan the nature and reason of where and how to put a wire, or in the case of the fianl swtach the conductive thread to be able to turn it on.
ANALOG SENSOR
I decided to design a CONTACT SENSOR, where by pressure you are able to light on a LED, getting a more interactive textile. This was the final textile swatch.
PROCESS
I first did a protorype of what I needed in order to achieve a contact sensor, then I illustrated a tentative way to transform it into a textile idea with fabric options.
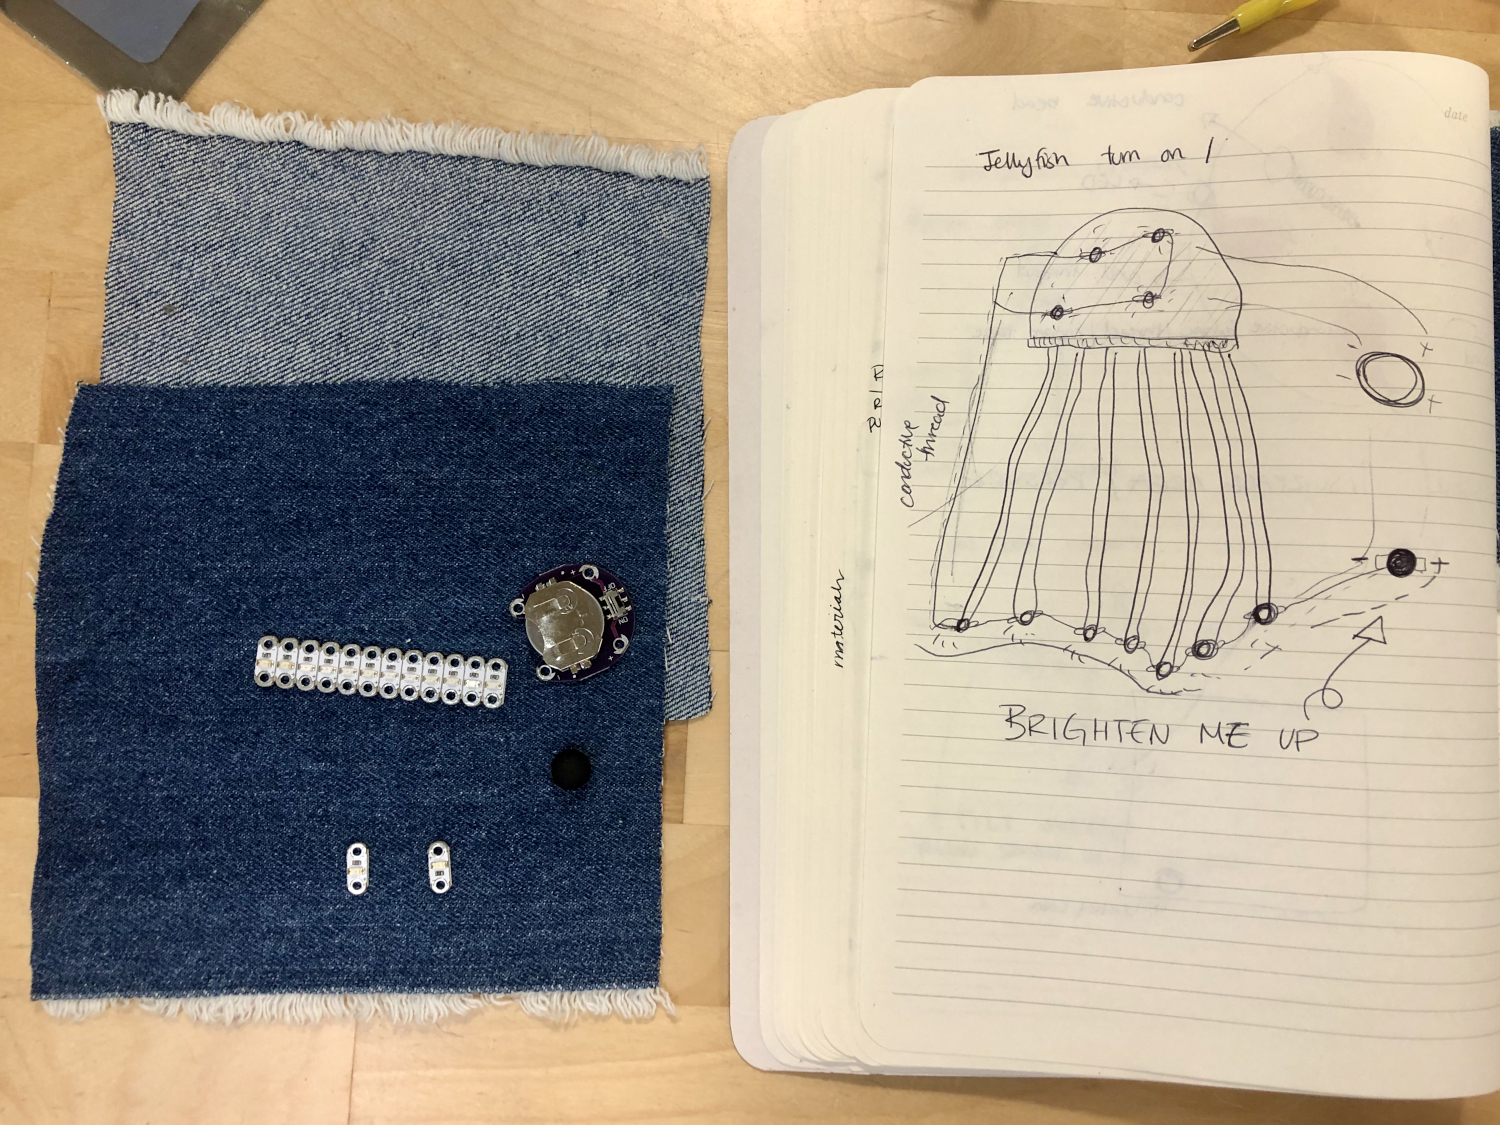
That prototype was made by my instructor and it was of much help for understanding what goes where when making a circuit. I wanted something to be embroidery related and colorful and while looking for ideas I found the image of a jelly fish, and I chose that for my design. When I was putting the sandwich together, and sewing everything, I closed the circuit, I basically did more than what I needed. The circuit was working perfectly, just by touching the LEDS were on, but the whole purpose was to make the LED only turn on by pressure, so after checking the conections and a few minor changes I got it to work. I think I could still have made more small adjustments to turn on the LEDS even brighter.