12. Soft robotics
This week was about soft robotics and the assignment was to create one of these options:
- Build a pneumatic wrist brace (basic level) or thermovynil sample
- Build a Soft Gripper (intermediate level) or
- Build and document a Pneumatic, digitally controlled system , electronics schematic, electronic control and code (advanced level)
RESEARCH
 picture from here
Let's start by defining a little bit what soft robotics, and why are they important and used for. I found this really nice explanation and definition of soft robotics.
" Soft robotics is a growing field which relies on mimicking locomotion mechanisms of soft bodies existing in nature to achieve smooth and complex motion. Among those “soft bodies” that can move in complex environments, earthworms, snakes, larval insects, octopus and eels present a large range of different strategies, developed over years, that we can draw inspiration from.
Soft robots are primarily composed of easily deformable matter such as fluids, gels, and elastomers that can match certain materials, in a process called compliance matching. Compliance matching is the principle that materials that come into contact with each other should share similar mechanical rigidity in order to evenly distribute internal load and minimize interfacial stress concentrations. However, this principle does not apply to rigid robots interacting with soft materials, causing damage or mechanical immobilization (where E is the Young’s Modulus, which gives a measure of the stiffness of a solid material). These types of interactions with soft materials are widely spread, as for instance with natural skin, muscle tissue, delicate internal organs, but also organisms, artificial replications of biological functionalities, etc. Due to this dramatic mismatch in mechanical compliance, it is easy to conclude that rigid robots are not adapted and even dangerous for intimate human interaction.
Therefore, there is a need of robots that match the elastic and rheological properties of materials and organisms found in nature, and this is where soft robots could bring the solution. "
In less fancy words, soft robotics could be used to match what technology can do with hardware to replicate actions and materials that are found in nature, and therefore the materials used are soft, moldable.
Unfortunately for this week I had to quarantine and did not have access to the lab to get more creative and do something more advanced. (Hopefully if you are reading this, COVID is gone) so what I made was A PNEUMATIC WRIST BRACE Before starting my project I did a test of inflatables with the tutotial. It was not a very successful trail because of the material I used but here are the steps and materials for a basic inflatable example.
My intention was to do something with a big scale, and for that reason I wanted to experiment with vinyl fabric instead of heat transfer vinyl paper-plastic. I bought a rain coat and a cheap shower curtain to cut and make an inflatable with.
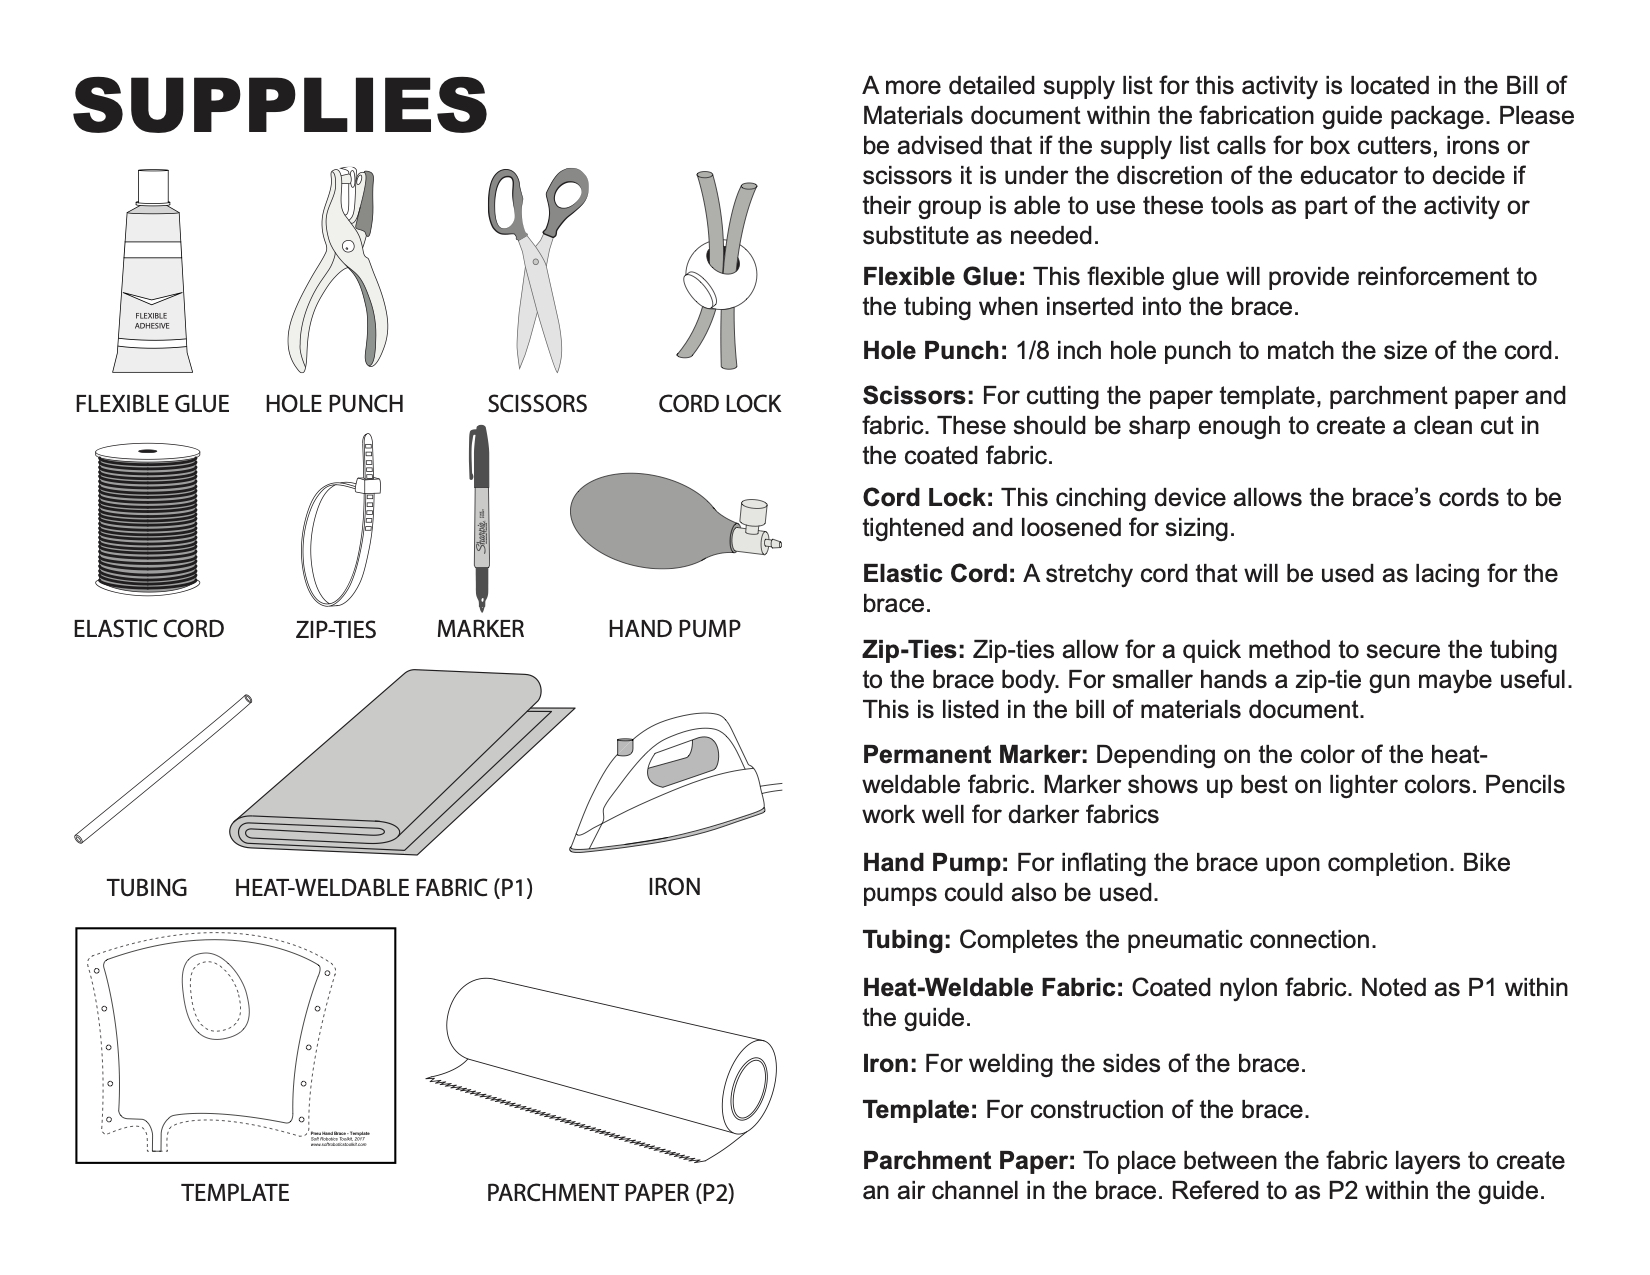
Materials used:
- Rain coat vinyl fabric
- Baking - parchment paper
- Tubing
- Hand pump or inflate it yourself
- Iron
- Scissors
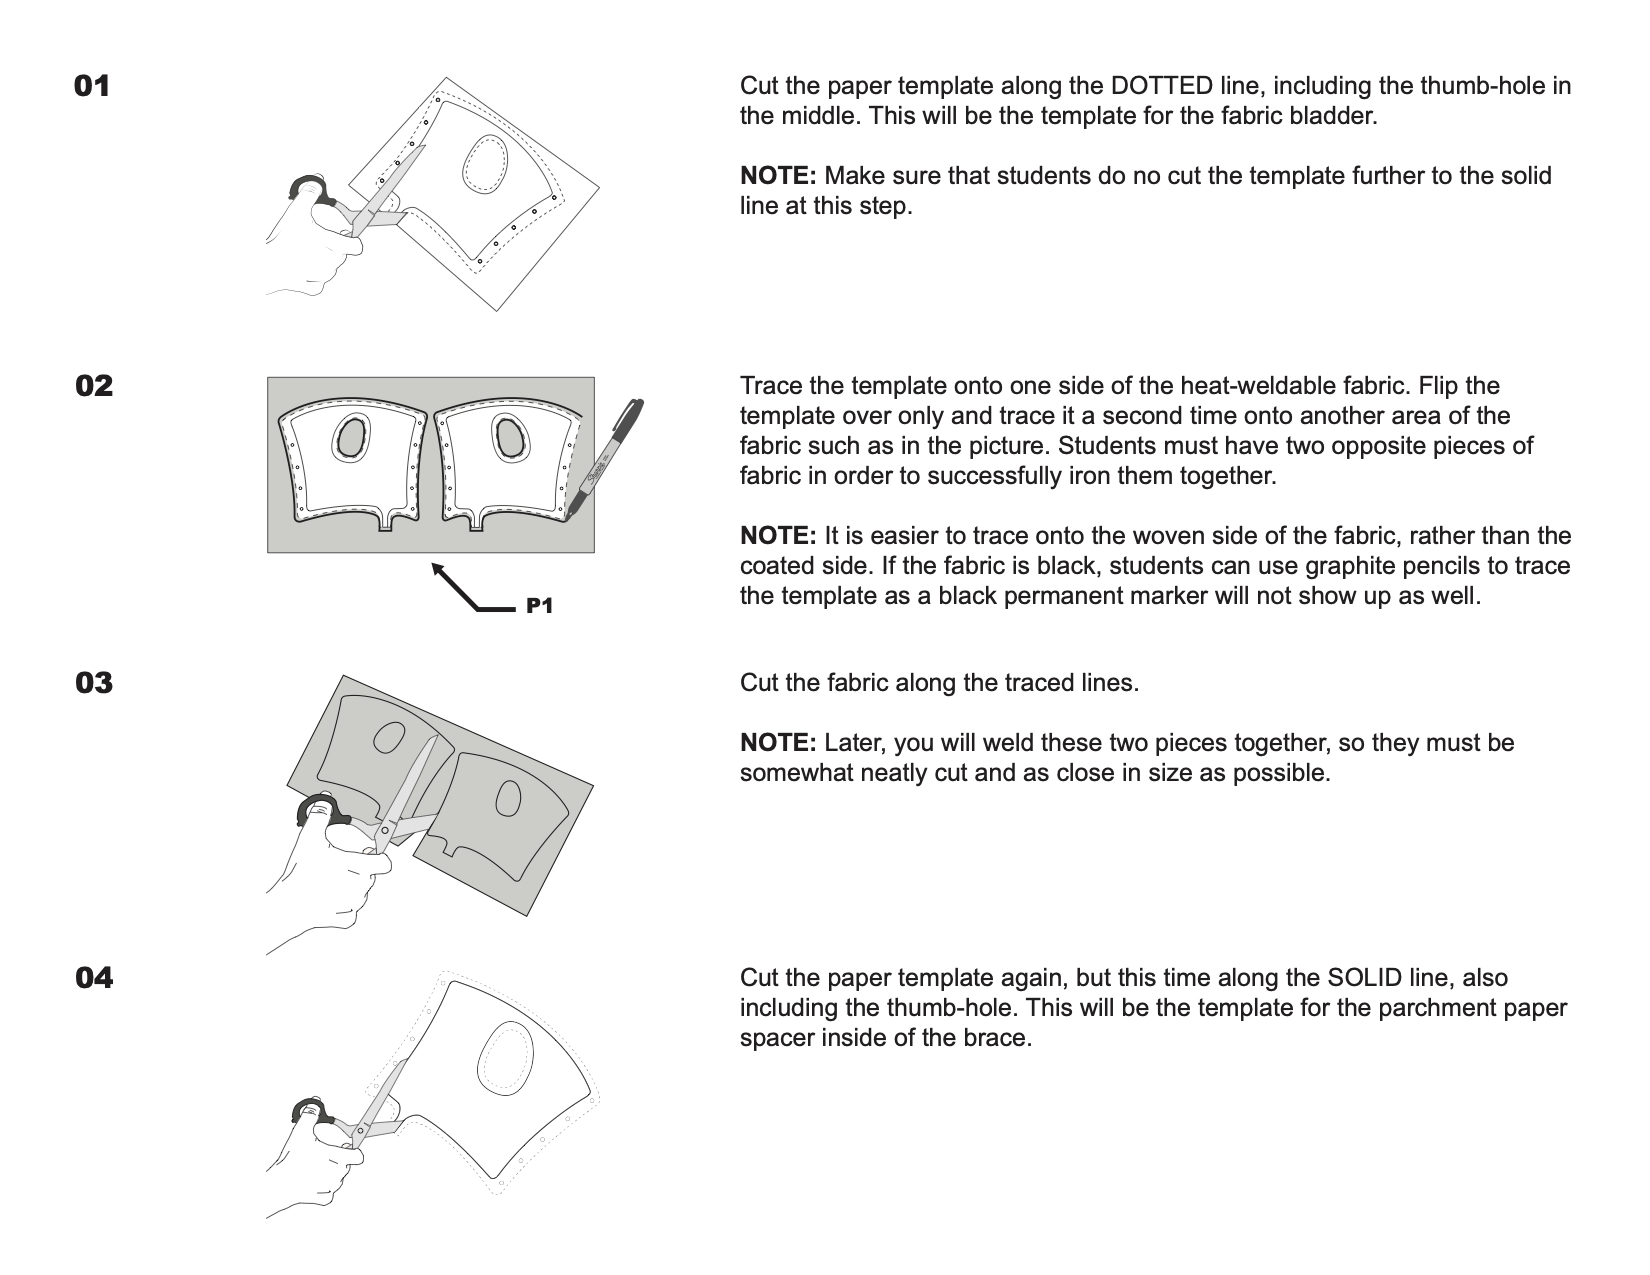
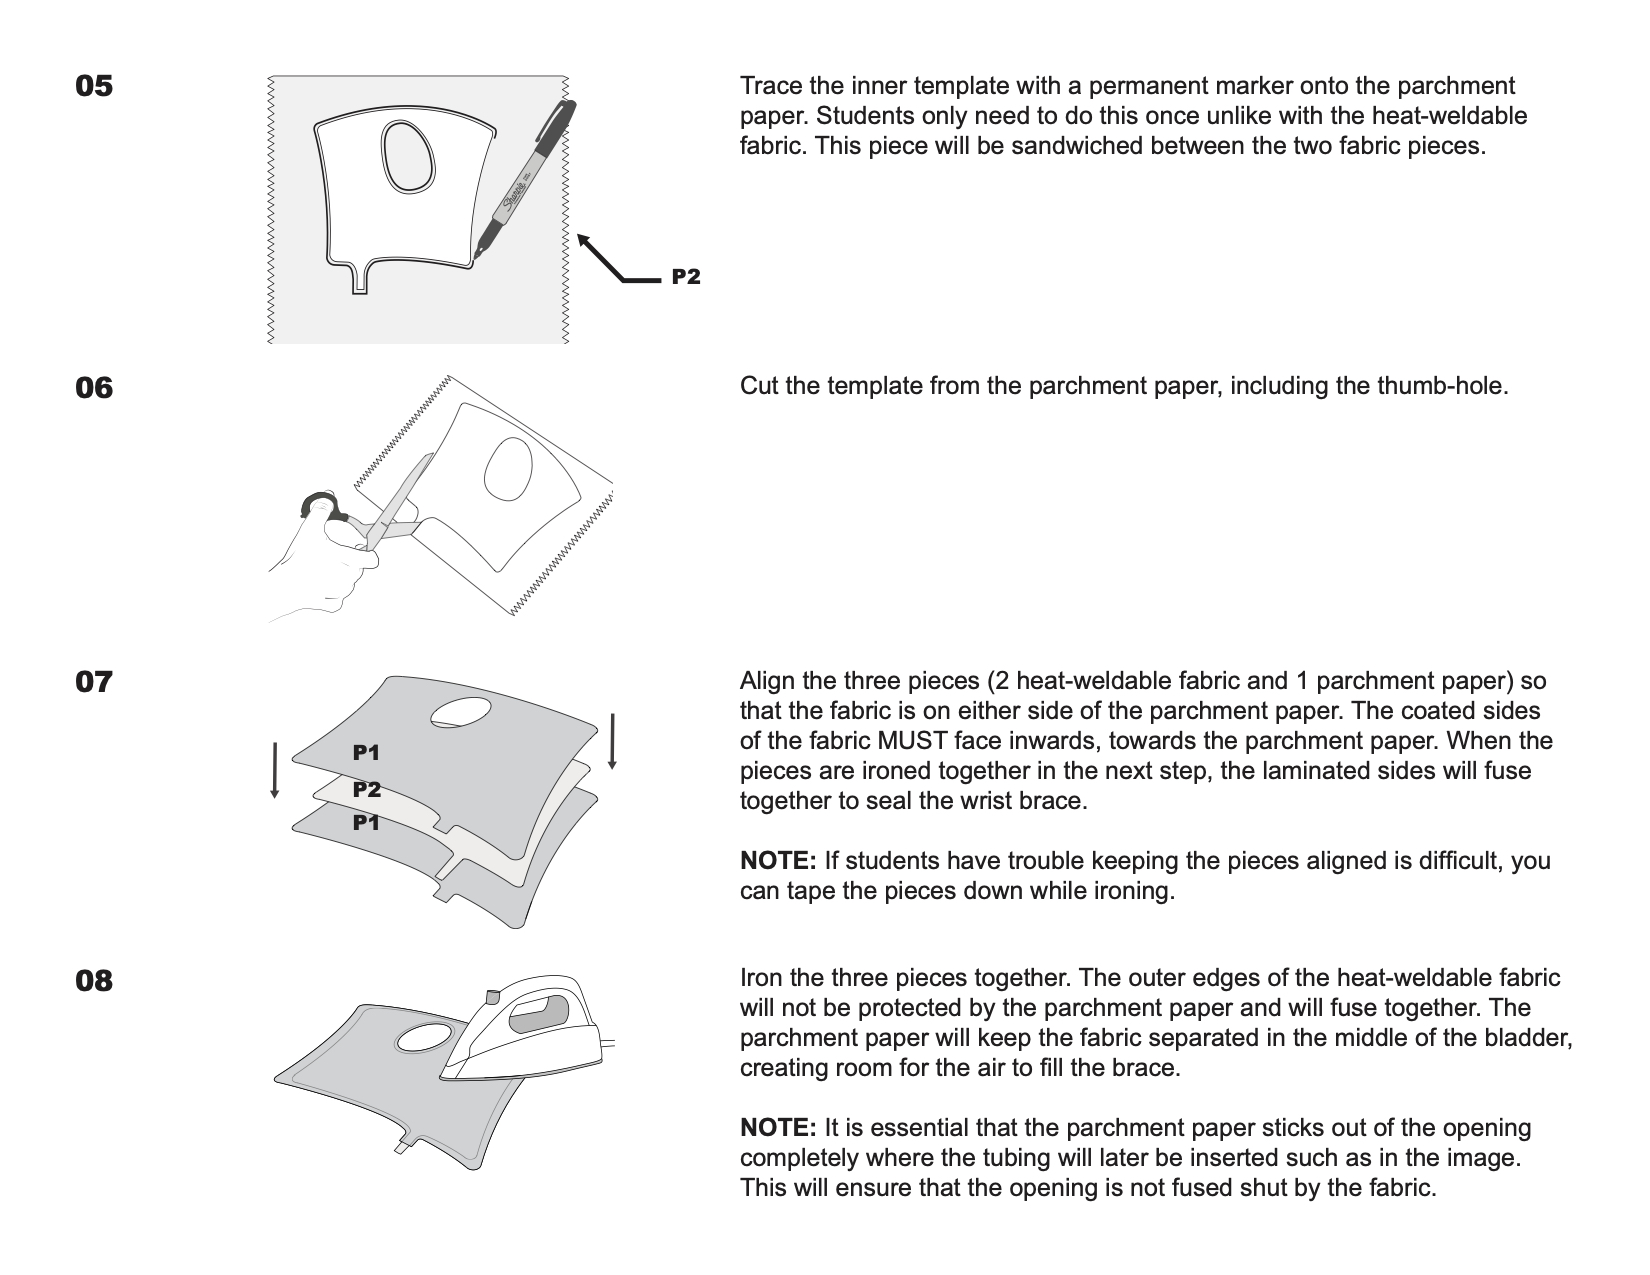
The first step is to cut the design of the inflatable over the baking paper, remember to enlongate the part where the tube will enter to keep it safe from the two vinyl to seal that area. Then you need to cut the two pieces of vinyl to be bigger than the design on the baker paper, but always keeping the tubing area slightly longer than the vinyl. You are basically making a sandwich of first a layer of vinyl, then baking paper (with the design, in can be something organic too) and on top another layer of vinyl. Remember that the glossy part of the vinyl goes in the outside of the sandwich, and it applies for both layers. The next step is to iron the sandwich, for this you will need to add one layer of baking paper to cover the inflatable and it doesn't stick to your iron. Then you have to add the tubing and make sure it is well inside with no air leaks, then connect it to a hand pump or motor and voilá, you will have an inflatable.
As I mentioned before I used vinyl fabric from a rain coat for this excercise/test, and the outcome was not very clean. I was suggested to use a soldering iron to seal or glue the vinyl, but when I tested, it only burned the fabric. So at home I tried to use the iron and I had to use double baking paper so that the vinyl would not burn and tear appart. It worked but it gave a very dirty look, not very clean and neat to work with. Now I now, and did my actual project with heat transfer vinyl. ☺️😌
Here is a visual of the experiment done with the tutorial
inflatable from Tania Velasquez on Vimeo.
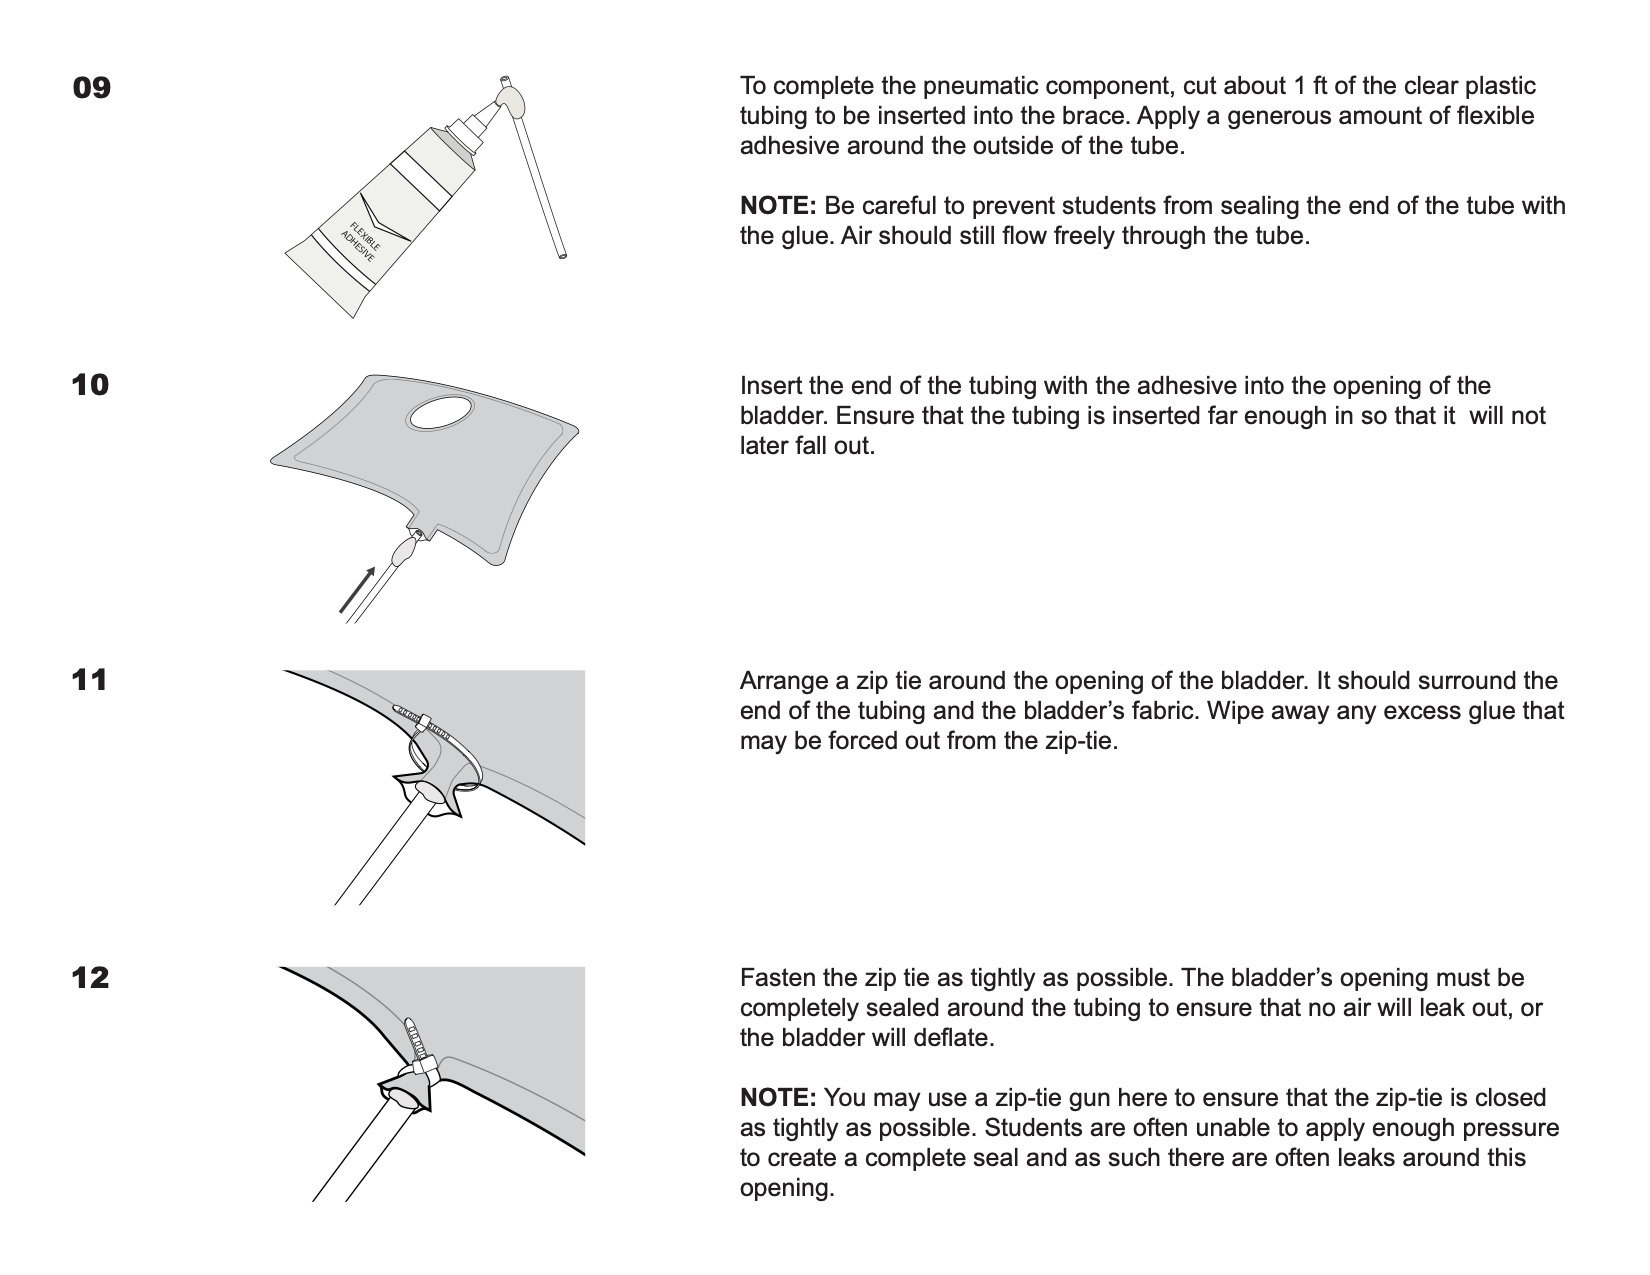
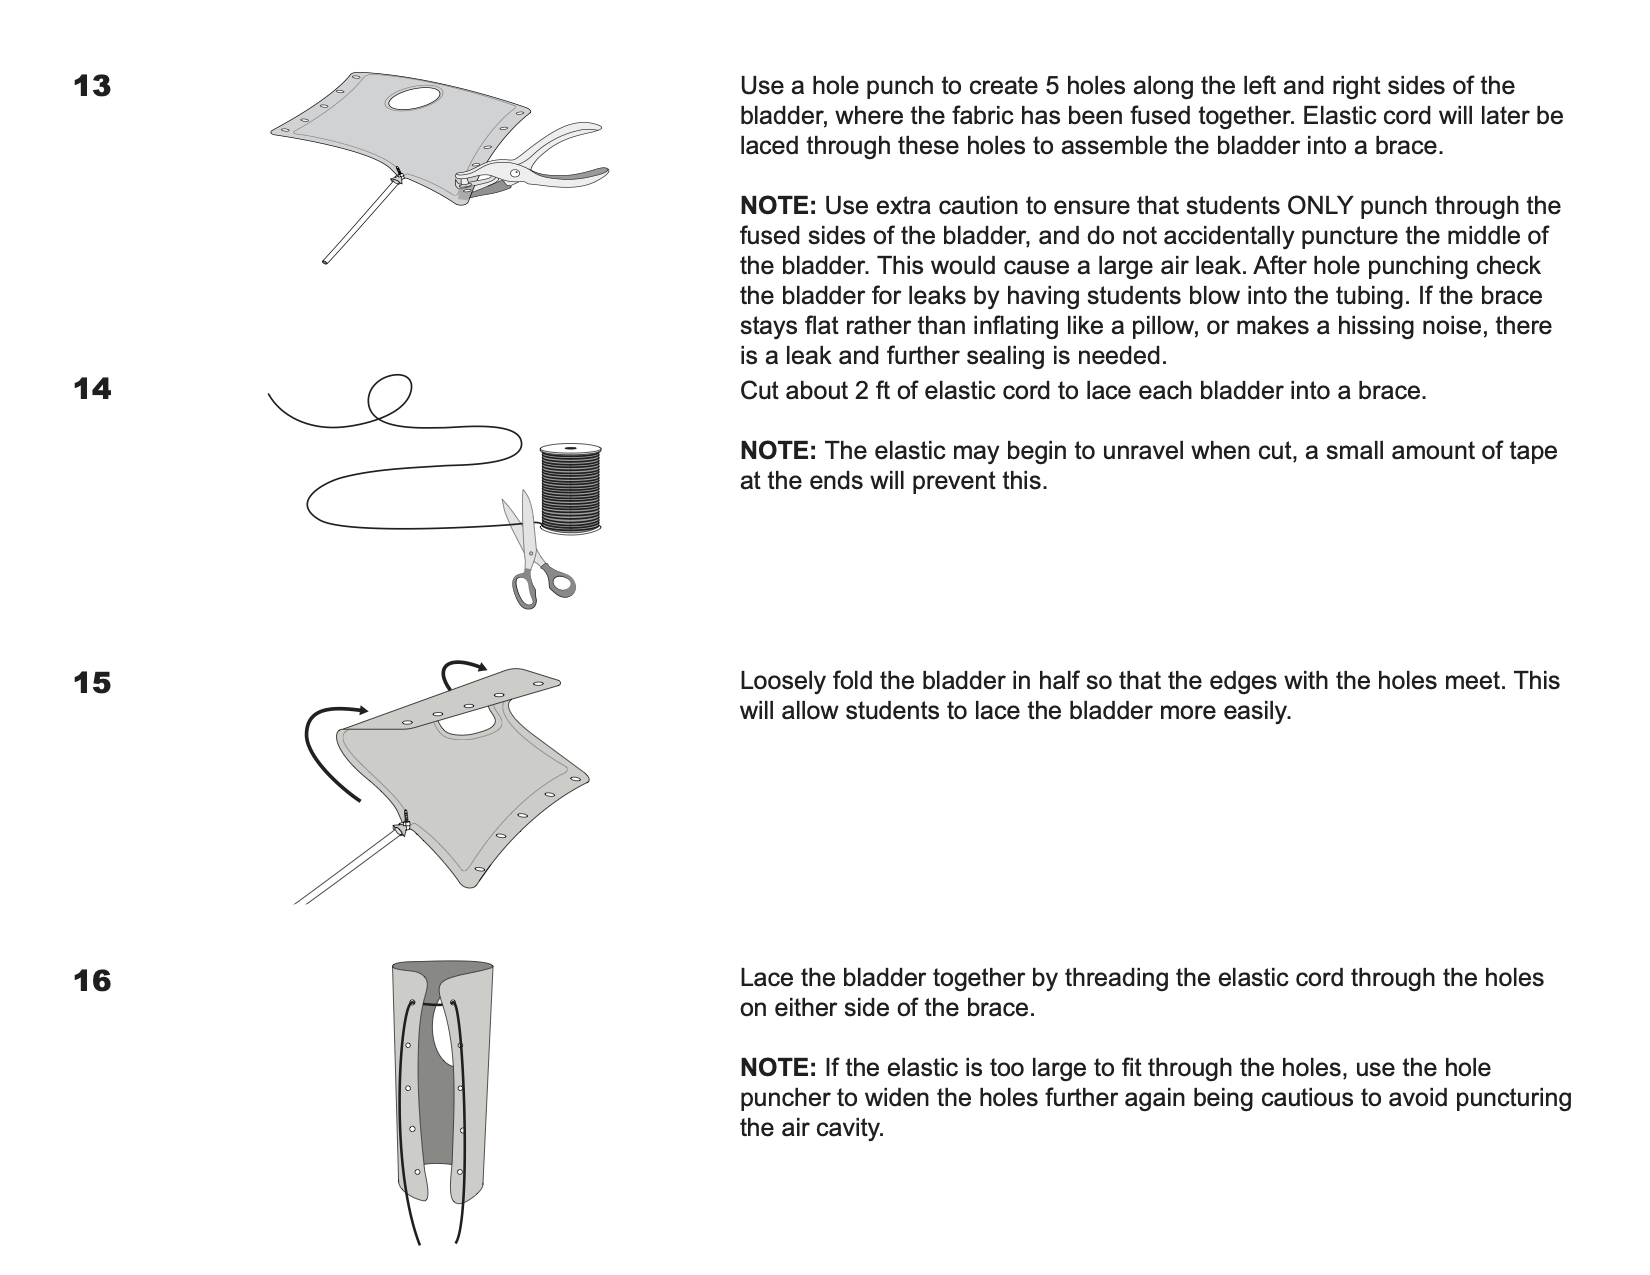
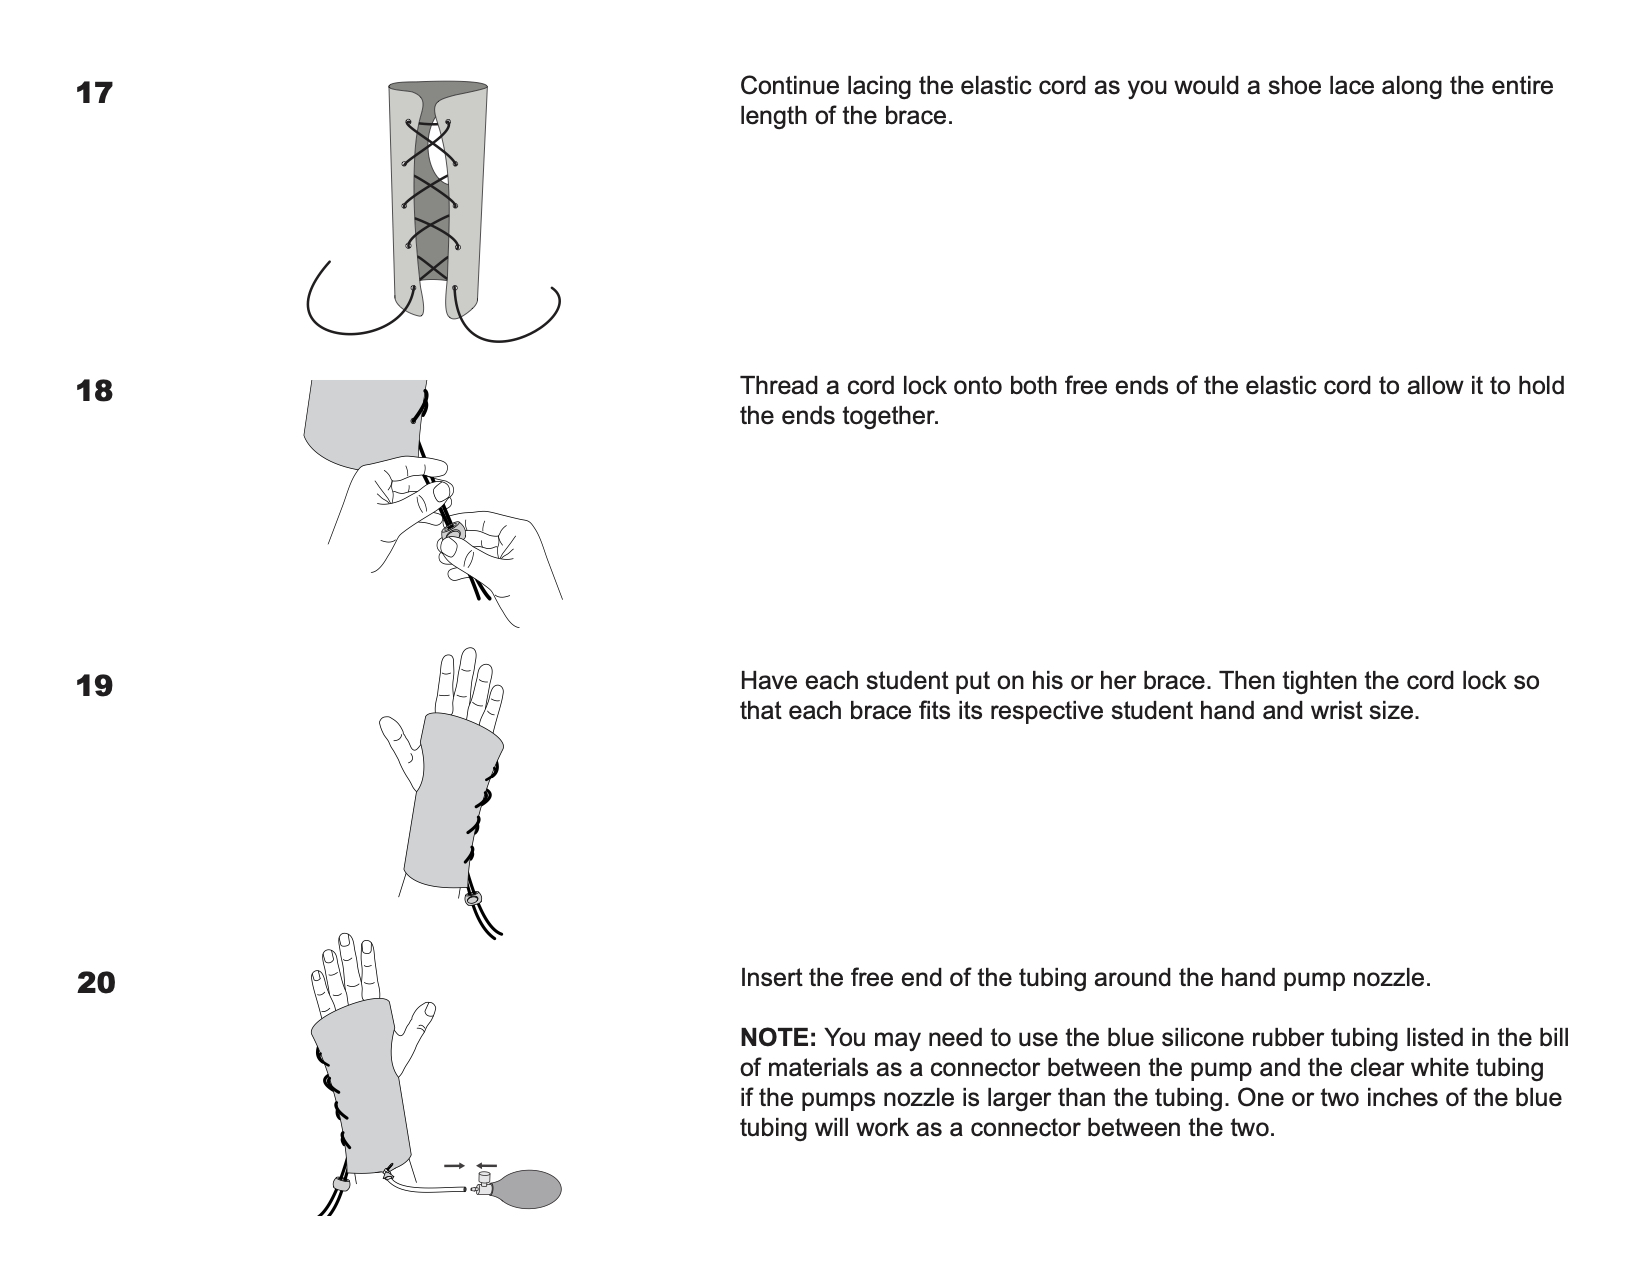
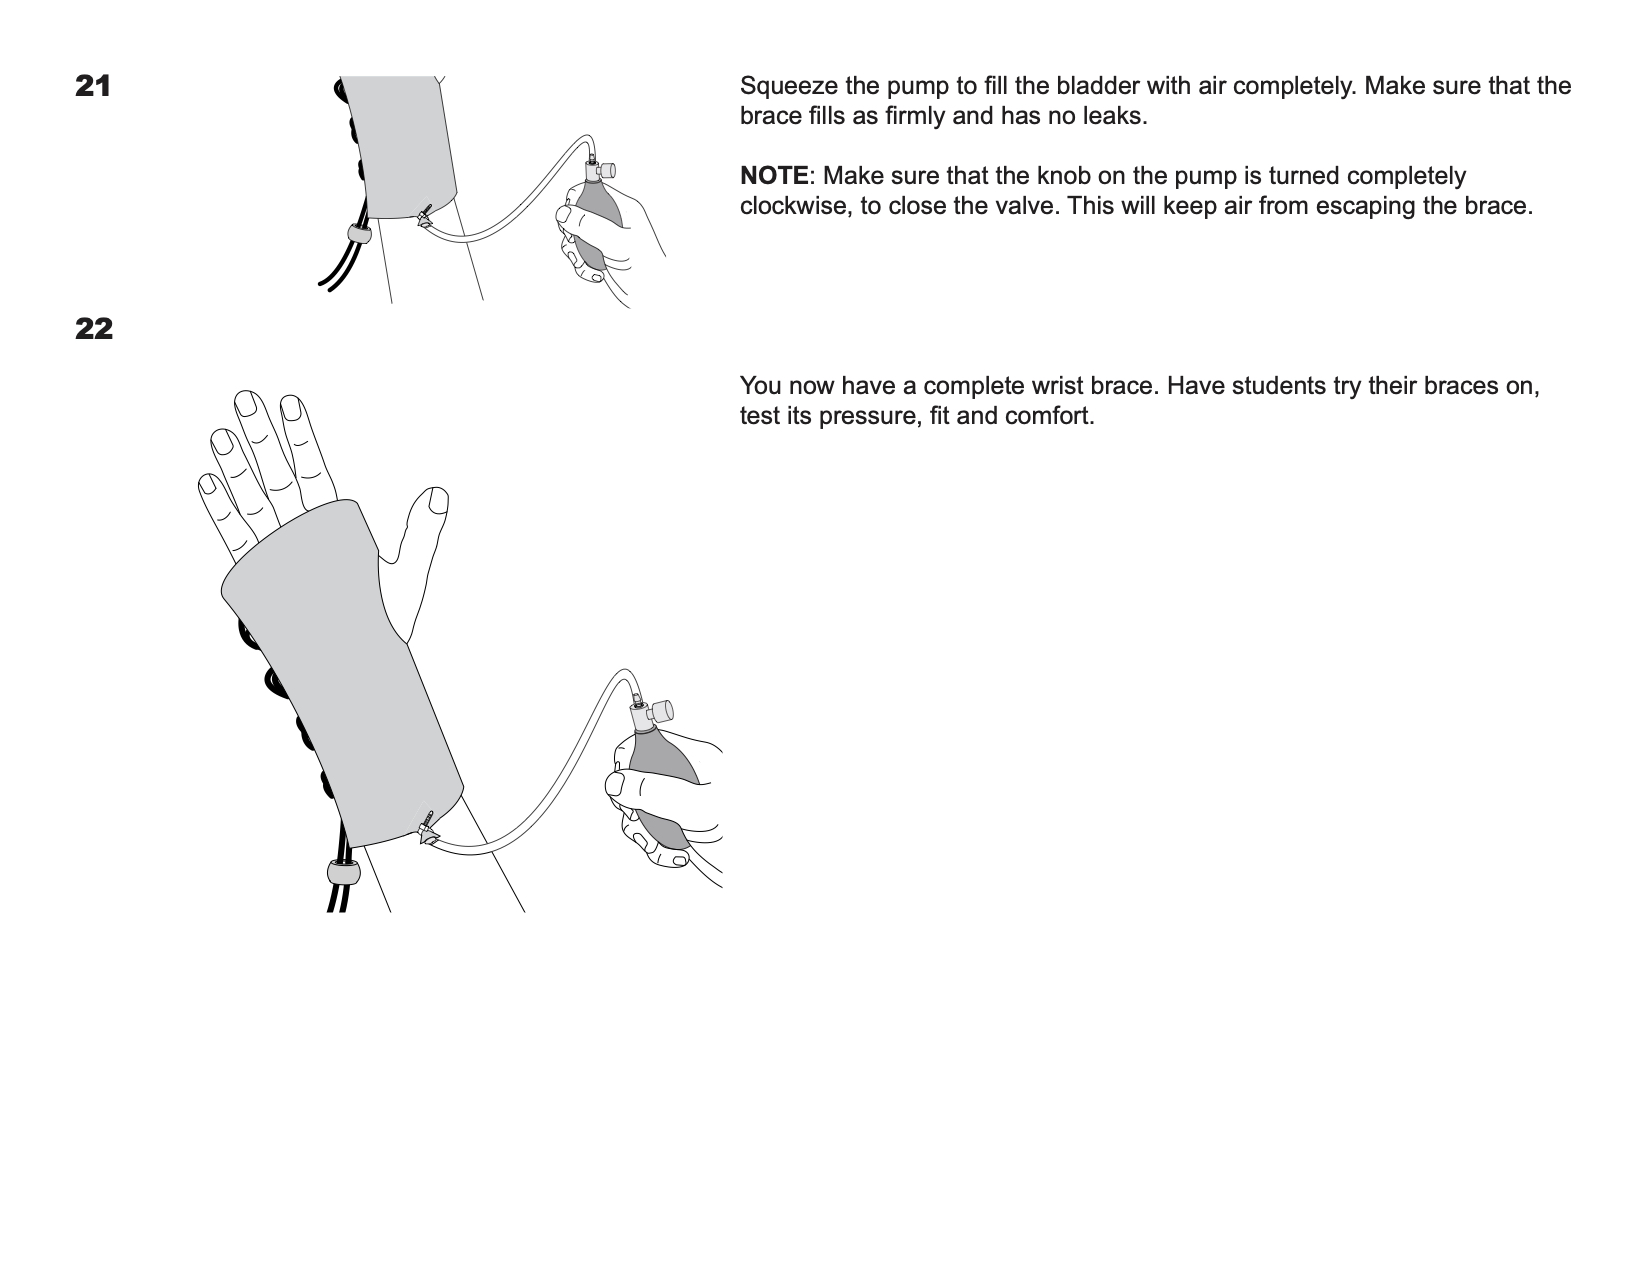
PNEUMATIC WRIST BRACE
Fortunately, all the steps you can find it in my useful links at the end of the page. These steps are very easy to follow with almost no posible complications. This pneumatic example was using fabric heat-wealdable fabric, instead, I used heat transfer vinyl, because it is what I had at home to work with. Hopefully you give it a try and successfully achieve it.

IMAGES OF MY PROCESS:
-
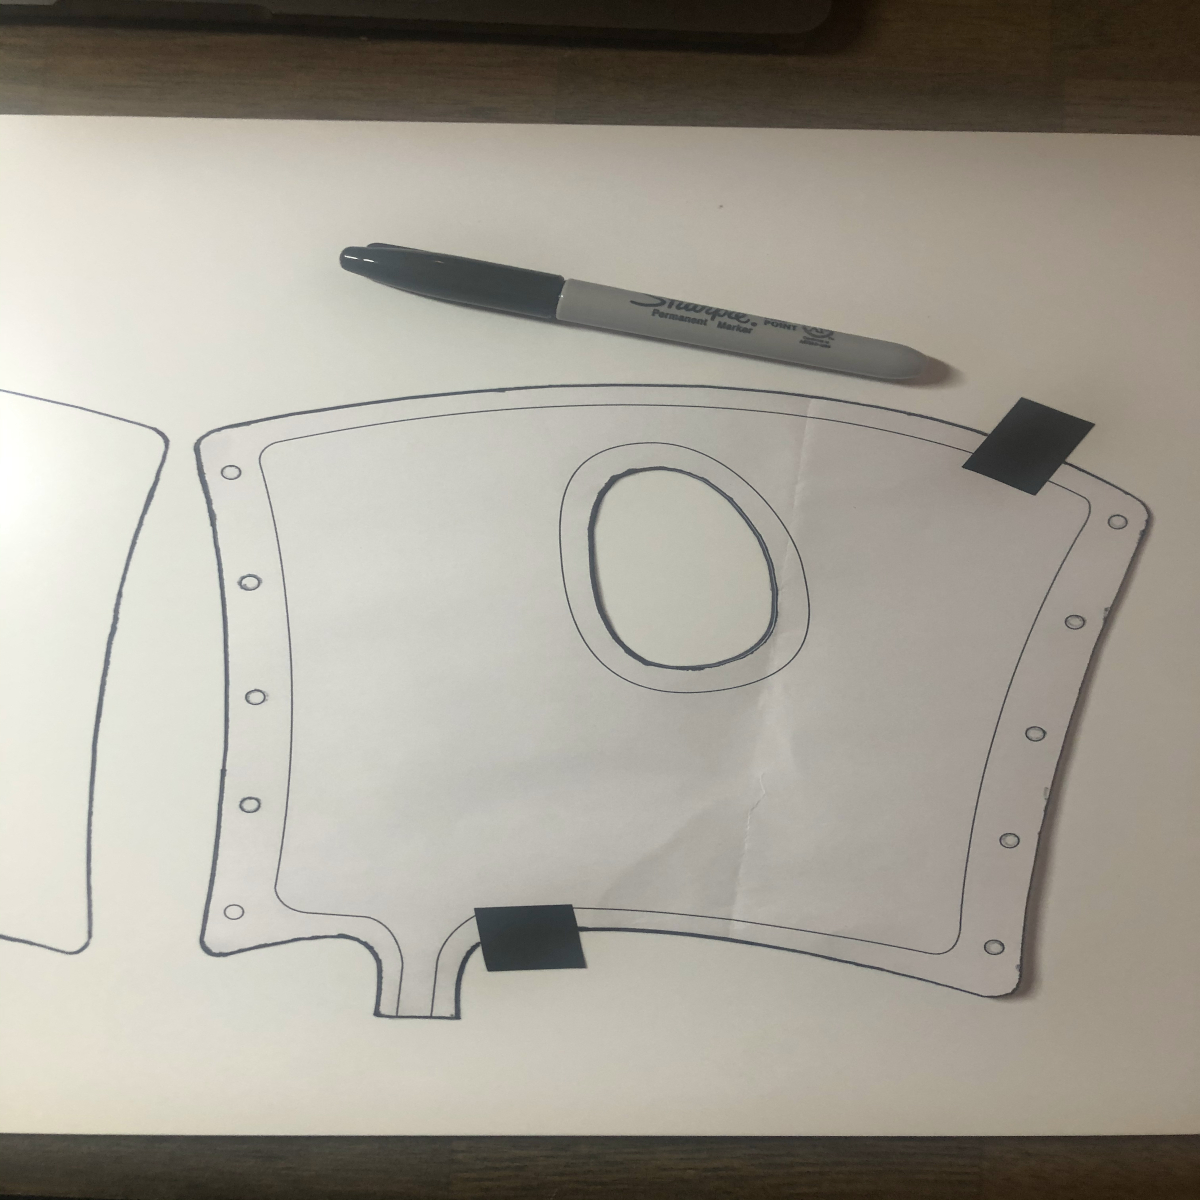
Tracing over vinyl
-
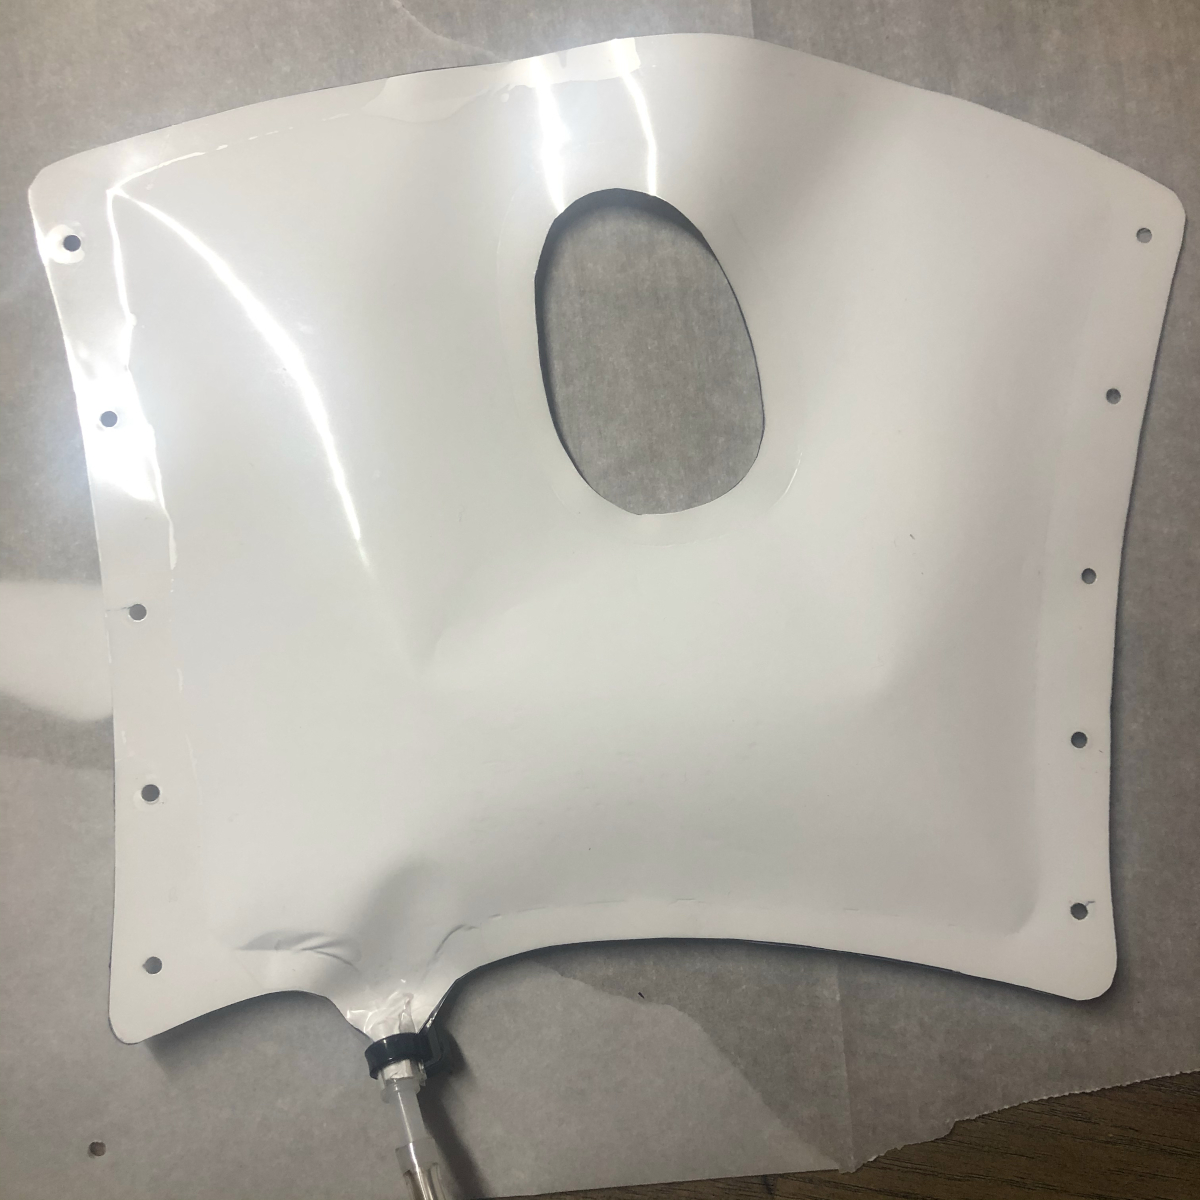
Sandwich ready and holes done
-
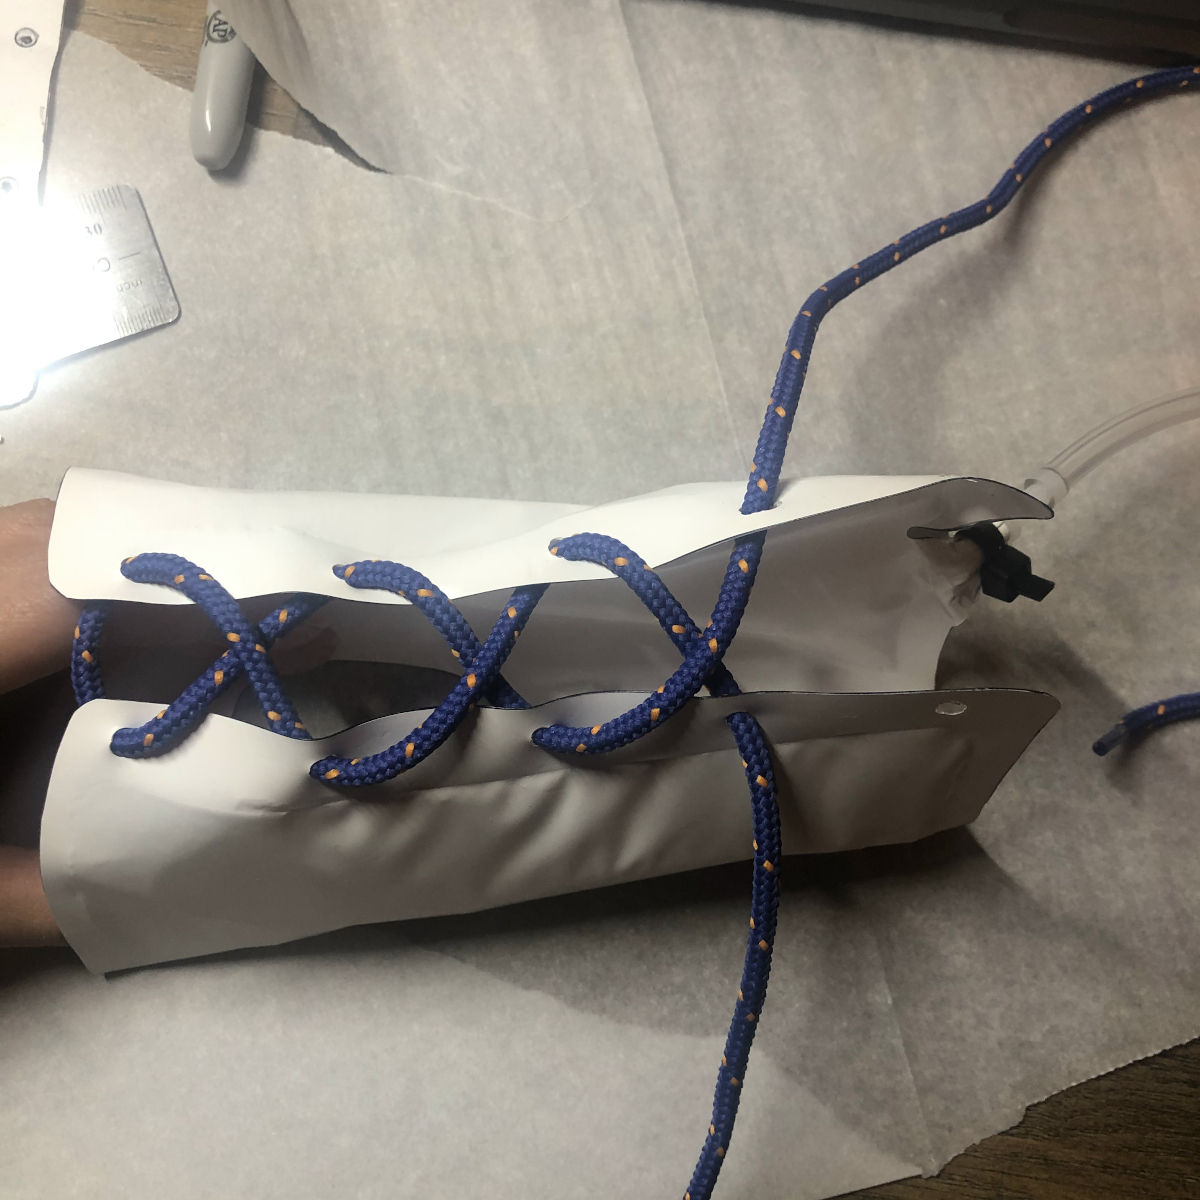
Threading cord
Final result
Pneumatic wrist brace from Tania Velasquez on Vimeo.
Personally I felt I followed all the instructions right on point, but somehow managed this result, which does look a little different from the video-tutorial. I guess that fabirc does not inflate as much as vinyl paper.