2. Digital bodies
- Include some inspiration: research on artists or projects that work with the human body
- Document the use of 3D scanner and softwares to acquire a 3D model
- Document the process of repairing and/or manipulating a 3D mesh and slicing it.
- Create my ready to cut file for laser cutting, learn how to use the laser cutter and document the workflow and upload your 3D and 2D files
- Learn about the fab lab processes, booking system, usage, machine demos, tools and safety rules
- Build and/or assemble my mannequin, create a stop motion assembling it or stepped process
- EXTRA POINT Send one picture (HIGH RES) of my mannequin to enter the competition for the annual exhibition
Making myself in foam
The files that represent the mannequin that can be cut are in the following link: Cutting sheets and parts
This week I worked on creating a mannequin by scanning my body, making a mesh in 3D out of it and slicing the mesh and cutting it via a laser cutter.
The inspirations behind my design is an abstract view of antique Romain torso sculptures such as : Sabine's torso created around year 128. I was also inspired by antique Grecque sculptures, for example the famous Venus of Milo created around 150 bc. I was also inspired by a statue called "the god of the river Ilissos" that dates around 447 BC. More contemporary inspirations include the family romance sculpture by charles ray 1993 as well as ron Mueck massive extra realistic bodies such as the sculpture " A girl".
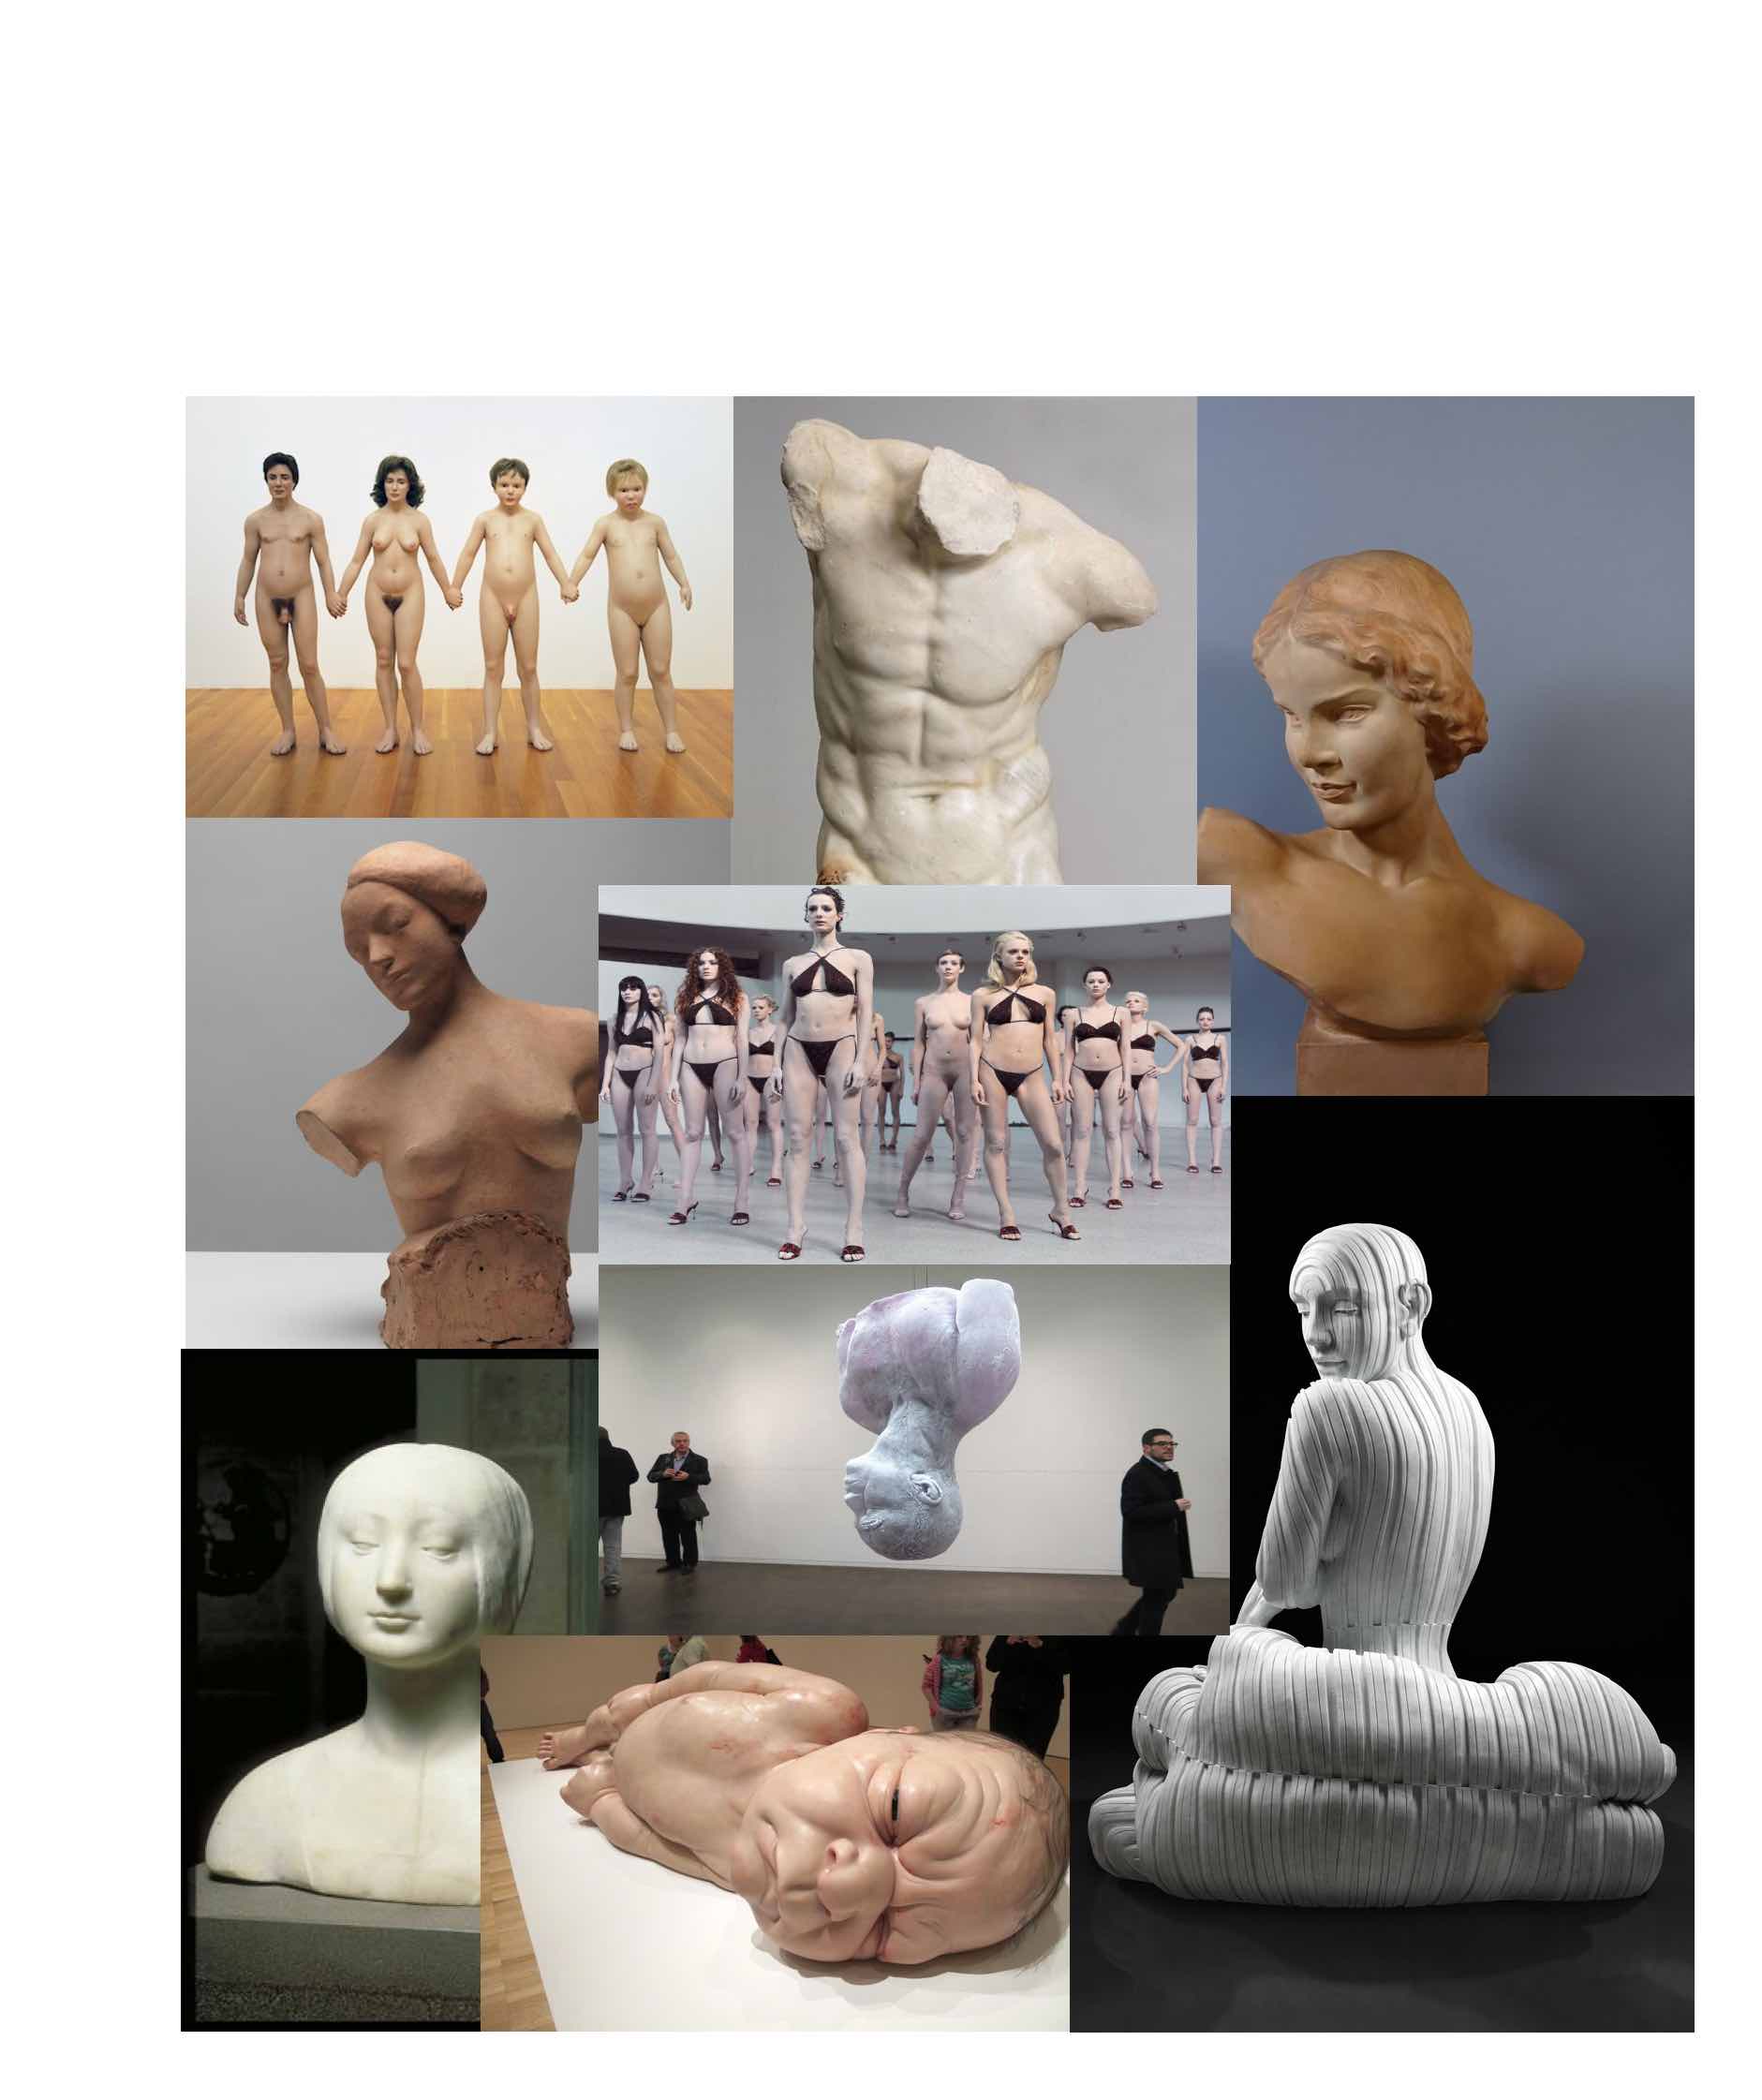
All of these statues display a body that mixes both vulnerability and strength, with a posture that is expressive and usually quite dramatic. I was wondering how I could represent myself and my own body with this angle and whether that would carry the romanticism of these early ages.
In terms of the rendering, I very much like the work of Antony Gormley, and how he uses very few information to carry the form of the human body, almost a pixelized aesthetics that still carries the expression : Antony Gormley's exhibition
I also used the material available in the fablab inspired by the work already done by Romain Di vozzo, which is "Polypropylène" black with thickness of 10mm. Romain Di Vozzo's fabricademy mannequin
Photogrammetry
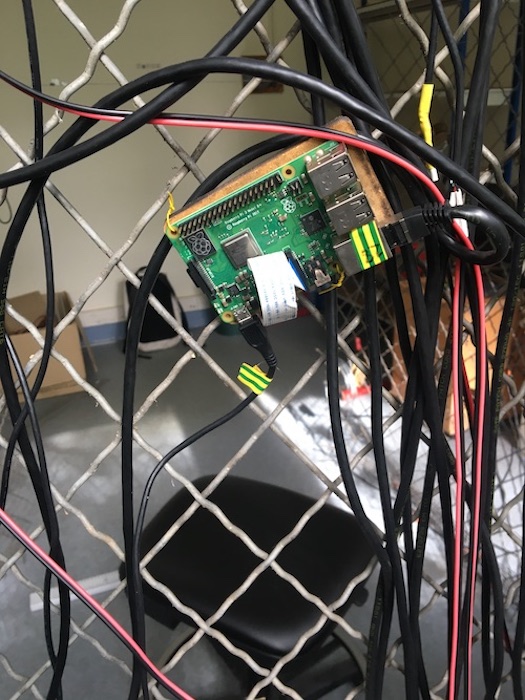
I used ambroise de Vries's Cabin that he built for his Fabacademy program. It is made of a collection of Rasberry Pis that take simultaneously a picture of a different part of the body
Here is a link to his work where it is thoroughly documented : Ambroise's cabin
He developed his own application that allows to control the cameras simultaneously.
| Ambroise developments | RasPi + images |
|---|---|
 |
 |
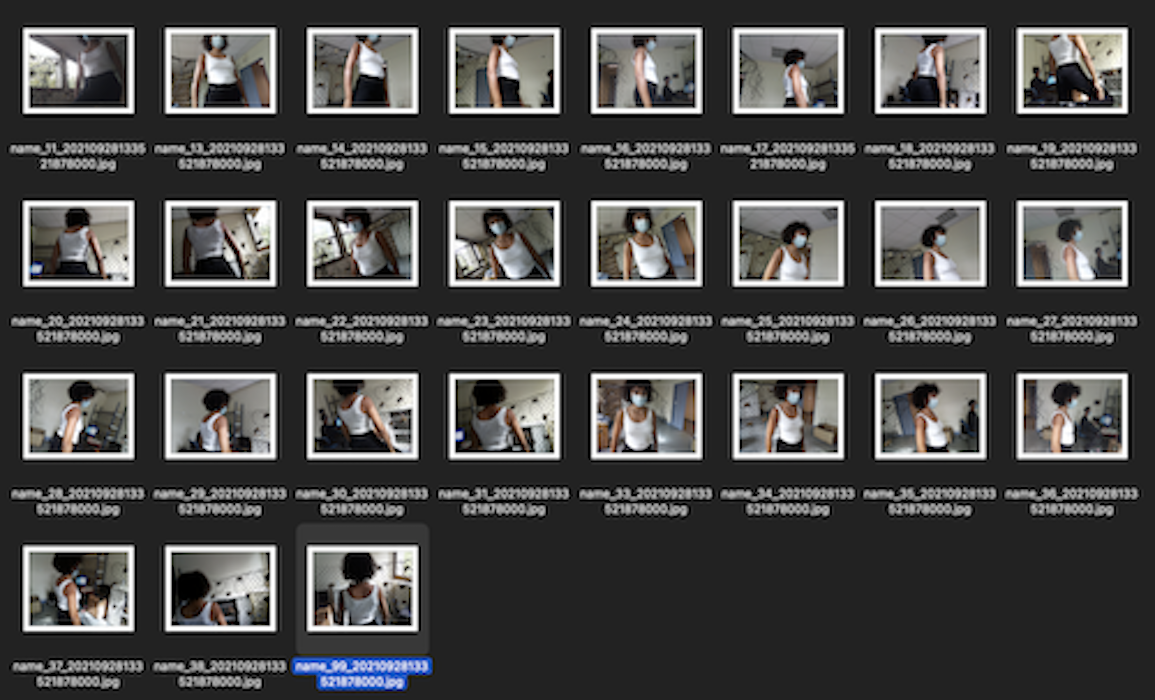
The result of the process it is a set of images taken of me all around my body:
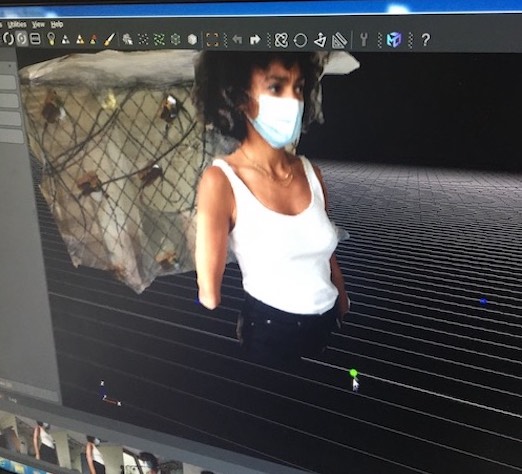
Generating the Mesh using Zephyre3D
I used Zephyre3D to generate the mesh from the photogrammetry. I obtained a dirty mesh with a dirty texture.
Cleaning the Mesh using Meshmixer
In order to correct the mesh, I used Meshmixer and the following features :
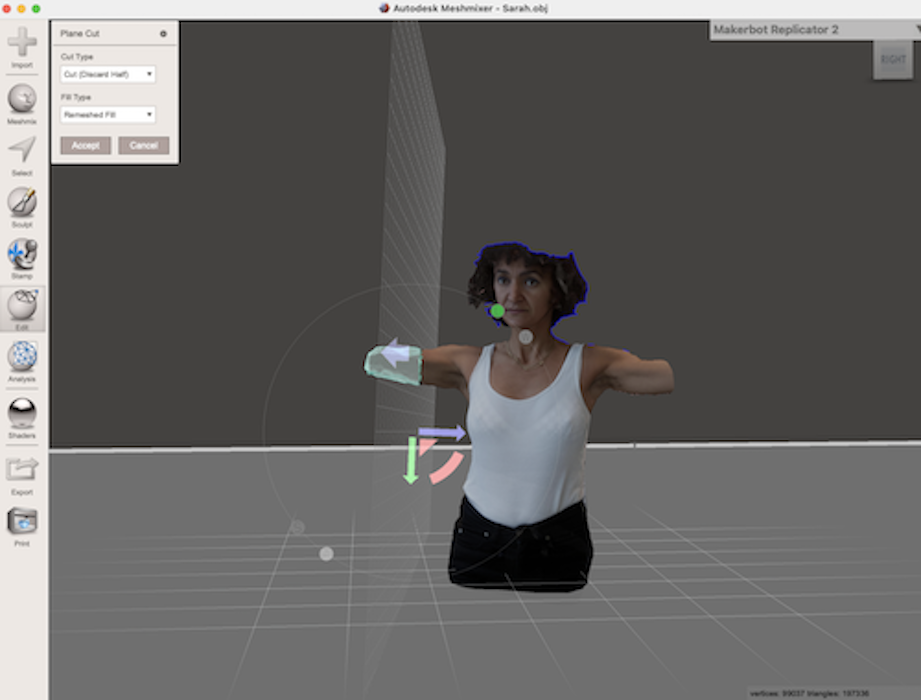
Plane cuts
I wanted to quickly get rid of elements in my model, for that go to Edit > Plane Cut tool. When entering the tool, it will automatically give you a plane that you control. When you accept the cut, it cuts what beyond the plane.
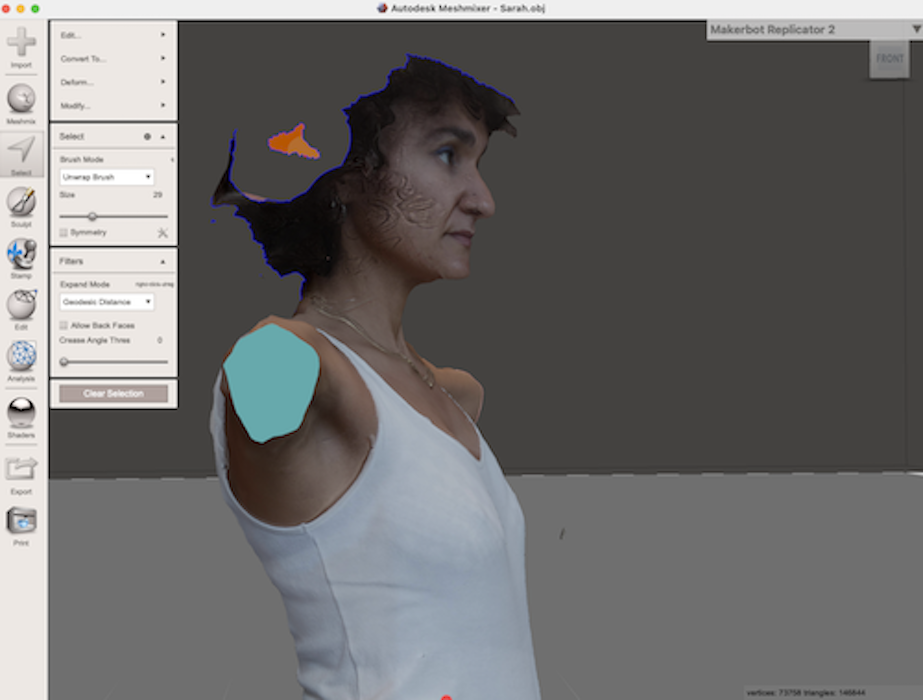
Removing specific parts of the model
To remove specific parts of the model, I go to the Select tool and paint onto my mesh to highlight the polygons I want to select, then simply press X to delete them.
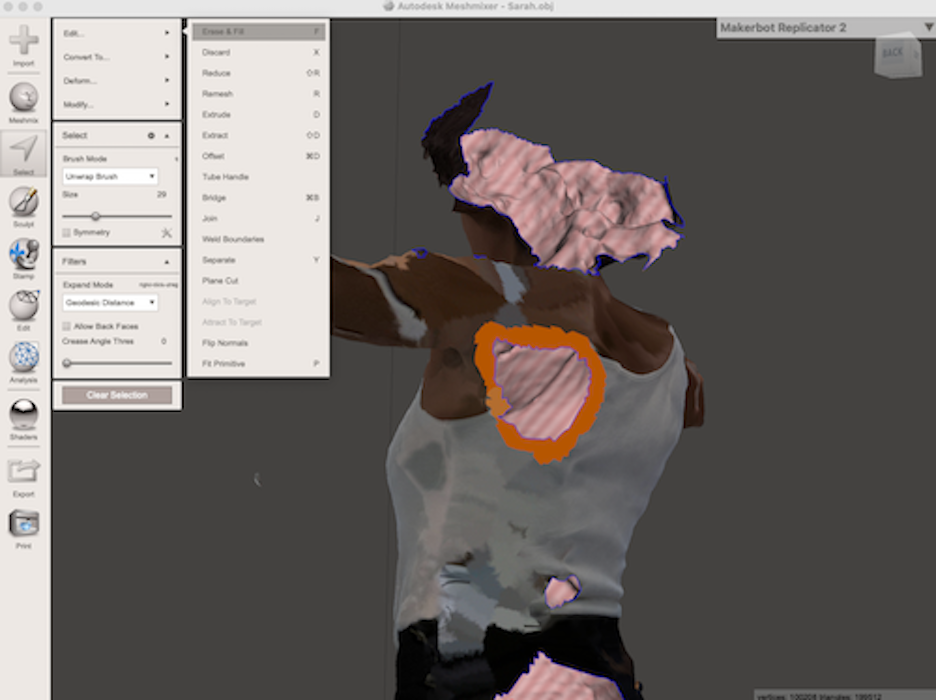
Filling the wholes
I start by selecting the polygons that surround my unwanted whole. Go to Edit then Erase & Fill tool. Click and the whole is magically filled.
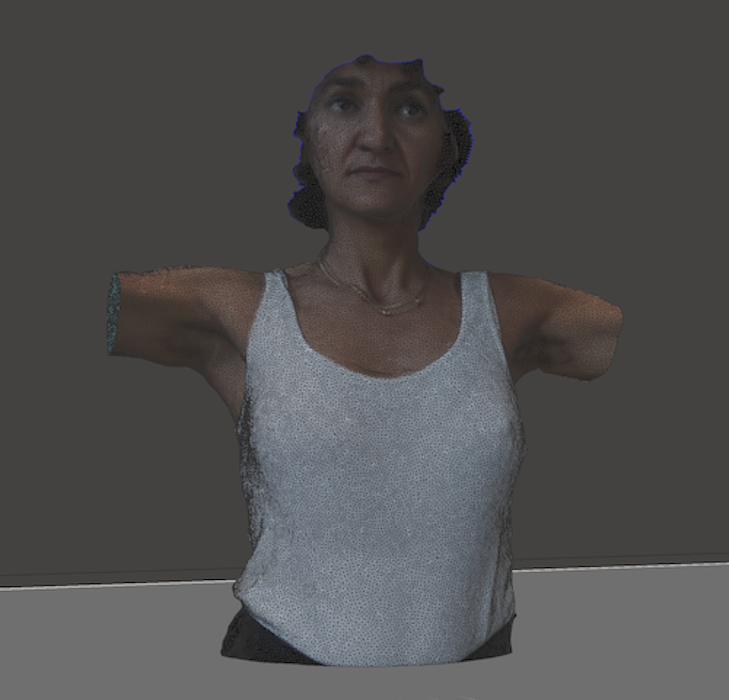
The result of these steps is a cleaner mesh that I can then slice:
| Plane cuts | Removing specific parts of the model |
|---|---|
 |
 |
| Filling wholes | The resulting clean mesh |
|---|---|
 |
 |
Slicing the model using Slicer for Fusion 360
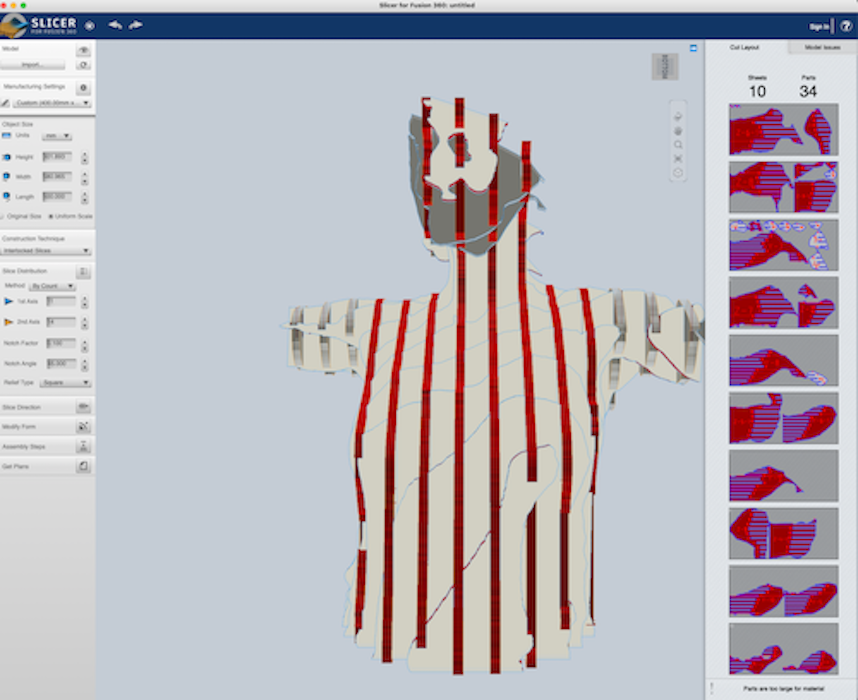
In order the parametrize the slicer (slicer for Fusion 360) I entered the following parameters : in "Manufacturing settings" I entered the width and length and thikness of my material : W : 400mm / L: 800mm / Thikness : 10mm
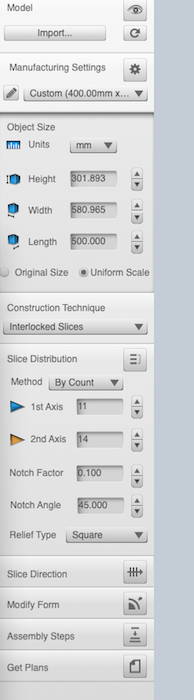
I also set up the width according to my body's width (500 mm) from an arm to the other, choosing as units milimiters.
After many exploration, I then chose as a construction technique : "interlocked slices" and played with the slices distribution "by count" on both axes until I set it up such as I would use around 10 sheets (11 on the Z axes and 14 on the X axes) - because that was approximatly the material that was available to me in the fablab. I obtained a slicing that uses 10 sheets and 34 parts.
| The slicing technique | The sheets and parts |
|---|---|
 |
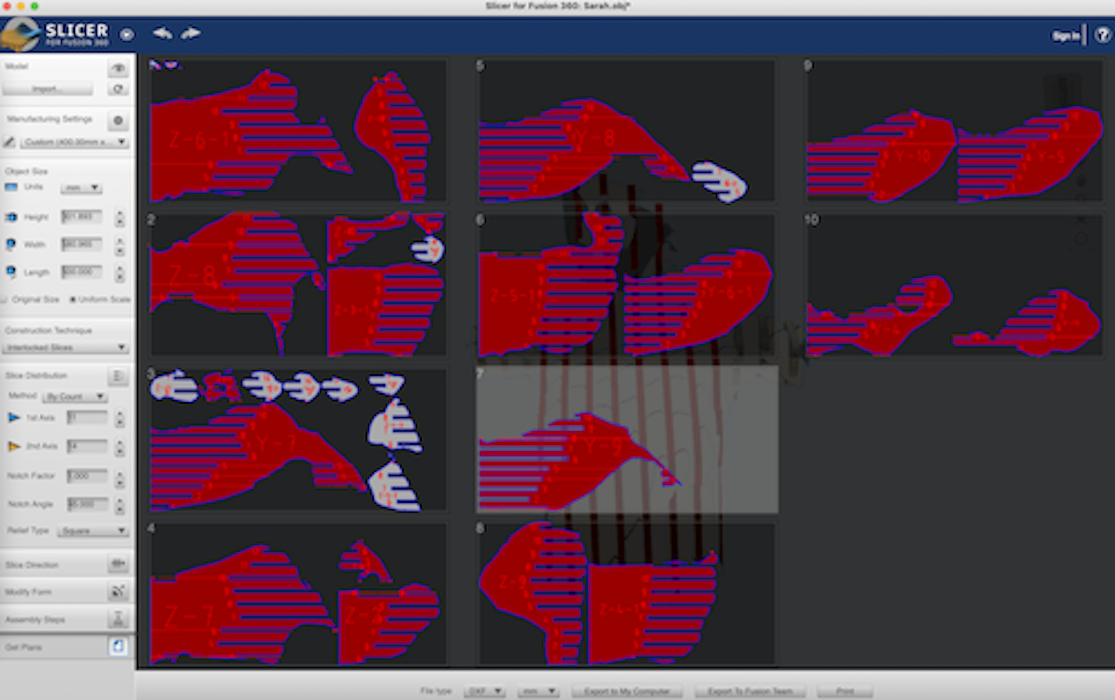 |
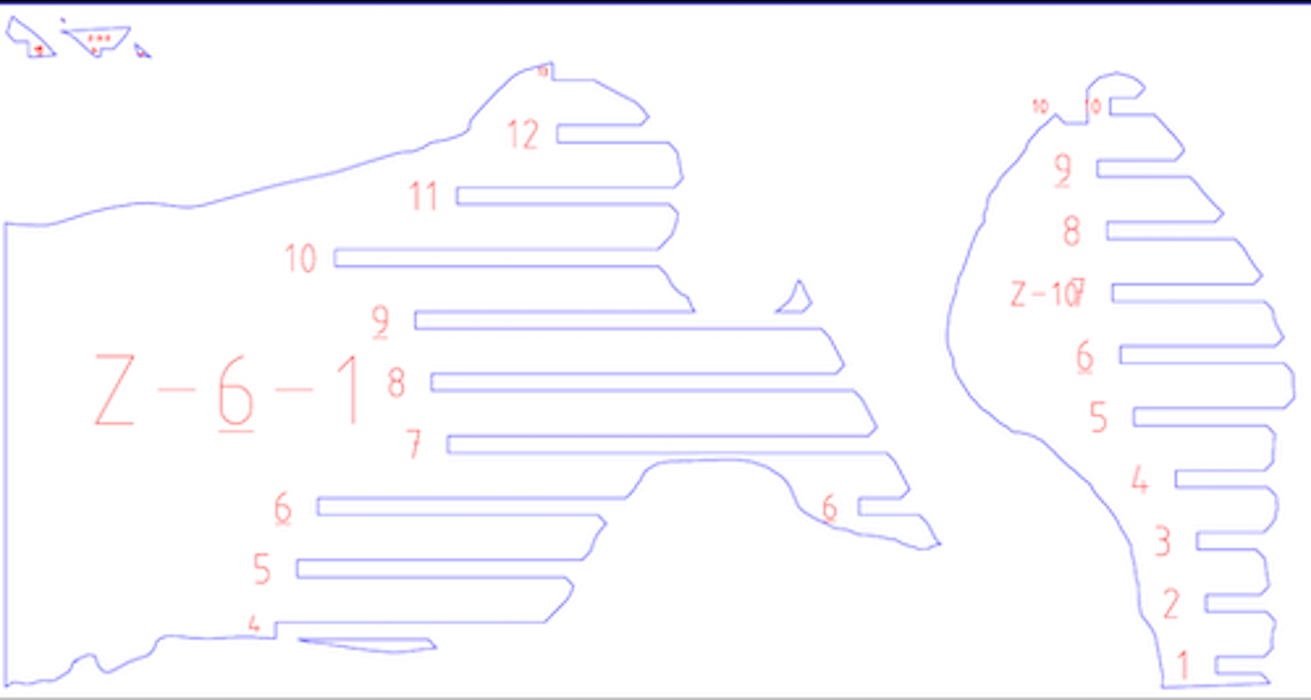
I save it in PDF and in dxf.
The PDF file looks like this :
Cutting the sheets and parts
I import the pdf into CorelDRAW X6 and I start setting up the cutting jobs
Setting up the laser cutter
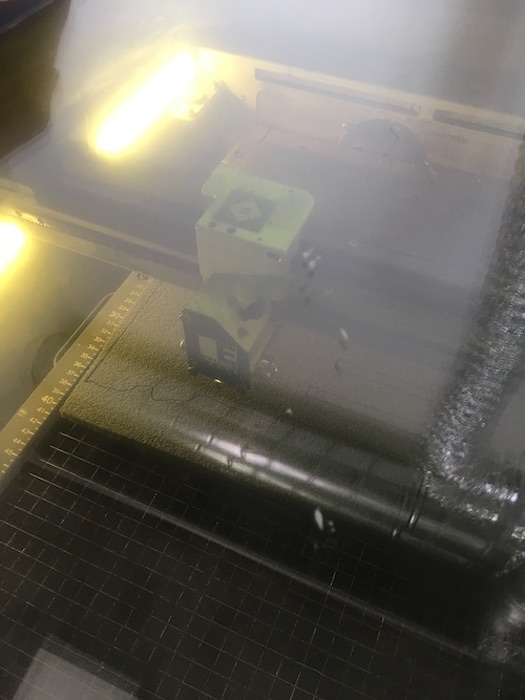
In order to cut the parts, I first set up the laser cutter. I use the Epilogue Fusion Laser M2 75 watt.
I switch it on, I start the air pump. I then set up the plateau into the Z axes, getting high enough to touch the tool. I then move the cursor of the laser cutter to set the home both in XY and in Z (using the tiny red led light).
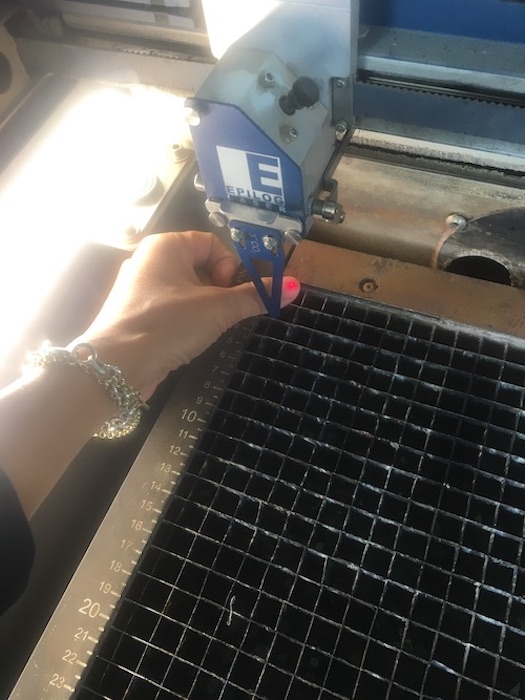
| Setting the laser cutter | XYZ |
|---|---|
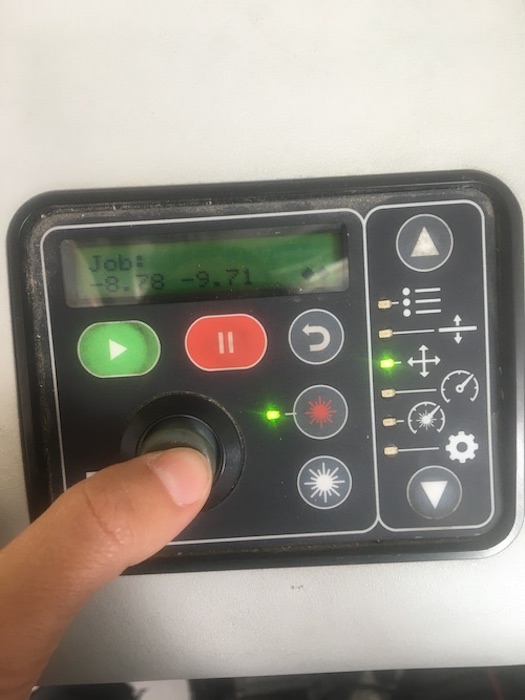 |
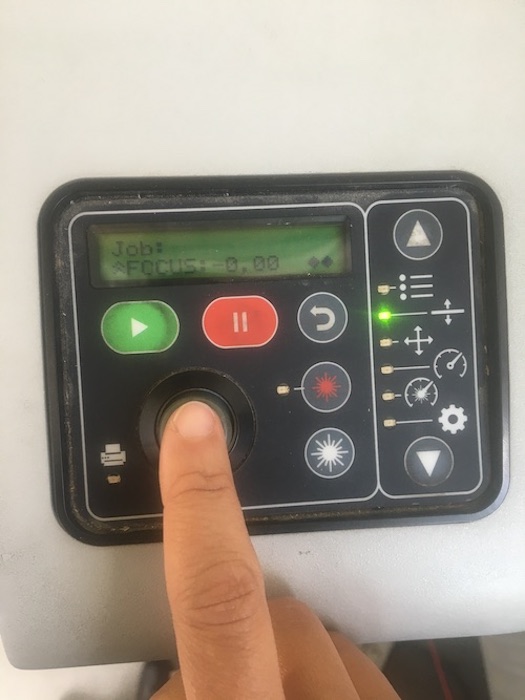 |
I then open my PDG on CorelDraw. I set up the cutting parameters as such : 1. CO2 as default setting 2. Vector as Job Type 3. Speed : 18% 4. Power : 100% 5. Frequency : 50%
| PDF in Coreldraw | Setting Coreldraw |
|---|---|
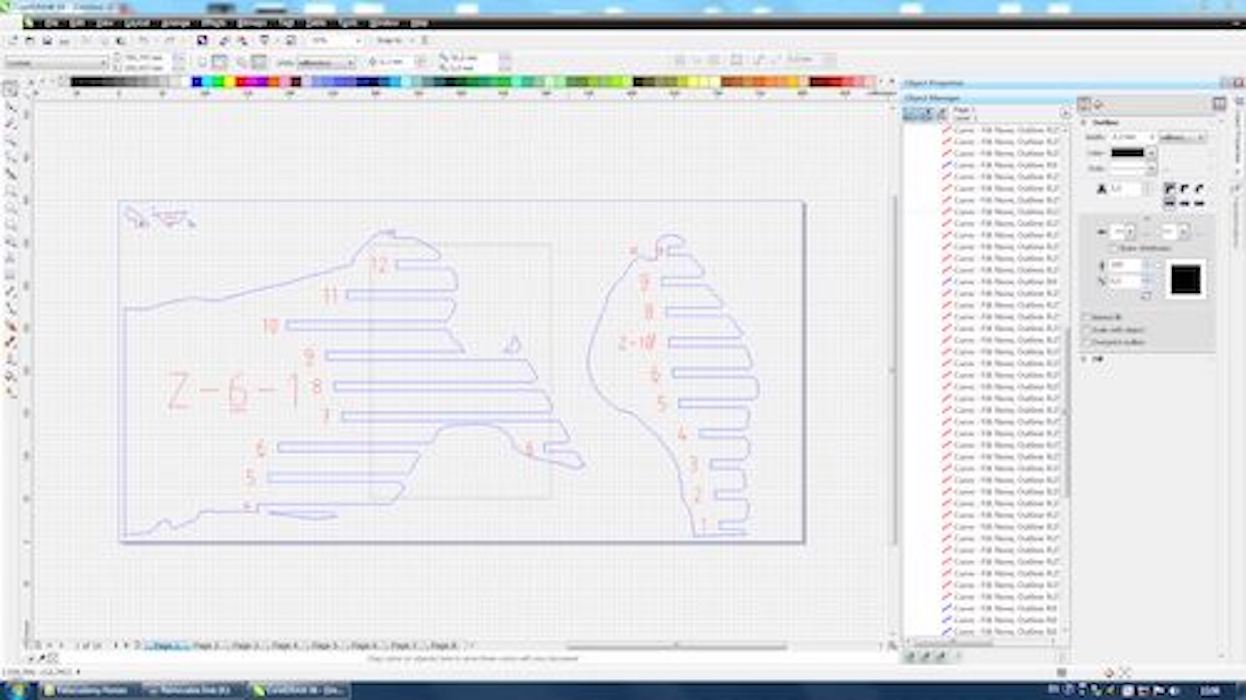 |
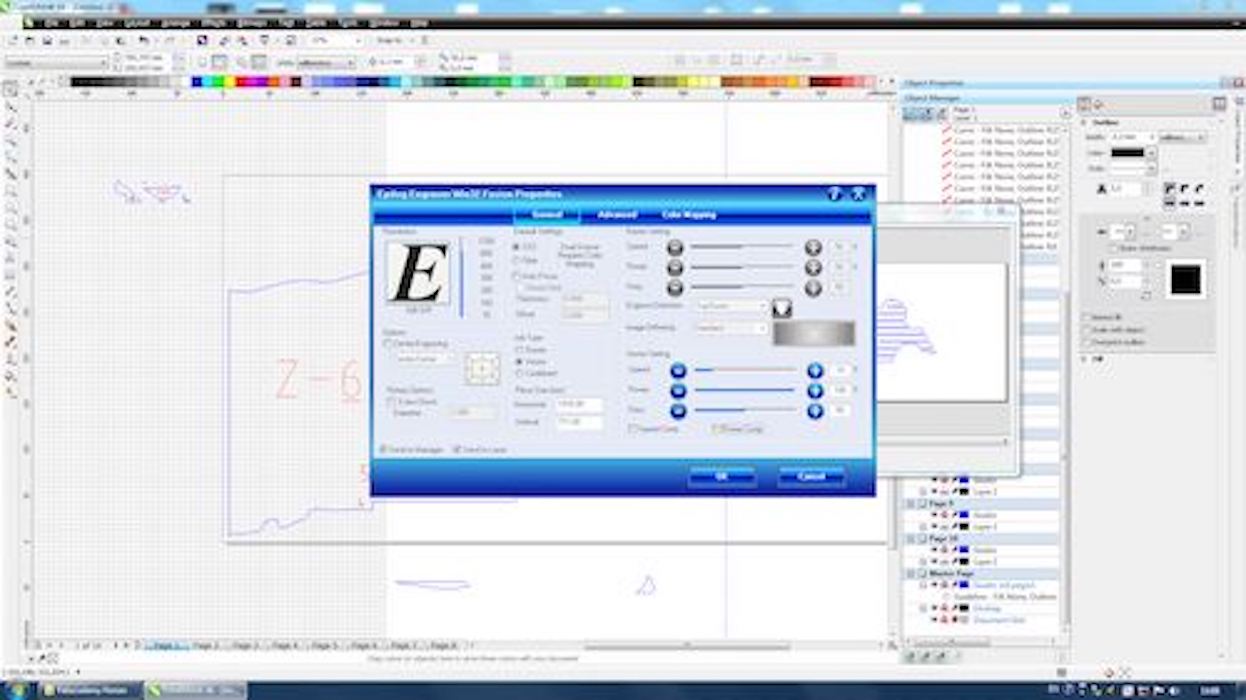 |
I then cut each part by selecting each part of the sheet seperatly because my material is not squared, so I have to optimize it. I then launch the cutting.
| Cutting process | resulting part |
|---|---|
 |
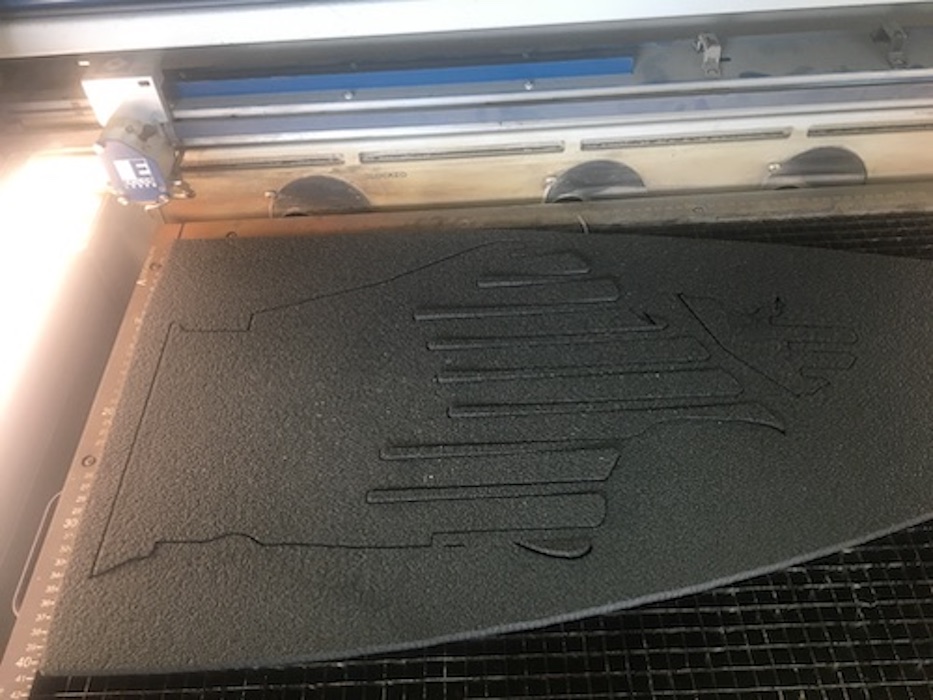 |
Assembling the mannequin
I assembled the mannequin using the reference of each part on the slices.
Here is the result :
| reassembled mannequin | different angles |
|---|---|
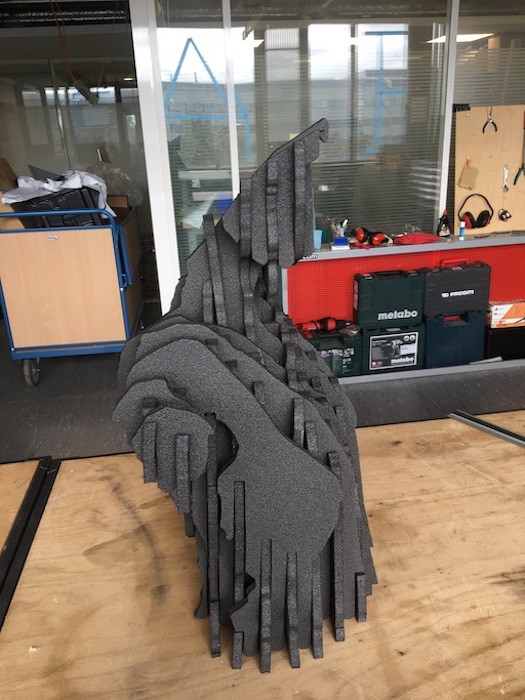 |
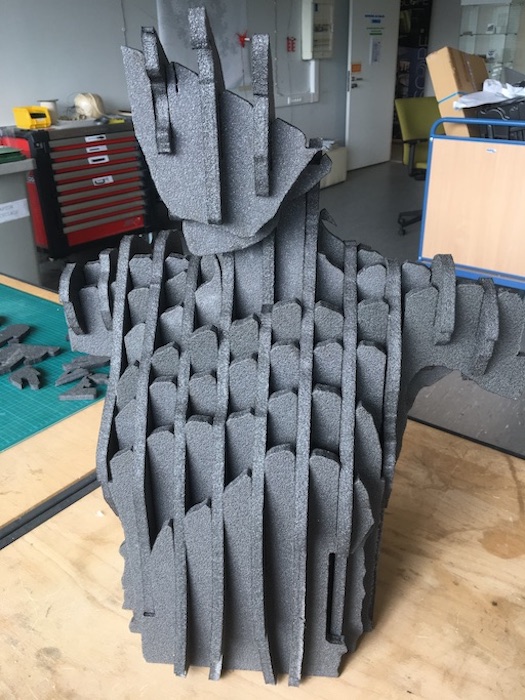 |
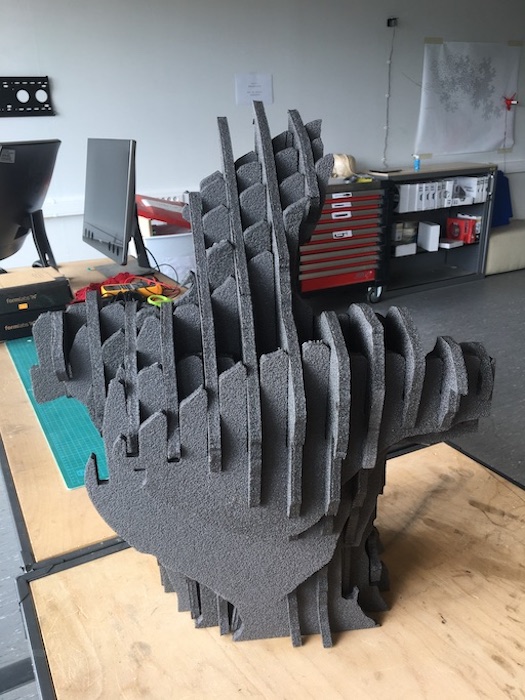 |
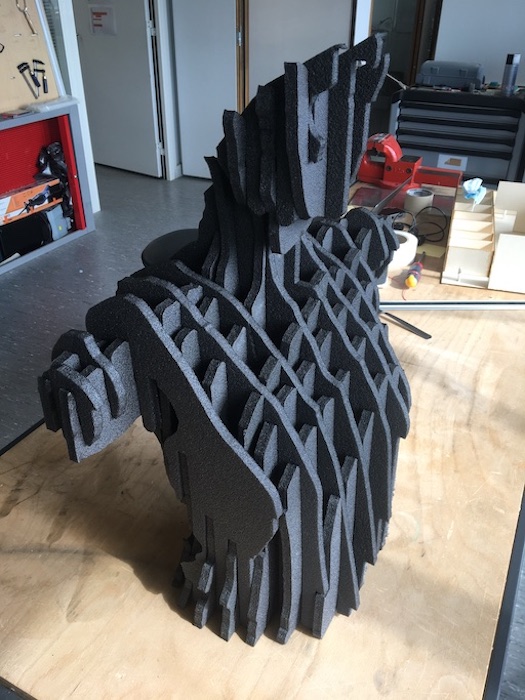 |
Here is a video summurizing the whole process :