5. E-textiles
My relation with E-textitles is interesting because I've been sometimes close to people/teams that work with it and I've already helped in workshops about it but I was most of the times someone assisting or focusing in other aspects of the projects and not really making or working with the eletronics myself.
For this week I focused on the basics of eletronics with the classes and tutorials as well as got together some inspirations and interesting projects that expresses the paths I would like to follow when talking about eletronics related to art and design projects.
Research and Inspirations
A very interesting project I've participated and still inspires me a lot was Electrònica Biodegradable proposed by Elizabeth Lorenzi and made together with an amazing team during a Laboratory from Inovacion Ciudadana in Costa Rica. There we tested the conductivity of different materials and thought about the possibilities of a less toxic and idealisticly a biodegradable electonic. In the pdf atached you can find some of the results of the research as well as recipes of contuctive biomaterials.
 Electronica Biodegradable 2019
Elizabeth lorenzi have also other projects around this tematic that are very inspiring. Two exemples of them are: the Felt battery and the gelatin solar cells. Two experimentations on energy sources from natural materials! Amazing!!
 Felt battery and gelatin solar cell. Pictures from Elizabeth Lorenzi
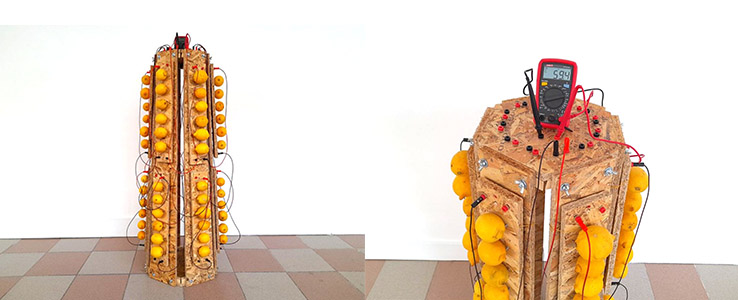
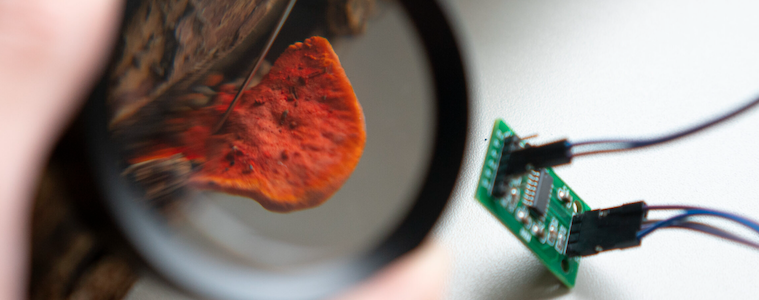
Ana Laura Cantera is another artist that inspires me a lot and I could also colaborate with. She was my introduction to the mycelium world in practice. She have amazing works mixing eletronics, living beings and biomaterials.
 Nidos de Equilibrio, 2014. Picture from Ana Laura's website
 Paisajes Metamórficos, 2019. Picture from Ana Laura's website.
Another artist that is an inspiration in this sense is James Bridle with the projects: Server Farm and Aegina battery
 Aegina battery, 2022. Picture from James Bridle's website
The duo Cesar and Lois is also a big inspiration when talking about eletronics, different surfaces and living beings.
 Mycorrhizal Insurrection, 2022. Picture from Cesar and Lois's website
Other websites and links:
Process and workflow
This week we learned the basics of eletronics and started to play with its possibilities.The classes were long and dense, and I've made a selection of some important slides from Emma's classes that helped me undestand this basic concepts to start bringing it into my practices.
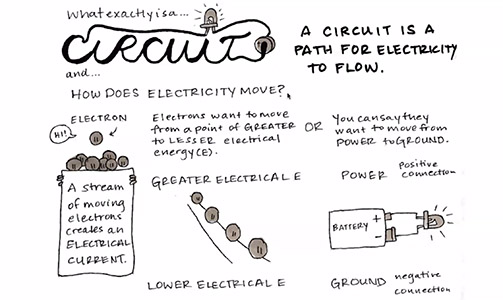

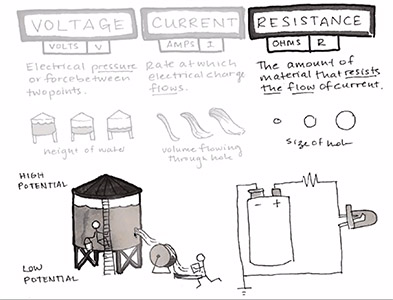 Slides from Emma Pareschi
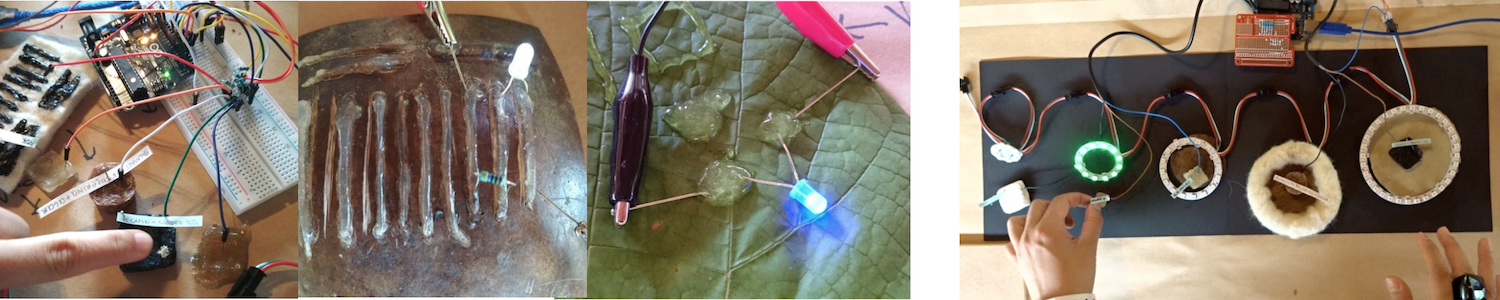
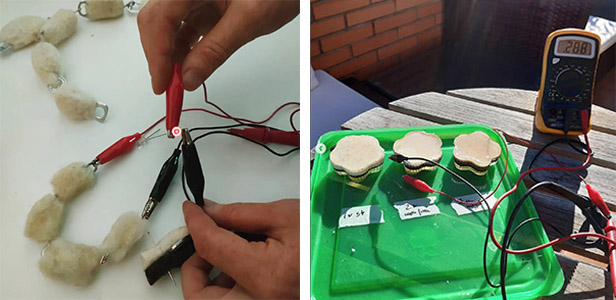
After some explanations, I test it in the fabrics. As I didn't have conductive fabrics or threads, I addapted some materials. The idea of this documentation is also to show alternatives for those who couldn't find some of the materials.
The first material I tested was the inner wire from old earphones (not working anymore). The ones from the earphone I got were super delicate copper wires covered by some plastic isolant. They would work perfectly like thereads but it was super hard to expose the copper and it was breaking easily. I didn't knew this was the problem at the first moment, I just tought they were not conductive, so I discarted this possibility. But if you have patience, yes, this wires are conductive and if you can expose the conductive part where it should be conductive on your project, it would work very well because it's already protected, it have some colour on it (normally blue, red, orange, black or green) and they're super flexible.
The second material I tested was a normal old wire from some broken eletronic I had at home. It was this normal metal, (probably Aluminium) wire covered with black plastic. It is super conductive, but it not so flexible, and because of that, it gives some structure to the fabric. It works, it works in the needle, but it's not the best option depending on what you want to make. I think it could be unconfortable in a wereable, for exemple.
| Material | Conductivity | Positive points | Negative points |
|---|---|---|---|
| old earphone wire | yes | flexibility, beauty and protection | hard to expose the conductive copper without breaking |
| Aluminium wire | yes | works well | not so flexible, probably unconfortable, unprotected(exposed condutivity) |
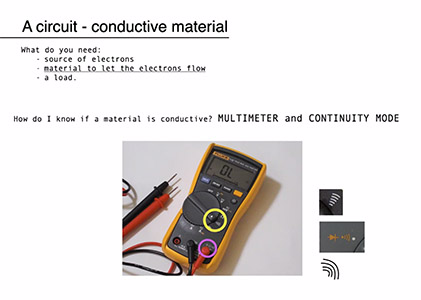 How to test conductivity
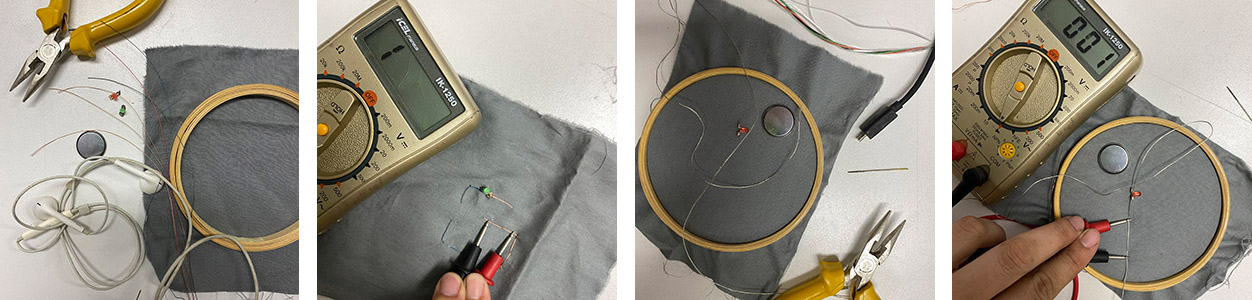 testing materials
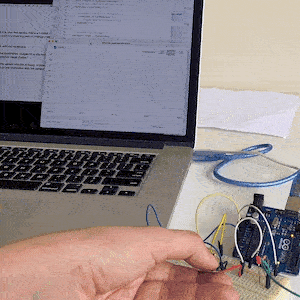
Following Emma's exercises, I did this circuit and this conductivity tester. To check if the material is conductive, you hold the 2 clips in the mateial and check if the led turs on.
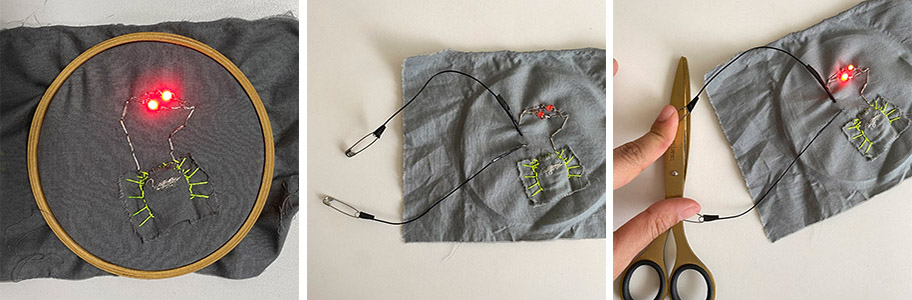 Circuit and condutivity tester
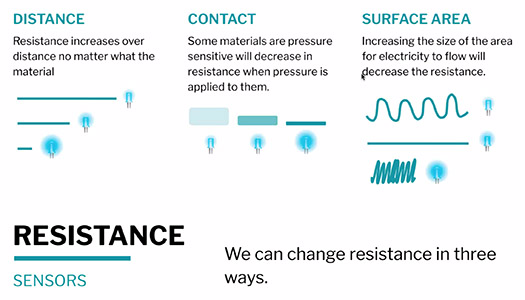
After doing this basic circuit, we started testing some codes with Arduino. This week we learned about digital sensor and analog sensor. The digital sensor only reads a HIGH or LOW signal, "1" or "0". an analog sensor collects readings over a range of values.To exemplify, when we're talking about light, the digital sensor can read only, NO LIGHT or ANY LIGHT and the analog sensor can read intensity of the light.
Digital sensor
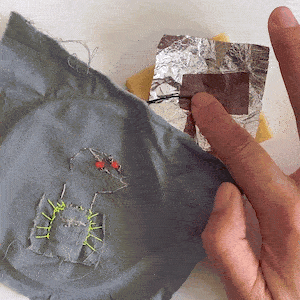
For the digital sensor switch I followed a basic tutorial: 2 Aluminium sheets and a foam with holes. So that the Aluminium sheets only touch each other allowing the electricity to flow when you press it.

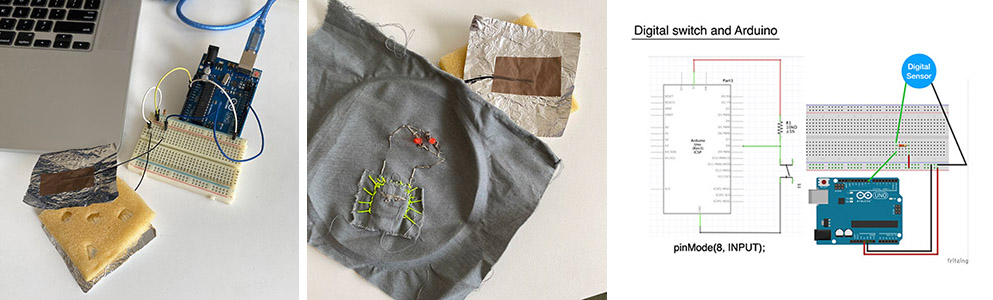
TOUCH x DON'T TOUCH digital sensor switch tests:

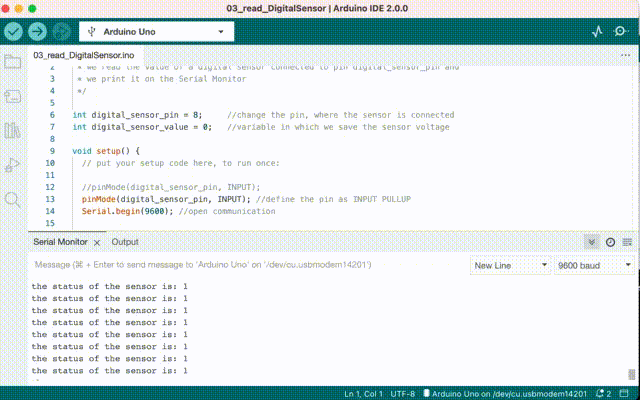
Arduino code (reading):
DIGITAL SENSOR WITH SERIAL MONITOR
/*Emma Pareschi - Fabricademy 2022/2023
 * we read the value of a digital sensor connected to pin digital_sensor_pin and
 * we print it on the Serial Monitor
 */
int digital_sensor_pin = 8;     //change the pin, where the sensor is connected
int digital_sensor_value = 0;   //variable in which we save the sensor voltage

void setup() {
  // put your setup code here, to run once:

  //pinMode(digital_sensor_pin, INPUT);
  pinMode(digital_sensor_pin, INPUT); //define the pin as INPUT PULLUP
  Serial.begin(9600); //open communication

}

void loop() {
  // put your main code here, to run repeatedly:
  // digitalRead(pin);
  digital_sensor_value = digitalRead(digital_sensor_pin); // read the sensor

  Serial.print("the status of the sensor is: ");
  Serial.println(digital_sensor_value); //print the value
  delay(100);

}
/* Emma Pareschi - Fabricademy 2022/2023
 * while the digital sensor is pressed, the Led blinks
 */

int digital_sensor_pin = 8;     //change the pin, where the sensor is connected?
int digital_sensor_value = 0;   //variable in which we save the sensor voltage
int led_pin = 3; //change the pin of the Led

void setup() {
  // put your setup code here, to run once:
  pinMode(digital_sensor_pin, INPUT);  //initialize the sensor pin
  pinMode(led_pin, OUTPUT);   //initialize led pin
  Serial.begin(9600);

}

void loop() {
  //digital_sensor_value = digitalRead(digital_sensor_pin); //read the Voltage at pin sensor

  // check if the pushbutton is pressed.
  while(digitalRead(digital_sensor_pin) == LOW){    //If it is pressed

      digitalWrite(led_pin, HIGH);     // turn the LED on
      delay(100);
      digitalWrite(led_pin, LOW);
      delay(100);

  }

}
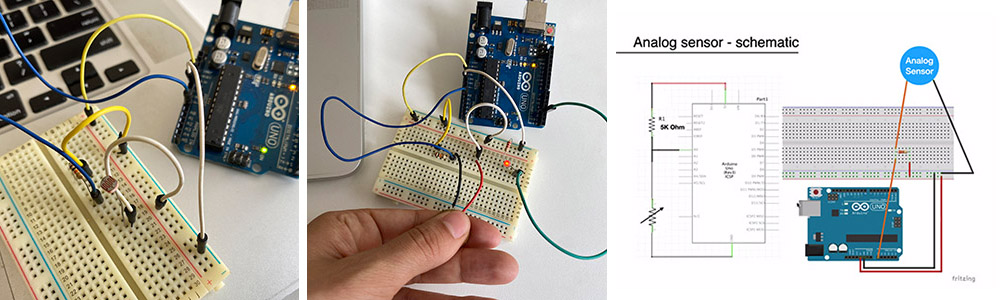
Analog sensor
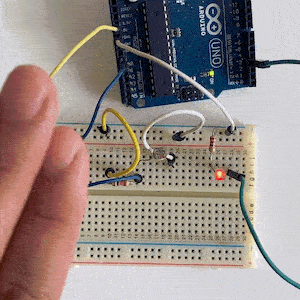
For the Analog sensor, I used 2 different sensor, a light sensor and a piezo (touch sensor).
Codes used:
Reading the Analog sensor:
/* Emma Pareschi - Fabricademy 2022/2023
 * with this sketch we read the analog sensor connected to pin analog_sensor_pin
 */

int analog_sensor_pin = A0;   //change the pin, where the sensor is connected?
int analog_sensor_value = 0;

void setup() {
  // put your setup code here, to run once:
  pinMode(analog_sensor_pin, INPUT);
  Serial.begin(9600);

}

void loop() {
  // put your main code here, to run repeatedly:
  analog_sensor_value = analogRead(analog_sensor_pin); //read the Voltage of the pin sensor

  Serial.println(analog_sensor_value); // print the value on the Serial monitor
  delay(100);

}
/*
  Smoothing

  Reads repeatedly from an analog input, calculating a running average and
  printing it to the computer. Keeps ten readings in an array and continually
  averages them.

  The circuit:
  - analog sensor (potentiometer will do) attached to analog input 0

  created 22 Apr 2007
  by David A. Mellis  <dam@mellis.org>
  modified 9 Apr 2012
  by Tom Igoe

  This example code is in the public domain.

  https://www.arduino.cc/en/Tutorial/BuiltInExamples/Smoothing
*/

// Define the number of samples to keep track of. The higher the number, the
// more the readings will be smoothed, but the slower the output will respond to
// the input. Using a constant rather than a normal variable lets us use this
// value to determine the size of the readings array.
const int numReadings = 10;

int readings[numReadings];      // the readings from the analog input
int readIndex = 0;              // the index of the current reading
int total = 0;                  // the running total
int average = 0;                // the average

int inputPin = A0;
int led_pin = 3; //change the pin of the Led

void setup() {
  // initialize serial communication with computer:
  Serial.begin(9600);
  // initialize all the readings to 0:
  for (int thisReading = 0; thisReading < numReadings; thisReading++) {
    readings[thisReading] = 0;
  }

    pinMode(led_pin, OUTPUT);   //initialize led pin
}

void loop() {
  // subtract the last reading:
  total = total - readings[readIndex];
  // read from the sensor:
  readings[readIndex] = analogRead(inputPin);
  // add the reading to the total:
  total = total + readings[readIndex];
  // advance to the next position in the array:
  readIndex = readIndex + 1;

  // if we're at the end of the array...
  if (readIndex >= numReadings) {
    // ...wrap around to the beginning:
    readIndex = 0;
  }

  // calculate the average:
  average = total / numReadings;


  // send it to the computer as ASCII digits
  Serial.println(average);
  average = map(average, 0, 200, 0, 255); //we change the range
  average = constrain(average, 0, 255); //we apply the limits

  delay(50);        // delay in between reads for stability
  analogWrite(led_pin, average);
}