13. Skin Electronics + wereables
continuation of the wereables week (08) + adding skin leds
In recent years, the virtual encounters and use of screens have increased a lot. Speaking for myself, I have been noticing that my headache and eye pain are increasing, probably because of the excess of screens during the day. The computer, the cellphone and television are now part of our daily lives.
The artificial blue light transmitted by these electronic devices is being studied by scientists and are probably linked to sleeping problems.
The idea of the project for this week is to make a wereable device that indicates when you're too long in front of a screen that is emiting this artificial blue light and then activate two vibration motors in the do-in points of the eye, that are close to the neck.
Informations of this "do-in eye points" - gate of consciousness point
Gall bladder 20 (GB-20): Base of neck point Helps to relieve: Headache, neck stiffness and pain, shoulder pain, and eye pain.How to find it: The 2 points are on the bony base of the skull. Each point is about one finger-width from the midline of the head, on the left and right sides.
There are also studies that indicates the artificial blue light as a threat for the Circadian Rhythm, witch could affect the sleep:
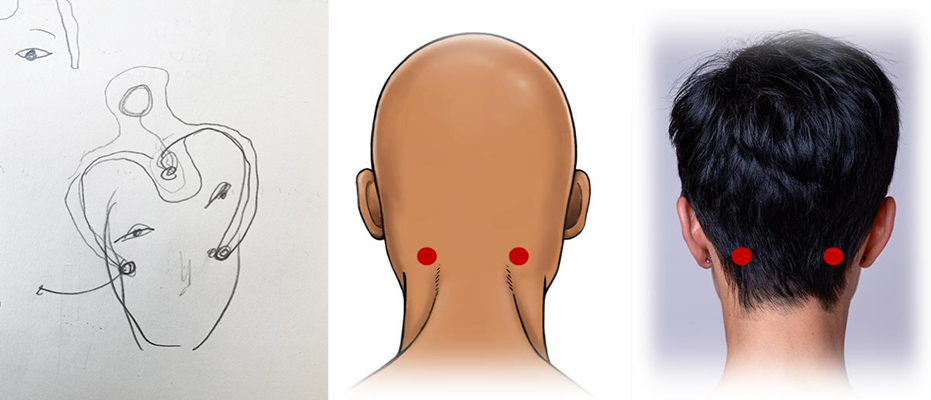 Sketch of wereable and GB-20 point
Aesthetic references ans inspirations
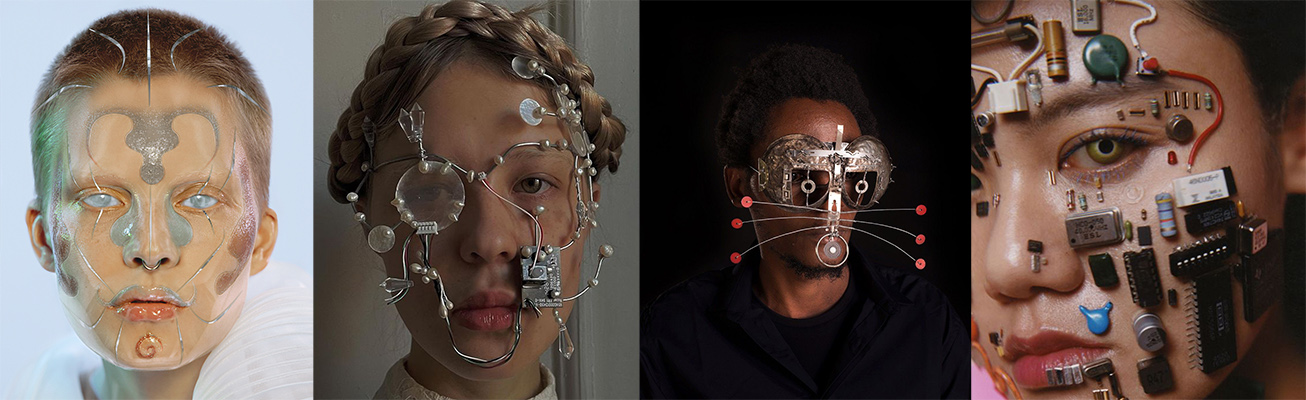 Some inspirations. Artists: Xenia Valevsky, Polina Osipova, Cyrus Kabiru, Cho Gi Seok
For more references please check my folder on Pinterest
Processes
Materials
For the assemblage of the wereable, these materials are recomended:
| Qty | Description | Price | Link |
|---|---|---|---|
| 1 | Lilypad | 75 R$ / 13,80 EU | Casa da Robótica |
| 1 | Ftdi conversor module | 24 R$ / 4,40 EU | Casa da Robótica |
| 1 | Gesture and colour sensor apds 9960 | 30 R$ / 5,50 EU | Casa da Robótica |
| 2 | Vibracall 1027 3V | 14 R$ / 2,60 EU | Casa da Robótica |
| x | mini leds | 9 R$ / 1,60 EU | Mercado Livre |
| x | Wires or conductive thread (you can use other conductive materials) | found/leftovers/donation or conductive thread 1m |
TOTAL: 152 R$ / 28 EU
Code and circuits
The code was made with arduino app, I used an exemple code from a tutorial I found on this website about the color and gesture sensor. I tested it some times and some versions until the final one.
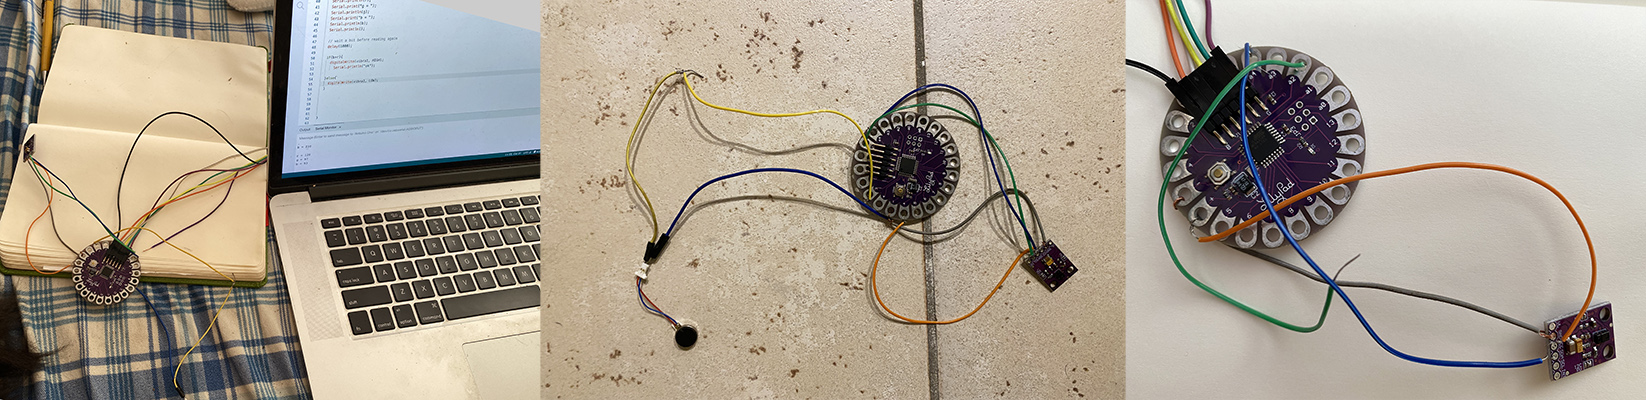 testing the codes
The command is to identify when the blue light is higher then the red one, and after 1800 seconds (30min) of this condition (blue light > red light) the vibration motor turns on for 3min and then you know is time to look another way, relax the eyes and massage your "Gate of conscioussness points". The leds turn on when the sensor identify the blue light as higher then the others. The counter is per second. Each second you look other way (with less incidence of blue light), it discount 1 second from the 30min.
#include <Arduino_APDS9960.h>
int vibra1 = 3;
int ledPin = 5;
int r, g, b;
int val =0;

void setup() {

pinMode(vibra1, OUTPUT);
pinMode(ledPin, OUTPUT);
  Serial.begin(9600);
  while (!Serial);

  if (!APDS.begin()) {
    Serial.println;
  }
}

void loop() {
   // check if a color reading is available
  while (! APDS.colorAvailable()) {
    delay(5);
  }

  // read the color
  APDS.readColor(r, g, b);

  // print the values
  Serial.print("r = ");
  Serial.println(r);
  Serial.print("g = ");
  Serial.println(g);
  Serial.print("b = ");
  Serial.println(b);
  Serial.println();

  // wait a bit before reading again
  delay(1000);

if(b>r){

    val=val+1;
    Serial.println(val);
    digitalWrite(ledPin, HIGH);
    cont();


}else if(b<r){

 val=val-1;
  digitalWrite(ledPin, LOW);
  loop();
} else {
  digitalWrite(ledPin, LOW);
}

}

void cont() {

  if(b>r && val>1800){

    digitalWrite(vibra1, HIGH);
    delay(180000);
    digitalWrite(vibra1, LOW);
    Serial.println("ok");
    val=0;

  }else{
    digitalWrite(vibra1, LOW);
  }

}
To build the circuit and make it cleaner for being visualizable, I drawed it on the fritzing app.
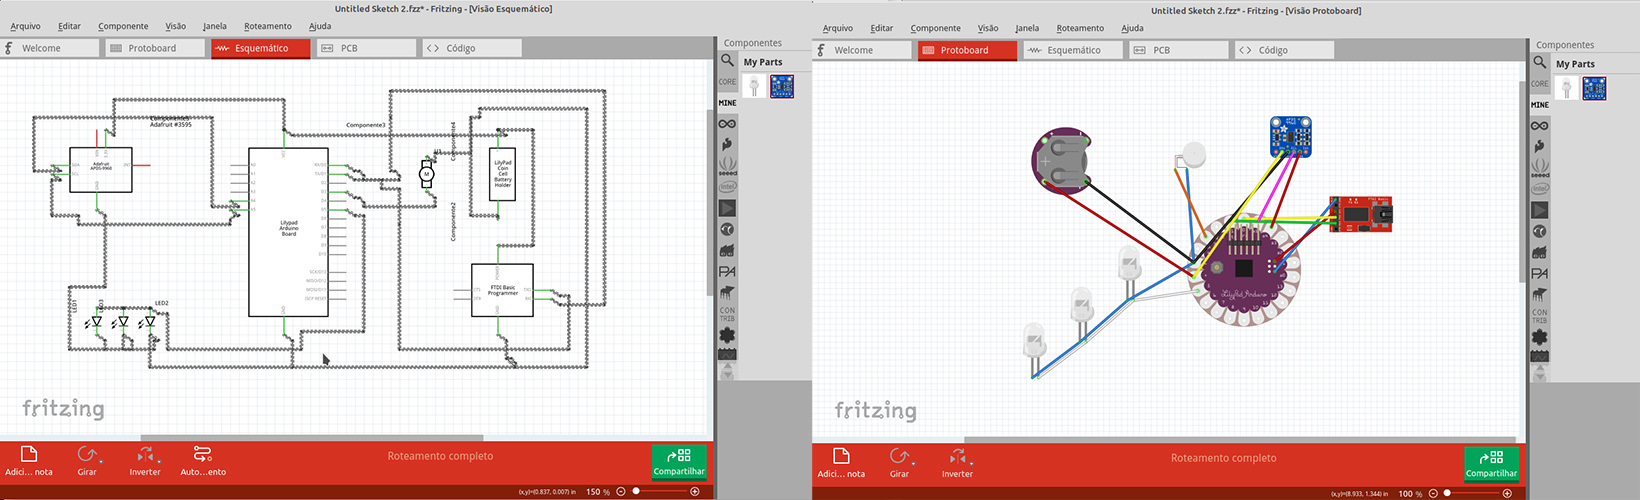 Sketch of the circuit on Fritzing
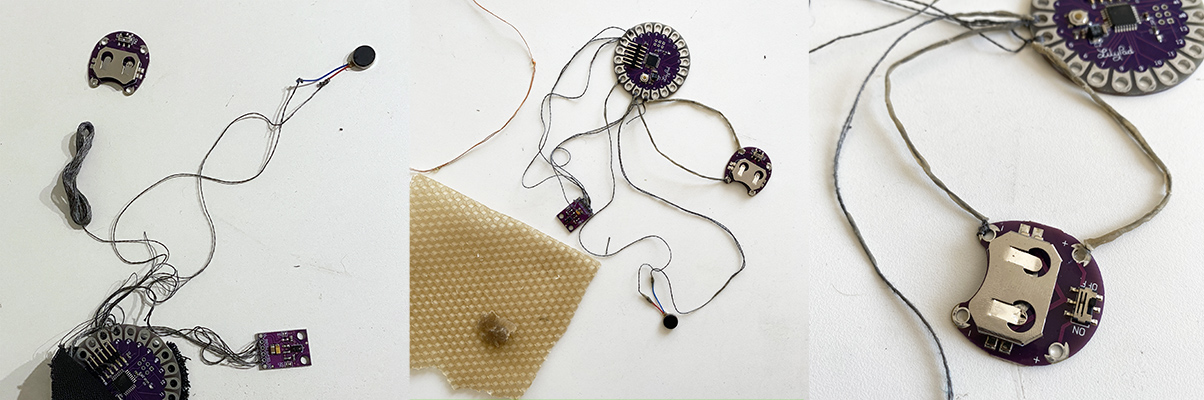
Trying the conductive thread with beewax to isolate it
Instead of sewing the thead into the textile I decided to use it as wires, to test the isolation with beewas, and the do some experiments in the textile, but the thread I had was not doing the contact. So I changed my mind and decided to use normal wires.
 Experimenting with conductive thread and beewax
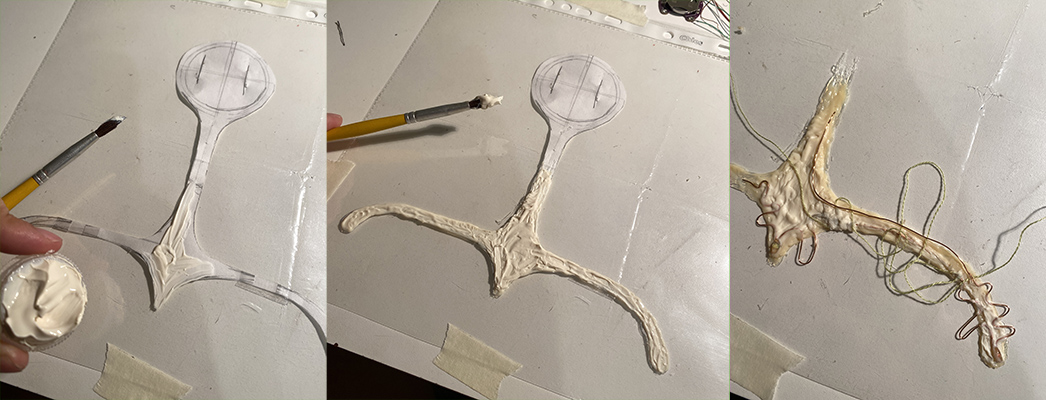
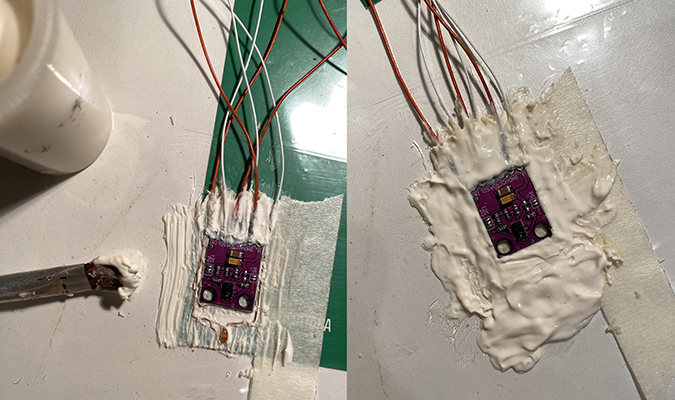
Experimenting with the latex
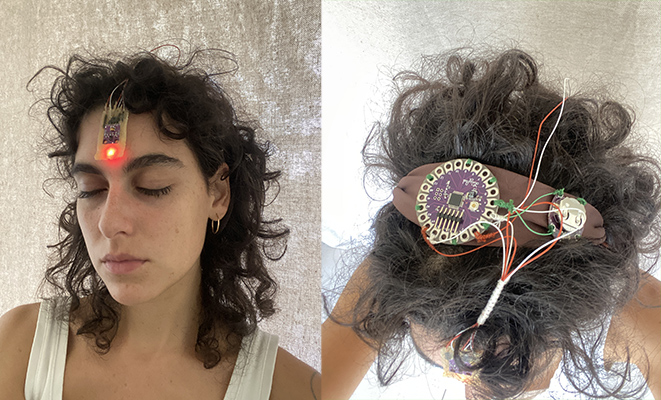
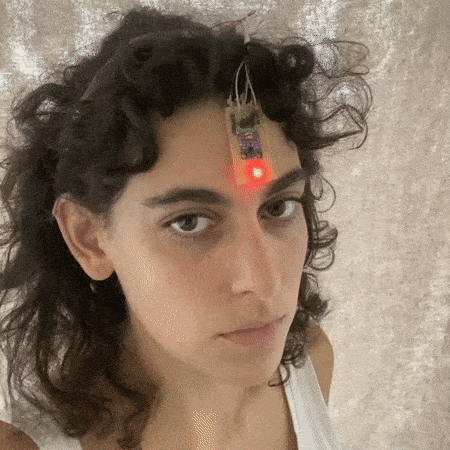
I decided to do this project combined with the "Skin eletronics one". For that, some part of the wereable would be on the skin, like the sensor in the forehead and the leds. First I imagined 3 leds, one in the foreheah and the 2, one next to each eye, in the temples. But as the first trial of latex did not work, and the 3 leds were not turning on with the 3V battery I had, I decided to simplify it and put just one led together with the sensor, in the forehead.
Another problem I had with the latex was that it was old and instad of turning translucid after drying, as I expected, it turned into a yellowish, very visible when placed in the skin.
 First trial with the latex
 Trying the latex
Assembling / designing the wereable
When I tought about the design I wanted for this wereable, I was thinking in something for the head, kind of a cap-headband or glasses.
In the end, I decided to make it as simple as possible, as the time was short and the coding and circuit part took me a long time, as I'm not familiarized to programming. So this is the result of this first prototype:
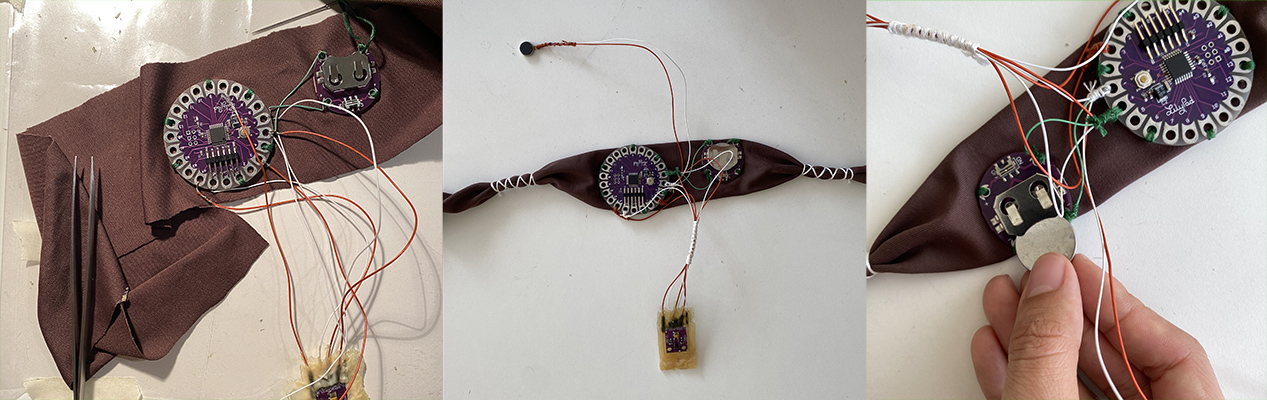 wiring and sewing the circuit in the headband
 wearing and testing
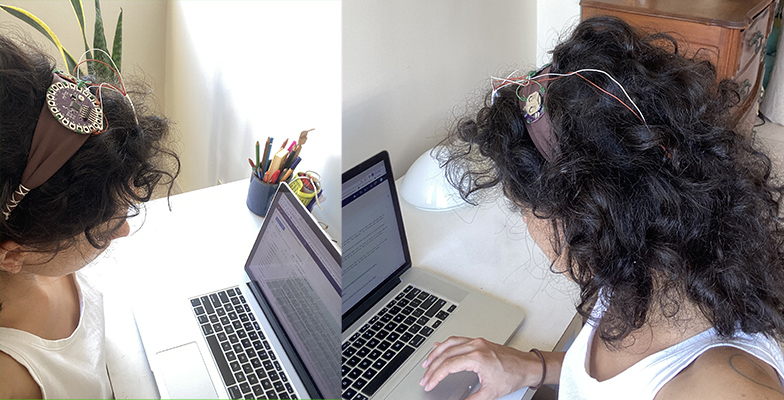 wearing and testing
Conclusion
This project was very fun and interesting to build the concept I and really liked it and would like to do other versions with more care and time in the design process. It was also important to increase my habilities with arduino programming and remember me of the possibilities of the wearable world. The variety of sensors and actuators are amazing and very inspiring.