4. BioChromes
Research
This week sounded so special because we worked as a team and were not expected to create a whole project by ourselves but experimenting and assimilate new processes.
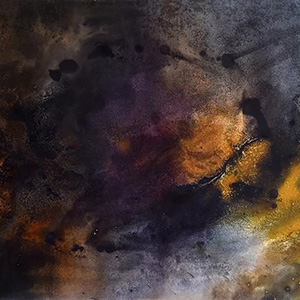
Cecilia's lecture was huge and we had a lot of informations to assimilate. Our 3 days of experimentations were supervised by Charlotte from MARGA Création (picture : example of her work).
She started from the beginning with definitions and basics of dyeing.1
In the class we seen 3 ways to color, and the most important thing to do when dyeing :
So much vocabulary (translations of all the plants names) :
weekly assignment
Actually, don't delete all the pre made tips on your gitlab, it can help you structure your work. Check out the weekly assignment here or login to your NuEval progress and evaluation page.
References & Inspiration
Here a reference of beautiful realisations with natural dyed fabrics, by Sophie Morille.
 Natural dye on bedsheets, then patchworked / Natural dye on wool, called "Noeuds"
Also,
Not natural but worthy having a look : she is a master quilter, but she also dye her fabrics to have the perfect radials suites.
It would be interesting to try to reach these very soft graduations of color shades with natural dyes.
Painting with natural inks.
Tools
Process and workflow
We use plants to dye because of their color, luminosity and stability (means they resist to ligth, washing and friction).
Preparing the fibers
Samples
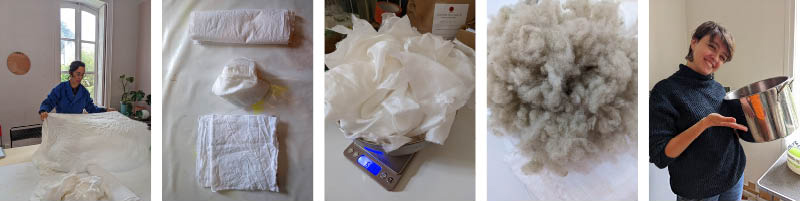 Cutting the fabrics to have samples for everybody in linen, silk and cotton.
This step is called etching. It consists of opening up the fibers to help the color settle there and stay there longer, becoming solid.
There are two types of etching: for cellulosic fibers and for animal fibers.
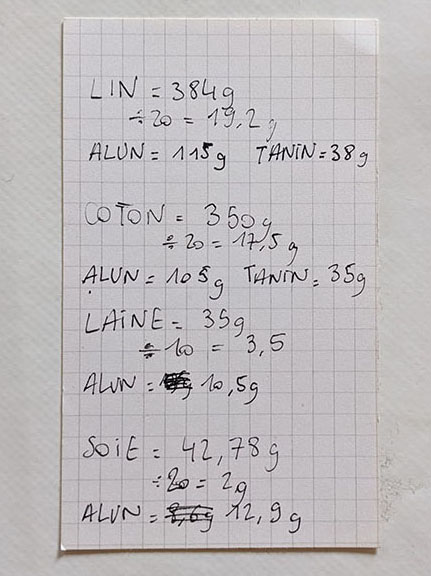
Animal fibers only need the alum bath while organics need two: first an alum bath and then a tannin bath.
Depending on the desired color, we will use a different mordant (alun, lycopodium, symplocos, presle). We choose alum which comes in crystals. Tannin adds protein to cellulosic fibers which do not have enough unlike animal fibers. The tannins color so pay attention to the choice of this one (oak gall is very popular because it does not tint much).
- Heat the fibers in a 20-30% WOF dilution alum bath
- For cellulosics, after this bath, make the tannin bath at about 30% WOF (10% if it's extract)
- There are 3L of water for 100g of fibers.
Dyes
Ingredients
-
mortanted fibres
-
desired percentage of WOF of tinctorial plants
-
water
-
cooking pot
-
spatule
-
thermometer
-
time !
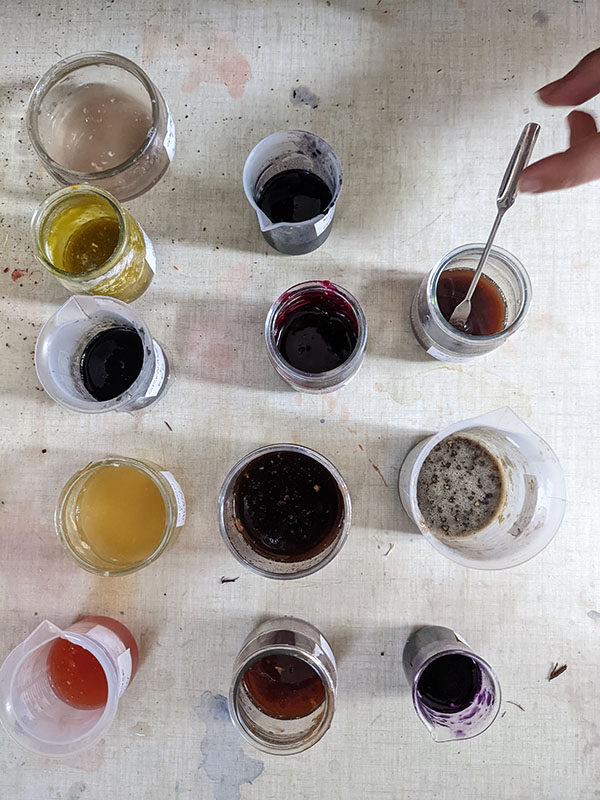
Baths
We made several baths with different dilutions to make more shades of the same color.
Baths are principally decoctions, so we put the tinctorial plants in water and heat the bath until 70-80° depending on them.
When the bath is hot enough and colored, we can immerge the fibers. We have to be very carefull with wool: this fiber doesn't like temperature shocks, so you have to immerge it when the bath is still cold and heat very progressively to avoid the felting.
| Madder | 20 | 50 | 300 | 300 + 50 logwood | |
| Logwood | 12 | 50 | 150 | ||
| Reseda | 10 | 50 | 150 | 50 + 10 iron | 50 + 150 madder |
| Pomegranate | 50 + 10 iron | ||||
| Walnut | 1000 | ||||
| Onion | 50 | 50 + 10 iron | |||
| St John's wort | 100 | 100 + 10 iron | |||
| Gall nut | 30 + 10 iron | ||||
| Sandalwood | 50 |
* every number is expressed in %
Before doing the madder bath, you have to prepare the roots to help the extraction : mix it in cold water and let it rest for few hours before starting the bath.
First immersion in the 300% WOF madder bath :
Stir regularly and check the colors :
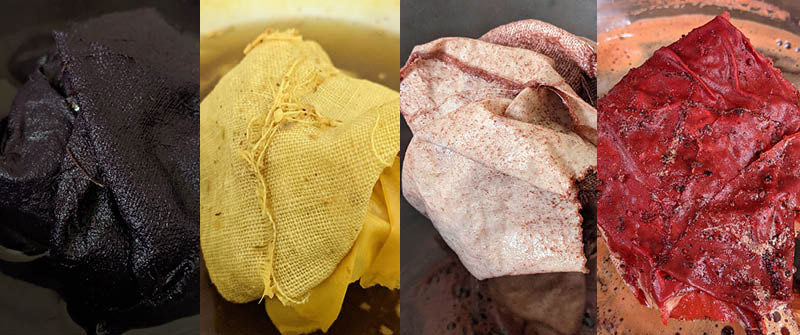 logwood / reseda / santalwood / madder
 madder / walnut / logwood / reseda + madder
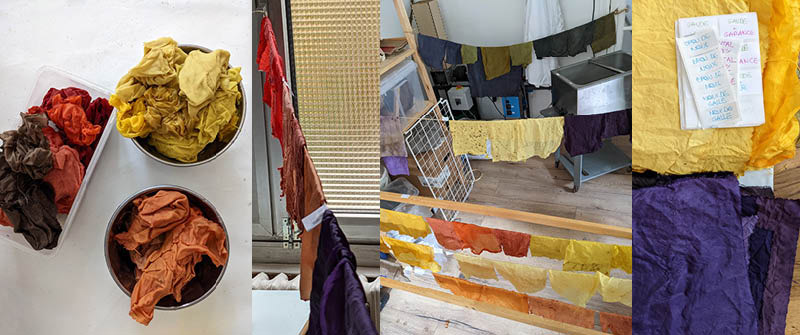
Drying
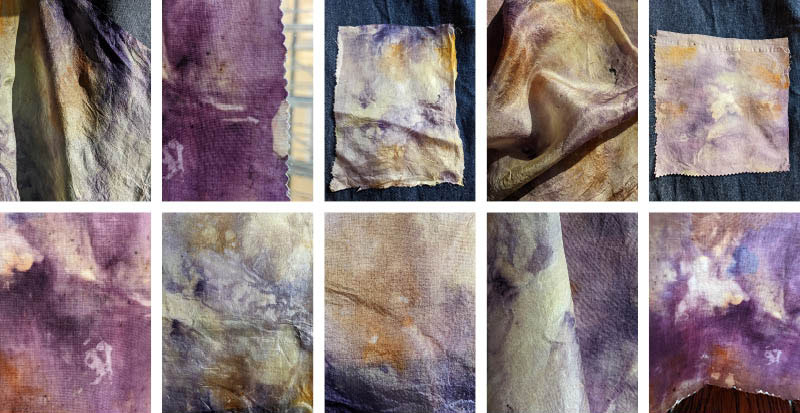
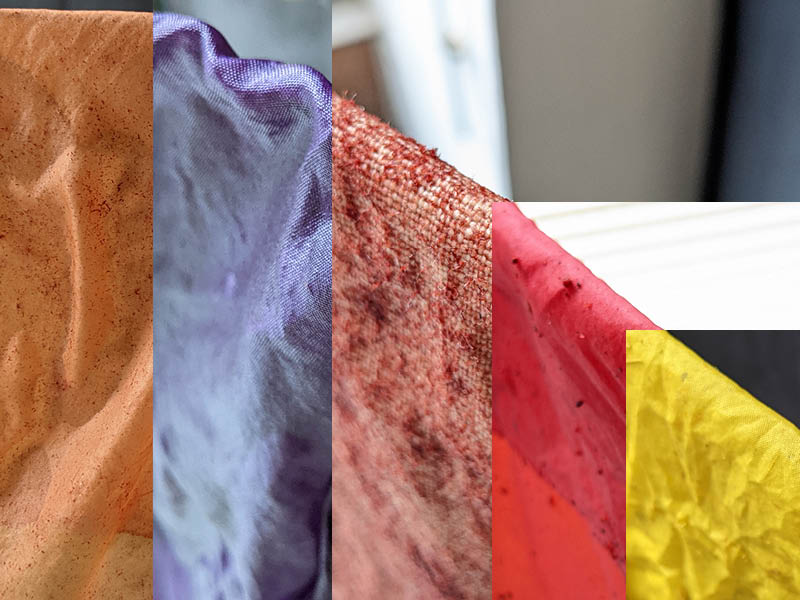 reseda + madder / logwood / madder / madder / reseda (all on silk except the middle which is linen)
Results
Colors are super bright and vivid on silk, more pastel on cotton and got different depths on linen.
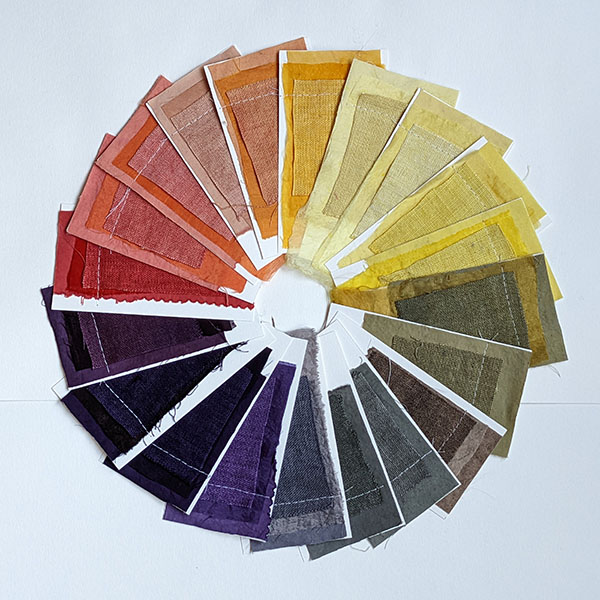
I have been shocked by the intensity and brigtness of the colors, only by using a high level percentage of material.
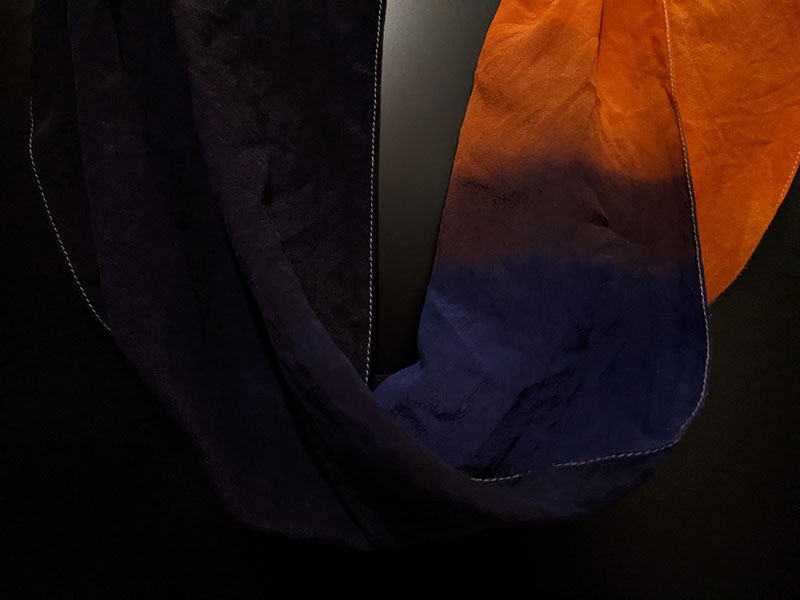
A personnal project
I am very happy to be able to dye a small silk scarf that was beige. I put it in the alum bath only, then in two different bathes : logwood for the purple side and madder bath for the other one. In the middle I let the colors overlap and mix to have stripes between the two single colors.
Baths are the ones we made earlier, with the higher concentration for both madder and logwood.
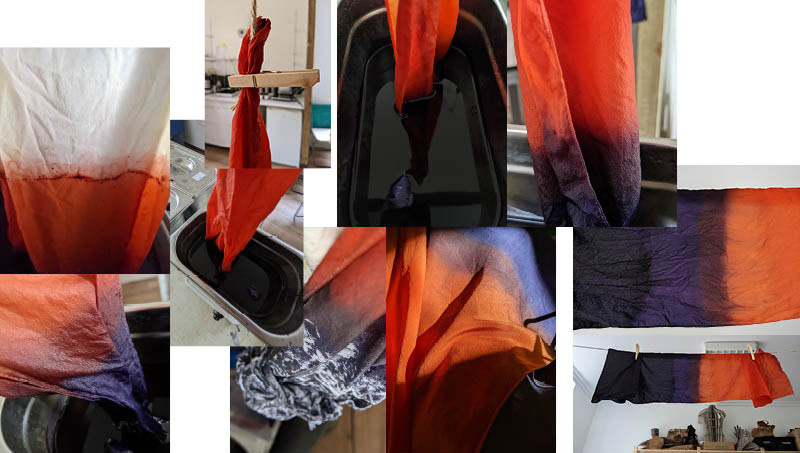
Really felt like a lil chemist.
sentence of the week
C'est trop beau !
Up to come
 I prepared a wool scarf in an alum bath. My goal is to dye it with onion skins. Can't wait!
Update 20/12/2022
Here are the steps of the onion bath.
The scarf was weighting 295g and I had 87,76g of onion skins which corresponds to a 30% dye bath.

I'm in love with this english yellow mustard.
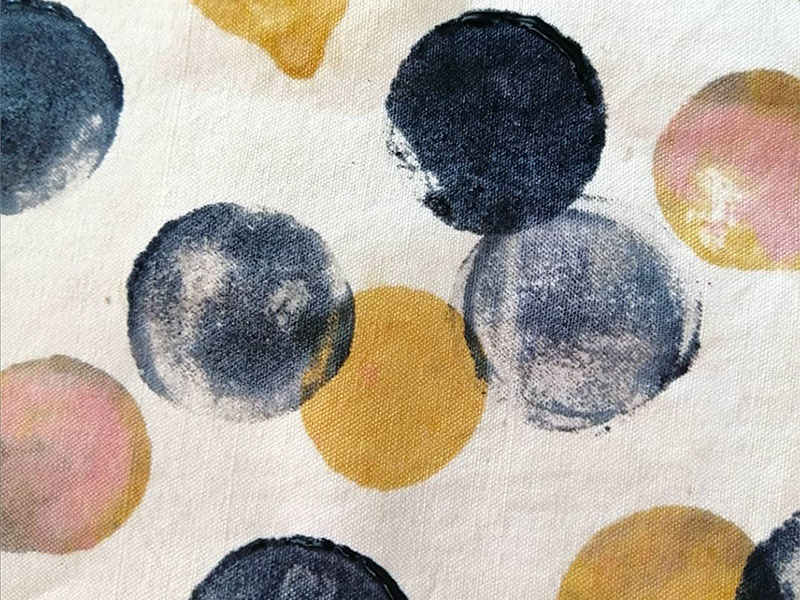
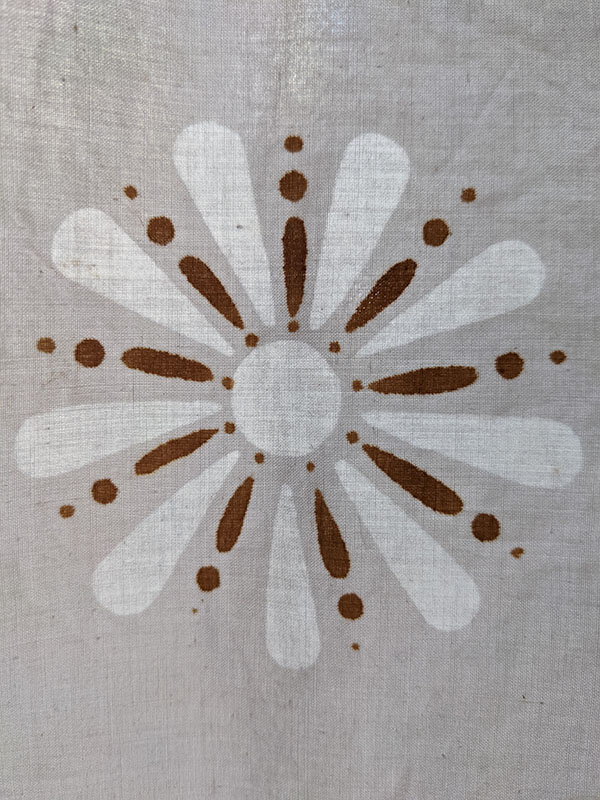
Eco print
We picked all kinds of plants in the garden to compose a painting on fabric. The fabrics used were mordanted beforehand (cotton, linen and silk).
I composed a pattern with oleander petals, slices of mushroom (unknown type), green leaves of ivy, oak, vine and other unknowns. I also used pinecone scales. On another test, I used powders of dry plants: sulphurous cosmos, logwood, dry oak leaf.
We rolled up the fabrics on batons wide enough so that the fabric overlapped as little as possible, and tied tightly with a string.
We put them in the oven for an hour, then unrolled them.
Surprise !
- The green plants gave almost nothing, except that they acted as a reserve.
- Surprisingly, the fungus colored pale yellow, resembling the hue of St. John's wort.
- The pinecone scales gave an orange-brown.
Finally, I have large spots of purple, obviously coming from logwood, but, not having used any, I think that the contact of the rollers between them was not beneficial to our ecoprints.
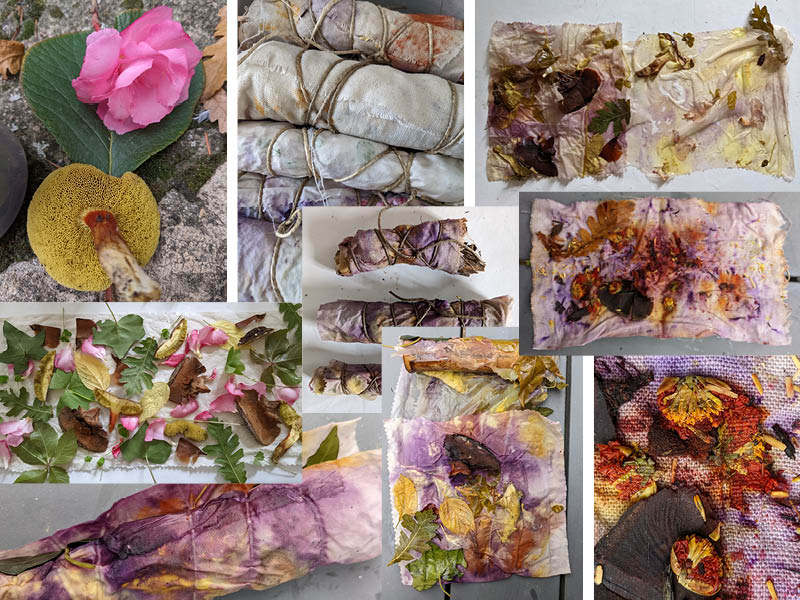
The result is not very colourful, especially on silk. Maybe not enough tinting elements in my spring roll.
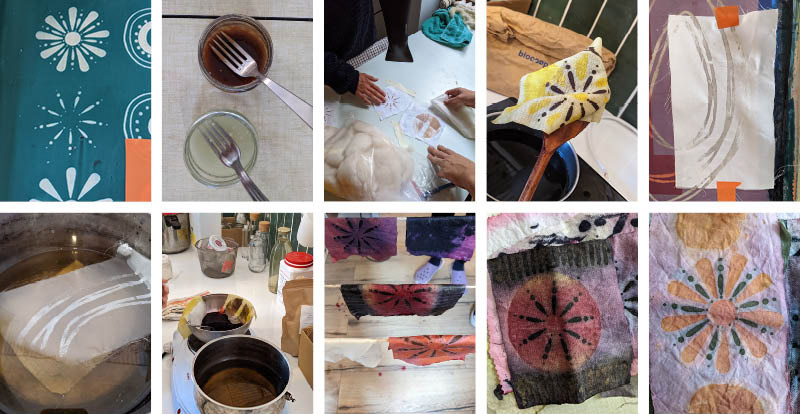
Inks
Silkscreen printing
Printing paste
I choose to keep both langages because we worked everything in french and we have a lot of new words to remember in english so, each time I'll read my notes, I'll memorize some.
Alum acetate / Acétate d’Alumine :
- 200ml vinegar 10/12%
- 12g alum sulfate
- 10g soda crystals
- Guar gum in powder
Iron acetate / Acétate de fer :
- 200ml vinegar 10/12%
- 12g iron acetate
- 10g soda crystals
- Guar gum in powder
Never mix both together so be careful everything is well cleaned after use.
Inks preparations :
Proportions are 1/1 :
-
50g of alum, tannin or iron
-
50g of dyeing bath
-
thickeners (guar gum, waxes, gelatin)
⚠️ Respect the order of the ingredients. Add the soda crystals in small quantities to the mixture. Watch out for the acid-base reaction, it foams!
-
In a beaker, pour the vinegar, then the aluminum or iron sulphate, then the soda crystals.
-
Mix everything well, there should be no lumps left.
-
Gradually add the guar gum according to the desired texture.
You have to achieve the texture of honey. Mix well while adding pinches of gum. The preparation will keep for a week max in a fridge.
To fix it, stove 1 hour (textiles)
NB: inks are less solids than printing pastes
Wheat bran = removes excess mordants, absorbs impurities.
⚠️ Bien respecter l’ordre des ingrédients. Ajouter les cristaux de soude par petite quantité dans le mélange. Attention à la réaction acido-basique, ça mousse !
-
Dans un bécher, verser le vinaigre, puis le sulfate d’alumine ou de fer, puis les cristaux de soude.
-
Bien mélanger le tout, il ne doit pas rester de morceau.
-
Ajouter au fur et à mesure la gomme de guar par rapport à la texture souhaitée.
Il faut atteindre la texture du miel. Bien mélanger tout en ajoutant des pincées de gomme. La préparation se conserve une semaine max dans un frigo de préférence.
Pour fixer, étuver 1 heure (textiles)
NB : les encres sont moins solides que les pâtes d'impressions
Le son de blé = enlève les surplus de mordants, absorbe les impuretés.
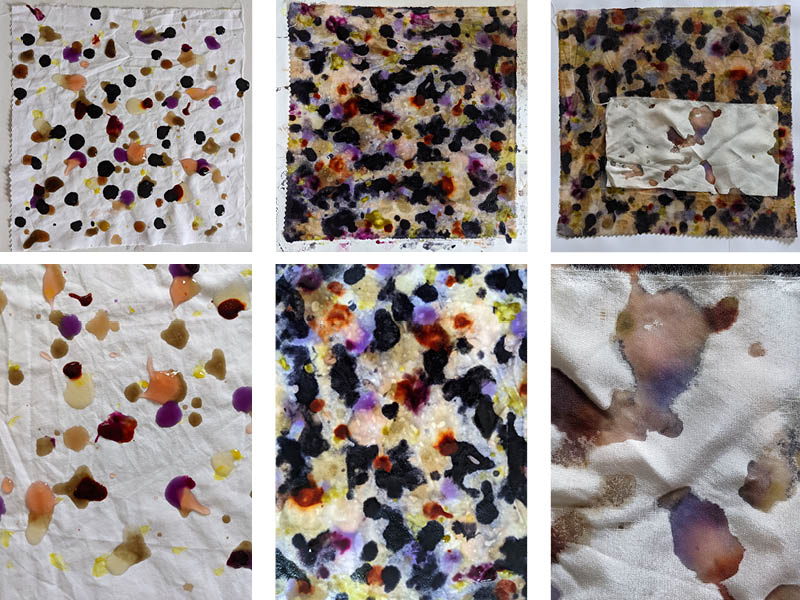
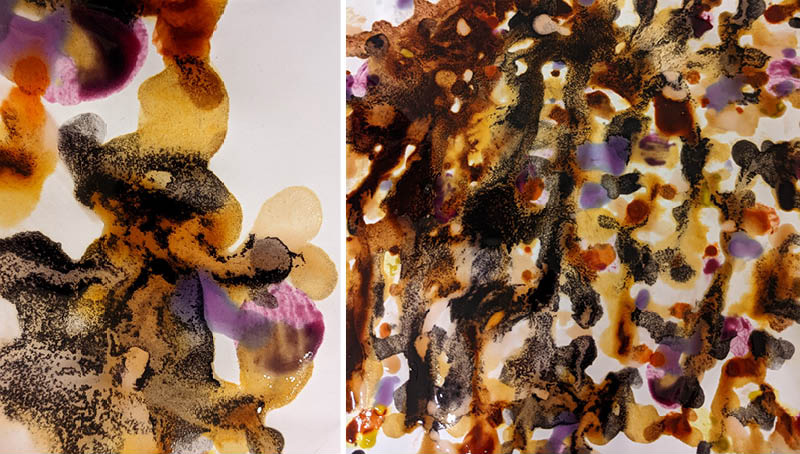
Painting
For me, painting with the inks was not very satisfying because our inks had different consistencies and some were too thick to paint on. On the other hand, I was able to crush the ink with my finger, whether on the fabric or on the paper, and thus notice that the color was inserted deeply into the material. Thus, I was able to have translucent colors, which overlapped without really mixing.
Finally, with the inks that were too liquid, I was quickly inspired by the dripping technique. I thus deposited drops on the support and let them connect together, mixing the colors randomly.
I was able to notice the interaction of the inks between them according to their dilution with iron or alum.
I created an all over pattern on cotton and paper.
It's a process that I really like, but the colors didn't hold up well enough in the wash, despite the steaming stage.
On fabric still wet
On paper
Conclusion
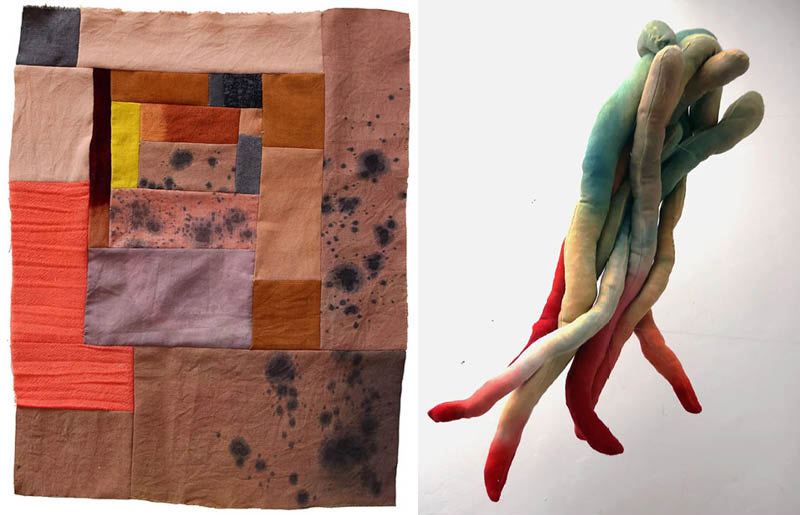
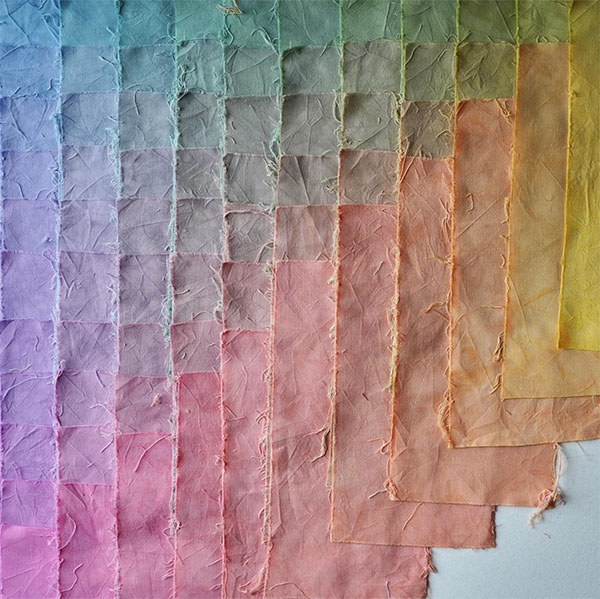
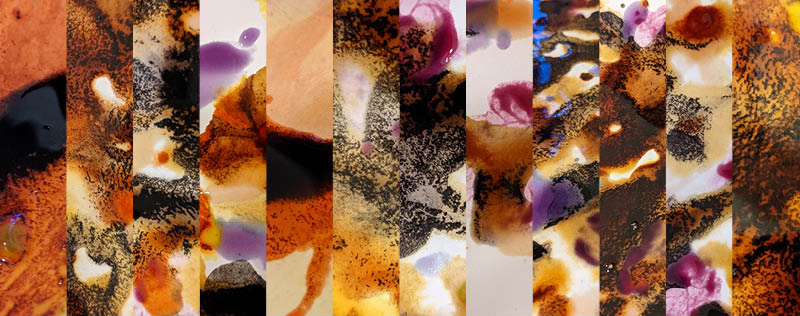
Two ways of showcasing and comparing results with images below
On the left an image of a nuancier of all the samples we made. On the right, an image of us studying but, aren't we wearing the same colors ?!
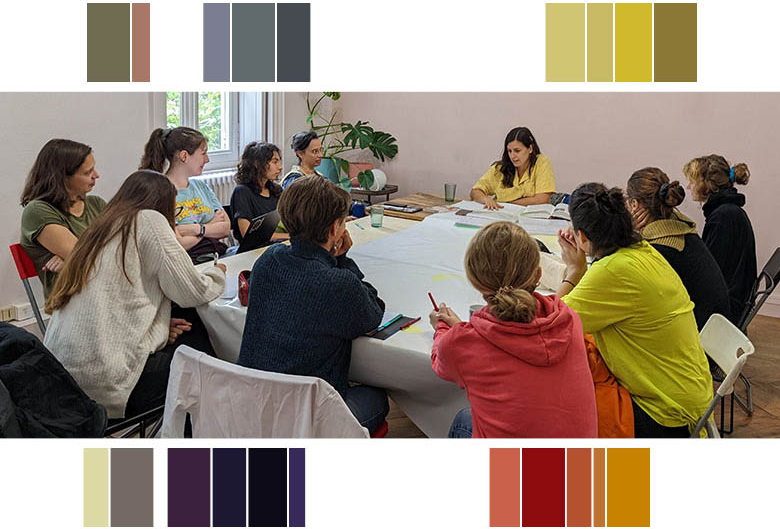
NB: the colors are pipette picked on InDesign, it's not scientific colors translated in #FFFFFF.
Pigments
Recycling the dye into pigments
- 20g of alum
- 5g of sodium crystals
- 200ml of dyeing bath
- higher than high jarr because of the chemical reaction
- coffee filter
Dissolve the alum and sodium crystals in two containers
Filter 200 ml of dye bath, put in a high-rimmed beaker
Add the diluted alum to the dye bath
Gently add the sodium crystals to the mixture
Leave to decant for a few hours to obtain 2 phases: a liquid and a solid
Filter the mixture to keep only the solid (2h)
Grind the crystal with a pestle and mortar to obtain a powder
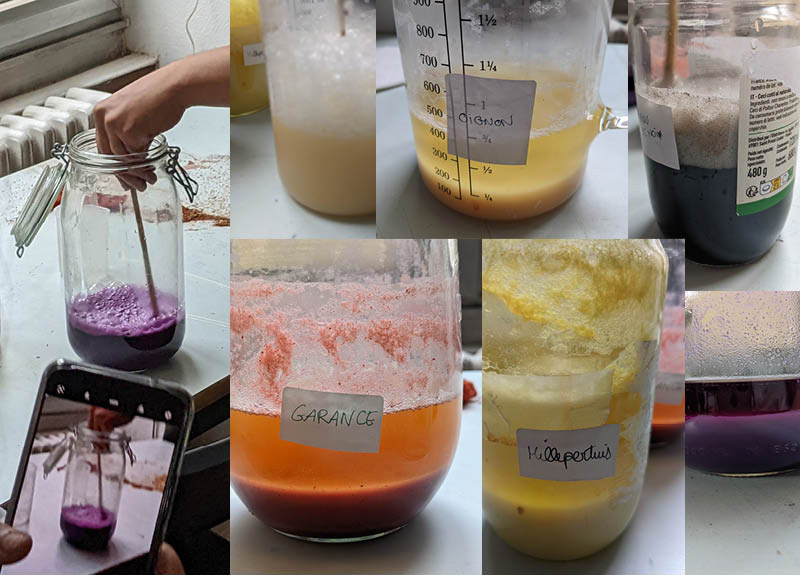
Still drying.
24/10/2022 update
Week04 was definitely hard to leave.
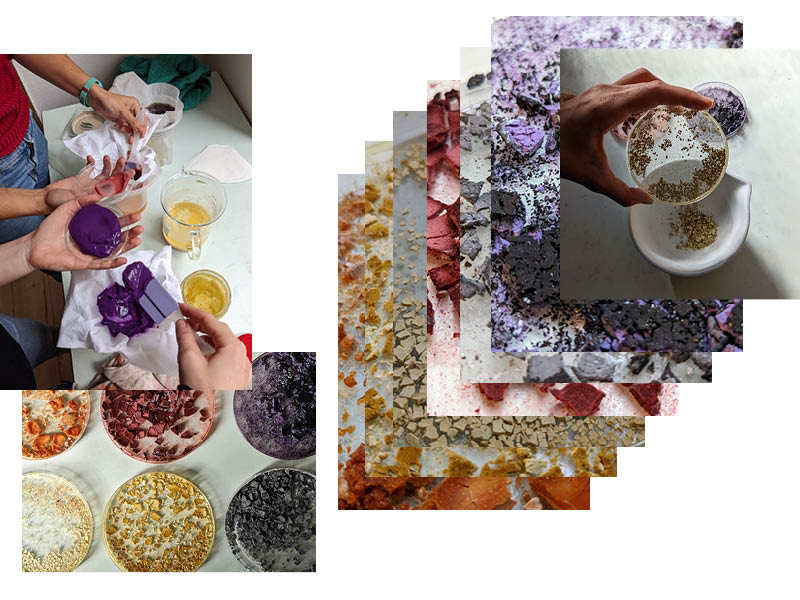
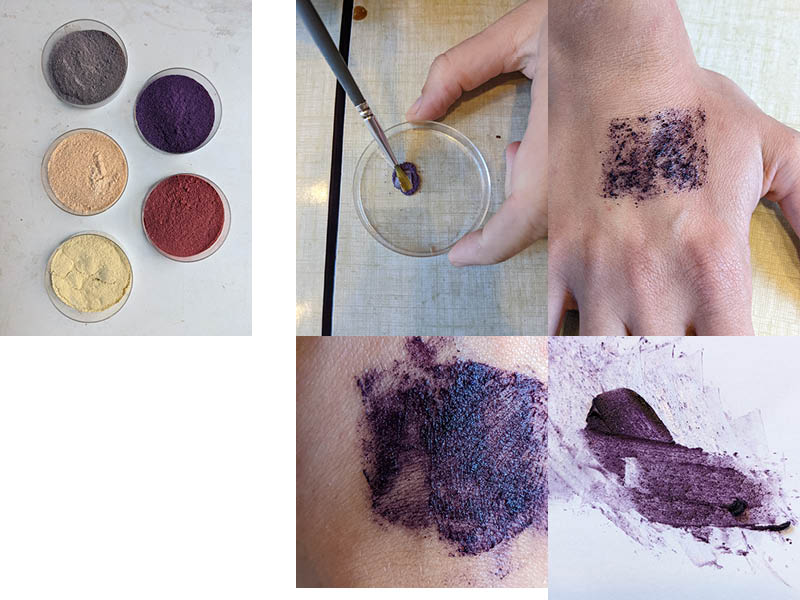
With the pigments dry, Laora and I crushed them and collected these pastel powders.
We naively thought that the addition of a fatty agent would be enough to create a lipstick, unfortunately the test on the back of the hand was not conclusive: the grind was too thick, the color did not blend at all in the fat and it was moreover, unpleasant to the display.
Disappointed, I decided to spread it on paper, which I could handle better.
This was the solution, having a flat and hard surface allowed me to work the pigment in the fat like a paste by crushing it with the spatula. The result is much more interesting, and more easily spreadable on the skin.
I would like to find suitable binders and retest the pigments on skin and paper.