10. Open Source Hardware - From Fibers to Fabric
Research & Ideation
Really not inspired by this week's class.
References & Inspiration
A team for a goal : use biomaterial with the Zmorph 3D printer
With Amandine Ferry and Mélanie Abel we were joined by Capucine Robert from 2022 Fabricademy class to make an amazing 3D challenge team. The 6th week was all about bio materials so to plan to use one of the Textile Lab 3D printer to use some of them was a nice proposal to go farer.
Tools
Process
We start with what was gathered by Diane Wakim, our local instructor. Thanks to her!
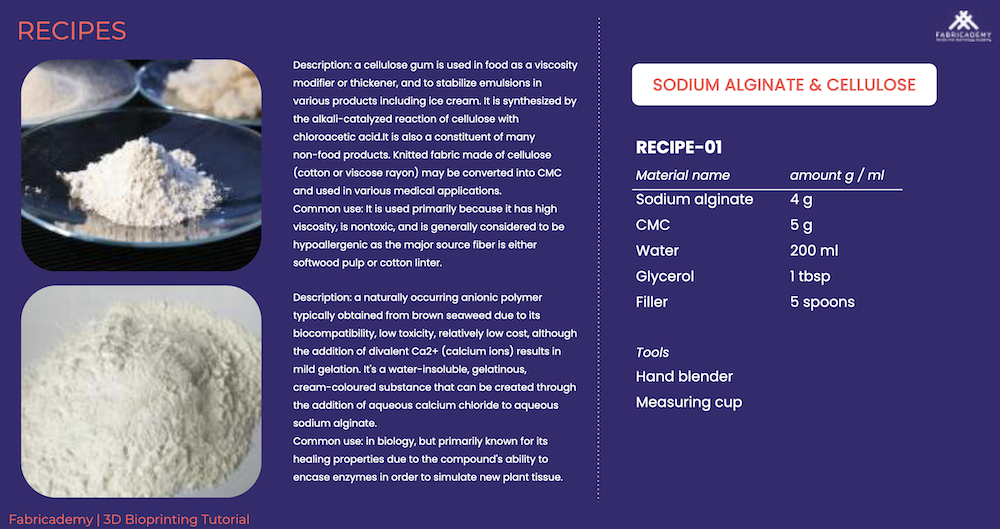
Recipes
On week 6 about bio materials there were a 3D Bioprinting tutorial from Petra Garajova. She gave some receipes during the tutorial and wrote them on a PDF with a summary of the tutorial presentation

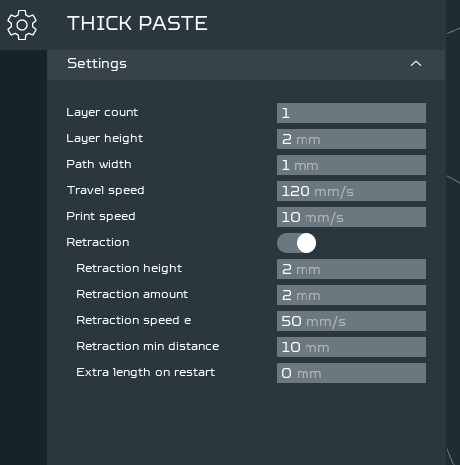
Zmorph instructions
The Zmorph got its own Thick Paste Extruder we refered to the ZMORPH quick start guide from page 38 to p41 to install it.
Our first tests was a basic coil draw with Inskape and transform as Gcode with a single layer.
Guar gum with mycelium
We get a first test with Petra's guar gum recipe.
- 8 g Guar gum
- 200 ml water
- Filler : 7 spoon of wood shreds with mycelium
- put the gum guar on a small bowl
- add progressively by mixing energetically the water with the guar gum
- mix the shredded material more finely
- add it to the paste of gum guar
After a lot of try to arrange the correct speed for the machine, we arrive at the conclusion than the past was definitly not thick enought except if you want to do a pancake.
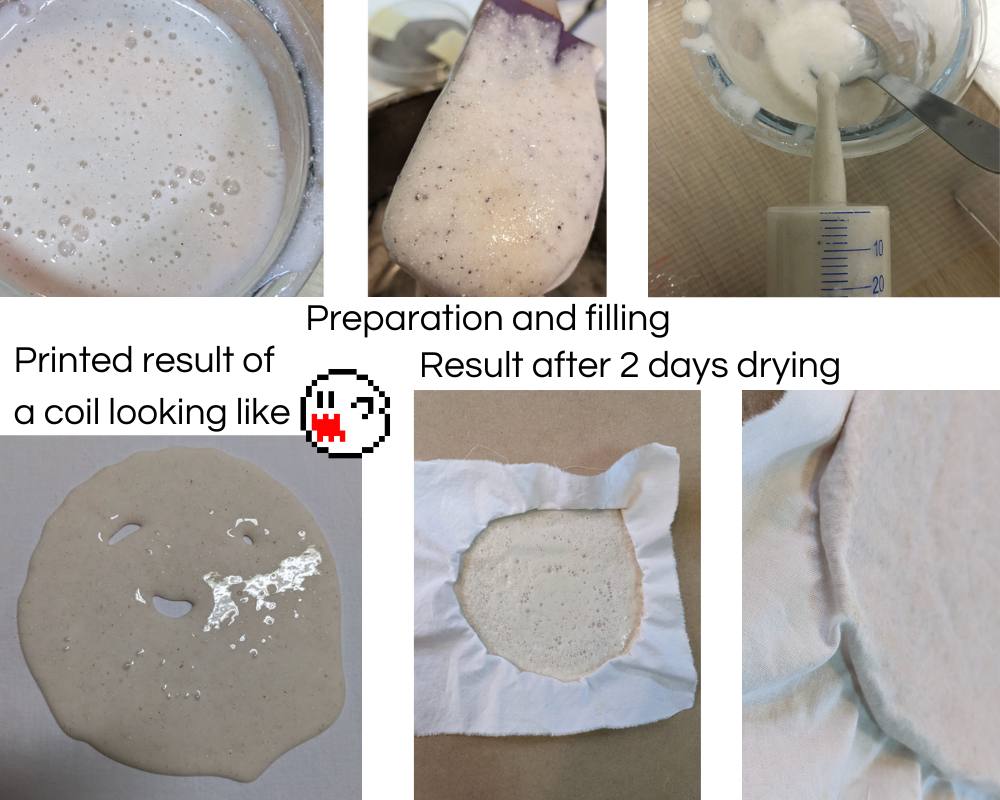
Methylcellulose recipes
We try Petra's methylcellulose receipe respecting the instruction of the methylcellulose box.
- 4 g Sodium alginate
- 5 g CMC
- 200 ml Water
- 1 tbsp Glycerol
- Filler : 2 teaspoons of marble and 3 teaspoons of eggshell
- heat 1/3 of the water to 70°C
- add the methylcellulose
- add 2/3 of cold water
- add the alginate
- separate the paste in two half
- first half receive pigments (red, purple and grey)
- keep both in the fridge for 20 min so that the mixture is well homogeneous
The first half was extruded on a cotton fabric. The result was not at all as expected, the dough was not firm enough to hold a shape we got a "Pancake".
The second half was to thick after 3 hours on the fridge, probably because of the pigments.
Alginate based paste
We visited the Materiom platform and find than in the recipes for 3D printing the filler was much more important (at least 60% of the total weight). For example: Mussel shell paste and Eggshell paste for 3d printing. We therefore defined two recipes by adding powdered shells to the basic alginate recipe until we obtained a paste that seemed thick enough for printing.
- 8g alginate
- 10g methylcellulose
- 12g de glycerine
- 400ml cold water
- Filler (will be added later)
- 10% calcium chloride solution in a spray bottle
- mix alginate, methylcellulose and water to get a nice gel with the arm mixer
- keep in the fridge for 20 min so that the mixture is well homogeneous
- add the filler (see recipe for eggs shells and mussels shells)
- spray with the 10% calcium chloride solution
Eggshells paste
We had 270 g of eggshells which, thanks to a blender and a coffee grinder, were already powdered. We add to this powder 180g of preparation to get a perfect cookies paste.
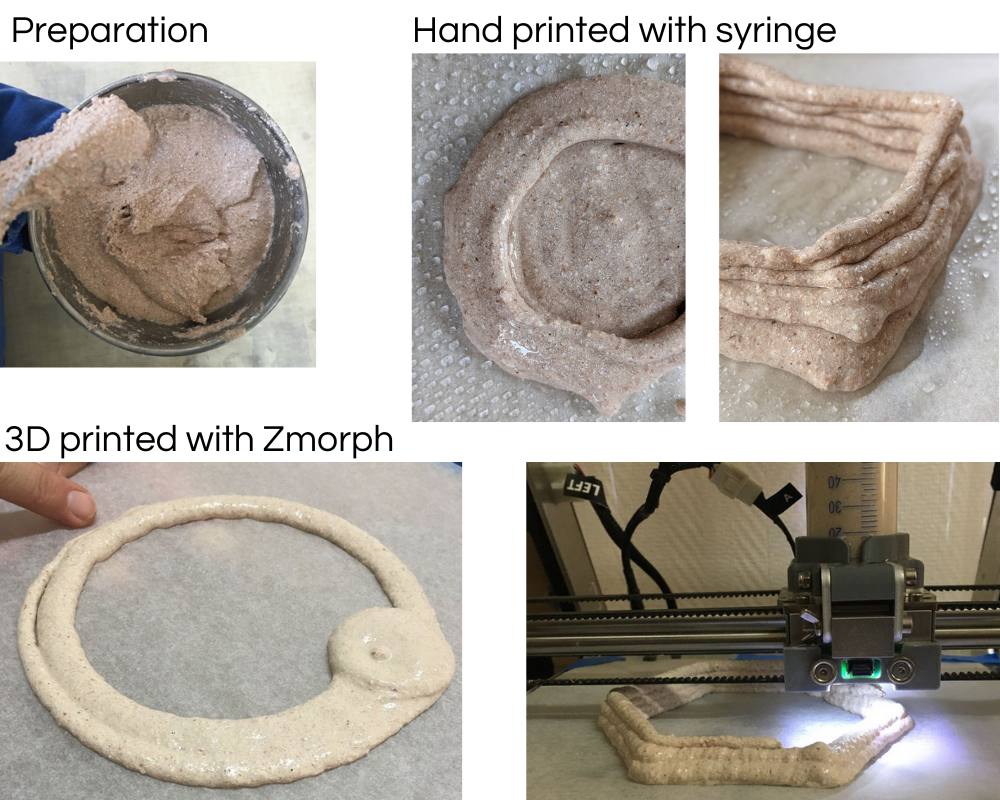
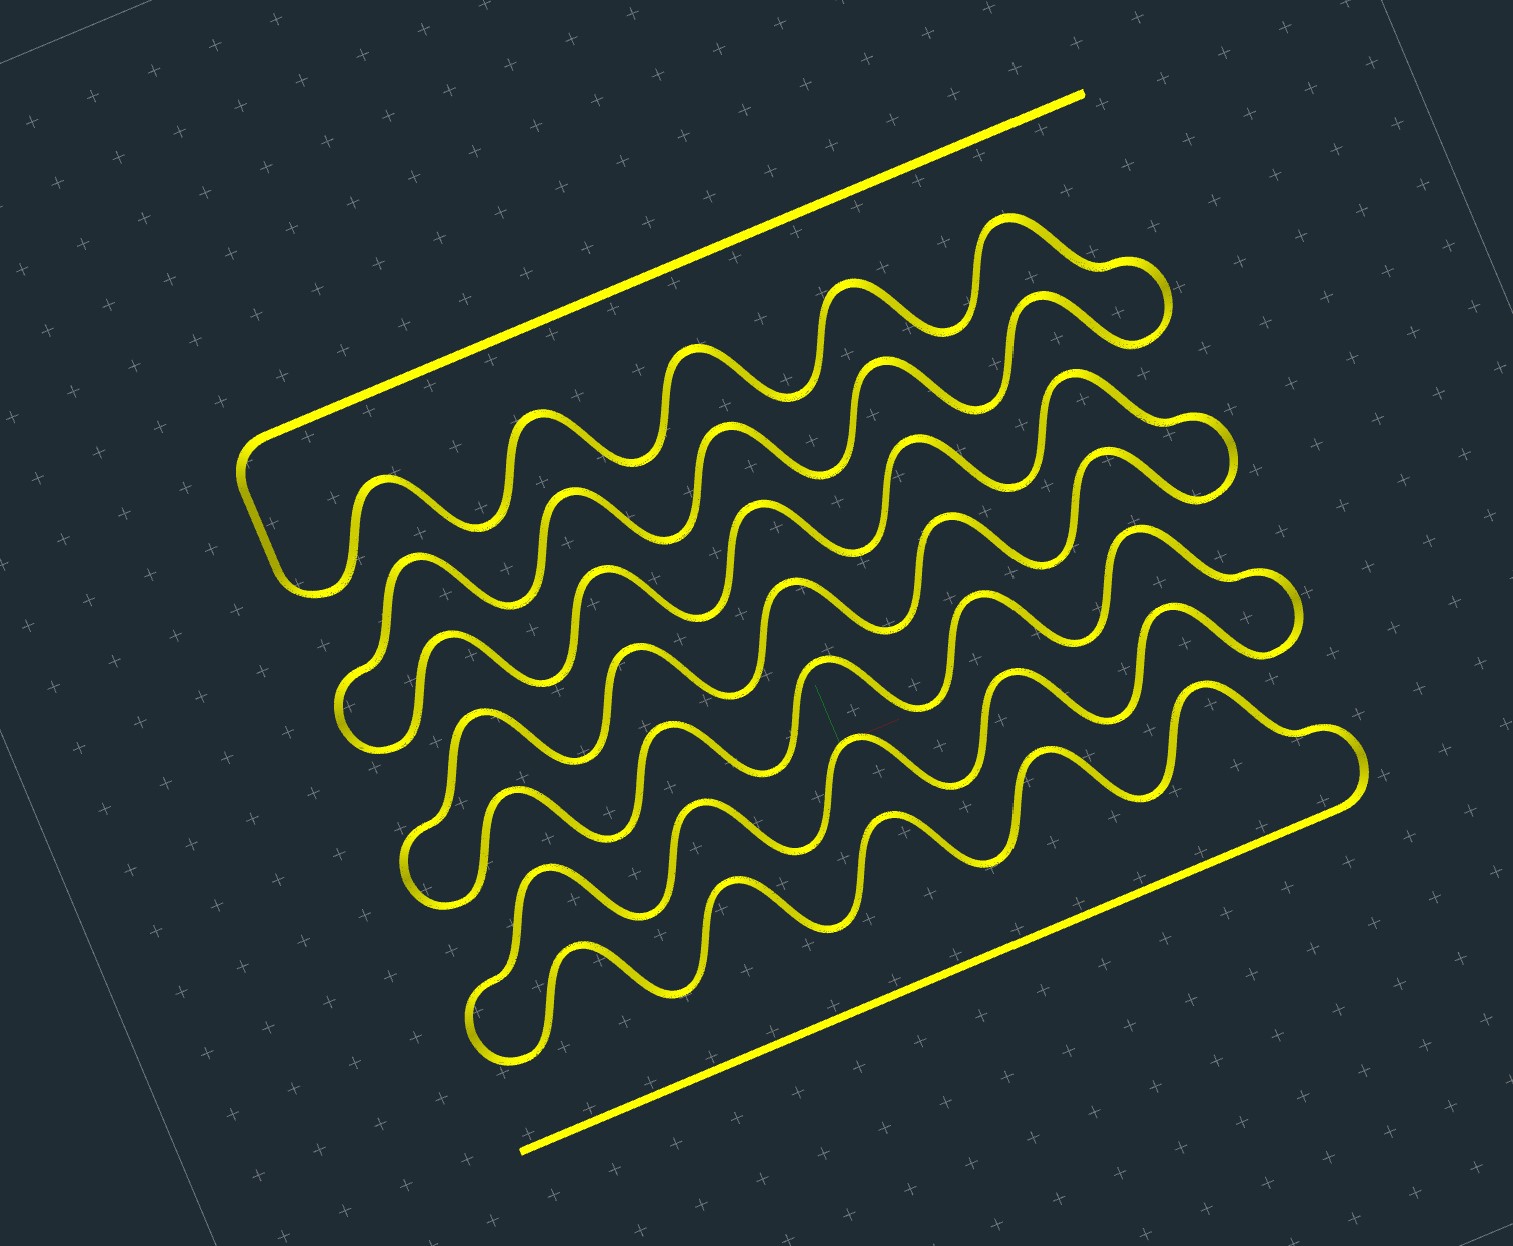
To go from the left circle to the right hexagonal, the goal was to set the machine to the correct speed and manage the start and stop of the material flow. the setting are writen in the Gcode explaination.
Coffee ground and clay powder paste
The recipe is simple, mix together :
- 40g wet coffee grounds
- 20g yellow clay powder
- 20g base mix (alginate / cellulose)
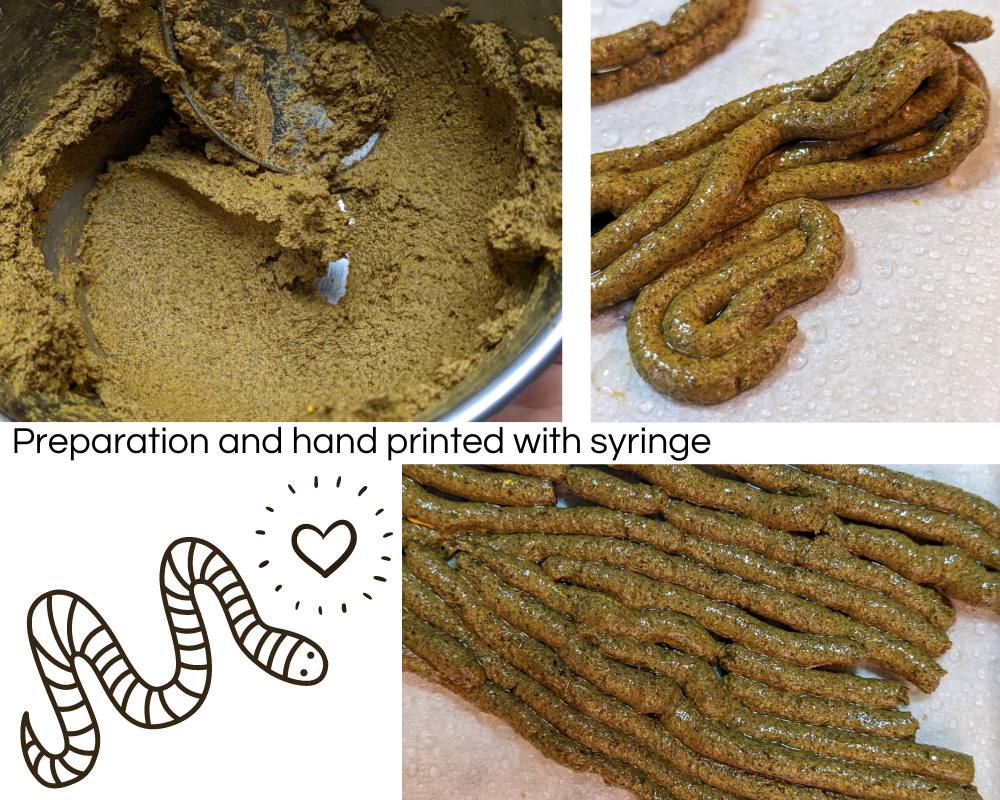
The hand extrusion was so hard than we didn't plan to put it in the printer. It's probably because of the clay powder and it's huge absorption power. When we visit Tygre, Nicolas explain us than he use 25% moistured clay. The fact is that his clay is already prepare, nothing to see with powder.
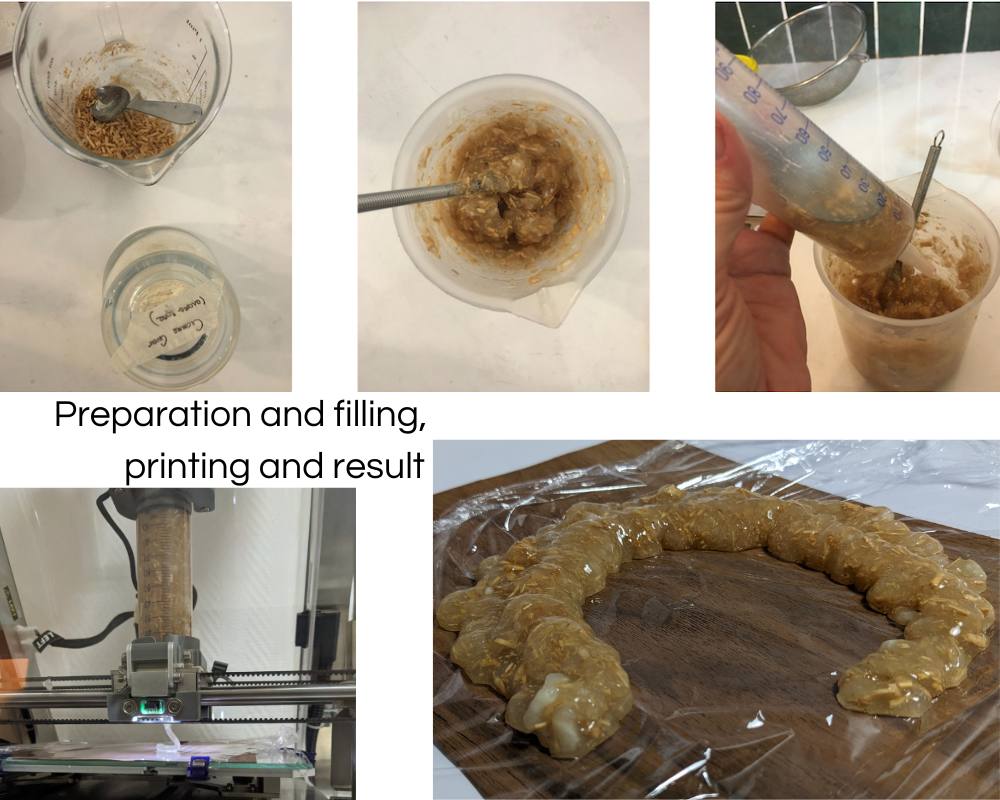
Mussels shells paste : musselina
The mussels shells were cooked at 200ºC for 20 min, then smash with a hammer and ground with coffee grinder. To 70g of this powder 30g of basic alginate preparation was add to get a perfect (mussel smelly) cookie paste.
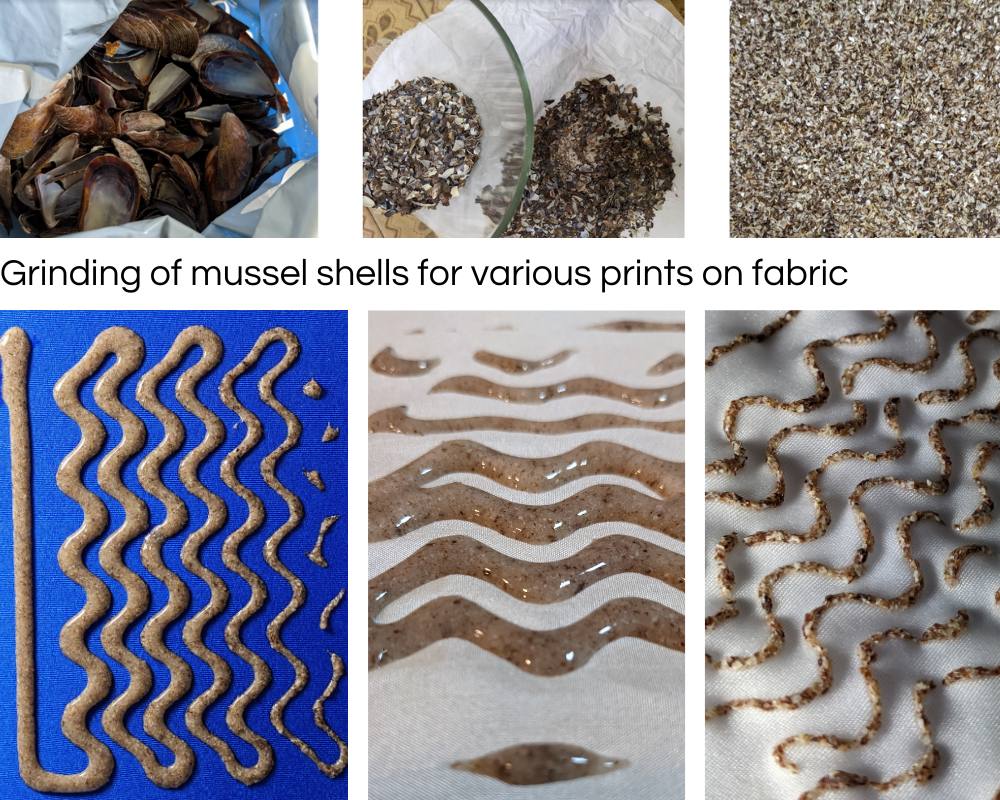
We have several difficulties to make our tests go up in height. Otherwise we would like to create solidity effects on textile, following the inspiration of our "Pancake" experiment. To print on textil, the fabric was stretch as much as possible. We tape it underneath so we can fix it to the worktable before putting the clamps back on. The deposit of the paste was very even and thin. We were pleasantly surprised by this after all our thick tests. The moisture in the paste quickly soaked into the fabric, bringing out the filler, which did not crush on the surface. We keep the shape of the basic document, but have the desired effect: creation of volume through printing when the fabric is not streched.
Twisted by the machine instruction
The challenge of choosing the shape for an adapted Gcode
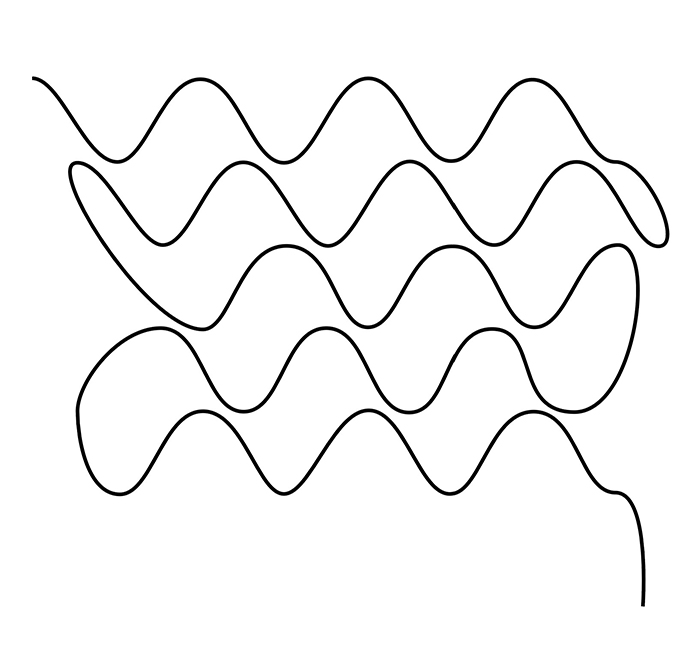
The Gcode of the Zmorph can't interrupt the printing, we have to make a continuous path to facilitate printing. That's why our shapes were coil, hexagonal, or continous line for the mussels paste on fabric.
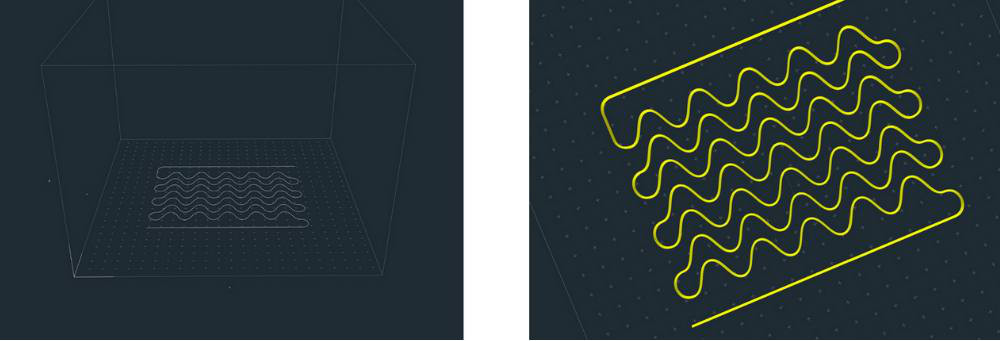
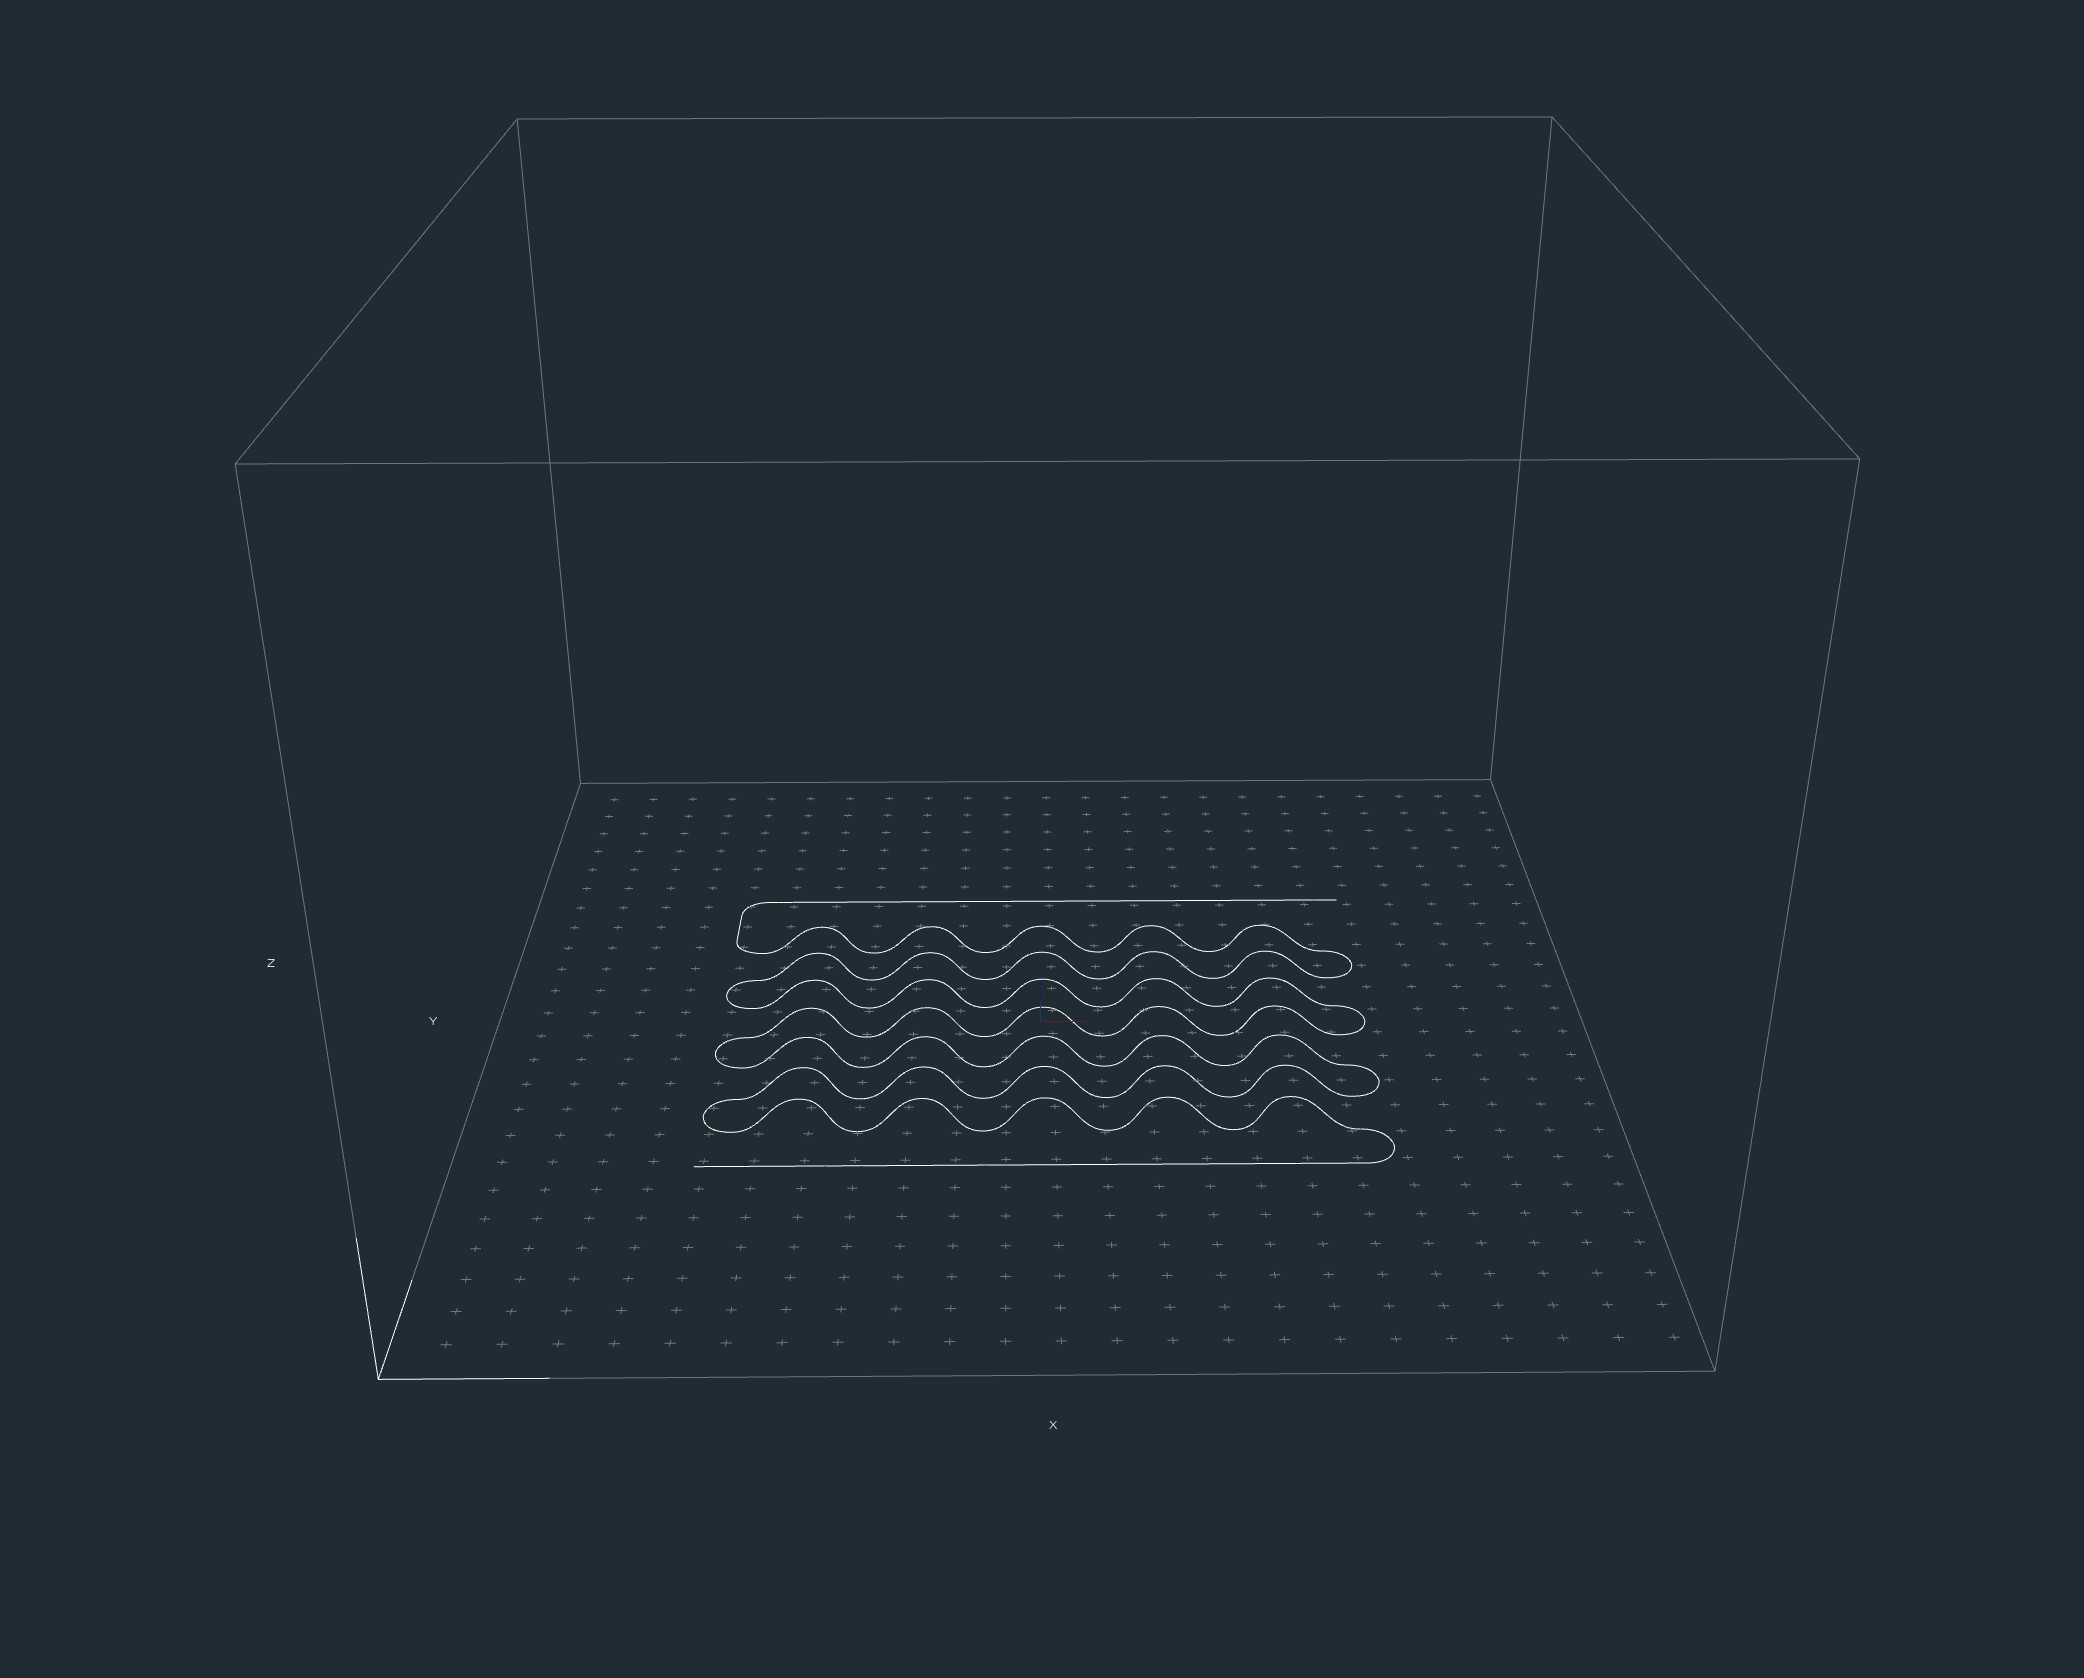
After getting the good shape, we work on getting a Gcode. These are our finals choices.
| material paste | layer count | layer height (mm) | print speed (mm/s) | retraction | height of the head print (mm) | image |
| Eggshells hexagonal | 5 | 4 | 15 | on | 8 (before the nozzle was added) | 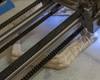 |
| Mussels shells line | 1 | 2 | 10 | off | 6 | 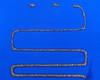 |
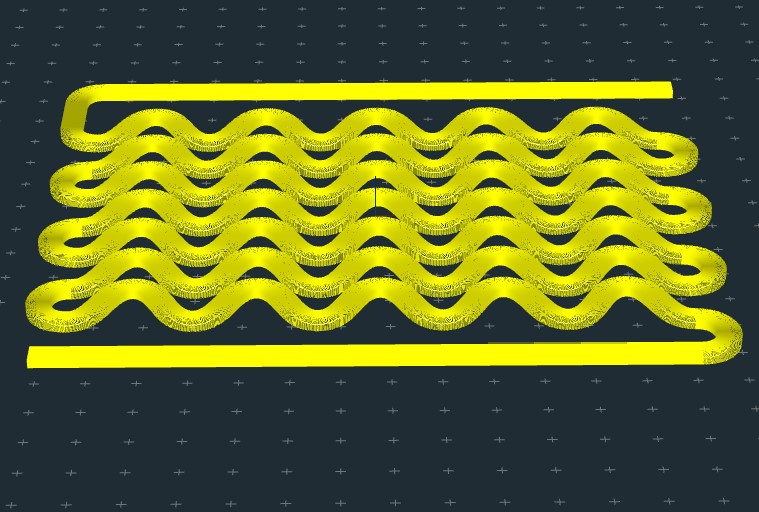
| Mussels shells curves | 1 | 2 | 10 | on | 4 | 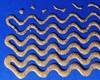 |
The retraction give the hexagonal a better support. It was also on for the Mussel shells curve but not for the line one, we don't nderstand why the line is getting thinner.
Calibration of the worktable
To be able to work with the thick paste extruder, we removed :
the blocking device that prevented the machine from lowering further and can set it at 0 for the Z axe ; the windows from the openings to have an easier access to the whole machine.
We try to work with the hot worktable by fooling the printer when changing the head, It not only did not work, we broke the glass of the tray when the print head lowered unexpectedly :/
The missing nozzle
We got a double problem with the end of the syringe:
it is not long enought to ensure the way of the print head without getting the printed material touched with the caterpilar; its bevelling leads to an irregular distribution of the material according to the path.
Looking for a solution, we thought to do an addition to the noze and by looking on internet we finally discover than a white nozzle was missing in the kit. It was probably add later by Zmorph because it also didn't comes in our printer documentation but it is present in this one (p148). I found a crafty hacking solution, by fixing the nozzle of a silicone gun. It allows also to plug the hole of the nozzle with the red stopper and don't get the paste outside when not wanted.
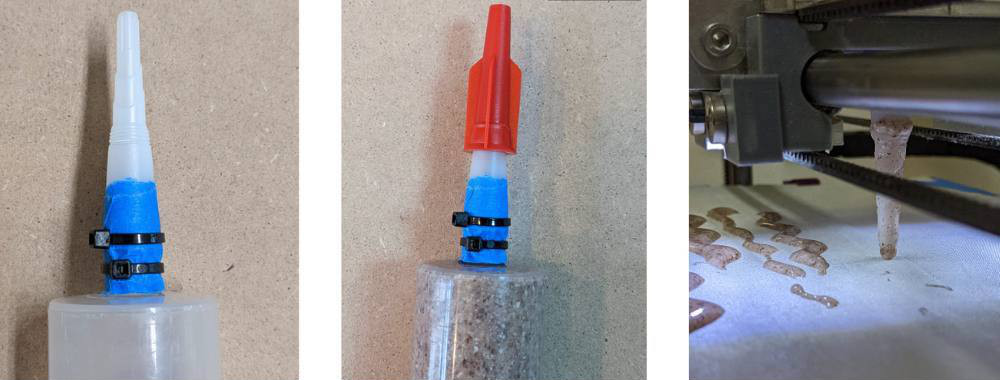
All the musselina paste was printed with that method.
Conclusion
I didn't like this week because we stayed in the infancy of hacking and hacking. nothing crazy,I spent more time creating biomaterial than hacking the machine (that is no unpleasant, but not the aim of the week I think).
I haven't read the Zmorph docs, I don't know what the removed parts are called.
I did not find the use of this machine practical.
I feel like I spent more time trying to use the machine without hurting myself/etc than actually using it.
The fact of having a machine, which must be modified, with software off the machine, working on a file which must be transferred by SD card, to validate it in another software to create the version read by the machine, to transfer again , make the settings, then finally, start printing. Realizing that after 3 seconds nothing is going well and you dirty the machine, having to stop everything urgently, clean, recharge, resume... tedious.
Video
up to come
3D Models
Thank you Mélanie !