3. Circular Open Source Fashion
Tuesday's Class
Fabricademy 2022-23 Week 3 OS Circular Fashion
Following the Zoe Romano's class, I had a direct idea of a pattern. I want to assemble two or many hands in oder to express the idea of collaboration. Indeed in this Zoe Romano's class, she said today the design's world must turns to sharing. Then, I put together this idea and a tesselation assembly. The hand's pattern was my outcome.
Before I present of my week, I should mention that my week's work was organized in two steps. Firstly, I thought about to create two same pieces that it can assembly. After I find a shape and a intercrossing , I focus on the pattern in a way that the print pattern board produce zero waste.
References & Inspiration
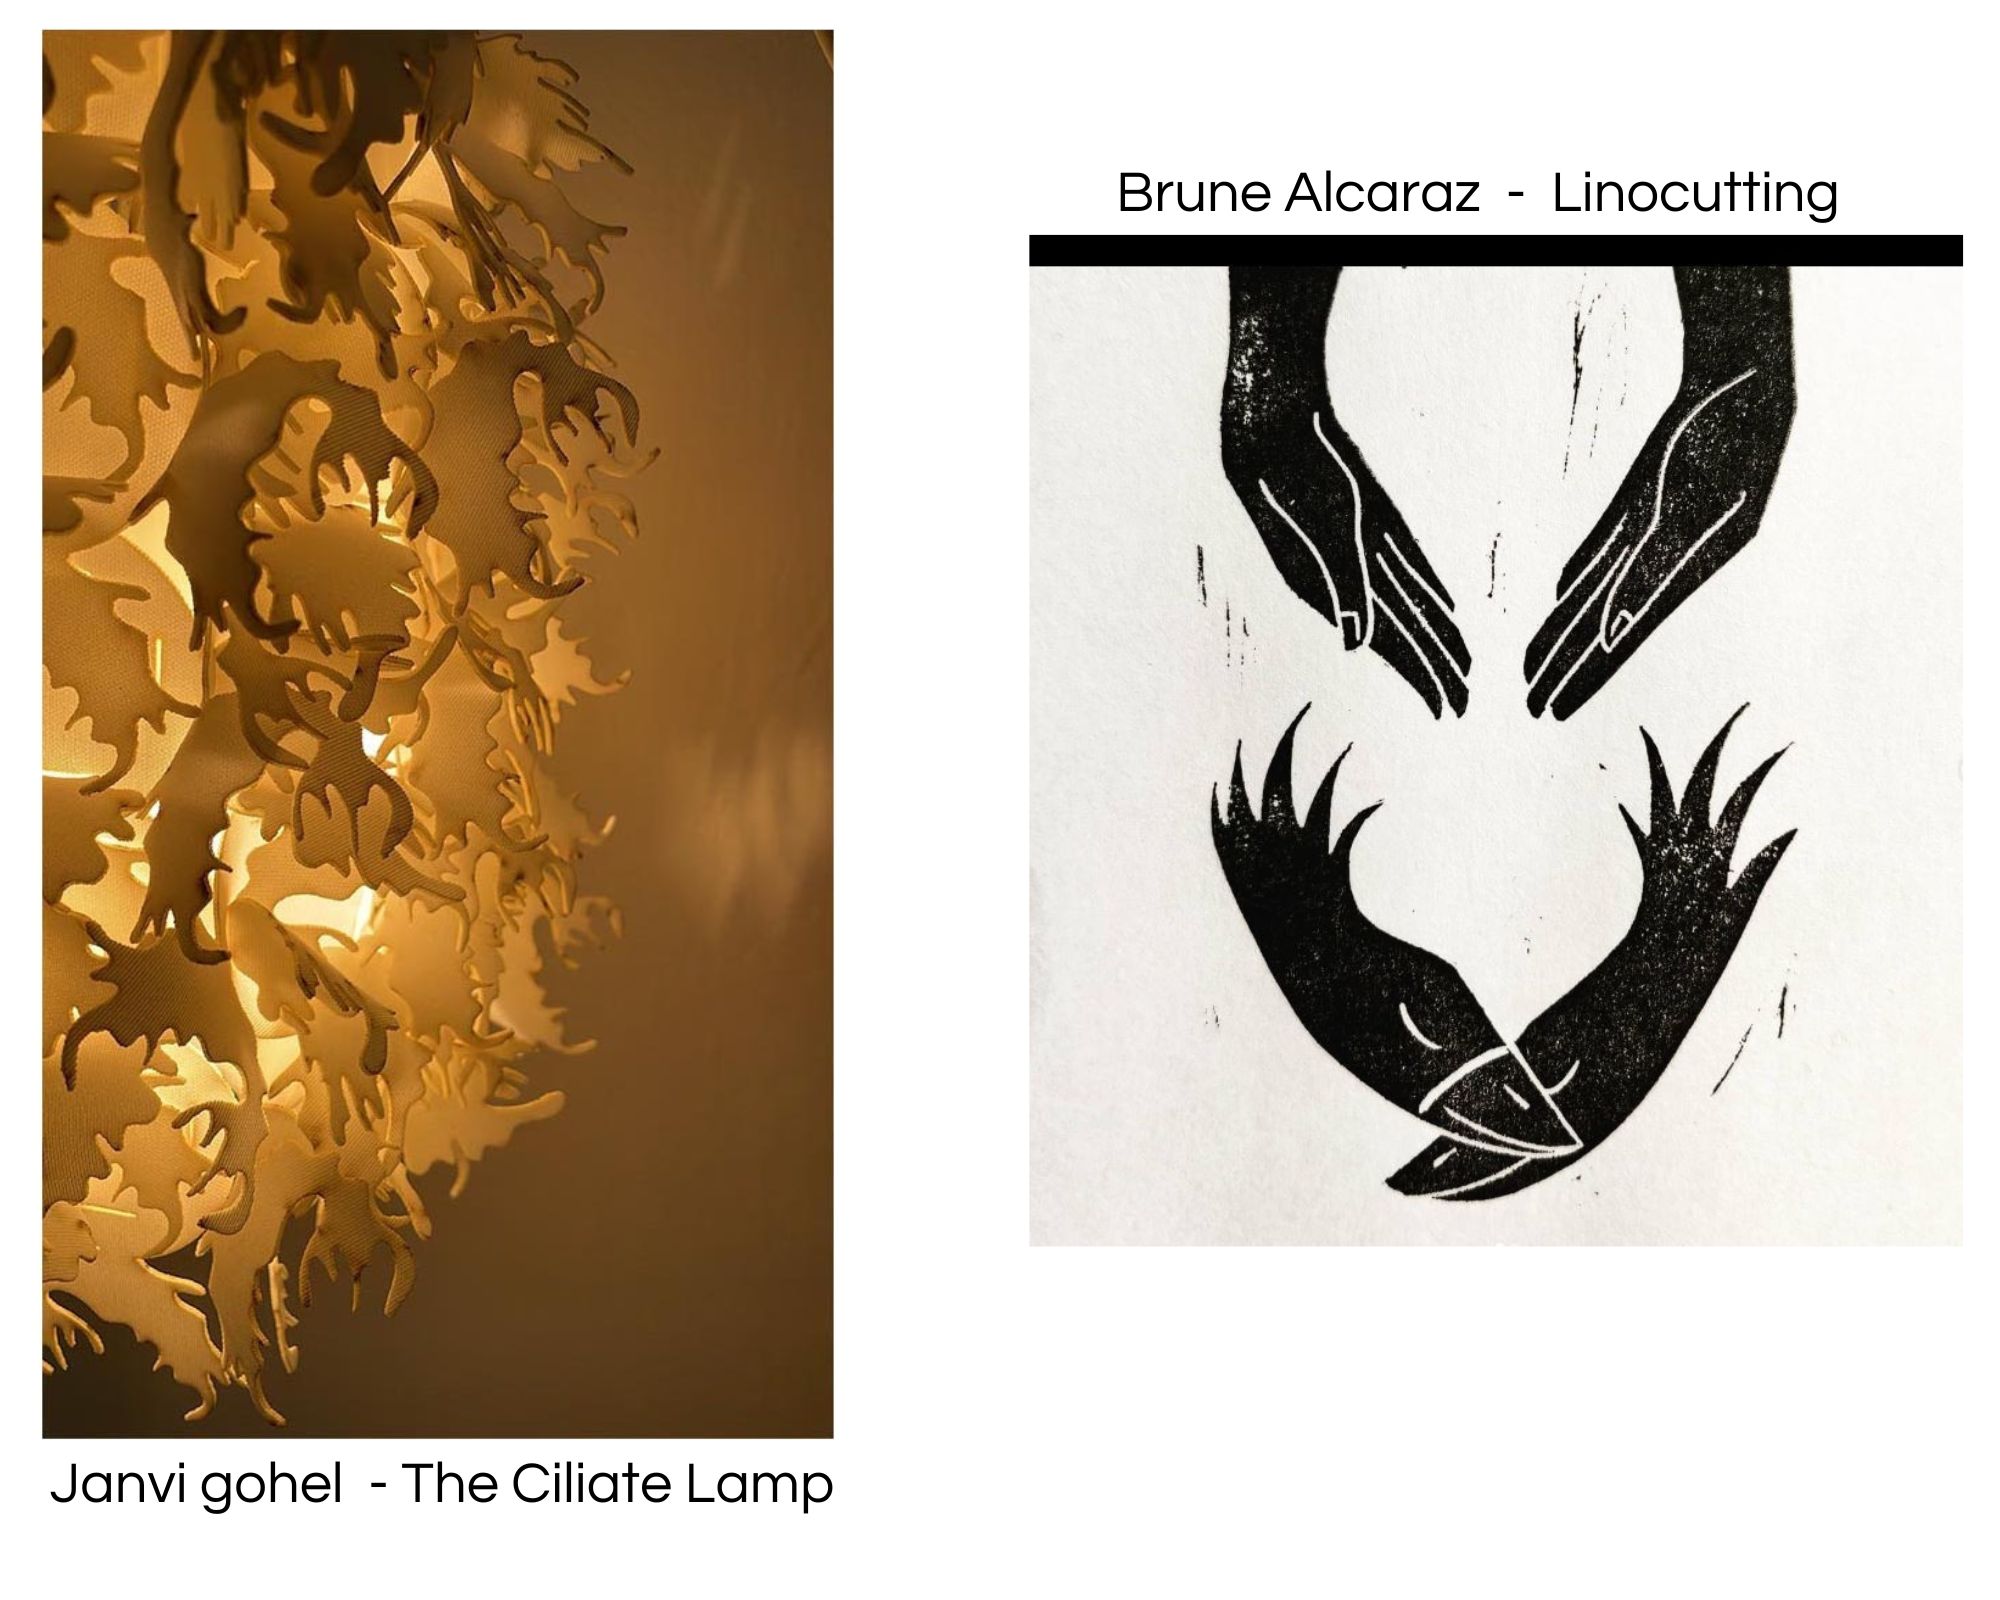
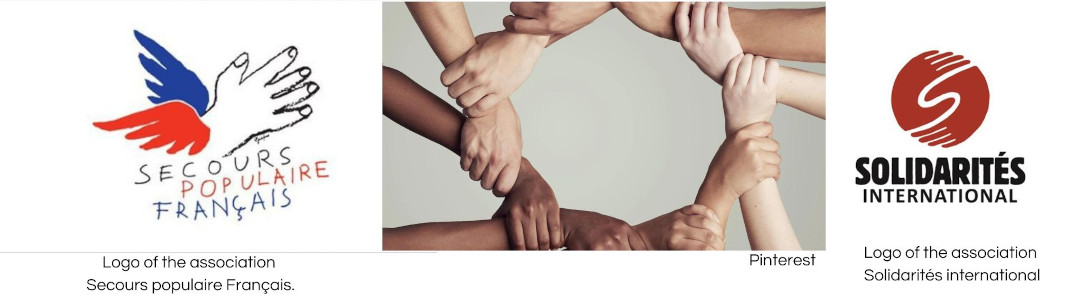
Prior to make my first idea, I go to see on oscircularfashion. I can see a lot of alumni projets and some kind of interlocked. I really enjoyed the work of Janvi gohel, The Ciliate Lamp. Her modules creat a specif volume with lighting. It's very organic. I continued my search crossing a envy of creat volume and the hand's pattern. I want to express the idea of collaboration and solidarity as the images in the hand's linocutting make by Brune Alcaraz and in the logo on my moodboards.
Research & Ideation
SEAMLESS
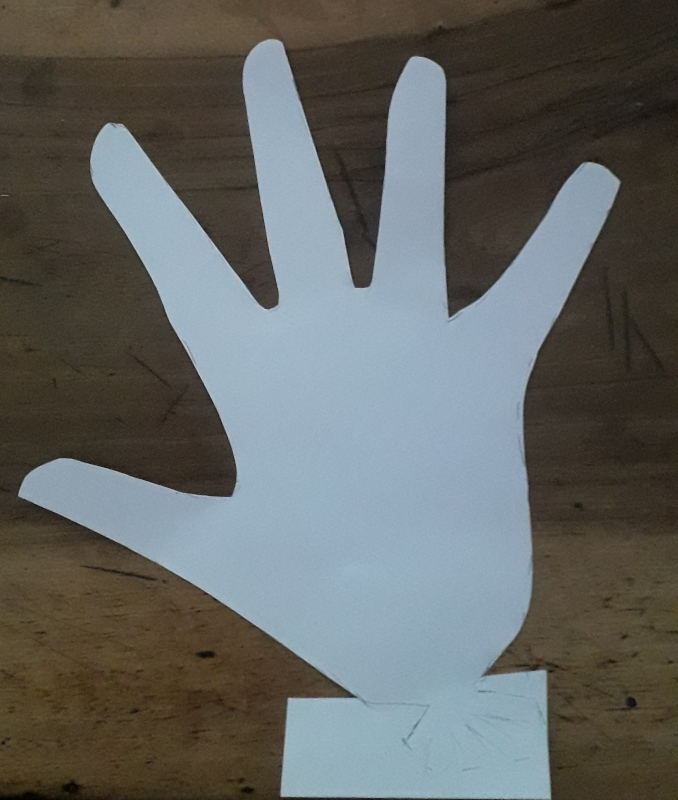
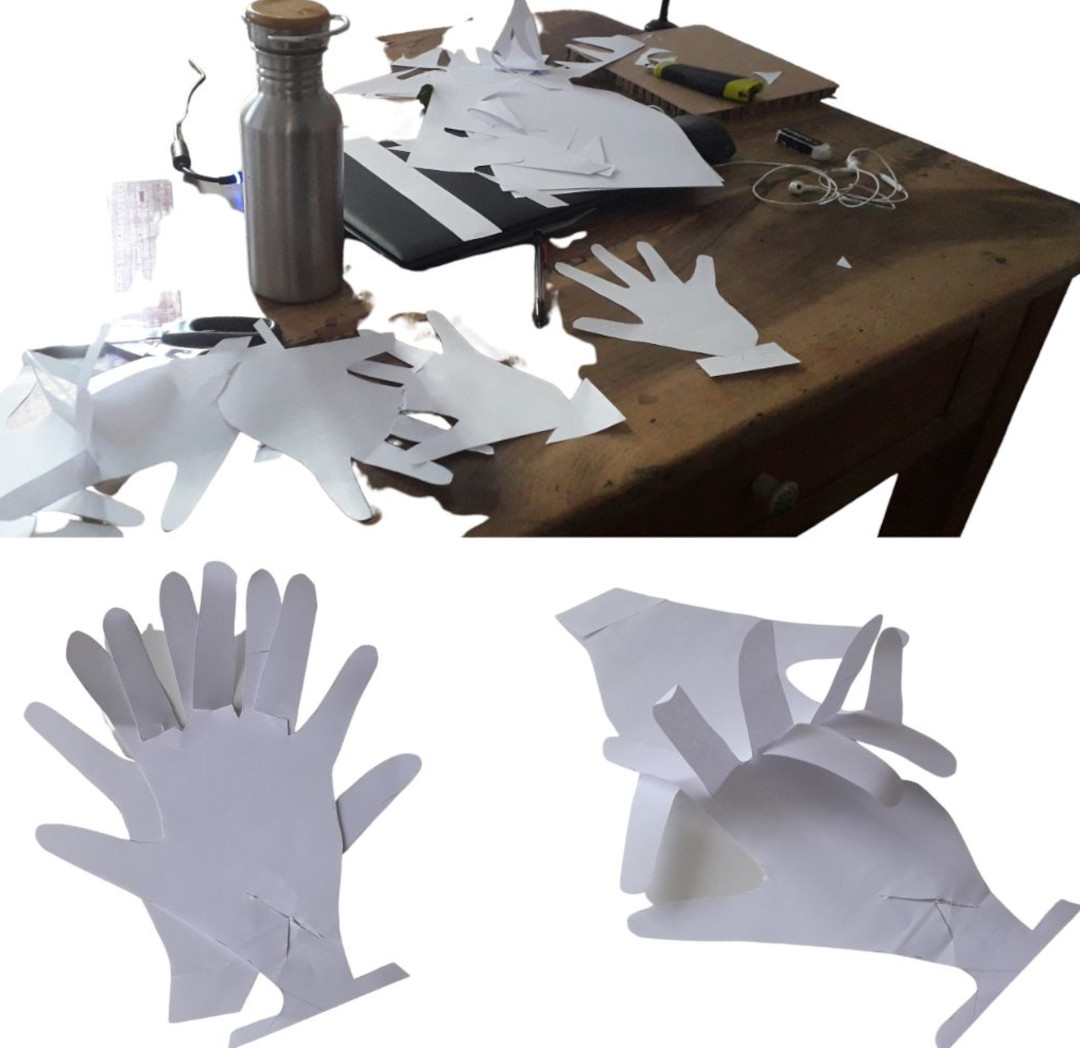
I start with trying assembly. My hand make sketches are some geometrical pieces and cut it. Concretely it absolutely takes two hang-ups for it to hold : one entry and one exit.

PATTERN & ASSEMBLY
I select my hand's idea! Let's go to make. To realize my module, I decide to take my own hand. I make the outline of it on a piece of paper, and cut it with a chisel. It was quick. The idea behind this assembly is to help each other. We can move forward hand in hand to find new solutions.
MATERIAL
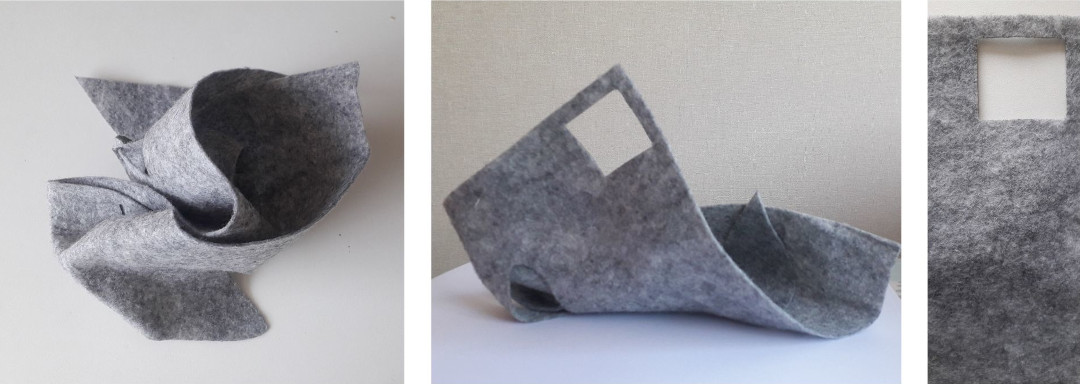
To make this module, I chose a fabric that was already in the workshop: felt. This material is easy to work with, flexible and it stands up easily. For this prototype, I am satisfied with this gray. To go further, I would have liked to choose the different colors of the skins to make the hands.
PATTERN + ASSEMBLY + MATERIAL
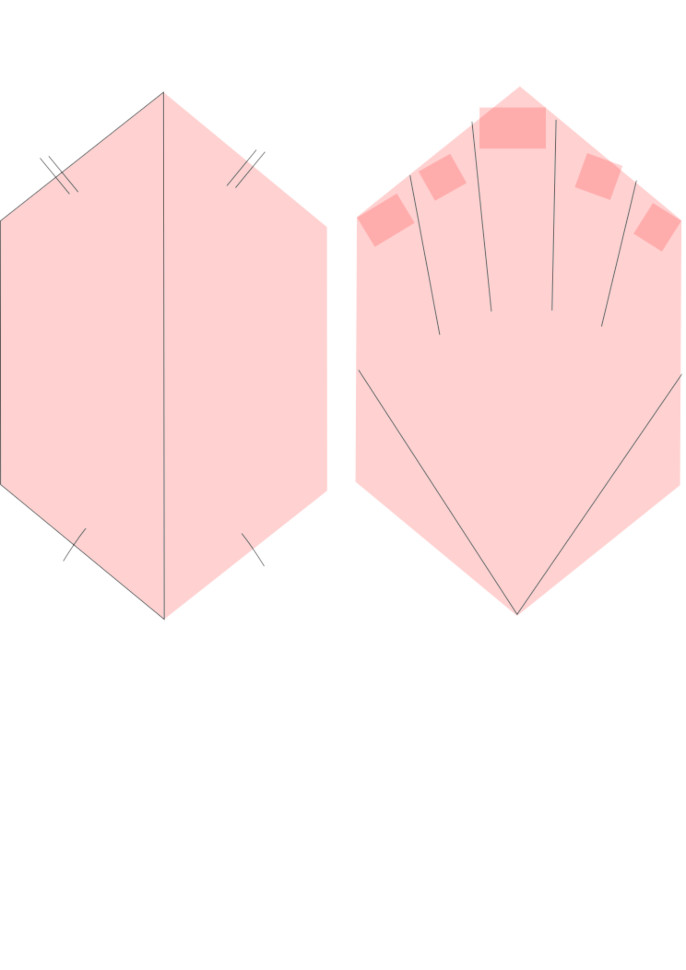
This Hand module was obtained by embodiment of two hands on one side or by embodiment of two palms of the hand. I add a few squares to create another shape.
VECTORIZATION
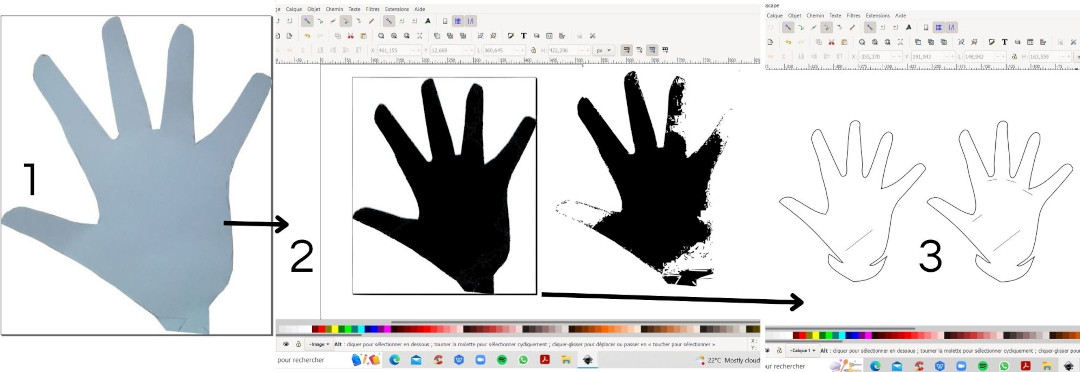
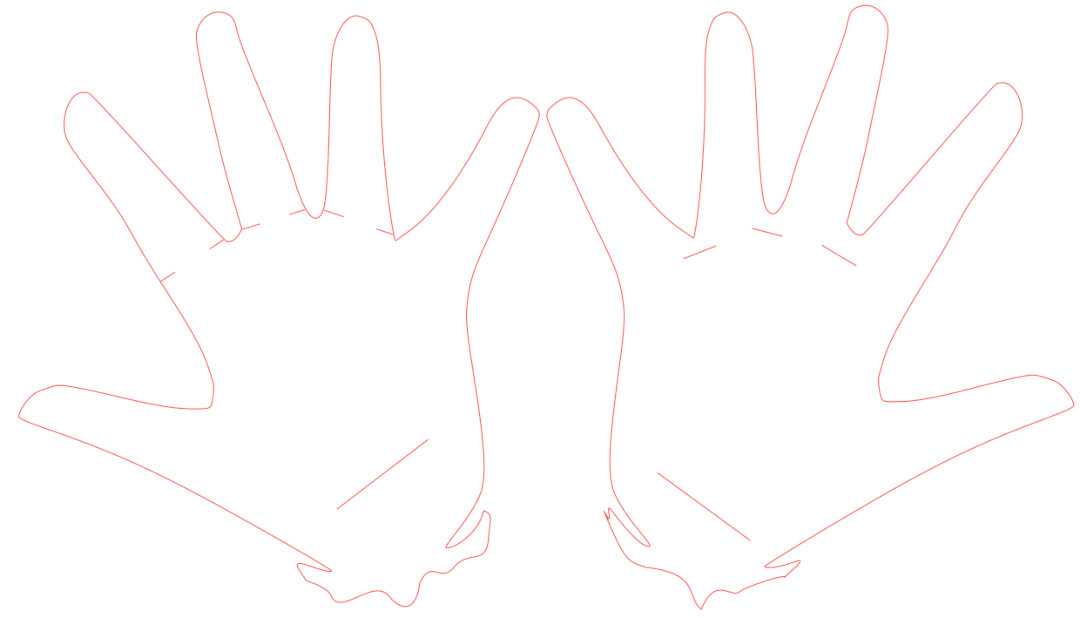
To vectorize my image, I chose the software inkscape. I first ventured into Rhino. But I was unable to create a mesh from my photographed image(the solution is located at the import, do not check hatch). It took me several tests of vectorization to succeed in keeping only the contours of the image. Moreover, I tried to obtain a clean outline. After several attempts and help from my classmates, I was able to get this beautiful hand. My module is already, here is an .svg version1 and a .pdf version2 .
The path taken is : Path --> vectorizing a matrix object --> a single pass / contour detection --> Contour threshold 0,650 --> Update --> shift the vector image from its origin.
OPTIMIZATION
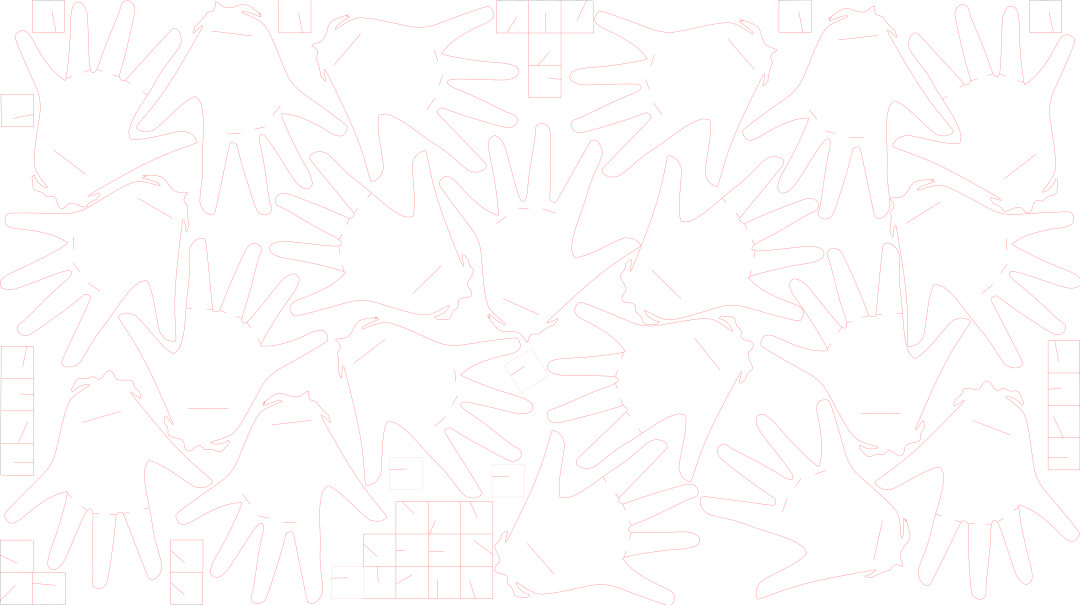
I spent time looking for the best layout to make the least amount of fabric scraps. This board looks like a human fresco. After placing my hands, I added squares with a slot. I quickly designed these squares to explore another shape. Finally, this assemblage is fragile because there is only one hook.
LASER CUT
This gray felt was not referenced in the laboratory laser. It had to be tested first. Diane helped me to find the best setting. We relied on the setting of the wool and another felt. The document used to cut these pieces is available here3.
Setting
- Power : 90
- Speed : 45
DRAPING ON MANNEQUIN
With the parts in hand, all I had to do was assemble the modules and form an object on my mannequin. I used the molding technique to experiment with the attachment system and also to create volume.

TESSELATION
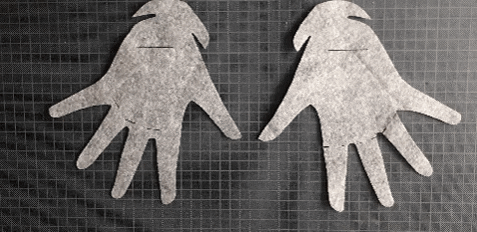
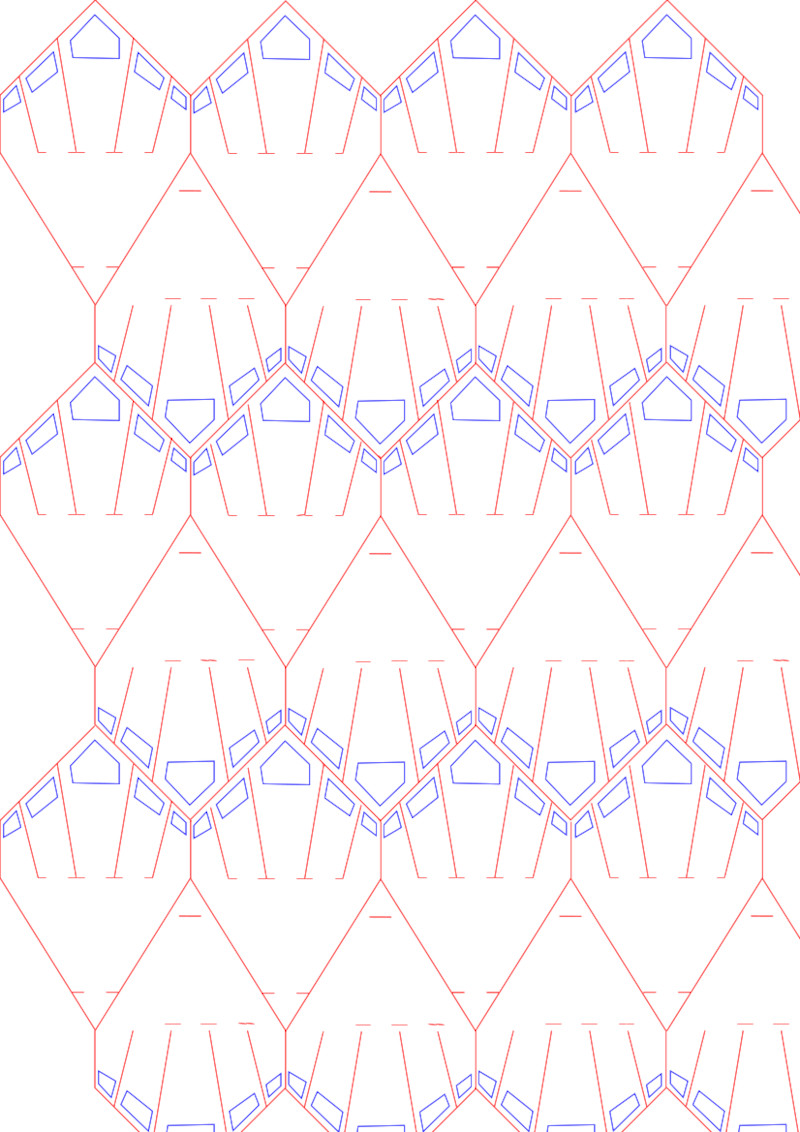
After making my project on a mannequin, I went back to my board to work on scraps. I made a lot of fabric scraps with my first hand pattern. So I decided to work on my hand pattern again. I had to simplify it. For that, I went through several steps. The pictures below show two stages of thinking. I tried to include the shape of my hand in a more geometric shape. I was able to do this, but I had to simplify my hand pattern a lot. I also reduced the size of the hand: from 17x22cm to 5x8cm. Here is an .svg version of Module little hand4 and a .pdf version5. I had a problem when I tried to laser cut my little hands. The red color is not recognized by the laser software. I would have to look in detail if the red used is the same as my other documents. Here can find the little hand cutting board6.
Test no waste