7. Computational Couture
Tuesday's Class
Fabricademy 2022-23 Week 7 - Computational Couture
This week we returned to Rhinoceros 3D, and more specifically to Grasshopper. This week's theme is parametric design, using variables to vary our design. This week is a mix between learning how to use Grasshopper, exploring new shapes, design parametric and decovering 3D printing.
Research & Ideation
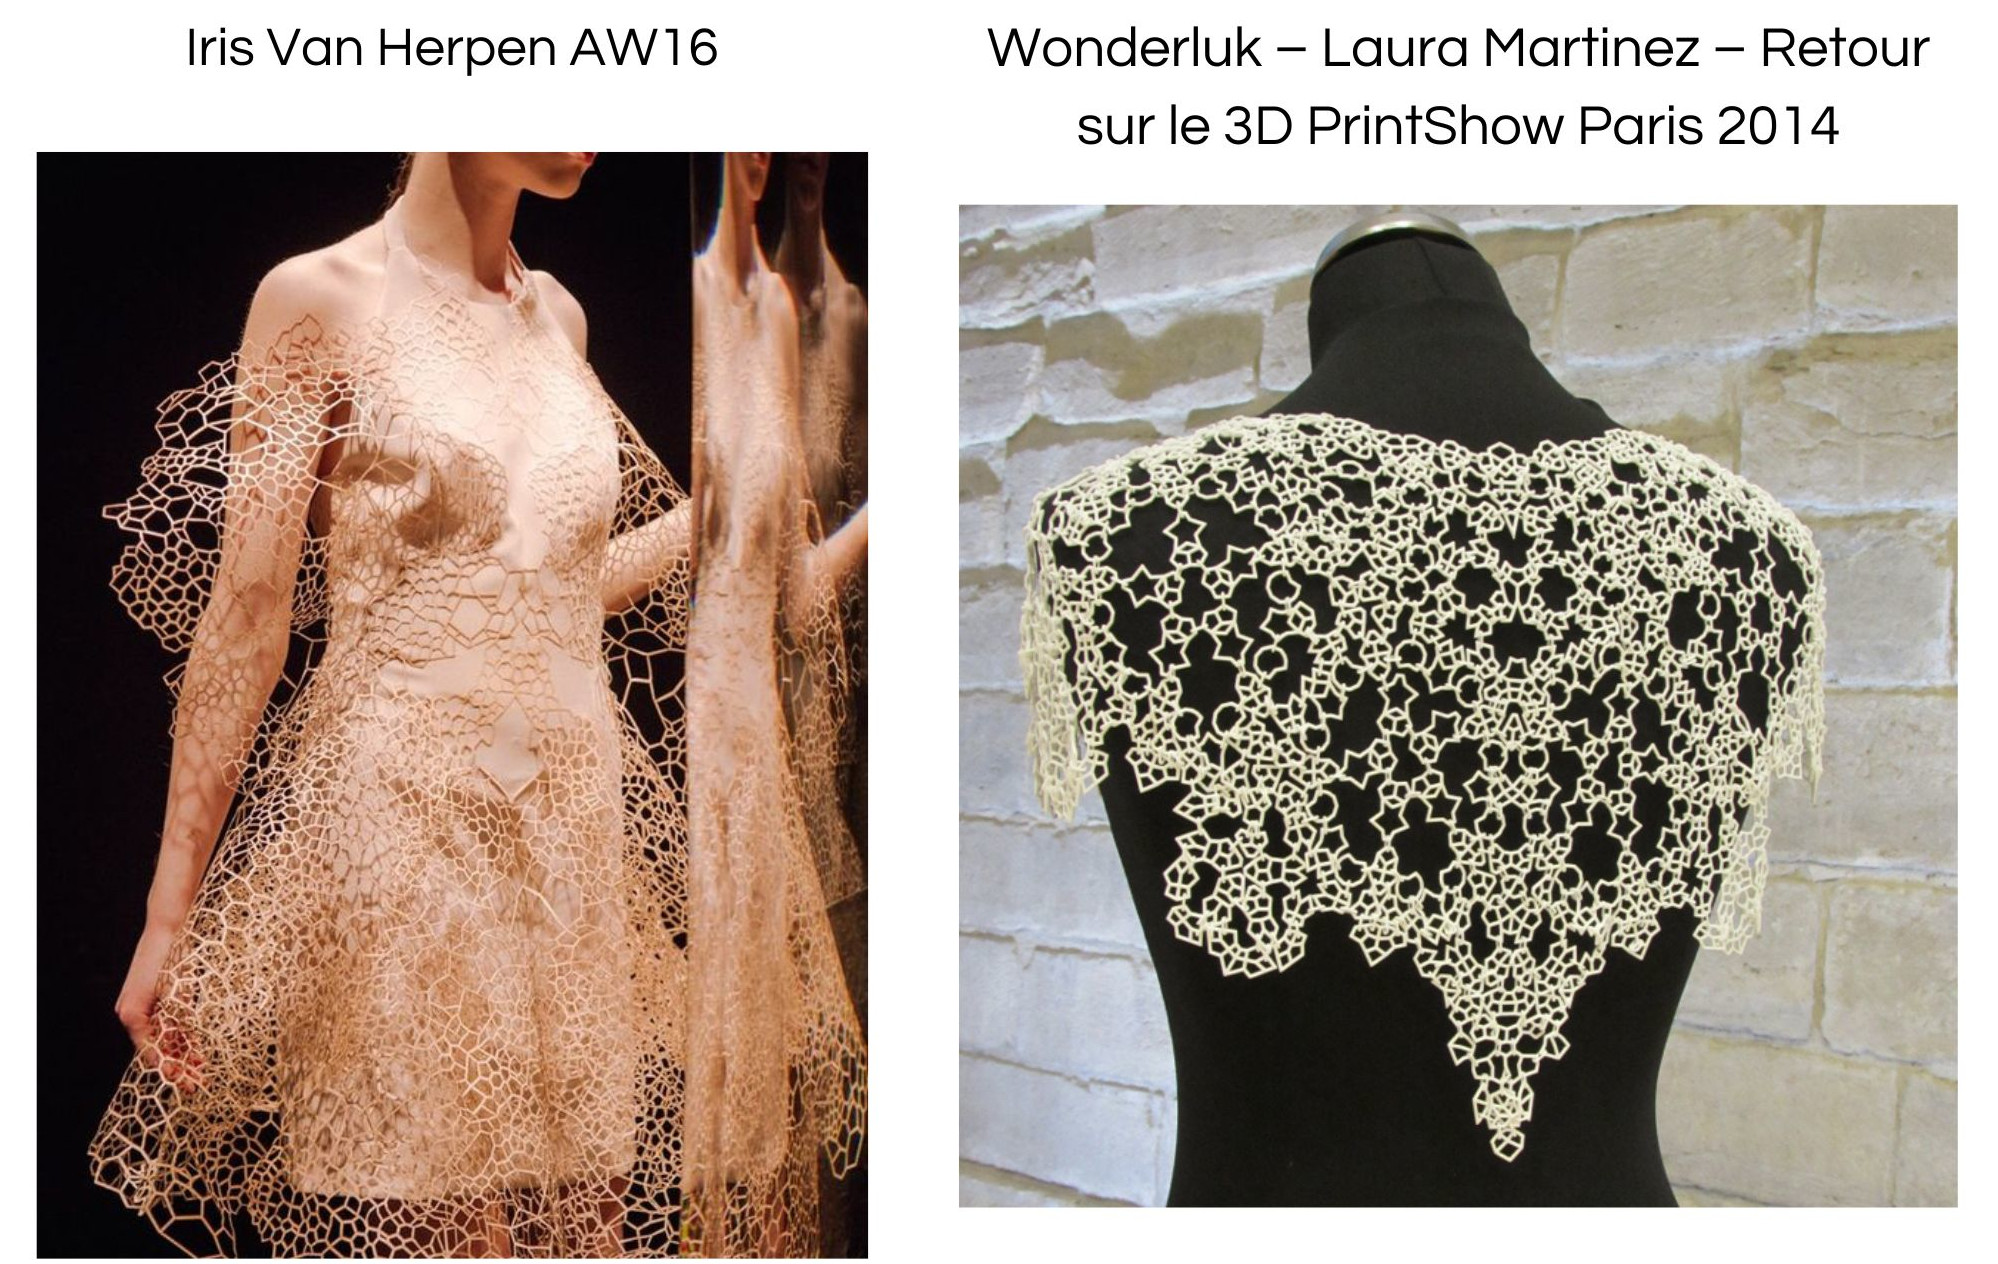
This week, I would like to create a pattern. This pattern will mix finesse and mutiplication of several geometric shapes, close to the spirit of lace.
GRASSHOPPER
Learning Grasshopper
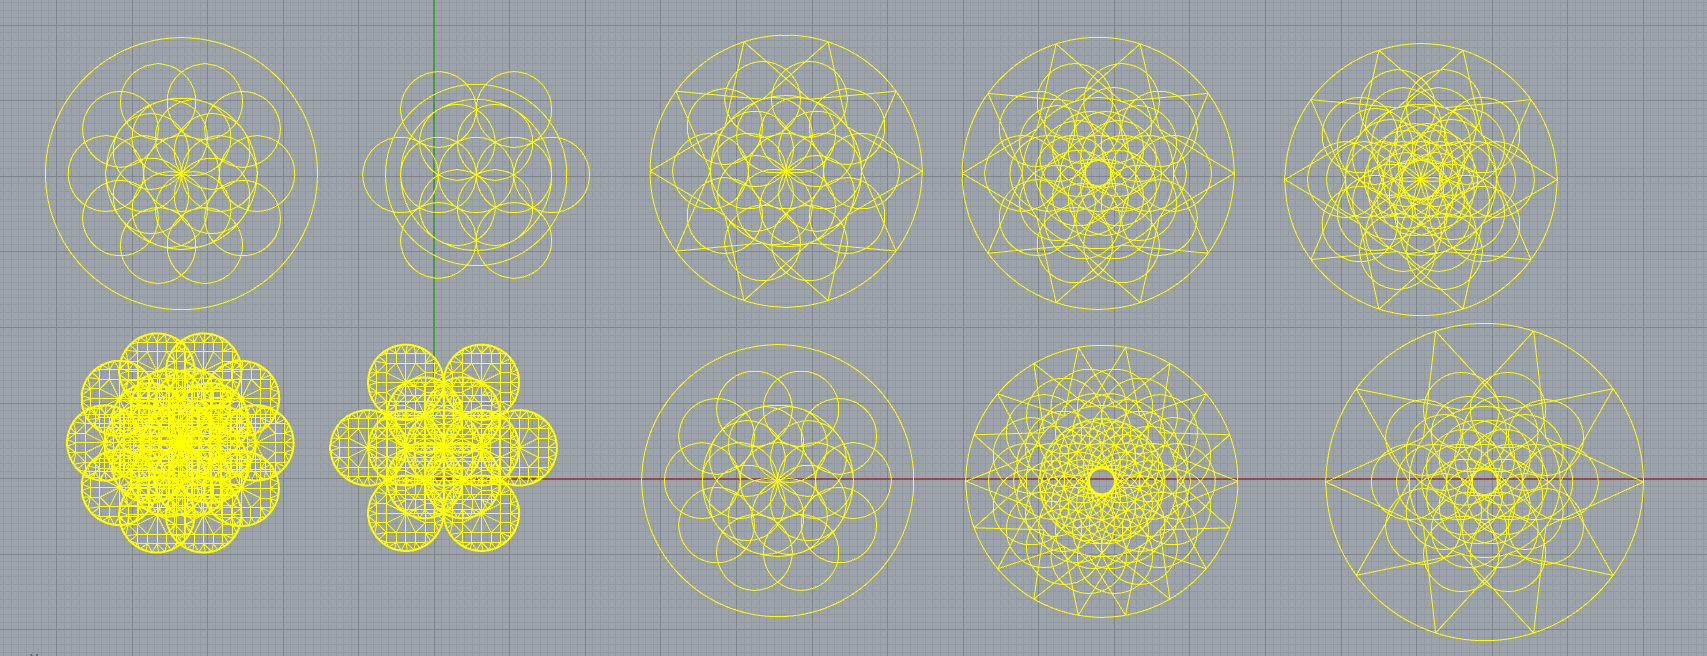
First tuto :
Here is my result after making the tuto and fiddling with stuff :
Mandala : First attempt in Grasshopper
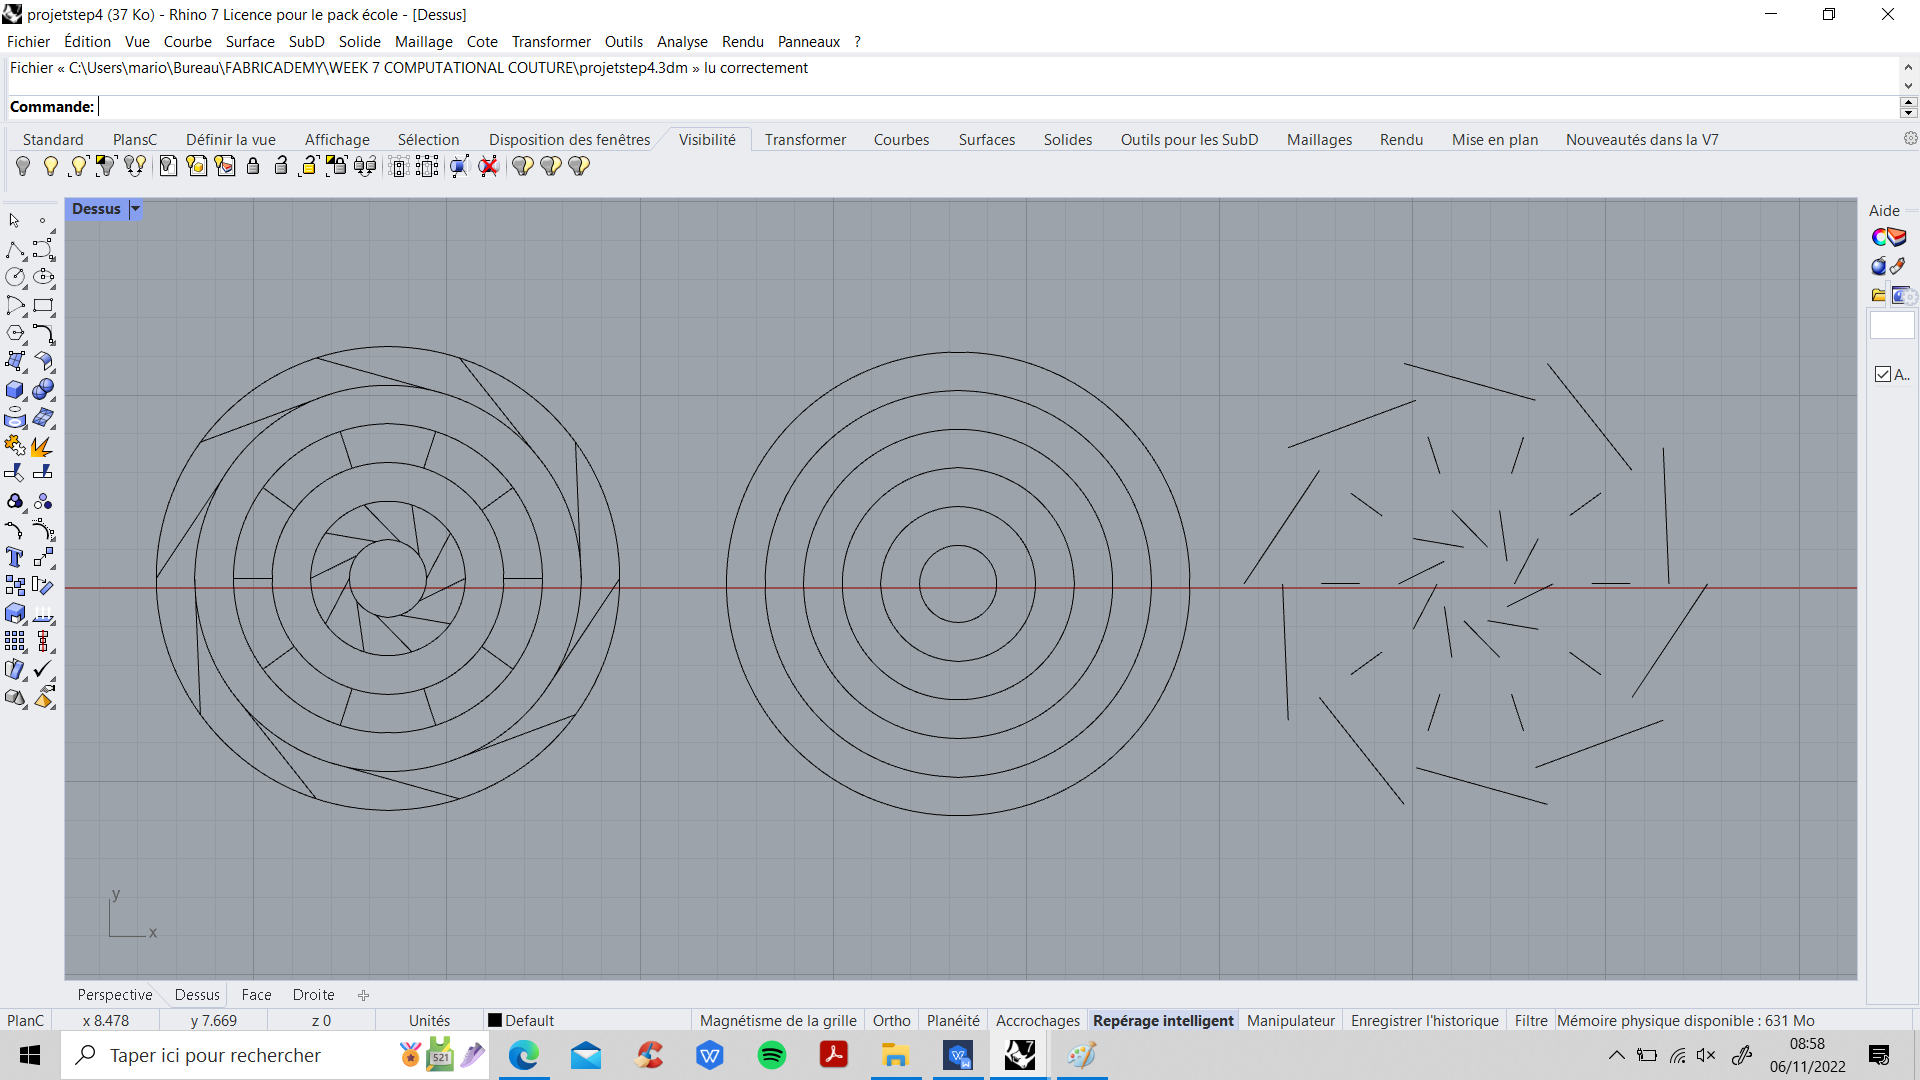
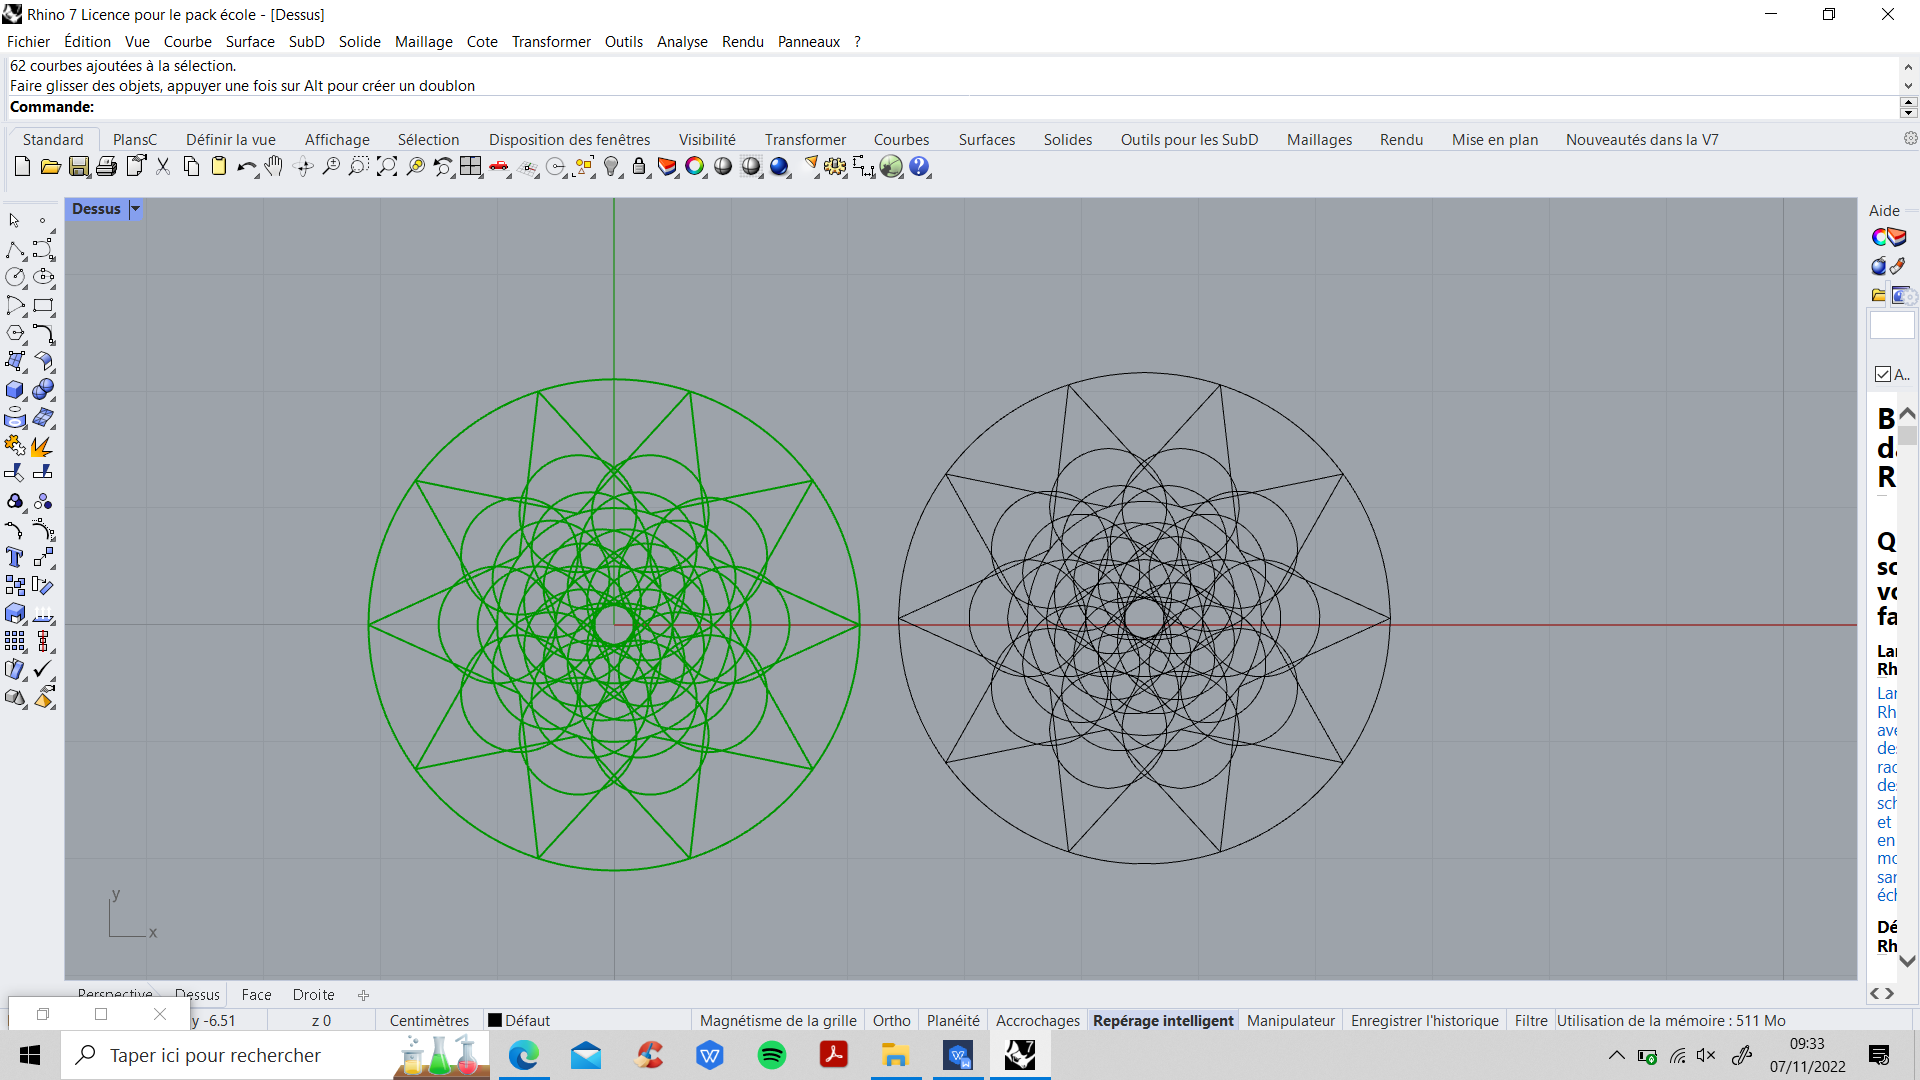
Build a sketch as a guideline
I realized this shape in Rhino 3D with only circle. This shape looks like a mandala.
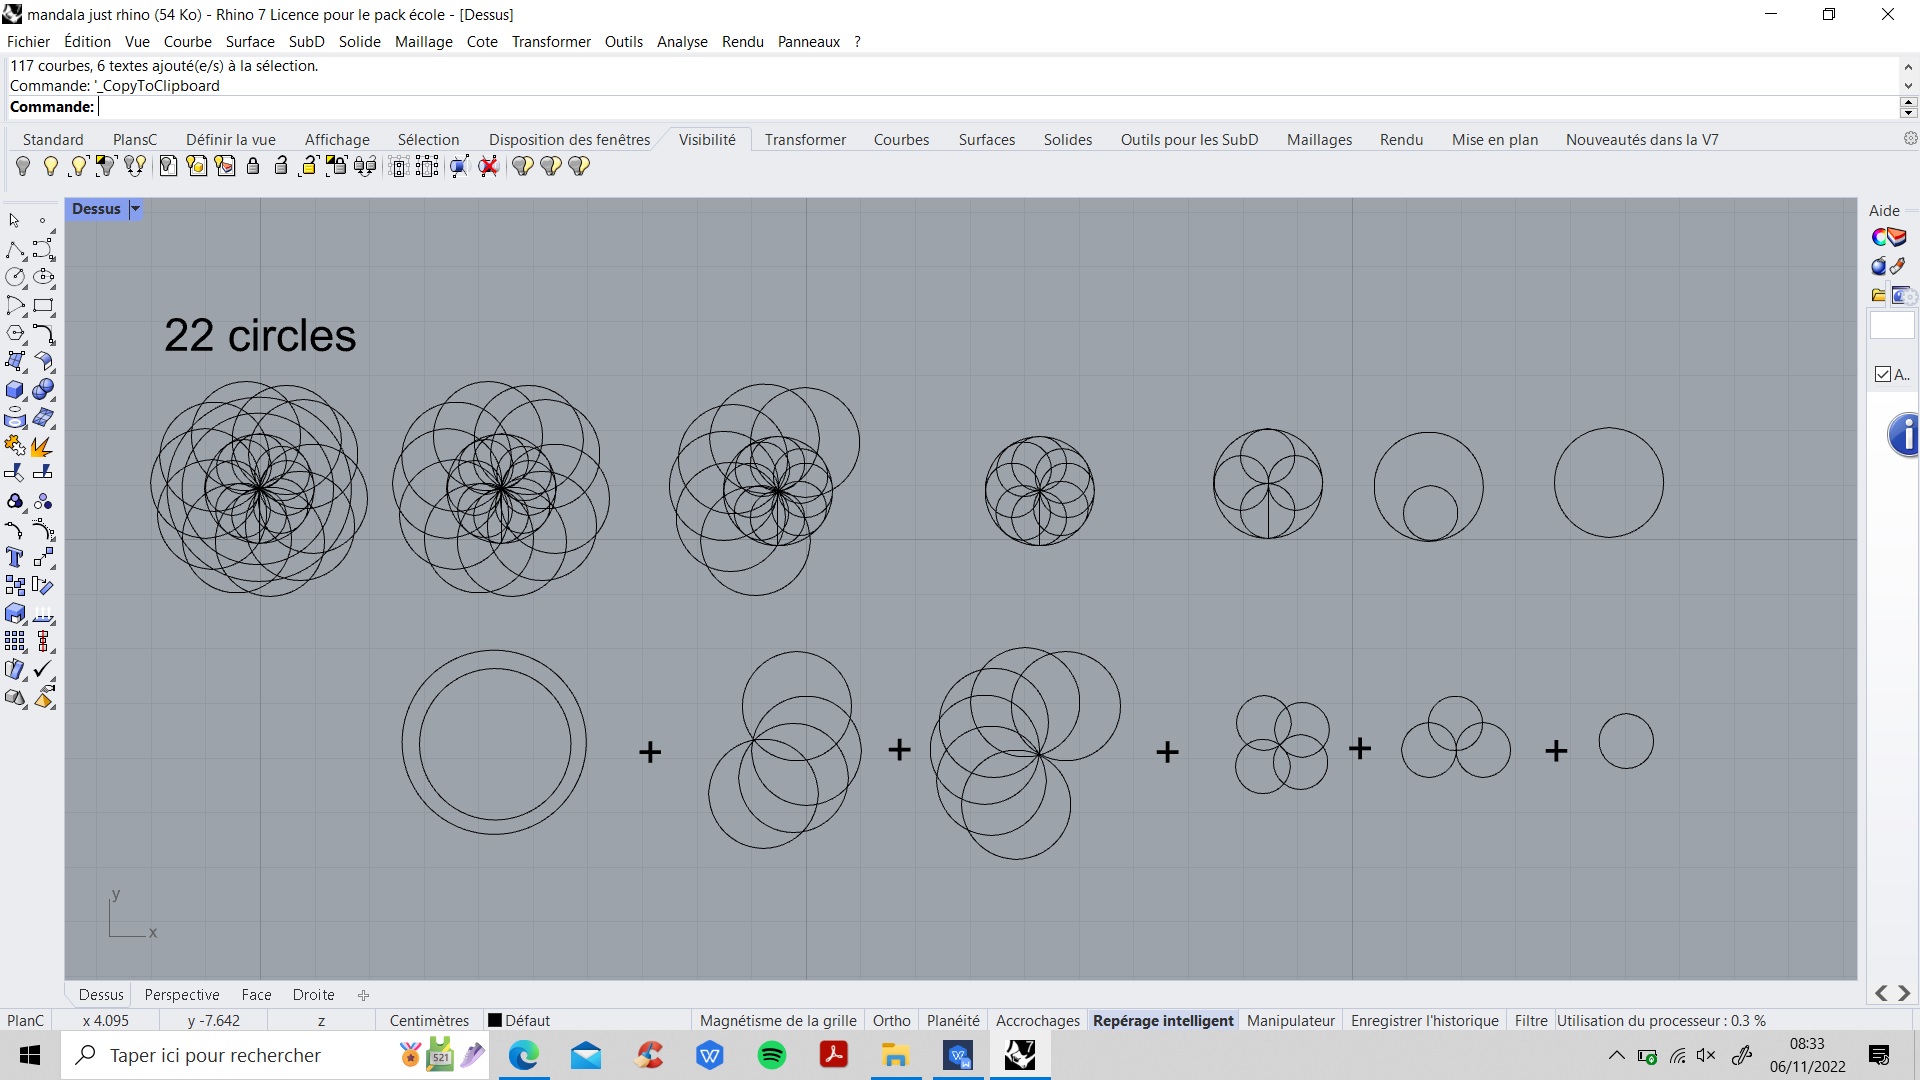
Let's go to grasshopper
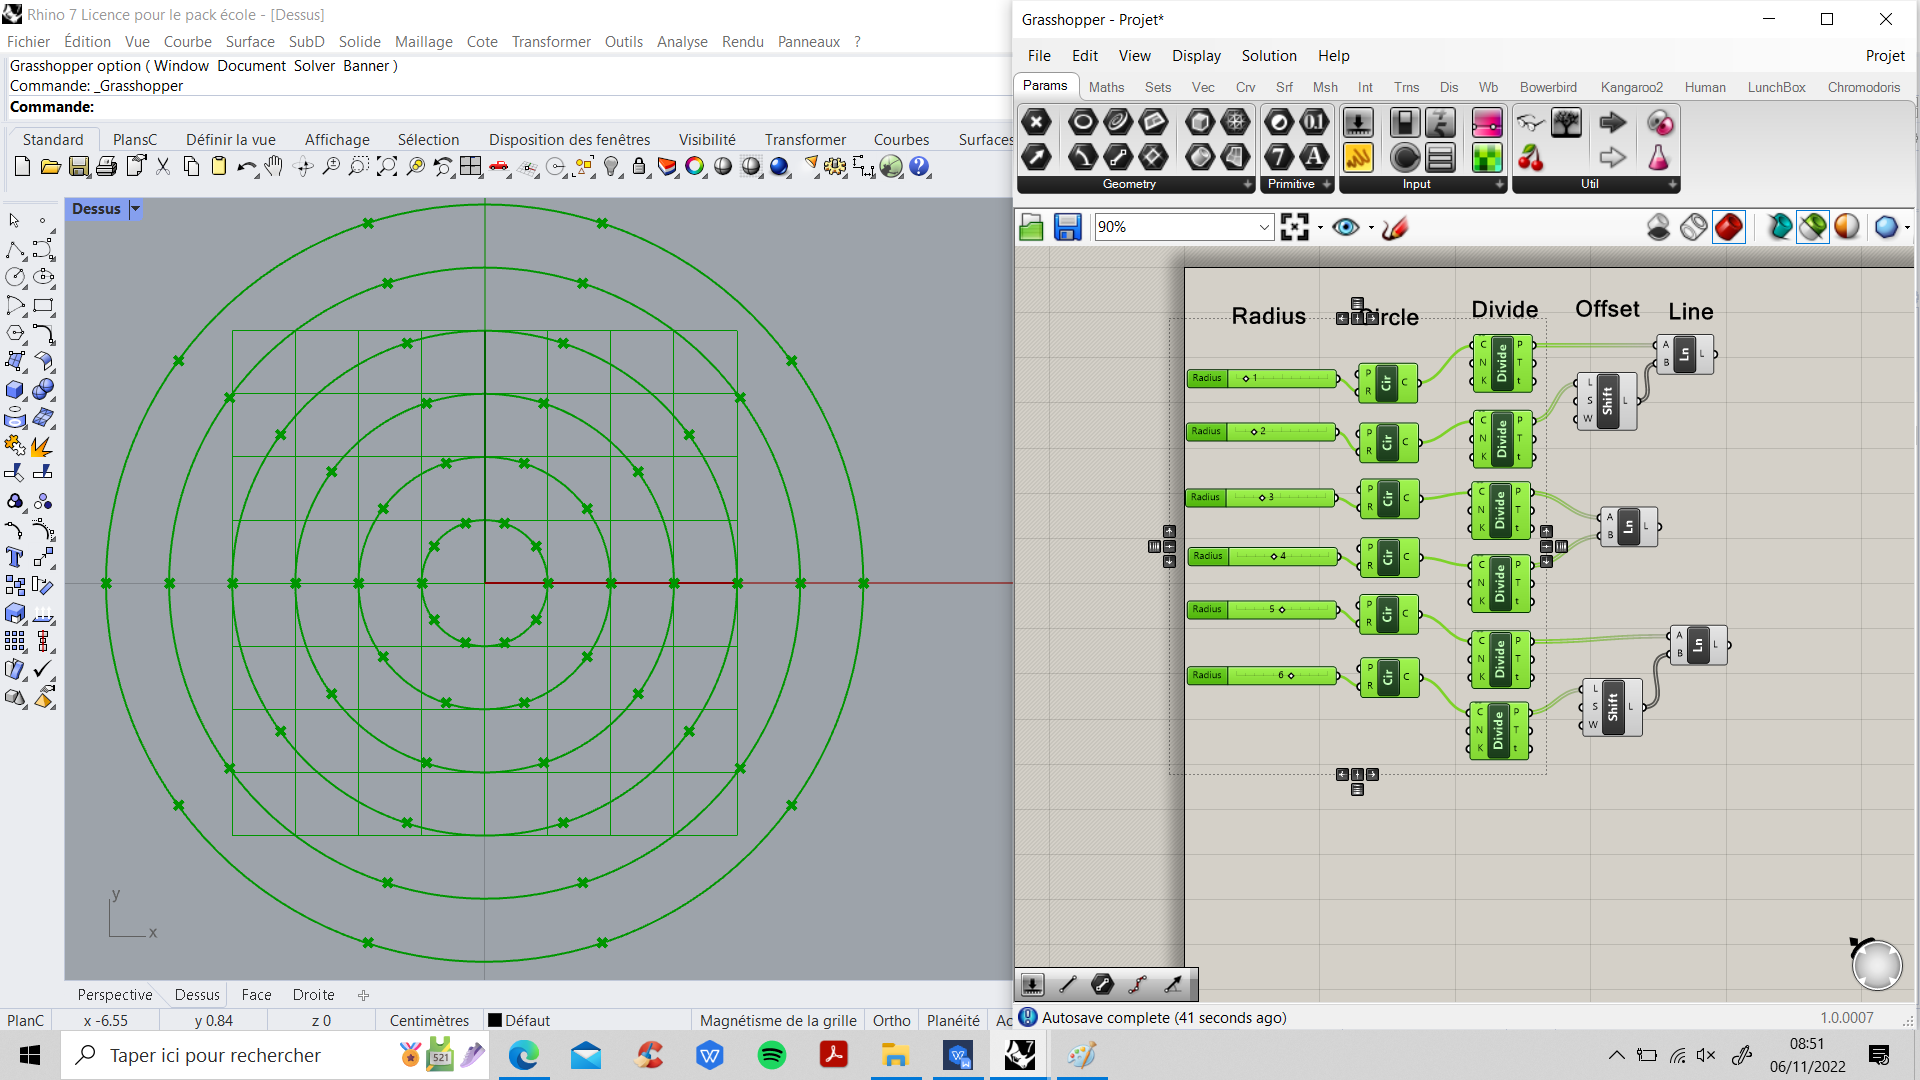
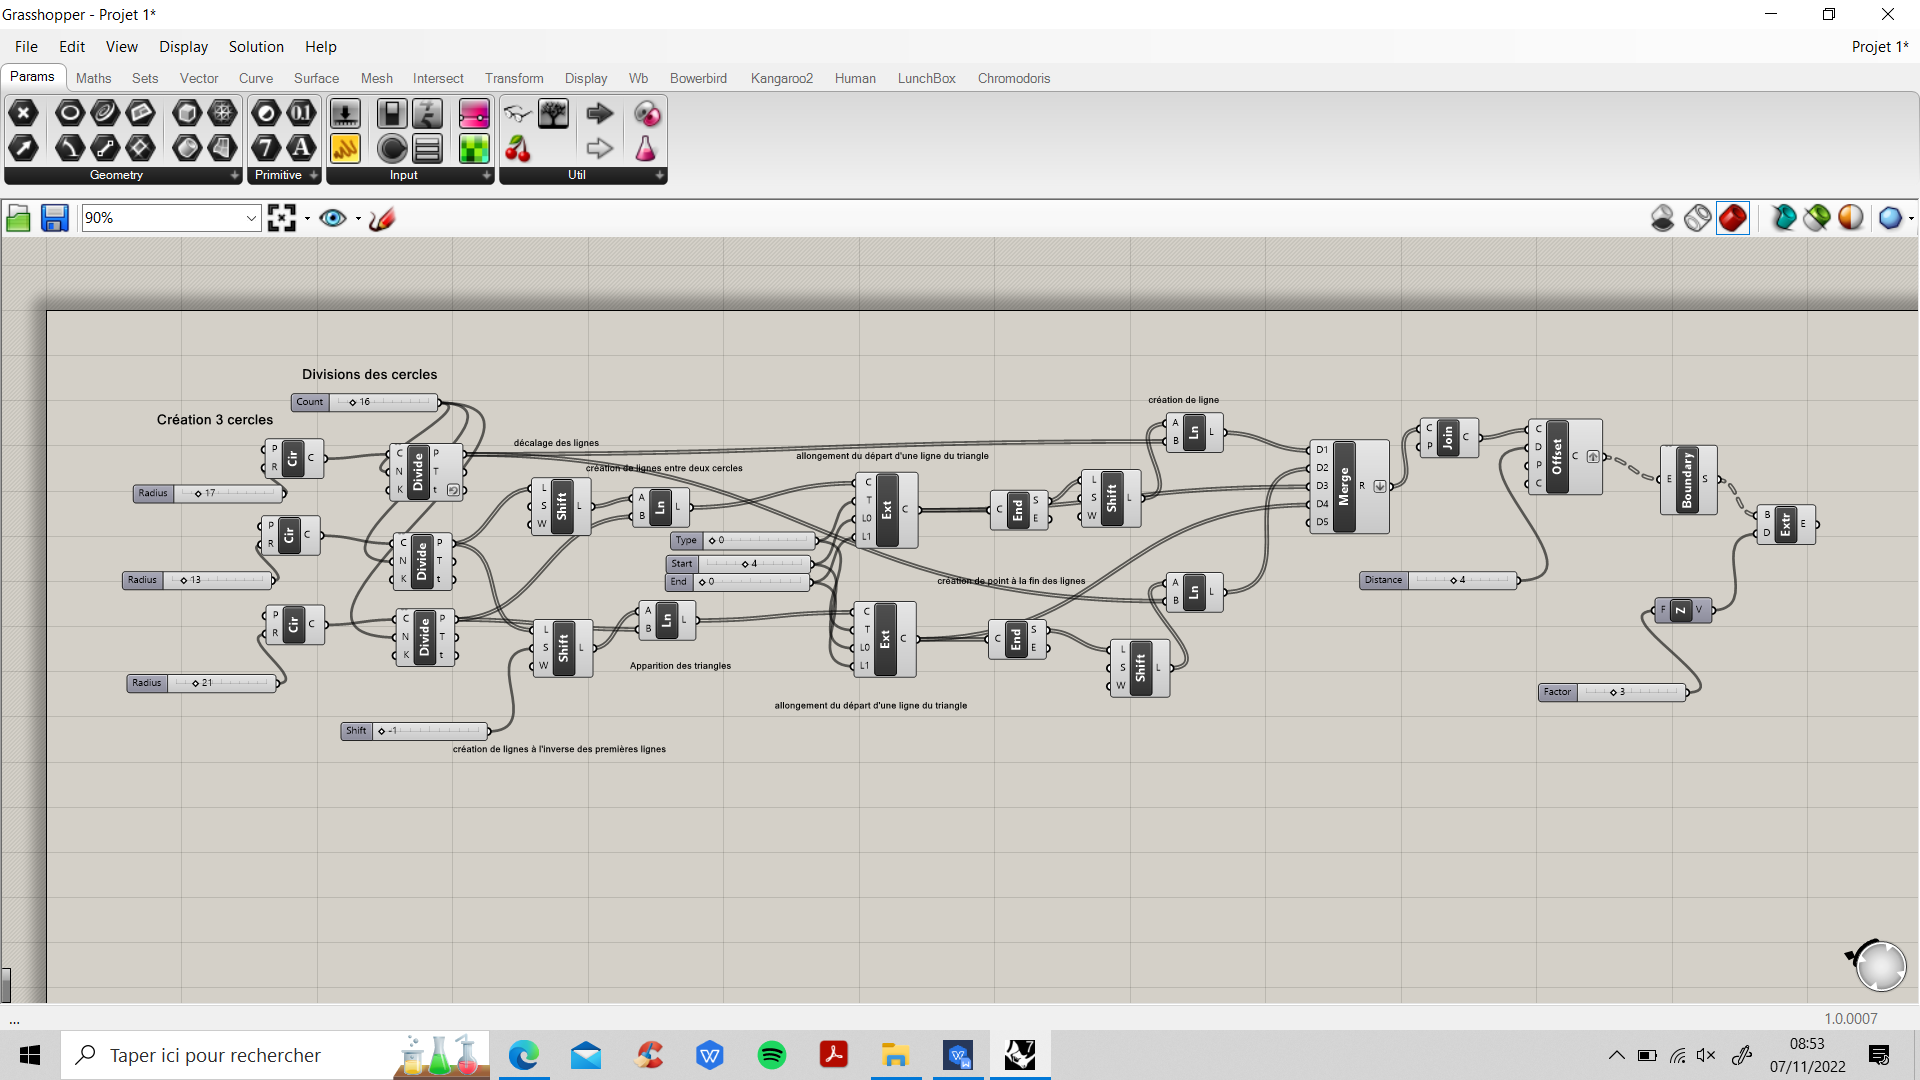
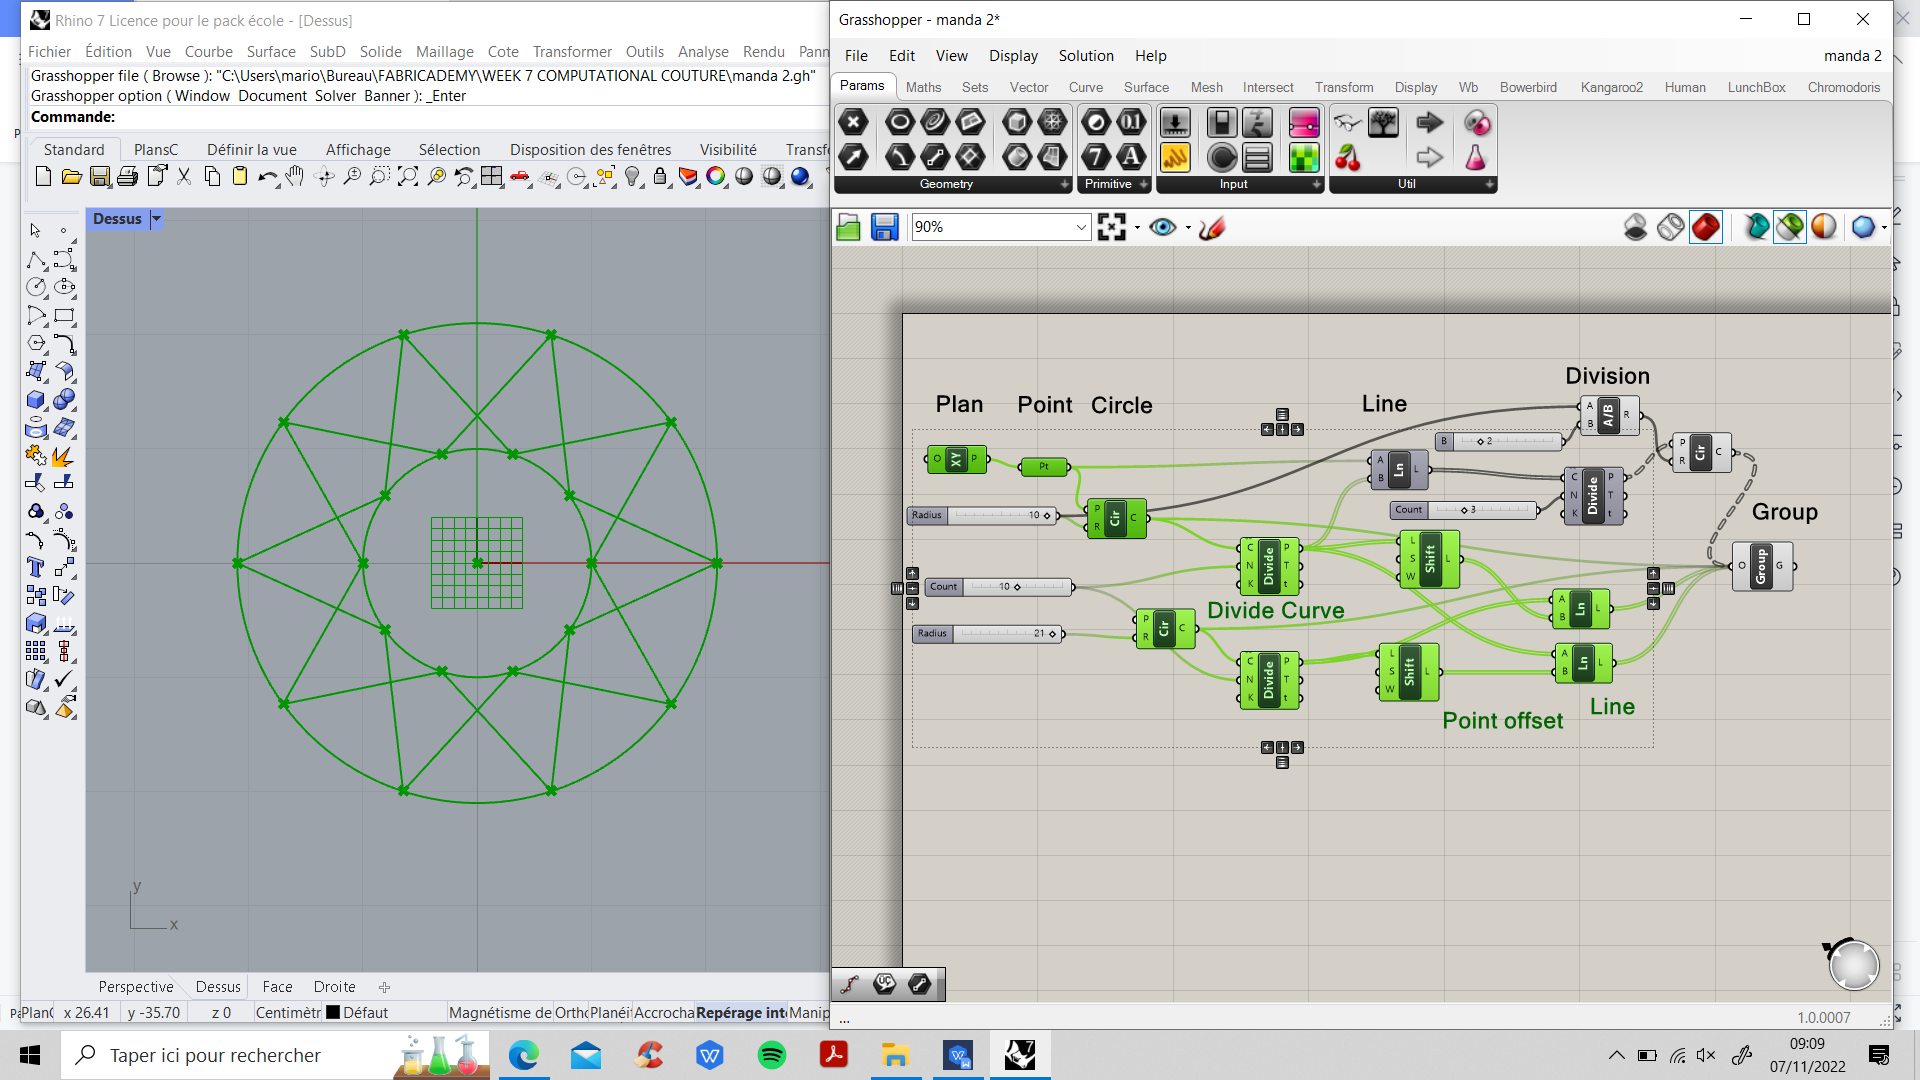
I decided to go solo. My target was in my brain and my sketch a bit off to the side, I tried something.
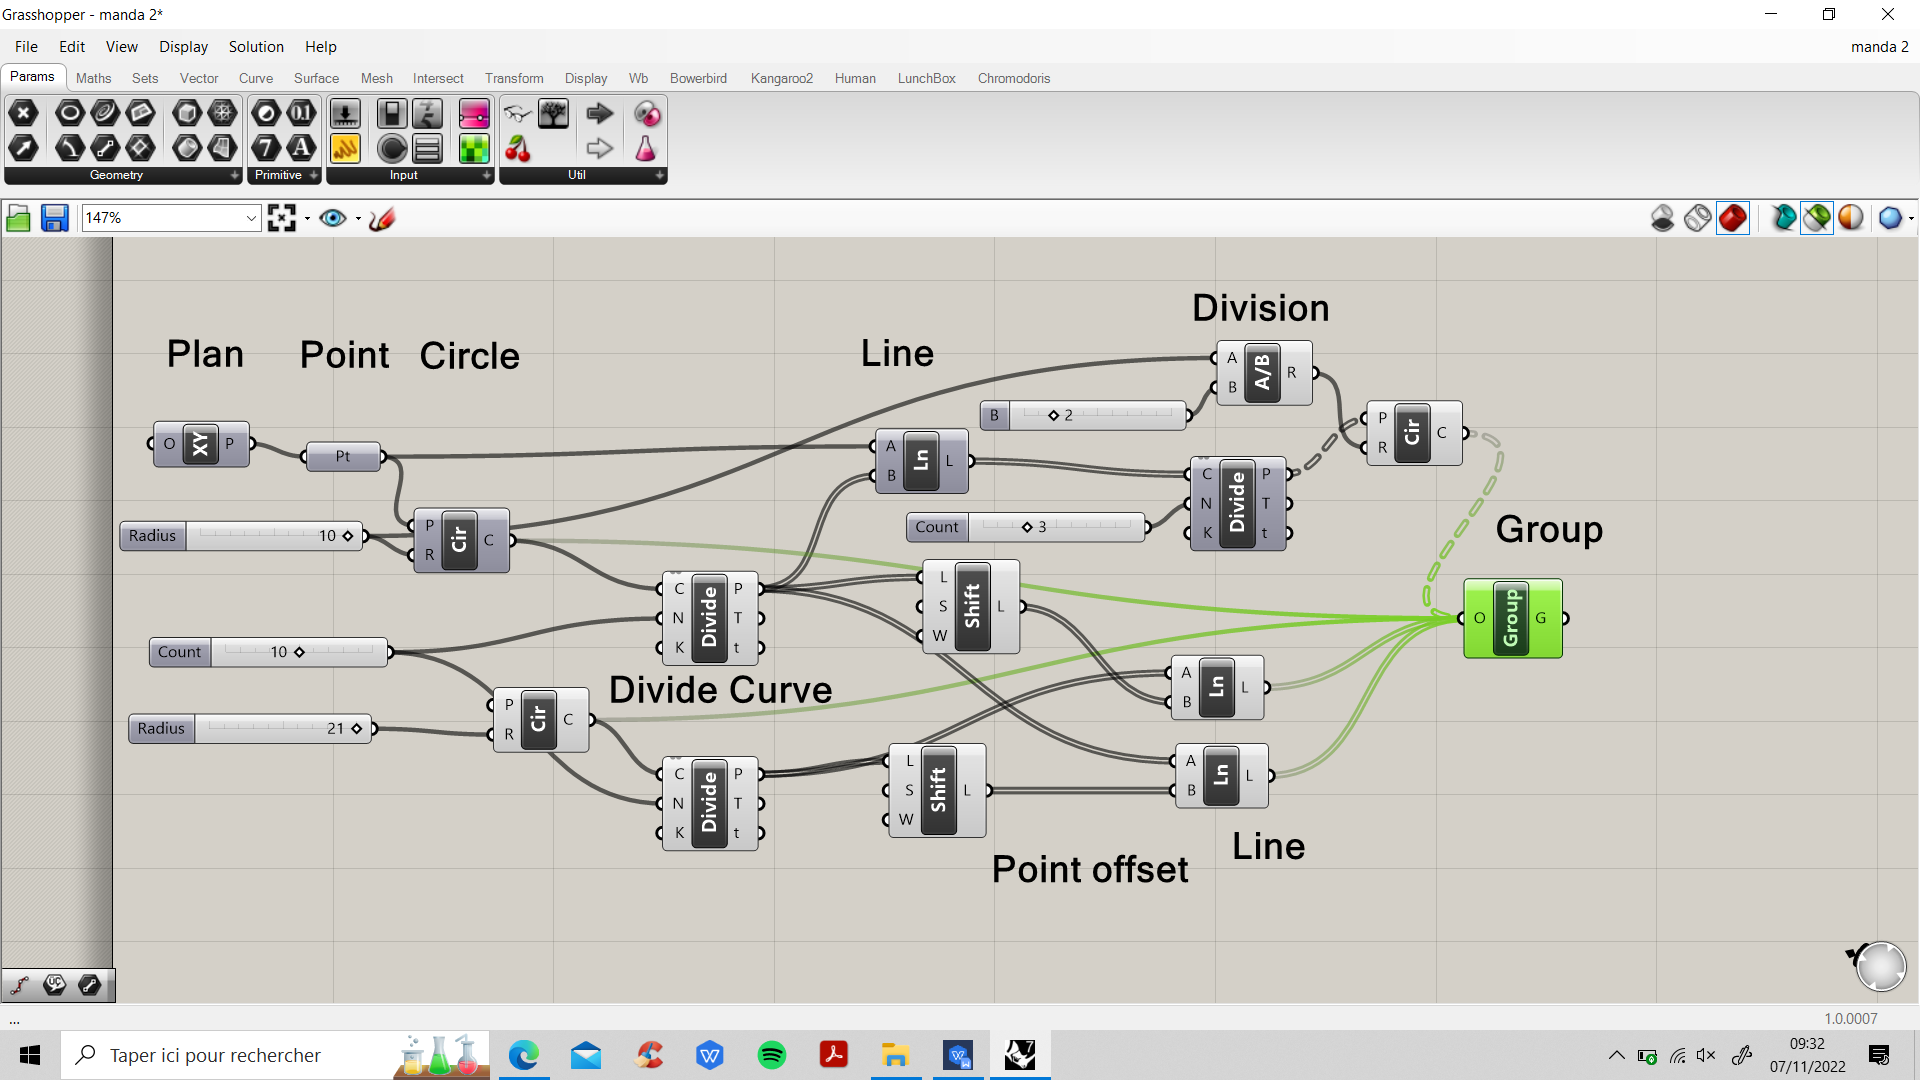
STEP 1 : I created six circles with different radii. I can change the radius in the numerical slider.

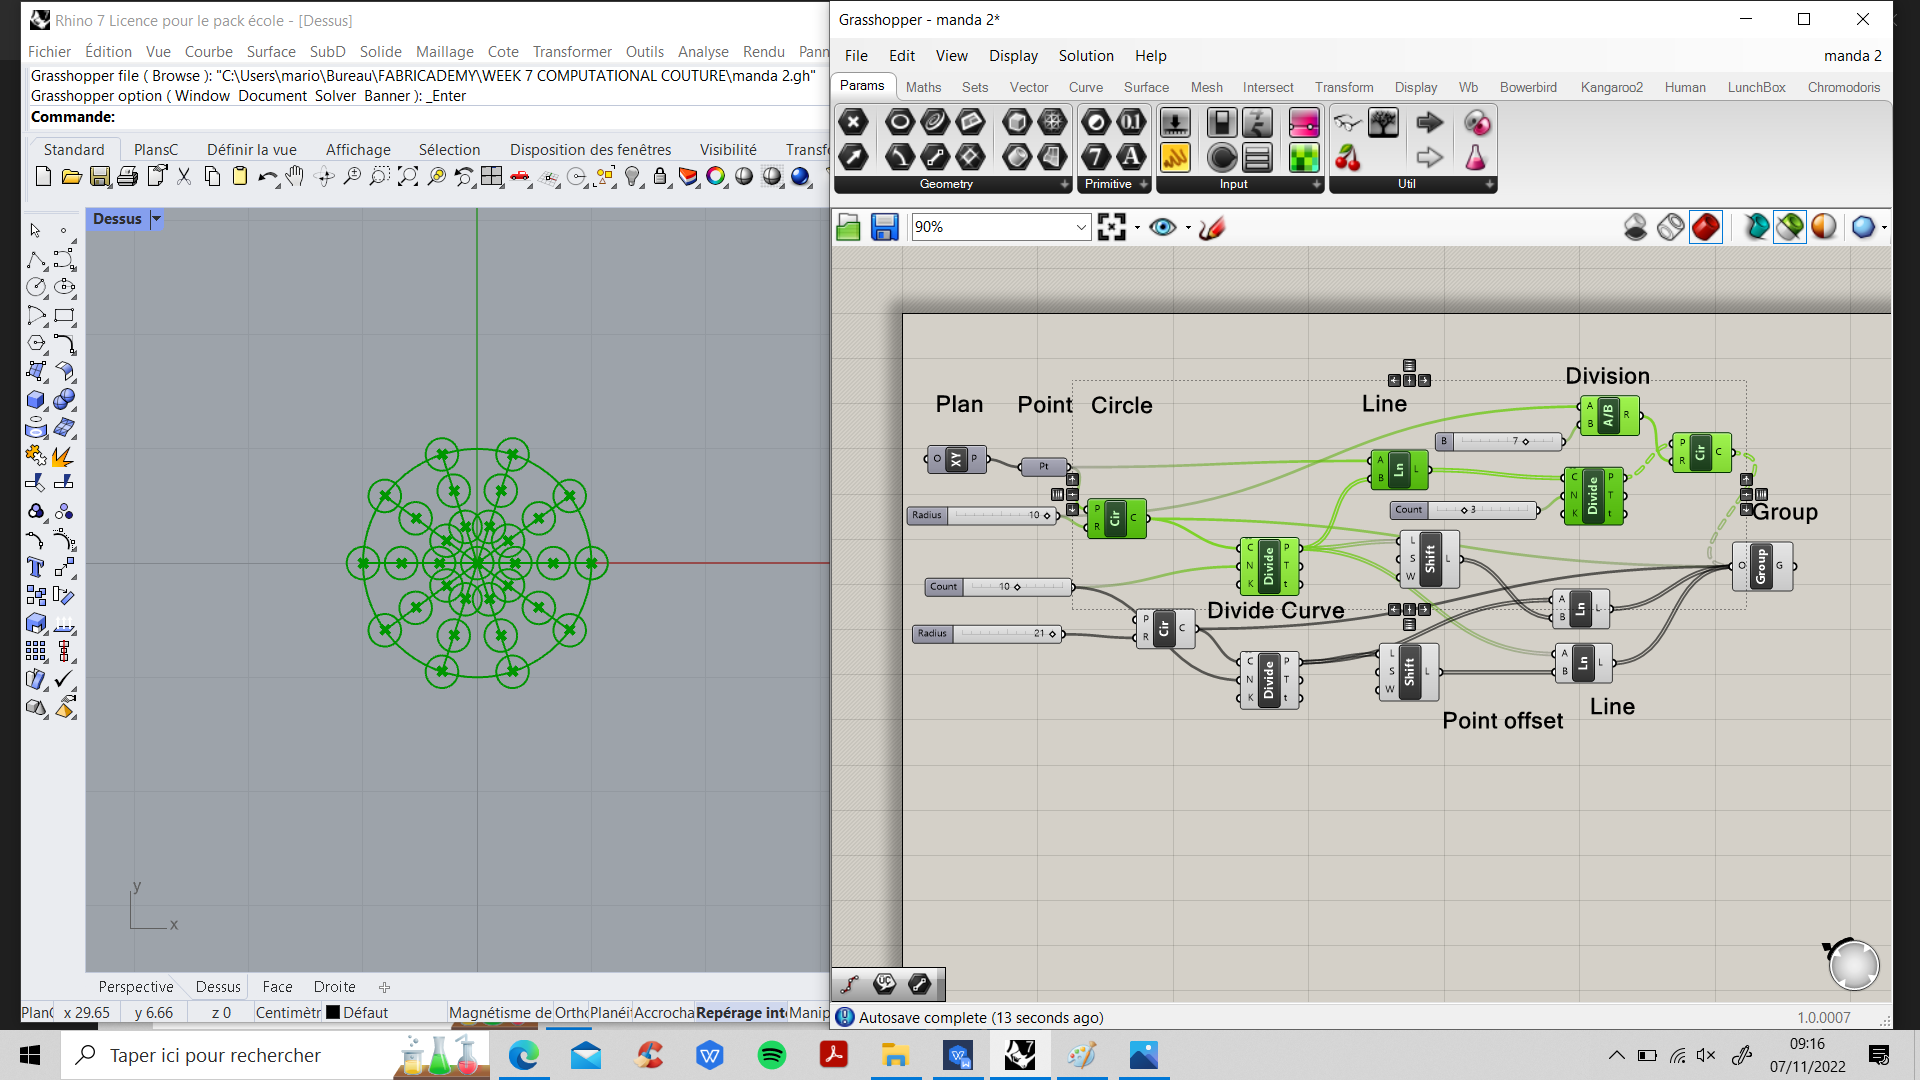
STEP 2 : I made some divisions on the circle. I want to create new points to use in future shapes.
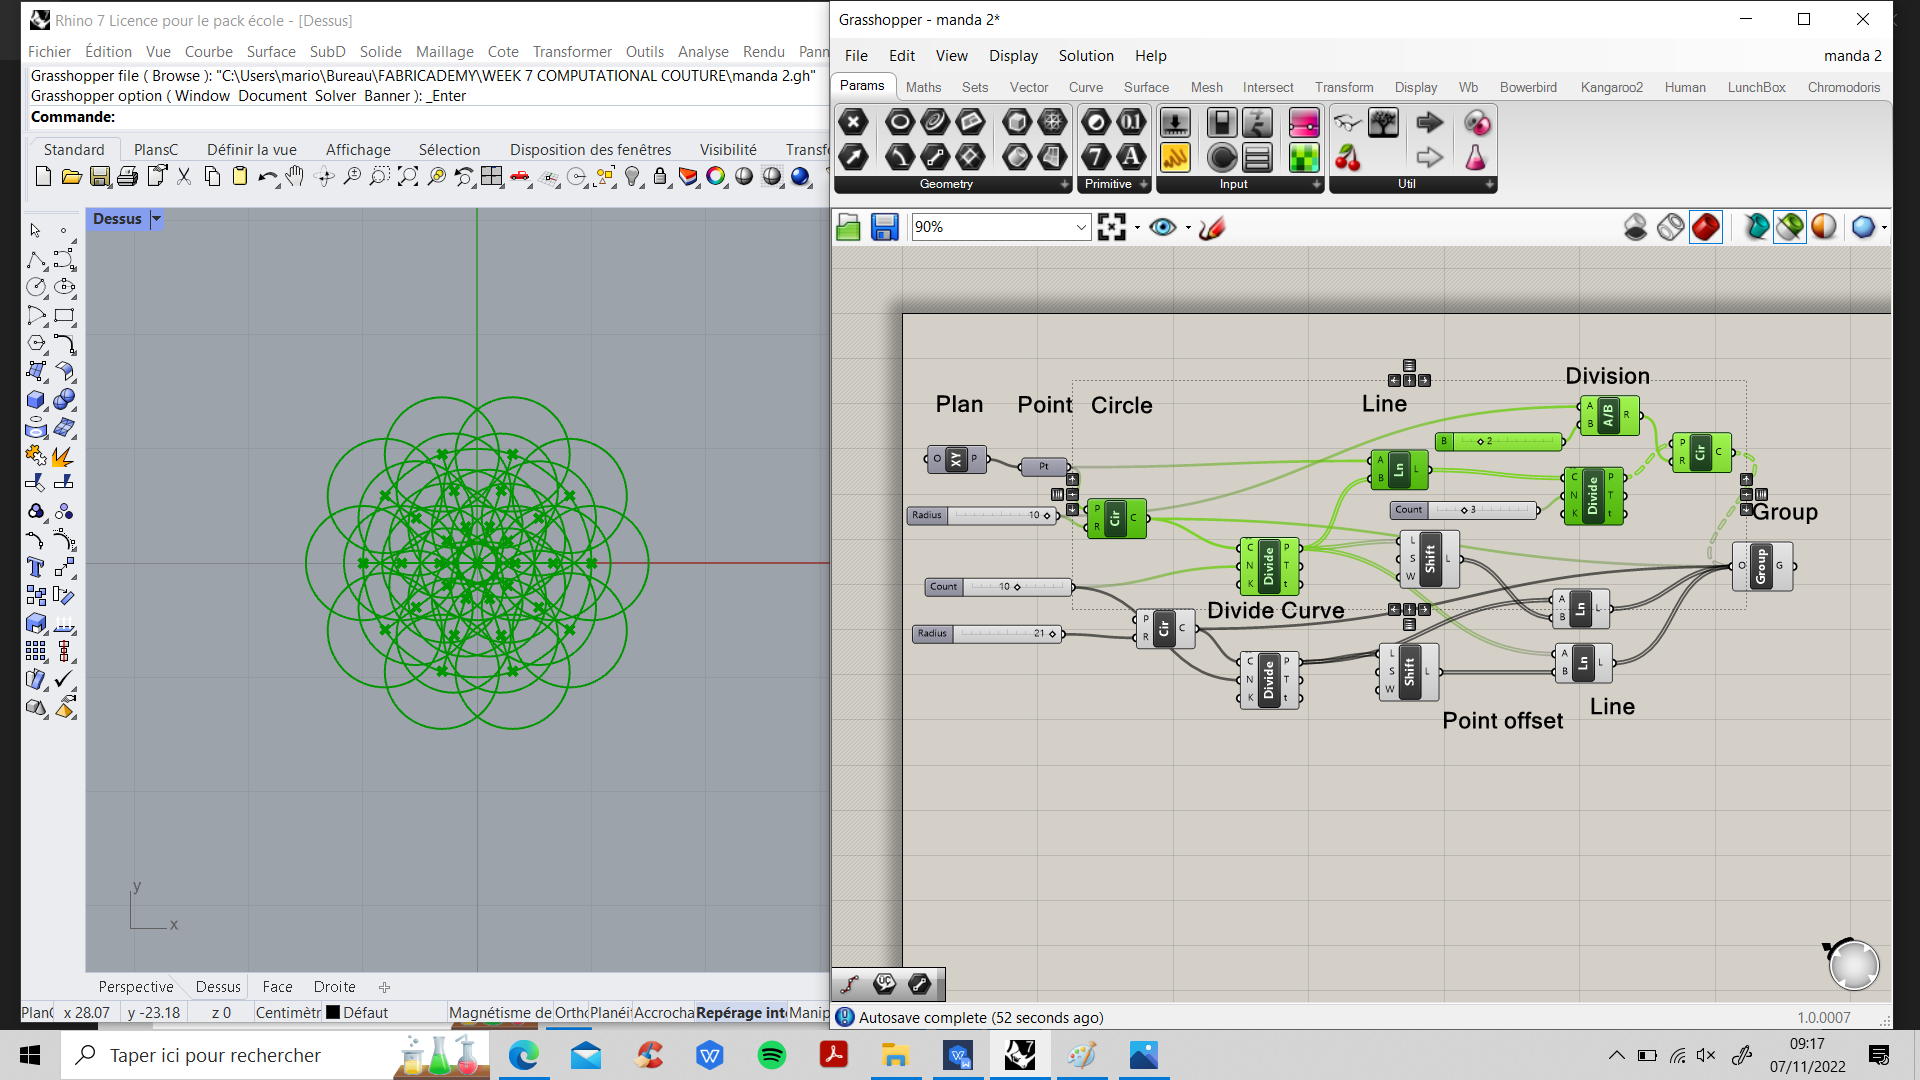
STEP 3 : I want to add lines from these points. But a line needs two points. So I created new points by shifting the first ones. Then, I drawing my lines.
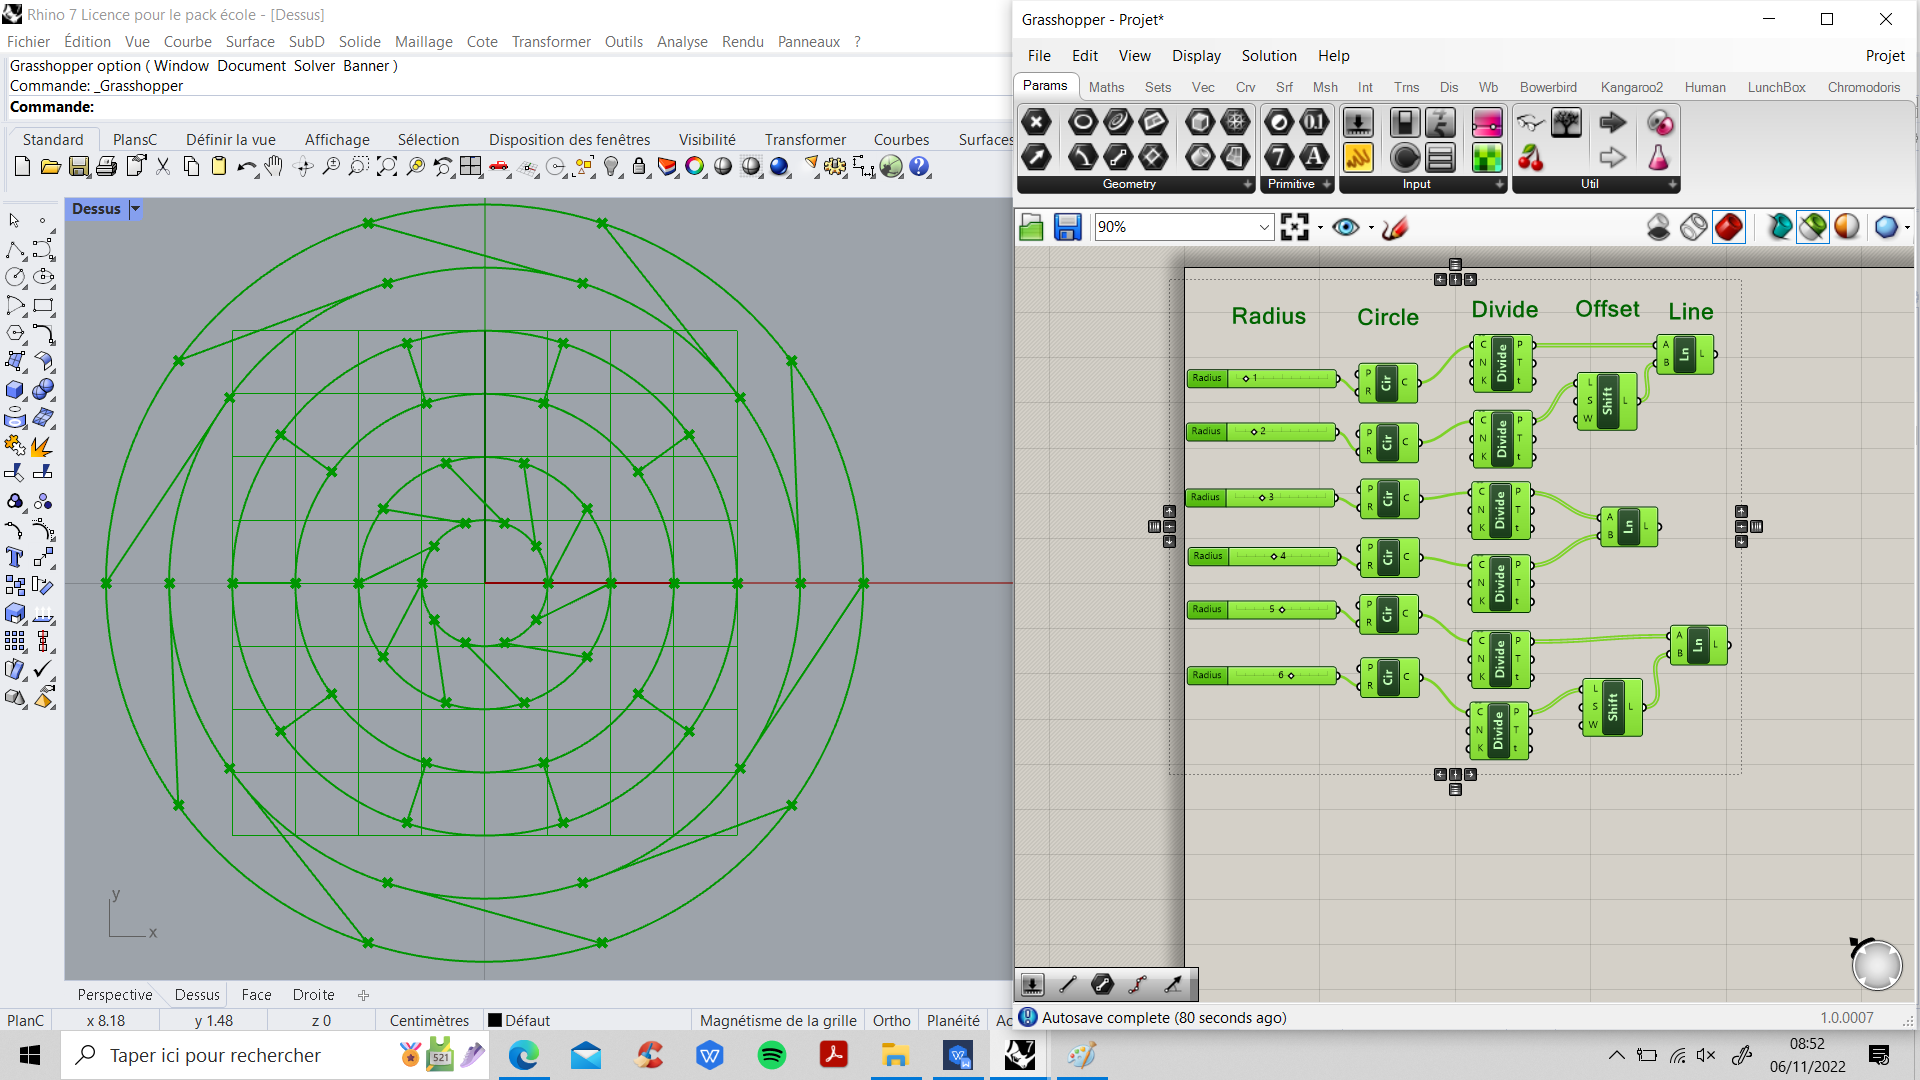
STEP 4 : In this step, I decided to bake my shapes. I saw that my shape with all its geometry was far from my idea of mandate. Now, I didn't know how to visualize how I should do it or where I should continue to get my idea of a mandate. I was lost, Unsuccessful test.
Again Learning Grasshopper
Fabricademy 2022-23 TUTORIALS Grasshopper 1 by Eugenio Bettuchi
I decided to go back to Eugenio's tutorial, more slowly to understand a logic of shape construction and approach the algorithmic logic. Indeed, each added box is a code script. All the scripts together form a definition. Therefore, the definition must follow a coding logic to work.
Another tutorial that I followed, in which it is explained how to make shapes close to what I am looking for. Grasshopper Lecture 01_ Parametric Islamic Pattern
This tutorial helped me understand how to create triangles from a point on a circle.Thanks to this tuto, I can have this result.
Mandala : Second attempt in Grasshopper
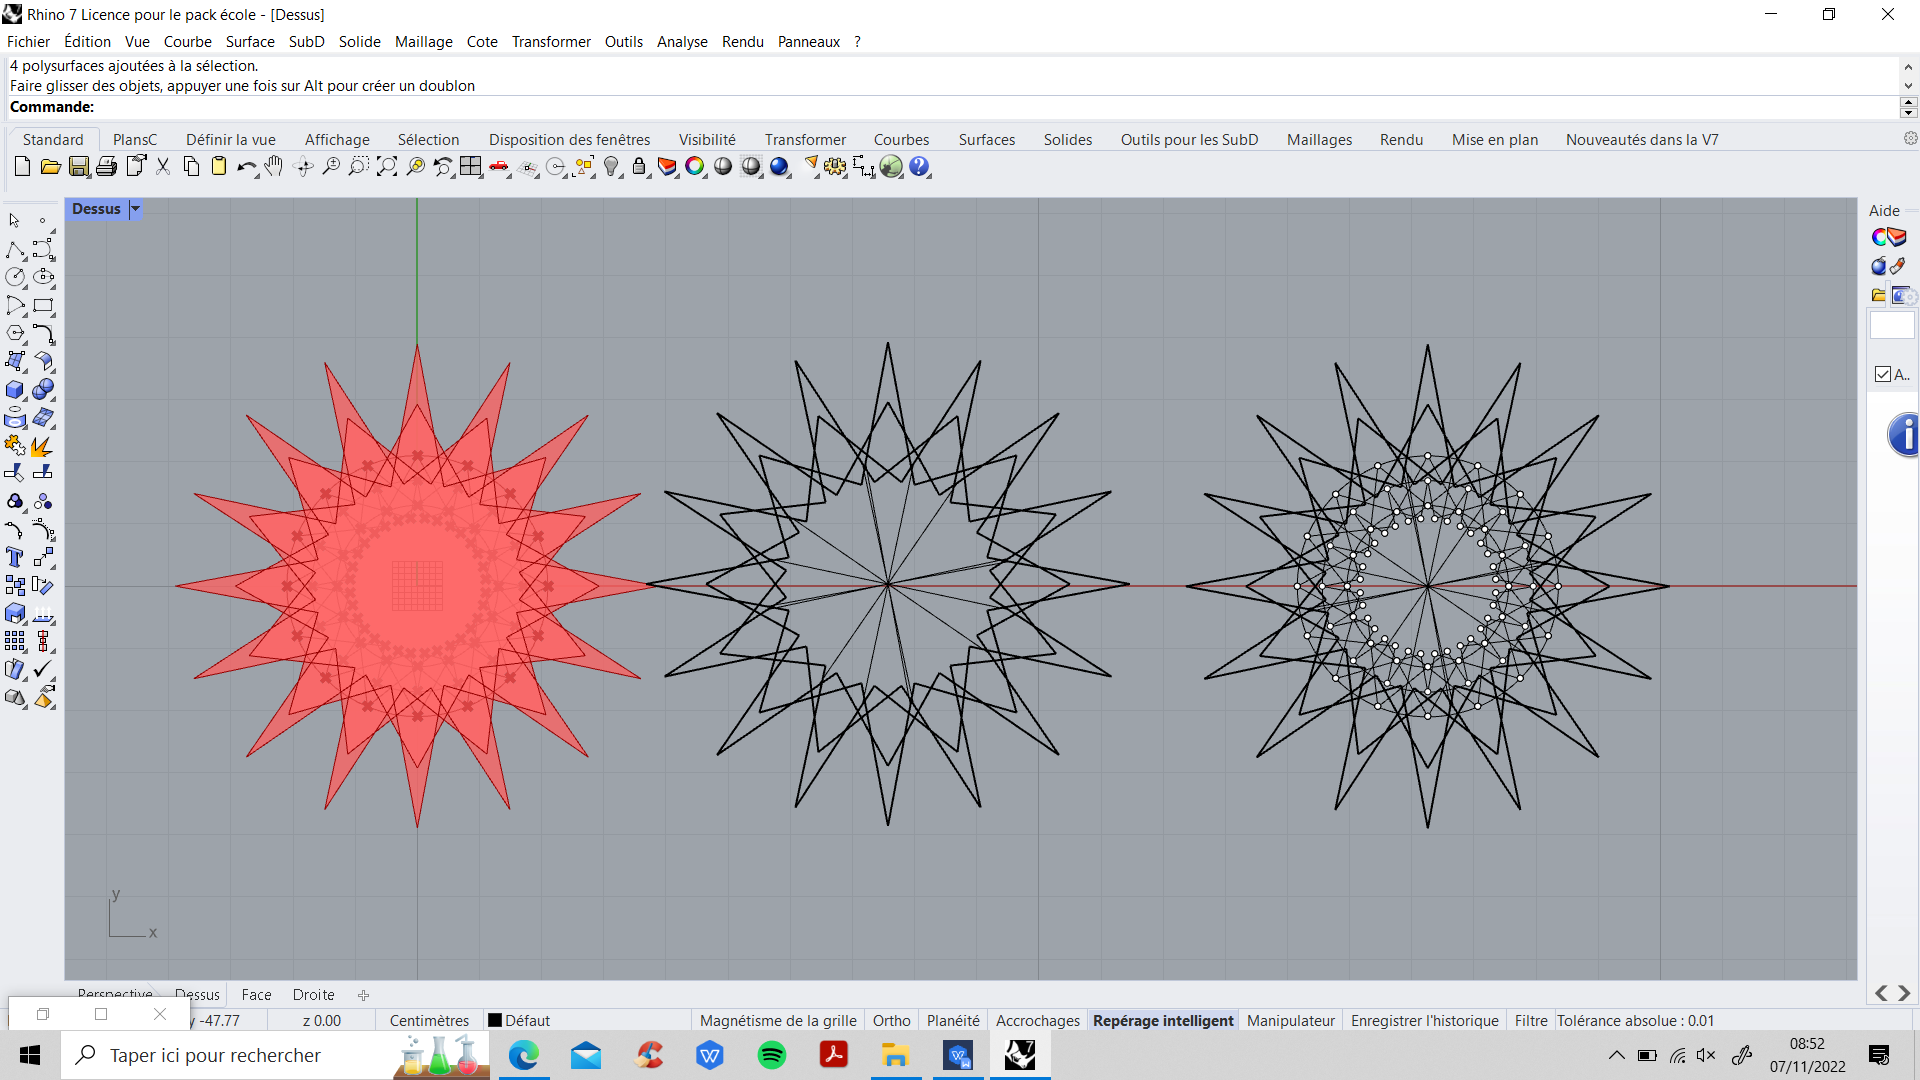
It's gone again, I returned in Grasshopper with the desire to build a mandala. I am satisfied with this result.
Step 1 : First, I created an XY plane. I needed it because I chose to build a 2D shape. Then I added two circles with different radii.
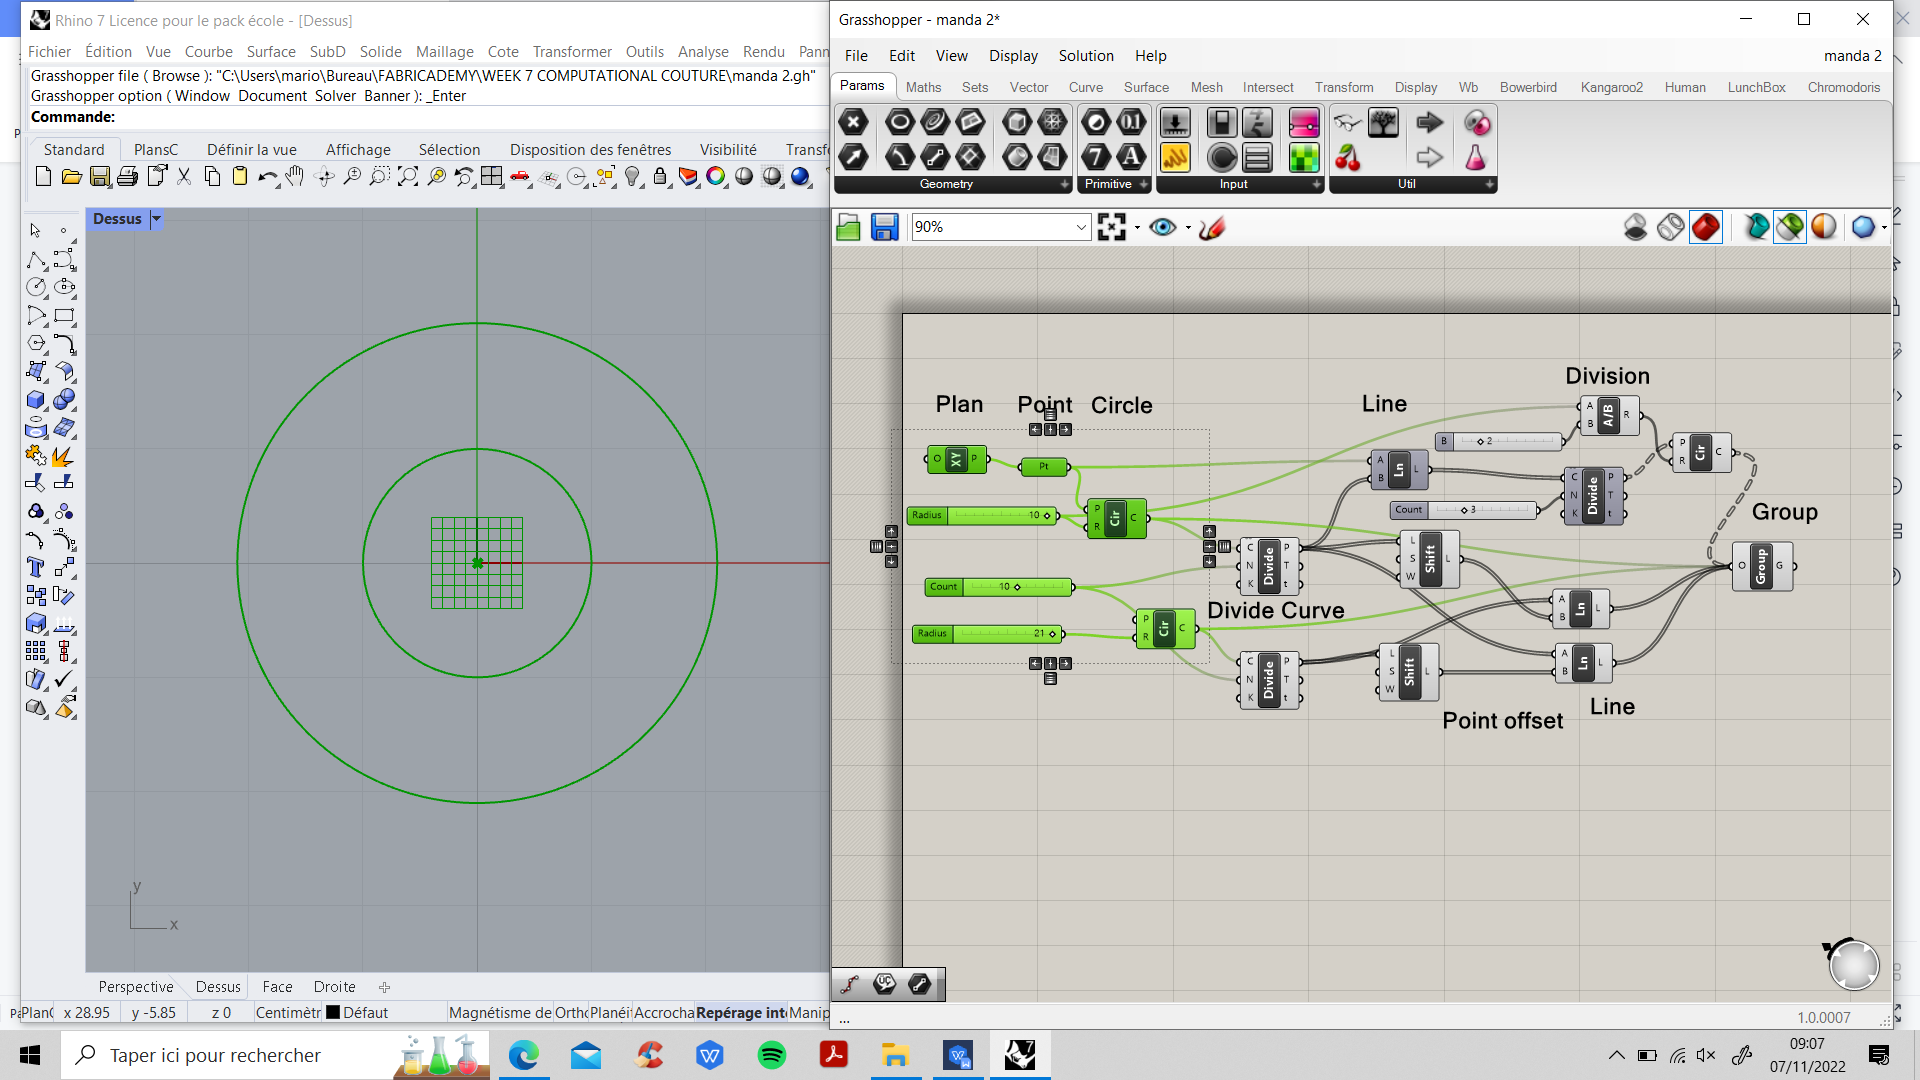
Step 2 : I divided my two circles into 10. I have shifted the 10 points created by the division, to have two pairs of 10 points. I was able to draw a line between these points. I reproduced this pattern in reverse. In the end, I drew triangles from the lines I created.
Step 3 : In this stage, I didn't know how or why I was doing it. But I wanted to create circles in my little circle. So I started to add lines, on this line by adding points. These points are the center of my circles. Then I changed the radius of my small circles in my small circle. The second picture shows the evolution.
Step 4 : In the end, I grouped all the shapes together and BAKE !!!
After the effort, the fun.
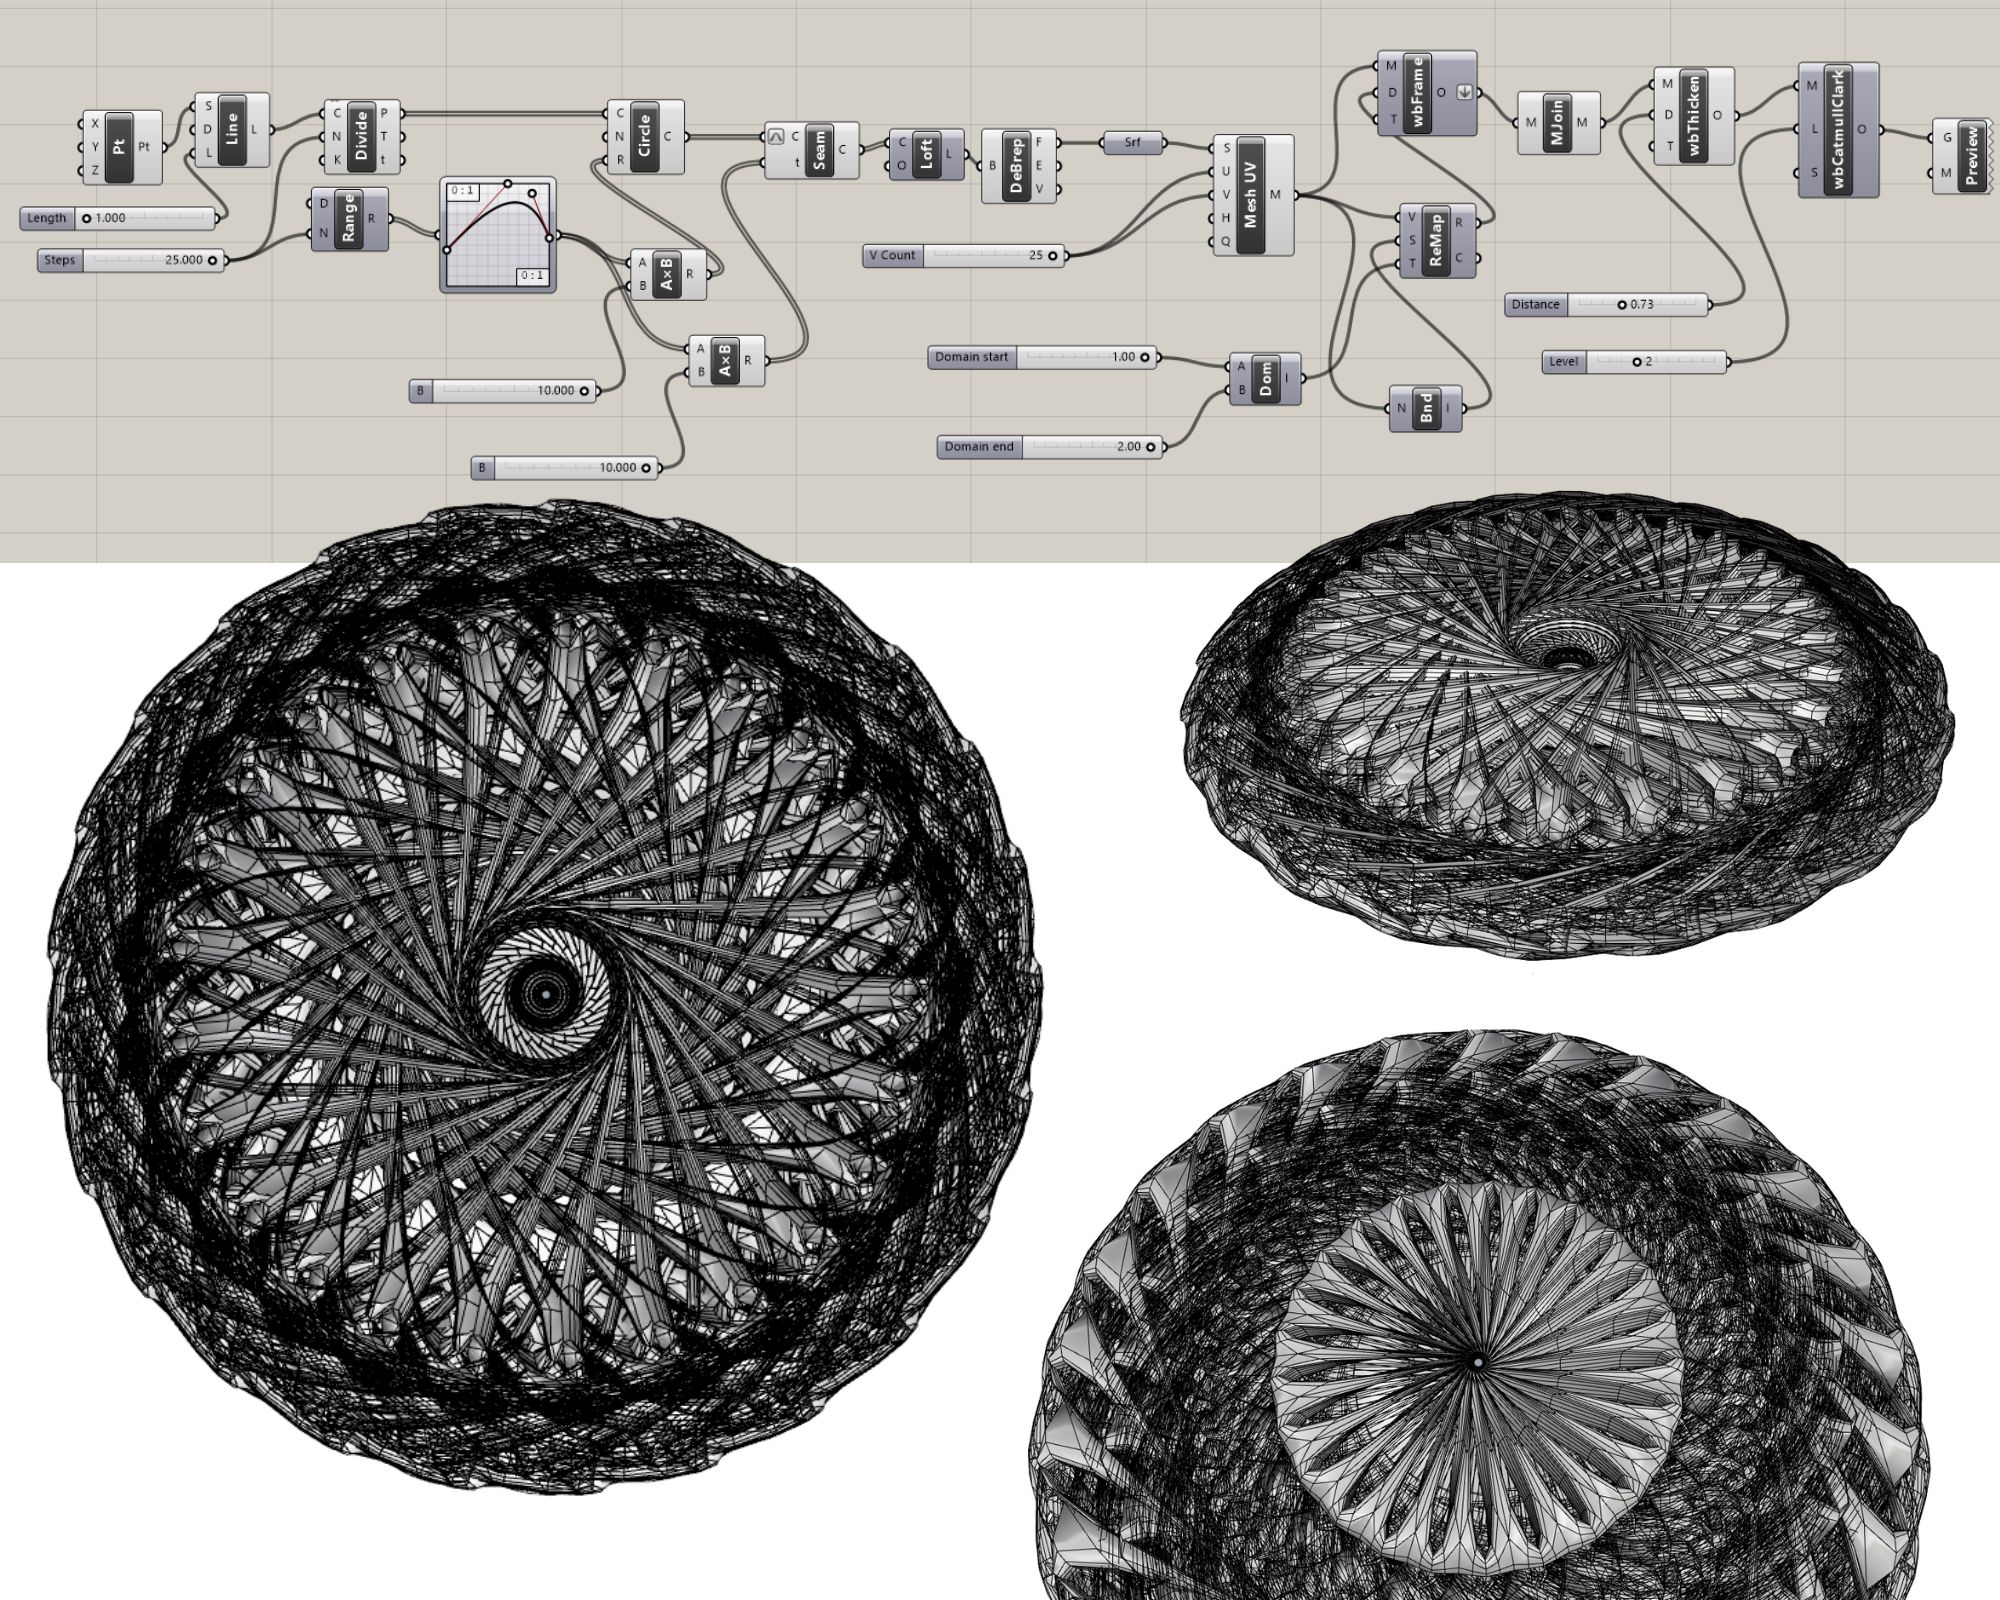
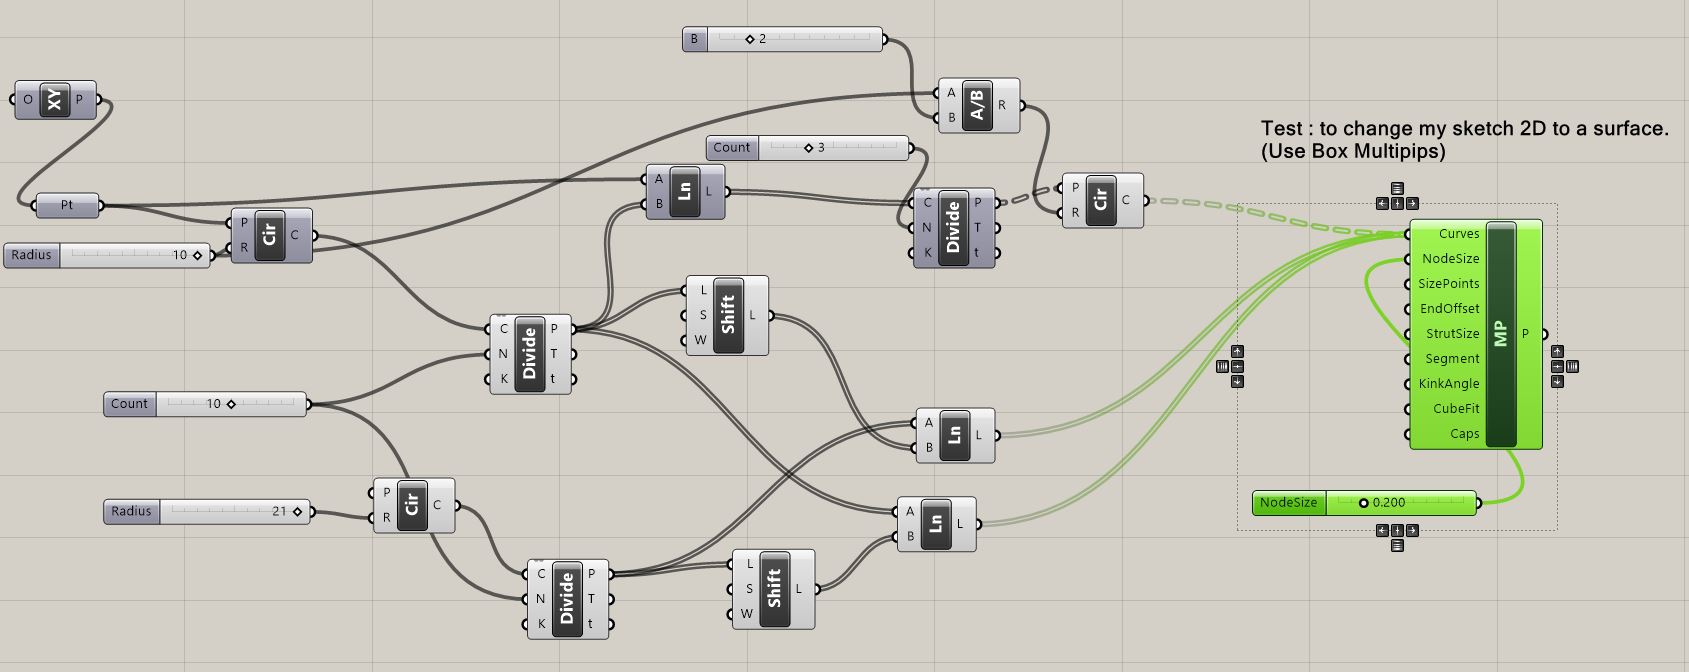
Mandala : 3D Models
After having a good time, I chose a mandal from all my creations. To 3D print this mandala, I have to transform this 2D pattern into a 3D surface. I made this transformation on Grasshopper directly.
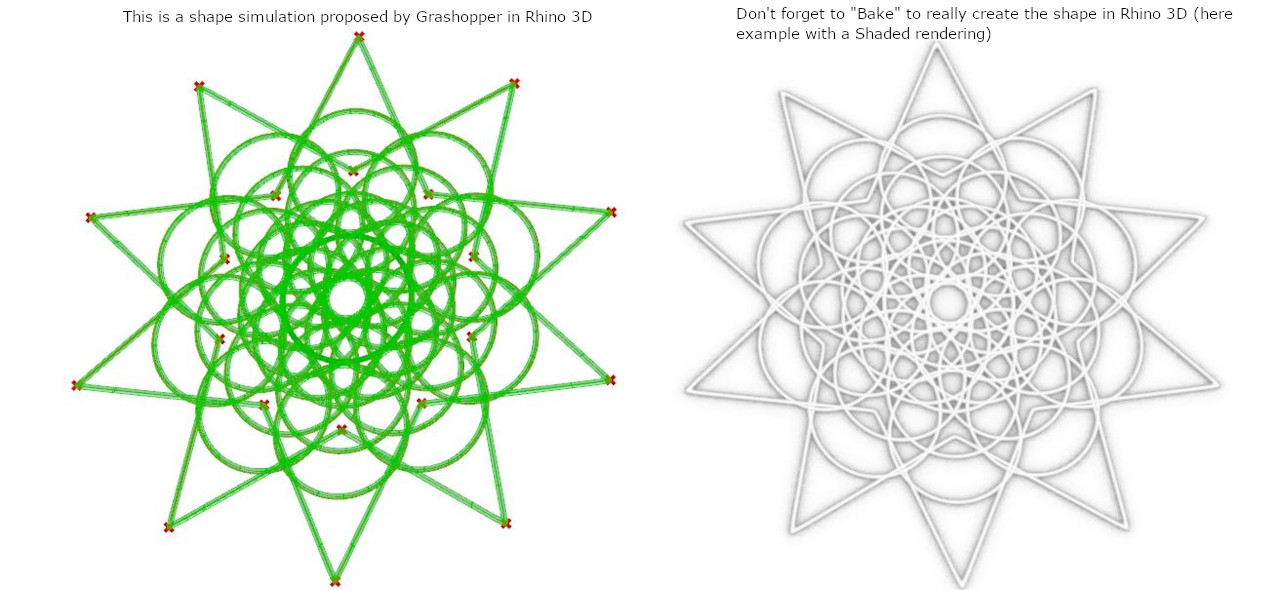
Here you can find the STL1 and Pdf2 documents.
Result : Ready to print
Voronoi
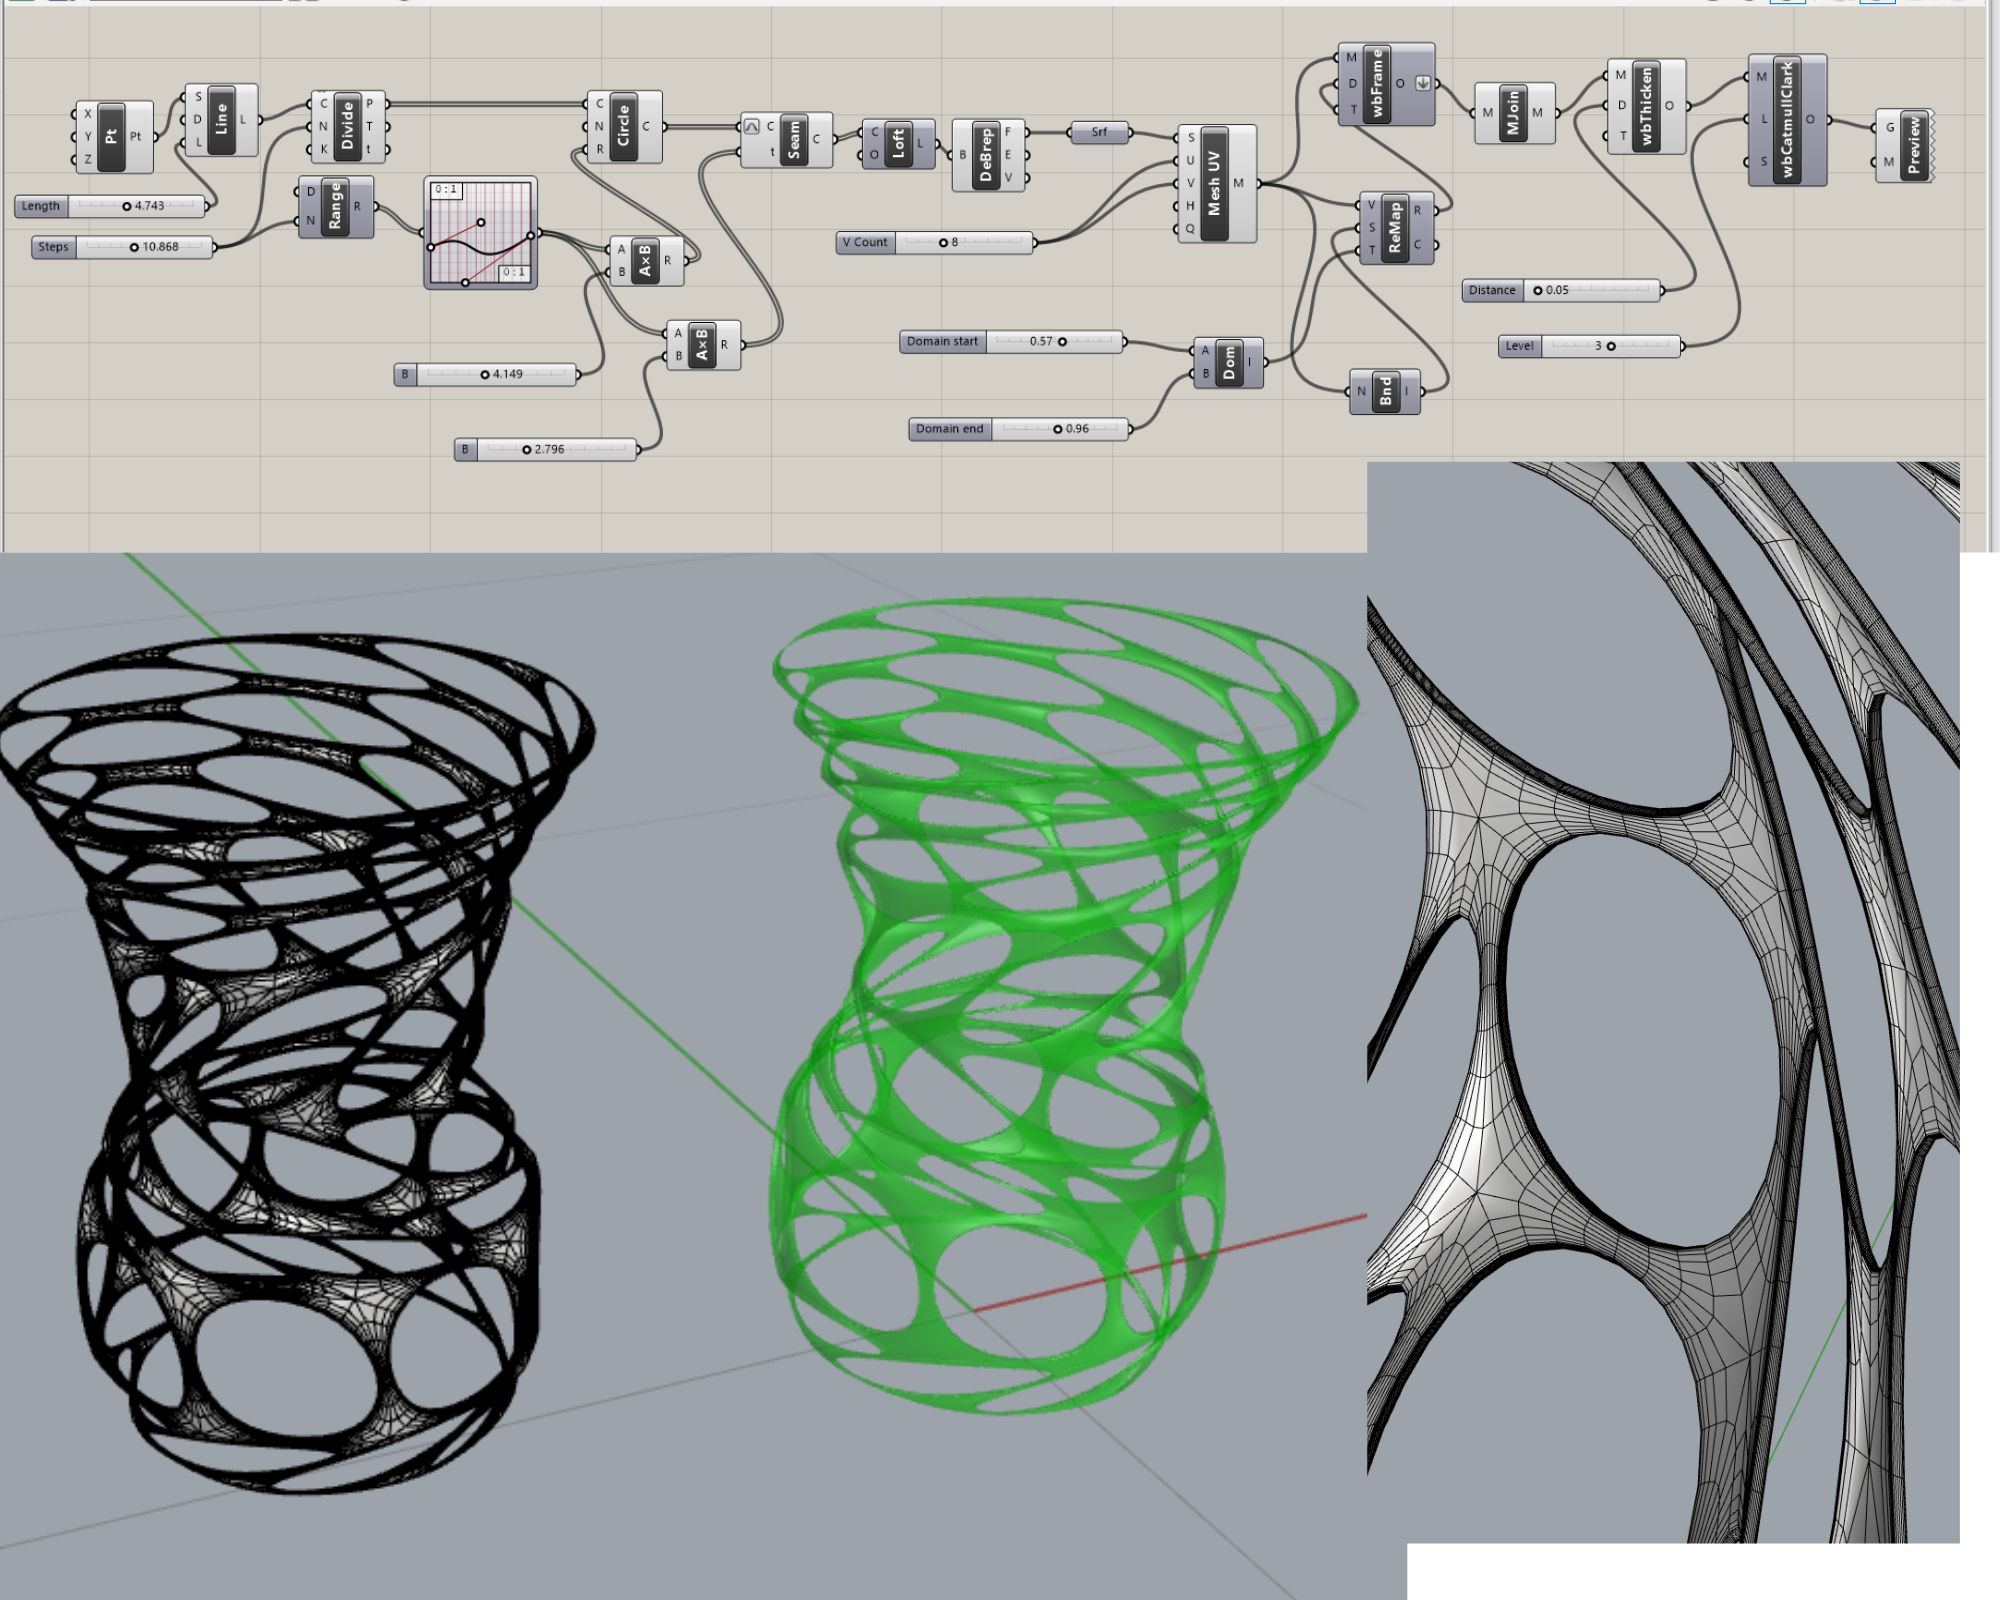
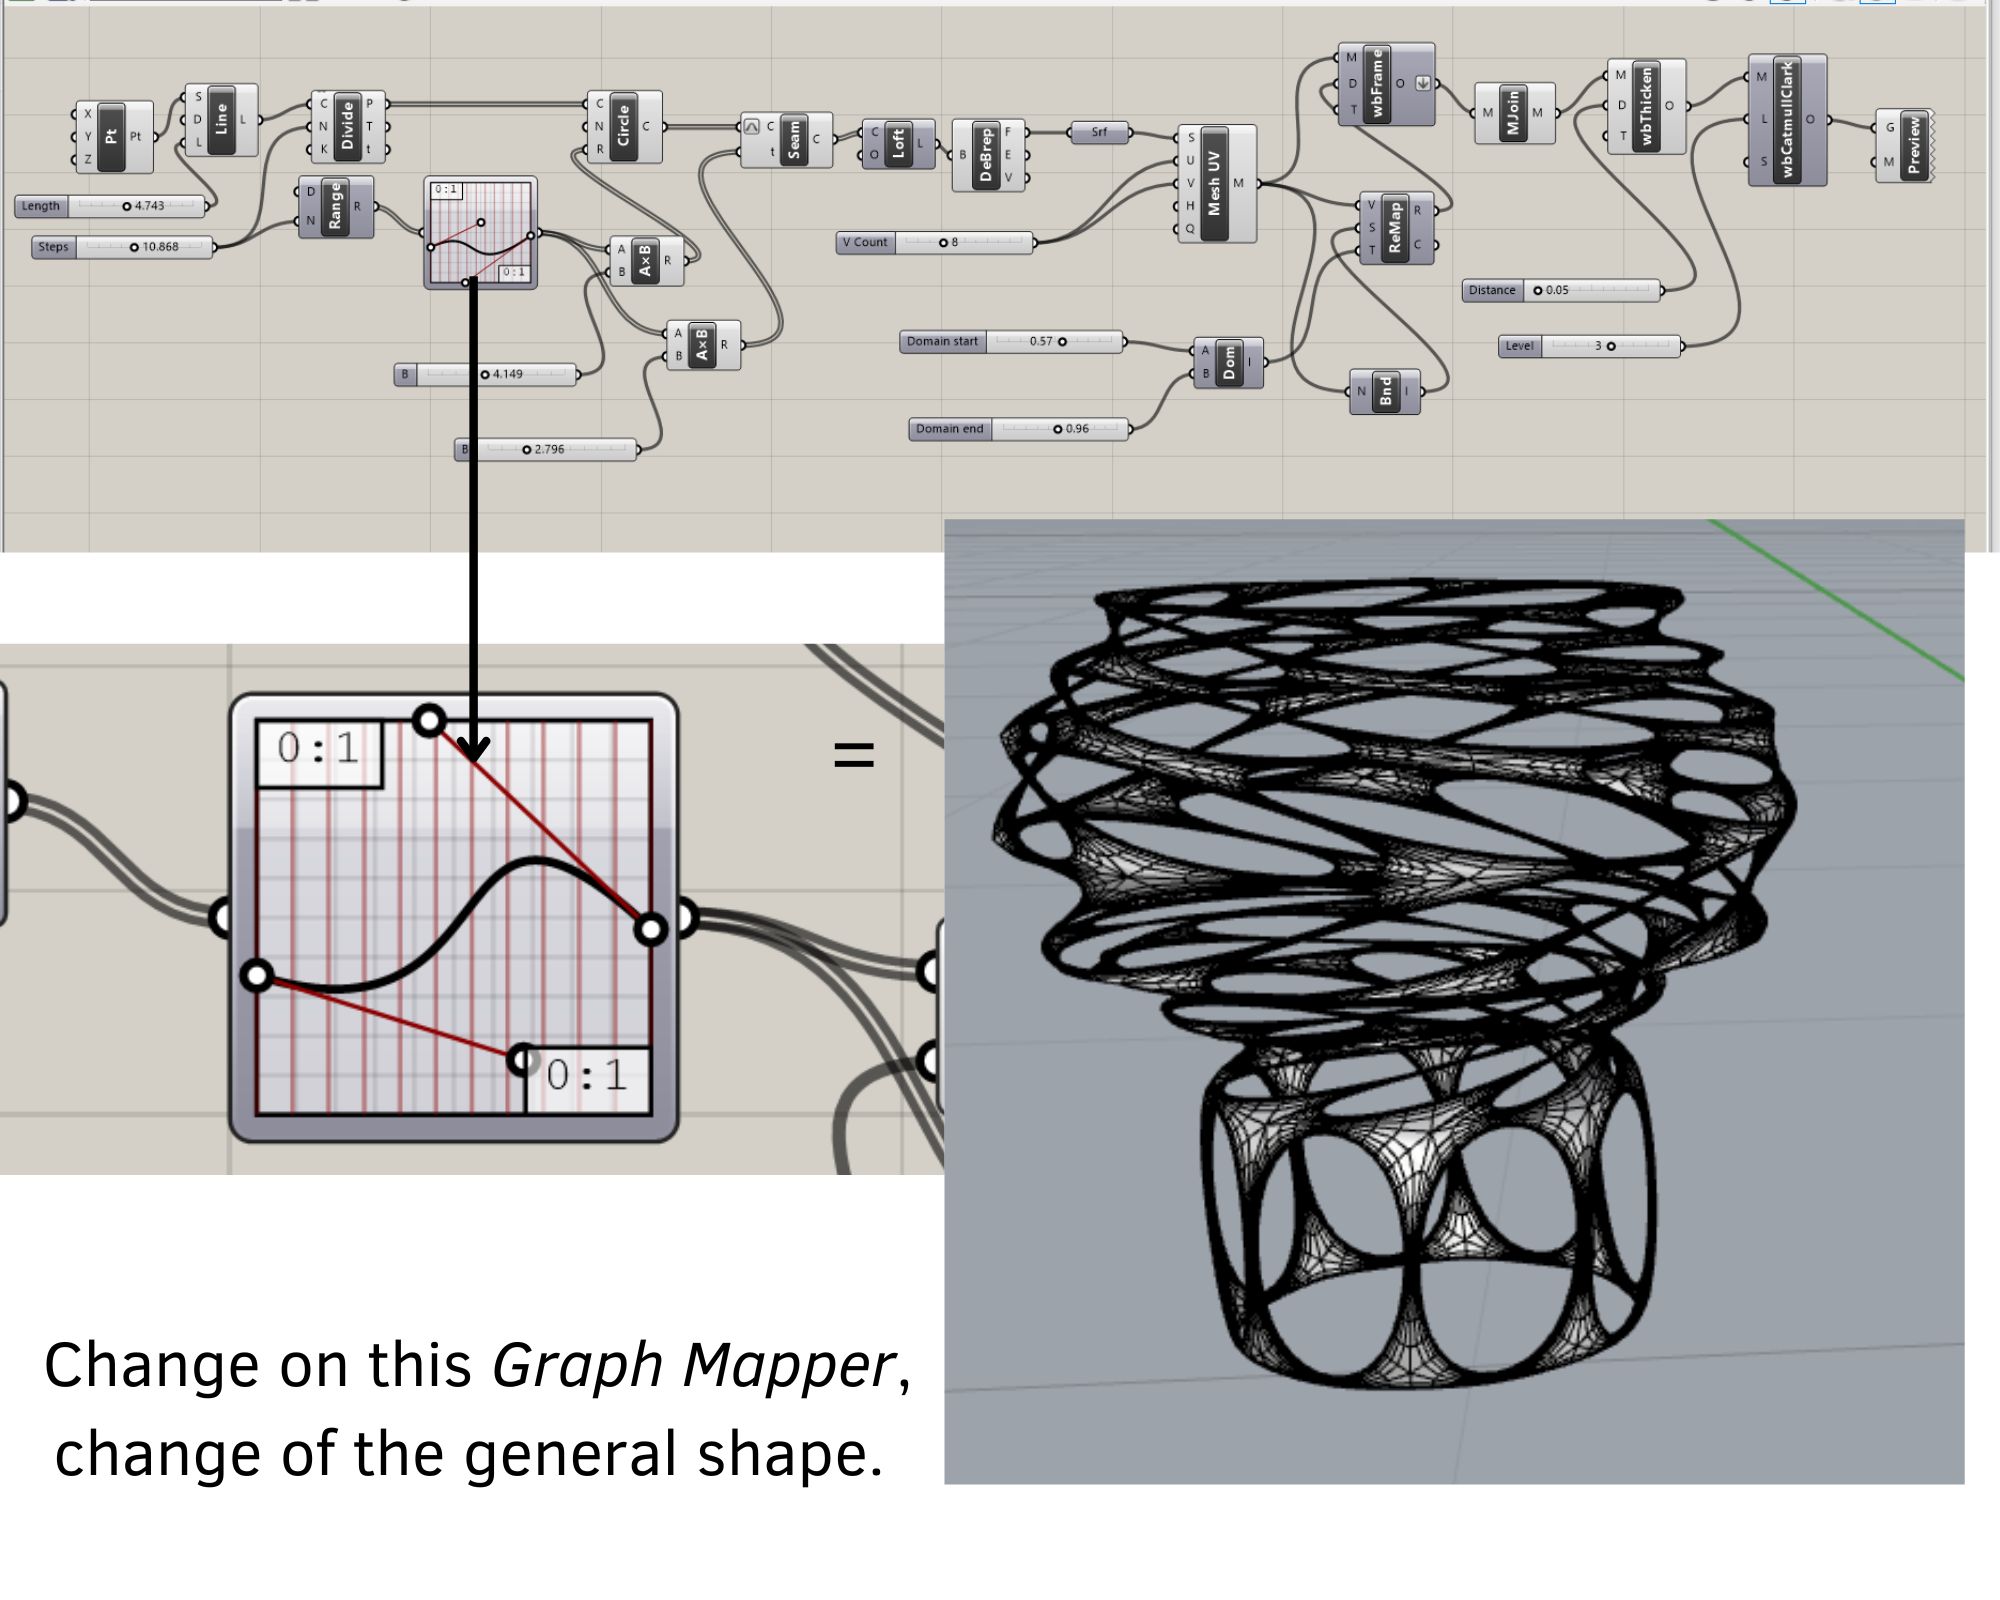
I realized an another more specific tuto on Voronoi :
Step 1 : Grasshopper + Rhino 3D
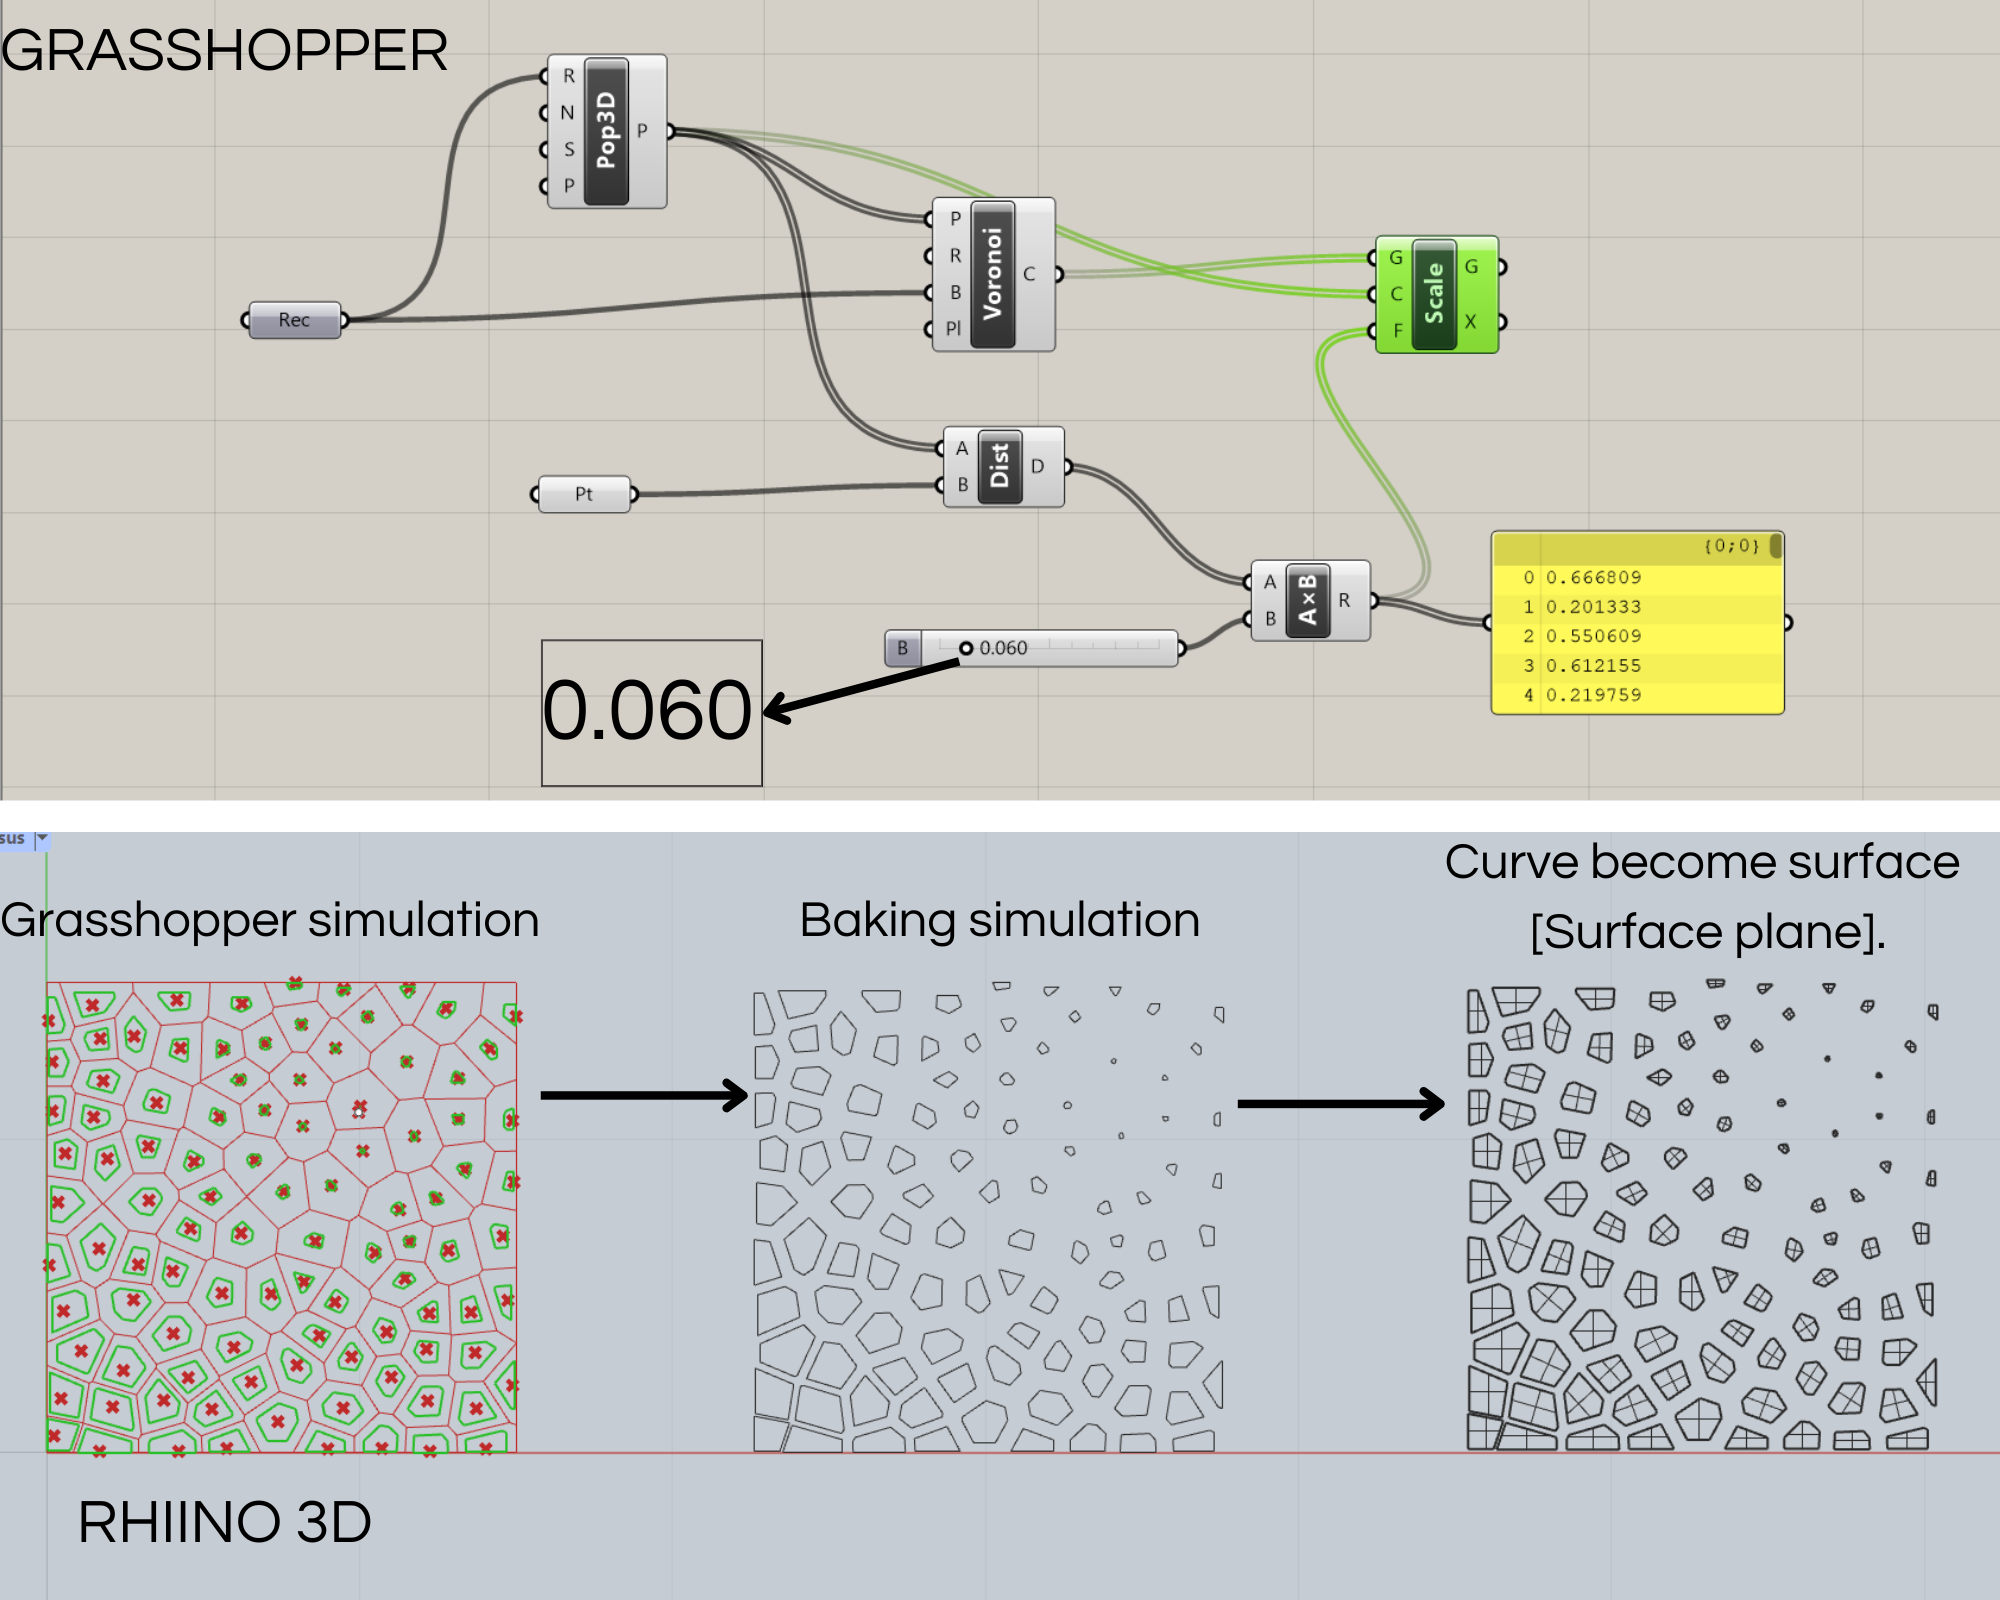
Step 2 : Validation of shape
Step 3 : I will chose a stretchy fabric, so I could try to see how the fabric reacts to the pattern. Everything is ready for 3D printing.
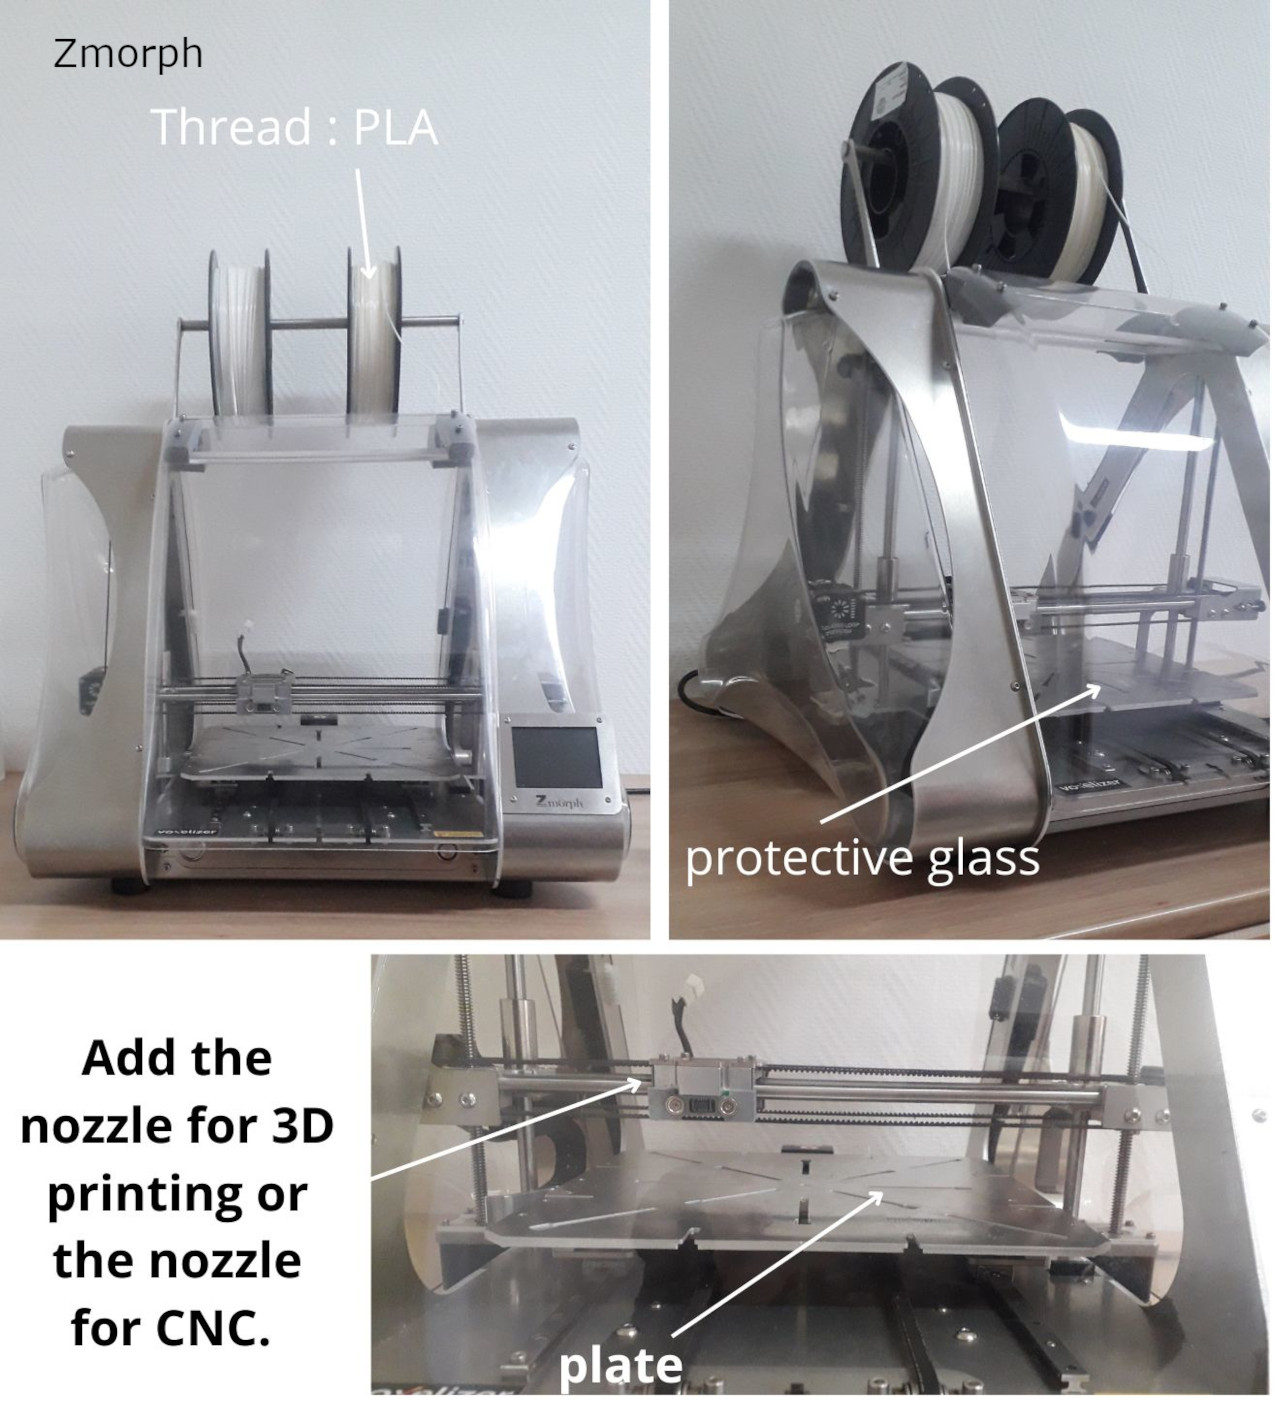
3D Printing
Some useful informations before you start :
- TPU (Tensor Processing Unit) : 1.75 (Thread flexible)
- PLA (PolyLactic Acid) : 2.85 (Thread rigid)
- Know the size of the plate in the fablab machine
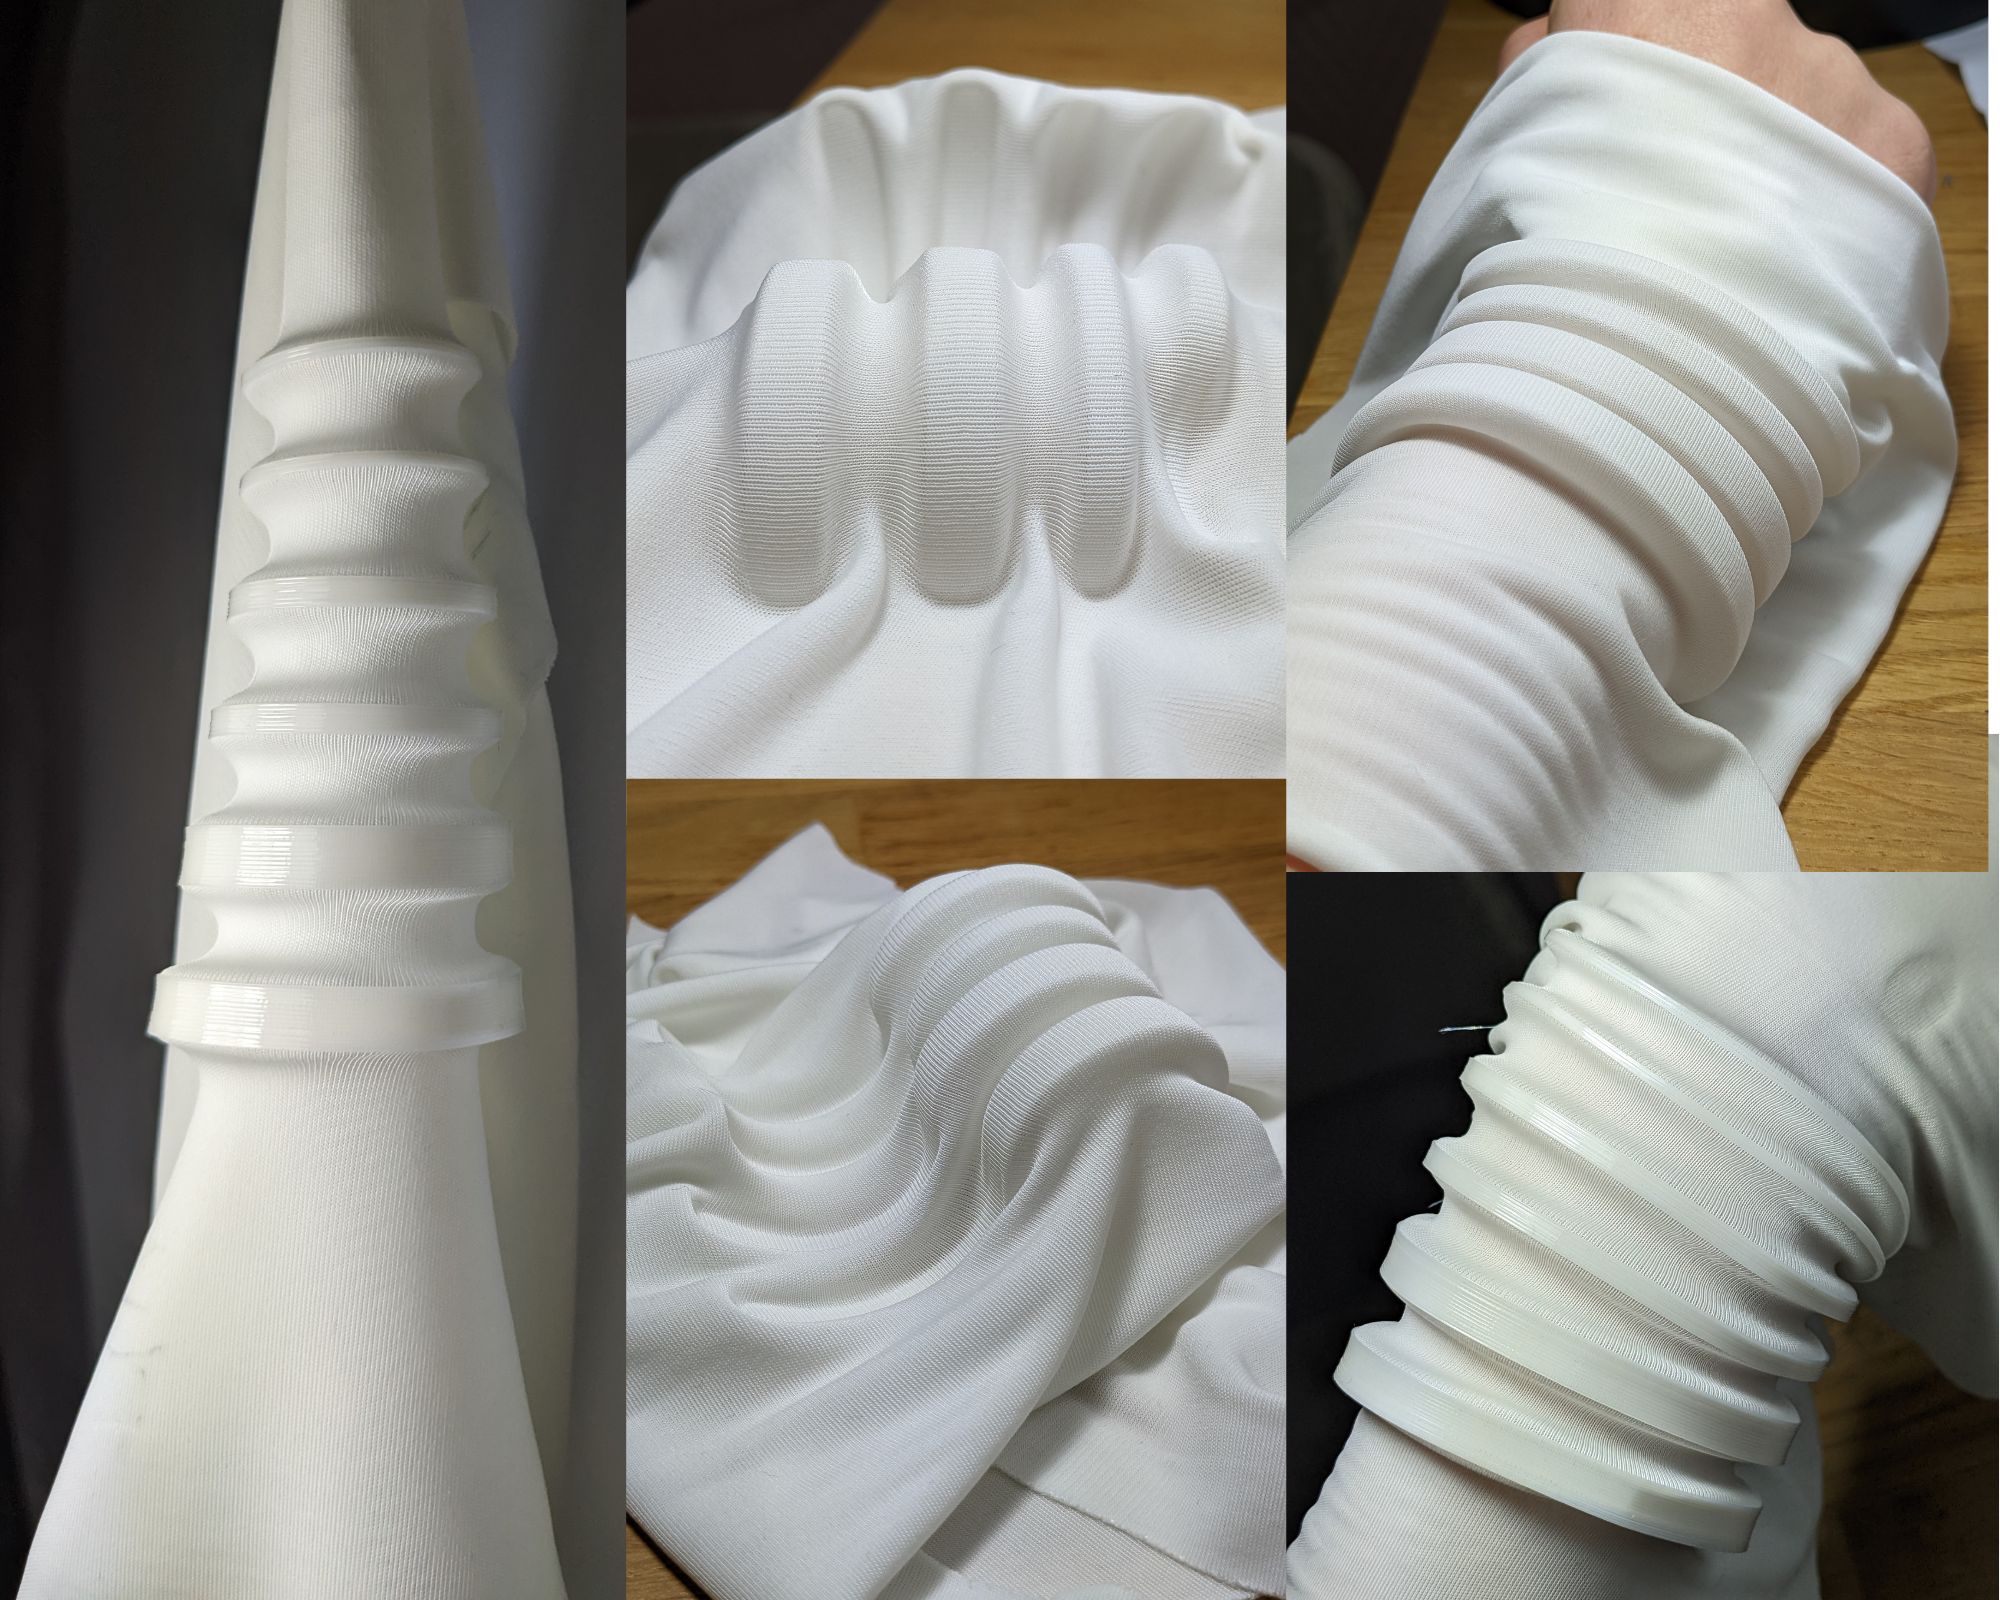
Some tests with Diane
Before considering a 3D printing project, I helped Diane run some tests on the machine. She made several lines of different thicknesses with the same spacing. The result is nice, as the lines cling to the fabric creating volume. It's pretty fragile though, one line came off during the photo shoot. This first view is impressive.
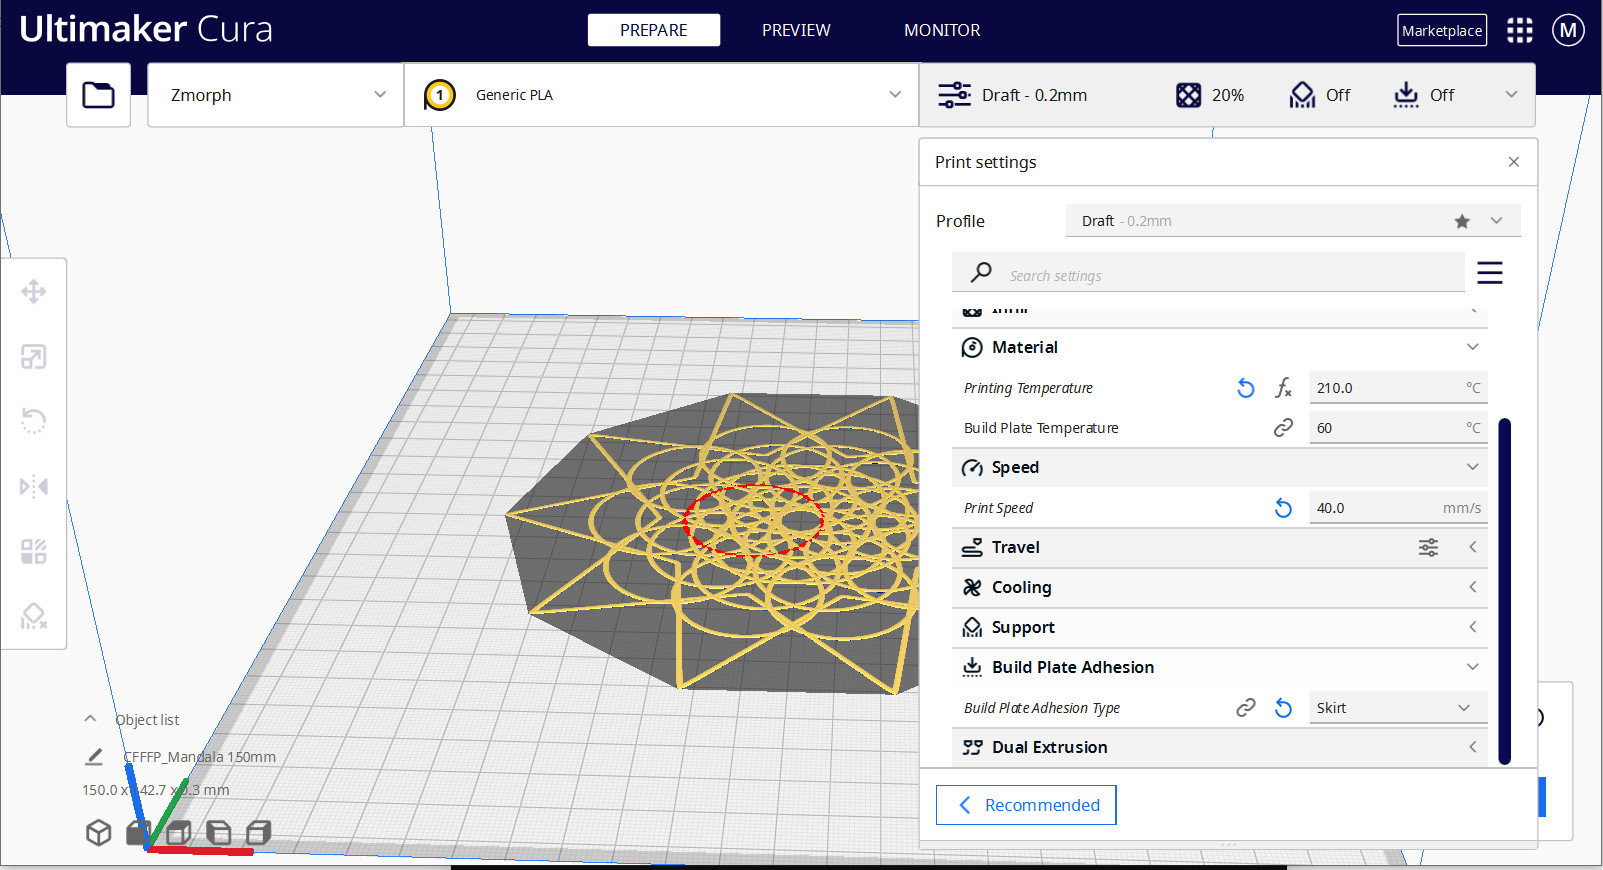
Ultimaker Cura
To prepare my document for printing, I had to run my design in a specific software, in this case Cura. The first thing I did was enter the parameters for the 3D printing machine. Each of these parameters is specific to the machine. Then after saving these settings, I opened my design: the mandala.
Next, I had to enter the specific parameters for my design. The images below show the parameters I chose to make my 3D print. Finally, I had to press the "slice" button on the bottom right to see the print time and watch the video simulating the printing of the design. The estimate was 13 minutes.
Mandala in progress
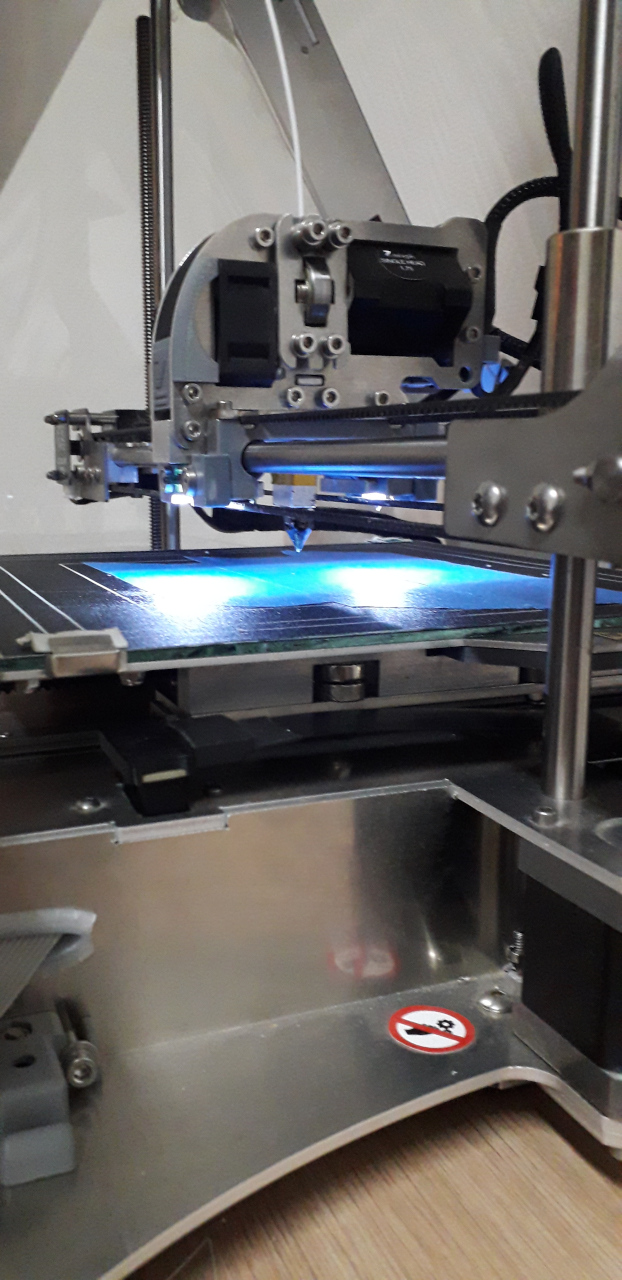
Before starting the printer, it is very important to calibrate it. It can be automatic, done by the machine directly, or manual. Here, Diane has started an automatic calibration of the nozzle height according to the plate. There is a height sensor located on the side of the machine with an indicator light. After the machine adjusts to the height, 5 lines are produced to test the fusion of the PLA wire.
During the test, the PLA threads melted well but did not cling to the plate. So Diane changed the calibration manually. She decreased the distance between the nozzle and the plate by lowering the nozzle.
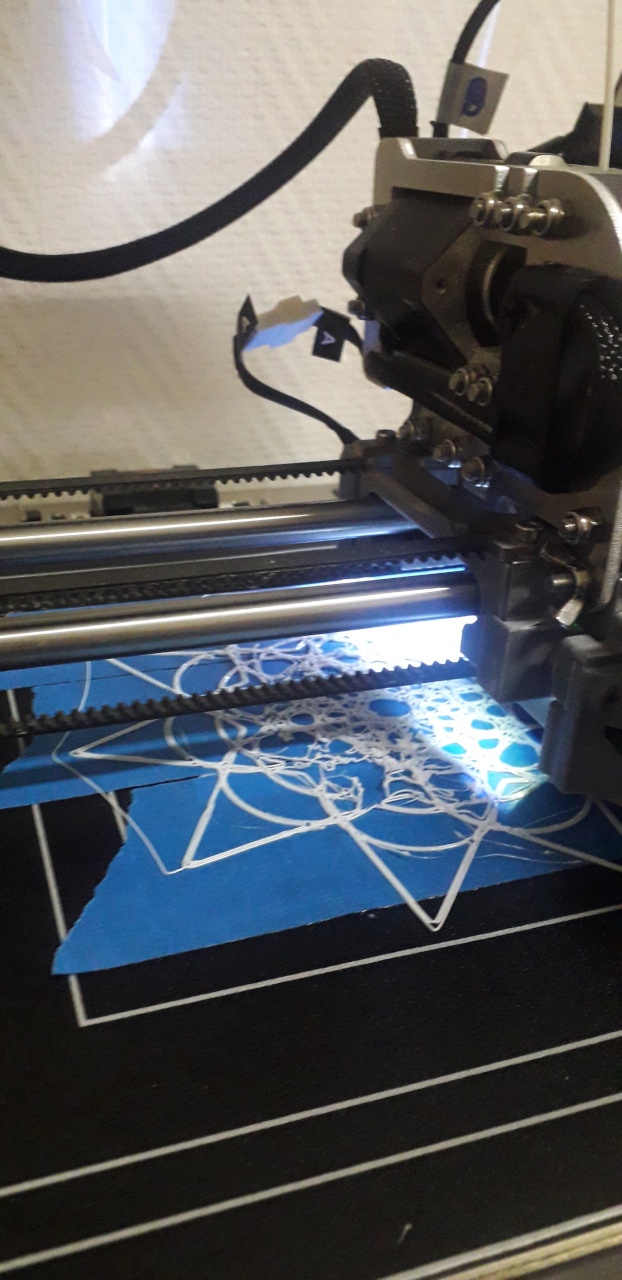
Mandala's Result
Finally, the printing took 31 minutes and 6 seconds. It took 60.56 cm of stiff PLA wire to make this mandala. It was a single layer (0.2 cm), but the design contained many curves, line after line. It contained 31 meshes in all. Before printing, I should have simplified my mesh and avoided printing the same line twice.
The mandala has a diameter of 15 cm. This measurement was chosen according to the tray of the 3D printer.
 If, like me, you need to reduce the size of your pattern you should use the scale command.
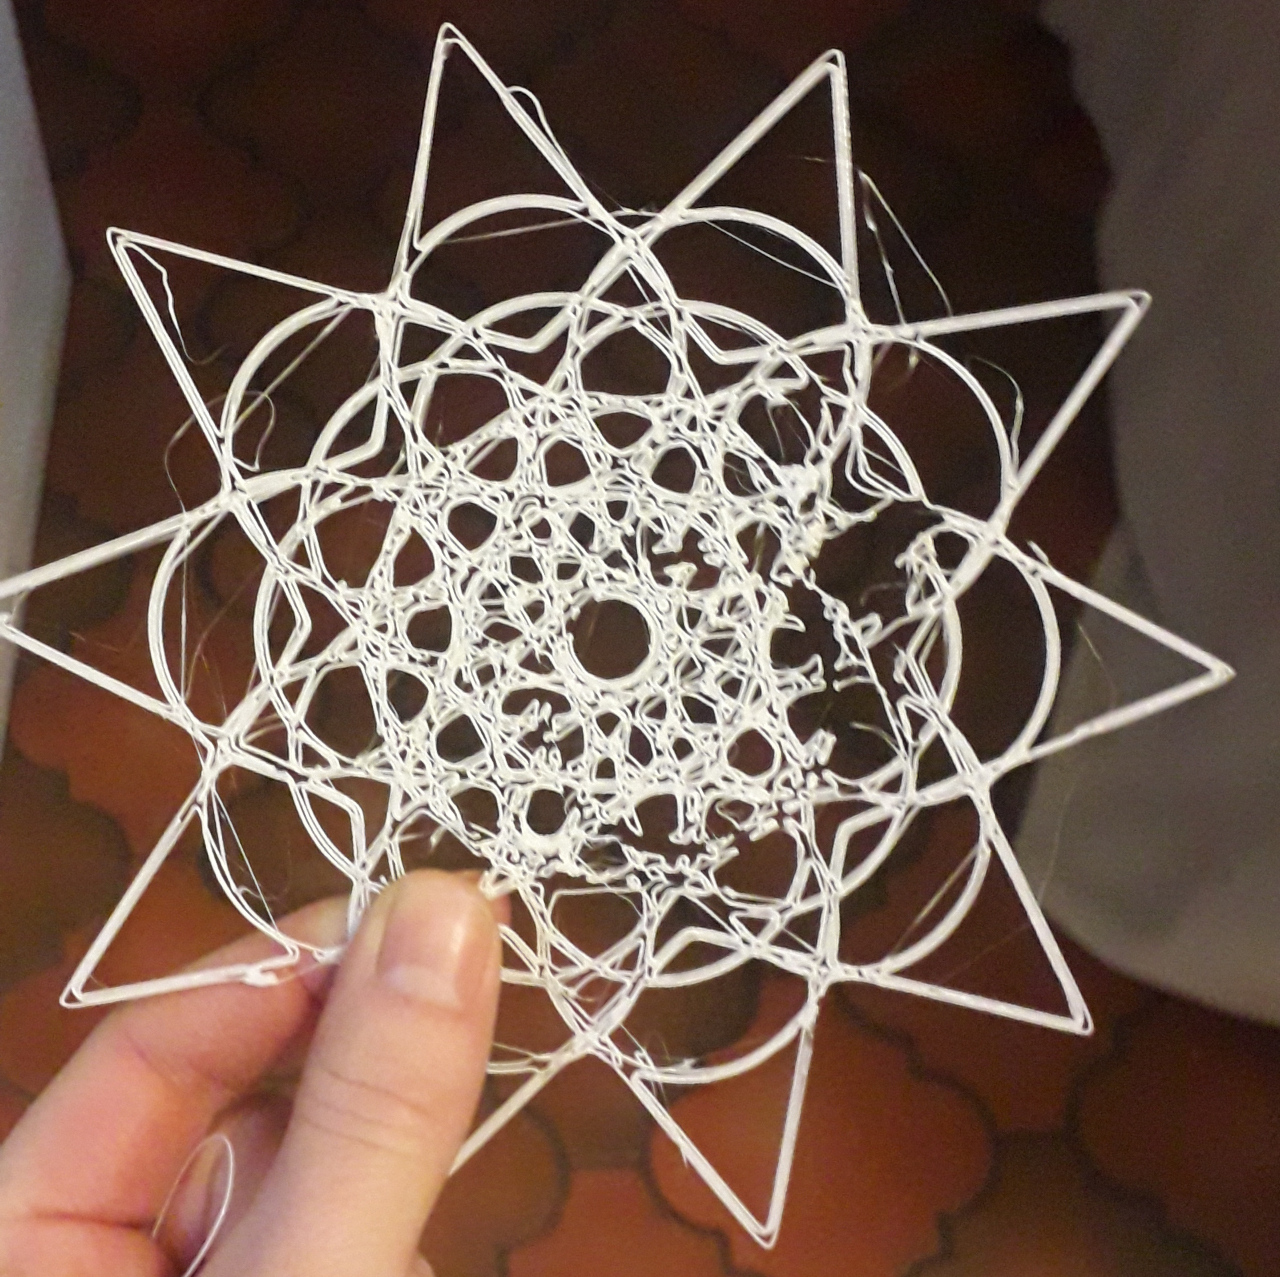
Part of the pattern didn't stick to the tray, which formed a bunch of threads. But for a first attempt, I think it's a success. To get a better result, I would have to rework my pattern on rhino.