2. Digital bodies
The topic of the week is the representation of the body and its 3D volume.
Key takeaways from Tuesday's class
The class we had on Tuesday opened the field to reflections around the body. The numerous works that Anastasia Pistofidou showed us, offer a wide range of body representation's forms, whether it is fixed or in movement.
Each historical period has developed an image of the body in connection with their social, political and technical contexts: whether it is the Greeks with their Kouros (rigid, stone, monumental), the expressive bodies in the nineteenth century caricatur, or our current representation of a thin body, a slender neutral.
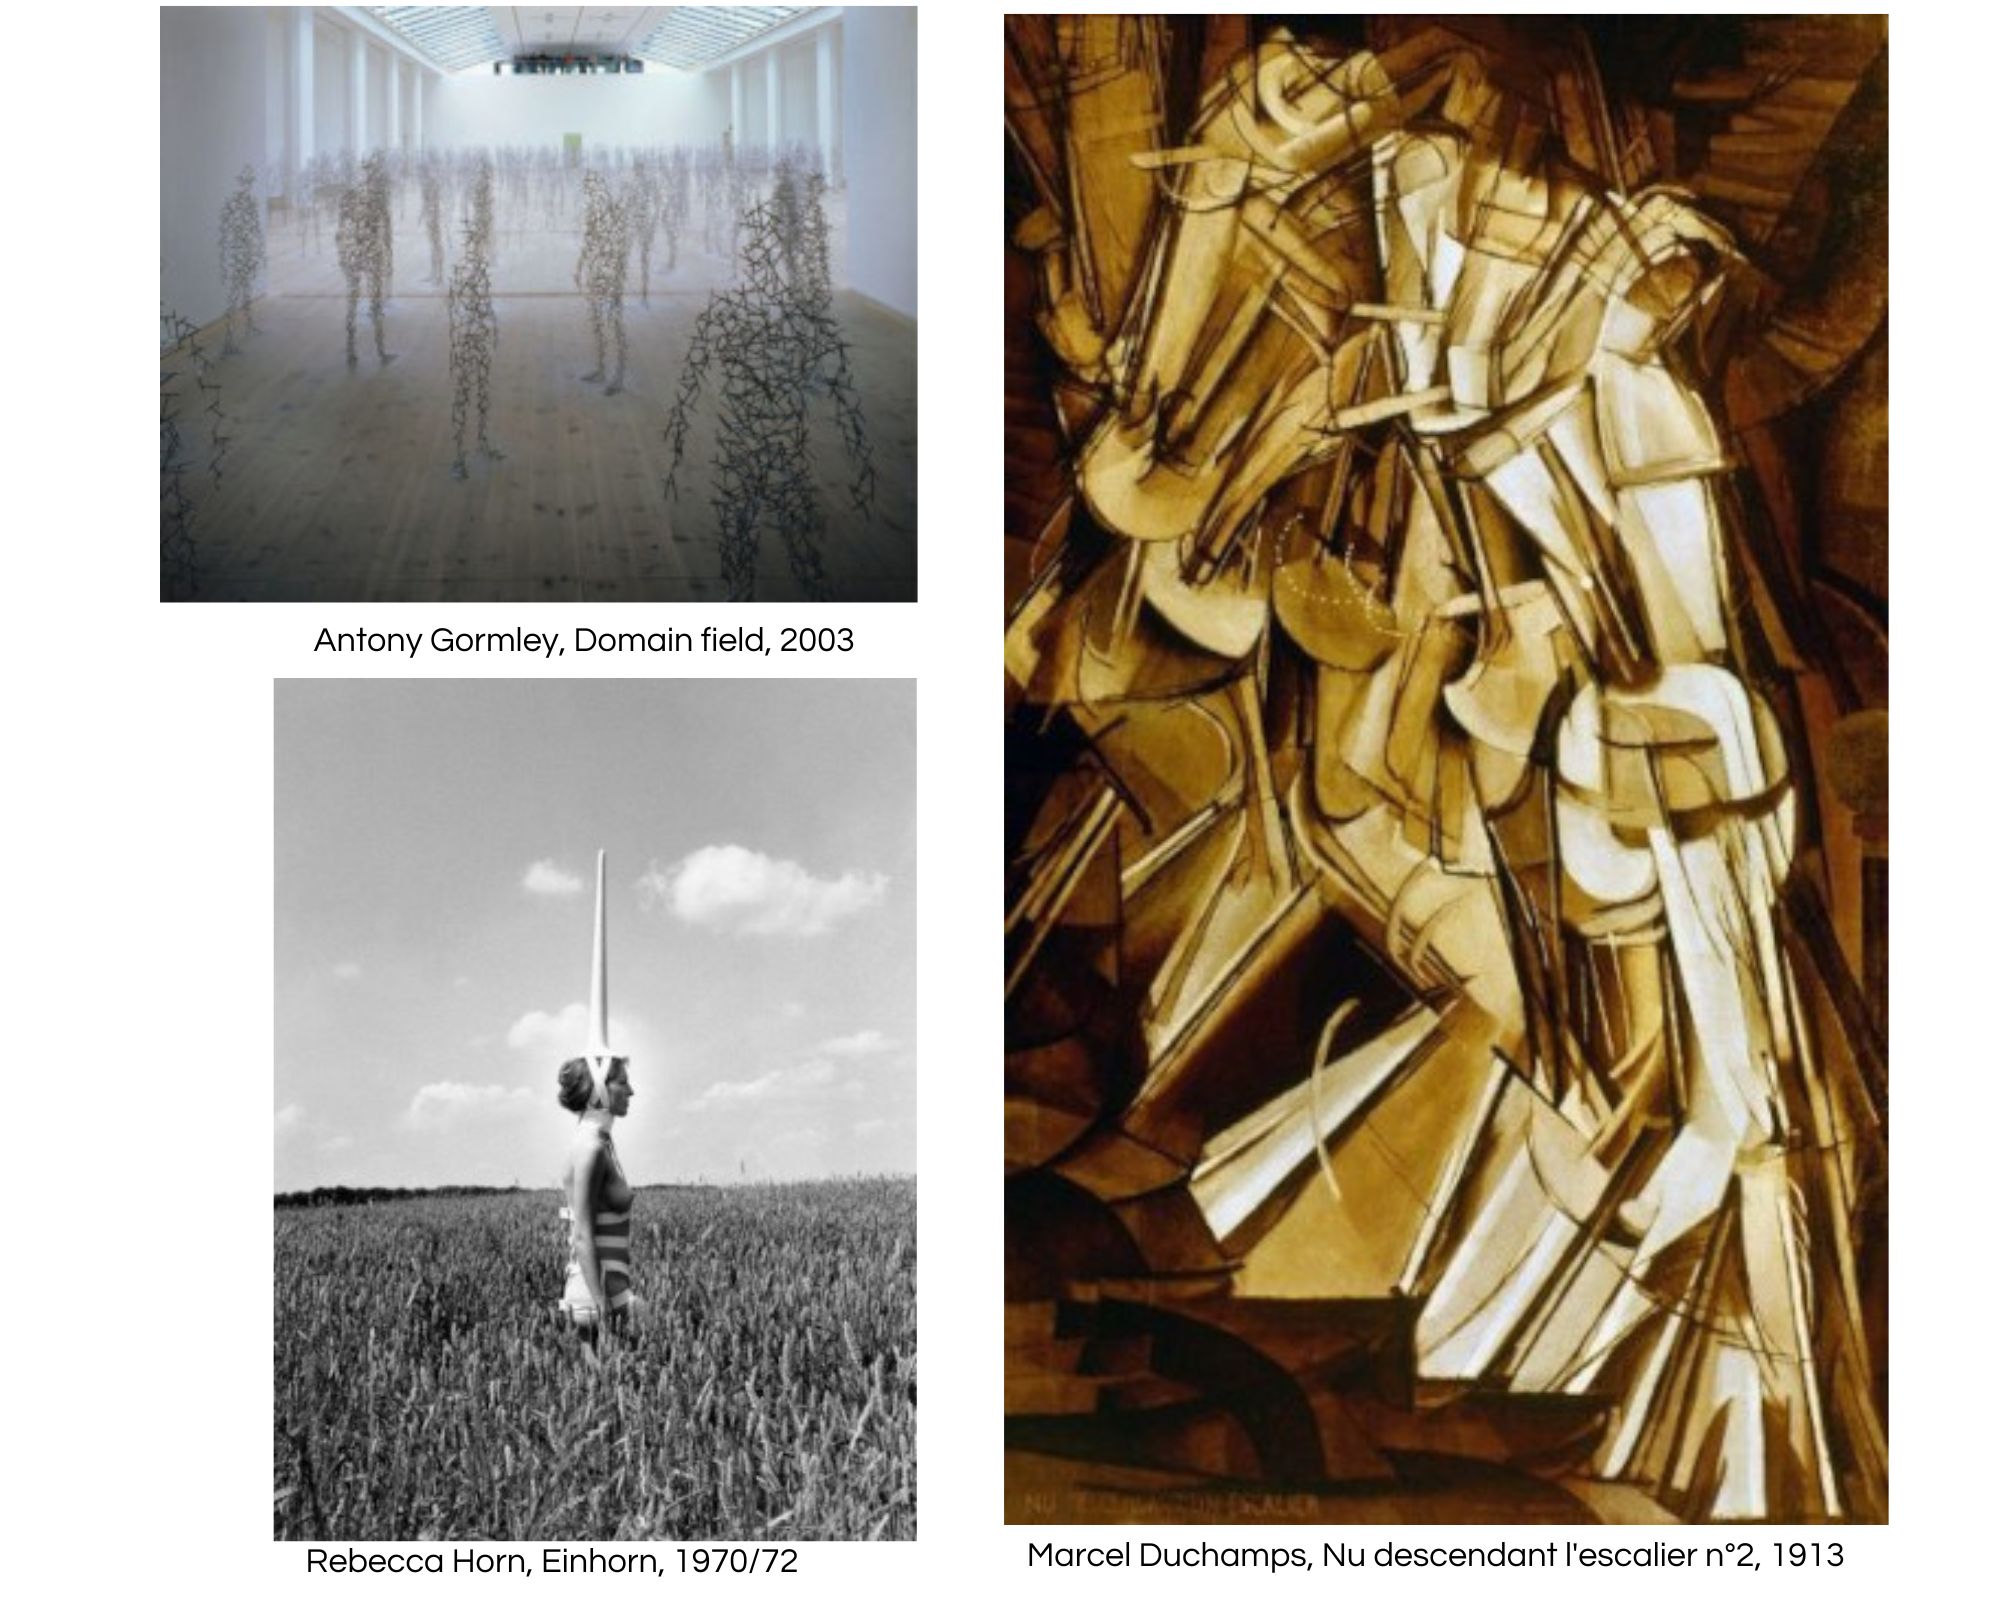
Inside the representation of the body is the question of our relationship to the body and to our own body. How from our eye we look at a body and which line we wish to emphasize. Here, I refer to the works of Antony Gormley that were shown to us. His works touch me because he succeeds to highlight a facet of a human using only a standard body shape and a single material. For example, his 2003 installation Domain field at Newcastel exposes bodies that sting.
Moreover, in the question of the representation of the body, the question of 2D, 3D or 4D arises. The artistic movement Cubism explored the representation of a body in 2D, as the very famous work of Marcel Duchamps, Nude descending the stairs No. 2 of 1913. This representation was a scandal at the time of its exhibition, because it is far from the canons of beauty imposed in the fine arts. This visual exploration that the artist offers us exposes the idea that the body can be represented in different ways. In this work, I find that the body is in motion, which highlights the mechanical function of the human body and points to the decomposition of both the movement and the decomposition of body parts.
Afterwards, we moved on to the question of body extensions and prosthetics: adding an element either for lack of or to enlarge the body. Rebecca's performances perfectly illustrate the principle of extension of the body in space. Her body extensions make it clear that the material body is not alone. There are many things that gravitate in and around it. It is this idea that I wish to explore this week.
In the rest of the course, a lot of digital body's software was exposed to us. All the tools presented will allow us to develop a body representation form and to produce a 3D mannequin.
Brainstorming
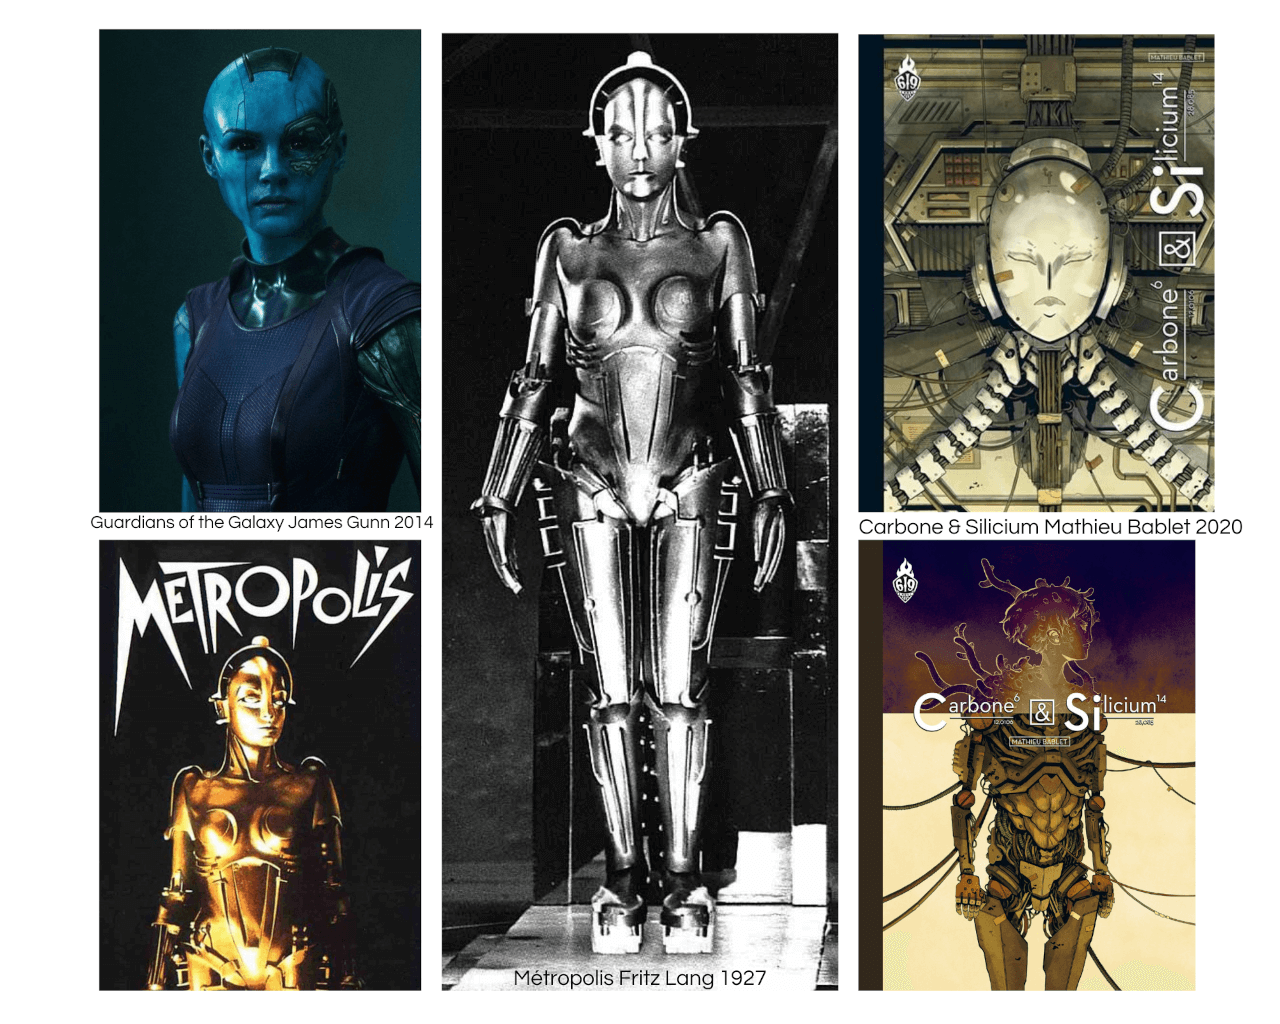
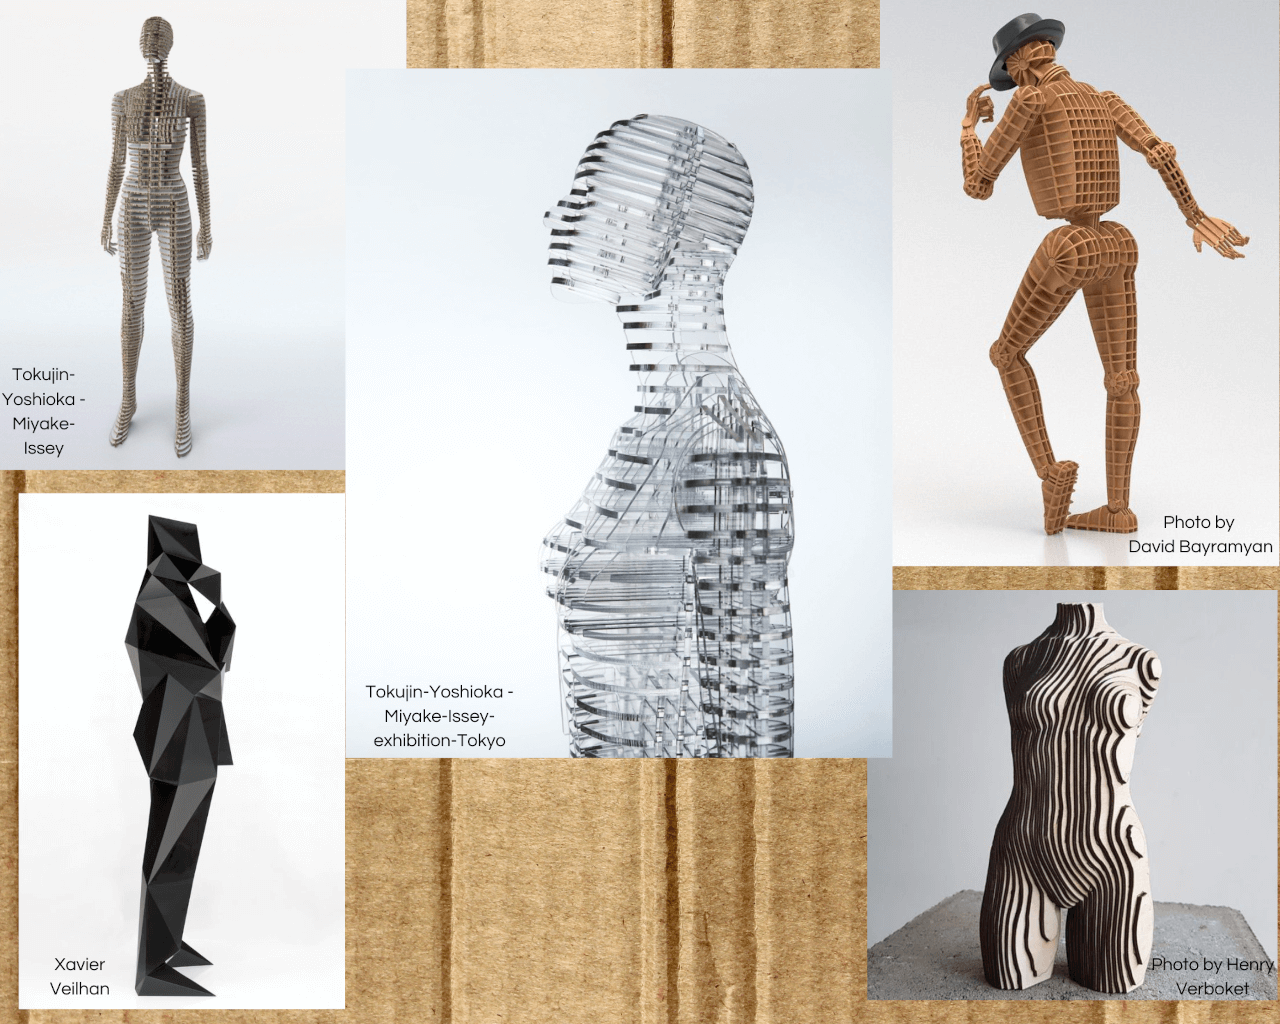
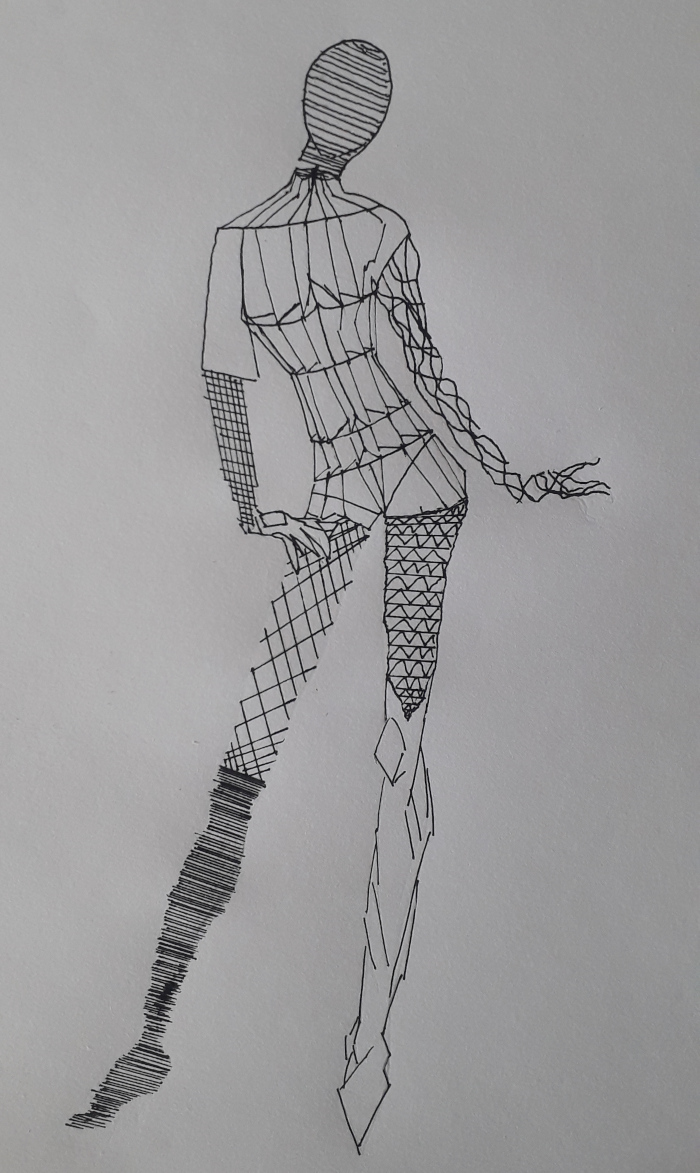
These two plates illustrate my research. I first looked for 3D models made from a laser cut. Then, I chose one of my inspirations: the robot. I find that the body as proposed by Slicer refers to the image of the robot. At the end of this week, I will have produced a cardboard body. My idea will be to exploit the different cutting techniques and assemble them into a body. The final result will be close to the prosthesis. This body in piece could be animated in a distant future.

Discovery of Makehuman and moment of distraction
3D Scan Test
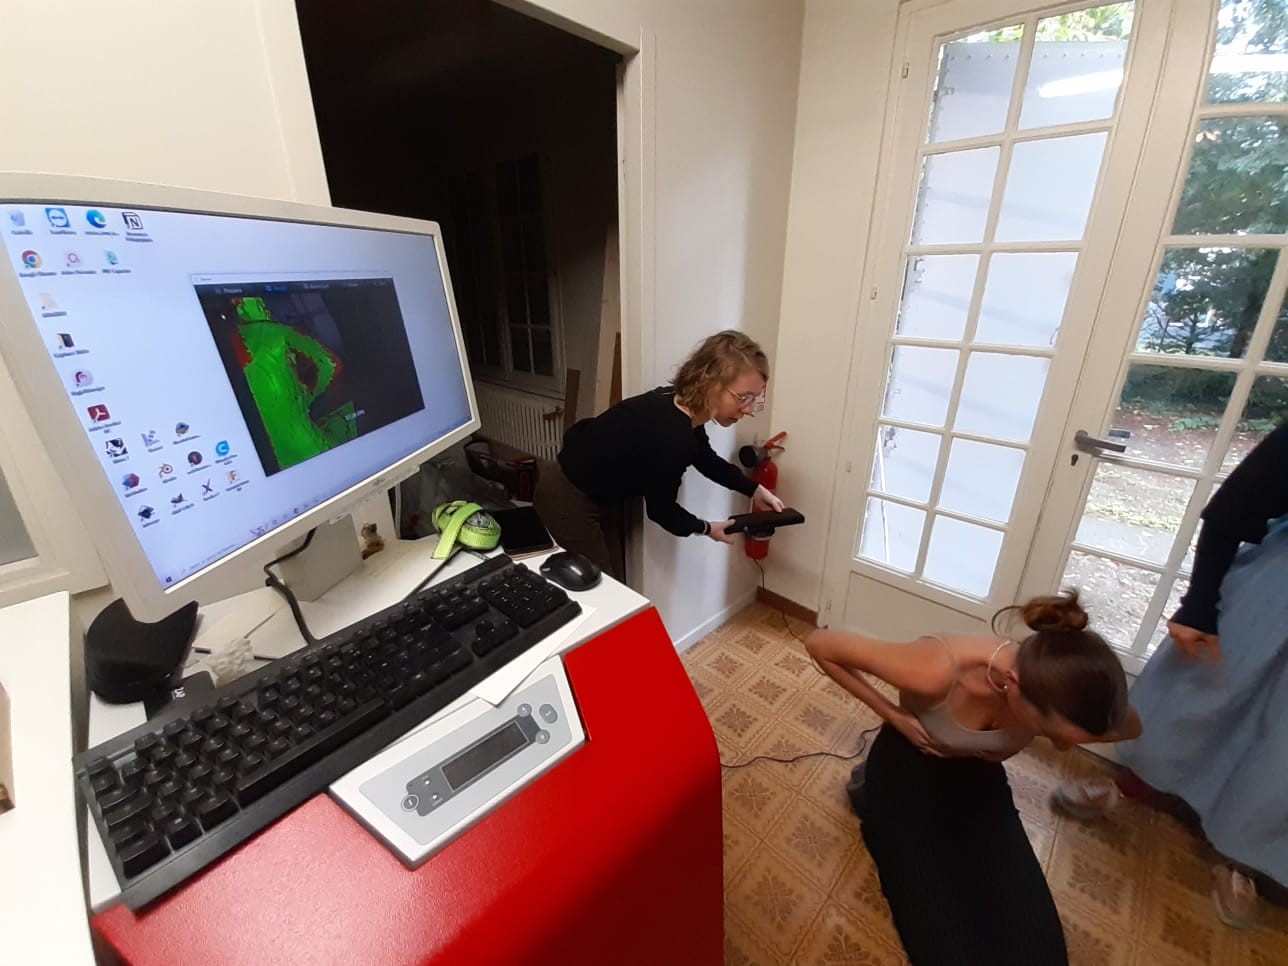
To start this week, we tried to scan ourselves in 3D with a kinect. The exercise was quite fun. We had to scan very slowly so that the software could record the volume in 3D. On the picture below, I am scanning Tess, classmate, with the camera. On the screen we can see that what is in green is recorded and what is in red is not recognized by the machine. The result of this recording was clean except that a piece of arm was missing.This project was born, you can see it here.
Project of a robotized body or cut in limbs
Target
Step 1 : Validation of the shape
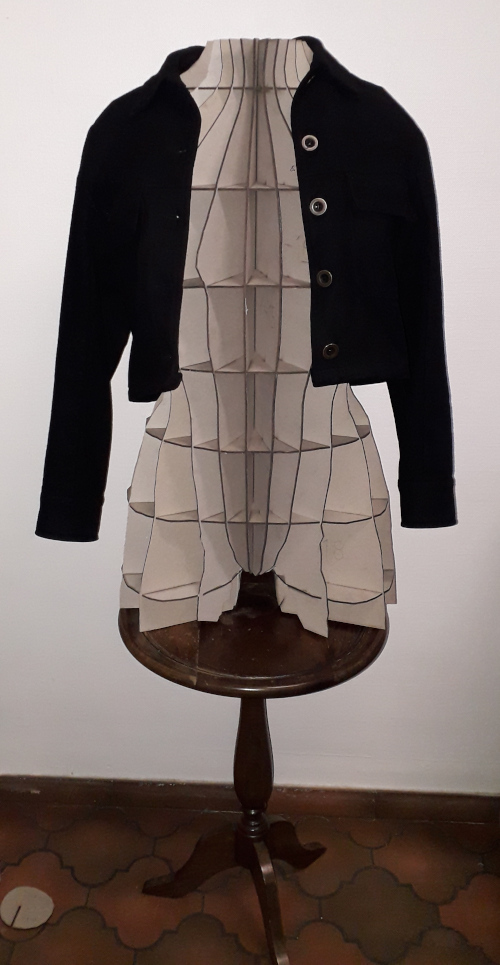
I won't have time this week to scan my own body and make it usable. I will scan my head later and 3D print it. I will be able to have a state-of-the-art self-portrait of myself. Also, I won't have the time to build a complete cardboard mannequin. So I chose to create only the bust for this week. I would like to use this bust as a support for my next projects. In January, I will try to build my robot.
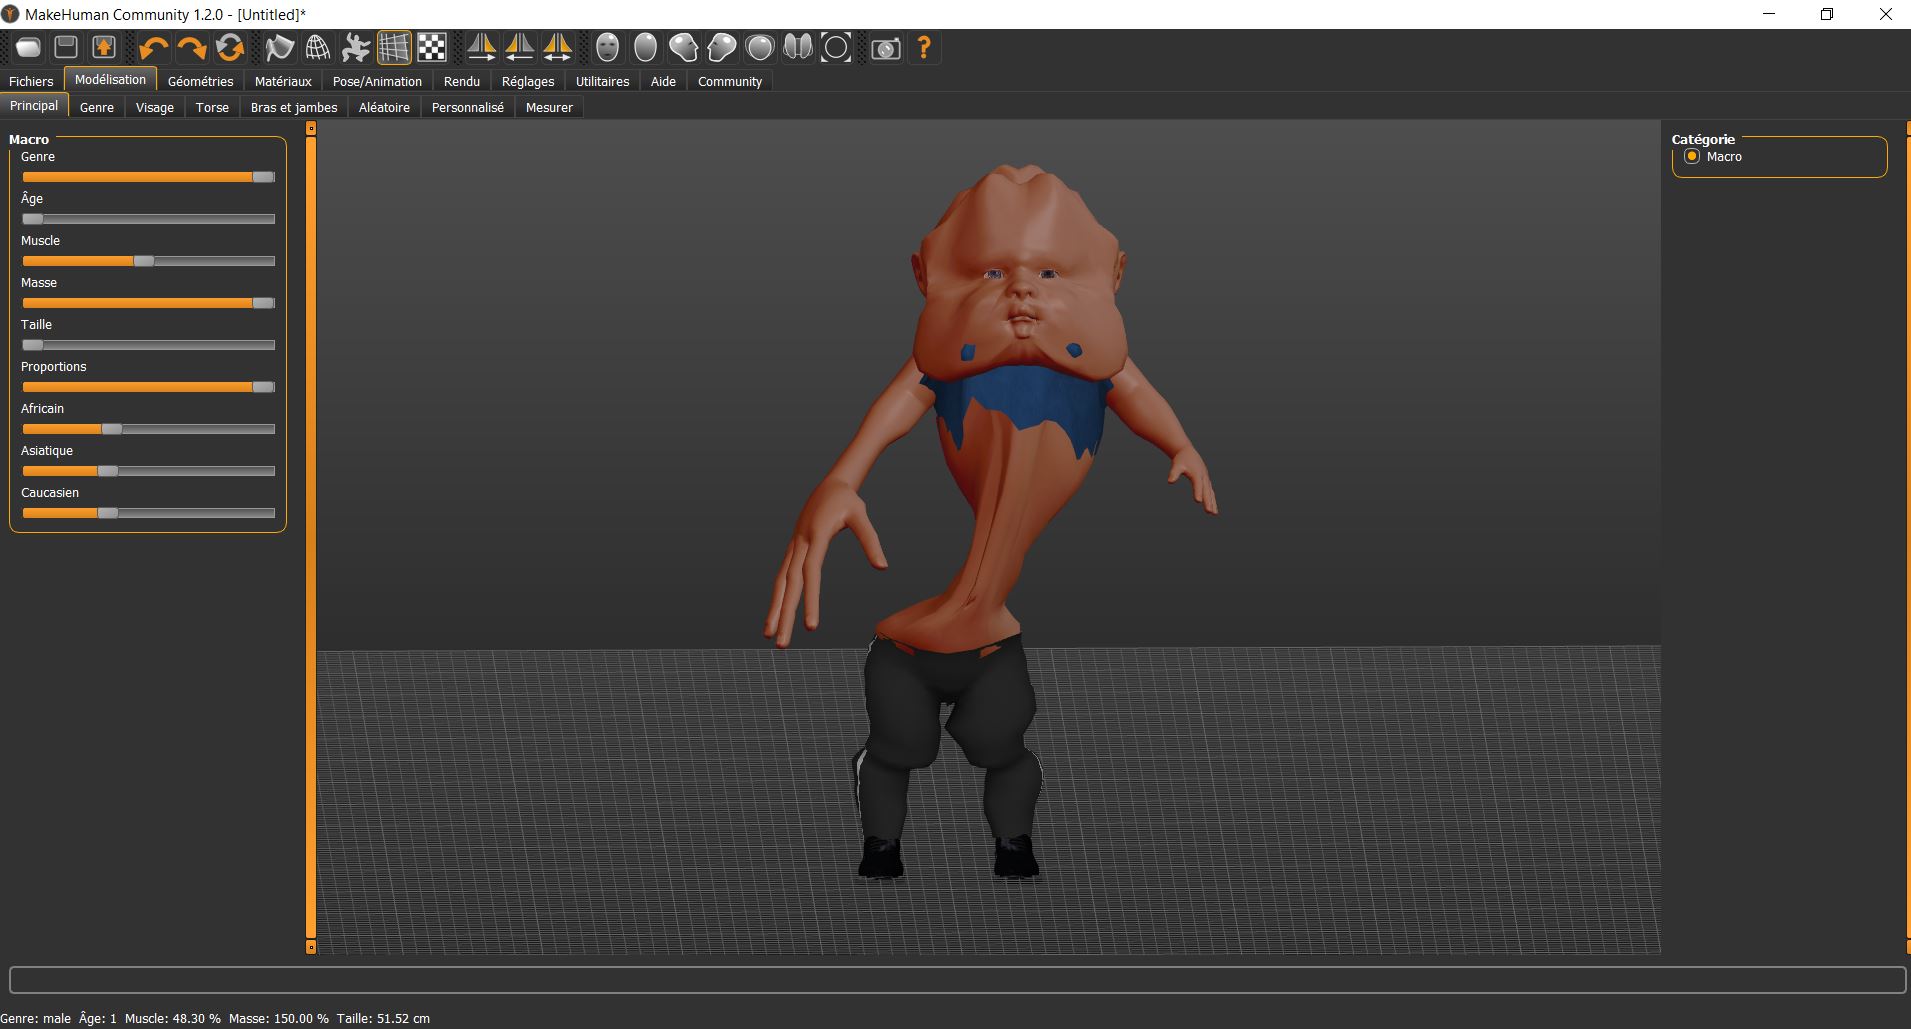
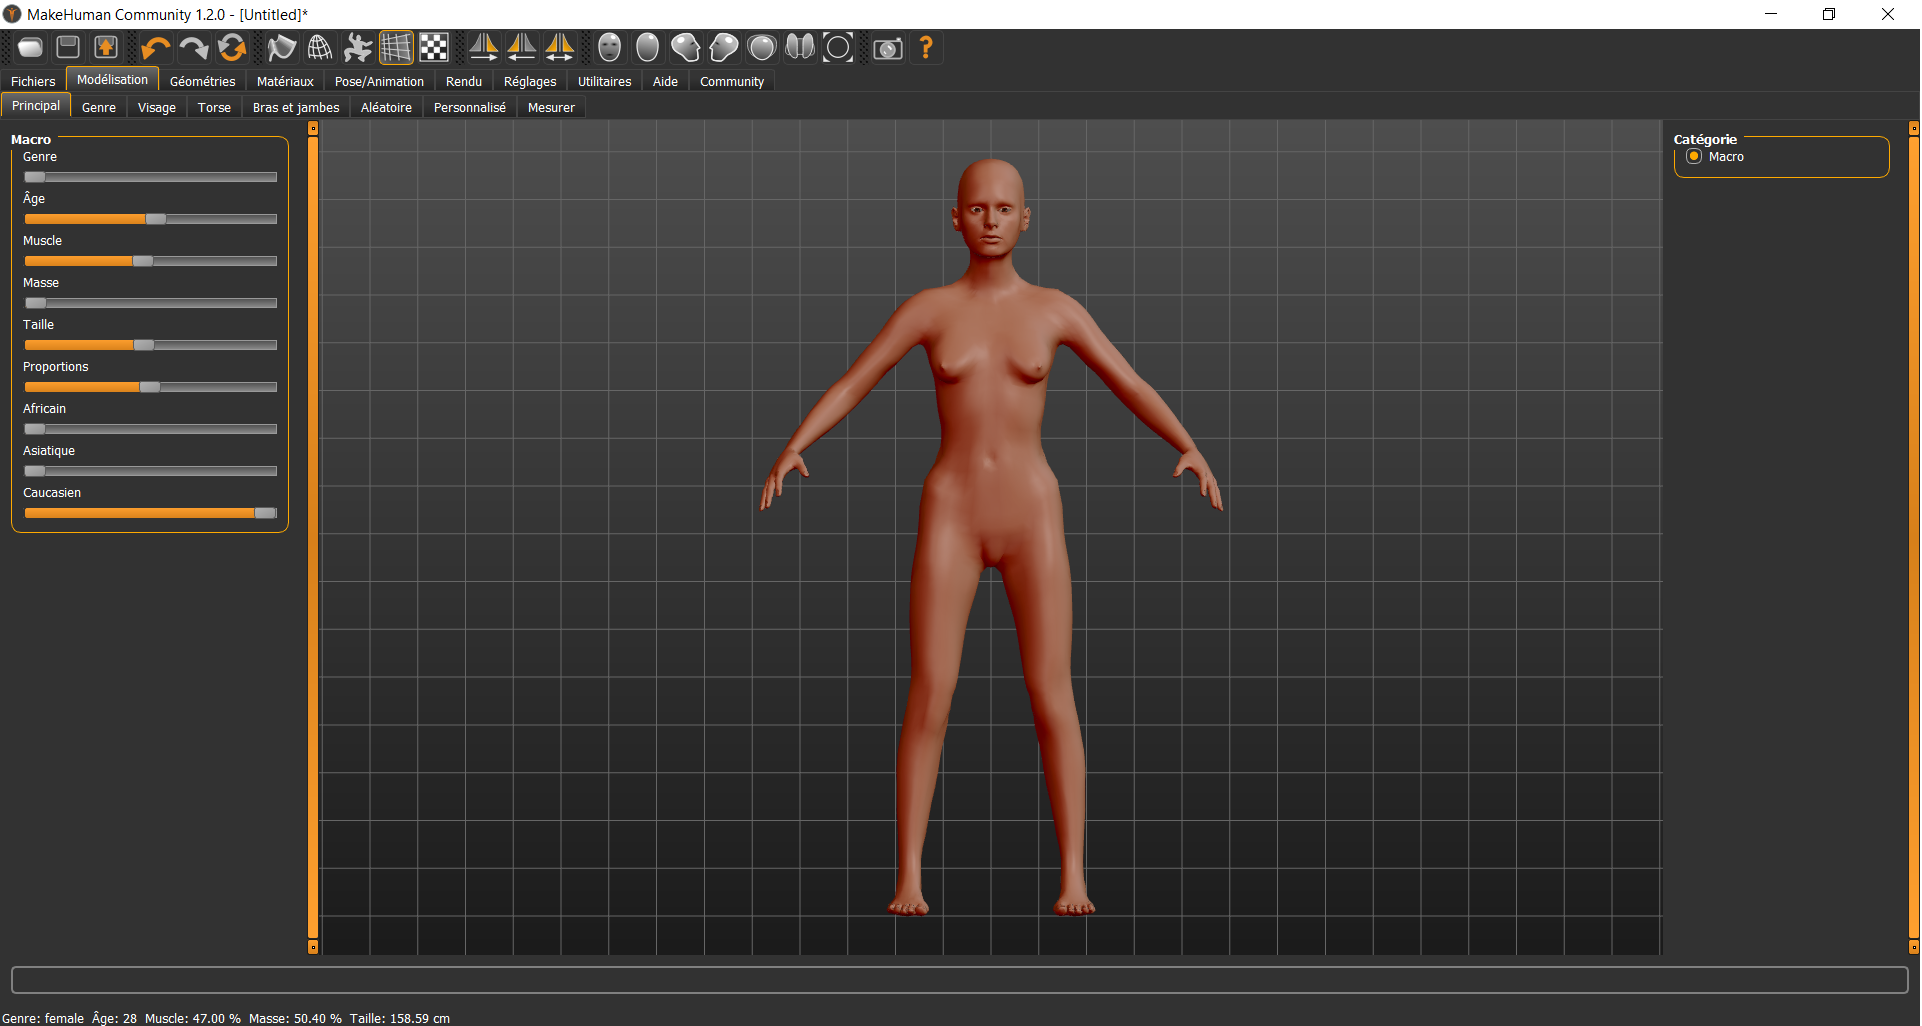
Step 2 : MakeHuman
It did not take us long to use this software. It is easy to use and very fun. I created slightly deformed characters to understand all the features of this software. I ended up creating a female model of my size. This mannequin will be used as a base for my creation.
Step 3 : Rhinocéros 3D
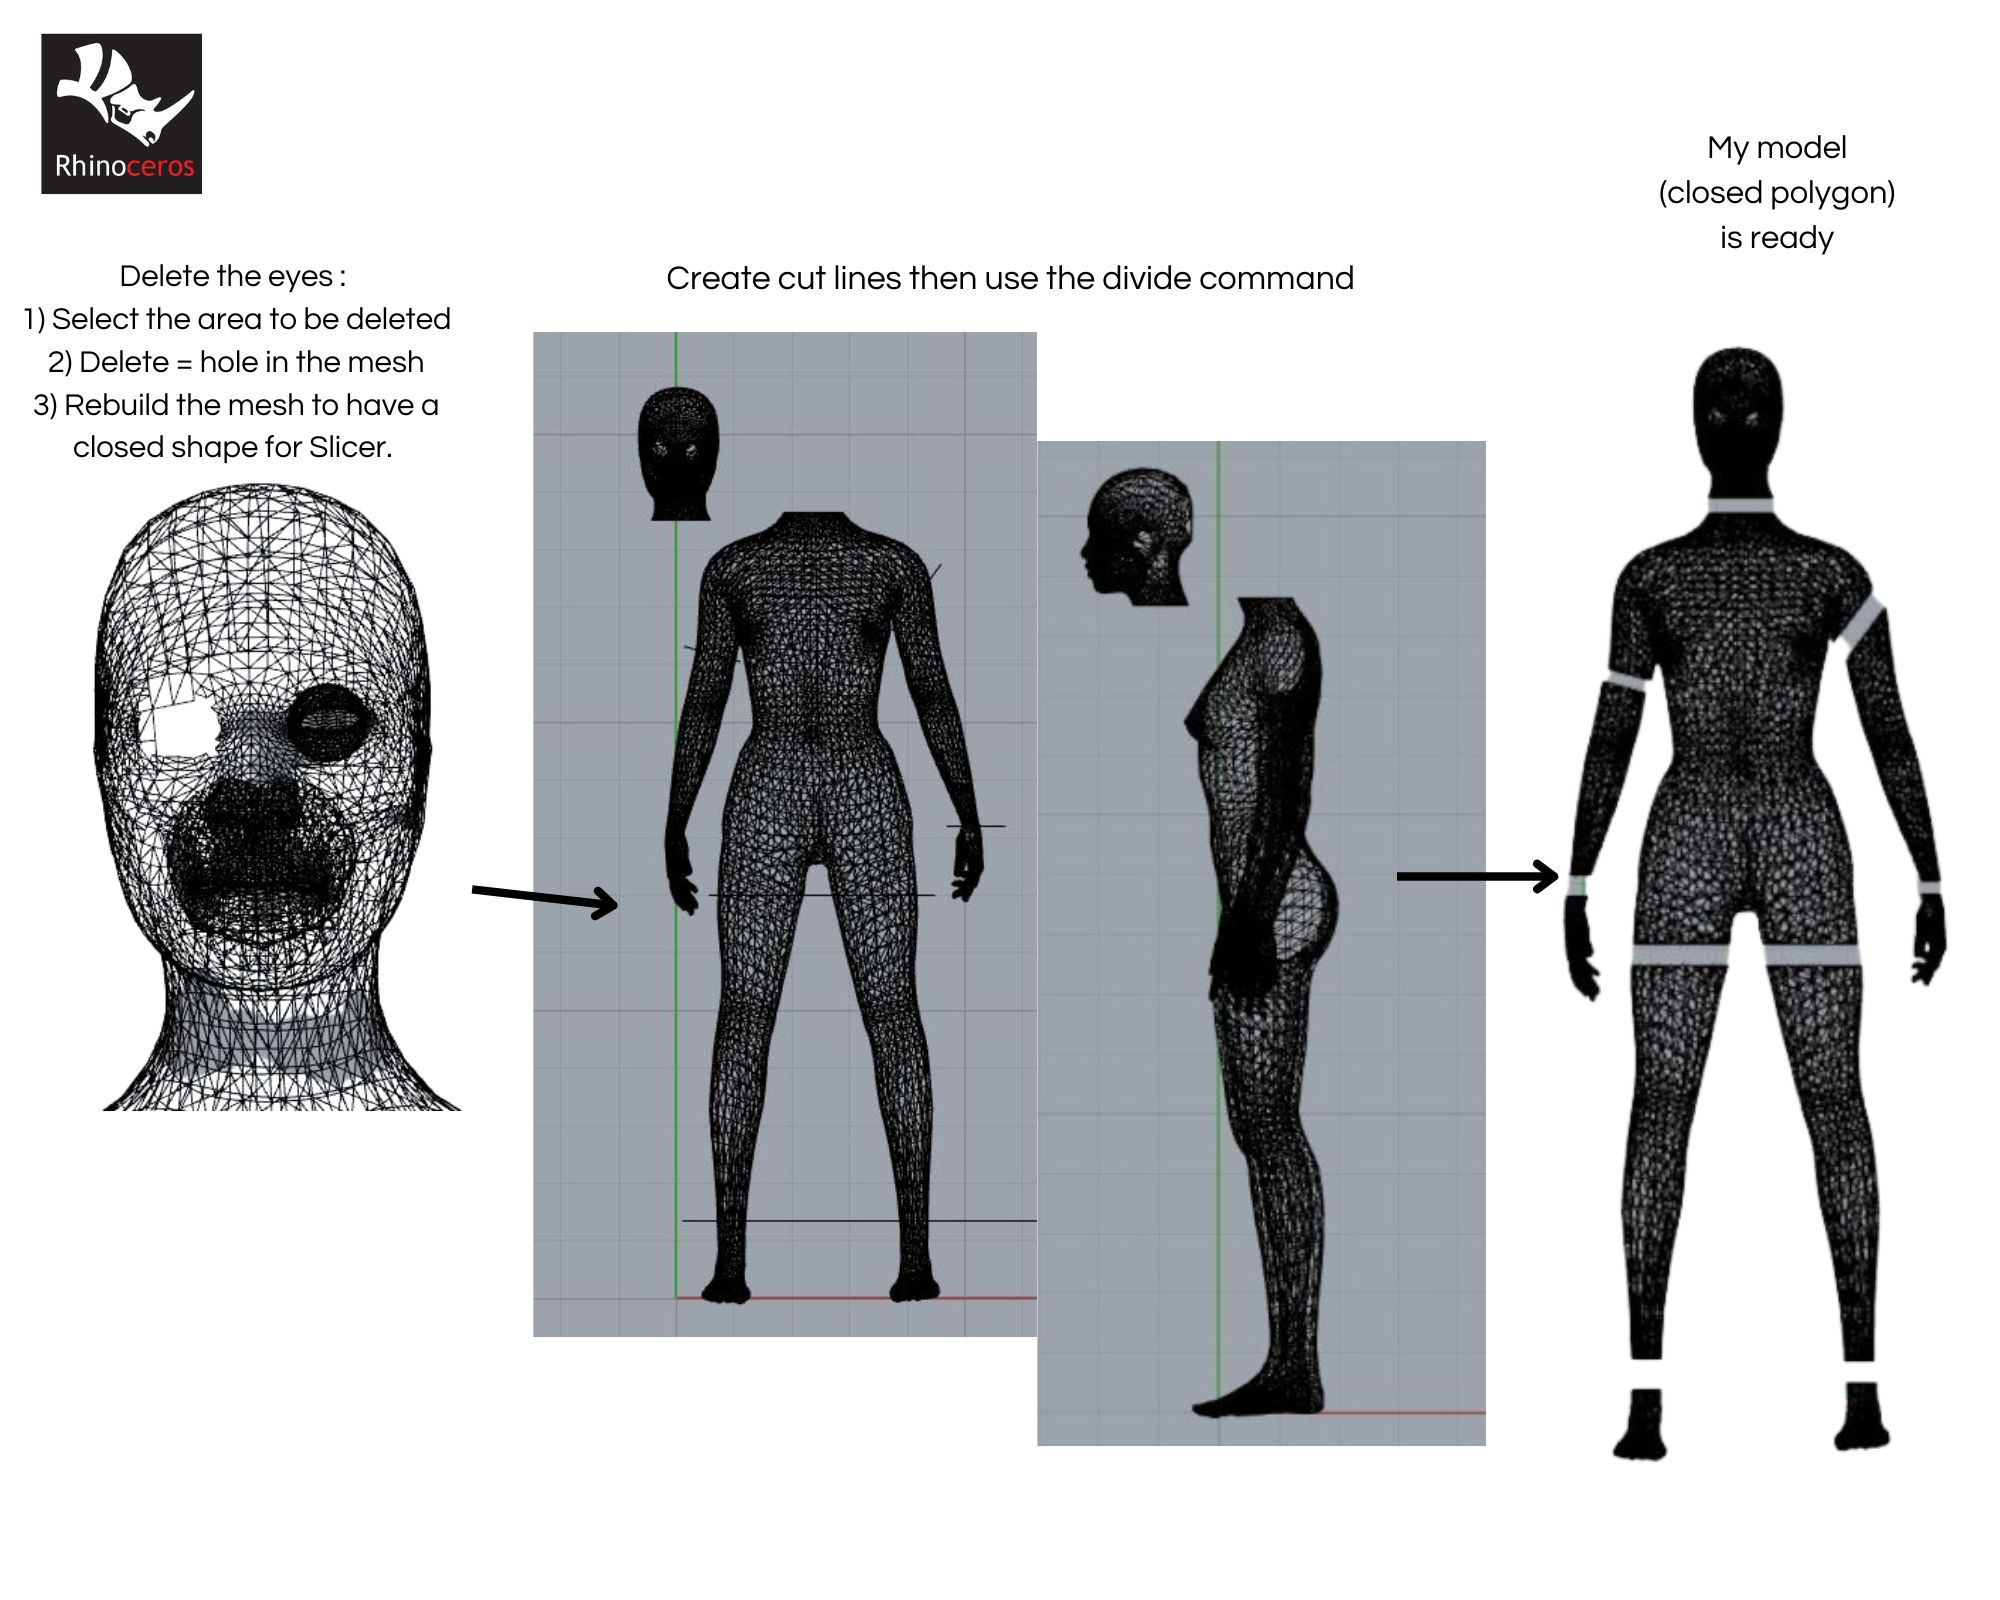
After producing my mannequin on Makehuman, I had to cut it into pieces. For this, I went to Rhinoceros 3D. I met my first difficulties. I had already done a tutorial on this software before Fabricademy, but my memory failed me. So I had to relearn some mechanisms like the use of the command bar on top or the notion of mesh.
The features I discovered this week :
- Close mesh
- Divide mesh
- Fill mesh
- Delete node from mesh
I had to fill in the 3D model so that it could be imported into the following software Slicer. Patience was the key word in the workshop. I often couldn't find the icons in Rhino, so I quickly started writing the commands directly in the search bar.
After successfully cutting my dummy into pieces, I split my Rhino file into several. One file per body part to make my work in Slicer easier. When everything was ready, it was time for me to visualize my 3D cardboard bust with the future cuts.
Warning
I encountered a problem when importing my document into Rhino. My model was 6mm high. It was part of the bacteria world. I thank Diane for explaining how to export my Rhino file correctly. You have to pay attention to the scale 1:1

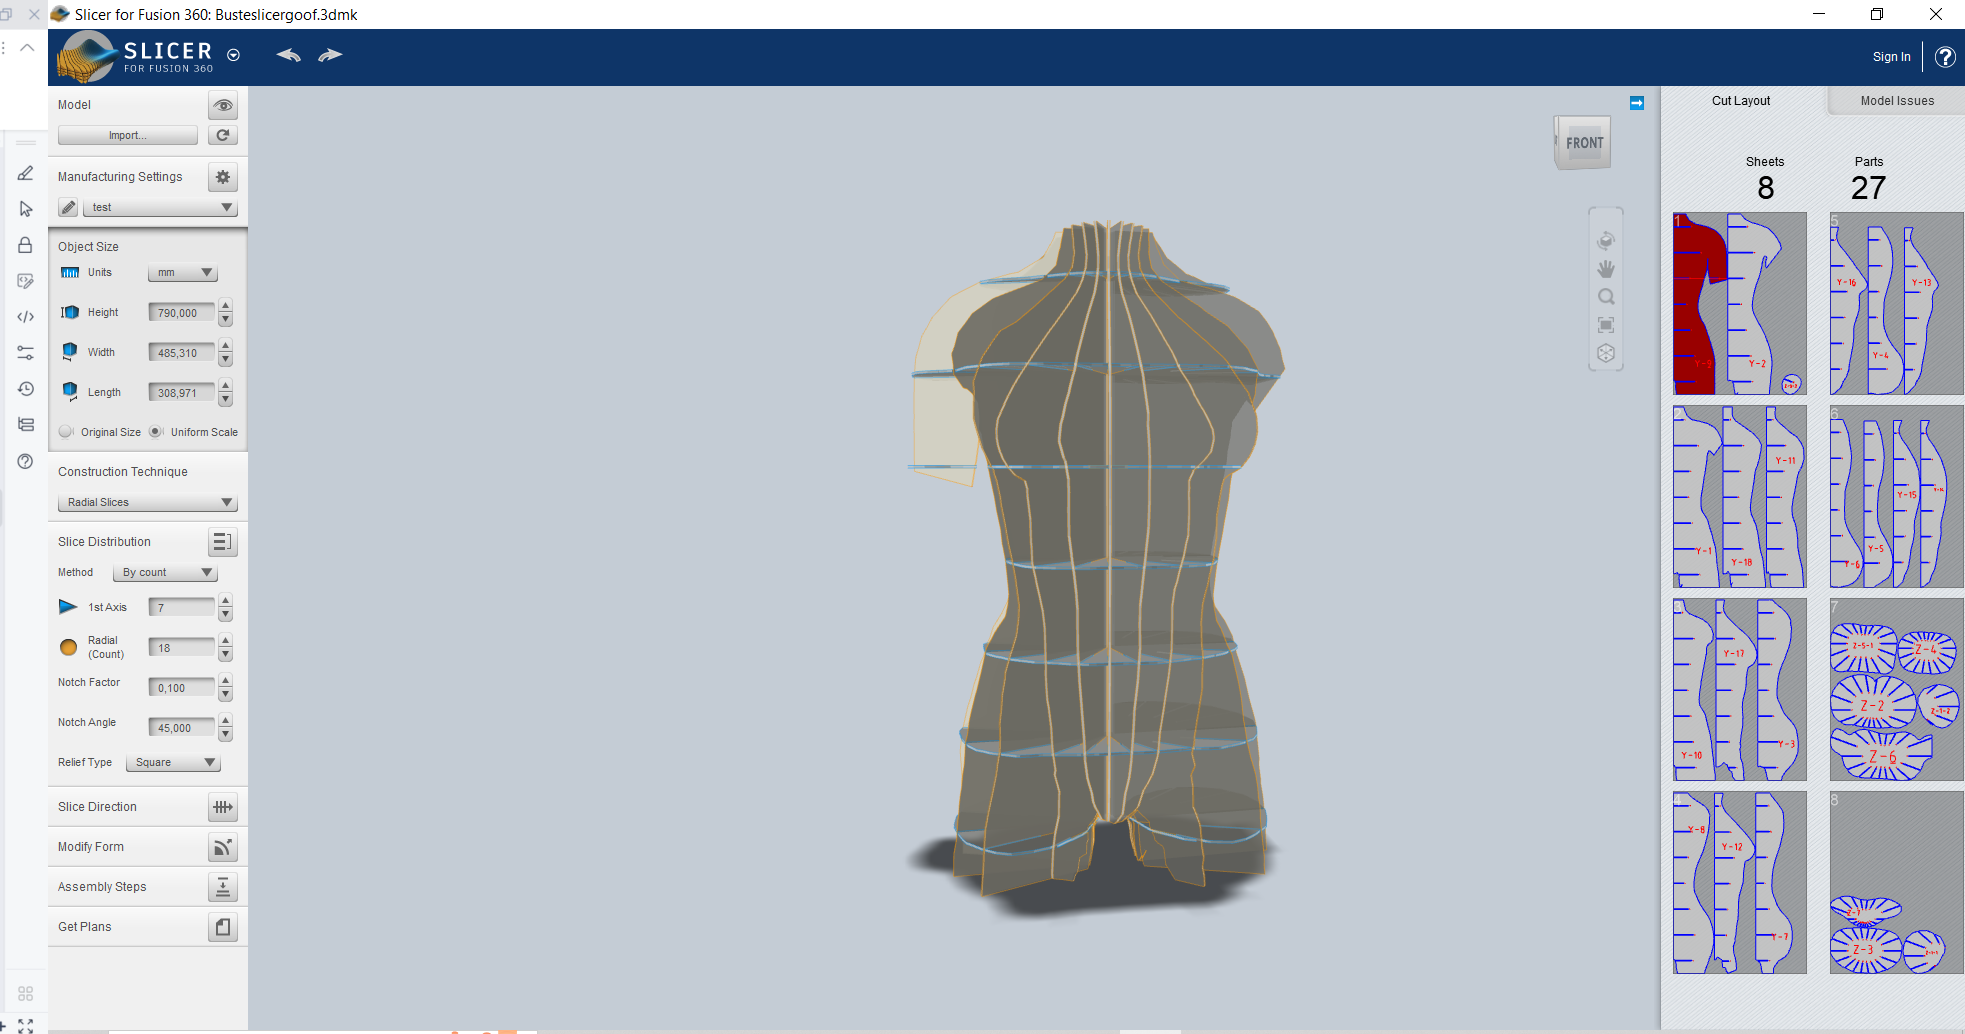
Step 4 : Slicer
Slicer is a great discovery. This software is amazing, because with a few clicks it is possible to visualize an object in 3D with different cutting shapes. It is important to choose the right parameters before starting to work on the 3D model. The parameters that you have to pay attention to are the size of the cardboard boards, the thickness of the cardboard and finally the size of the 3D model.
Among the cutting techniques, there are :
- Stacked Slices
- Interlocked Slices
- Curve
- Radical Slices
- Folded Panels
I decided to make my bust in radical slices for several reasons. The first reason is to minimize the number of pieces to assemble. Also, I wanted to have a clean look. Finally, I needed a solid bust to add the other limbs of my mannequin soon. I will make the other parts of my mannequin with other cutting techniques. I would like to try all the techniques.
Step 5 : Inkscape
Going to Inkscape is my last step before cutting. This step seemed simple and yet it is the one that took me the most time. The objective was for me to optimize the cutting boards to reduce my number of boards. I had 8 at the beginning and I had only 7 at my disposal. I had to take a piece of my dummy, change its orientation and add it to another page. I was able to move a piece with all the little writing inside after 25 minutes. I had to move 4 pieces. Then I moved on to checking the calibration of my pages, so the laser wouldn't cut in a vacuum. The format I used is 600x800mm, landscape format. The color of my cutting lines was blue and The color of my engraving lines was red. This setting is important, because I have to put the same in the laser software. All you have to do is cut!
Cutting board n°1/7 :

Step 6 : Laser cut
I write only for this part always make a test before cutting and it is fast and effective as machine.
| The parameters in Lyon’s Lab | |
|---|---|
| Matter | Carton gris 3mm Slicer |
| P (power) | 70.00 |
| V (speed) | 25.00 |
| cutting | blue line |
| semi-cutting | red line |
Estimated time per board : 10 min./board
Real time : 8min./board
Step 7 : Manual Assembly

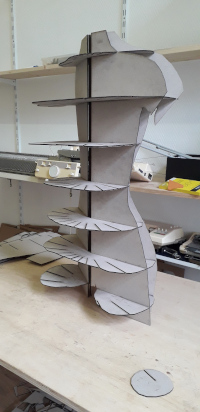
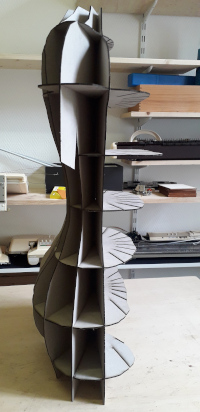
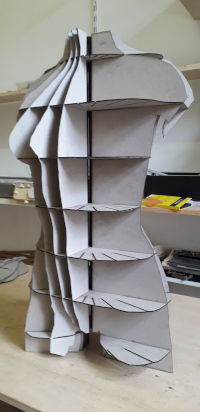
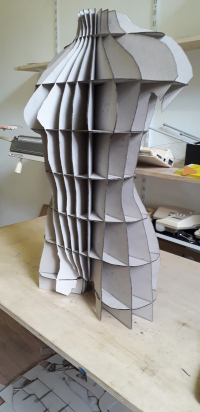
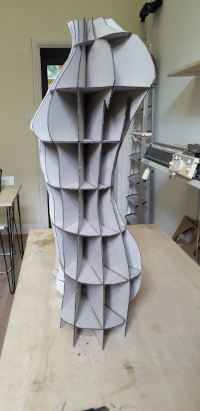
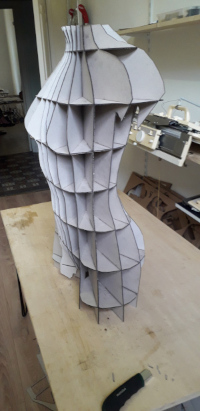
Result
Tools
- Scan 3D & kinect
- Makehuman
- Rhinoceros 3D
- Inkscape
- Laser cut
- Slicer for Fusion 360