5. E-textiles
Tuesday's Class
Fabricademy 2022-23 Week 5 - E-Textiles Liza Stark
This week, the techniques and materials we discovered was a real cross between the old and the new, like mixing embroidery with electronics, like knitting and conductivity. This contemporary approach to old techniques allows us to push the limits, to go further in the techniques by including our needs of today and tomorrow.
I begun this week any clearly idea and any inspiration, but my mind was open to discover E-textile and to find out more about artists using electronic in their creation. I was ready to meet the fabulous wolrd of electricity and electronics.
This week was a bit disjointed, I lost ''the thread'' in the middle of the week so I decided to organize this page according to days and not techniques.
References & Inspiration
Eyeo 2017 - Afroditi Psarra
The video below is a conference presented by the artist Afroditi Psarra. She explains her background, then she explains a lot of E-textile projects. This presentation lists several aspirations specific to E-textile, and shows a great diversity of projects grouped in the notion of E-textile.
Audrey BRIOT
LISTENING SPACE
This project uses an amplifier with an antenna or textile sensor to obtain a radio signal. The recovered data are then knitted. It makes visible invisible data.
ListeningSpace_SatelliteIkats from Afrdt on Vimeo.
Other projects what I want to explore
Tuesday, 18th October
Introduction to the world of electricity and electronics.
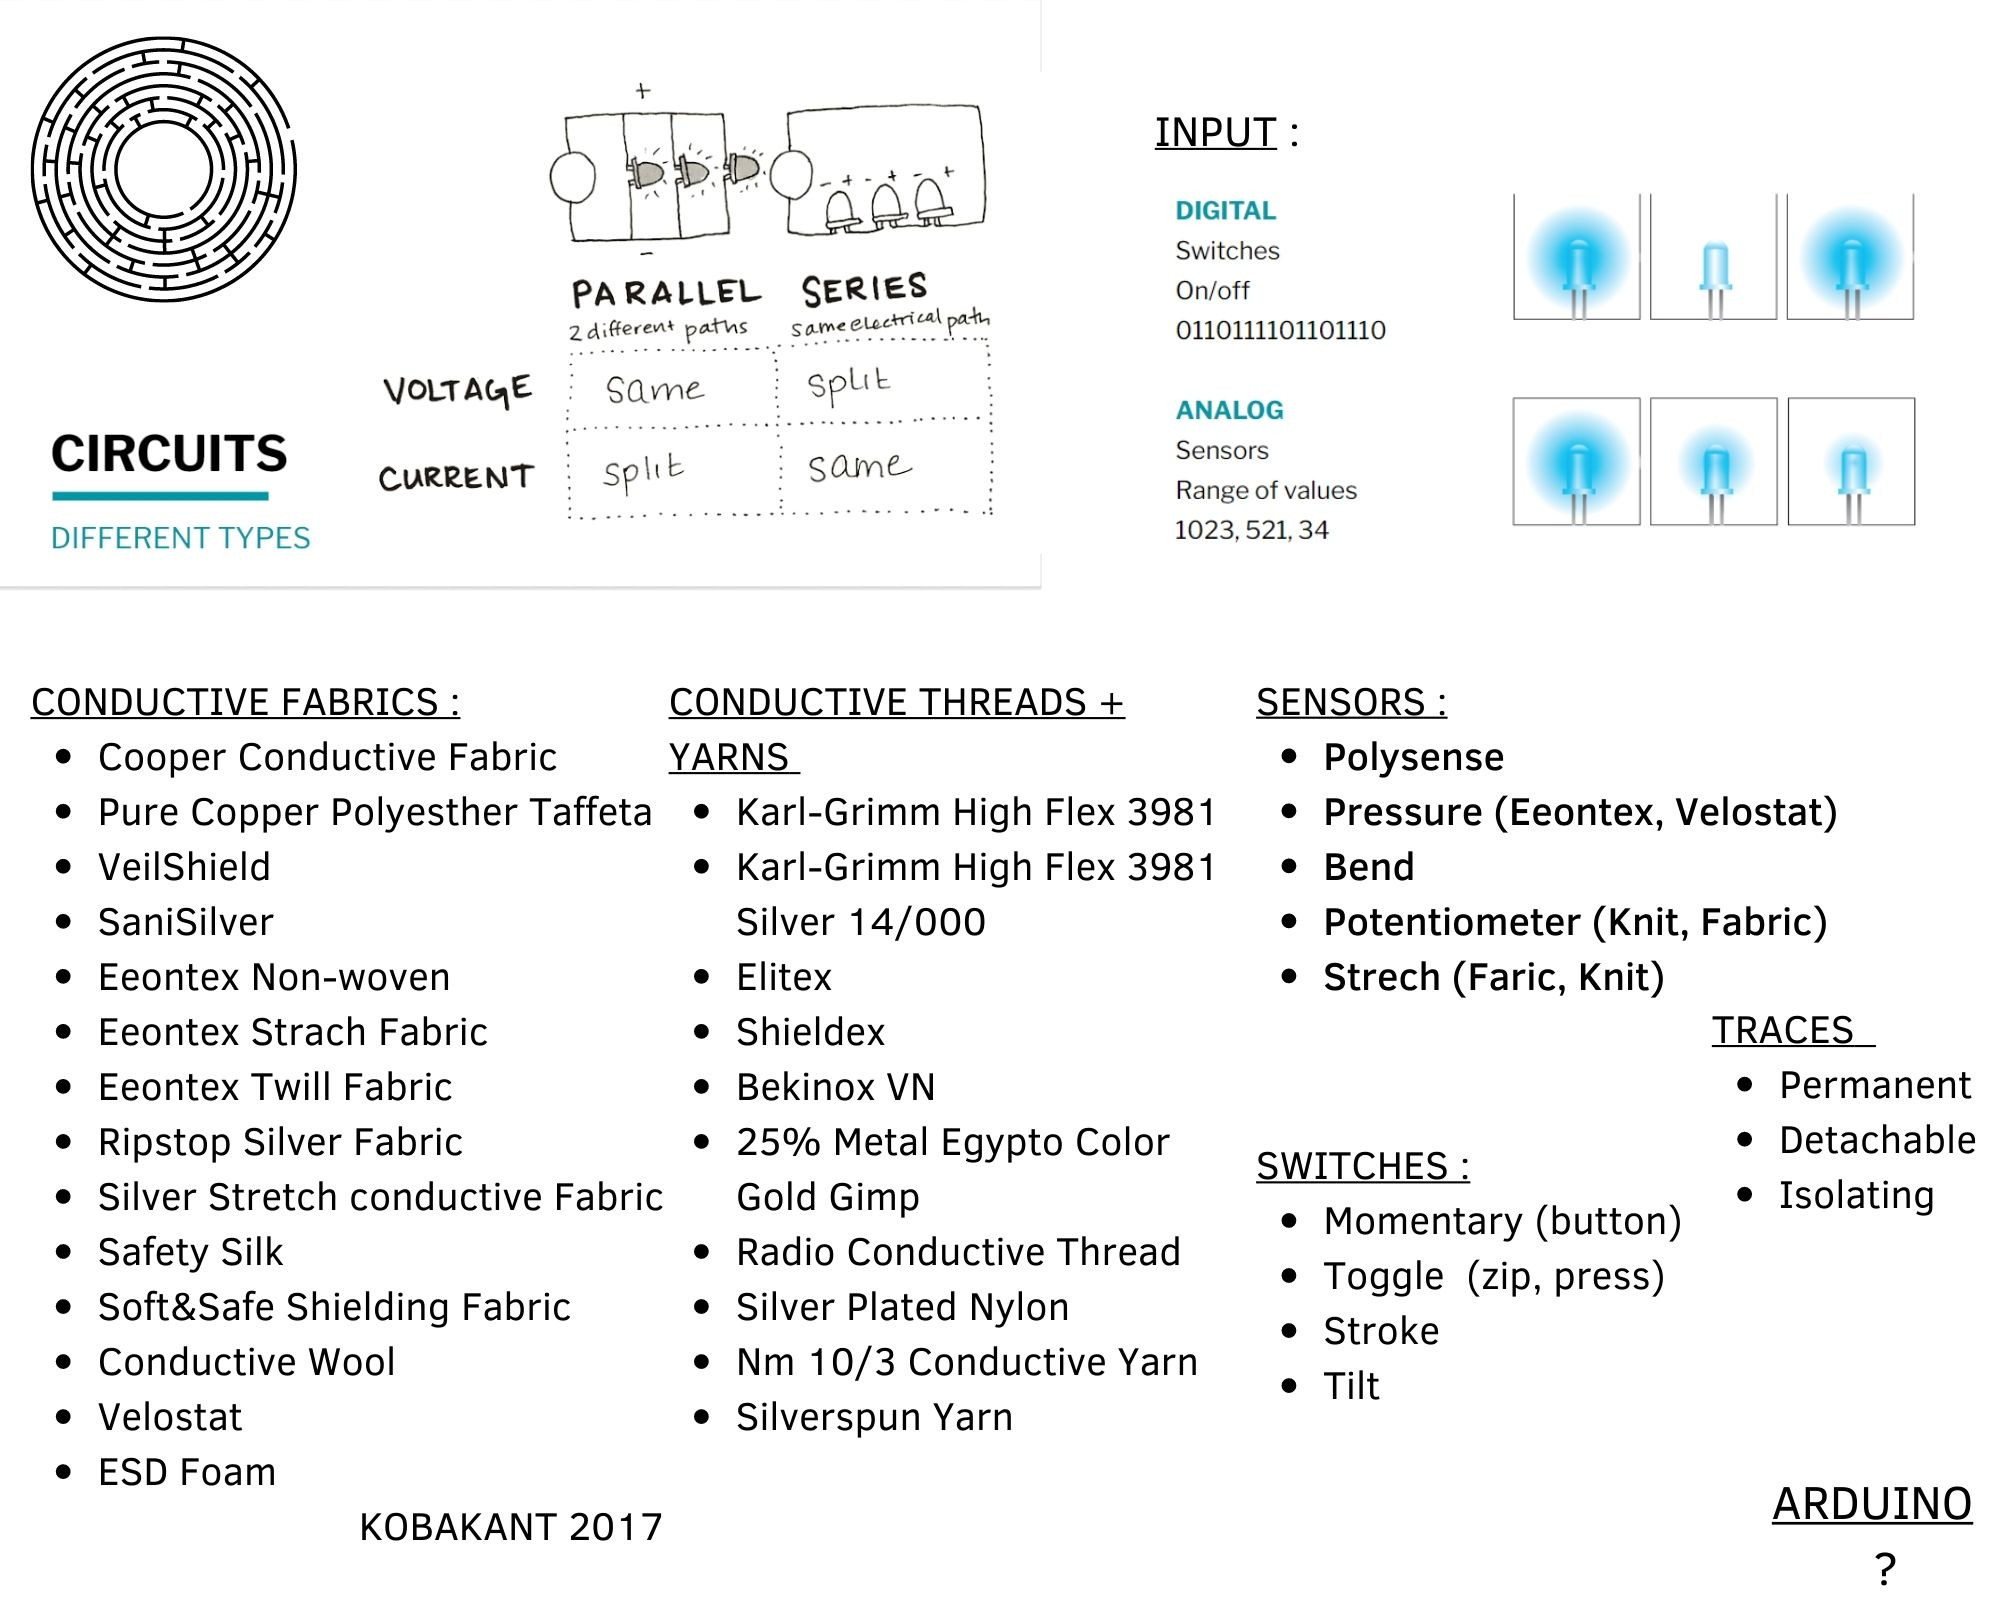
Lisa Park's class - Electronics Basics This week starts by Lisa Stark's class. She explained to us some basic notions of electricity. Through this first exercise, we understood that to build a circuit and for it to work, it must be closed. A few school memories come to mind during this exercise. The materials used must be conductive or not. A conductive path must be drawn where the electricity can move etc.
Wednesday, 19th October
How to make a circuit ?
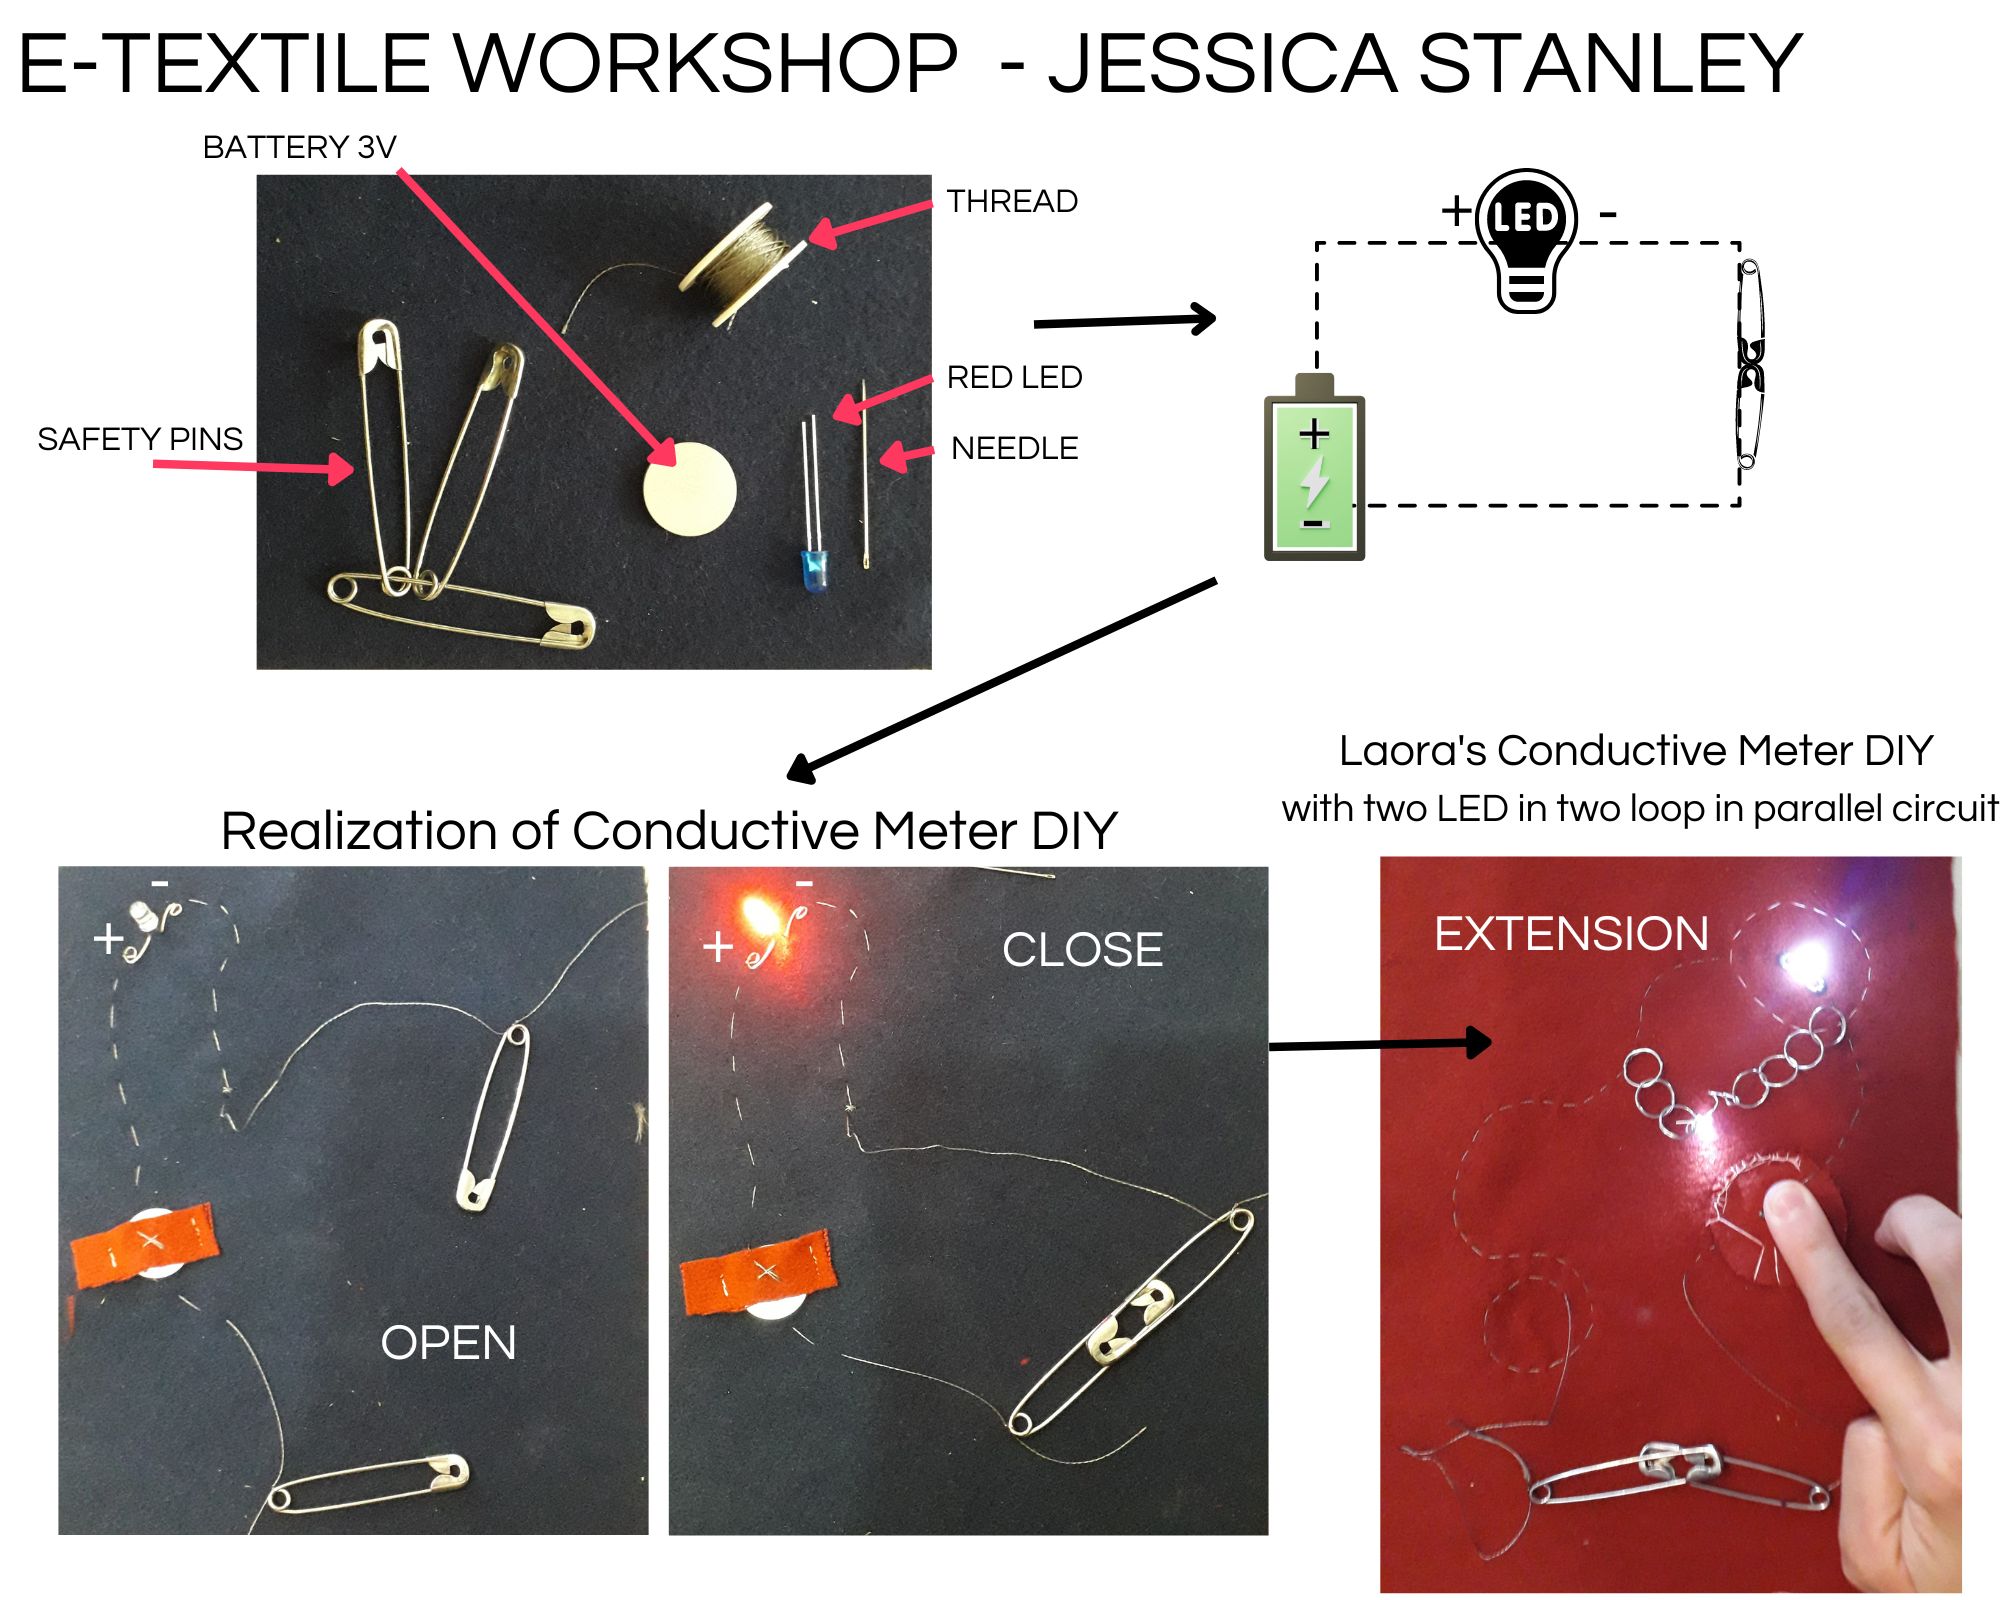
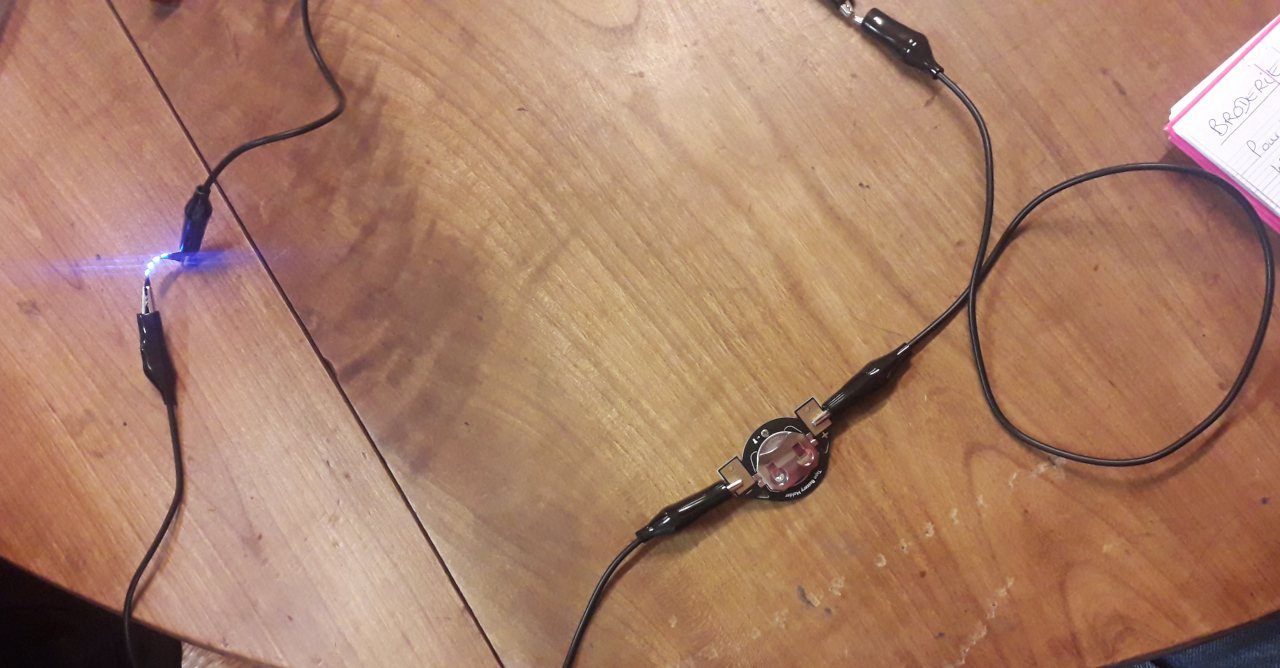
Jessica Stanley 's Tutorial - Electronics Basics 2 The first practical exercise, the objective was to create a first closed circuit with an LED and a 3V battery. We can now use this creation as a conductivity tester. Here is my circuit after this class :
Thursday, 20th October
Discover Arduino & Connecting the Arduino to my computer
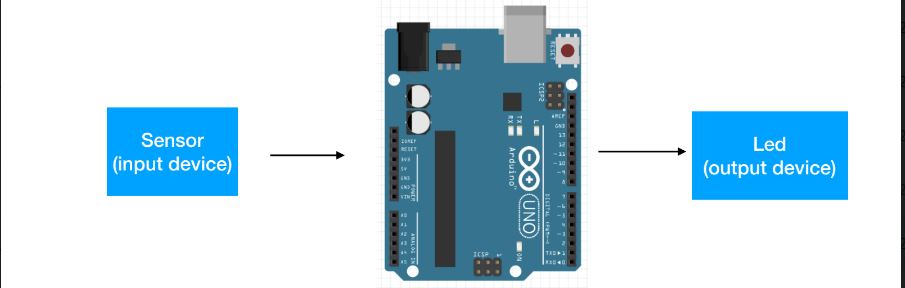
Arduino is a microcontroller board. Here is using a Arduino Uno Rev3. It will be connecting to my comptuer with a USB 2.0 Cable Type A/B. Arduino is at once a software and a hardware. If I understood correctly Arduino is the holy grail of electronics, it has allowed the development of many great projects.
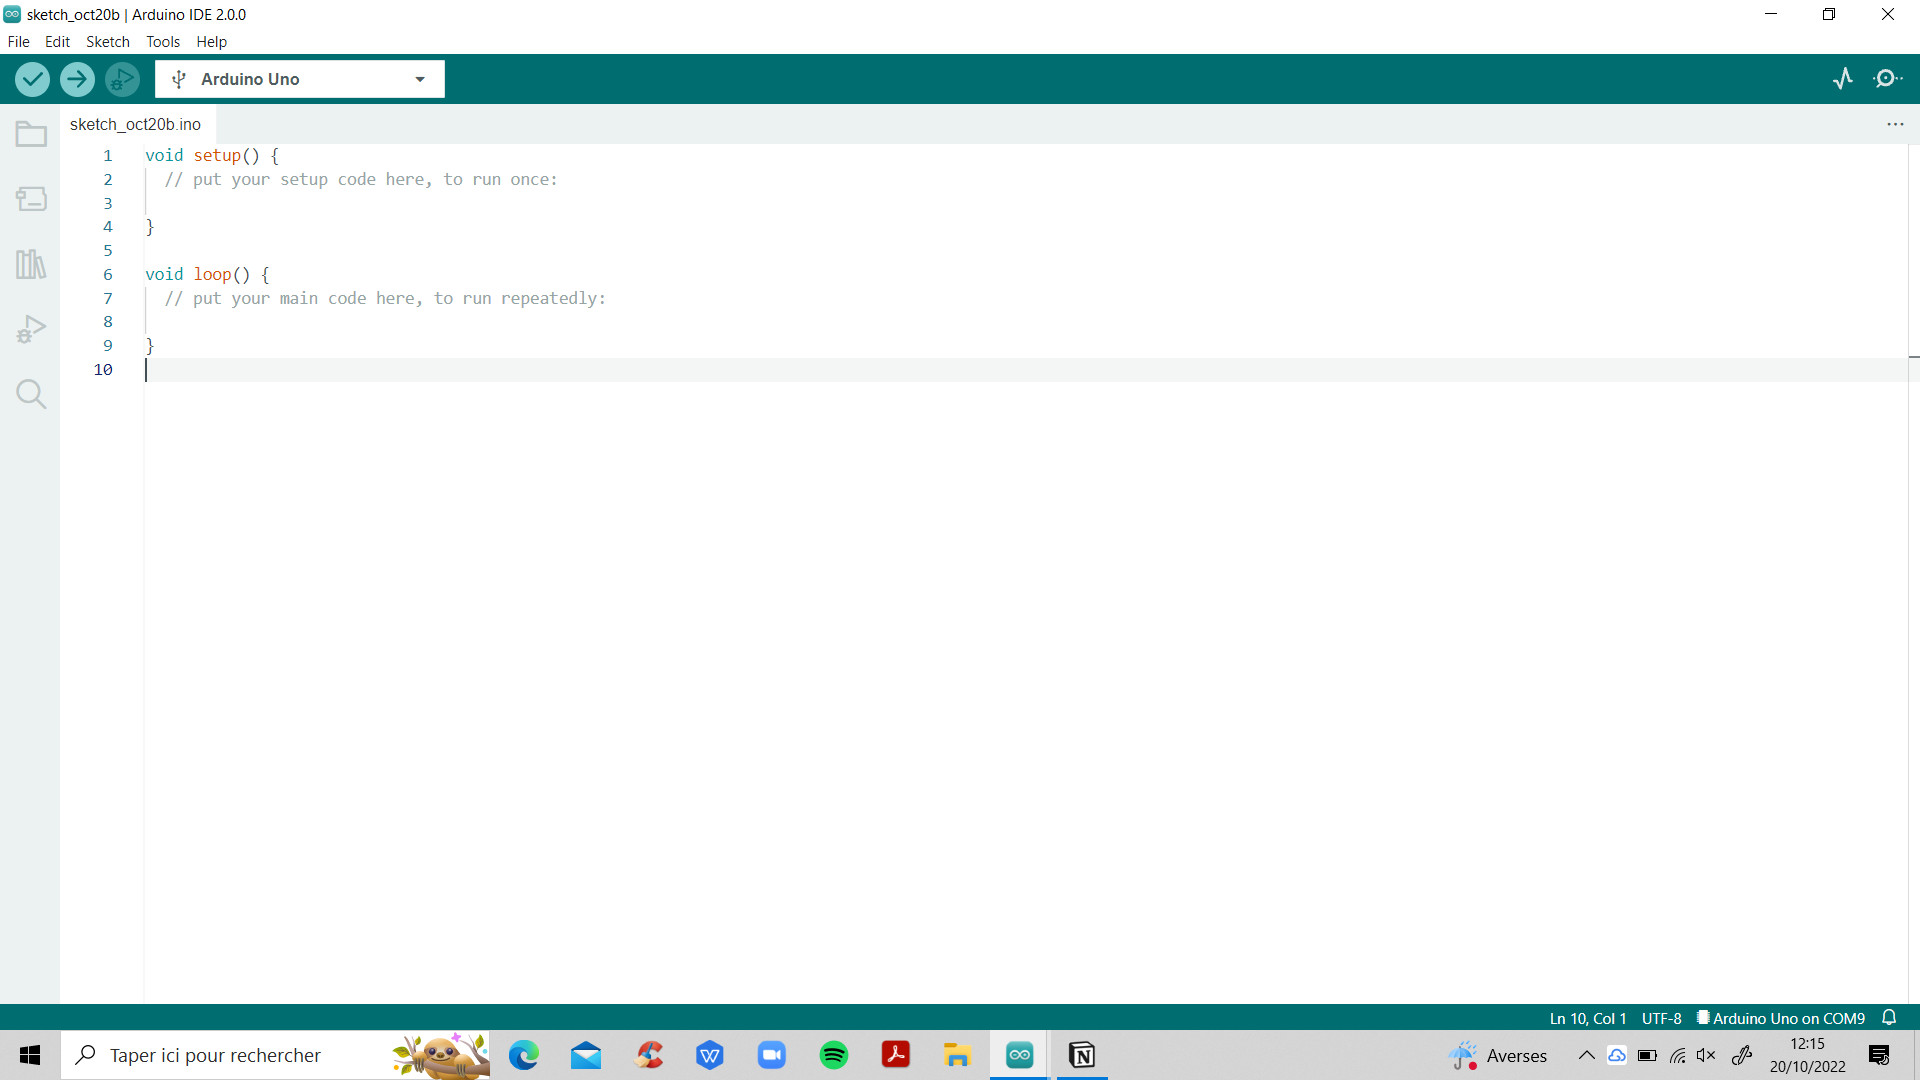
First exercise to set up Arduino on my computer and learn how to use it :
0 - User setting - Download the software - Connect the ARDUINO board to the computer - Check in Tools -> Board = ARDUINO UNO - Check in Tools -> Port = COM 9 - A light should light up on the board when it is set to the computer.
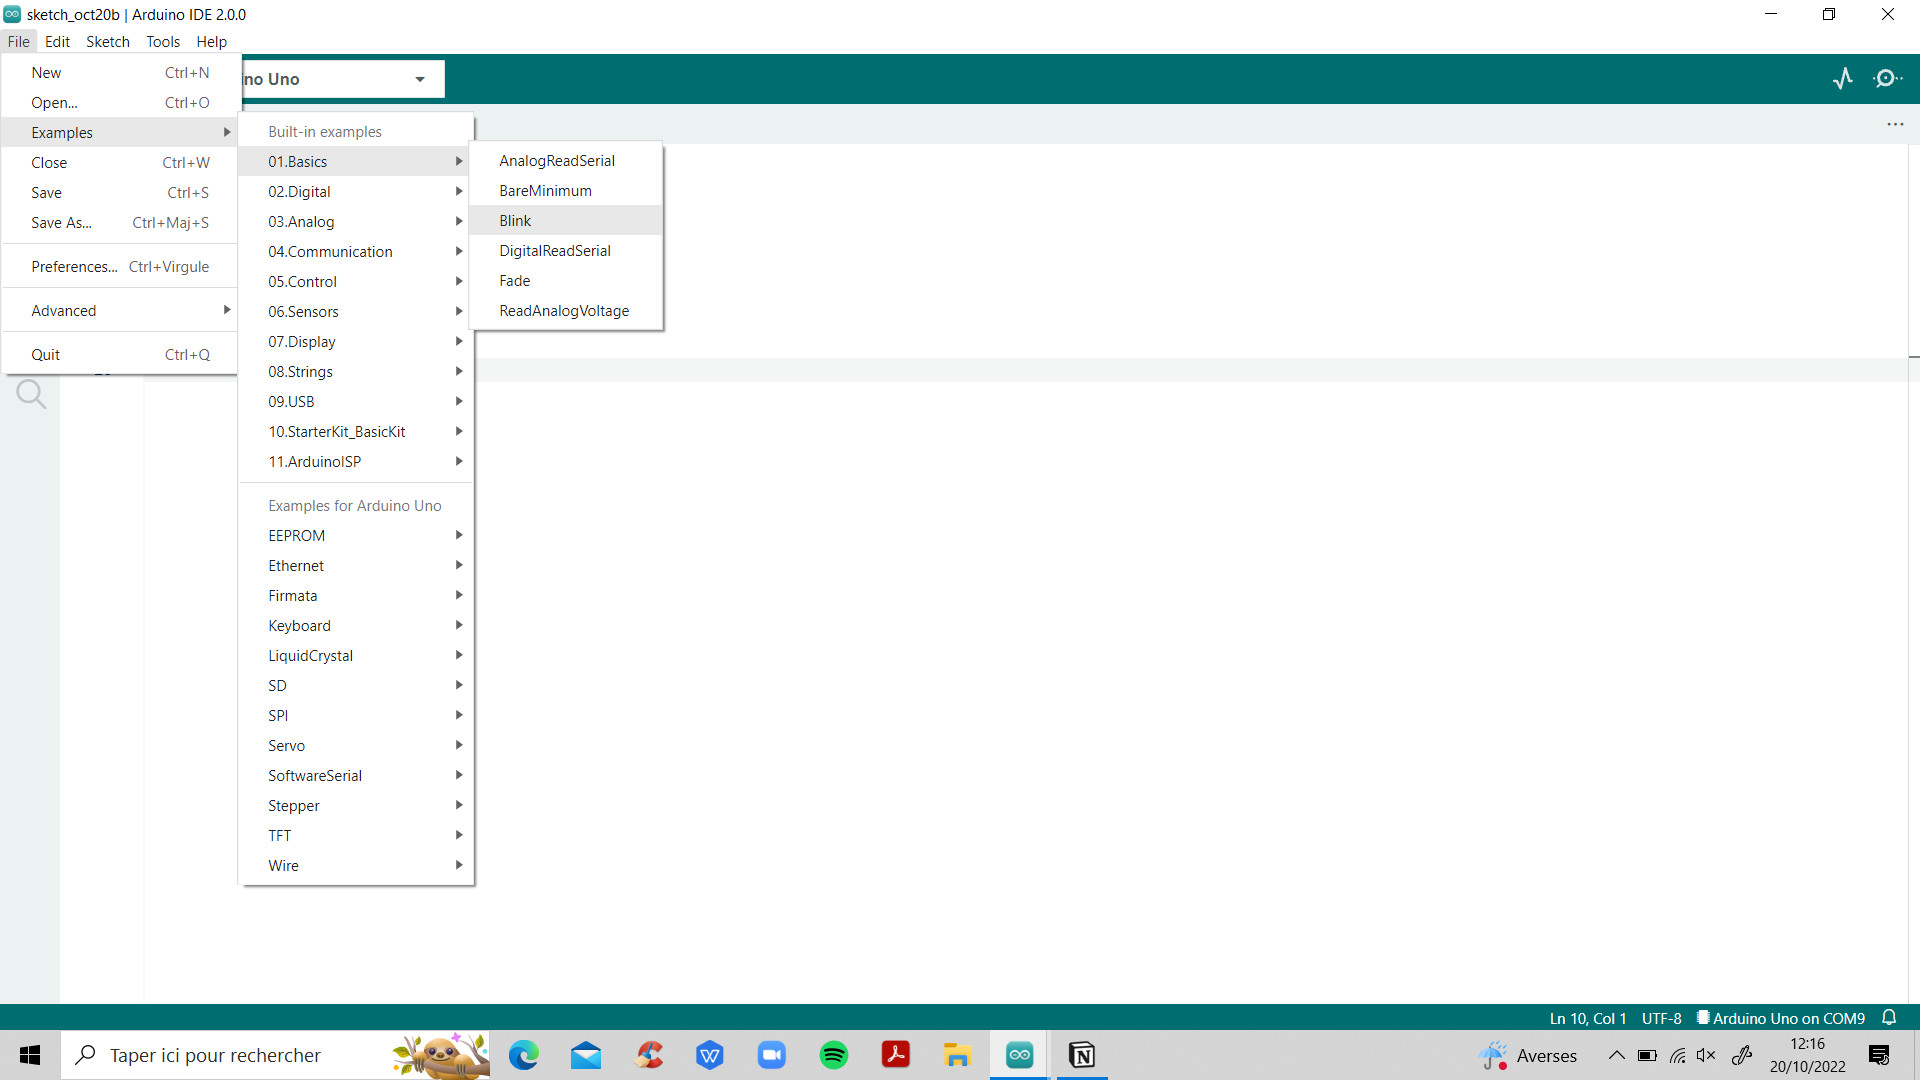
1 - Open a new file in Arduino to creat a new projet
2 - Choose an example script in Arduino
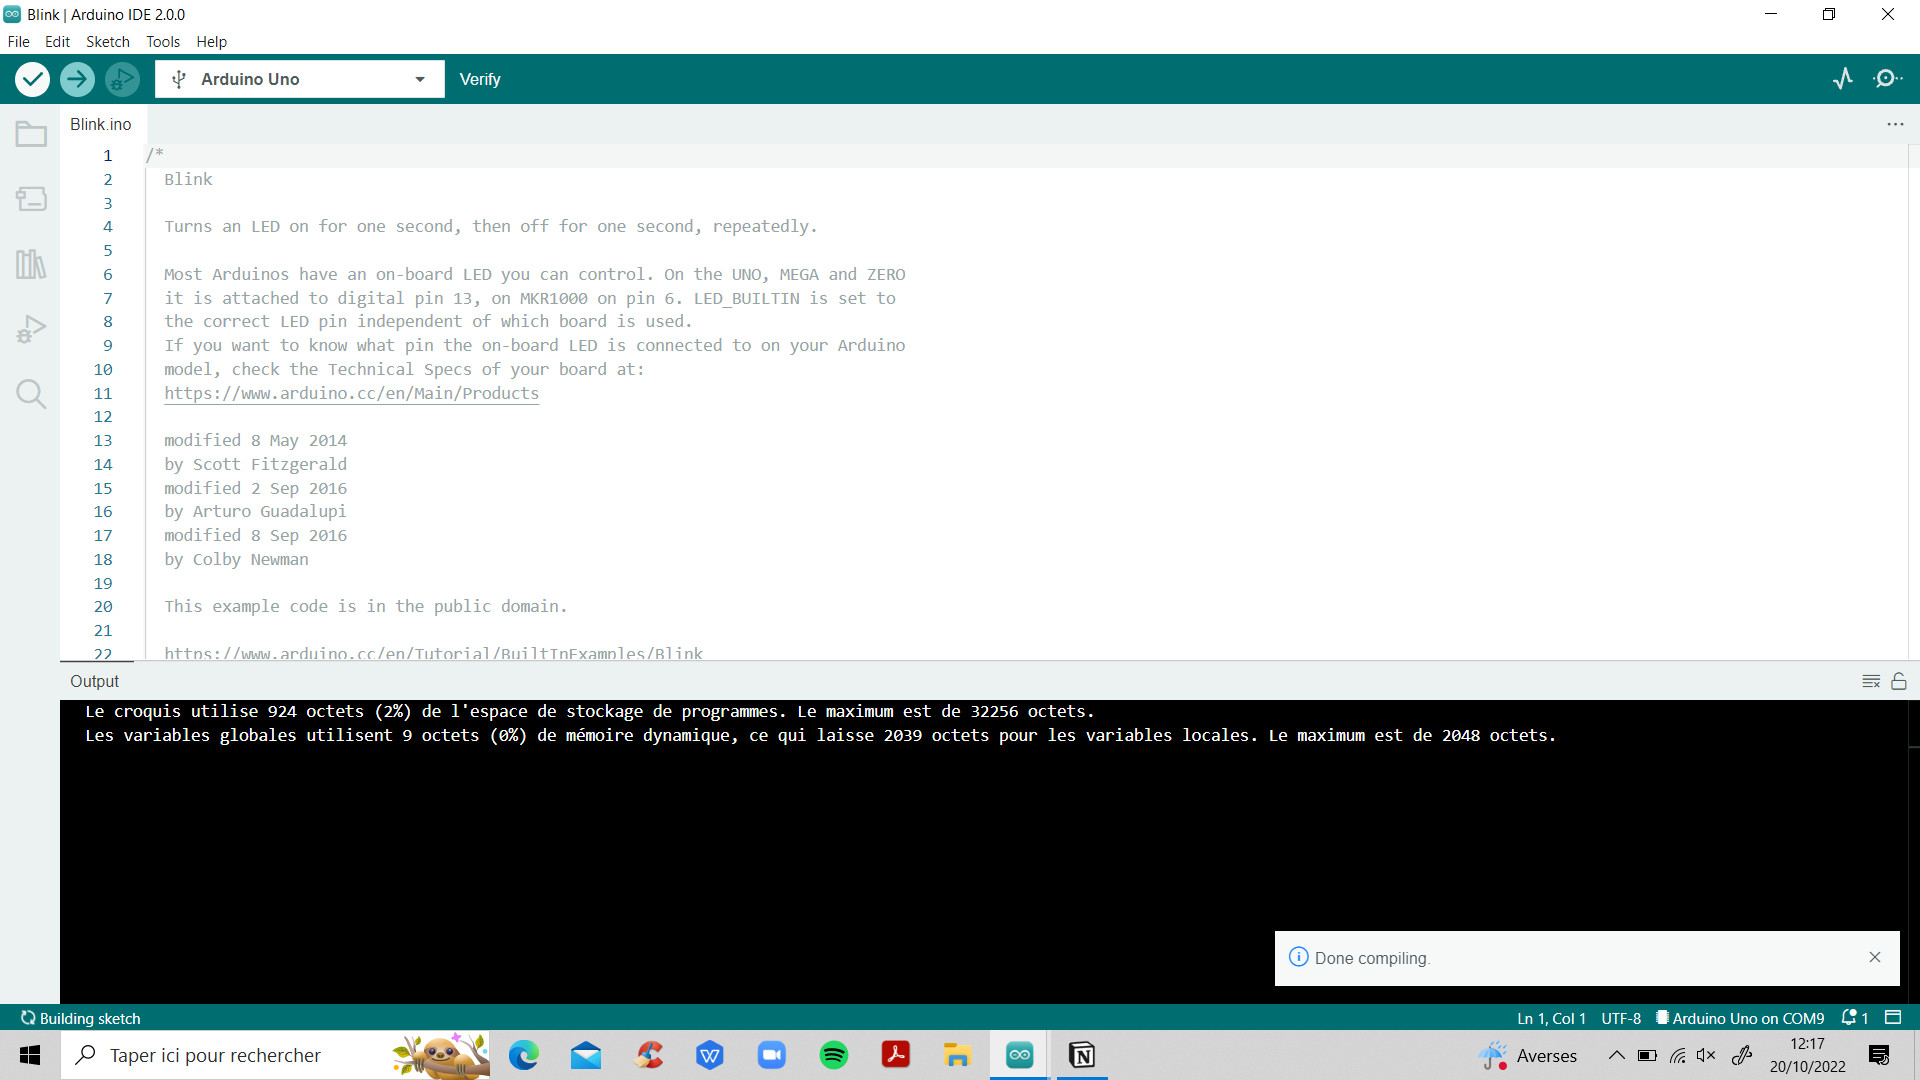
3 - A new window opens with the script. Click on CHEK OUT on the top left corner
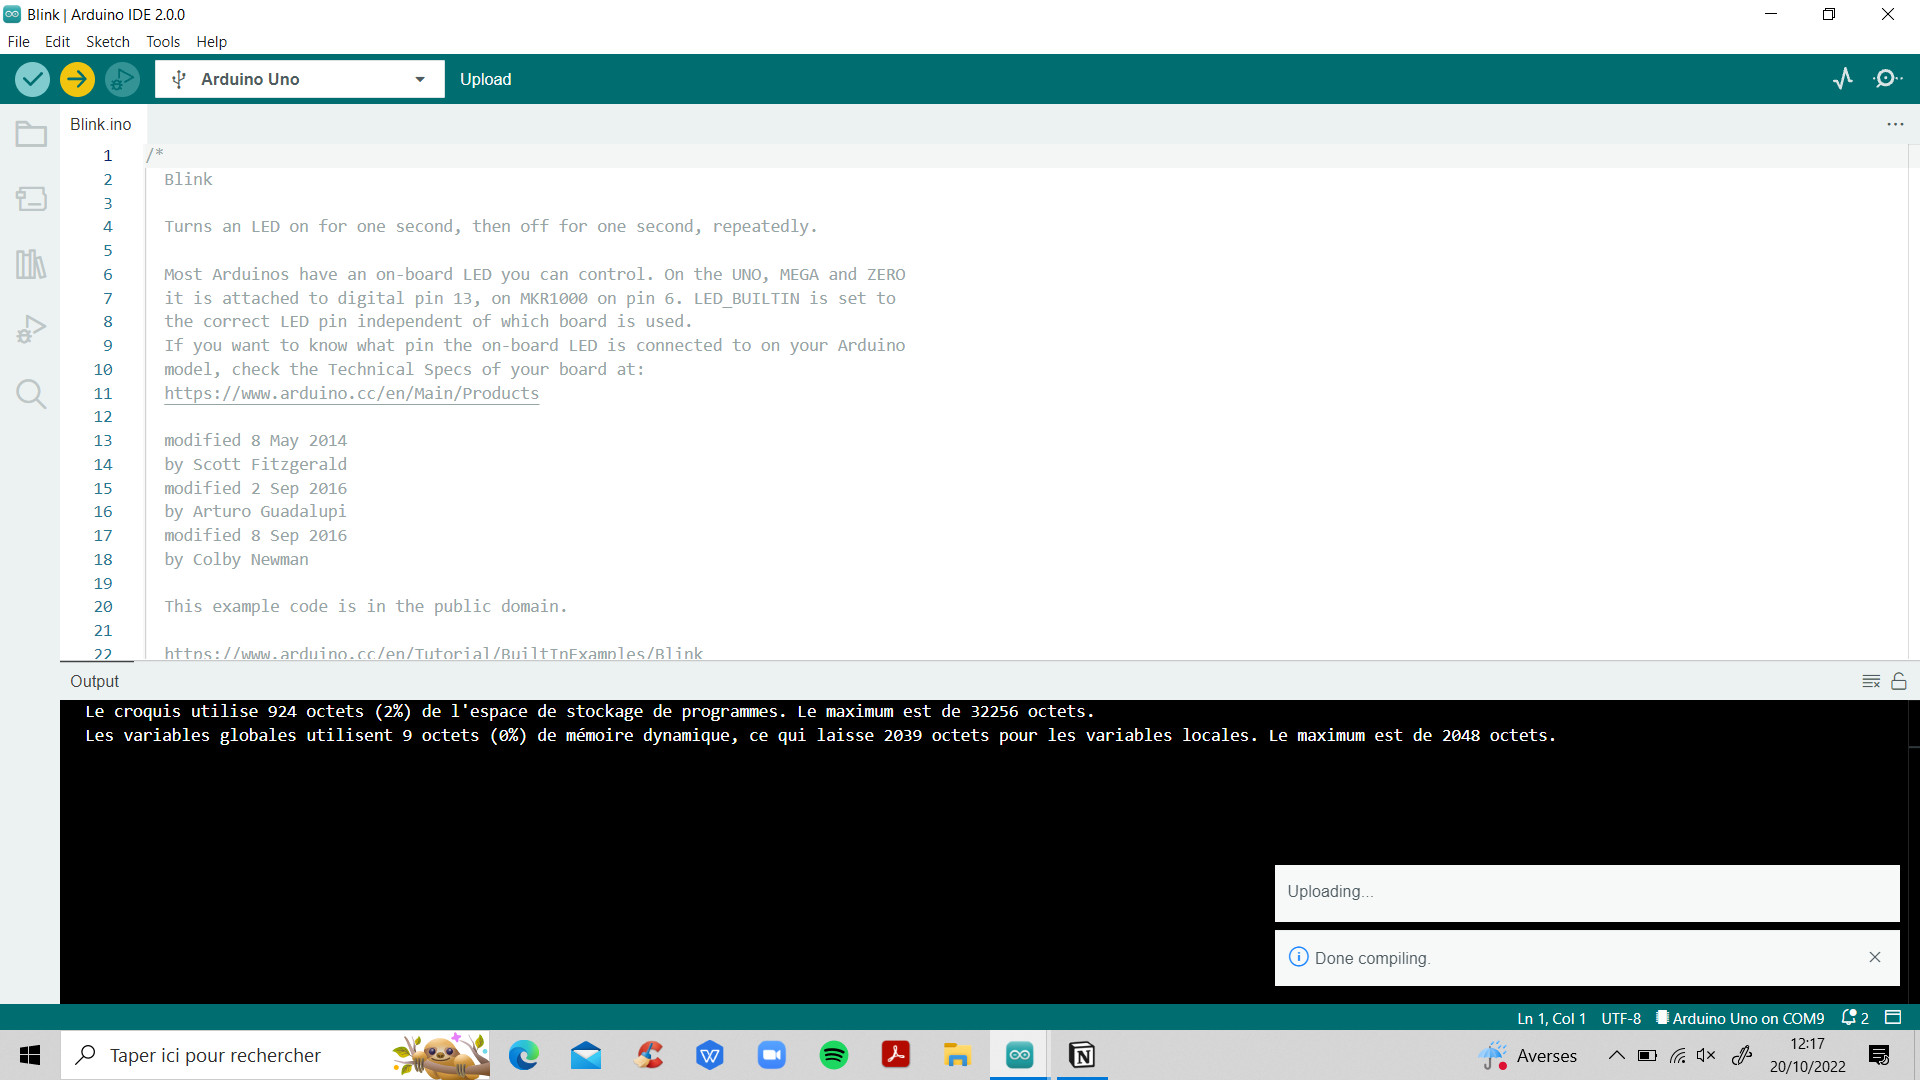
4 - If any error --> Updoad ---> The programm must be operating
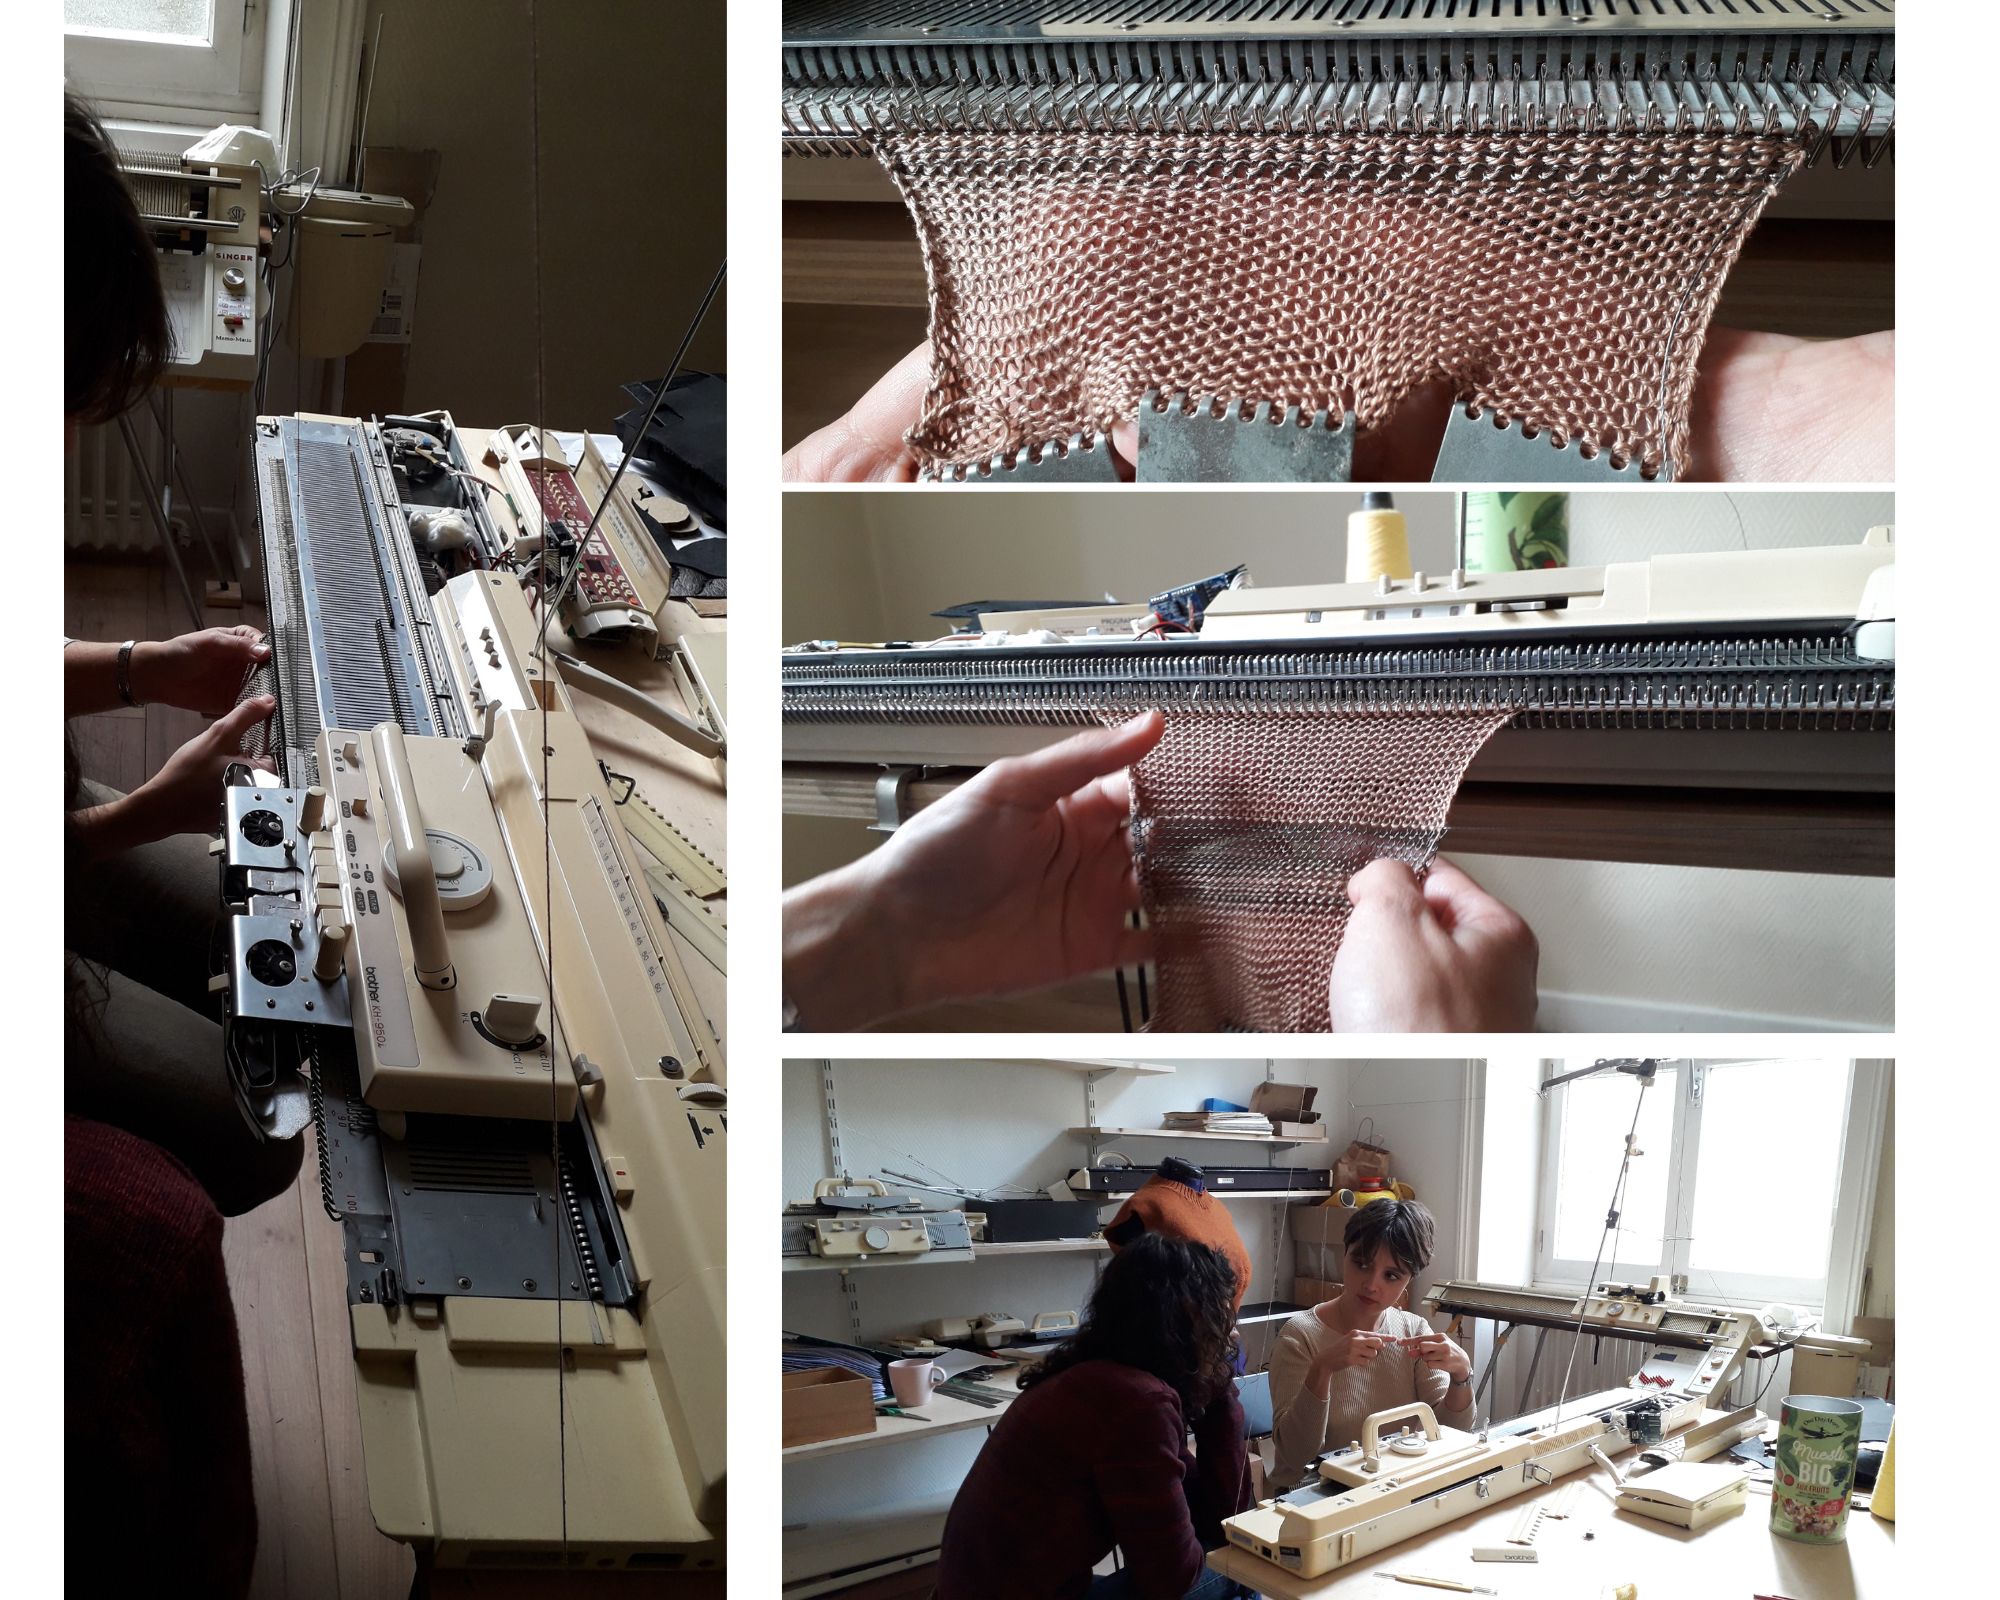
Discovering the knitting machine and making a conductive knit.
Amandine took a moment to explain how the knitting machine functions. Amandine, Laora and me, we tried to knit conductive thread for the purpose to creat E-knit. We deepen this idea later.
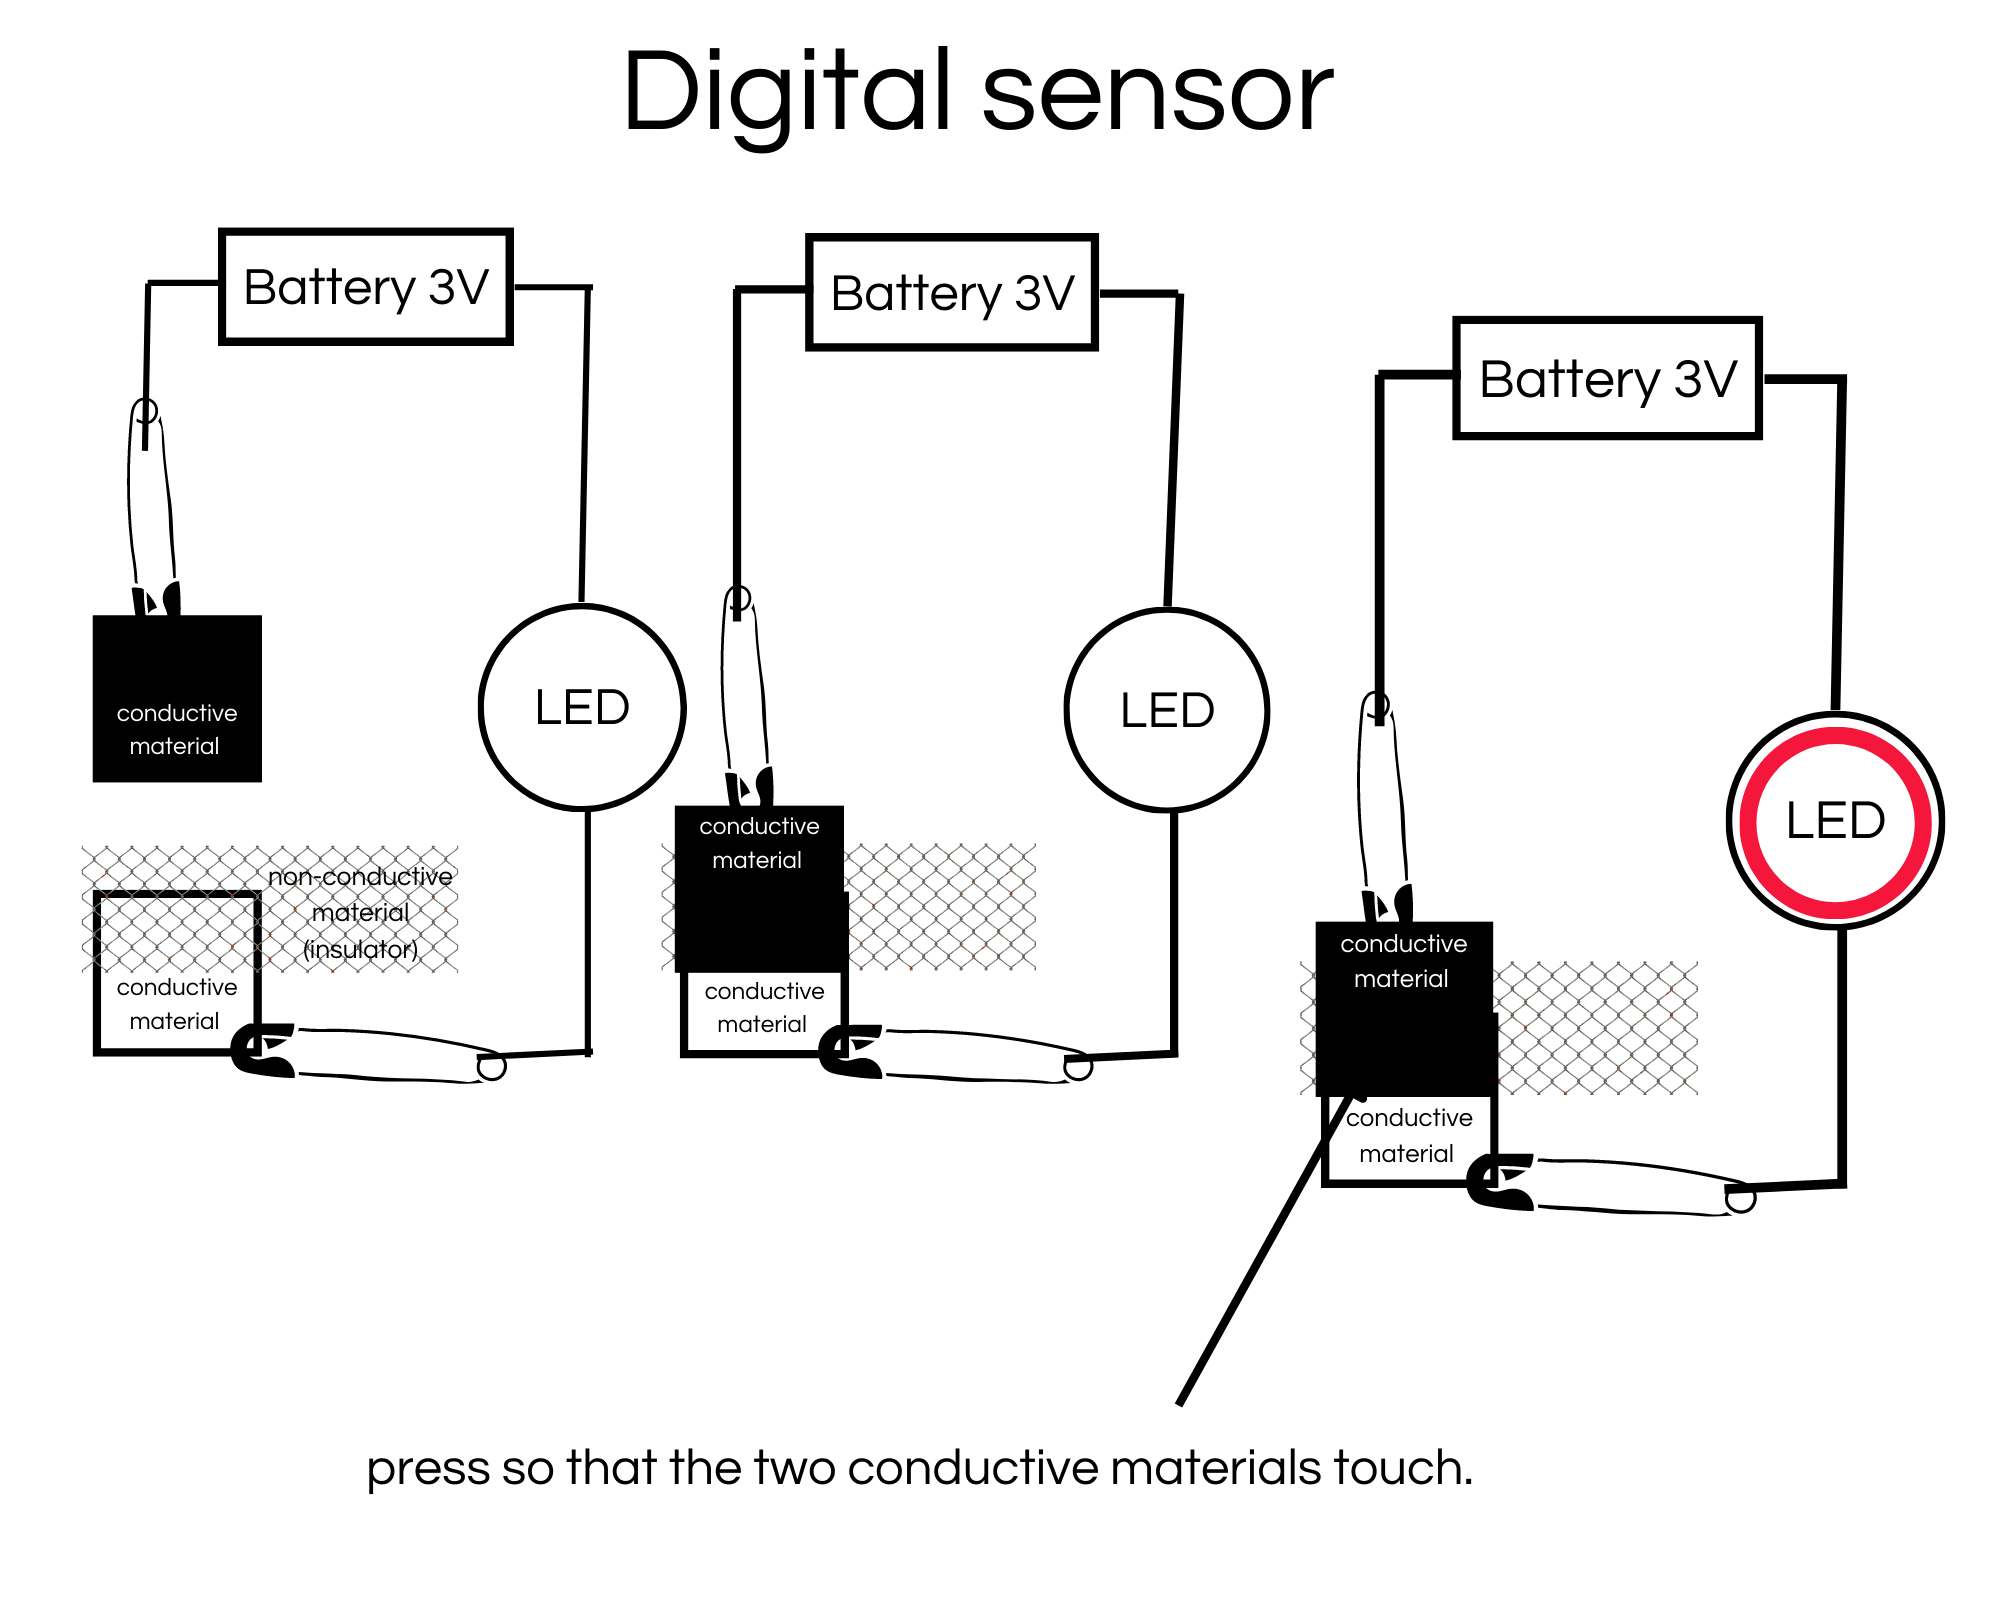
How to make a digital sensor and a analog sensor ?
Emma Pareschi's Tutorial - Electronics Basics 2
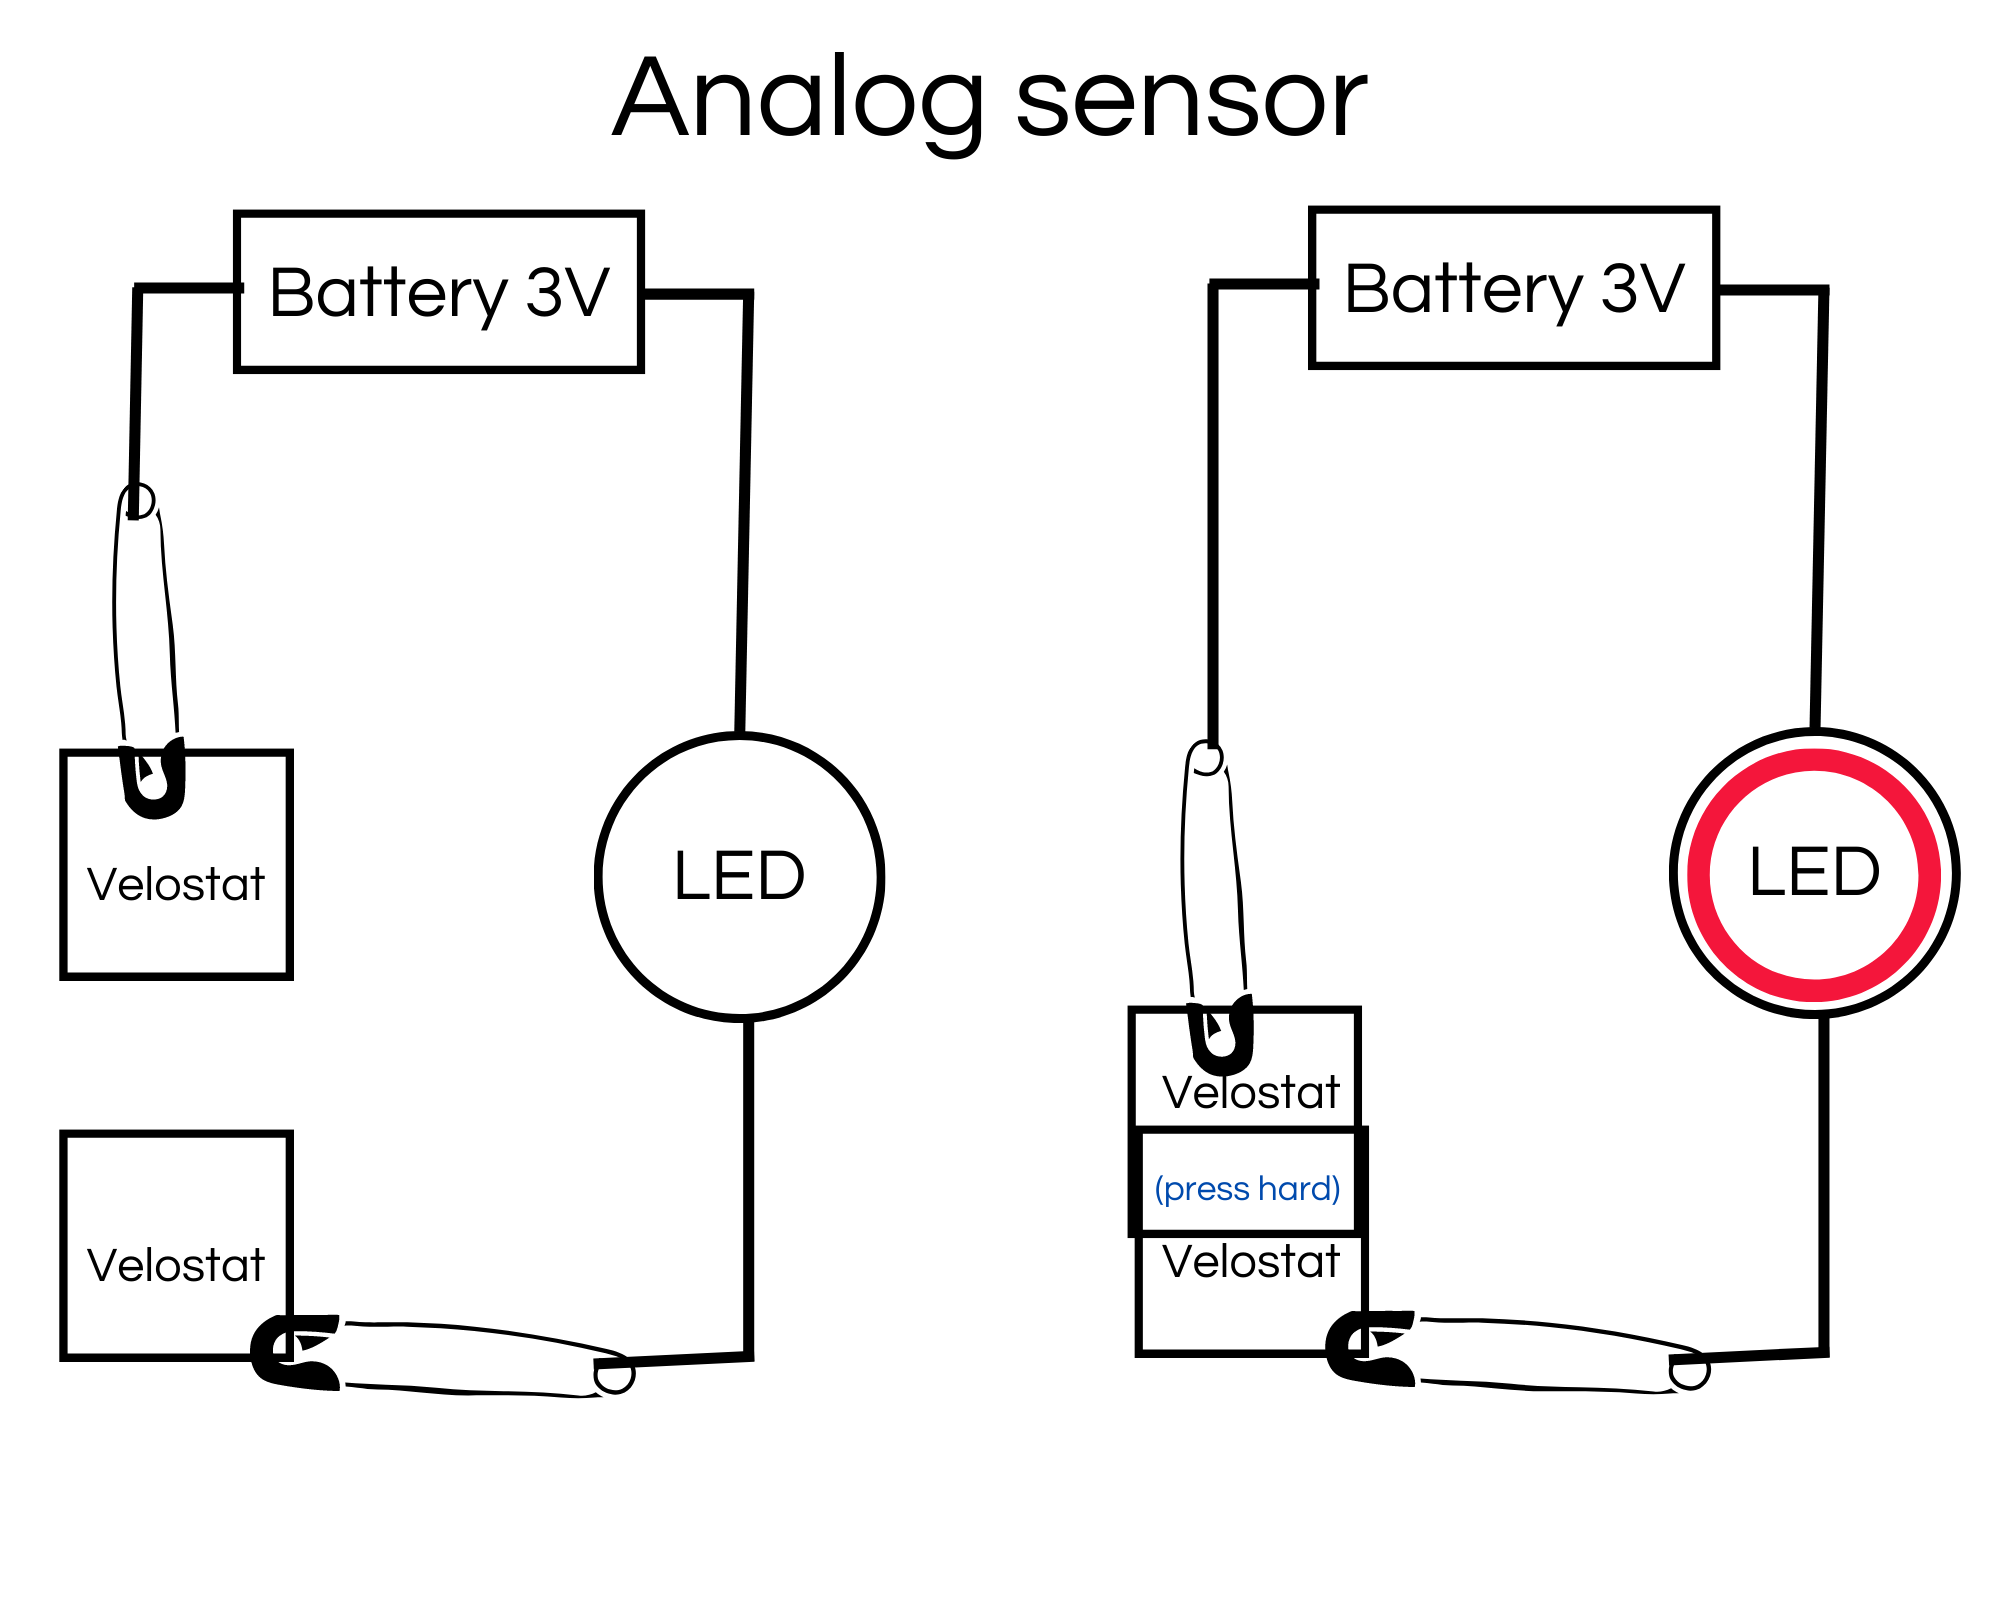
You can believe me, the light is on. Too much resistance in this circuit to have a light that shines well.
Multimeter
It is a very useful tool !
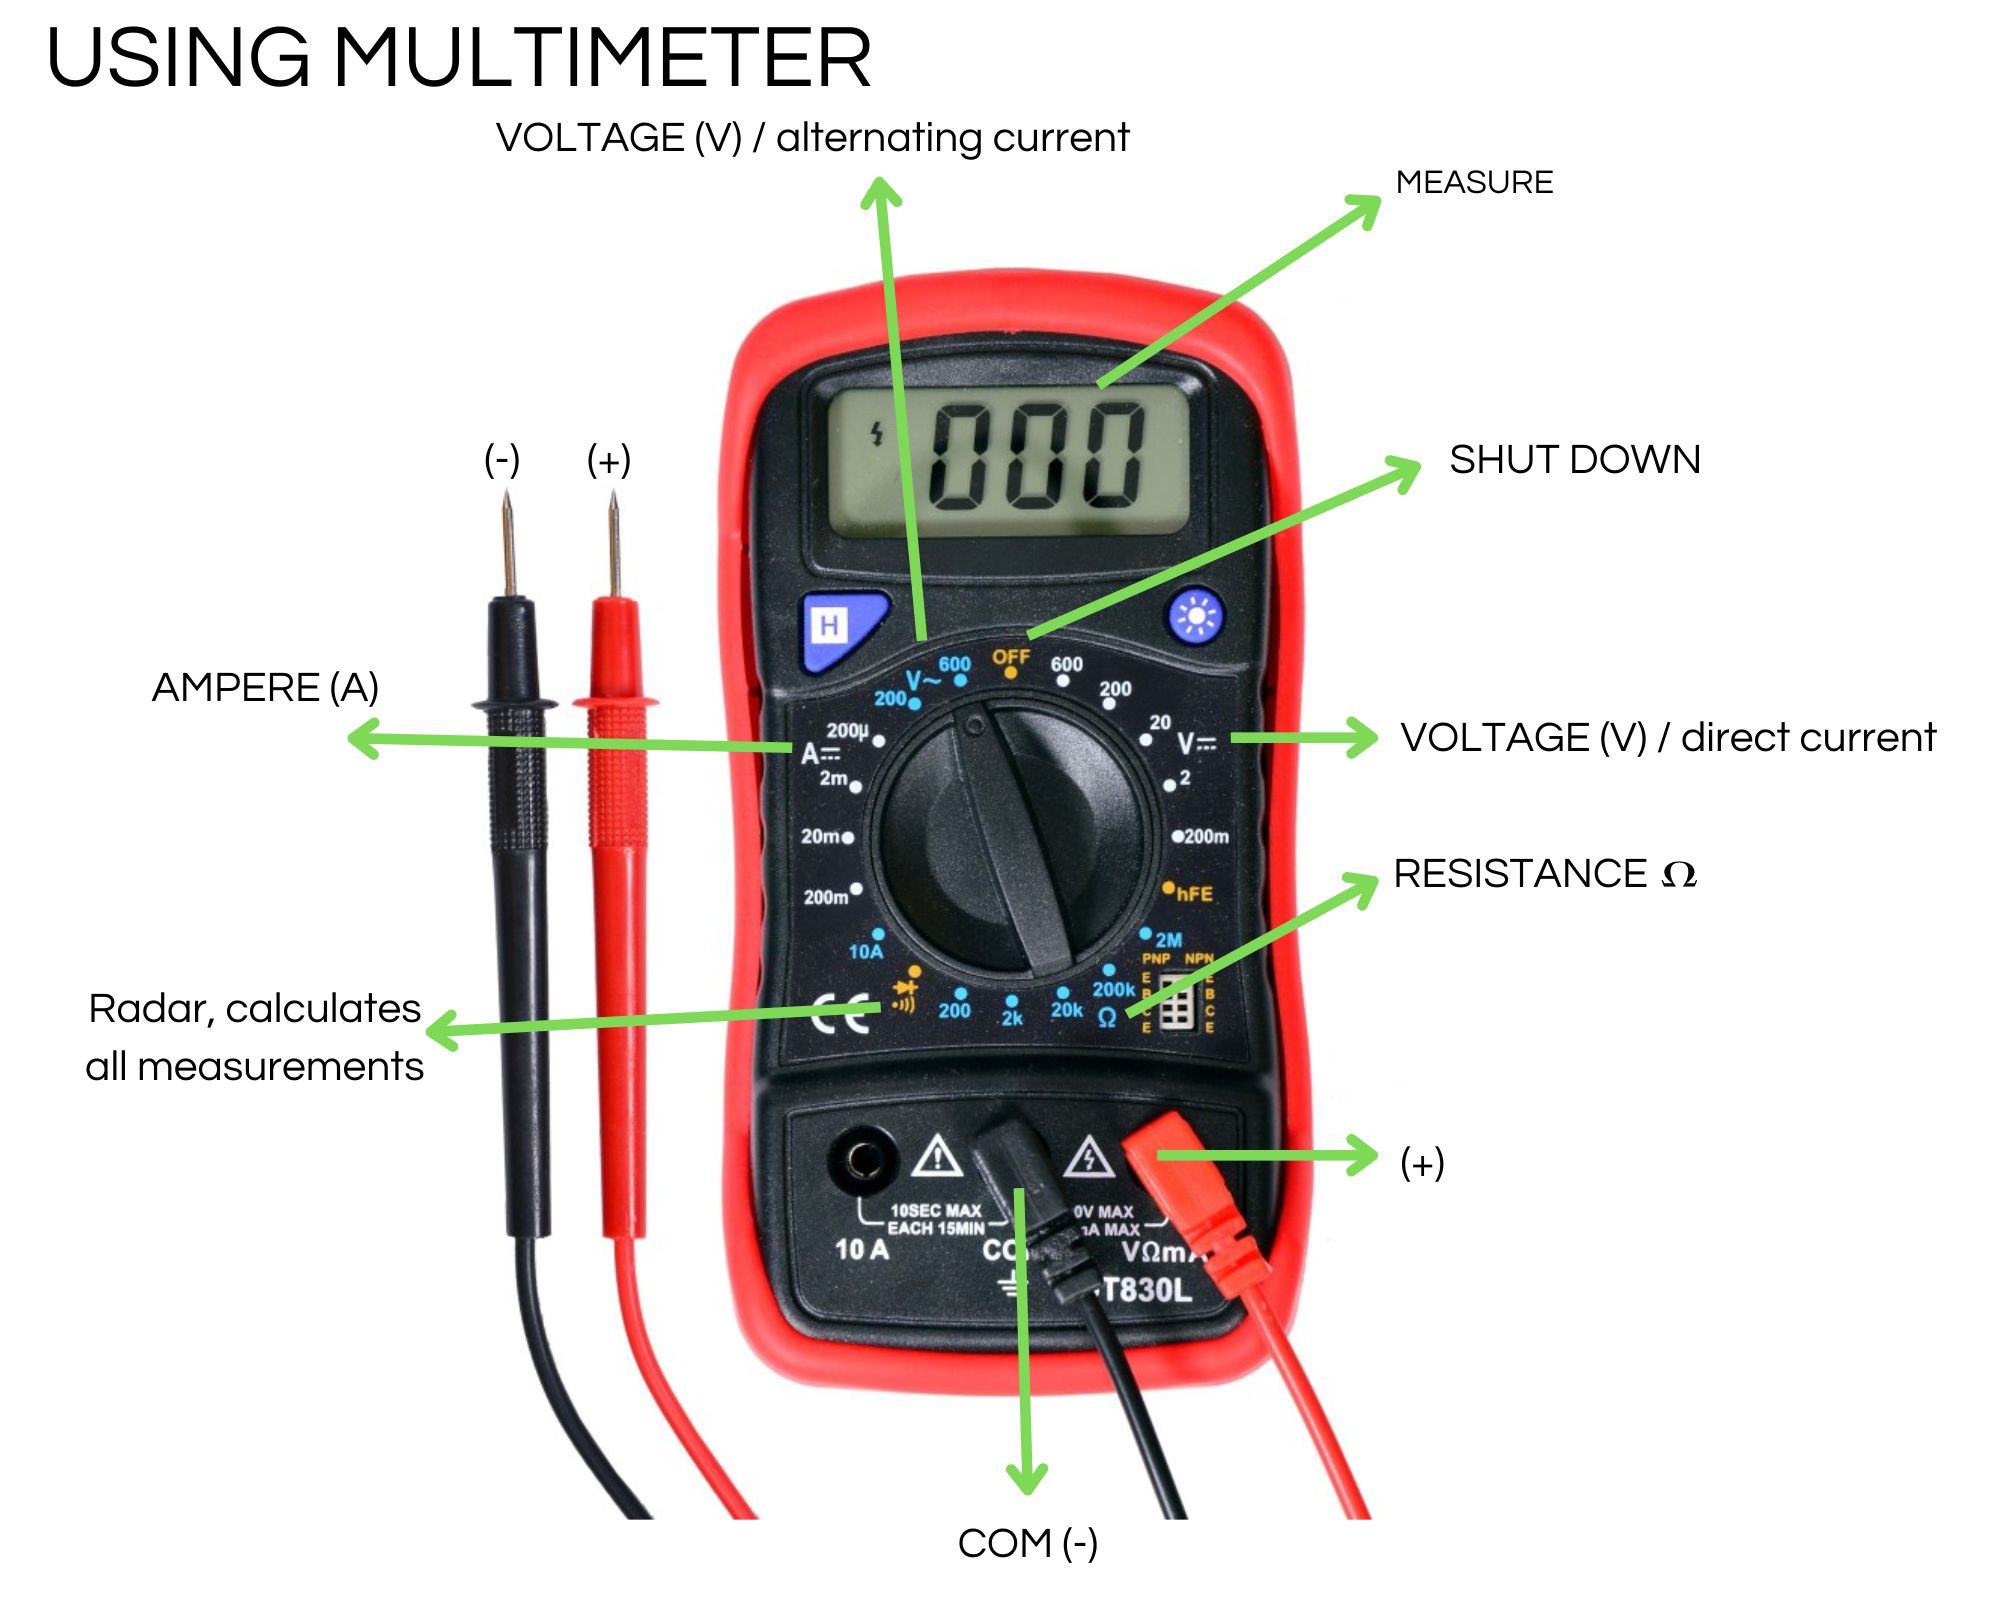
Lots of information to use soon
Forward Current (If) -> max current that you fix
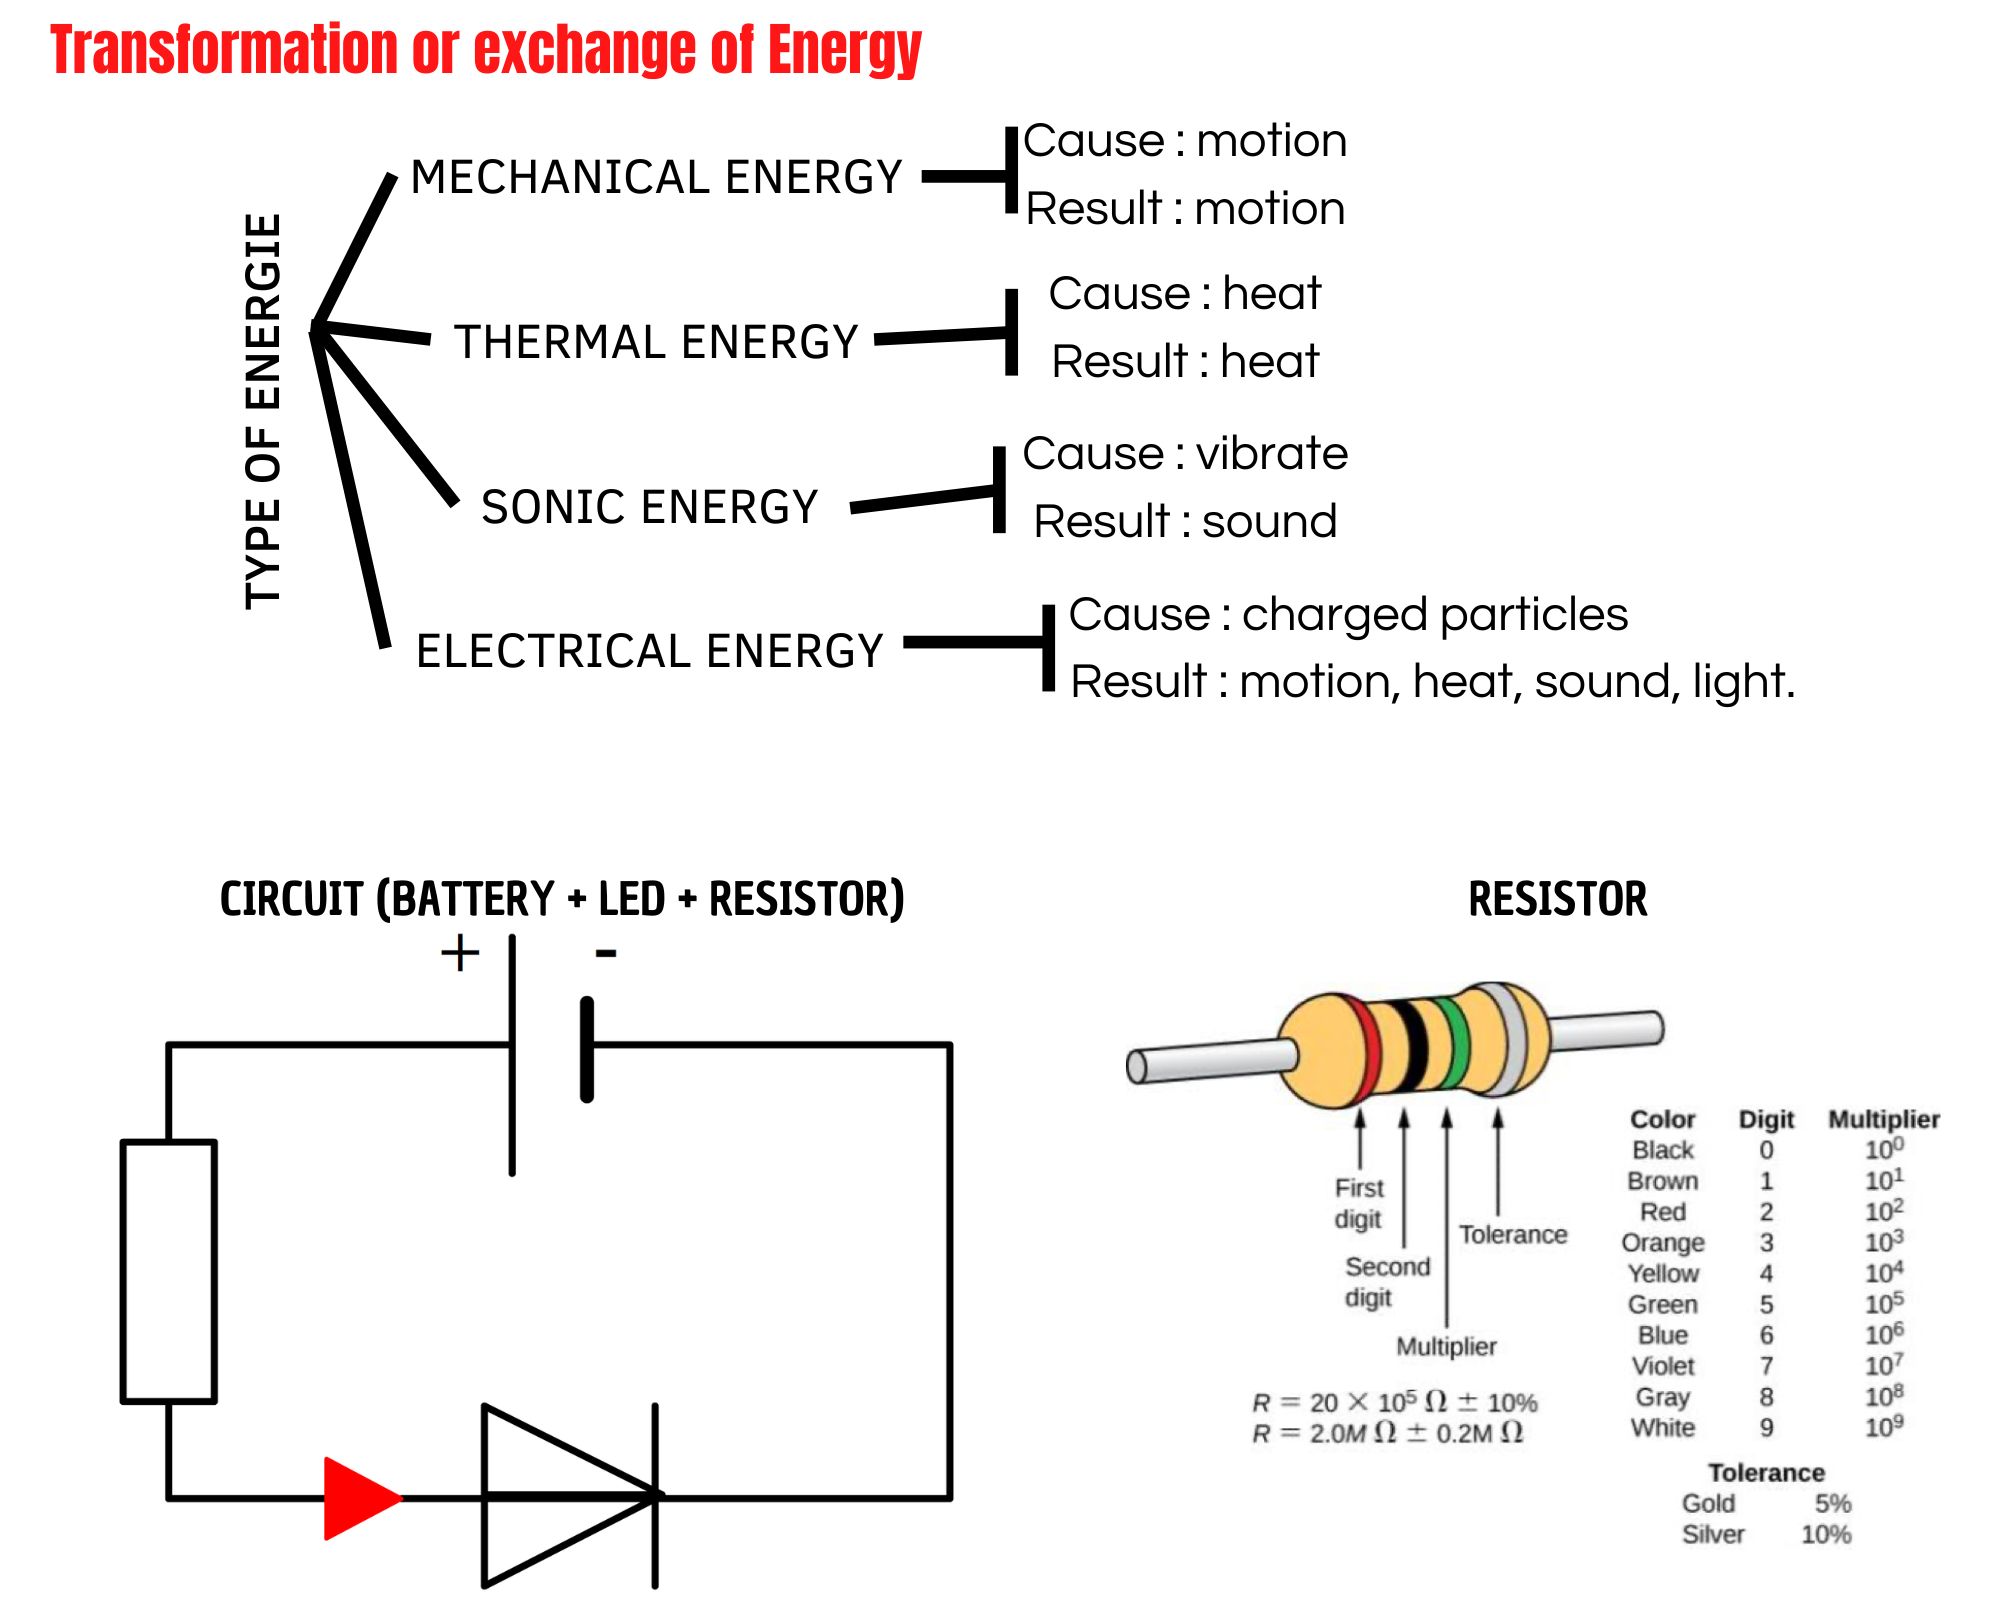
What do I need to make a circuit ?
- Source of electrons Power source (battery)
- Material to let the electrons flow (traces)
- a Load
- Resistor (1kohms = 1000 omhs / 1 MOhms = 10000000 OMHS)
SENSOR
- An analog sensor = variable resistor
- Pressure sensor
- Bend sensor
- Stretche sensor
- Potentiometer
A few measures
- LED = 0,005/0,020A = 5/20mA = Anode (+) Cathode (-)
- Velostat resistor = 24.5 Ohms
- Copper resistor = 0.20 Ohms
VOLTAGE - CURRENT - RESISTANCE
- Lower is the resistor. Higher is the current
- Higer is the resistor. Lower is the current
PHYSICAL CONNECTION
V = I x R = IR
I = V/R
R = V/I
R= (Vs-Vled) / Iled
RESISTOR
- Battery 9V => R>4700 Ohm
- Battery 5V => R>220 Ohms
- Battery 3V => no resistor
PRESSURE SWITCH"
- Battery 3V --> Sensor Min 0 Ohms to 250 Ohms
- Battery 9V --> Sensor Min 350 Ohms to 1400 Ohms
Some important informations :
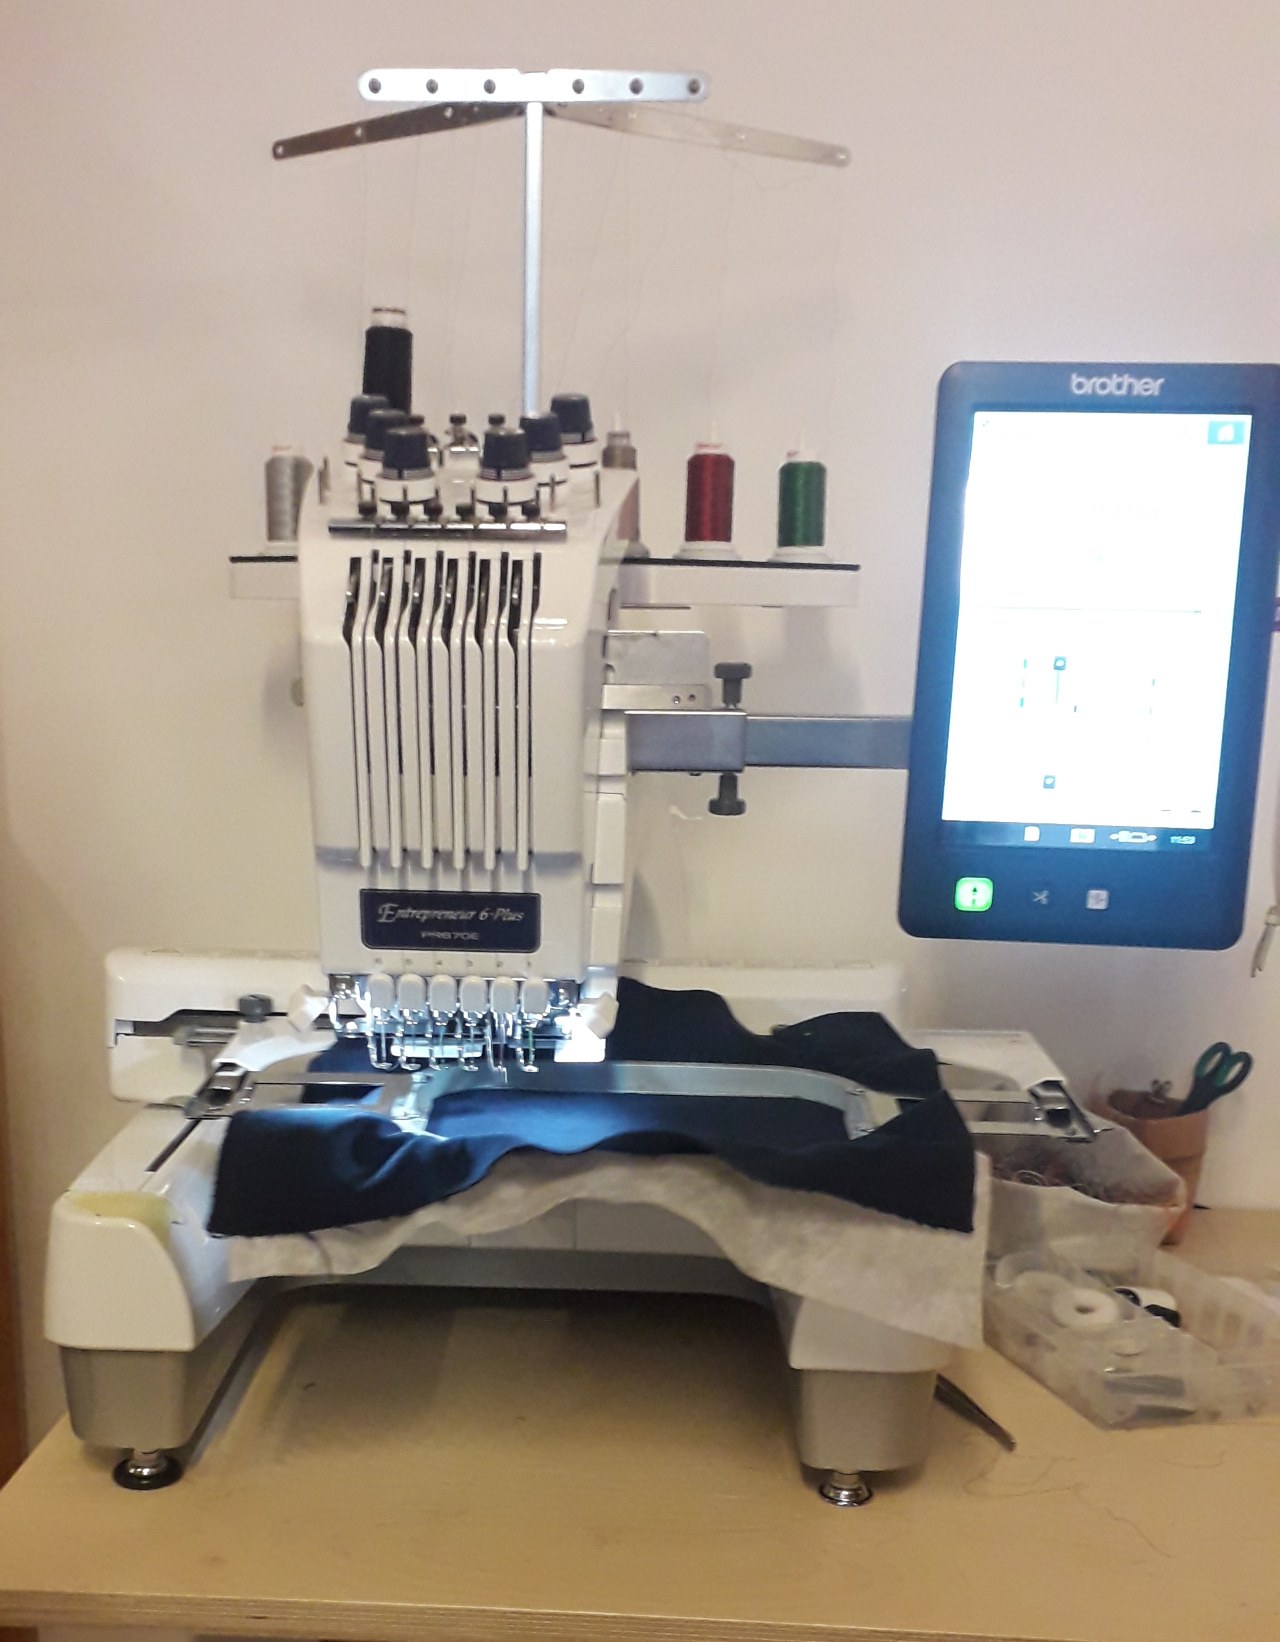
Friday, 21th October
Discovery of digital embroidery
Here the sacred machine with its control screen :
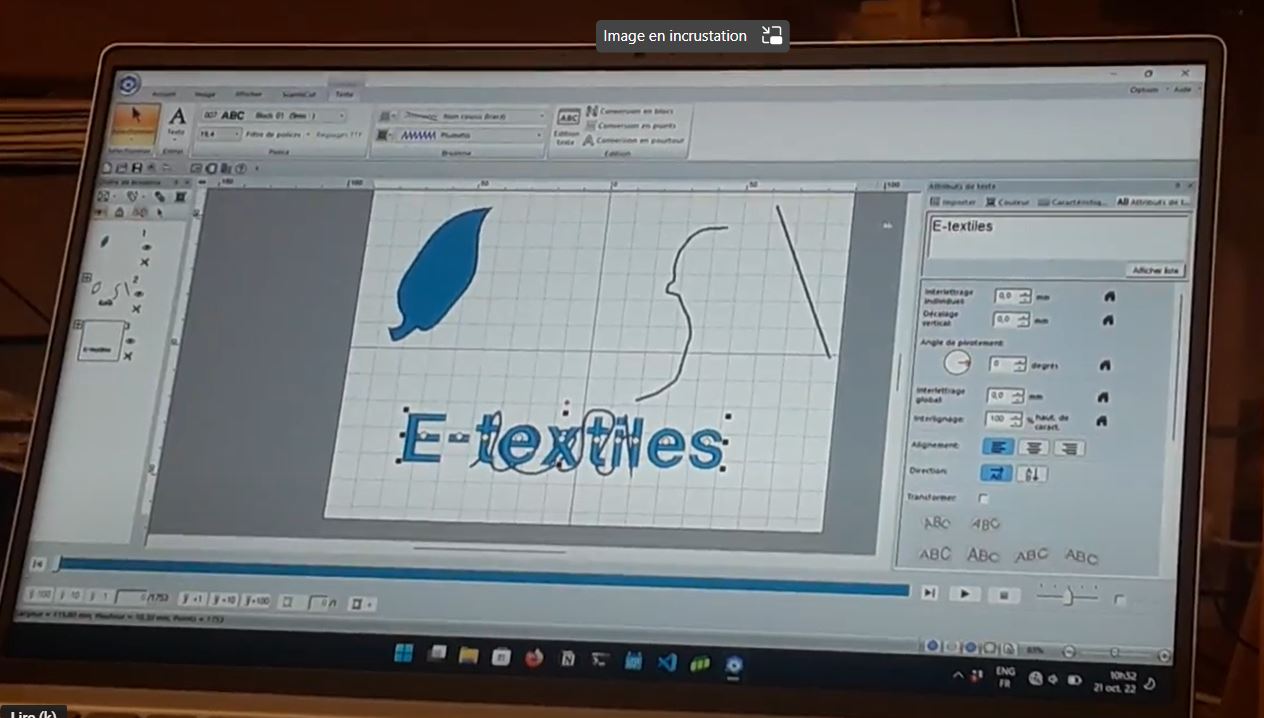
Project on the software associated with the machine :
Validating the imagined circuit :
Machine in action (so fast...) :
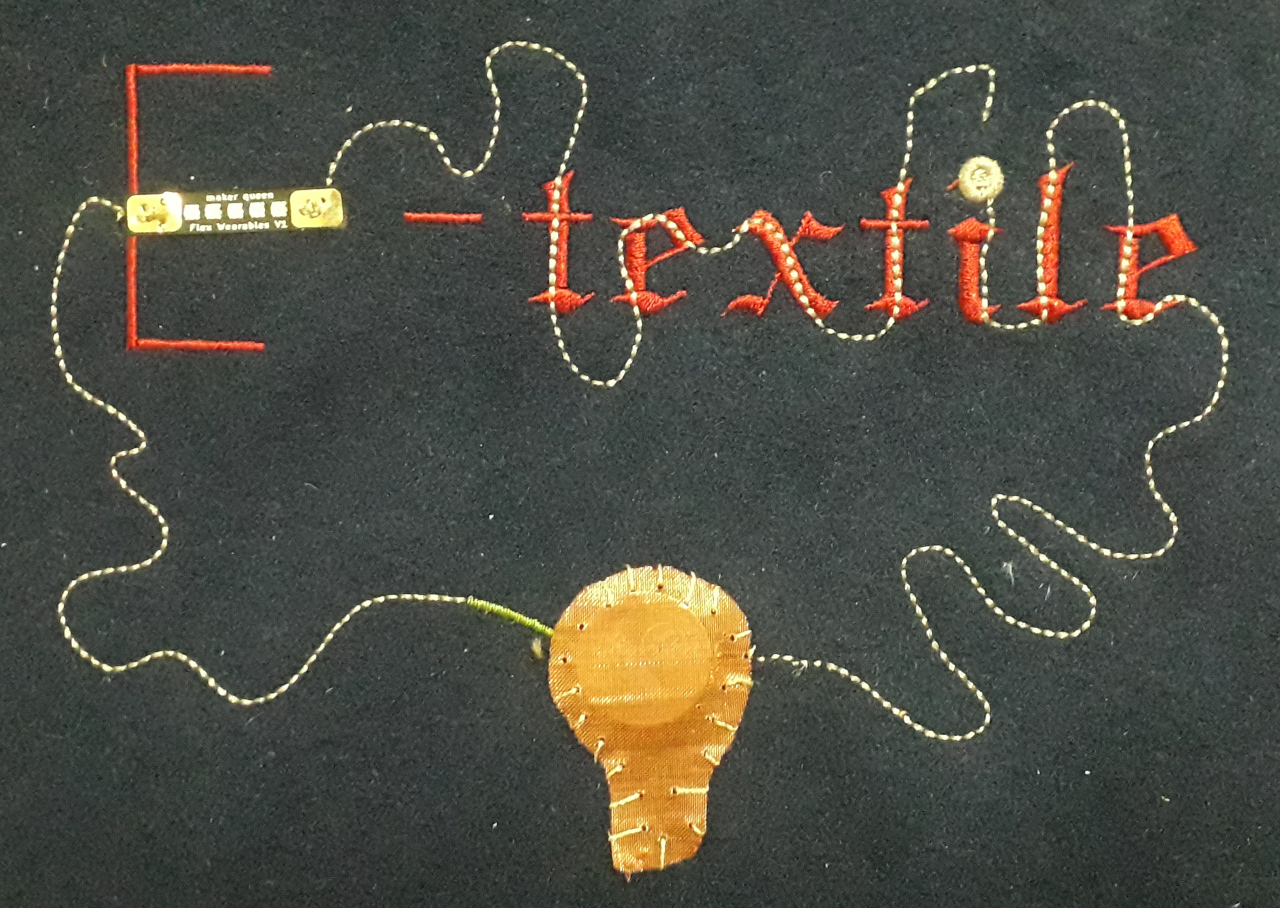
Result (not finished...) :
Monday, 24th October
ARDUINO
Language Reference : here
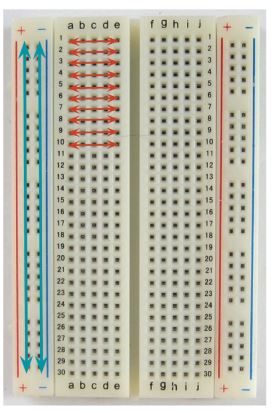
New tool : the breadboard and its functioning
This table can facilitate the assembly of a circuit with a led and a resistor.
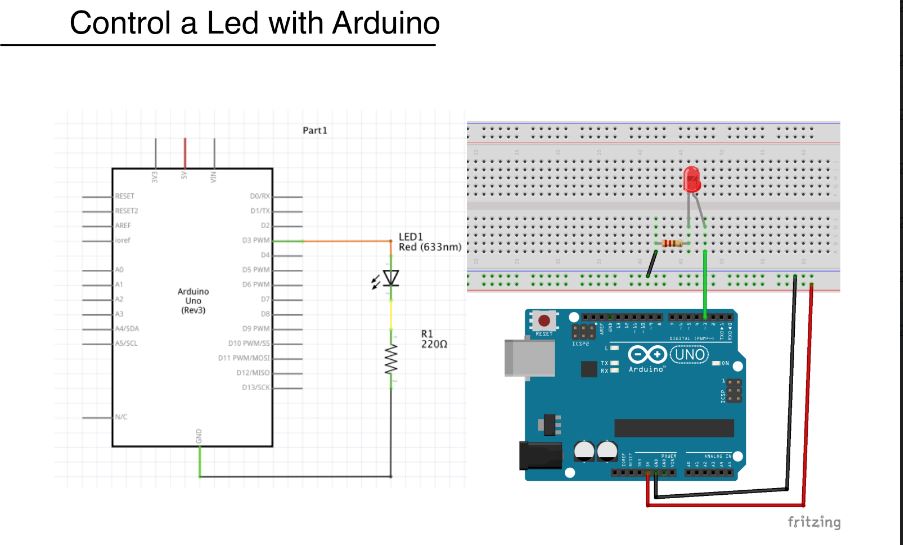
Blink Led
By following Emma Pareschi's tutorial and with the help of her explanations I managed to light a led with the harware and software of Arduino.
Tools used
- Microcontroller Arduino
- Arduino IDE
- Breadboard
- Blue Led
- Resistor 220ohms
- Threads
- a bit of sweat
Code used Blink LED :
int led_pin = 3; //defin the pin where the Led is connected

void setup() {
  pinMode(led_pin, OUTPUT); //define pin of the Led as an output
}
void loop() {
  digitalWrite(led_pin, HIGH);
  delay(110);
  digitalWrite(led_pin, LOW);
  delay(100);
}
Visualize information with Arduino Software
In this second setup with the Arduino hardware, the goal was to display the data collected by the Arduino software. Thanks to this information collection, it was possible to control the intensity of the LED. This example illustrates the power of the Arduino.
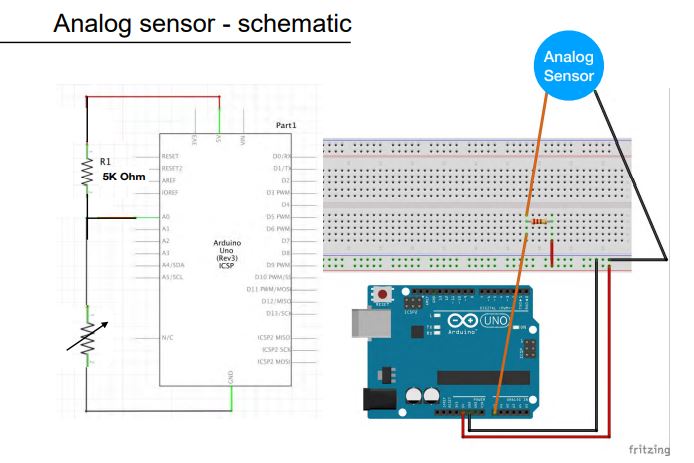
Code used Read_Analog_sensor :
int analog_sensor_pin = A0;
int analog_sensor_value = 0;
void setup() {
  pinMode(analog_sensor_pin, INPUT);
  Serial.begin(9600);

}
void loop() {
    analog_sensor_value = analogRead(analog_sensor_pin);
  Serial.println(analog_sensor_value);
  delay(100);

}
Result
Articles
- E-textile et accessoires intelligents : avancées majeures
- E-textile Wikipédia
- ScienceDirect
- E-textile 2022 Conference
- Mode in textile by Ifth - Un fil conducteur en cellulose, potentiel pour les textiles électroniques durables
- ARS ELECTRONICAS STARTS Prize to Artificial "Skins and Bones"
- Le textile, un matériau multifonctionnel, Guy Némoz