WEEK 09. Textile Scaffold
References & Inspiration
Guillermo Parada, "Catenary Potter printer"
First of all, I got really interested into the topic of printing the memory of the fabric.
The work of Guillermo Parada really embodies the subtleness of the print, and the potteries made with this techniques really have this something sensible, with a part of randomness in it.
Catenary Pottery Printer by Guillermo Parada from Dezeen on Vimeo.
The notion of imprints is very important to me. It brings the idea of memory and transmission.
El Anatsui
This Ghanean artist works with copper wire, liquor bottle caps in aluminum.
Textile and wood marquetry
I was really interested into the topic of marquetry. I think wood is a beautiful material, with so many different nuances that the
Marquetry is a term that comes from the French marqueter, which means variegate, alter in appearance, especially by adding different colours.
I like this idea of working with several nuances of wood. It is sensual, and full of meaning, since you work with a living material.
Elisa Strozyk
The work of Elisa Strozyk is surprising, since the fall of fabric is modified through the adding of a refined work of wood.
Andrea Mastrovito
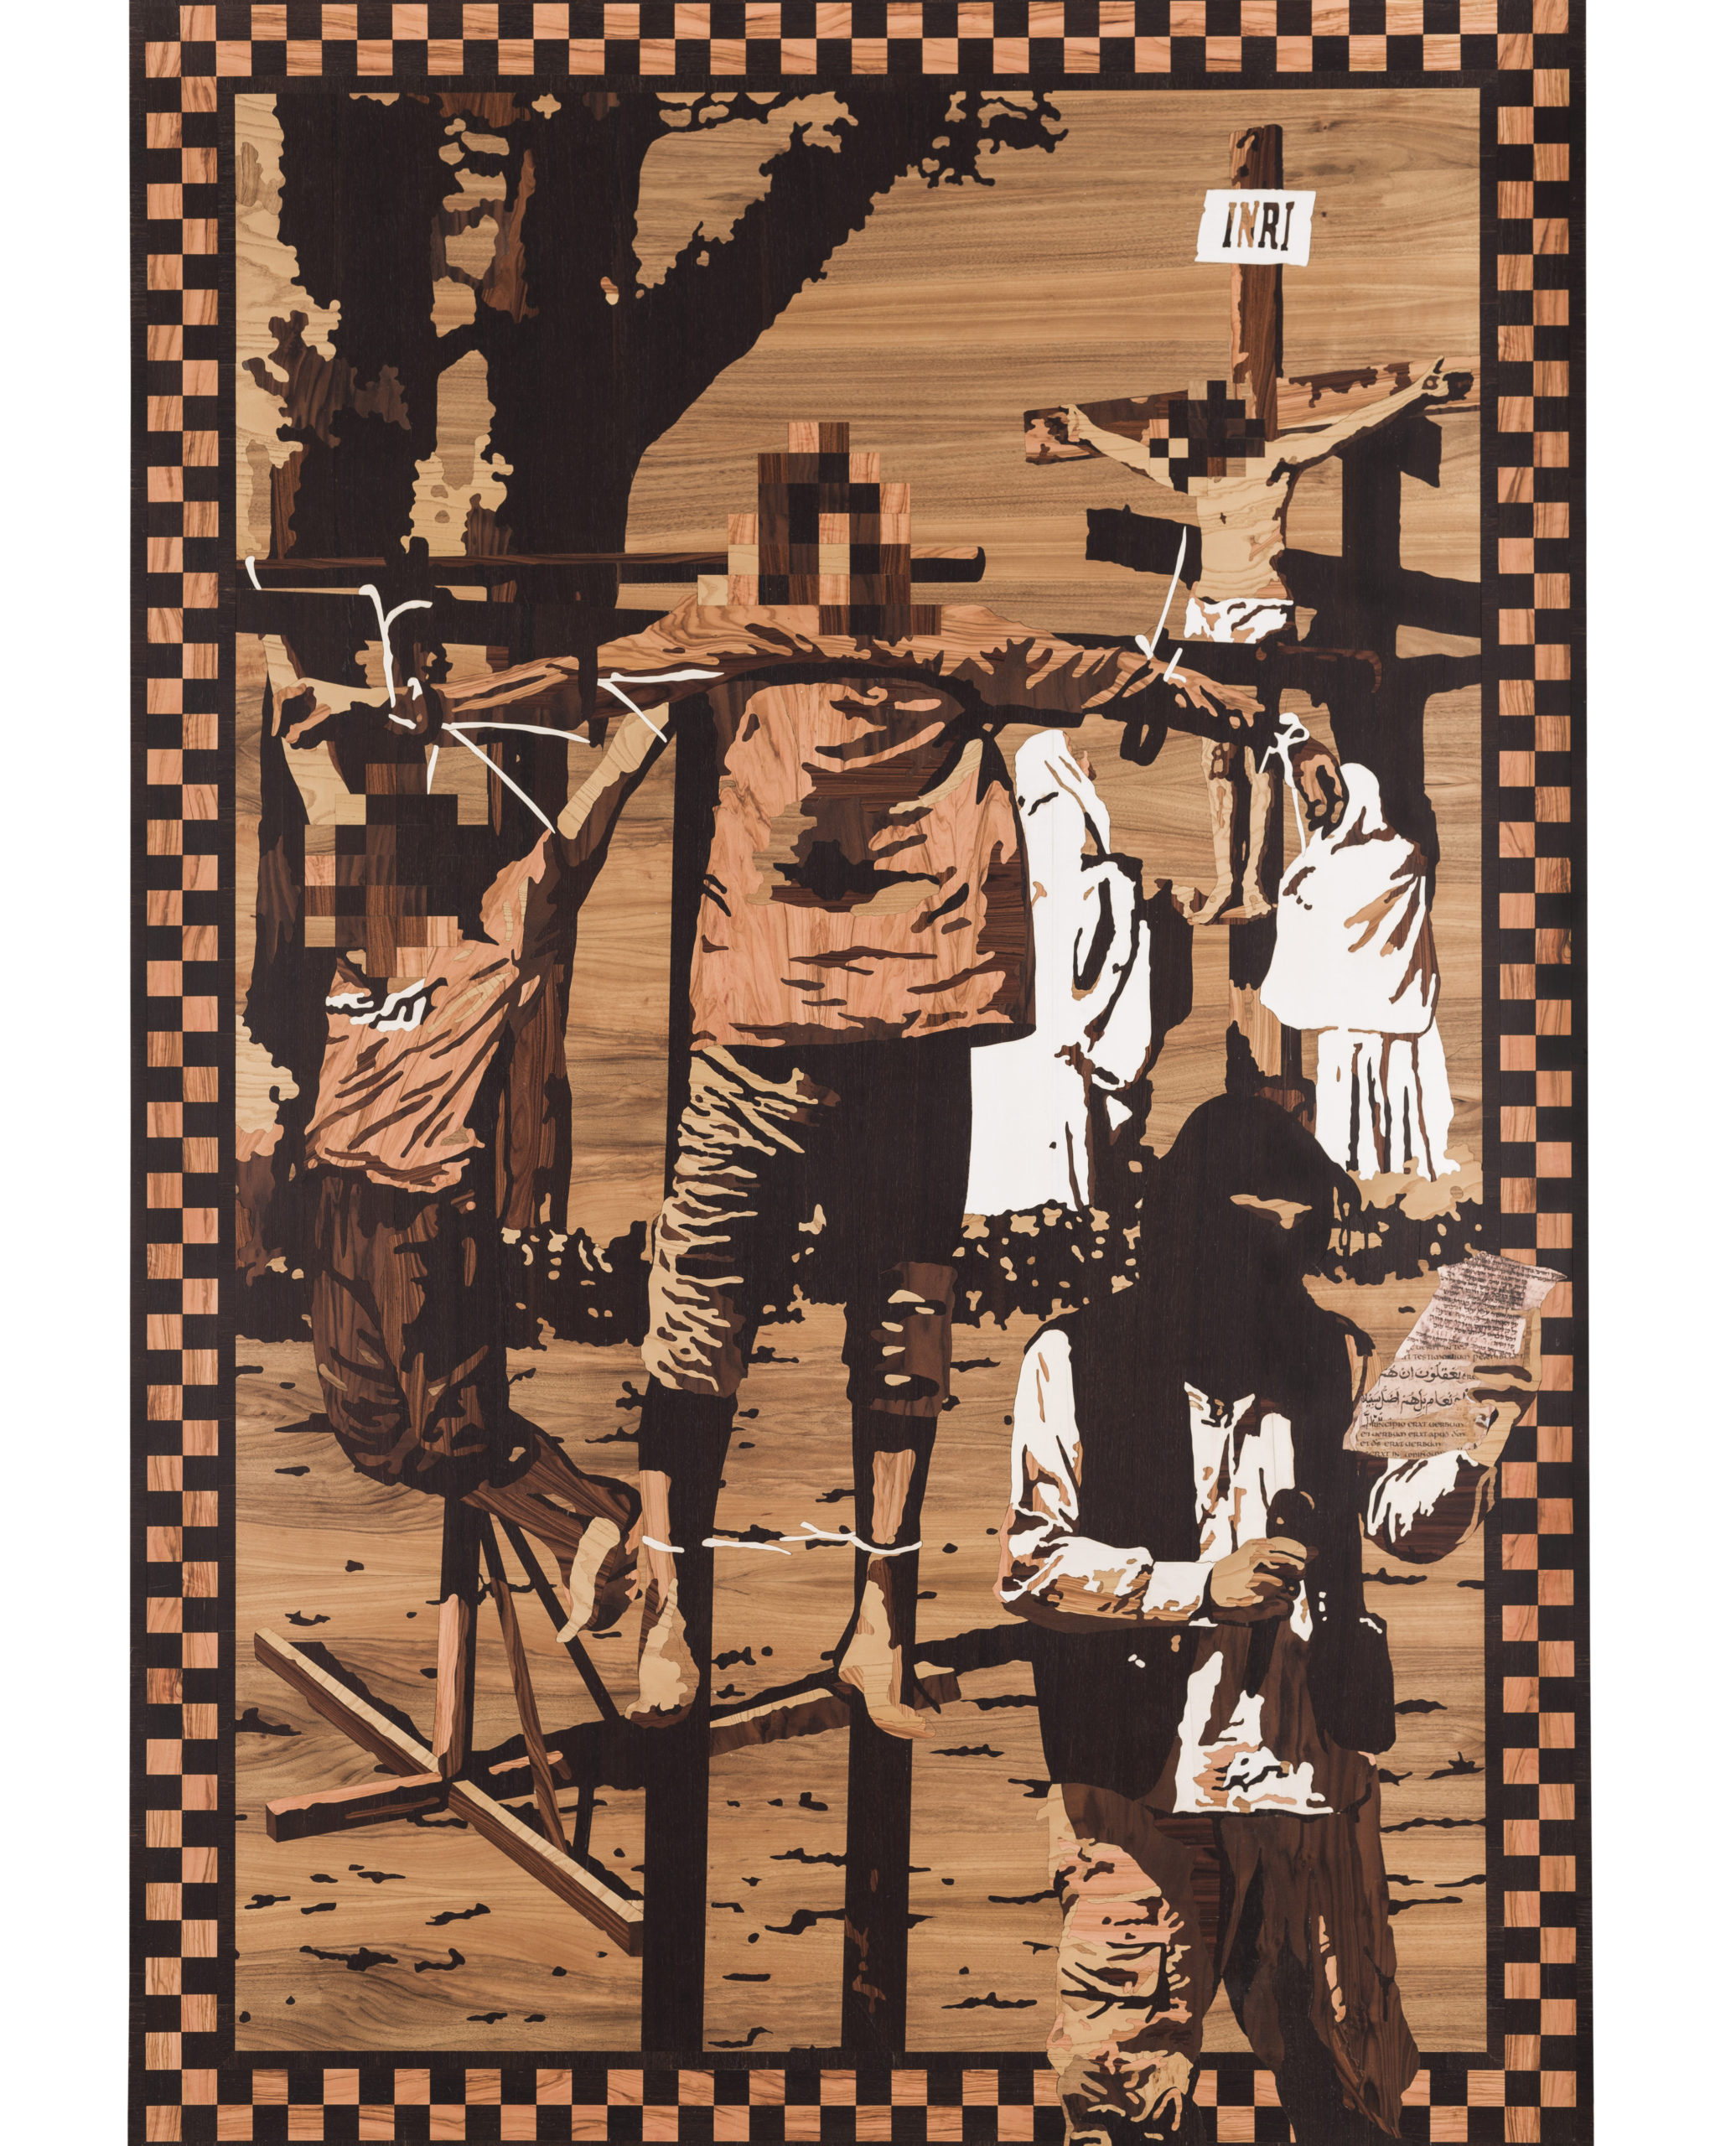
You can say so much with this technique, here is the proof of it. Andrea Mastrovito denounces some of our contemporary situations through the work of wood. It is interesting that his masterpieces are put on the ground like a wooden flooring. It forces you to avoid walking on it, it guides your path just as it helps guiding your reflexion about the world.
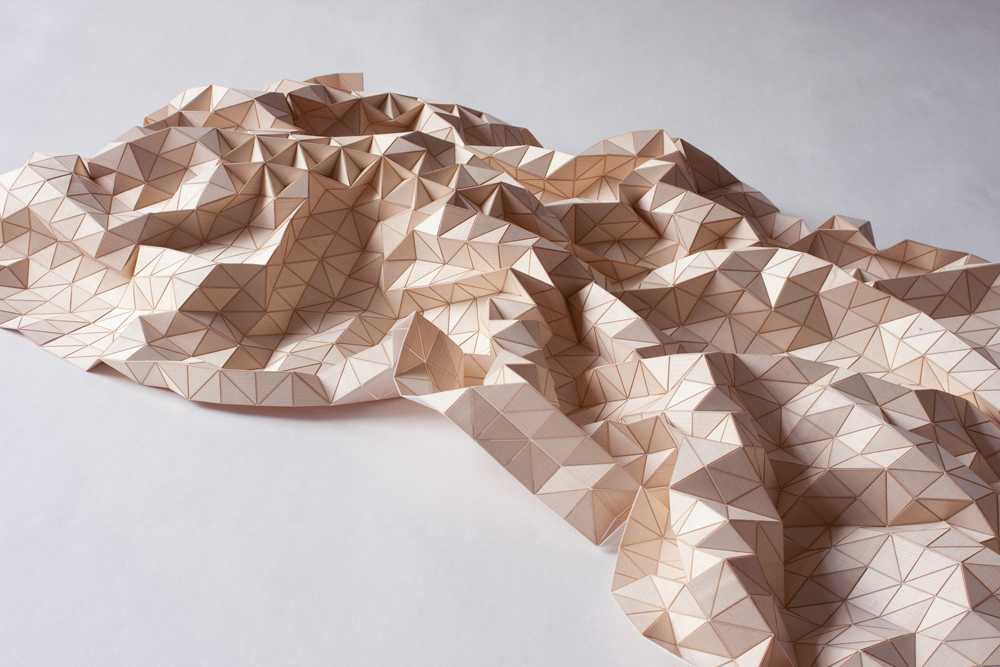
Idea and process
I thought of two different types of marquetry: the geometrical and abstract one, and the figurative one.
Moving textile and organic shapes
The dilemna I solved by using both types of shapes what: do I use geometrical shapes, or organical ones?
Geometrical shapes are useful for the good and fluid manipulation of the textile after it is enwooded.
Nonetheless, I really like organic shapes and it is really part of my practice. Actually, when I thought about marquetry in the first place, I had some work of marqueters inside my head, such as the work of Andrea Mastrovito and his marquetry figurative masterpieces.
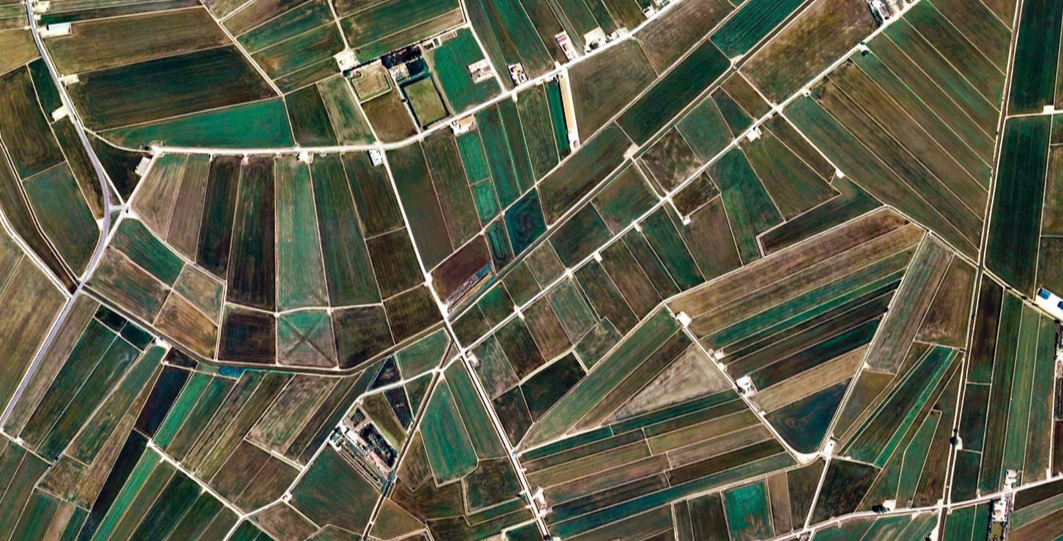
The idea was to mix both types. Actually, the geometrical shapes of marquetry made me think of fields seen from above. Here is one example of it:
The making
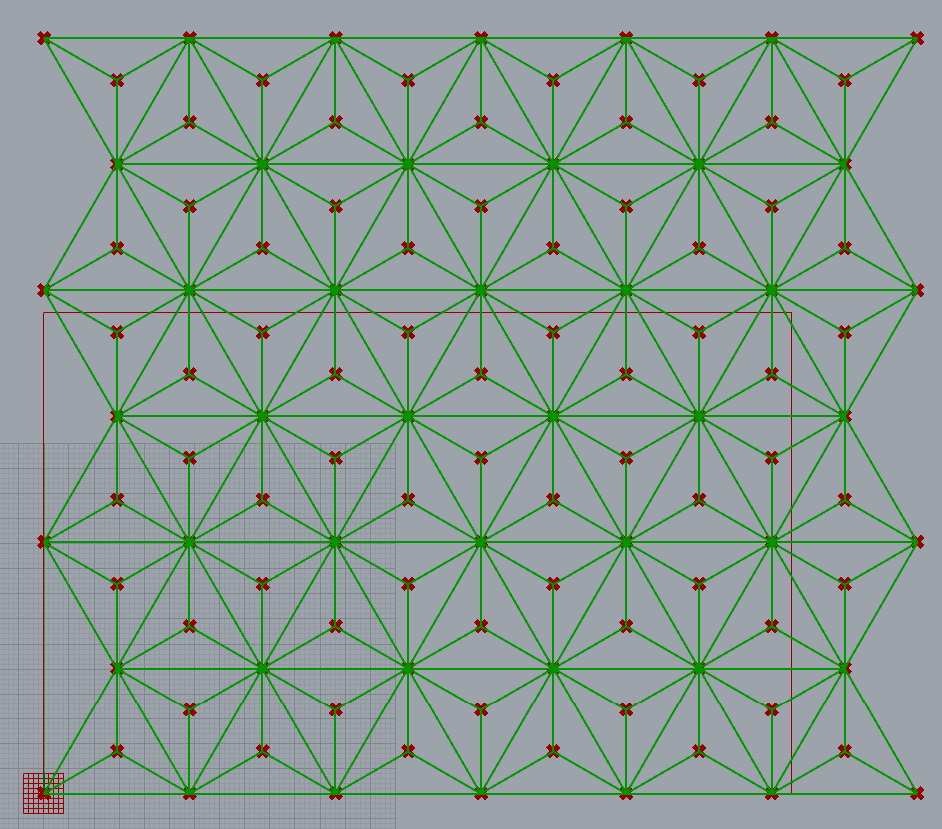
First, I used a geometrical pattern of repeated triangles I made in Rhinoceros 3D.
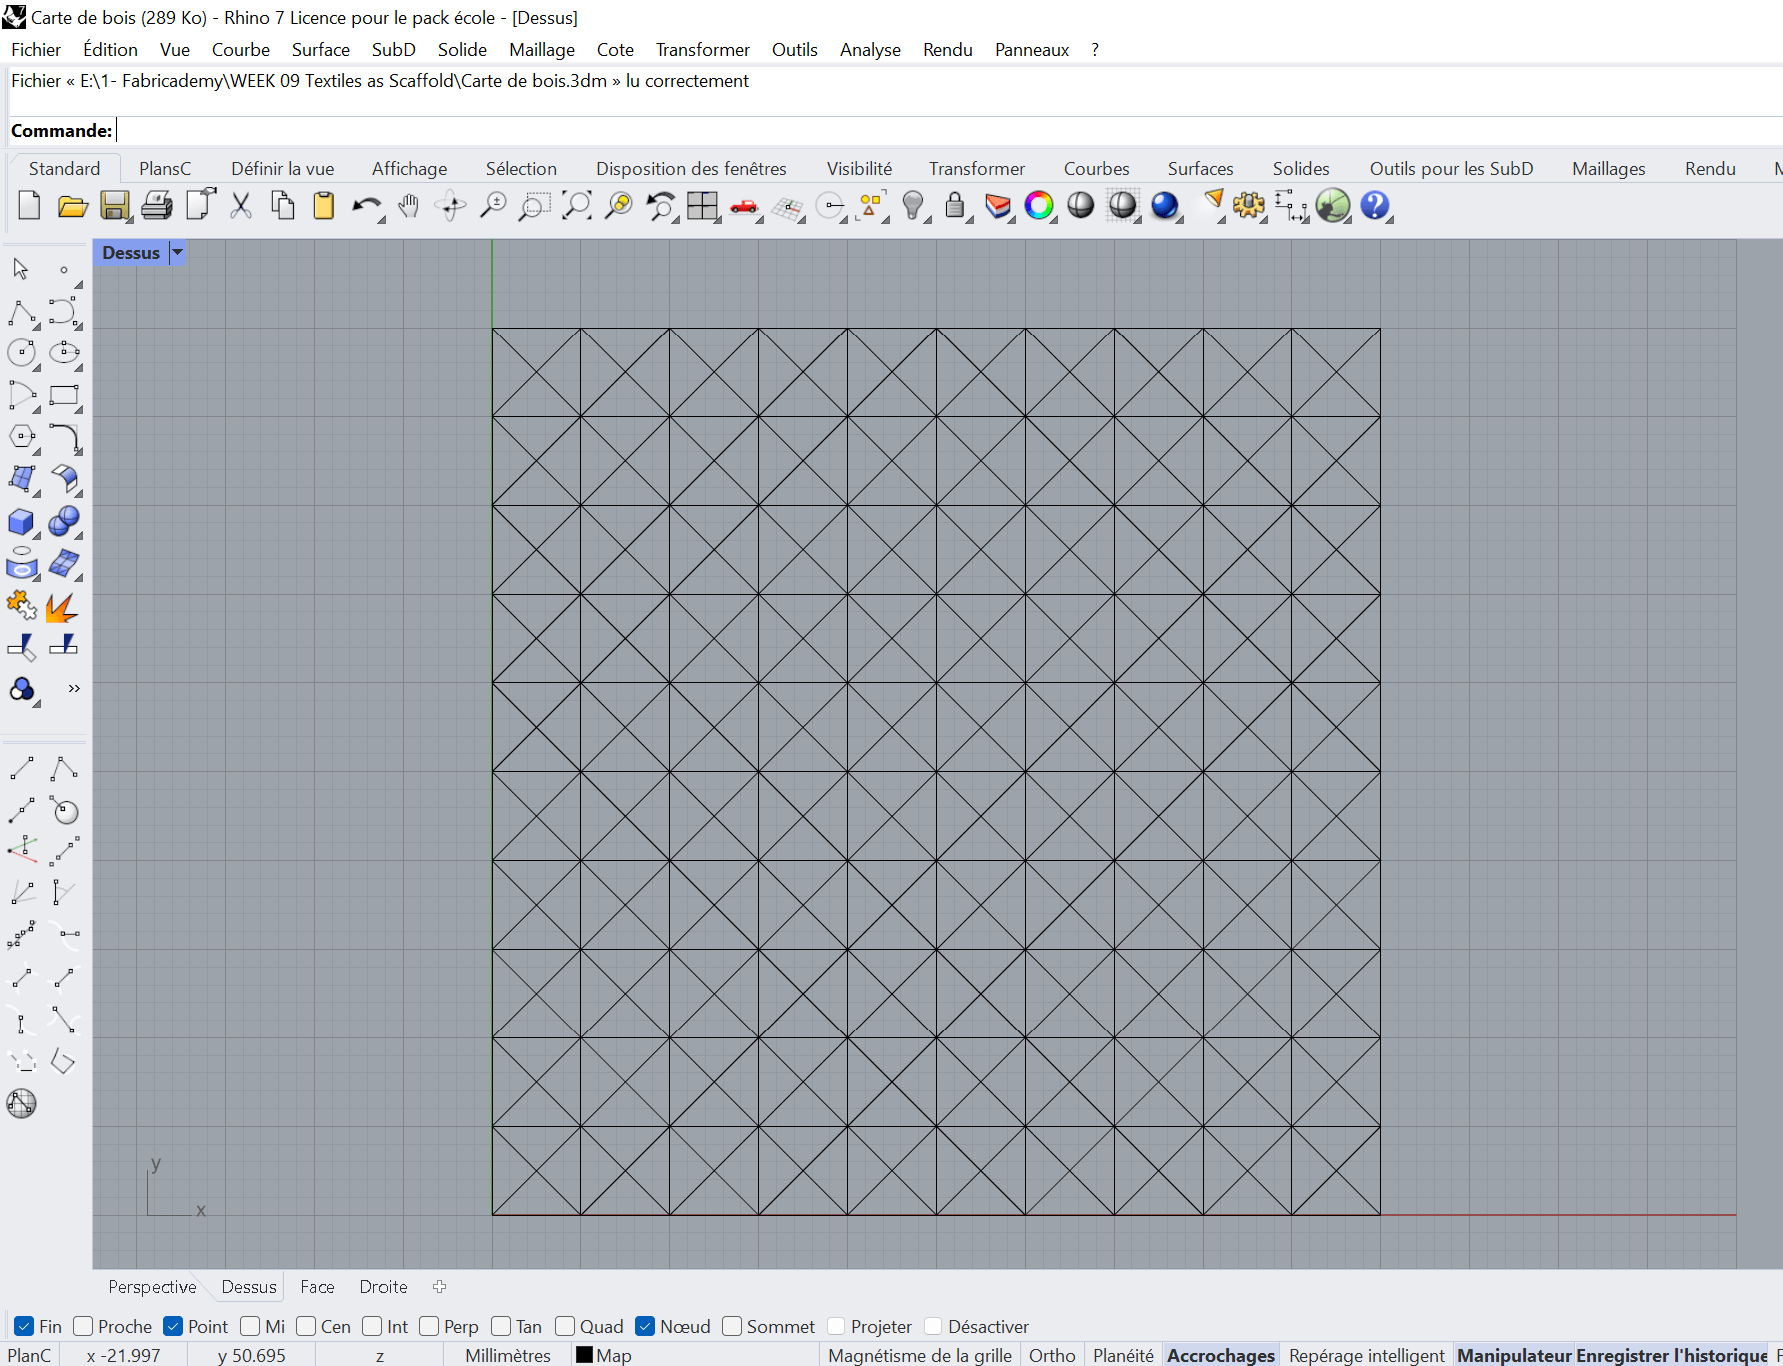
Tool "Rectangle"
- First point of reference = 0
- Second point of reference = 5
- Third point of reference = 5
Tool "Polyline", join each corner to the opposite one; you are creating triangles.
Tool "LinearArray", select the global shape.
- Number of shapes: 4 (or one you want)
Repeat the same process in the other direction.
Your result won't be equilateral triangles, but rectangle triangles.
Wood and roots
But I needed to anchor my idea in some roots, and to add some organic shapes to it, just like trees are strongly anchored in the soil. I decided to work with satellite pictures of Normandy, my region of origins, and more specifically with the village my parents live in. From a satellite picture, I extracted some lines, created by roads and fields.
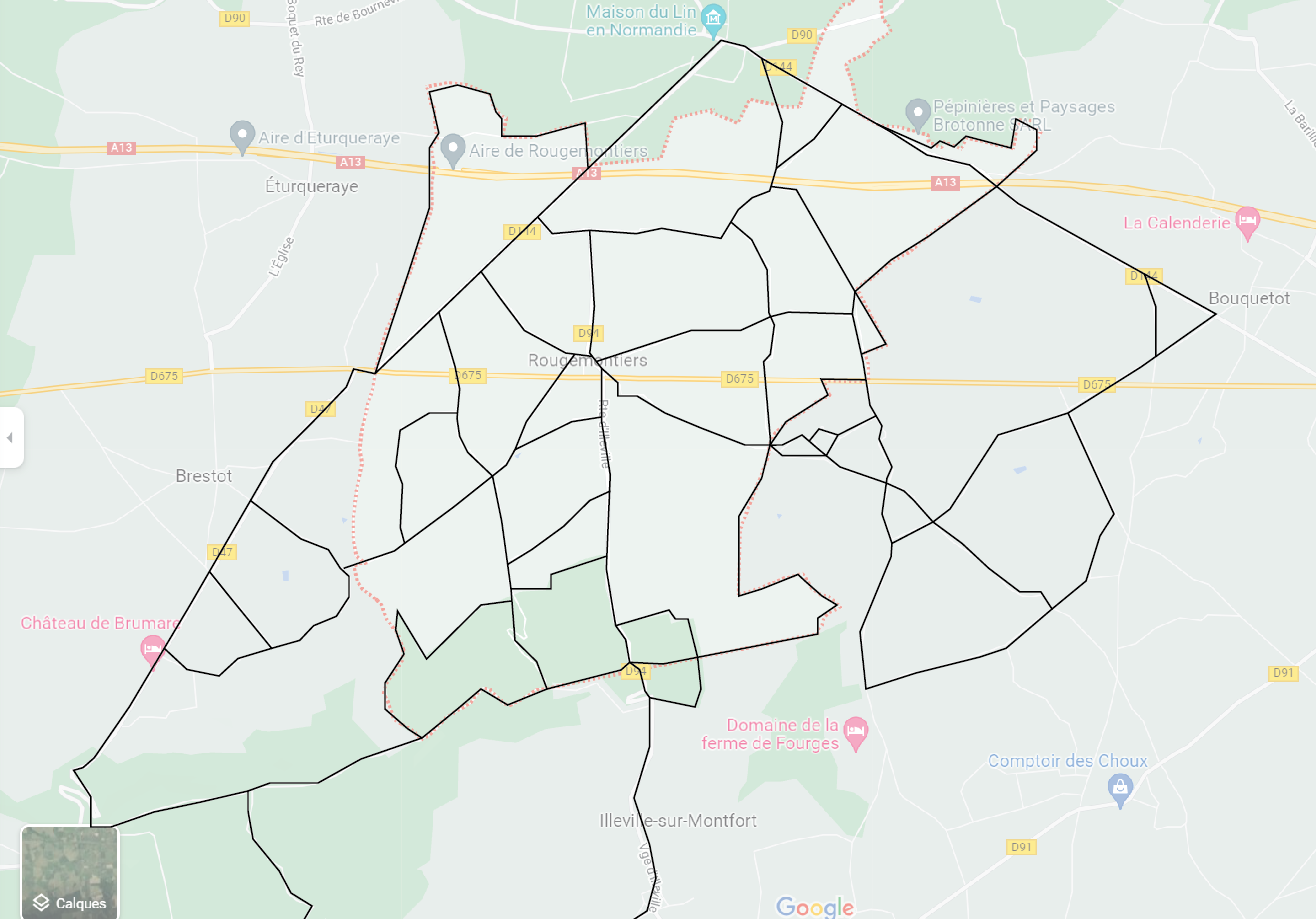
Then I put my map of lines (in black on the previous picture) onto the geometrical modules.
Laser cutting and engraving 1
Then I had to parameter the laser cutting machine. I worked with walnut veneer. This wood had a lot of nuances and tones in it, so I knew I could work with different colors, and made marqueterie with only one cutted piece of wood veneer.
The settings:
Semi cutting settings (in black, similar to engraving):
Power: 40.00 Speed: 10.00Cutting settings (in red): Power: 95.00
Speed: 20.00
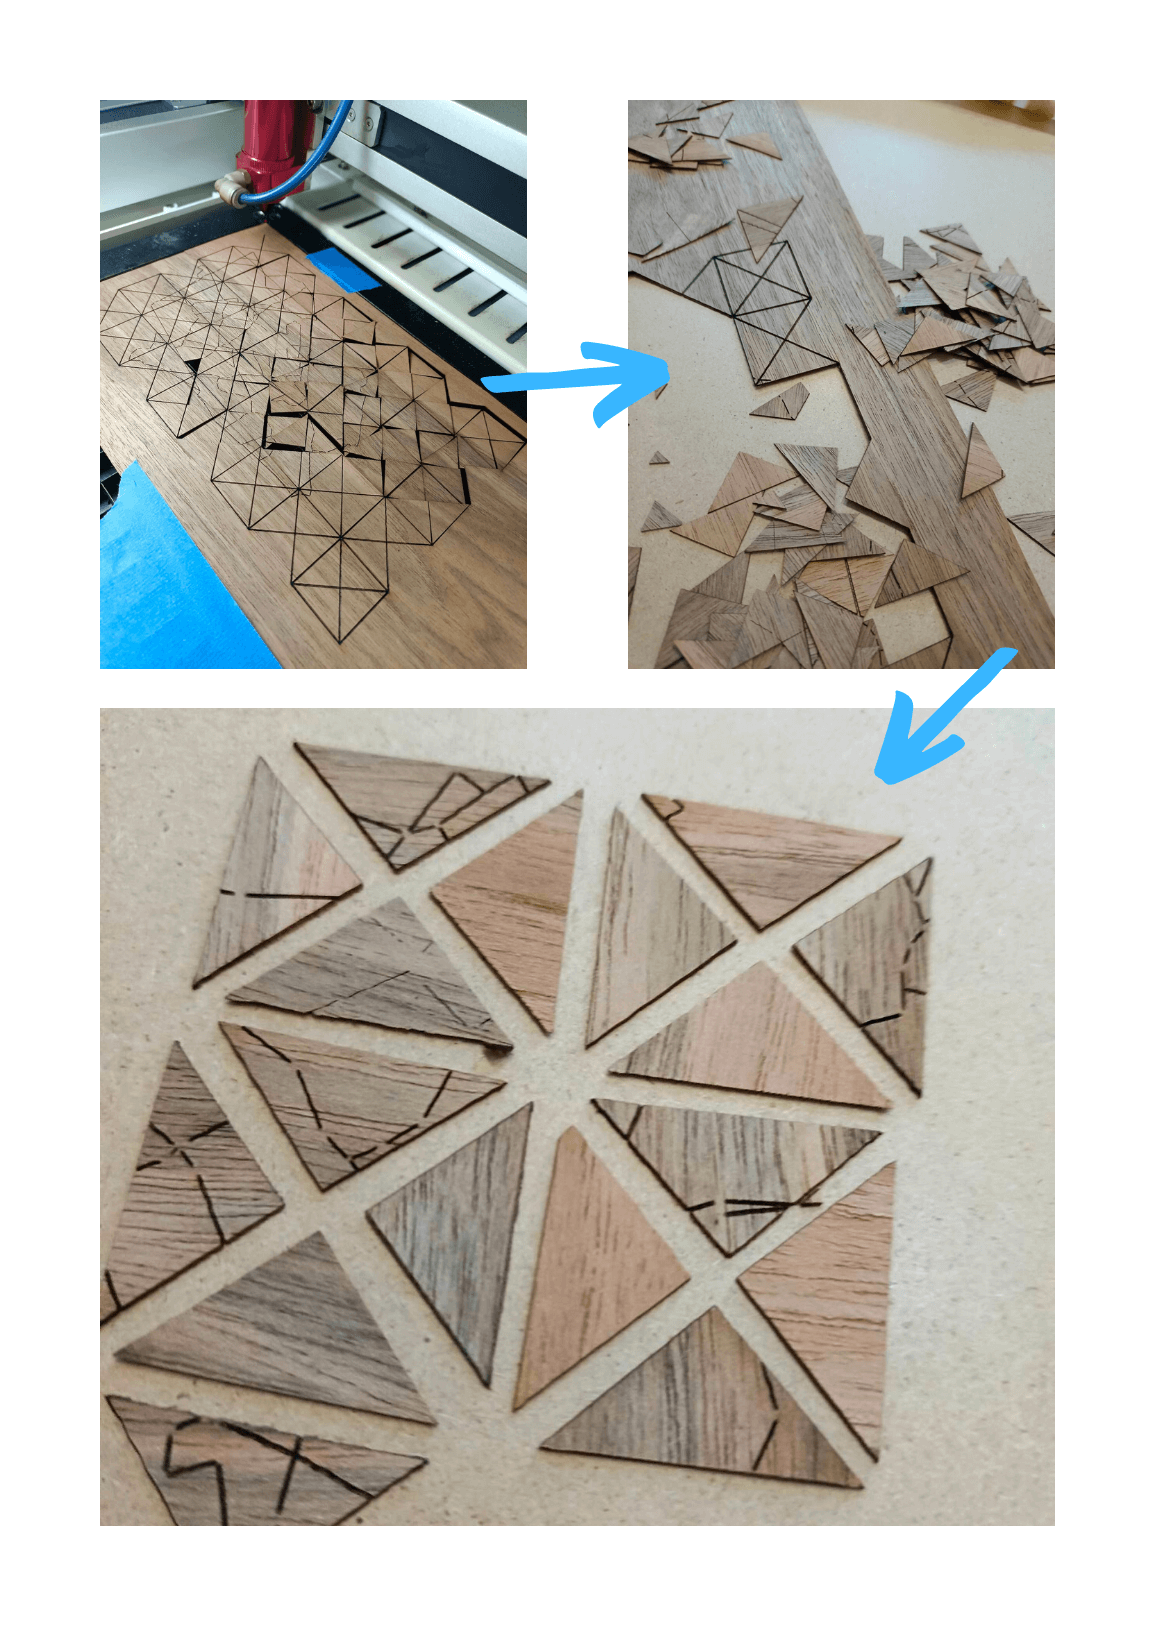
 I used wood glue to fix the little pieces onto a synthetic felt fabric. The walnut veneer being very thin (1mm approximatly), when gluing it to the felt, it had the tendancy to bend. Make sure to press it (with a pile of books for instance), and let it dry in the right shape for a night.
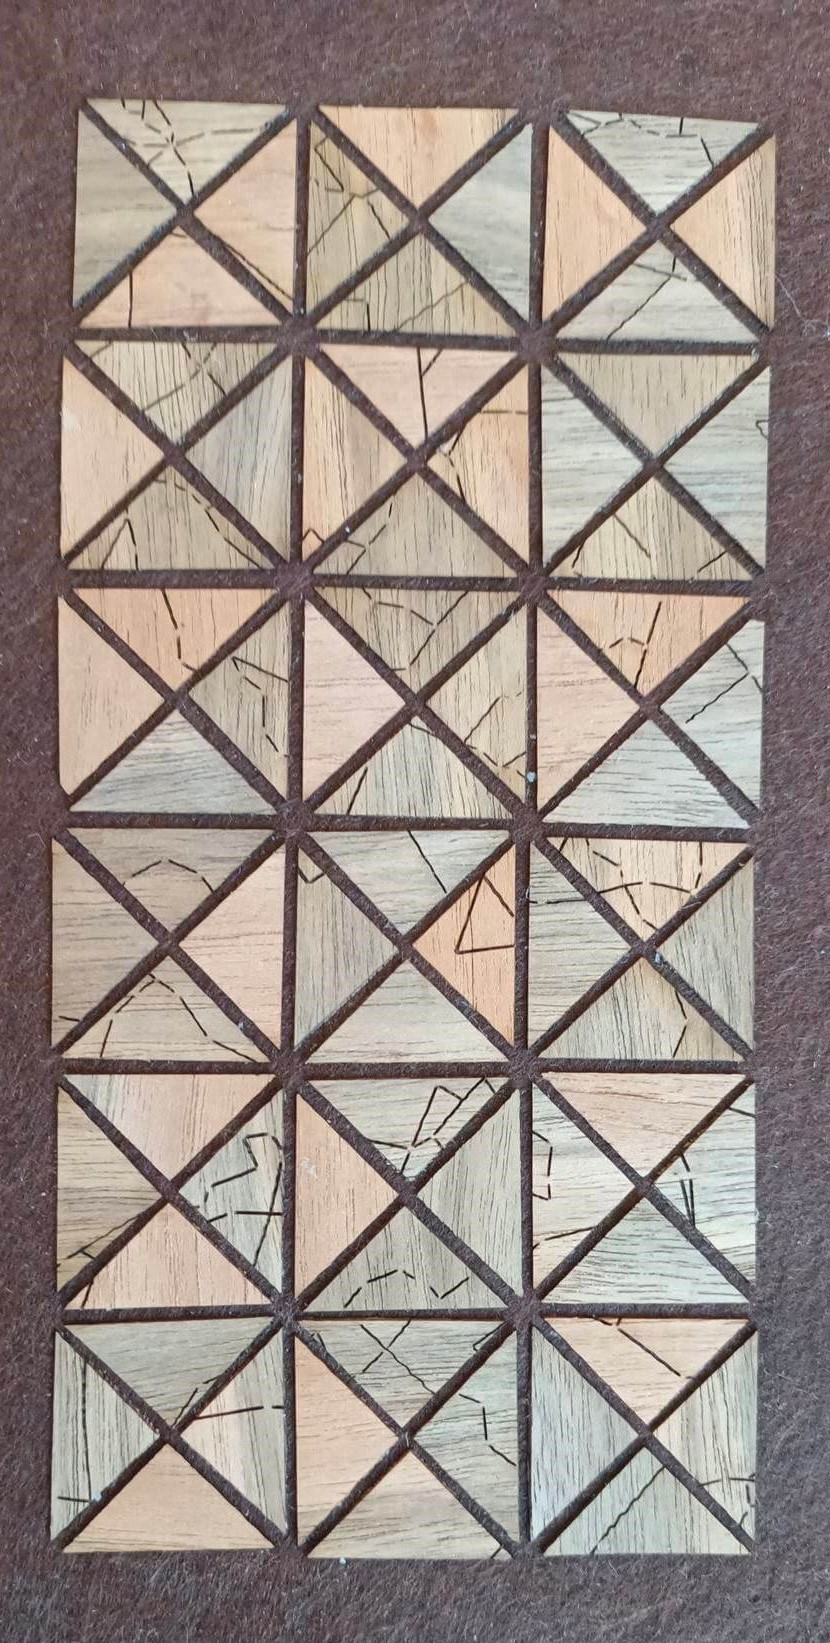
Then you can manipulate it:
BOM and tools to create wood cover for textile
1 or several sheet of wood veneers (depending on the wood, the color will be different)
1 piece of fabric (mine were scraps of synthetic felt)
Glue for textile
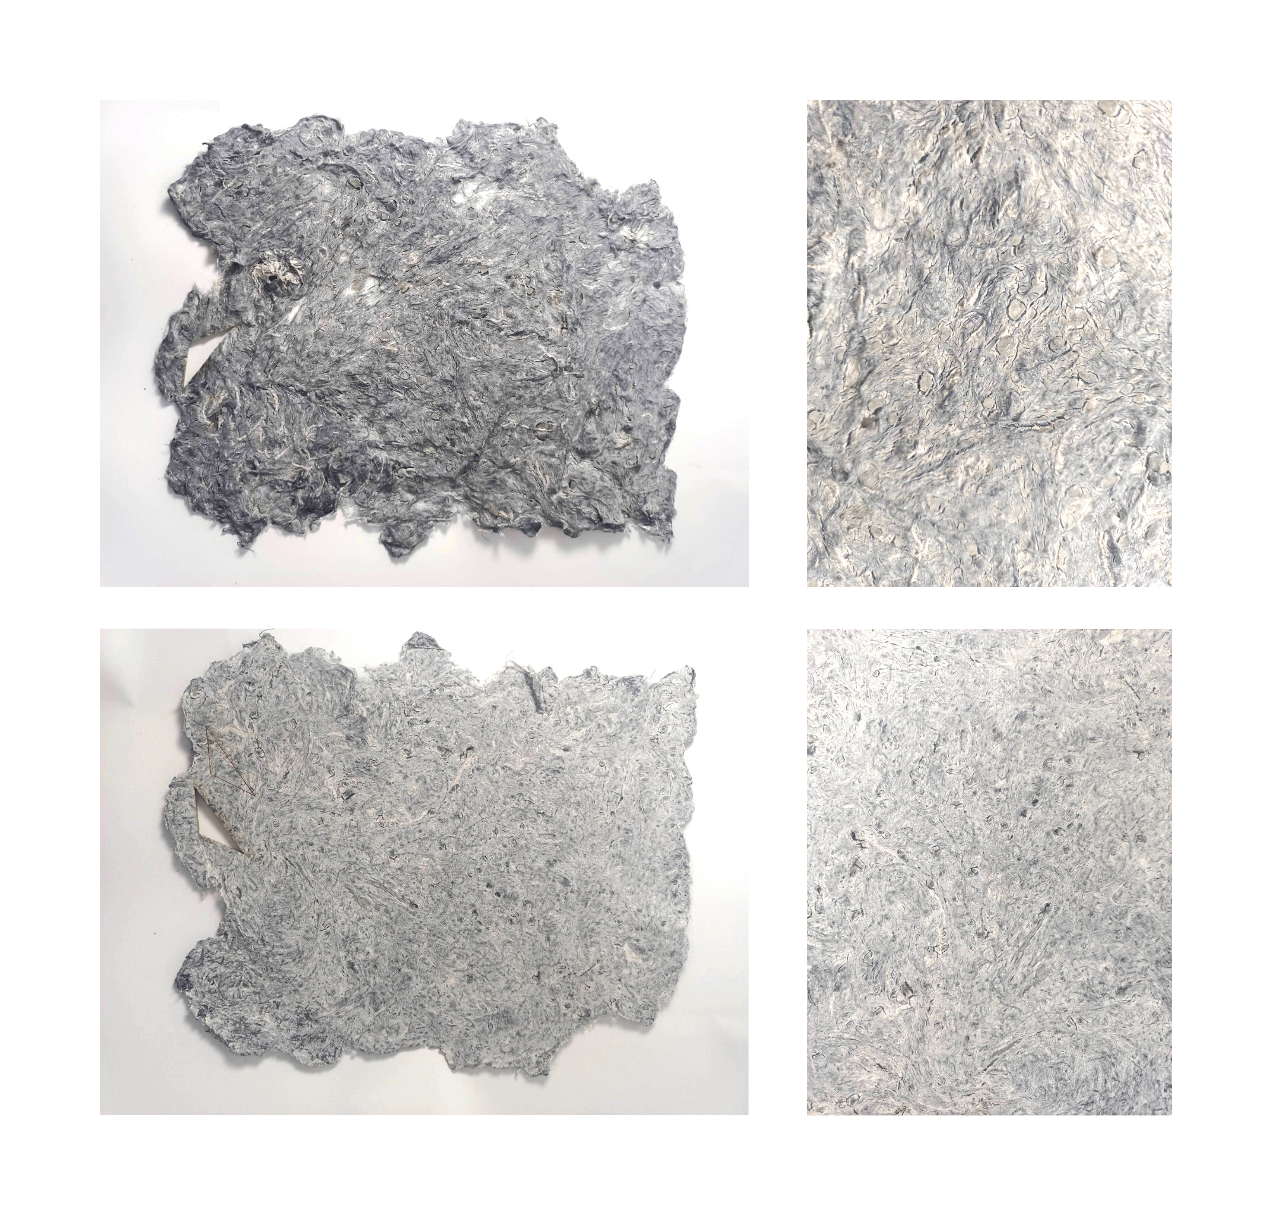
Biocomposite: making paper with textile
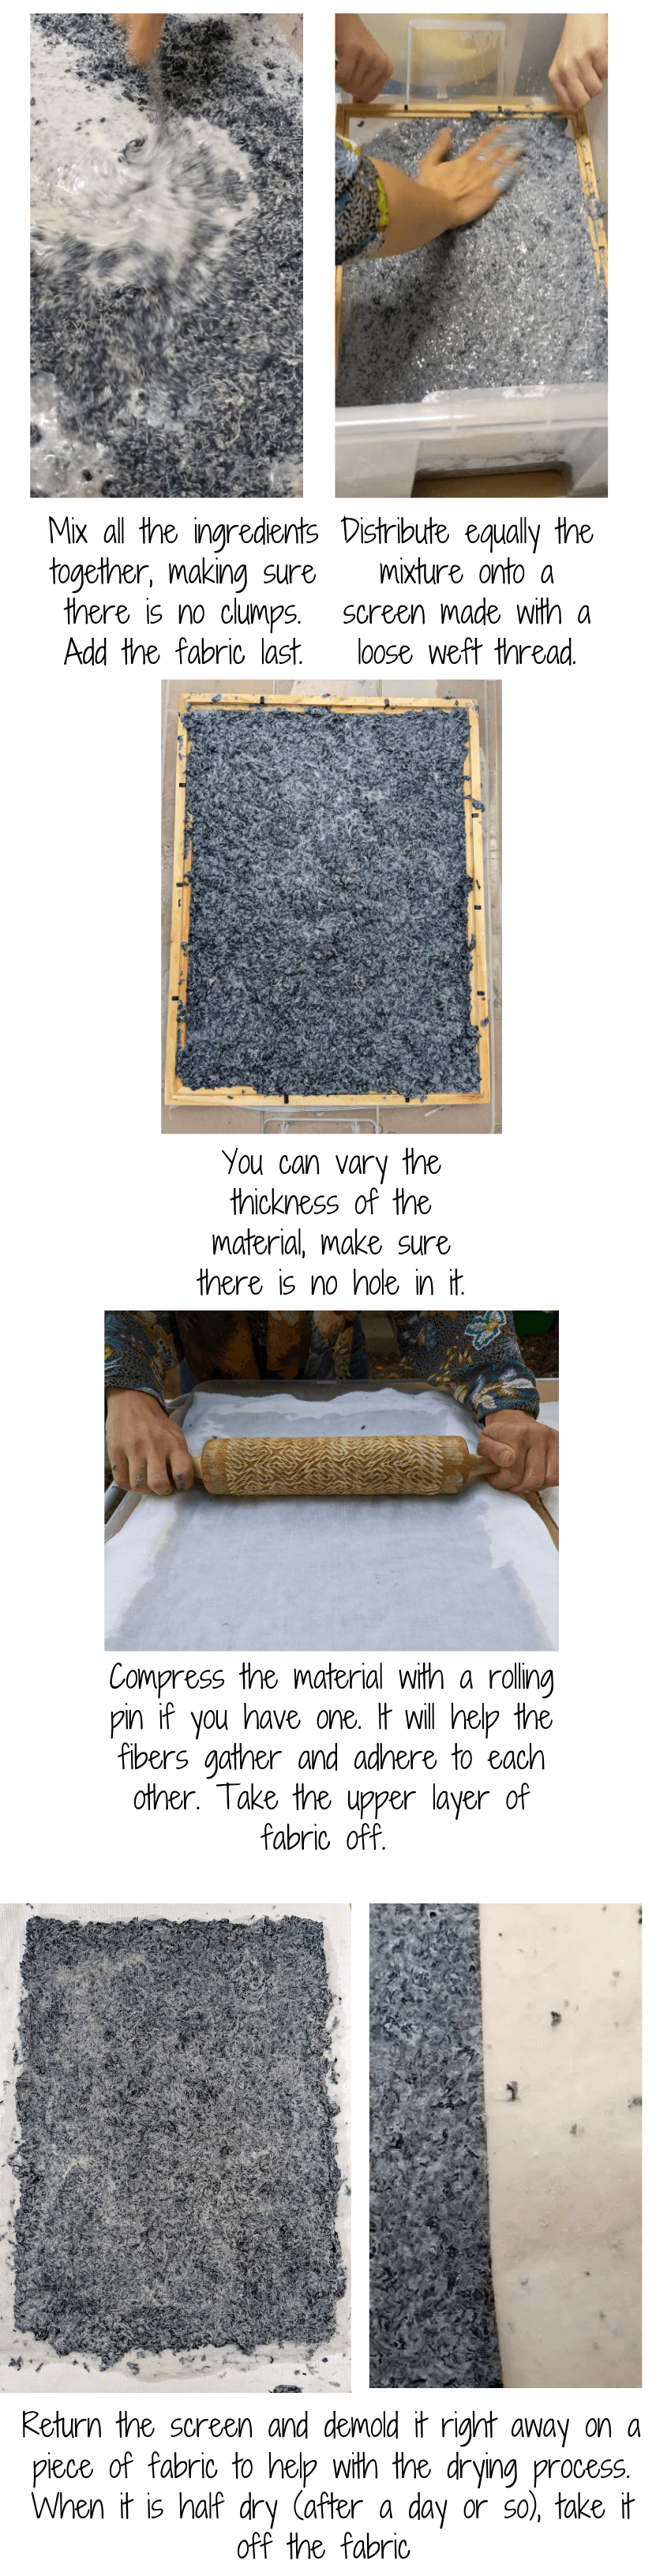
The grinder
During this week, we learnt how to use the grinder in order to grind some textile scraps.
Recipe of papier-maché
We used two different recipes:
First recipe : 250g of wheat flour for 1L of hot water.
Second recipe : 110g of maizena for 1L of hot water.
BOM and tools to make paper
1 big plastic rectangular container (the size of your screen)
1 screen made with a frame of wood (e.g. a painting frame) and some mosquito net attached to it
1 wheat flour or maizena
Hot water to half-fill the container
Grinded fabric scraps (you can sieve it to get the finniest part of these scraps, your paper texture will be smoother)
Laser-engraving of wood : discovering the veins of this living material
During the week of biomaterials, and thinking about the work of Diane Scherer, who works with roots she shapes with specific molds and scaffold, we wanted to create a mold in order to grew some roots into it.
It was a "To be continued" work, and we hadn't had time to continue it since this week. It appeared a great idea to dig into the idea of mold creation. We decided it would be some mold in which we could mold some mycellium.
With a pine wood plank, Melanie Abel made some tests in order to get the settings and parameters to engraved the material to get the perfect depth for your mycellium mold.
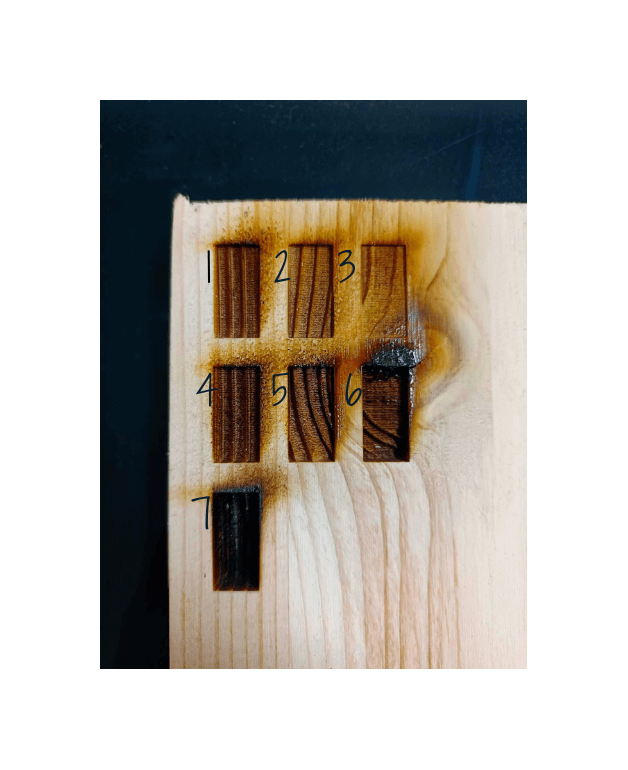
1: Power = 60 ; Speed = 30
2: Power = 60 ; Speed = 40
3: Power = 60 ; Speed = 504: Power = 80 ; Speed = 30
5: Power = 80 ; Speed = 206: Power = 100 ; Speed = 20
7: Power = 100 ; Speed = 10
What we noted was that the veins of the wood were stronger than the rest of the wood pulp. It resulted of these tests the discovery of the magnificence of this pine tree veins. Then, we had the idea to engraving a 15x15cm and a 20x20cm of wood, using the settings of the Test 4.
Here are the results
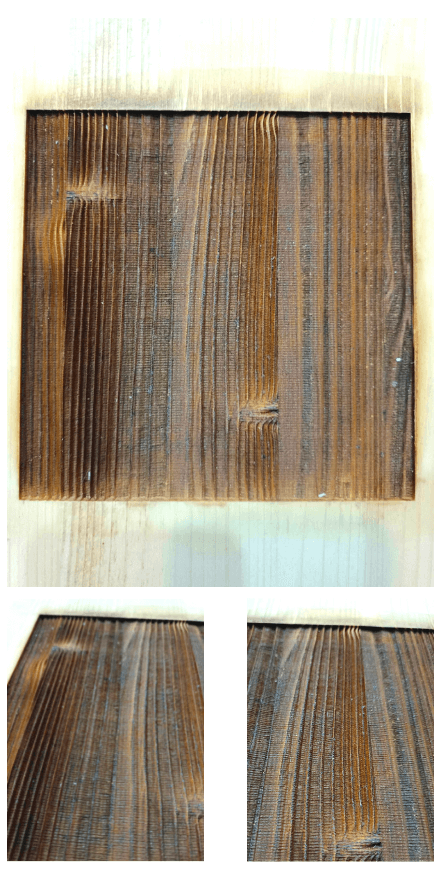
This engraving has become a mold for a composite of textile.
We used the process of biocomposite described above, and we used the recipe with maizena.
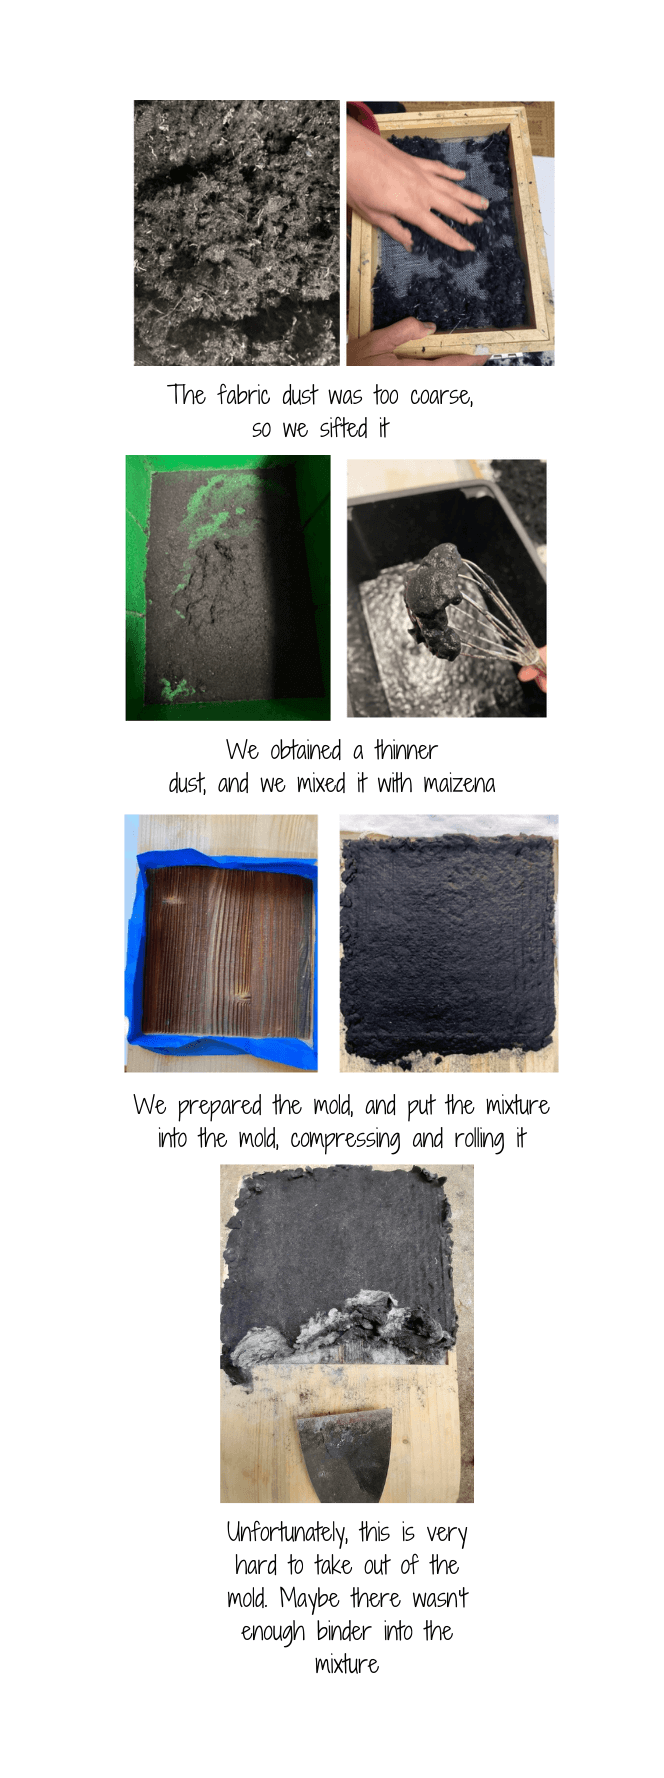
When had some deep black fabric scraps at the Lab in Lyon; we grinded it and sifted it in order to separate the "fabric dust" from the larger fibers.
Pierre Soulages
The work of Pierre Soulages is stunning to me. During his artistic carreer, he worked mainly with black color, and he created the "OutreNoir" color. His goal was to display the nuances of black color, playing with the reflecting light onto his very textured yet monochromic paintings.

So, why mentioning this artist? Actually, we decided to mold a biocomposite made out of black fabric dust mixed with a papier mâché basis into our wooden mold. I made the hypothesis that the veins of the wood would create texture onto the biocomposite, and that we could varnish it (or not) in order to get some result in term of reflecting light.
The process
Textile paper as medium for marquetry 2
In February 2022, I had a workshop about techniques to create biomaterials and biocomposites more generally. During this week, my group of class and I made some papersheets with textile scraps of blue jeans, with the same process described above. I wanted to try laser-cutting this material to create marquetry.

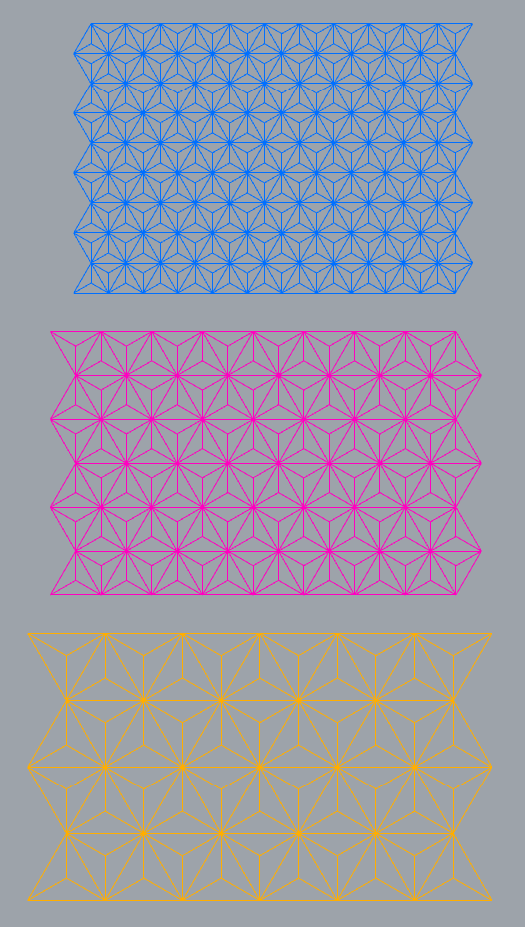
I created a geometrical pattern using Grasshopper. The uneven surface of the material of basis was still keeping some organical shapes to the result.
Creation of the geometrical pattern
I followed a tutorial about Parametric pattern by the channel RhinoGrasshopper on Youtube. I adapted the result to what I needed in term of shape and size of the pattern modules.
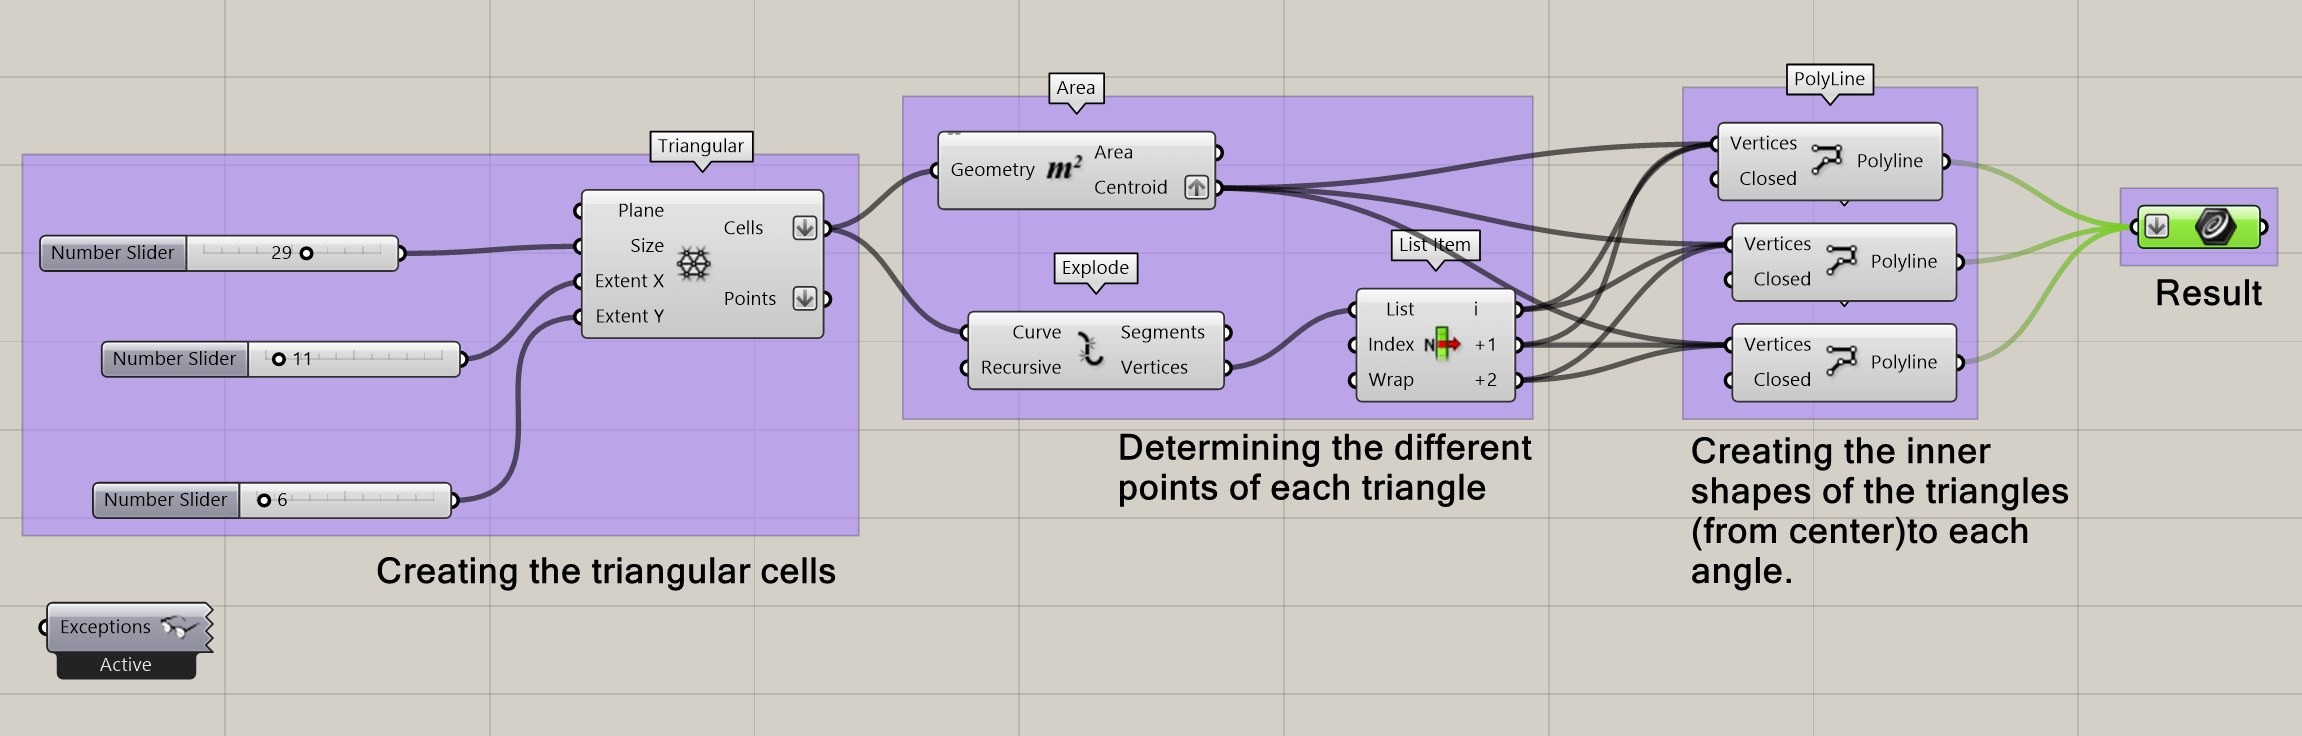
Because this is a parametric design, I could modify the size of the pattern. I had a surface of reference, which was the front part of a little drawer. (14.9x9,6cm). The purpose of this was to create the reversal process of the previous marquetry test (with wood on textile). Here, I wanted to use a medium made out of fabric to create textile marquetry onto wood.
I assembled the pieces onto the drawer with wood glue, and here is the result!

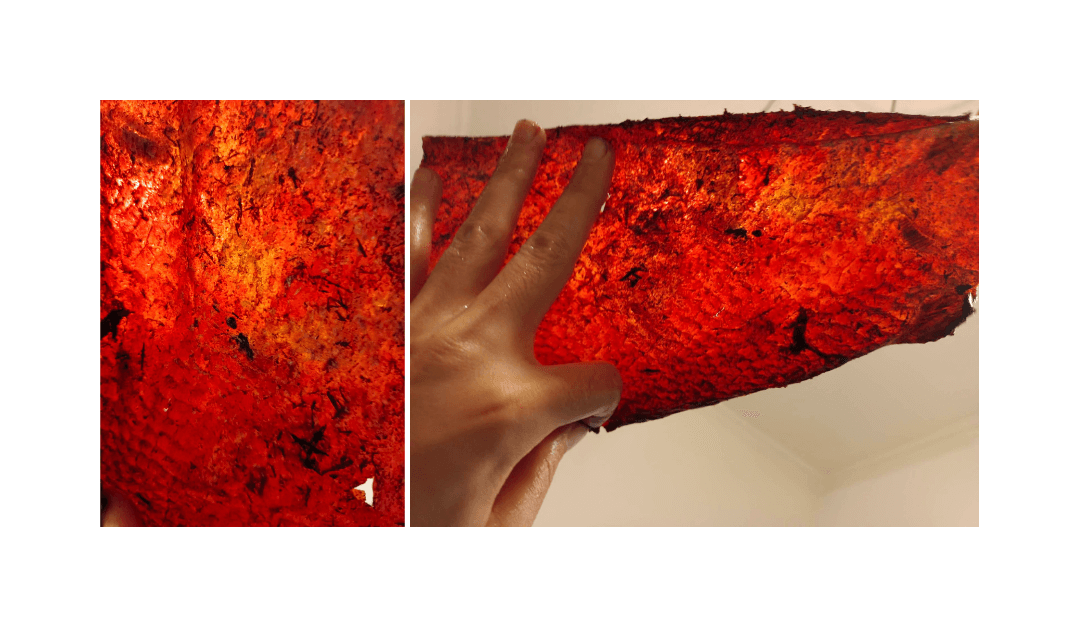
From fish skin to leather : I invite you to go see Amandine Fery's documentation for this week
I think that the result in term of coloring and tanning the fish skin was really impressive.
The following recipe and process was written by Amandine Féry.
Step 1 - Mordanting
79g of fish skin
24g of tannin
Heat the skins at 2 degrees gently until they reach 50°.
💡 The fat stands out. The fish stay inside the bath during all the night.
💡 The skins have softened and become fragile. Empty the water, rinse.
Step 2 - Dying Color
30g Logwood 3L of cold water Fish skin
Start the cold bath Raise the temperature to about 50°. Then turn off the heat. Leave to cool in the bath for a day. describe what you see in this image
Step 3 - Making leather Boil water at 80° with tablespoon of bicarbonate. Stop the water. Add fish inside.
Step 4 - Molding Leather
Material needed
Vacuum cleaner A thermal strippe Moulds with holes Vacuum box with plastic and big surface in latex
I use this mold for doing fish molding.
Conclusion and acknowledgement
This week, I really felt the amount of possibilities that we can have in term of mixing the techniques.
It gave me hints in term of projects I would like to do. I come from a Fashion Design school, but I had the feeling that maybe I won't work in the field of fashion.
Having the possibility to work with wood again was really satisfying. This week was also one where I used several techniques we had seen during the previous weeks.
Laser cutting
Biomcomposites
Grasshopper and parametric design
I had fun doing this, and gathering pieces of ideas and techniques I had before, in order to have a "to be continued project" in the end.
Fabrication files
-
File: Triangles in Rhino ↩
-
File: Triangles in Grasshopper ↩