02 DIGITAL BODIES
RESEARCH
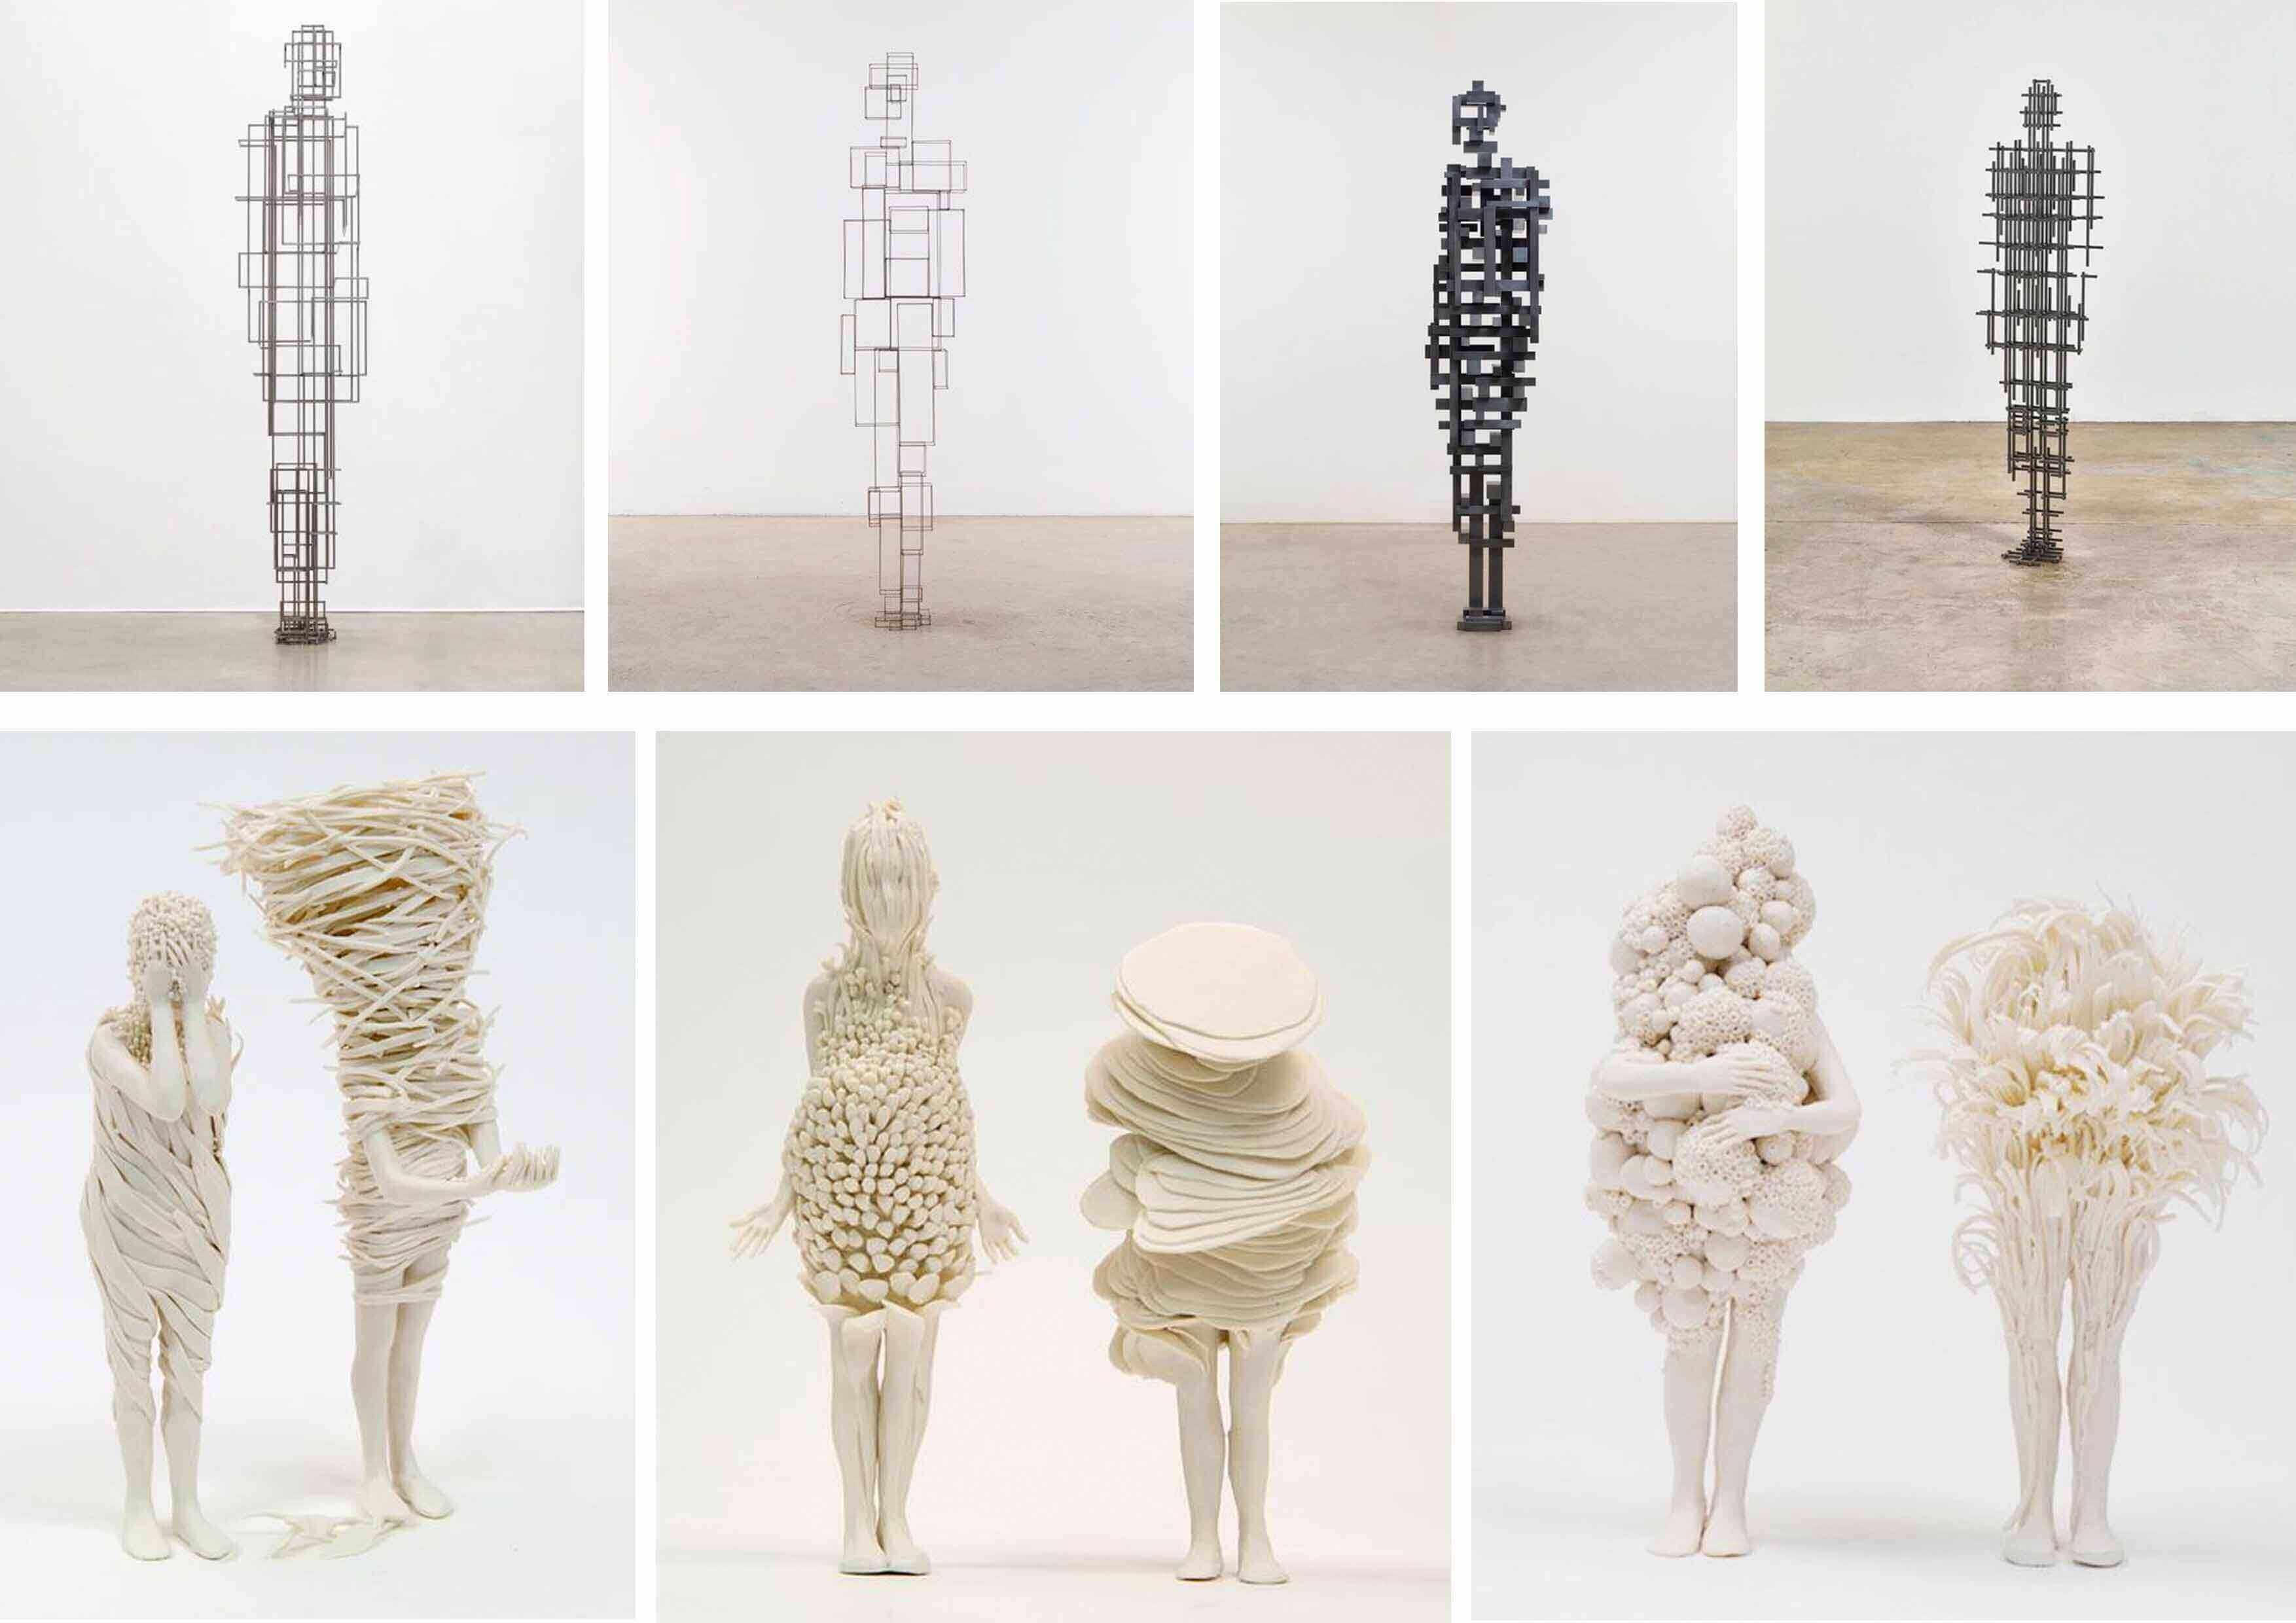
Here are some artists whose names I took note of during the global lecture. I've encountered Antony Gormley's work online many times. The British sculptor creates abstract human forms with steel and geomotric shapes. On the other hand, Claudia Fontes's sculptures are softer and more organic. She creates these creatures from the fairytales with white procelain. They gently hug themselves, or each other, portraying the intimate and unseperable relationships between human and nature.
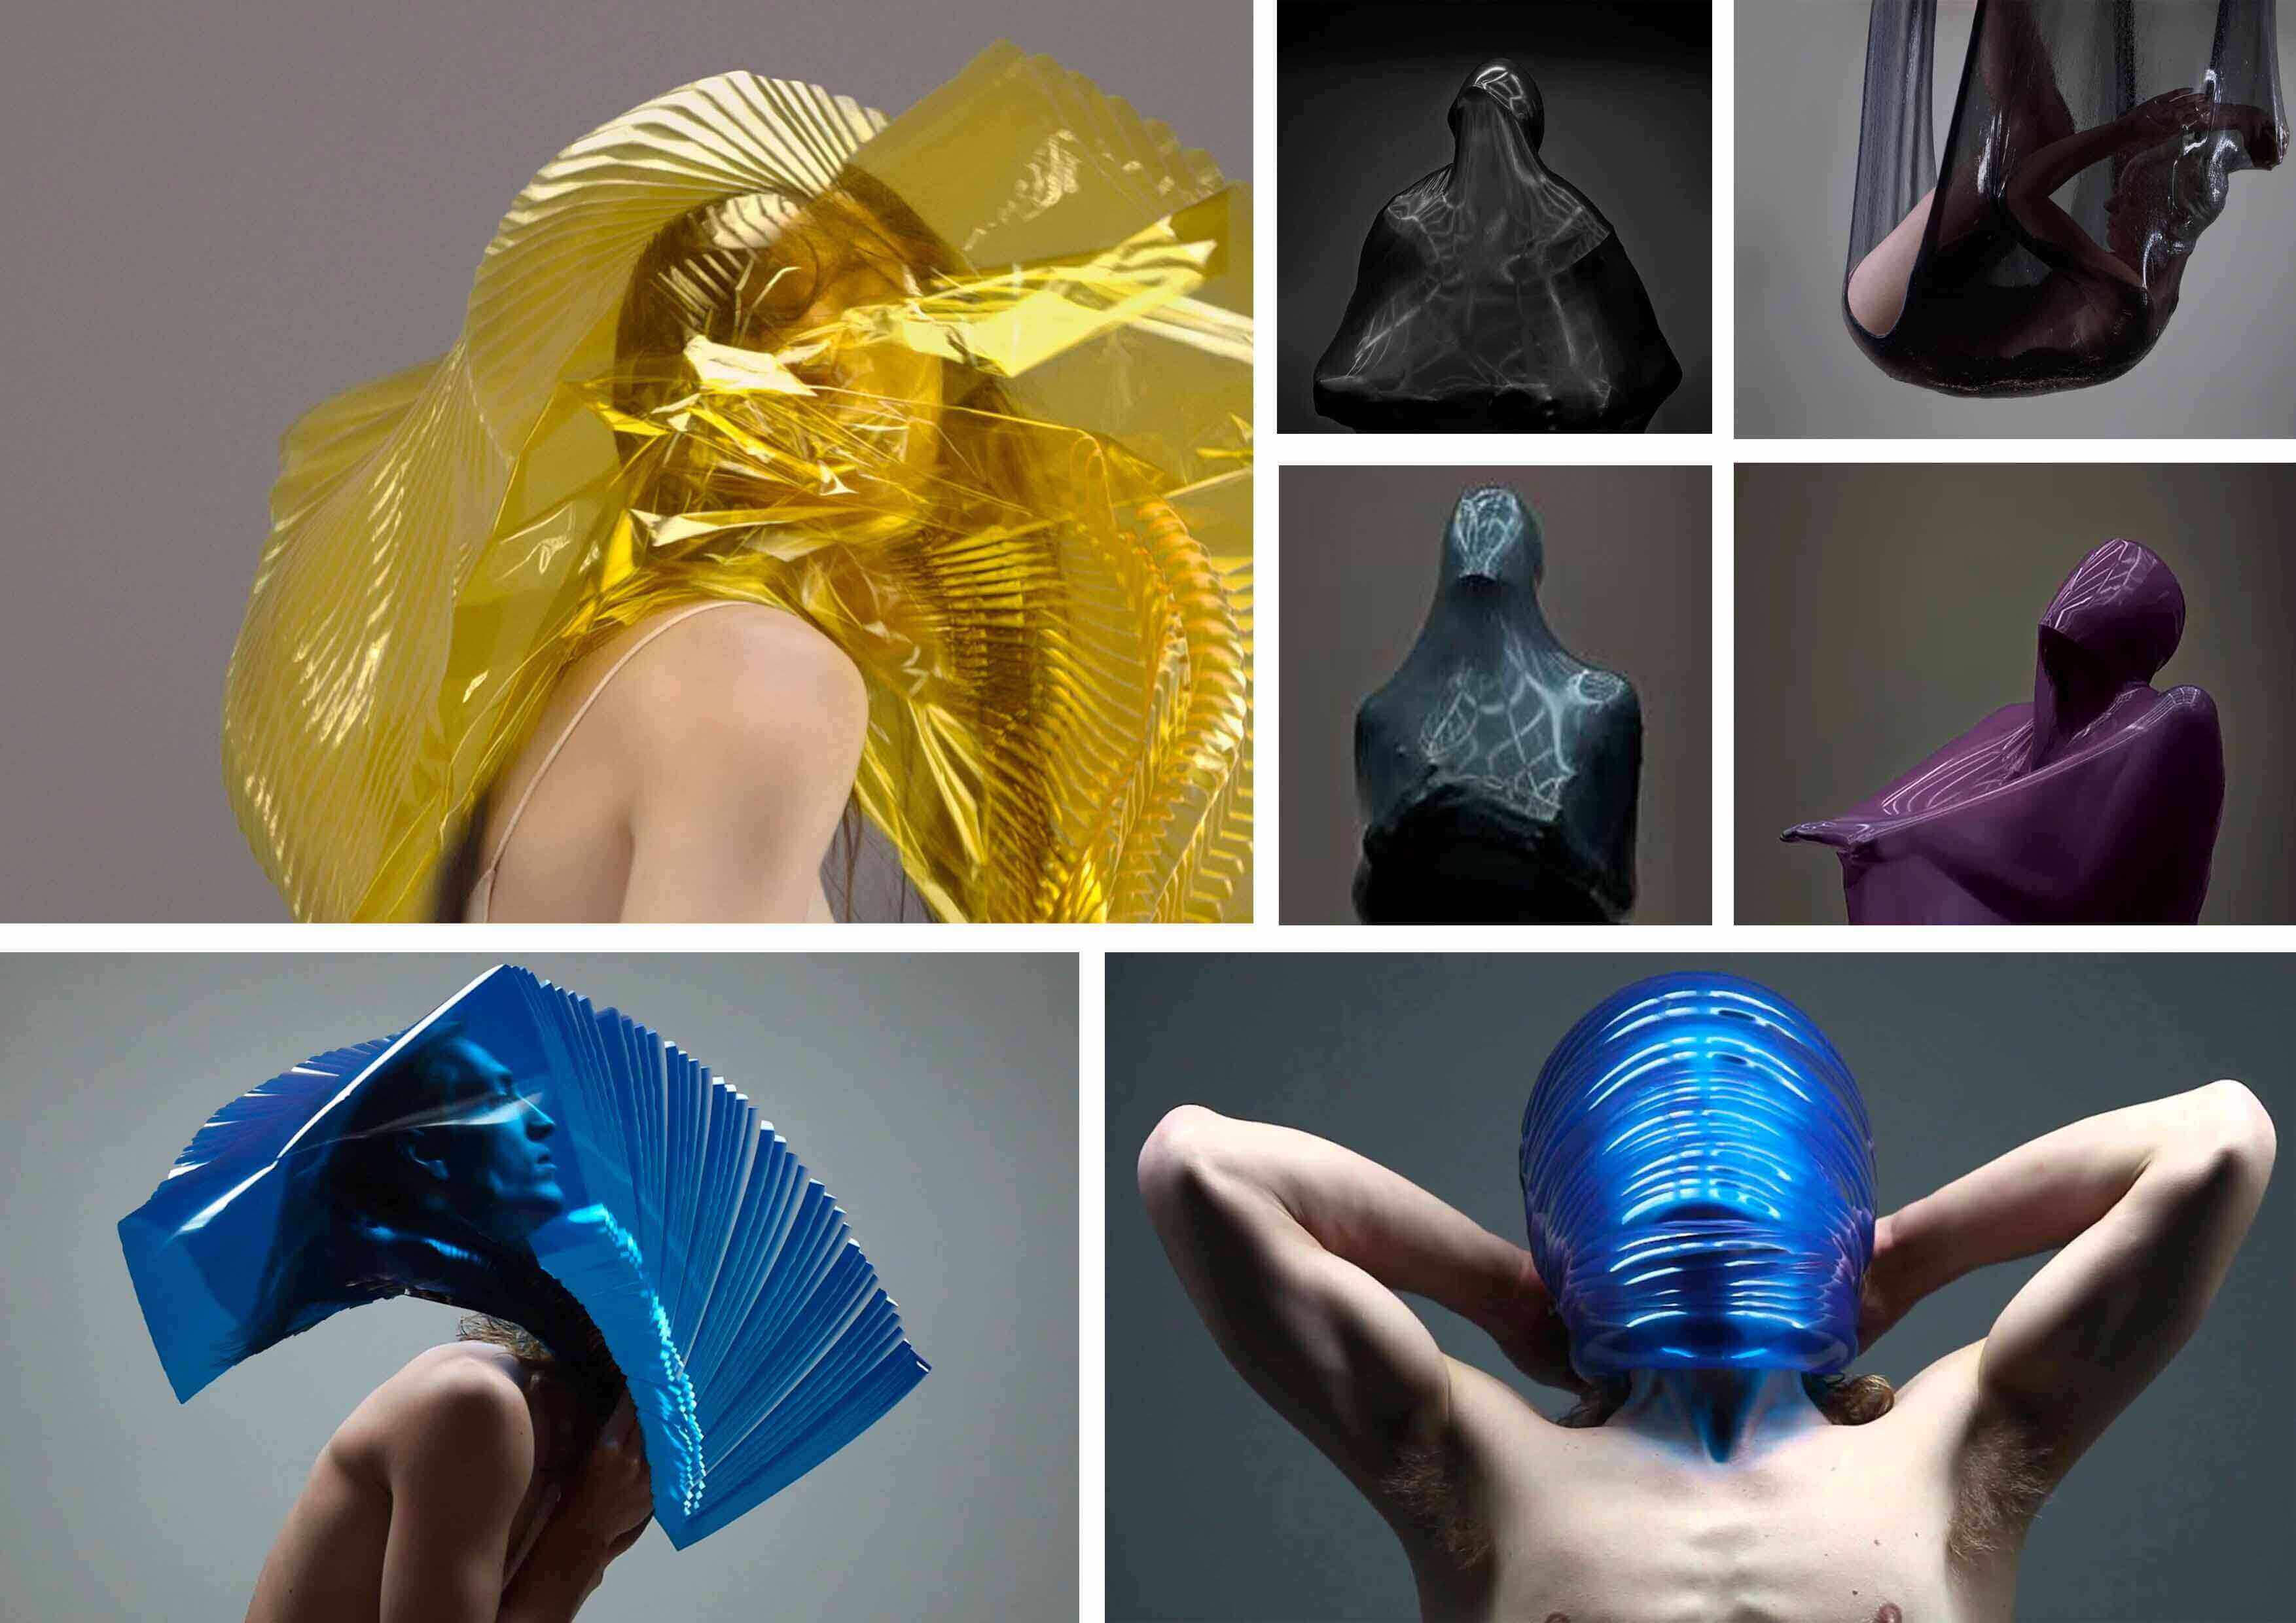
Bart Hess is a Dutch fashion designer whose work is very new to me. He sees and uses our bodies as "a platform for sensitive and ineractive technology". (very new idea to me) I really like how he modifies the body by using materials that extend the body's shapes. Thanks to him I came across a new term called "body architecture", which explores "the possibilities of designing the unique type of wearable for different natural and artificial environments and how the body and its prostheses woudld react and adapt to future trends." Very interesting and I will look deeper into it.
Here is an example of body architecture, a collaboration between Lucy McRae and Bart.
3D SCAN
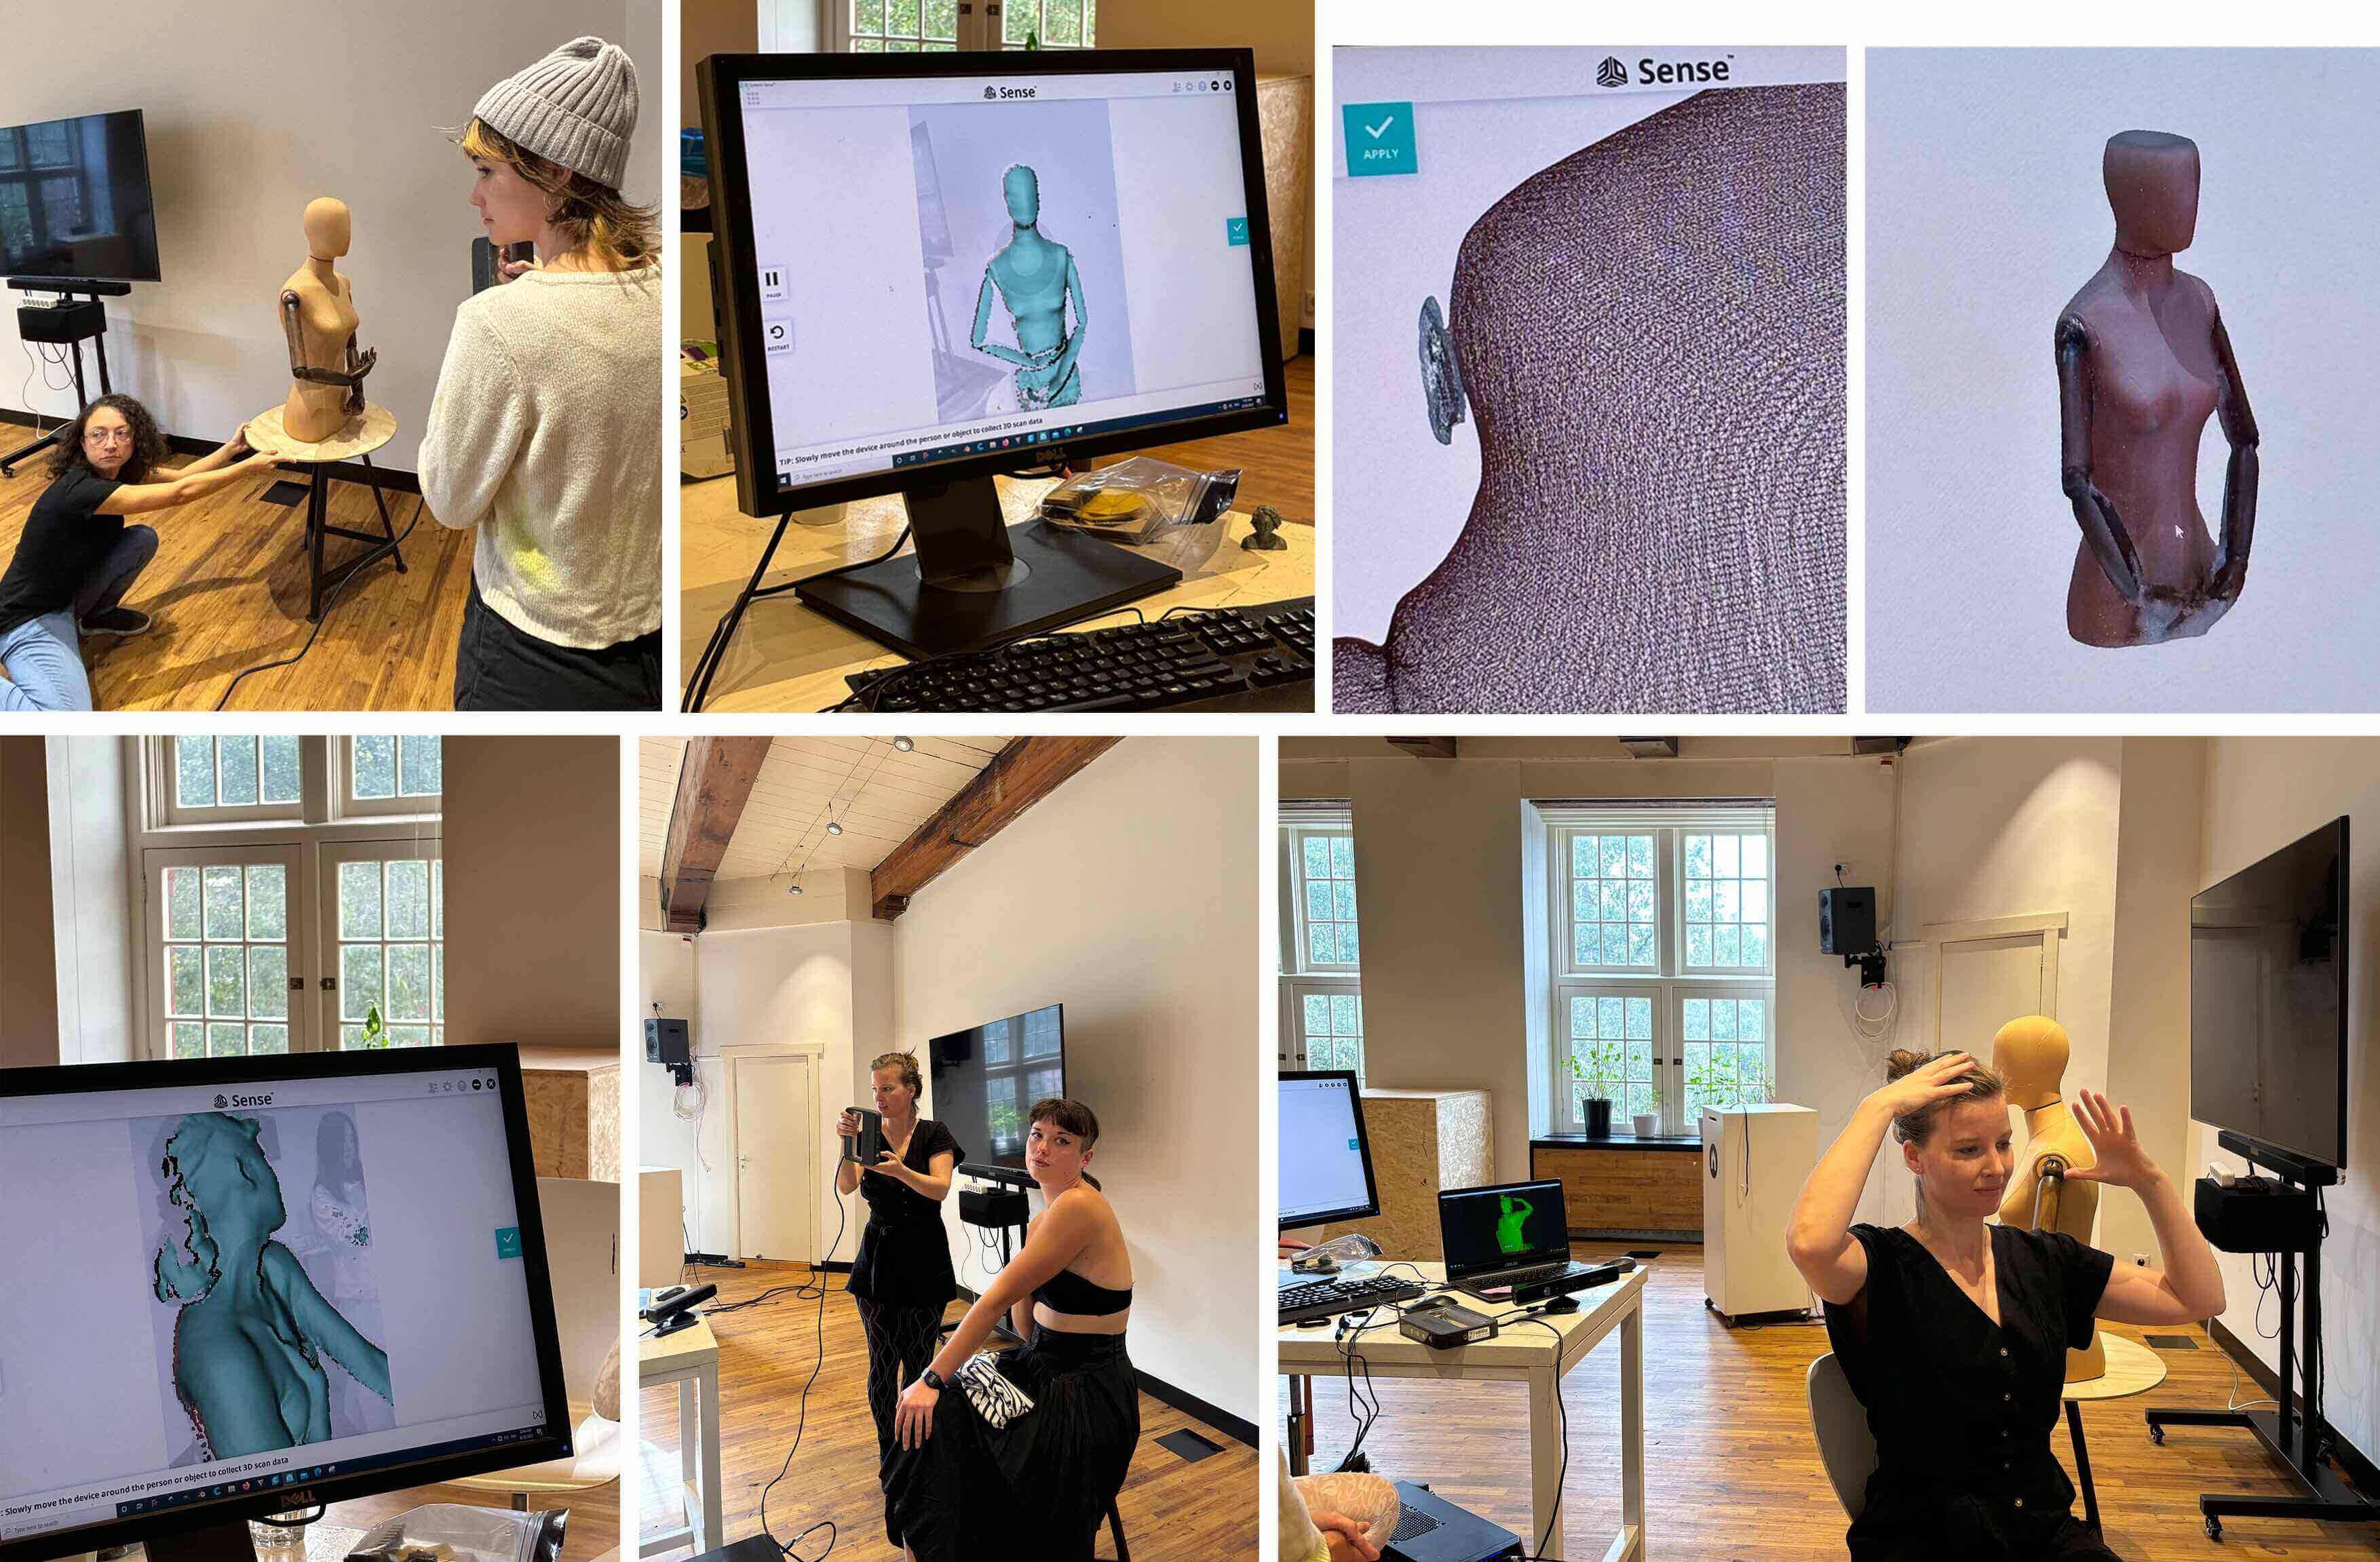
We tried two types of 3D scanning, Sense Scanner and Skanect, and learned how 3D scanning works with structured light using principals of triangulation. Sense Scanner is when we hold the scanner and move it around our object, and it can get really into details. But it got really confused and crazy sometimes when we were trying to scan the hair and shoes, so I'm assuming it performs better when the object is made of simple materials with less distracting colours and details. Skanect is when you put an object in front of the scanner and do a full rotation of the object. Skanect is very steady, no matter how dramaticly you move, it still keeps scanning. Both scanner doesn't react on metal.
Notes:
You can remove some undesirable parts after scanning but remember to make the objects watertight.
RHINOCEROS 3D
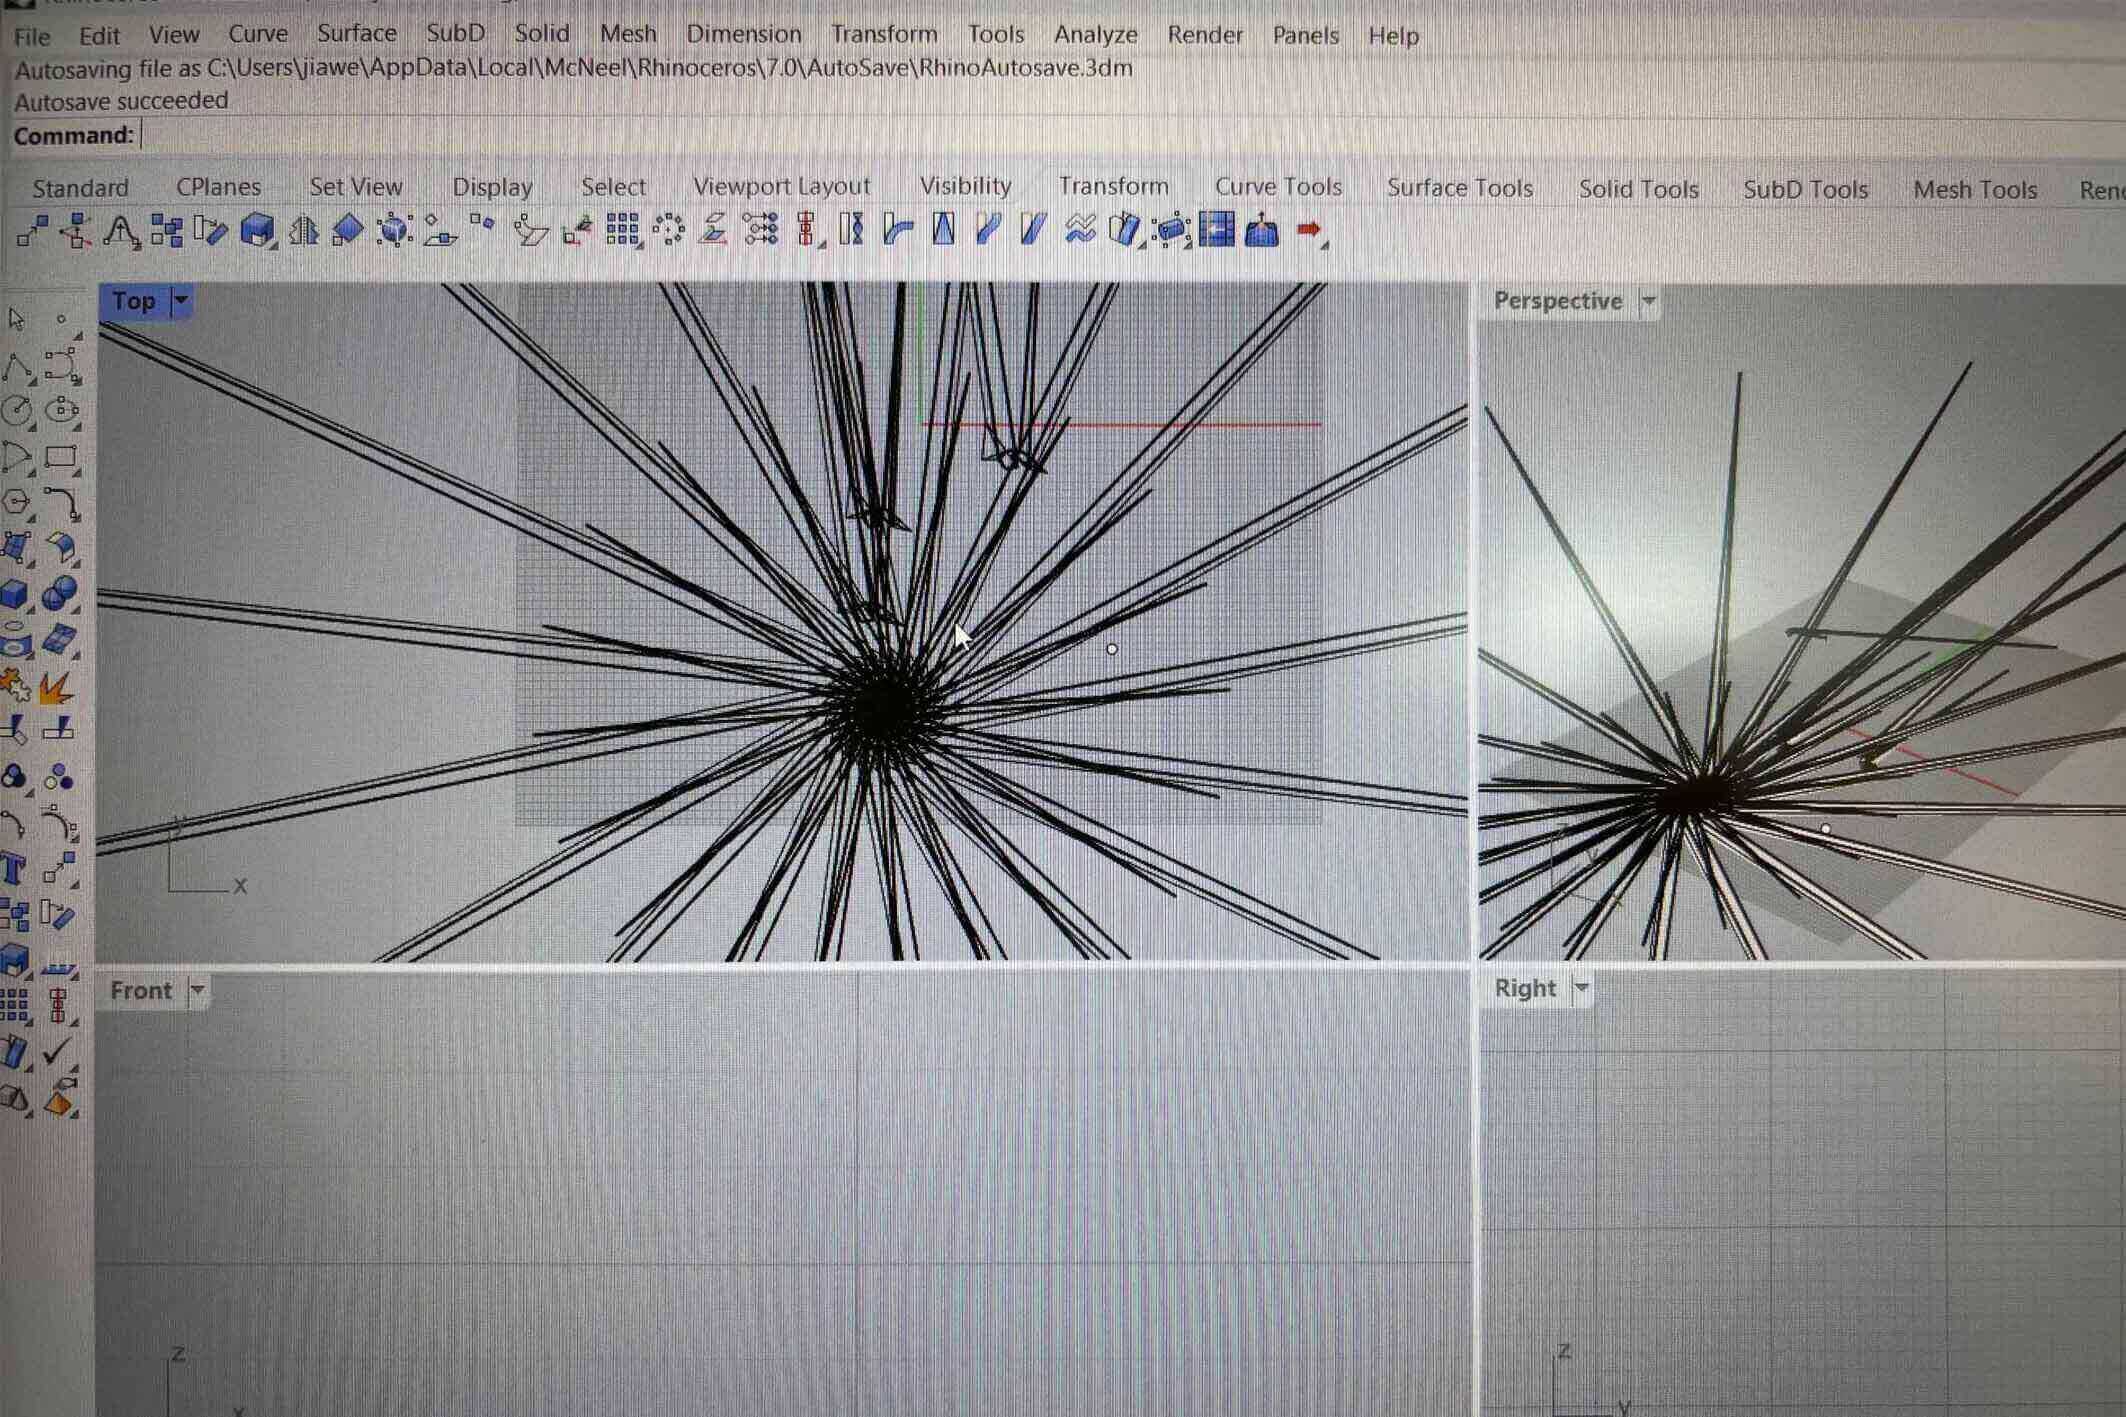
Here comes the fancy software that I've been wanting to learn for ageeess!! Turned out it's much simpler to get started with then I thought, because it's like talking to a machine. If you want to rotate an object, you only need to type in "command: rotate". But it will take me some time to know all that it does and use it skillfully.
When we were learning the basics of Rhino, I got really fascinated by this function called "polar array". It multiplies the selected object in a circle. I also used this function in the project.
Last but not least BUY A MOUSE!!!
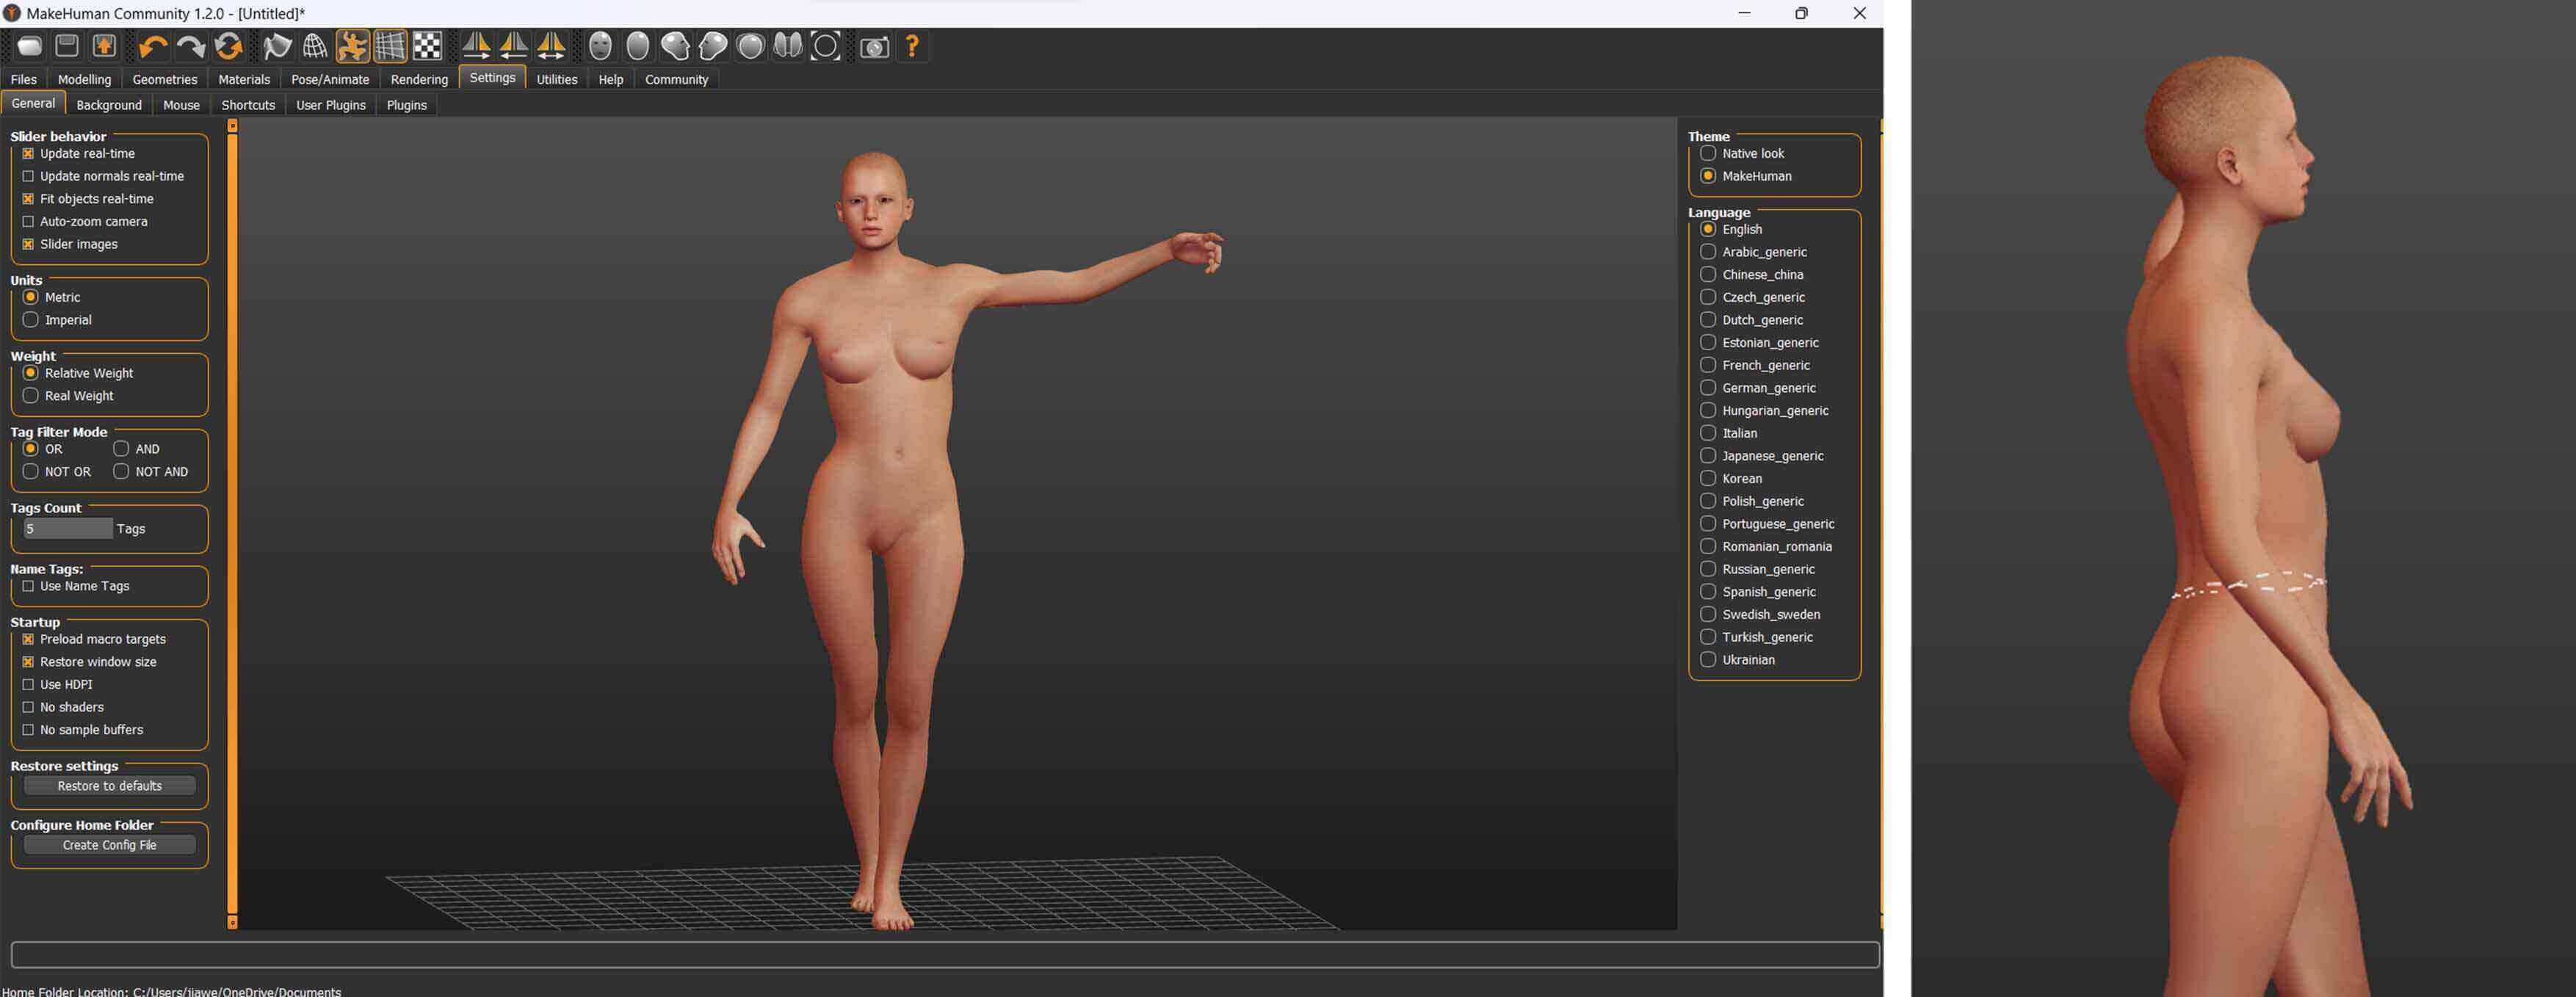
MAKEHUMAN
As straightforward as the software's name. Here is a human I made, which I later used in the project.
Notes:
Less features on the human means less polygons, which reduces the size of the files and makes it easier to work with.
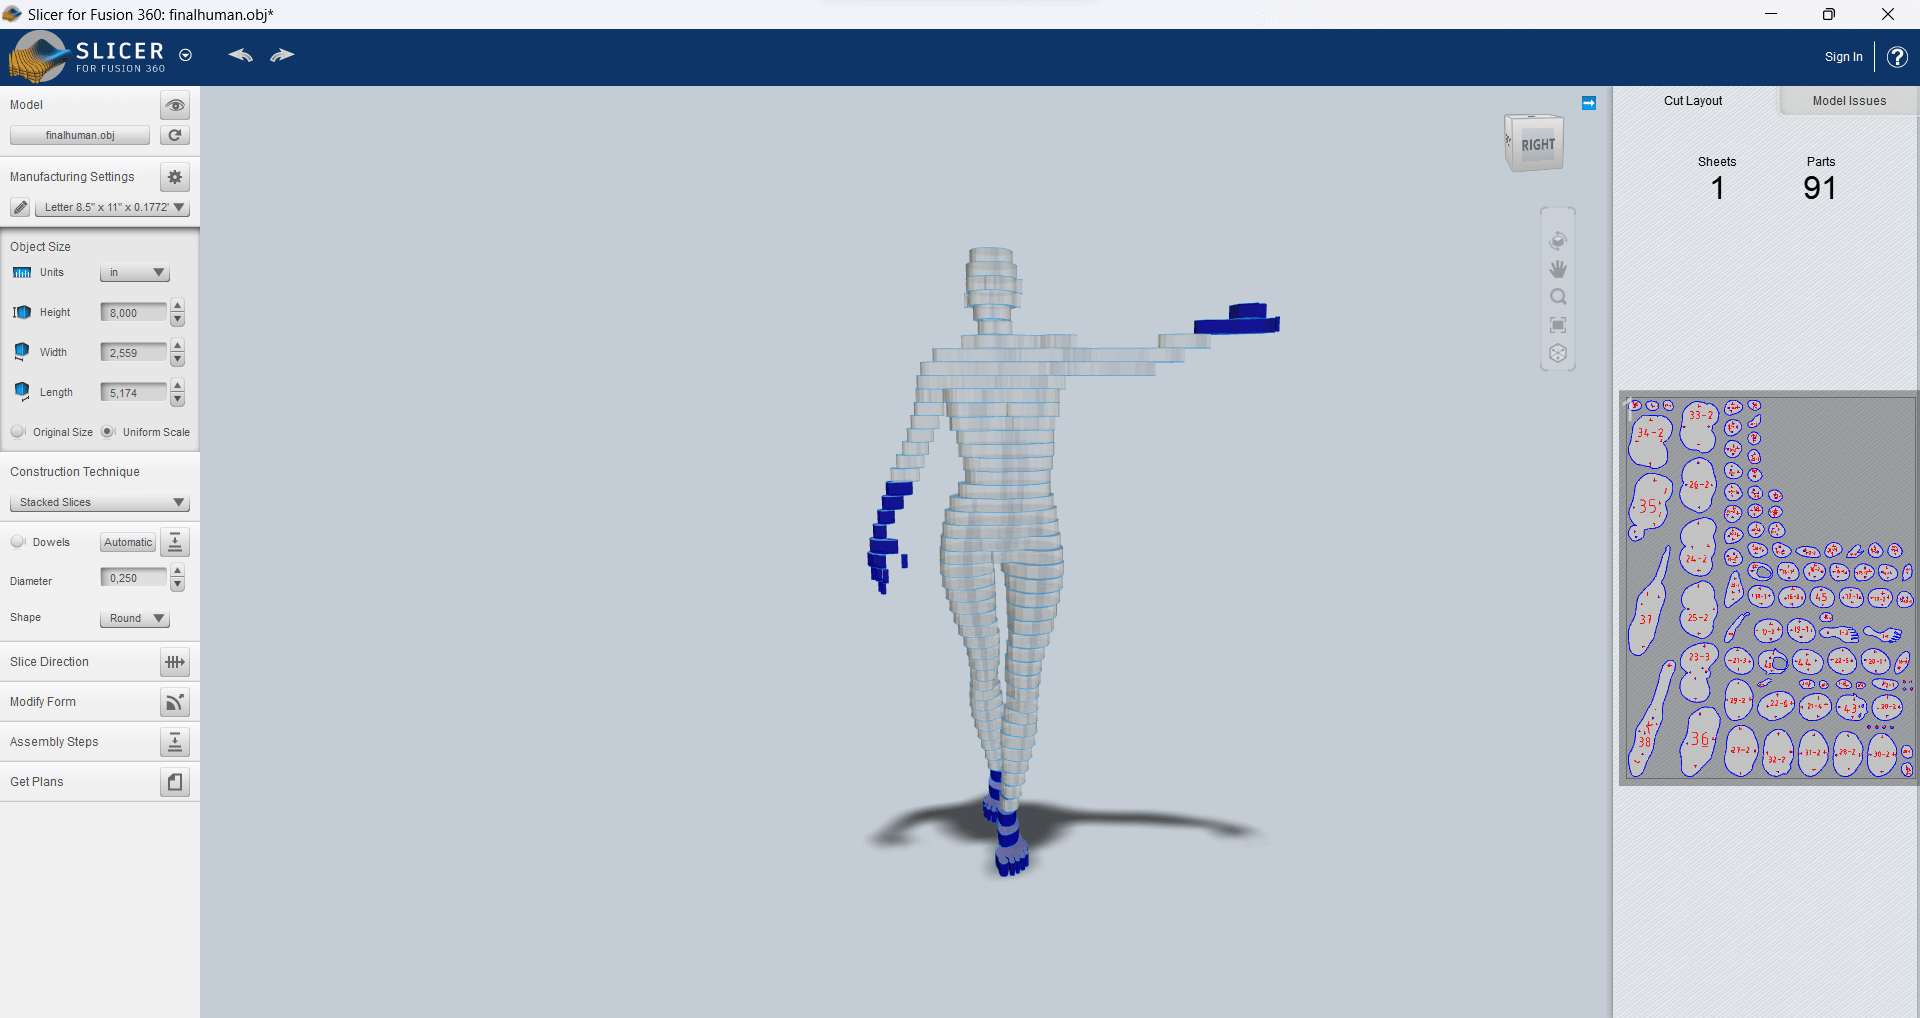
SLICER
Slicer translates a 3D file into 2D, prepare it for laser cutting. Be careful with the blue parts. It means some parts may not be able to stand or hold.
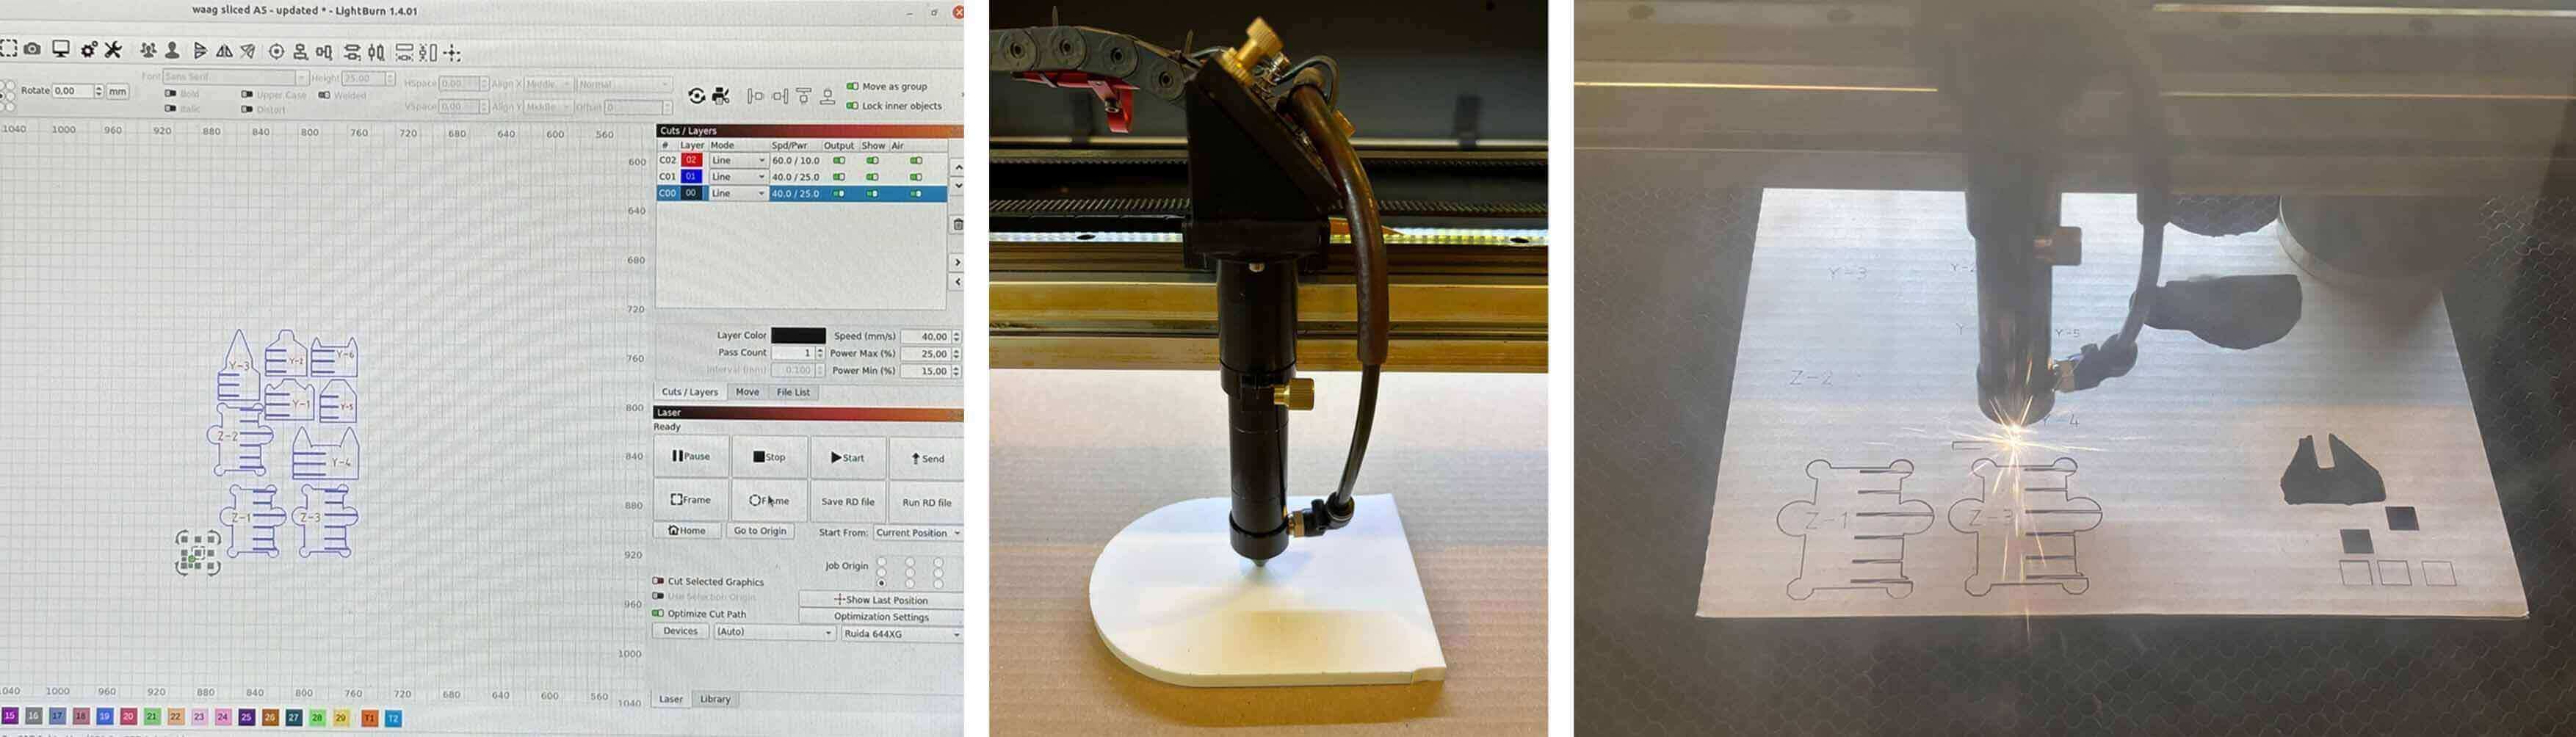
LASER CUTTING
A scary-looking machine but only does what you ask it to do.
Notes:
Speed And Power
Higher speed = faster laser cutting, resulting in a lower laser exposure (may cause cuts being too shallow or smoked edges) Higher power = deeper laser cutting
Different materials require different speed and power, always do a test sample first.
Colour Mapping
Color mapping is a method of assigning different speed and power settings to different parts of an image based on colors. This works with both engravings and cuts, so you could have a single job cut through some areas with stronger settings and use weaker settings to create outlines or perforations in other areas.
If you are doing both engraving and cutting, do the engraving first because cutting may cause misalignment of the cut piece.
Important Procedures
- Delete duplicates
- Select open shapes
- Auto-join selected open shapes
- Place the jig
- Do a small sample to test speed and power
- Do a frame test
- Turn on ventilation before laser cutting
- Keep an eye on the machine when it's running
Remember
- Machine runs faster horizontally, so it's better to place the image in landscape
- Check if the material lays flat, if not, use weights or tape. When using weights, do a frame test to make sure they are not in the way.
- Keep the cover closed for a few minutes when the job is done, and let ventilation does the job to prevent heavy smoke and smell.
INSPIRATION
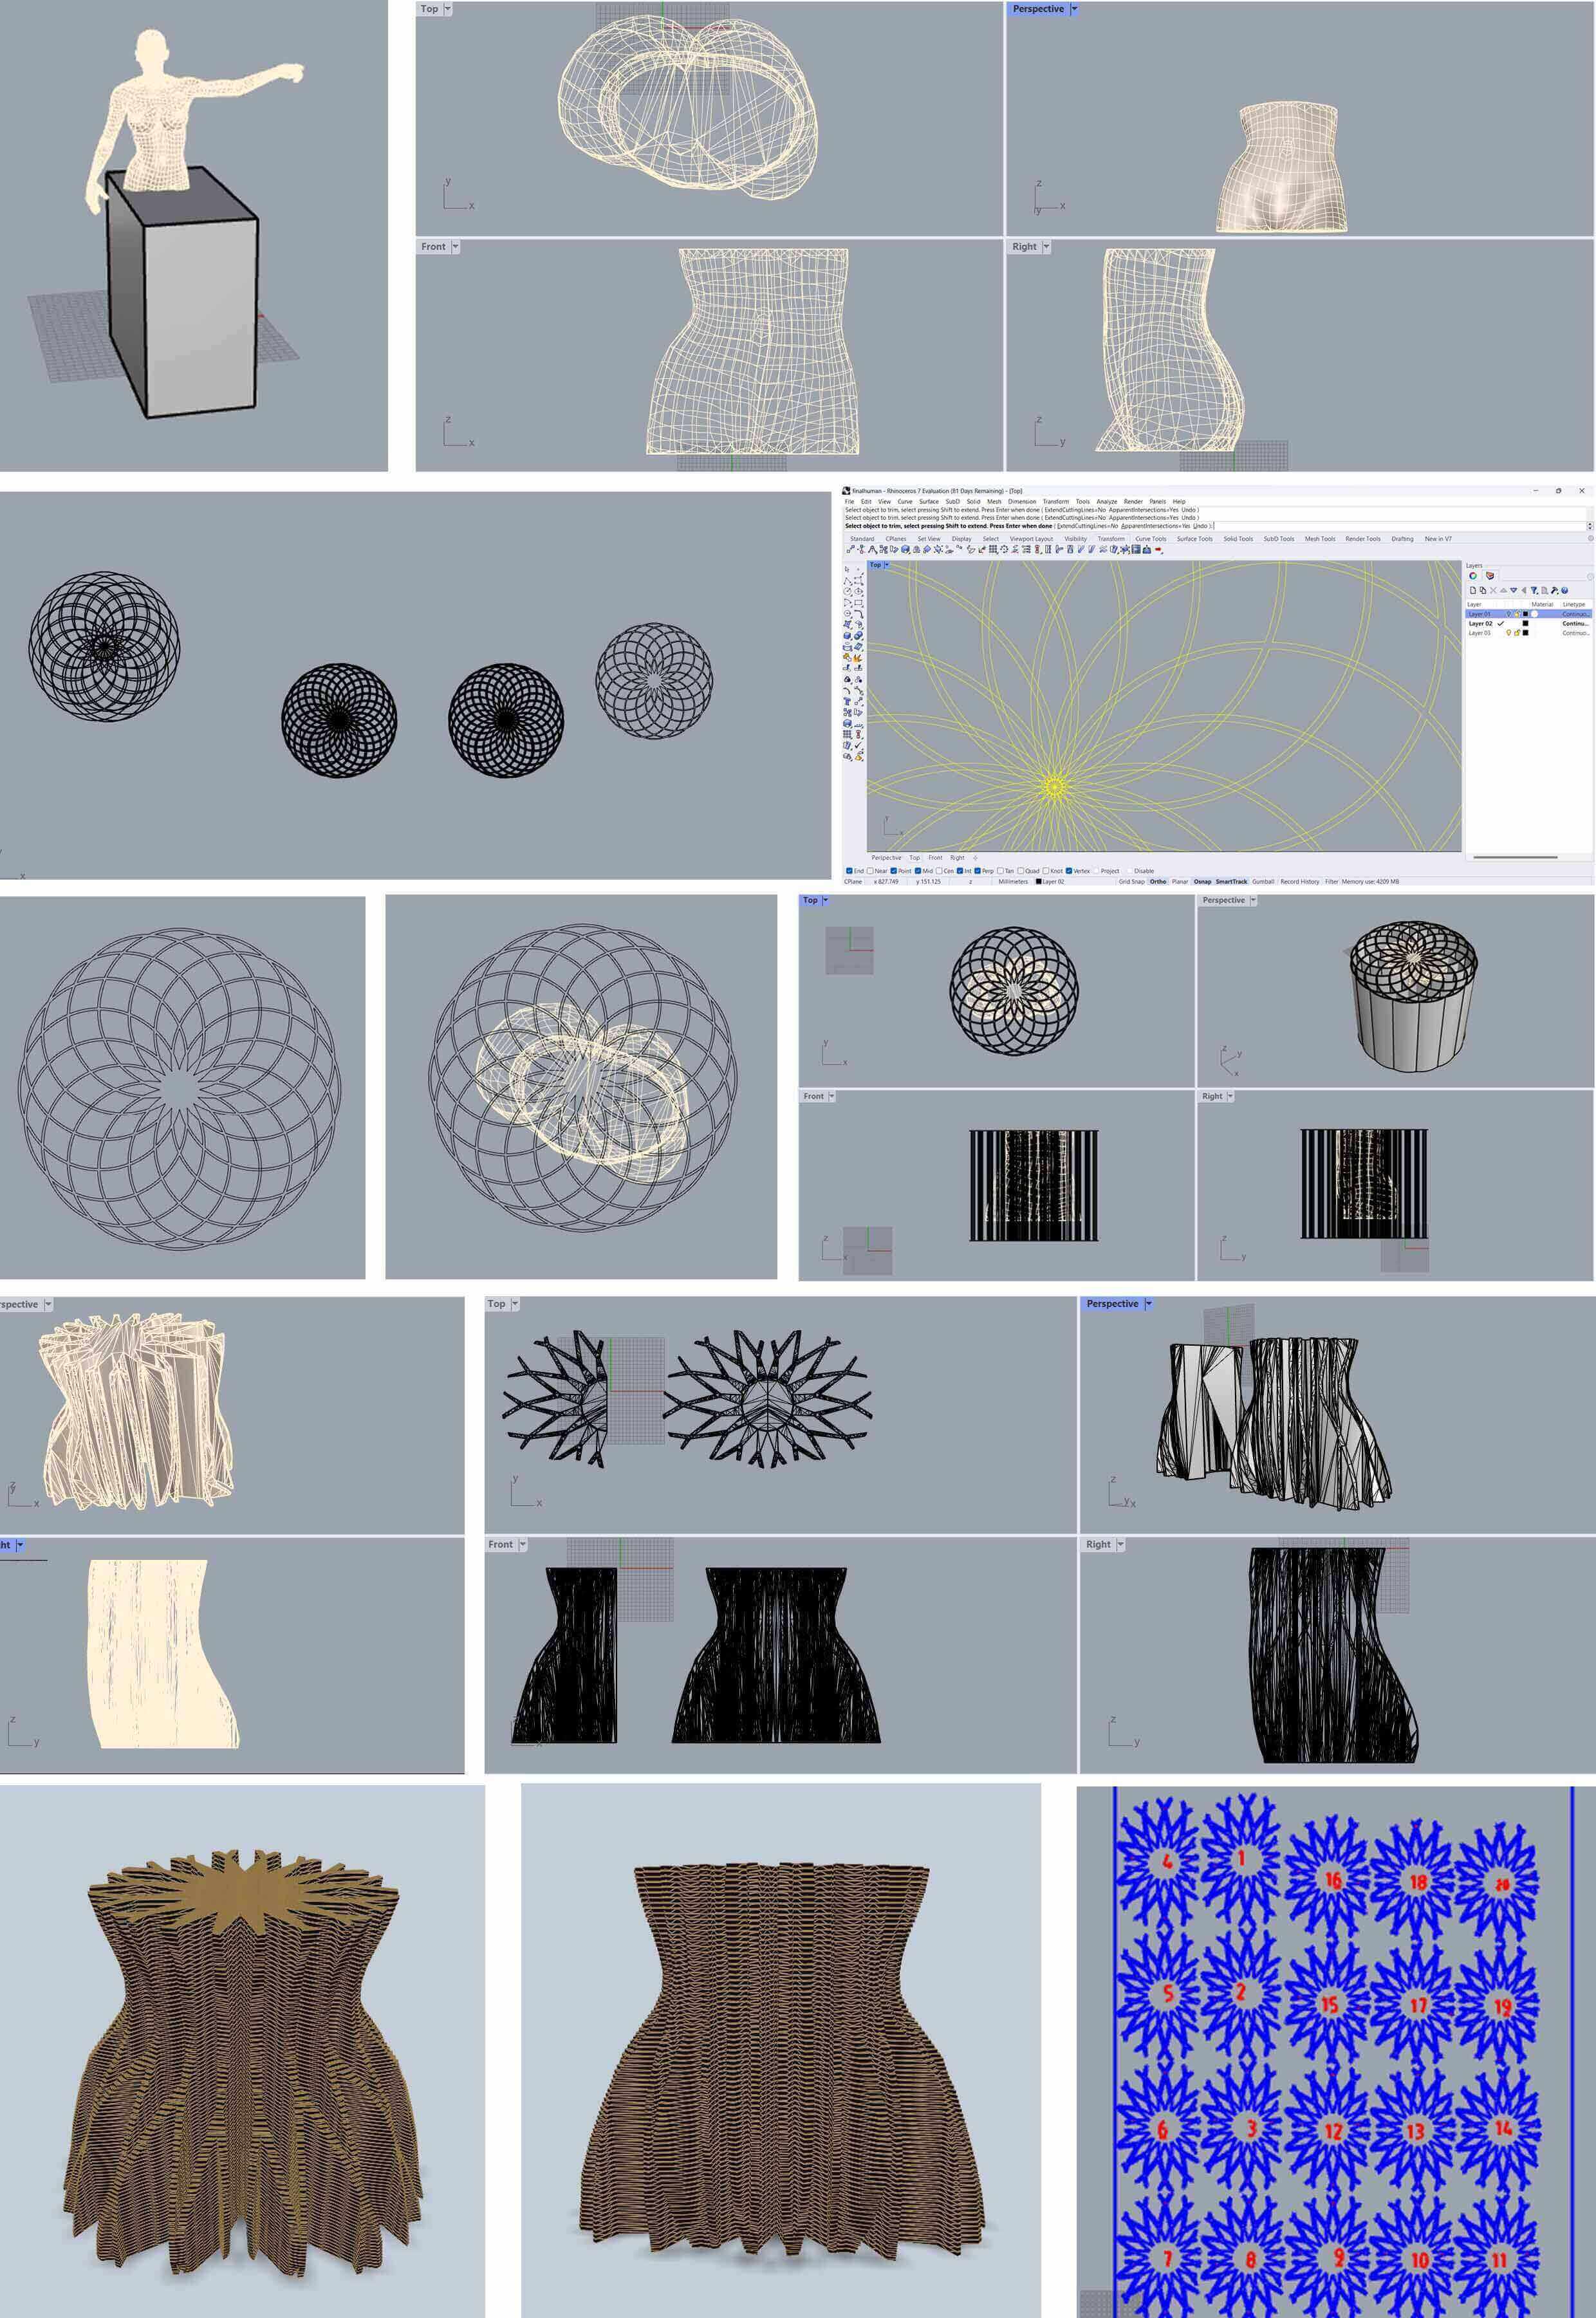
As I got quite into the polar array function, I want to do something with circular rosettes. When I was looking for a connection between these circular lines and our body, I found models wearing Kei Ito's garments. So the idea a circular rosette on the body came to me.

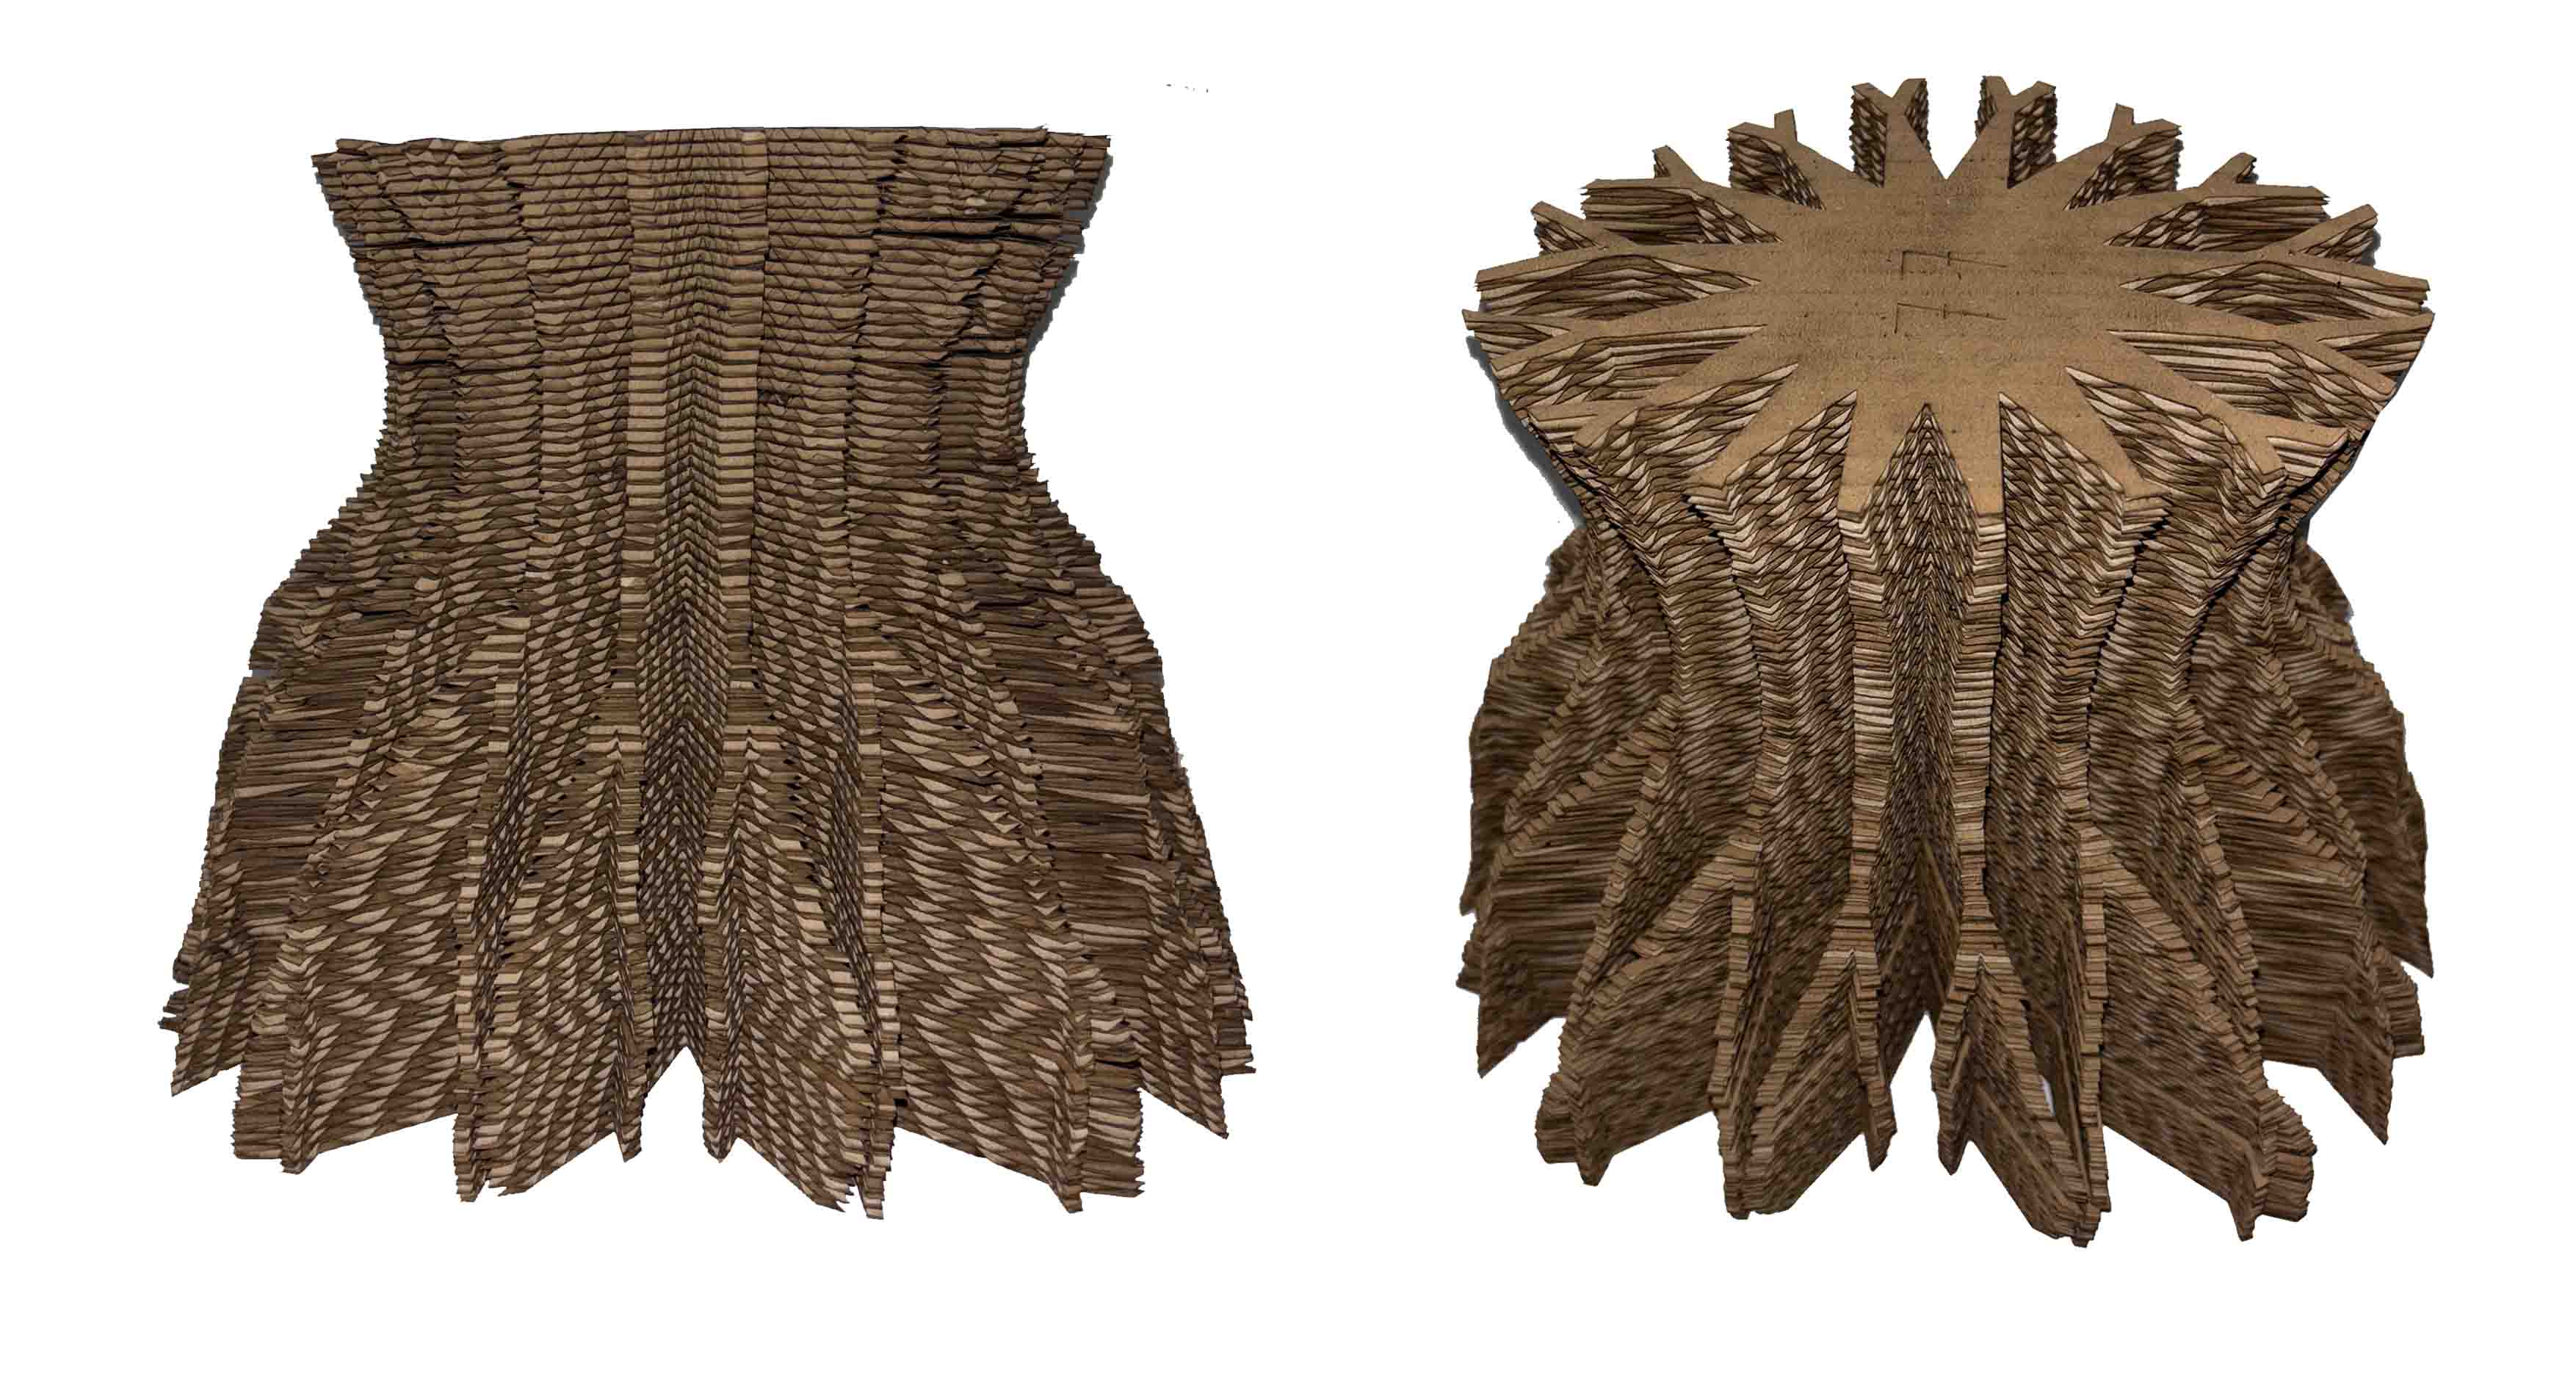
DIGITAL PROCESS
Well, circular rosettes are 2D, so the fun part was about making it 3D. I first created a pattern using polar array and gave the lines some thickness. And I extruded the pattern and made it into a tube. In order to show the pattern as much as possible, I needed two largest surfaces of the body, which is why I am using only the waist. And I overlapped the patterned tube and the body, and combined them together using bolean difference. By using Slicer, I transformed the body into stacks, which makes it 2D and ready for laser cutting.
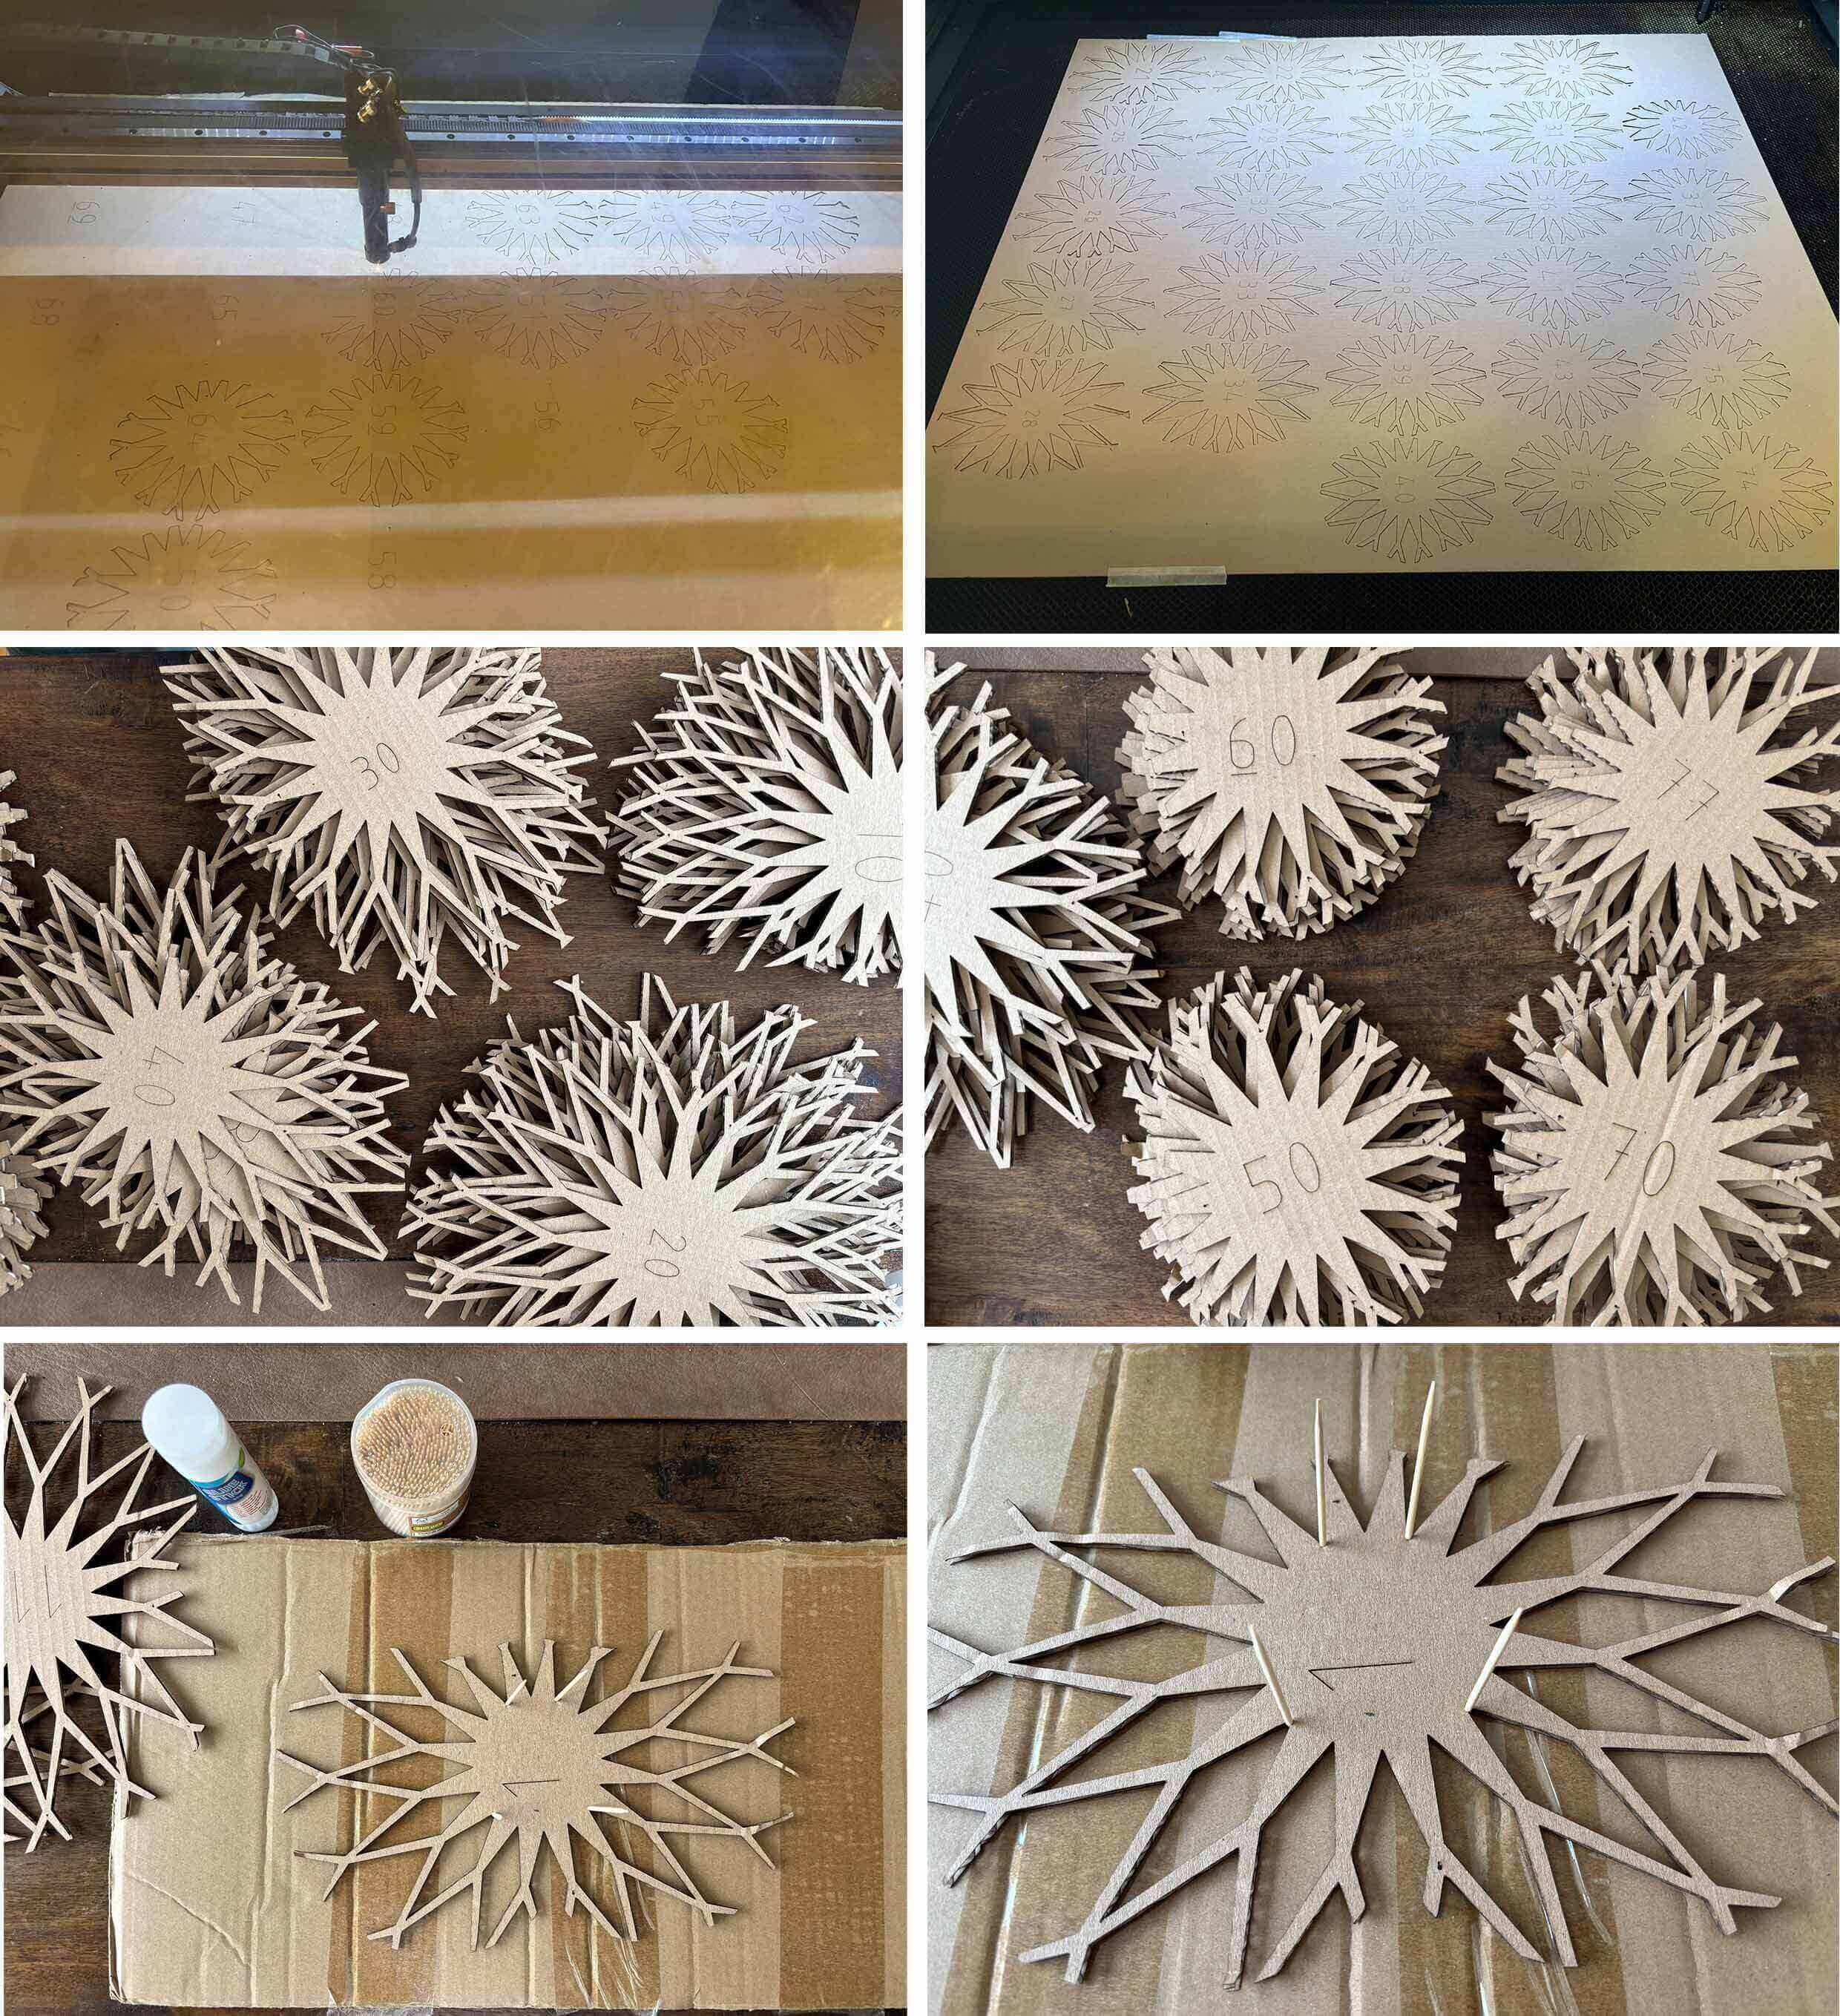
FABRICATION
My body consumes 2 and half 3mm thick cardboards that are 115cm by 95cm.
Settings for the laser cut:
Engraving: 50/15 Cutting:30/40
Assembly
I used some toothpicks as guidance for alignment and glued the cardboards together using a gluestick.
FINAL OUTCOME!!
TOOLS
TinyPNG Skanect SENSE SLICER RHINECEROS 3D MAKEHUMAN
FABRICATION FILES
-
File: Rhinceros 3D file ↩
-
File: Laser cut sheets ↩
-
File: Laser cut sheets ↩
-
File: Laser cut sheets ↩