11 TEXTILES AS SCAFFOLD
This week we are working in pairs and I'm partnering up with Ray:) We are interested in making pleats with bio materials.
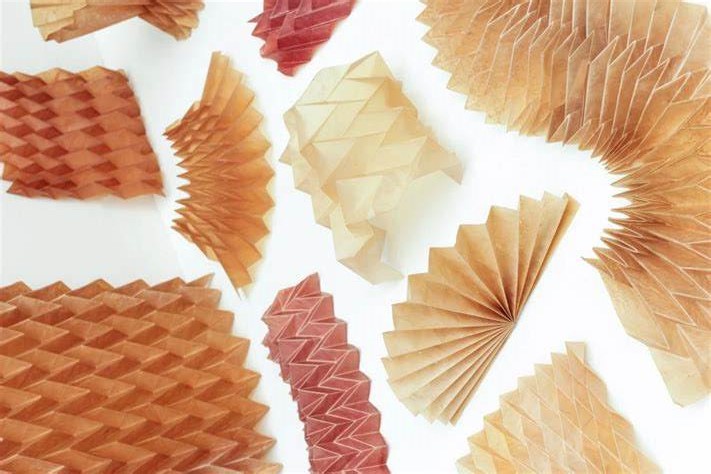
RESEARCH AND INSPIRATION
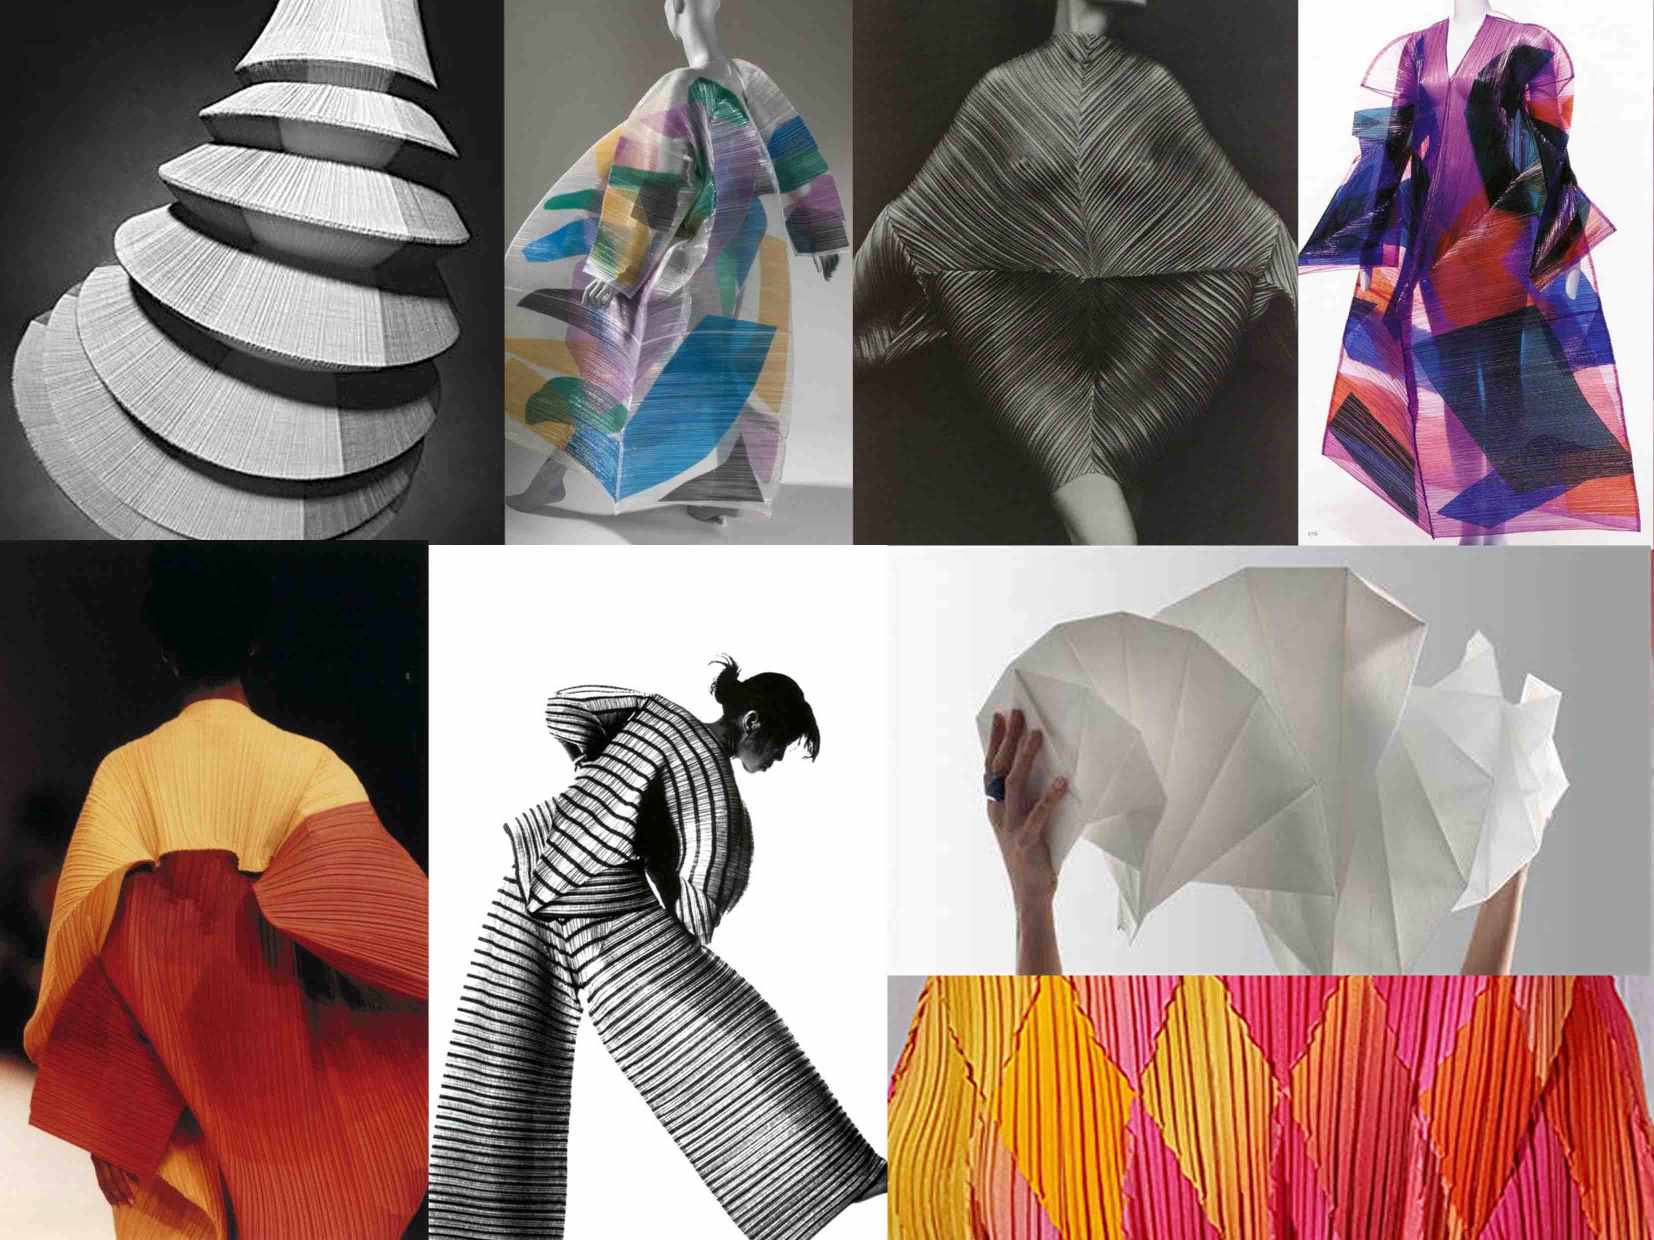
UNFOLD by Studio Lionne Van Deursen
"Unfold is a material research that explores the versatility of a material created by living microorganisms. The material used in this project is made by a symbiotic culture of bacteria and yeast.
This biofilm composed of bacterial cellulose, becomes a solid material when dried. It’s biodegradable, strong, has a high flexibility and can easily be shaped and folded in any desired shape.
The project explores the possibilities to create relief surfaces and three-dimensional objects with the sheet material. By using a simple folding technique, complex structures can be created. The folded sheet can expand and contract and made into more dynamic objects."
MAKING A MOLD
3D MODELING ON RHINO
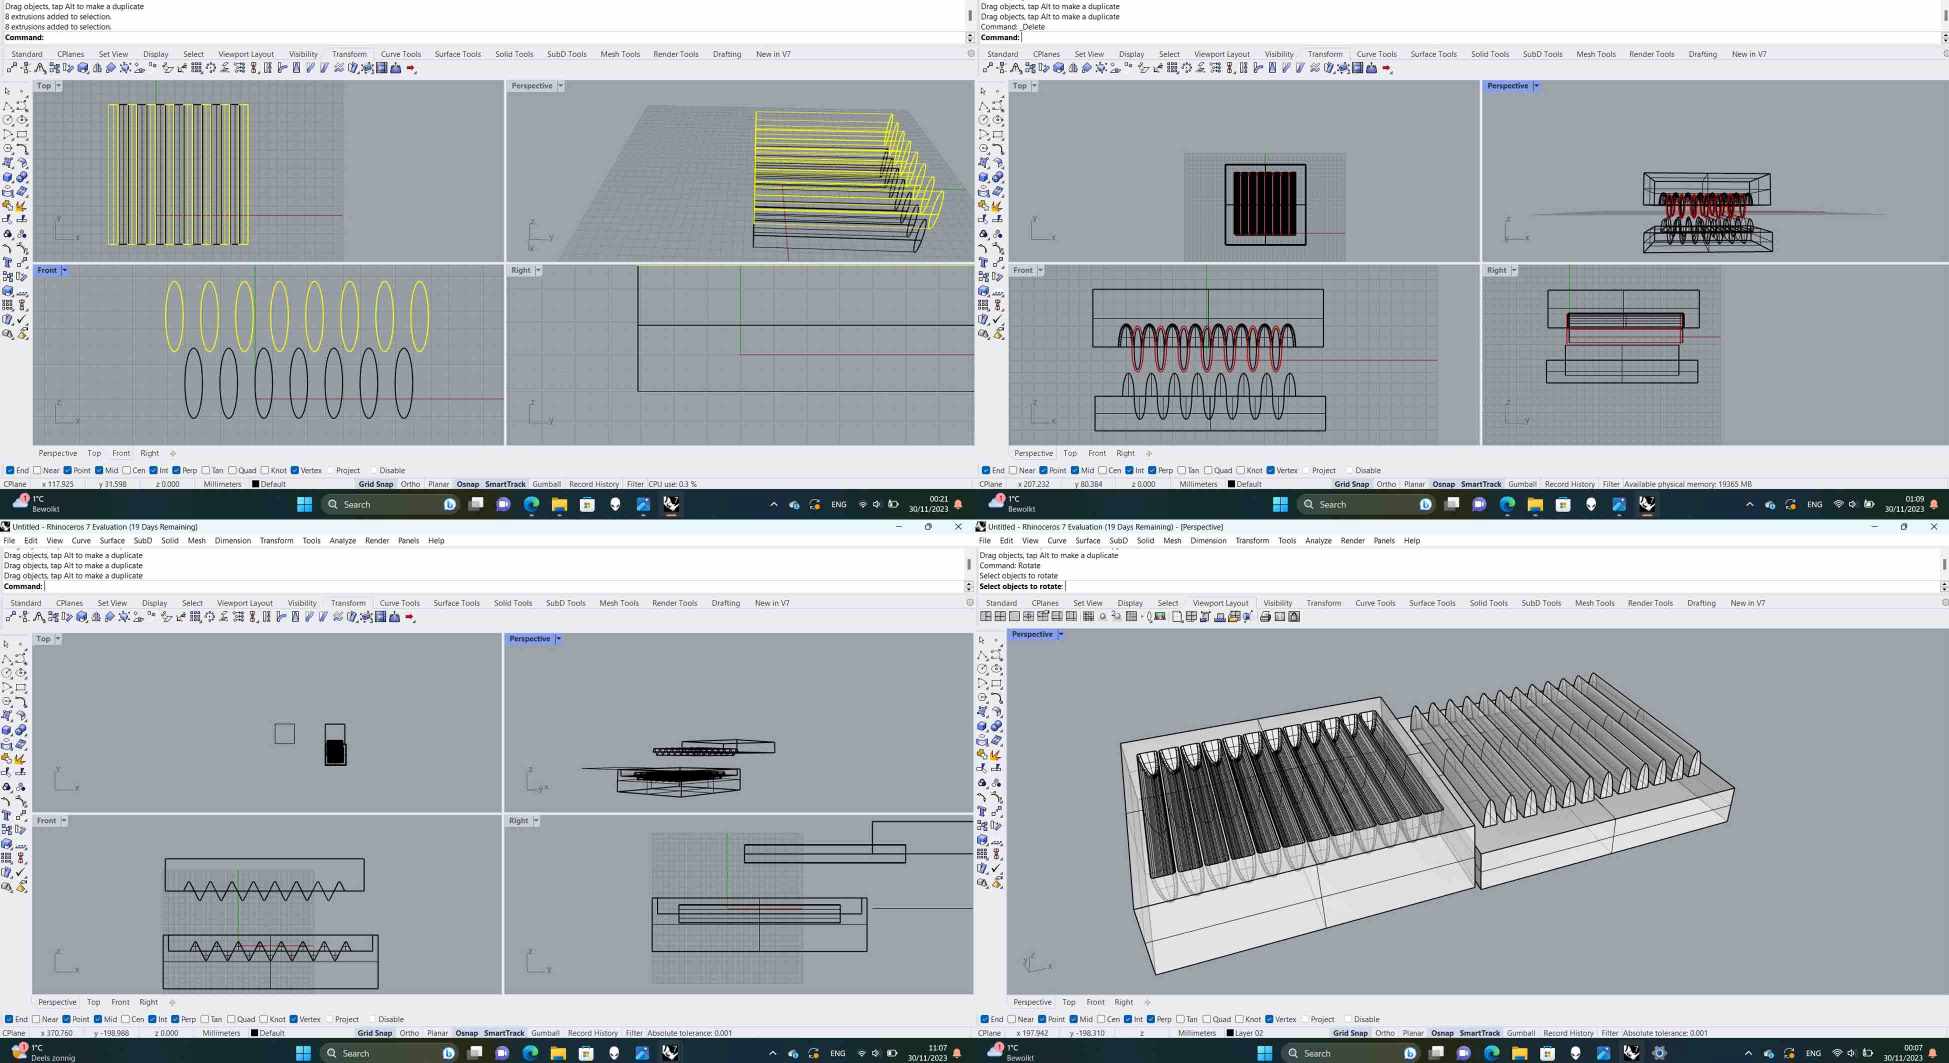
I started playing around with the idea of pleats on Rhino. It's important to consider some restrictions of 3D milling. For example, the milling bit has a diameter of 5mm and a height of 3cm, so the gaps between the pleats should be bigger than 5mm and no deeper than 3cm. And it's not possible to mill anything with negative angles since the milling bit only works perpendicularly at this point.

Another thing to consider is that since we are casting bio plastics off of the molds, we are basically working with liquids. So for the bottom mold, I added borders for containing the bio materials better. And the top mold needs to be smaller to fit within the borders.
FINAL MODELS
CREATING TOOLPATHS ON VCARVE
STEP-BY-STEP
-
Save your 3D model in .STL
-
Import it in VCarve.
-
Fill in the section regarding your material (size and margins).
-
Material Setup —> Z position click on the left bottom corner in the diagram.
-
Toolbar click on : tool database —> choose the right tool for you or create a new one yourself. We used “foam end mill 5mm”.
-
We changed the speed and feed of the foam tool we choose : (spindle speed: 1000 r.p.m) (feed rate 80%) (plunge rate 20mm/sec).
-
Create tool path: ROUGHING —> click on the roughing icon —> Limit Boundary “Material Boundary” —> Rough Strategy “Boundary Z level Raster X FINISHING —> click on Icon finishing under toolpath —> Limit Boundary “Model off-set 10mm” —> Area Machine Strategy “off-set/climb”
-
Save the toolpaths separately, ready for shotbot import.
3D MILLING WITH SHOPBOT
STEP-BY-STEP
-
Open KeyPad by hitting the K letter on your keyboard. You can control the position of the x and y axis by the arrow keys. (Left and right arrows for changing the x-axis.Up and down arrows for changing the y-axis.)
-
Homing x and y axis by pressing Zero (2) axes (X&Y).
-
You can change the position of the z axis by the page up and page down keys.
-
To zero your z-axis, bring the metal plate underneath your miling bit.
-
Touch the metal plate to the miling bit to check if inp 1 flashes green to make sure the miling bit will stop when it touches the plate.
-
Lower the z axis a little bit and make sure the plate is exactly underneath the miling bit.
-
Hit the Zero Z button for zeroing the z-axis.
-
Bring your x and y axis to desired job origin. Take note of the positions of your home x and y axis because it helps you to go back to job origin.
-
Zeroing the x and y axes by selecting Zero (2) axes (X&Y).The X and Y axis in the position pane is now 0,000. This is where your job will begin.
IMPORTANT
 1. Tie your hair up when operating the machine.

 2. Turn on ventilation.

 3. Keep your fingers on Space key when you start your job. If something were to go wrong, it's mostly likely to happending in the beginning.

 4. If something has gone terribly wrong, press the STOP button located under the milling bed.
IN PROGRESS
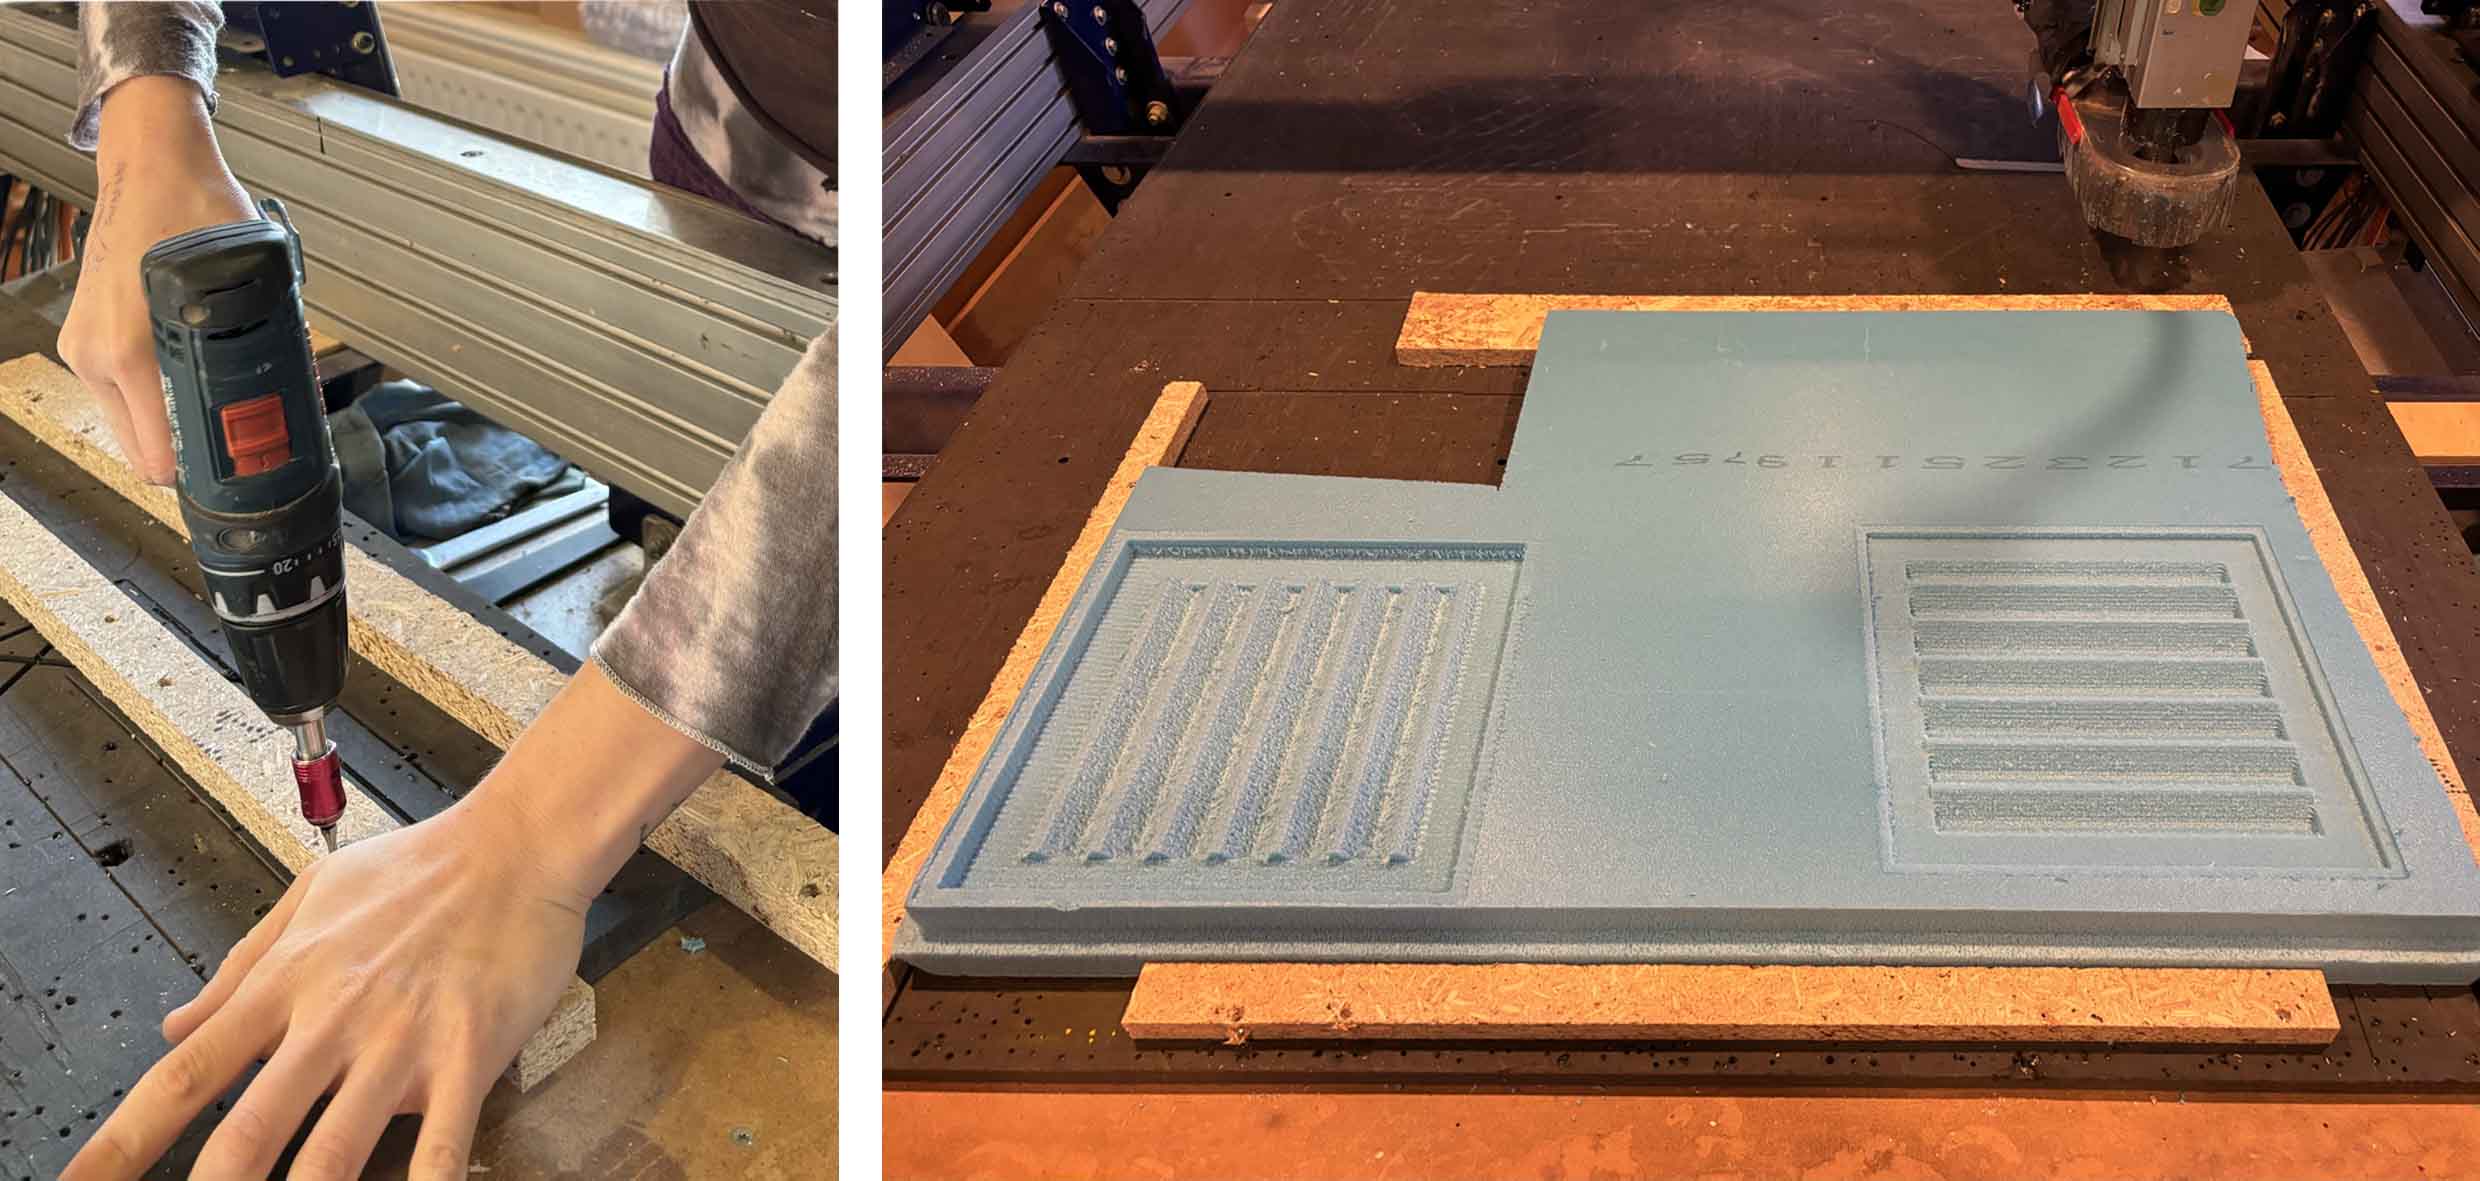
We used foam boards with 5cm thickness for milling. We used double sided tape to place it on the bed and secure it with wood sticks screwed around the board.
When placing your foam board, make sure it's parallel to the milling bed.
Something to notice is that, you can change the toolpath to a direction that worked better with your design. In our case, we have a lot of vertical lines, and we have the bottom mold milled horizontally and the top mold milled vertically. And the top mold had a finer result whereas the bottom mold had a rougher finish.
MAKING A COMPOSITE
FABRIC MANIPULATION WITH STARCH
RECIPE
| Starch | 100g | Water | 100ml |
Mix the starch well in cold water and apply to fabric.
Works on both natural and synthetic fabrics but works expecially well on plant-based fabrics.
GROWING ALUM CRYSTALS
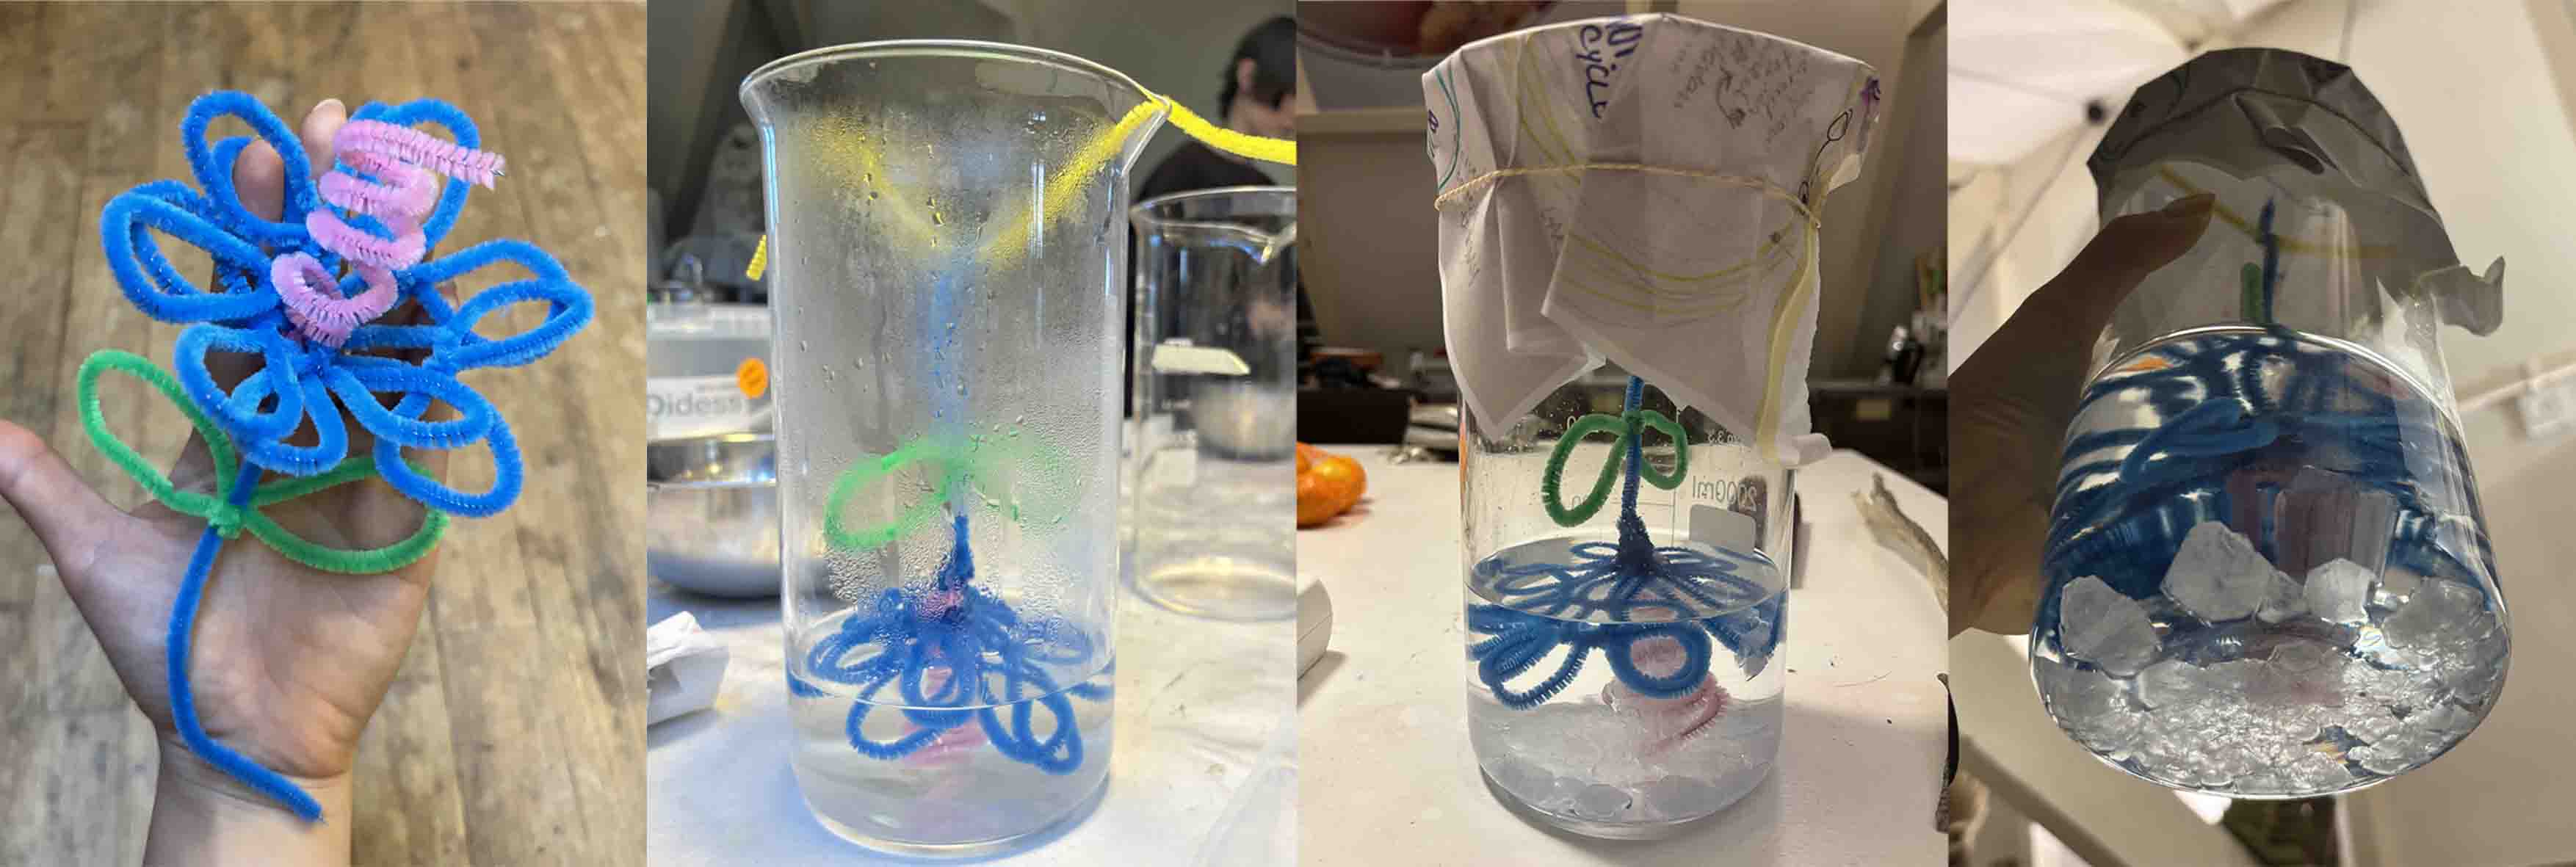
RECIPE
| Alum | 200g | Drinking Water | 600ml |
STEP-BY-STEP
-
Boil 1 litre of drinking water. Note that the water has to be really pure in order to grow crystals, so no tap water.
-
Prepare a clean container for your solution. A glassware is recommended.
-
Add alum to the water until it's saturated (alum stops dissolving in water). I used 200g of alum in 600ml of boiling water.
-
Mix your solution well.
-
Place your sample in the solution, make sure it doesn't touch the bottom/walls of your container.
-
Put a lid on your container to prevent dust from getting in your solution.
-
Leave it overnight.
OBERSERVATION
  1. The crystals tend to grow more around the bottom of the container.
  2. If you shake the solution, you will get smaller crystals.
USEFUL LINKS
The Best Way to Grow Alum Crystals at Home
Grow Alum Crystals That Resemble Simulated Diamonds