12 SKIN ELECTRONICS
INSPIRATION
When thinking about skin electronics, my first impression would be these on-skin sensors that monitor our body. But Laura's lecturegave me more ideas on how skin electronics can be adapted into fashion practices such as accessories and cosmetics. I was perticularly interested in having leds on the skin.
TOOLS
- [Arduino IDE](http://class.textile-academy.org)
- Adafruit Gemma
- Neopixel Flora
- Conductive wires
- Multimeter
- Soldering iron
- Pliers, wire stripper
- Glue gun
- Alum crystals
- latex
- 3 x AA battery pack
GROWING CRYSTALS ON NEOPIXEL FLORA
I would like to make a spine piece with crystals growing on the leds. Thanks to Loes' detailed documentation on how to grow crystals on electronics, I got very satisfactory results in one go.
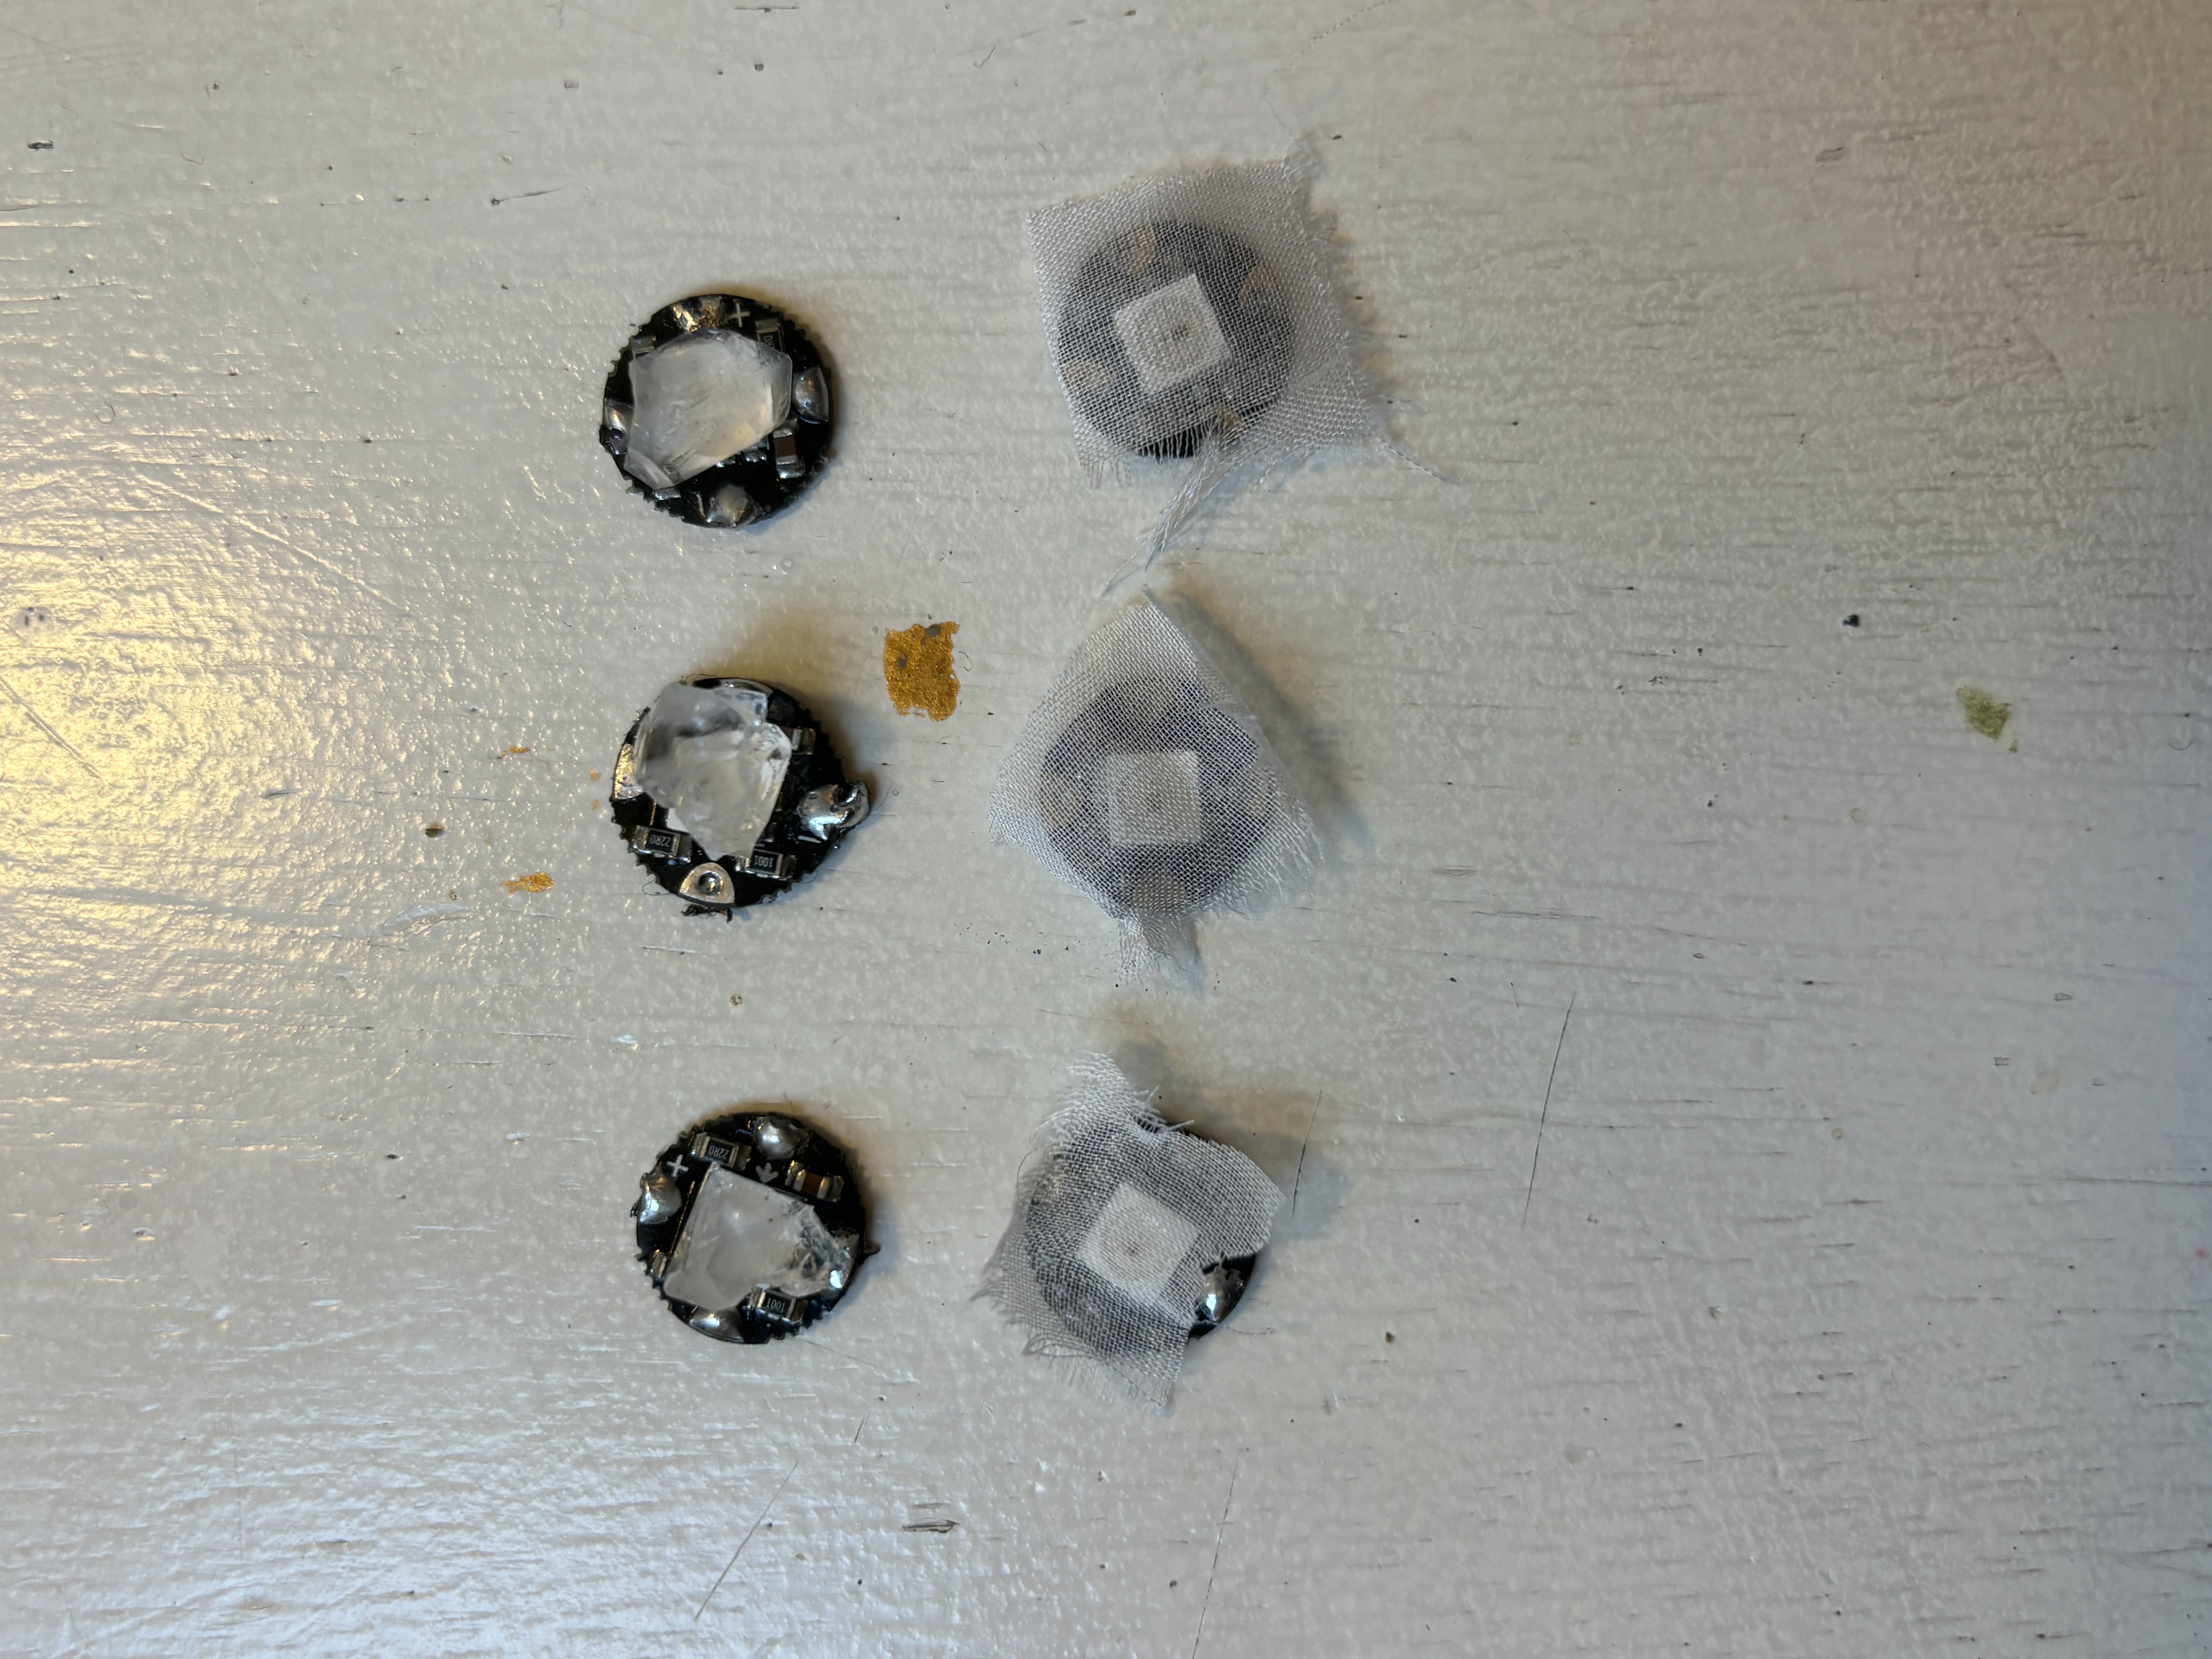
STEP 1
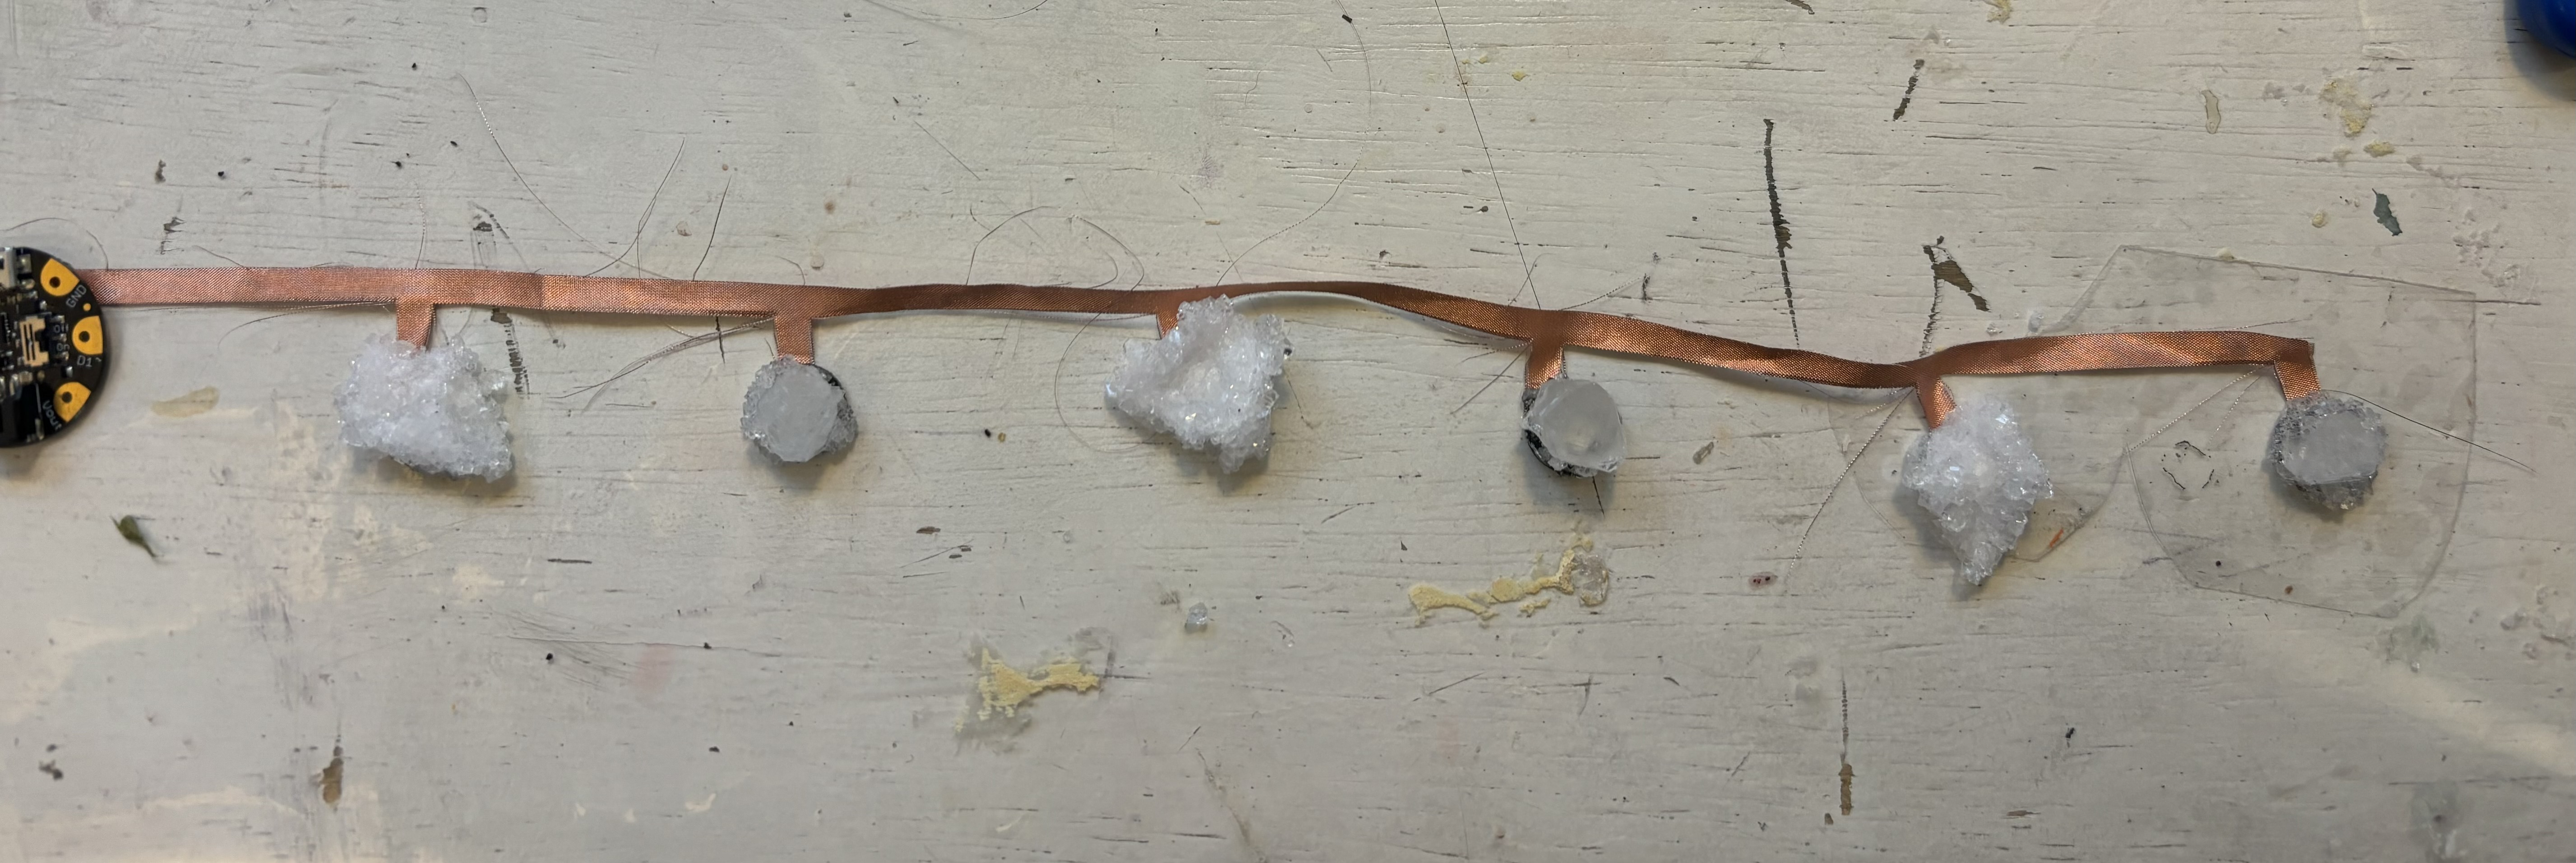
According to Loes' experience, glueing a piece of silk fabric on the neopixels gives pretty nice results, as well as glueing a crystal seed directly on the neopixel. So I tried both by glueing 3 pieces of silk fabric onto 3 neopixels and glueing 3 alum crystals (that I grew from the previous week) onto another 3 neopixels with a glue gun.
STEP 2
I made another batch of alum solution for growing more crystals with the same recipe from last week. Check out the steps here
I used:
| Alum | 200g | Drinking Water | 400ml |
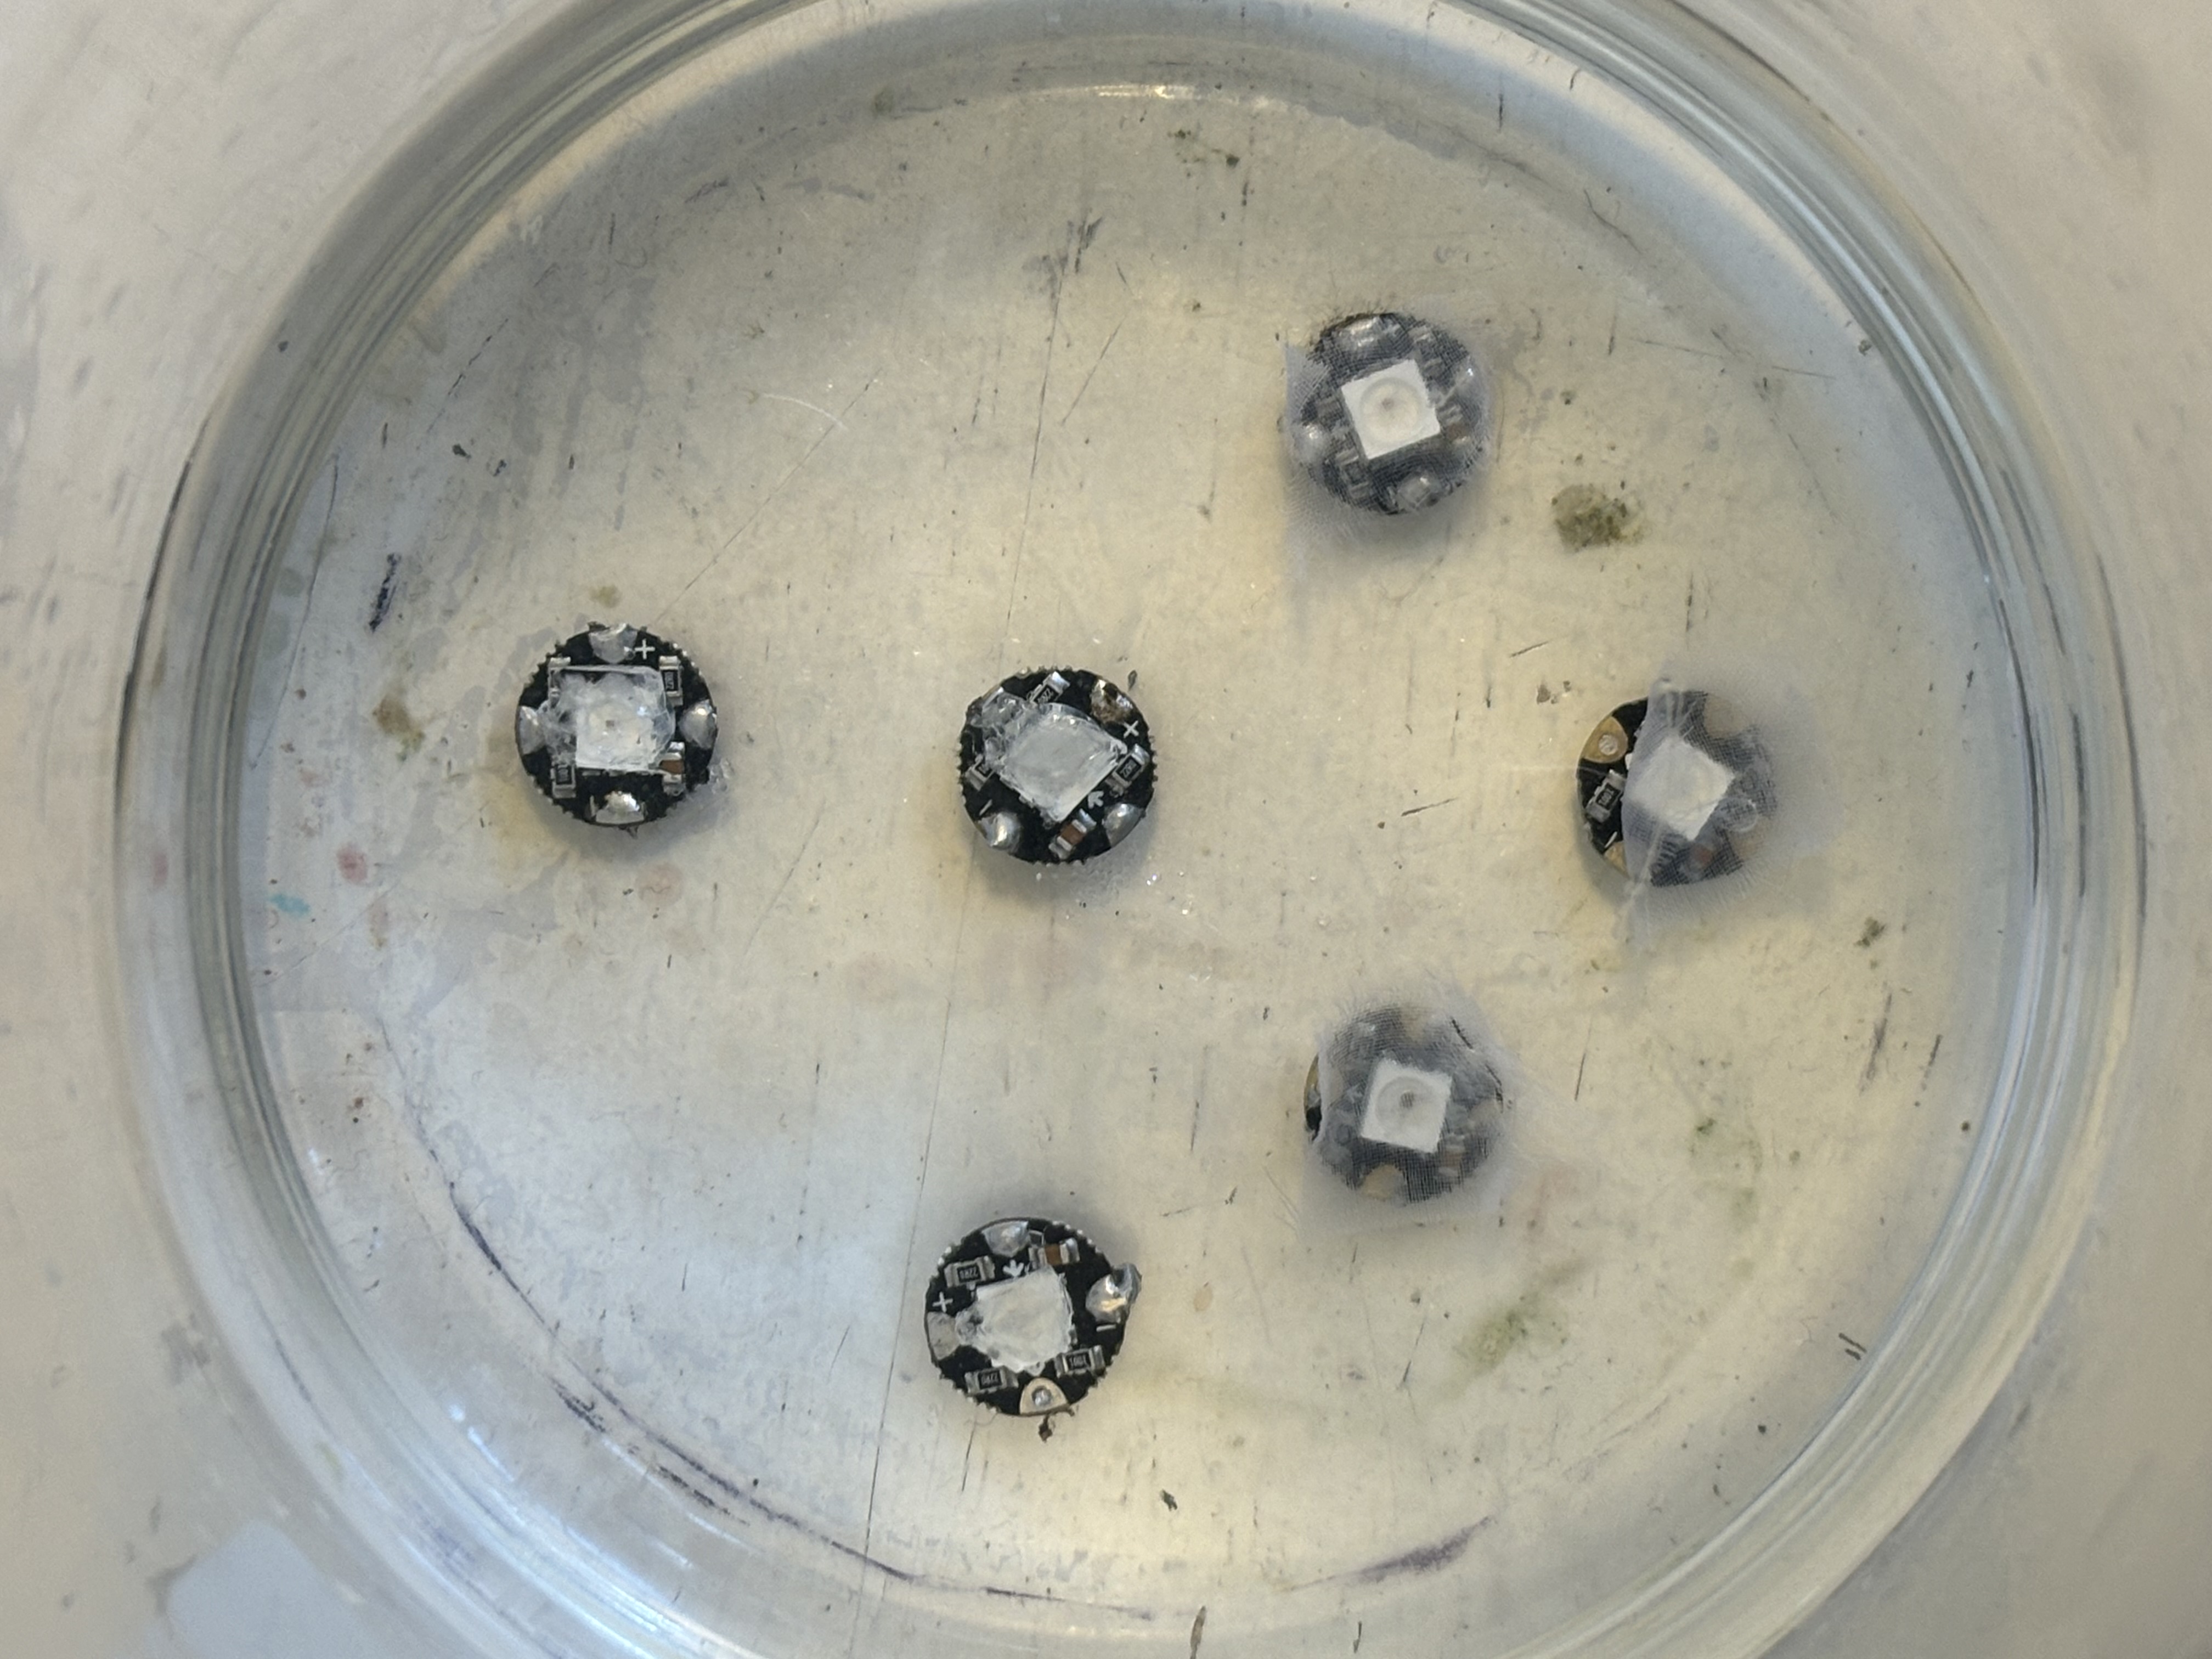
STEP 3
Place the neopixels on the bottom of the jar, with some space in between. This way it prevents the crystals from growing on the bottom side of the board so you have a clean surface to work on later on.
NOTE: Don't put your neopixels in when the water is still hot because your alum will melt in hot water. I would like to quote from Loes' description to know when is a good time: "I compare it to tea: if it's nice and hot and you'd drink it. It's too hot. If it gets to the point where you think "I have to drink it now, if I wait a minure longer it will be cold" that's a good moment to put the crystal in :)"
STEP 4
I left them in the solution for around 4 hours before taking them out. I was observing the crystals' growth once in a while and took them out when I was happy with their growth.
RESUILTS
Here you can see that crystals growing on the seeds and crytals growing on the silk fabric look very different. I think both are nice, so I decided to distribute them evenly on my spine piece.
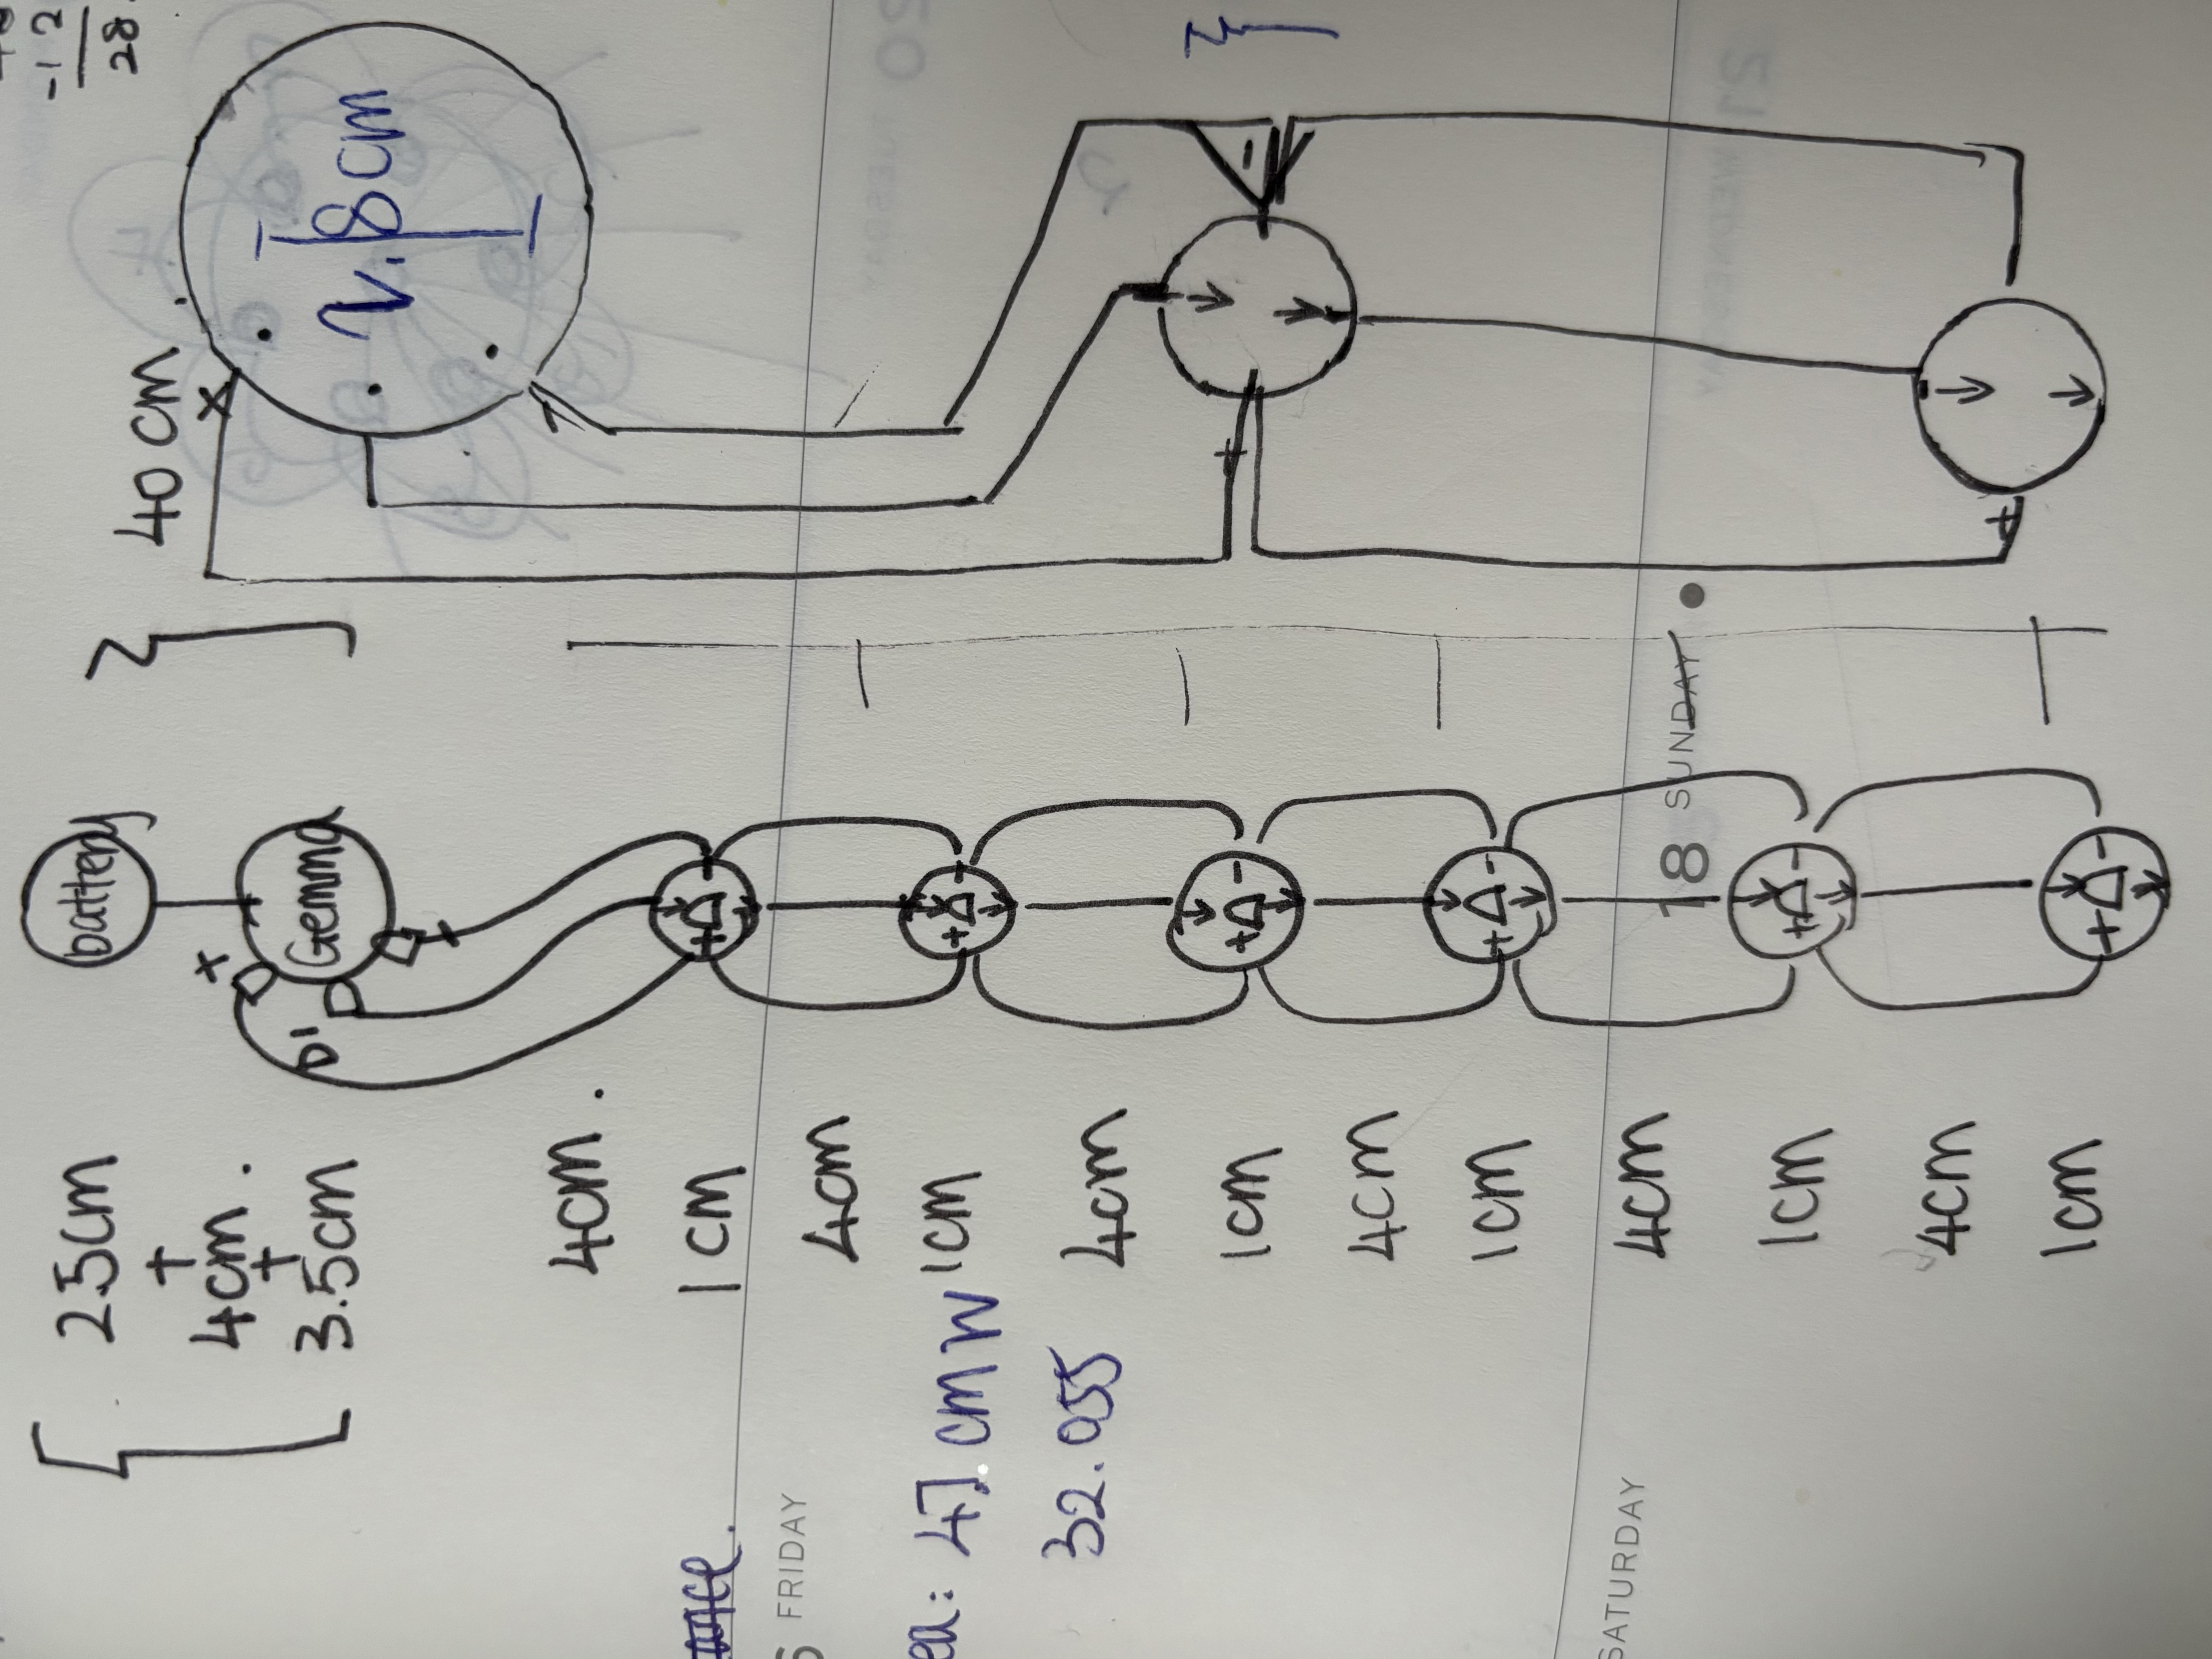
CIRCUIT
SCHEMATIC
This diagram helps me to design the circuit and how everything should be connceted.
Tips for powering the neopixel flora:
1.When connecting NeoPixels to any live power source or microcontroller, ALWAYS CONNECT GROUND (–) BEFORE ANYTHING ELSE. Conversely, disconnect ground last when separating.
2.Adding a 300 to 500 Ohm resistor between your microcontroller's data pin and the data input on the first NeoPixel can help prevent voltage spikes that might otherwise damage your first pixel. Please add one between your micro and NeoPixels.
CRICUT MAKER 3
I drew the circuit on rhino and cut it out on a piece of conductive fabric with Cricut. It looked really nice at first but once I started soldering, the fabric melted and was not usable anymore. So conductive fabric is not recommended for soldering.
SOLDERING WITH CONDUCTIVE WIRES
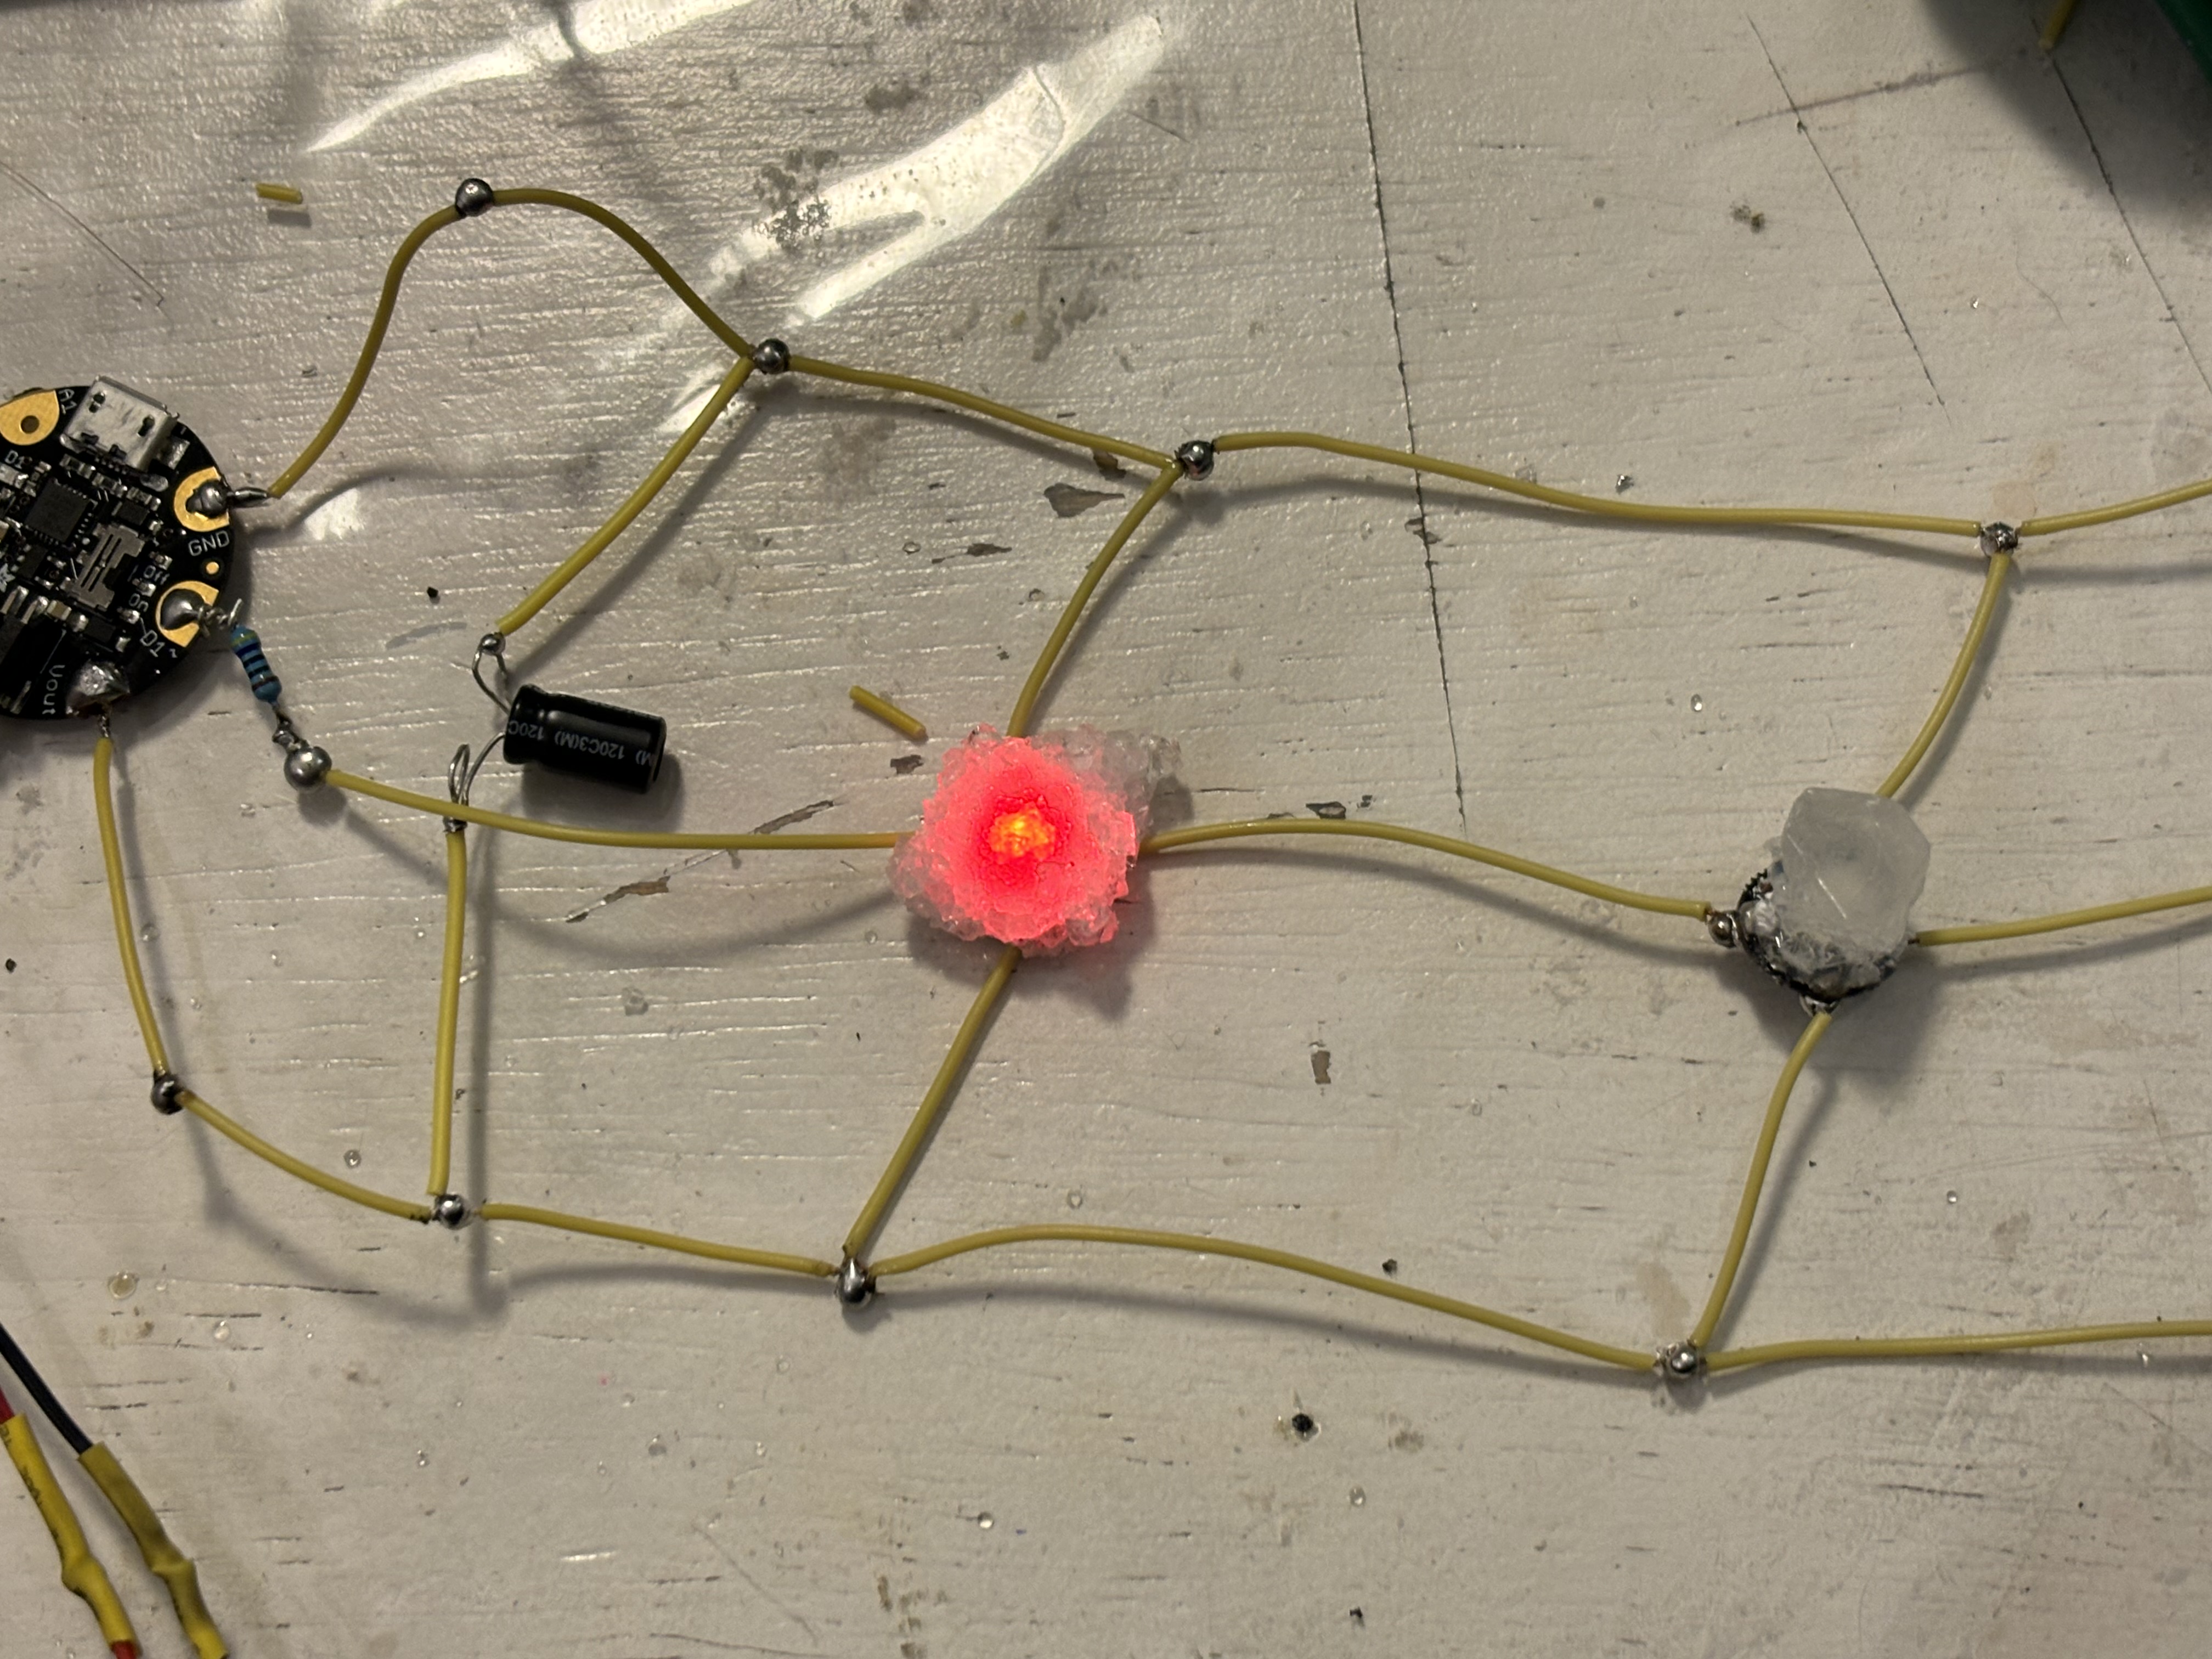
I switched back to soldering with conductive wires and it worked pretty well. I used all yellow wires because it's the closest to skin colour and thus the least noticable.
LATEX
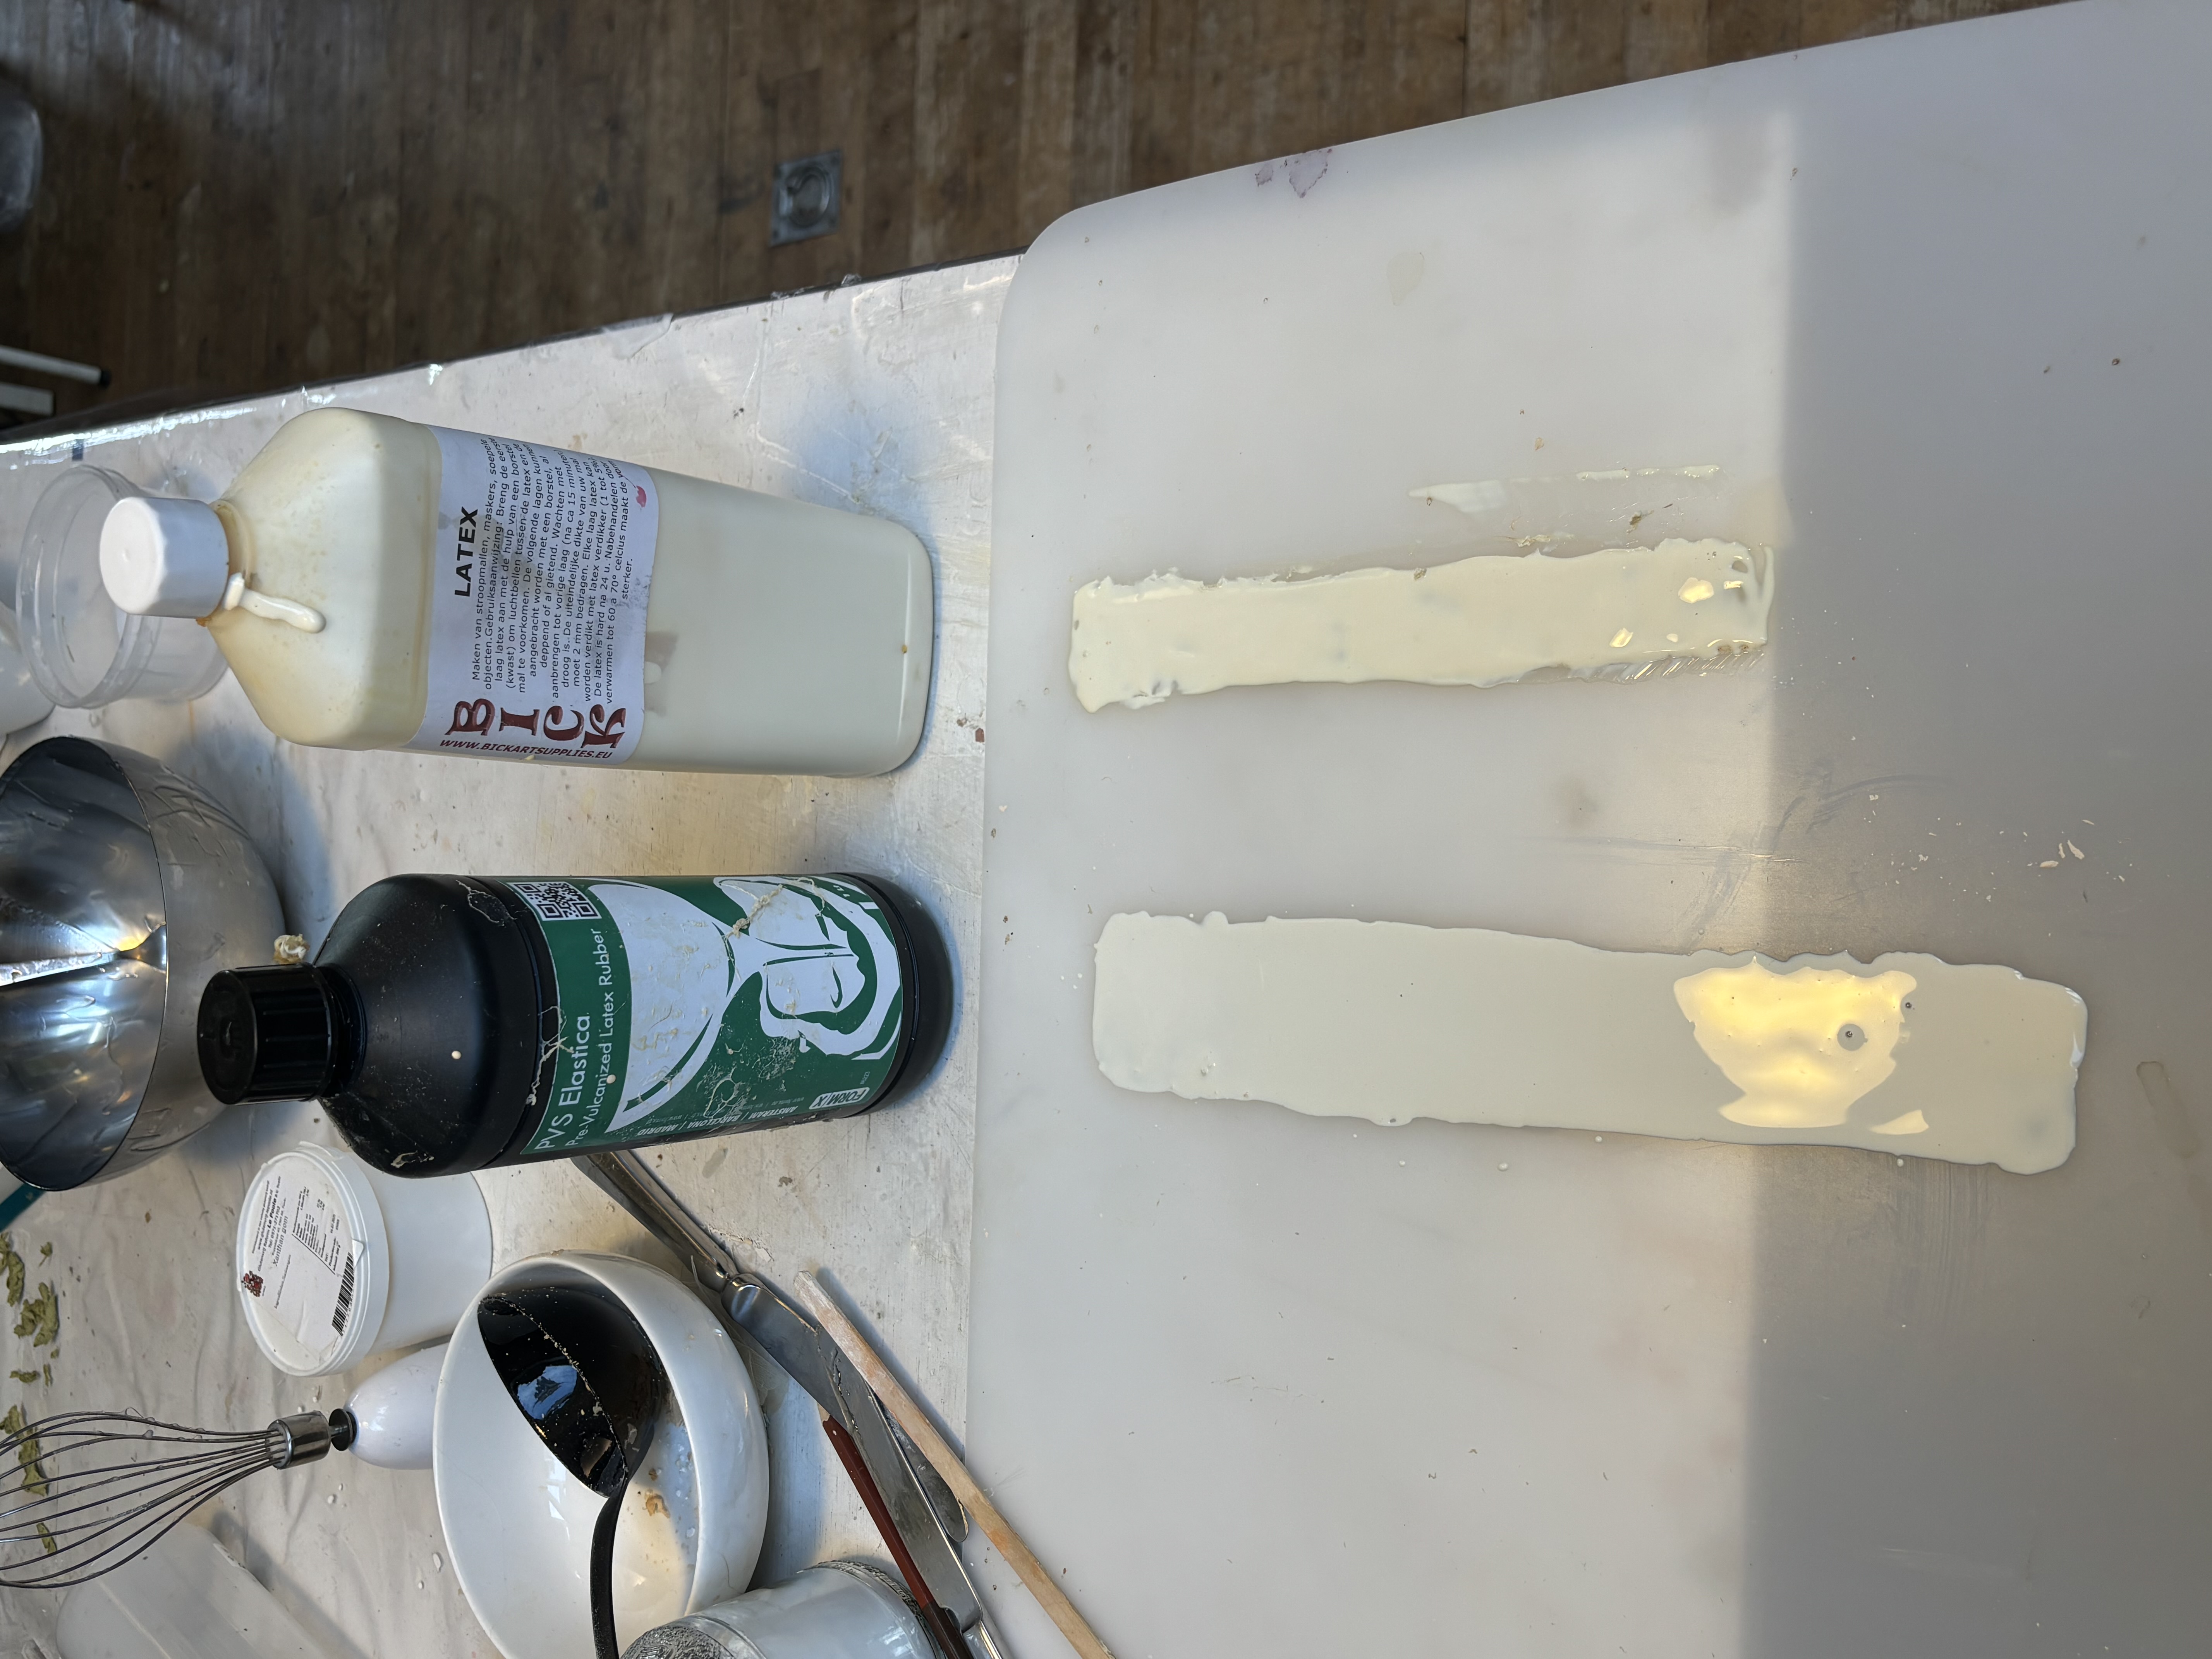
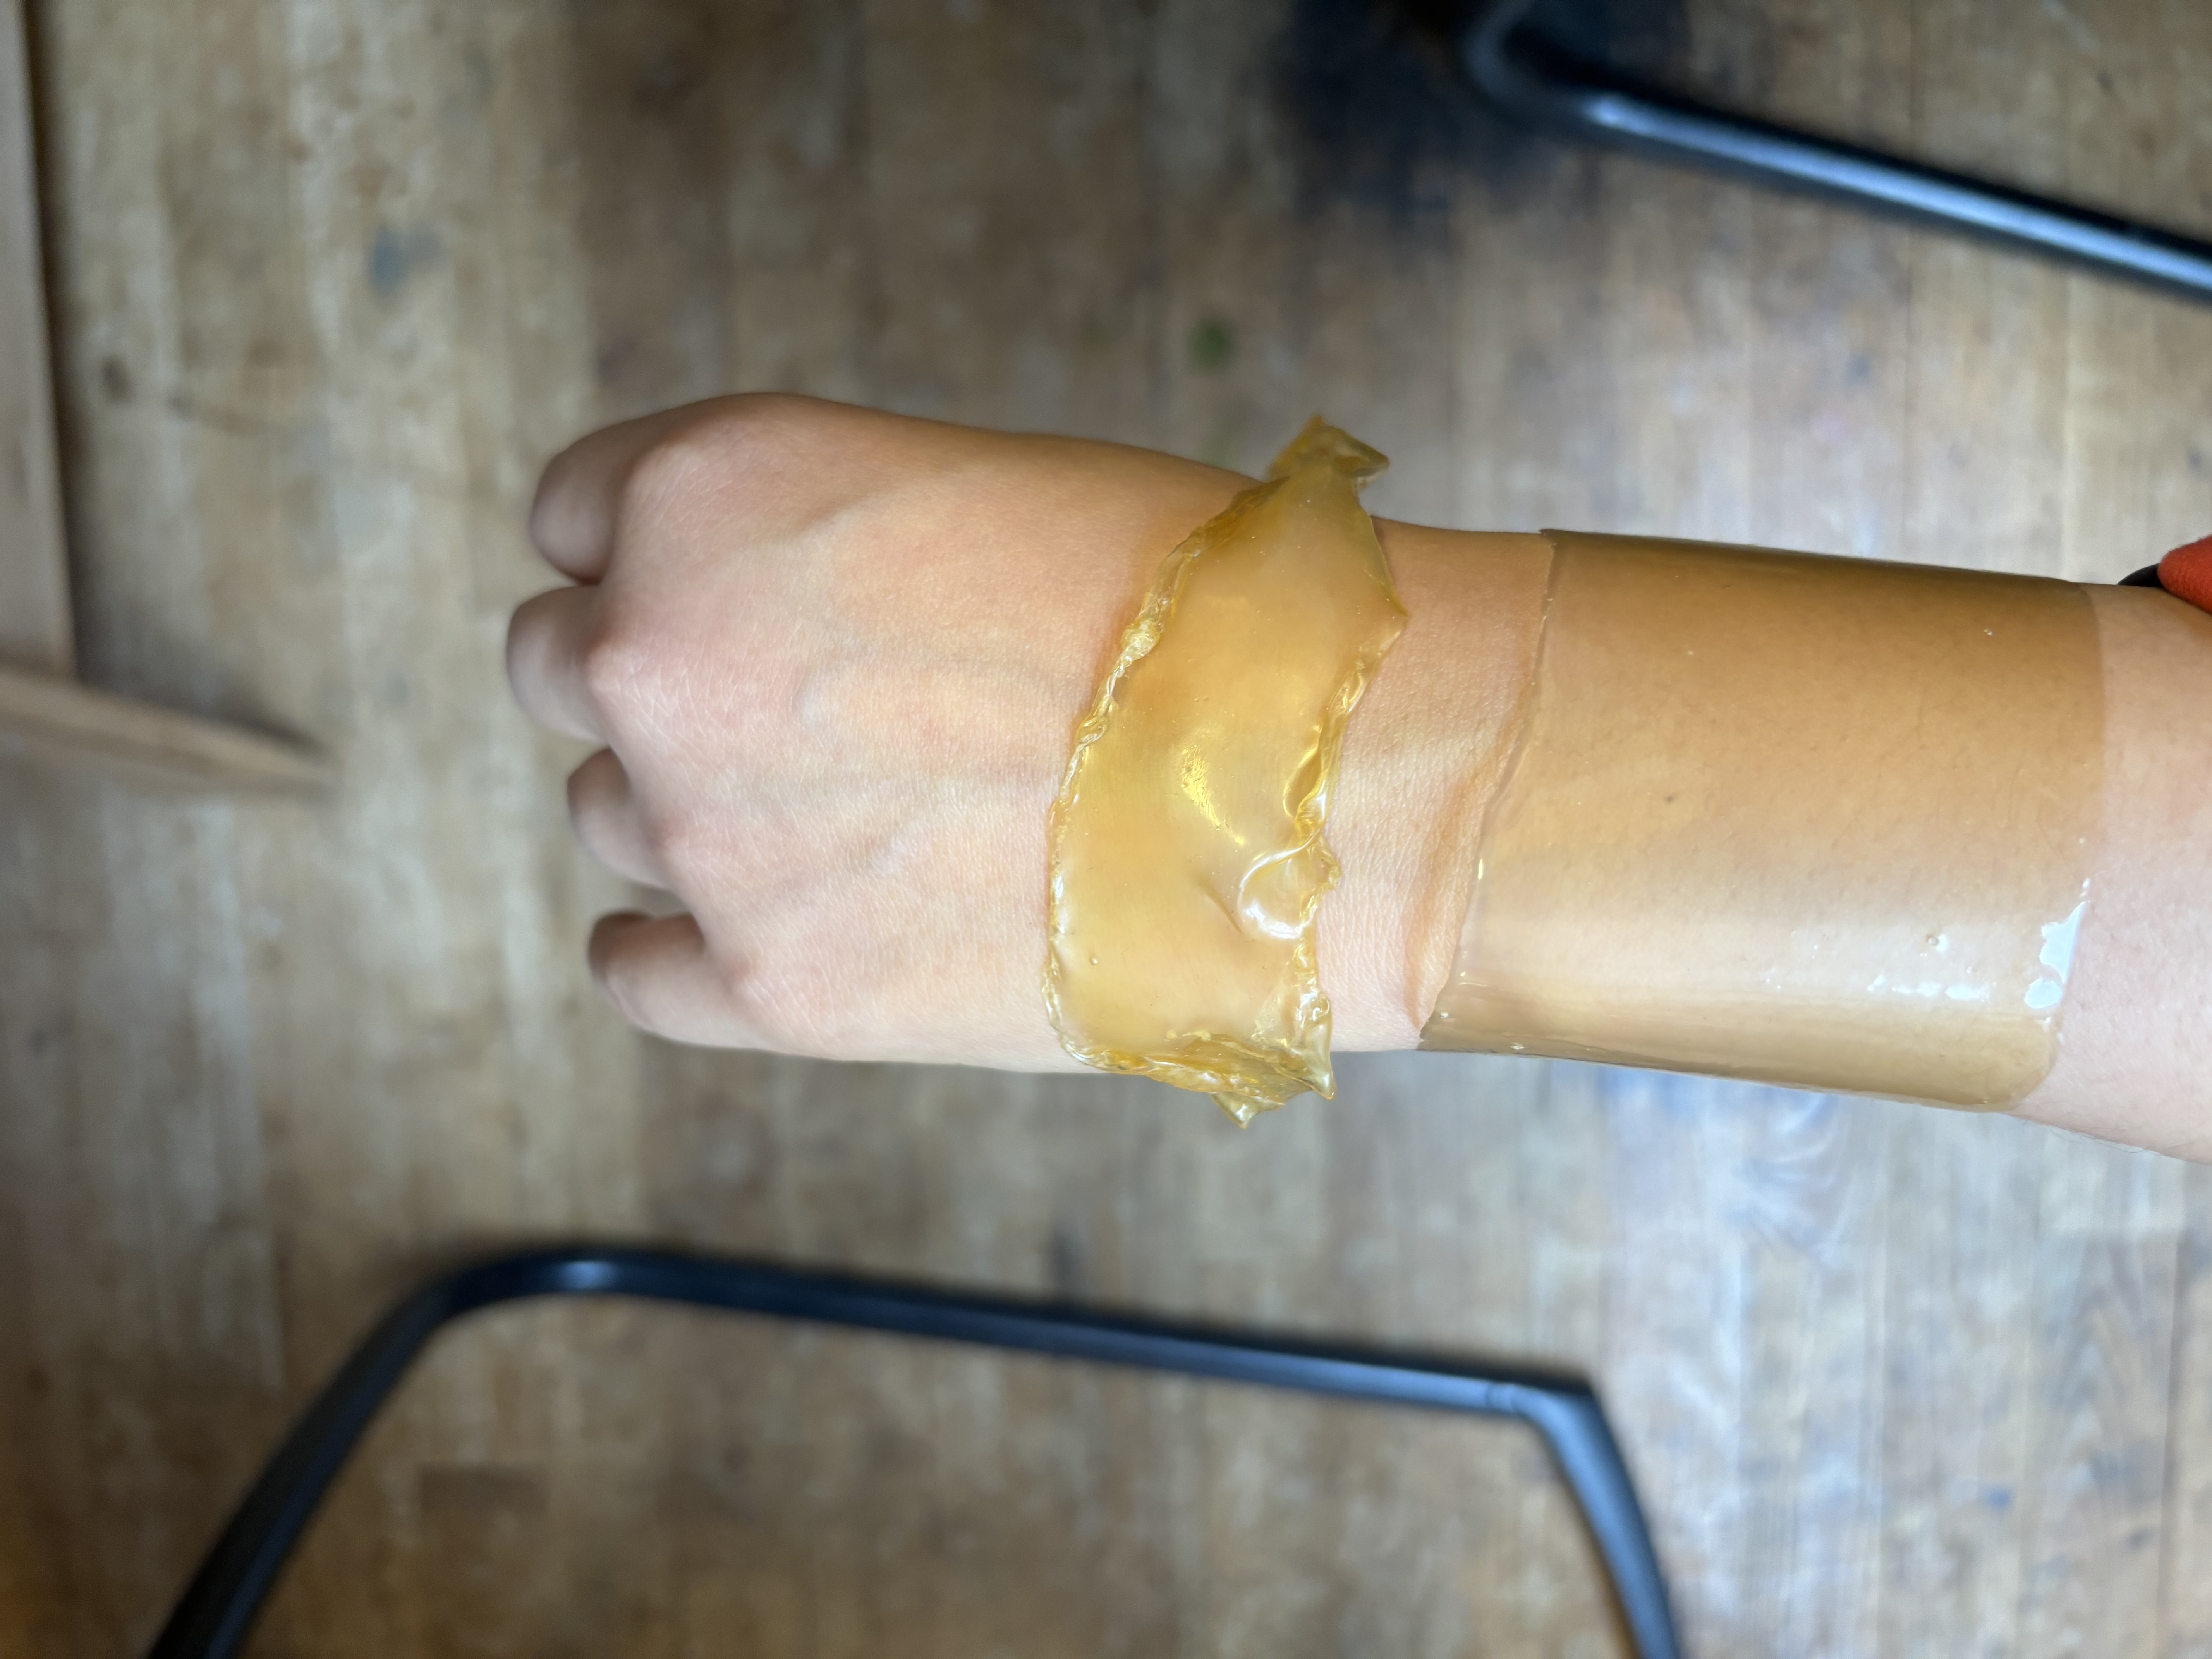
I wanted to embed my circut in latex so I can later attach it on skin with glue. There are two bottles of latex in the lab so I tried both by brushing them on a platic board. I prefer the black bottle because the result is smoother and more transparent.
PROGRAMMING A GEMMA
STEP-BY-STEP
-
Open your first sketch Open the LED blink example sketch: File > Examples >01.Basics > Blink.
-
Select your board type Select Arduino Gemma from Tools > Board
-
Upload the program Select Arduino Gemma from Tools > Programmer. Plug in the Gemma, make sure you see the red LED lit. Press the reset button on the Gemma - verify you see the red LED pulse. This means it is ready to receive data. Click on File > Upload Using Programmer above within 10 seconds. When the upload is finished, the built-in LED will flash every other second.
ADAFRUIT DRIVER FOR WINDOWS
ALERT!!!!! If you are using Windows and you want to work with Adafruit, you have to download this driver first!! Otherwise you will only be told "Programmer not found" after all the right procedures.
TESTING WITH NEOPIXEL FLORA
My gemma was a bit moody and didn't want to cooperate for an hour. I tried multiple solutions with michelle but it was just acting weird. No idea why :(
But an hour later it decides to do some work and this is the neopixel show all the colours with the Strand Test from the Examples library.
CODE
I want my crystals to flash white for 2 seconds and then stops for 2 seconds.
Here is a very useful video on how to do that:
And here's the code:
#include <Adafruit_NeoPixel.h>

int dataPin = 1;
#define numberOfPixels  6
#define maximumBrightness 255

Adafruit_NeoPixel ledStrip = Adafruit_NeoPixel(numberOfPixels, dataPin);

void setup() {
ledStrip.begin();
}

void loop() {
setLightsToColour(255, 255, 255);
ledStrip.show();
delay(2000);
setLightsToColour(0, 0, 0);
ledStrip.show();
delay(1000);
}

oid setLightsToColour(int red, int green, int blue) {
for (uint8_t i = 0; i < numberOfPixels; i++) {
ledStrip.setPixelColor(i, ledStrip.Color(red, green, blue));
}
}
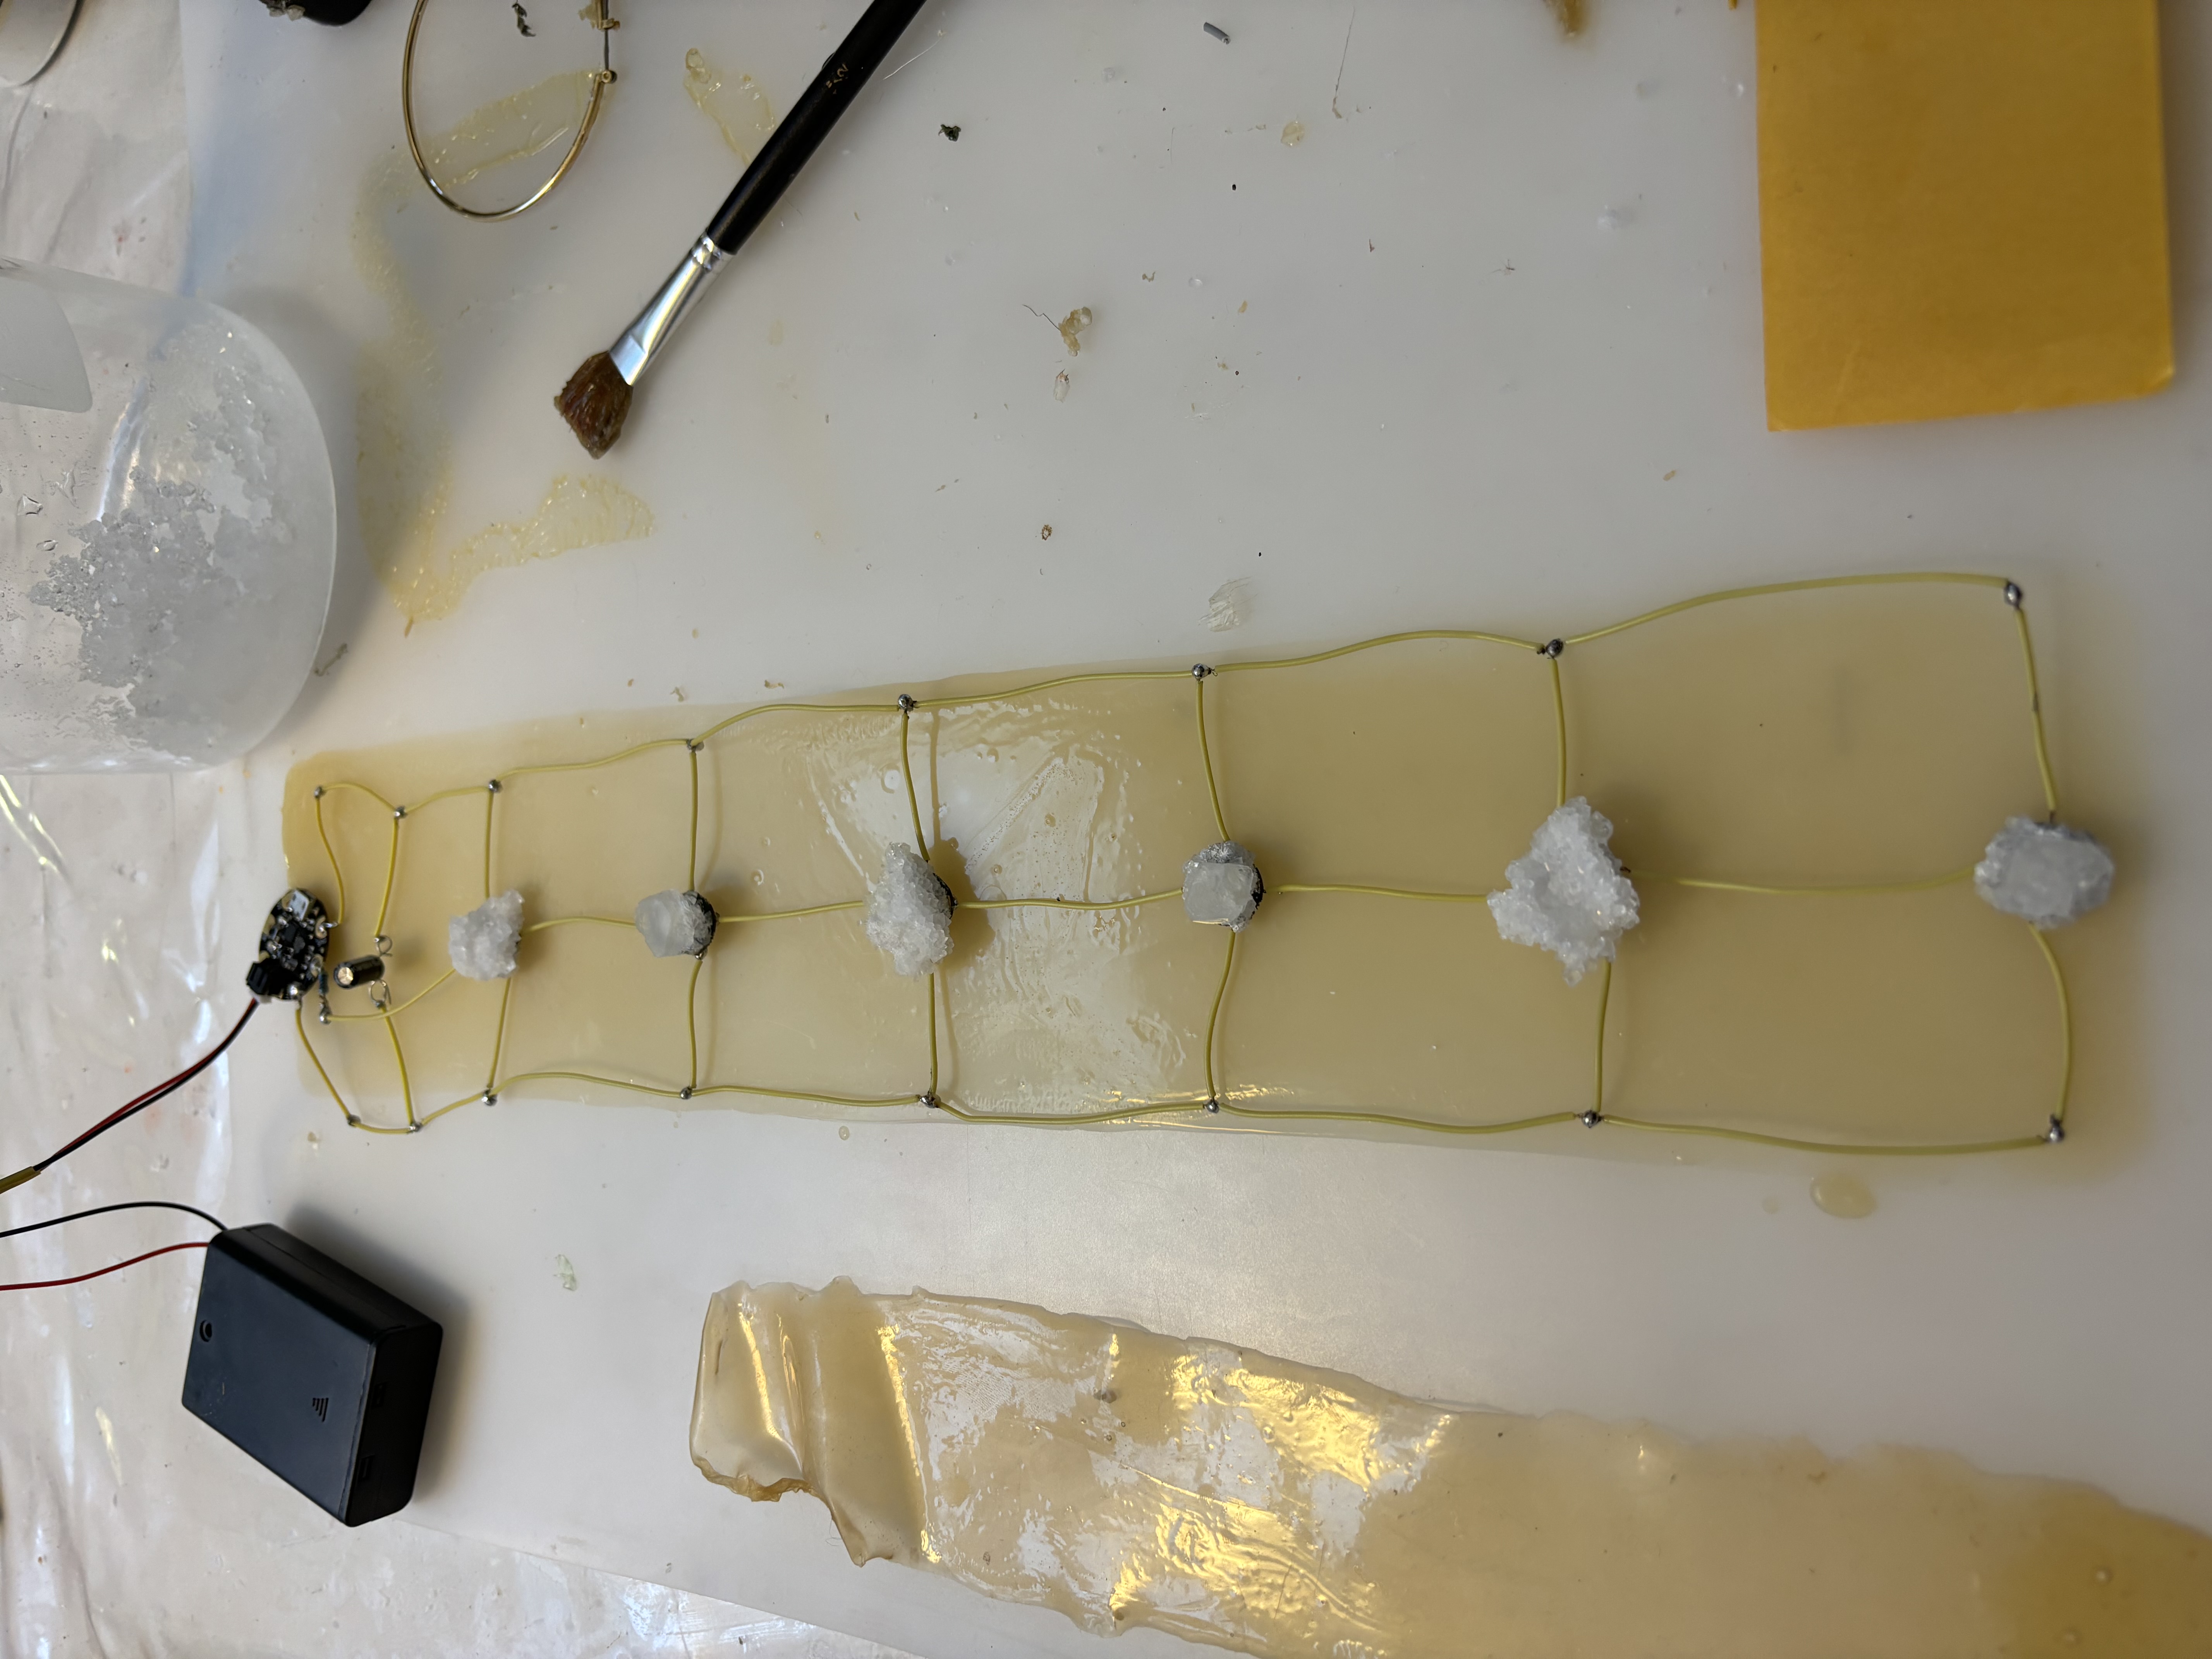
FINAL RESUILT
My crystal spine piece working connected to a 3 x AA battery pack.
Testing it on a mannequin.
TO BE CONTINUED