12. Skin Electronics
 The human skin is the largest sensory organ, made up of complex sensors (somatosensors) that detect external stimuli to actively measure them and rapidly send warning signals to the central nervous system to initiate a motor response.
On-skin electronics are an emerging group of interactive devices, with challenges in both engineering functionalities and design aesthetics.
The human skin is the largest sensory organ, made up of complex sensors (somatosensors) that detect external stimuli to actively measure them and rapidly send warning signals to the central nervous system to initiate a motor response.
On-skin electronics are an emerging group of interactive devices, with challenges in both engineering functionalities and design aesthetics.
Research
Tech & Health
MOXO sensor is wearable device that reveals consumer emotions. This startup’s stress sensor tracks users’ unconscious responses to products and experiences. Electrodermal Activity Sensors measure micro-changes in participant’s sweat glands. These sweat glands are a marker of the sympathetic nervous system (the reptilian fight or flight response). With the Electrodermal Activity Sensors, you can measure customer’s excitement, engagement, attention, calmness, and stress. With these sensors, you can see the exact moment when customer’s emotionally react to your product.
e-TLC devices are ultrathin, compliant skin-like, or ‘epidermal’, photonic devices that combines colorimetric temperature indicators with wireless stretchable electronics for thermal measurements when softly laminated on the skin surface. The technology uses the transient temperature change at the skin’s surface to determine blood flow rate, which is of direct relevance to cardiovascular health and skin hydration levels. (When skin is dehydrated, the thermal conductivity property changes.)
LAB-ON-SKIN is a flexible, wearable sensor that analyses biomarkers in sweat. It monitors the chemical composition of sweat and can provide detailed information about its composition including lactate, chloride and glucose concentrations, pH, and the body’s rate of water loss.
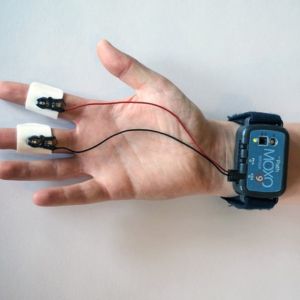
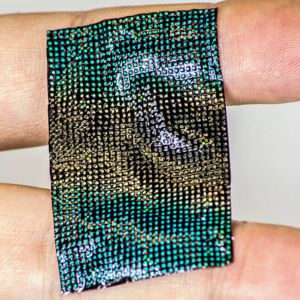
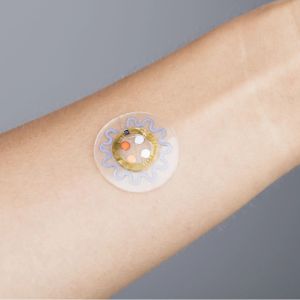
image credits
from left to right, top do bottom:
-
Moxo Sensor
-
e-TLC device
-
Lab-on-Skin wearable
Nature
Chromatophore is a special animal cell, usually dermal, that contains pigment granules: it is often capable of expansion and contraction in such a manner that the skin color changes. The primary function of the chromatophores is camouflage. There are a number of different kinds of chromatophores. They are divided into the following groups based on their colour under white light: xanthophores (yellow), erythrophores (red), iridophores (reflective/iridescent), leucophores (white), melanophores (black/brown) and cyanophores (blue). Humans have only one class of pigment cell, the mammalian equivalent of melanophores, to generate skin, hair, and eye colour.
References & Inspirations
Art, Prosthetic & Special Effects Makeup - SFX
Social Prosthesis by Morgan Chen, is a art moving appendage designed as two headpieces made from rigid and soft structures. The soft skin of the prosthesis curls and contracts when triggered by touch on the face. It's an exploration of how technologies enhancing the human body create meanings that extend past the merging of biological and artificial.


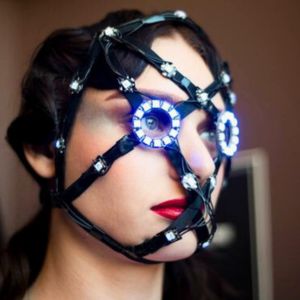
image credits
from left to right, top do bottom:
-
Salvador Dali wearing an eyepatch with The Eye of Time, 1950s
-
iBorg from Star Trek - _Voyager, 1995
-
Chromat Autumn-Winter Collection - Bionic Bodies, 2014
Rob Spence is a one eyed filmmaker that lost his eye in a shotgun accident as a child and later created a wireless video camera eye to replace it. He is teaming up with a young Polish Opthamologist who has a startup named Next Eye based on making prosthetic eyes with a 3D printer. The company will be able to produce from materials fully biocompatible with the human body: they will need a 3D scanner, a 3D printer and a specific printer for the iris and vessels.

Prosthetics makeup is the process of lifecasting, sculpting and moulding to create a makeup look that totally transforms the actor.
Morphace is a computer-aided fabrication approach that blends transformative wearables with the native skin using prosthetic makeup techniques. Morphace’s fabrication process consists of:

(a-b) designing and simulating on a scanned face | (c-d) fabricating functional primitives | (e-f) applying the prosthetic patch.
weekly assignment
the assignment is to:
-
design a skin circuit
-
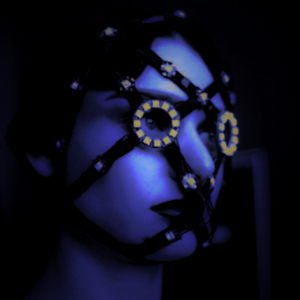
build my version of the “Skin masquerade party” project
-
document the concept, sketches, references also to artistic and scientific publications
skin electronics advances
-
AnimSkin - fabricating epidermis with interactive, functional and aesthetic color animation
-
AlterNail - ambient, batteryless, stateful, dynamic displays at your fingertips
-
Bionic Skin for a Cyborg You - article about how flexible electronics allow us to cover robots and humans with stretchy sensors
-
DermalAbyss - tattoo inks with biosensors – liquids that change colour in response to alterations in the bloodstream
-
DuoSkin - gold leaf temporary tattoos that can be used to control devices through touch
-
Light up your Body with Temporary Tattoo Circuits - Makezine article
-
Lotio Interface - lotion mediated interaction with an electronic skin worn display
-
MicroFluid - RFID artifact based on a multiple-chip structure and microfluidic switches
-
SkinMarks - comprise skin electronics on temporary rub-on tattoos
-
SkinPaper - silicone-treated washi paper to weave lightweight and easy-to-fabricate on-skin interactions
-
Skintillates - designing and creating epidermal interactions
-
Soft Inkjet Circuits - fabrication of soft circuits using a conventional desktop inkjet printer
-
Thermotion - thermofluidic composites to design and display thermochromic animation effects on surfaces
inspirational projects
- Beatriz Sandini Fabricademy 2020
- Ieva Dautartaite Fabricademy 2023
- Monserrat Fabricademy 2019
- Marisa Stasia Fabricademy 2022
- Jessica Stanley Fabricademy 2019
Color Change Pigments
The possibilities for color change are virtually endless. Then, there is true color-changing, in which the color transitions from one to another. There are primarily four ways this happens:
-
Thermochromic: happens as a result of exposure to a heat source, like body heat, or UV exposure.
-
Photochromic: occurs due to UV light exposure, particularly sunlight.
-
Hydrochromic: a material will change color based on exposure to water. How much water required varies, but some materials can be made so sensitive they change color based on simple humidity.
-
pH balance: this change color is based on a combination of factors, shifting colors from heat and moisture combined. pH change can occur in any liquid material, even minor amounts of perspiration and is impacted by heat.
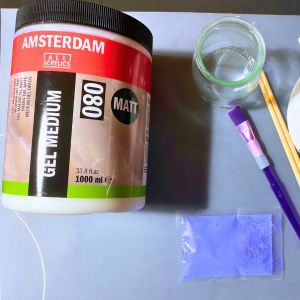
Tools
- thermochromic pigment
- gel medium
- 3V coin cell battery
- air dryer
- conductive thread 0,25mm (copper)
- resistors (tried 30ohms and 220ohms)
- paint brush
- fabrics (used a white undersbust made of 90% cotton 10% elastane)
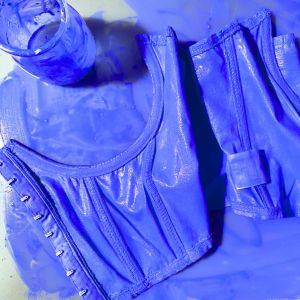
Step 1 - Dye the Fabric
Mix the thermochromic powder pigment with the medium. I used a ratio of 1:1. Then apply the mix with a paint brush and let it dry.

Step 2 - Expose to Heat
Started by using an air dryer just to see how it reacts!!! Amazing! Wow!
Thermochromic ink reaction to Hairdryer de Lia Von F.
Then made several attempts using the breadboard and some aligator cables, conductive thread, 3V cell battery and resistor. None of them seem to generate heat enough to have a reaction.
- 1st fail: 90cm thread + 20ohms resistor + 3V cell battery
- 2nd fail: 15cm thread + 220ohms resistor + 3V cell battery
- 3nd fail: 15cm tread + 30ohms resistor + 6V cell battery

Information to have in mind for future experiments:
- Copper Resistivity: 1,694 microOhms.cm
- Thread diameter: 0,25mm
- Thread section: 0,05m2
- Ohm's second law is valid only if the electric current is evenly distributed in the section of the conductor, i.e. in the case of direct electric current: 𝑅=𝜌ℓ𝑆 where 𝑅 is the resistence knowing that the wire is characterized by a length ℓ and a cross-section of area 𝑆
WANNA TRY: using the metal structure of the undercorset as a conductive guideline and create patterns. Find a more heat sensitive pigment that can react to body's temperature. Experiment other types of color changing coatings like Liquid Crystals. Found these suppliers:
Cyborg Eye

Step 1 - Hand Draws
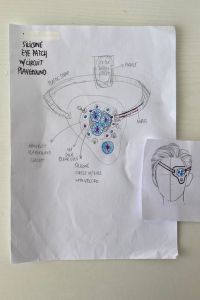
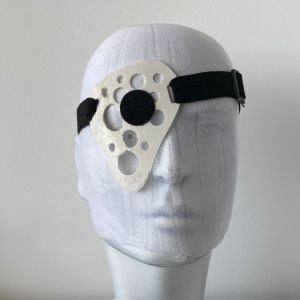
Step 2 - Eye Patch Design
For the eye patch base I used a model that I found on the on Thingiverse
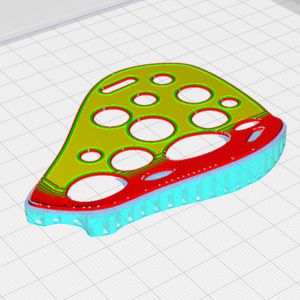
Step 3 - Eye Patch 3D Printing
To slice the design and generate the GCode I used the slicing software Ultimaker Cura.
I printed the design in PLA filament. The .gcode files for EyePatch[^1] can be found at the bottom of this page. Make sure to Lay Flat the model!

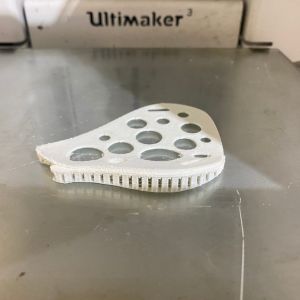
Tools & Print Settings
- Ultimaker Cura Software
- PLA Real Filament, 1.75mm white
- 3d Printer: Ultimaker 3
- Profile: Fast 0,2mm
- Temperature: 230º
- Print Speed: 120mm/s
- Infill Density: 10%
- Generate Support
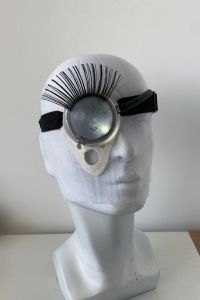
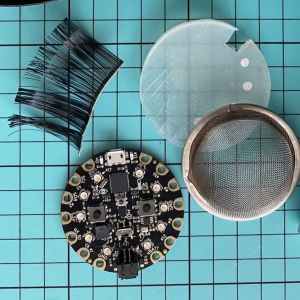
Step 4 - Prepare & Assemble
To rub all the support on the printed model I used and electric sander and for the finishings, a metal flat file. Made a flat round difuser for the leds using ecoflex 00-30. Then made a small cutout for the battery plug. Using the ecoflex as a glue, I attached the half mesh ball tea infuser to the flat round difuser. Applied the jumbo lash and as a finishing for the perimeter sticked a silicone tube. Last I applied a thin layer of ecoflex allover the eyeglobe to make it more solid and difuse the half mesh ball.

Tools
Eye globe supplies:
- Adafruit Circuit Playground Classic
- Ecoflex 00-30 (see tutorial on `Soft Robotics` assignment to know how to mix)
- half mesh ball tea infuser
- jumbo lash
- silicone 0,4mm transparent tube
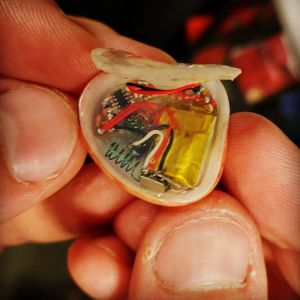
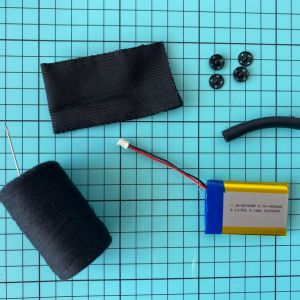
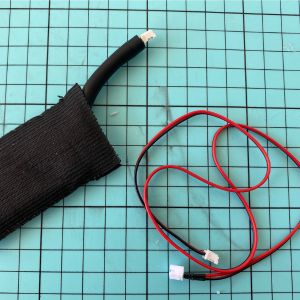
For the battery pocket:
- rechargeable lithium Ion polymer battery - 3.7v 1200mAh
- elastic straps
- black metal hooks
- black silicone tube (to hide the cable)
- needle and black thread
- JST-PH battery extension cable - 500mm
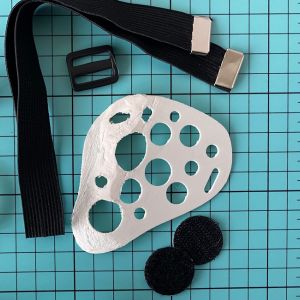
For the Eye Patch:
- 3D Printed Eye Patch model
- elastic straps
- circle velcro dots
Step 5 - Coding Adafruit Circuit Playground
Meet the board:
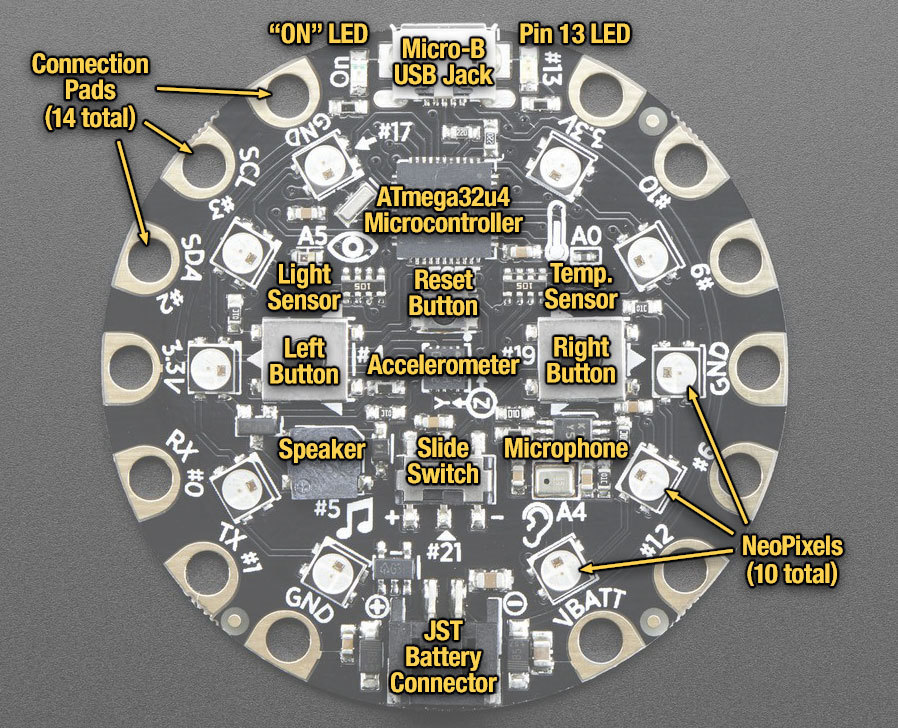
Bellow you can find the code uploaded via Arduino IDE to the Adafruit Circuit Playground Classic: For more instructions about this hardware please follow this tutorial.
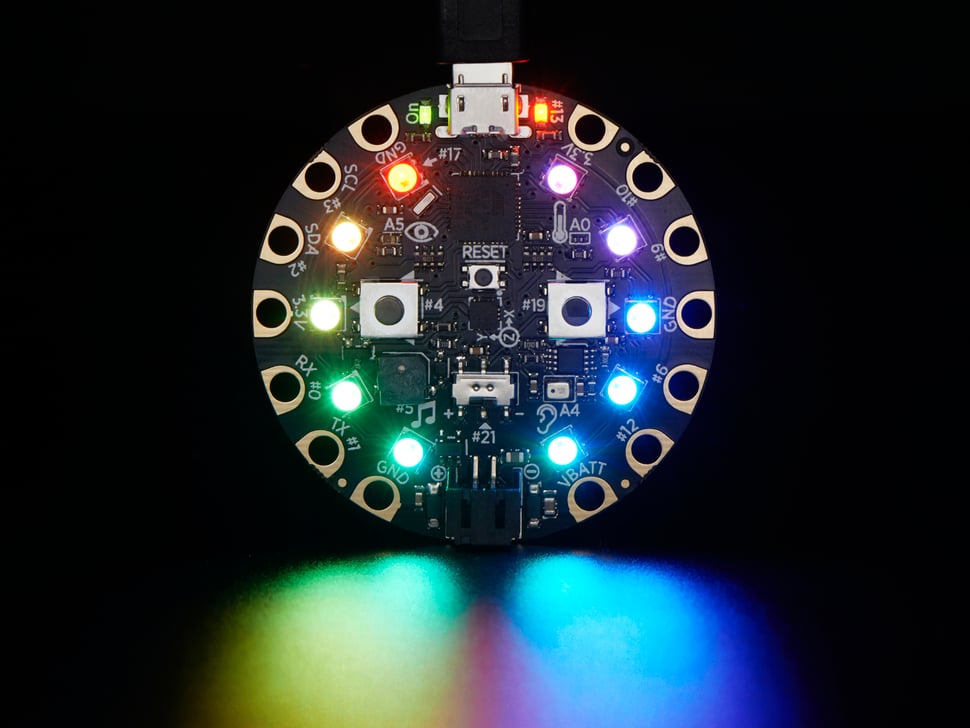
The idea with this one is to just randomly flash random colors on random pixels. This is a good example of where using the (r,g,b) version of setPixelColor() is useful. You can generate a random red value, a random green value, and a random blue value. Then we just call setPixelColor(pixel, r, g, b) for a random pixel.
include <Adafruit_CircuitPlayground.h>
define BEDAZZLE_RATE   100     // lower is faster
void setup() {
CircuitPlayground.begin();

// Make it bright!
CircuitPlayground.setBrightness(255);
}
void loop() {
// Turn off all the NeoPixels
CircuitPlayground.clearPixels();

// Turn on a random pixel to a random color
CircuitPlayground.setPixelColor(
    random(10),     // the pixel
    random(256),    // red
    random(256),    // green
    random(256) );  // blue

// Leave it on for a little bit
delay(BEDAZZLE_RATE);
}
Cyborg Eyepatch de Lia Von F.
WANNA TRY: work with temperature sensors and lights. Conect a blinking sensor with light animation.

Fabrication files
^1 File: Eye Patch 1.gcode
^2 File: Eye Patch 2.gcode
^3 File: Eye