12. Soft robotics
This week felt really short and my experimentation is not fully done- YET! Although I have experimented with fabricating soft robots in my makerspace residency just right before I came into the fabricademy program and the process is sort of familiar, I still have SO MANY THINGS I want to experiment with during this week.
This week has been super fun and I got to make a few new perspex molds and experiment with some biomaterials! Adriana Cabrera and Lily Chambers and their lecture on Soft Robotics was insanely inspiring- the biomaterial biodegradable robot, potato molds, artificial muscles and many many more were included in the lecture. More about it down below!
This week's assignment is-
-Document the concept, sketches, references also to artistic and scientific publications
-Make a soft robotic sample, develop the pattern for the Inflatable and draw a sketch of the air flow
-Build a pneumatic wrist brace (basic level) or thermovynil sample
-Build a Soft Gripper (intermediate level) or
-Build and document a Pneumatic, digitally controlled system , electronics schematic, electronic control and code (advanced level)
-Experiment with different materials, such as silicones, 3d printing, parchment paper, thermoadesive vynil, bioplastic , document your achievements and unexpected outcomes
-Upload a small video of your inflatable working
-EXTRA POINT Integrate it into a project
Research and previous work with Soft Robotics
I am very interested in the possibilities that Soft Robotics and Inflatables can offer in assistive healthcare and in rehabilitation especially in wearables and surgical simulations.
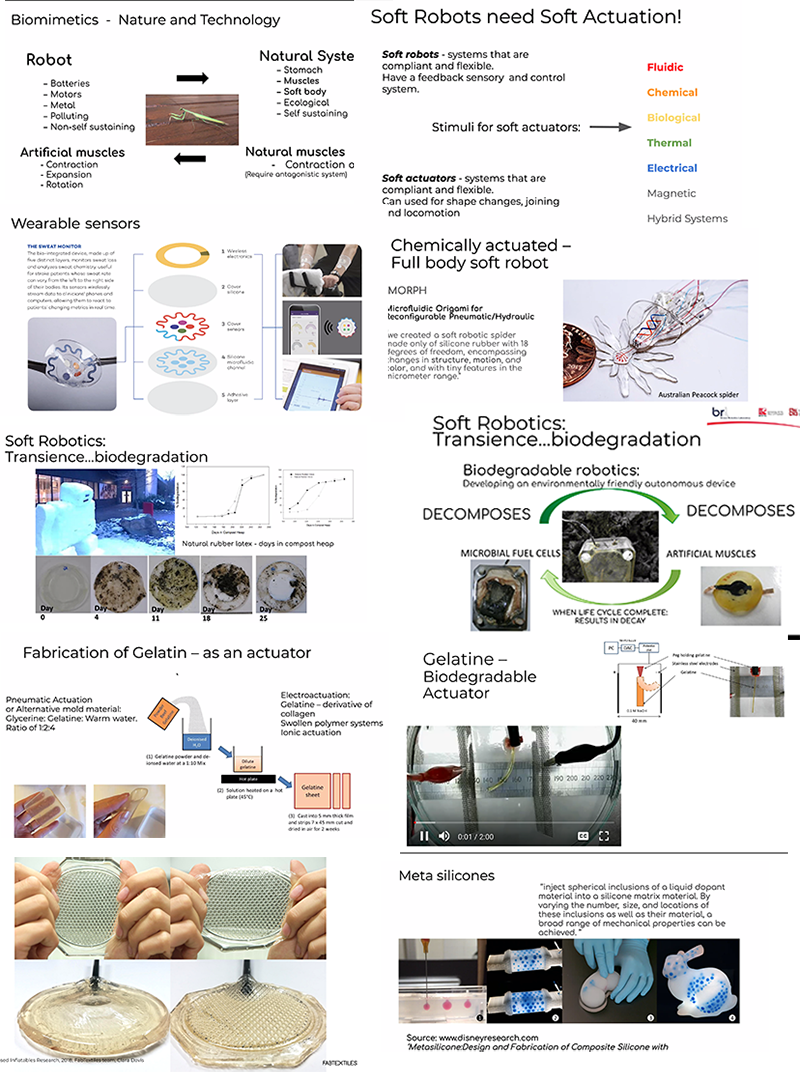
Inspirational works and highlights from the Soft Robotics lecture by Andriana Cabrera and Lily Chambers
Some keywords for this week were-
-Biomimicry

-Locomotion

-Pneumatics

-Flexures

-Molding and casting
Sketchbook doodles of my ideas and making inflatables
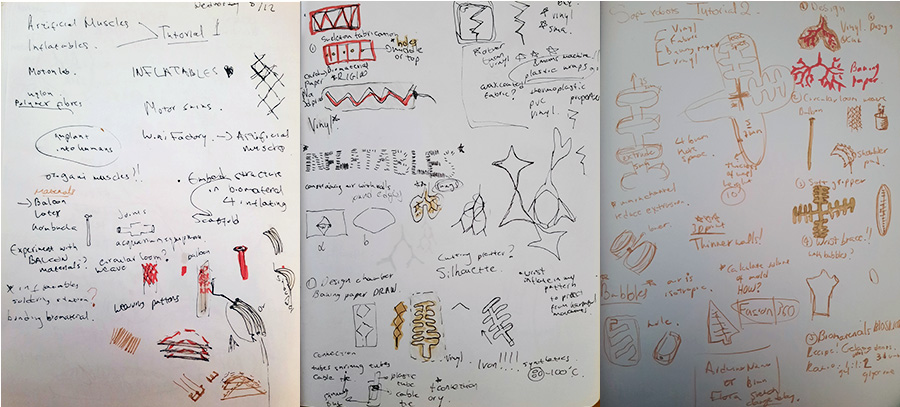
Doing some sketches and brainstorming about my experimentations
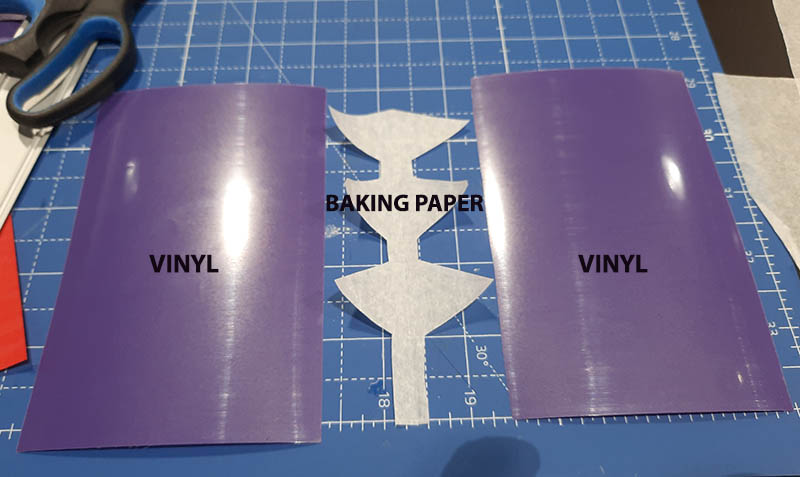
Making inflatables with baking paper and vinyl
I have never made inflatables with these materials before and I really enjoyed making them. Unfortunately I did not have much access to the biodesign centre and to Martha, our lasecutter for the 3 first days of the assignment due to bank holiday but also due to bad weather conditions. For these reasons I used low tech ways to make the second inflatable with scissors for cuting my baking baper and vinyl and a heating iron for putting everything together instead of a heat press!
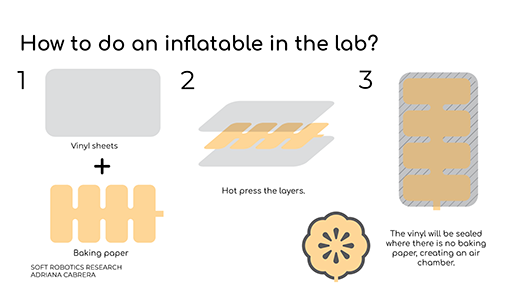
How to make an inflatable, from Adriana's and Lily's lecture
Using the heat press to put together the vinyl
Apart from baking paper and vinyl you will also need the following in order to pump some air in your inflatable:
-Plastic tubes
-Shrinking tubes in various sizes depending on your airpathway
-Cable ties
BIOINFLATABLES/BIOACTUATORS- biosilicone and 3d printed molds
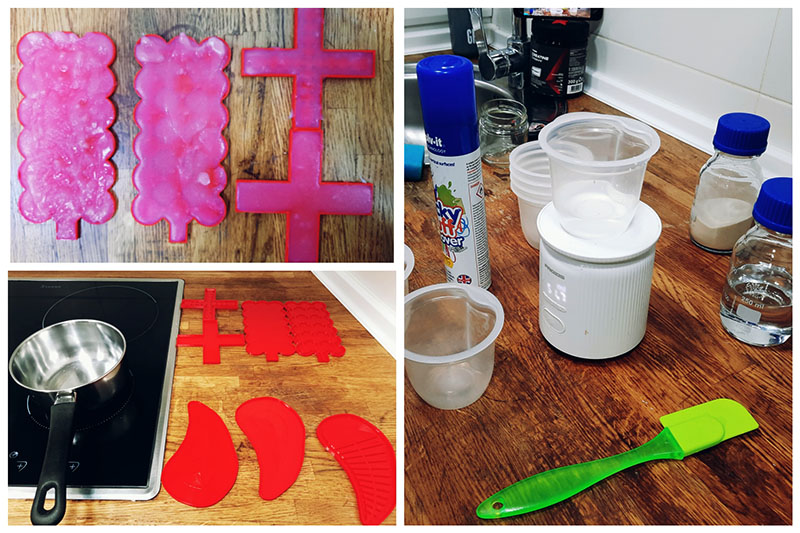
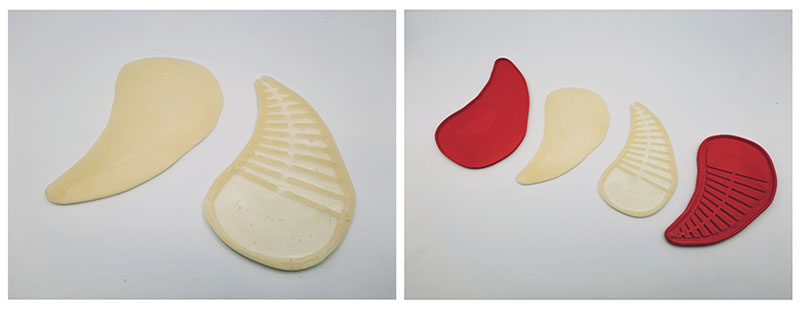
We made this using the biosilicone recipe above
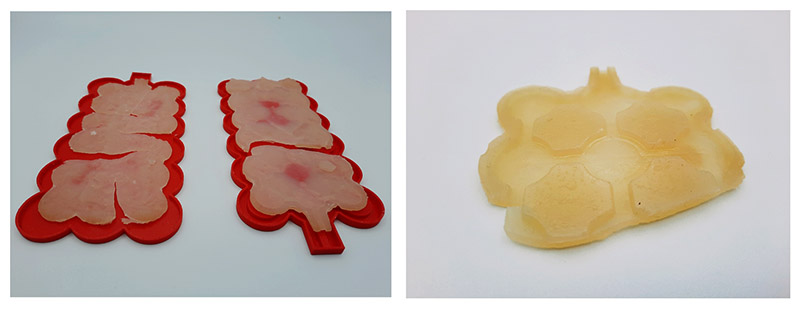
We also tried an agar recipe but it did not quite work. The large water ratio of this recipe is problematic for this project
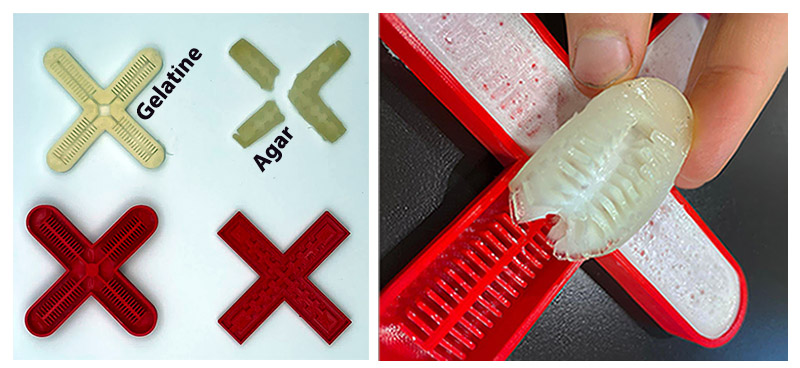
Comparing gelatine biosilicone and the agar recipe
Later on we tried a different recipe for gelatine and we are still exploring more agar recipes because as you can see the one above did not work so much!
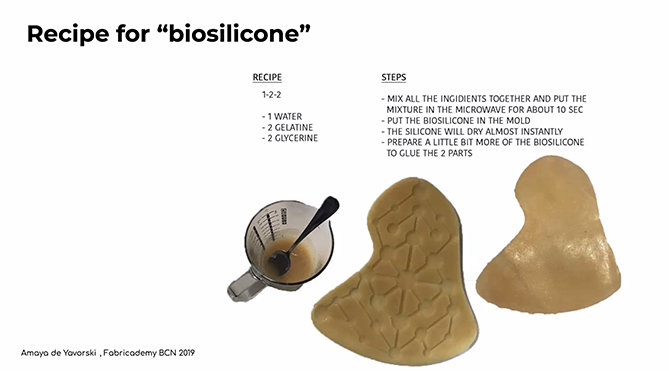
This is the recipe for biosilicone as you can see above from Amaya de Yavorsky, Fabricademy BCN 2019!
This is the Recipe: 1-2-2
1 PART Water
2  PARTS Gelatine
2 PARTS Glycerine
And these are the steps:
1. Mix all the ingredients together and put the mixture in the microwave for about 10 sec.
2. Put the biosilicone in the mold.
3. The silicone will dry almost instantly.
4. Prepare a little bit more of the biosilicone to glue the 2 parts (***it also helps heating the pieces slightly before putting more biosilicone but you have to act fast as this material solidifies VERY QUICKLY***)
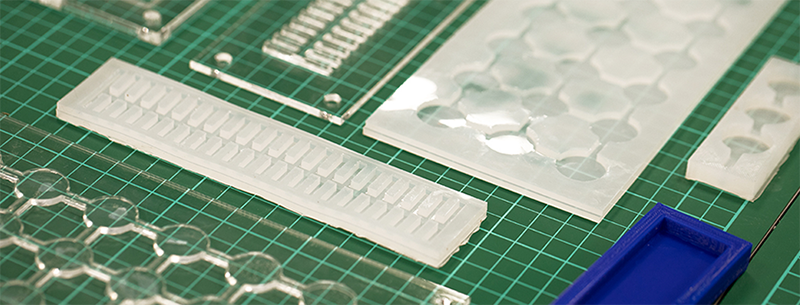
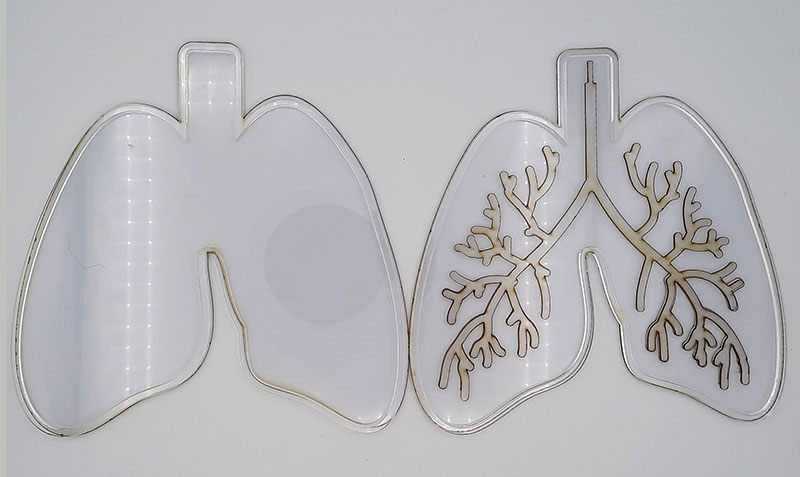
Making of LUNG mold and soft gripper
I decided to make 2 molds with perspex. One as a soft gripper in which I played with filleting the corners and changing the pathway thicknesses through the whole design and one mold to resemble lungs!
Soooo I will give you a general guide into how to make a soft robot with perspex molds:
-Design your pieces in Rhinoceros. Do not forget that you will glue the different parts of your mold and do not forget that you can use 2 different thicknesses like I did below!
-Cut your pieces on the lasercutter
-Assemble them with special glue that is suitable for acrylic
-Let then dry and make sure they are stuck well
-Grease up your mold with some oil or put a release spray
-Measure the volume of your mold- Pour some water in there and then measure the water inside a measuring container or scale it
-Measure your silicone- if your mold needs 40ml to fill up you will use 20ml from part A and 20 for part B
-Mix them up WELL!
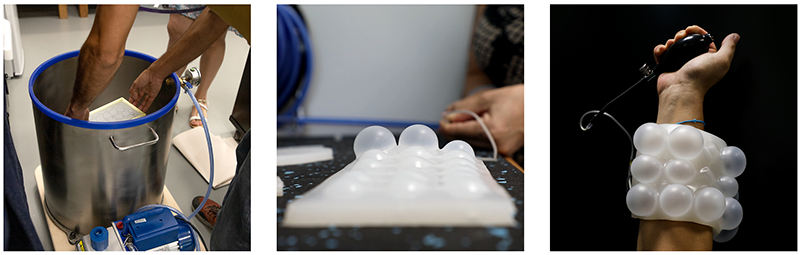
-Put in the pressure chamber to DEGAS your silicone
-CAST YOUR SILICONE IN YOUR MOLDS :)
-Let them cure depending on the temperature in your lab/studio
-Remove the casted pieces and stick together using more silicone! DO NOT use a lot of silicone or your pathways will close. USE A BRUSH and when you stick them together put some silicone on the sides where the 2 pieces are joined.
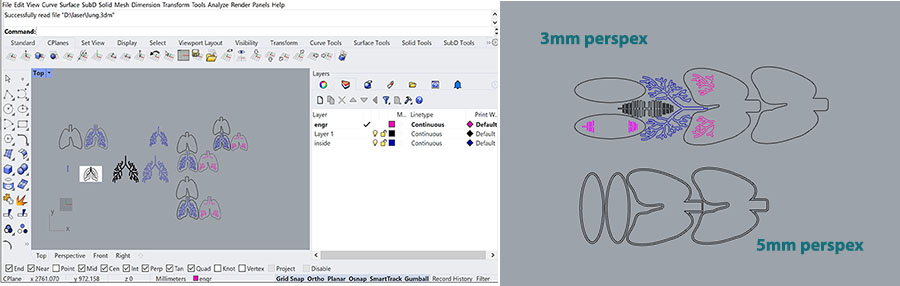
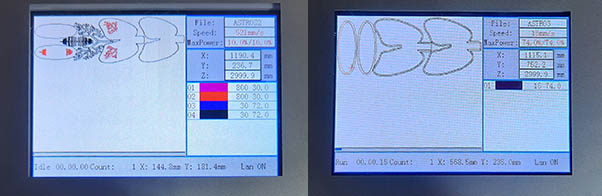
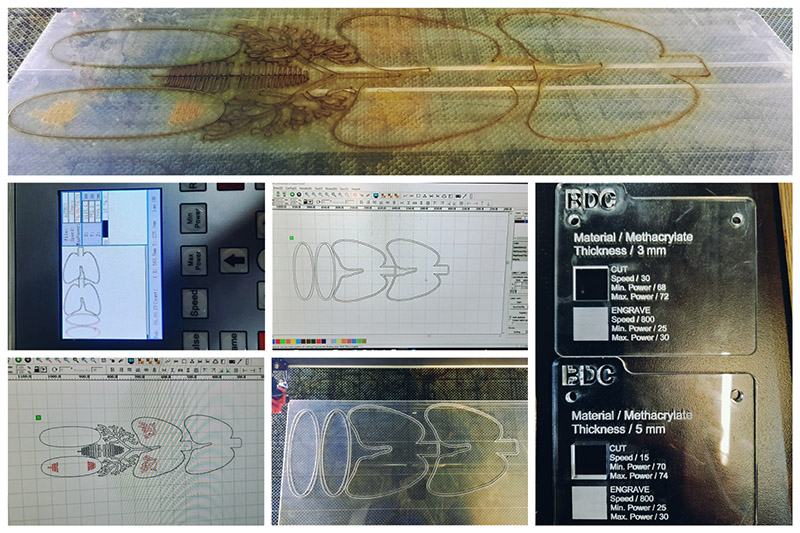
Designing the molds and lasercutting process
So I divided my pieces to 3mm and 5mm pieces. I used the 5mm perspex for making the borders of the molds and the rest of the pieces i cut them in 3mm. The parameters are for a 3mm are different to the 5mm ones.
Laser parameters for 3mm perspex (metracrilato)
CUT MODE
-Speed- 30
-Min power- 68
-Max power- 72
ENGRAVE MODE
-Speed- 800
-Min power- 25
-Max power- 30
Laser paratemers for 5mm
CUT MODE
-Speed- 15
-Min power- 70
-Max power- 74
ENGRAVE MODE
-Speed- 800
-Min power- 25
-Max power- 30
I added a little engraving on the 3mm pieces to mark where the top part (the air pathway) would sit.
Cut perspex pieces before glueing
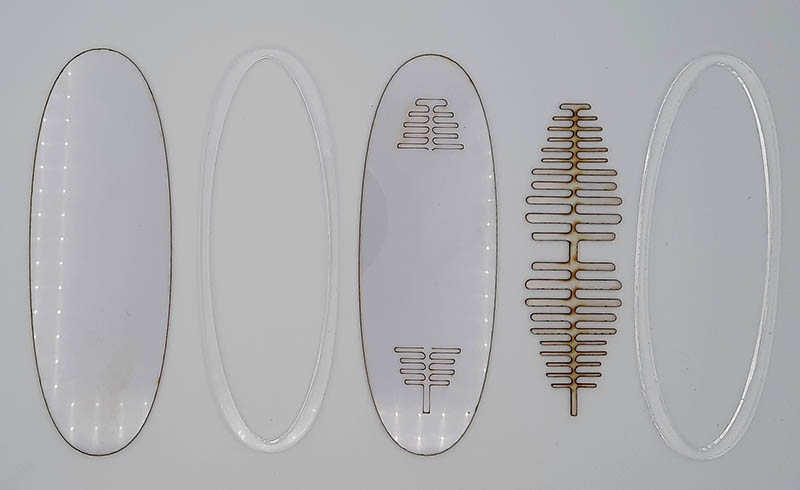
Here is the softgripper pieces I lasercut and now I have to stick them together to finalise the mold
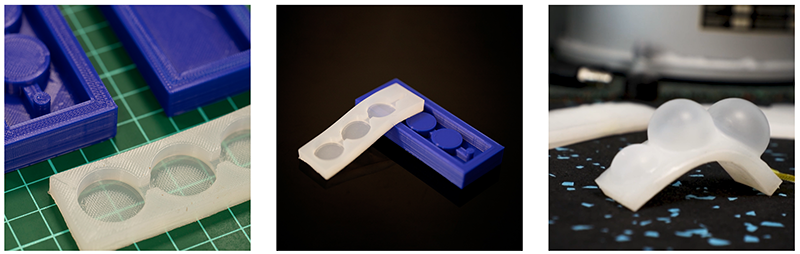
Fabrication and casting with silicone and demolding
Bill of materials for making perspex molds and casting with silicone
| Material | Price | Link |
|---|---|---|
| Ecoflex 00-30 Silicone Rubber | 42,68€ | https://www.amazon.com/-/es/Ecoflex-Silicona-Platino-Prueba-unidad/dp/B00CA5VY3U/ref=sr_1_2?__mk_es_US=%C3%85M%C3%85%C5%BD%C3%95%C3%91&crid=2VF9MNAC14W93&keywords=silicone+ecoflex+00-30+silicone+rubber&qid=1653643497&sprefix=silicone+ecoflex+00-30+silicone+rubber%2Caps%2C924& sr=8-2 |
| Thermo-Retractable Cable | 6,28€ | www.amazon.com/560-tubos-termorretráctiles-aislamiento-termorretráctil/dp/B07P11GJMG/ref=sxin_14_pa_sp_search_thematic_sspa?content-id=amzn1.sym.bdb62de4-4445-472f-a46c-4743abbcf384%3Aamzn1.sym.bdb62de4-4445-472f-a46c-4743abbcf384&crid=2YENCN6DZRQ9P&cv_ct_cx=thermo-retractable+cable&keywords=thermo-retractable+cable&pd_rd_i=B07P11GJMG&pd_rd_r=c487cef2-16f5-46bf-ba9c-be93d0fcb1ef&pd_rd_w=kCnRZ&pd_rd_wg=Tq3sv&pf_rd_p=bdb62de4-4445-472f-a46c-4743abbcf384&pf_rd_r=ZN5V54M3QQWRC5KMHAG2&qid=1653576548&sprefix=termoretractil%2Caps%2C310&sr=1-1-8acce81c-1022-4788-a21d-98553f7388f3-spons&psc=1&spLa=ZW5jcnlwdGVkUXVhbGlmaWVyPUExM0hUWjFSRDdNOVpBJmVuY3J5cHRlZElkPUEwMTc0MTYxU0FHVEhURDhDSkVHJmVuY3J5cHRlZEFkSWQ9QTA2NTUyODYyMFNBUlgzQUFSNlBDJndpZGdldE5hbWU9c3Bfc2VhcmNoX3RoZW1hdGljJmFjdGlvbj1jbGlja1JlZGlyZWN0JmRvTm90TG9nQ2xpY2s9dHJ1ZQ== |
| Portable Air Pump for Inflatables | 6,19€ | https://www.amazon.com/-/es/TONUNI-extensi%C3%B3n-baloncesto-waterpolo-ejercicio/dp/B07FR65S9G/ref=sr_1_7?__mk_es_US=%C3%85M%C3%85%C5%BD%C3%95%C3%91&crid=16J06WGIJCZSH&keywords=small+air+pump+for+inflatables&qid=1653576598&sprefix=small+air+pump+for+inflatables%2Caps%2C351&sr=8-7 |
Ecoflex rubbers characteristics
-Ecoflex™ rubbers are platinum-catalyzed silicones that are versatile and easy to use. Ecoflex™ rubbers are mixed 1A:1B by weight or volume and cured at room temperature with negligible shrinkage. Low viscosity ensures easy mixing and de-airing.

-Cured rubber is very soft, very strong and very “stretchy”, stretching many times its original size without tearing and will rebound to its original form without distortion.

-Certified Skin Safe - Cured Ecoflex™ 00-30 is skin safe and certified by an independent laboratory.
Features
-Ecoflex™ rubbers are water white translucent and can be color pigmented with Silc Pig™ pigments for creating a variety of color effects. You can also add Smooth-On’s Silicone Thinner™ to further lower the viscosity. THI-VEX™ silicone thickener can be added by weight to Ecoflex™ silicones for brushable applications.

-Ecoflex™ rubbers are suitable for a variety of applications including making prosthetic appliances, cushioning for orthotics and special effects applications (especially in animatronics where repetitive motion is required).
For our experiments this week, we used ECOFLEX 00-30!
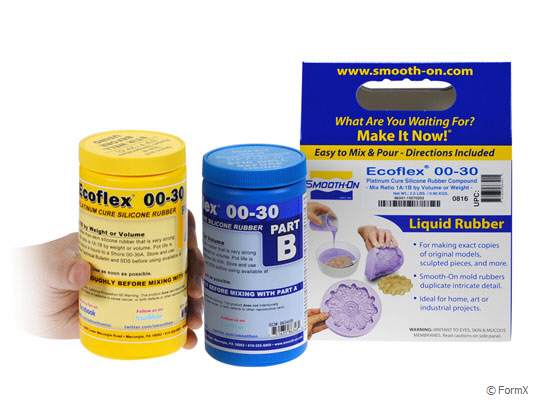
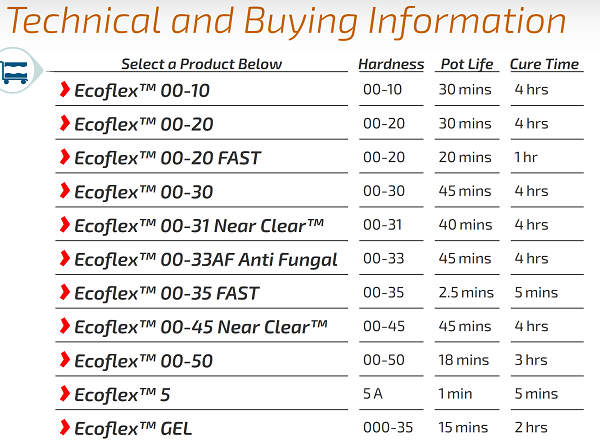
There are different kinds of ecoflex silicone and you can see some of the differences below! You can also use this silicone to make a mold but the process is different, you can read about it here.
Instructions for using ecoflex 00-30
Safety
-Use in a properly ventilated area (“room size” ventilation). Wear safety glasses, long sleeves and rubber gloves to minimize contamination risk.

-Wear vinyl gloves only. Latex gloves will inhibit the cure of the rubber.

-Store and use material at room temperature (73°F/23°C). Warmer temperatures will drastically reduce working time and cure time. Storing material at warmer temperatures will also reduce the usable shelf life of unused material. These products have a limited shelf life and should be used as soon as possible.
Applying A Release Agent
-Although not usually necessary, a release agent will make demolding easier when pouring into or over most surfaces. Ease Release™ 200 is a proven release agent for use with silicone rubber.

-IMPORTANT: To ensure thorough coverage, lightly brush the release agent with a soft brush over all surfaces of the model. Follow with a light mist coating and let the release agent dry for 30 minutes. If there is any question about the effectiveness of a sealer/release agent combination, a small-scale test should be made on an identical surface for trial.
Measuring and mixing
-Before you begin, pre-mix Part B thoroughly.

-After dispensing required amounts of Parts A and B into mixing container (1A:1B by volume or weight), mix thoroughly for 3 minutes making sure that you scrape the sides and bottom of the mixing container several times.

-After mixing parts A and B, vacuum degassing is recommended to eliminate any entrapped air in liquid rubber.

-Your vacuum pump must pull a minimum of 29 inches of mercury (or 1 Bar / 100 KPa). Leave enough room in container for material expansion.

-Vacuum material until it rises, breaks and falls. Vacuum for 1 minute after material falls.
Pouring
-For best results, pour your mixture in a single spot at the lowest point of the containment field.

-Let the rubber seek its level up and over the model. A uniform flow will help minimize entrapped air.

-The liquid rubber should level off at least 1/2” (1.3 cm) over the highest point of the model surface.
Curing / Post Curing
-Allow rubber to cure as prescribed at room temperature (73°F/23°C) before demolding.

-Do not cure rubber where temperature is less than 65°F/18°C.

-Optional: Post curing the mold will aid in quickly attaining maximum physical and performance properties.

-After curing at room temperature, expose the rubber to 176°F/80°C for 2 hours and 212°F/100°C for one hour.

-Allow mold to cool to room temperature before using.
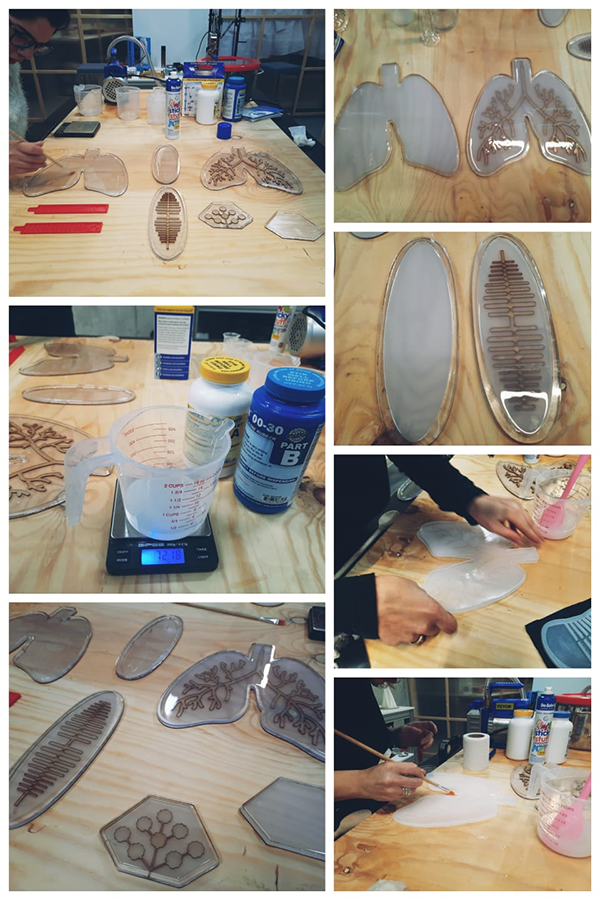
Putting the molds together with more silicone
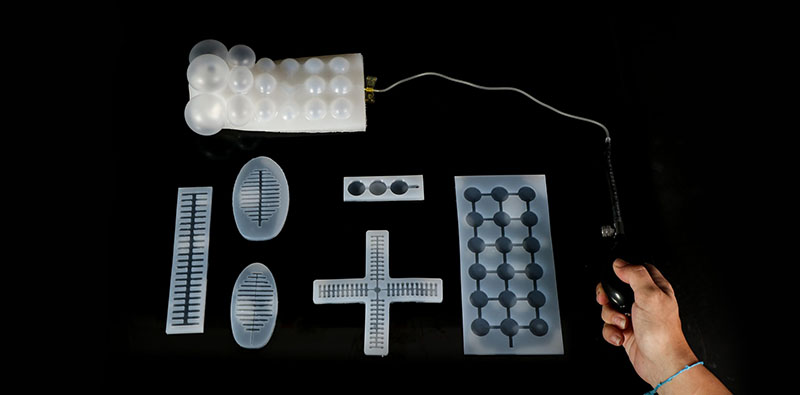
Inflating the lungs and soft gripper
Here are the.dxf files for the lasercut molds!
Just a small note on the perspex pieces
-I realised I cut the top part of the lung mold wrong! If you are gonna print the top part make sure you mirror the top part. It works fine like this is when you demold you mirror it yourself but you can also do it with the molds.
Useful links
- Soft Robotics Toolkit
- Adriana Cabrera gitlab Soft Robotics actuation control
- Ecoflex 00-30 specifications