3. Circular Open Source Fashion
Research & Ideation
This week's challenge has been an exploration of modular fashion, and it has allowed me to blend my love for artistic expression with the practicality of modular design.
The challenge revolved around creating modular elements, structures, and connections that allow users to transform the shape of a garment, resize it to their liking, or even replace specific elements – all within the realm of wearable art. The goal was to piece the puzzle together like a wearable work of art.
There are three things to keep in mind when creating a module (a repeat ‘puzzle piece’): zero waste, tessellation and interlocking. Zero waste in design is about minimizing resource waste. Tessellation creates seamless, repetitive patterns. On the other hand, interlocking introduces an element of uniqueness and adaptability, often with imperfect fits, adding intrigue to designs. This challenge also encourages us to share our creations on Fabricademy's open source platform, so we contribute to a network of innovative fashion designers.
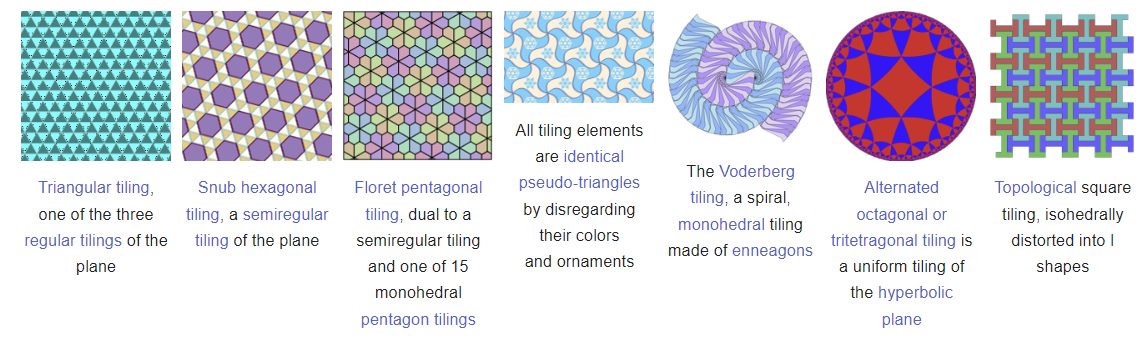
Examples of tessellation (Source: Wikipedia)
As someone who has an affinity for sculptural fashion and an appreciation for the color black, I've found myself drawn to this challenge like never before. My passion for sculptural fashion is deeply rooted in my admiration for how fabric can be sculpted and molded into three-dimensional forms that transcend the boundaries of traditional clothing.
References & Inspiration
Straight after I heard about having to create a module, I knew which shape I would choose, based on two forms of inspiration. Firstly, this painting I made in 2022:

Also, I finally was able to use some of my street impressions for inspiration.
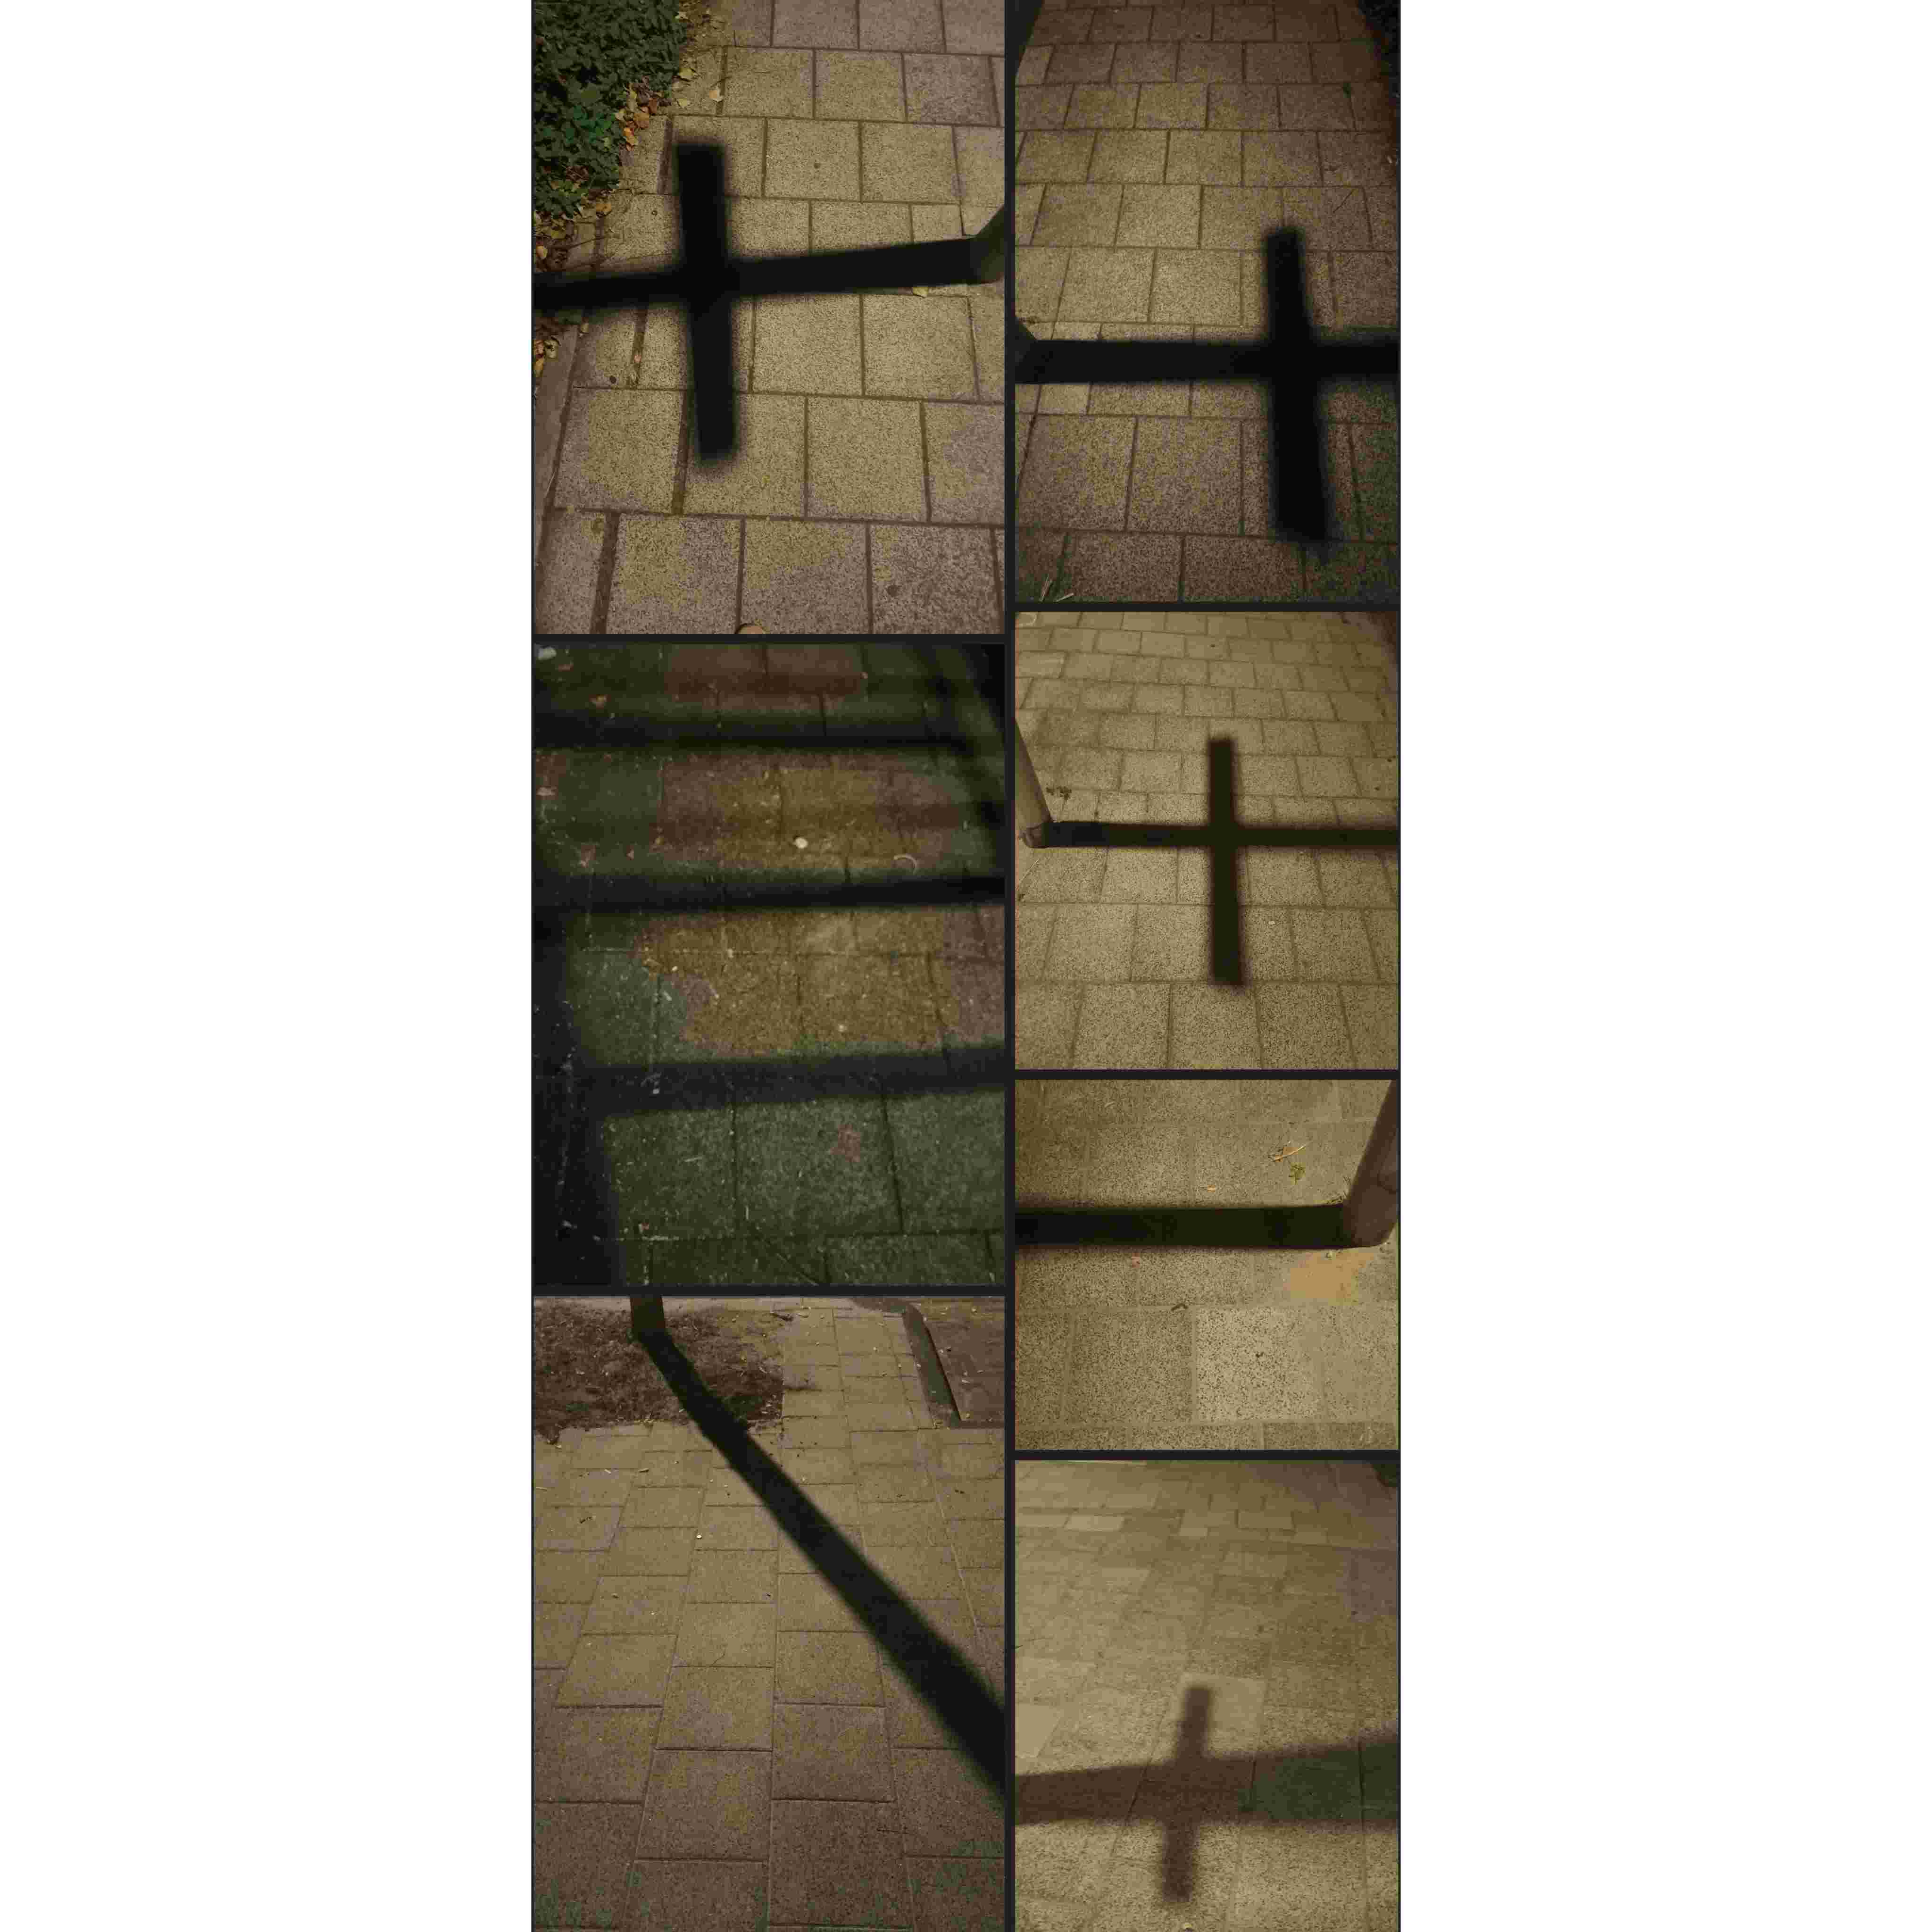
I've recently been captivated by the enchanting evening streets, where the play of light and shadows creates mesmerizing abstract shapes on the pavement. These intriguing silhouettes have become an inspiration for me.
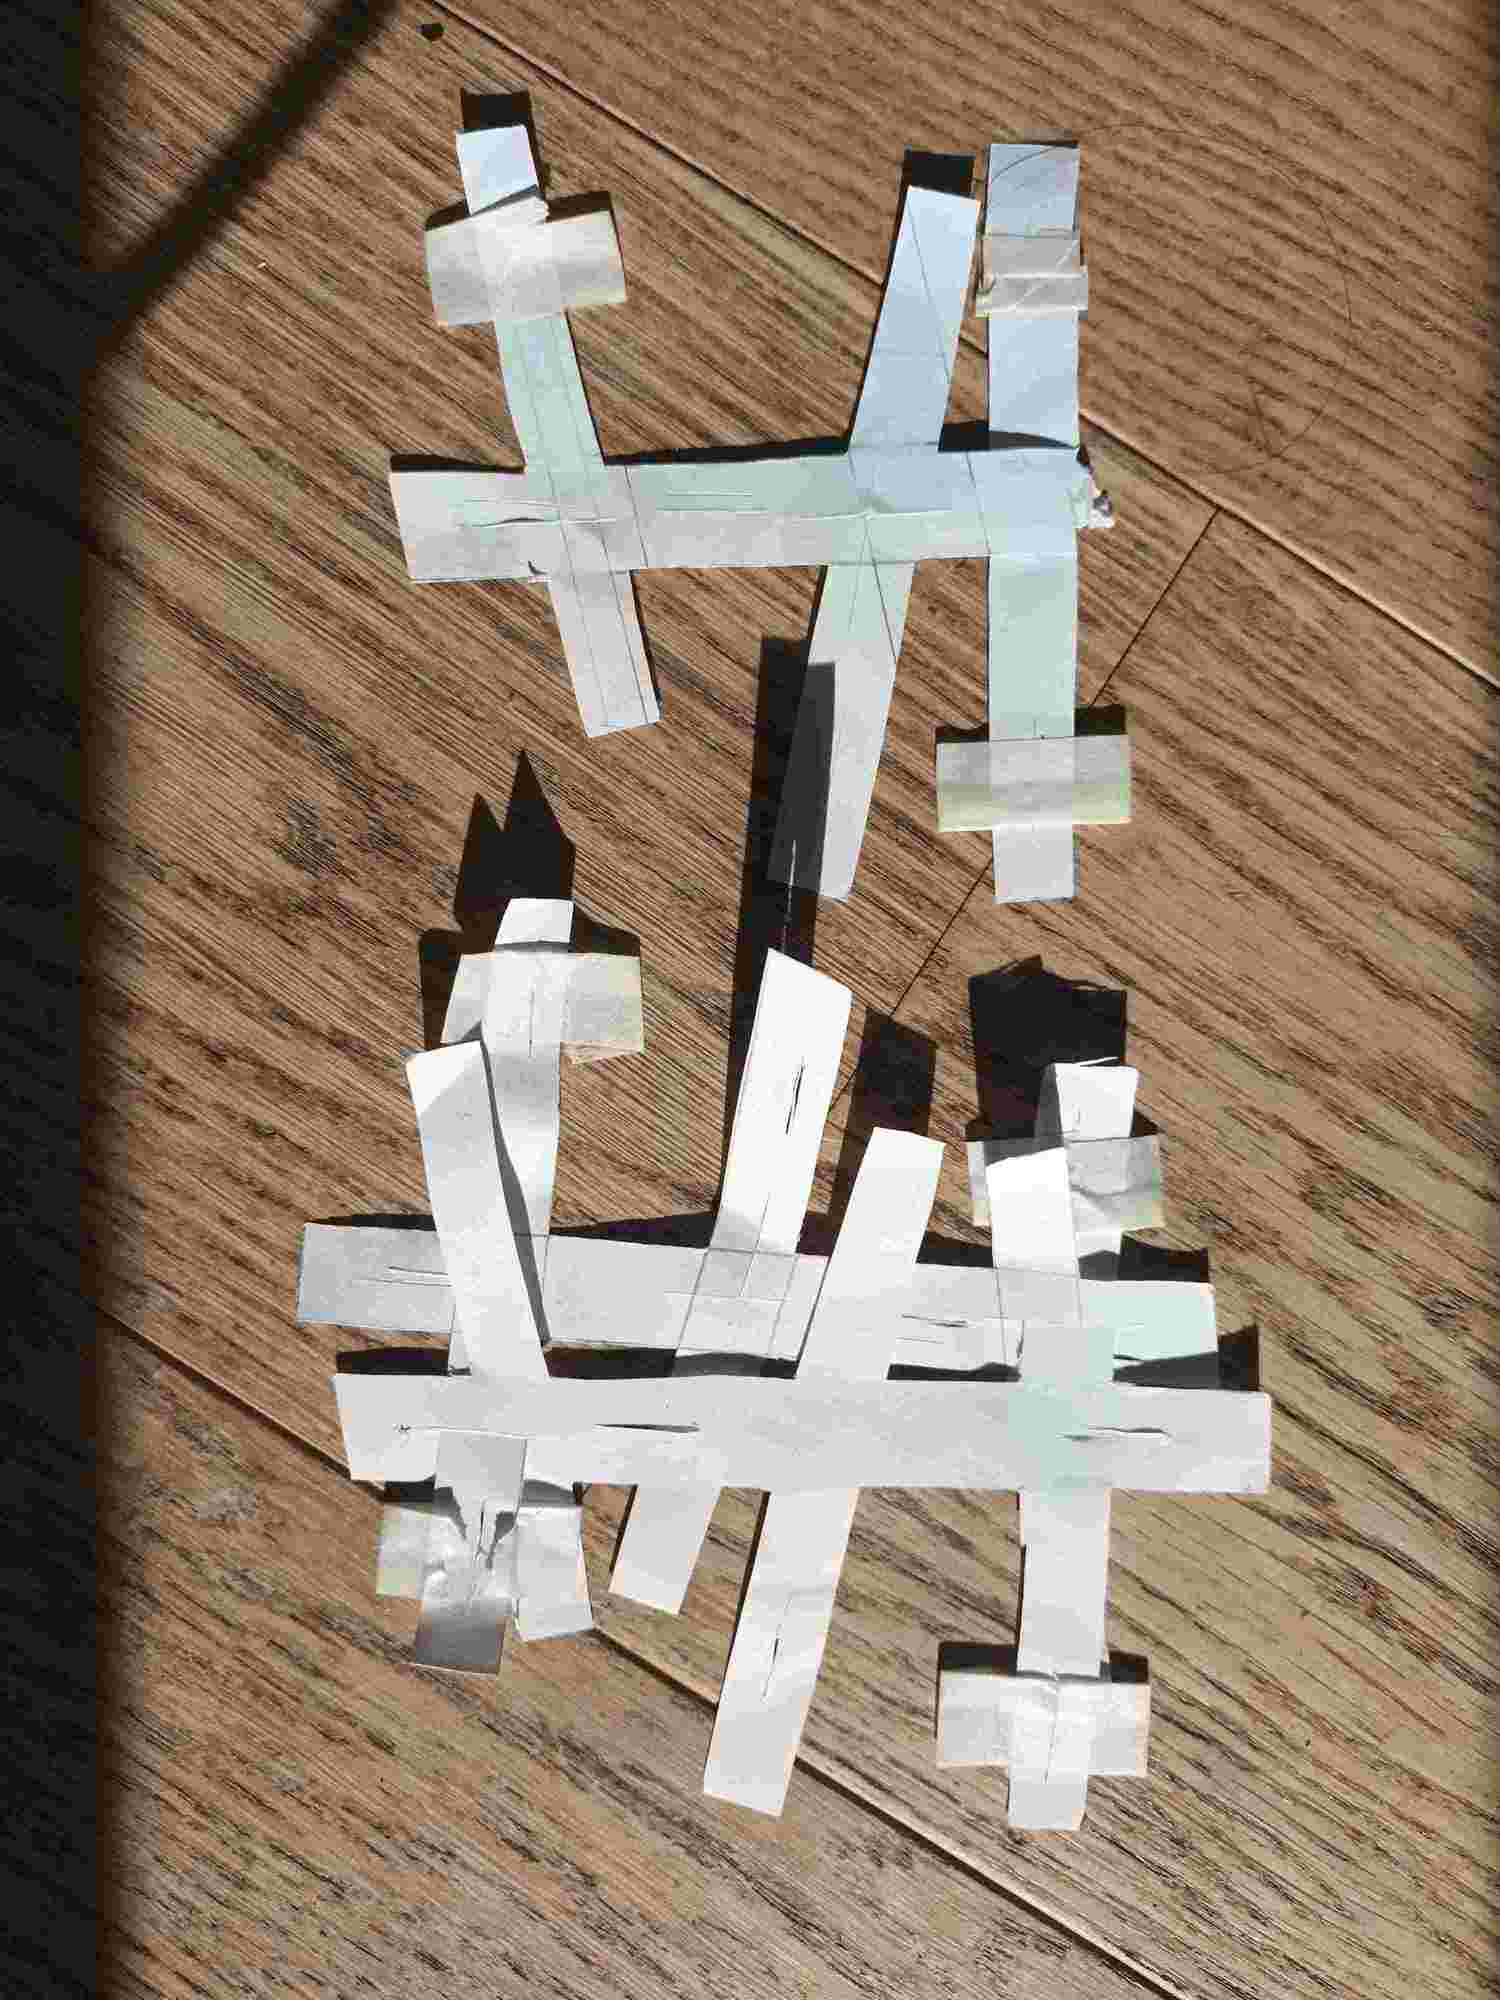
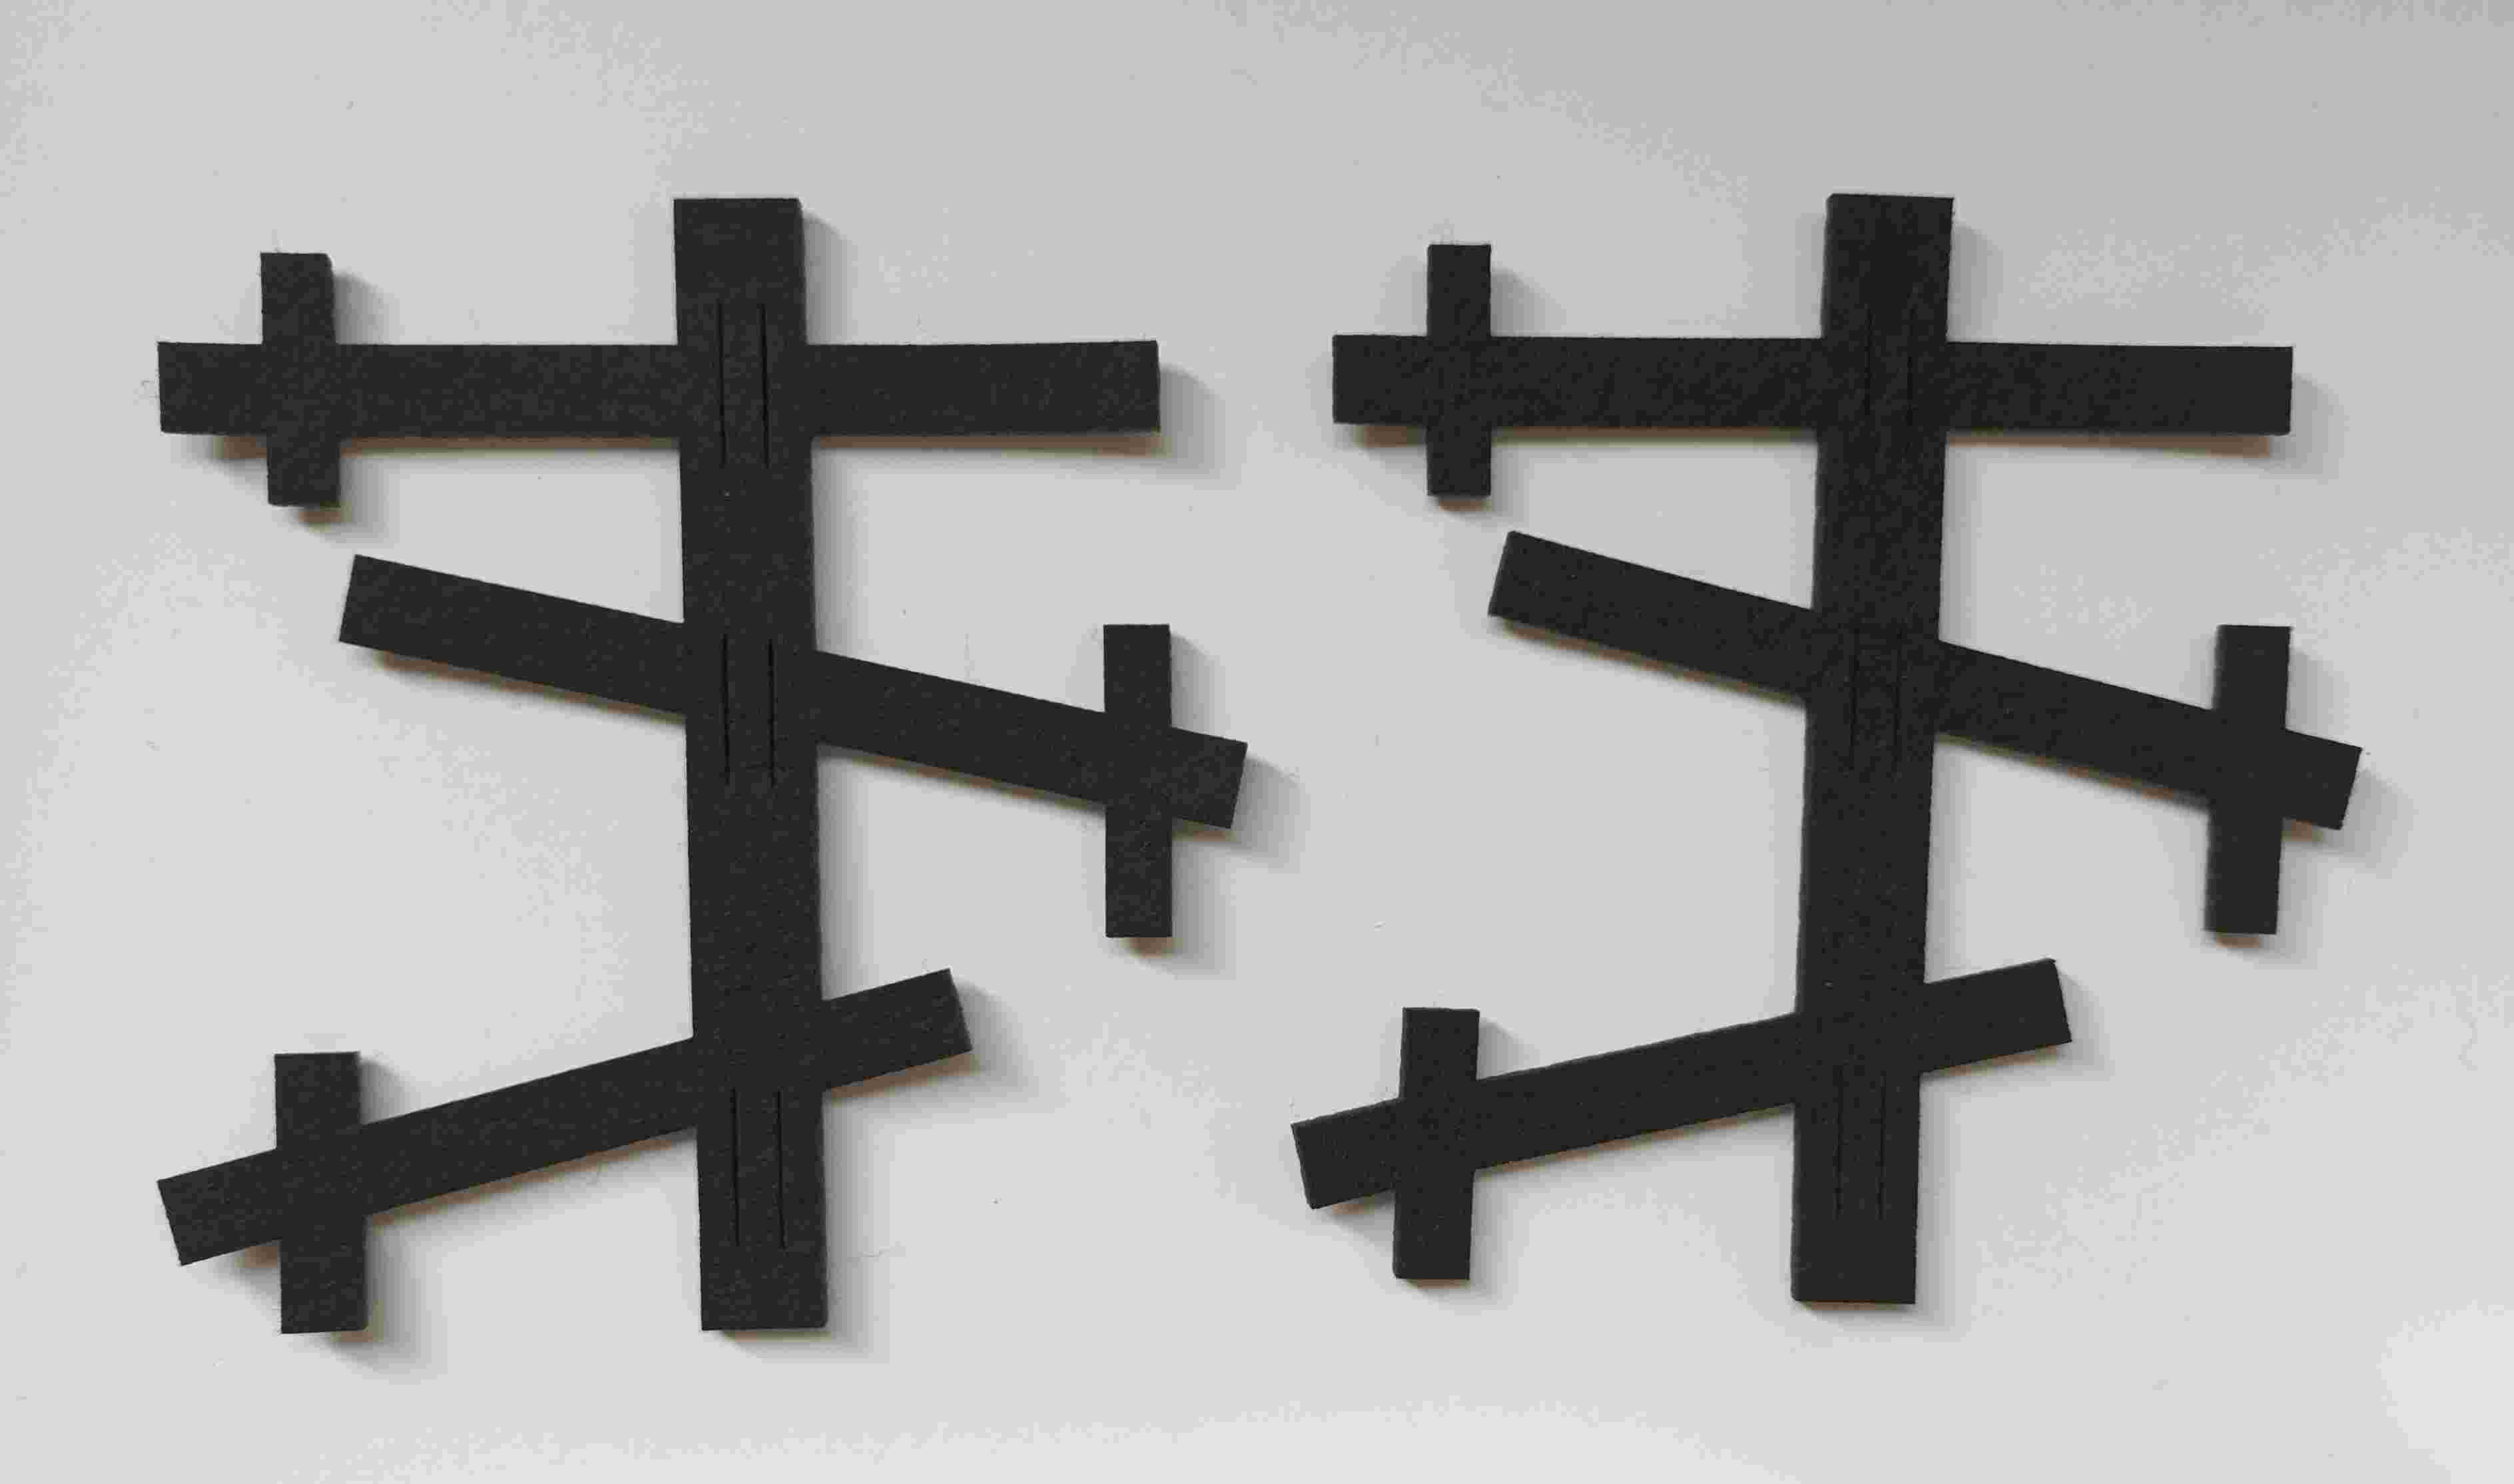
I started designing a 2D module by using paper, tape, scissors and a stanley knife and see if it interlocks in a way that works and looks good.
When choosing fabric, I experimented with wool, cotton, and felt. The wool proved to be way too flexible, and looked floppy. I did not get the sculptural outcome with that material. The cotton design I subsequently chose had these beautiful faces on them, and I initially wanted to work with that. I spent hours trying to make it look beautiful, but it never worked out.

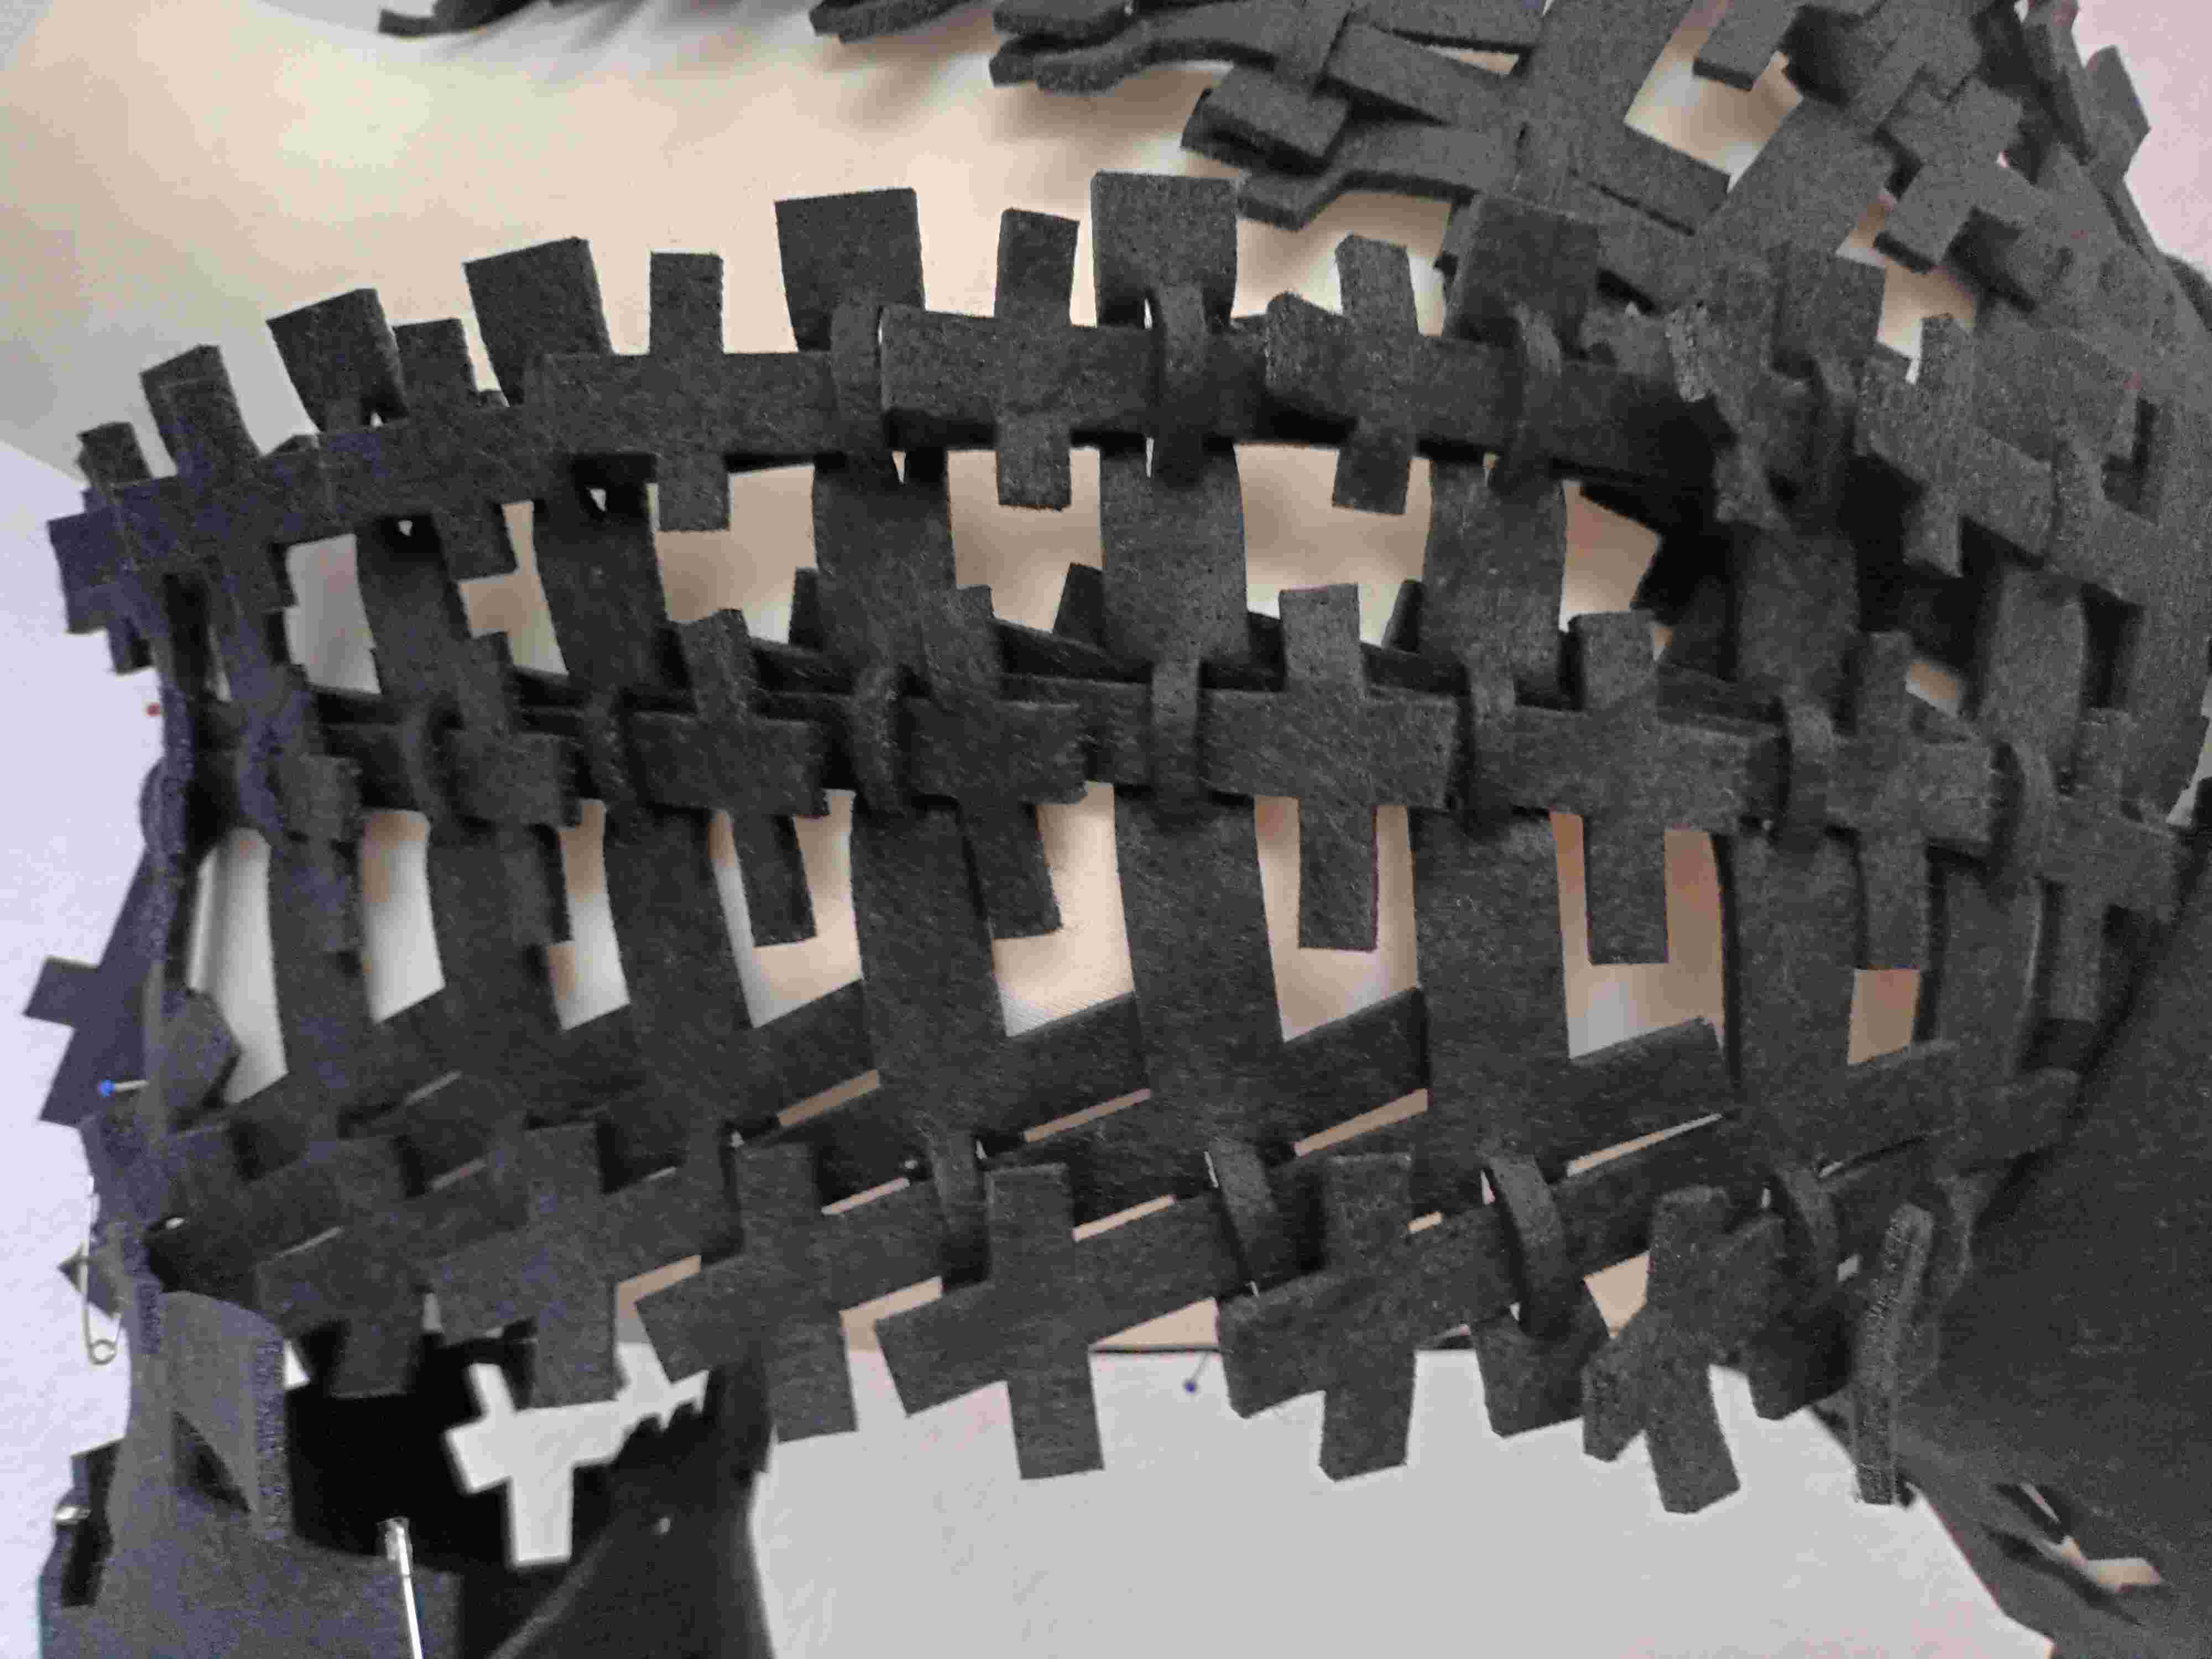
Eventually, I started working with my third choice, the black felt.
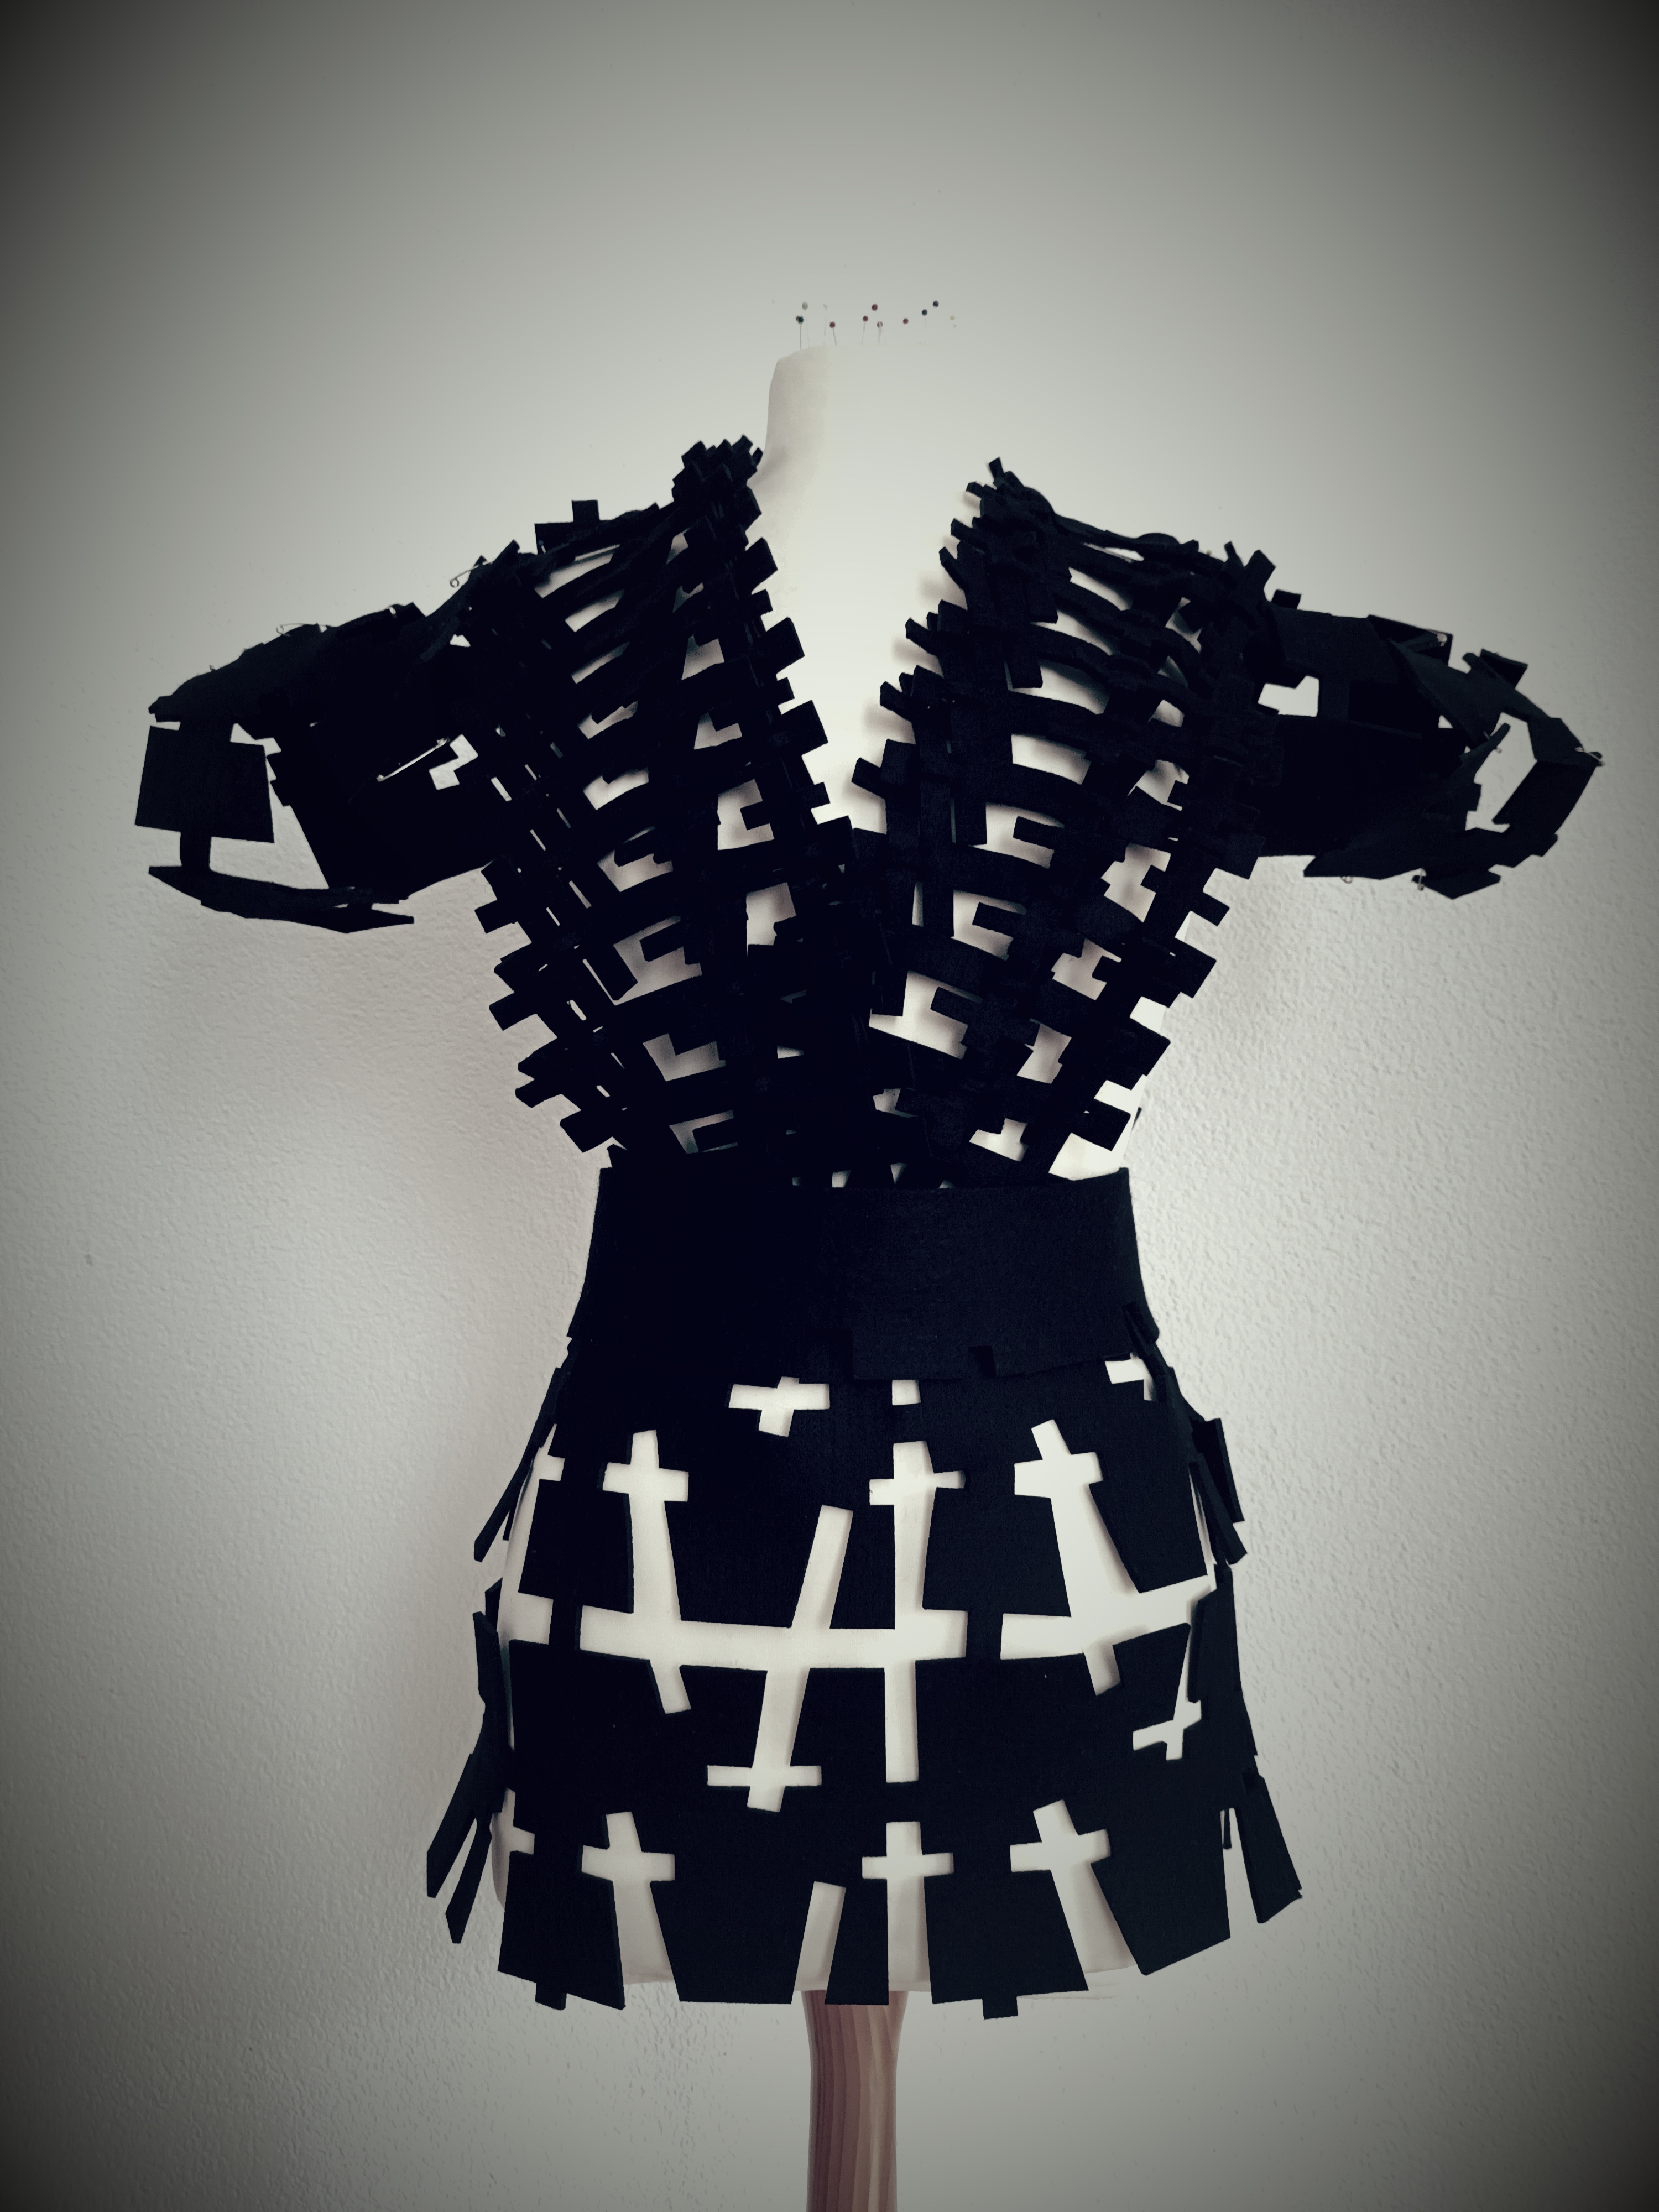
What emerged was the final result of this project - a black cocktail dress that encapsulates the essence of the abstract shadows I saw on the streets in the evening. With felt, I had the freedom to experiment with thick layers and create a piece of sculptural fashion that would showcase the intricate dance of light and shadow.
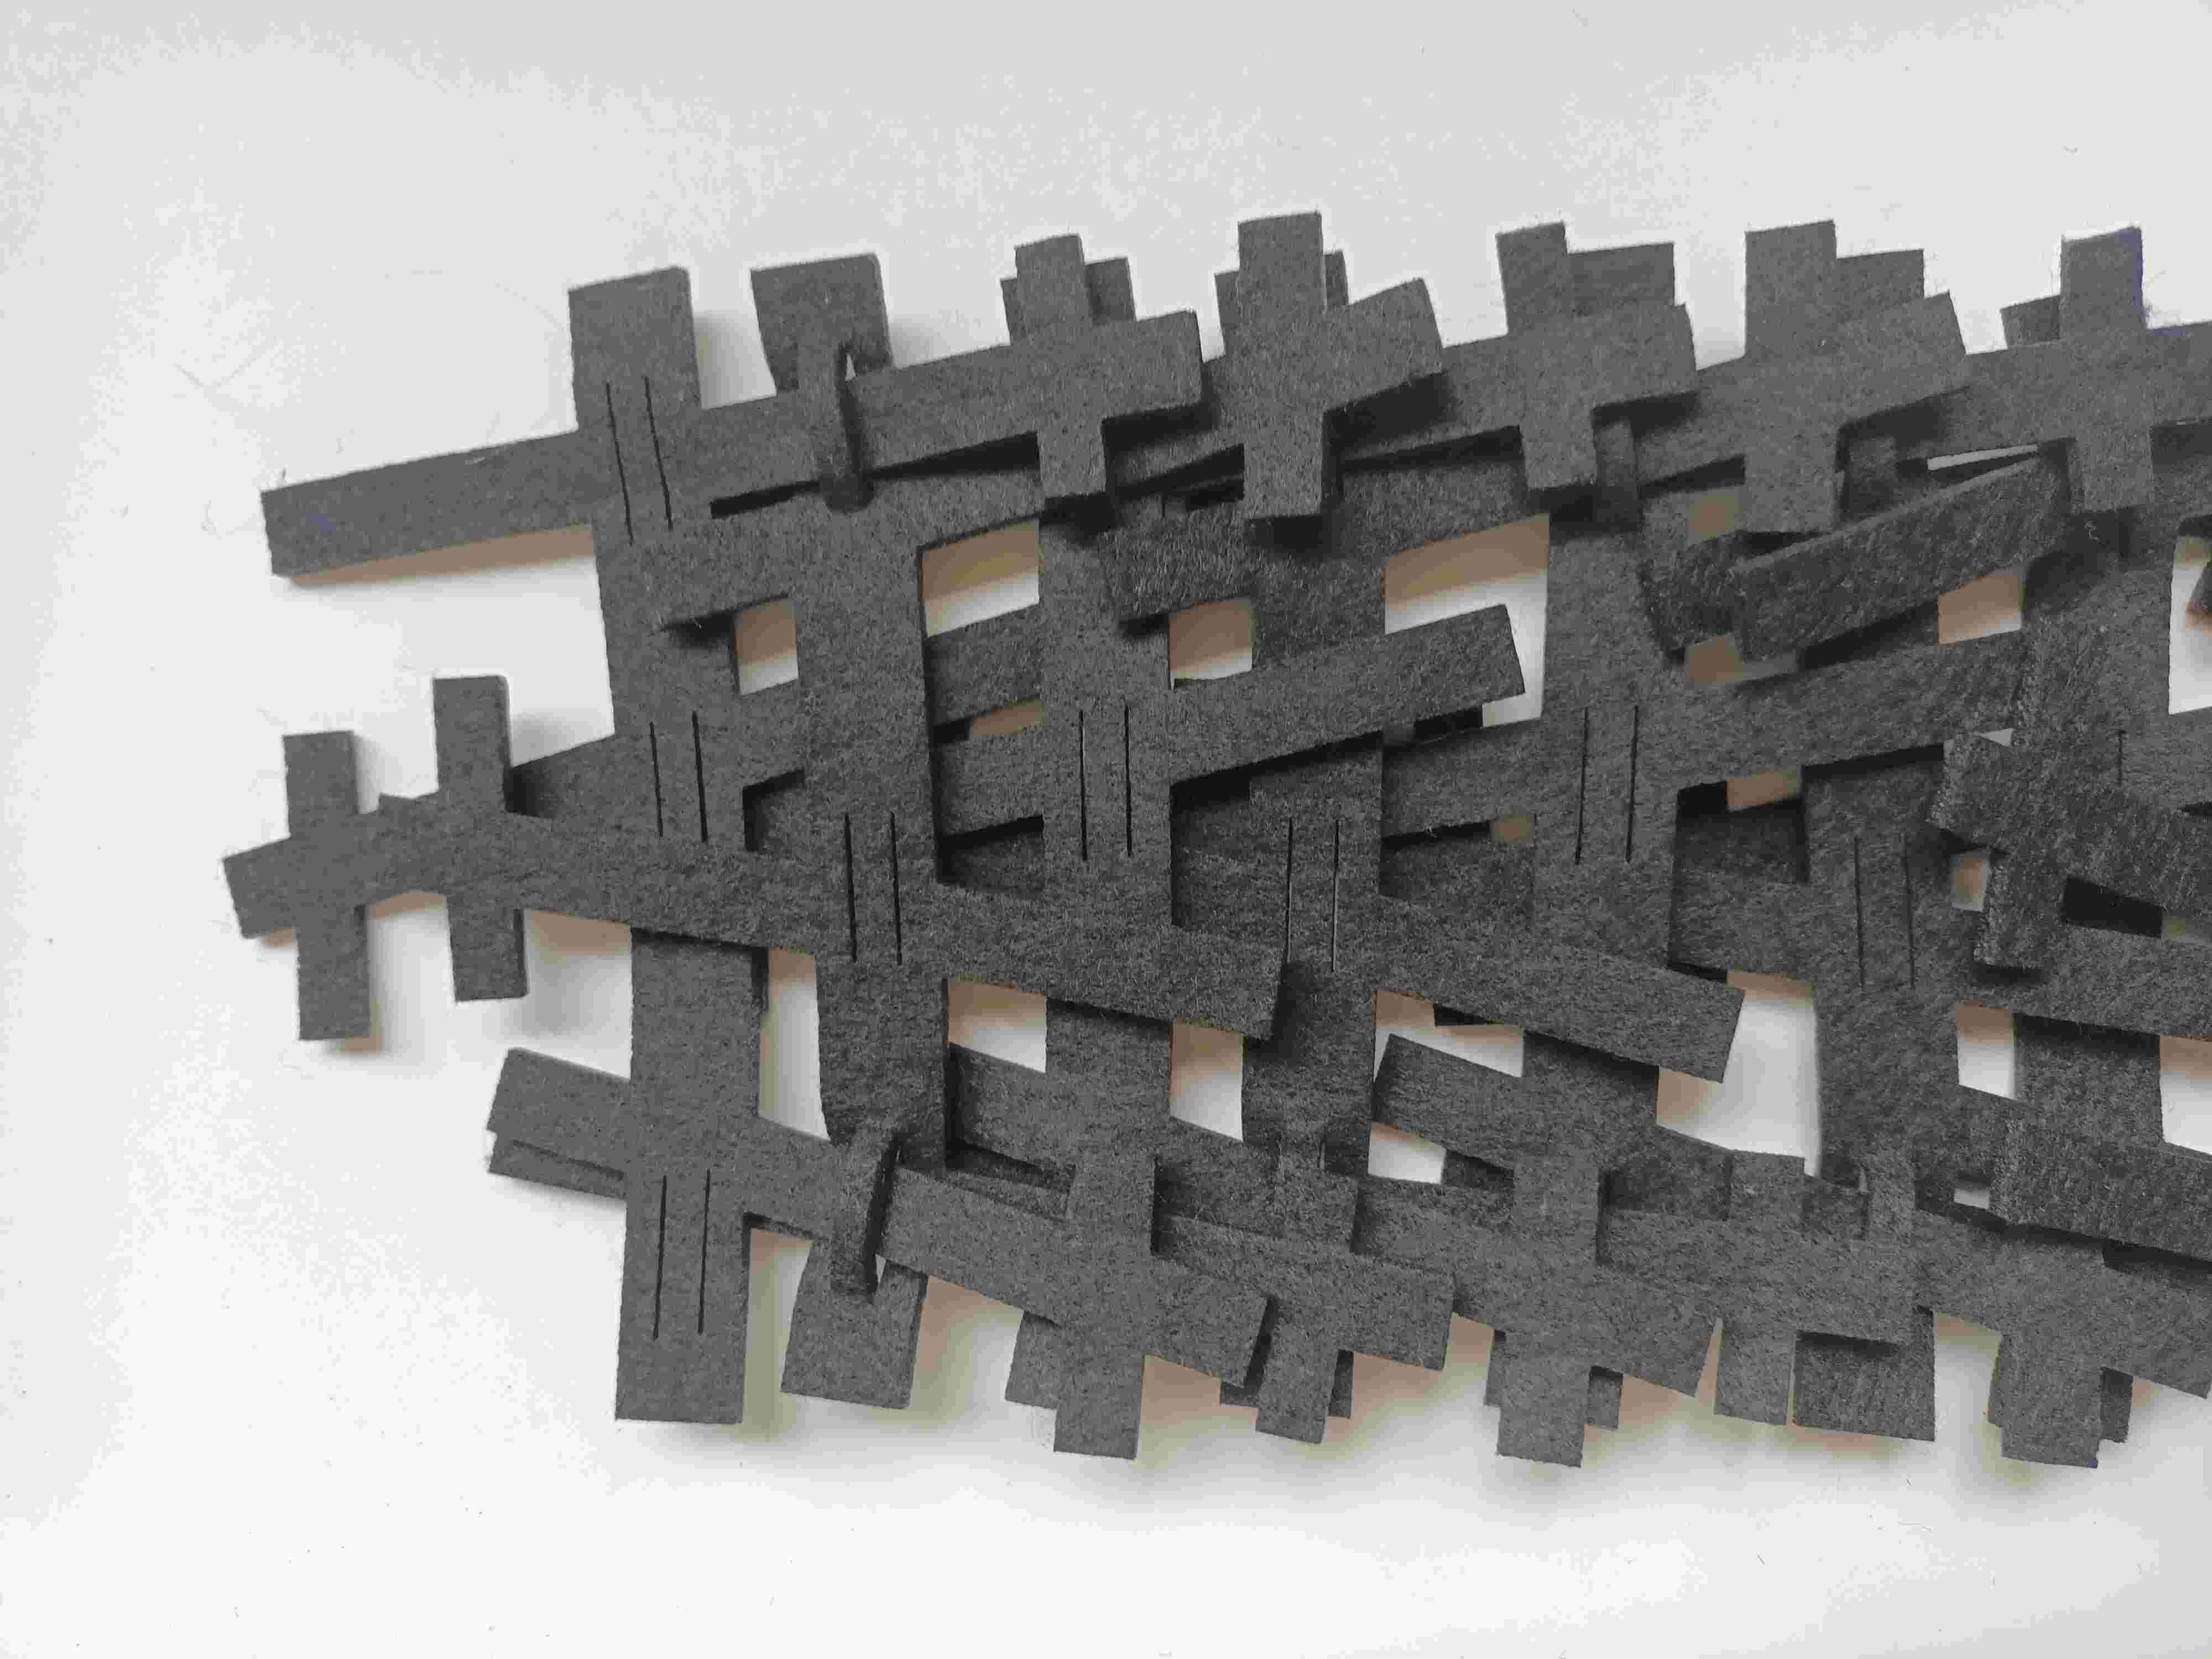
I used the modular cutouts and the sheet of felt to craft the dress, so that only a bit of felt was left over. It took me days to figure out which composition of the pieces worked best – so many options!
Unlike the traditional approach of tessellation, where modules fit together seamlessly like a jigsaw puzzle, I intentionally opted for interlocking elements that don't align perfectly. These design choices introduce an element of unpredictability and spontaneity into my creations. It's the delightful chaos that comes from the imperfect fit that excites me.
I find beauty in the asymmetry and the unexpected gaps or overlaps between modules. It's as if each piece of the puzzle brings its own unique character to the design, contributing to an overall aesthetic that is visually stimulating and thought-provoking. I embrace the idea that beauty can be found in the unpolished and the unconventional. It challenges the notion that precision is the sole measure of excellence in design.
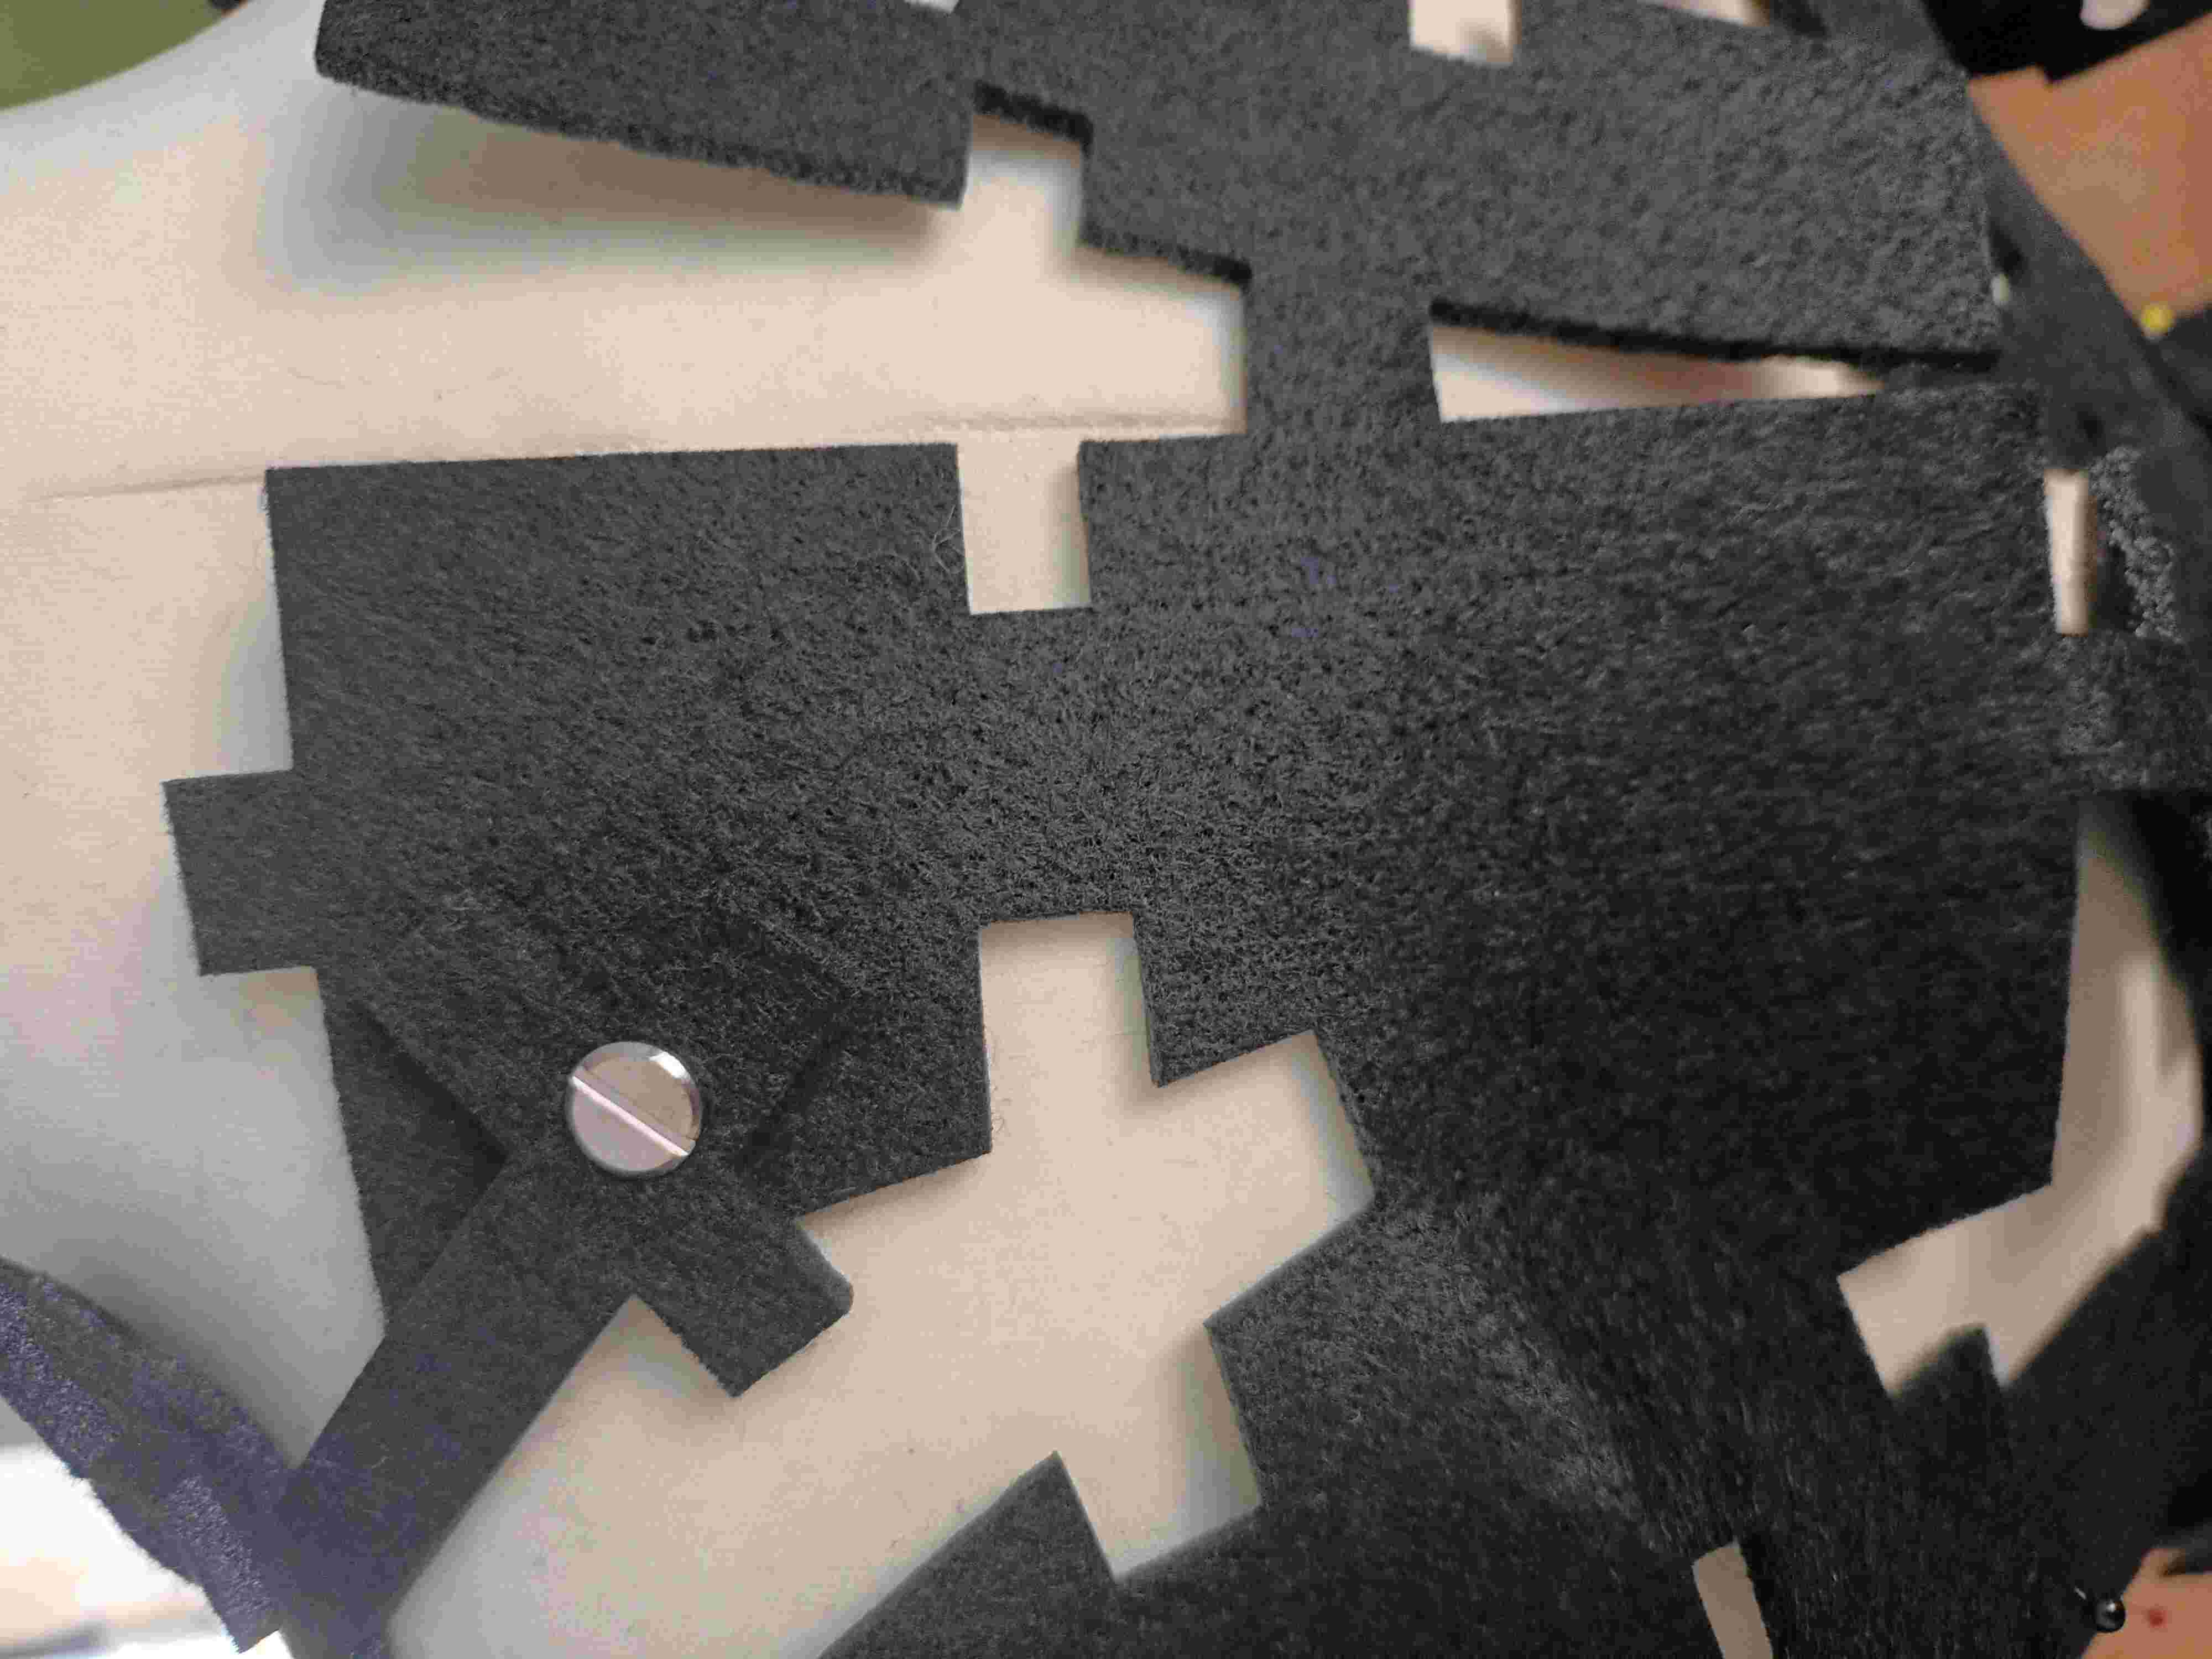
To assemble this distinctive dress, I opted for bookbinding screws instead of traditional sewing. This choice allows the dress to be unscrewed and reassembled into something entirely different. It embodies the spirit of modularity, where the possibilities are boundless, and the wearer becomes the creator.

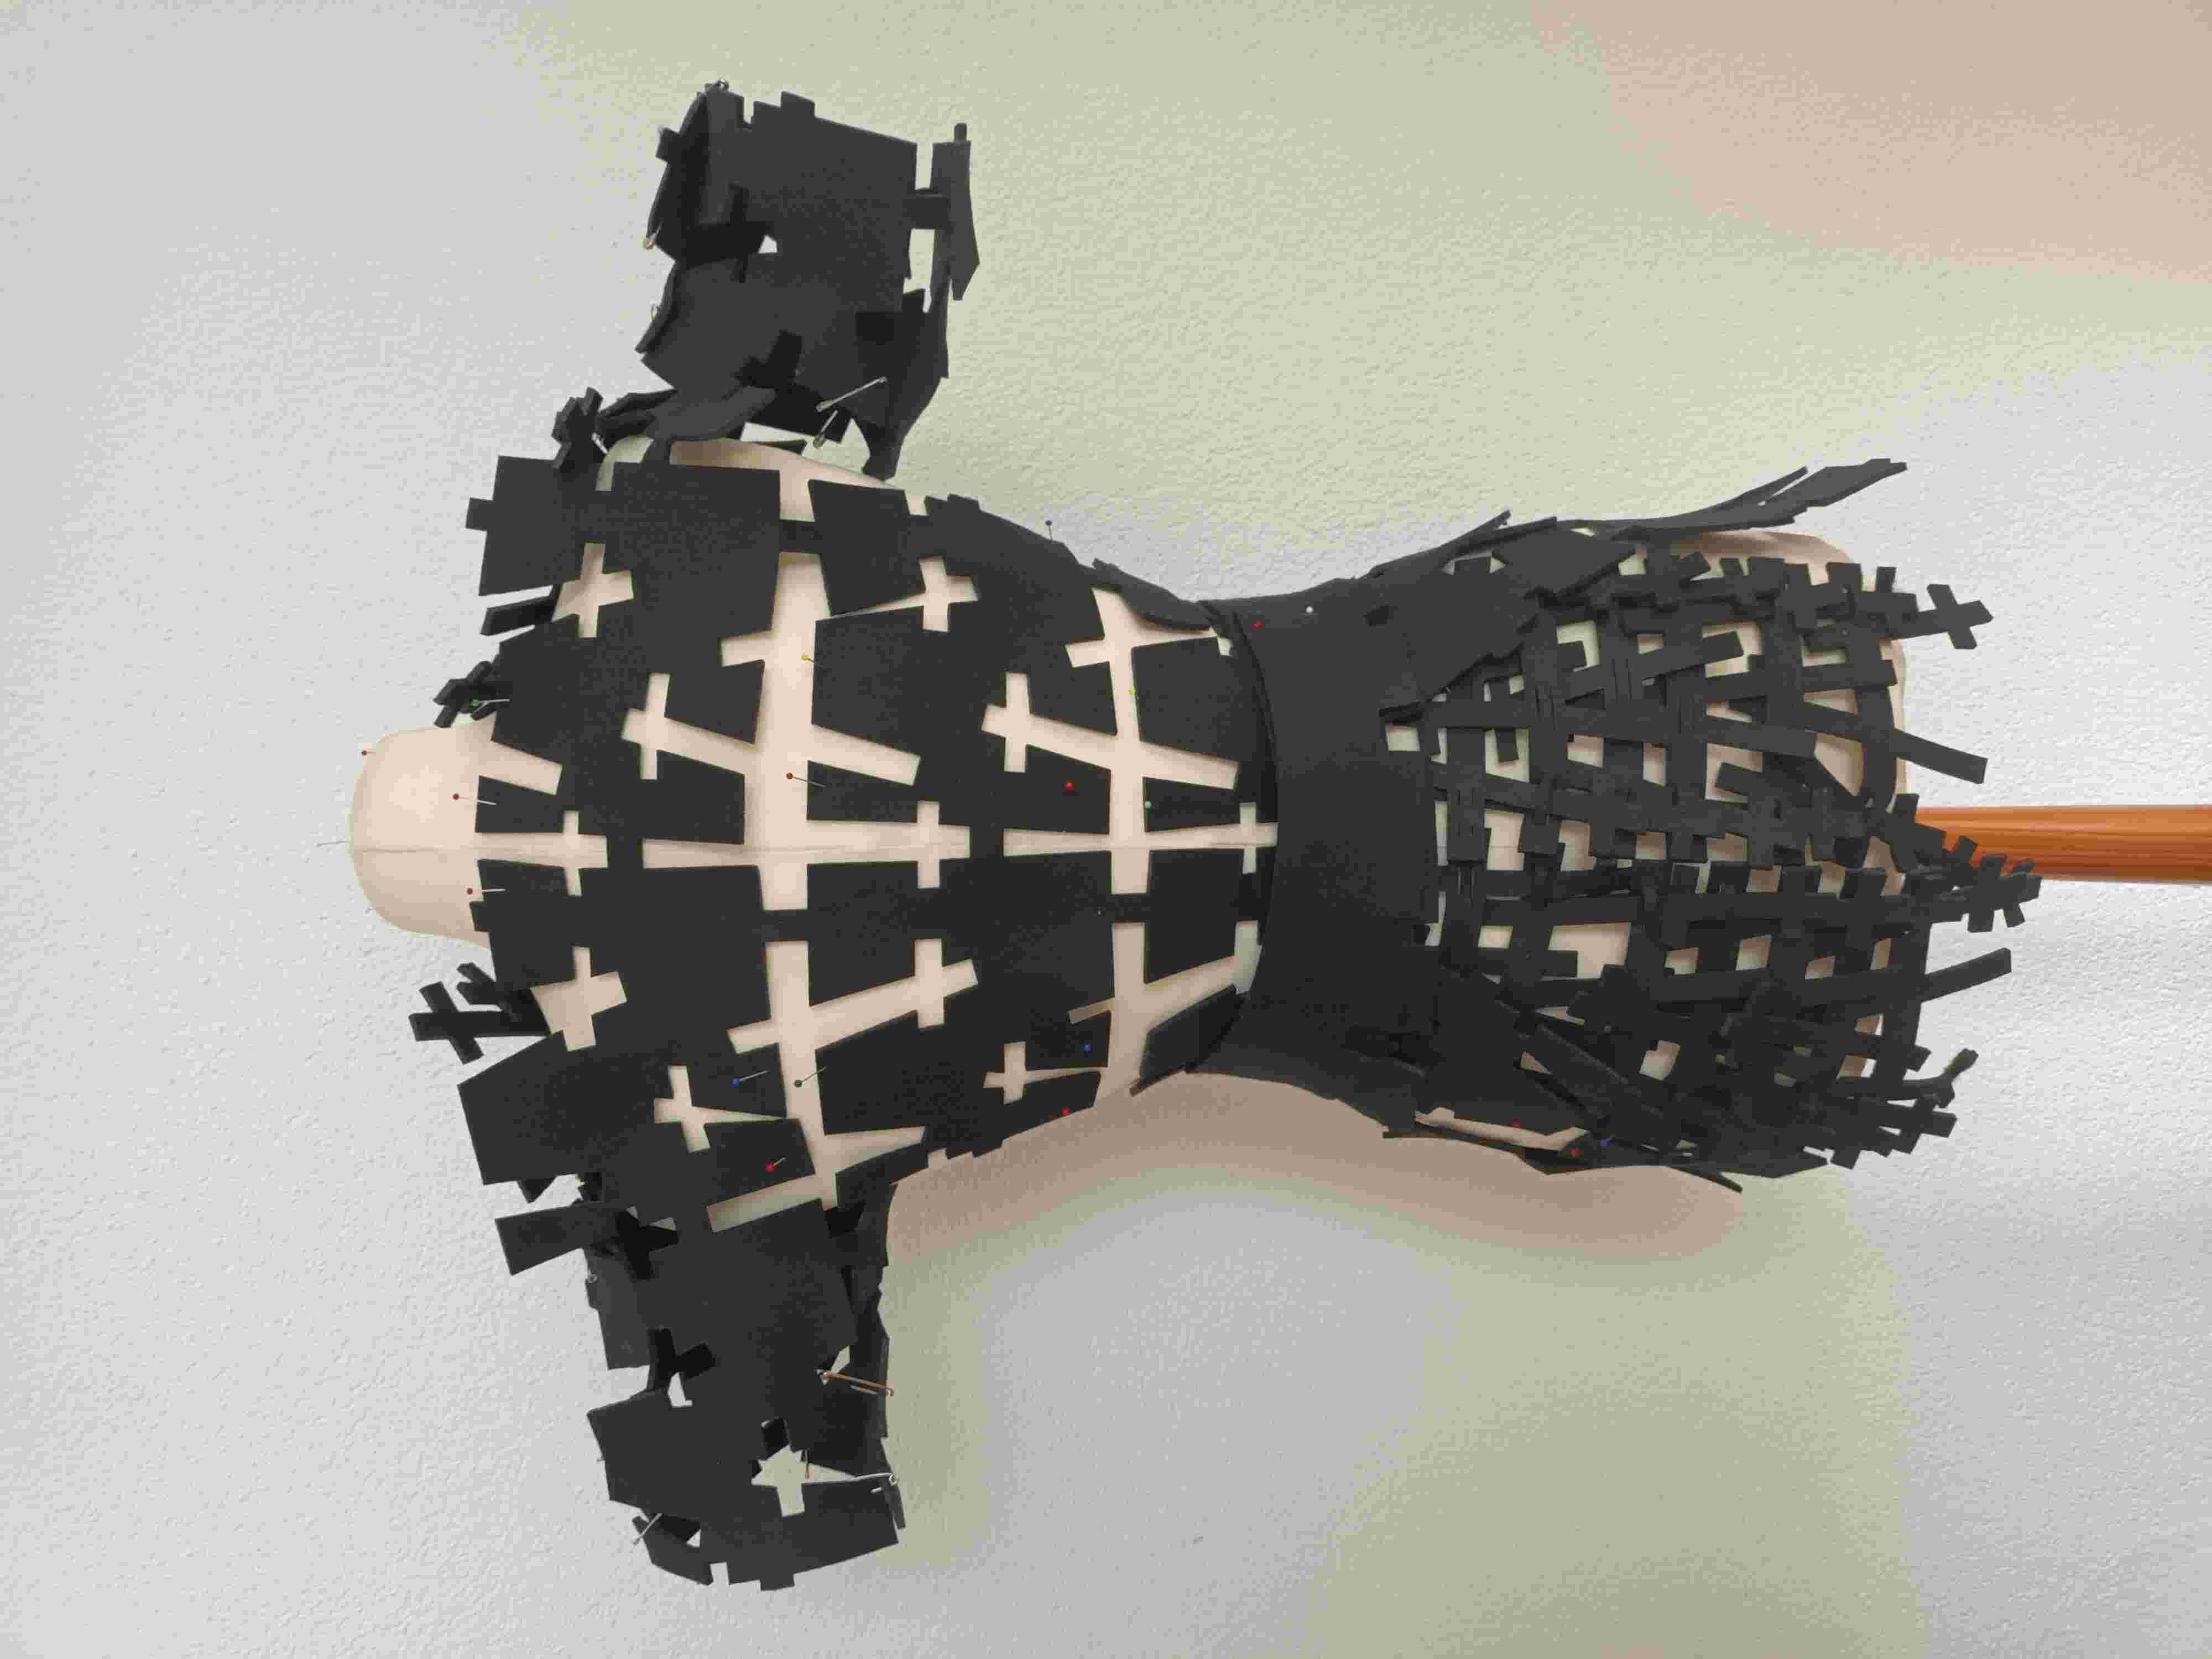
I have used 36 modules (two strokes for the chest, two strokes for the back) and the remaining felt for the back and the skirt (front and sides-back).

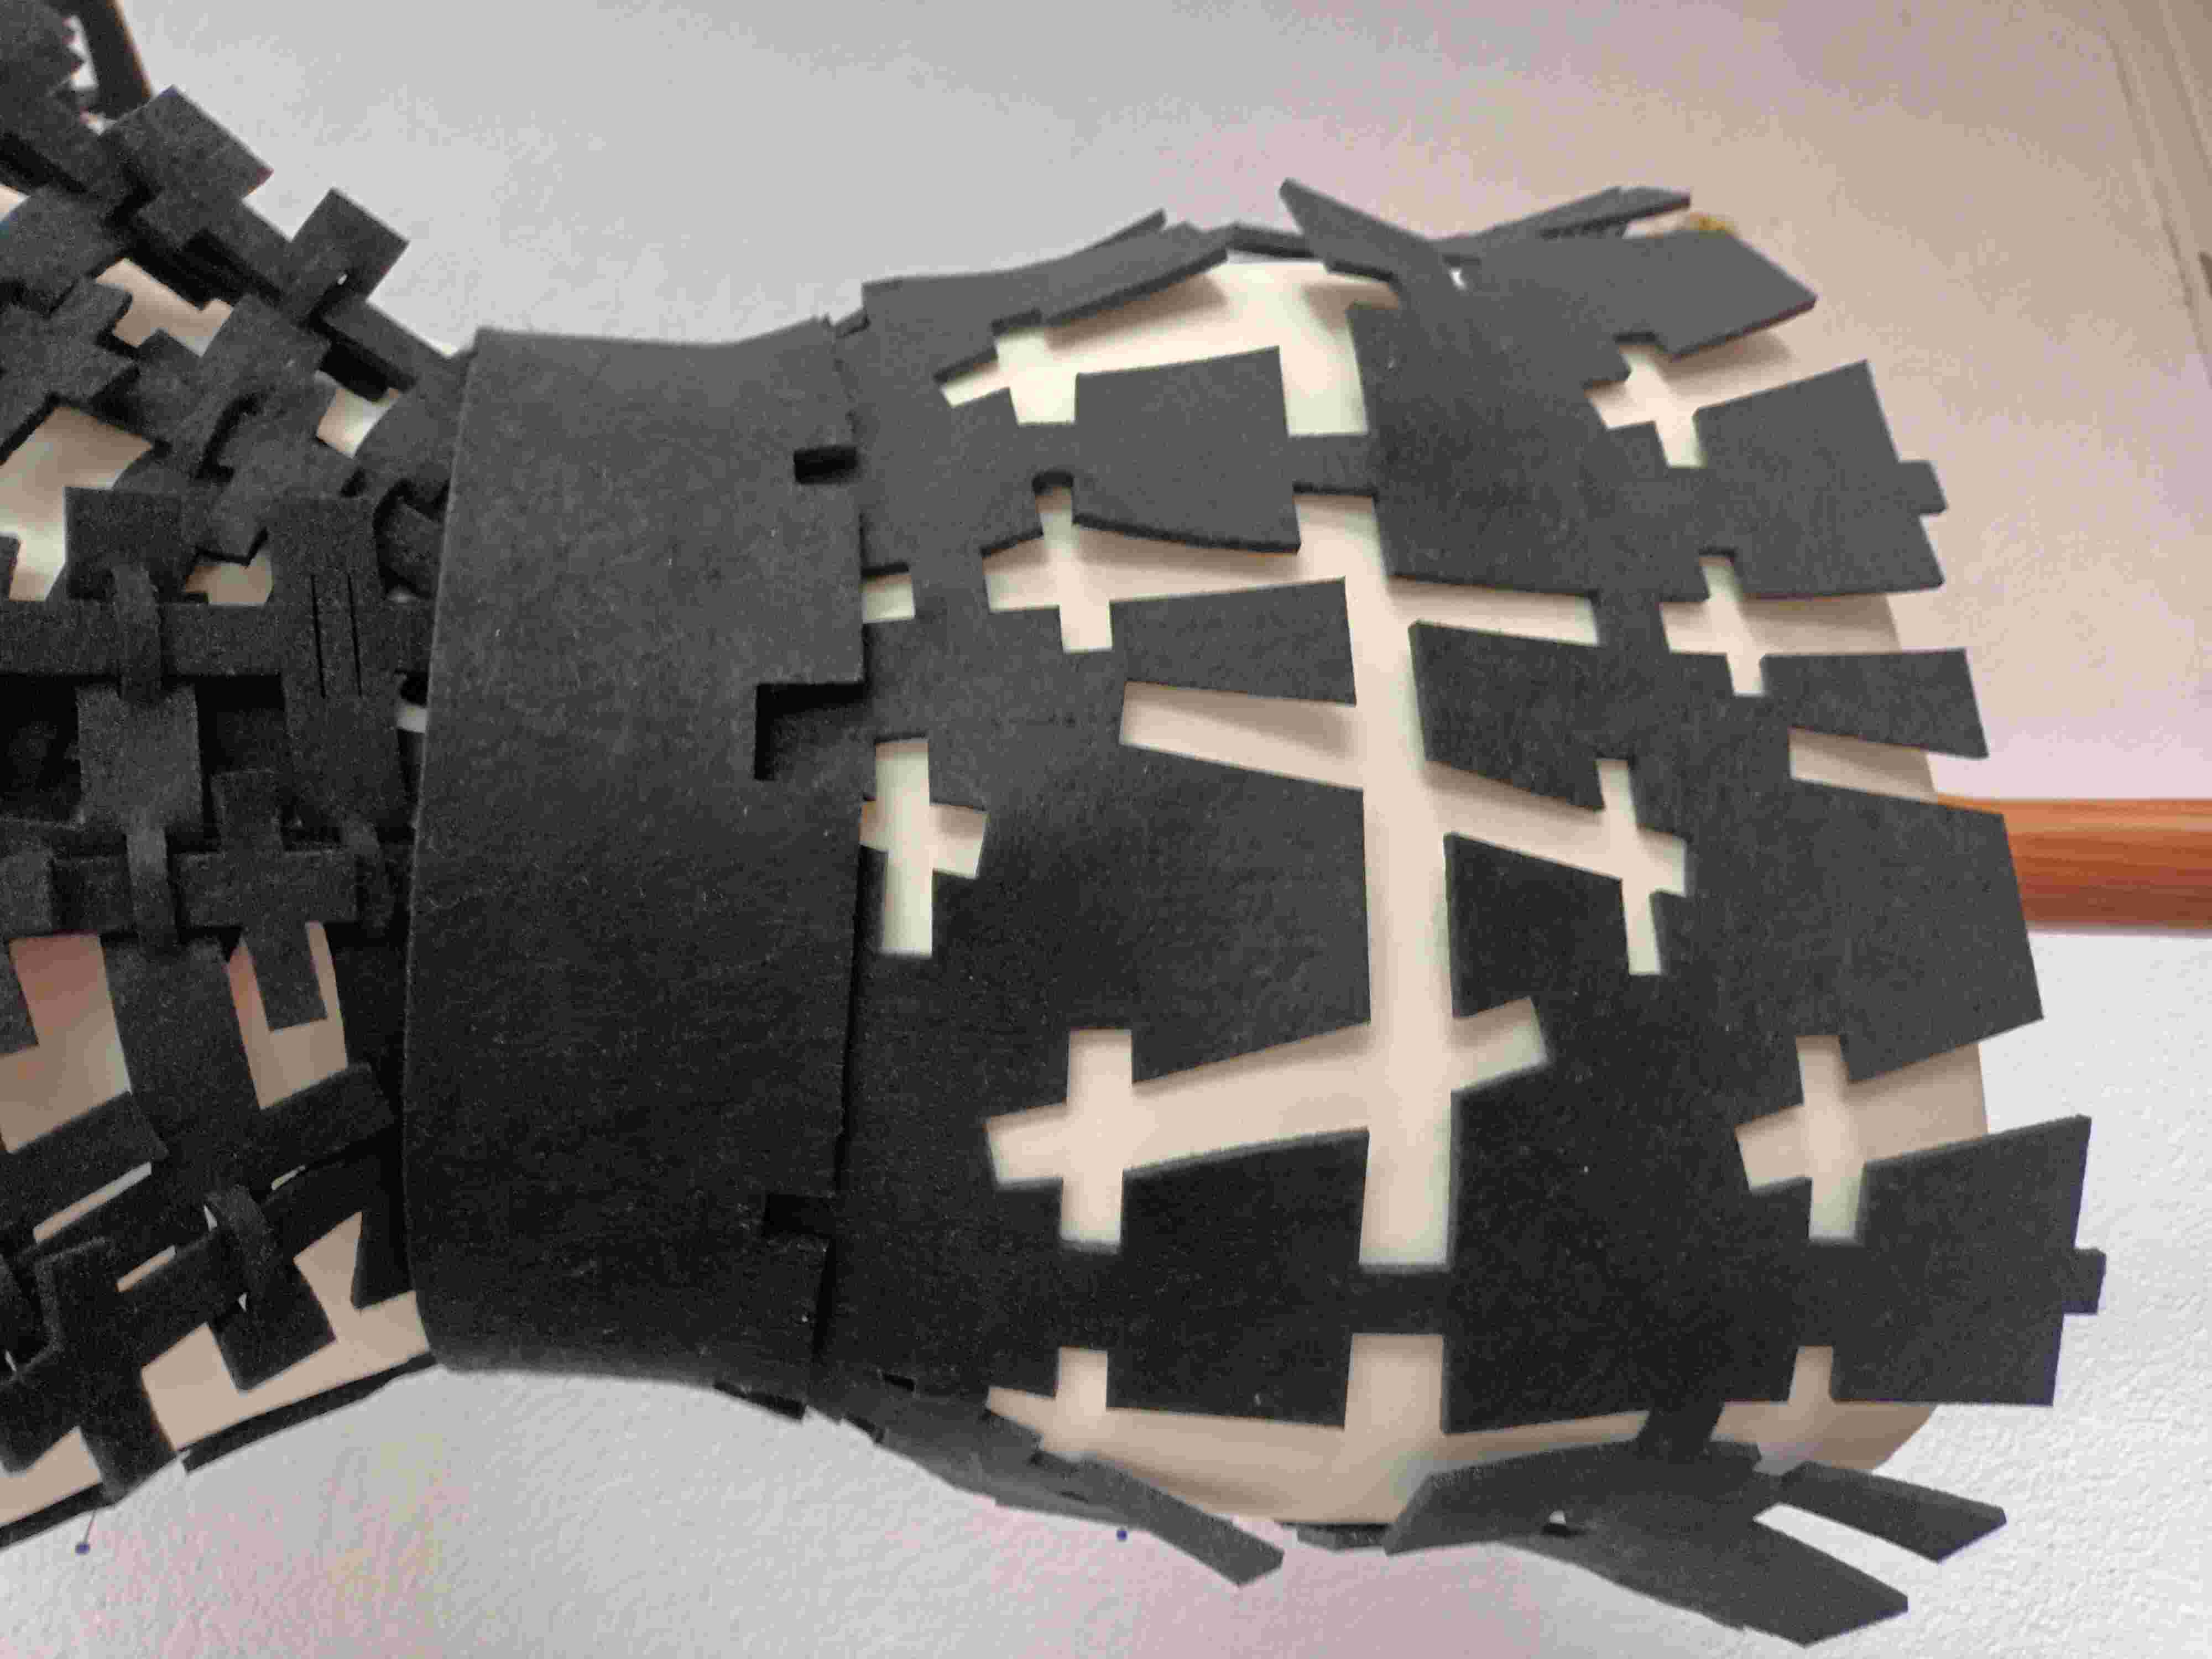
The front:

The back:
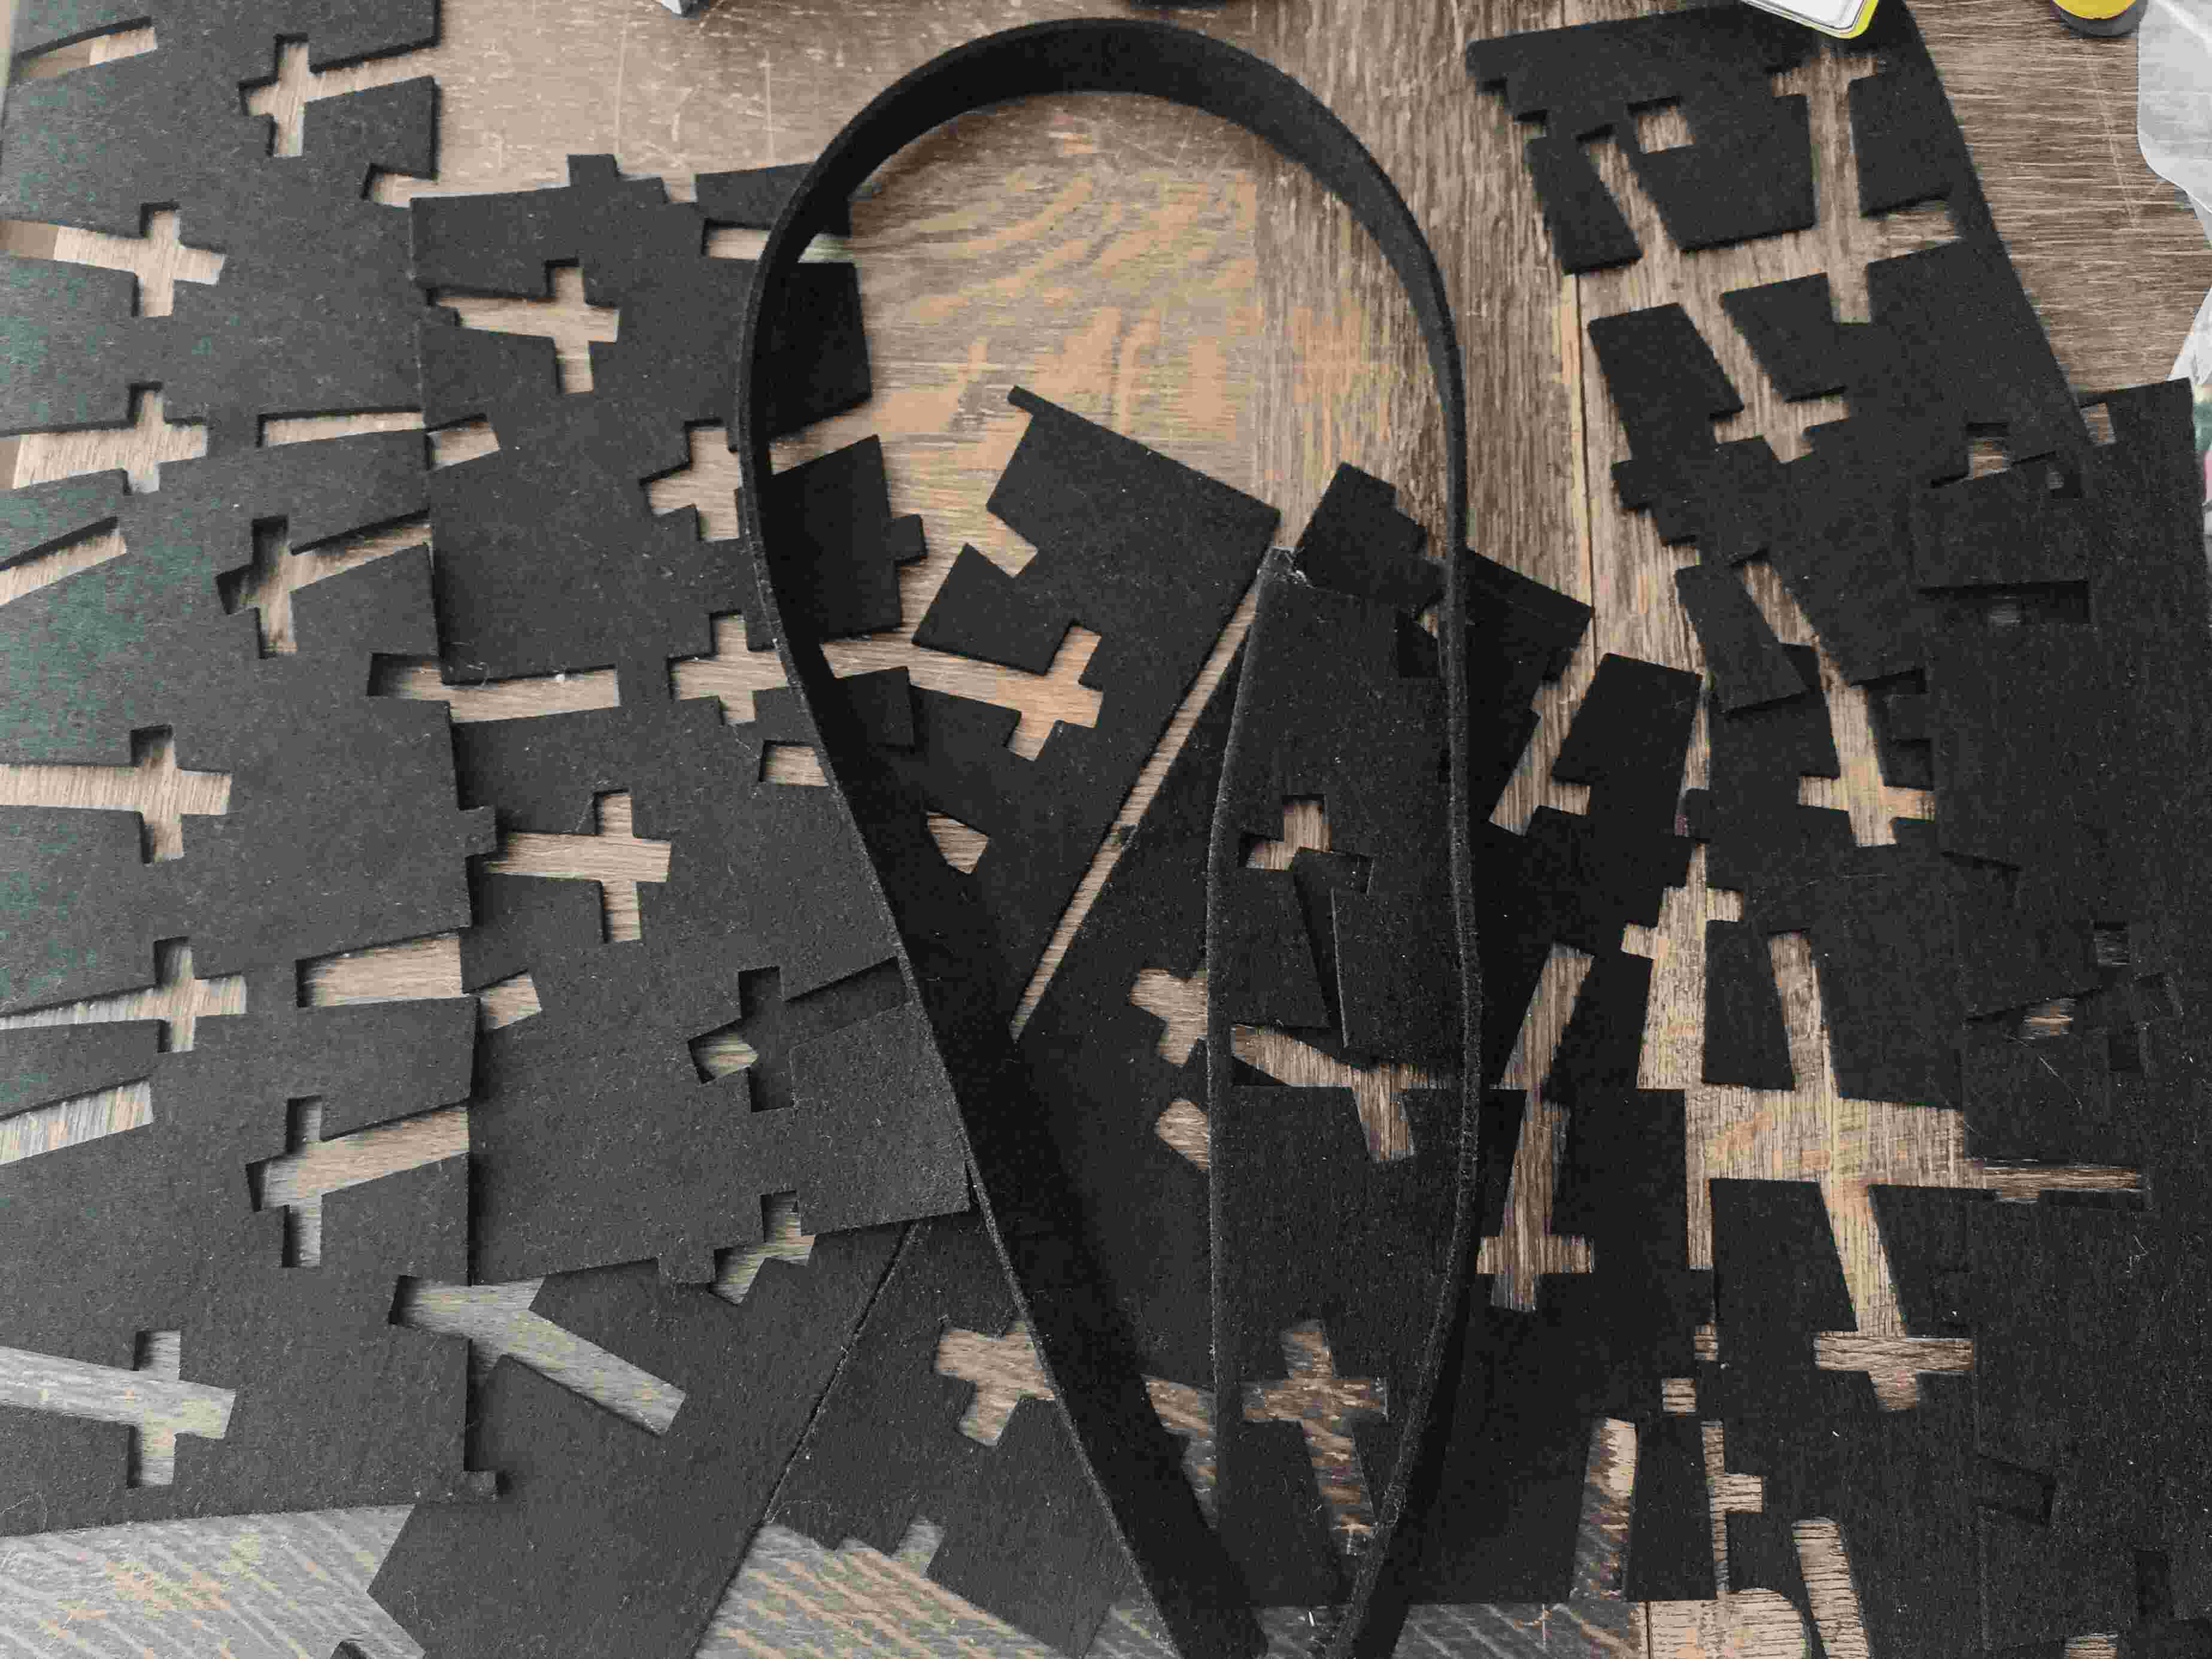
And in the end, I had this much left - nothing will go to waste, I will find another project to use all the fabric.
Tools
- Rhino
- Lightburn
- Laser cutter
Process and workflow
Create your handmade design into a digital design so that it can be lasercut. For this, use Rhino software.
Using Rhino for Creating a Module:
Creating Boxes: - In Rhino, you can create a box using the "Box" command. Type "Box" in the command line. For my design, I created seven rectangulars. - Specify the box's dimensions, either by entering values or by selecting two diagonal corners. - Press Enter to create the box.
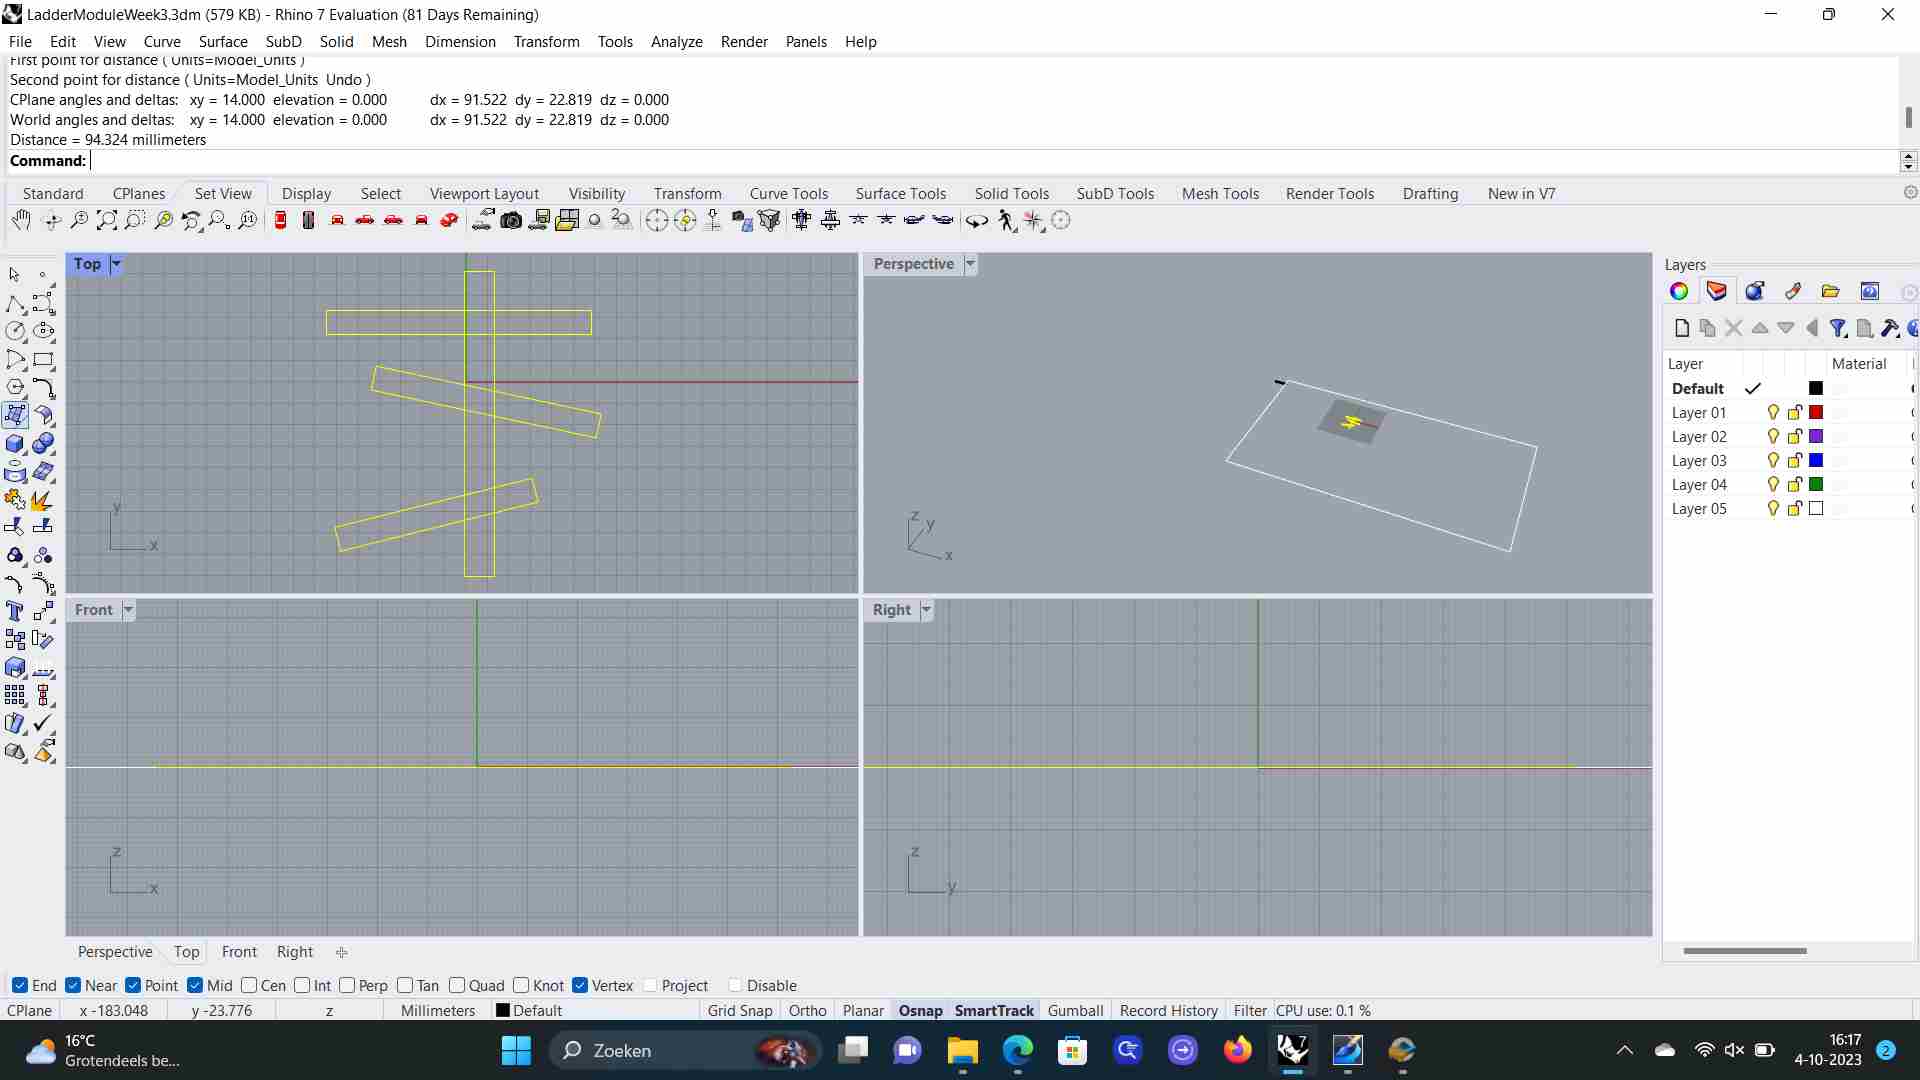
Creating lines for slits:
- To create slits so the ‘plusses’ fit into them, create 2 x 3 lines in the module.

Performing the Trim Operation:
- To trim the box using another object (e.g., the plane), use the "Trim" command. You will need to trim the inner lines, so that the laser cutter only cuts the outside lines.
- Select the box as the object to trim.
- Select the cutting object (e.g., the plane) as the cutting tool.
- Rhino will trim the box where it intersects with the cutting object.
Extending the boxes:
- If the module needs to be extended, this is the way to do that:
Filling a sheet with modules:

To copy one module in Rhino and fill a specific size sheet for zero waste, you can follow these steps:
Create Your Module:
- Begin by designing the module you want to replicate. This module should represent the building block of your design.
Determine the Sheet Size:
- Determine the size of the sheet material you'll be using for your project. This is crucial for optimizing material usage and achieving zero waste. Mine was 102 x 87 cm.
Copy the Module:
- Select the module you want to copy. You can do this by clicking on it with the mouse or using the "Select" command.
Use the Copy Command:
- Once the module is selected, use the "Copy" command. You can access this command by typing "Copy" into the command line or by selecting it from the toolbar.
Specify the Number of Copies:
- When prompted, specify the number of copies you want to create. Keep in mind that the number of copies should be based on the dimensions of your sheet material and the size of your module.
Arrange the Copies:
- After creating the copies, Rhino will ask you to specify the base point for the copies. Choose a point where you want the copies to start on your sheet.
Distribute the Copies:
- Use the "Array" or "Distribute" command to evenly distribute the copies across the sheet material. Ensure that they fit within the specified sheet size while minimizing waste.
Check for Fit and Adjust as Needed:
- Zoom in and inspect the arrangement to make sure the copies fit well within the sheet without overlaps or exceeding the sheet's boundaries. Adjust the positioning as needed.
Save and Prepare for Fabrication:
- Once you're satisfied with the arrangement, save your Rhino file.
Export:
- If you wish to export the trimmed modules, you can use the "Export" command and choose the desired file format; an STL.
Once you've finalized your design in Rhino, it's time to bring it into the physical world using a laser cutter. This is where Lightburn comes into play. Lightburn is a software specifically designed for controlling laser cutters and engravers. It allows you to import your 2D or 3D designs and convert them into instructions that the laser cutter can understand.
With Lightburn, you can fine-tune settings like cutting speed and power to achieve the desired precision and quality in your module. You can also optimize the layout to minimize material waste, which aligns with the principles of sustainability in design.
Using Lightburn for Laser Cutting:

Importing the Design: - Open Lightburn. - Import the STL file created in Rhino into your project.

Setting Cutting Parameters: - Specify cutting settings such as power, speed, and focus depth based on your material and design. For my project I used felt, and used 40 speed, 40 power, minimum 15.
Laser Cutter Control: - Ensure the laser cutter is correctly calibrated.
Preview and Layout: - Use Lightburn's preview feature to visualize the cutting path by clicking ‘Frame’. - Optimize the layout to minimize material waste by arranging multiple modules on the material sheet.
Start the Laser Cutting: - Press the 'Start' button to initiate the laser cutting process. - Lightburn will communicate with the laser cutter to execute the design.
Monitor Progress: - Monitor the cutting progress and ensure that the laser cutter follows the desired path.
Save and Store: - Save your Lightburn project for future reference.