8. Wearables
How to make your own speakers
With fabric, a coil and a jack
For this week on wearables, I made two speakers myself. The first one is made out of fabric and conductive thread - co cool and it actualy works.
As you can hear - it is not loud, but it does work.
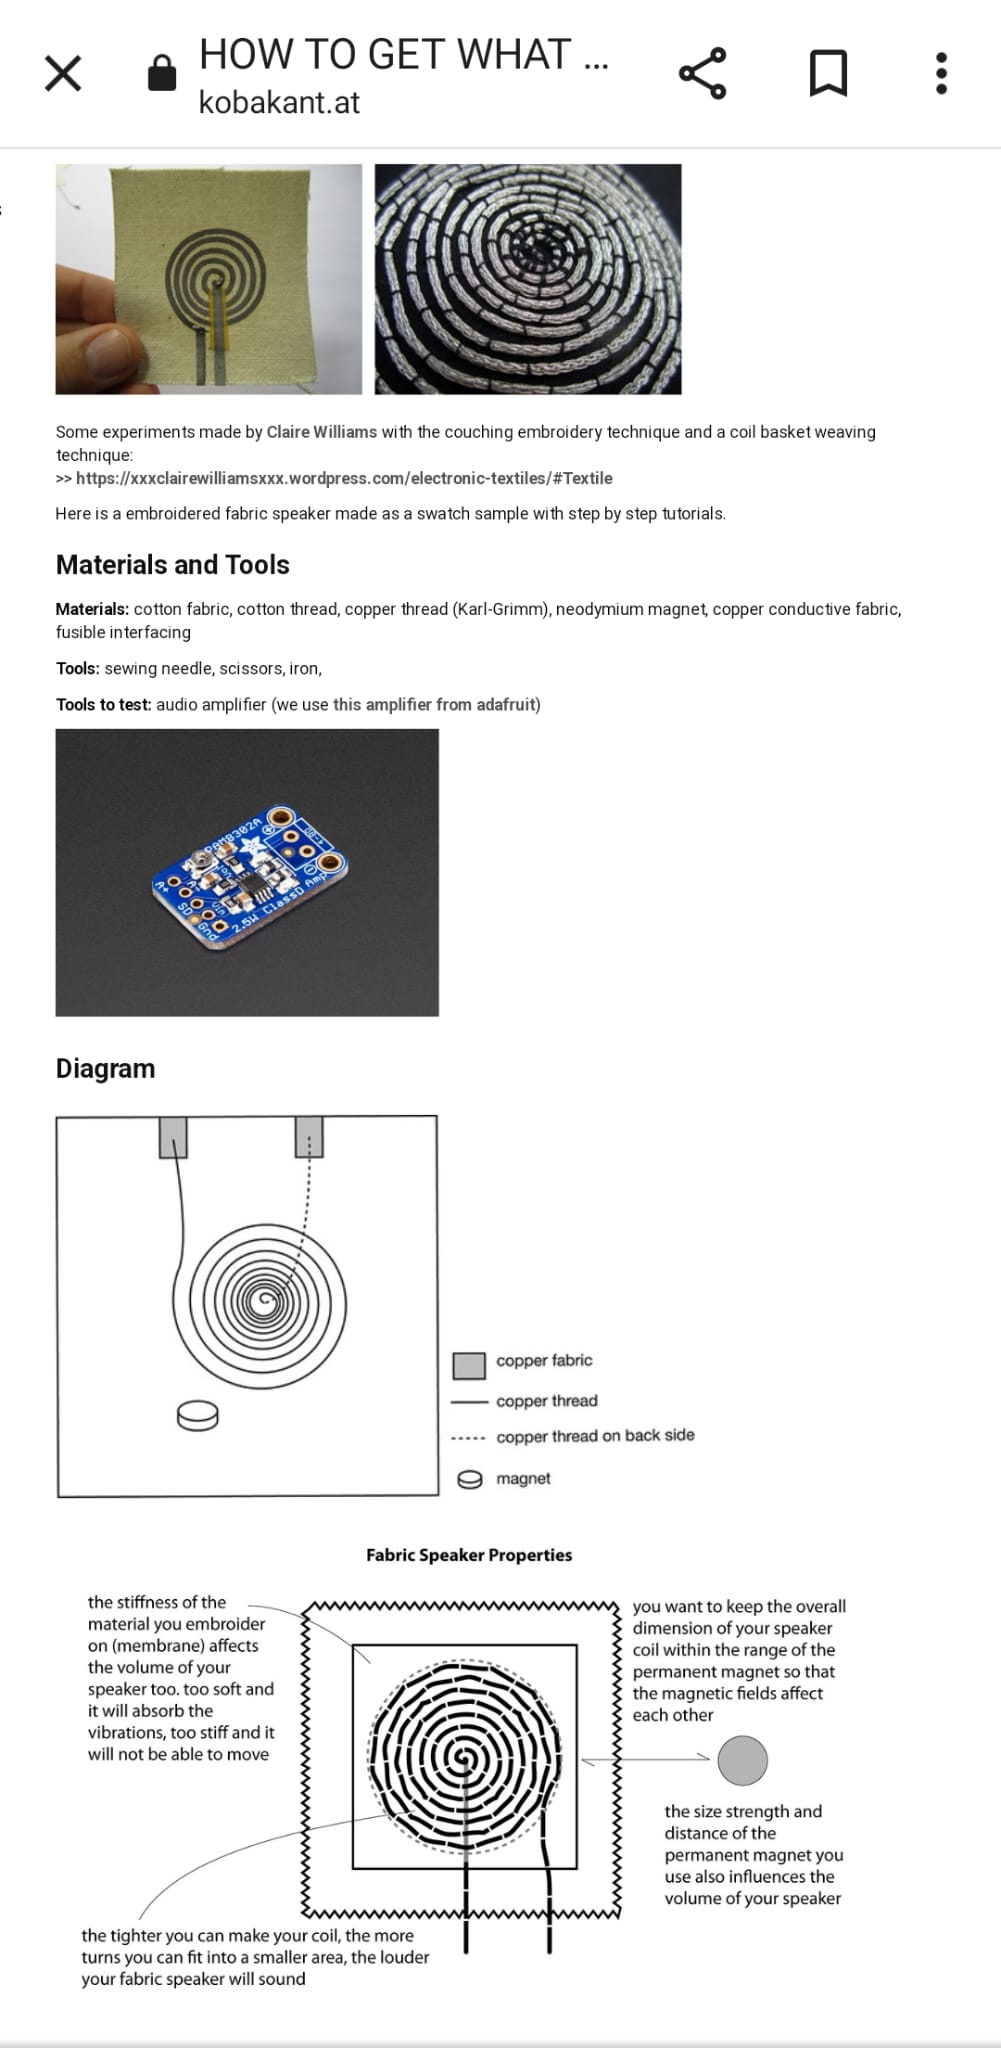
The speaker works by converting electrical signals (audio signals) into physical movement. The varying electrical current passing through the coil interacts with the magnet, causing the attached diaphragm to move and produce sound waves that we can hear. This process is the fundamental principle behind how most speakers work in audio devices.
This is how a coil works:

(Courtesy of Liza Stark)
But how?
Components: - Coil (Voice Coil): This is a wire wound into a coil shape. - Magnet: A permanent magnet, usually made of a material like neodymium. - Diaphragm or Cone: This is a flexible material (fabric in this case) attached to the coil that moves to create sound waves.
Basic Idea: - When you pass an electric current through a wire (the coil), it creates a magnetic field around the wire.
Interaction of Magnet and Coil: - The coil is positioned within the magnetic field created by the magnet. The magnetic field interacts with the current flowing through the coil.
Movement of the Coil: - According to the basic principles of electromagnetism, when you have a current-carrying wire (the coil) in a magnetic field, it experiences a force. - This force causes the coil to move.
Attachment to Diaphragm: - The coil is attached to a flexible diaphragm or cone.
Creation of Sound Waves: - As the coil moves within the magnetic field, it causes the attached diaphragm or cone to move as well. - The movement of the diaphragm creates changes in air pressure, producing sound waves.
Sound Reproduction: - By varying the electric current passing through the coil, you can control the movement of the coil and, consequently, the diaphragm. This allows you to reproduce different frequencies, creating a range of sounds.
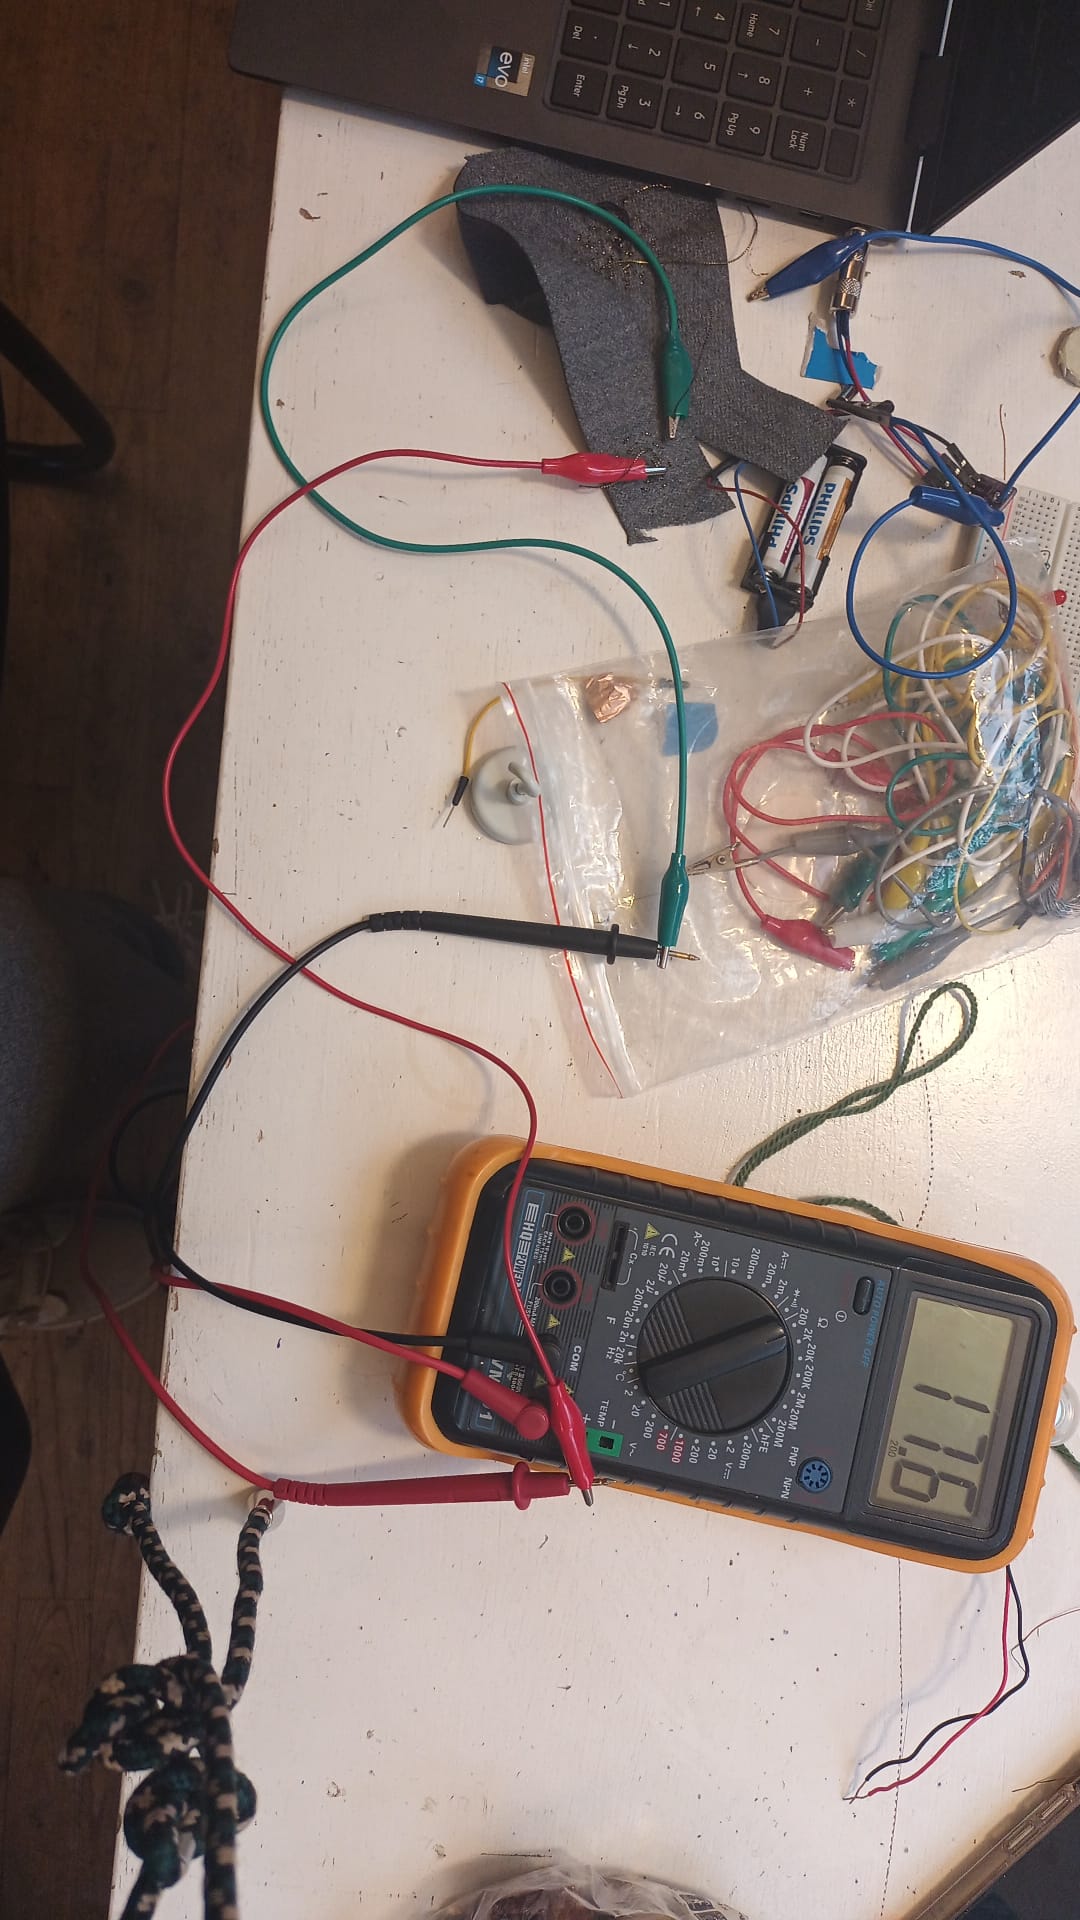
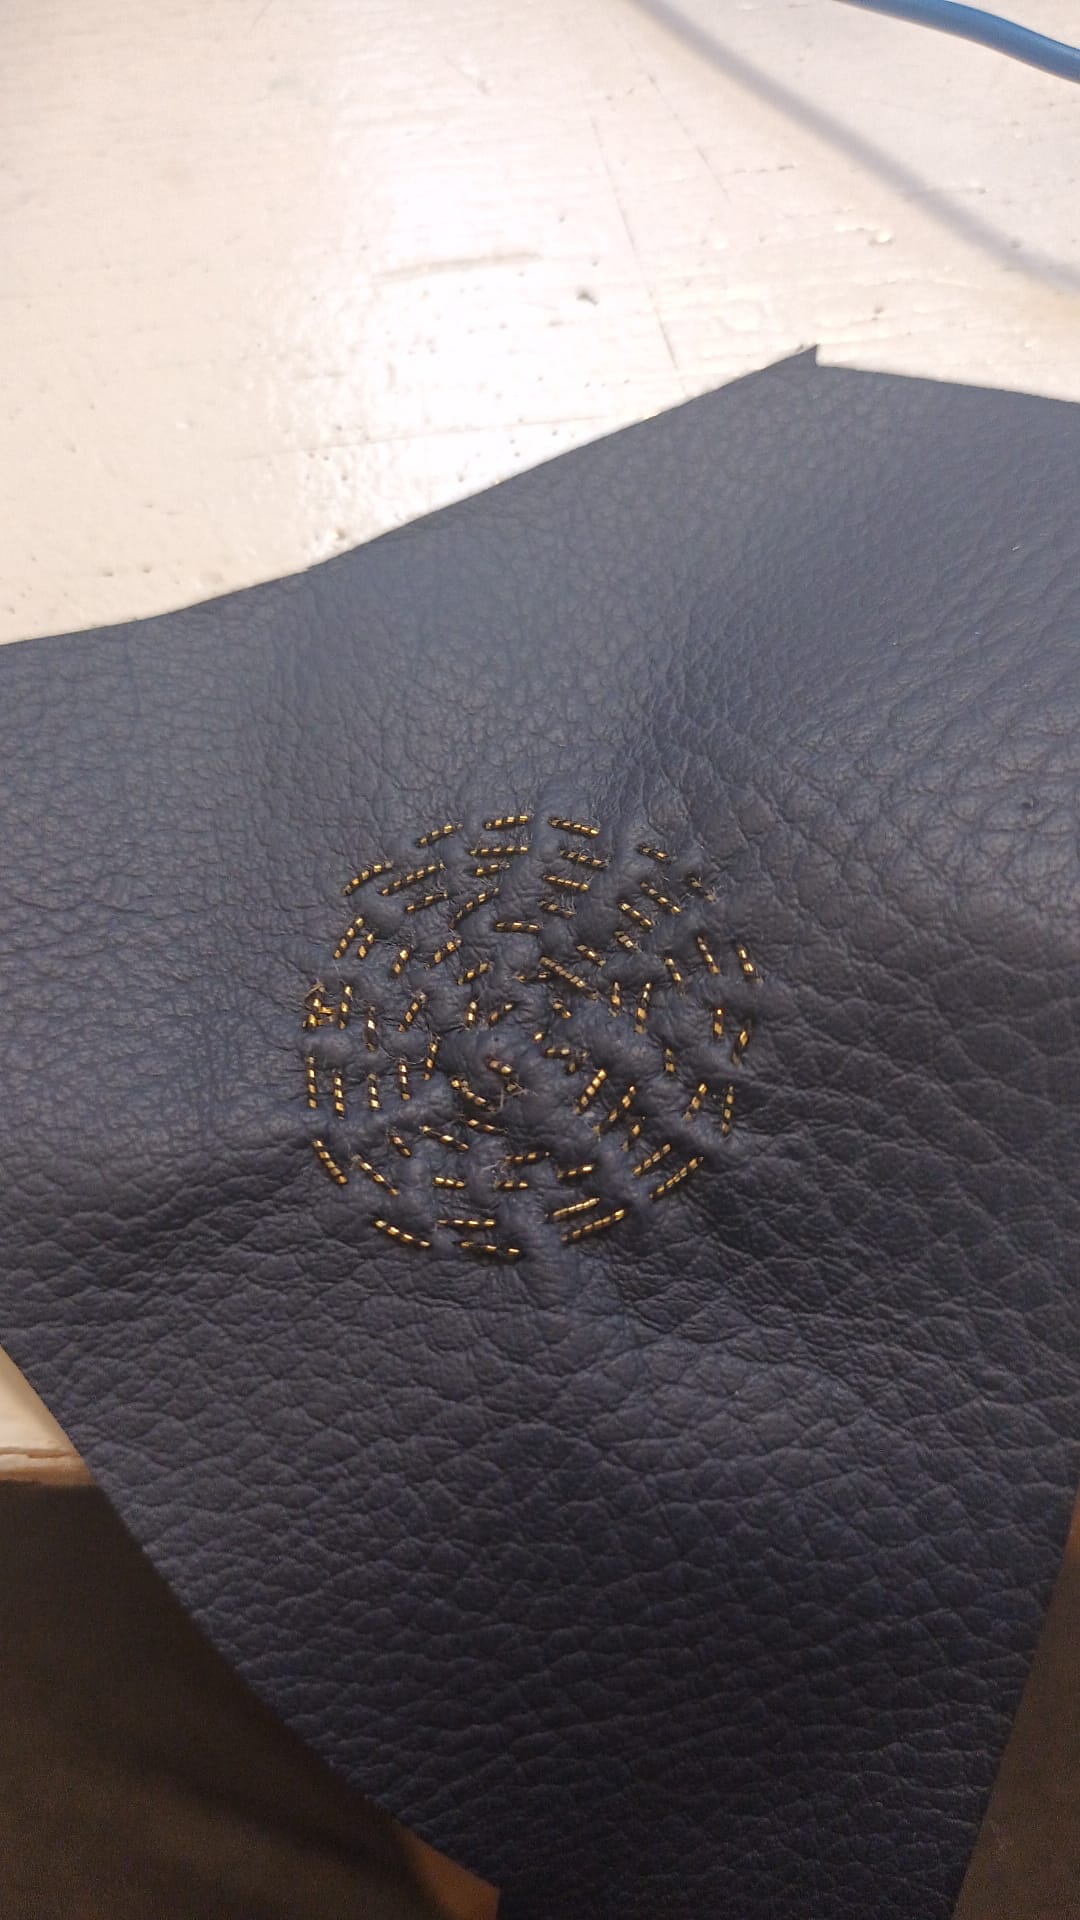
I toyed with different kinds of conductive thread and different material. The resistance should be between 4 and 8 Ohm. Too big of a coil, too much resistance. Fabric too flappy? Vibrations won't work well. Copper conductive thread with a diameter of around 3 centimeters on faux leather works best, I find. Always measure with a micrometer!
Micrometer:

my beautiful coil:
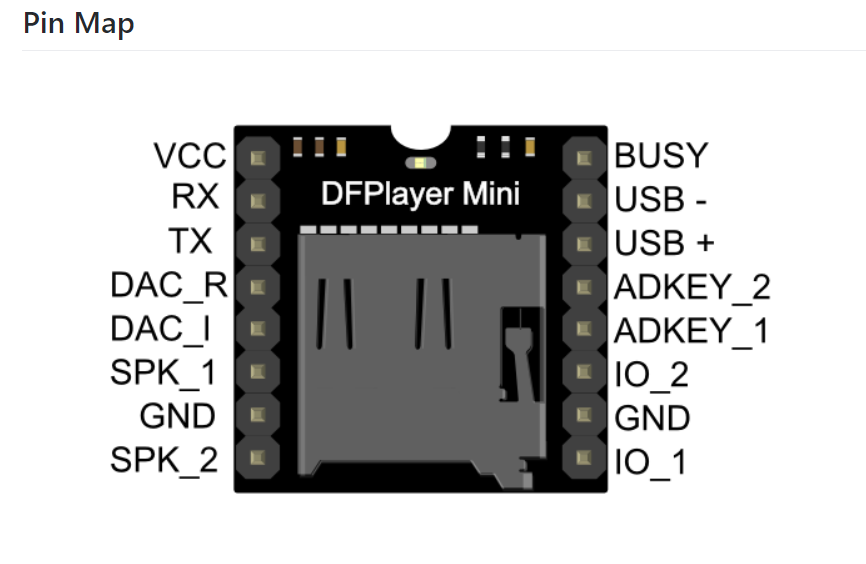
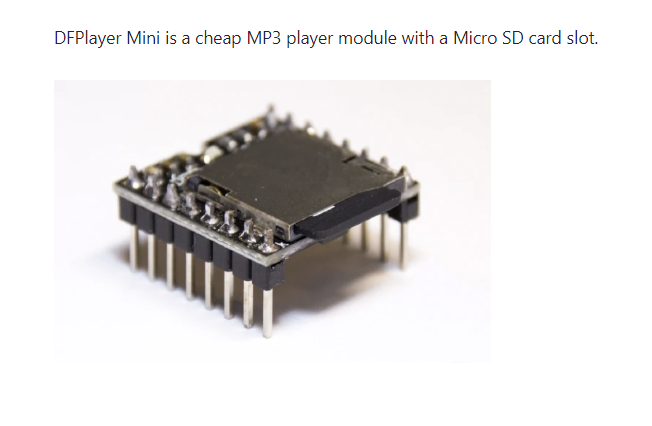
With an Arduino board and a DFPlayer Mini
Required Components
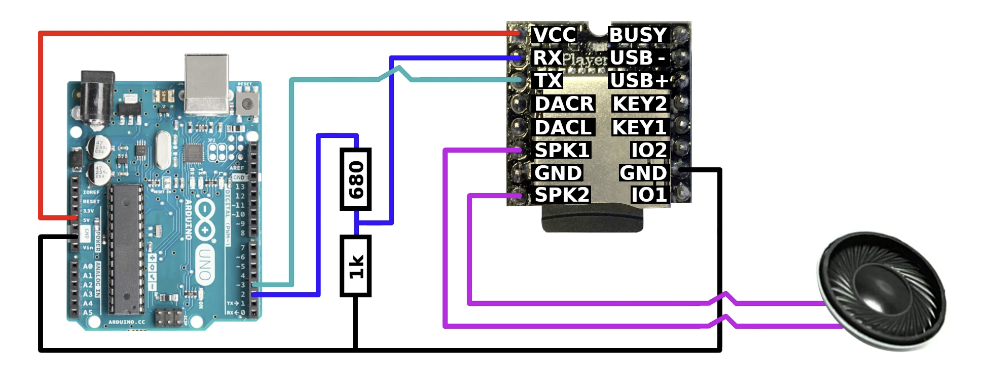
A DFPlayer Mini module A Micro SD card An Arduino Uno A speaker (Up to 3W) Two resistors to create a voltage divider from 5V to 3.3V. For example, a 1kΩ and a 680Ω resistor. Some jumper wires
For this challenge, I imagined a bag that would play sound when opened and closed:
Your bag is now open. Or is it? Your bag is now closed Or is it?
So, there I was, fumbling with this teeny tiny IT thingy—oh, an ATtiny, I mean. I had this breadboard that looked like a mini cheese grater and an Arduino, which I think is like a super smart Lego brick. Anyway, I was trying to stick wires into the breadboard holes, but they kept popping out or bending like crazy straws. The Arduino was supposed to control the ATtiny, but I kept mixing up the pins and nothing worked. At one point, I accidentally made a sound come through, and I have no idea how. It was a mess, but kind of fun, in a confusing way.
See below for instructions that might actually help.
Breadboard = circuit-building platform which enables you to connect multiple components without committing to soldering

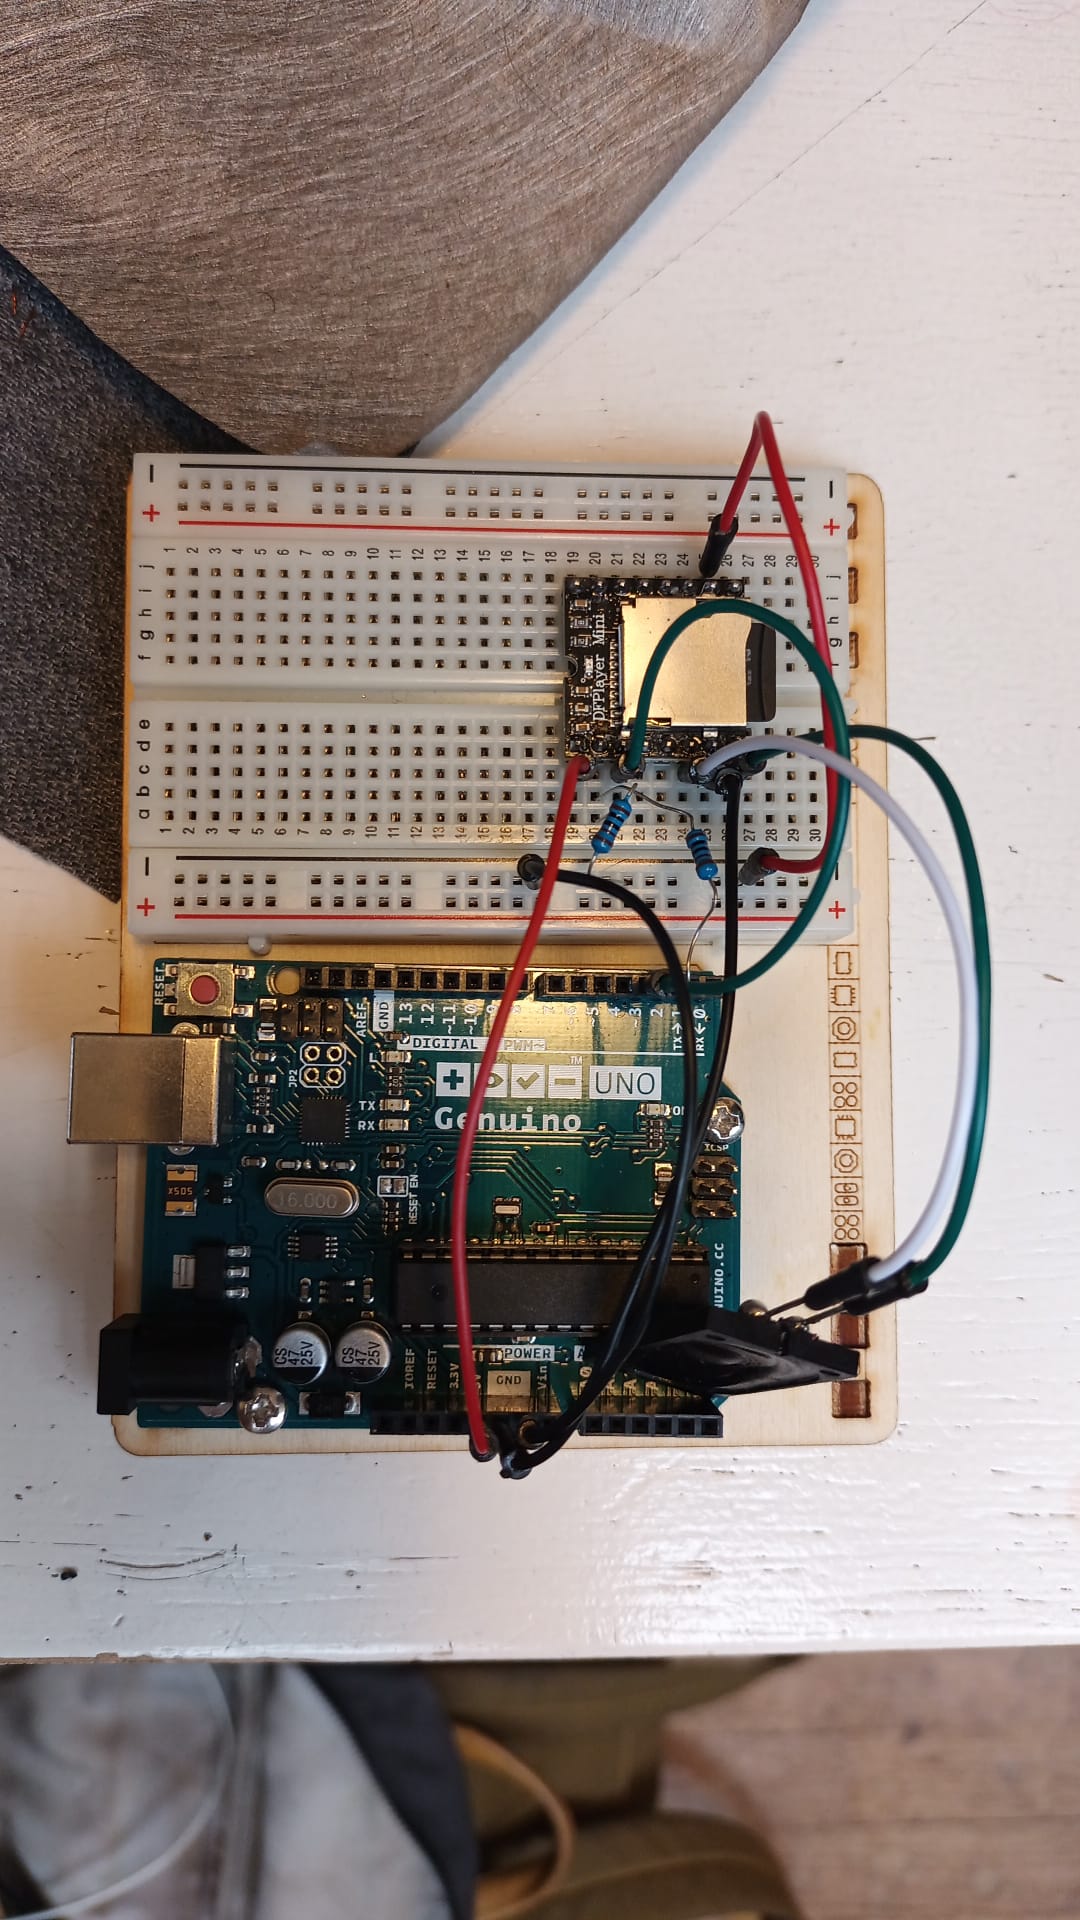
Final outcome
This is the manual, which gives a step by step instruction.
Arduino
Arduino software refers to the integrated development environment (IDE) provided by Arduino for programming and uploading code to Arduino microcontrollers. It serves as a user-friendly platform where you can write, compile, and upload code to control various electronic projects.
The Arduino Uno, a popular microcontroller board, is a key component in the Arduino ecosystem. It acts as the brain of your projects, interpreting and executing the code you write in the Arduino IDE. With its versatile input and output pins, the Arduino Uno serves as a powerful tool for hobbyists, students, and professionals alike to create a wide range of interactive and automated electronic projects.
Programming an Attiny85 with Arduino
Here's a basic walkthrough of using an ATtiny85 with a breadboard and an Arduino as a programmer:
Materials Needed:
ATtiny85 microcontroller
Arduino board (e.g., Arduino Uno)
Breadboard and jumper wires
10 μF capacitor
220 Ω resistor (optional)
LED (optional, for testing)
USB cable for Arduino
Steps:
-
Install Arduino Software
-
Connect Arduino to ATtiny85: Connect the ATtiny85 to the breadboard. Connect the VCC of the ATtiny85 to the 5V output on the Arduino. Connect GND of the ATtiny85 to the GND on the Arduino. Connect Pin 9 (or any other digital pin) on the Arduino to the Reset (RST) pin on the ATtiny85. Connect Pin 10 (or any other digital pin) on the Arduino to the MOSI pin on the ATtiny85. Connect Pin 11 (or any other digital pin) on the Arduino to the MISO pin on the ATtiny85. Connect Pin 12 (or any other digital pin) on the Arduino to the SCK pin on the ATtiny85. ATtiny85 Wiring
-
Upload ArduinoISP Sketch: Open the Arduino IDE and go to File -> Examples -> ArduinoISP and upload the sketch to your Arduino board.
-
Burn Bootloader to ATtiny85: Select "ATtiny25/45/85" from the Tools -> Board menu. Select "ATtiny85" from the Tools -> Processor menu. Select "8 MHz (internal)" from the Tools -> Clock menu. Click Tools -> Burn Bootloader.
-
Upload Code to ATtiny85: Write your code in the Arduino IDE. Select "ATtiny25/45/85" from the Tools -> Board menu. Select "ATtiny85" from the Tools -> Processor menu. Select "8 MHz (internal)" from the Tools -> Clock menu. Select the appropriate programmer (Arduino as ISP) from the Tools -> Programmer menu. Upload your code using Sketch -> Upload.
-
Test Your Circuit: Disconnect the ATtiny85 from the Arduino. Connect the components as per your project requirements. Power the ATtiny85 with an appropriate power source. Test your project!
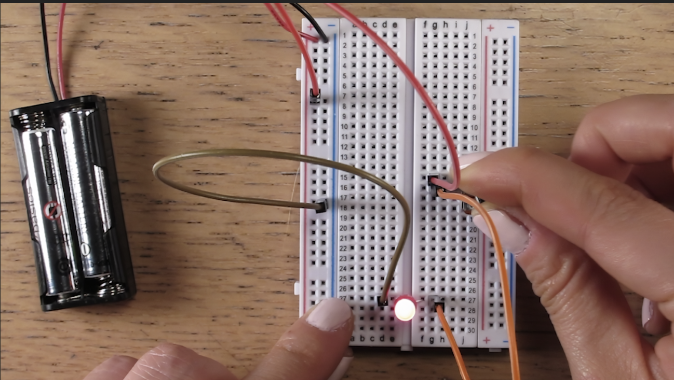
Breadboard
I never worked with a bread board before.
A breadboard is a tool for prototyping electronic circuits without soldering, featuring interconnected rows and columns of conductive clips beneath holes for component insertion. Components are placed into the holes, and their leads make temporary connections via the internal clips, allowing for quick and reversible experimentation before creating a permanent circuit.
Code for Playing Sounds via Arduino
void setup() {
  Serial.begin(9600);
  softwareSerial.begin(9600);

  if (player.begin(softwareSerial)) {
    Serial.println("DFPlayer Mini online.");

    player.volume(30);

    // Play the first song
    player.playMp3Folder(1);
  } else {
    Serial.println("Connecting to DFPlayer Mini failed!");
  }
}

void loop() {
  if (player.available()) {
    // Check if the current song has finished playing
    if (player.readType() == DFPlayerPlayFinished) {
      delay(1000);  // Add a delay to avoid reading the play state too quickly

      // Play the next song
      switch (player.read()) {
        case 1:
          player.playMp3Folder(2);
          break;
        case 2:
          player.playMp3Folder(3);
          break;
        case 3:
          player.playMp3Folder(4);
          break;
        case 4:
          // All songs have been played, restart from the first song
          player.playMp3Folder(1);
          break;
        default:
          // Handle unexpected cases
          break;
      }
    }
  }
}