Process
System Ideation
Modular components
- Generator interface - to produce vector or 3d files to be used downstream
- BioMaterial Recipes - to come to a suitable biocomposite material with required properties
- Production workflow - a biopaste printer to fabricate the designs, and other pre- and post-processes for production
- The Garment - structurally designed to fulfill the listed functions, while also fulfilling aesthetic, emotional, and behavioural requirements.
The following pages describe the path taken for all the aspects of the project, including the research, ideation and execution of each of them, as well as any files and other information. While the process of doing these was more chaotic in reality, and interwoven across time, for clarity, I am presenting them individually along the same structure as the weekly exercises. The rest of this page tells the overarching story into which these fit in.
- BioMaterial Recipes
- BioGun and BioPrinter
- Generator Interface
- Structural explorations - Auxetics
- Structural Explorations - BioComposites
- Structural Explorations - Wood with Textile Scaffolding
- Garment Design and Final Production
- Documentation, Story and Presentation Workflows
Over the course of the project, some aspects took a back seat - for e.g. the BioPrinter - and new aspects that weren't in the initial plan came up - like the structural explorations, which I had assumed would be a part of the garment design, but needed to take a life of their own.
//write the story of your process, how you did it //may need to happen after the individual process steps since story will have to knit them all together.
BioMaterial recipes and extruder
I did the first round of BioMaterial recipes trying out various combinations of cellulose and binders, but also testing for vertical height achieved and stability. Part of my initial ambition for this project was also to build a paper or biopaste 3d printer, primarily using cellulose or bagasse. #SpinoffProject!
In one of the mentoring sessions, it was pointed out that I needn't worry about height, since while a full-fledged biopaste printer would need to build height, my application required nominal thickness deposited over a surface. The relaxation of that requirement, obvious in hindsight, meant that I "merely" needed a plotter with an extrusion head instead of a 3-axis printer.
To work on the extrudability of mixtures and nozzle dynamics, I tried out a couple of bio-gun builds, as well as designing and building one of my own. I also attempted to build a biopaste printer anyway, based on a clay printer from Fablab Barcelona. Eventually, I stalled this whole line of action since there were enough separate requirements for this project that needed to be worked out, beyond the scope of the current project.
Read about the BioMaterial work here and the BioGun builds here
Generator and Interface
The Generator interface was designed, executed and iterated over a 3-4 day trip we took to Kochi, in the South of India, to visit the Kochi Biennale. Since I could not work on physical materials, I utilised the cafe-evenings to work on the interface.
The initial sketch for the belt and cummerbund designs was done by handcoding in p5.js. Later I passed my core code to ChatGPT to generate the UI elements - sliders and radio buttons and the rest, as well as finetuning their layouts.
This is a strategy I have used previously for some other tool pages, since I thoroughly enjoy working out the logic and coding it, but find making UI elements tiresome. I'm also not a fan of laying out the HTML and CSS of pages, nor do I have the skill to be fast or efficient at it.
Read about the Generator Interface here
Auxetic Structures
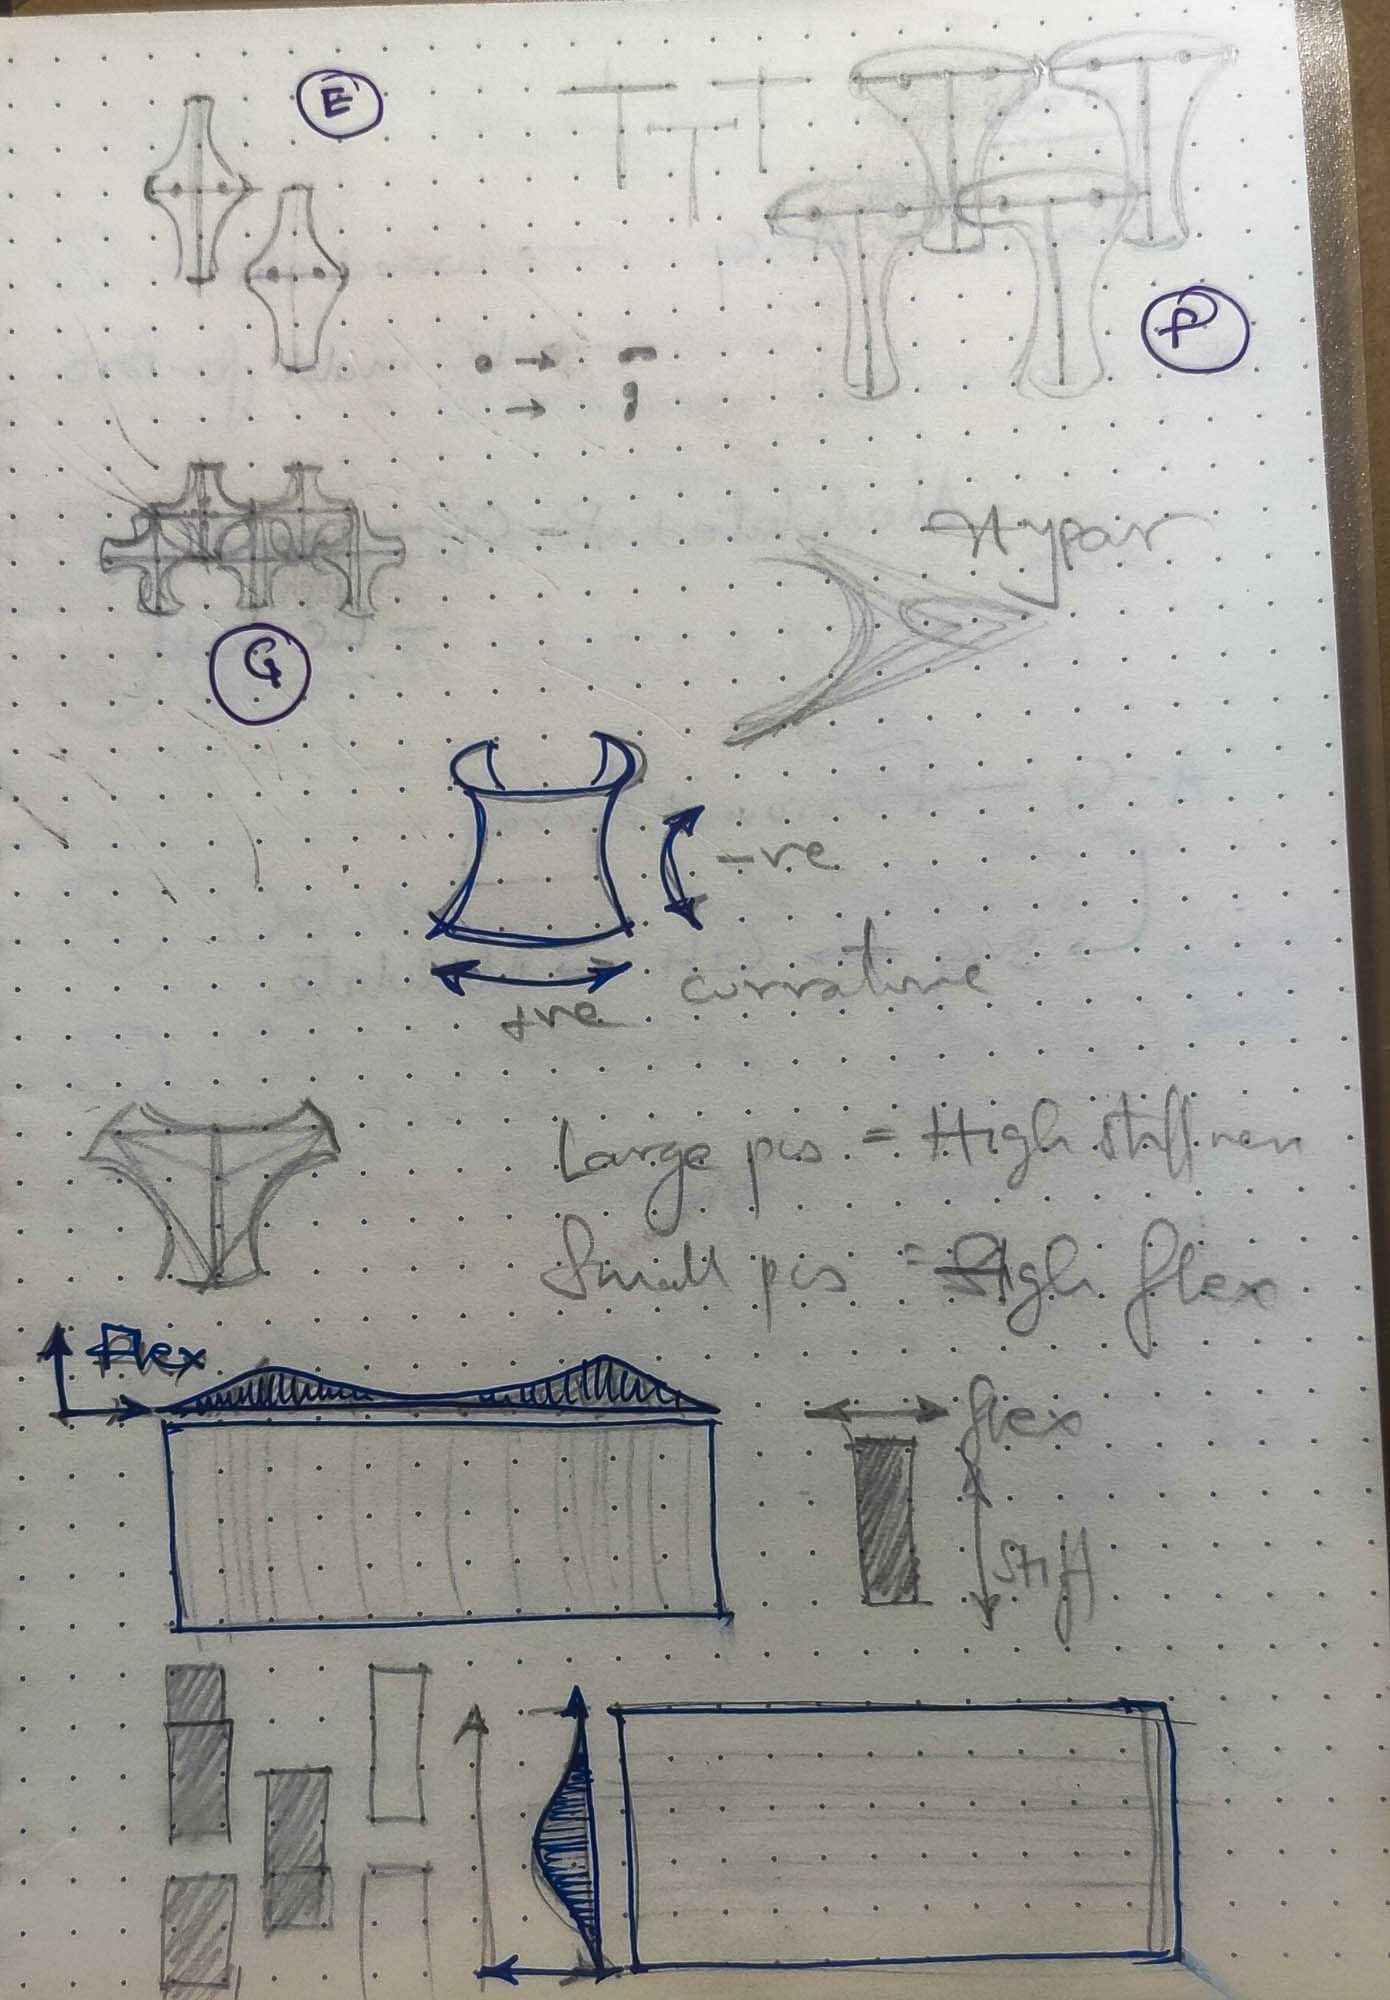
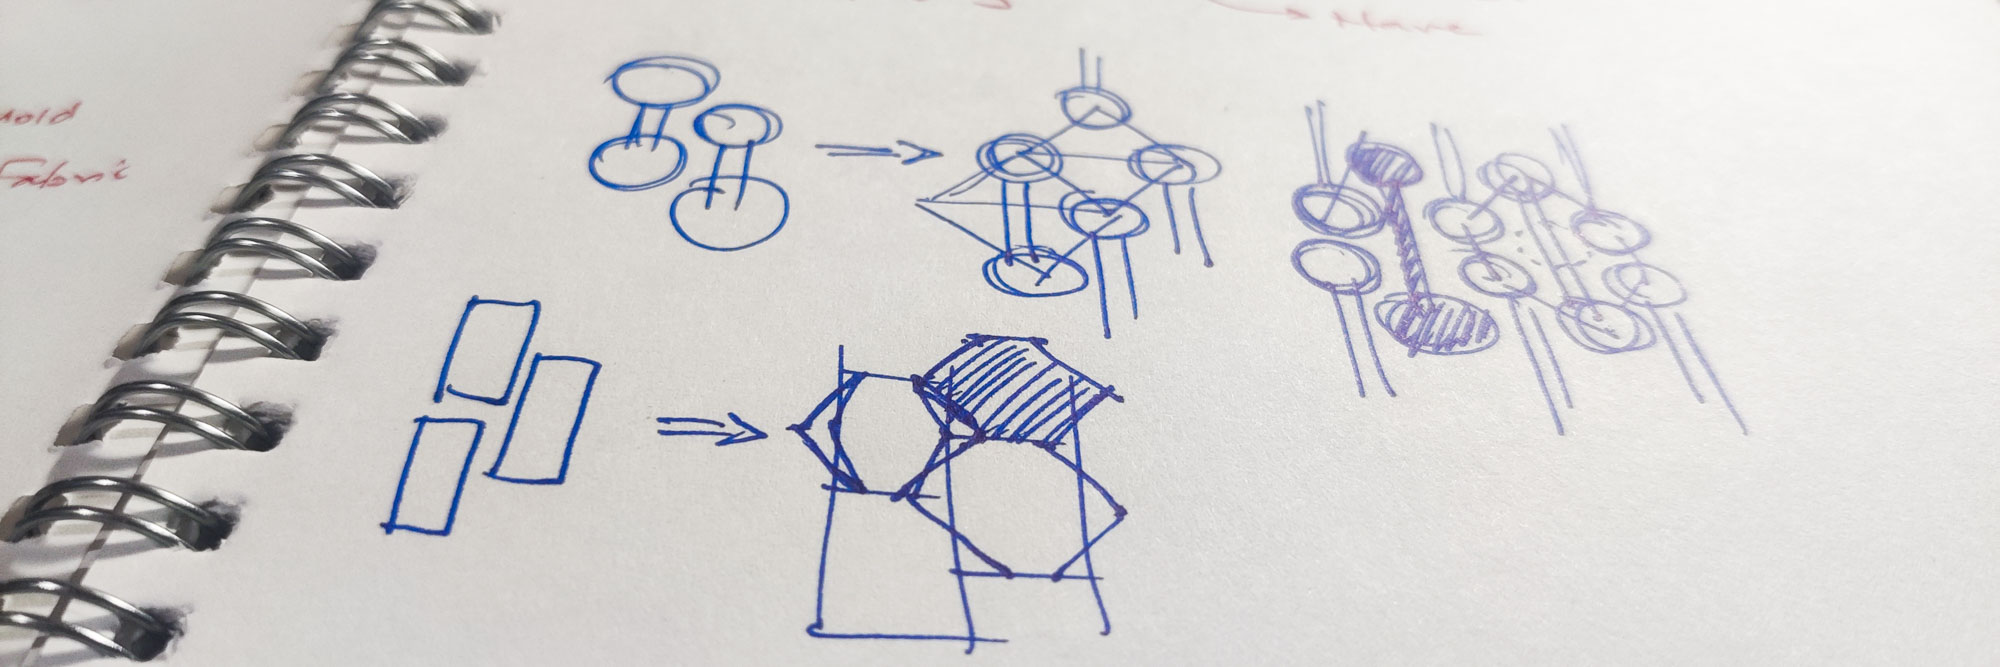
I was also interested in using Auxetic structures within the project, since I knew I'd require some expansion-contraction structures to allow bending and flexibility. The biomimetic inspiration of Pangolin and Armadillo shells that incorporated both hard materials but also bending would require similar structures to be translated.
I tested various auxetic patterns and structures. I think I got enough knowledge and experience to help me later when doing the structural designs. But in itself, I realised, cut patterns in a base material would not be the first line of designing my outcome. Introducing breaks in a material, while allowing varied kinds of motions and flexibility, also inherently weakens it, and the strength required by the belt could not be compromised. However, it did tell me that having weaker/stretchier areas vs rigid, non-deformable areas was a potentially good direction.
Read about the Auxetics study here
Recentering
At this point, it had started to become late into the project timeline, and I took a step back to take a hard look at everything. I realised that I had extended myself and the project in too many directions, and not all of them were going to be achieved, nor were they necessary, after a point. The uncertainities of the extruder machine were weighing me down and blocking me from the parts I was looking forward to work on as well.
I talked to my mentor, Anastasia, to drop doing the belt and focus on the machine, since most of the work I had done until that point was with the biomaterial recipes and the extruder. However, she stongly advised against it, since the Belt was the intended outcome of the project and hence anchored it. Without that, I would have no goal to test decisions against, and would continue to go in circles (instead of spirals!)
I took her advice. I decided to focus on designing the belt as a garment with all it's requirements. A few days later I dropped doing the machine entirely, since there were to many uncertainties and many things to do before it could take off. I also froze the interface where it was, since it offered a fair proof of concept and further improvements would need me to design the belt structure anyway.
Redesign
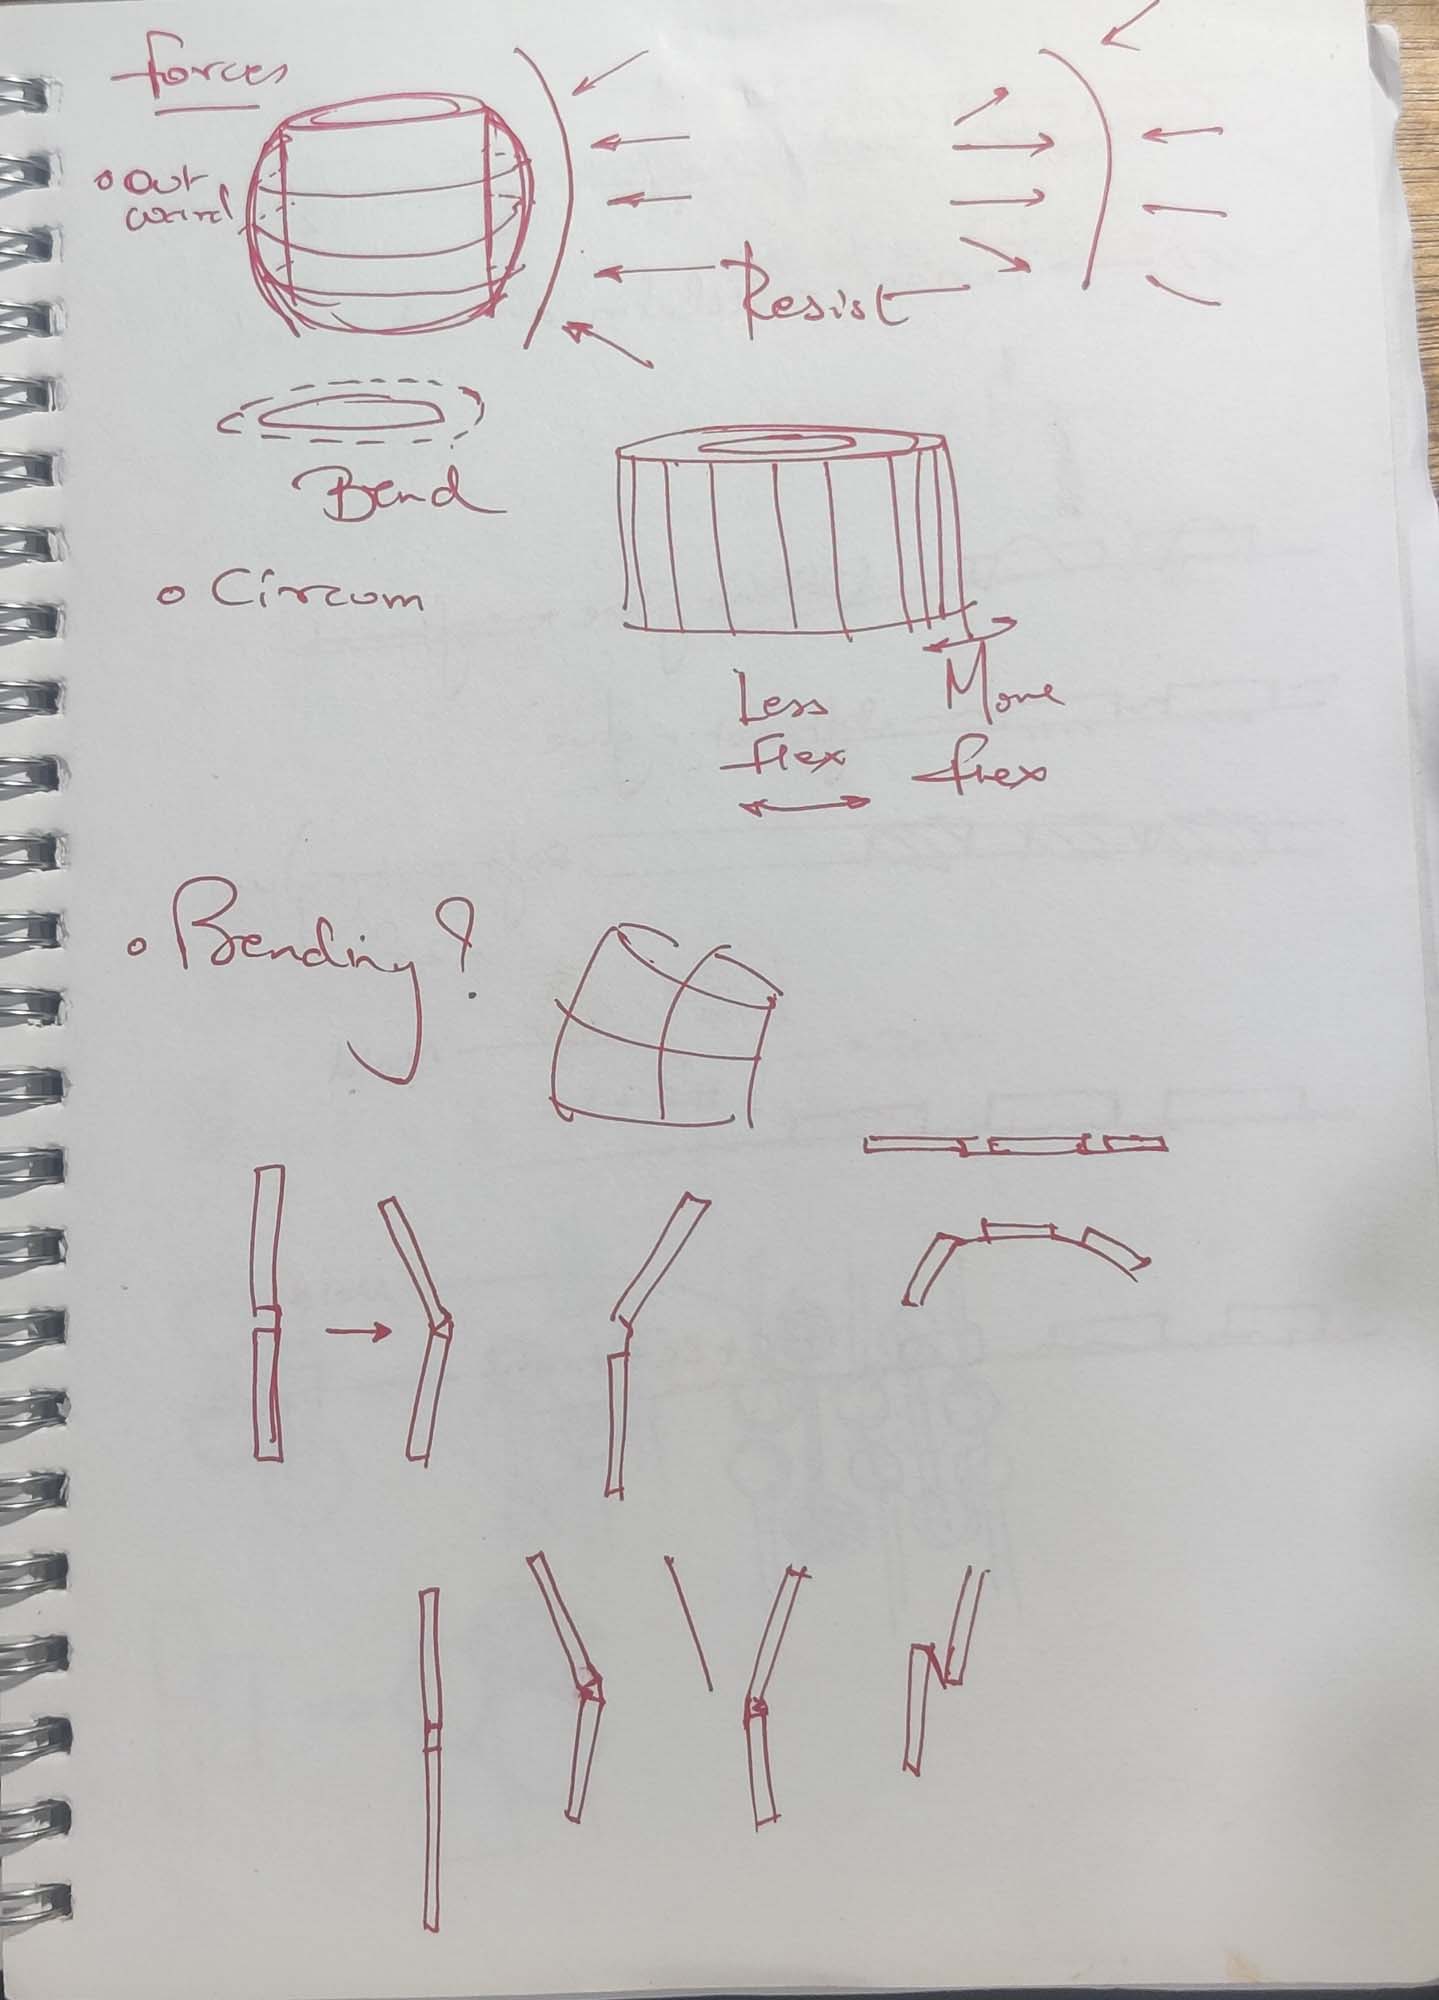
Looking to redesign the belt, the most important thing I needed was the mix of rigidity and flexibility that allowed bending forward and backward while being supportive around the circumference.
I worked out a few details through my sketches, and came up with a few structures to try out. I also worked out the essential dimensions of a full-size cummerbund as a base for trying out these structures.
More on the geometric and structural details below and following pages.
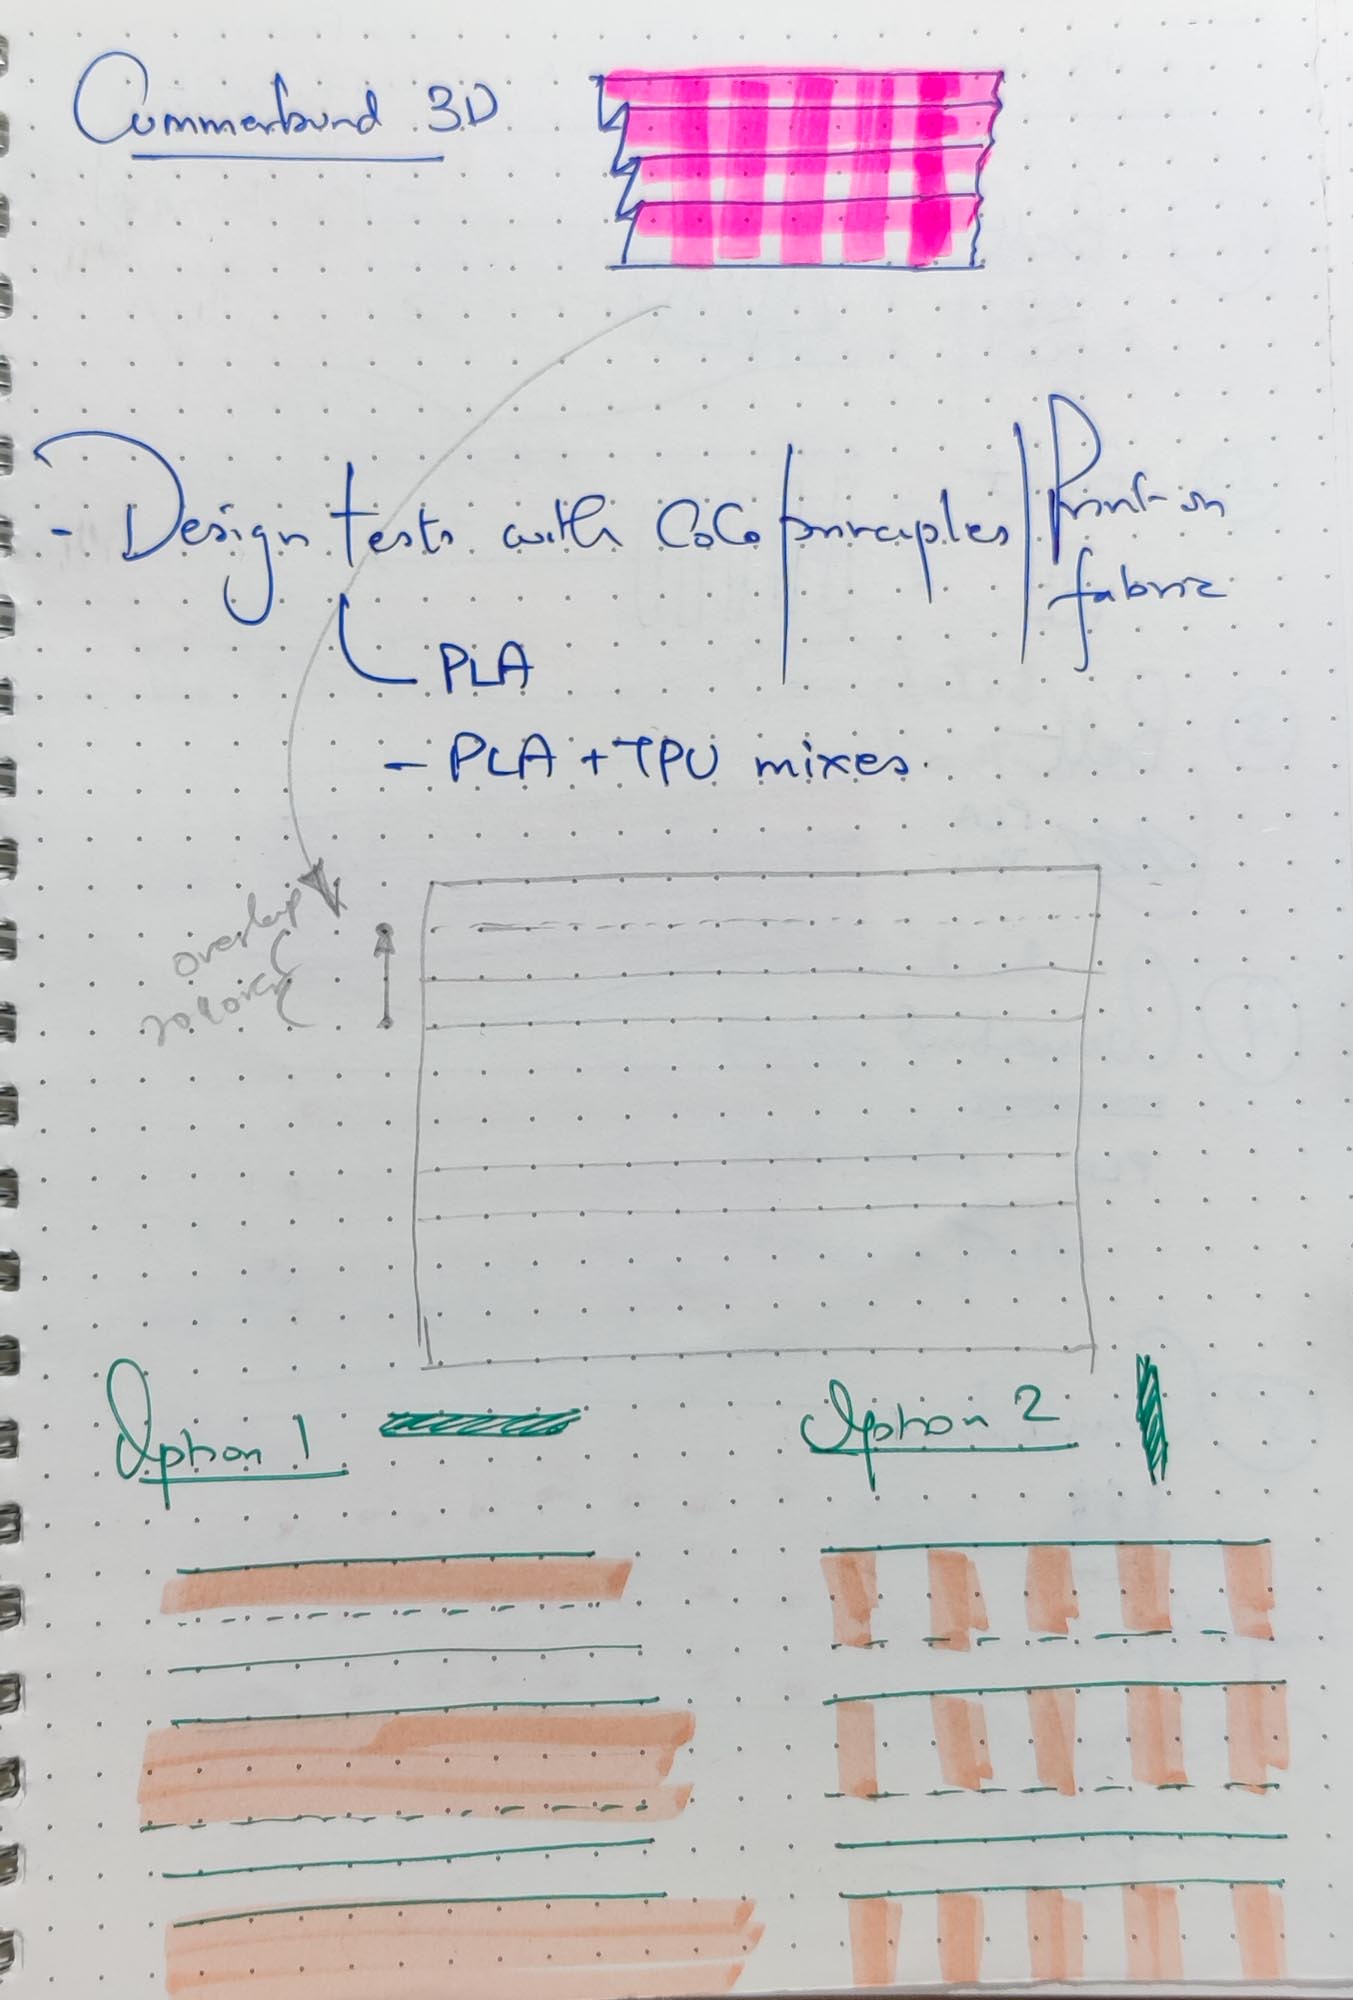
Cummerbund
I had initially envisioned the garment as a corset-type enclosing support. However, over time, it evolved into a belt and a cummerbund. The corset would be structurally far more complicated than necessary, and for the same or less benefits.
I simplified it to a belt but also realised that it could very well be a cummerbund. I took inspiration from the traditional formal cummerbunds of the west, as well as the original sources, the kamar-bandhs of south Asia, especially the north and northwestern regions where it originates from.
Another interesting inspiration was the support belts worn by weightlifters and wrestlers, which are narrower but provide similar functions.
The cummerbund traditionally has pleats that act like pockets. That was a feature I put in the interface as well.
By the time the final prototypes were being made, I had abandoned the pleats to go with a far simpler structure of fabric, since there was a lot of complexity coming in from the composite structures that would not allow pleats very easily.
And so, between these sources and my process, the shape of the garment evolved.
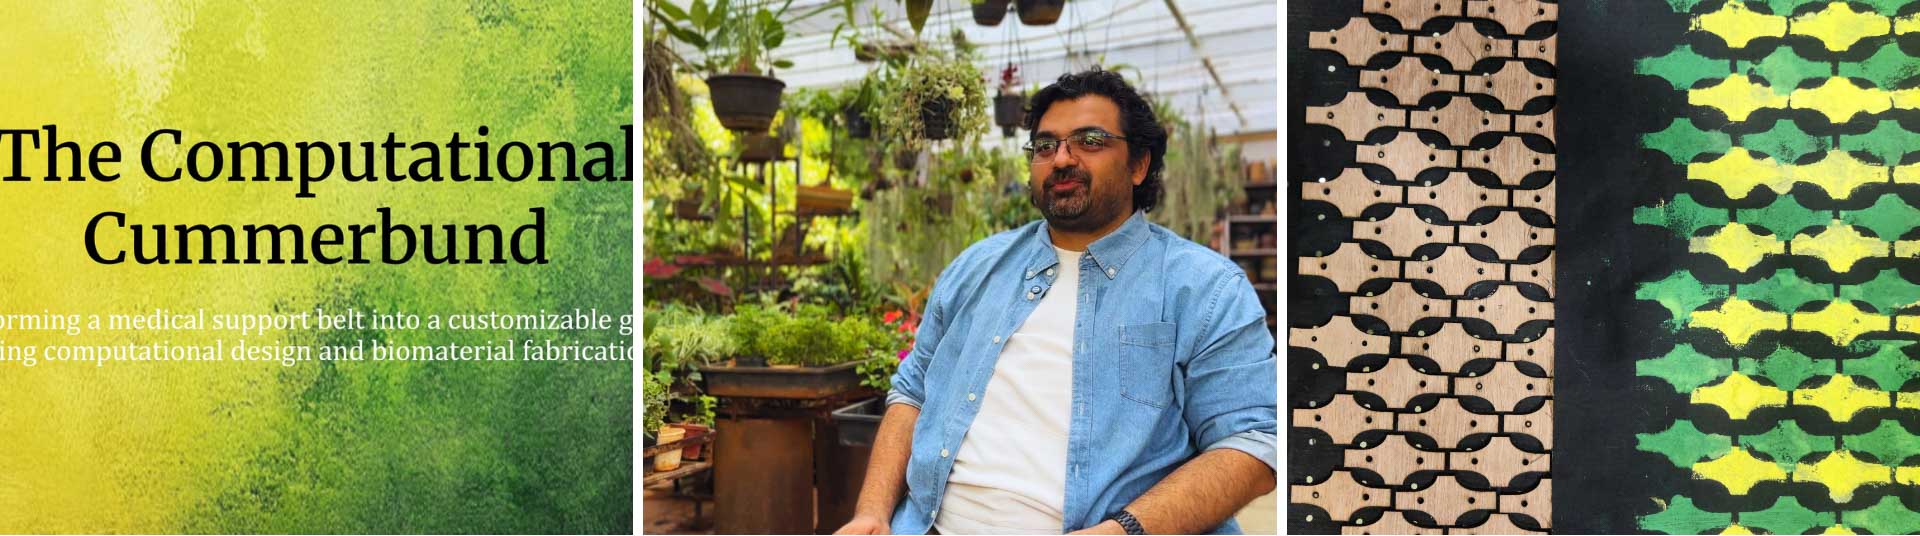
SolarPunk
I had initially started with SteamPunk as a theme/style to work the project in.
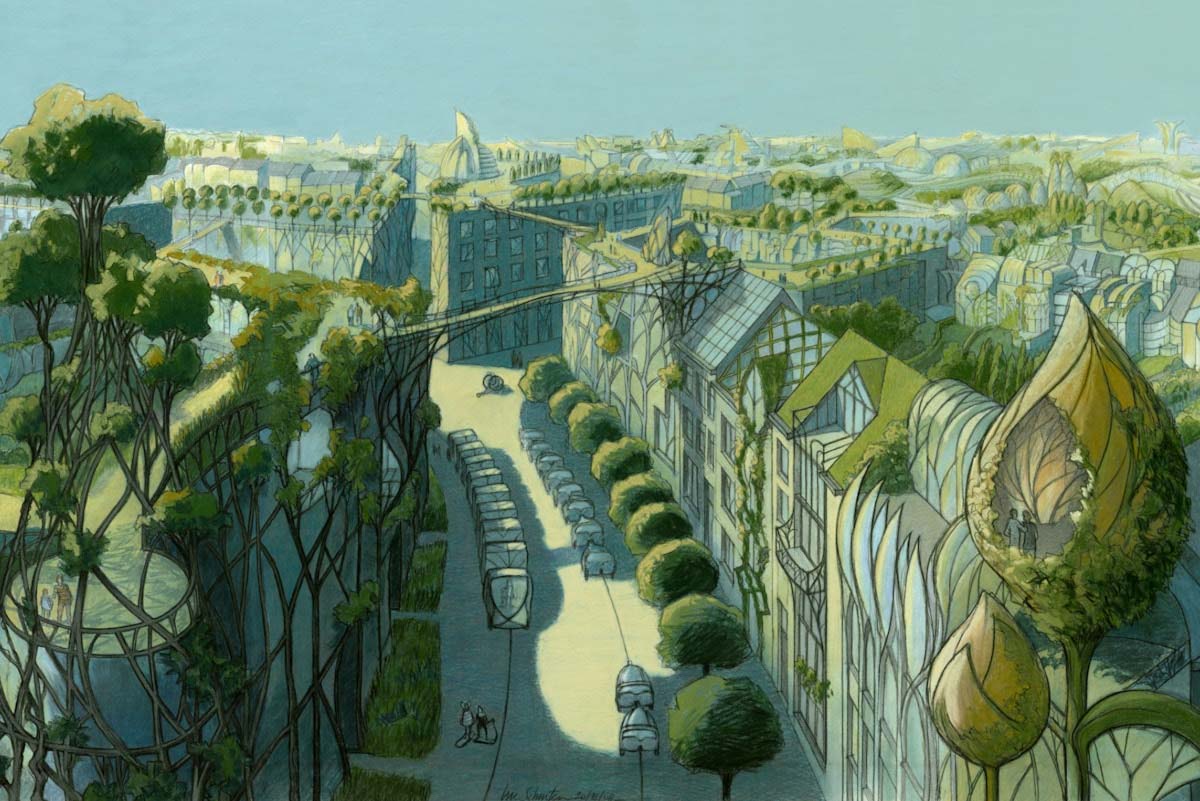
With feedback from the mentors, I switched over to SolarPunk, a movement and a style that looks towards a more hopeful and happier future, instead of dark, dystopian ones.
To simply quote Wikipedia,
Solarpunk is a literary, artistic, and social movement, closely related to the hopepunk movement, that envisions and works toward actualizing a sustainable future interconnected with nature and community...
...Solarpunk works to address how the future might look if humanity succeeded in solving major contemporary challenges with an emphasis on sustainability, human impact on the environment, and addressing climate change and pollution. Especially as a subgenre, it is aligned with cyberpunk derivatives, and may borrow elements from utopian and fantasy genres.
This was suggested because my project was already using natural materials, crafting, and touched upon inclusivity, help and support, both literal and metaphorical.
Based on the Solarpunk movement, and it's moods, and associated style, I worked out a colour scheme and moodboard. This mood and colour scheme has run through my prototypes, my presentation, as well as my final video.
The first Frankenstein Trials
I lasercut the basic plans for a cummerbund (pleated) and a belt (non-pleated) and assembled them with clips and tape, no stitching yet. This was the first size and shape trial.
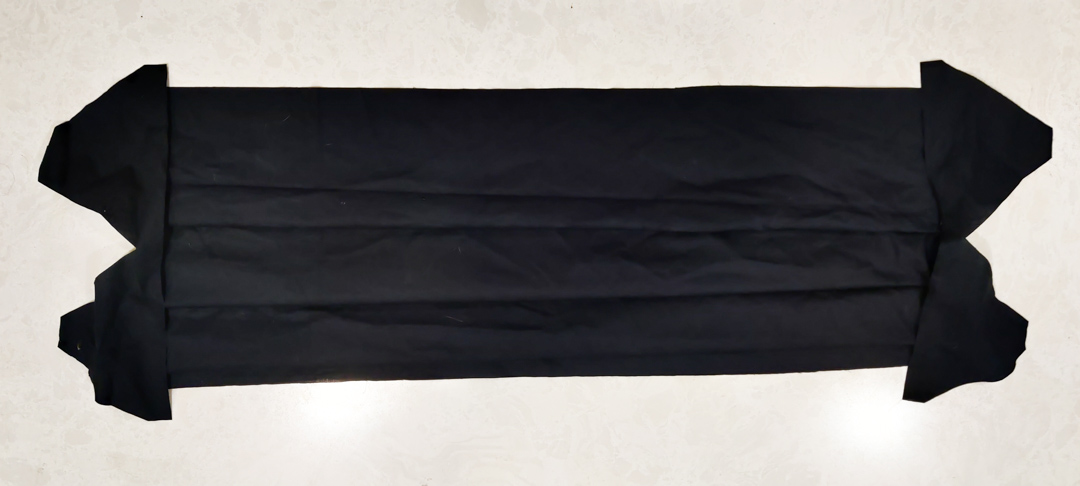
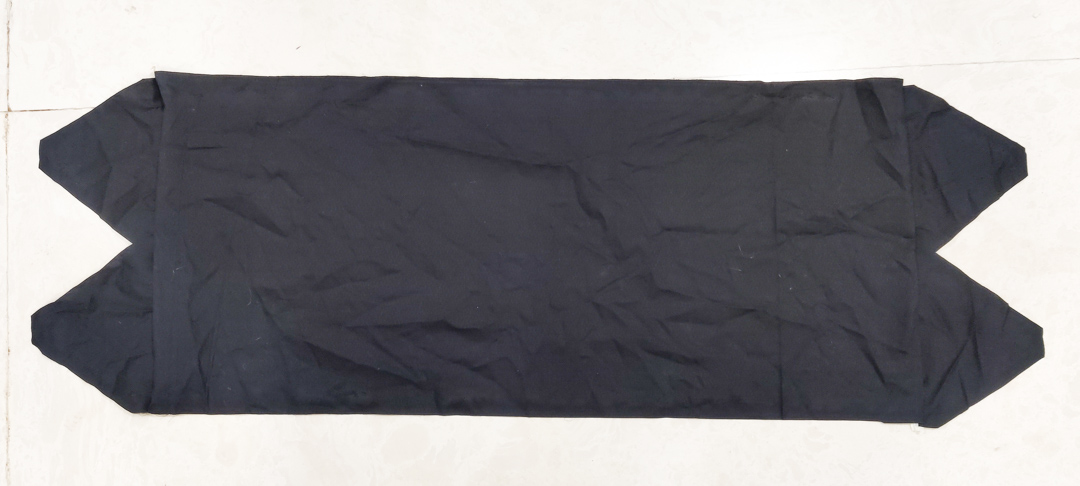
They consist of 3 pieces - 1 main piece and 2 double triangles where the fastener attachments will go.
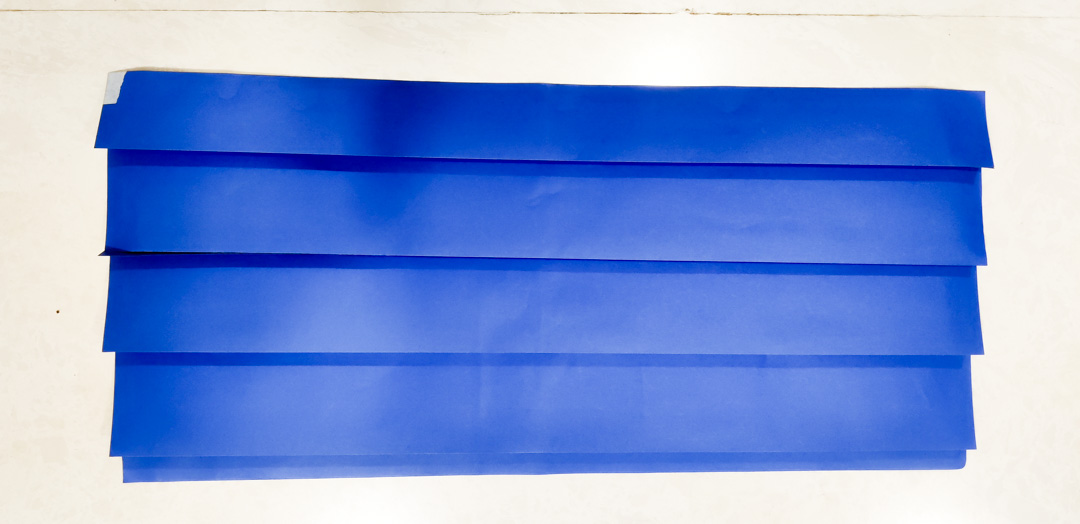
I also used a fabric origami technique to get the pleats on the fabric :
- make the required pleats or folds on 2 sheets of paper
- lay the fabric between the paper sheets
- steam iron the whole assembly to transfer the creases onto the fabric
- once cool, separate the fabric and re-fold
Structural Testing
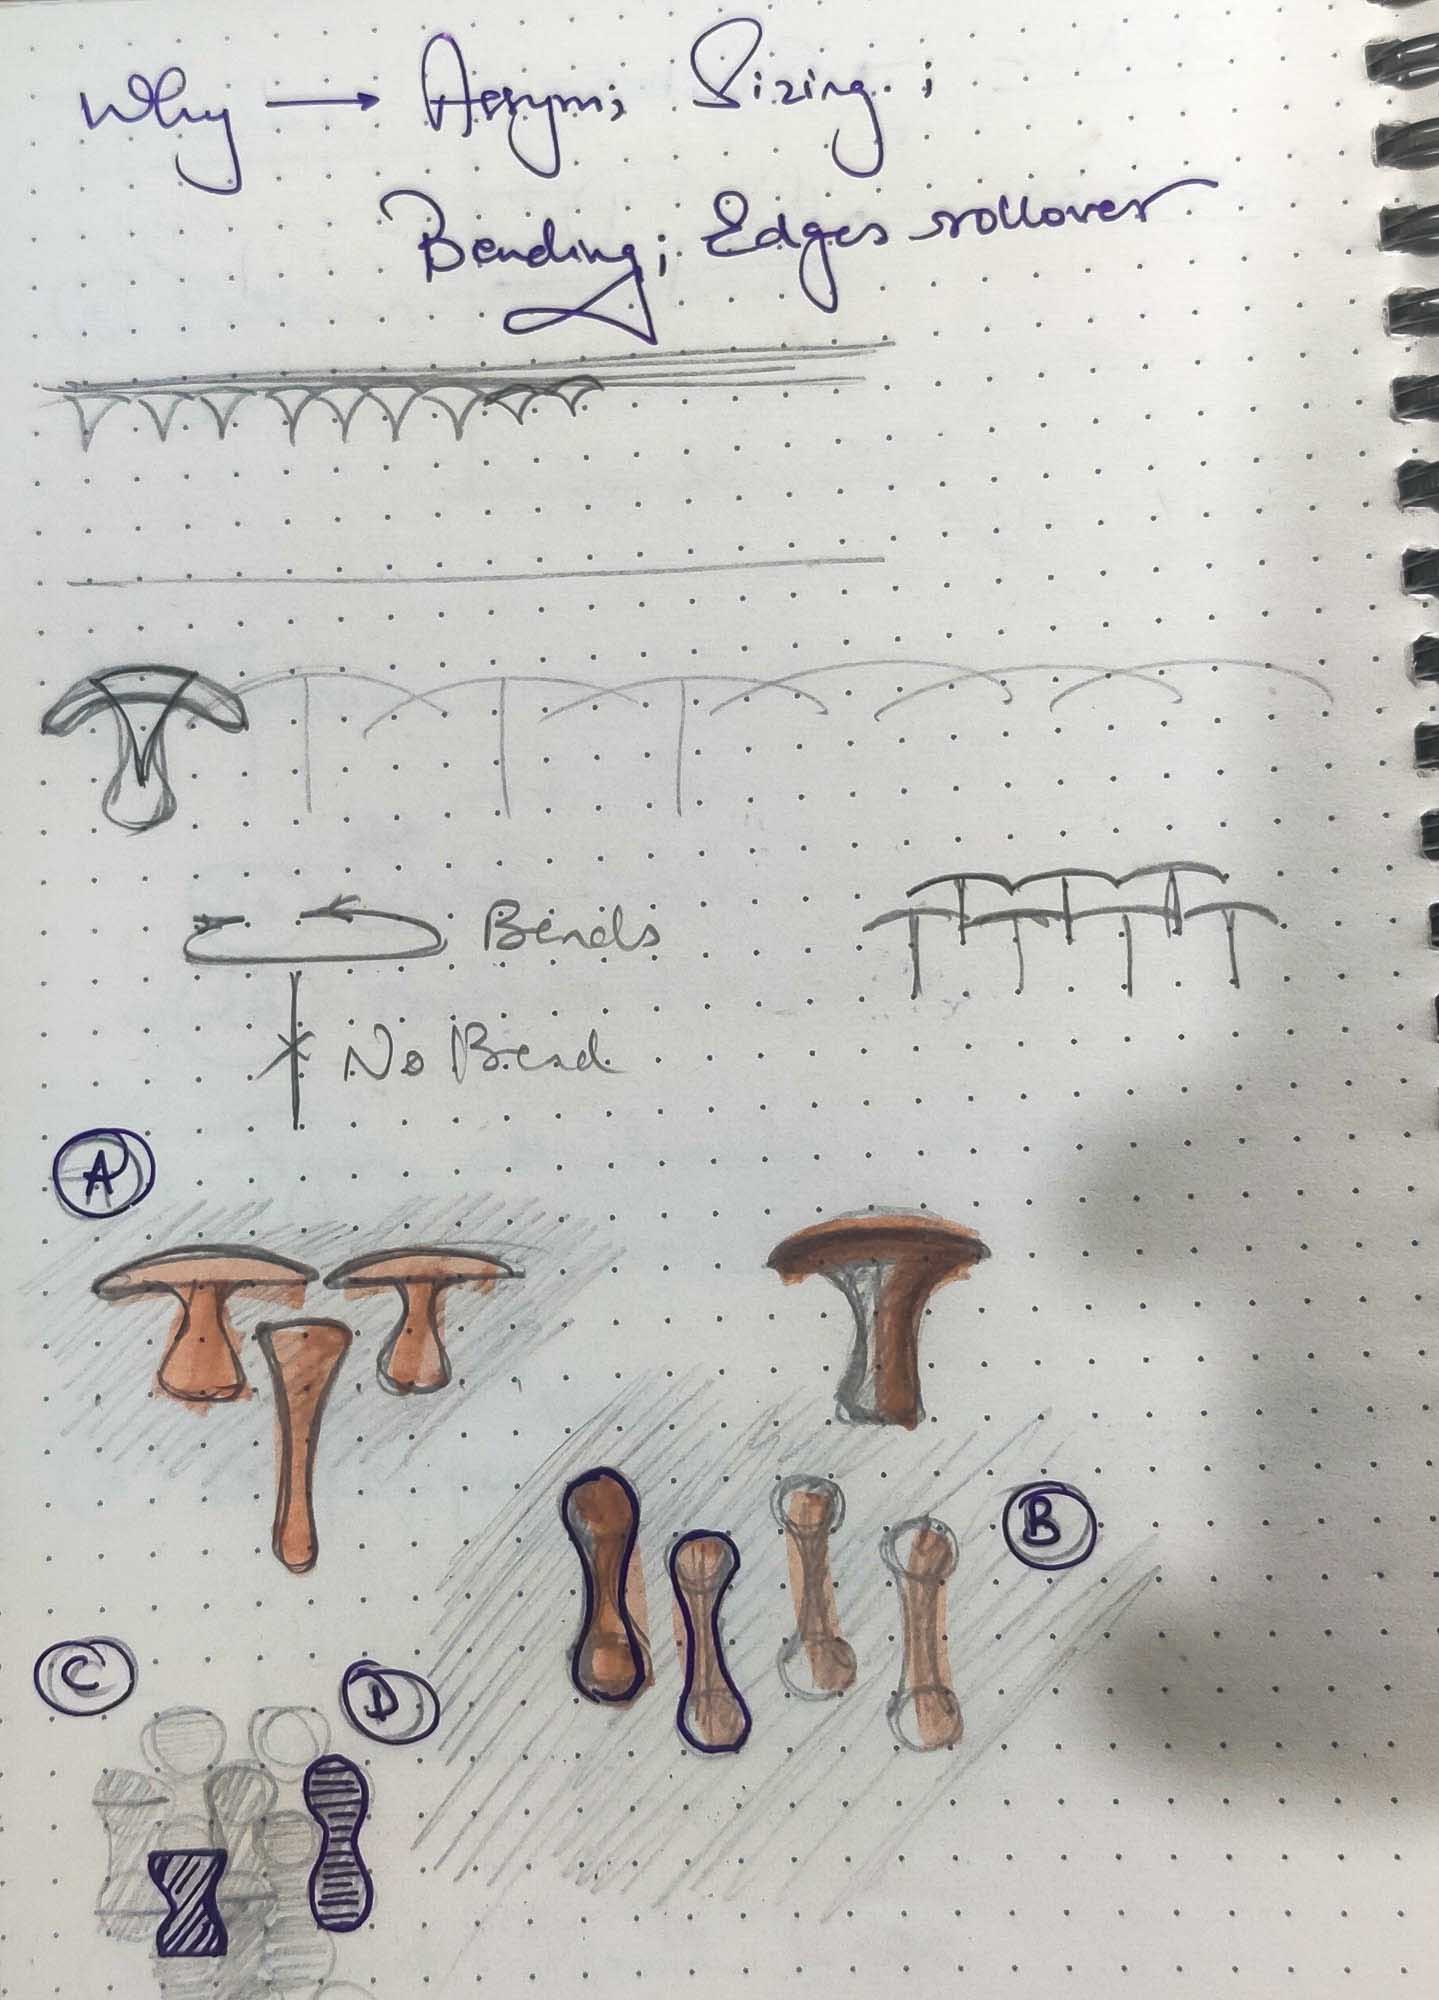
Since the primary requirement of the belt was a controlled bending - preventing bending and curling over in some directions, and allowing flexibility in others - I decided to test a series of shapes in a rigid-pliable combination.
I initially did this by 3d printing on fabric. This was closest to what I had initially planned with the extruder - to print a mix of rigid-setting and softer, more bendable materials, based on geometric and mechanical considerations. Or alternately to print the rigid-setting material on fabric directly. These ideas had been reinforced by the auxetic studies as well.
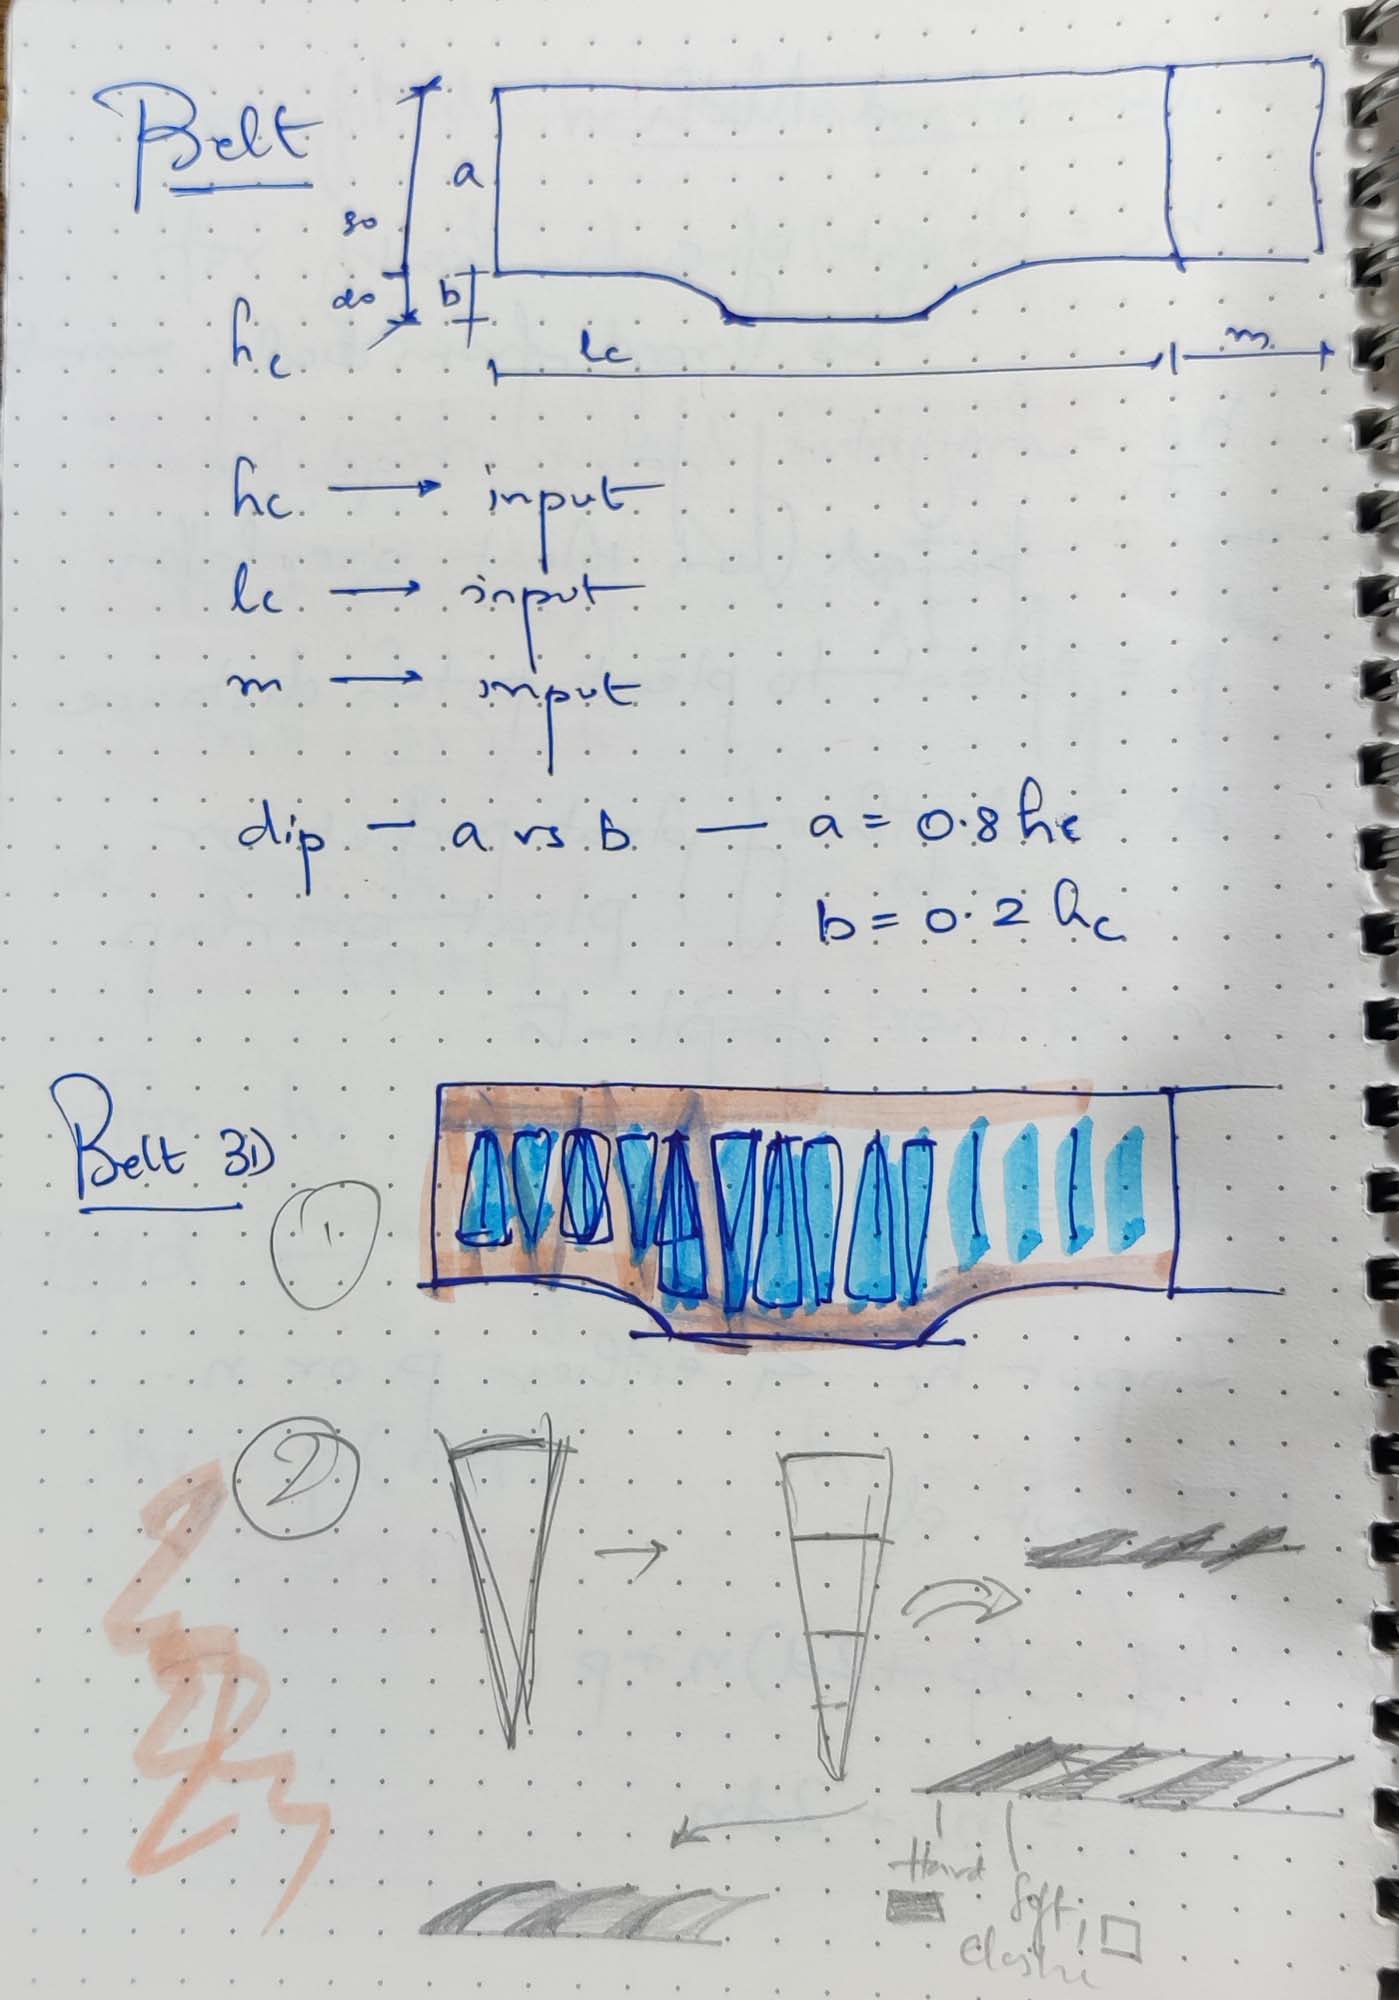
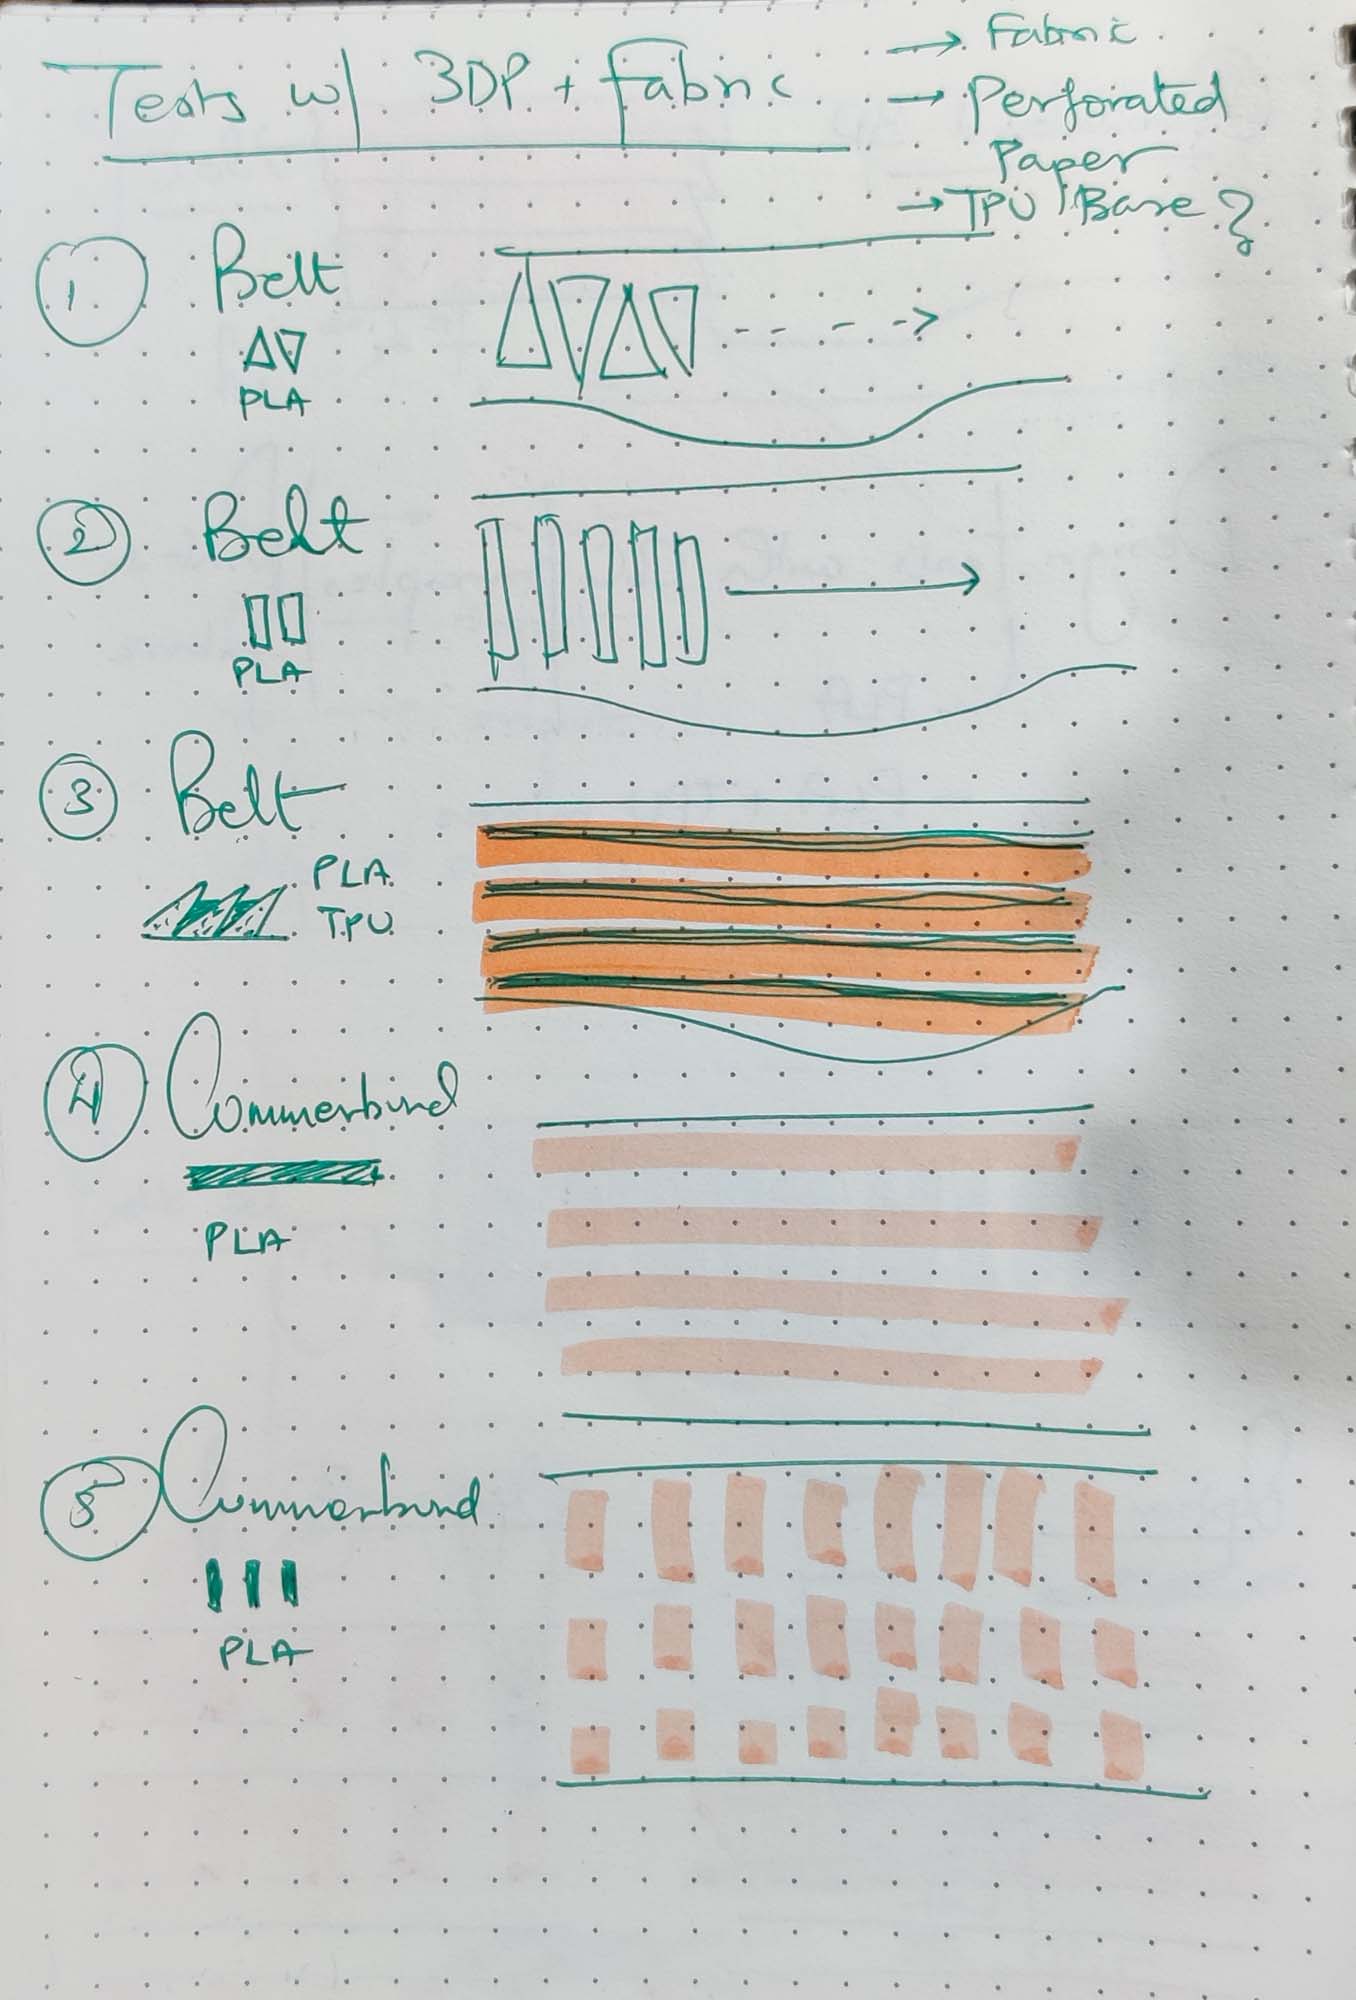
3D printing on fabric offered similar material properties that could then be tested. I printed on stretchable fabric as well as normal non-stretch fabric.
This offered me enough insight to then design further with better materials, since PLA or other 3D printed plastics were never an intended material.
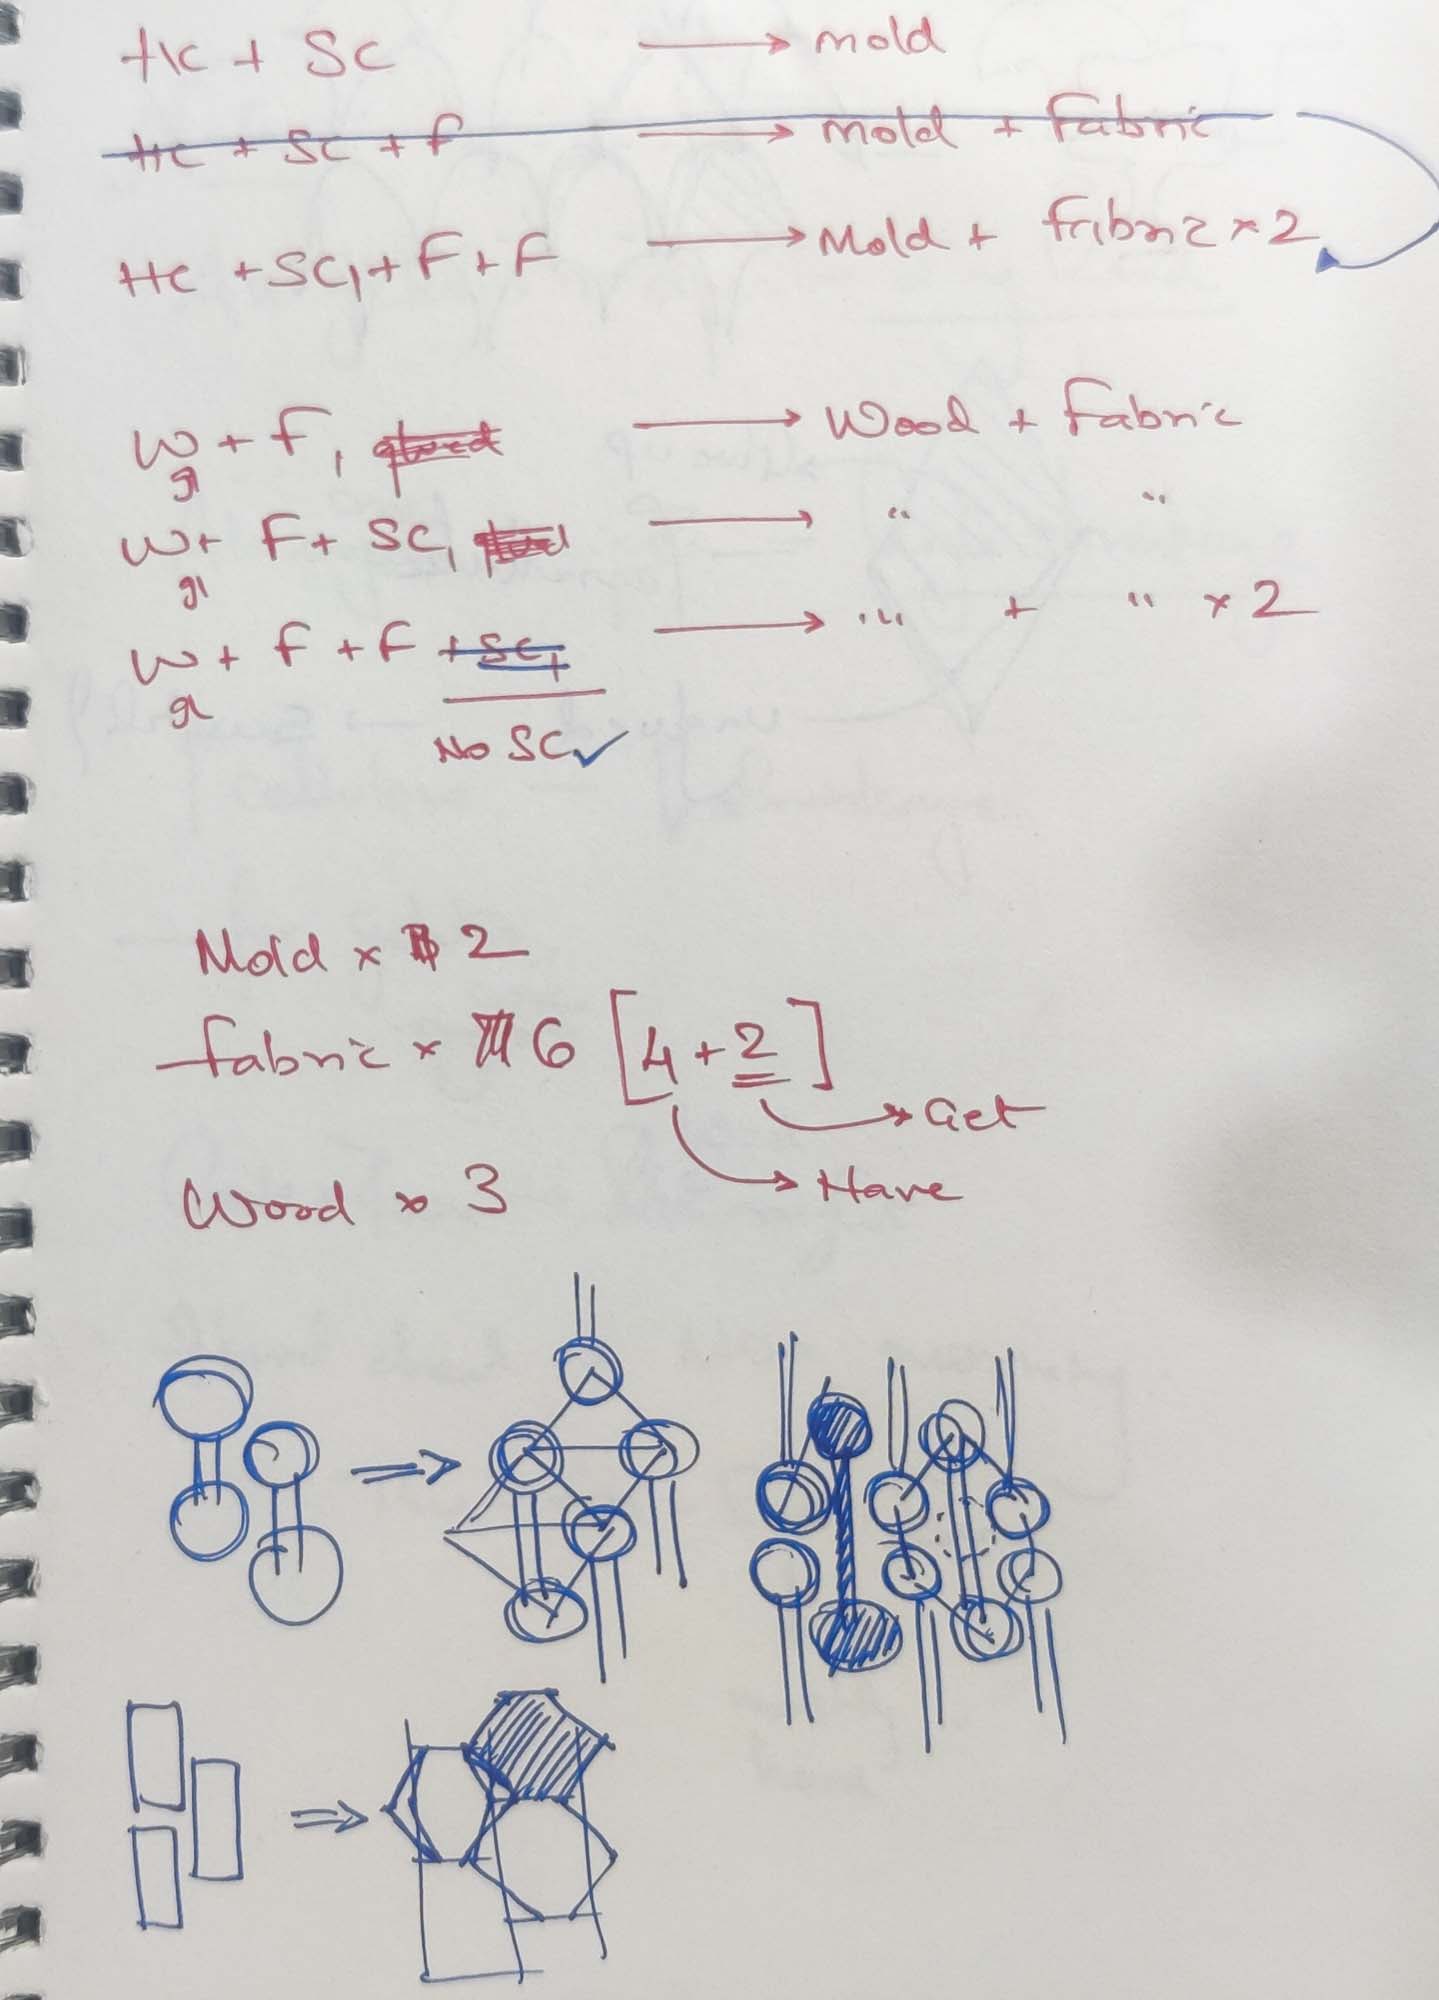
Since I had abandoned the bio-paste printer, I turned to casting the pieces in lasercut molds. This was from a suggestion left in the feedback sheet from an older presentation session, but it came back to me when I needed a different production process.
This time I limited myself to Gelatin as binder and Bagasse cellulose as filler, since that was the most promising combination from the previous round of material testing. However, I tested various ratios of Gelatin to Filler to Glycerin to understand how the properties changed based on the proportions. This was done for both, a hard and rigid material as well as a softer, more flexible material.
I created hard pieces that were then embedded in a soft high-glycerin matrix as a second pour, as well as incorporating fabric as a base material combined with the soft biocomposite.
While the results were interesting and I eventually made one full-size belt using the gelatin-cellulose biocomposite, I wasn't too sure of the material. Hence, I switched to other techniques for achieving the structural properties.
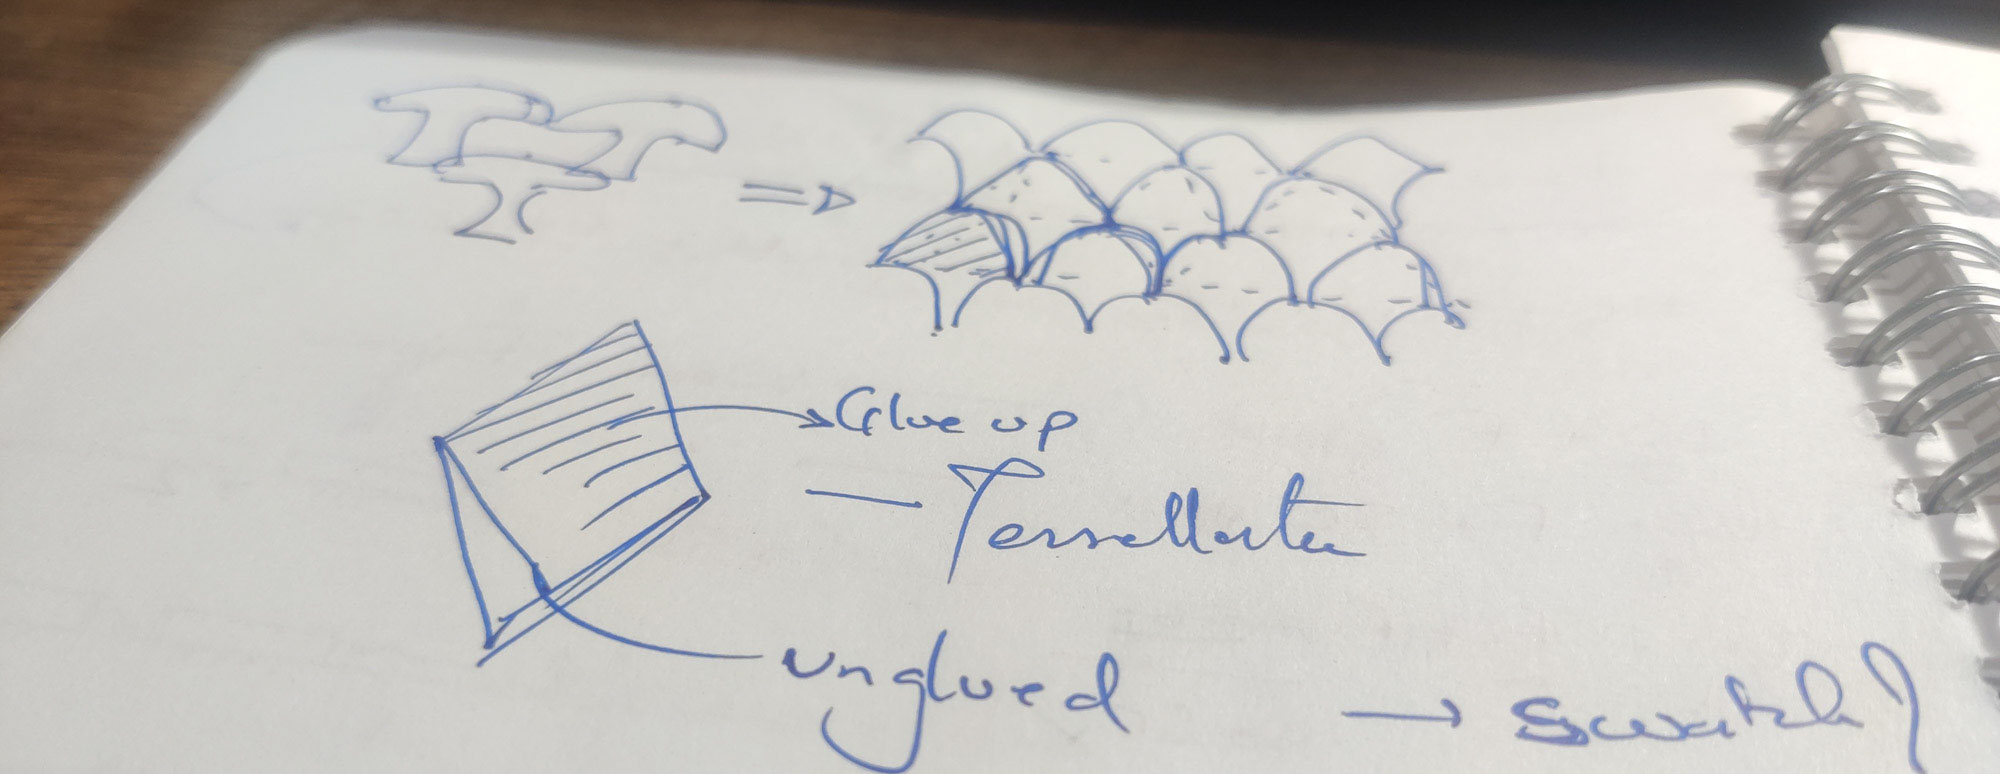
I then tried using thin plywood on fabric to achieve the hard-soft combination. This was done by either stitching the pieces onto the fabric, gluing them onto the fabric, or both. The stitching allowed certain kinds of slidable movements since the entire piece wasn't locked to the fabric. But eventually I settled on gluing them since the relative movement that stitching allowed was causing more problems than benefits. This version is what I finally chose to execute the belt with.
Later, I also tried combining this with the biocomposite by casting the flexible material onto the fabric that held the wood pieces, but did not proceed with that.
In summary, I tried the following combinations - biocomposite hard pieces on flexible base - biocomposite hard pieces on fabric - thin ply pieces stitched on fabric - thin ply pieces glued on fabric - thin ply pieces on fabric encased in biopolymer/biocomposite
Read about the BioComposite structures here and the Wood Fabric composites here
The final pieces
After the structural tests (and somewhat alongside, at times) with the above combinations, I created 4 pieces, 2 (or 3) of which I would consider a final piece.
The first to be tried and last to be finished, and also abandoned, was the biocomposite hard + soft combination. I tried one with clear bioresin and no filler, but that one failed completely. The next one I tried with bagasse cellulose filler, which turned out better. But on the whole, I did not pursue this since I was doubtful of the outcomes.
The plywood and fabric combinations fared much better.
I ended up making 3. The first one was on the older fabric measurements from the frankenstein trials above. It felt too large once done. So the next two patterns I worked on a smaller height of fabric.
All three were lasercut on ply, then taped up before even picking the ply from the bed to maintain spacing and transferability. I had realised the fabric would need to be glued during the trial swatches, so for the first one, I manually applied glue to the pieces while leaving the stock around clear. For the later versions, I 3d printed a stamp so I could dip into a glue tray and "block print" glue onto the pieces, and finally I just lasercut stencil masks to apply glue with a sponge.
Shoutout to the artisans of Kutch for showing me these techniques during my visits to their block printing and batik workshops.
After gluing the fabric, letting it dry, and the shake-testing it for loose pieces that fell out and needed regluing, I let the pieces rest.
Finishing touches
Belt and clasps
Given the overlapping structure of the fabric, I had decided to pass straps from within and use snap-fit buckles attached at the ends to wear the belt. Two belts were used, one at the upper margin, one at the lower.
In time, this can be a more elegant solution, anf the nylon webbing straps replaced with canvas or fabrics ones. But for now, it was effective.
Stencilled patterns
This was a last minute but very relevant addition.
After finishing the first prototype, I realised that as lovely as the wood pattern looks, it is hidden by the upper layer of fabric - mostly for it's own protection from being snagged and ripped off, as well as aesthetic reasons when the wood may not be the best looking visual.
So I decided to replicate the same pattern in paint on the upper surface of the fabric. As such, any pattern would do, and a patterned and coloured fabric would not need this intervention. However, to do a callback to the pattern used underneath, I felt this was the right choice.
Here, instead of creating stamps or blocks, I lasercut some large stencils out of polypropylene sheets. The sheets covers a larger area so the stencilling was faster. However, I was also using 2 colours, so I had to wait in stages for the paint to dry before continuing.
Closure
Once the assembly, belts, stencilling, etc were done, I wore the belt.
In the fast fading evening light, we completed the photoshoot.
And but for the mountain of documentation yet to be completed, I finally felt confident of the upcoming presentation, and that the project was done.
Mentoring notes
All mentoring notes on the Notes and Feedback Log page here
- Mentoring Sessions
- Midterm feedback
- Storytelling Feedback
- Final presentation feedback
Fabrication files
The Fabrication files where needed are on the respective Process pages.