12. Skin Electronics
References and Inspiration
The Interactive Organisms Lab and Katie Vega's work
- pHigment | Interactive Organisms Lab
- Nail-pHolish-Dental | Interactive Organisms Lab
- BioCosMe: Lip-Based Cosmetics with Colorimetric Biosensors for Salivary Analysis
- Beauty Technology NFC Twinkle Nails | Katia Vega
Other interactive projects and Fabri Alumni work
- NFC Piano Leads to Innovation with Gaming Companies | RFID Journal
- Jessica Stanley, Fabricademy 2019
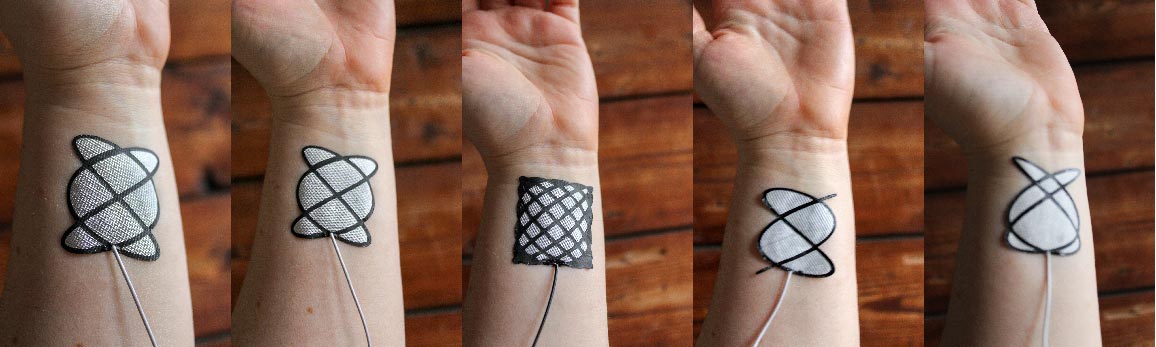 Jessica Stanley
Research and Tutorials
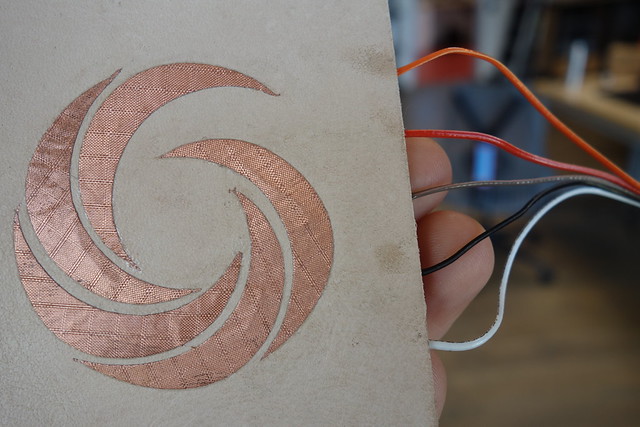
Capacitive Wheel Fabric Sensor | Kobakant
- Sensitive Matrix Tutorial | Fabricademy 2025
- Capacitive Wheel Fabric Sensor | Instructables
- Capacitive Wheel Fabric Sensor | Kobakant
- NFC-Powered Flashing Fingernail Sticker | YouTube
NFC-Powered Flashing Fingernail Sticker
Ideation
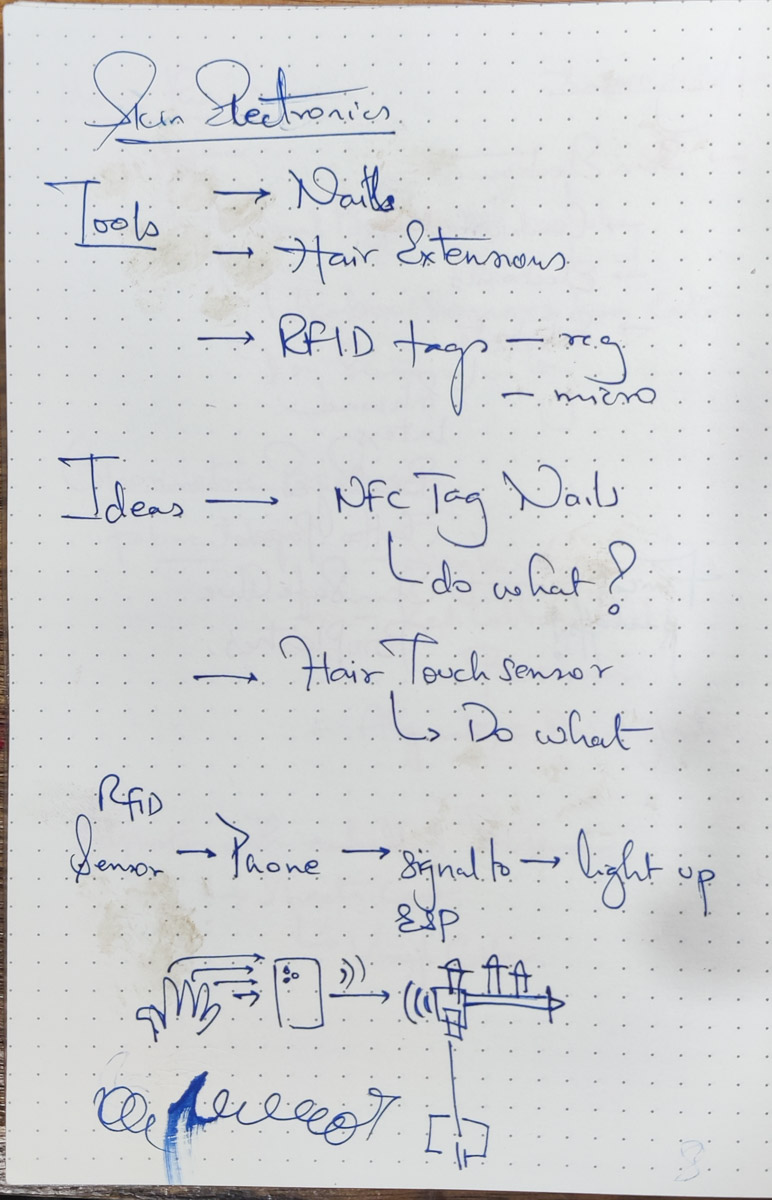
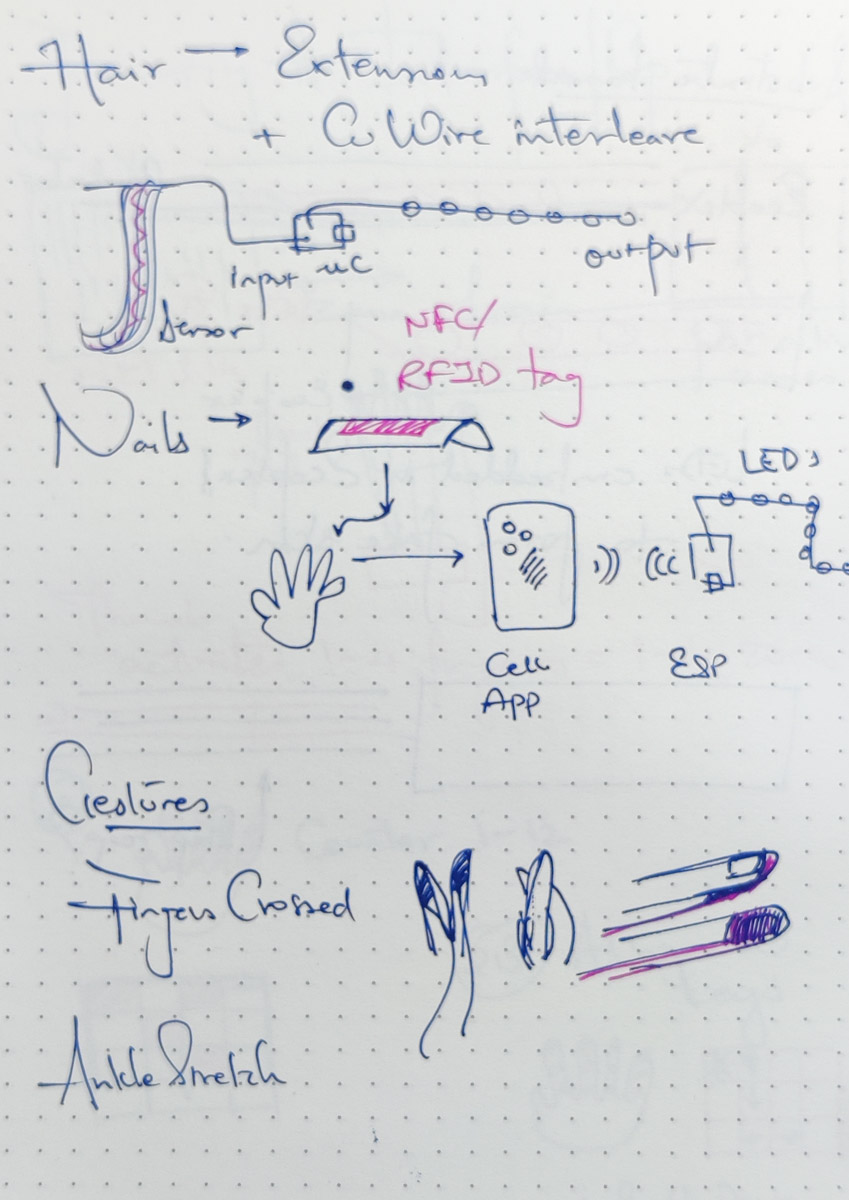
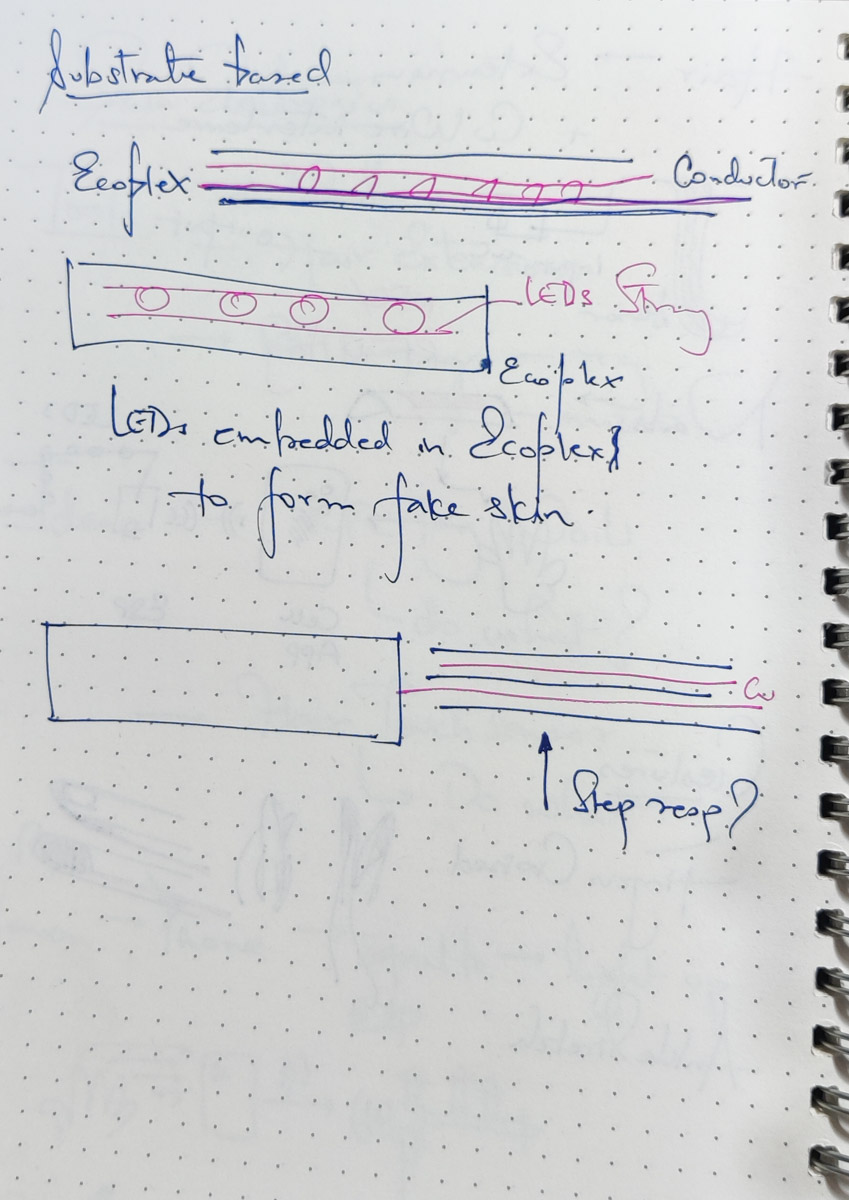
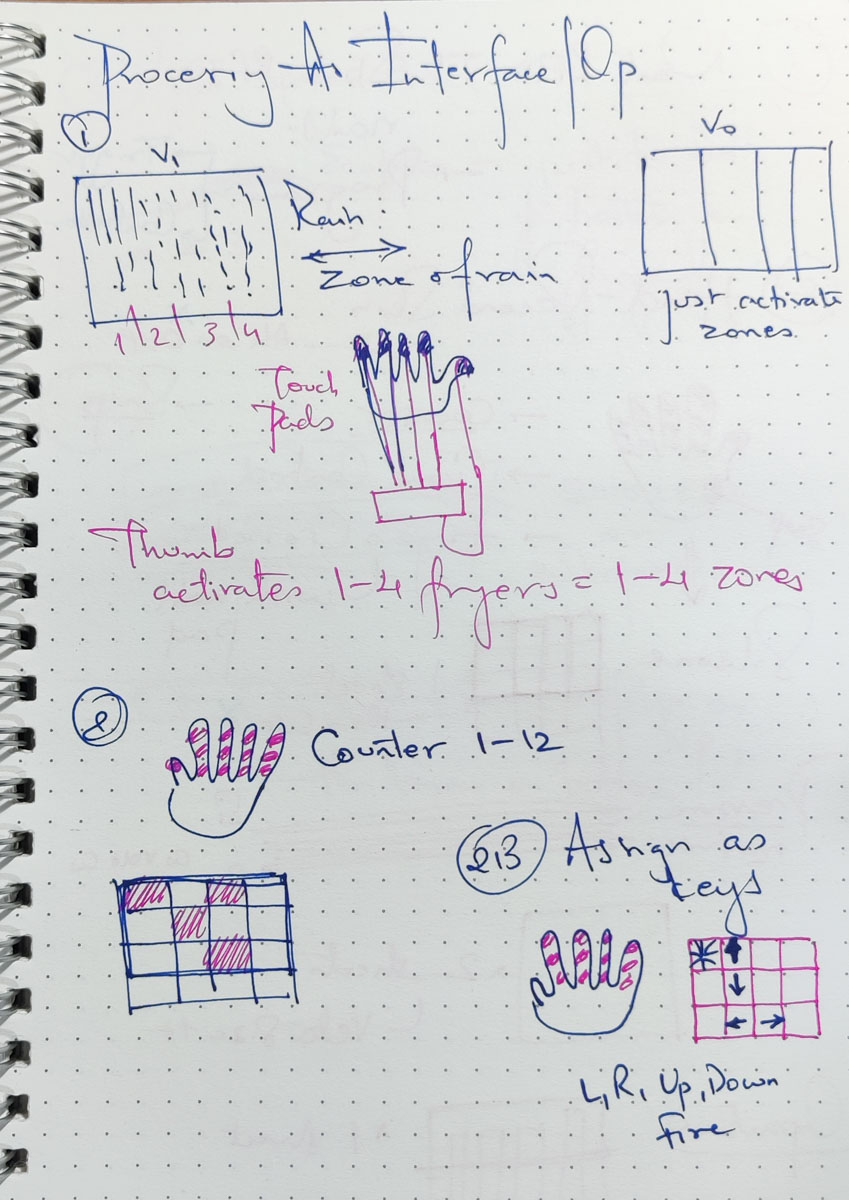
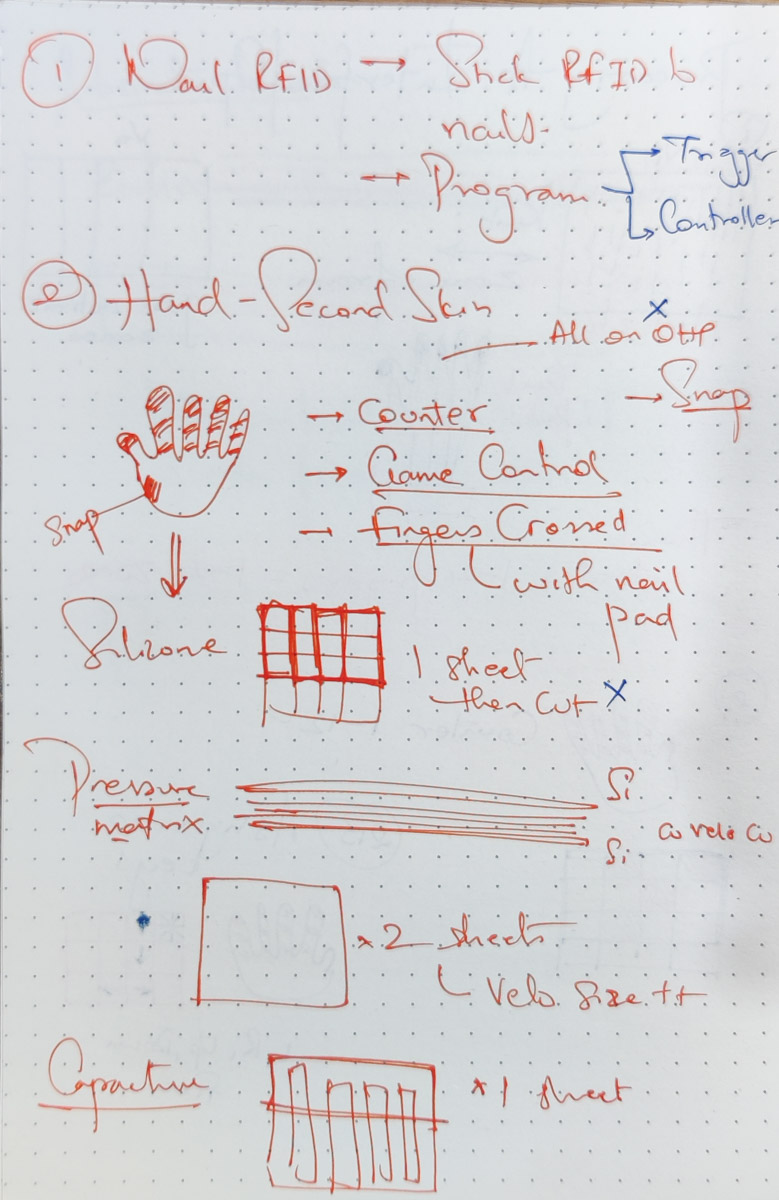
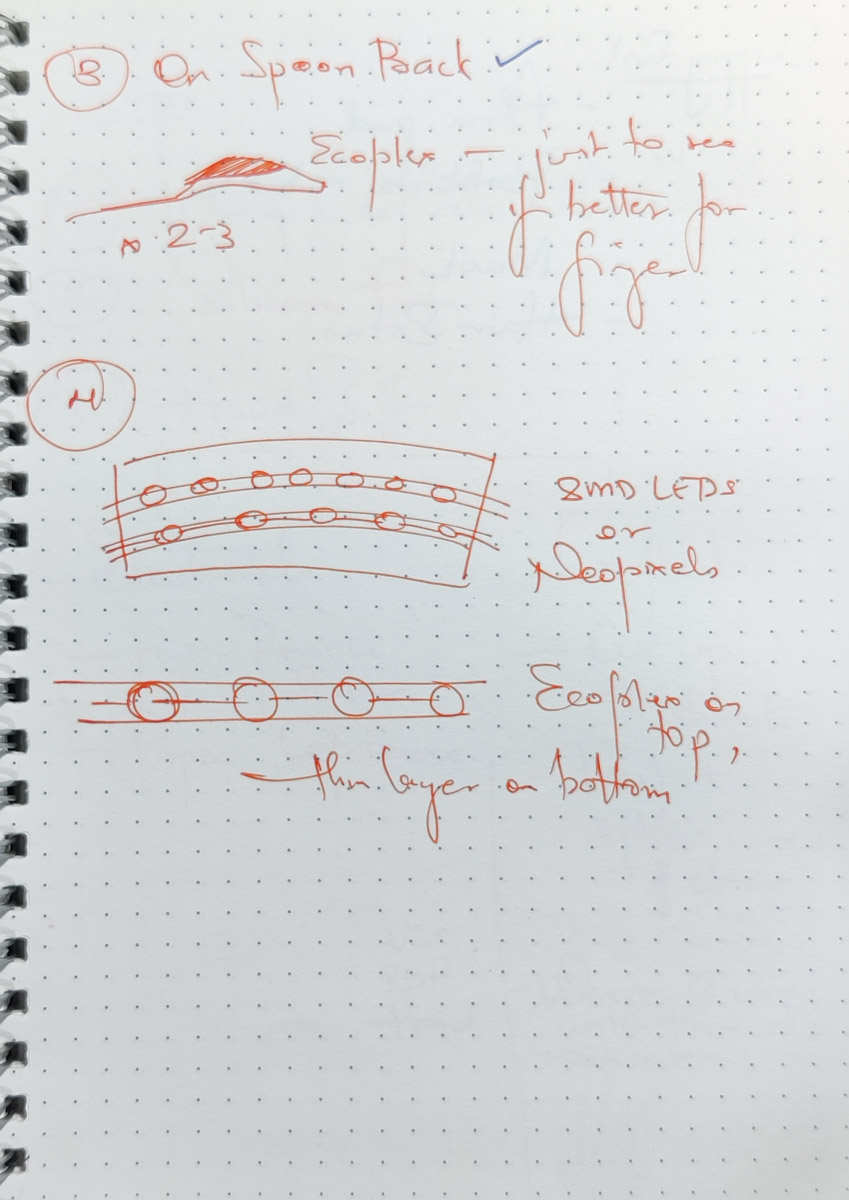
I narrowed down on a bunch of ideas based on the session as well as other inspiration. I mostly thougt of the input side of things, since that was more interesting to DO but eventually did consider outputs since those would be more interesting to SEE and EXPERIENCE !
A. Hair - Instead of conductive thread, I wanted to use the fine Cu wire I used in the ETextiles and Wearable modules to bring conductivity and enable hair-based gestures.
B. Fingers and Palm - A set of gestures all essentially triggering a touch-sensor logic, but differentiated by the areas touched and the gestures that led to the trigger.
- Finger snap : Snapping a finger lands the fingertip on the area below the thumb. A touchpad pasted there can capture this and activate an output.
- Fingers Crossed : Many meanings - Usually "good luck", sometimes "I am saying/promising things but I dont agree/accept". The underside of the middle finger in contact with the upper side of the index finger, with Cu tape touchpads to capture this.
- Counting on my fingers - 4 (one per finger) or 12 (one per finger segment) and a counterpart on the thumb completes the circuit and identifies which finger/finger section the thumb is touching.
C. Nails + RFID/NFC
Tiny NFC tags embedded in/under artificial nails, programmed to trigger things on the phone.
Nail -> RFID -> Phone reads and activates phone based shortcut
Nail -> RFID -> Phone reads and sends signal -> ESP32 recieves -> LED lights up
D. Ankle stretches - when you are sitting for a long while in a meeting or a lecture, stretching your ankles or rotating your foot gives invisible relief. Use that gesture to interact with other devices ? Flex sensors, off the shelf or DIY, capture the movement and translate it to an output.
E. Neopixels as Output - the usual - brightness, colour, numbers, patterns.
F. Processing - I had been trying to include Preocessing into my Fabri work since a while but this was the perfect chance. Any sensor input could be transmitted across a Serial bridge from an Arduino to Processing and then be used as an input for a processing sketch. This was an exercise I did with my Third Year students anyway, so it seemed the perfect addition to take the outputs to interesting places.
I finally combined, dropped, evolved, and mixed up these ideas into the following
- Forearm controller : 3 sensing pads on the inner wrist to control Rain visuals in Processing
- Forearm controller 2 : Metal wire "tattoos" connect to the Arduino and trigger outputs
- Fingers and Palm - the set of sensors that enable Finger-snap and Counting as inputs and can be codified to other gestures and effects
- Hair Cu wire to trigger Neopixel band on forehead
- RFID tag triggers : applying RFID tags and using them to activate cellphone based shortcuts/read notes and reminders
Forearm controller - Touch Pad
Concept
A touch sensor on the inner wrist to control Processing based Rain
Process
Tools
- Paper
- Cu tape
- Velostat square
- Cutting mat and cutter
- Soldering iron
- Jumpers
- Arduino Uno and associated essentials
- Ecoplex
- Gauze fabric
Phase 1 - paper version
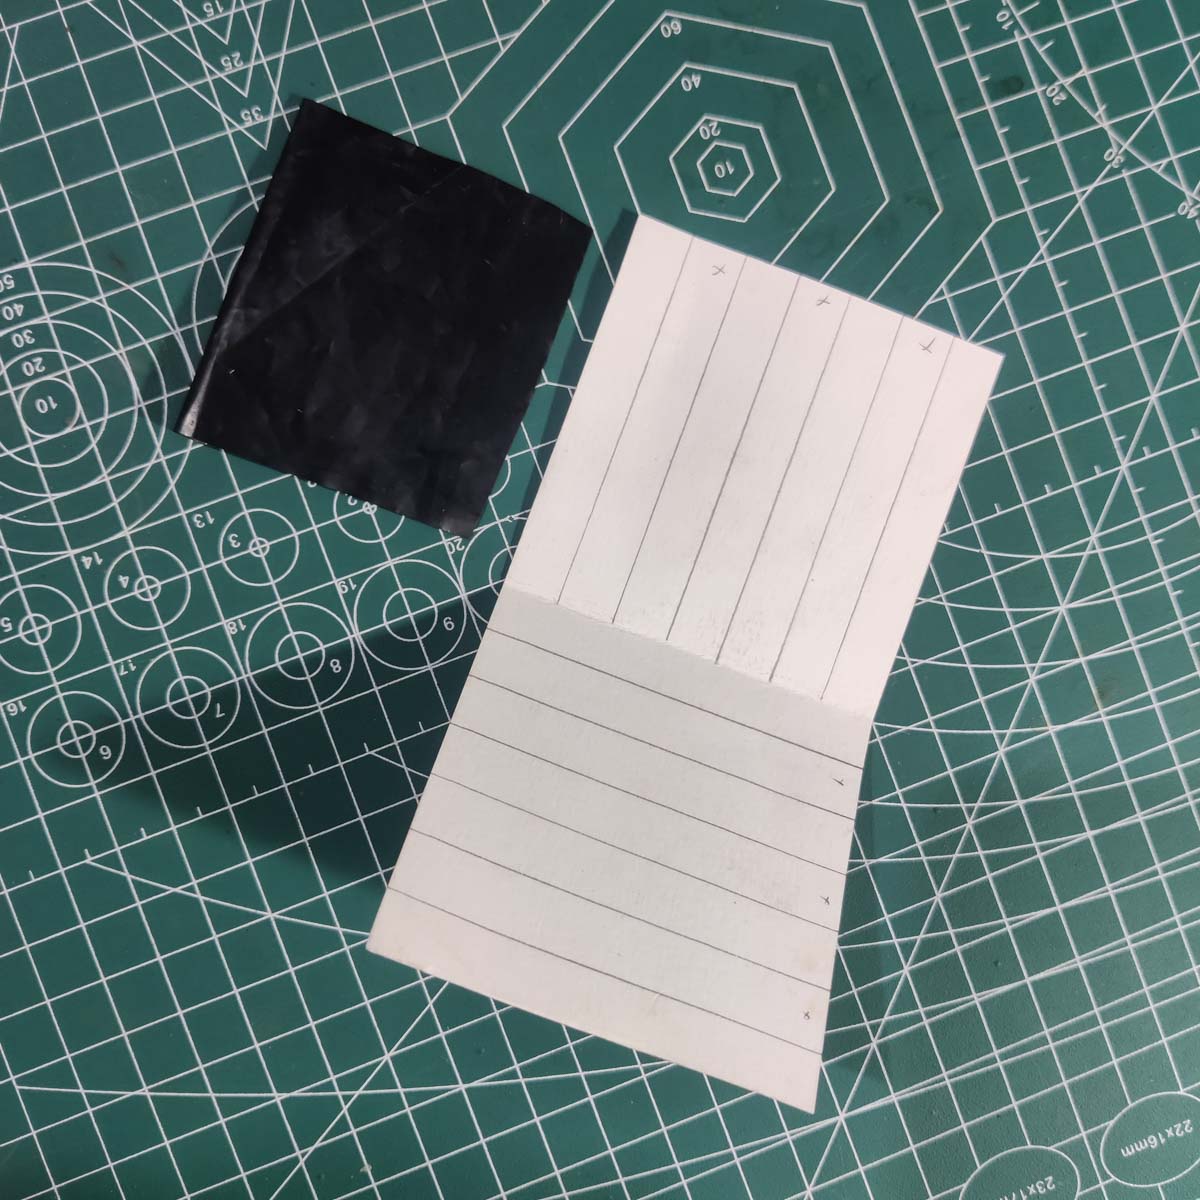
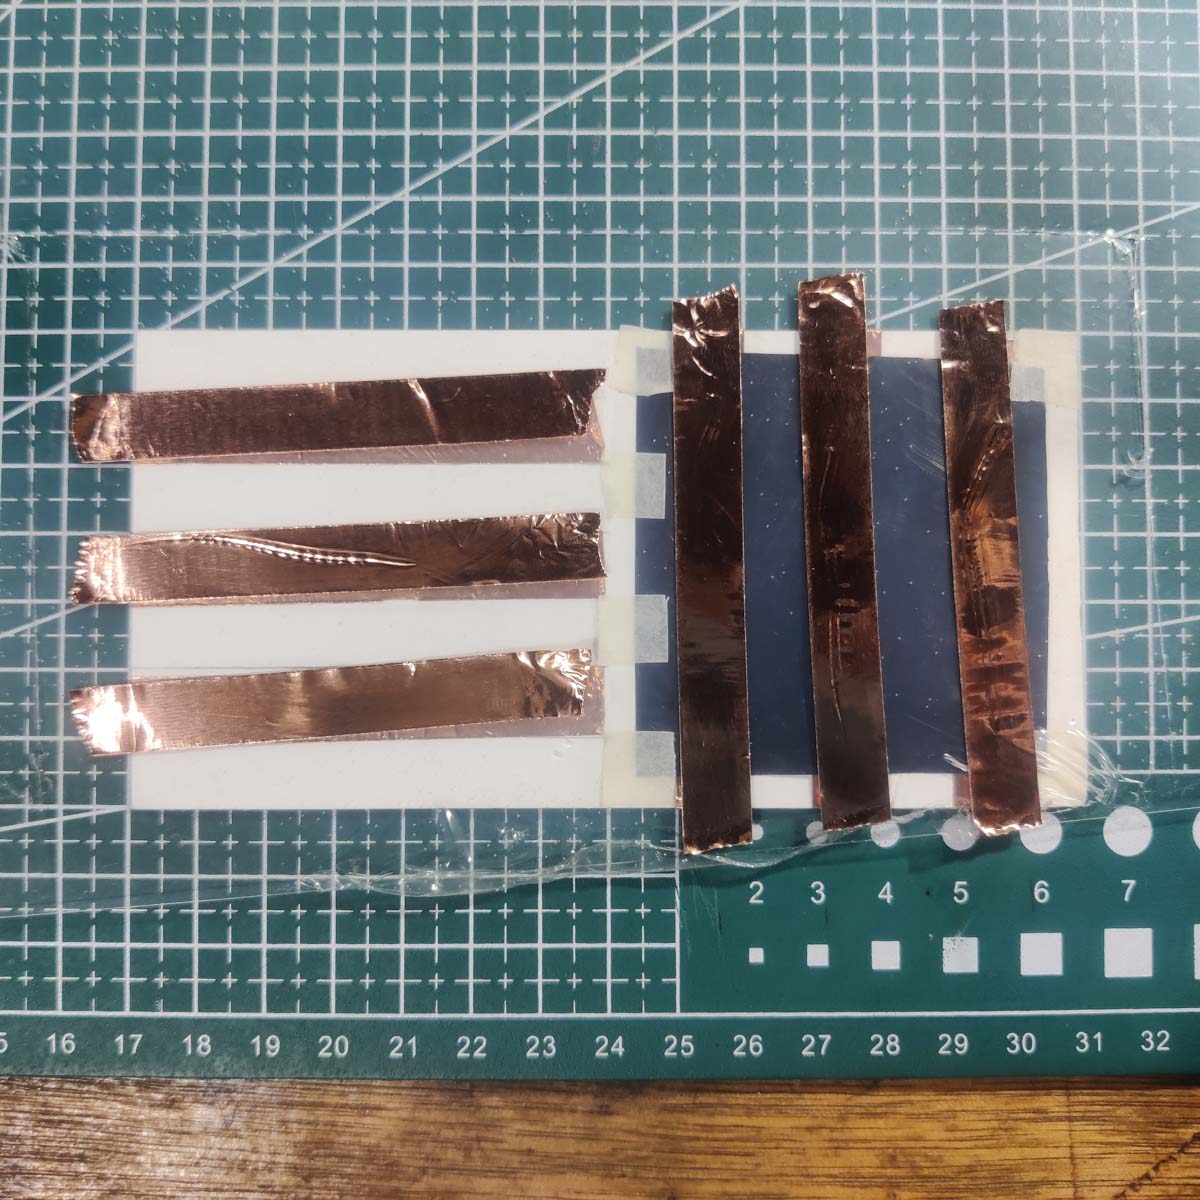
The 3 rows x 3 column = 9 inputs pressure sensor was done in the tutorial class. I replicated that to begin with.
Build :
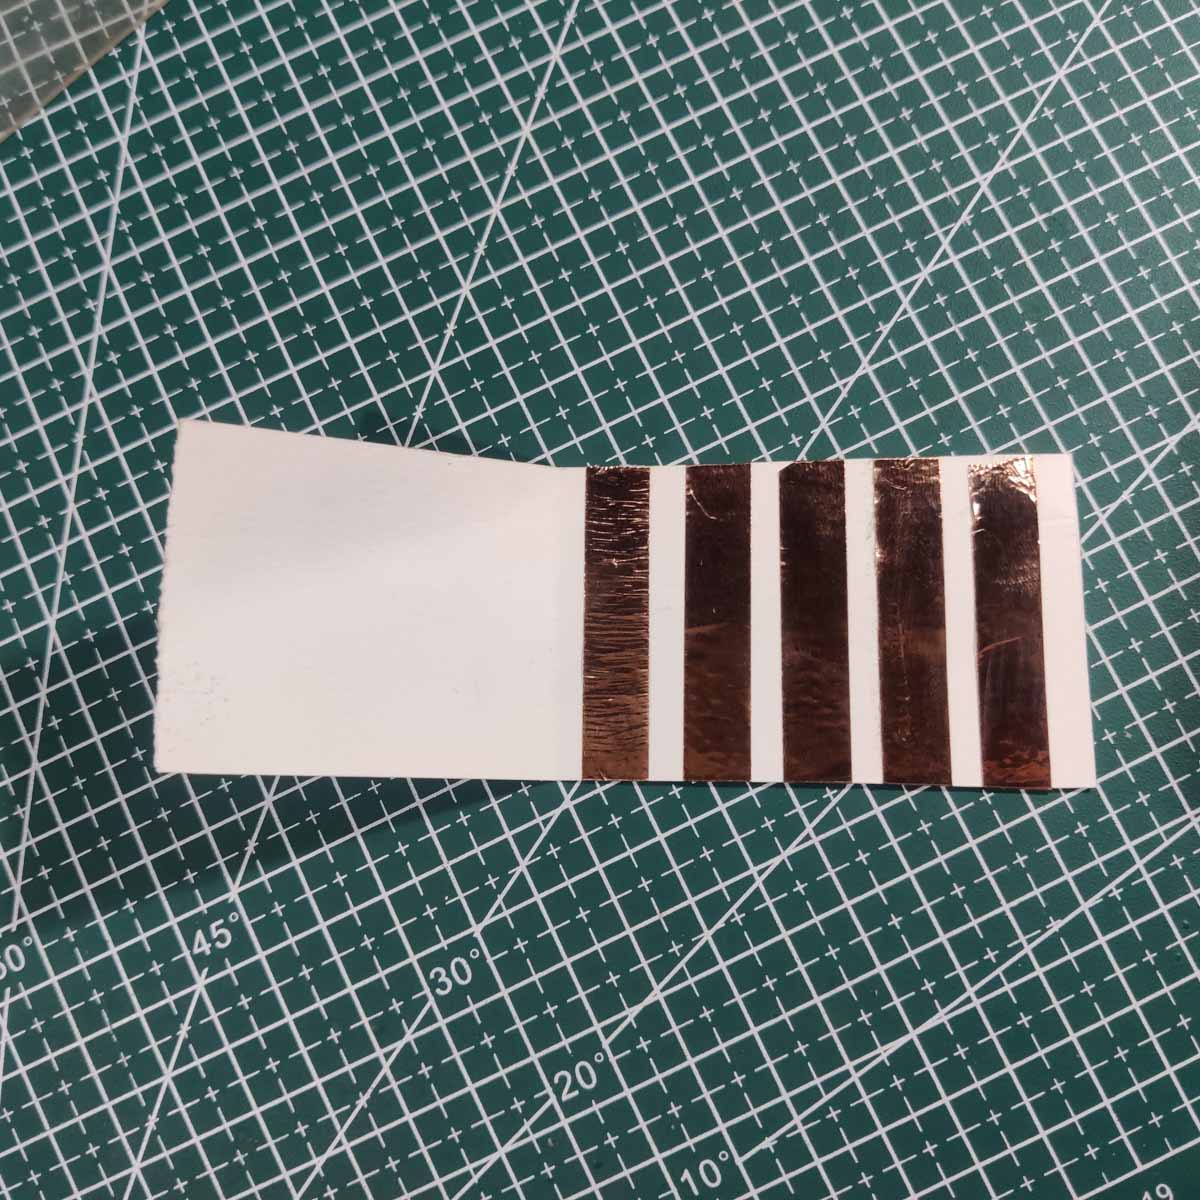
- Cut a 2:1 rectangle from paper and fold it into a square. Size as per conveneince and wrist area
- Tape 3 vertical Cu tapes on one inner face
- Tape 3 horizontal Cu tapes on opposite inner face
- Cut a square of Velostat to sit over this assembly in a way that the Cu tapes do not have any contact among themselves
- Solder jumpers to each of the 6 Cu strips and connect them to the Arduino pins
- Connect the Arduino to the PC, load the code, and test readings
The Serial Bridge : The serial bridge or handshake allows hardware like the Arduino to send data to the PC over a serial connection that can be intercepted by Processing and used. It is incorporated into the code on both sides.
Arduino Code : This picked up the touch sense from the Cu tape matrix, and included the code for the Serial bridge to transmit the data.
Processing Code : This included the code for the Serial bridge to recieve the data. The rest of the code was a simple rain sketch, rendering rainfall across the screen. The touch sensors controlled which "zones" the rain was higher or lower, to demonstrate the entire experience.
Paper 3x3 version operational
Phase 2 - The fake-skin version
I repeated the same process but instead of paper as the base, I used Ecoplex cast into a thin sheet.
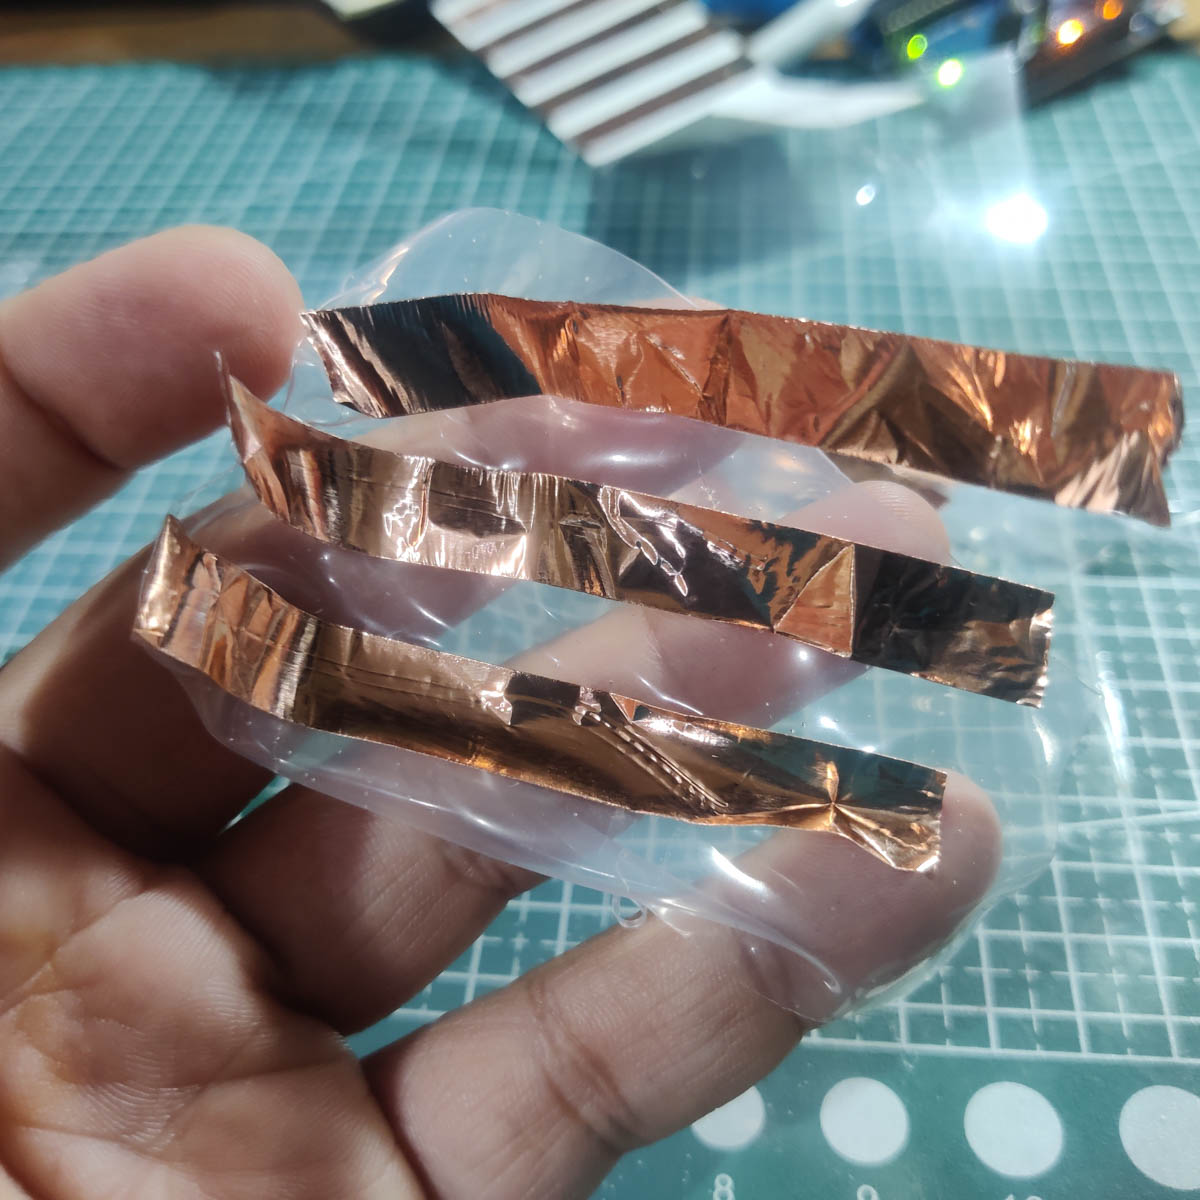
Unfortunately, this proved to be very fragile as well as highliy stretchable, leading to the Cu tapes constantly coming off the ecoplex since they could not match the stretch and the glue would fail.
Phase 3 - The fake-skin version, updated
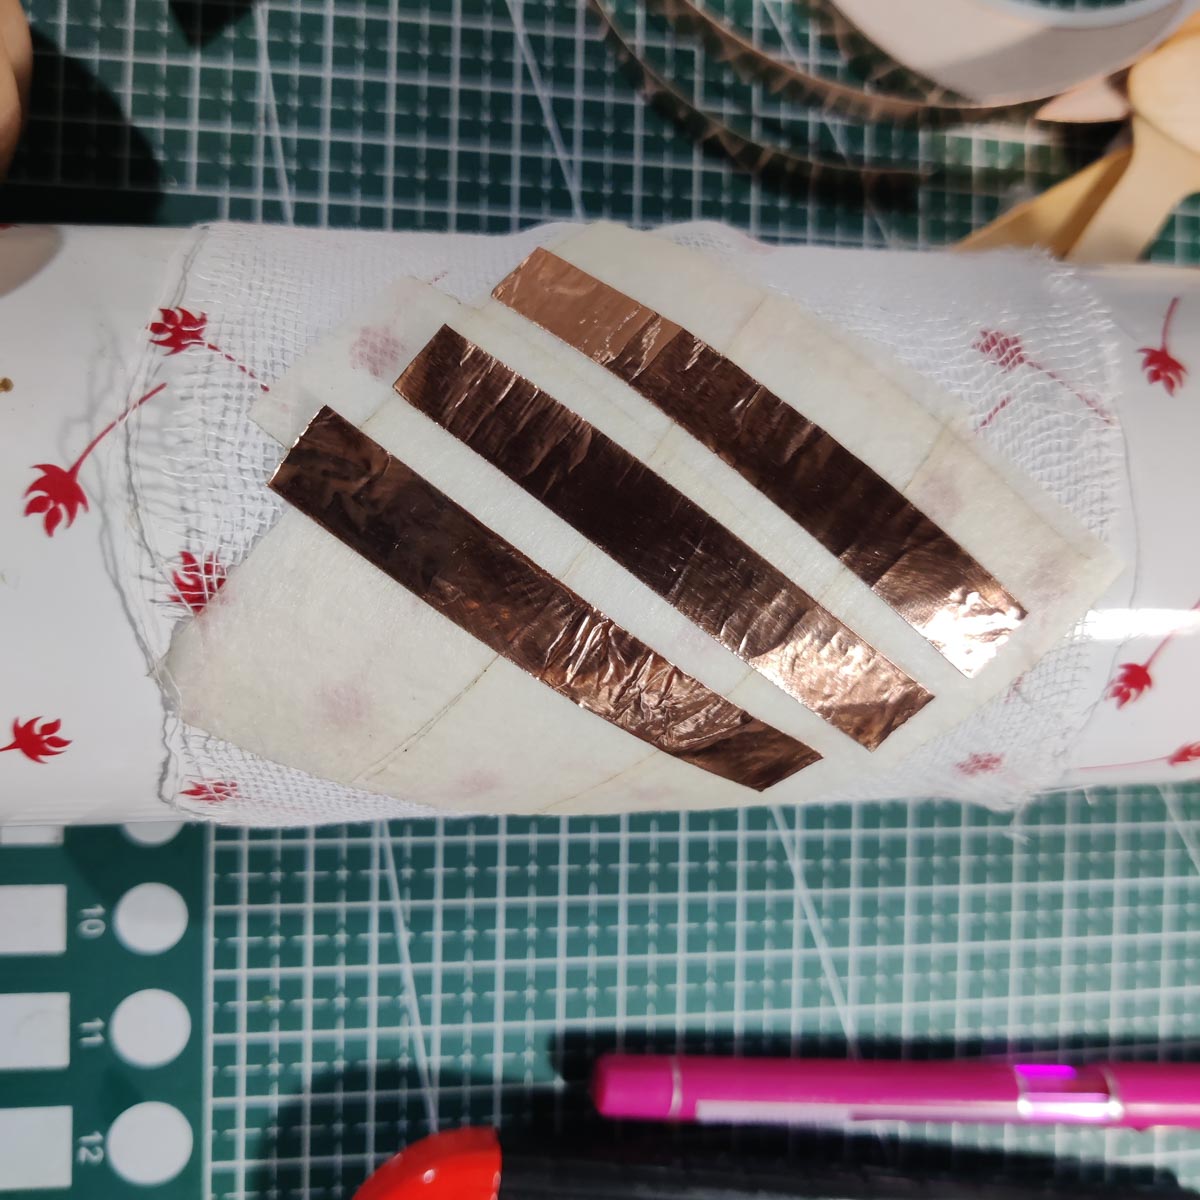
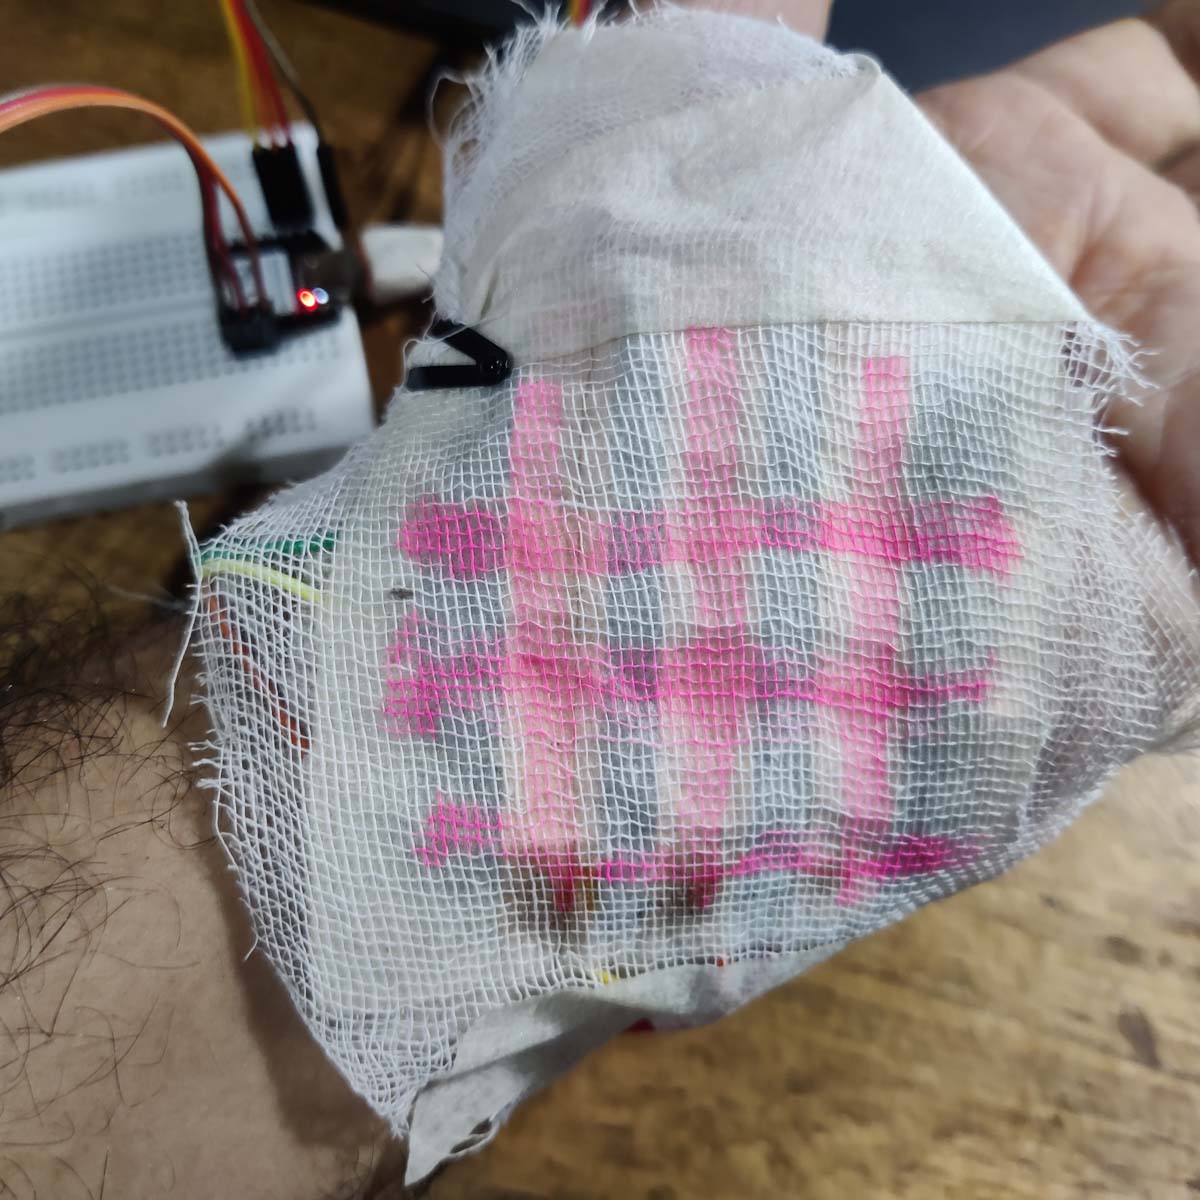
To prevent the ecoflex from stretching so much that the Cu tapes would come off, I decided to make 2 major changes
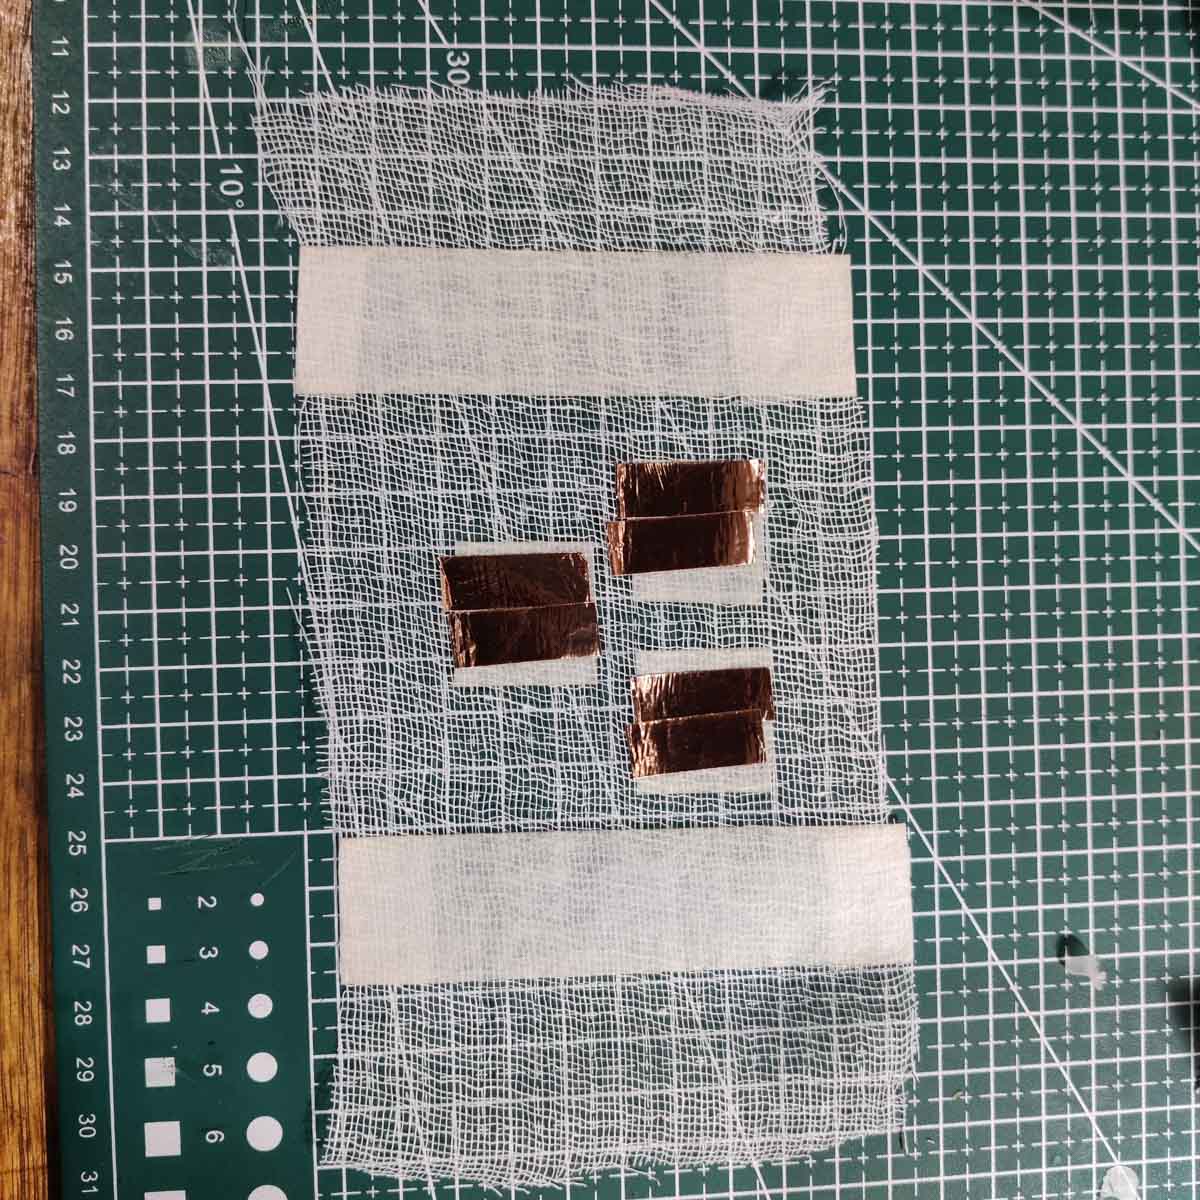
- Embed fabric bandage gauze in the ecoplex layer. As a composite structure, the fabric threads would prevent the ecoplex from stretching out, and thus the Cu tape wuold not be distorted to the point of ejection
- I also used paper tape/masking tape liberally for a firm base
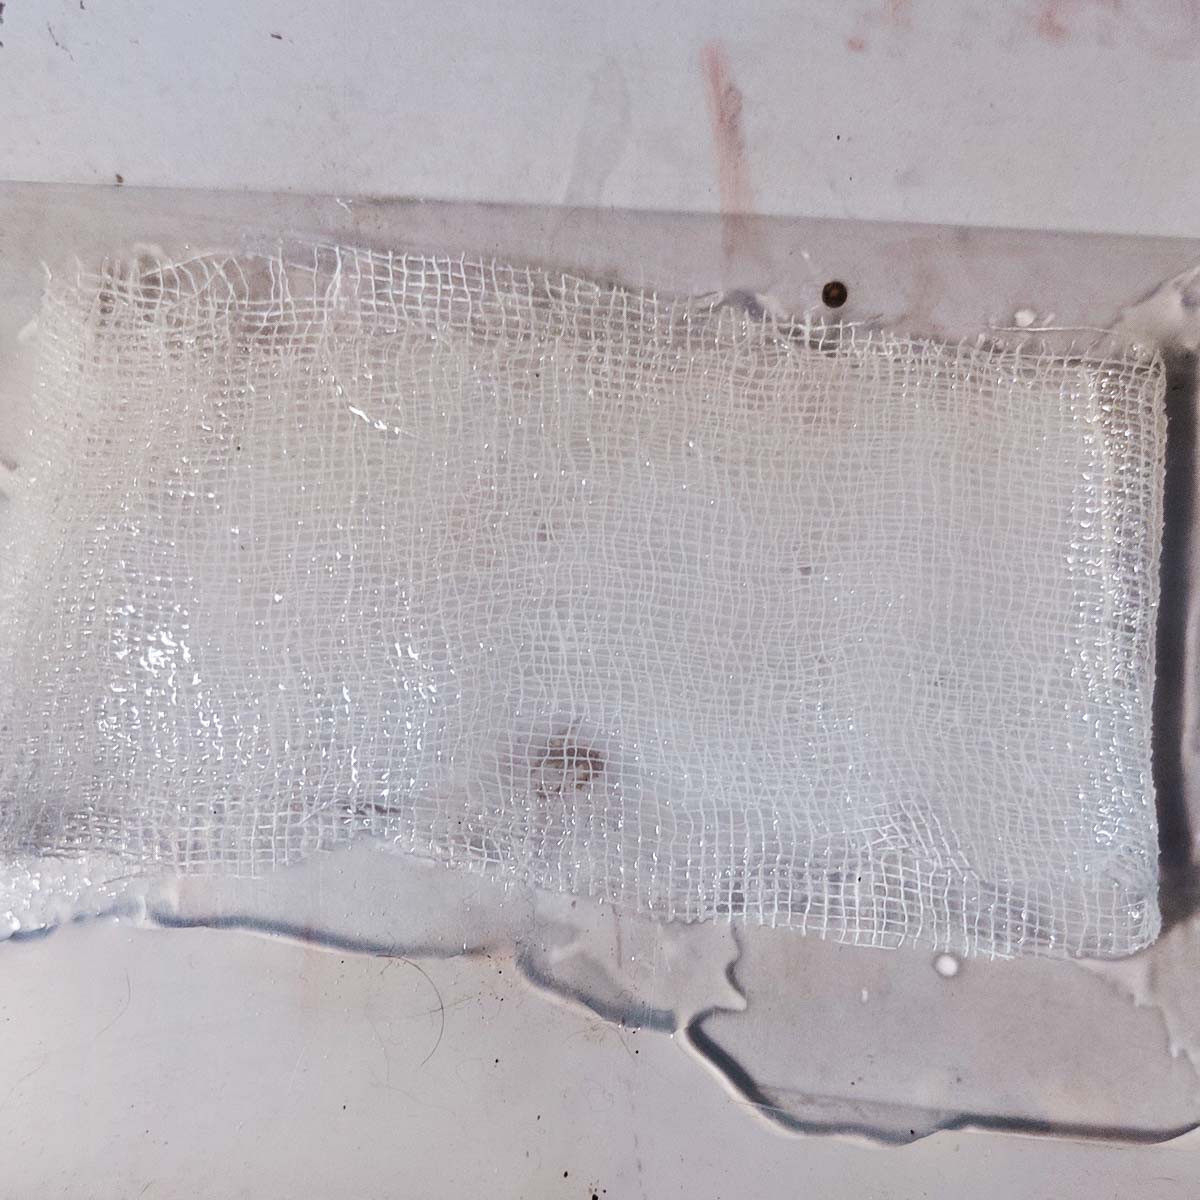
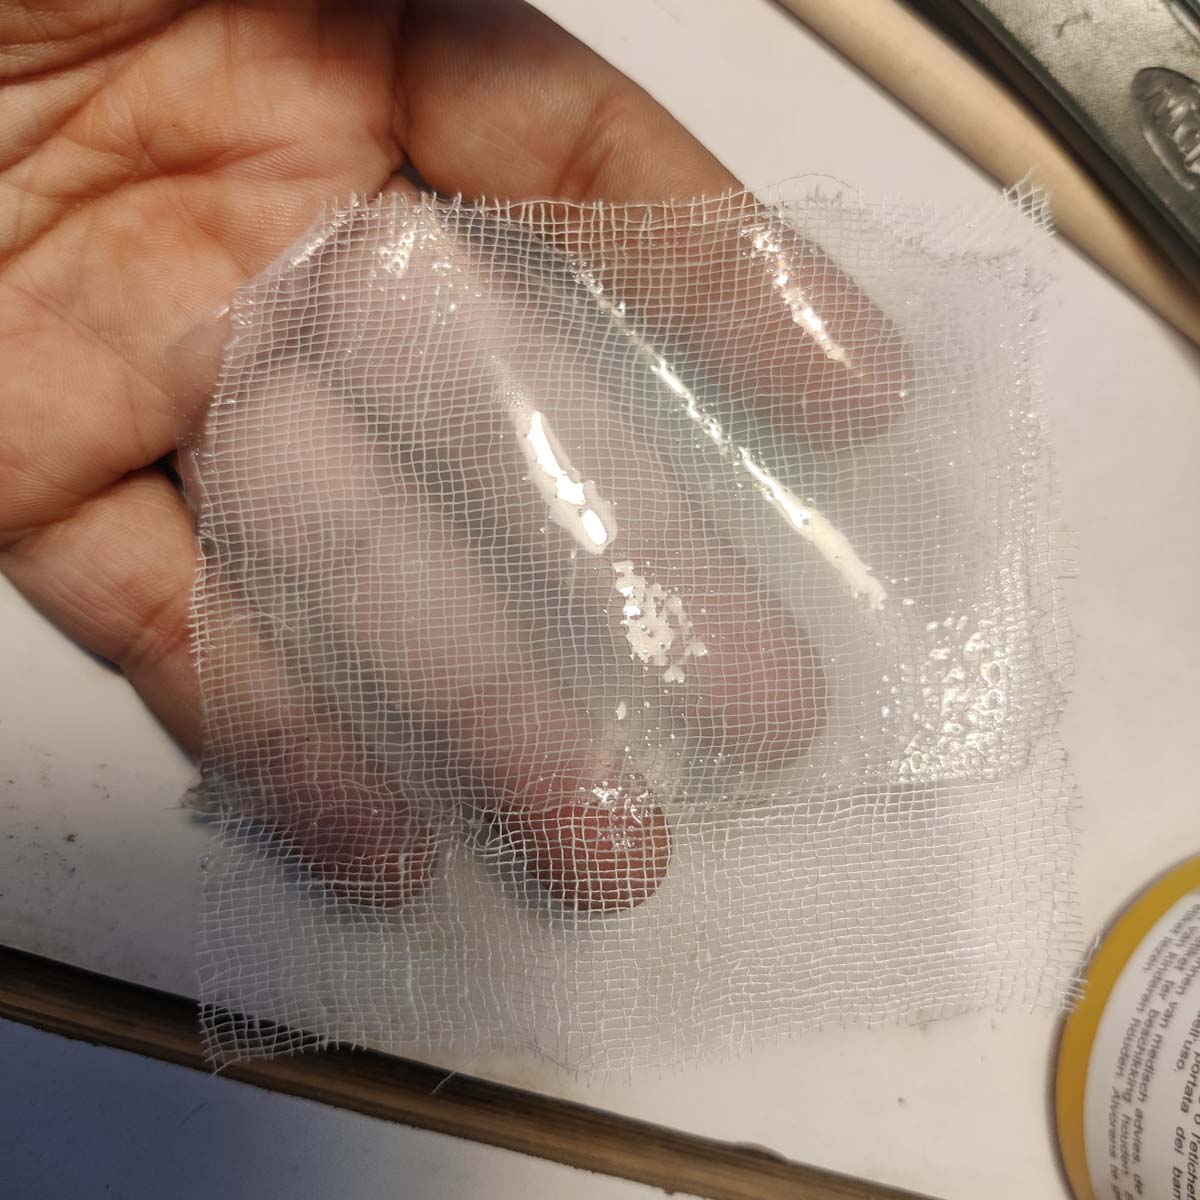
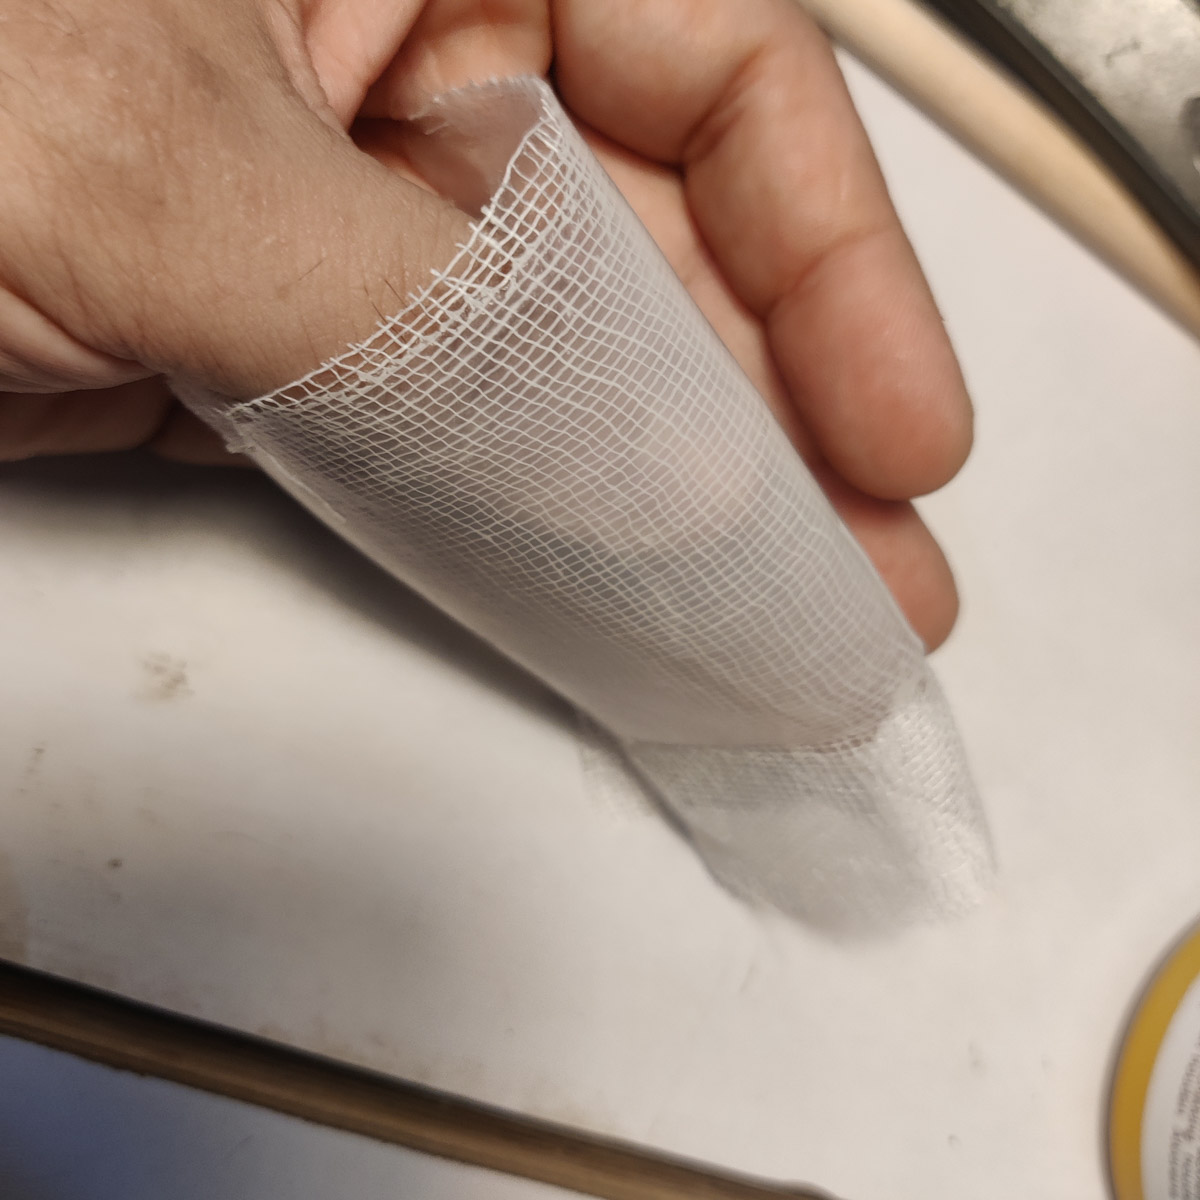
3x3 Skin version (unmounted)
The rest of the process remained similar, since it had already been validated.
Phase 4 - Capcitive Touch
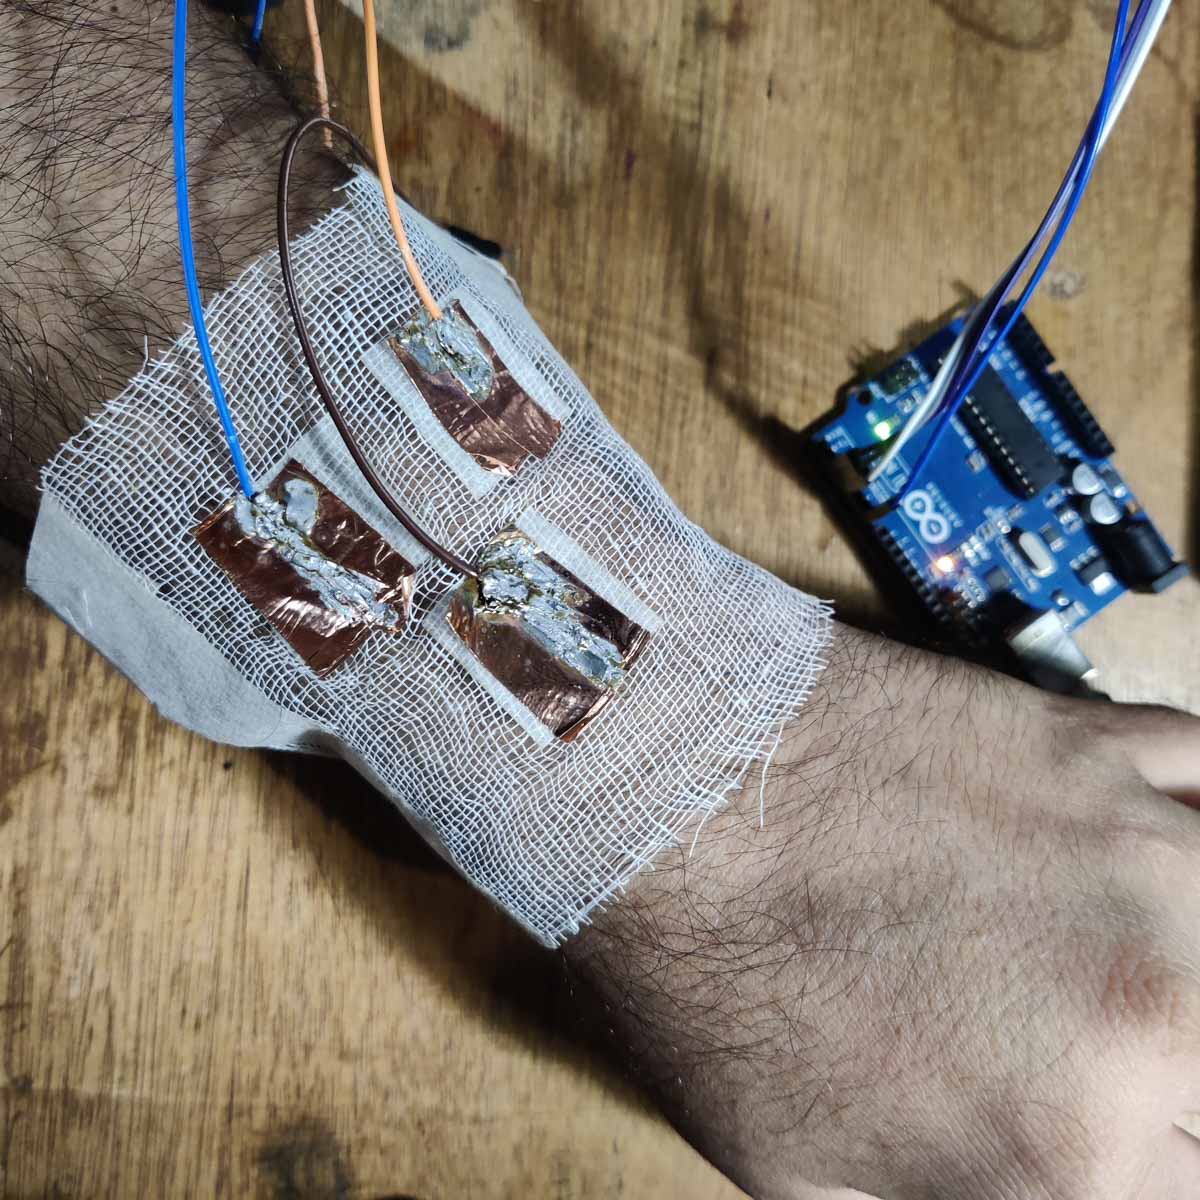
With the 3x3 pressure sensor, while it worked fine on paper (literally!), when mounted on skin, it did not perform as well. Pressure requires a firm backing, and being mounted on skin and flesh were not really working.
So I decided to go back to basics and just make them touch sensors instead of pressure sensors.
I used the basic Step-Response principle and made a paper version at first.
I also simplified the Cu tape structure. The long strips were covering a larger dimension and stretching multiplies the overall base length entirely. I changed this to smaller squares that did not have any single dimension too large to become a problem. And I decided to go with only 3 active touch zones instead of more.
3 zone Paper version - Capacitive sensor
3 zone Paper version - Capacitive sensor - with Rain
Final
3 zone Skin version - Capacitive sensor - with Rain
Forearm controller 2 - Metal Tattoo
A "metal tattoo" - a wire embedded in fake ecoplex skin - connects to a microcontroller as a touch input.
Concept
This one was not very high on "concept" - I just wanted to try and see if it would work. I made two versions - a basic flower, and a plaited 3 strand ring.
Tools
- Ecoplex
- flat acrylic sheet
- solder wire, lead free
- Cu wire and/or jumper
- Arduino Uno and accoutrements
Process
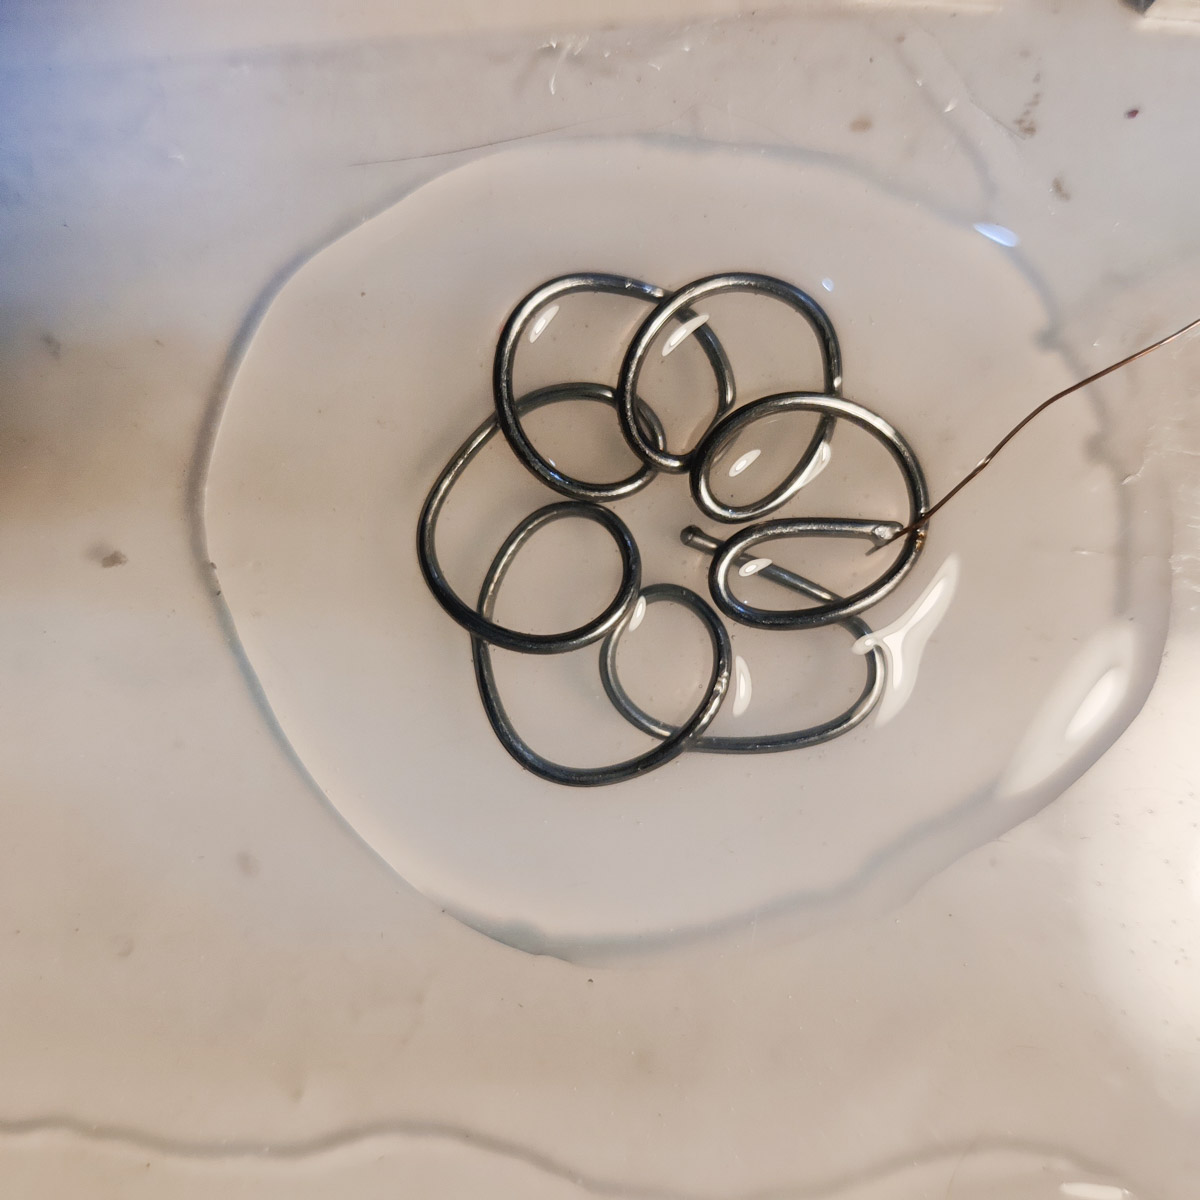
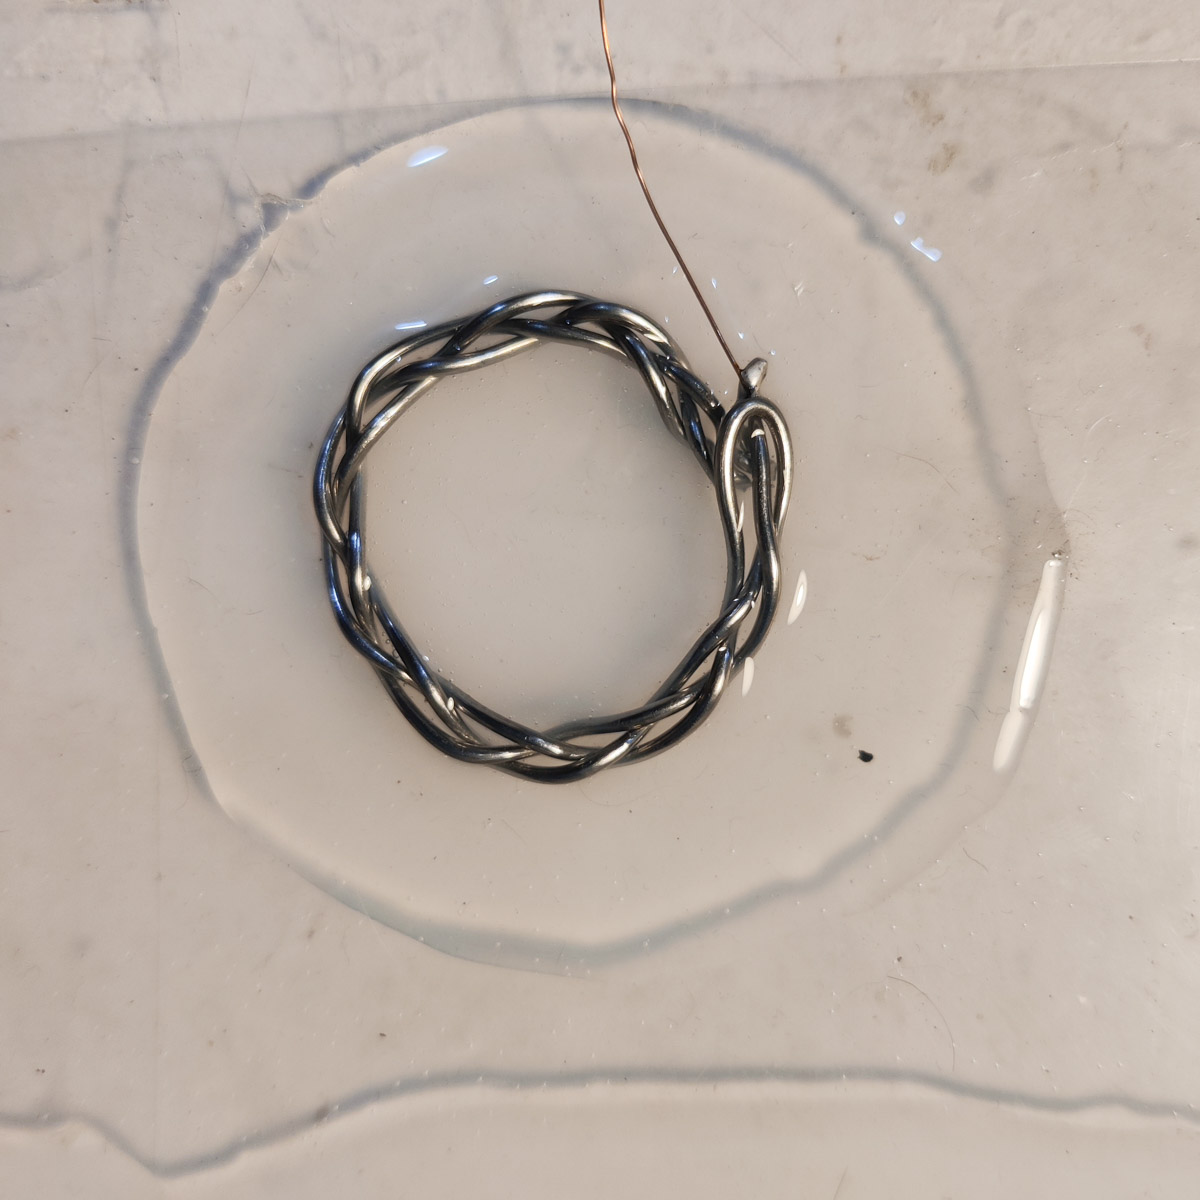
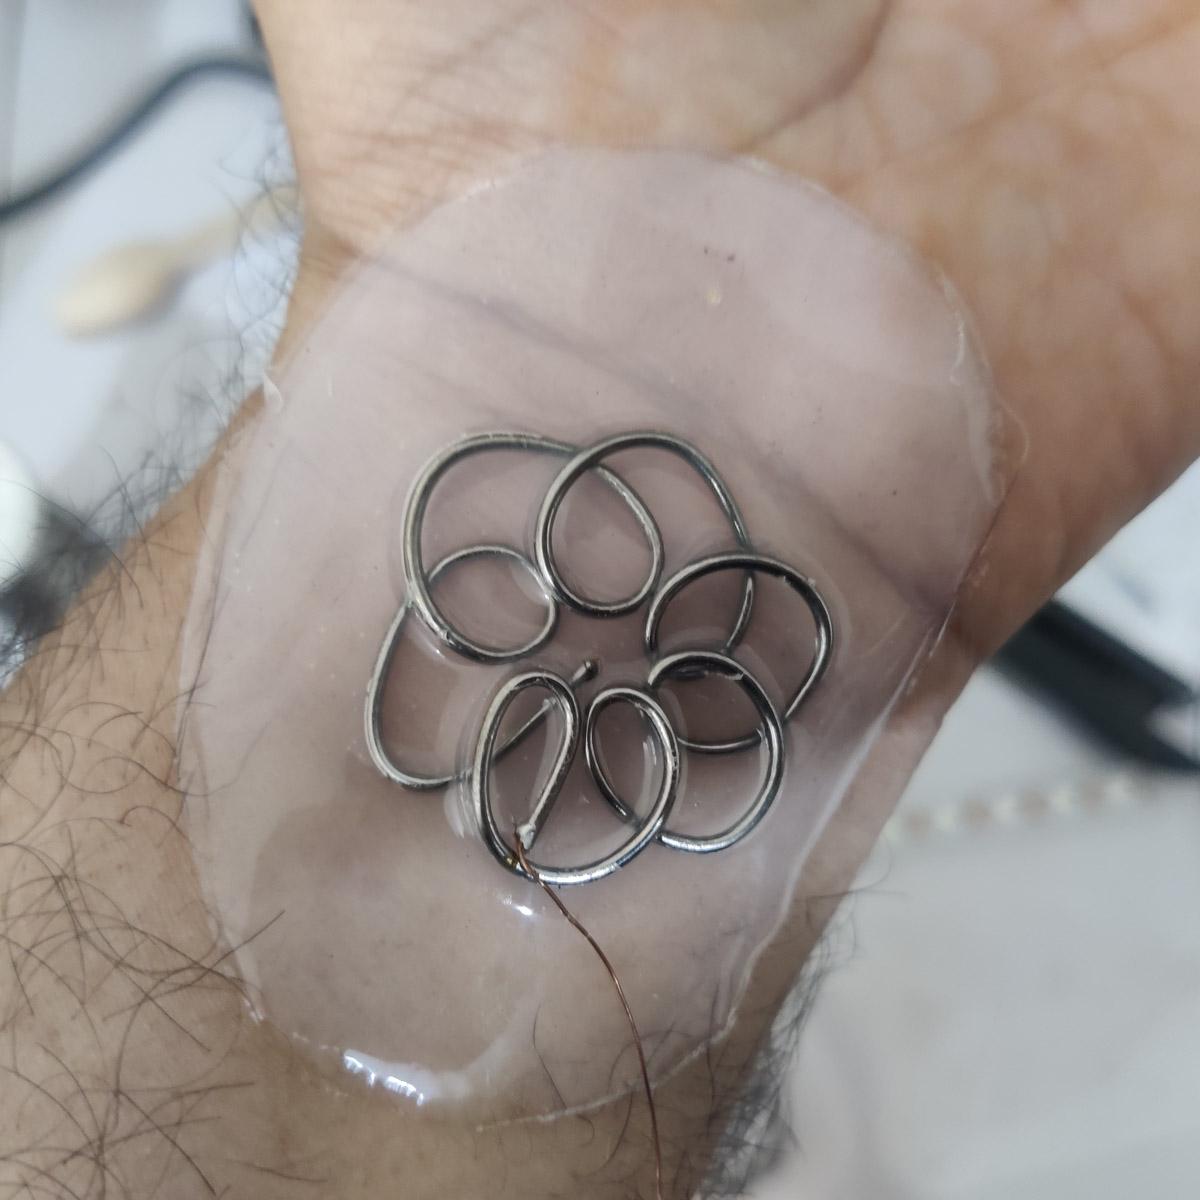
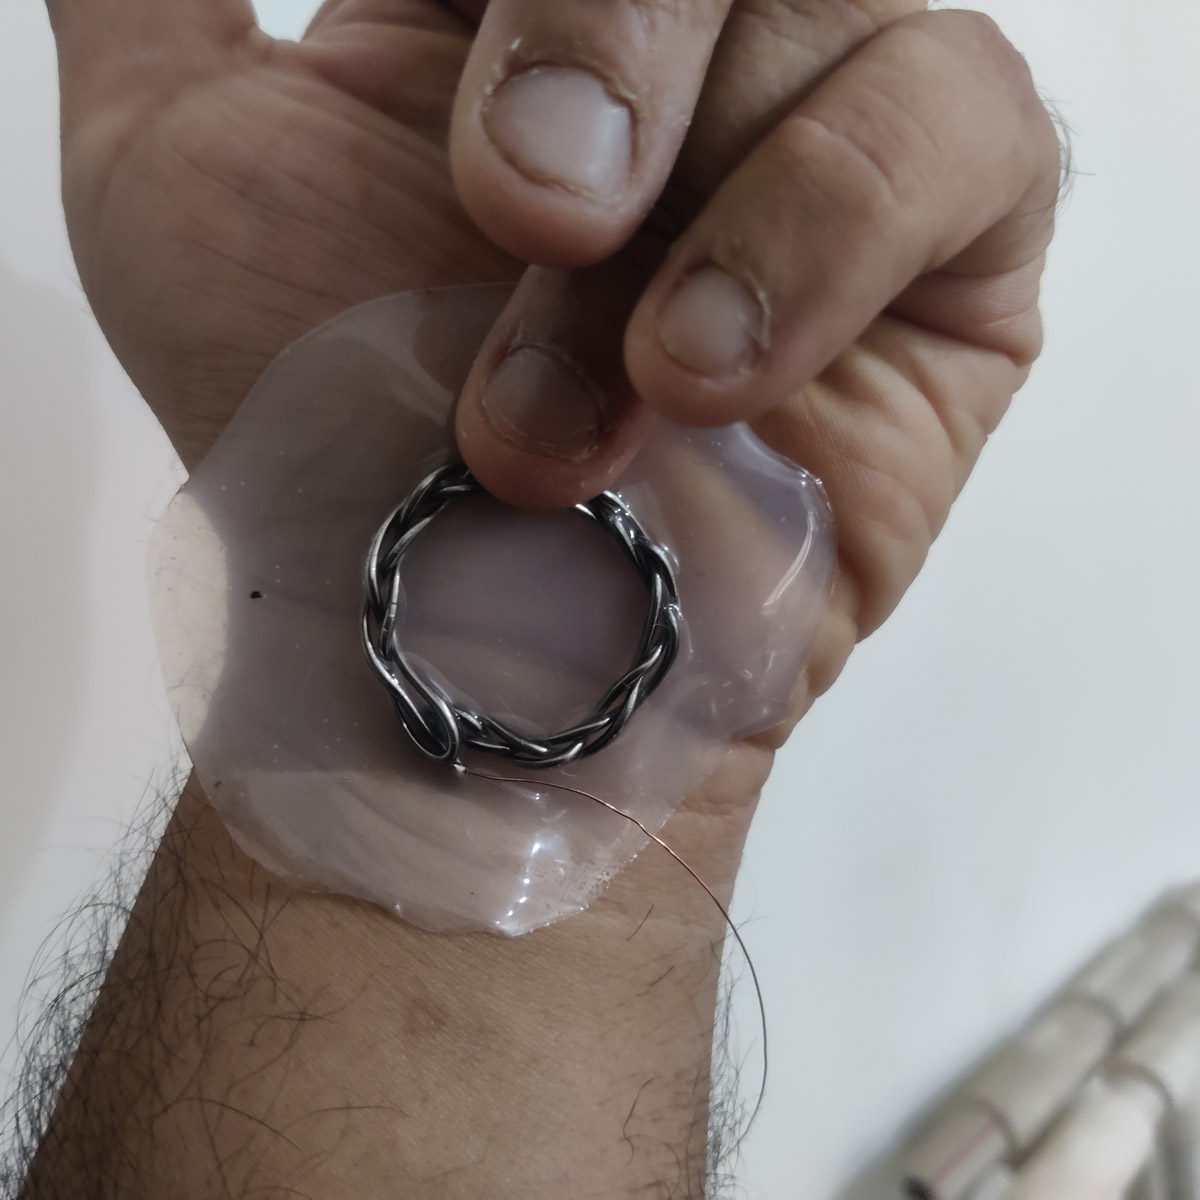
- Twist and shape the wire as you wish. I used solder wire since it was handy, thick enough, and very pliable. I would use Aluminium wire as the next option, but it would have to be soft enough to not just be bent but take the shape of the body.
- Attach a connection to metal - either a Cu wire + stripped jumper if you need a long length, or a stripped jumper directly.
- Pour a spoonful of the ecoplex mix on a level acrylic sheet, let it spread naturally a little. This will give you a smooth bubble free outcome.
- Place the metal shape onto the ecoplex and let the whole thing set for atleast an hour (depends on the mix, but you want to wait till its slightly firm, but it is not necessary to wait for the entire cure time)
- Then pour another spoonful of the mix on top so that it covers the exposed metal areas and generally binds and encloses everything
- Use by connecting the jumper at the other end to the relevant point in your circuit
Final
I rigged up the pseudoskin-metal-tattoo assembly as a analog sensor, and tested it out on the serial monitor.
The first round of code served to print out just the numerical values registered, so I could judge what a good threshold value would be to use to demarcate On-Off states later.
Then I used the threshold value, with some more tweaking, to get serial to print out "Touched" or "Not Touched"
Finger gestures
Concept
 The Wicked and the Divine
Source: Amazon.in
I had been reading the amazing "The Wicked and the Divine" series, by Kieron Gillen and Jamie McKelvie, and published by Image Comics, and the finger-snap is a central action to the story. So when this week came along, it was already in my head to try something like that out.
I started off with two gestures to incorporate
- a finger snap where a fingertip lands at the base of the thumb
- counting on your fingers where the thumb touches the 12 individual sections on each finger.
I had decided to combine the multiple finger based genstures into this one "platform" that could probably be recoded to capture and trigger more than just the 2 initial thoughts I had.
Touch pads on all 12 sections of the fingers, the thumb top and the thumb base would become a comprehensive touch interface.
To my annoyance when it cmae to building it, it also became a complicated touch interface.
Tools
- Cu tape
- Ecoplex
- 3D printed hands
- casting base
- masking tape
- Cu wire, jumpers and other connectors
- the Arduino Uno + accoutrements
Process
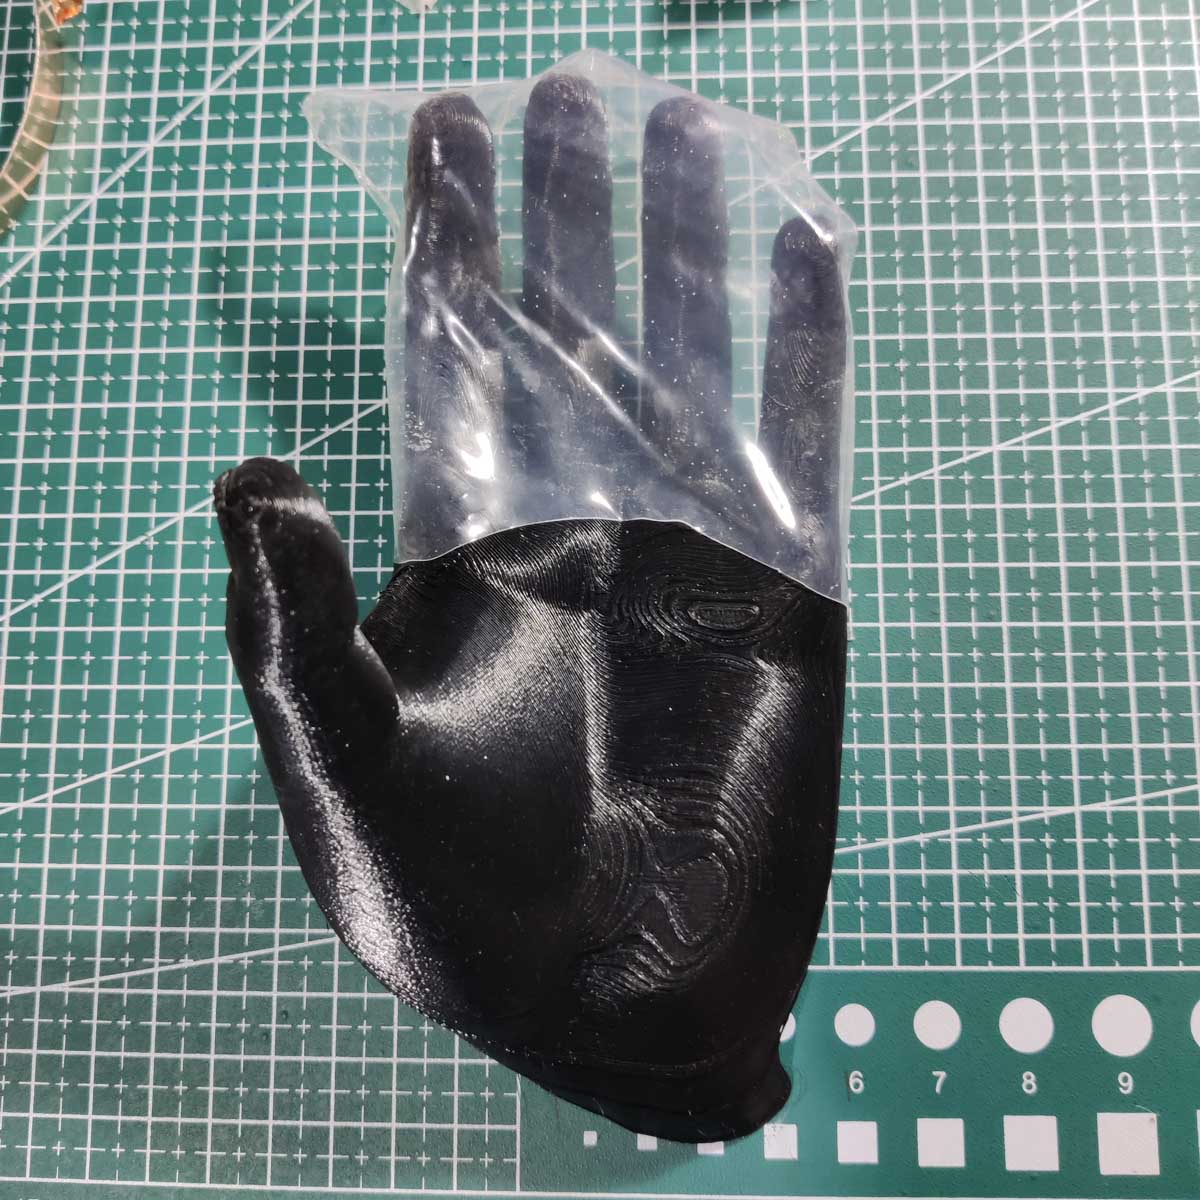
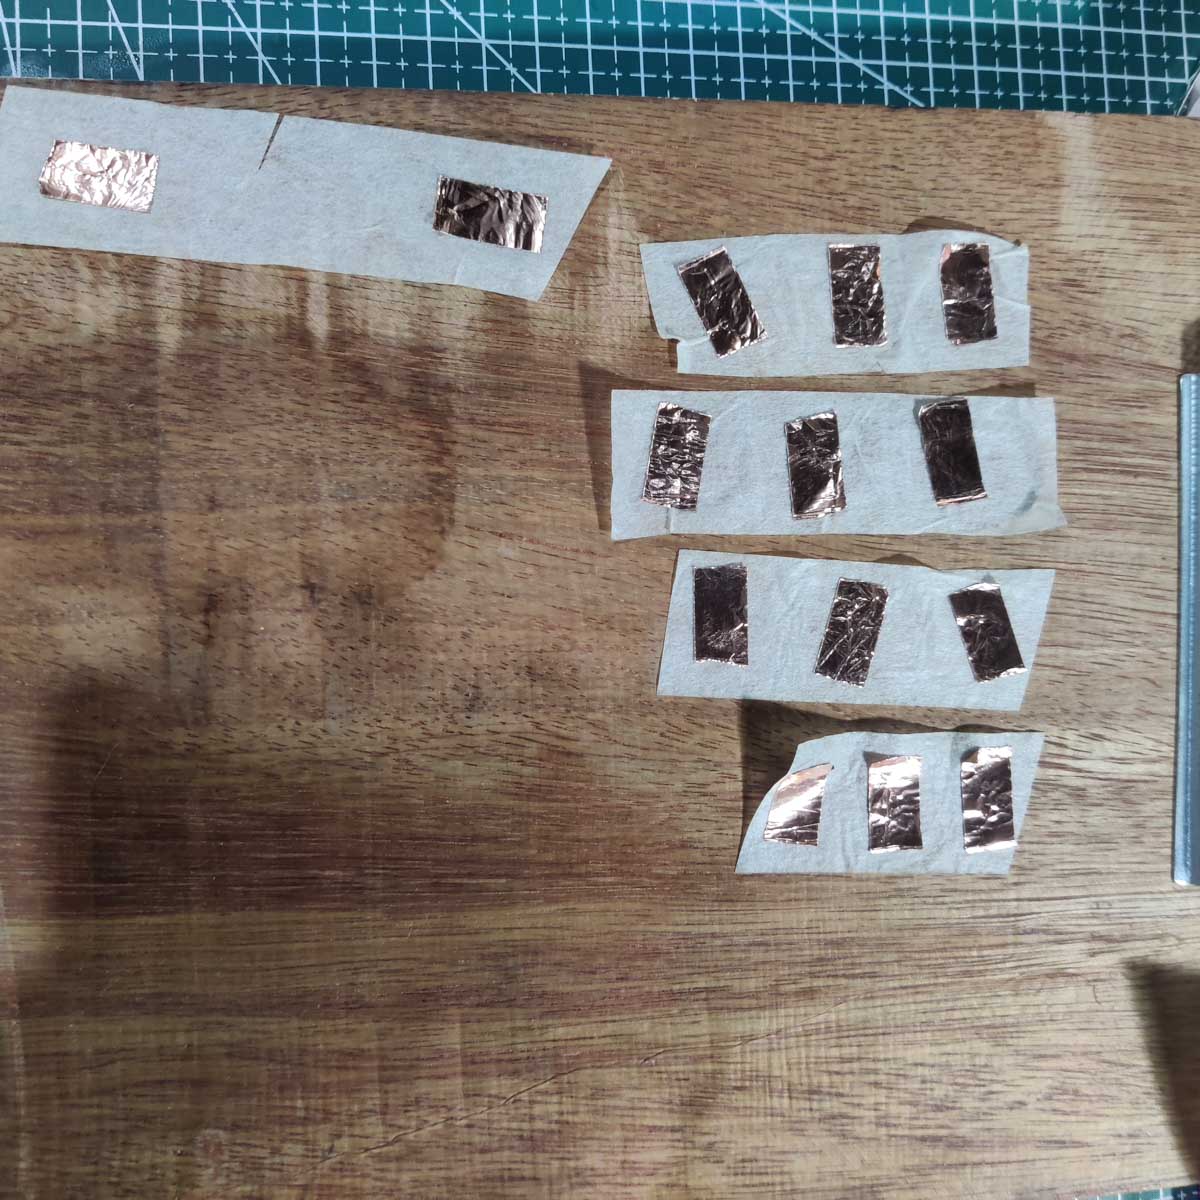
This was an intensely trial and error process, finicky and fumbly. In the future, I would probably rethink my approaches.
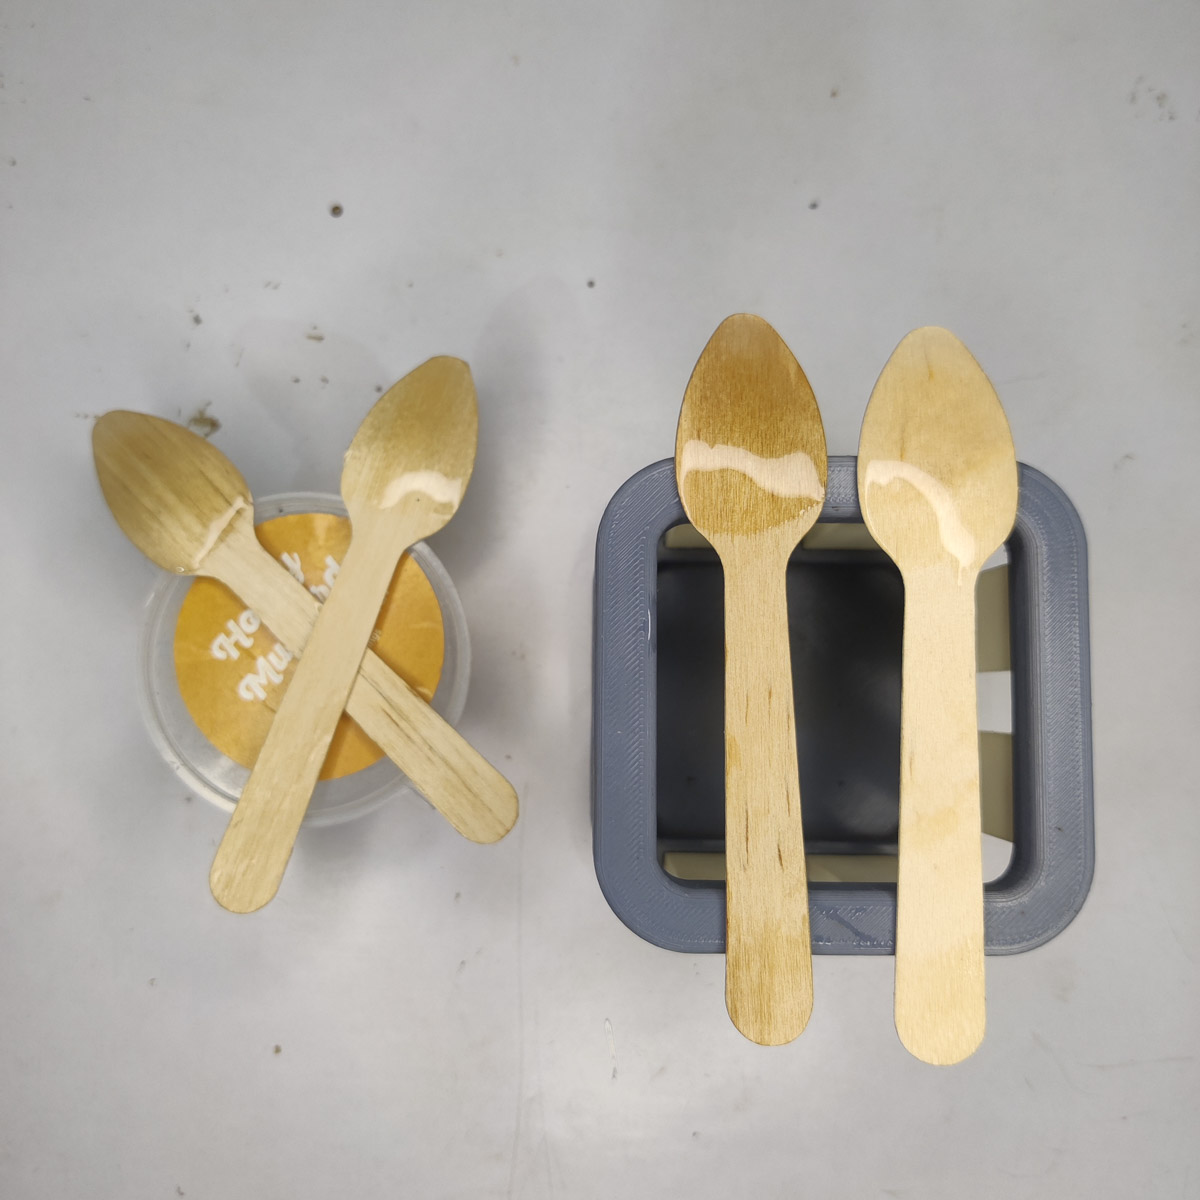
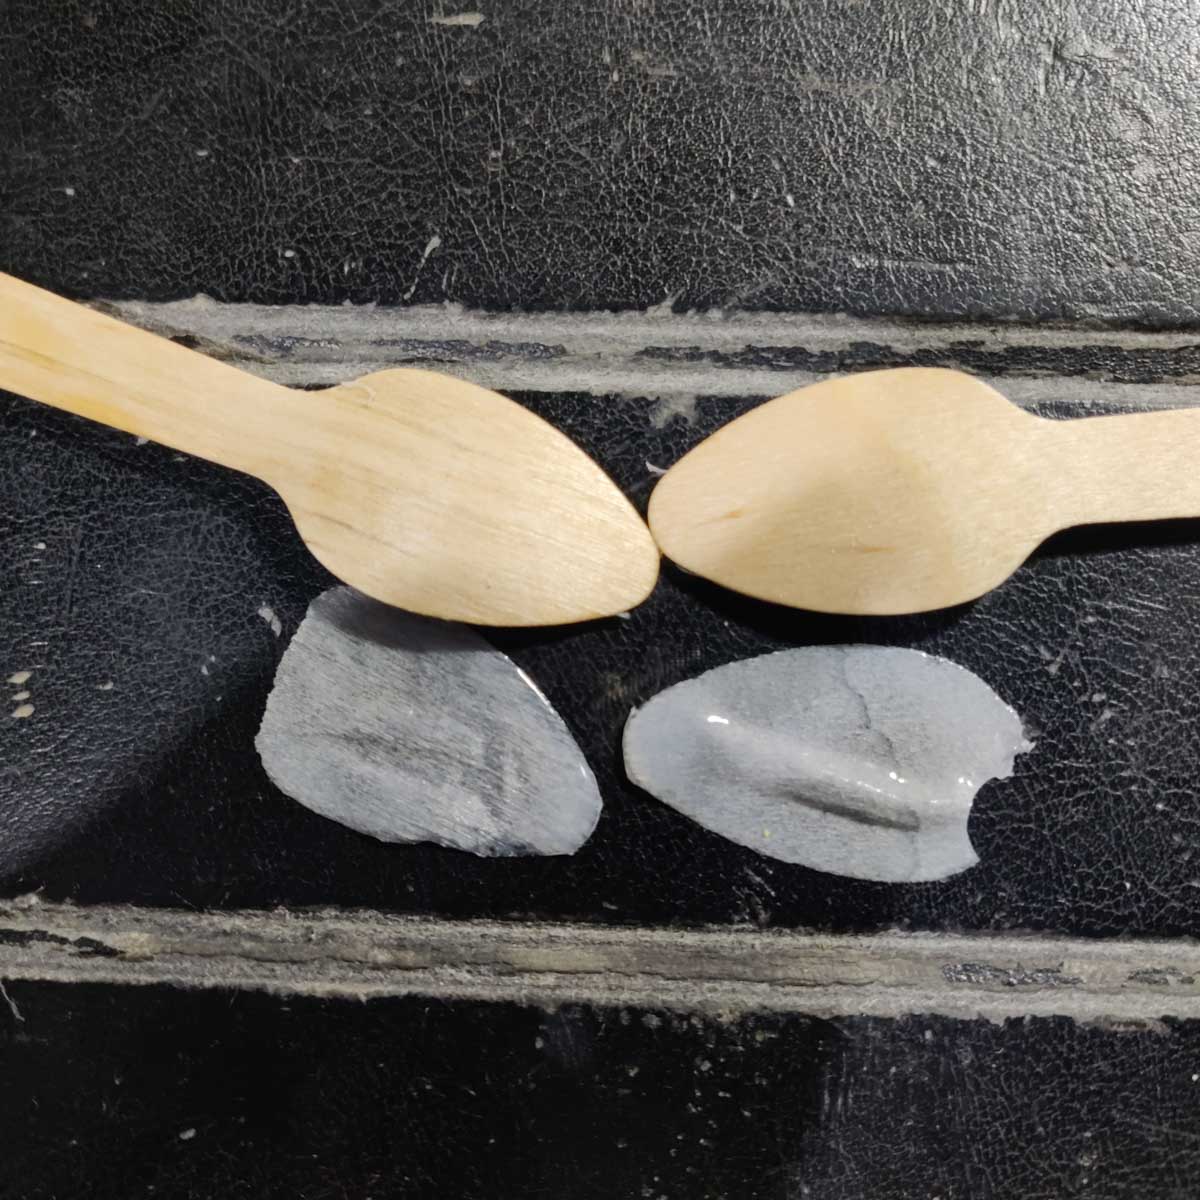
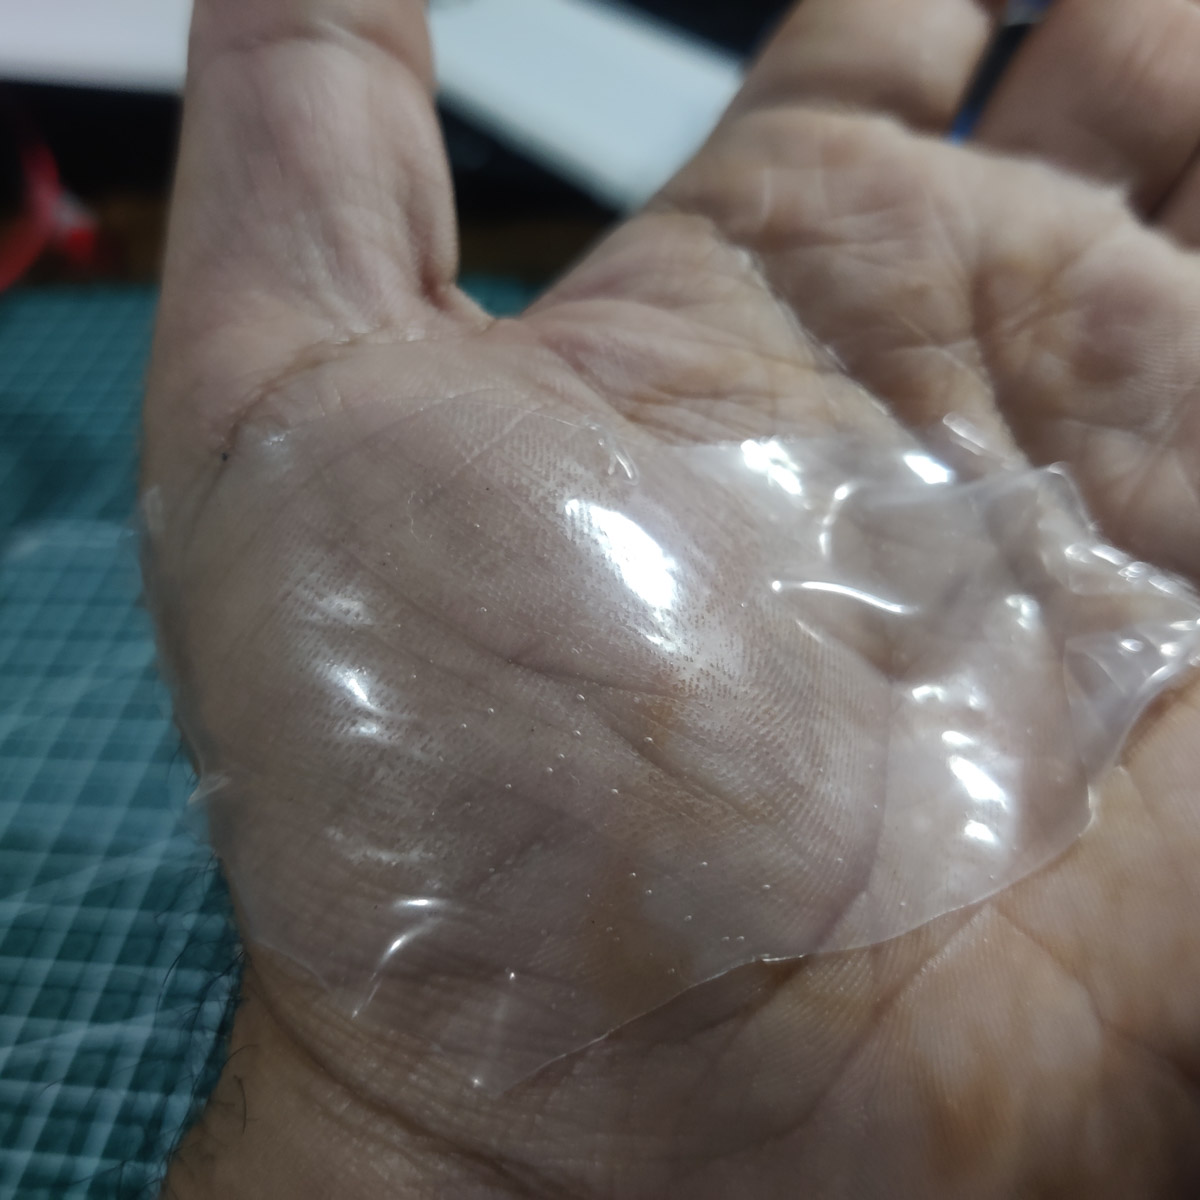
Ecoplex + Cu tape had already failed in the earlier pressure sensor. I was planning to use some of the same ecoplex sheet for this, and so that idea was the first casualty.
I had also tried casting ecoplex on the backs of wooden spoons to imitate fingertips.
Finally I straight up applied masking tape to my fingers and thumb. Then I applied the Cu tape on each finger section since my hand was already a handy on-hand reference for the loactions.
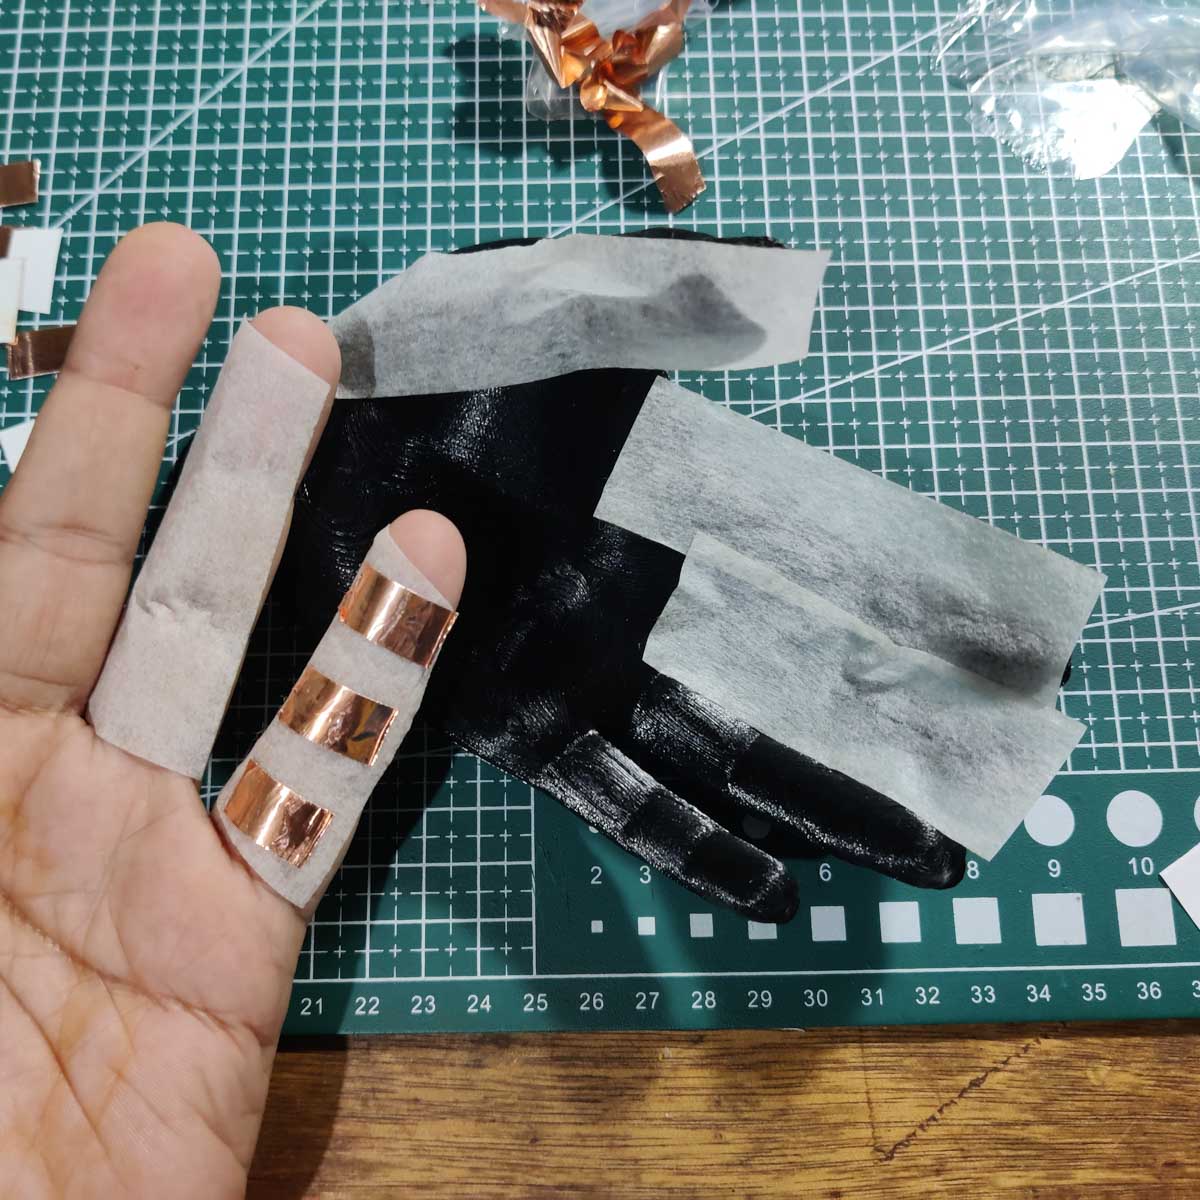
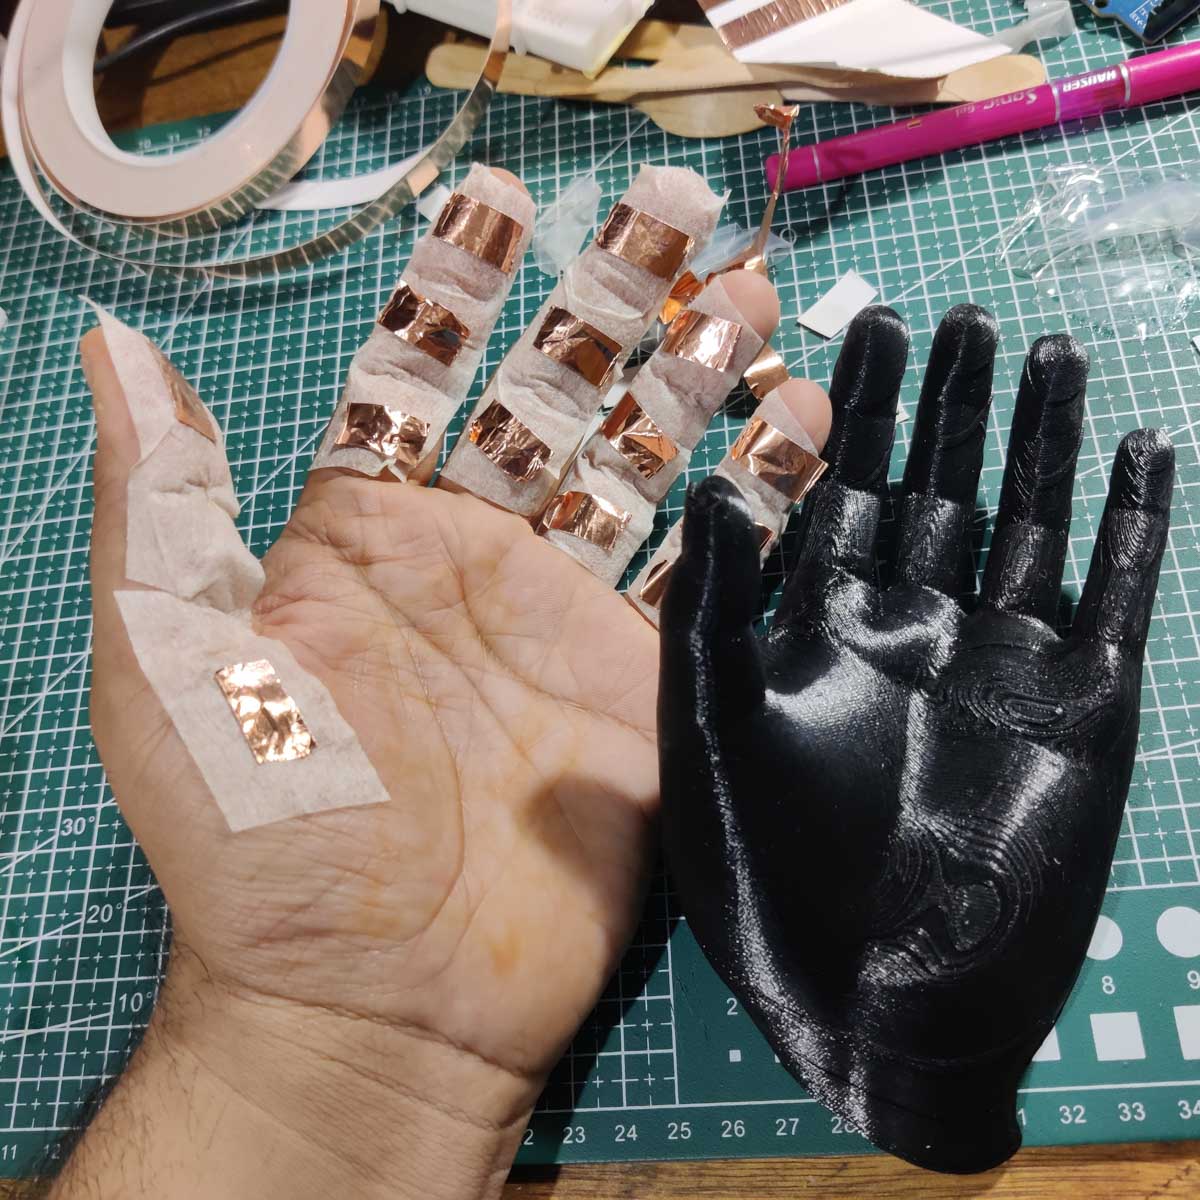
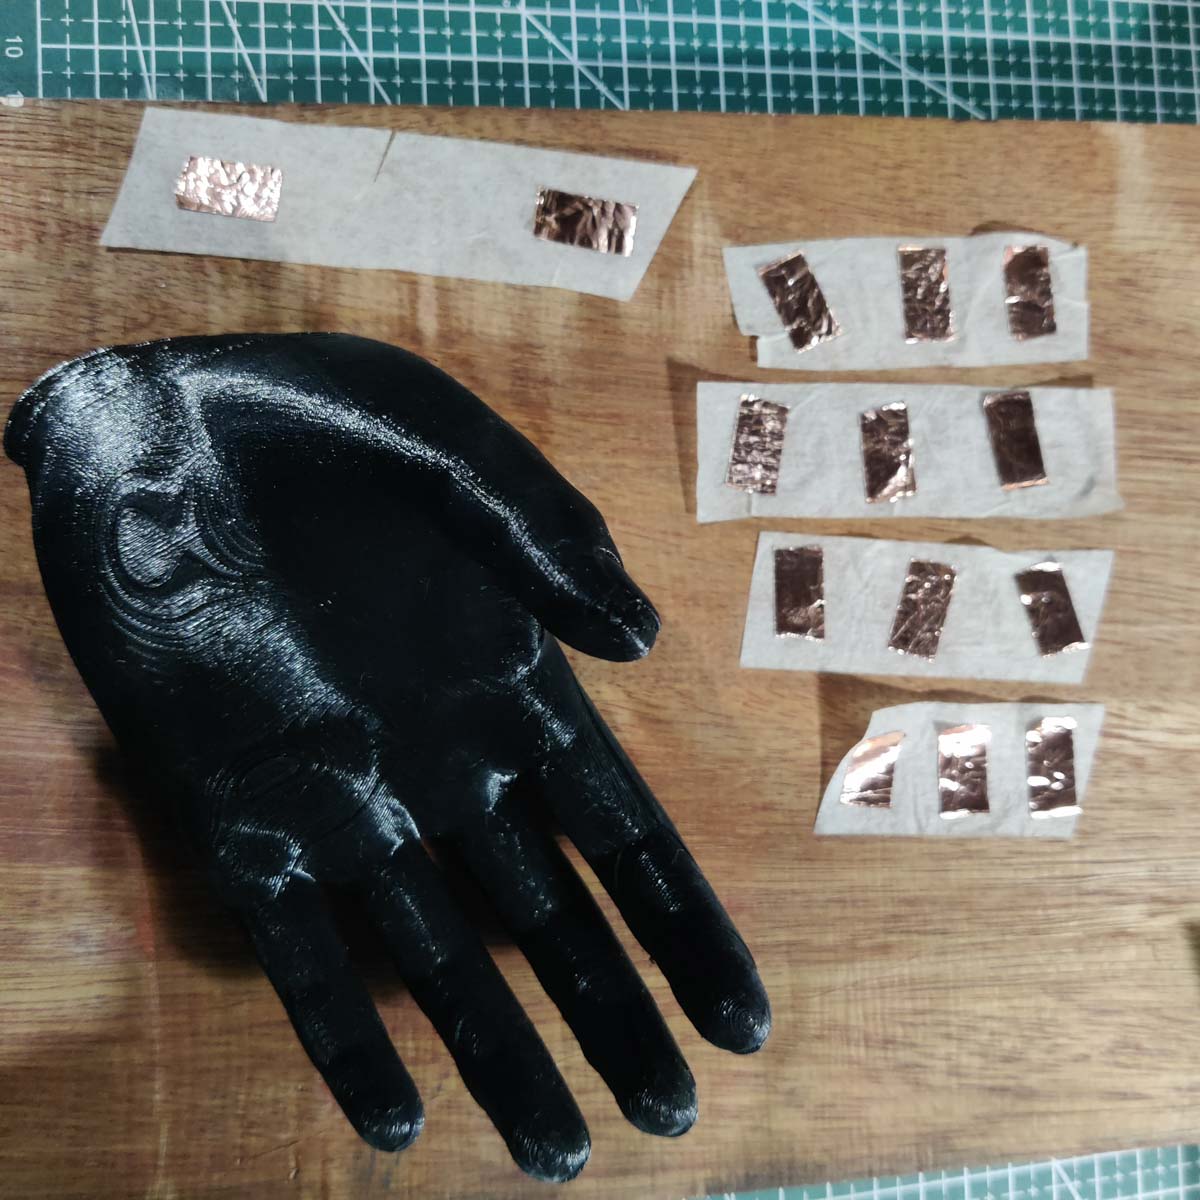
Once this was done, I realised I was utterly disarmed and could not proceeed with this assembly attached.
I had some intuition that I would need something like this so I had off-handedly printed 2 hands - left and right - a couple of days earlier and had those ready to use as a base.
I peeled off the tape-tape assembly and attached it to the 3DP hand for safekeeping and to solder, etc. Apart from being unable to single-handedly do the soldering, I was not really up for poking a hot piece of metal 14 times into my hand.
However, time ran out, and this is where I stopped for the moment. This is an ambitious project that really just got out of hand. It is evident if one considers that punnery and frustration are directly proportional.
Final
RFID triggers
Concept
Embedded RFID tags are preprogrammed with instructons and data that can be triggered or read on a cellphone using it's built-in RFID reader.
I had several ideas, but I shortlisted some
- meditation/breathing exercise visualisation - the tag opens a link to a p5.js sketch in fullscreen on the phone, and the visualisaton is a breathe-in-breathe-out visual to help with the breathing exercises
- trigger maps to navigate home to work
- trigger maps to navigate work to home
- trigger the Cab apps to open and add work as destination location
- trigger the Cab apps to open and add home as destination location
- contact transfer OR portfolio share - send phone number, email, and a bunch of links to reciever
Most of these are variations on quite standard use-cases.
The medium then becomes the interesting aspect.
However, while playing with the RFID tag, I held it against the cellphone too long - for some reason I needed my other hand to do something so I gripped the cellphone and tag togeher - and the tag became VERY HOT ! So I realised that it is necessary to be TAP-ONLY and not be in longer contact, for safety reasons. While I had earlier thought of gluing the tags under or on fake nails, I now decided they were not going on my body directly.
I would embed most of the tags for the above ideas into 3d printed objects, flat material sandwiches on my keychain for all the navigation ones, or a non-giveaway "business card" for the contact transfer concept.
Tools
RFID Tags NFC Tools (Android App) - the broader app for writing NFC tags NFC Tasks (Android App) - the more specific app for automating tasks on your own cellphone when triggered by the NFC Acrylic Nails Other build materials to embed the tags
Process
The process is relatively very simple. This process works for the Contact Transfer, Portfolio Links as well as Meditation visualisation concepts. It also works for launching Maps, since locations can be embedded in the URL of the page.
- Once the necessary apps are installed, open the NFC Tools app
- Tap the tag with the phone and let the App "see it"
- Add the data you want to the tag - this could be text, urls, or any of a range of datatypes
- Confirm writing to the tag
- Apply tag to object in a way that it will not get damaged - moisture, friction, etc
Final
Headband and Hair Gestures
Concept
Thin Cu wire is interleaved with hair using a hairband. This is then connected to a microcontroller to trigger any output - in this case, an invisible/fakeskin headband of neopixels.
 Source : CinemaBlend.com | SoundVenue.com
The inspiration came from the character Book in StarTrek Discovery, who has glowing dot patterns on his forehead and face when he is in an empathetic link with any creature. I later realised the Naavi from the Avatar universe also have a similar light-up look.
Tools
- Neopixel strip
- Cu wire
- Ecoplex
- Hairband
- A Mask - not a flat paper one, but in 3D
- Arduino and it's accoutrements
Process
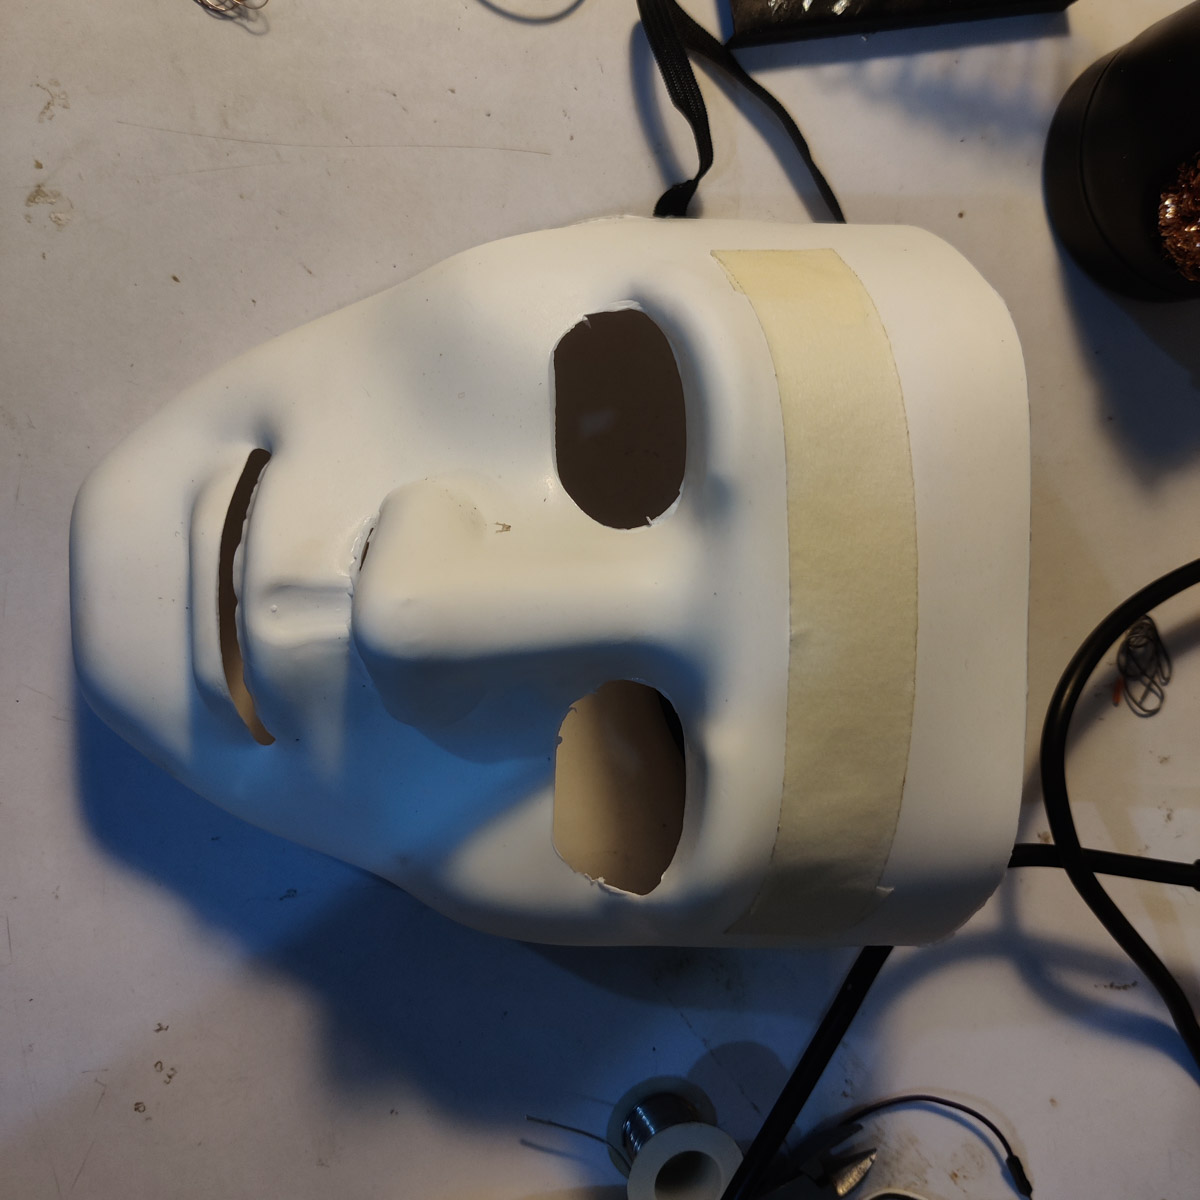
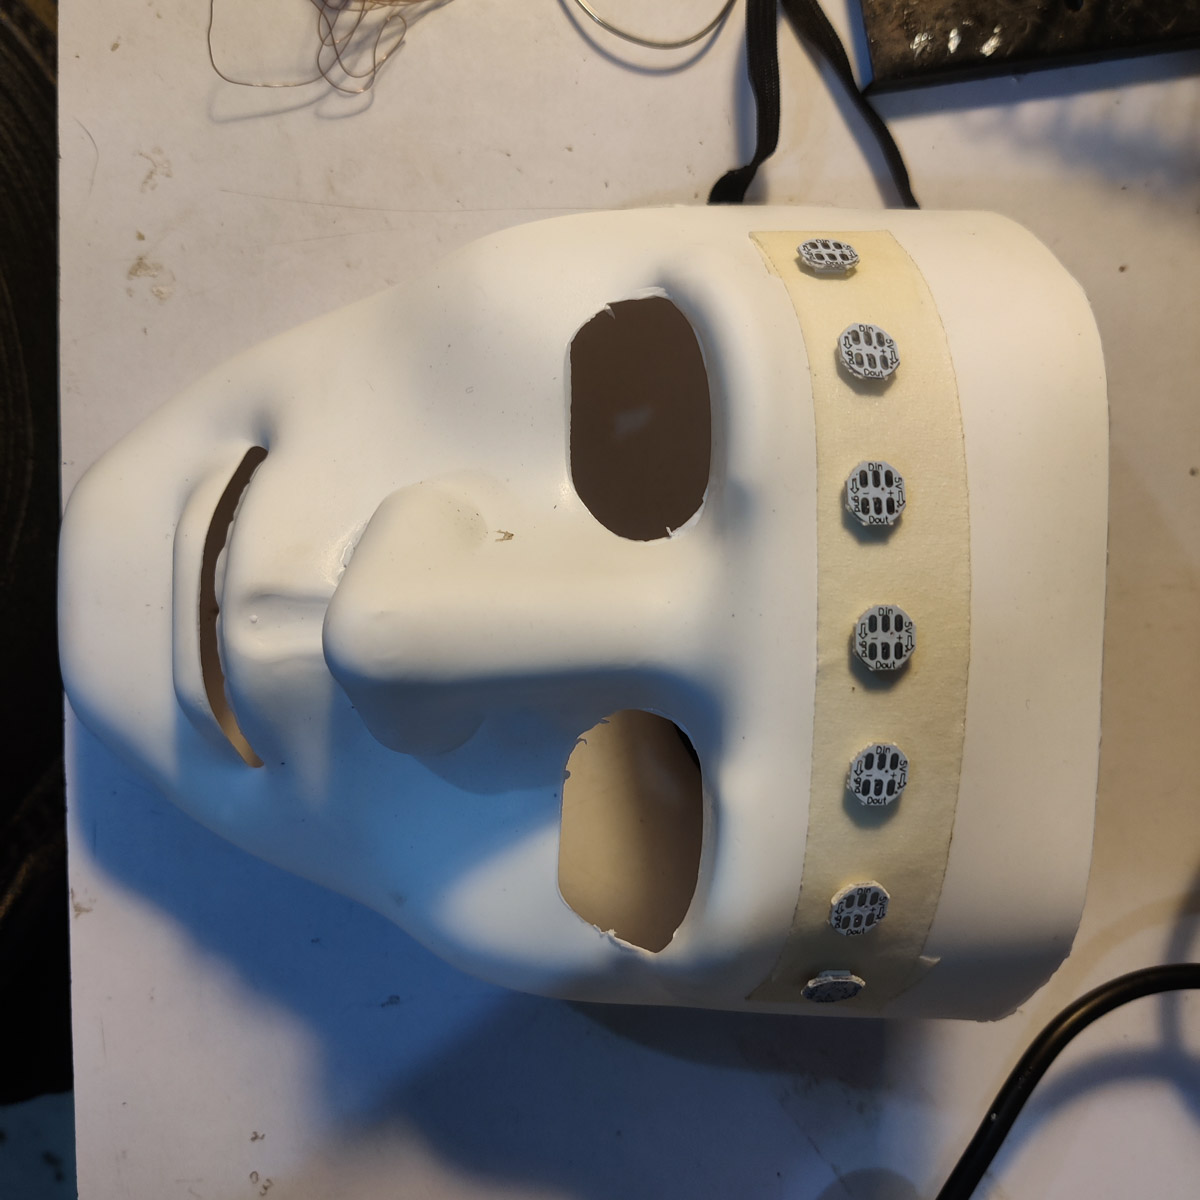
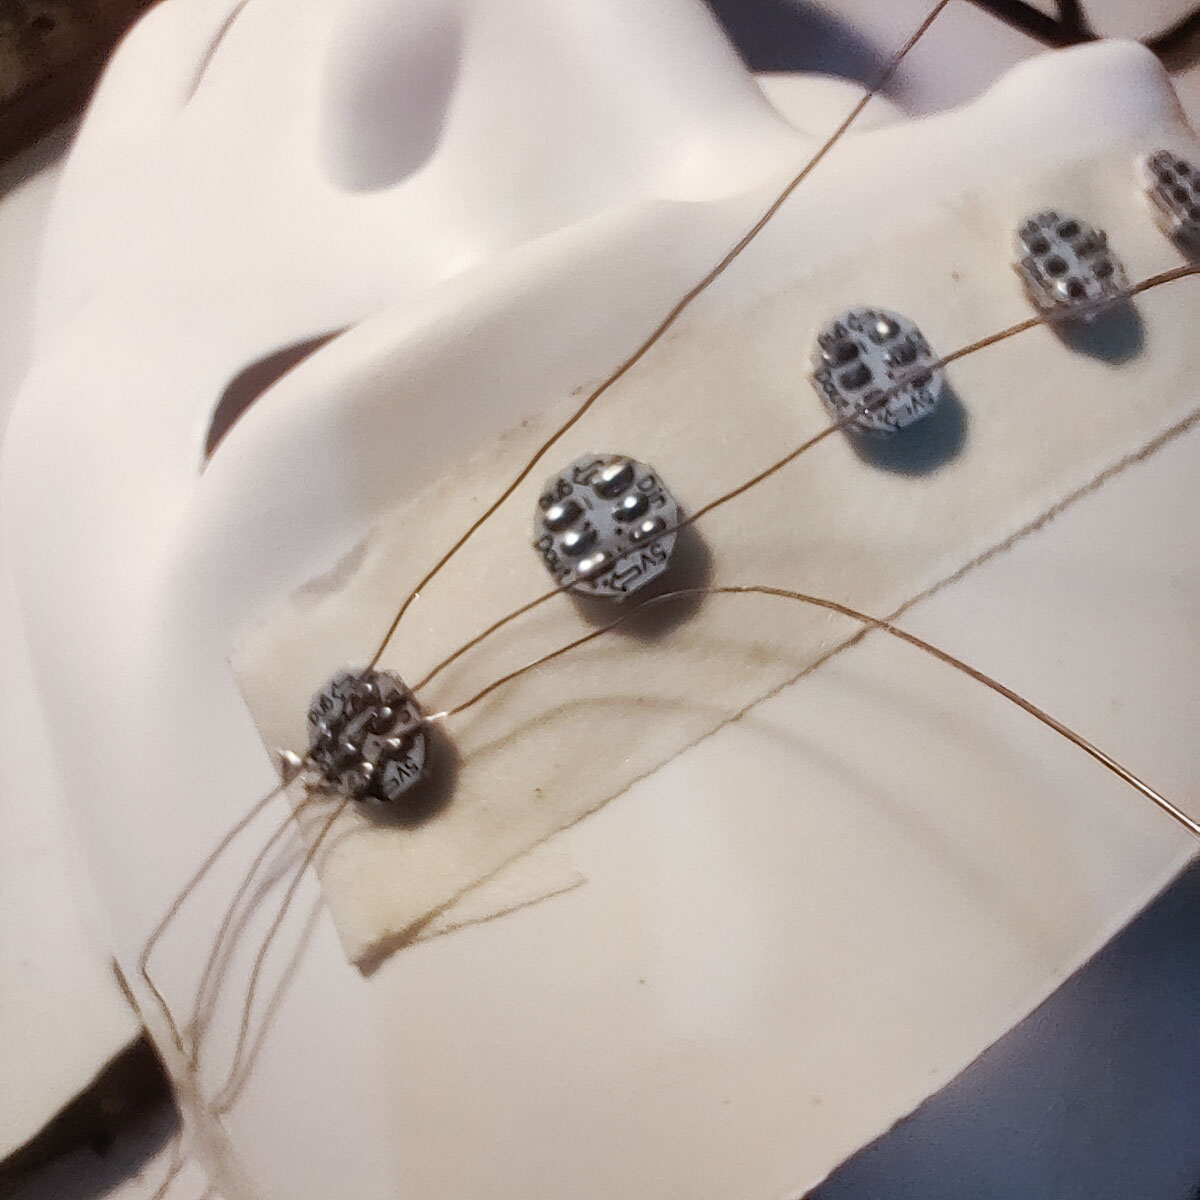
Again, a very trial and error build.
Initially, I decided to use single Neopixels and solder each manually at the required distances to form a "strip" of 7 or 9.
For this, I used the mask, and ran a strip of masking tape - sticky side up - over it's forehead, tucking the ends backwards under itself so it would stick to the mask as well. The sticky side would be used to hold neopixels while being soldered.
This quickly became another erratic and thankless task, so I gave up, bit the bullet and took the easy way out - I used a neopixel strip directly. I soldered 3 wires to the 3 contacts for 5V, Sig IN, GND.
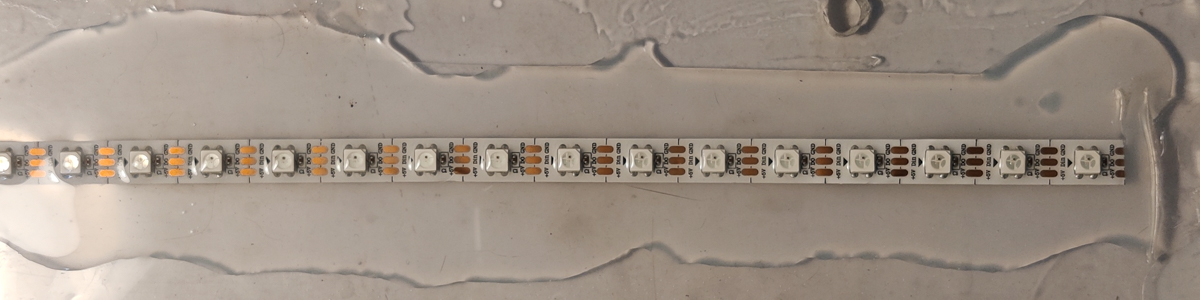
I poured ecoplex over an acrylic sheet, and then placed the neopixel strip on it.
Once it had started to set a little - about 45 mins - I poured a second round of ecoplex and sealed it in. Then I let the whole assembly cure for a day.
Once again, since other concepts had worked out and this one had already taken up more time, I paused it for the time being to finish what was already working. The Hair attachment is left to be worked out.
Code
Code at bottom
A crucial part of the code was to maintain symmetry on two halves of the strip, leds 1-8 and 9-16, with a correspondence between 1-16, 2-15, 3-14, etc. However, since the LEDs are actually 0-15 and not 1-16, the correspondence is actually 0-15, 1-14, 2-13 etc.
This is obtained by this bit of the code
for (int i = 0; i < 8; i++)
    int leftLED  = 7 - i;
    int rightLED = 8 + i;
Then I used ChatGPT to quickly rustle up 3 functions, one for light trails, one for a random but symmetric constellation, and one for a twinkling effect. By the final version, I had these 3 effects in 3 different colour palettes as well.
Final
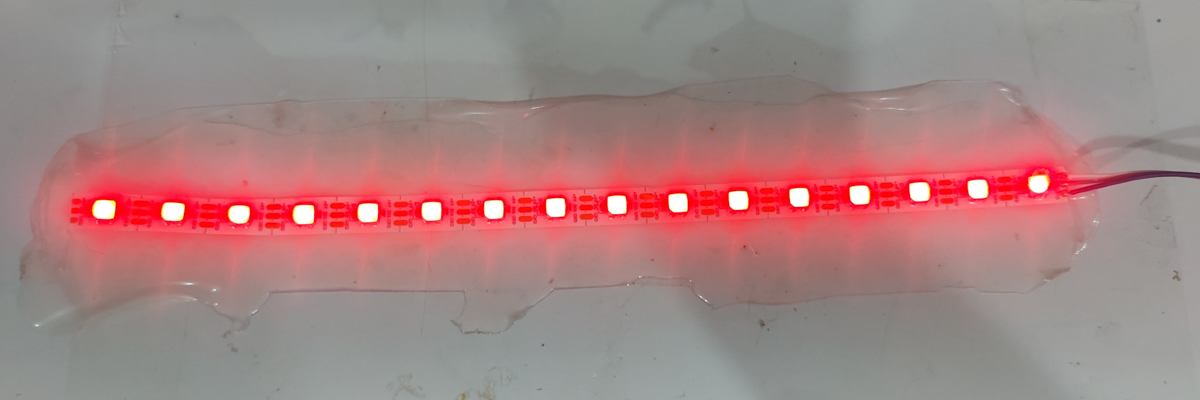
Once the connections were made and code was written, I lit up the Neopixels to test various light configurations on them.
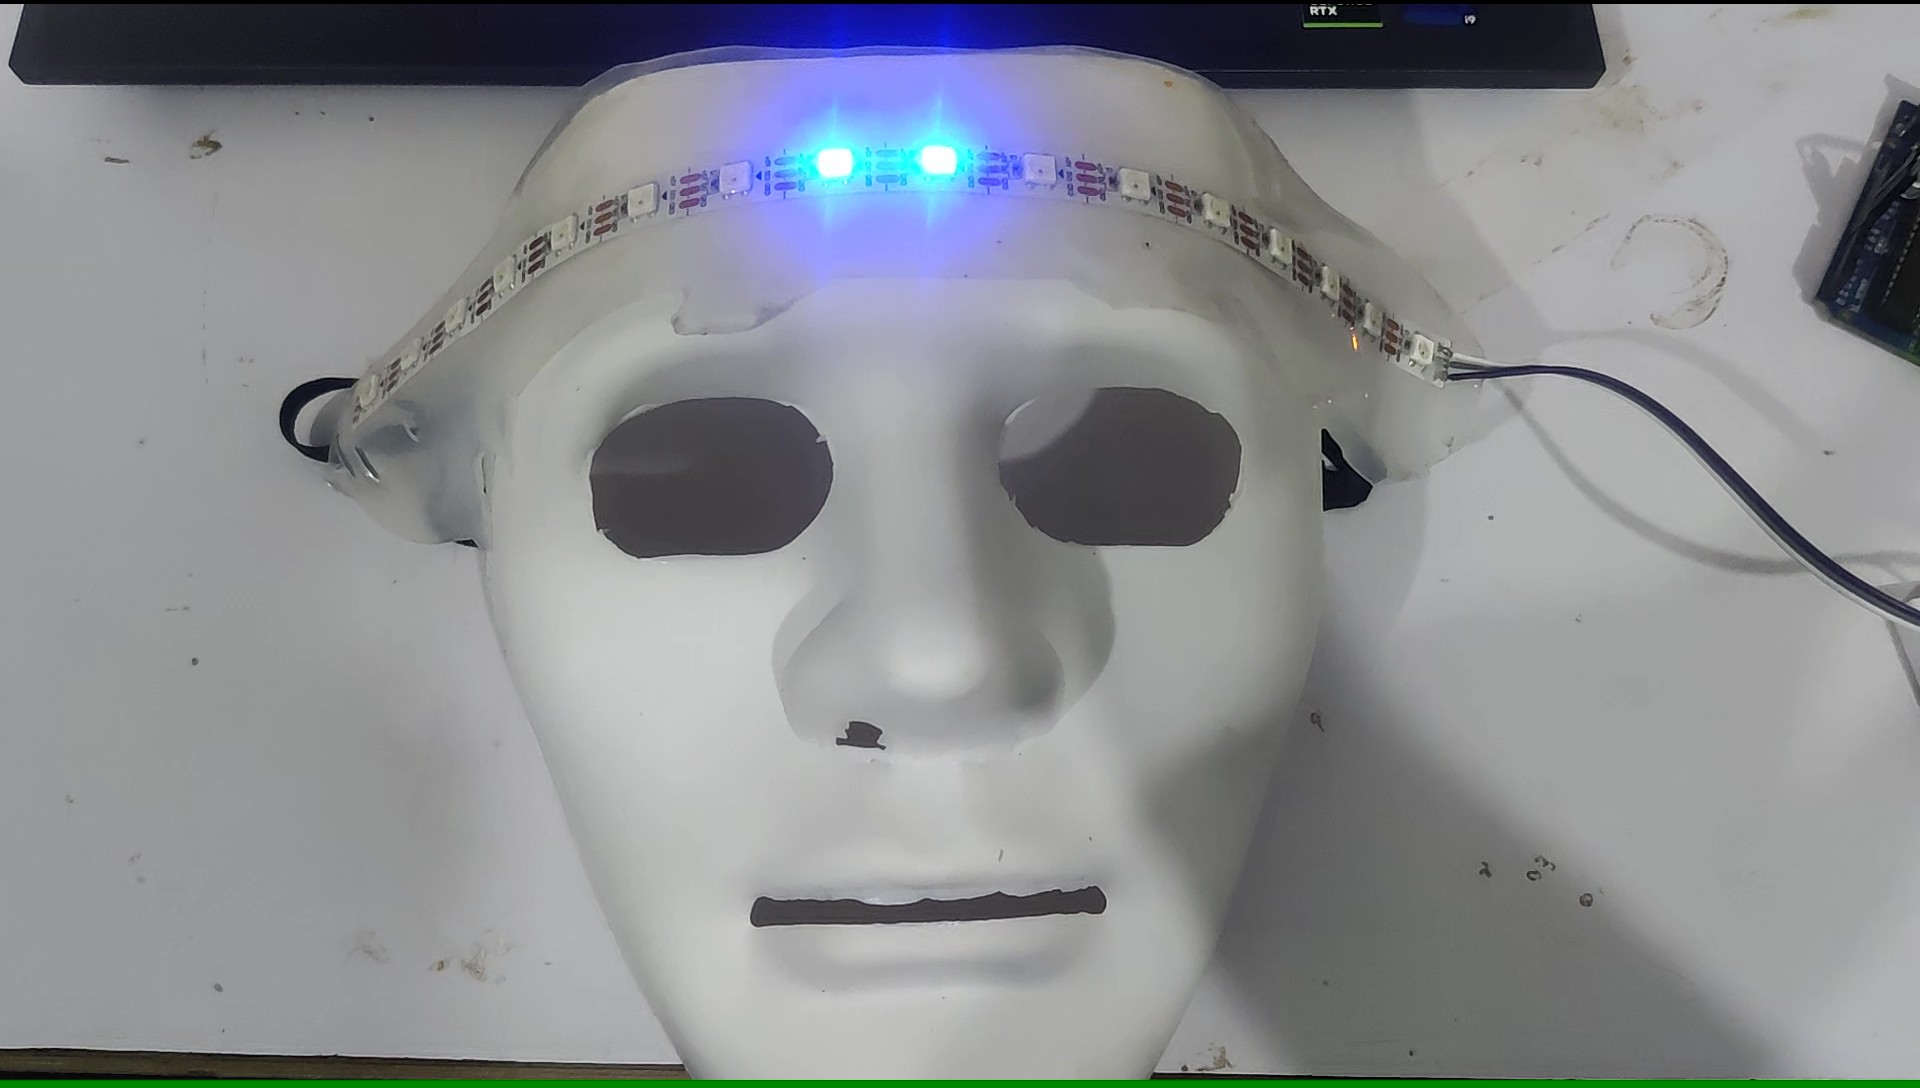
Then, since the pseudoksin seemed tacky enough, and without using any glue, I tried to apply the whole assembly on my head !
You can see me struggle with setting up the pseudoskin band !
You can see me upload code midway to change the light patterns in the band.
With the right glue and some more control over the initial pseudoskin cast, this is a viable project. Currently, it seemed to blend with my skin well enough, but the edges stand out. If they were trimmed, they'd have a thick section visible though. So the edge of the patch needs to be controlled during the casting itself.
Headband and Metal Touch Tattoo
Eventually, once I worked out the Metal Touch Tattoos, I linked those up with the Neopixel headband instead of the hair sensor.
I used ChatGPT to use the touch input to cycle through the 3 light pattern functions, as well as had the serial output print the touch values, incase I needed to tweak them.
Final
Conclusions and Reflections
The Cu tape vs ecoflex flexibility disparity and the issues arising form that were a big learning.
The same principle used to counter the issue - embedding non-stretching gauze in the ecoflex - was also a learning.
The metal-tattoo touch sensors are also a nice play but being mounted on skin interferes with the touch sensing, and that will need some workarounds. However, it was a satisfying trick to play with.
The Neopixel strip was an easy hack instead of soldering individual LEDs, but individual LEDs would allow me more control over the positioning. However, I am gald I tried the strip, since it is a good beginning and provides the necessary inspiration to try more involved builds, without which I may not bother going ahead in this direction.
Treating the Skin as an interface - a skinterface - is a very interesting approach. Personally I find it a little intrusive and unsafe on two counts
- the material, chemical, etc exposure needs to be very well realised since the risk of injury is quite high if done improperly
- when you use body parameters as a signal, it can be intentional, but you may also be signalling things unintentionally, and that needs careful work at the concept level itself
Going ahead, I would probably try things with gloves, sheer fabrics and other such rather than be on the skin directly. This may bring things closer to wearables instead of the skin as an interface, but that boundary was always arbitrary.
However, qualms aside, there are many wild and wonderful ways to apply the skills of this module that I am looking forward to.
Files
Touchpad code
Processing
Pressure Matrix (from Tutorial)
3 Zones basic
Rain controller
Metal Touch Sensor - Arduino Code
Threshold Output
Yes-No output
Neopixel Headband - Arduino code
Single Bounce Test
Light effects