8. Soft robotics
Research
I had attended Adriana's Soft Robotics Workshop in Bhutan during Fab23, and had been following her work online.
The FlowIO device was also used during the workshop and I had started replicating or making a device of similar function
Other online resources
- Soft Gripper Fabrication Guide | Soft Robotics Toolkit
-
AeroMorphs - Heat sealing Inflatable Shape-Change Materials for Interaction Design
Inspiration
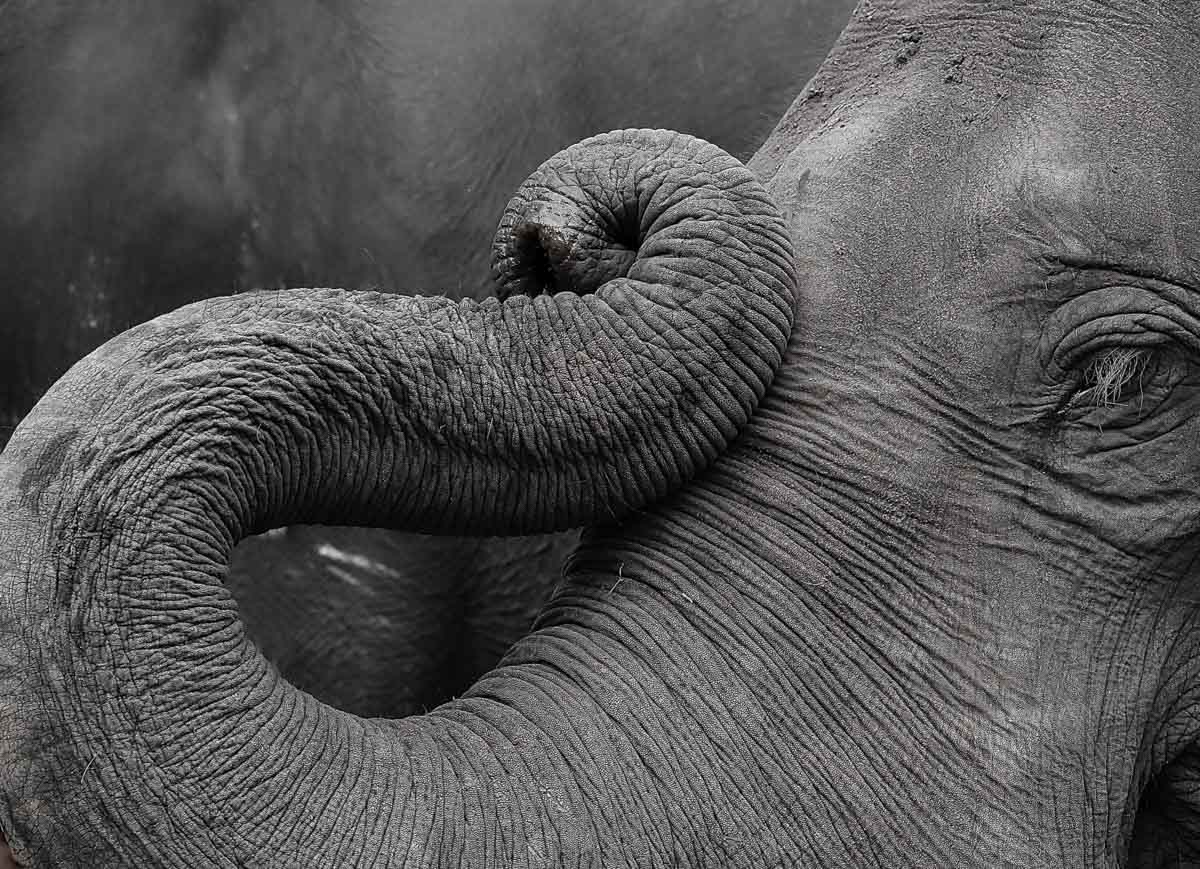 - How Elephant Trunks Twist and Twirl | AskNature
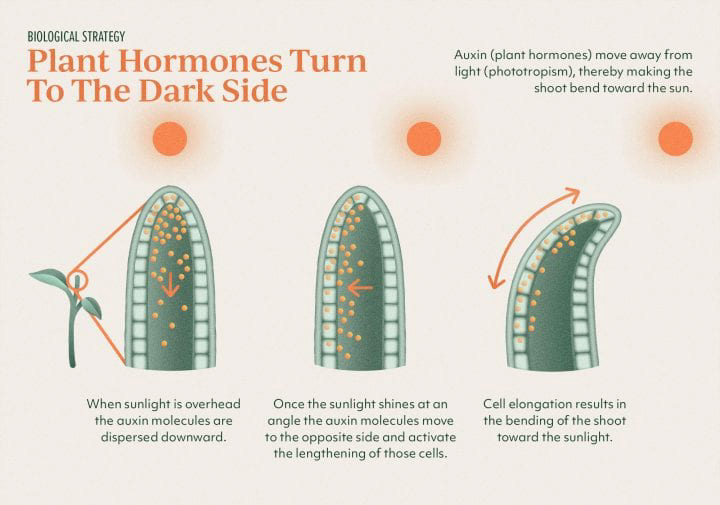 Water Pressure Helps Flowers Follow the Sun | AskNature
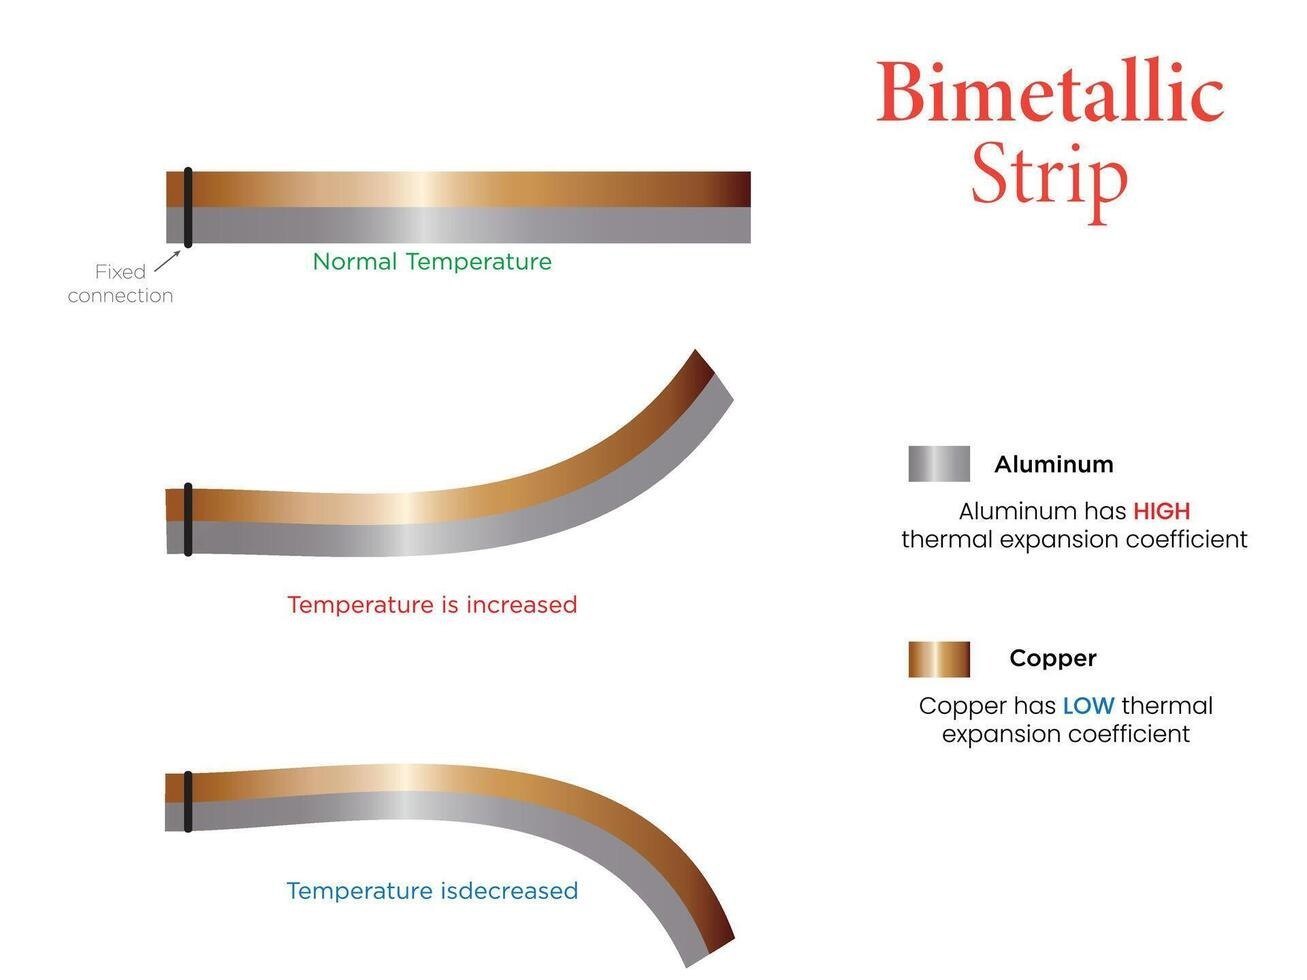
Soft Robotics, in many ways, functions similar to animatronic principles and how muscle and bone, a tensegrity combination, work in nature. Some muscles expand while others contract, to make a trunk or a tongue move in one direction or another. Some cells expand while other shrink, to make plants move and face one direction or another. The expansion-contraction principle goes as far back in simplicity as the bimetallic strip.
If this action can be sped up and repeated, you get an inchworm type motion !
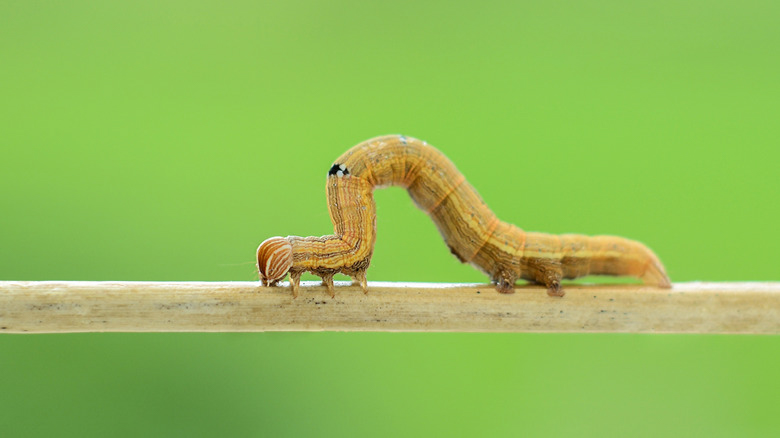
Source: A classic video I love of an inchworm — Reddit
Many inspiring Fabricademy Alumni works as well !
- 9. Soft Robotics | Grecia Bello
- Week 08 – Soft Robotics | Dima Hejap
- 12. Soft Robotics | Ala' Janbek
- 12. Soft Robotics | KYON
Ideation
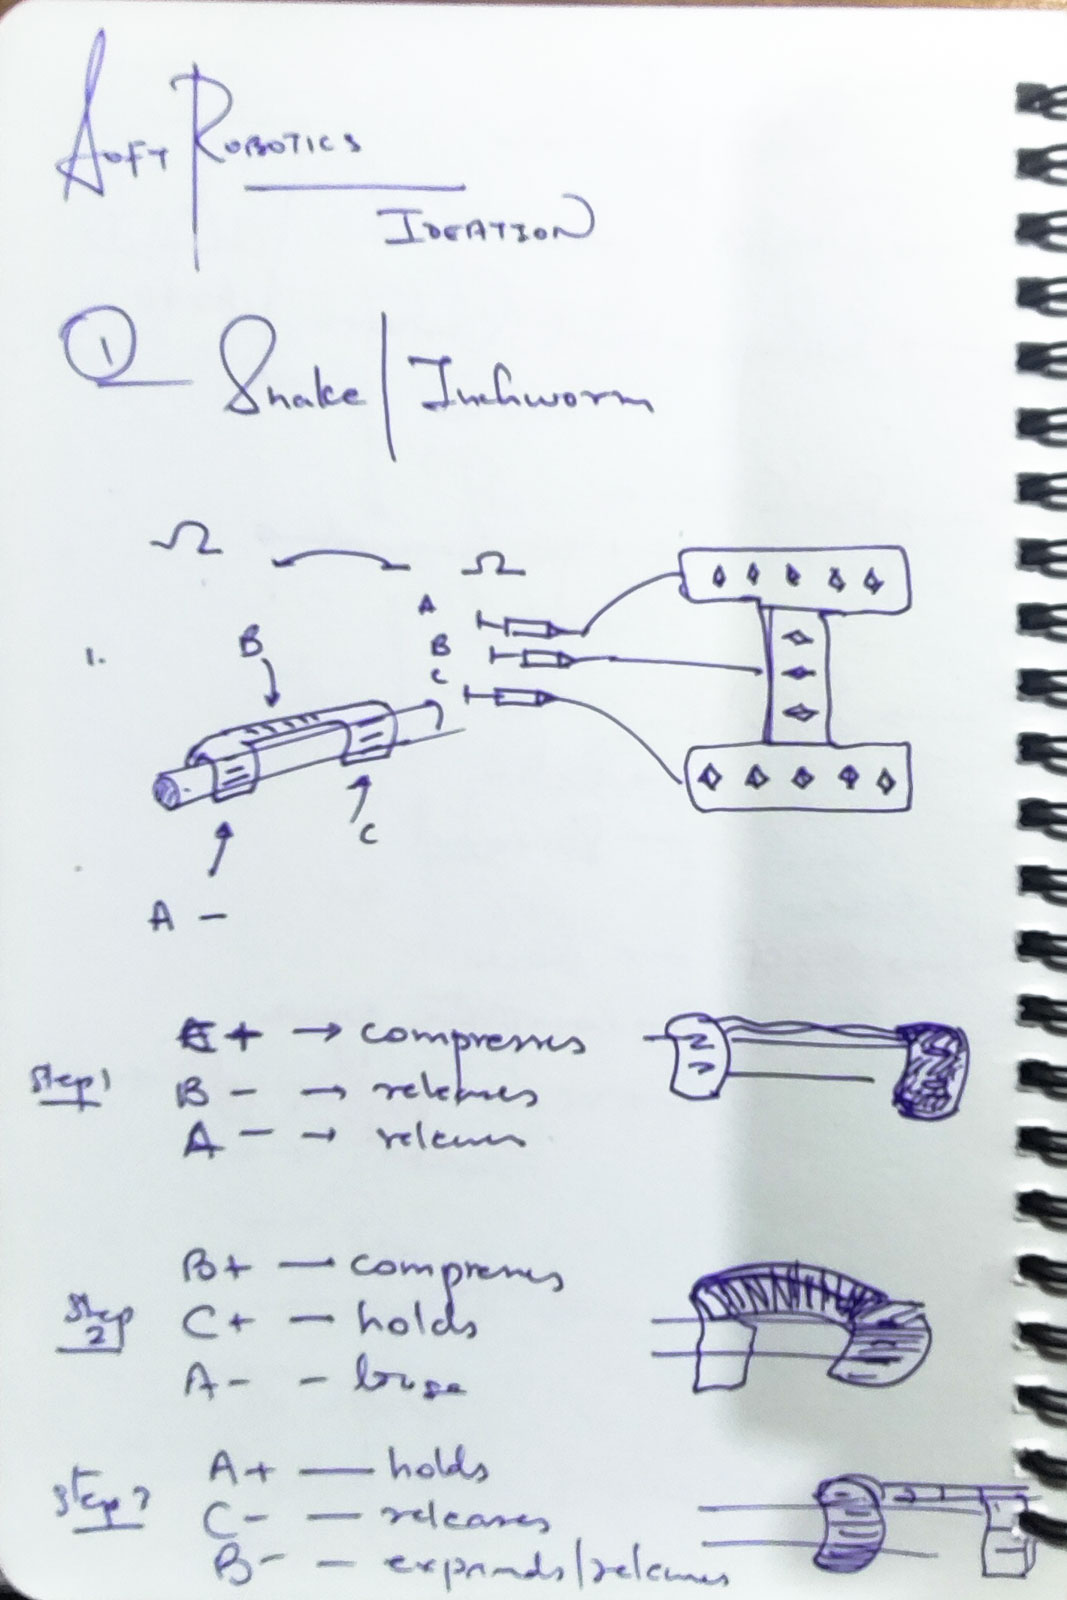
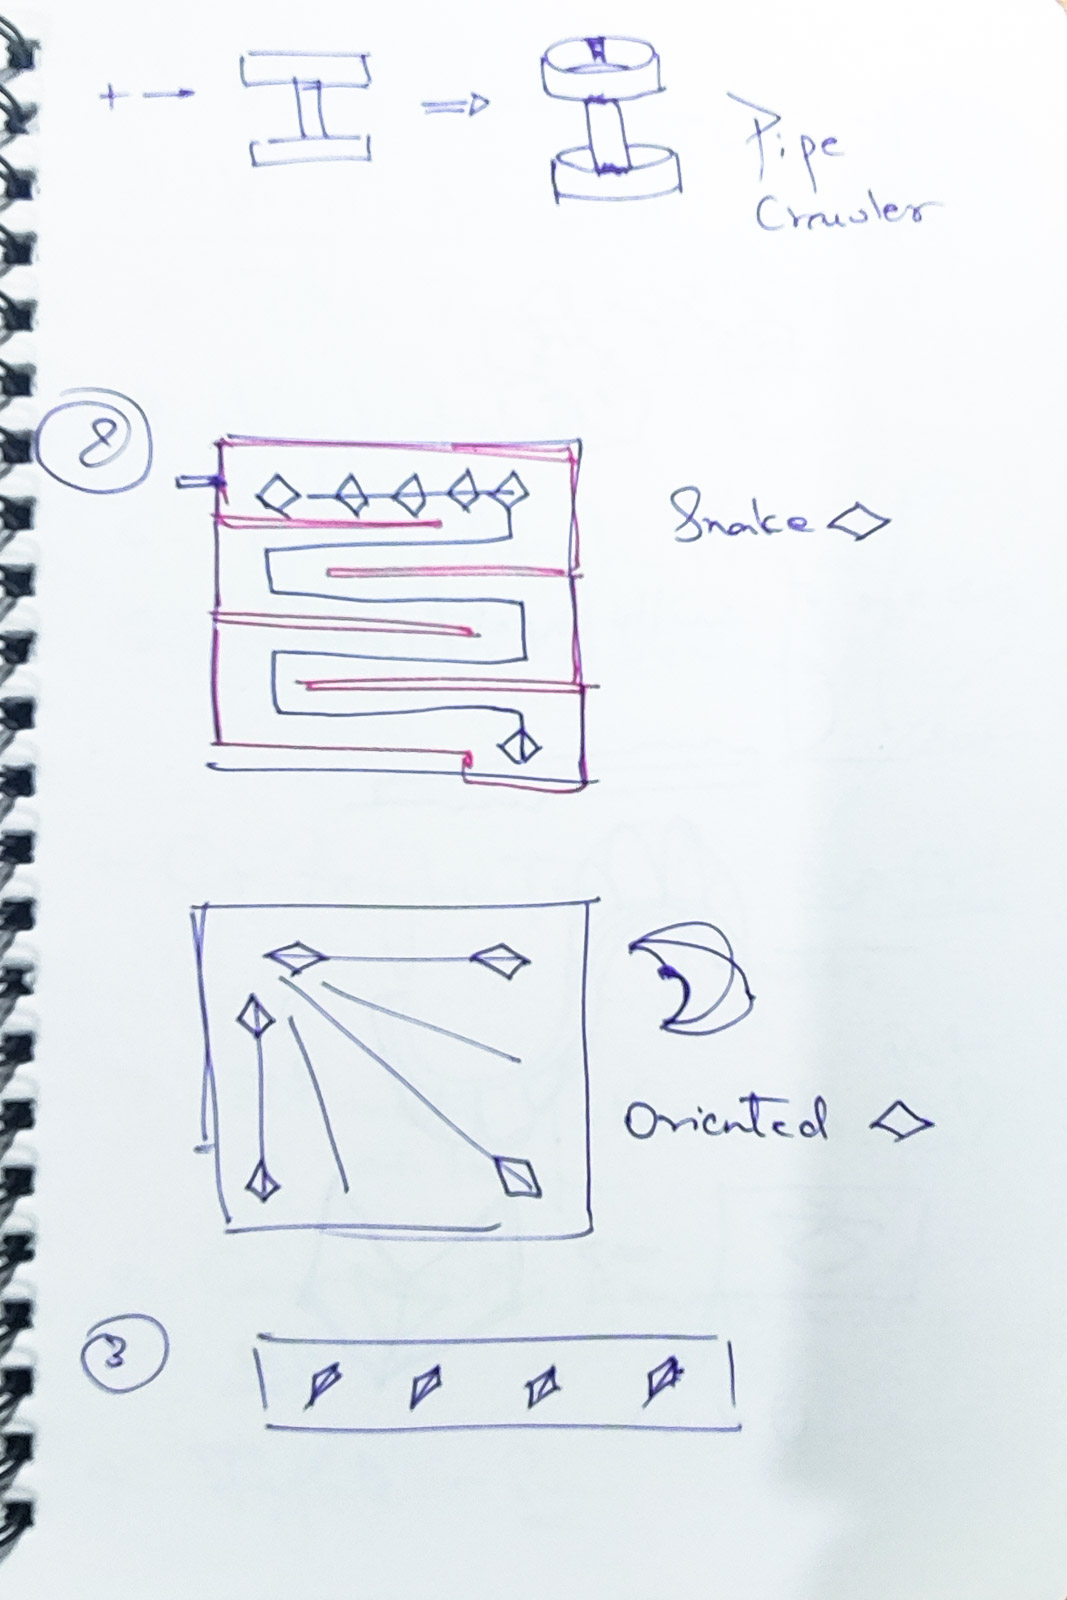
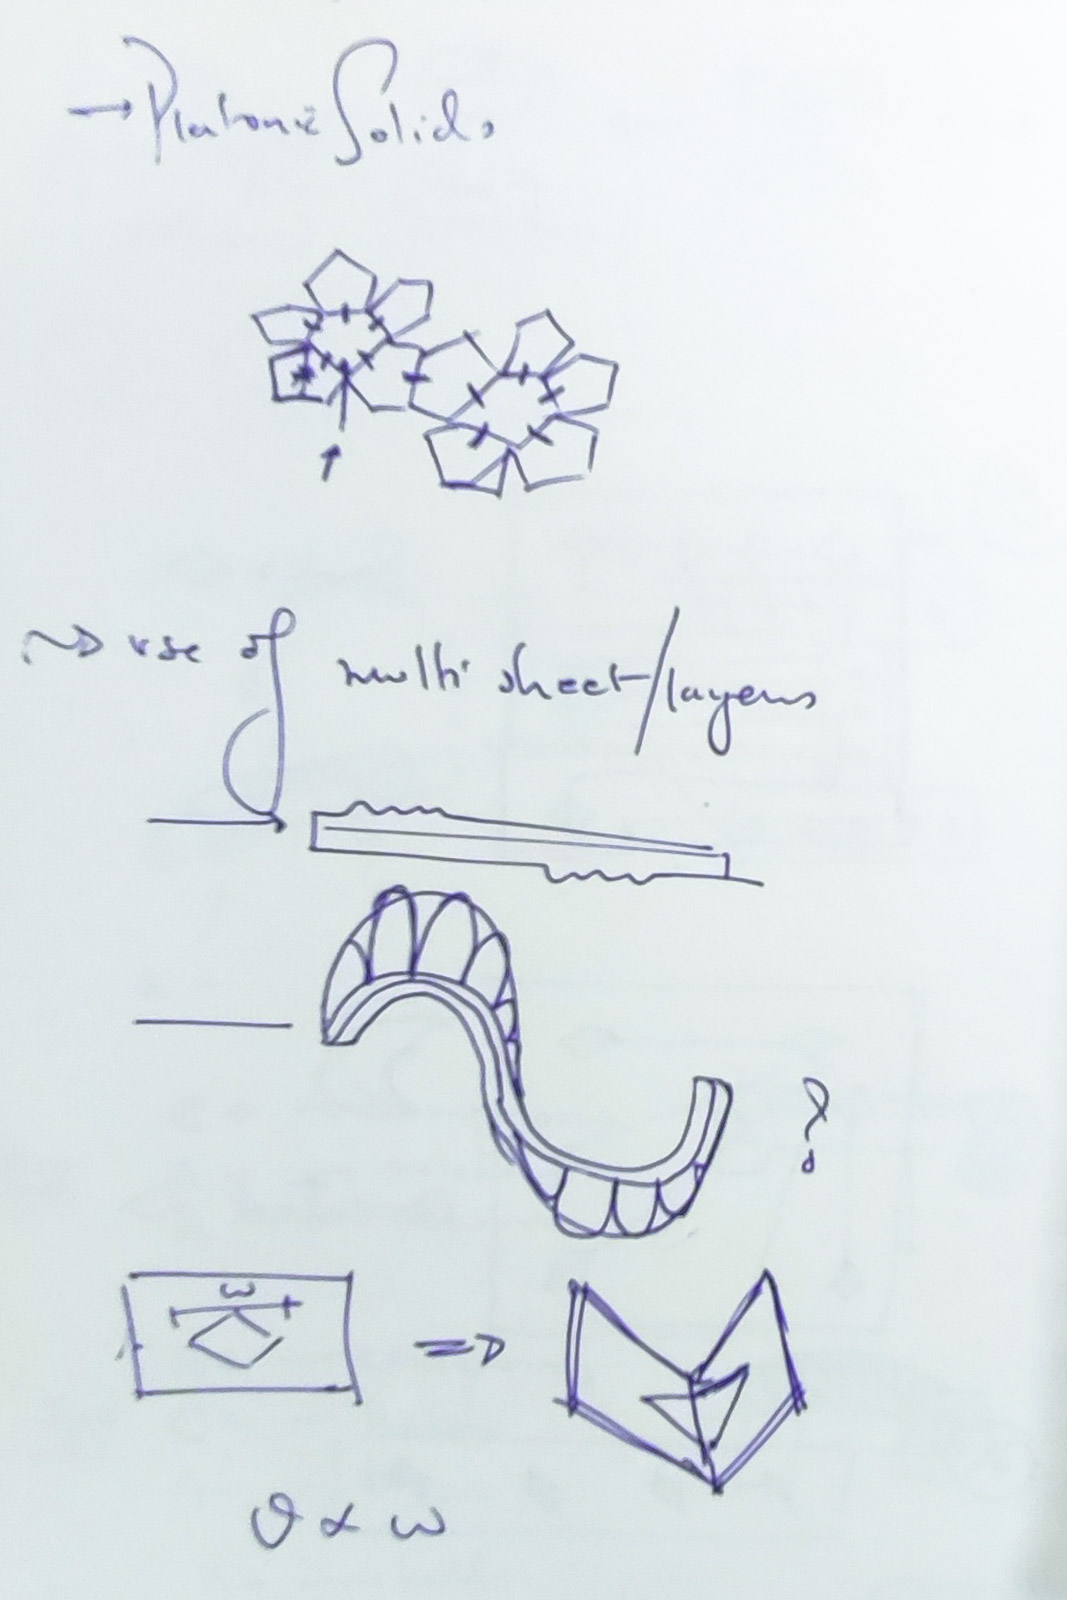
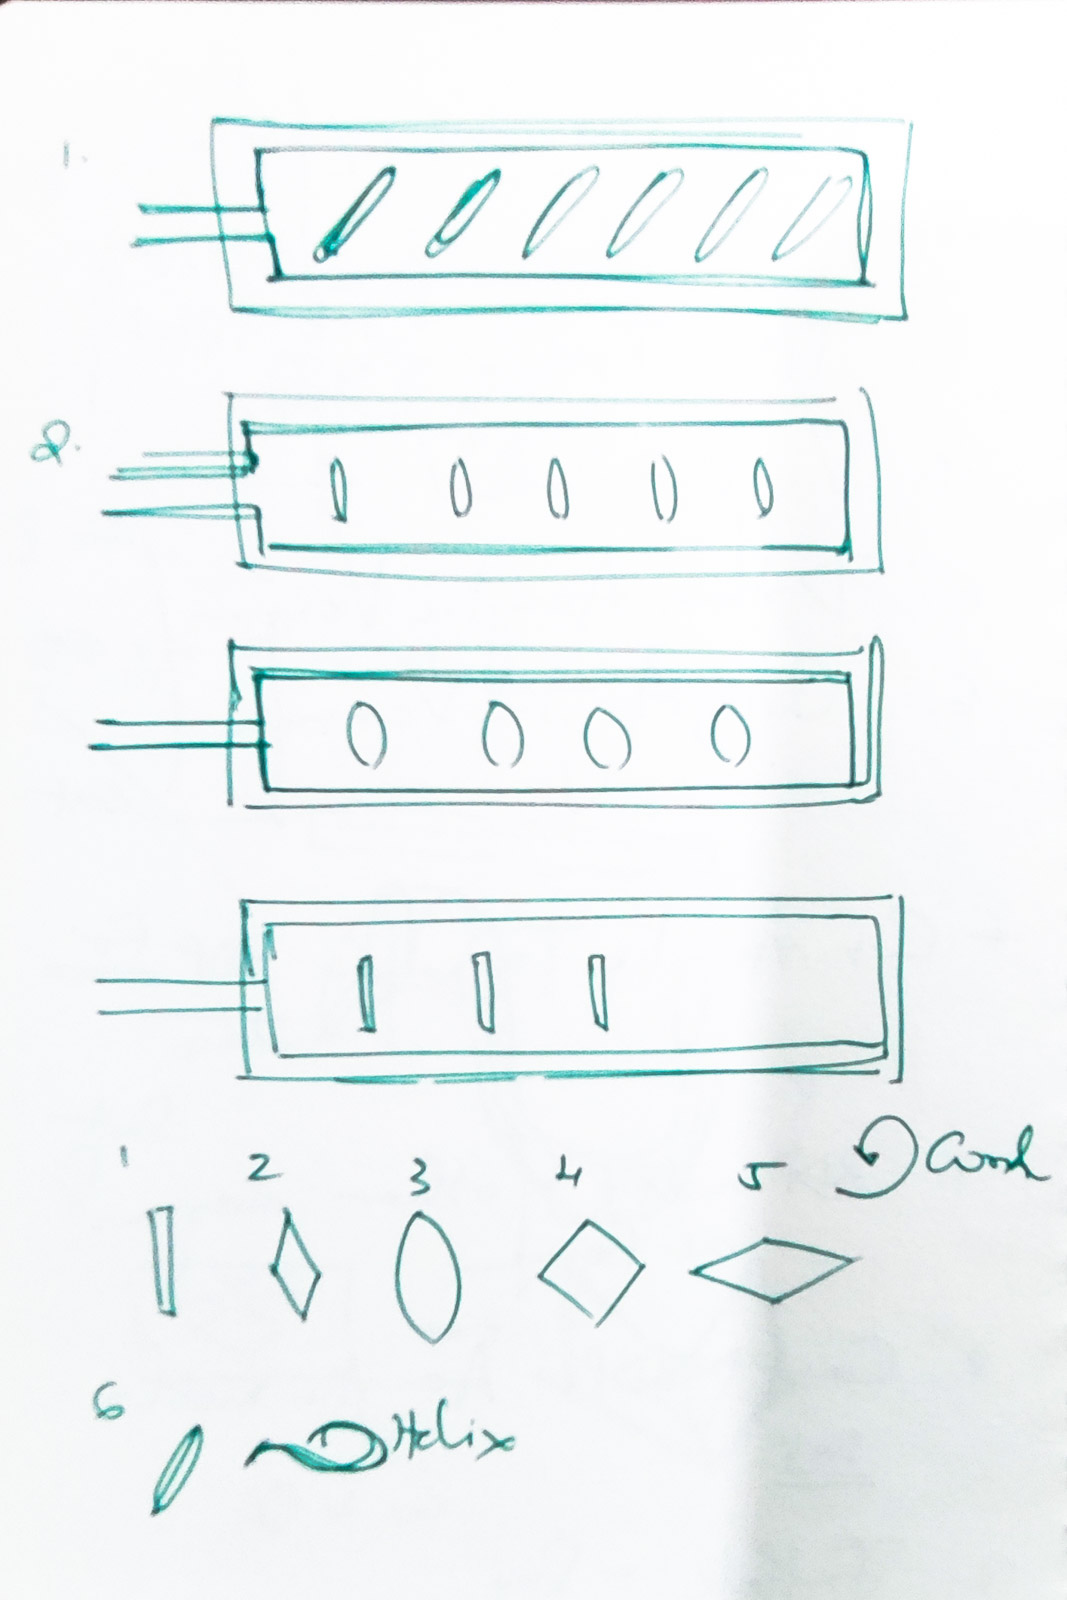
The accessibility of creating soft robots with just vinyl sheets, butter paper and a clothes iron was amazing. I had so many thoughts. I wanted to approach this from multiple directions - biomimicry in motion, the mechanics and animatronics translating to soft robotics, origami actuations, texture play, and more.
I was inspired by the various grippers I had seen, but wanted to make something more than just a gripper. I decided a climber-crawler bot inspired by a mix of the Inchworm motion as well as tree climbing monkeys and humans.
The Soft Robitics exploration would be in 2 primary phases :
- a lot of vinyl trials to understand the relationships between the geometry and the motion
- a silicone inflatable soft robot that would have some intentional motion, the Crawler
Given material availability, time, etc this was the list of explorations I did
- Vinyl trials - lots of simple trials with varying parameters
- TPU sheet - I had some TPU sheet so I tried lasercutting and laser-welding it with a defocussed beam into an inflatable
- Ecoplex cast 1 - the standard gripper to begin with, with one combined chamber
- Ecoplex cast 2 - a crawler bot with 3 different inflation-deflation chamber
- polythene bag trials - since I got the wrong vinyl initially, I tried experimenting with milk bags
Vinyl Trials
Tools and Materials
- Heat transfer vinyl
-
Butterpaper
-
Lasercutter
-
Vector tools
- p5.js
Process
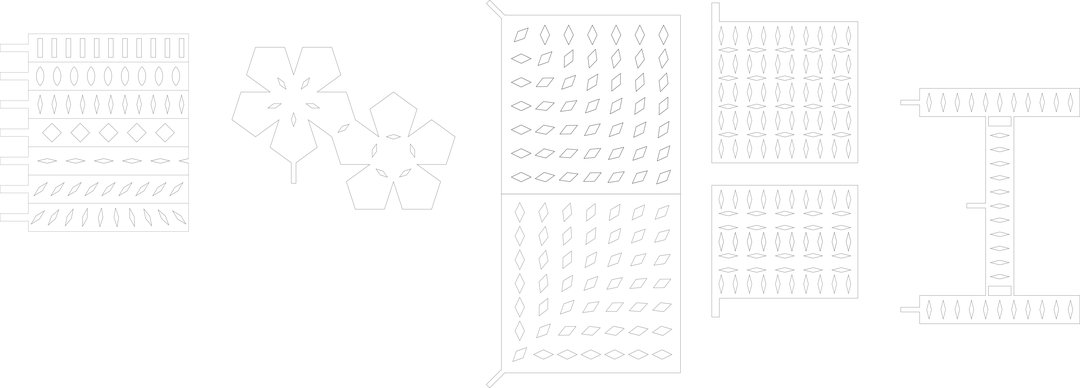 Butterpaper core lasercutting drawings
I started with a series of vinyl trials to understand how different parameters would affect the angle of bending and the resulting motion or geometric position.
I wanted to test:
- the aspect ratio of the diamonds
- the distance between consecutive diamonds
- the orientation of the diamonds
- changes in orientation across the piece
- alternative shapes such as narrow slits, ellipses, circular vesicas, and narrow rectangles
- different arrangements and patterns of these shapes
- a dodecahedron-based configuration
I began with a basic diamond shape arranged in a simple series, perpendicular to the direction of the material strip. I hoped this would produce a regular curling spiral.
I then modified the following parameters:
- Aspect ratio — producing thinner or broader shapes
- Shape — diamonds, ellipses, narrow rectangles, and other forms
- Orientation — tilting the shapes at an angle to the strip
- Gradients — gradually changing parameters across the piece, particularly the orientation
I used vector software to make the primary drawings. The transform, duplicate, rotate functions were used, and the blend command was very useful to generate a gradient of shapes between two extreme versions.
For the larger square pieces, I coded p5.js to give me a grid of constantly changing orientations of the basic diamond shape.
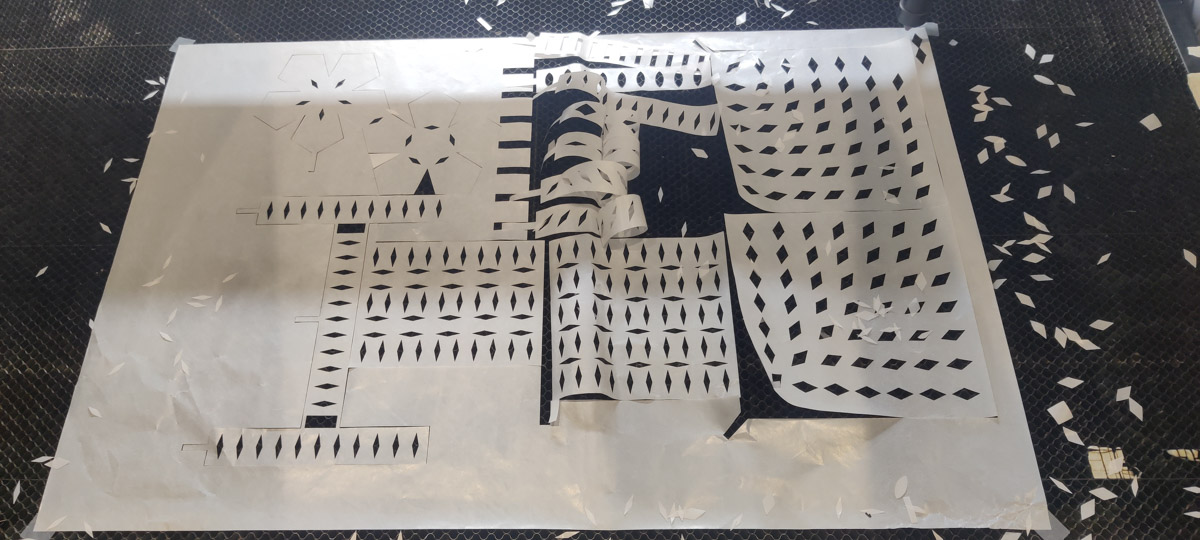
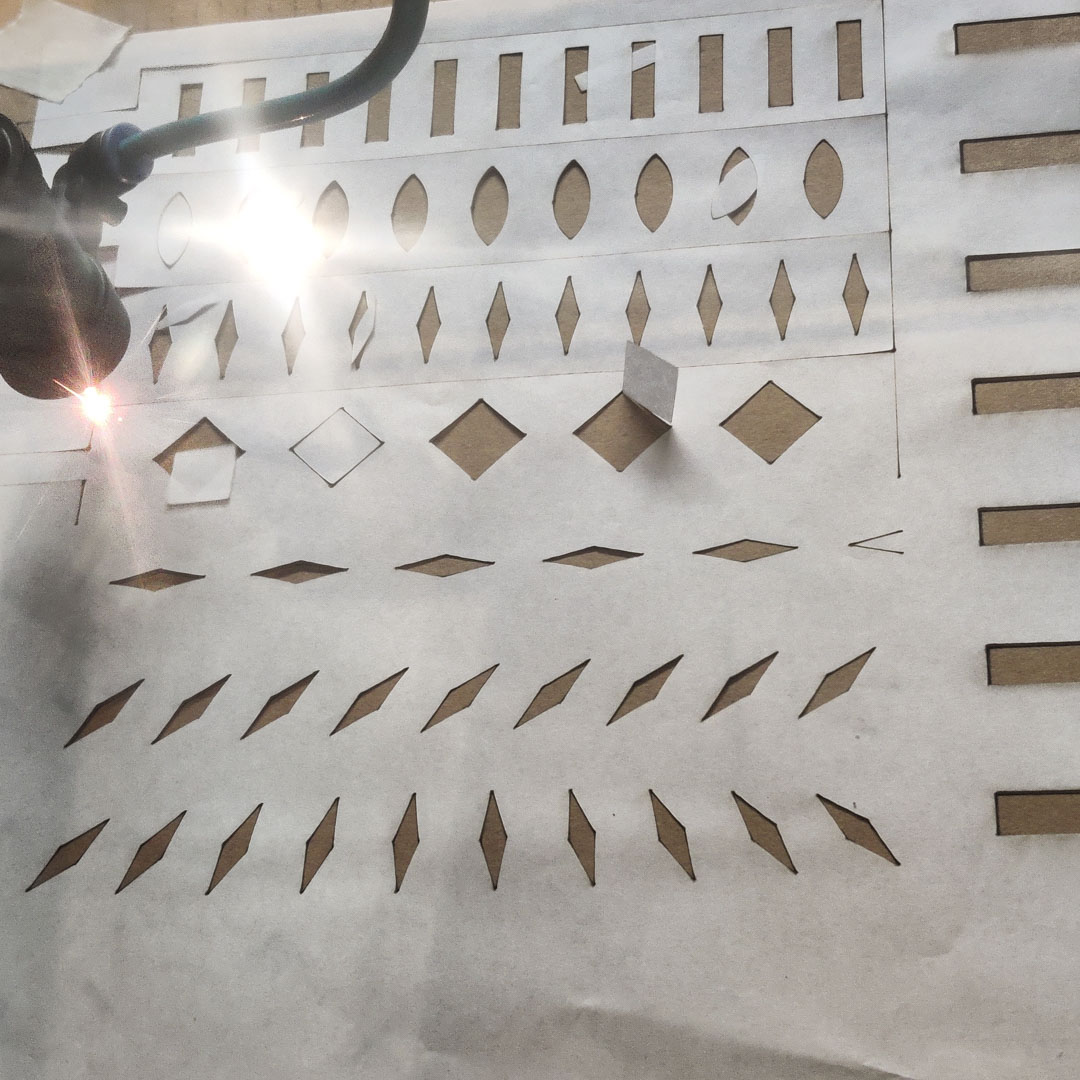
Based on prior experience, I imported the drawings into the lasercutter software, RDWorks, in 2 separate layers to control the order of cutting. I needed the internal bits to be cut off before the outer shape could be cut, else the outer shape would move and the internal cuts would be dislocated, rendering the piece unusable.
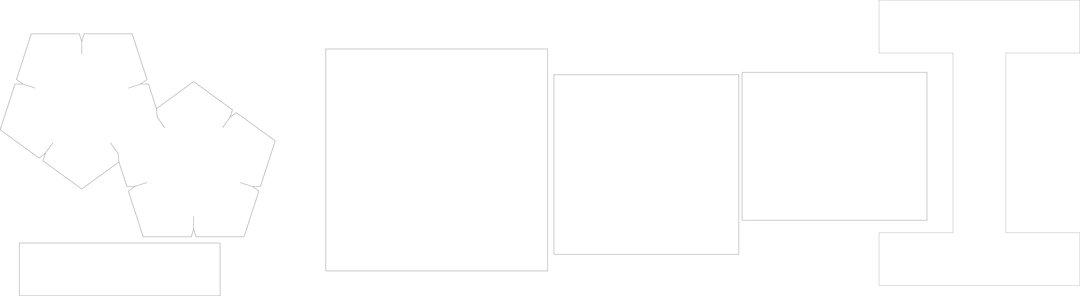 Cartridgepaper lasercutting drawings
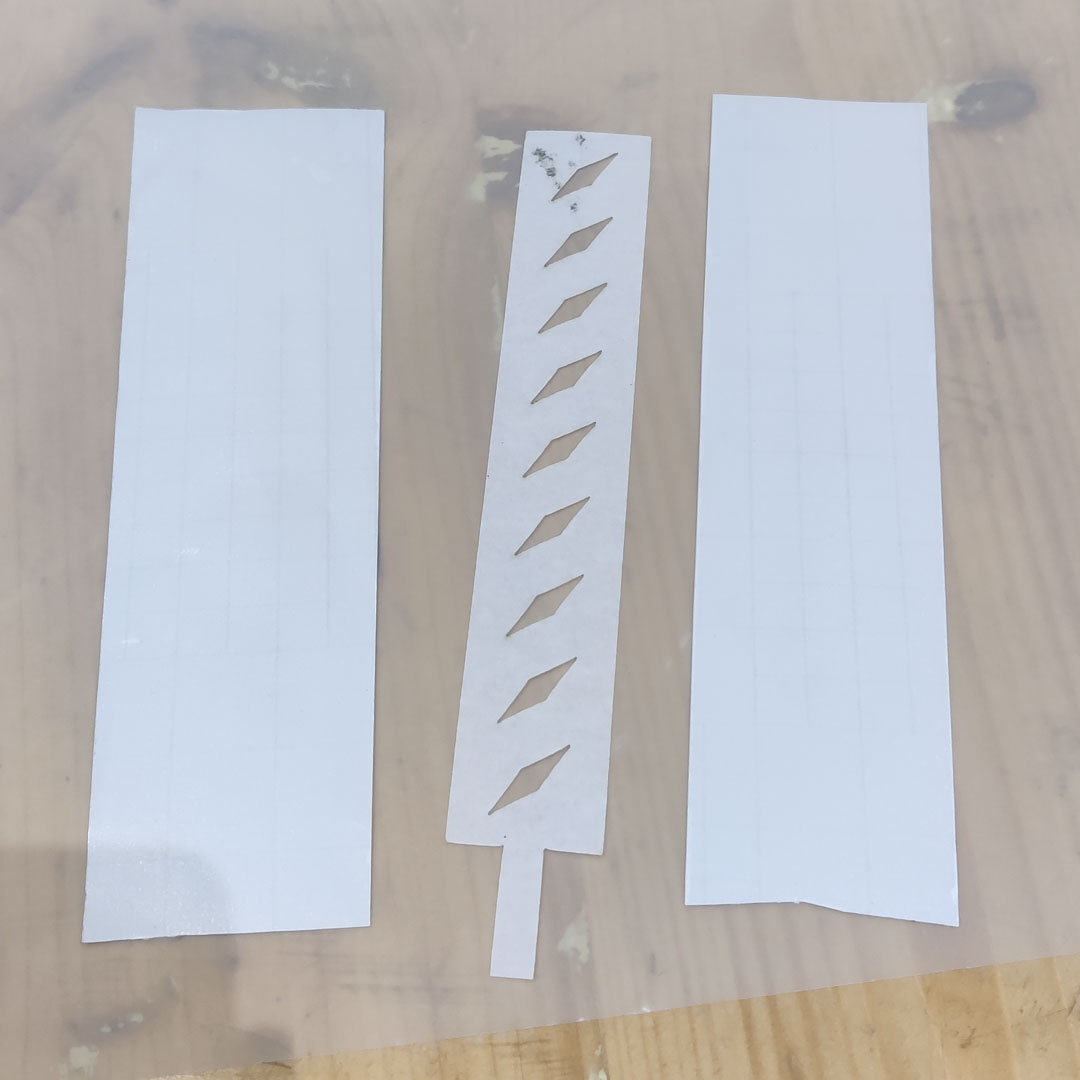
Vinyl should not be lasercut - it release toxic Chlorine fumes that are bad for humans, the machine, and the planet. So I lasercut some thick cartridge paper pieces to use as stencils and guides to cut the vinyl by hand.
After this, I had planned on exploring different motions, formations and actuated structures.
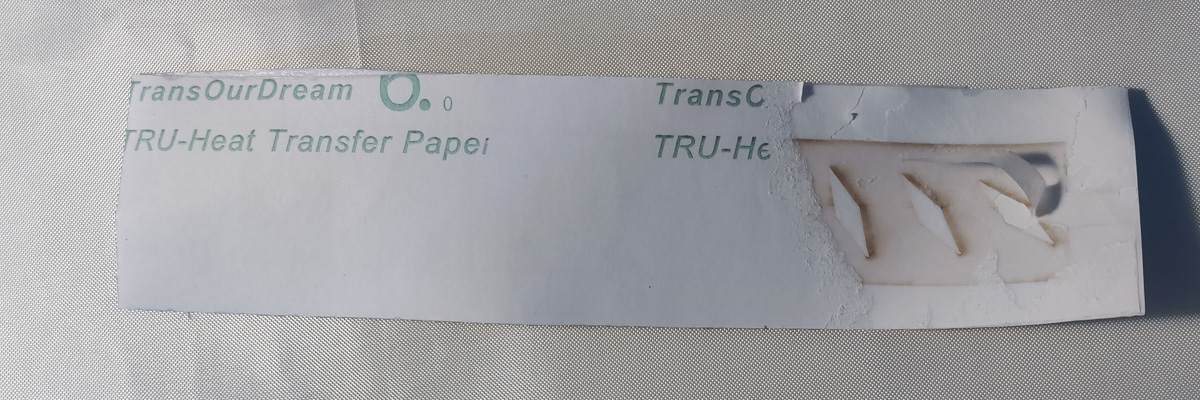
However, our supplier sent me sticker vinyl and not heat transfer vinyl, so I ended up spending several days trying to figure what went wrong as well as doing trials on a whole range of butterpapers since I first suspected that I was using the wrong butterpaper instead of the wrong vinyl. I will continue with vinyl trials once the right vinyl arrives.
TPU
Since vinyl wasn't working, and I had a TPU sheet that Anastasia gave me during Fab25, I decided to try laser welding the sheet.
Tools and Materials
- RDWorks, the lasercutter software
- TPU sheet
- My handy beam calibration jig
Process
I first tested the defocussed beam width with my jig to figure out what Z height would give me the required beam width.

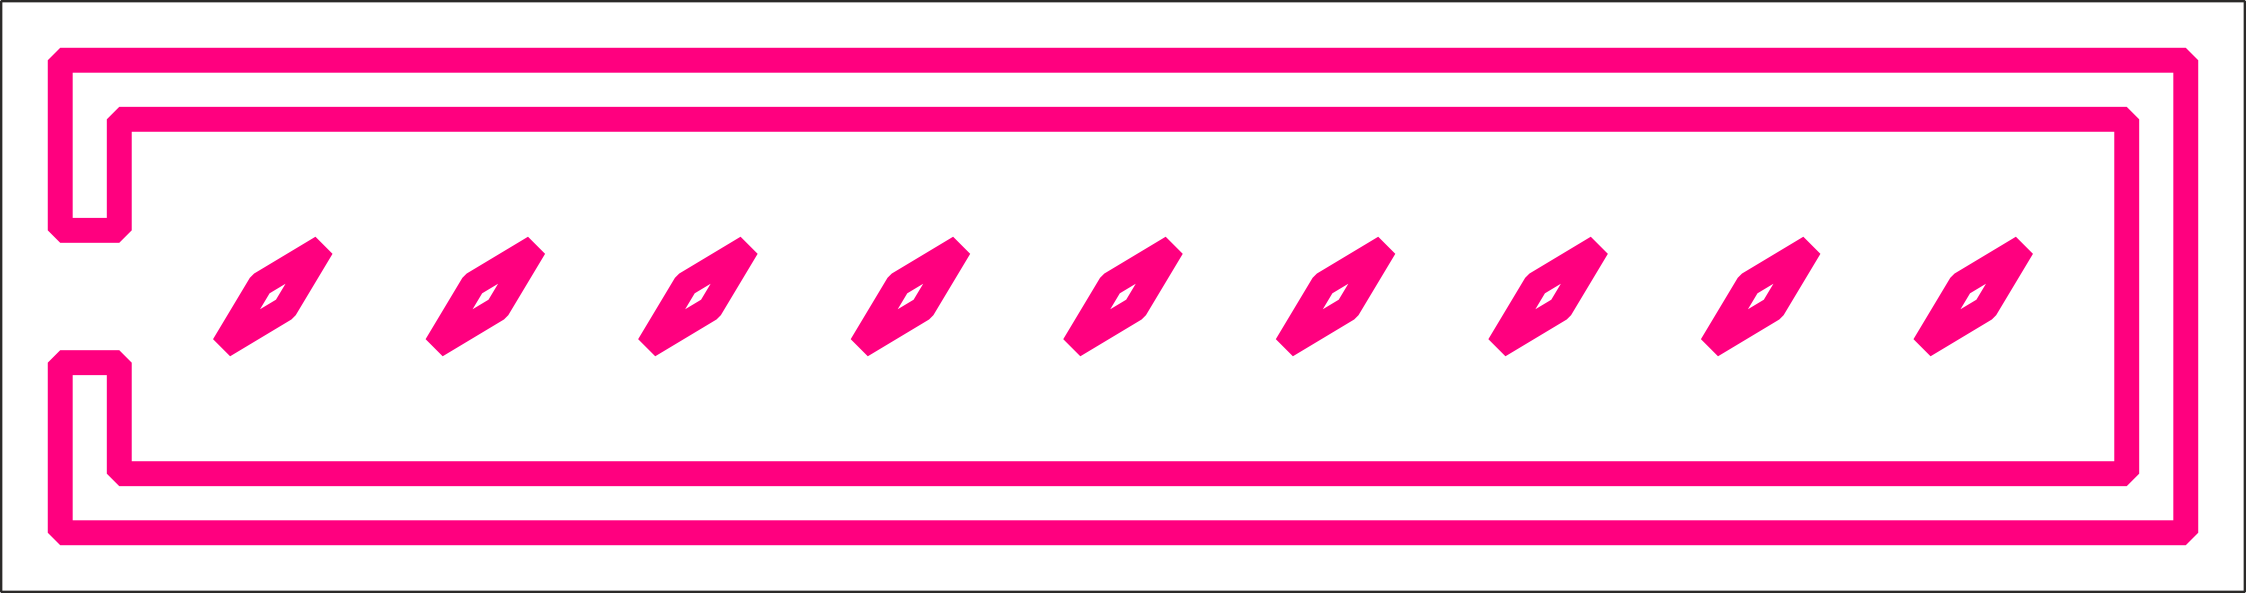
Then I drew a simple shape but slightly complicated vector drawing since the same drawing had to have multiple layers that did the following
- defocussed beam - moving on a path but leaving a gap for inflation
- focussed bean - moving offset to the same path but cutting the TPU
- double line variation to ensure good seal
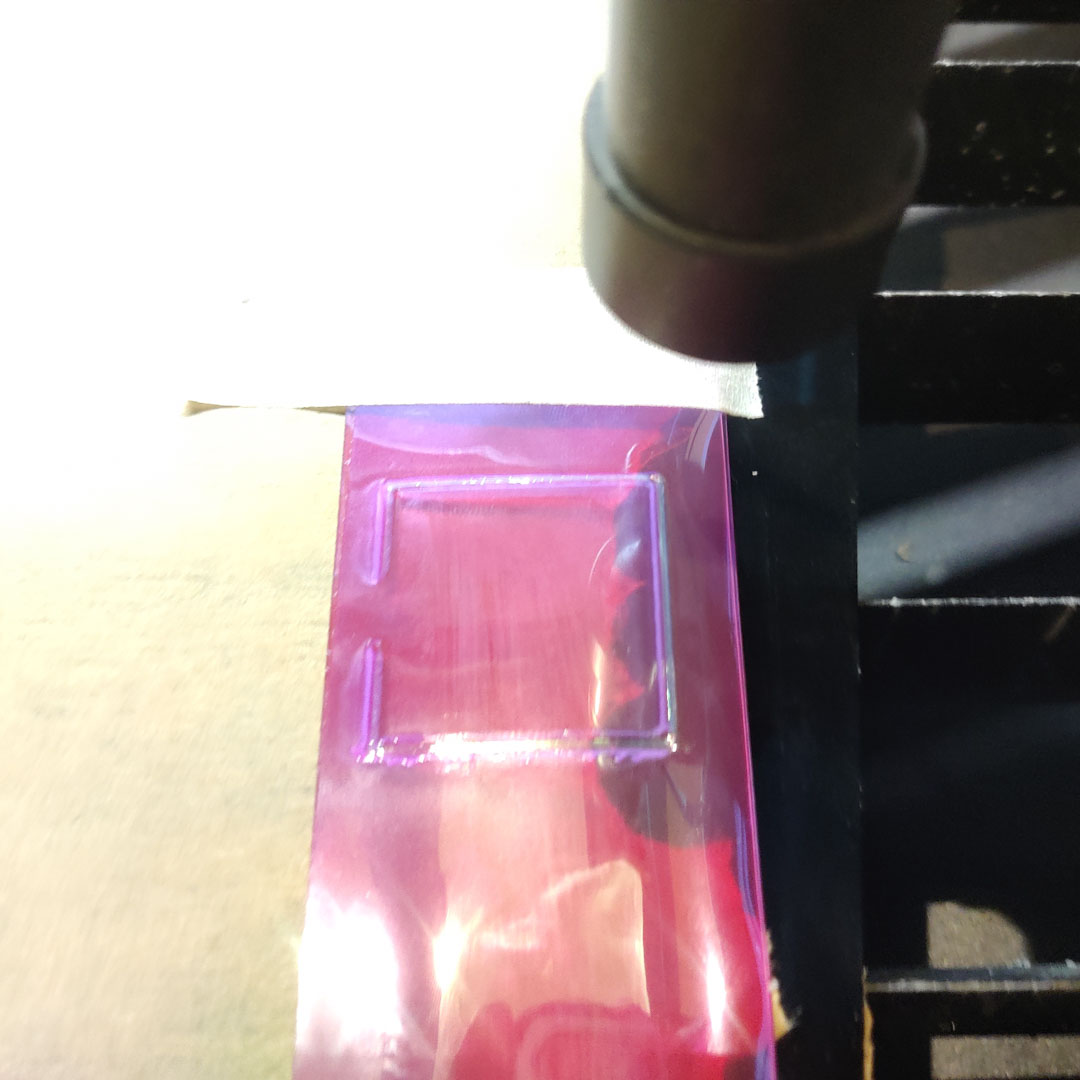
This was a successful operation, the weld was good, the defocussed beam worked exactly as predicted, and the cutting was fine as well.
However, the sheet was so thick that inflation wasn't easy and the stiffness proved resistant to most movement. I created the one sample to test the technique but abandoned the process since it would not work as well as vinyl.
Household PE
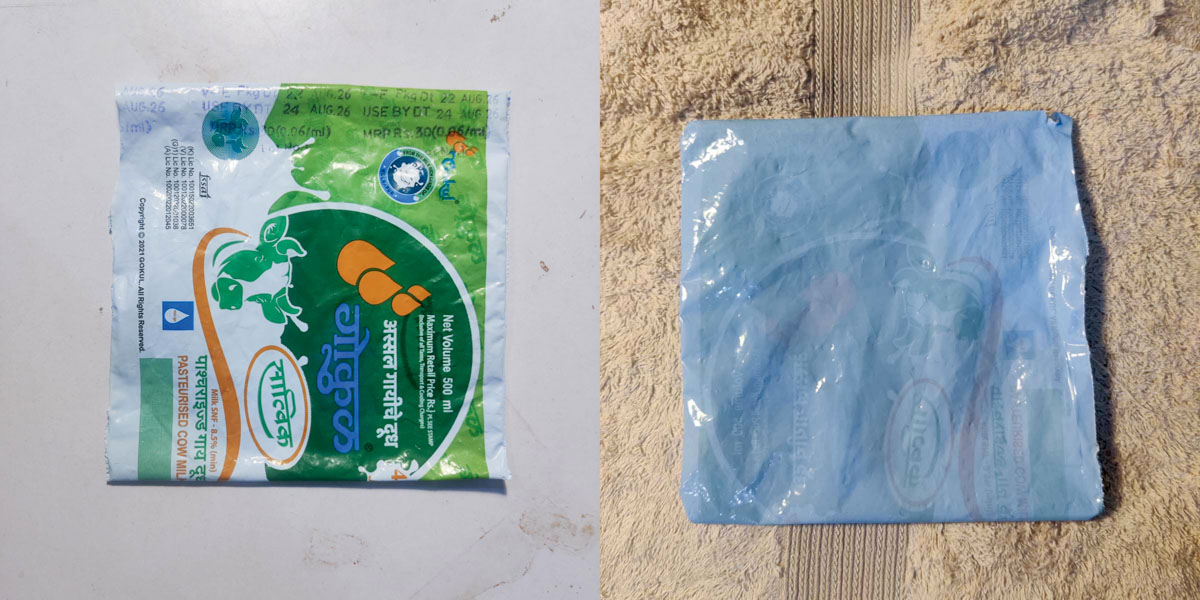
Since neither of these processes were giving satisfactory results, I tried to work with milk bags and other household polyethylene material that was typically heat-sealed to package food and other materials.
Three different processes were tried
- direct heat sealer on the bag - using the PE bags with the heatsealer to make fused areas keeping rest intact
- sandwich method - same as the vinyl sandwich but using PE, butterpaper core and an iron (a heat press would be very useful here), with teflon sheets to prevent PE melting and sticking to the iron.
- laser-welding of PE sheets with a defocussed beam
Household PE Trial 1 - Direct Heat sealer on bag
A heat-seal device was run on the PE bags based on the required pattern.
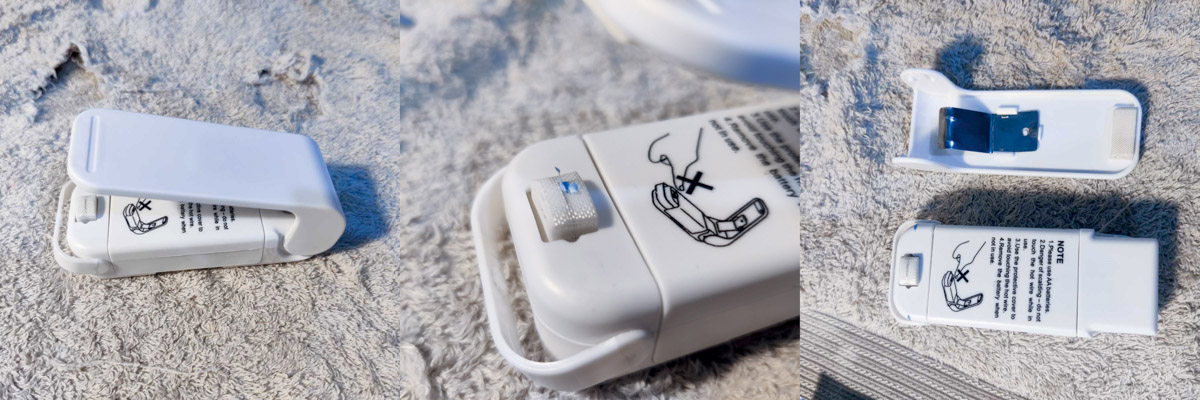
I was going to use a shopkeeper's resealer, but that would have only given me long straight lines. I found this little heat seal device in a local MrFixit store.
Tools and Materials
- Polyethylene milk bags
- Handy heat seal machine
Process
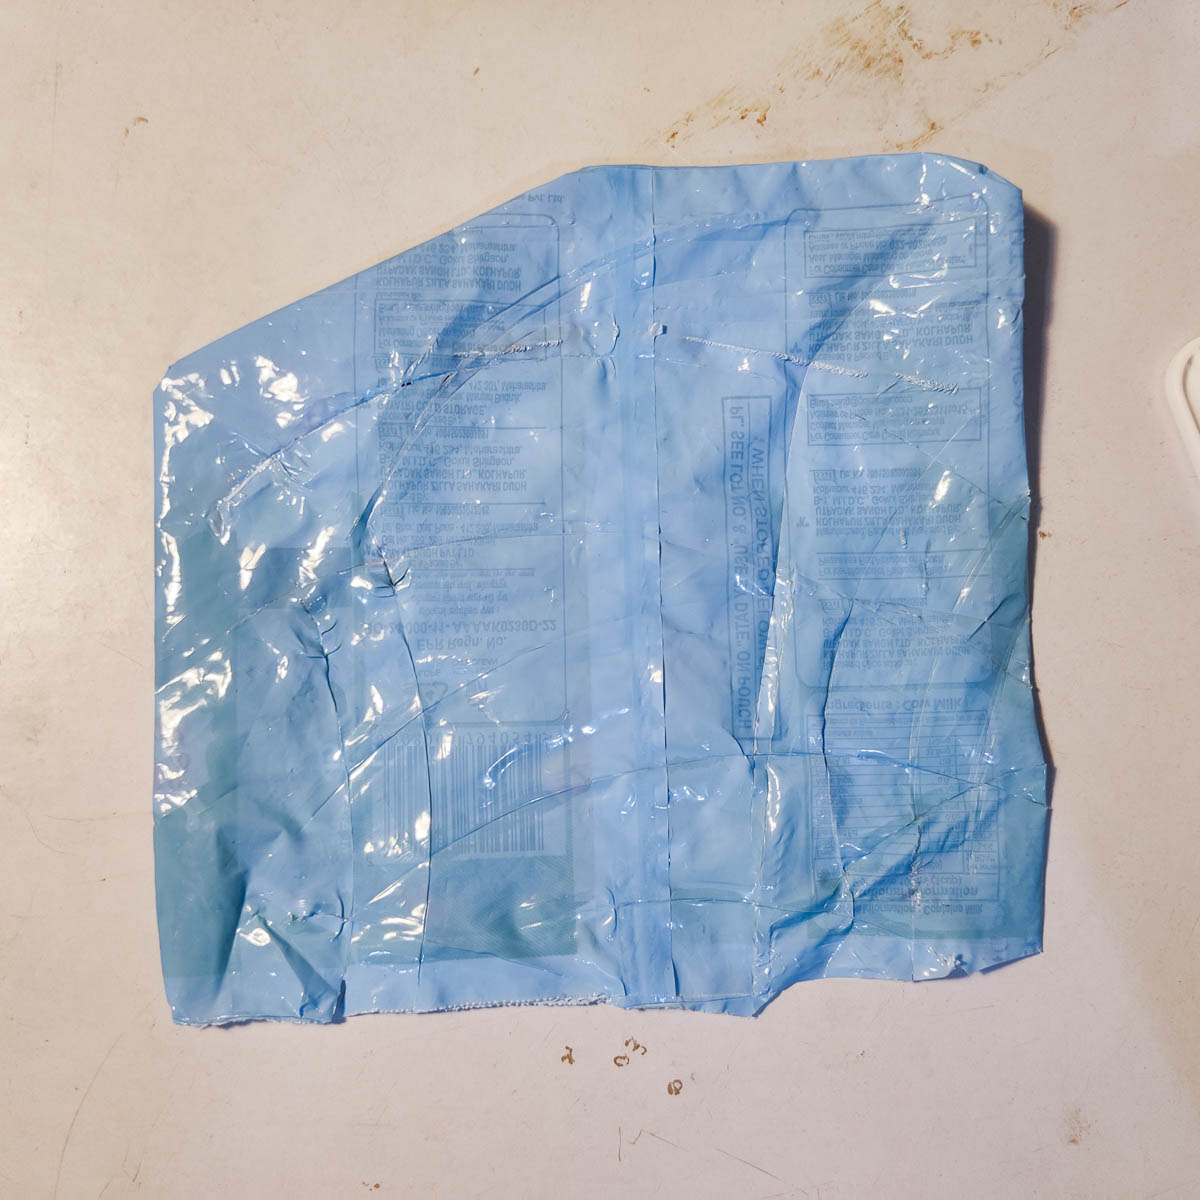
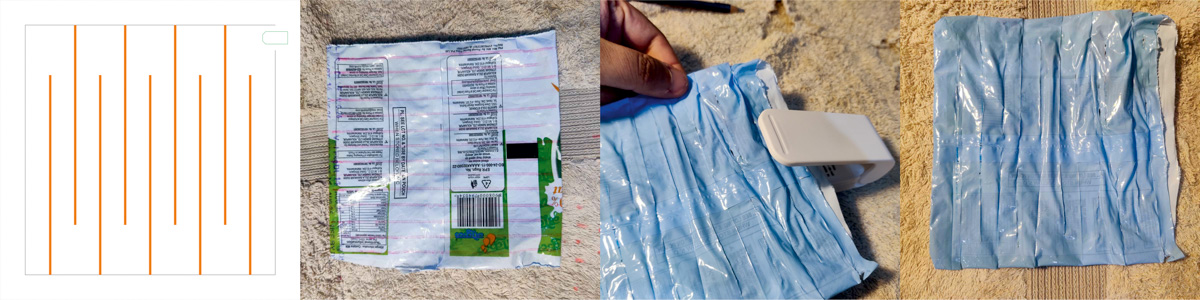
I ran the heat sealer on multiple bags, first to try it out, then with a planned pattern. It is not a very neatly controllable device, but it proved that PE could be used, atleast.
Results
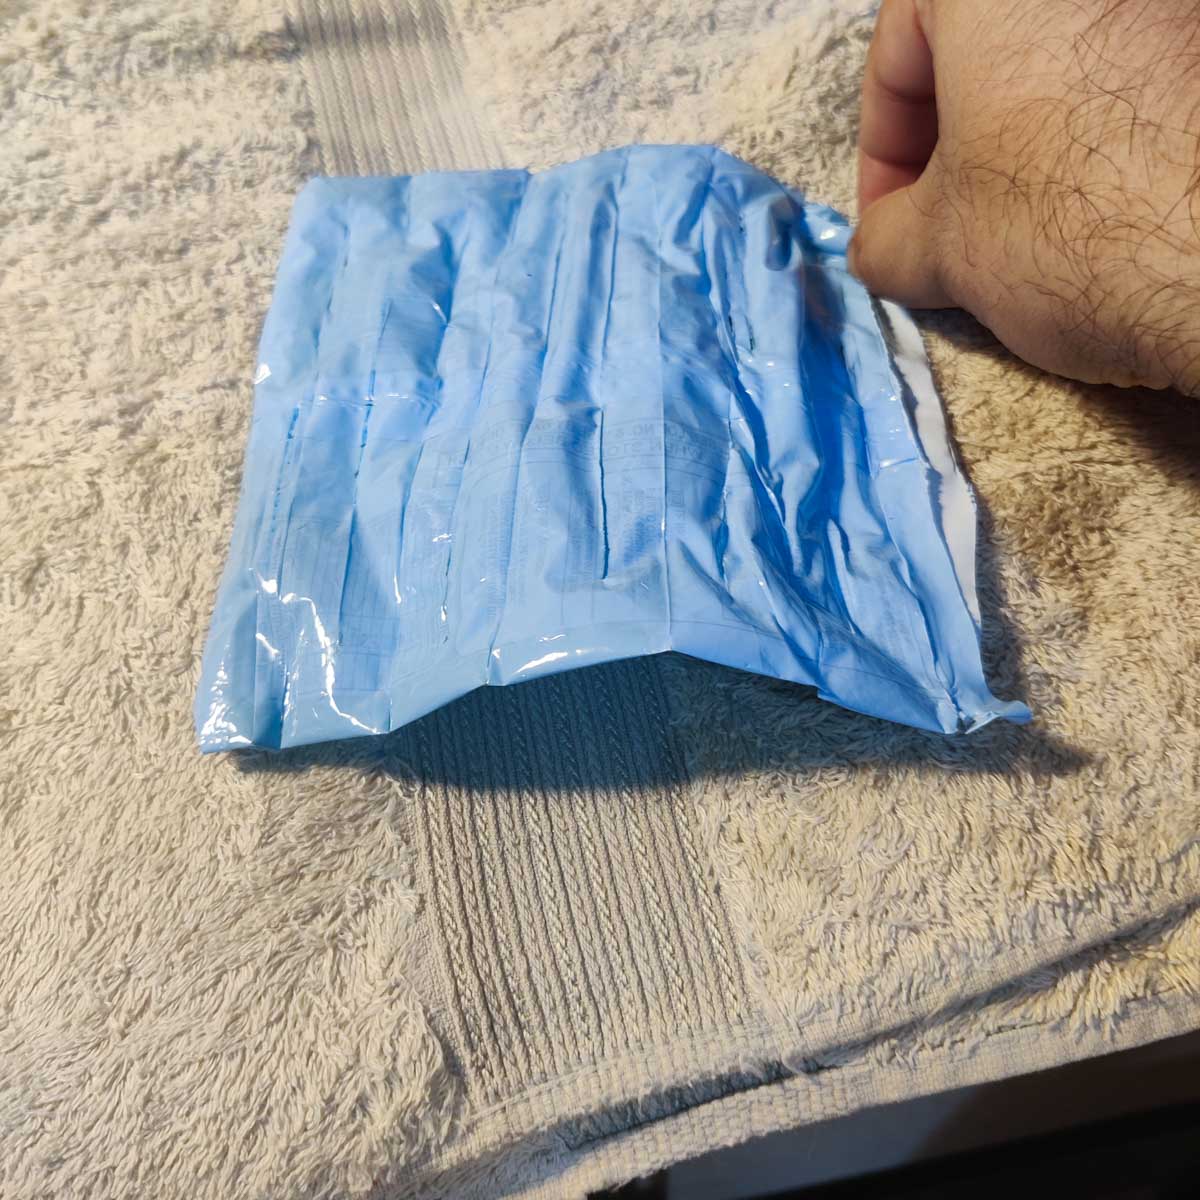
The pattern does inflate into a curved surface - if only it were neater, it would be more effective.
Freehand fusing was also working, but the temperature and pressure control were very difficult to keep right and maintain steadily.
Household PE Trial 2 - Butterpaper sandwich and iron
Similar to the vinyl process, a butterpaper core is sandwiched between two PE sheets, and irned to fuse.
Tools and Materials
- Polyethylene milk bags
- Butterpaper cutouts
- Clothes Iron
- Teflon sheets
Process
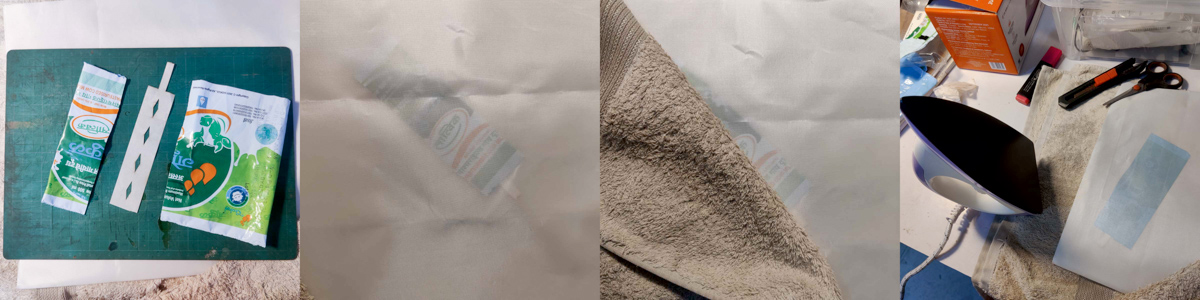
- The butterpaper cores were lasercut
- The PE bag was cut to get pieces of the right size
- The sandwich was placed between 2 teflon sheets
- The sheets were placed under a towel
- A clothes iron set close to maximum was run over the whole assemblage
Initially I put a towel between the iron and the teflon sheets, but later I ironed on the teflon directly. The results were better then.
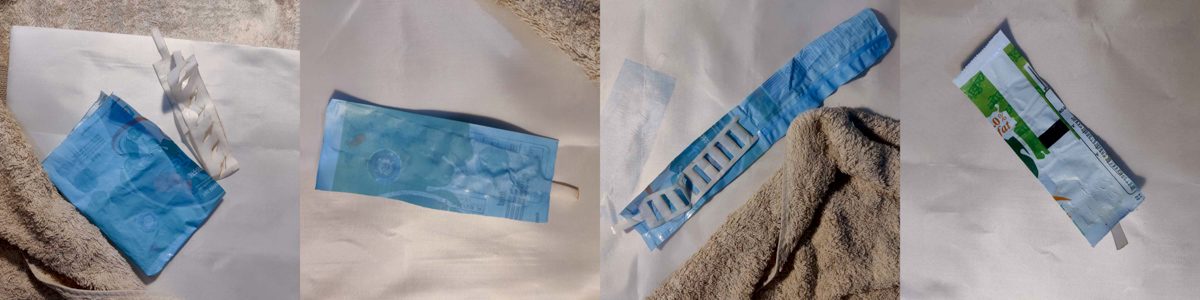
Results
The PE fuses well, and the inflation works. There was some delamination but I suspect it can be tackled with - more pressure - cleaner PE sheets - since these were milk bags, while they were washed multiple times, some fat residue may have prevented a proper fusion, or a weak fusion, at some points, and some of the patches delaminated under higher pressure.
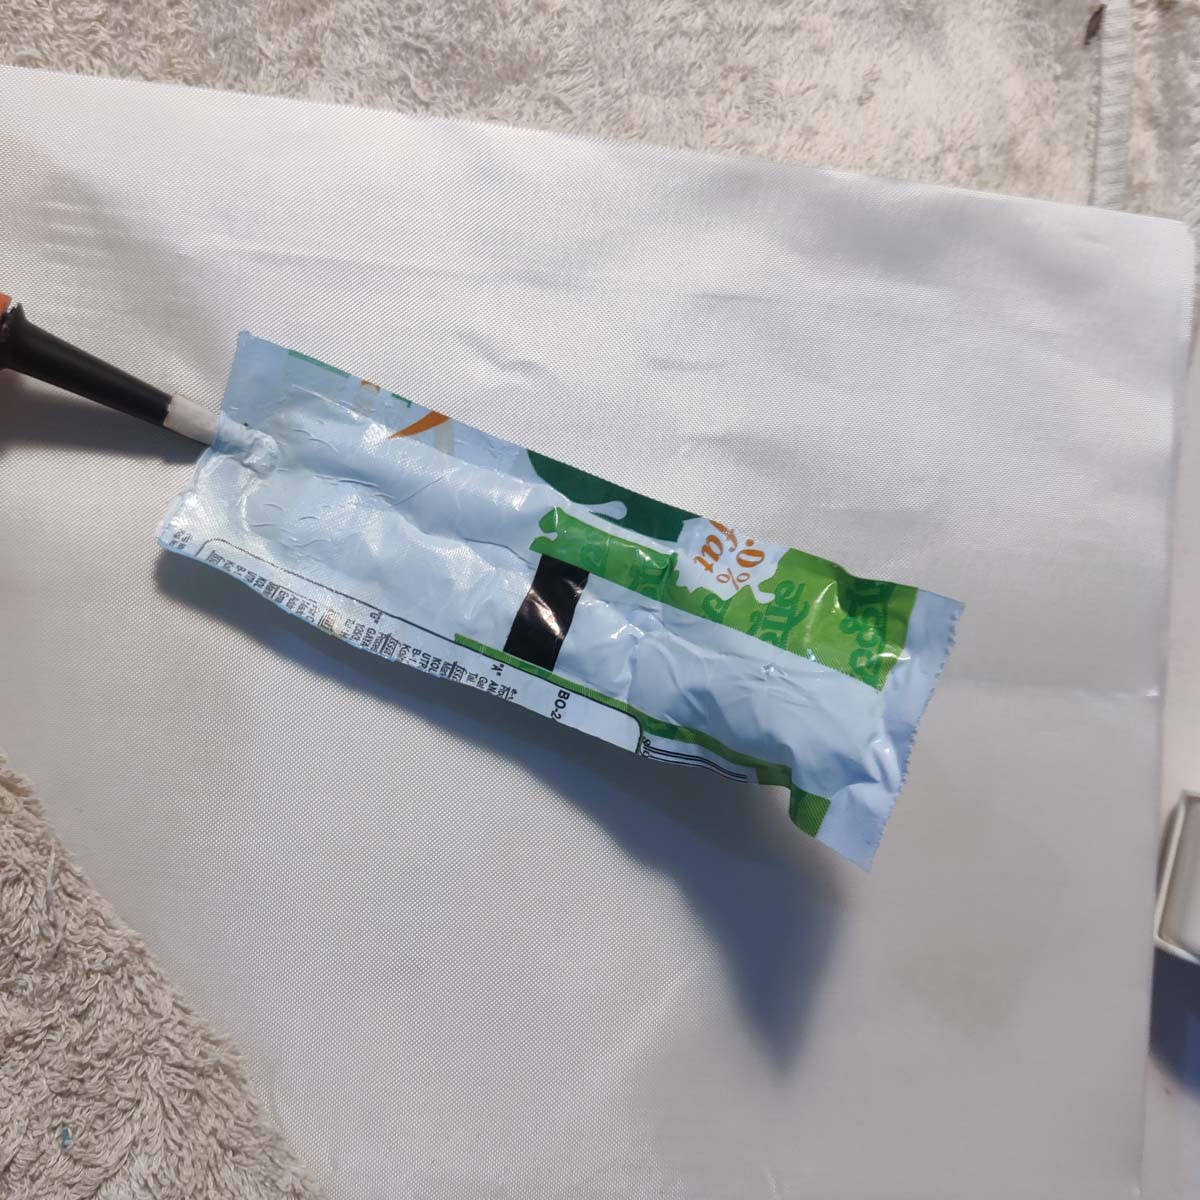
Household PE Trial 3 - Laser welding
Using a defocussed laser beam to weld the PE sheets in required patterns.
Tools
- PE sheets
- Lasercutter
- Lasercutter calibration jig - optional but helps
Process
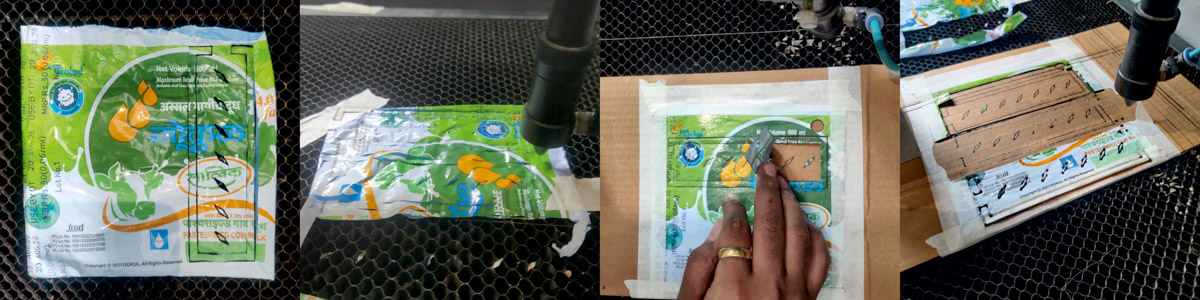
Initially I simply lasercut the pattern using a defocussed beam. On Shivam's advice though, we firmly taped the PE flat to some sacrificial stock. This helped the 2 layers to weld better.
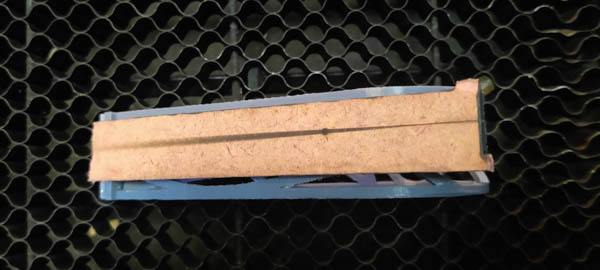
We used this image from my old calibration test to ascertain the z-height needed to defocus the beam to a particular beam width. In this case, we went about 8 mm beyond the focus height.
Results
The initial trials were meant to figure the right power and speed. Once we got that, the welding was working, but it was a weak join, often leaky or easily delaminated.
The taped-to-a-backing version was more successful, but still not entirely leak-proof.
From very leaky to mostly-not-leaky
Leaky 1 :
Leaky 2 :
Leaky 3 :
Not Leaky :
EcoPlex Gripper and Crawler
While I wanted to test the idea on Vinyl and be more certain of it before I moved to ecoplex and casting, I decided to go ahead anyway.
Tools and Materials
- Ecoplex silicone
- 3D printed molds
- Fusion360
- PrusaSlicer and Prusa 3D printer
Process
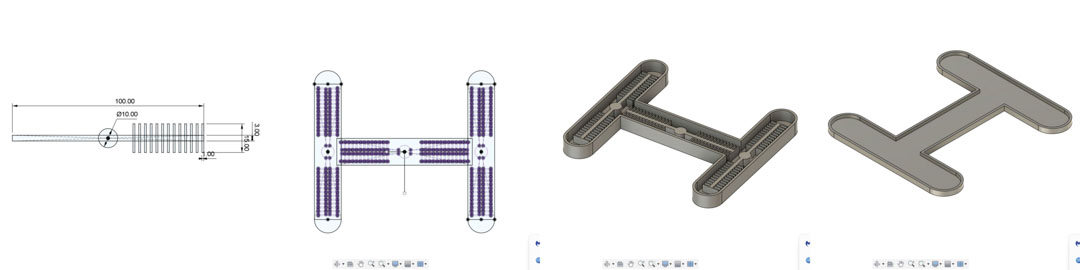 I modelled the mold based on the gripper's features, making the fins slightly larger.
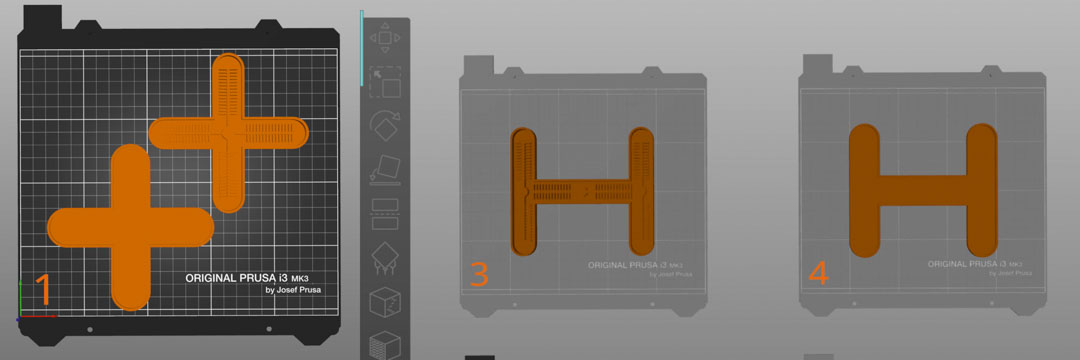
I then 3d printed the mold parts - 2 large ones for the main chamber, and 2 that were just a shallow matching shape to close the silicone chamber later.
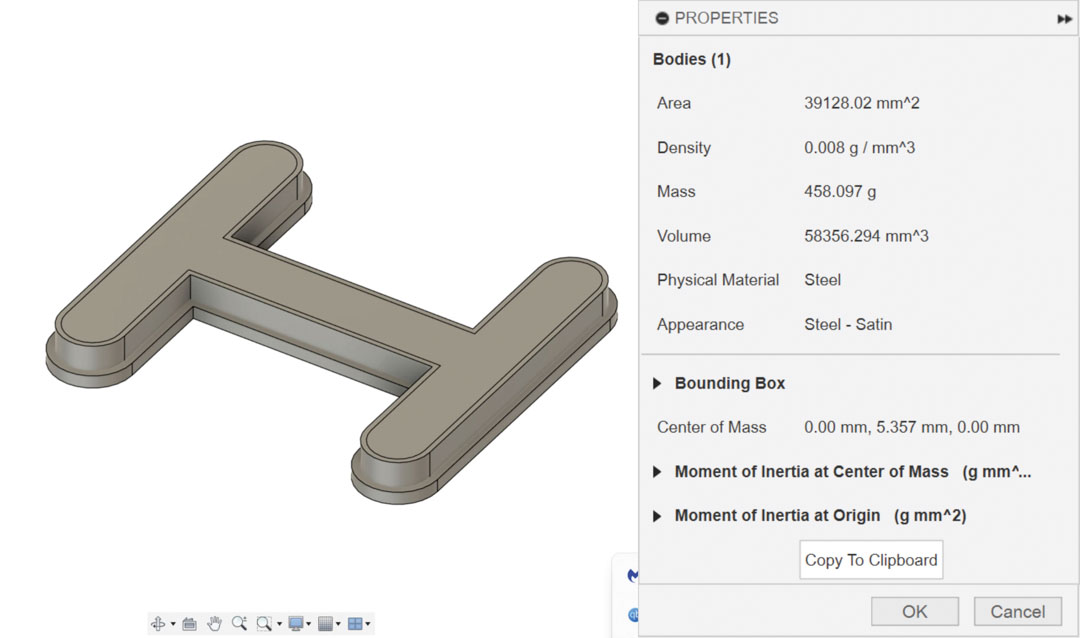
I also kept tabs on the volume of the mold cavity to know how much ecoplex would be needed for each piece.
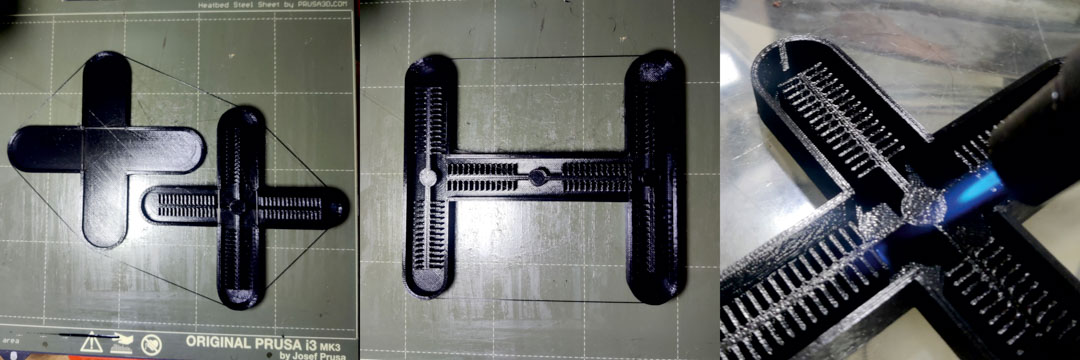
I printed out the pieces, cleaned them up. No supports were needed but there was some stringing from the filament that I scraped, nipped and blowtorched away.
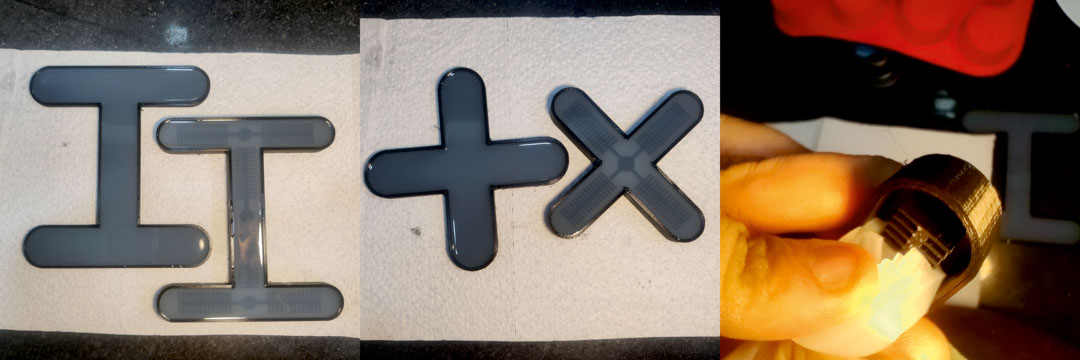 Finally, I poured the ecoplex mix into the molds and let it set for 24 hours before - very gently due to the fins - pulling it out of the molds.
I then place the matching parts - the deep one and the "cap" - over each other at the right location and ran a thin line of ecoplex using a toothpick to seal them up. Then waited another 24 hours for curing.
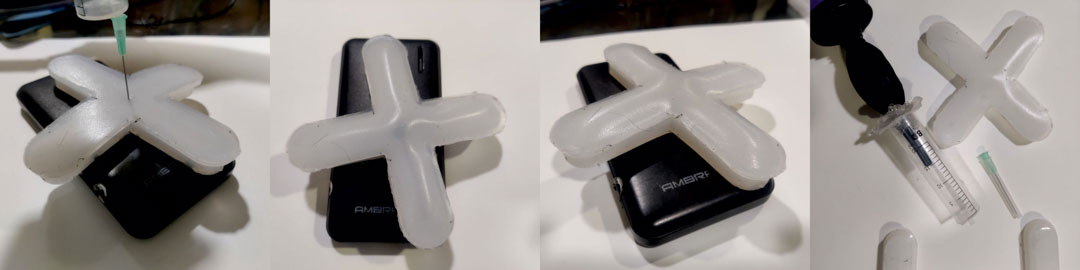
Finally, I stuck a needle into the silicone above the central chamber and used a syringe to inflate and deflate it.
Results
The gripper essentially does inflate. However, the volume of the syringe is too tiny to work on the entire gripper so I am going to try and use balloon inflators and pichkaris (simple syringe-like water guns used during the Holi festival to spray water) to get a higher volume of air moving. Mating their nozzle tips to the inlet of the silicone will have to be solved as well.
Watch out for
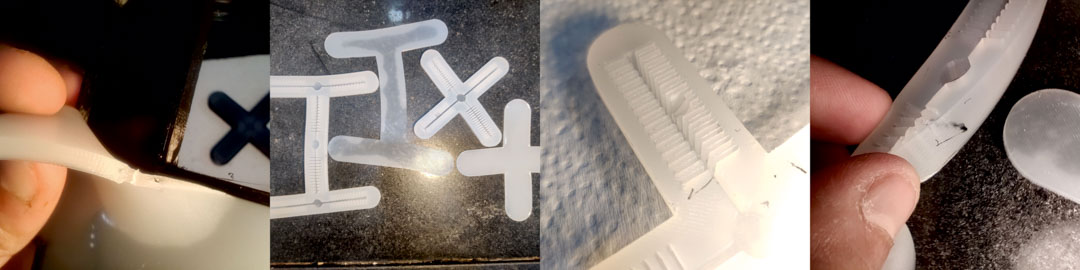
- the ecoplex tearing if not removed gently, especially at sharp edges
- the ecoplex is very flexible, especially the thin caps, so they distort easily, and need to be placed carefully when matching pieces
- fin breakage during removal
- leftover 3d print stringing fibres embedded in the silicone
None of these is a dealbreaker, a little can be ignored but too much will ruin the project.
I had used draft angles on the walls but draft angles on the fins also seem necessary.
Conclusions and Reflections
Soft Robotics is a very interesting, and a whole field unto itself as I found out.
Vinyl and PE are great at quick prototypes that allow a large amount of testing.
We can also approach Soft Robotics from 2 different directions, as I have
- create interesting geometry and check out what motions and shapes come up
- have an intended motion and work backwards to what geometries would bring it about
Very interesting motions, forms and actions can be done using soft robots.
However, an automated pump system would make life very much easier than just using syringes and inflators. I would really like to either replicate or make something similar to the FlowIO system especially since it is detailed out here while also trying out more geometries alongside.
Fabrication files
STL and Vector files on Google Drive
STLs
- 4_leg_gripper
- InchWorm Crawler Body
- InchWorm Crawler Cap
DXFs
- butterpaper cuts (softRobCores.dxf, softRobVinylTrial.dxf)
- cartridge paper outline cuts (softRobVinylTrial.dxf)
- TPU tests and cuts