6. Frame
This is the final step of my project and the moment where the whole vision becomes material. This is the frame stage. It is not just a simple frame — it also includes spaces for electronics. Because of this, I needed to understand which electronic parts should be inside. They are two boards, two distance sensors, one motor, and conductive threads. You can read more about this in the electronics section.
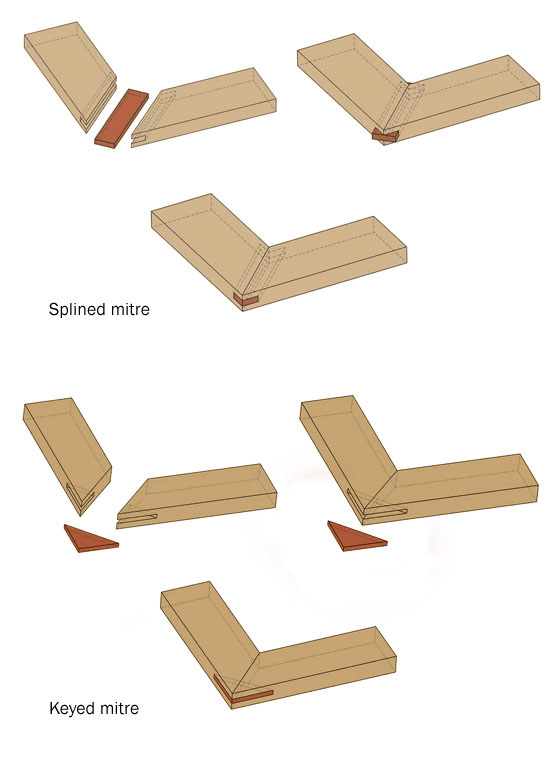
Frame Connections
For this, I designed the frame sizes in Rhino and started constructing it. There are many options for assembling frames, and here I needed to choose the one that is both stable and usable.
The frame connection options:
-
With a middle wooden piece

-
By dividing and gluing the sides
-
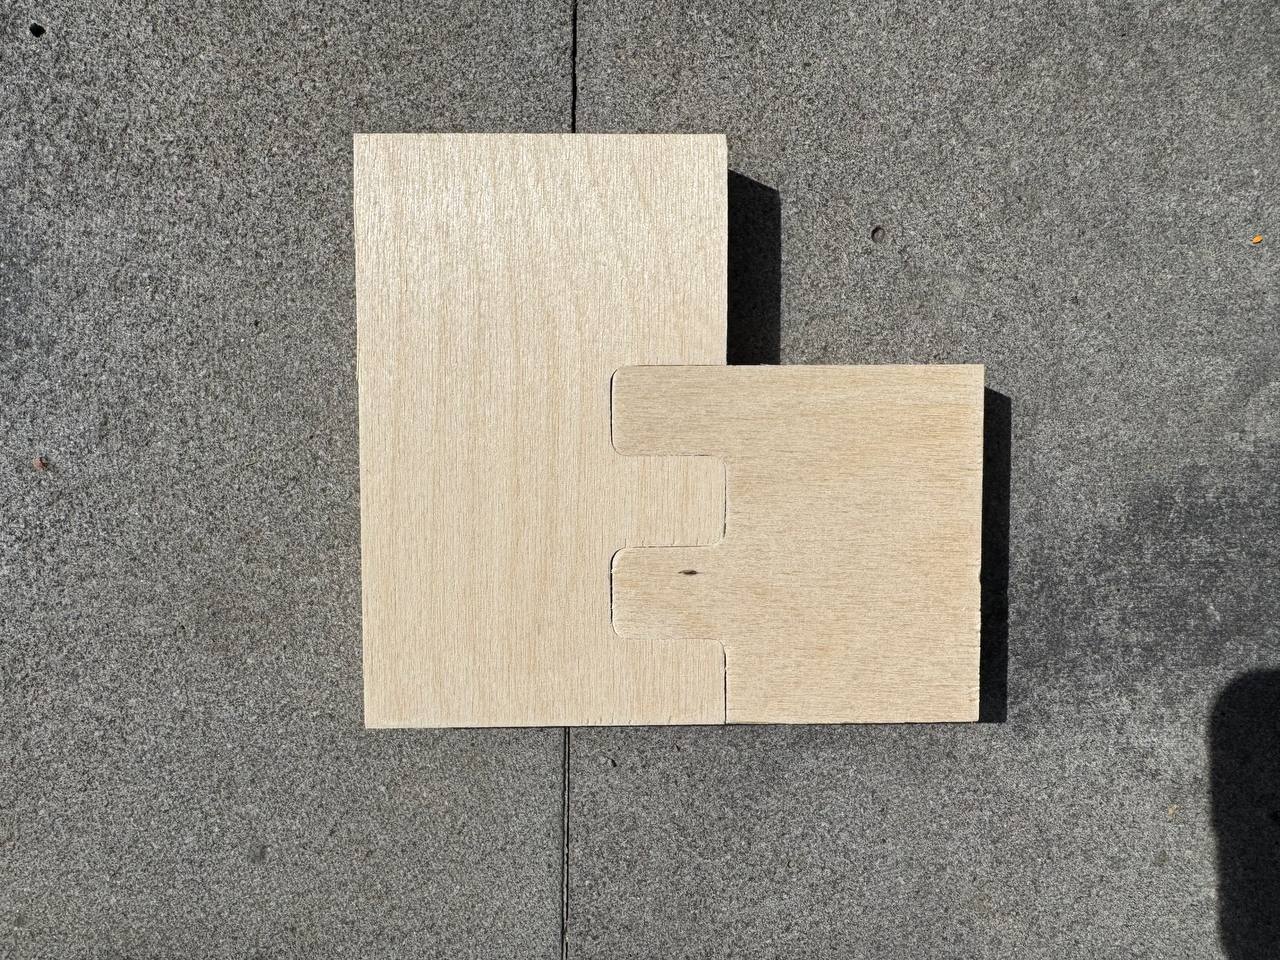
Zigzag cut — this is the best option for me because it creates a strong connection, and I can also add self-tapping screws for better stability
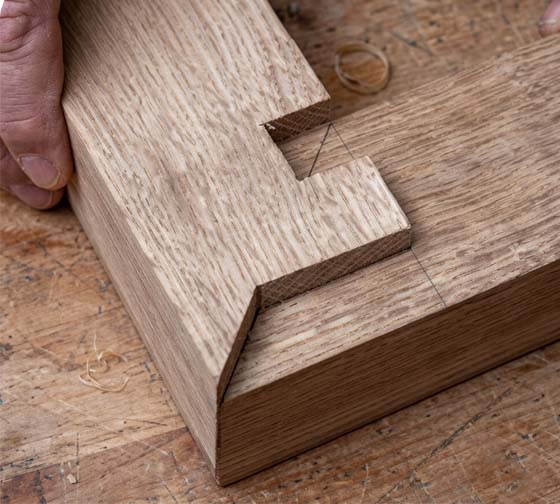
I made small examples of each to test if the connections and radiuses work well. I created small files and cut them with a CNC machine, trying different radiuses to find the best one.
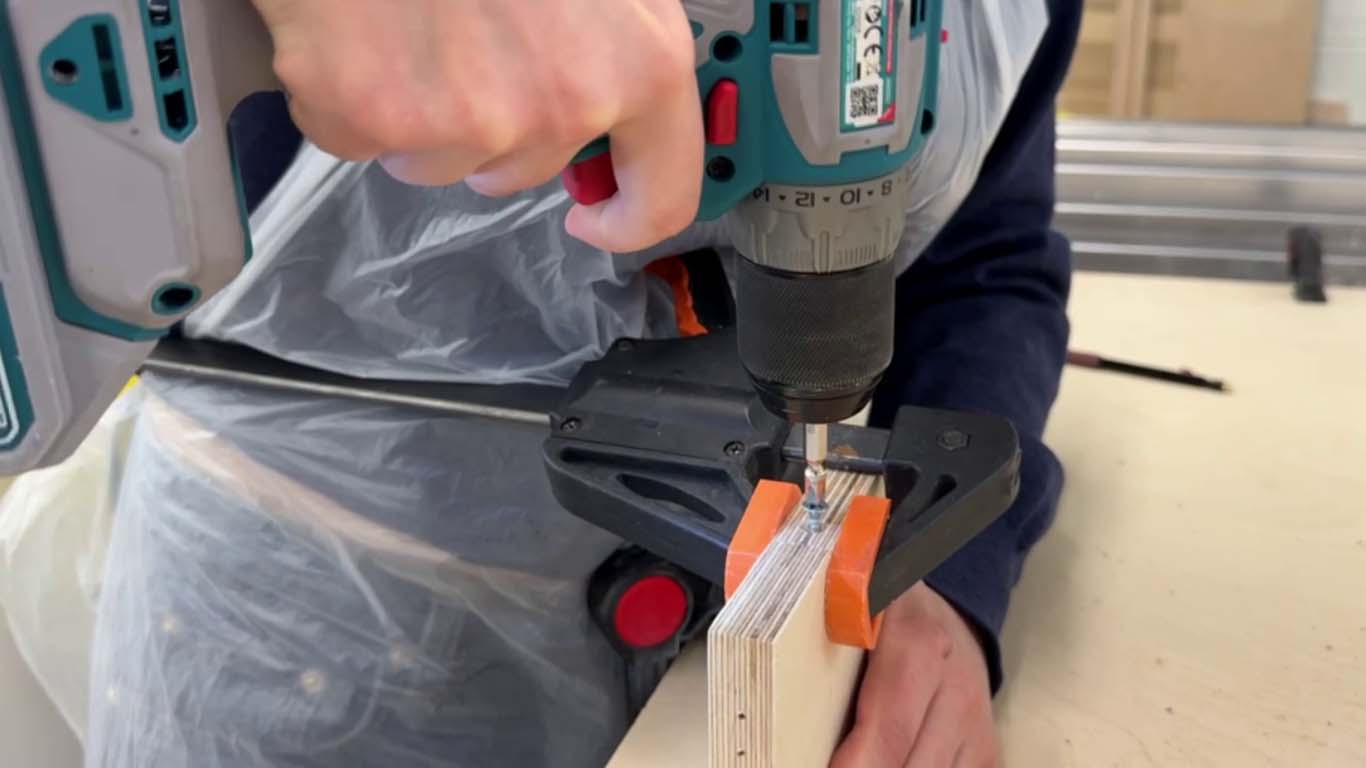
I added self-tapping screws (it was my first time doing this). First, you drill a hole with the correct drill bit, then fix the screw using a screwdriver. I tested this on a small piece a couple of times.
And finally, I got a result that is good enough to continue the work.
Result:
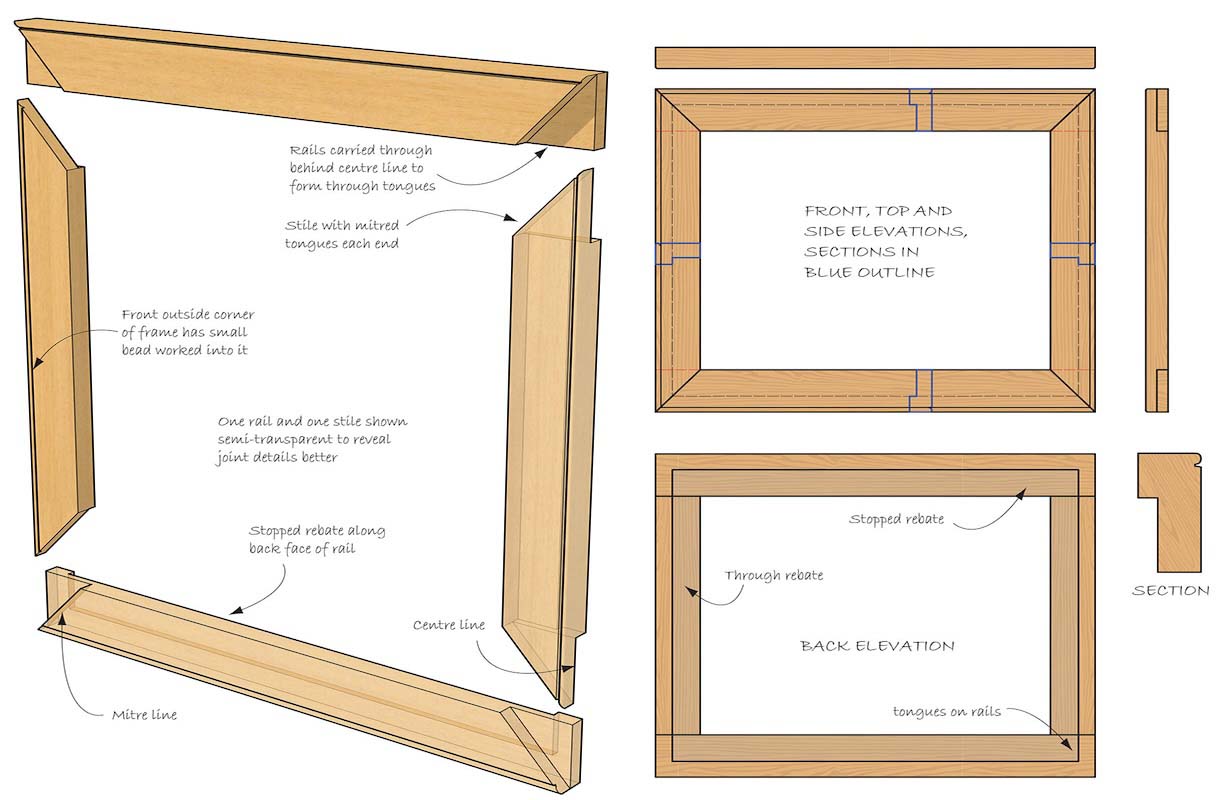
Frame mModeling
Rhino is a perfect tool for this. I placed the real-size fabric in Rhino and constructed the frame around it. I wanted to keep some space between the frame and the fabric, so the fabric can be fully visible inside the frame and feel like one complete composition. My project should be placed in the middle of a space, so people can see it from all angles and observe how it works.
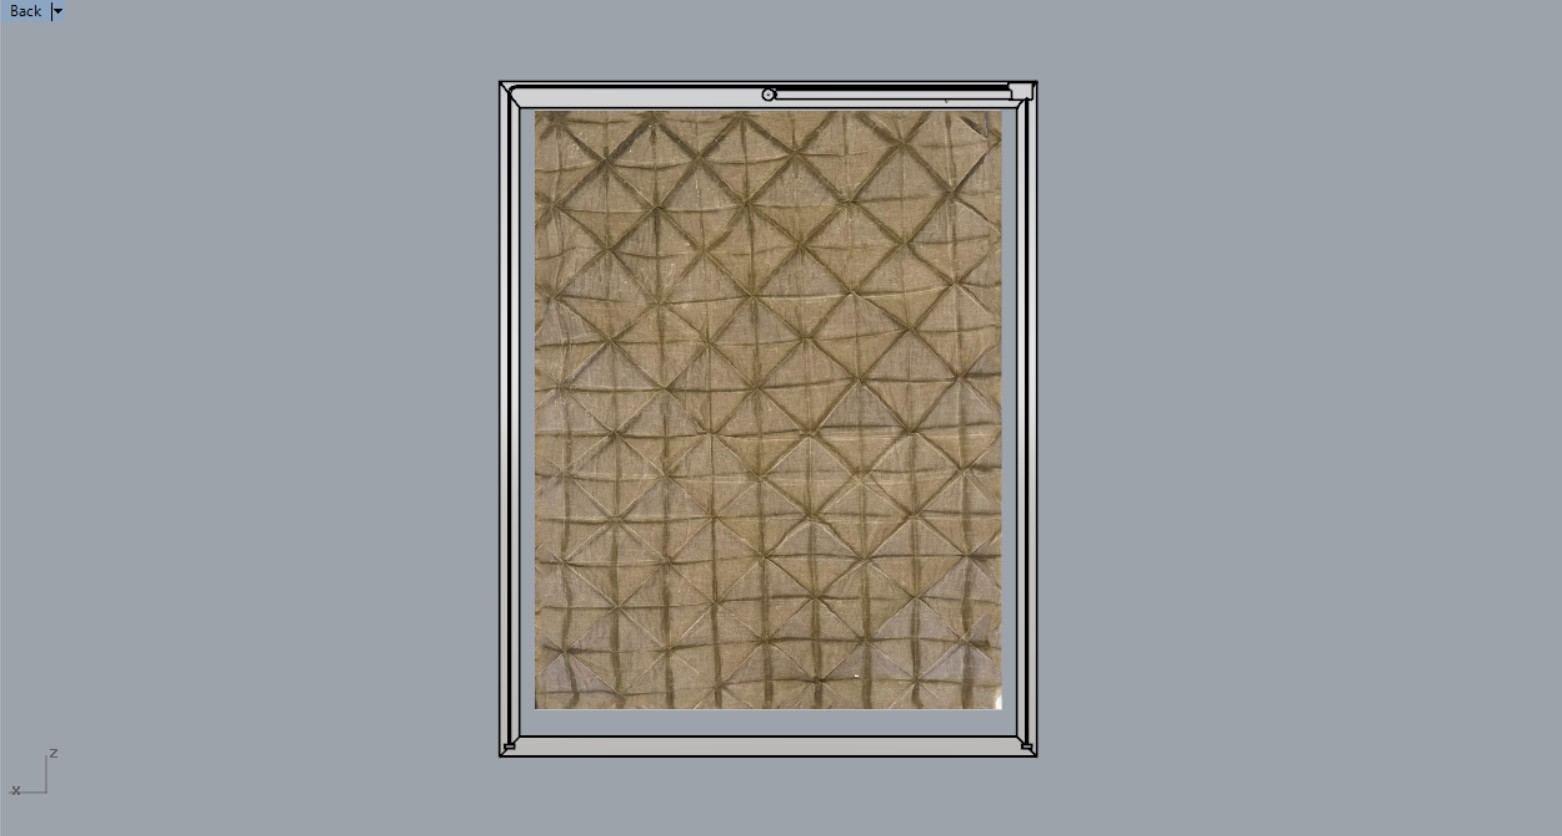
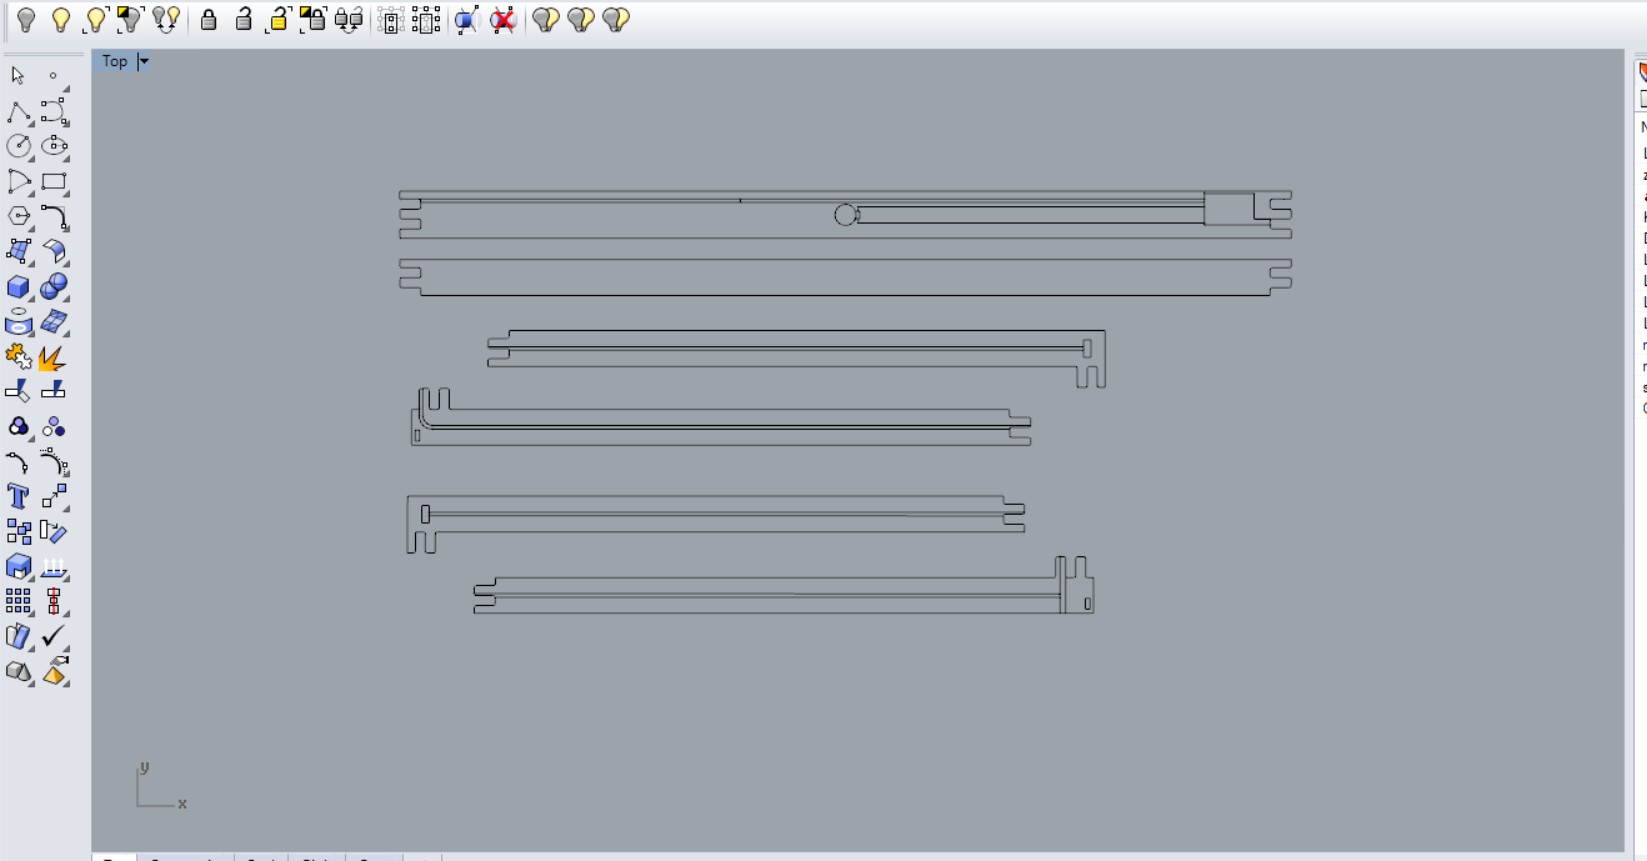
After that, it was time to understand where the cut-out parts should be. I measured all the details in millimeters and placed the scheme inside the frame, checking the cutting layout to be sure that parts don’t intersect with each other.
I tested everything — made a small stepper motor example, placed it inside the frame, and checked all the details. I changed and reconstructed the frame many times, searching for the best solution. I also looked for wood that was long enough for my frame parts.
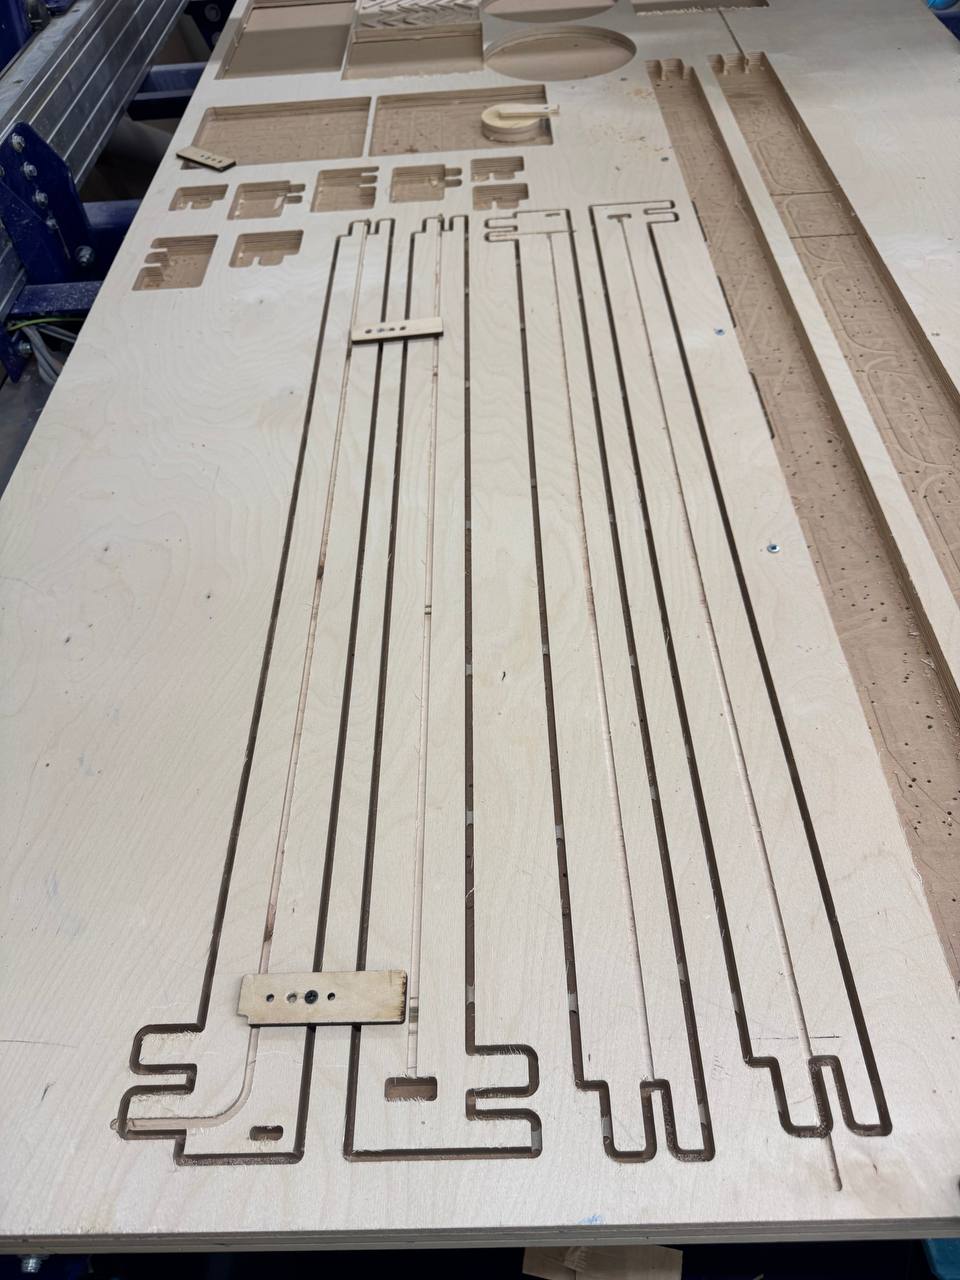
I realized that my frame needs to be constructed from 6 pieces. Making more pieces would make the construction too complicated. I wanted to make it in 4 pieces, but it wasn’t possible because of the wood size limits. The maximum length I could use was 1800 mm.
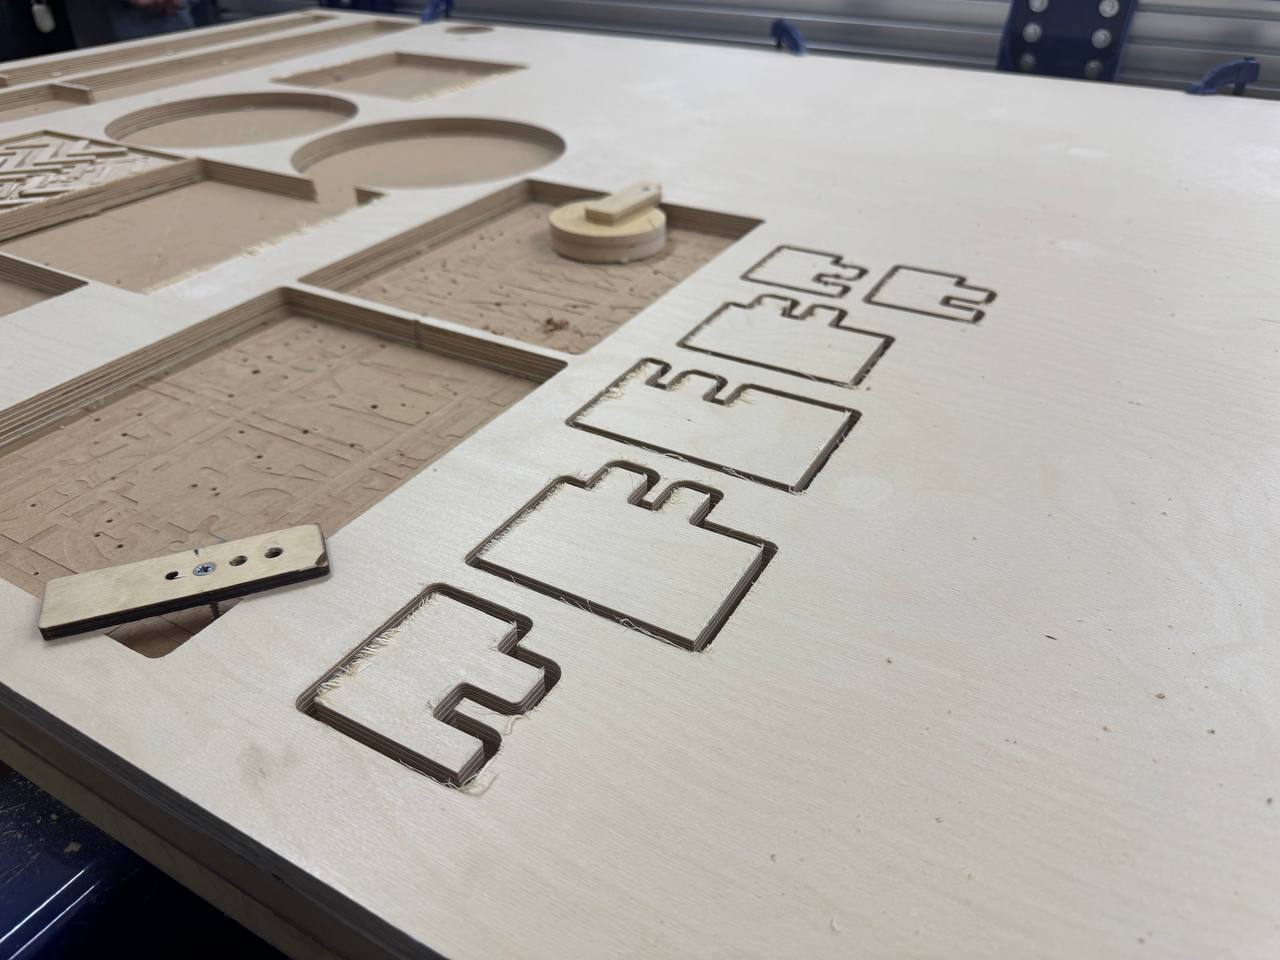
Cutting pieces:
Cutting process
I made the G-code for my frames. You can do this in different tools, but I did it in Fusion. You can see the full process in my Textile Scaffolding week. I prepared the G-code, set up all the steps for cutting on the CNC machine, changed the head, wore appropriate protective clothes, and followed all the necessary steps (more details are also in that week), and then started cutting.
Process video:
After this process and a few hours, we got:
Grinding
This is an important step after cutting. After CNC cutting, small fibers (“hairs”) remain on the chipboard surface. Before finishing it, we need to make the surface clean and smooth. For this, we sand the entire surface so that the paint can attach well.
For this, I used a Makita BO5041 Random Orbit Sander, a power tool for smoothing wood surfaces. I sanded all surfaces of the board.
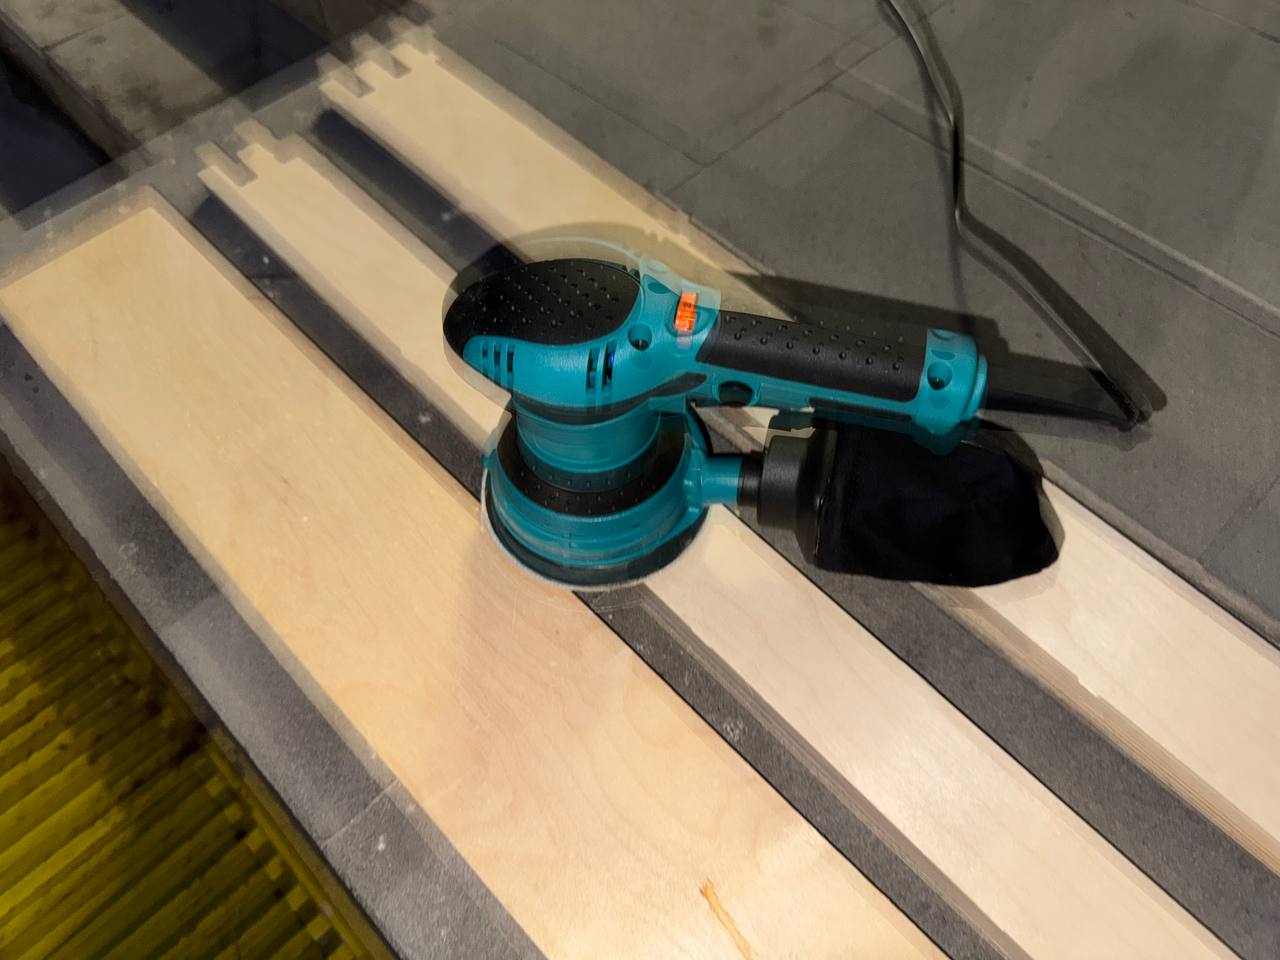
After that, I cleaned it with a wet cloth, and only then moved to the next steps.
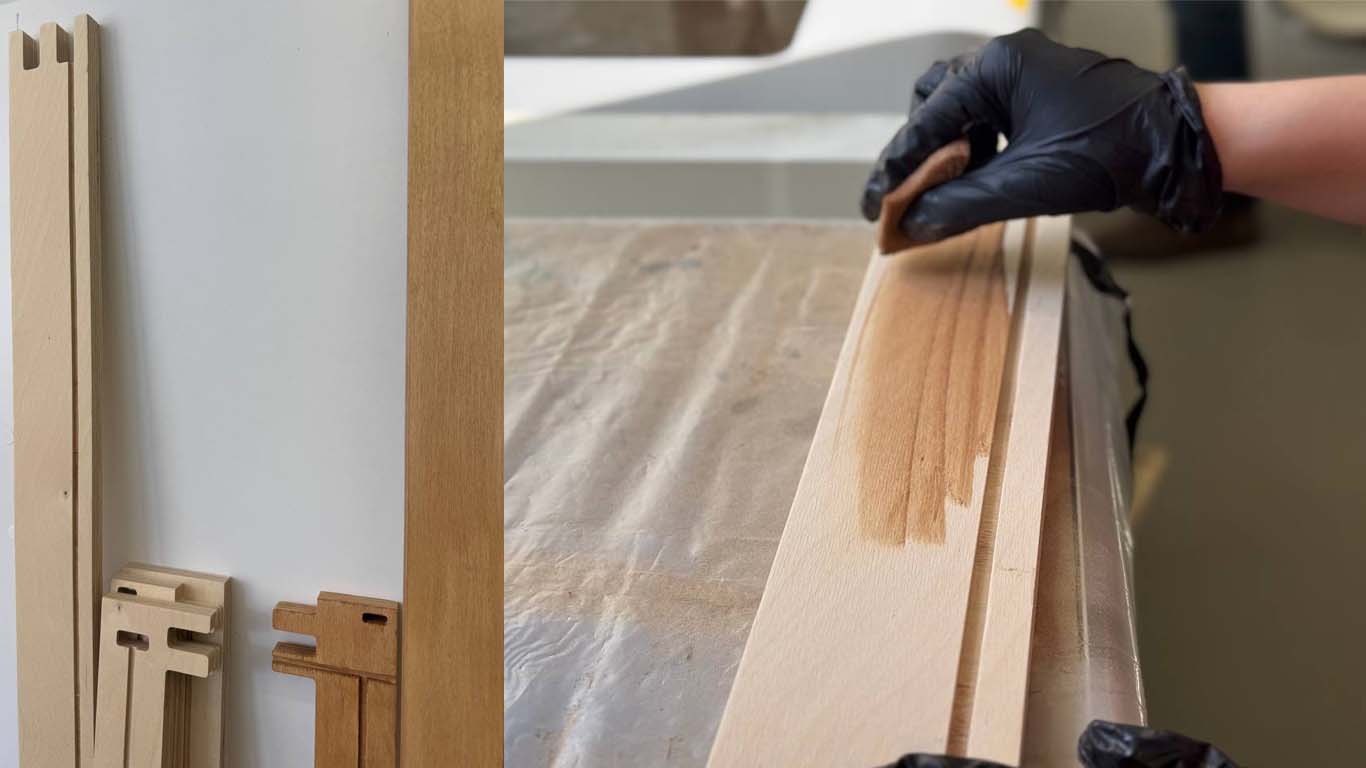
We must make this rocess again after one coat of varnish applied to wood.
Varnishing
Varnishing is done in light layers using a small sponge. It’s important to work quickly so the surface doesn’t dry before you finish the next area. If the layers are uneven, it becomes very visible, so the application must be smooth and consistent.
After that, we sand it again and repeat the process. You can apply multiple layers to get a deeper color and richer texture. I used two layers. Here is how one layer of varnish looks:
Mixing
All these processes took a lot of time — around two weeks — and a lot of energy. But it was still fun and interesting. I learned a lot, and then came the moment to understand: was all this work worth it?
I assembled all the pieces together, fixed them using bolts, and set up the structure. Then I installed all the electronic parts and checked if everything worked correctly (spoiler: I didn’t have major failures in this part). After that, I started testing and using it.
Where I placed the electronics and how it looks:
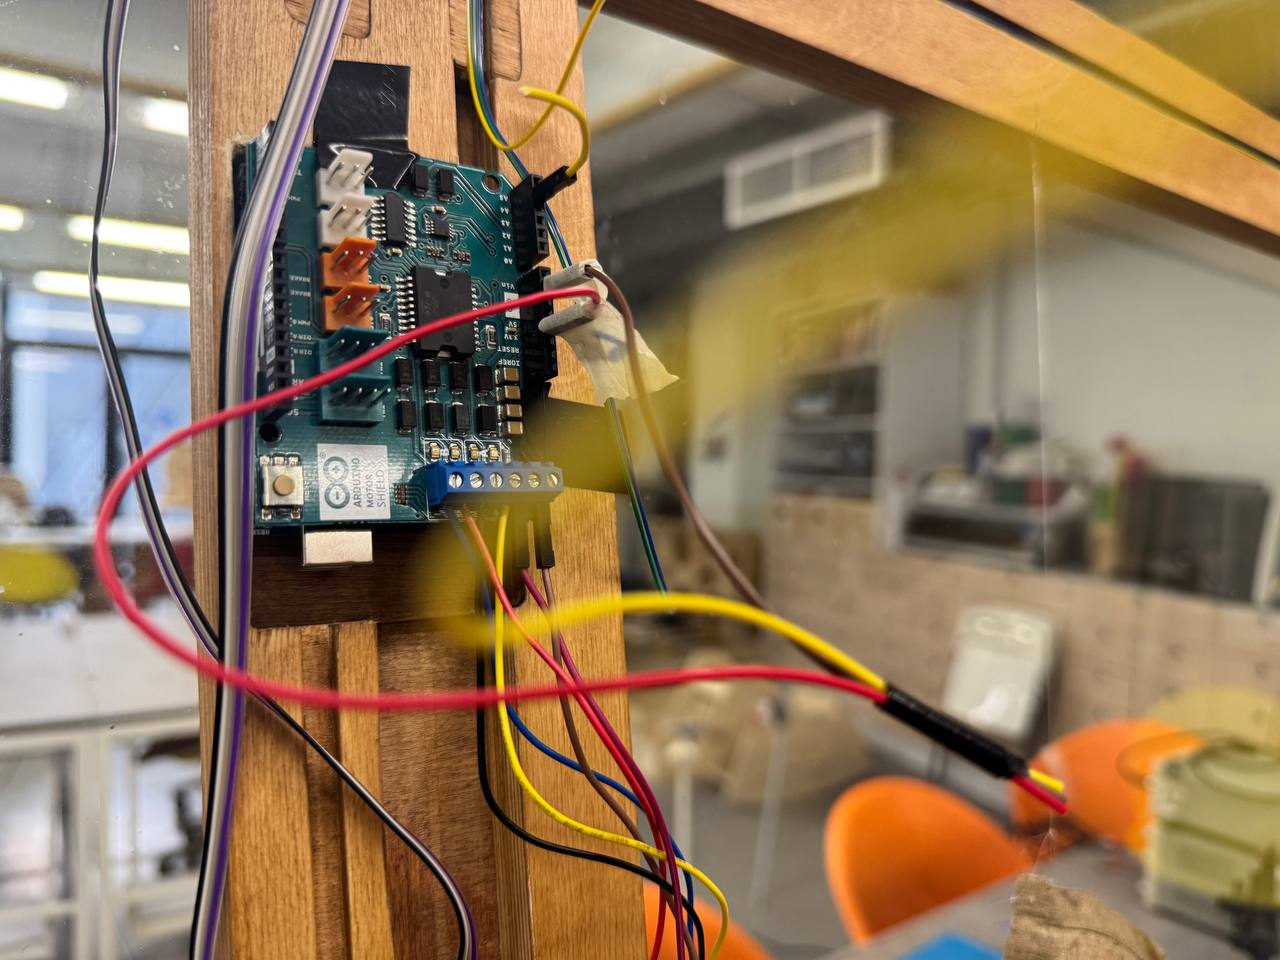
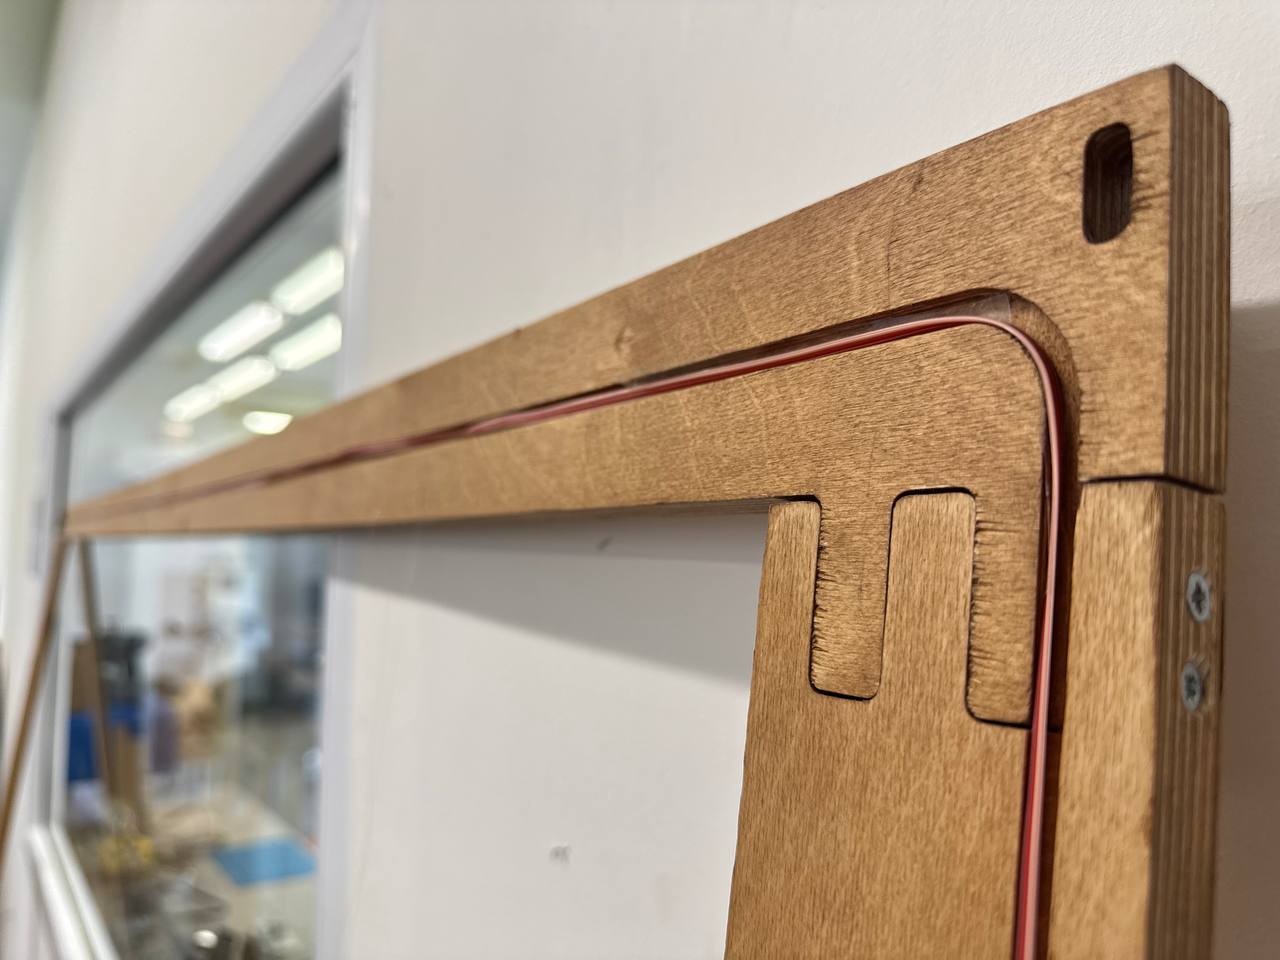
After a long time of assembling and connecting all the electronics, fixing them to the wood with double-sided tape, ironing and arranging all the conductive threads, the whole project finally started working perfectly.
It was both shocking and amazing at the same time.