Portfolio
Meono Talk of Art
Have you ever been in an art space?
Have you ever paused, moved closer, stepped away —
approaching a work to see the brushstrokes,
then stepping back to see the whole image?
Have you ever entered into a dialogue with a painting — trying to understand it, or to share your own thoughts with it?
Meono — Talk of Art is a dialogue between human and art.
A space where, at times, you speak to the artwork — and at others, you find yourself speaking to your own reflection.
Each encounter is different.
Each one — honest.
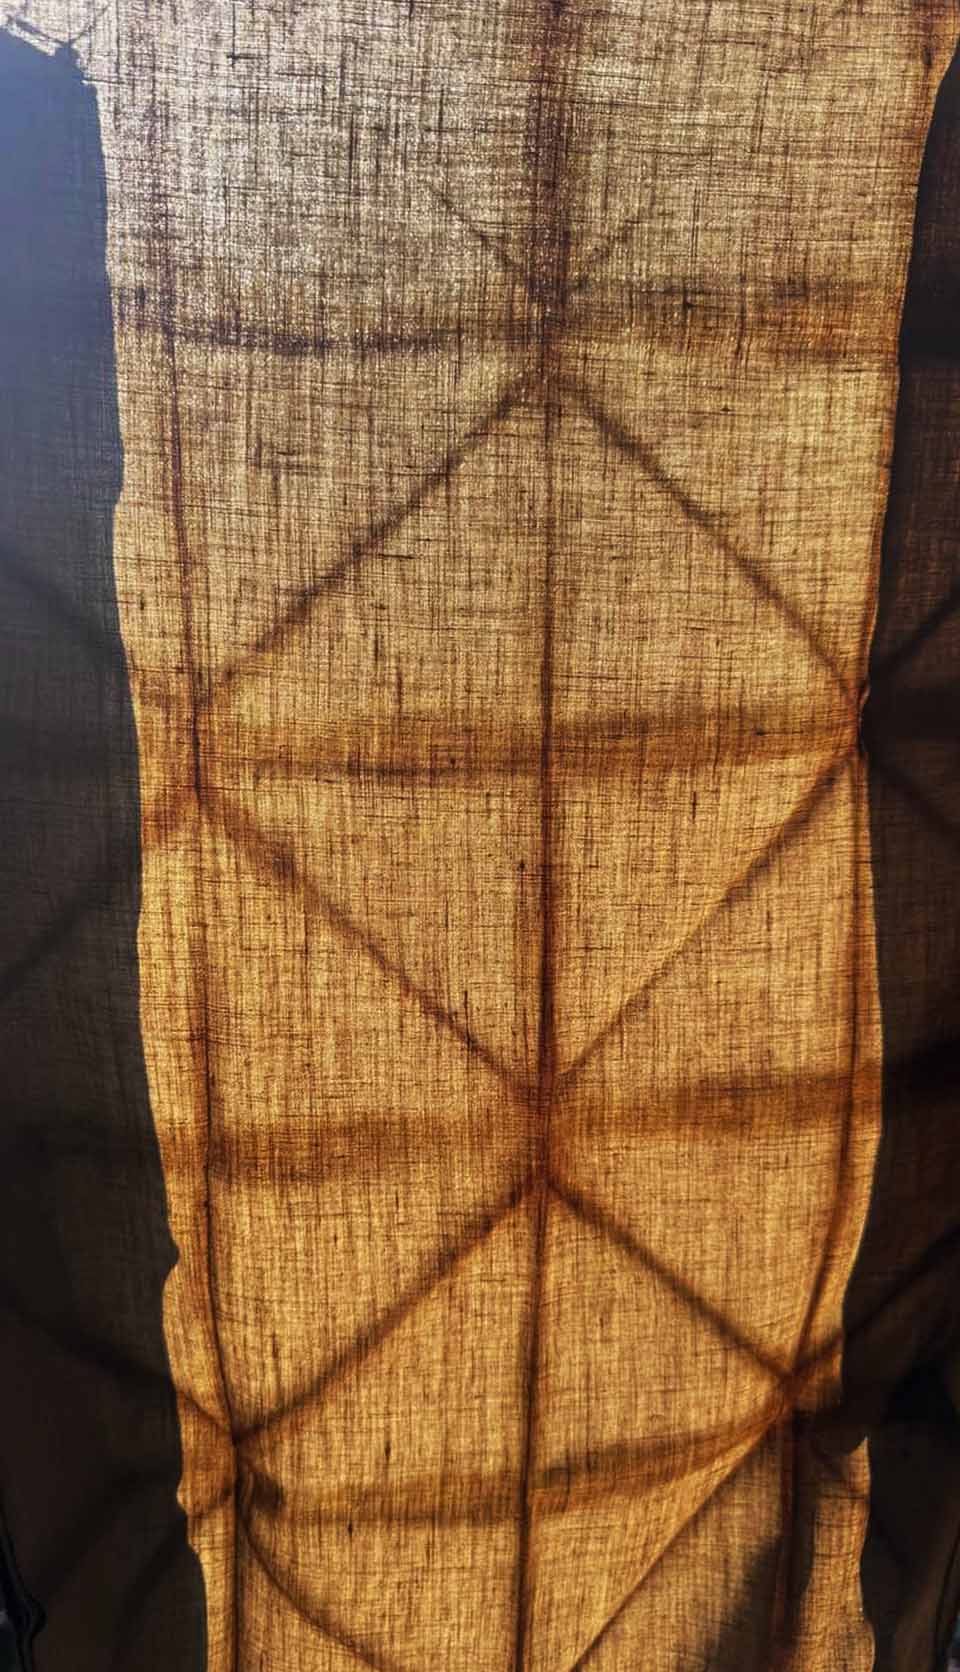
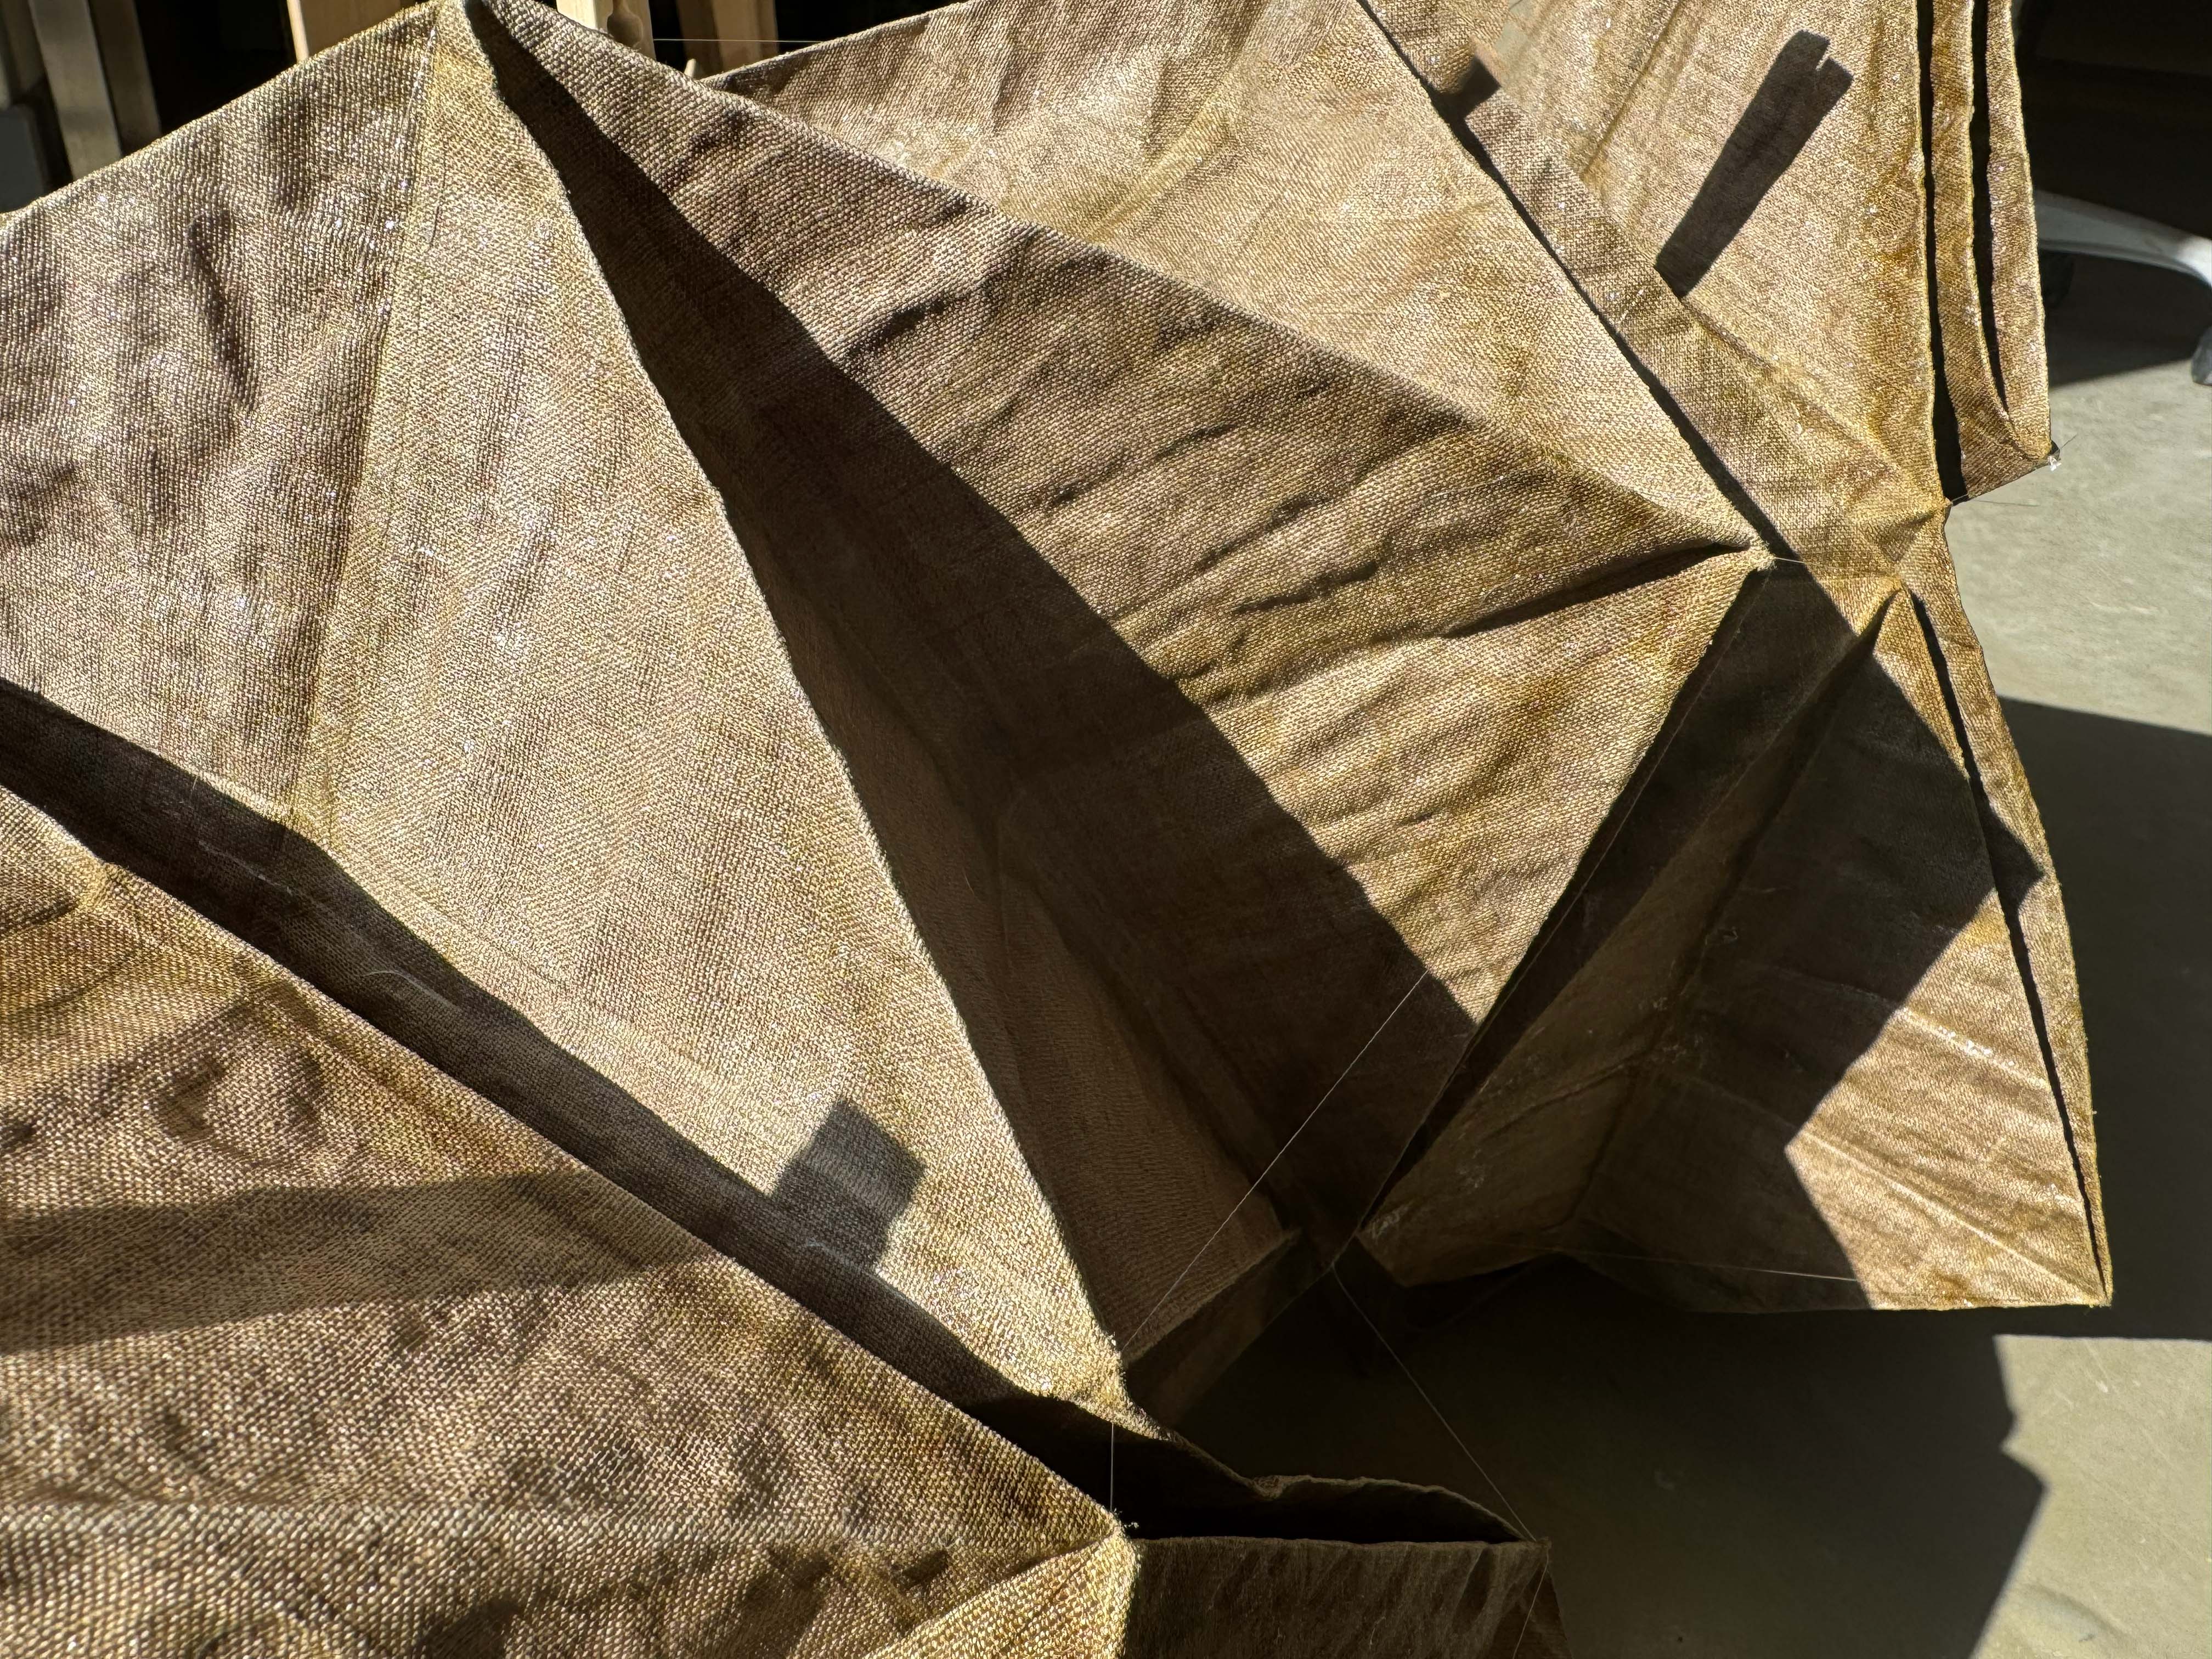
Lines drawn through dye come alive.
They begin to move, to breathe —
revealing forms that feel almost alive.
They carry a life within them,
becoming a meeting point of two worlds:
human and nature.
How Meono Works
Meono is an interesting construction that was born in my mind during the 9th week of the academy and later became a full project. Its main idea is communication with people — and each person can understand this communication in their own way. Kids may play with it, and even animals can notice the changes.
It “sleeps” when no one is around, as if waiting for you. In this state, it visually merges with nature.
How I constructed it
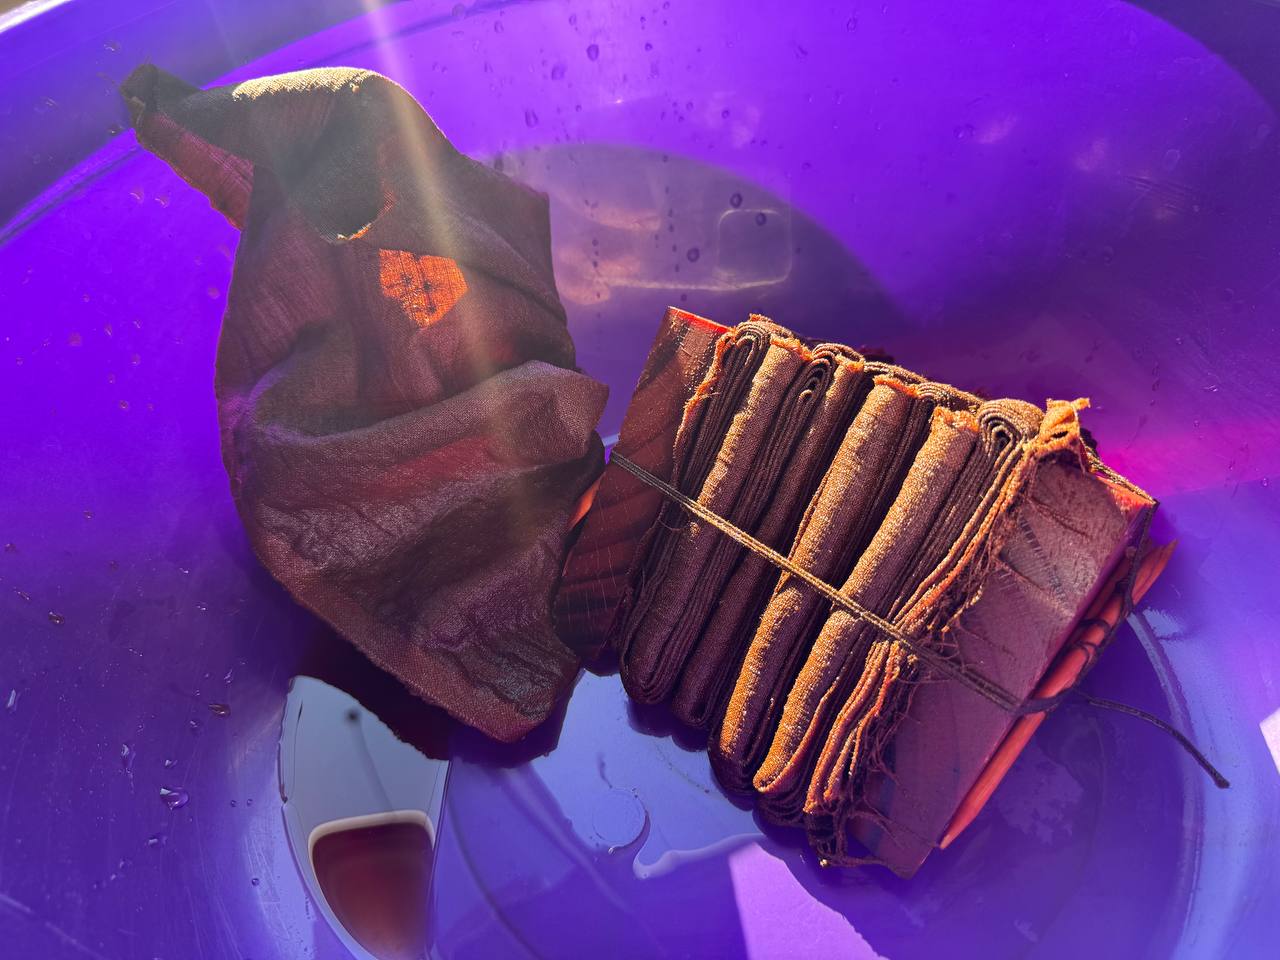
I wanted to turn shibori dyeing into a real movement — to “breathe life” into it. For this, I combined shibori-dyed fabric with origami-inspired shapes. I explored different forms and found combinations that work well together.
To make the fabric hold and follow folds, I combined materials and treated them with gelatin.
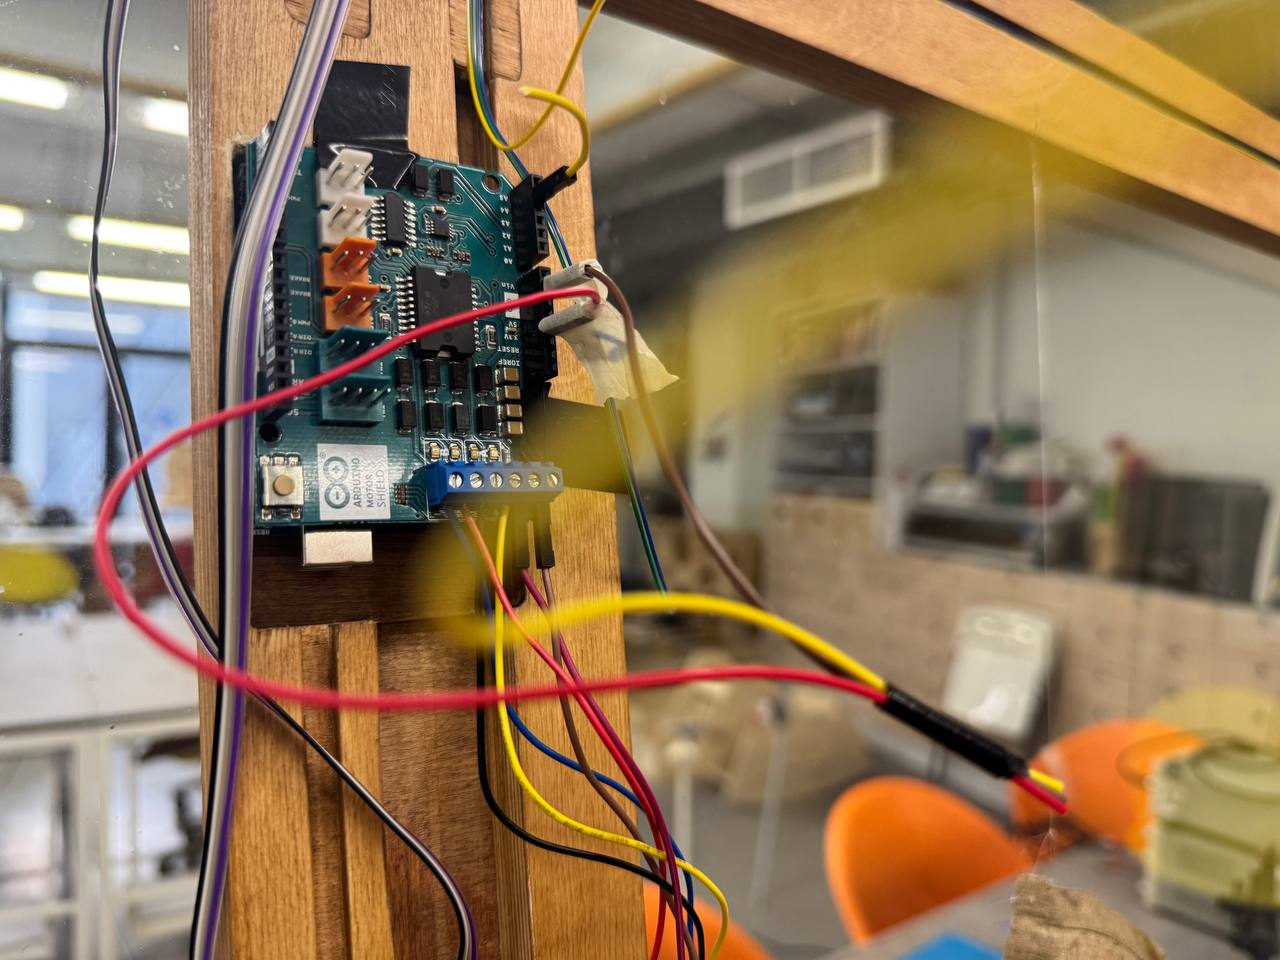
Then came the question: how will the material actually move? I used fishing threads to create the folding motion. To make this process automatic (not by hand), I added electronics and a stepper motor.
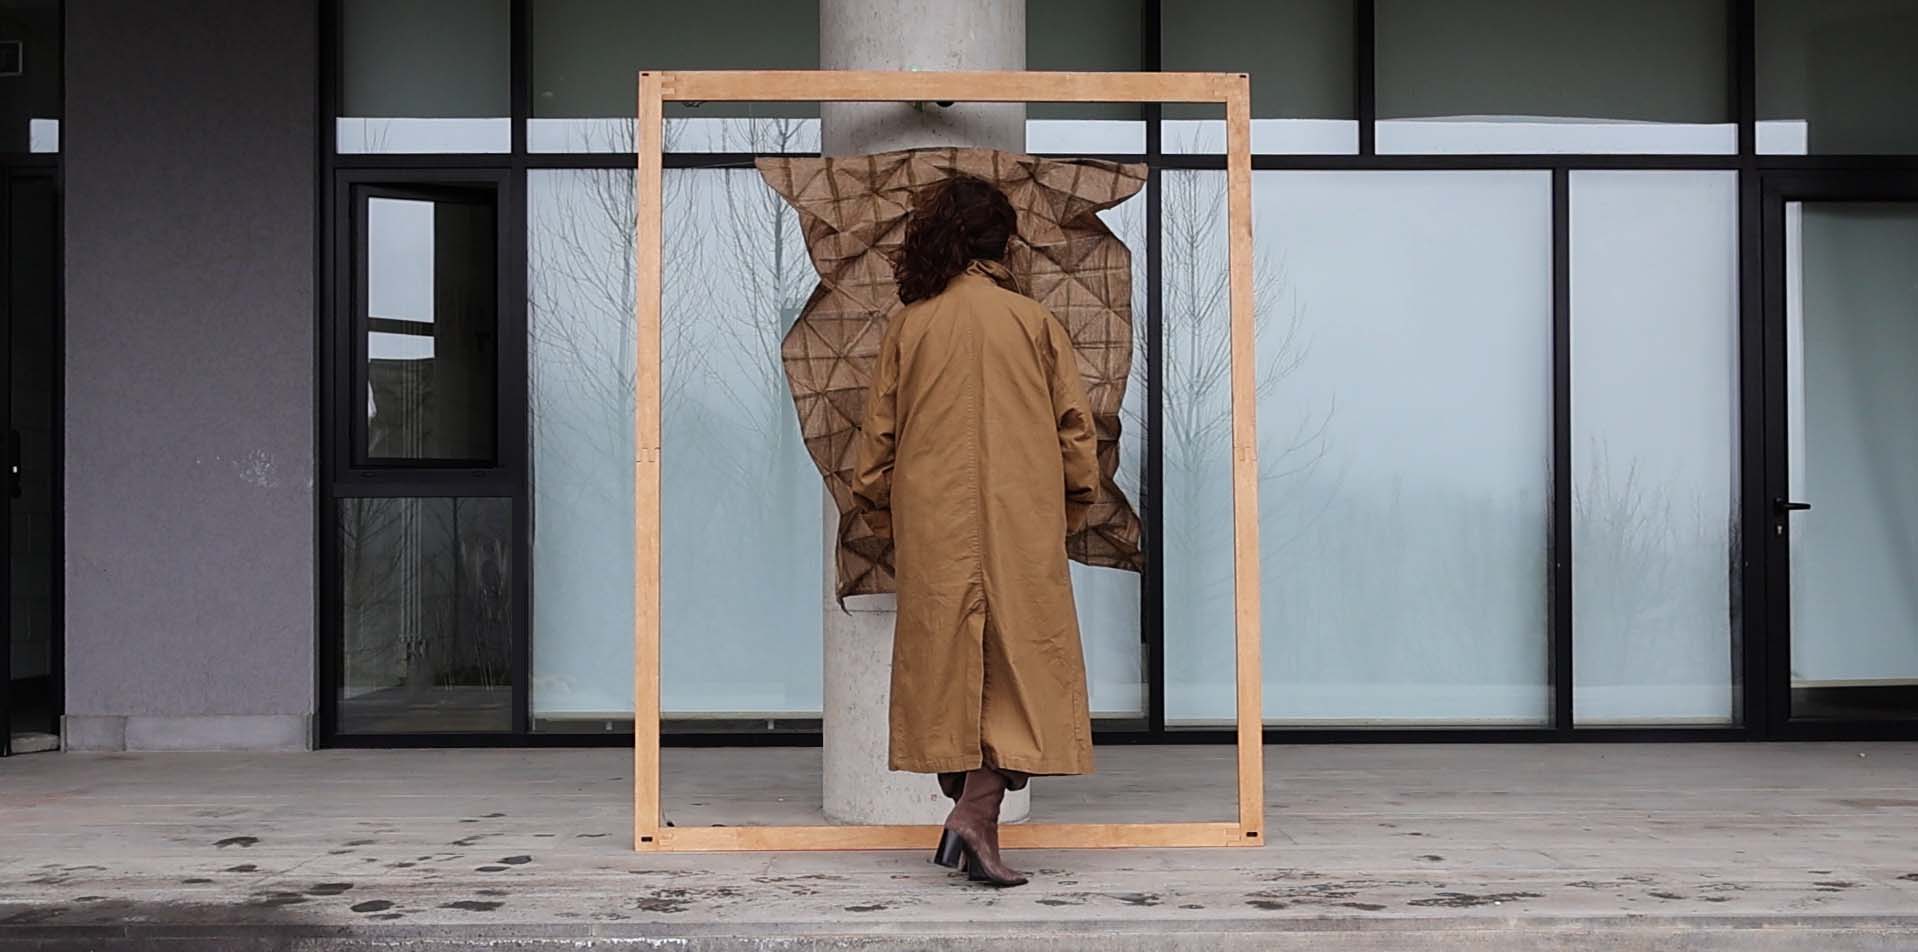
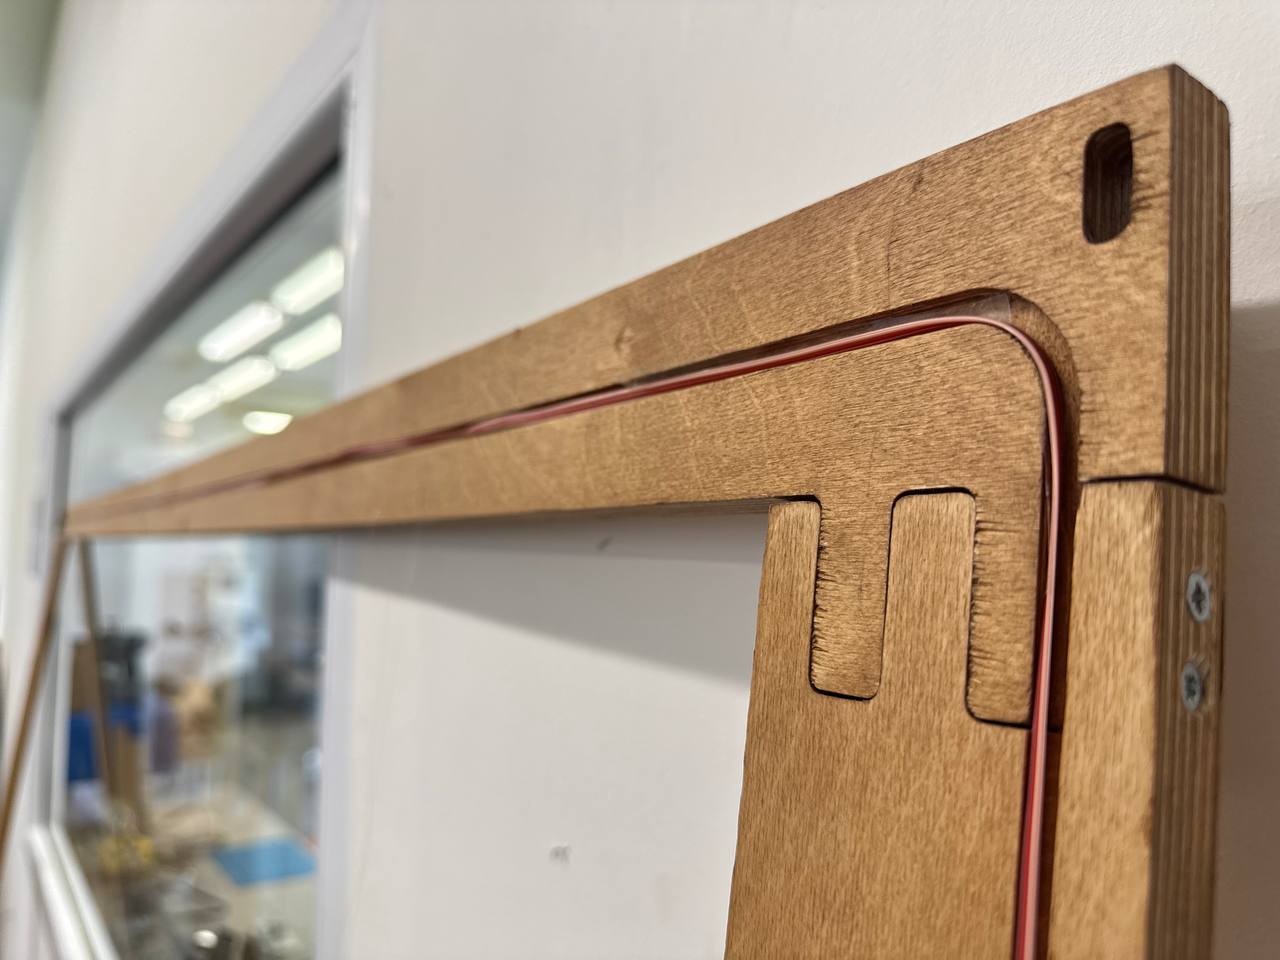
To give everything a clean and finished look, and to hide the electronics, I designed and built a frame.
I also added two distance sensors on the left and right sides to detect movement and trigger reactions.
By combining all these elements, Meono comes to life. llscreen.
Innovation
What is the innovation of Meono?
This question has interested and disturbed me for a long time. I have asked it to myself many times — and maybe we can find the answer together.
Meono grows from the roots of nature. Its story begins with natural dyeing and the creation of patterns known as shibori in Japanese tradition. Over time, this technique has traveled a long path to become part of a contemporary, unique object.
My intention was to make these patterns alive — to give them breath, to make them move. At the same time, I wanted to create an art object that could exist in a gallery space and invite people to think about form, art, and themselves. To enter their thoughts, to start a dialogue. To make people feel that art can communicate with them, respond to them.
To achieve this, I developed an electronic system that allows the object to react and move. I also created a structural frame that not only supports the work but creates a space between the artwork and the viewer — a space where interaction happens and where the movement of others can also be perceived.
What is unique in this project?
From a technical perspective, it is the combination of many processes and techniques — bringing together different materials, methods, and knowledge into one working system. Each step supports the next, creating a complete, functioning whole. In short: a multi-stage technological integration.
From a deeper perspective, it proposes a new way of experiencing art — combining technology with traditional craft while preserving its essence. It suggests that people are not alone in seeking connection with art. It proposes that art, too, seeks connection with us — to understand and to be understood.
Perhaps the main innovation is this: to make people feel that they are in communication — to awaken a sense of presence and interest in themselves.
In a world where everything is increasingly digital, people are hungry for real, direct interaction — without conditions, without roles — simply to be who they are.
The Processes
During this project, I used 5 main steps that helped me organize the process and work more clearly. These steps are based on what I learned during the academy.
The steps are:
- Shibori dyeing
- Biomaterial – combining linen with biomaterial
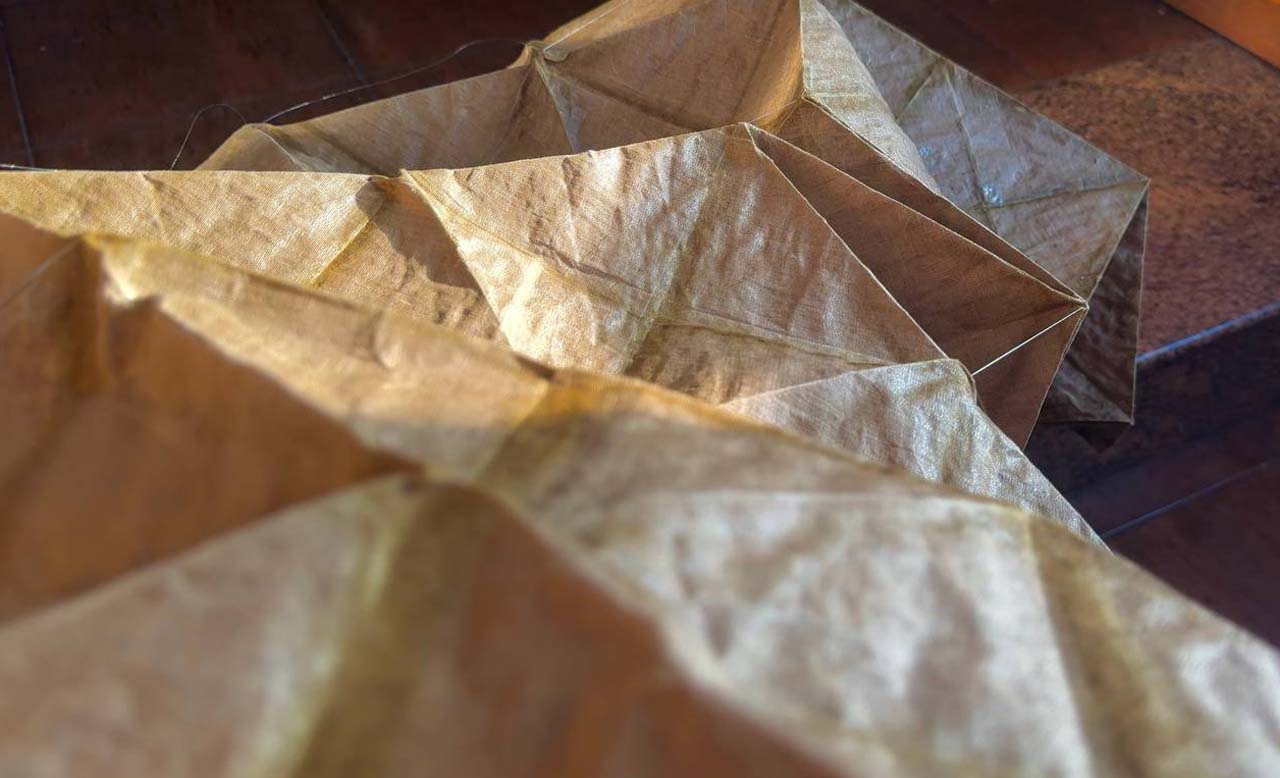
- Folding (Origami making) – breaking the origami shape lines
- Electronics integration – stepper motor + two distance sensors
- Making the frame
- Strengthening and assembling everything together.
I describe these steps in more detail on my page in the development section.
Some steps overlap with each other — for example, biomaterial folding, shibori folding, and electronics integration. In between, I also created smaller experiments and test projects.
Overall, these steps continue from one to another and complement each other.
BOM (Bill of Materials)
| Item | Cost ($) |
|---|---|
| Fabric | 40 |
| Onion skin | 14 |
| Alum, washing soda, etc. | 2 |
| Gelatin, alginate, etc. | 7 |
| Bowls and other tools | 50 |
| Electronics | 56 |
| Wood | 15 |
| Wood varnish | 2 |
| Total | 170 |
A lot of materials I took from lab itams and use it, some parts i bought by myself.
Video Making
This was another challenge for me. I love making photos and videos, but I had never created short films before — with voice-over, music, color editing, and mood shots for atmosphere. I also hadn’t really used a video camera in this way, so there were many new details to learn.
For filming, I asked one of the Fab Academy students, Hrach Barseghyan, to help me, and together we created different scenes with people. I really liked how they turned out. I also filmed some nature and rainy scenes, and even appeared in a few myself.
We decided to shoot outdoors because the lighting was better, the environment was more interesting, and there was more space for Meono to “breathe.” We carefully took the electronics outside, placed Meono under cover, and started testing and filming.
At one point, Meono even reacted to a lab dog — which was both interesting and very cute.
Stills from the filming։
After finishing the filming, it was time for editing. For this, I used CapCut because it’s easy to use, even though many features are paid. I adjusted colors and exposure, cut and arranged scenes, added zoom in/out effects, recorded my voice, and included some free stock clips that matched the mood of my video.
And the final result — let’s watch it together:
Video
Presentation
Frames
Frames that didn't fit in the video: