4. BioChromes
Research
This weeks topic is all about colors! We are to use natural materials to extract dyes out of it. I am taken aback to how the history of dye came to be and how it was prepared before use of readily processed mordants. I wannna link this weeks activity by delving into the history of traditional dyes and tannins in Kenya to better understand how it shaped the evolution of modern dye extraction.
Across Kenya, natural color traditions span coast, highlands, and arid north: on the Swahili coast, dyers fermented leaves of local Indigofera to make indigo vats for deep-blue cottons that circulated in trade; coastal artisans also boiled tannin-rich barks—like mangrove and other hardwoods—to produce durable browns and near-blacks used to color and preserve fishing nets, leather, and cordage. In the eastern highlands, especially among Taita, Mijikenda, and Kamba makers, chopped barks, roots, fruits, and leaves were simmered to dye sisal and other fibers in reds, browns, greens, and blacks, often assisted by wood ash or alum, then woven into patterned baskets. In arid zones (e.g., Somali communities around Garissa), decoctions from local trees supplied dyes and tanning liquor for leatherwork. While Maasai and Samburu are best known for red ochre (a mineral, not a plant dye) mixed with fat for hair and body adornment, plant dyes were common in utilitarian textiles and craft. Today, many of these practices persist in basketry and small-scale textile studios, with renewed interest from designers seeking lower-toxicity, culturally grounded color.
The Kenyan flag is represented by 4 different colors;
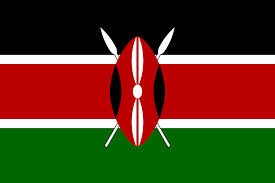
- Black- people
- White- peace
- Red- blood
- Green- fertile land.
Traditional dyes in Kenya were primarily natural and plant-based, extracted from leaves, barks, roots, fruits, flowers, lichens, and soil.
Key traditional sources:
🌿 Red ochre, a mineral (eng'are in Maa): From iron-rich soil, often mixed with animal fat or clarified butter to make it sticky. Applied on body and hair.
🌳 Acacia bark and pods: Rich in tannins, producing brown to reddish hues.
🌰 Saba (Acacia nilotica): Known for deep browns and used in leather tanning.
🐘 Charcoal and ash: Used to create greys and blacks.
The Maasai community are known to be the most culturally resilient groups in Kenya.They used natural tannins from tree barks to fix dyes and color fabrics as well as to tan hides for clothing and accessories.
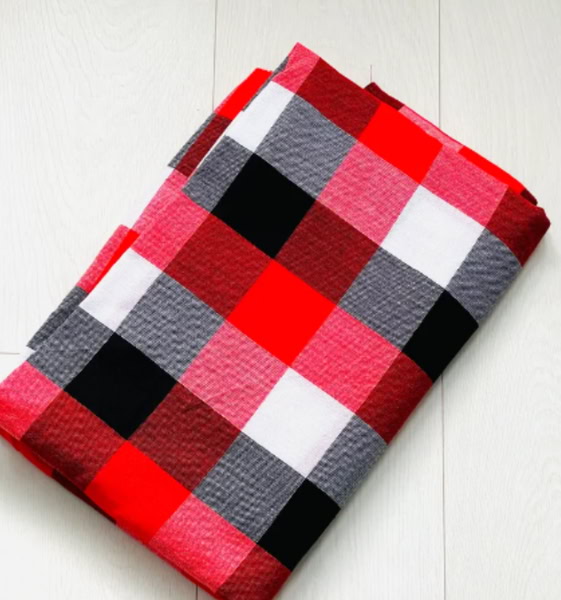
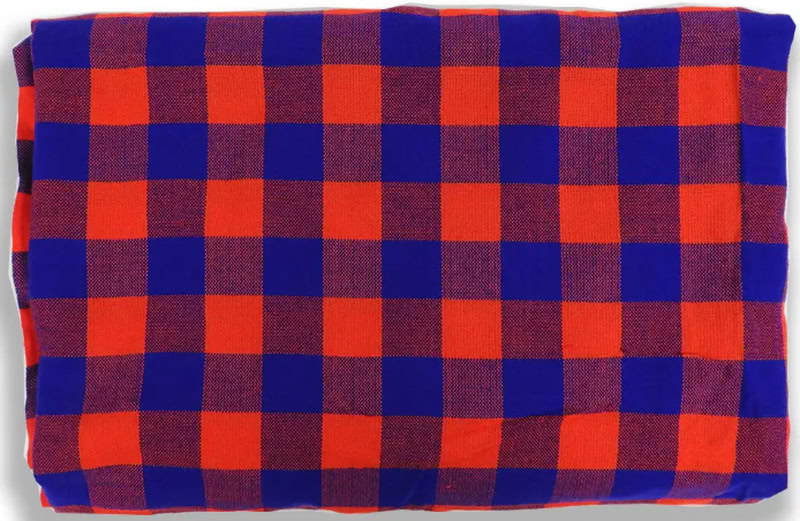

Red is the color most associated with the Maasai identity; it represents not just protection but also connection to cattle and tradition. Maasai community are known to produce Shuka- a vibrant checked cloth. Originally, the Maasai did not wear fabric but skins from cattle and goats, tanned and dyed using tannin-rich bark.
Preparation for fabric
- Soak hide material in water
- Soak in acacia tannin
- Apply ochre mixed with oil or fat- to help preserve both the hide and the pigment. Some of the colors were sourced from:
- Red-ochre, red clay
- White-chalk, white ash
- Green- barks, leaves
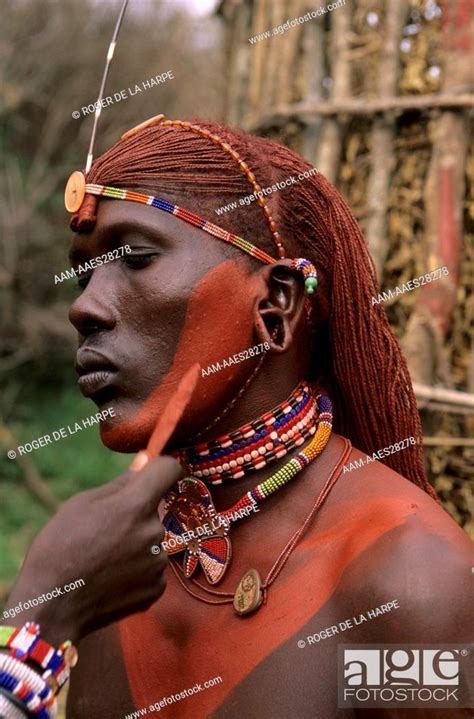
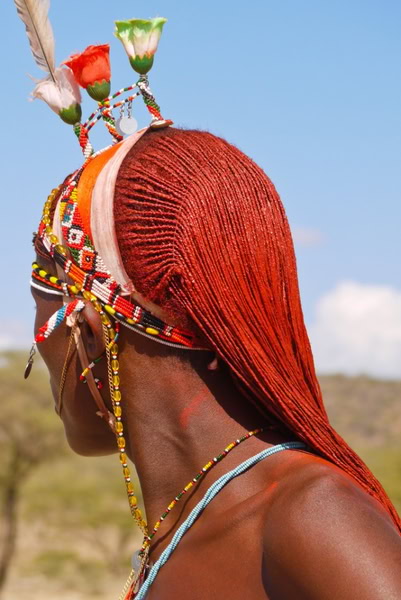
preparation for hair
- Grind red ochre finely
- Warm animal fat like ghee to soften
- Mix to smooth paste
- Braid hair into many fine plaits and work paste through the braids.
Weekly assignment
My first step was to ensure all tools and materials to be used for the week were available.
Tools
- Pot
- Measuring cylinder
- Motor and Pestle
- Knife
- Spoons
- Cups
- Filter paper
Materials
Cinnamon bark
Beetroot
Blueberries
Process and Workflow
Hibiscus dye extraction
??? 1. Wash the flowers to remove any dirt
-
Add 300ml of water in a pot
-
Simmer the mixture for 30 minutes while stirring occasionally.
- Allow the mixture to cool then filter using filter paper.
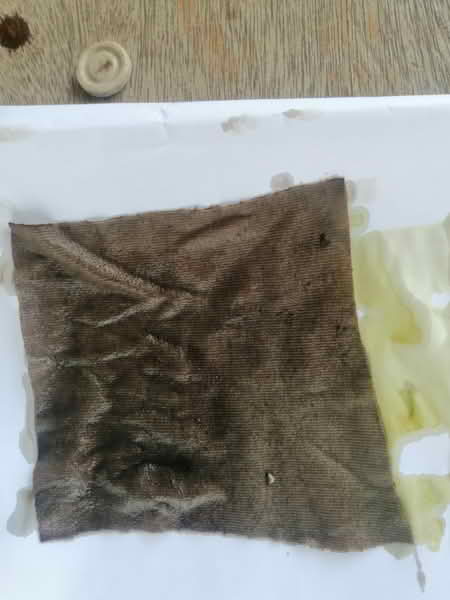
Application on cotton fabric
a)With dye bath only
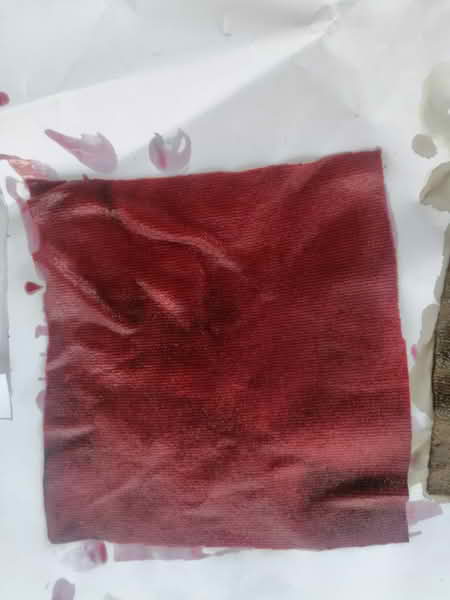
b) With Sodium bicarbonate
c) With lemon juice only
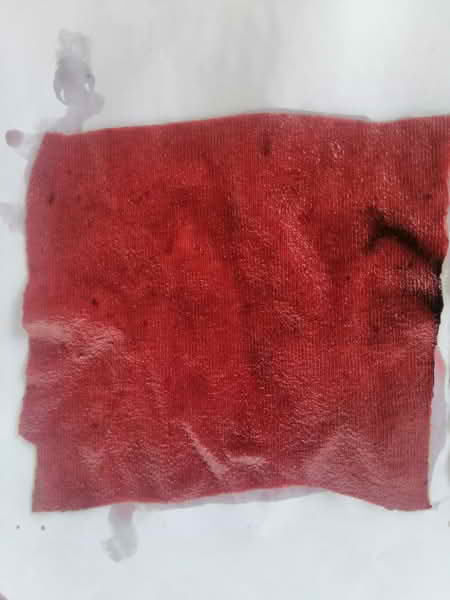
d) With Iron
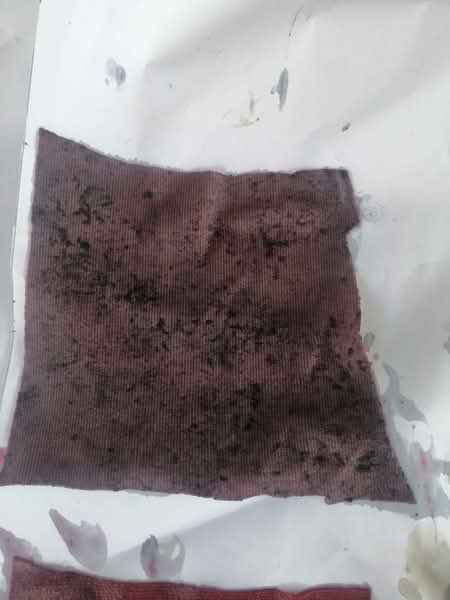
e) With sodium bicarbonat+ lemon juice
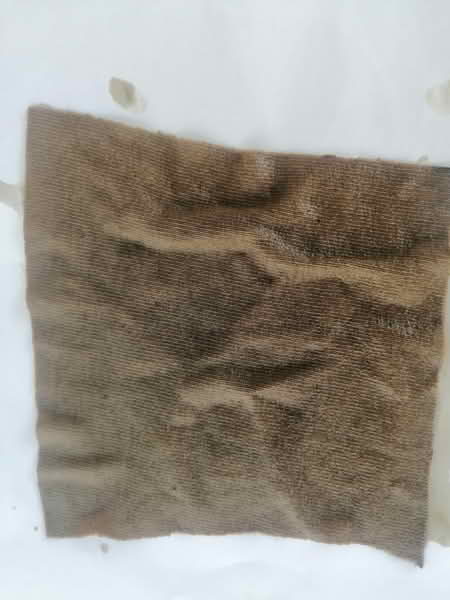
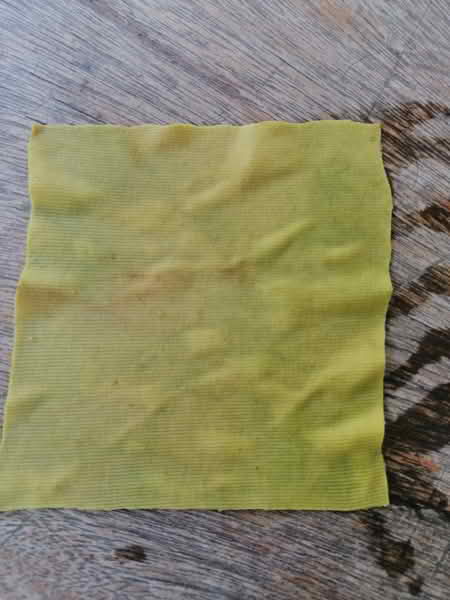
Mango leaves dye extract
- Wash and blend mango leaves
- Add 500ml of water in a pot
- Simmer the mixture for 30 minutes
- Allow mixture to cool and then filter.
Application on cotton fabric
a) With dye bath only
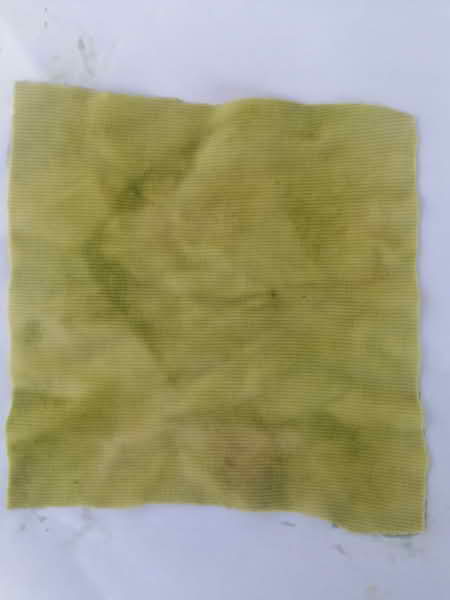
b) With sodium bicarbonate
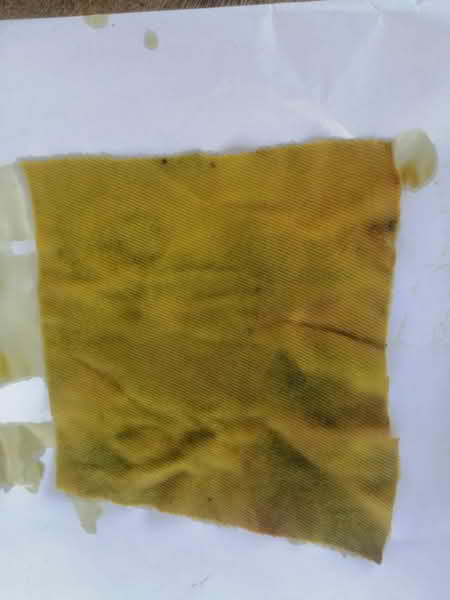
c) With Lemon juice only
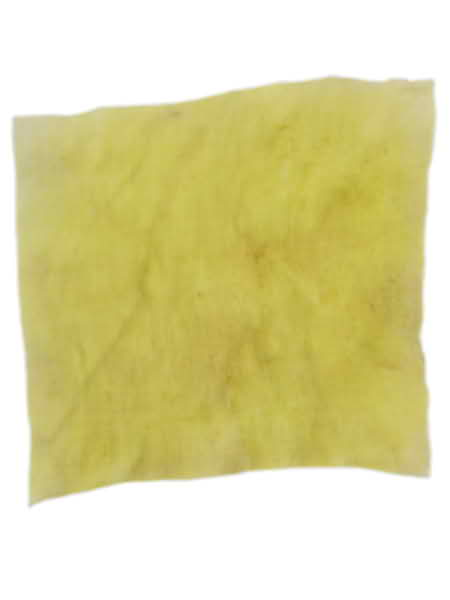
d) With Iron

e) With sodium carbonate + lemon juice
Application on wood
Aside from using natural dyes, I conducting waterproof tests using different surface finishes (synthetic) to determine how they can be protected and preserved when applied on wood. Because biochromes are more sensitive to moisture than synthetic pigments, exposure to water can cause color bleeding, fading, or deterioration of the coating layer. Testing various finishes allows me to evaluate which ones provide the strongest barrier against moisture while maintaining the integrity, vibrancy, and adhesione on the wood surface. Since wood itself readily absorbs water and can swell or warp, the waterproof performance of the finish is essential not only for preserving the color but also for ensuring the durability of the entire material. By comparing different finishing options, I can identify the most effective and sustainable solution that supports long-term stability, enhances product quality, and validates the practical use of surface finish in real-world applications.
I used plywood as my sample and adopted the Japanese standard of Waterproof test.
Exam order
- Specimen preparation: Cut the specimen to the specified size.
- Immersion: The cut specimen is immersed in boiling water for 4 hours.
- Drying: After immersion, the test specimens are dried in a drying box for 20 hrs.
- Re-soaking: After drying, soak again in boiling water for 4 hours.
- Re-drying: After immersion, the test piece is dried for 3hrs.
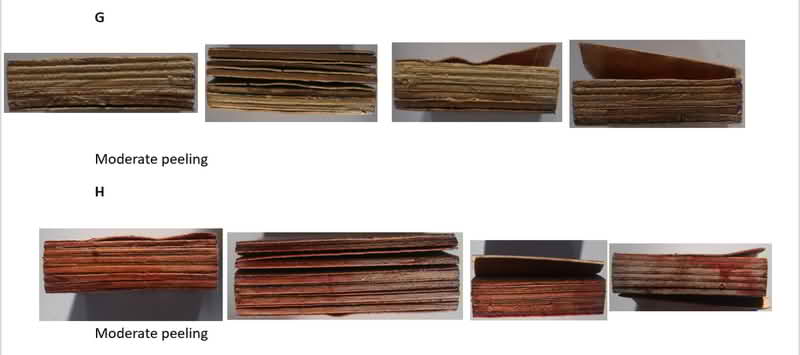
- Check for peeling: Finally, check for peeling of the adhesive surface
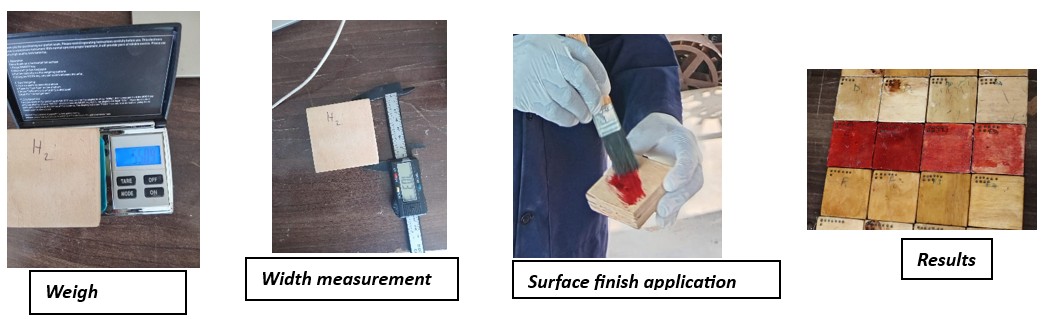
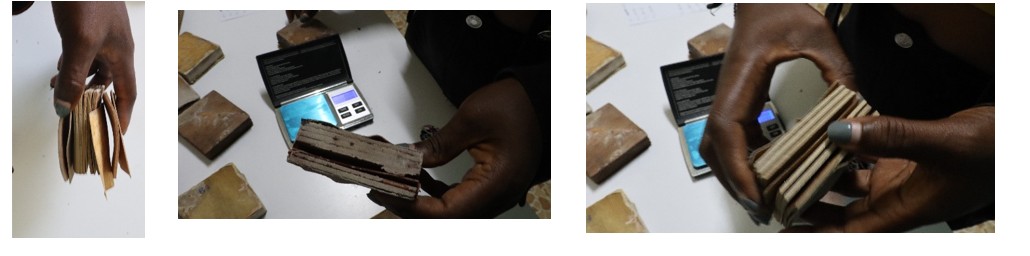
Test Workflow
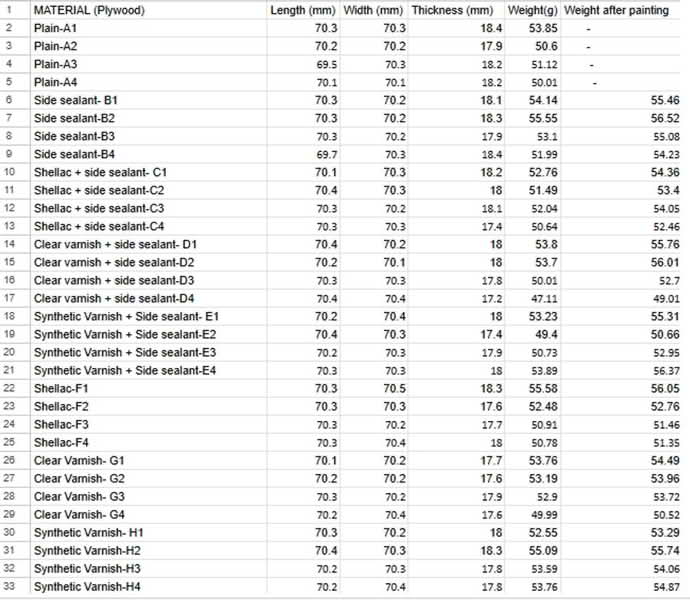
- Specimen preparation: Three surface finish were used: Shellac, Clear Varnish and Synthetic varnish Each batch had four samples prepared and measurements recorded as the table shown below. The samples were left to stick to the wood for 7 days.
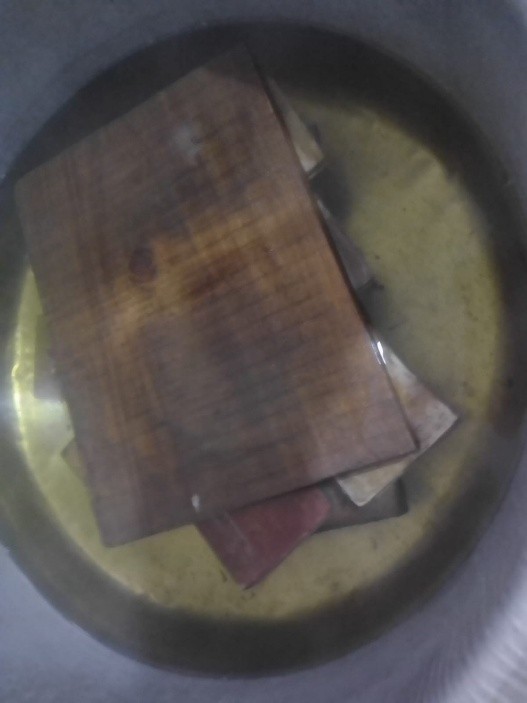
- Immersion
The pieces were immersed in boiling water for 4 hrs.
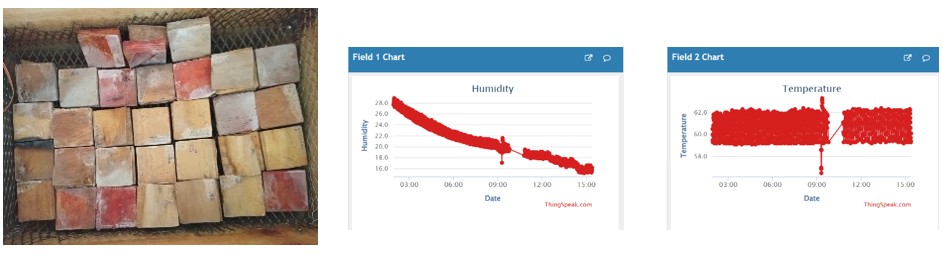
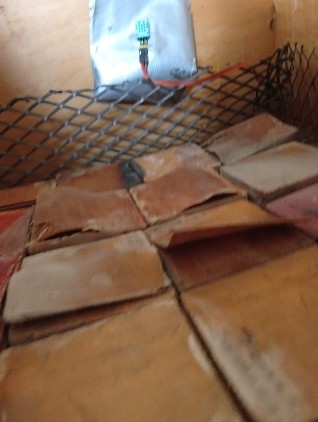
- Drying:
Drying was done in a dryer box that had controlled temperature ranging from 59–62-degree Celsius.
- Resoaking
Some pieces lost deformity and peeling was huge that they could not undergo resoaking. The remaining 16 pieces were resoaked in boiling water for 4 hrs.
- Re-drying
The pieces were dried in drying box for 3 hrs. There were some peeling off even after redrying.
% Moisture content Analysis
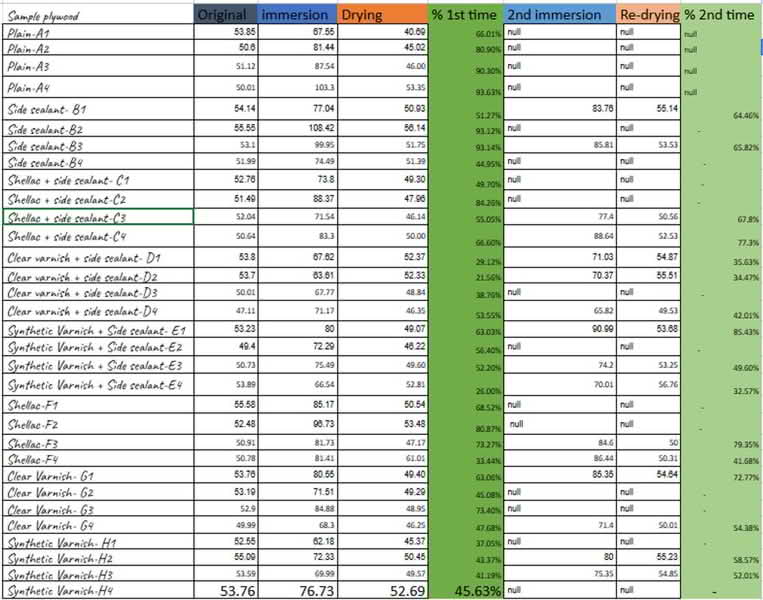
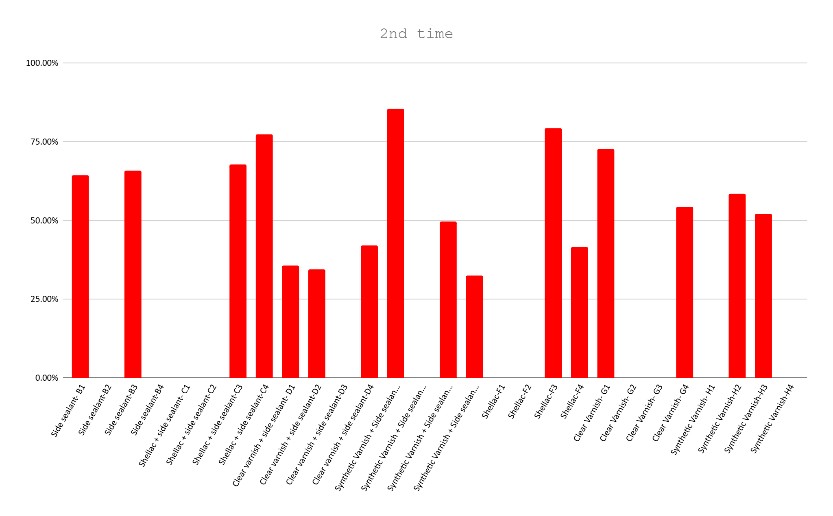
The ranking of treatments is not stable across repeats. This may be due to the quality of plywood, degree of boiling. Clear varnish+ side sealant shows to be performing better than the samples.
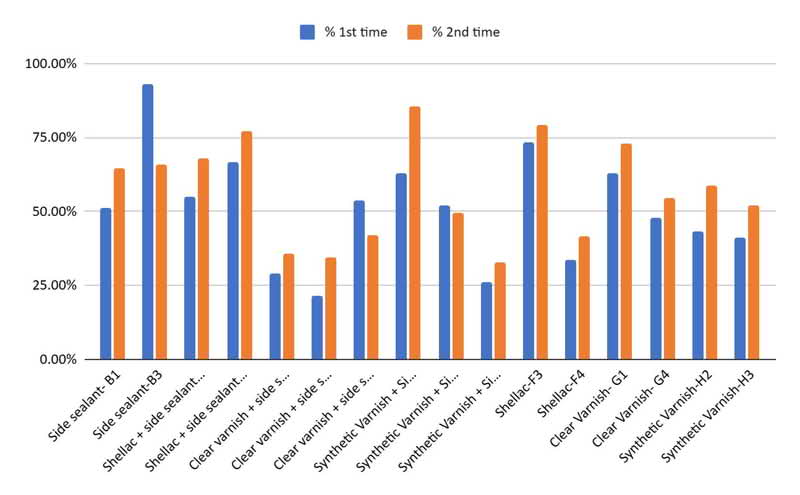
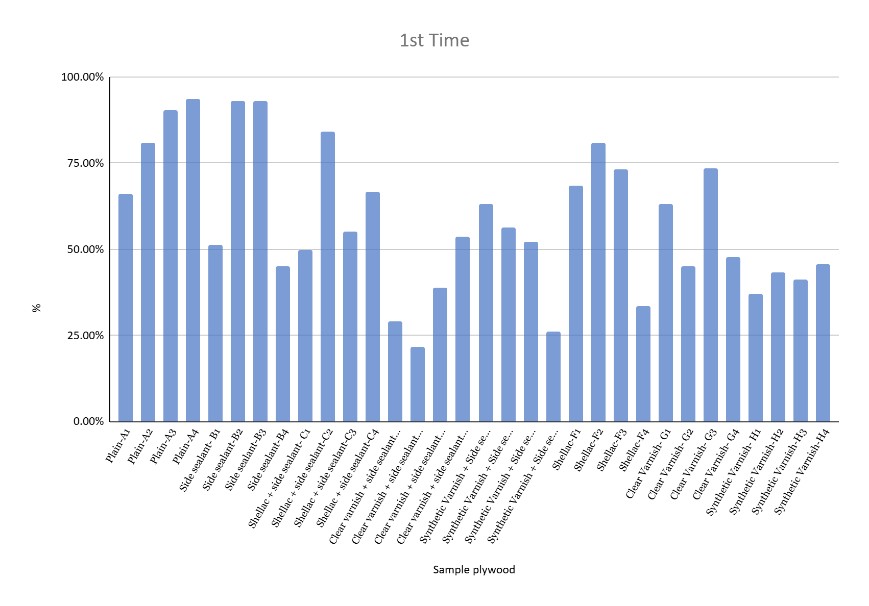
The chart only captures data of samples that were good to proceed to 2nd immersion based on the damage and peeling rate observations. The second time is much worse than the first this is due to reduced performance of the coating and increased in water absorption. Clear varnish+ side sealant still performs better compared to other surface coatings.
Comparing Surface Finishes
| Type | Outcome |
|---|---|
| Plain Plywood | The plywood absorbed more water and had the highest peeling rate indicating that lack of protection makes the plywood more vulnerable to moisture damage. Increased water absorption weakened the adhesion in the plywood. |
| The plywood did not proceed to the next phase of the test due to complete damage | |
| Side Sealant | It contributed to prevent water from seeping through the sides. However, the top and lower side not being sealed allowed for water penetration. Side sealant alone is not sufficient to fully prevent water absorption |
| Clear Varnish+ Side sealant | Showed a higher ability to prevent water absorption. The side sealant helped in ensuring water does not penetrate the wood from the sides, acting as a barrier against moisture. |
| Shellac+ Side sealant | Higher water absorption rate due to its sealing properties |
| Synthetic Varnish+ Side sealant | Showed moderate water absorption |
| Clear Varnish | Poor water absorption rate |
| Shellac | Higher water absorption rate |
| Synthetic Varnish | Moderate water absorption rate |
In general:
• Surface finish with side sealant proved to prevent water absorption into the plywood.
• Clear vanish has higher rate of preventing water absorption compared to shellac and synthetic varnish. This may be due to the stronger sealing properties and adhesion in clear varnish.
• Plain sample had the highest water absorption rate which also had the highest peeling rate.
• Side sealant alone cannot prevent water absorption
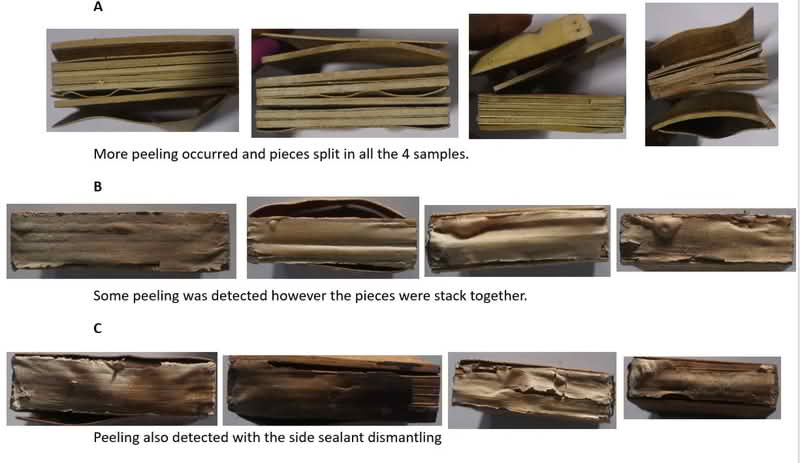
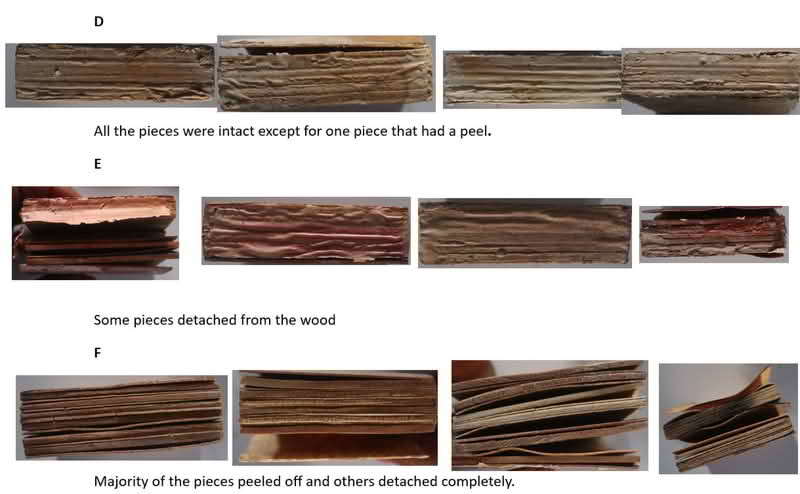
Peeling rate
References & Inspiration
- Inks & folds - Germarillis Ruiz - FabLab Bcn