8. Soft robotics
Research
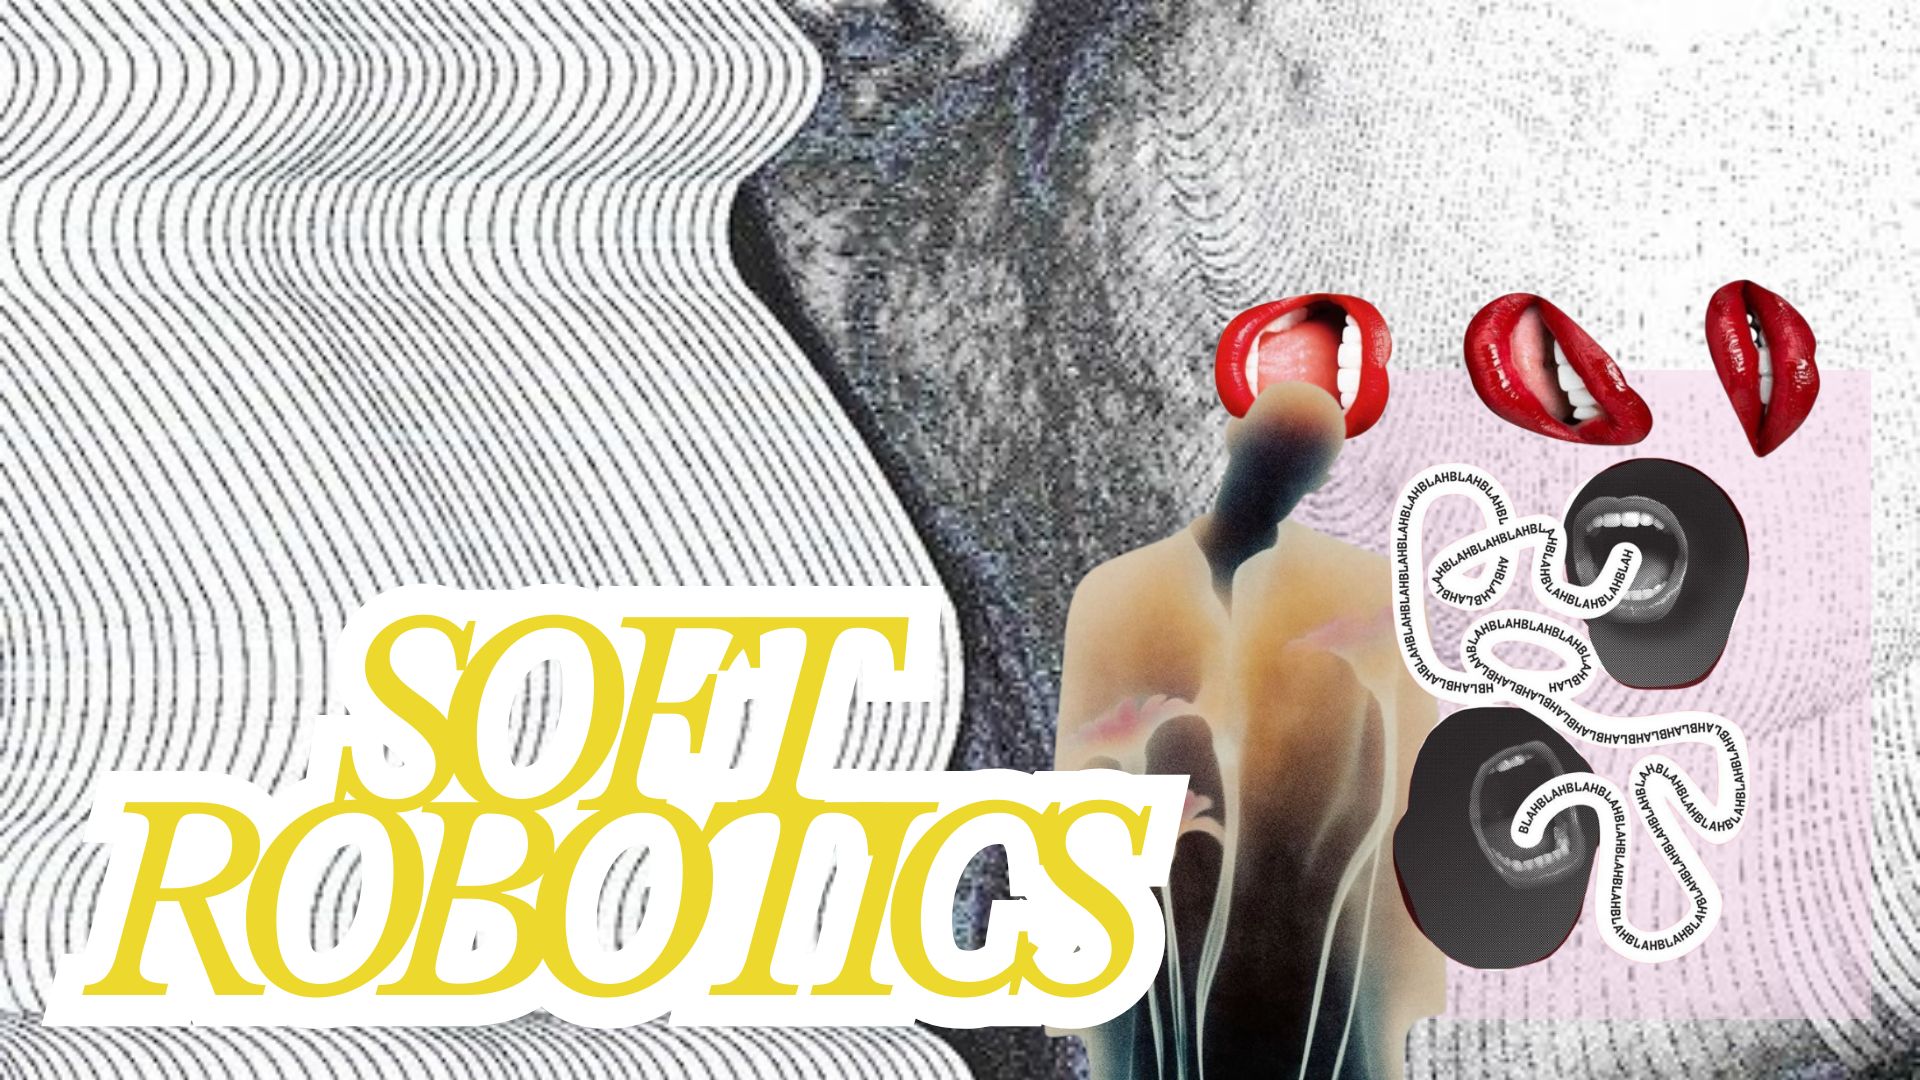 Cover Art- Nadia Attmore
Soft robotics, which focuses on systems that move and react using flexible materials rather than stiff mechanical parts, was introduced this week. Soft robotics, in contrast to standard robotics, is directly inspired by the human body, muscles, skin, organs, and breath making it relevant to my continued interest in anatomy as the basis for fashion and design. Soft robotic constructions, which frequently use air or fluid as a driving force, inflate, contract, and deform to resemble living things. In line with how the body naturally conveys emotion, tension, and release, this method reframes movement as something organic and responsive rather than mechanical.
References & Inspiration
I wanted to take on the mouth and lips as an area of expression, sensation, and vulnerability for this assignment. The lips are an expressive connection between the internal body and the outside world since they are involved in breath, conversation, intimacy, and emotion.
My idea was to use air pressure to replicate breath and motion by making inflatable lips that pucker and expand when air passes through them. This project functions as a soft robotic sample that investigates how air, material, and form interact to create lifelike movement rather than as a conventional wearable.
My artist inspiration is Philip Beesley a professor and multidisciplinary artist whose living sculptures and responsive buildings respond to human presence by using complex meshes and soft actuating materials.
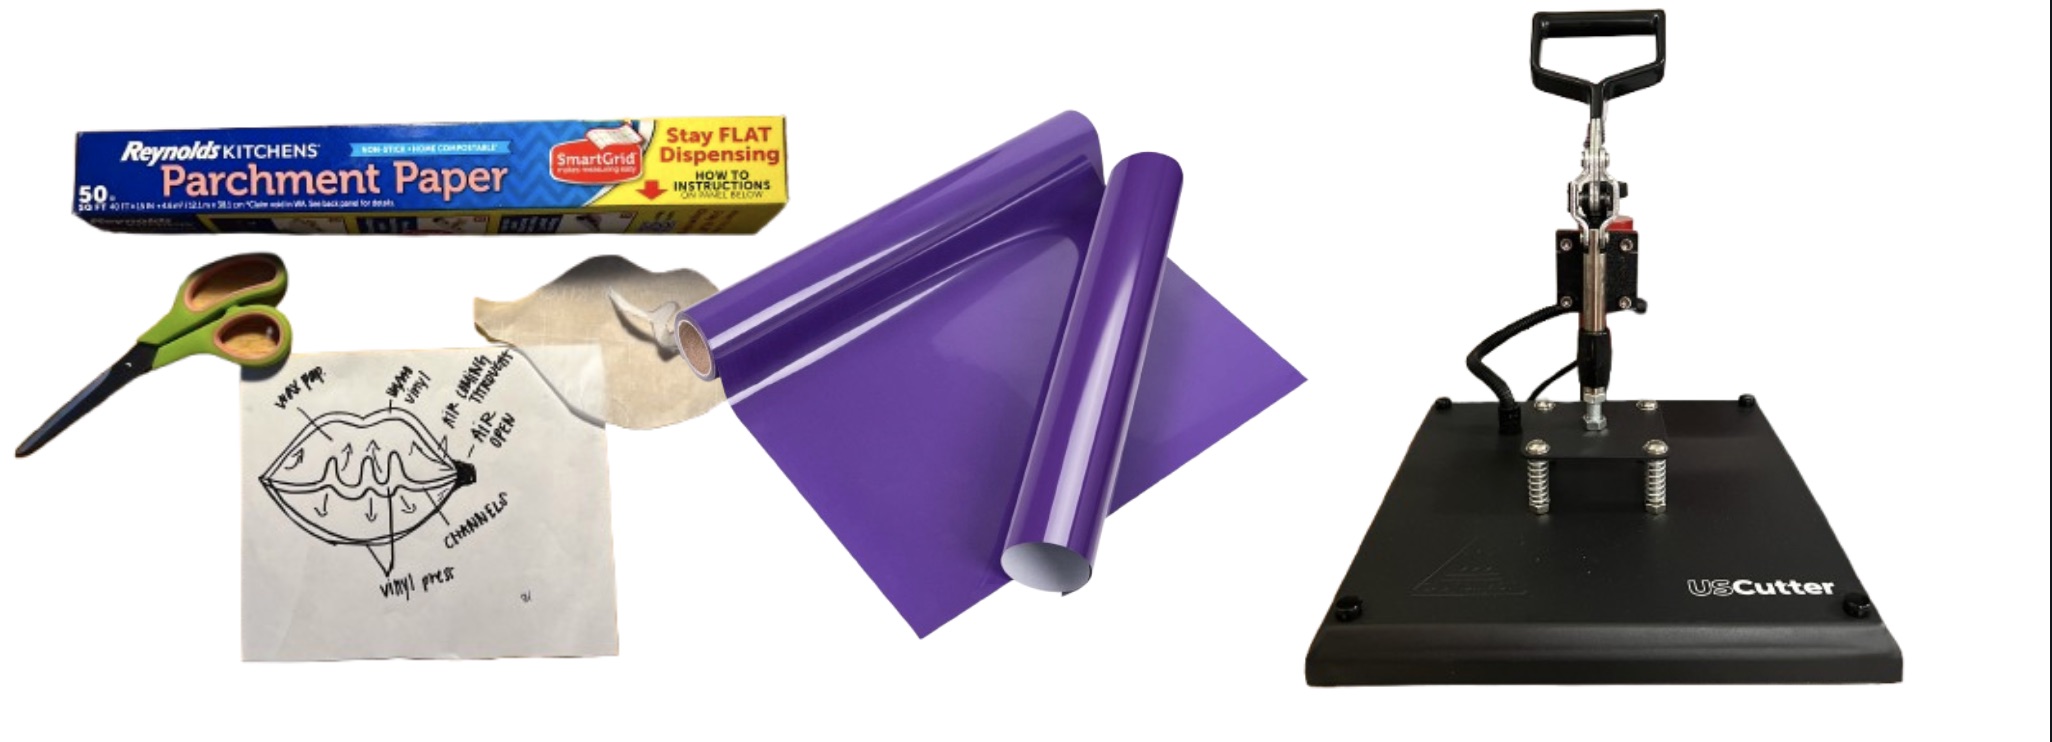
Tool
- Heated vinyl (as the primary flexible material)
- Heat source (heat press or heat gun)
- Straw
- Hand pump or air source
- Scissors and cutting tools
- Marker or template for pattern drawing
Process and workflow
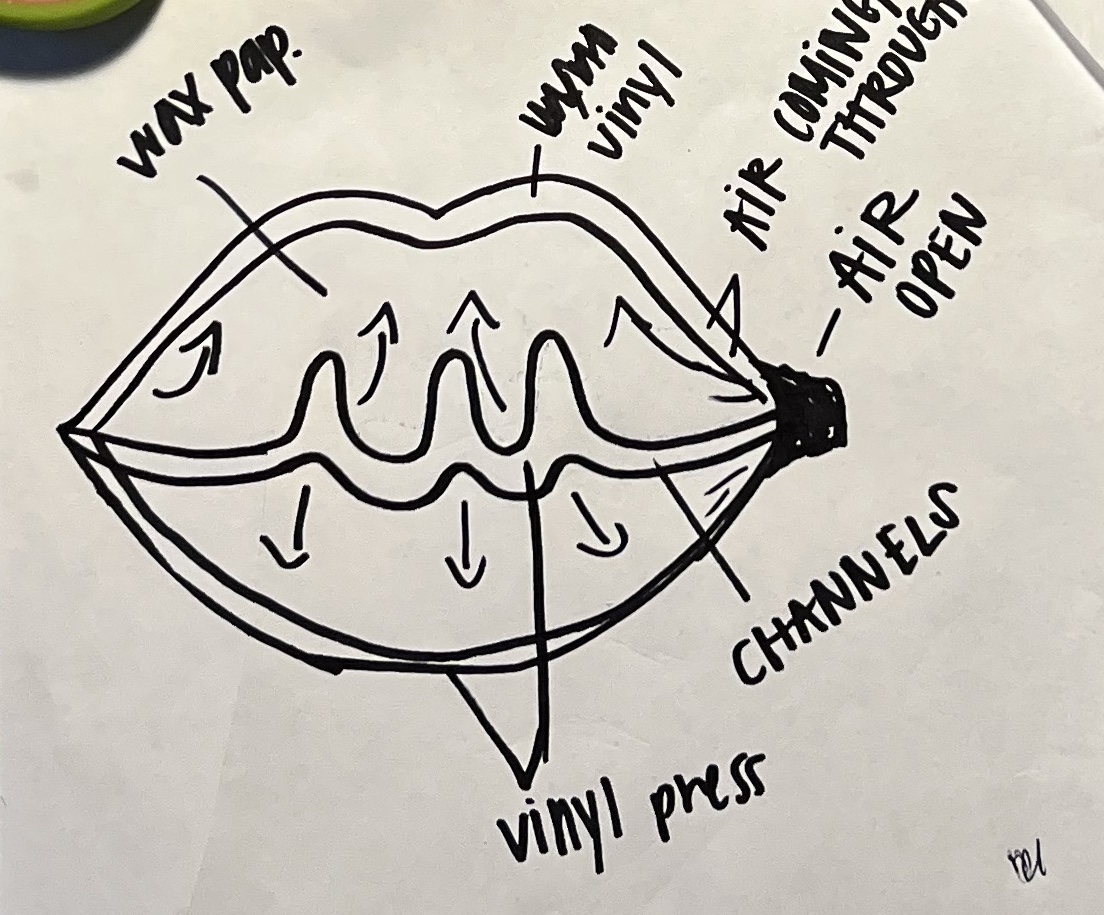
I started by drawing the outline of the lips, paying attention to how the form could expand evenly when inflated. The vents in the pattern were intended to direct airflow into the center of the lips, causing them to pucker outward rather than expand randomly.
The outside of the vinyl sheets were stacked and heat sealed, leaving spaces for air intake. I thought about where the opening would be because the seals dictate where and how the material expands. I placed a straw into the channel opening once it had been sealed.
When air was pushed into the lips, they inflated and deformed in response to pressure, visually imitating breath and body movement.
Lip Shape Design
    The lip shape was designed in a vector software (Procreate)

    It consists of:
    A rounded outer contour for smooth inflation
    A sealed edge margin (approximately 5–10 mm) to allow for heat sealing
    An internal air chamber path that controls how the inflatable expands

    Process:
    Drew the base lip silhouette using curves
    Offset the outer edge to create a sealing boundary
    Designed internal chamber lines to guide airflow
    Exported the design as an SVG file
Step 1: Setting Up
Power On the Machine Turn on the USCutter Digital Heat Press and allow it to warm up.
Set the temperature to 300–320°F (149–160°C). * This range is effective for bonding vinyl without warping or melting through. *
Set the timer to 10–15 seconds per press.
Adjust the pressure knob so the press applies firm, even pressure, but not so tight that it crushes or distorts the vinyl.
Step 2: Vinyl
Layering the Materials
Place one vinyl sheet on the bottom.
Lay the second vinyl sheet directly on top, matching the edges.
Sandwich the vinyl layers between two sheets of parchment paper (one on top, one on bottom).
The parchment paper prevents the vinyl from sticking to the heat plates and helps distribute heat evenly.
Step 3: Pressing Them Together
Place the vinyl and parchment sandwich onto the lower platen of the heat press, making sure it is centered.
Lower the heat press handle firmly to apply pressure.
Hold the press to heat for 10–15 seconds until the timer completes.
Lift the press handle smoothly and carefully.
Results
Silicone Gripper
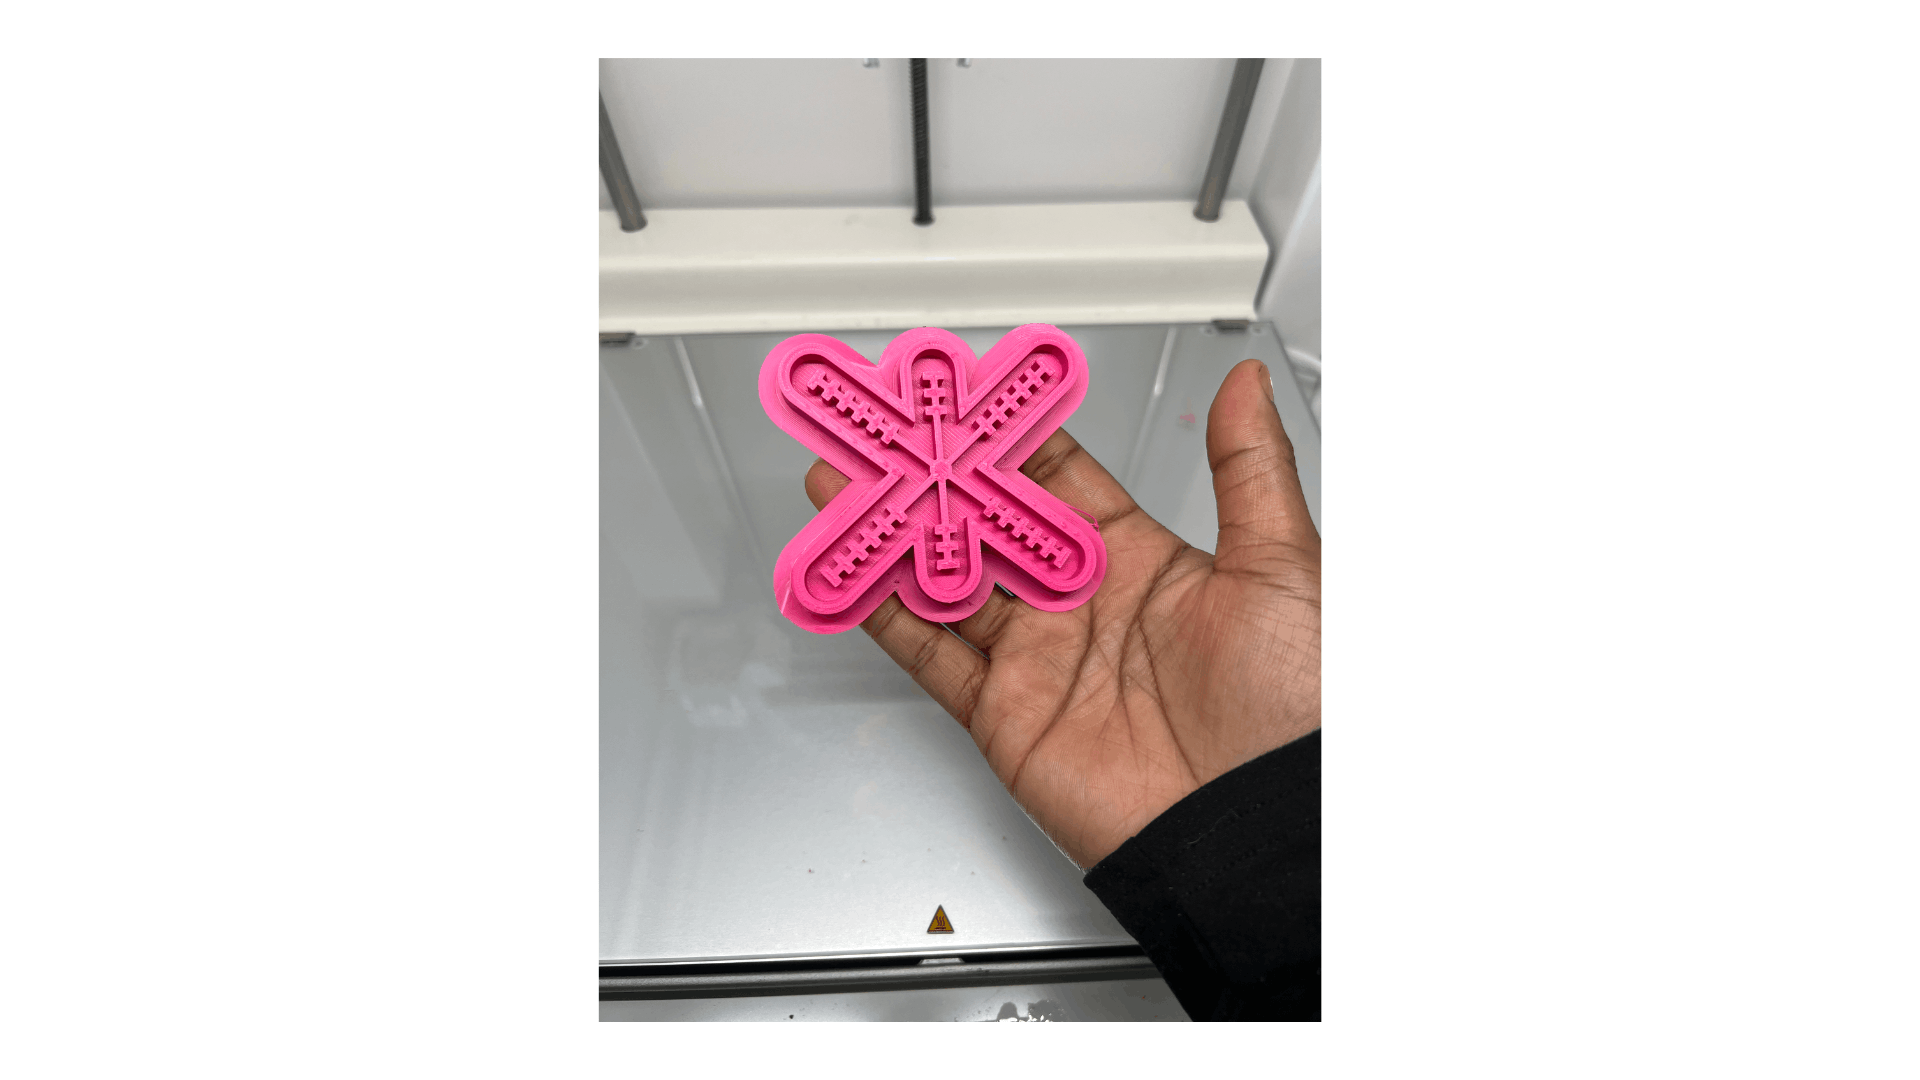
Step 1: 3D Design
    I created a digital 3D design that included walls and depth, allowing enough space for silicone to be poured and cured.

    The design was exported and printed using a 3D printer.

    Once printed, the mold form acted as a rigid container to hold liquid silicone in place during curing.
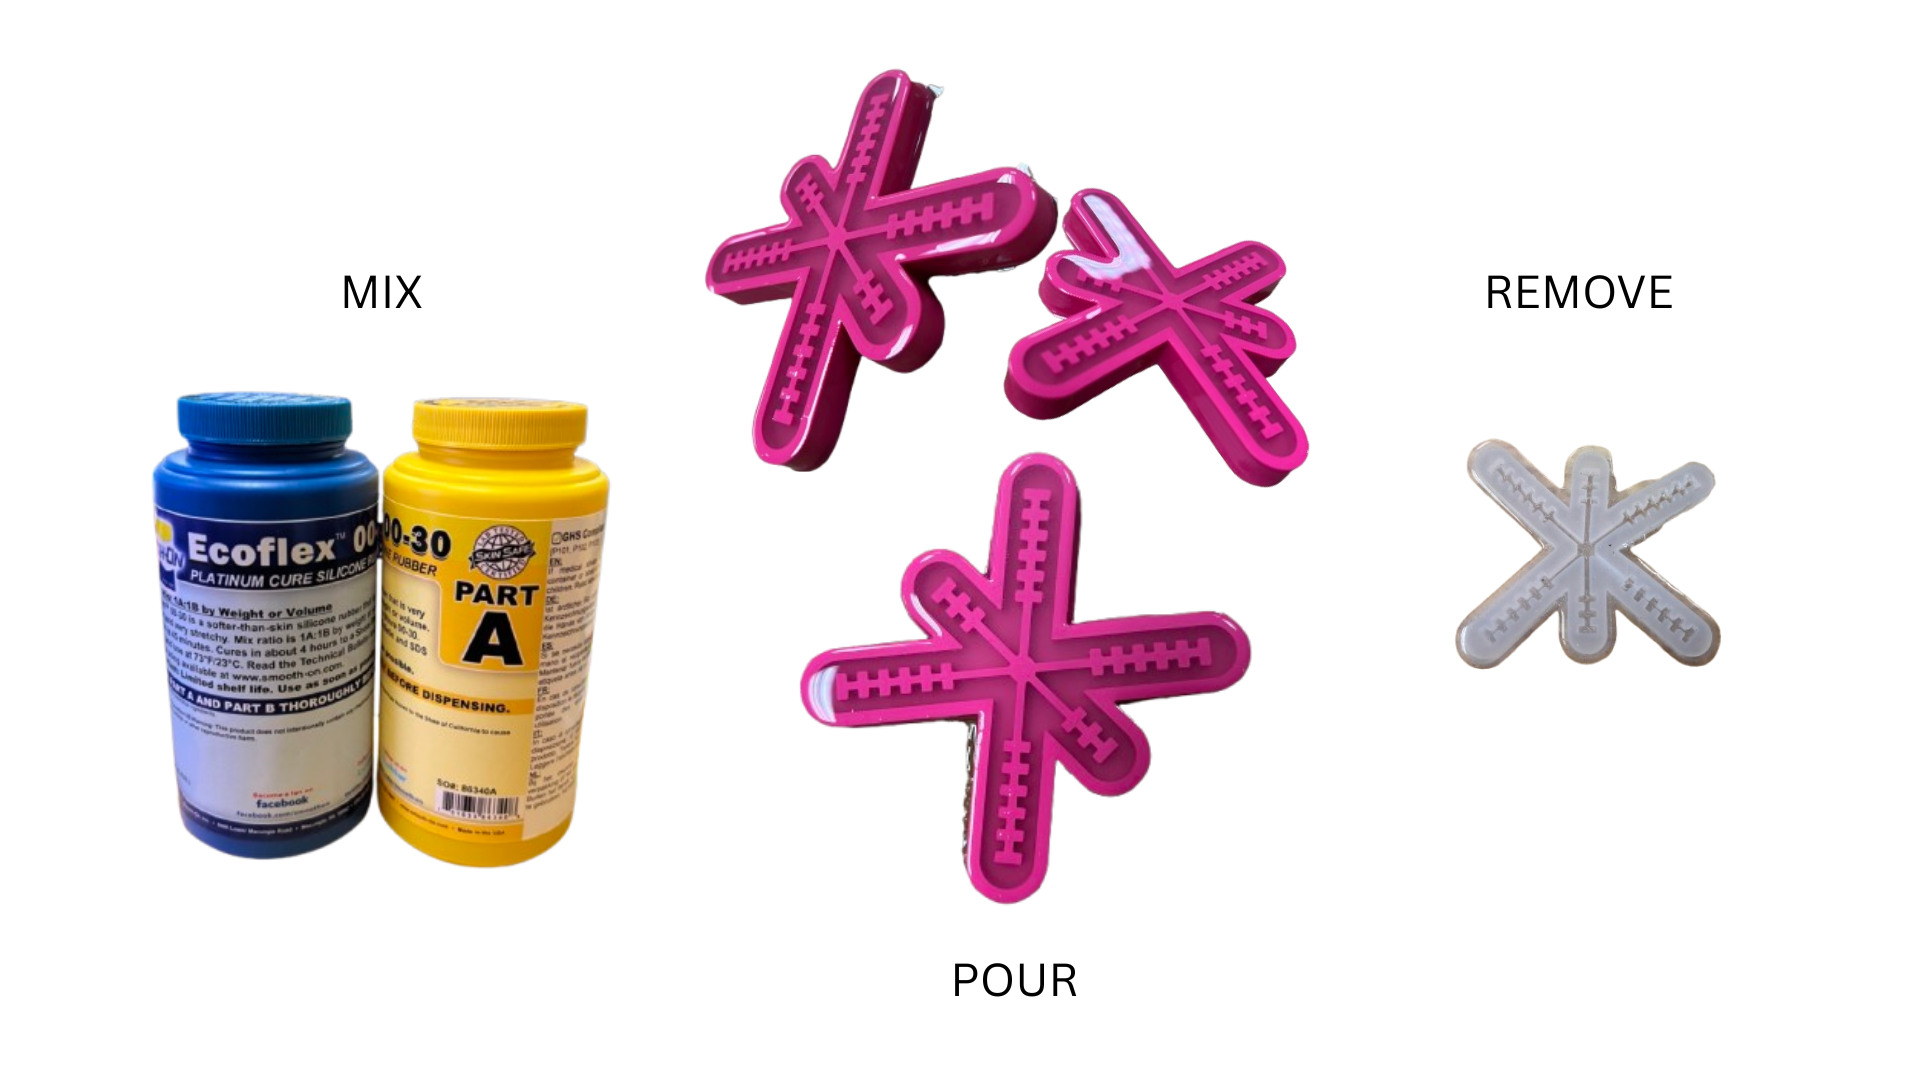
Silicone Casting Process
Material Specification Silicone used: Ecoflex (Smooth-On)
    Shore hardness: Ecoflex 00-30 (soft and flexible)

    Curing Time:
    Working time: ~30 minutes
    Full curing time: ~4 hours

    Process:
    Mixed Part A and Part B in a 1:1 ratio
    Poured silicone into the mold
    Allowed to cure fully before demoulding
Step 3:
    The mixed silicone was poured slowly and steadily into the 3D printed mold.

    Pouring from one corner helped minimize trapped air.

    The silicone was filled until it reached the desired thickness.

    Tap against the table to release trapped air bubbles.
Silicone Casting Process
Material Specification Silicone used: Ecoflex (Smooth-On)
    Shore hardness: Ecoflex 00-30 (soft and flexible)

    Curing Time:
    Working time: ~30 minutes
    Full curing time: ~4 hours

    Process:
    Mixed Part A and Part B in a 1:1 ratio
    Poured silicone into the mold
    Allowed to cure fully before demoulding
Results
