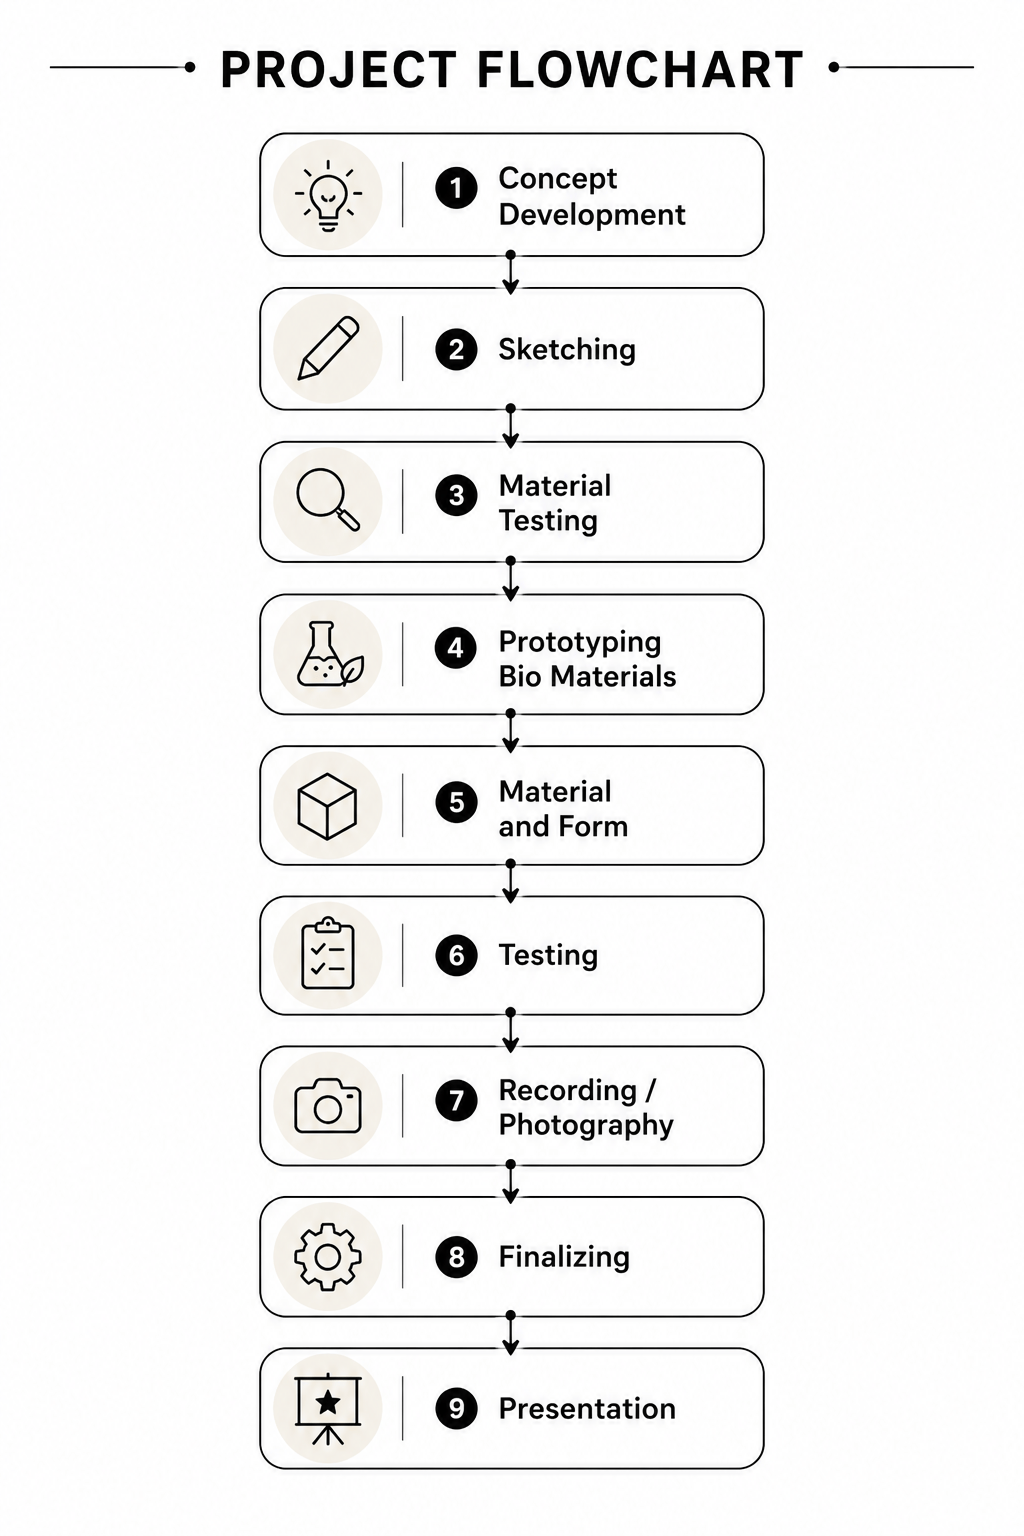
Process
Ideation & sketches
Design & Fabrication
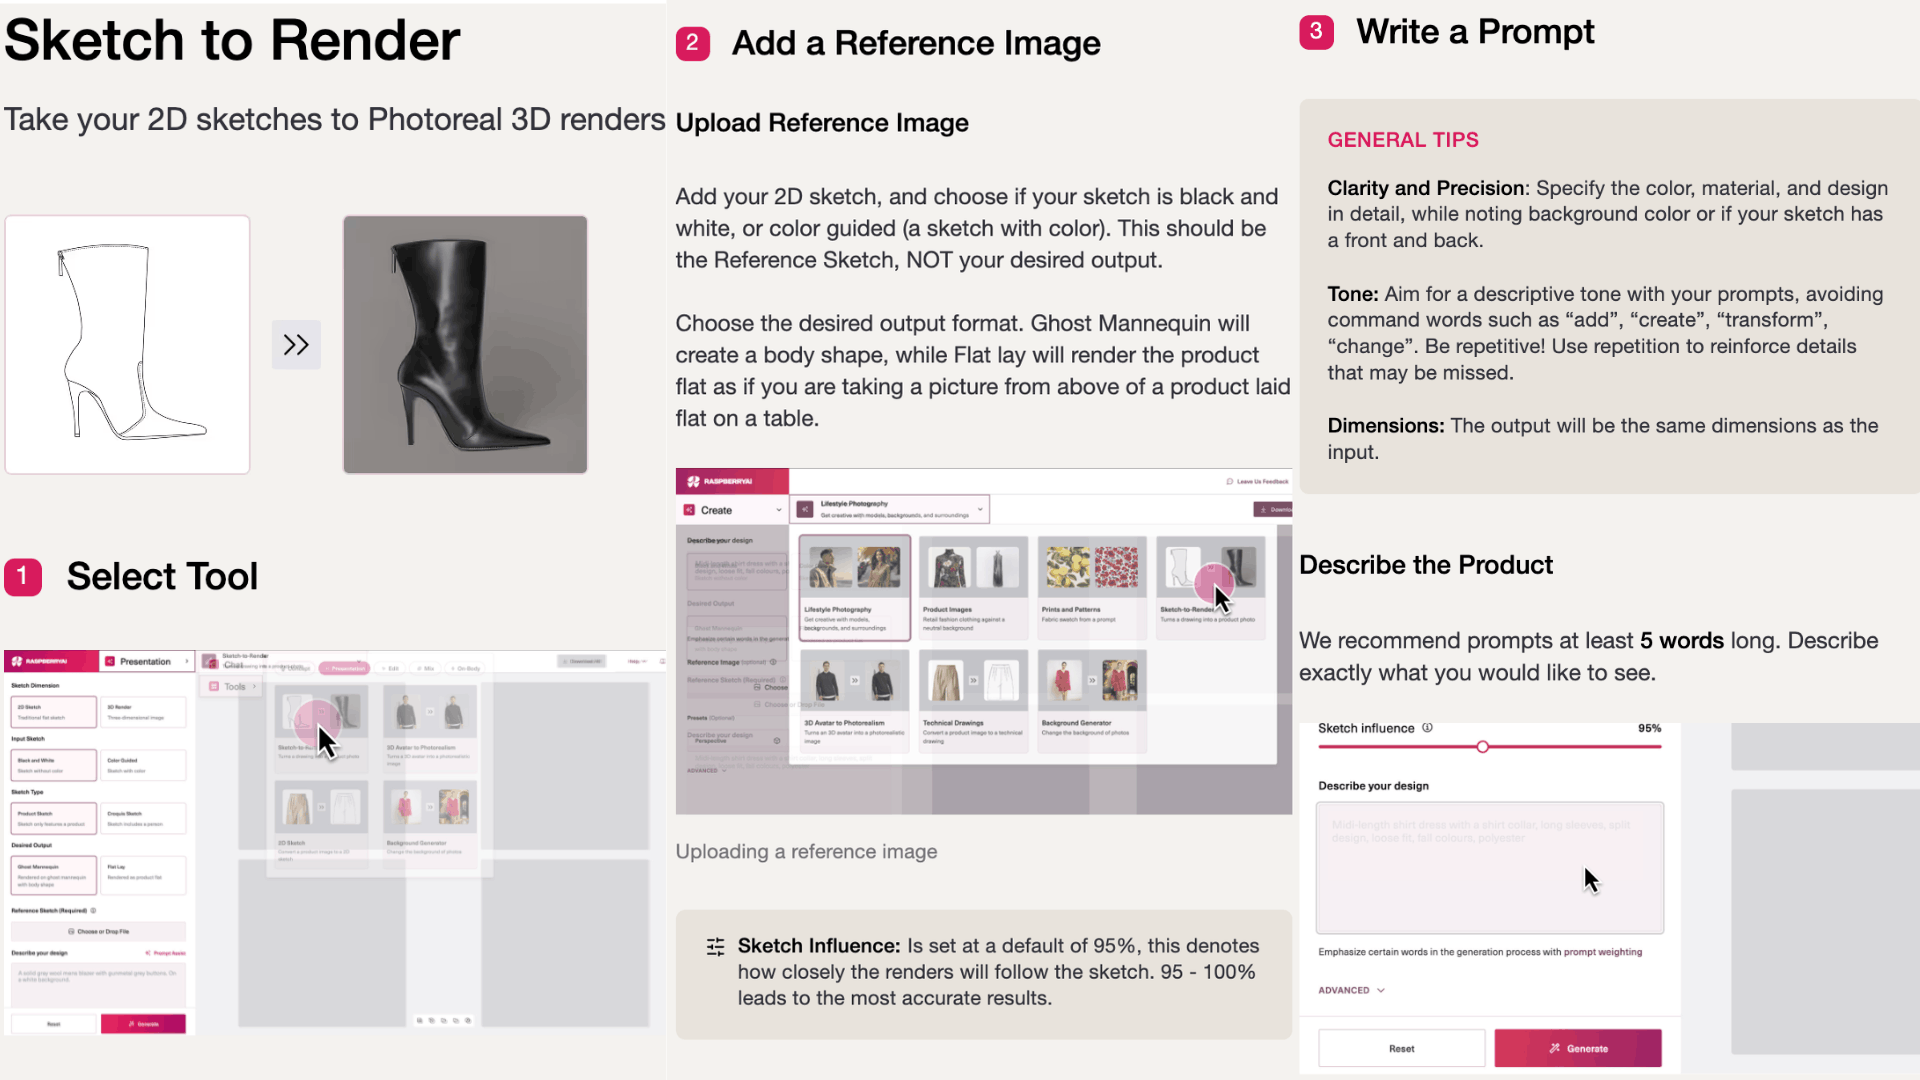
Raspberry AI
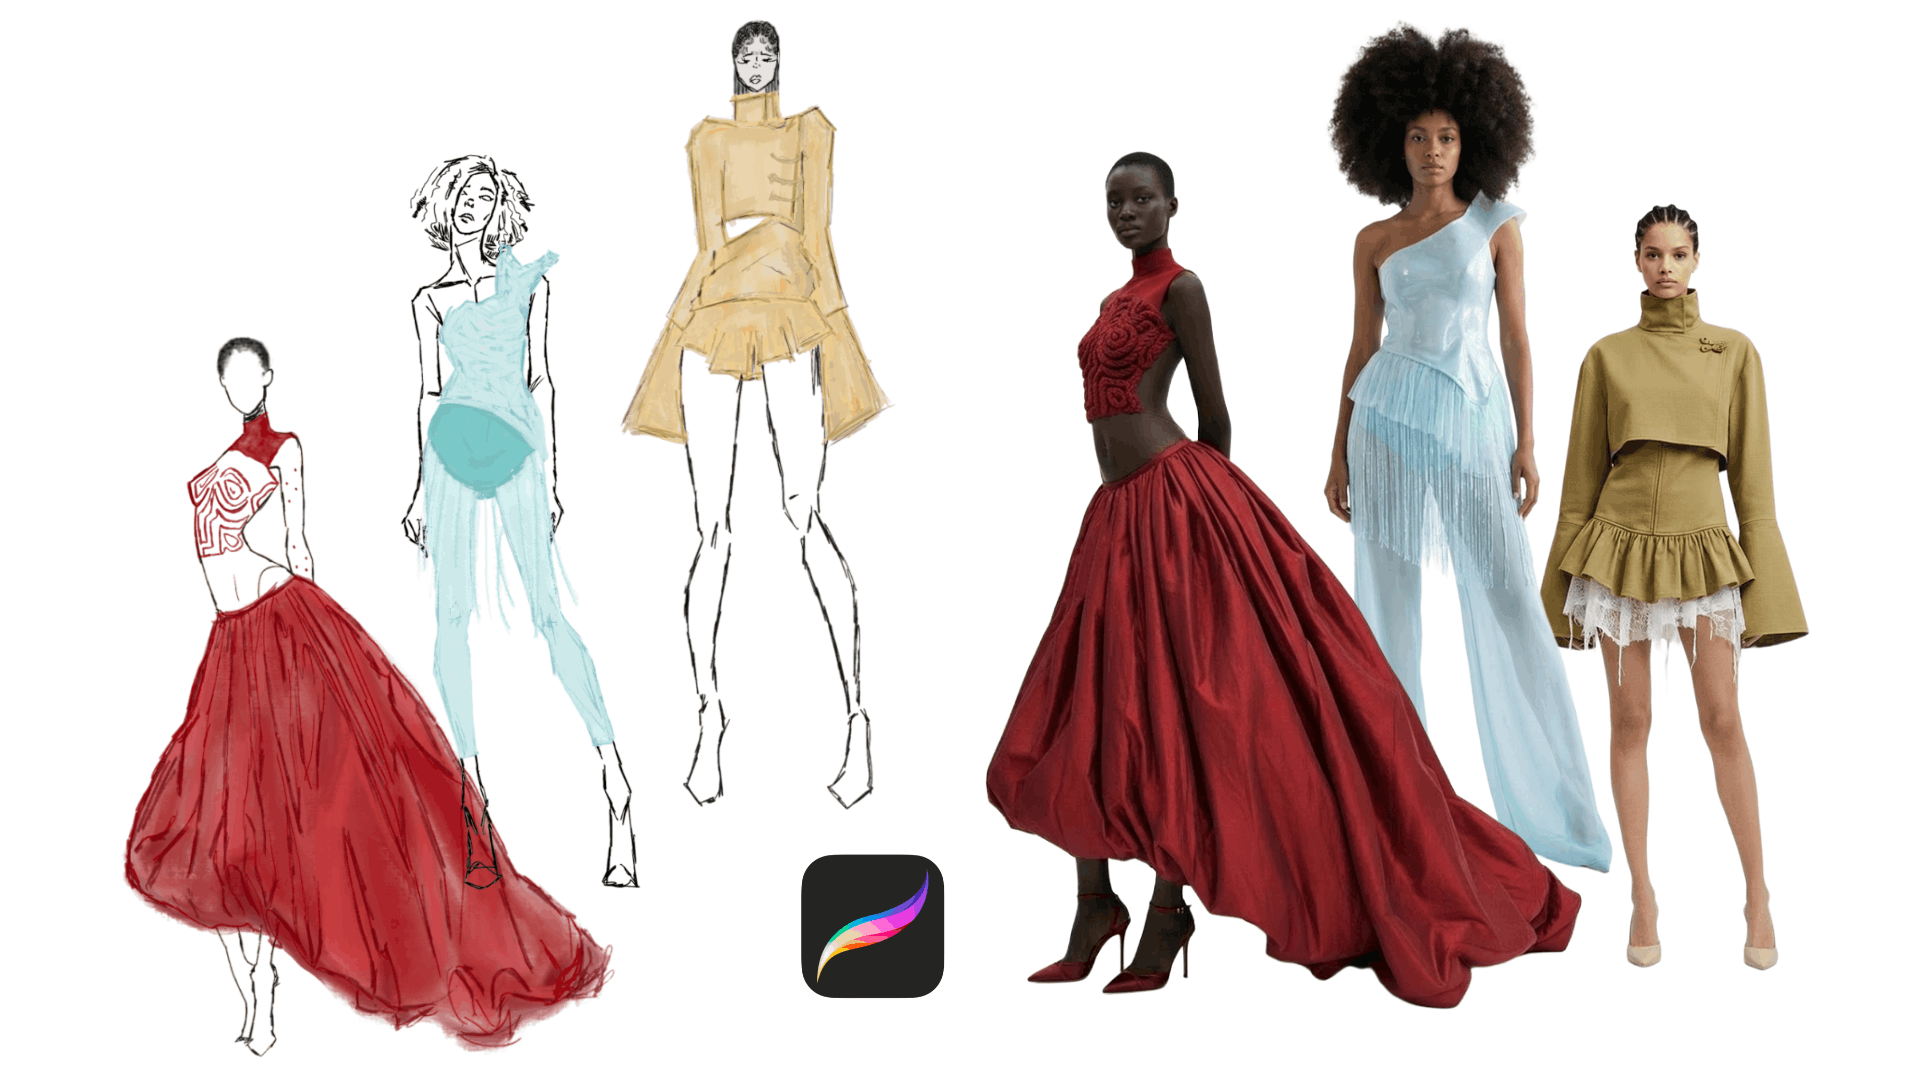
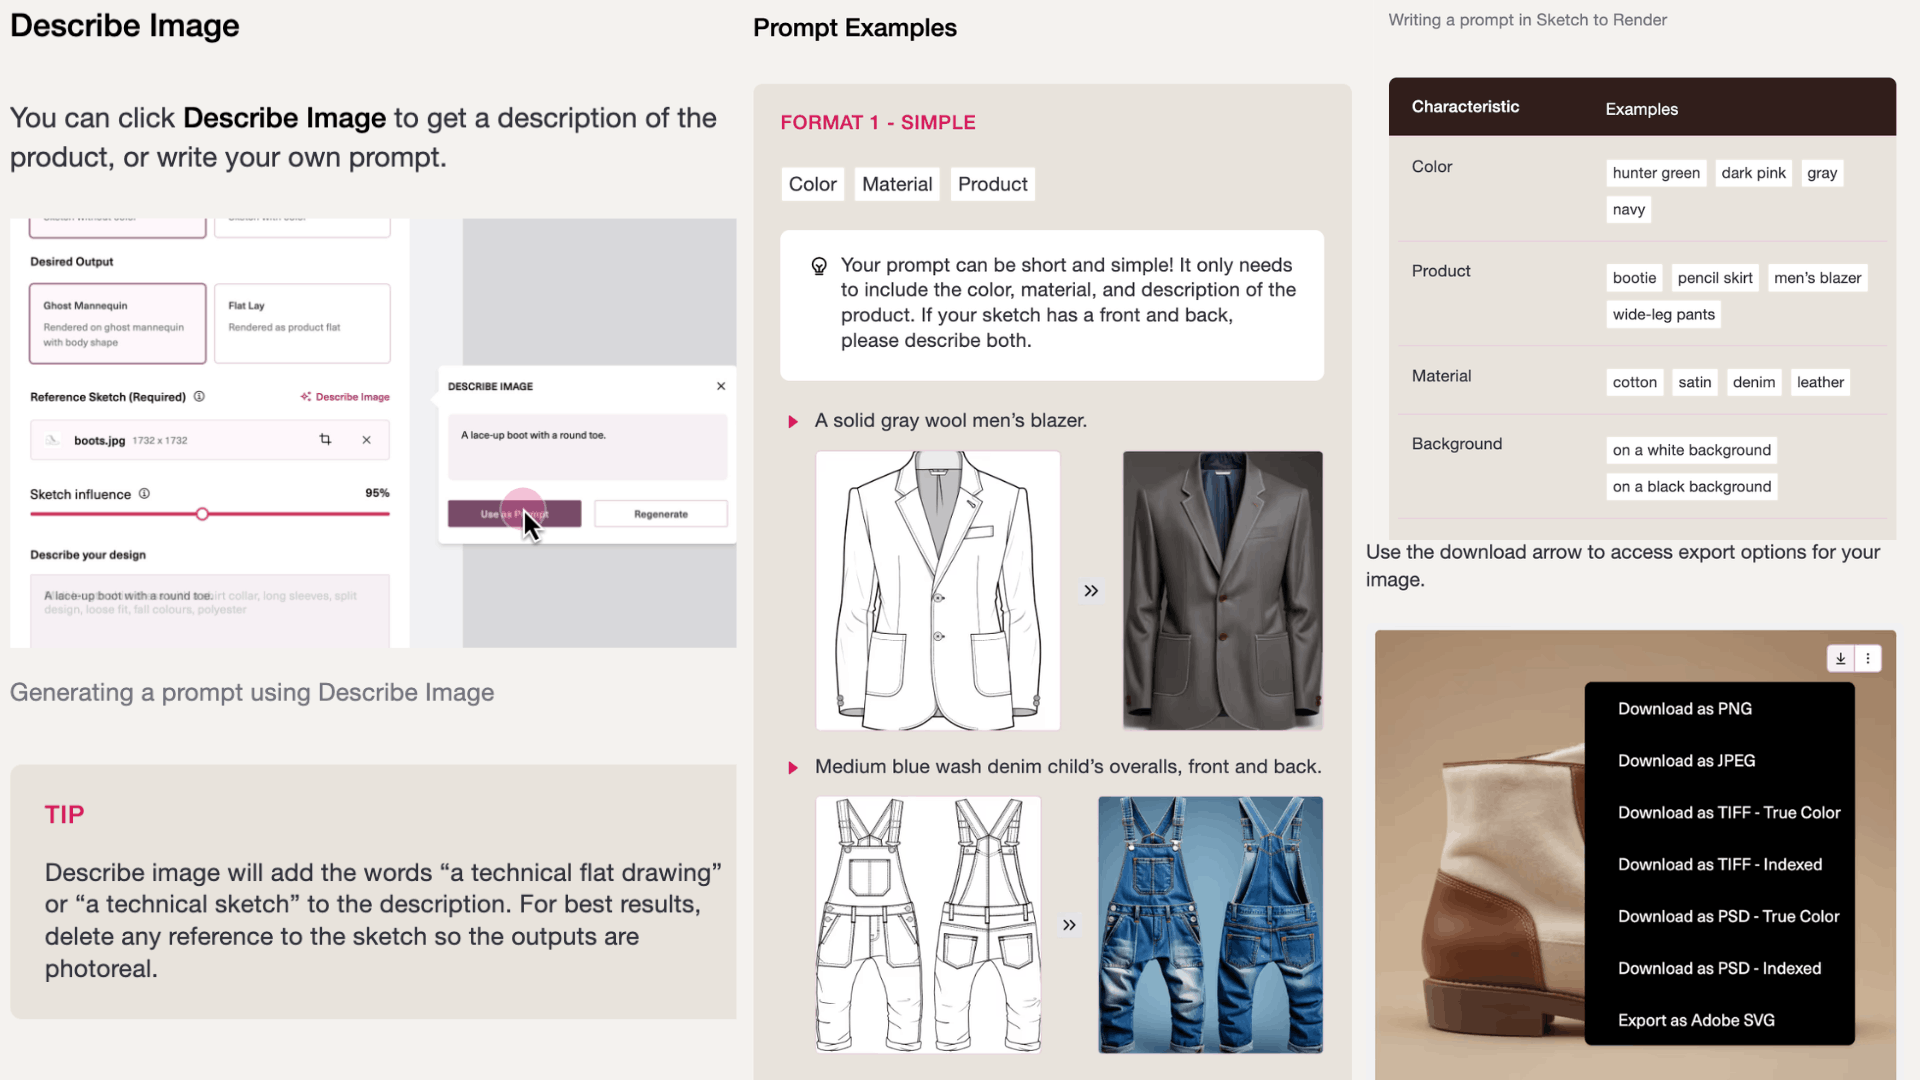
After sketching, I used Raspberry AI to translate these drawings into more developed digital renderings. I uploaded my hand drawn sketches into the platform and used it to generate visual variations of each design. Through this process, I was able to test different textures, material qualities, and surface details that were not fully visible in the original sketches. This allowed me to better understand how the garments would look in a more realistic and dimensional way, and helped guide my decisions before moving into physical construction.
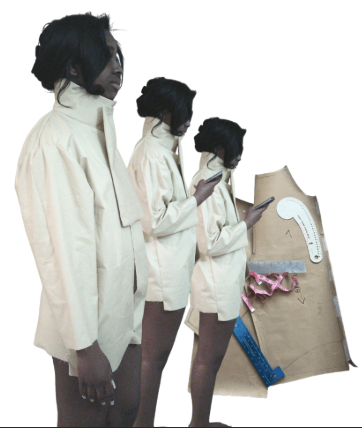
I started designing my patterns, and building the garments out of muslin as soon as I had a clear direction. Making the muslin samples allowed me to see the fit and structure of each look before sewing in the final fabrics.
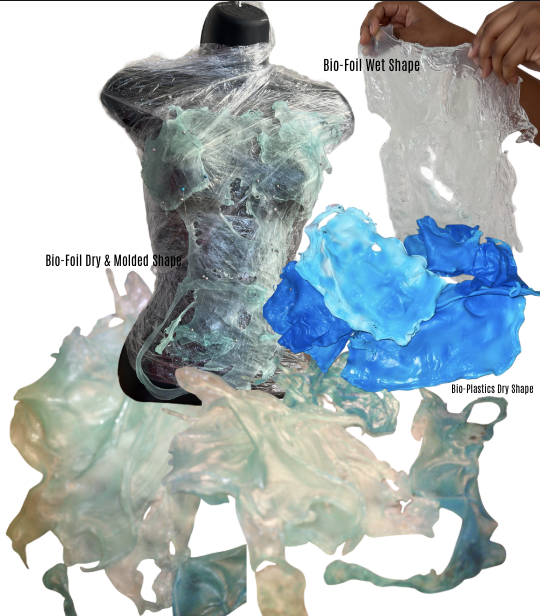
As I started working on the bio materials, I noticed that these materials don't behave like normal textiles. Instead, they change, stretch, harden, and breakdown over time. Because of that, I had to let go of controlling the outcome and instead respond to what the material naturally wanted to do. This alone shifted my whole strategy by that change. The material itself started to influence the final form and structure.
Sewing Prcess
I started by turning my first sketches into actual patterns. I began by sketching each design, paying attention to placement, proportion, and how the garment would fit the body. During this phase, I was able to see each look into parts while maintaining the conceptual ideas. Before adding the intricate details of my finished materials, I used pattern drafting as a method to map out structure.
I made several muslin mock ups after drawing to check the overall shape and construction. I was able to picture how the clothes would look on the body and in actual spaces thanks to these sketches. I made constant changes throughout this phase, refining the silhouette and proportions. Before committing to final materials, working in Muslin allowed me to experiment, make mistakes, and fix any structural problems.
I used the precise measurements I collected of my models to improve my designs in order to make sure it was wearable. This stage was crucial to figuring out how each garment will fit and contour to the body. I was able to make the changes that were needed thanks to fittings, guaranteeing that each style retained both its appeal and authenticity.
I used the finished materials to duplicate each garment after the patterns and fit were finalized. In order to do this, the construction process had to be repeated more precisely while also taking into account the special characteristics of the bio-based elements. In contrast to conventional textiles, these materials need a more adaptable strategy that balanced flexibility and structure. To keep control over detail, texture, and general form, each component was meticulously put together, frequently by hand.
Bio Yarn- Blood
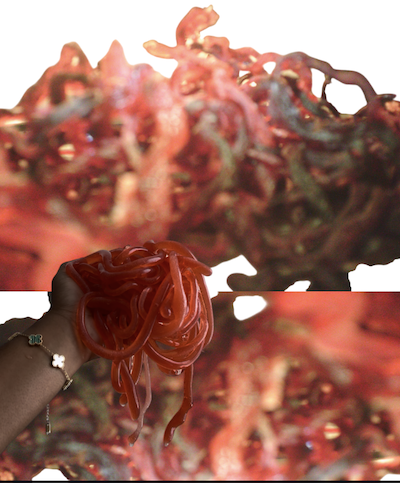
I created bio yarn to symbolize blood and circulation using a similar base solution as the bio foil. I pushed the mixture out into strands using a bottle extruder rather than pouring.
The solution started to form flexible, thread like shapes as soon as it was pressed into a calcium chloride bath. Depending on the thickness and required strength, these strands were then allowed to set for anywhere from 10 minutes to 30 minutes. After the yarn had dried, I experimented with twisting, stacking, and extending it to create flows. I then created a continuous system by hand sewing these strands together, giving the structure an abstract representation of how blood flows through the body.
Recipes :

12 gr Alginate
40 gr Glycerine
400 ml Water
10 ml Sodium Chloride Hydrate
100 ml Water
1-2 Drops Red Food Color

The best results from this recipe come from casting sheets or extruding yarns.
When making foils, be sure to let the liquid soak and spread before beginning the curing process.
It will decrease in size and thickness, but not as much as foil.
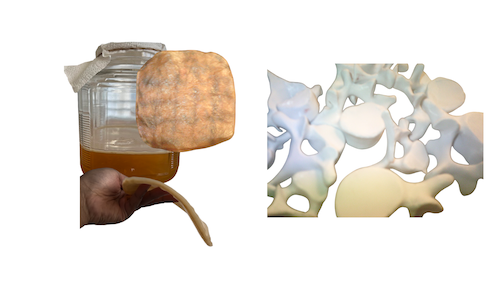
Kombucha Leather- Sweat
For “sweat,” I began growing my own kombucha at home, allowing it to ferment in a controlled dark environment. Over time, the scoby developed into a pliable, skin like layer that I later dried and incorporated into the garment. This material was used as paneling at the neck, where it naturally conforms to the body, emphasizing areas of tension and movement. Its translucent and organic quality reflects the idea of endurance and gradual transformation, symbolizing the slow, ongoing process of labor.
To develop the spine element, I sourced a 3D model from Thingiverse created by another designer. Rather than using the full spine model, I chose to work with individual sections because the complete form did not align with the visual direction I was aiming for.
After downloading the file, I placed the model in Blender to see if any adjustments or corrections were needed. Although I considered modifying the structure, I ultimately decided to keep the original form as is, since it already supported the aesthetic I wanted.
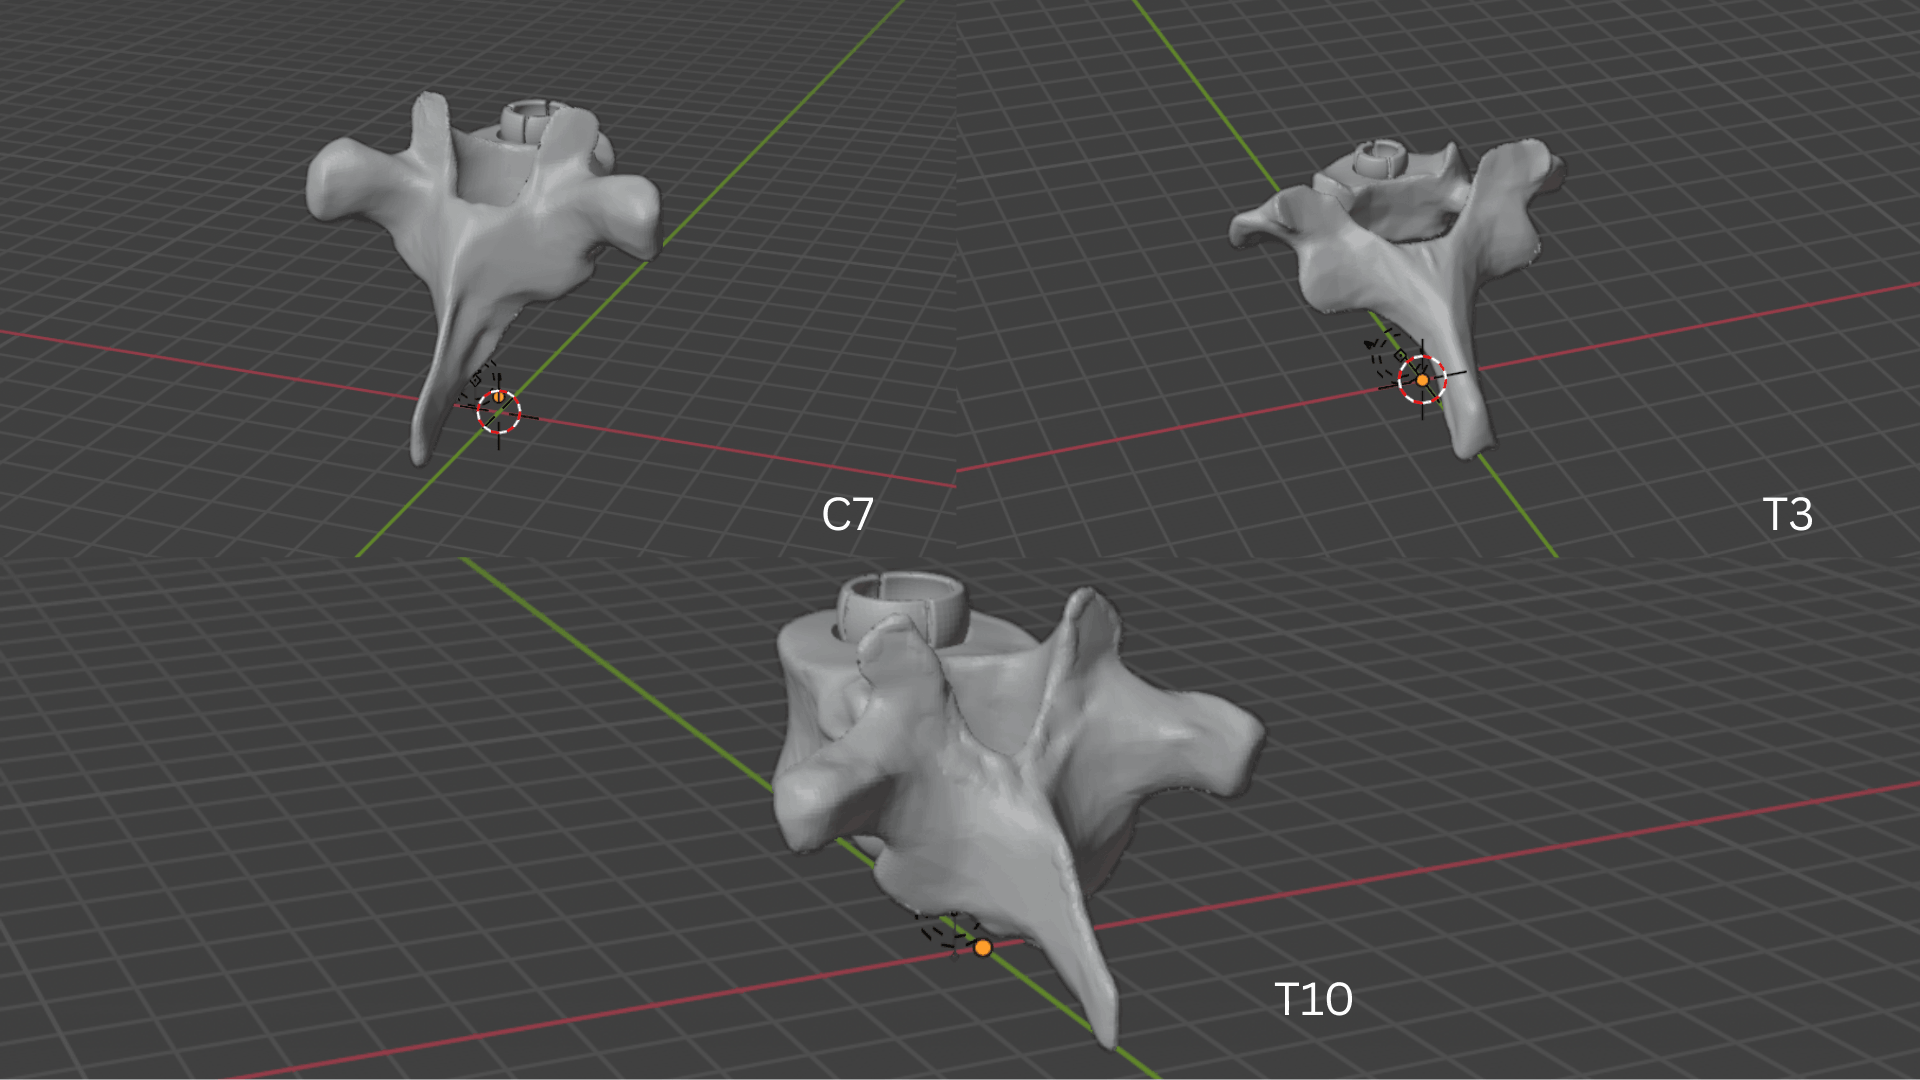
I experimented with printing the spine in various sizes instead of producing a single uniform piece. This allowed me to explore proportion, repetition, and how the elements would interact with the body. I also tested different arrangements by stacking and positioning the pieces in multiple formations before finalizing the composition.
From this process, I selected three main spine segments to use in the final garment. I printed multiple versions of these pieces, gradually increasing their size with each iteration to create a sense of progression and emphasis. This variation in scale helped reinforce the visual and conceptual idea of growth, pressure, and structural strain within the body. Week Six and how to grow and ferment the scoby Week Seven
Bio Foil- Tears
I started using bioplastic for the tears component. But after testing, I saw that the finished product didn't quite match my concept because it didn't have the emotional depth and flow I was going for. This got me to try bio foil, which turned out to be a game changer for me. Before spraying them with a mixture of water and calcium chloride, I started pouring tiny layers of the solution and letting them rest.I could manipulate it throughout that window, either while it was wet for fluid shape or once it was dried for more structured forms. There was a noticeable transition from liquid to something solid. Dimension, transparency, and texture were added with each new layer that was made. I created a corset like structure by hand sewing each piece together.
Recipes :
12 gr Alginate
40 gr Glycerine
400 ml Water
10 ml Sodium Chloride Hydrate
100 ml Water
1-2 Drops Blue Food Color

The best results from this recipe come from casting sheets or extruding yarns.
When making foils, be sure to let the liquid soak and spread before beginning the curing process.
It will decrease in size and thickness, but not as much as foil.