Deliverables
GANTT
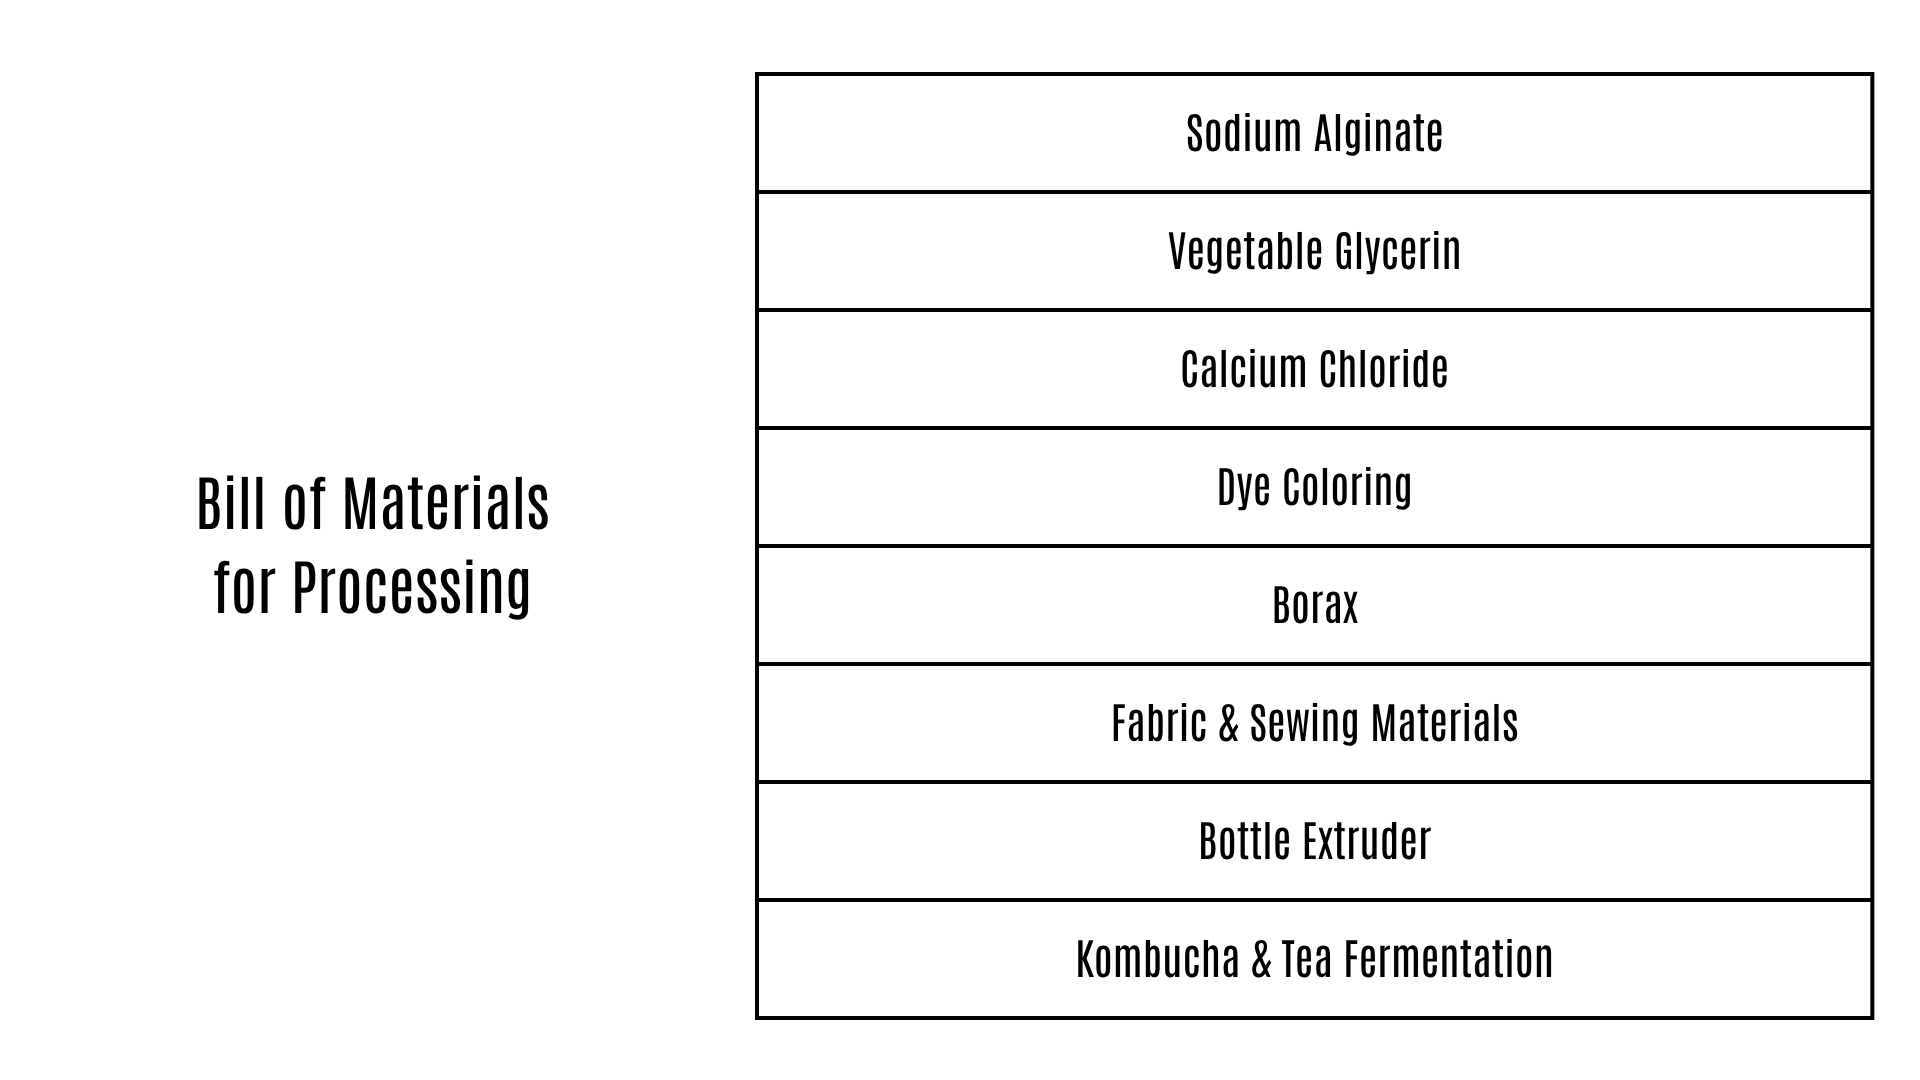
BoM bill of materials
| Qty | Description | Price(MXN) | Link | Notes |
|---|---|---|---|---|
| 3 | Sodium Alignate | $ 27.00 | Sodium Alignate | |
| 2 | Vegetable Glycerin | $ 30.00 | Vegetable Glycerin | |
| 1 | Calcium Chloride | $ 16.00 | Calcium Chloride | |
| 3 | Food Coloring | $ 12.00 | Food Coloring | |
| 1 | Borax | $ 7.00 | Borax | |
| 5 | Fabric and Sewing Materials ALL materials and sewing needs bought online through link | $ 150.00 | Fabric and Sewing Materials | |
| 1 | Bottle Squeezer | $ 9.00 | Bottle Squeezer | |
| 2 | Kombucha | $ 6.00 | Kombucha | |
| 1 | Black Tea | $ 6.00 | Black Tea |
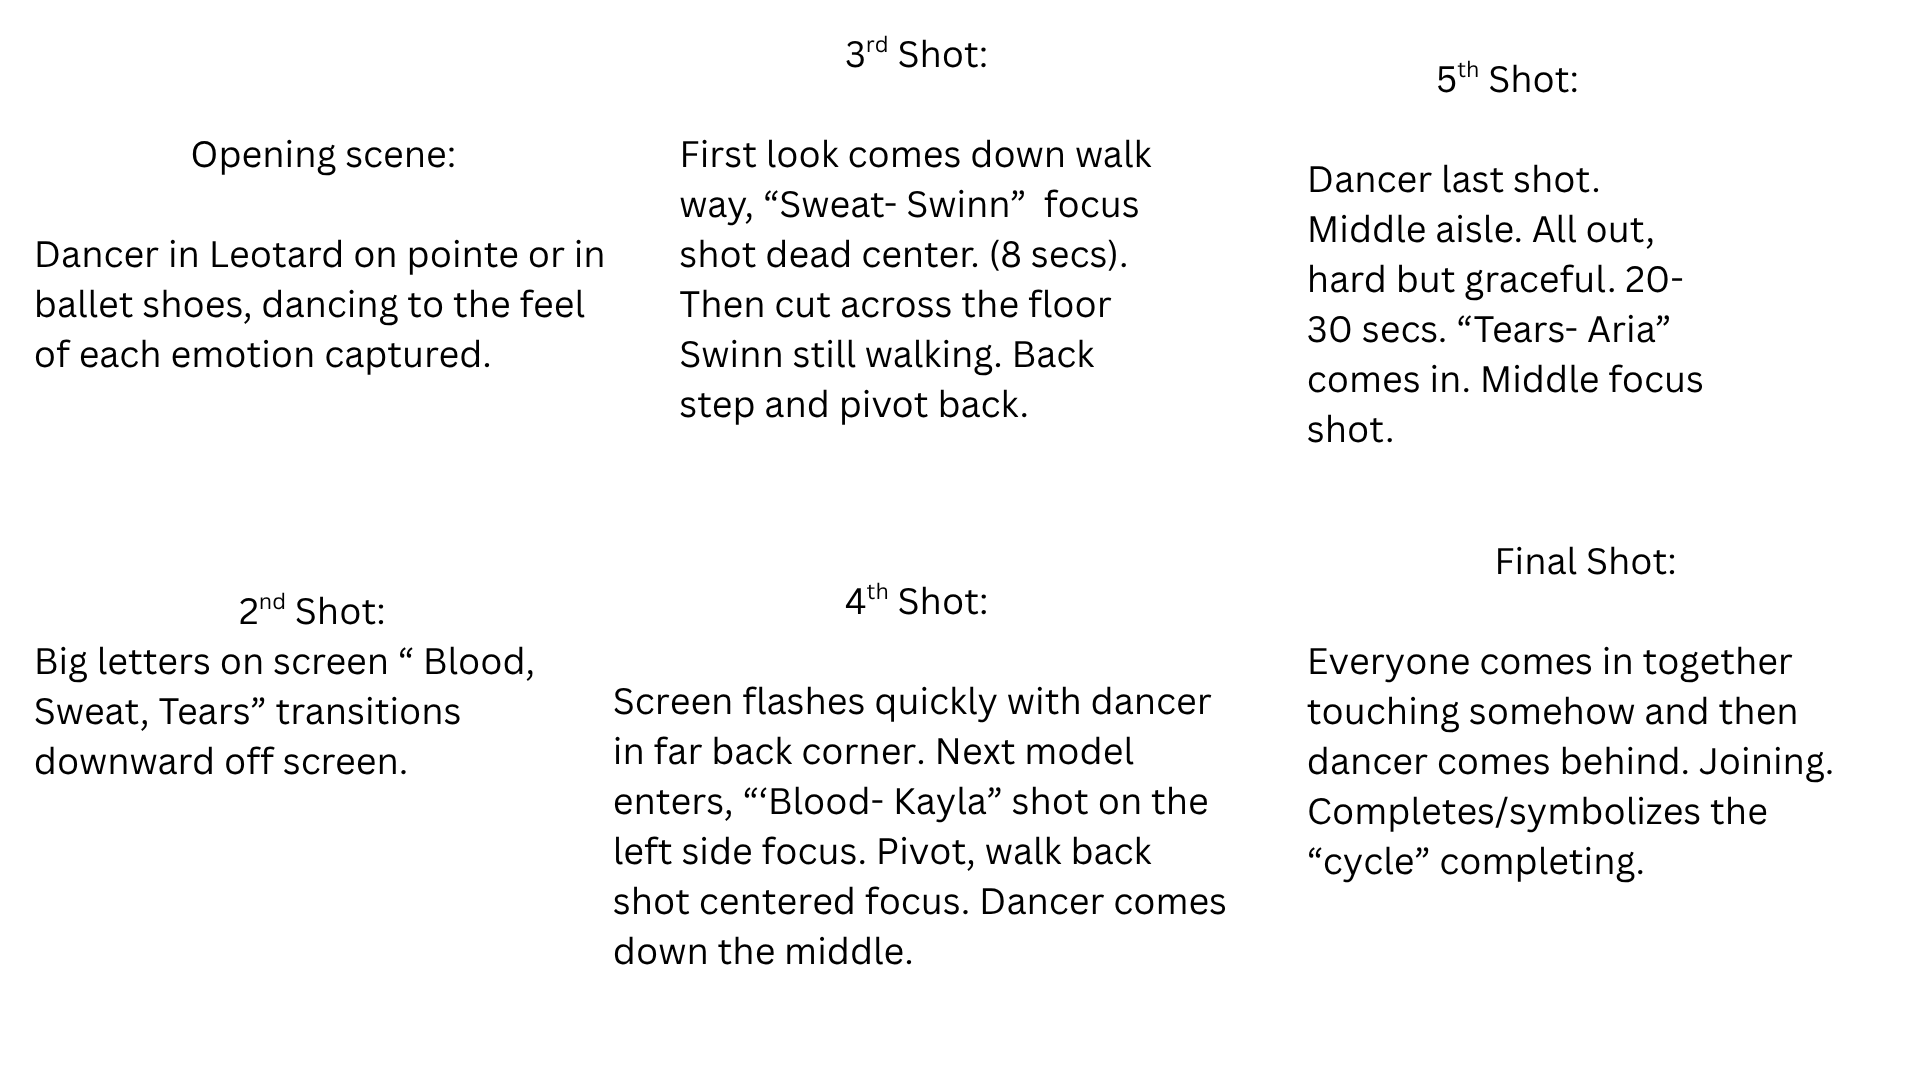
Story Board
How To's and Tutorials
Process Tutorials Followed Throughout the Project
The following tutorials outline the methods I followed and developed throughout this project. Each process reflects both technical steps and material exploration that guided the final outcomes.
1. How to Grow Kombucha Material (Sweat)
Materials:
- Black or green tea
- Sugar
- SCOBY (symbiotic culture of bacteria and yeast)
- Glass container
- Breathable cloth cover
Steps:
- Brew tea and dissolve sugar, then allow it to cool completely.
- Pour the tea into a clean glass container and add the SCOBY.
- Cover the container with a breathable cloth and place it in a dark, controlled environment.
- Allow the material to grow undisturbed for 2–8 weeks.
- Monitor thickness and texture as it develops into a cellulose layer.
- Once fully formed, remove the SCOBY layer and rinse gently.
- Lay flat to dry, allowing it to transform into a flexible, skin-like material.
Application in Project: This material was used as a surface element in the “sweat” look, representing endurance and gradual transformation over time.
2. How to Create Alginate Bio-Yarn (Blood)
Materials:
- Sodium alginate
- Calcium chloride solution
- Water
- Red dye/pigment
Steps:
- Mix sodium alginate with water until a smooth, solution forms.
- Add red pigment to achieve the desired “blood like” color.
- Prepare a calcium chloride bath in a separate container.
- Using a syringe or controlled pour, extrude the alginate mixture into the calcium bath.
- Allow the strands to solidify into flexible bio-yarn.
- Remove and rinse the strands, then let them dry slightly.
- Twist, braid, or layer the strands to create structure and texture.
Application in Project: The bio-yarn was braided and applied to the garment to mimic the flow and presence of blood within the body.
3. How to 3D Print Structural Elements (Spine)
Materials/Software:
- STL file (sourced from Thingiverse)
- Blender (for review/editing)
- Cura (slicing software)
- PLA filament
- 3D printer
Steps:
- Download the 3D model file from Thingiverse.
- Import the model into Blender to review scale and structure.
- Decide whether to modify the file or keep it as is.
- Export the model and import it into Cura.
- Adjust print settings (scale, supports, layer height).
- Print multiple variations in different sizes.
- Remove supports and clean the final prints.
- Experiment with stacking and arrangement before selecting final pieces.
Application in Project: Selected spine segments were used as structural elements to represent physical strain and support within the body.
4. How to Develop Garment Patterns and Muslin Prototypes
Materials:
- Pattern paper
- Muslin fabric
- Measuring tools
- Sewing machine
Steps:
- Sketch garment concepts and map placement on the body.
- Draft initial patterns based on body measurements.
- Cut pattern pieces from muslin fabric.
- Sew together a prototype version of the garment.
- Fit the muslin on a model and evaluate structure and proportion.
- Mark adjustments directly onto the fabric.
- Refine patterns and repeat the process if needed.
Application in Project: Muslin prototypes allowed for testing silhouette and structure before working with final materials.
5. How to Work with Unpredictable Biomaterials
Approach:
- Observe how the material behaves (stretching, drying, breaking).
- Avoid forcing control over the outcome.
- Adjust design decisions based on material response.
- Allow imperfections to inform the final aesthetic.
Application in Project: This adaptive process became central to the project, where material behavior directly influenced the final form and design direction.
Summary
These tutorials reflect the combined technical and experimental processes used throughout the project. Rather than following a fixed outcome, each method allowed for exploration, iteration, and responsiveness to both material and concept.