Biochromes
Thoughts and inspiration
Future Story
coming soon
Thoughts
As I already had some knowledge in dyeing with plants and also bacteria and I love working with biomaterials, I wanted to experiment a lot. I wanted to try out different materials, biodyes and stains. We ordered a lot of different materials for dyeing and beying dyed beforehand. But even that I had that pretty big selection of dyeing materials, I loved being outside to collect walnut hulls (the green/black outer layer), as it contains a lot of tannins. I also hat the idea to collect "Crested Milk Cap" for ink and testing to dye with it. Unfortunately it was hard to find, at it's so dry at the moment. Beside fungi, plants, algae and bacteria, you can also dye with lichen. I decided to not use them, because they need a lot of time to grow, sometimes years for some milimeters. That doesn't seem sustainable to me. So I stayed with bacteria and plants.
Inspiration
When dyeing with plants, there are colours that are easy to make and some, that are more difficult. Very dark colours on the one side and very bright colours, like a bright neon-like pink or violet on the other. My little Goth-heart was craving for dying a dark colourpalette. As plants I chose Walnut hulls and Mallow Blossoms and Janthinobacterium lividum for the bacterial dyeing process. I experimented with tannins and iron water as mordants, to get darker colours. The biggest inspirations to me are Natsai Audrey Chieza, who was the first designer, that I heard of, working with pigment bacteria and, on the other side the Bioshades-project, as I also do a lot of workshops with biodesign/biofabrication-topics and I like the open source idea behind it. Other bacteria-dye-projects:
- Colorifix
- Living Colours by Kukka
- Vienna textile lab
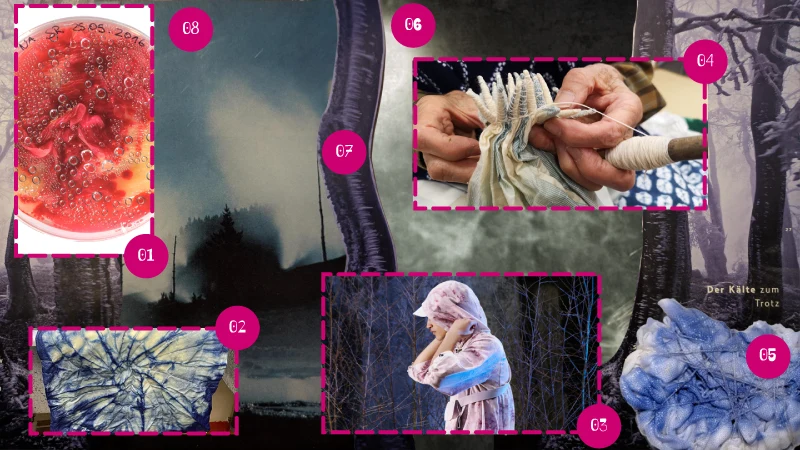
- 01 Bioshades, https://bioshades.archivesofthefuture.org/creative-research/concept/;
- 02 Shibori, Photo: Funke via https://commons.wikimedia.org/wiki/File:Gutau_Zeugf%C3%A4rberei_Shibori_07.jpg;
- 03 Faber Futures/Gingko Bioworks, Normal Phenomena of Life, Photo: Toby Coulson via https://faberfutures.com/projects/normal-phenomena-of-life/;
- 04 Shibori, Photo: 漱石の猫 via https://commons.wikimedia.org/wiki/File:Arimatsu_Shibori(%E6%9C%89%E6%9D%BE)%E6%89%8B%E8%9C%98%E8%9B%9B%E7%B5%9E.jpg;
- 05 Biodye Shibori Sample, Photo: Julia Krayer
- 06 Background: David Höpfner
- 07 Background: Cutout from an unknown magazin
- 08 Background: Cutout from an unknown magazin


Documentation
Preparations
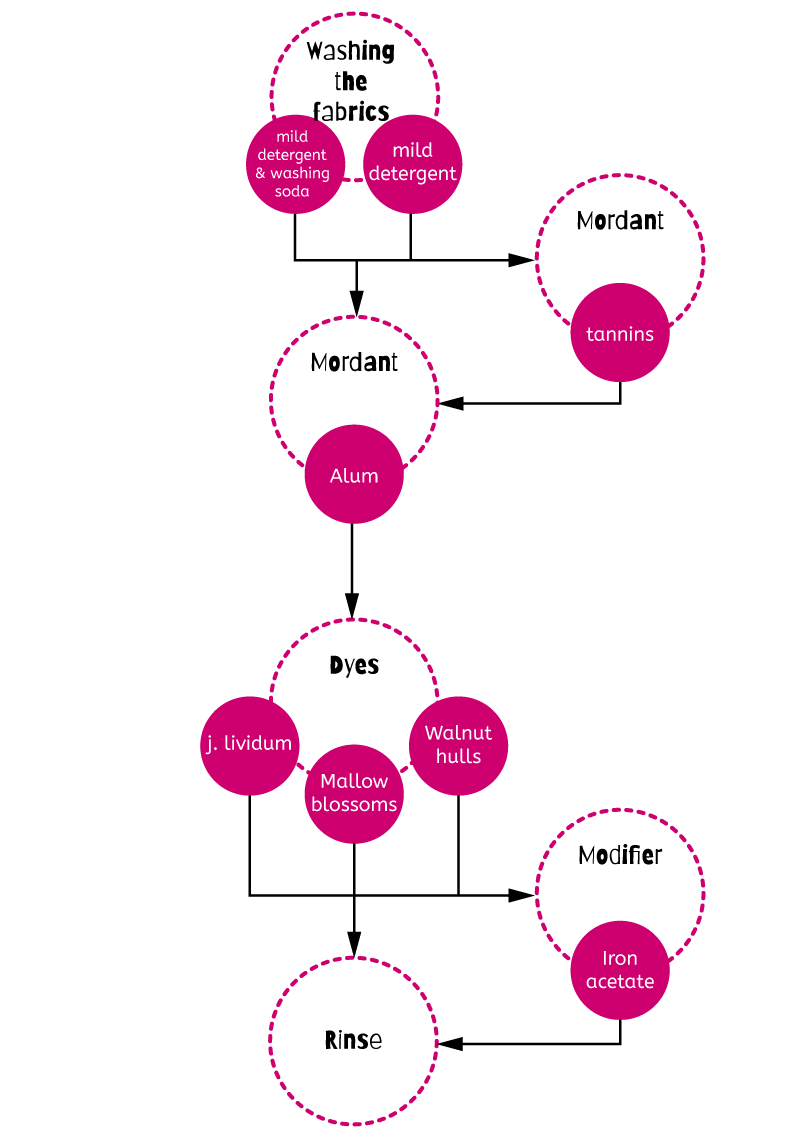
Because dyeing takes many steps, I had to structure my week. The two things, that take longest, were the iron acetate and the bacteria growth. Beside that, I prewashed the materials on the first day of the week.
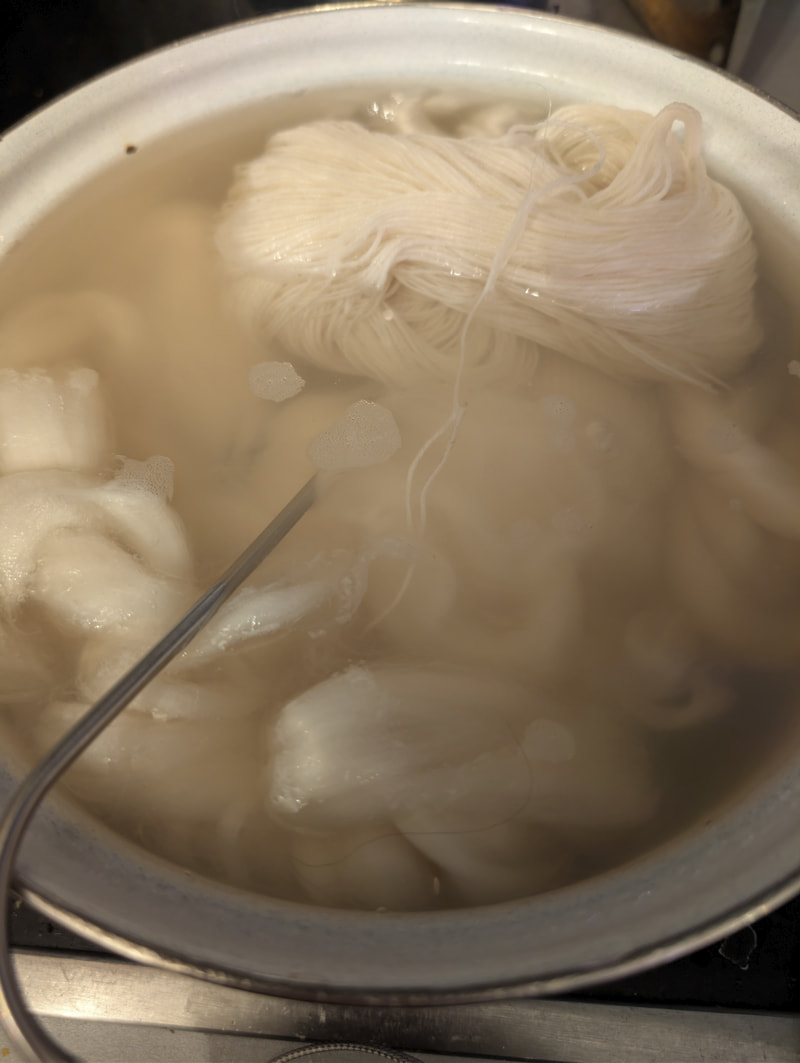
Preparing the iron water
Iron water can be used as a stain, to get darker colours. You take steel wool, cover it with vinegar and wait for 1-2 weeks. As we're having less time, I burned the steel wool beforehand. Doing this, the iron oxidises and you get the dark, Ironoxide, that then dissolves quicker in the vinegar.
Pre-wash fabrics
I washed the fabrics, yarns and fibres following those instructions: https://www.floraundfarbe.de/vorwaschen/
I washed all the fabrics, yarns and fibres for 45min at 80°C with 1 tablespoon of mild detergent. I gradually increased the temperature and then gradually cooled the fabrics again, since wool, silk, and linen do not tolerate sudden temperature changes well. For the plant-based fibers, I added a tablespoon of washing soda to the detergent. This is supposed to help the plant fibers absorb the dye better later on.
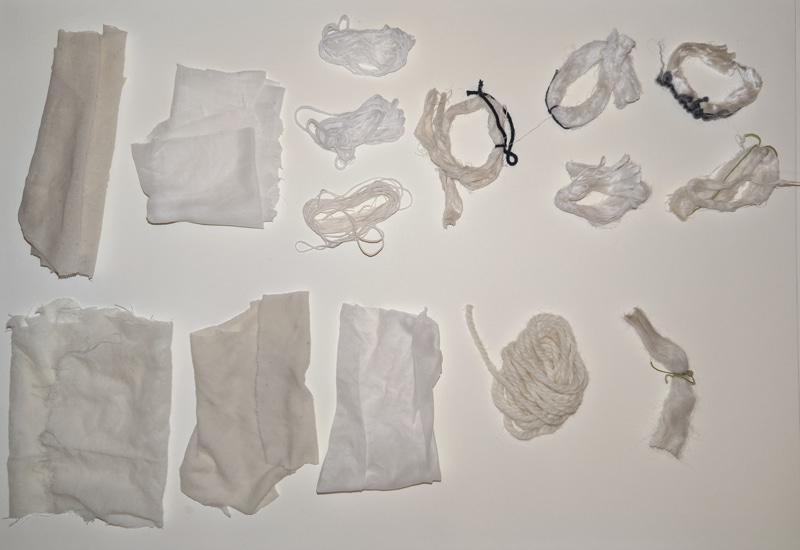
I used following materials (I marked the fibers with different types of yarn so I could tell them apart):
- combed fibers
- Alpaca wool fibers (green)
- Tencel (fluffy yarn)
- Ramie (white)
- Hemp (black, thick)
- Bamboo (dark purple [looks like black; it’s the thinner black one])
- Bleached linen (green)
- Yarns:
- 80% recycled. Linen/20% Linen
- 100% Cotton
- 100% Linen
- 100% Wool
- Fabrics
- 100% Wool
- 100% Cotton
- 100% Linen
- 100% Silk (Peacesilk, woven)
- 100% Silk (Peacesilk, Jersey) Peacesilk is silk produced in a way that allows the silkworms to hatch rather than being boiled alive.
Preparing the cultivation medium for bacterial dyeing
I mixed 1l of medium with following recipe:
- 1L water
- 5g Sodium chloride (Salt)
- 10g Soy peptone
- 8g yeast
I used half 500ml of the medium for agarplates, for this I added 7,5g agar to the liquid medium (Option A). The remaining 500 ml of liquid medium was used to soak the fabrics (Option B).
Sterilizing the medium and the fabrics for bacterial dyeing
I sterilized the agar-medium (Option A) in the pressure cooker at pressure level 2, that should be around 110°C. For Option B, I soaked the fabrics in the culture medium and sterilized them at 10 psi for 45 minutes. 45 minutes would be better, but because the fabrics were heated before, 30 seemed to be enough to me. After the agar medium had cooled slightly but was still liquid, I poured it into the Petri dishes. It seemed there hadn't been enough agar powder in one of the bottles of medium, so not all of the agar plates set completely.
Mordants
For the pre-tanning process, I tested alum and tannins (which are tanning agents, such as those found in oak galls). Since plant fibers often don't absorb dye as well, I used the tannins for the plant fibers. I ended up having 460g of animal fibres and 630g of plant fibres, that I devided into different parts.
- Only washed: 230g of animal fibres and 210g plant fibres
- Alum mordant: 230g of animal fibres and 210g plant fibres
- Tannine and Alum mordant: 210g plant fibres
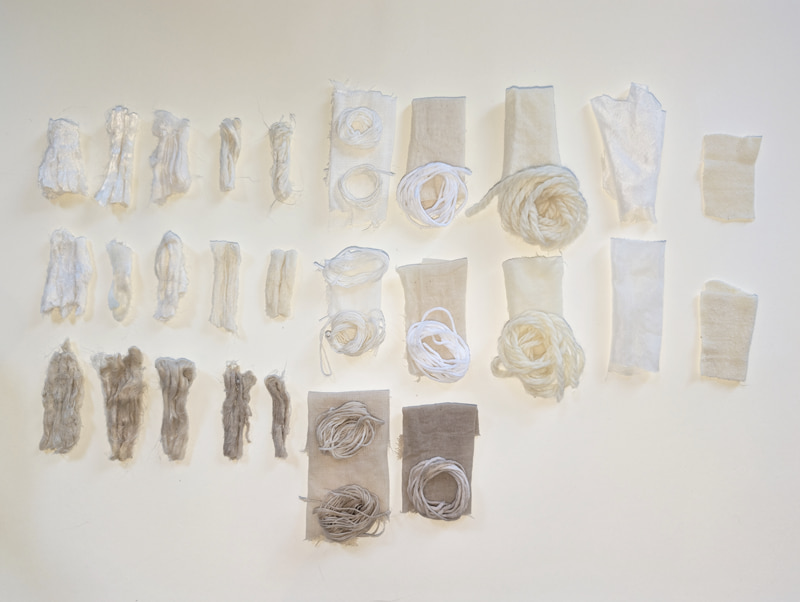
Alum mordant
I put the fibres, yarns and fabrics in a pot, covered them with a lot of water and added a water/alum mixture that contained 10% of the material weight in alum (45g). I let it simmer at 80°C for one hour.
Tannine mordant
I put the fibres, yarns and fabrics in a pot, covered them with a lot of water and added a tannine/water mixture that contained 20% of the material weight in tannine (40g). I let it simmer at 80°C for two hours. Afterwards, I added water/alum mixture that contained 10% of the material weight in alum (20g). I let it simmer at 80°C for one more hour.
Dyeing process
Plant fibres
Mallow blossoms
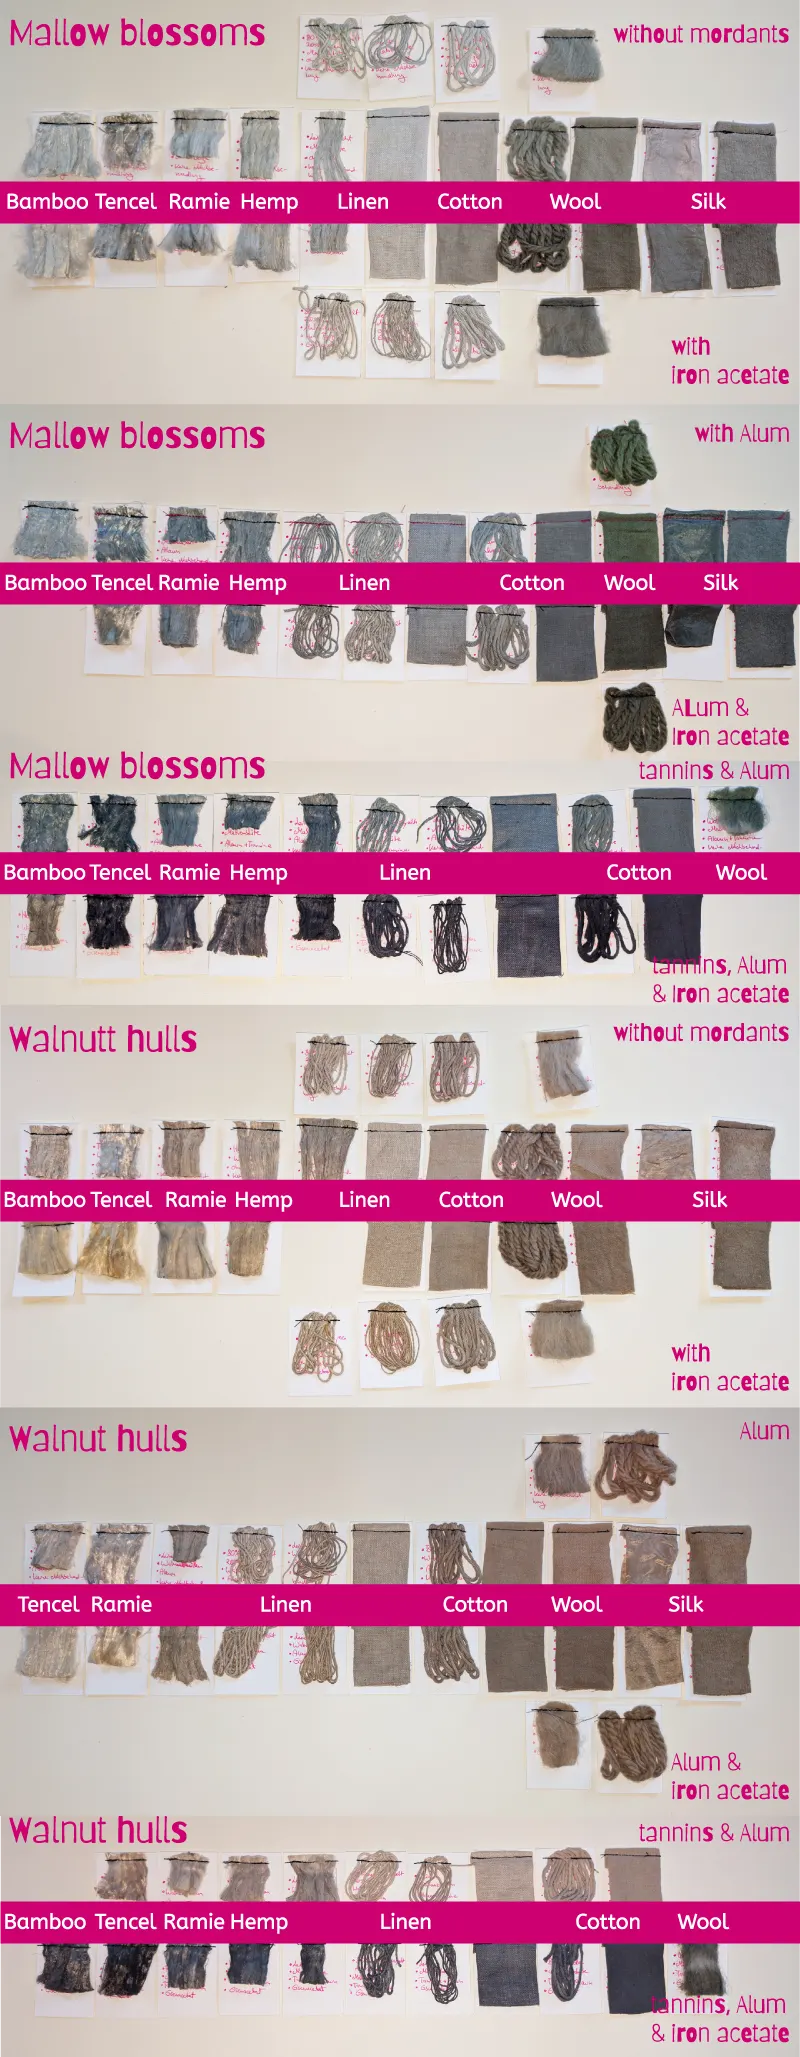
I read, that the pigments of Mallow blossoms dissolve better in an alcohol solution. I soaked 30g of Mallow blossoms in 70% Ethanol for 30 minutes. I added the solution into water and put the blossoms into a cheese cloth, that I hang into the dye bath. I let the dye bath simmer for 30 minutes before I added the first batch of fabrics. Since I assumed that the unstained fibers would absorb the dye the least and the stained ones the most, I first dyed the ones that had only been washed, then the ones stained with alum, and finally the ones stained with tannin and alum. In each round, I simmered the fibers for 30 minutes at 70°. I was unfortunately distracted for a few minutes and the dye bath startet simmering really intense. Perhaps this is why the colours turned out duller than expected. I always raised the temperature slowly and let the fabrics, yarns, and fibers cool down again before rinsing them out. After that, I put the items to be dyed into jars and let them steep overnight.
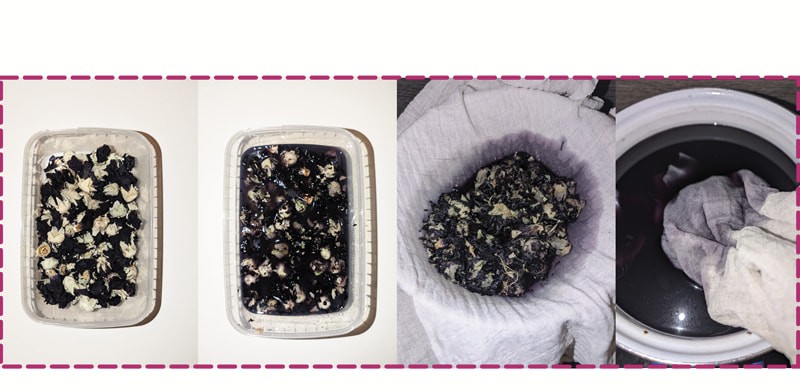
I followed the same procedure with 35g of walnut shells, except that I didn't make an alcohol solution; instead, I wrapped the walnut shells directly in cheesecloth and hung them in the dye bath.
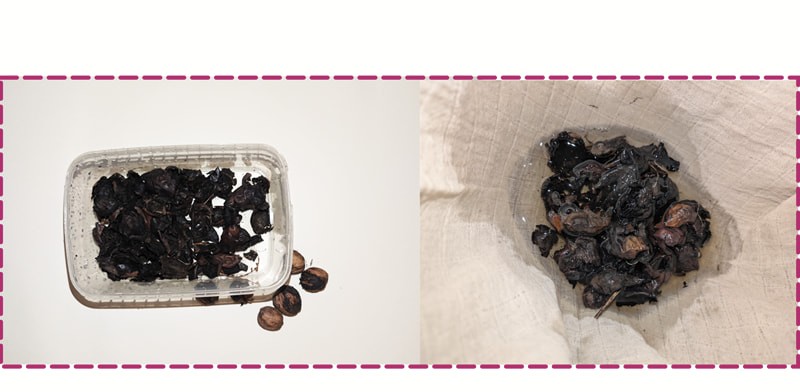
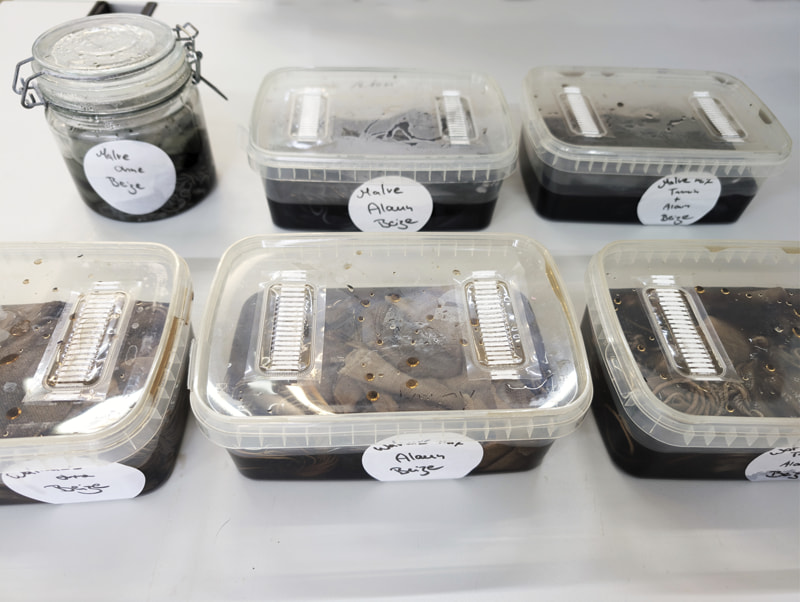
Bacterial dyes:
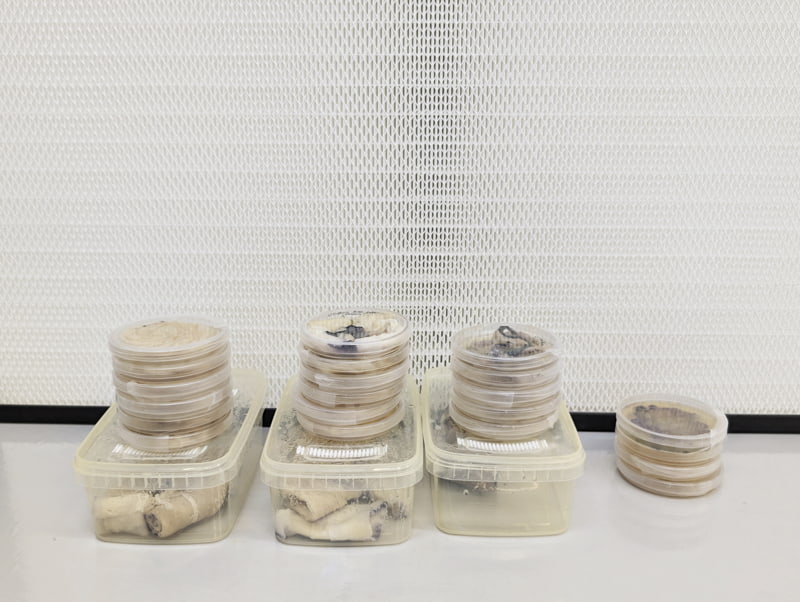
First I inoculated the agar plates with the Janthinobacterium lividum bacteria.
Option A: 1. I placed the pre-soaked yarns on the solid agar plates. 2. I placed the pre-soaked fibres on the remaining agar plates.
Option B: 1. I rolled and folded the fabric pieces to create patterns. 2. I dipped the edges into a petri dish with a culture of Janthibacterium lividum.
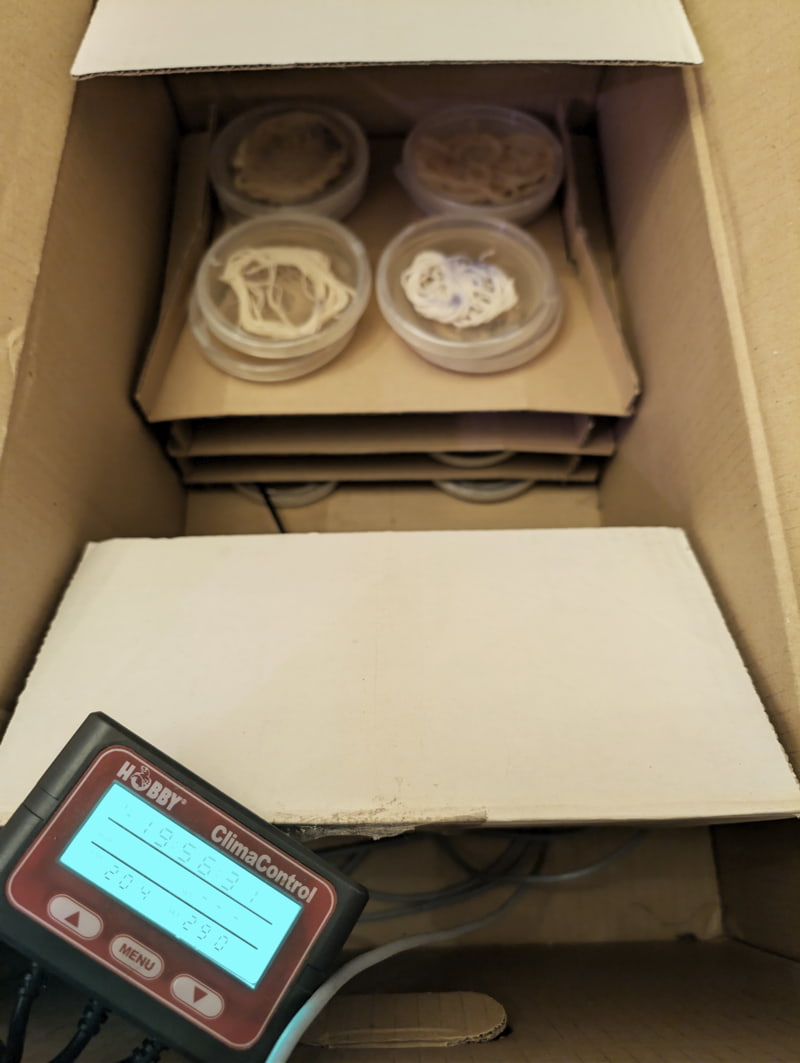
For growing the bacteria, they needed a temperature around 30°C. As we’re still building up our biolab-space, I had to improvise a little bit. I used a heating cable and a reptile-climate-control in two cardboard-boxes as an incubator. I let the bacteria grow for 3 days. Video coming soon
Iron acetate dye
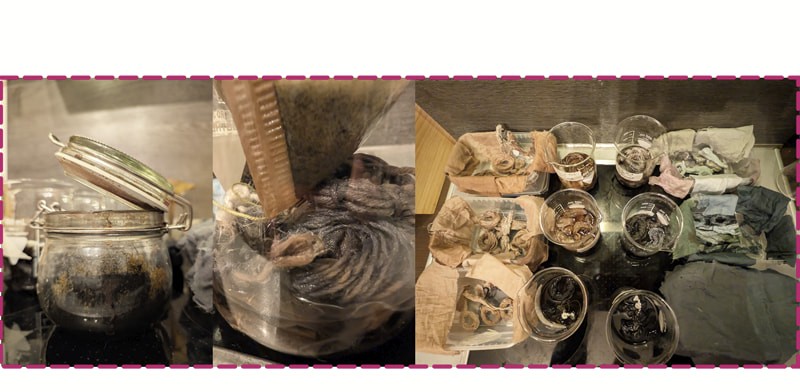
I let some of the fibres soak in iron acetate afterwards to create darker colours, like black or dark greys. To do this, I poured the iron acetate through a coffee filter first. It was important to me that no small particles remained in it, because that could have resulted in uneven coloring. Then I’ve let the fibres soak in the iron acetate for one night.
Rinsing
In the end, I rinsed the dyed materials in a lot of water. I created so many different samples during my process. I organized them on small cards so I could trace how each color was created. Some of my favorite swatches will be displayed alongside Lena's dyeing results in the exhibition area of our FabLab.
coming soon: Bacteria dyed samples
Ink
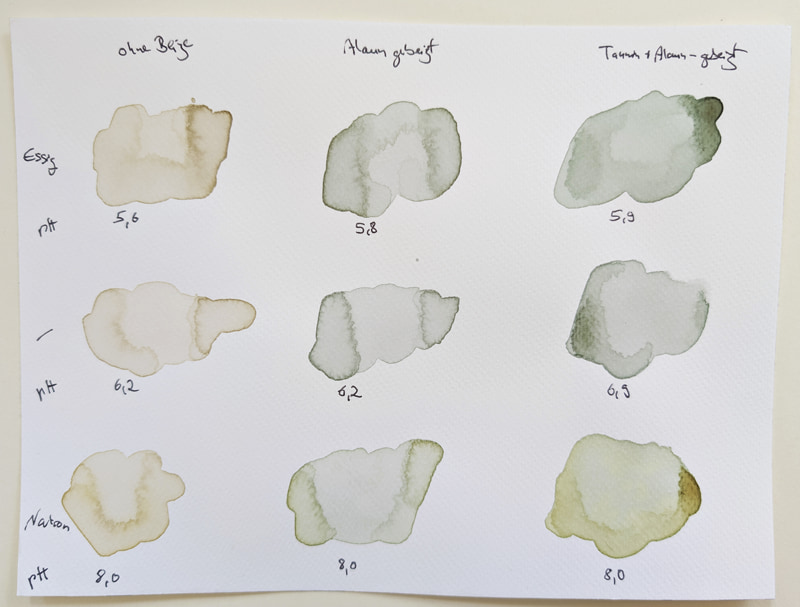
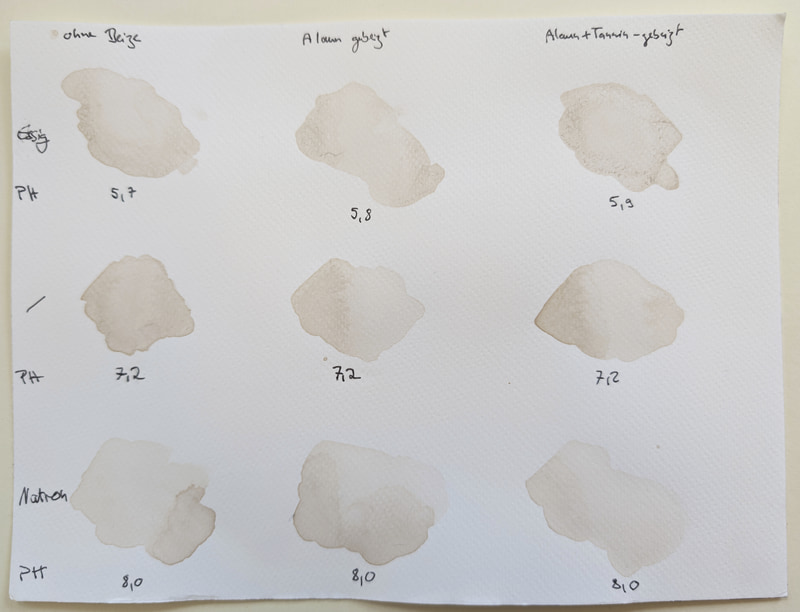
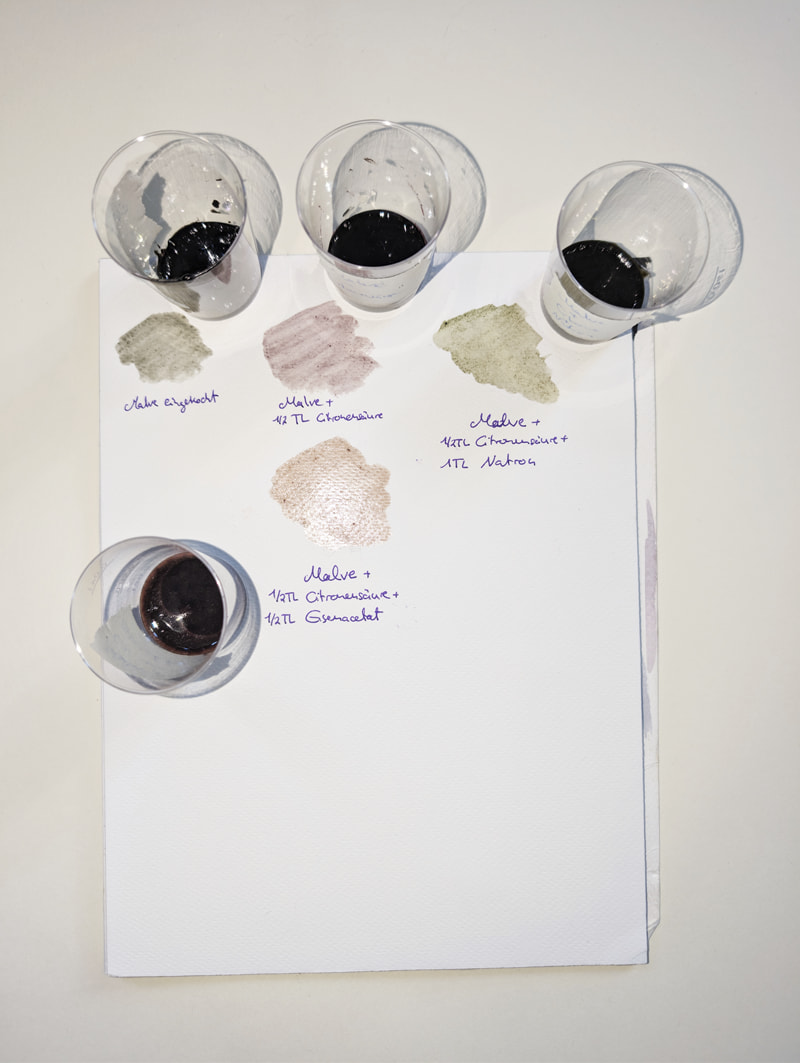
I tested the dye bath during the dyeing process on watercolor paper. As I prefered the colours, created by the Mallow blossoms, I decided to make an aquarell-ink out of it. During the dyeing process, I created different colors by adjusting the pH levels – either by adding an half teaspoon of vinegar to or tip of a knife of baking soda in 2cl of dye bath.
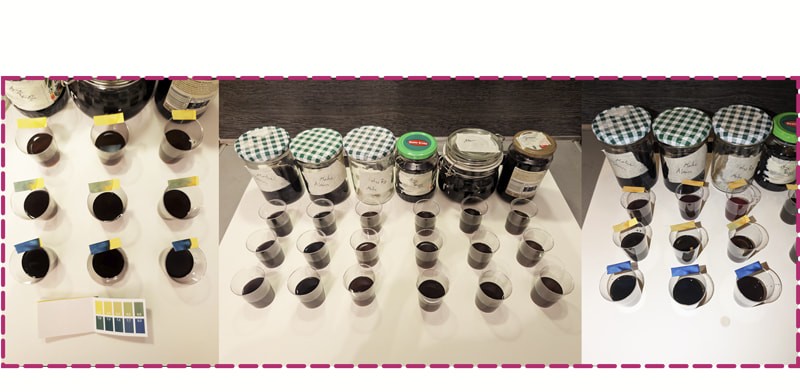
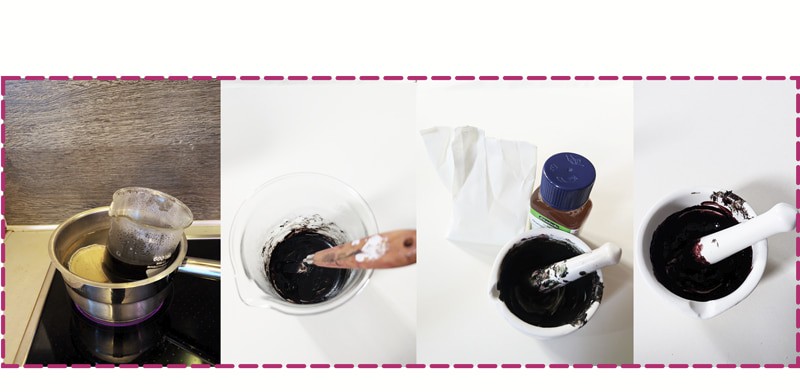
To make watercolor paint, I first had to reduce the dye. To do this, I collected the dye from the mallow flower dye bath and let it reduce in a water bath so it wouldn't burn. I then mixed the pigments with gum arabic in a mortar for the first ink. I added half of a teaspoon of citric acid to create an acidic pH-level for the second ink. I mixed some of this dye with baking soda to create an alkaline pH. I then mixed another portion of the second, reddish paint with iron acetate, which gave me a shade of red that leans a bit more toward rust red.
Tools and sources I used
- Squishtool (for PNG and JPG): https://squish.tools/de/compress-png
- Adobe Photoshop: https://www.adobe.com/products/photoshop.html
- Cooking plates
- Pots
- Pressure Cooker
- Ph-Test-Strips
- Laminar Flowbox
- Gum arabic
- Mesh strainer
- Wooden spoons
- Precision digital scale
- Paper coffee filters
- Mortar
- Petri Dishes
- Polypropylene grow boxes
Reflection
I found it absolutely fascinating, especially with the mallow blossoms, to see how simple methods can be used to create different colors from a single raw material and just a few additives. The well-structured nature of my process helped me test so many different fibres ans processes this week. I learned that I should be more concentrated. I wonder what color the mallow blossoms would have turned if they hadn't been heated so intensely.