E-textiles

Understanding
E-textiles are textiles that integrate digital components like sensors, microcontrollers, LED lights and power sources.
Some of its principal characteristics are: using conductive materials, softness and flexibility, and a whole integration of the elements in the fabric.
These textiles have been used in many fields, like fashion, entertainment, fitness, health and wellness.
Circuits
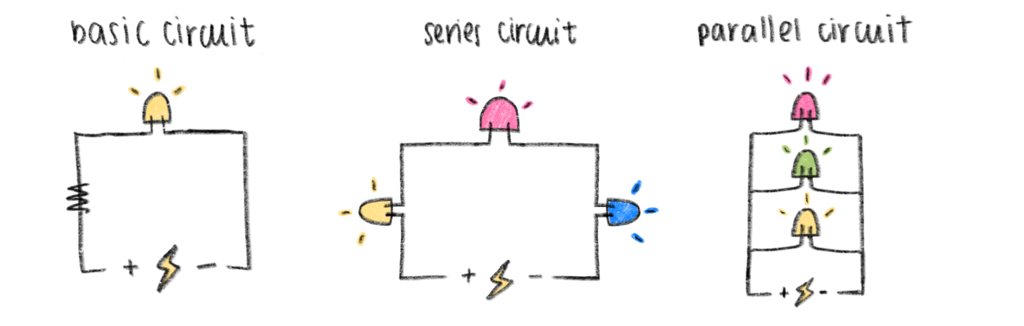
To understand circuits I used these simple diagrams that helped me understand how to construct a functional circuit.
Inputs Receive information
- Switches, knobs, buttons
- LDR
- PIR
- Thermistors
- Microphones
- Pressure sensors
Process Change incoming signal
- Digital software
- Microprocessors
- Microcontrollers
- Resistors
Outputs Respond to the information
- LEDs
- Buzzers
- Motors
- Heaters
- Speakers
Experimenting
Exploration #1
The first exploration I had with this topic was the construction of an easy circuit. I tried doing a basic circuit and a series one.
Materials
- A demin piece
- Copper tape
- 3x yellow leds
- 3x resistors
- 3v battery
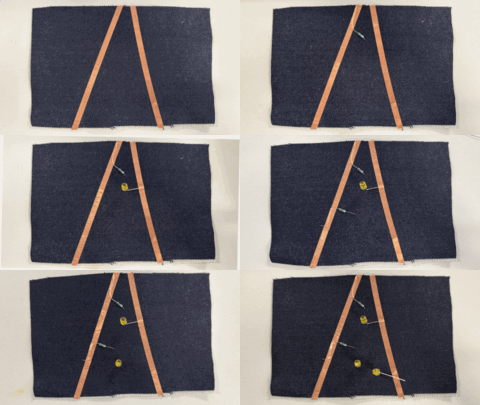
- Cut the denim piece
- Make a path with copper tape
- Make a circuit with resistors and LEDs
It was really confusing at first, but after a few trials I started to understand how it worked, which is why this exploration helped me a lot as my first.
Exploration #2
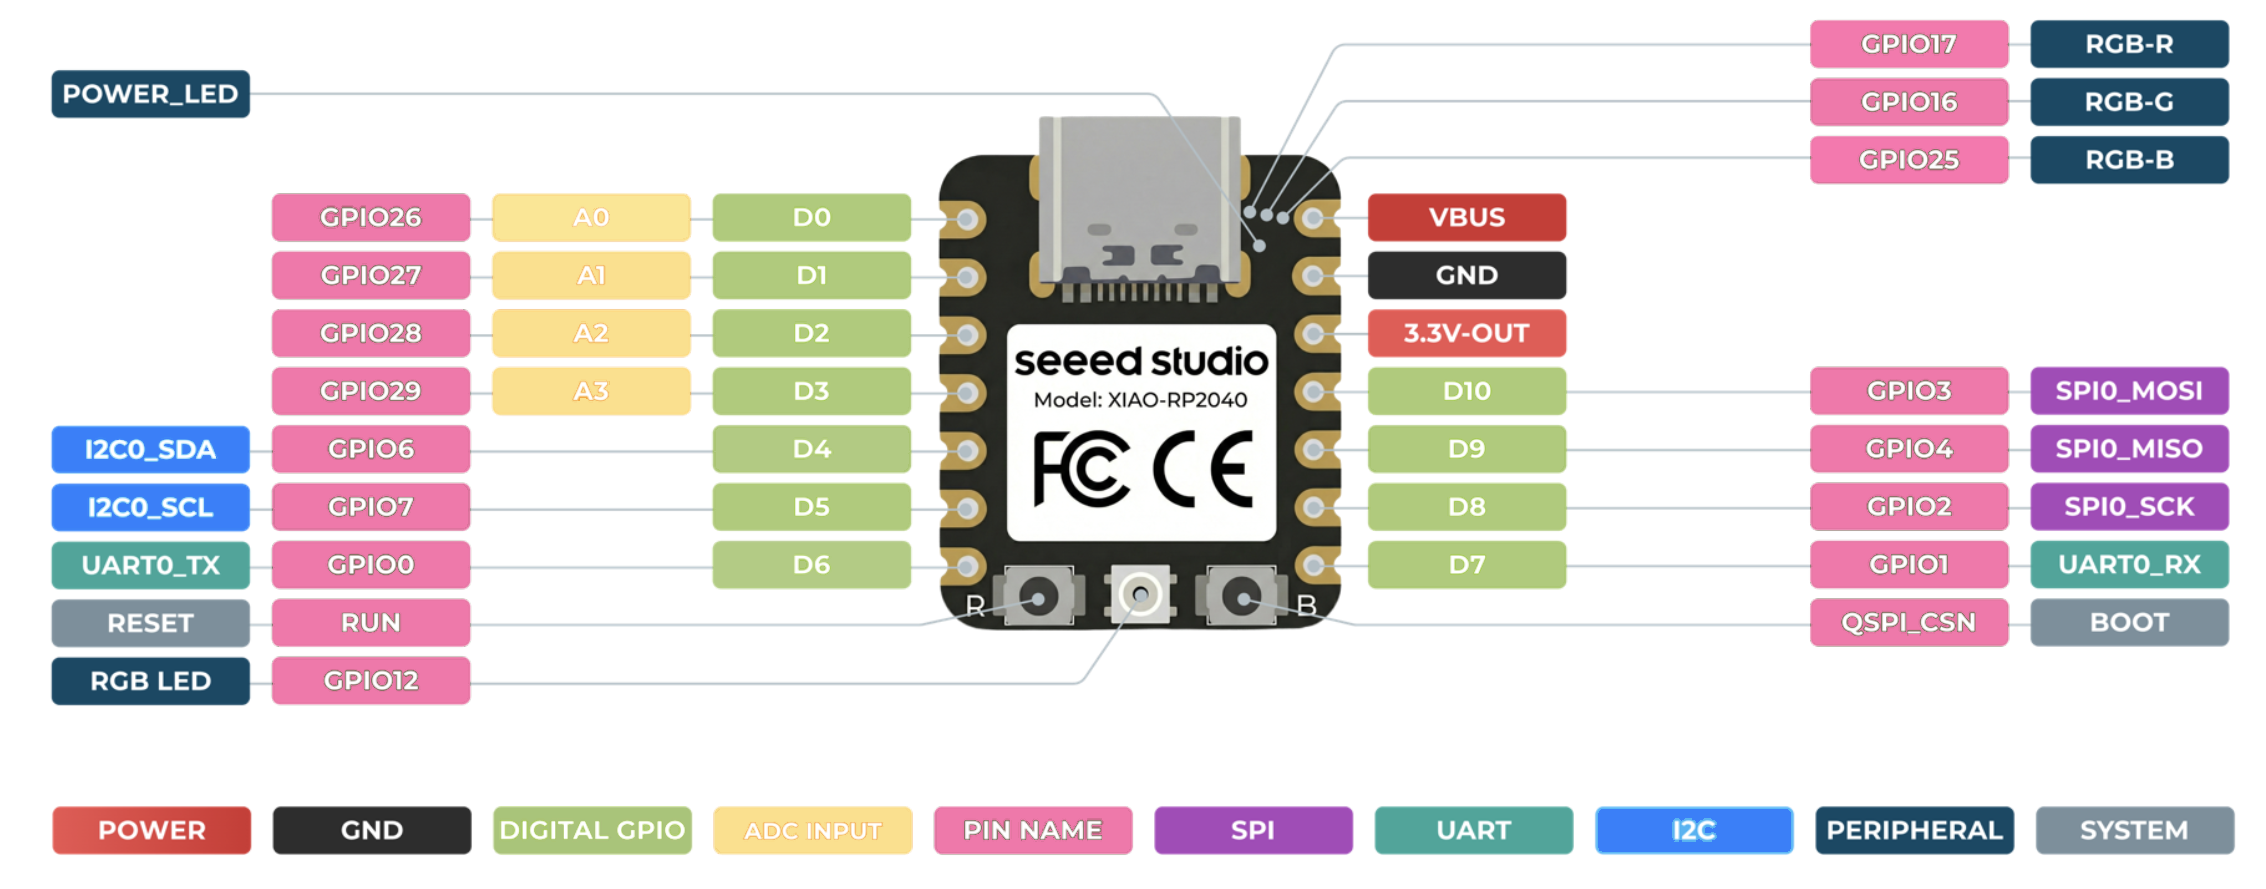
The second exploration was using velostat to make a pressure sensor, using a microcontroller, in this case seeed Xiao RP2040.
Materials
- Vinyl
- Grid
- Velostat
- Wires
- Xiao RP2040
- Copper tape
Microcontroller
A microcontroller is a small computer on a single chip designed to manage a specific task within an embedded system without requiring much complexity. 4
It uses its central processor to interpret data through its inputs which is temporarily stored in its data memory, where the processor accesses it and uses instructions stored in its program memory to apply the incoming data. It then communicates and take the appropriate action (output). 5
XIAO RP2040
Arduino
To program the microcontroller I used Arduino.
- First I downloaded the Arduino software.
- Open the software
- Add Seeed Studio XIAO RP2040 to the Arduino IDE:
- File -> Preferences -> Fill the Additional Boards Manager URL with:
- Install "Raspberry Pi Pico/RP2040" by Tools -> Boards -> Fill the Boards Manager -> Search for Raspberry Pi Pico/RP2040 -> Install
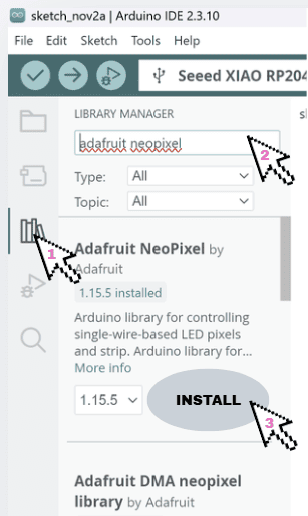
- Add the Adafruit NeoPixel library to control rgb LEDs by Libraries -> Browse "Adafruit NeoPixel" -> Install
Building the sensor
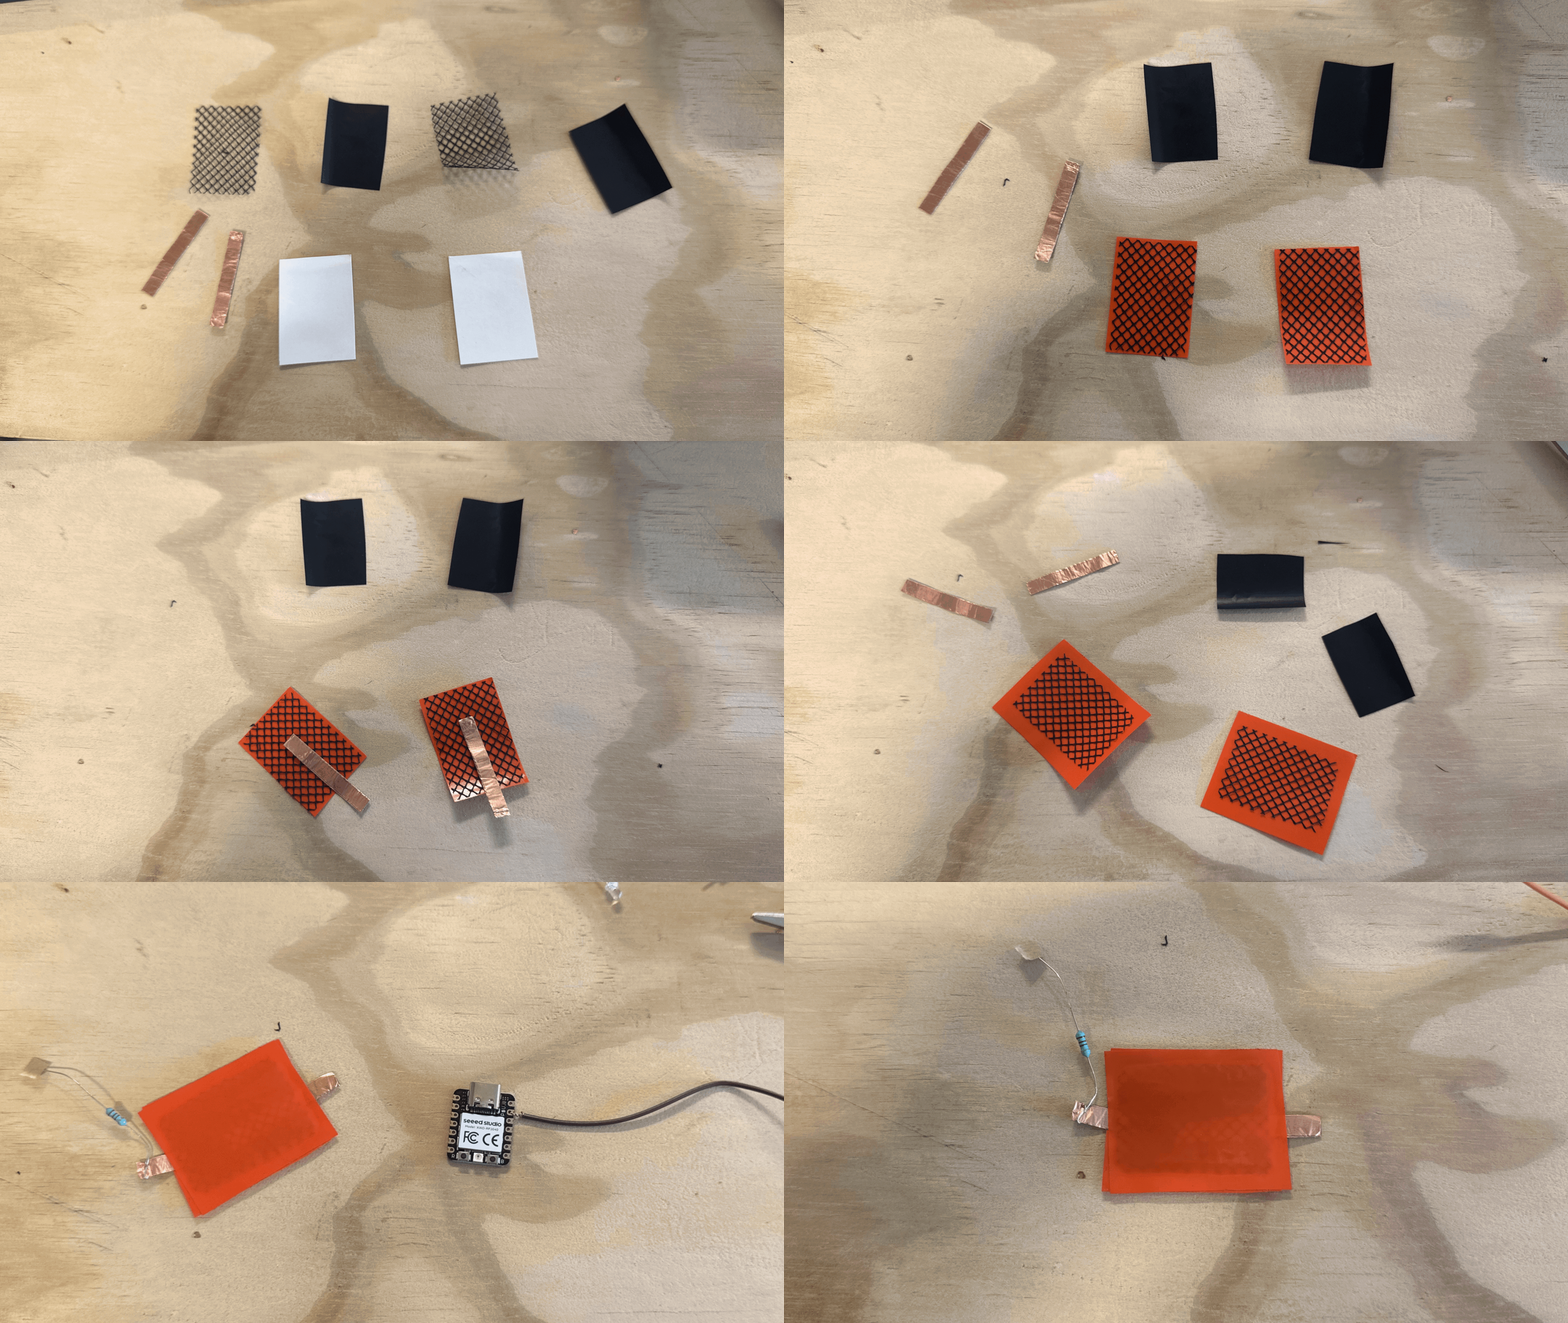
- Cut the vinyl in 2 small rectangles
- Cut the grid with an offset inward from the vinyl rectangles, so it is smaller. Place it in the vinyl.
- Cut 2 small copper tape pieces. Place them in the bottom middle of each piece.
- Cut the velostat like the grid, leaving an offset from the vinyl, around the edges. put in on top of the copper tape.
- Paste the two pieces together, adhesive side against adhesive side, each copper tape looking to the opposite side.
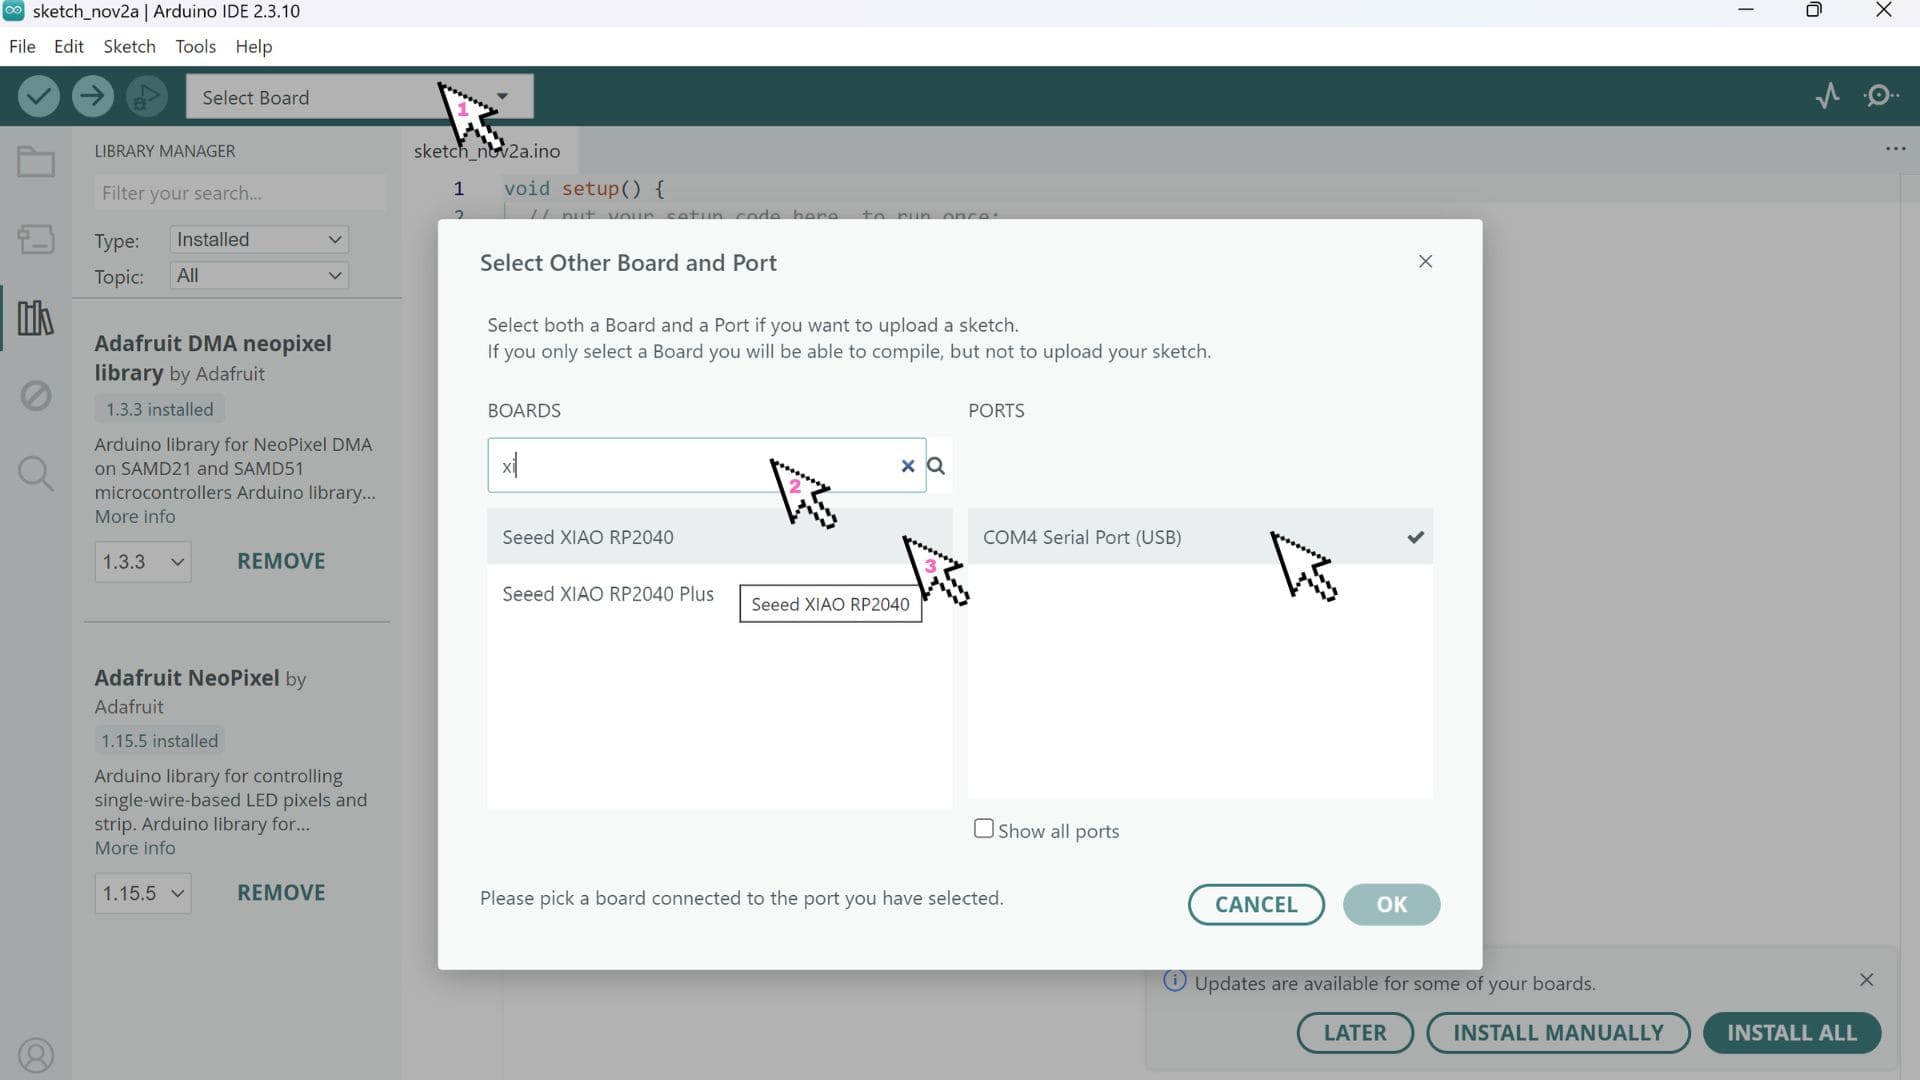
In arduino:
- Connect your seeed Xiao RP2040 with a data transfer cable
- Select your board
- Write your code
For this exploration I used Raul's code:
int sensor_fuerza= D0;
int led=D7;
int lectura;
int brillo;
void setup()
{

  pinMode(led, OUTPUT);
  Serial.begin(9600);
}

void loop()
{
lectura = analogRead(sensor_fuerza); // Resistance equals sensor reading (Analog 0)
Serial.print("Lectura Analogica = ");
Serial.println(lectura);
// Change the analog reading range (500-1023)
// We use in analogWrite 8 bits (0-255) configured in the map
brillo = map(lectura, 500, 1023, 0, 80);
analogWrite(led, brillo);
delay(100); //One hundred “ms” wait on each reading
}
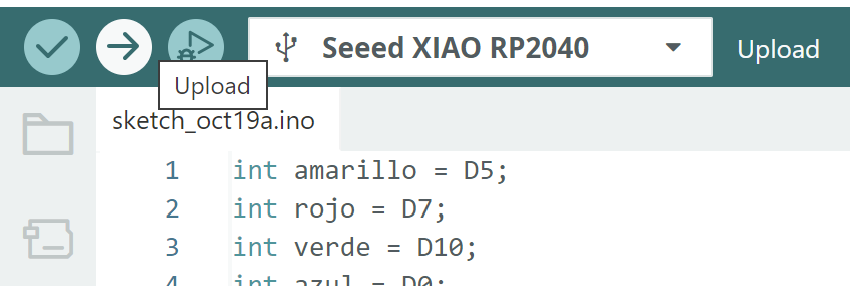
- When it's ready verify and upload

Result
Exploration #3
This exploration was more like a testing to prove if my understandment on circuits was real. I did 2 basic circuits that could become a series one.
Materials
- 2 LEDs
- 1 Power Button
- 2 Snap Buttons
- Iron wire
- 3v battery
Process and workflow
Inspiration
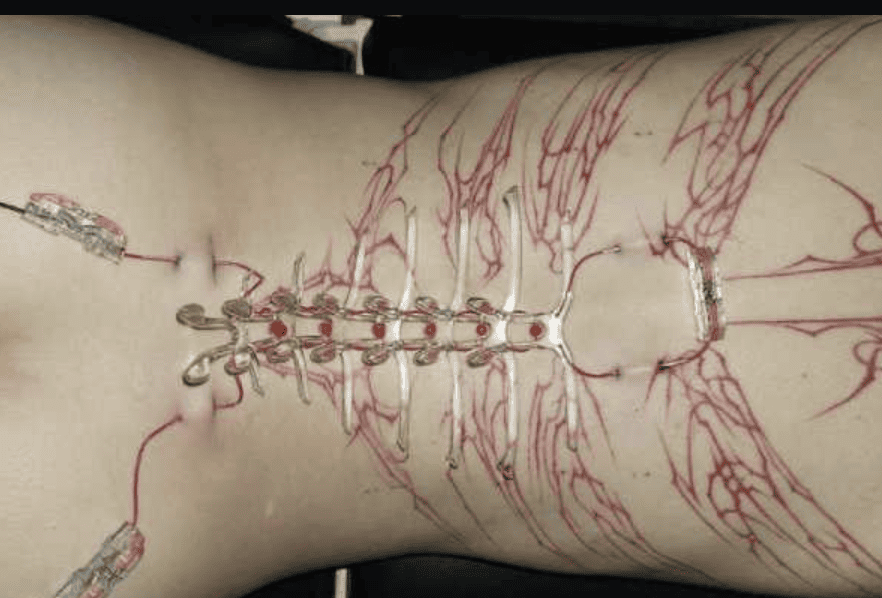
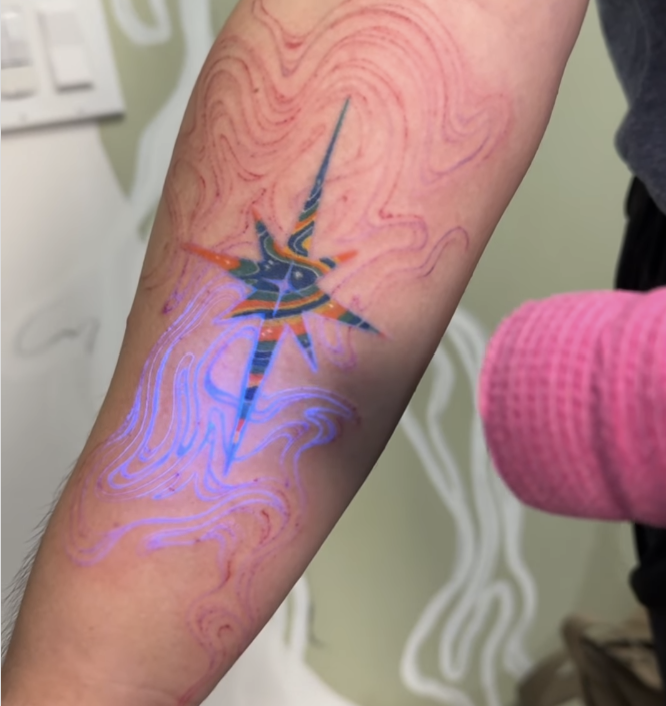
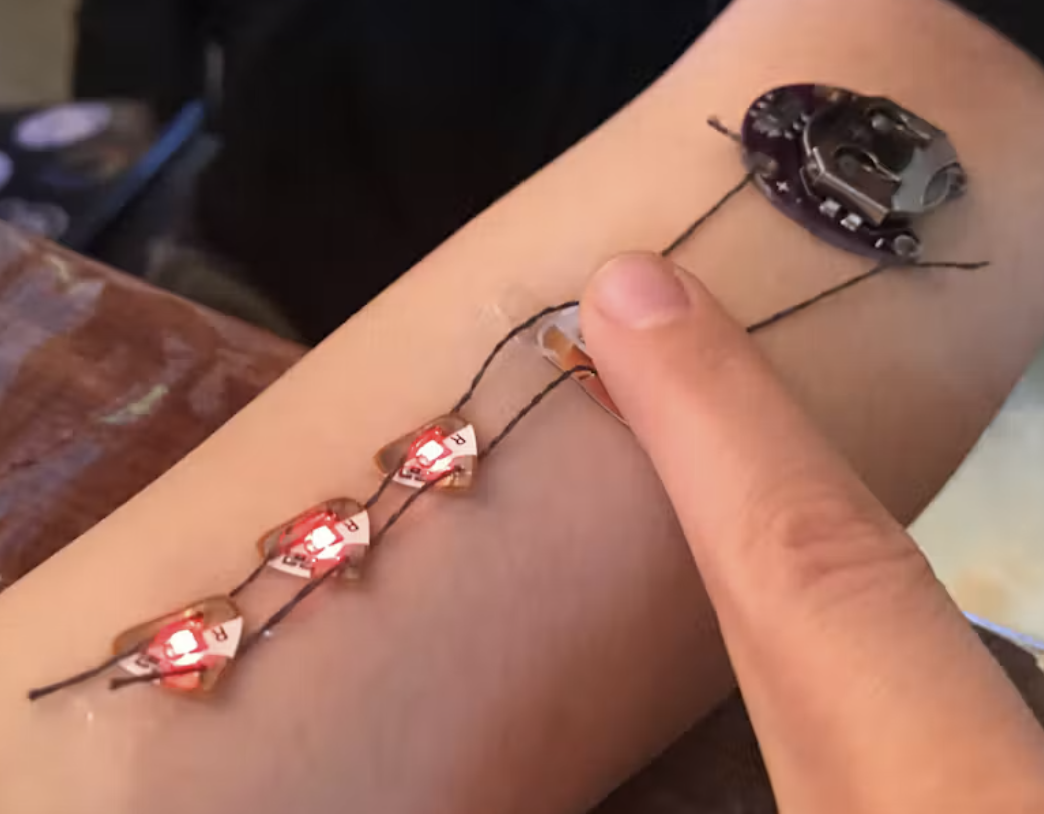
My idea for this week was about light tattoos, I started doing some research about the topic and remembered Ghoregrl pierced circuits, which was kind of the same root idea. For my surprise I found really interesting projects around this topic, some glowing ink, but also some experiments regarding LED tattoos.
Materials
- Xiao RP2040
- 8 Resistors
- 8 Leds (2 per colour)
- Wires
Tattoing
I decided to use fake skin for this, so I tattooed some and cut the shape.
Circuit
Then I started placing the LEDs around the skin and figuring out how to make the circuit.
My idea was to make the light go around in a circle.
This is how I arranged the circuit:
D0 → resistor → LED yellow 1 → GND
D0 → resistor → LED yellow 2 → GND
D1 → resistor → LED red 1 → GND
D1 → resistor → LED red 2 → GND
D2 → resistor → LED green 1 → GND
D2 → resistor → LED green 2 → GND
D3 → resistor → LED blue 1 → GND
D3 → resistor → LED blue 2 → GND
Code
int amarillo = D0;
int rojo = D1;
int verde = D2;
int blanco = D3;

void setup() {
  pinMode(amarillo, OUTPUT);
  pinMode(rojo, OUTPUT);
  pinMode(verde, OUTPUT);
  pinMode(blanco, OUTPUT);
}

void prender(int pin) {
  digitalWrite(pin, HIGH);
  delay(500);
  digitalWrite(pin, LOW);
}

void loop() {
  prender(amarillo);
  prender(rojo);
  prender(verde);
  prender(blanco);
}
5. Results
Weekly reflection & critical thinking
During this week I truly learned a lot, I've experimented with circuits and microcontrollers before but never really got them, now I think I have a better understanding of them and I'm impressed with how useful they are. At first it was really confusing but was also really interesting to see how I started to loose fear and start experimenting a bit more. Something I would do differently is the way in which I've arranged the cables and circuits, I think I could cleaner with it. This practice also helped me realize I want my final project to be related to electronics and I'm excited to explore what the possibilities are now that I have a bit of this knowledge and a lot of interest on it.
Fabrication files & References
-
Reference: Circuitskin, Alex Glow, 2017 ↩
-
Reference: Pierced circuits, Ghoregrl, 2024 ↩
-
Reference: UV tattoo, createdbydig, 2025 ↩
-
Reference: Design Tech Guide ↩
-
Reference: techtarget ↩