Inspiration
This week was wonderful in terms of creativity. We had so many options, son many things to try... I knew from the start that I would try some things with leather, since it's my favorite material. I got inspired a lot by leather molding projects. There was so many! The other project that inspired me the most is the composite made out of scraps of leather. Here is the work of Jorge Penades (structural skin), the work of Julie Van Den Boorn (compoleather) and the work of Esther Perbandt (leather molding). These are only a few creators, I could talk about projects like that for hours!


3D Parametric object
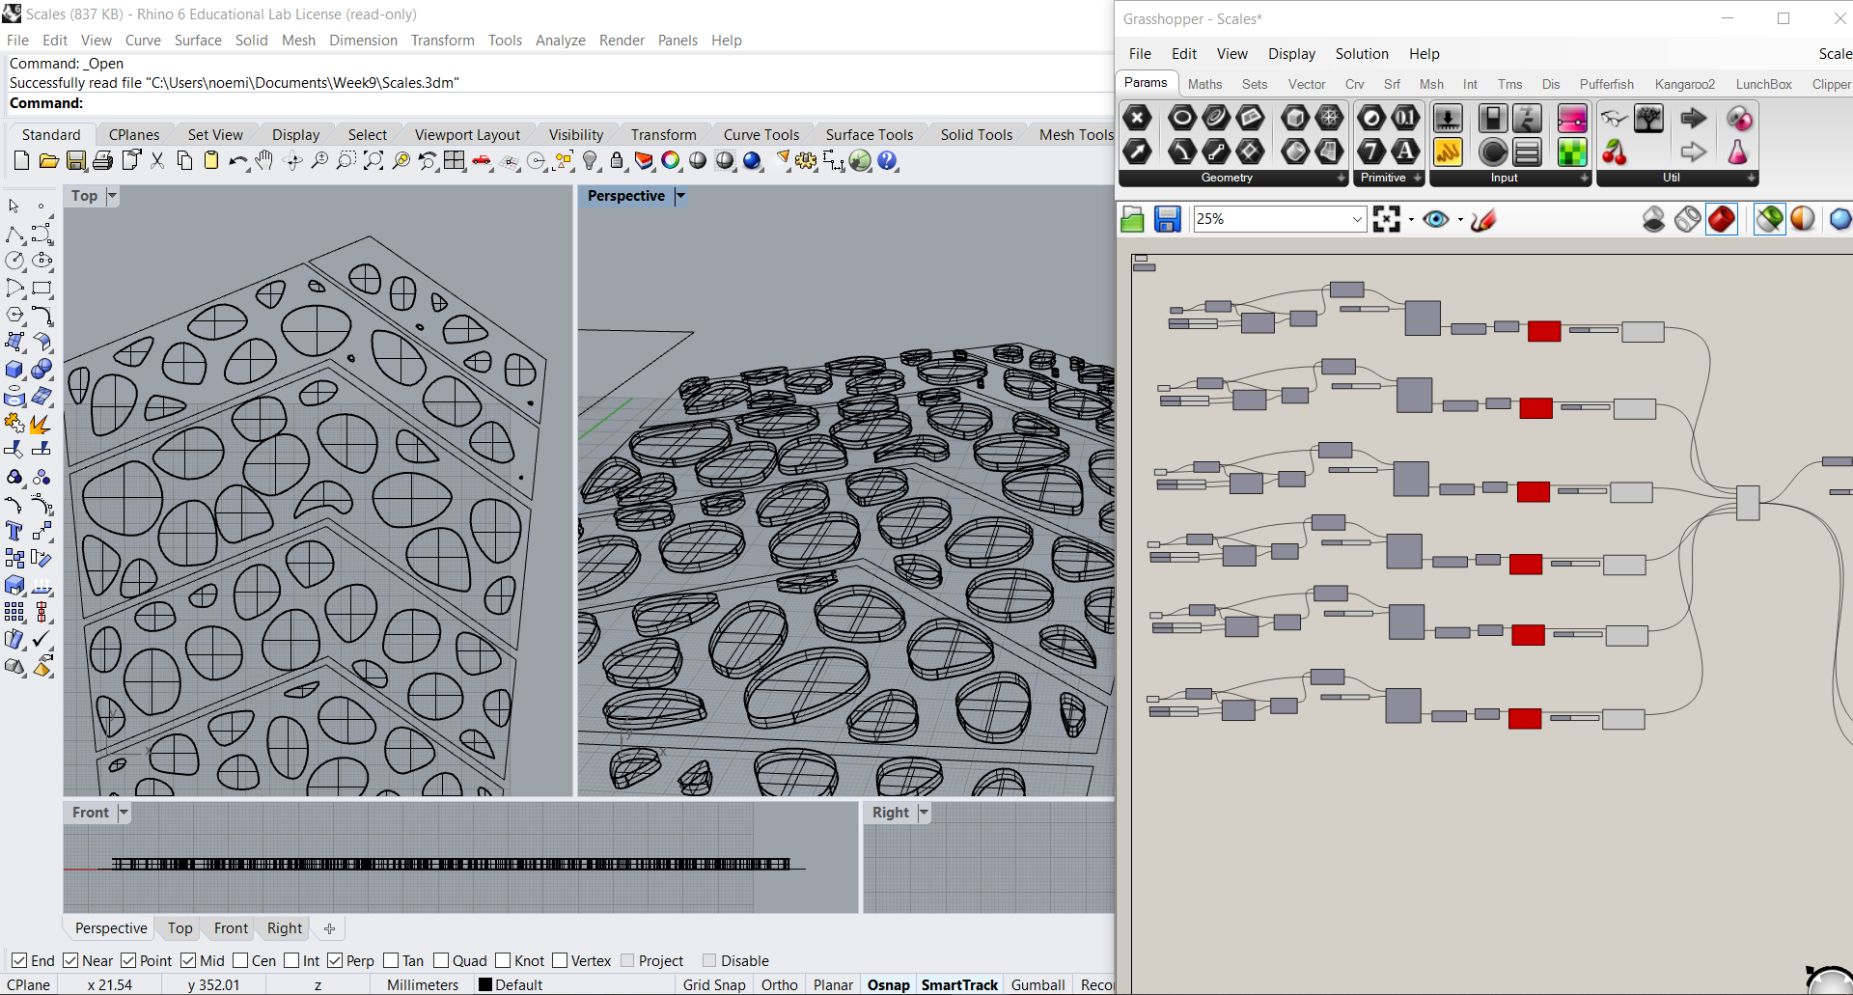
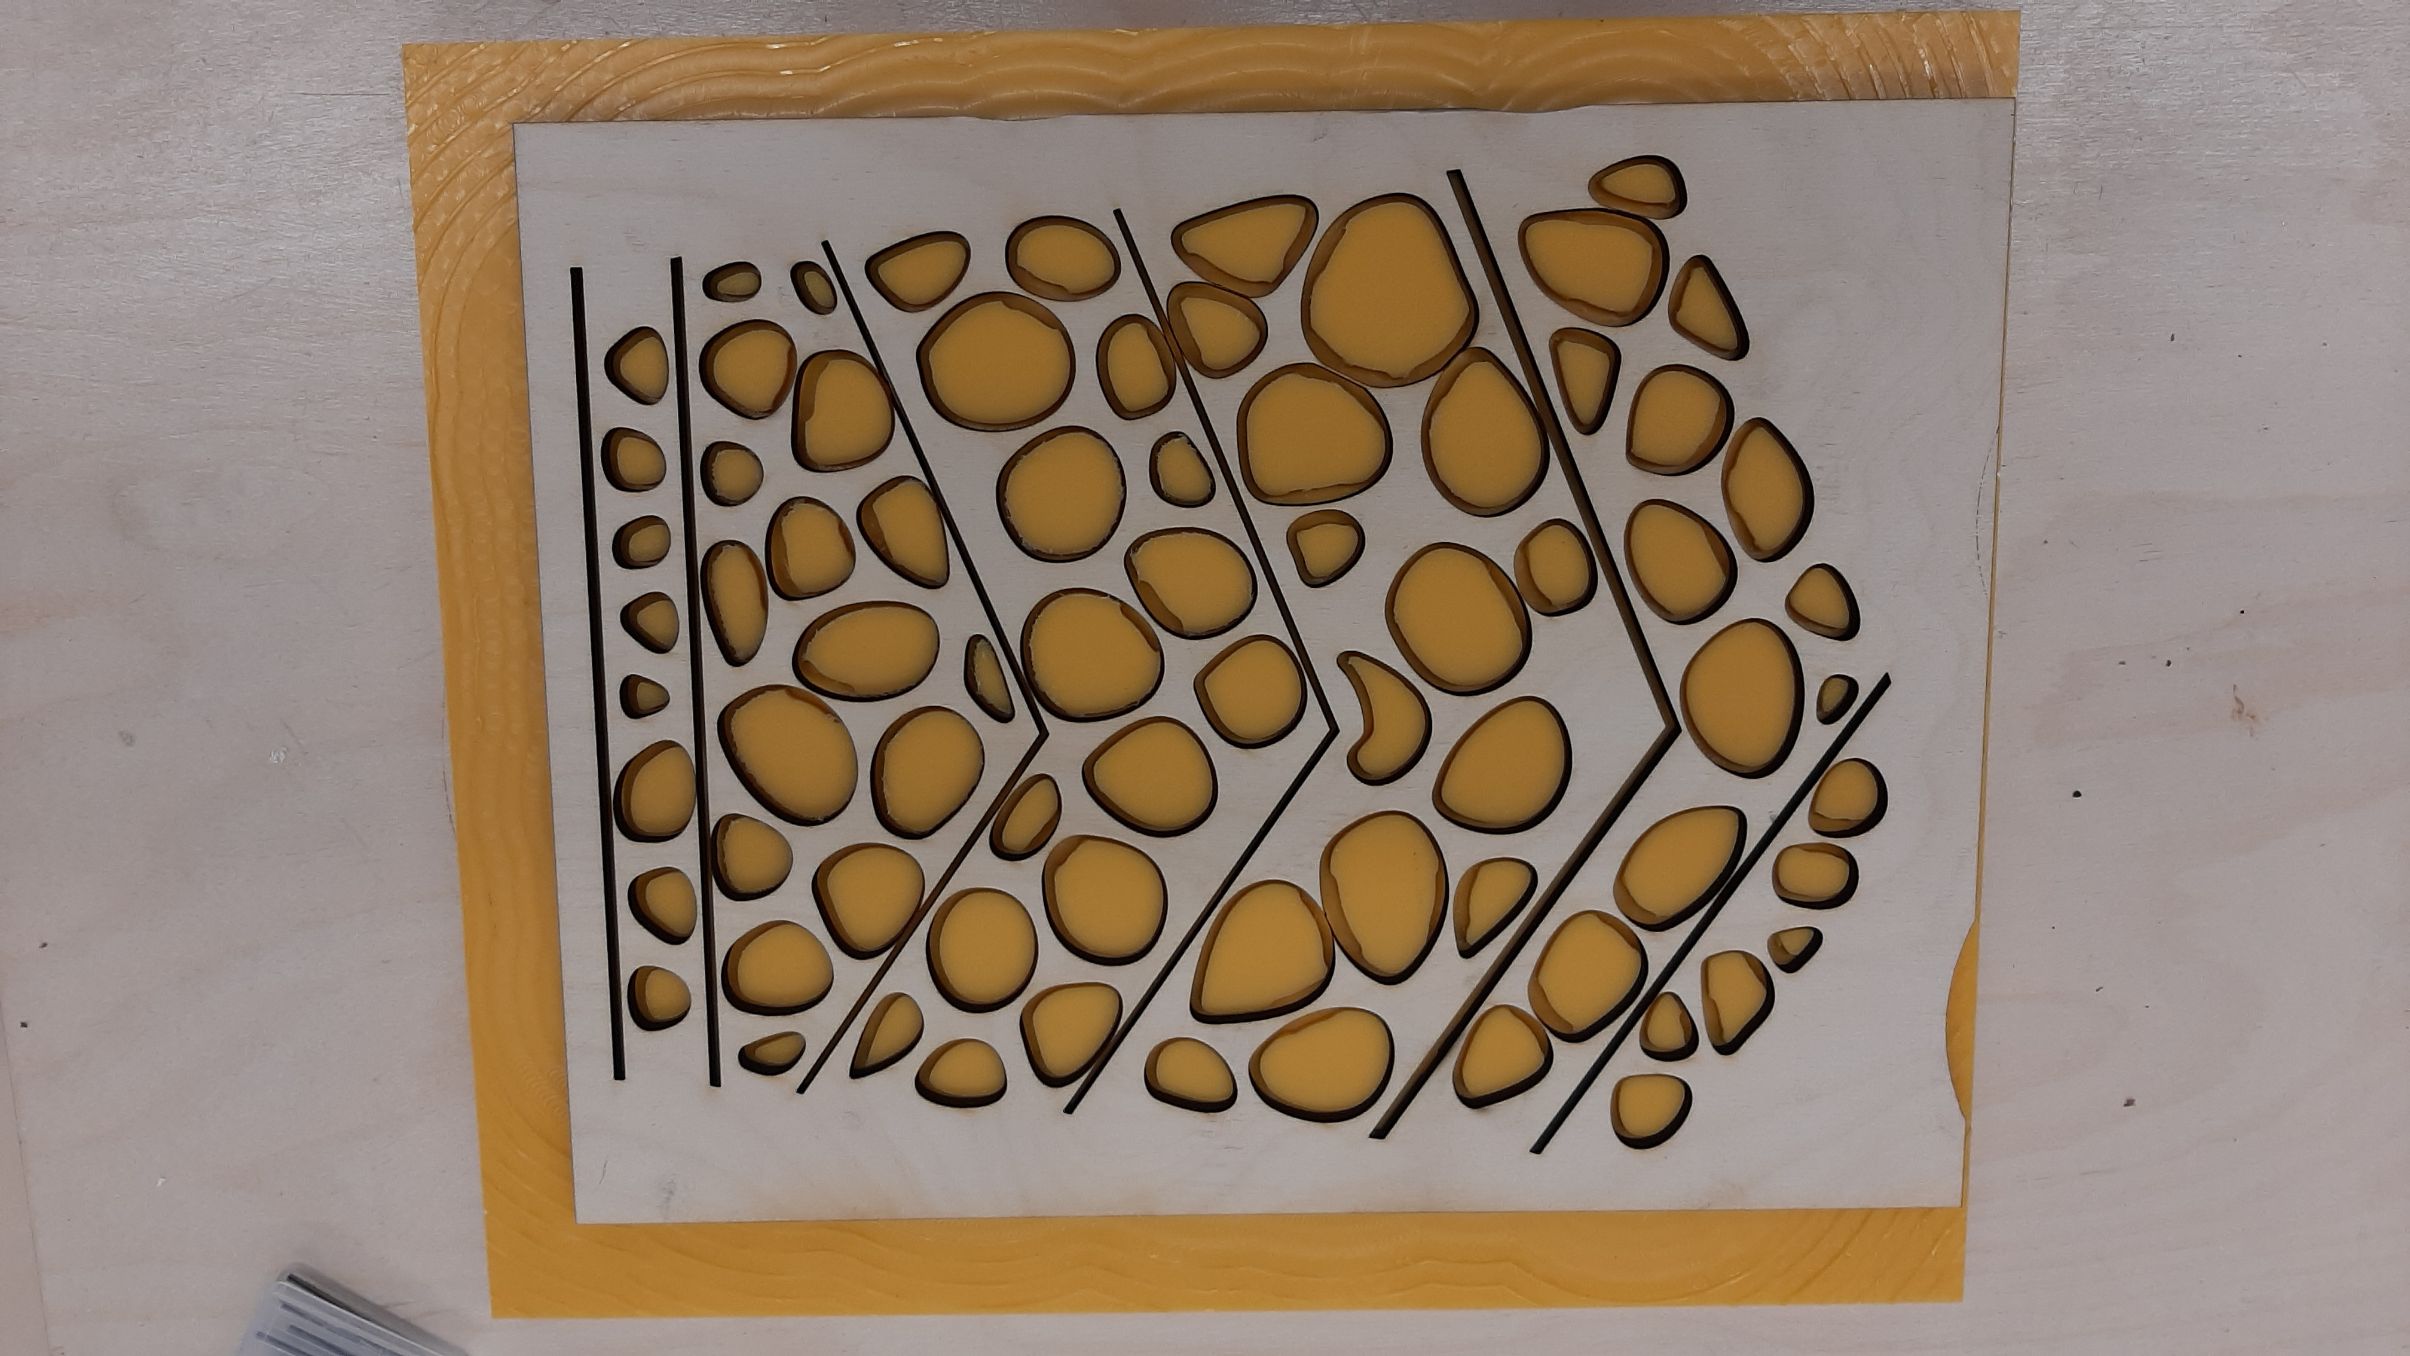
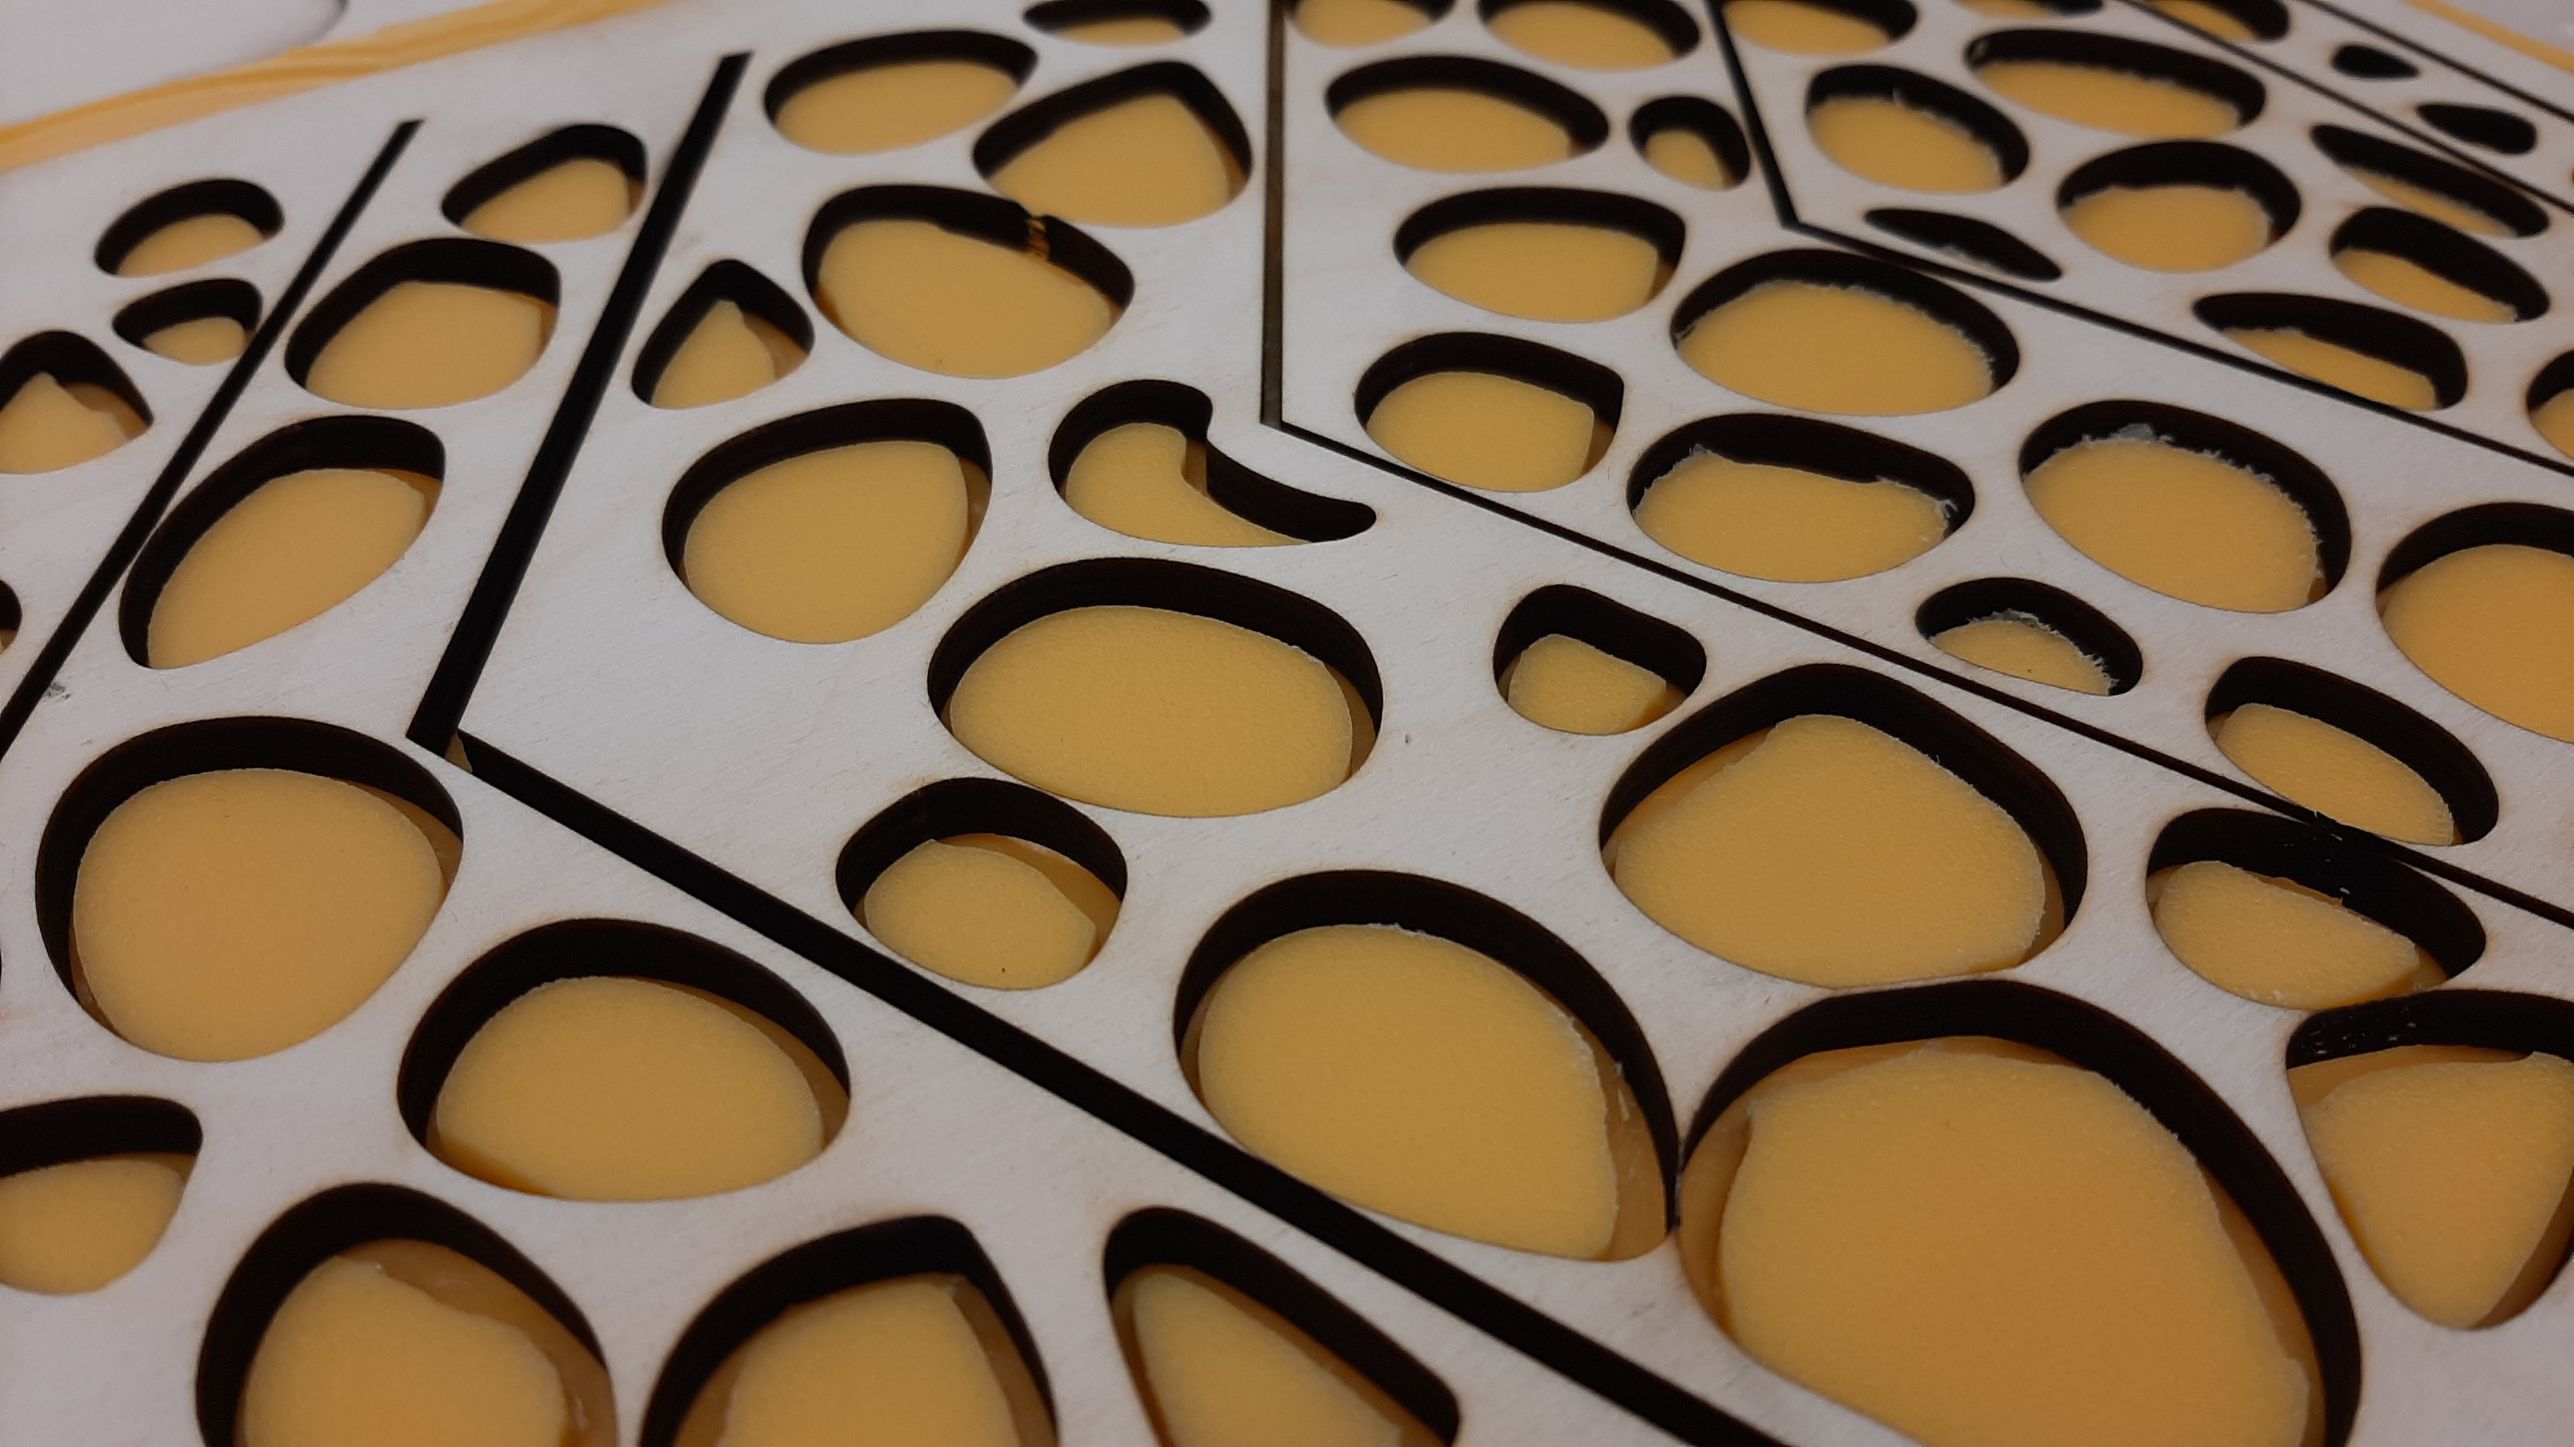
I did scales, inspired by the movie how to train your dragon. I generated random points in my pattern, made voronoi out of them, then took the points of each voronoi to make round shapes out of them. since the shapes were randomly generated, they sometimes were super close to one another, and I had trouble finding a way to make them round and with boudaries... the more I added offsets, the more the pattern felt empty... Maybe working with 6 differents segments in my pattern was not a good idea.

CNC
For the CNC, François took the time to check my objects and assist me in the making of my cnc file (nothing could be cut without his approval). I used fusion 360 to do it, since I could use it for free on my cumputer. For a girl that only did 3D prints with cura, CNC codes were on a whole other level. I wanted to use a 1/4in drill bit to do the rough job, but I couldn't find anywhere the option to create a second job with a different 1/8in drill bit, without the software starting the cut from the beginning again. What we were searching for was a way to do a 3d adaptative Clearing with multiple tools. We found the answer on forums... so happy someone had the same problem! Even with a 1/8in, I still had some shapes that were fused together, so I scaled up my shape a bit so the machine could pass everywhere. I kept the scraps of High Density Poly Ethylene (HDPE) we used last week for the loom project, and drilled it in place. I set the new zero and learn how to start my cut. I went really safe with the speeds at first, so the first code I sent to the machine needed to be speeded up a bit. I still think it's weird Fusion didn't show me how much time it would take.
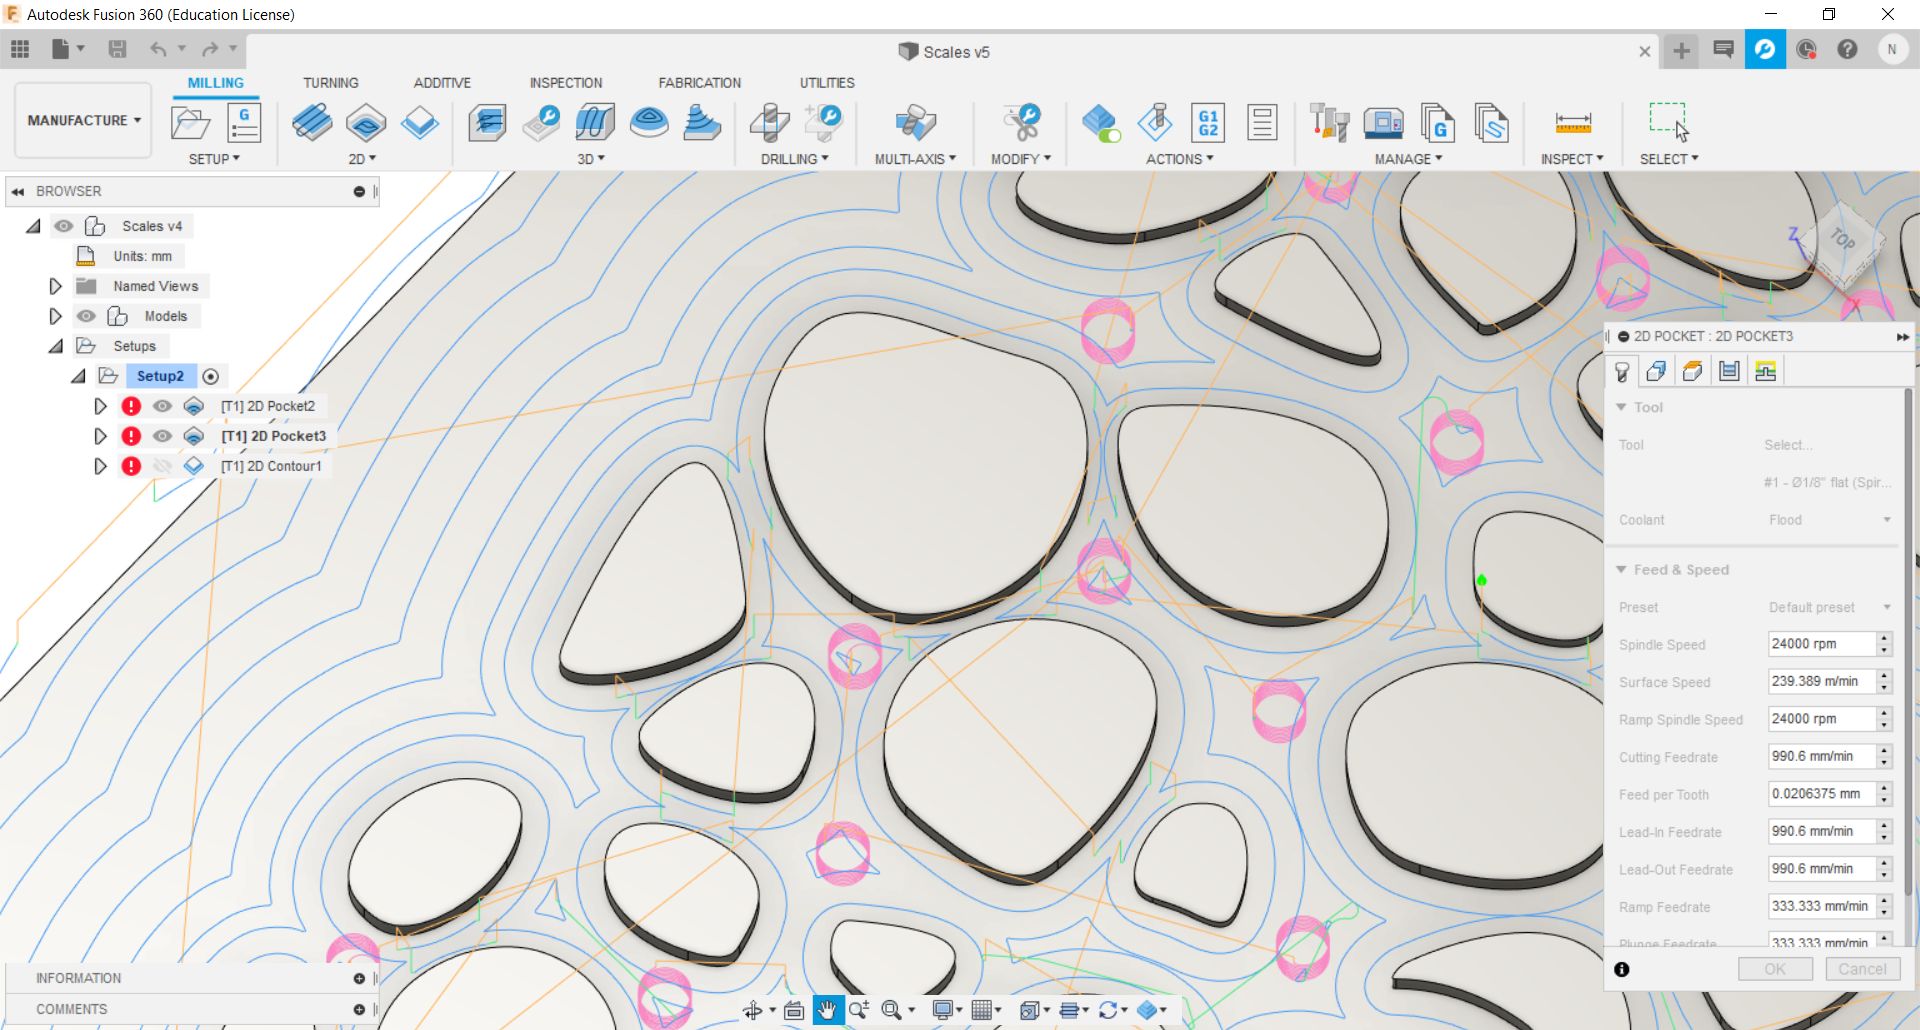
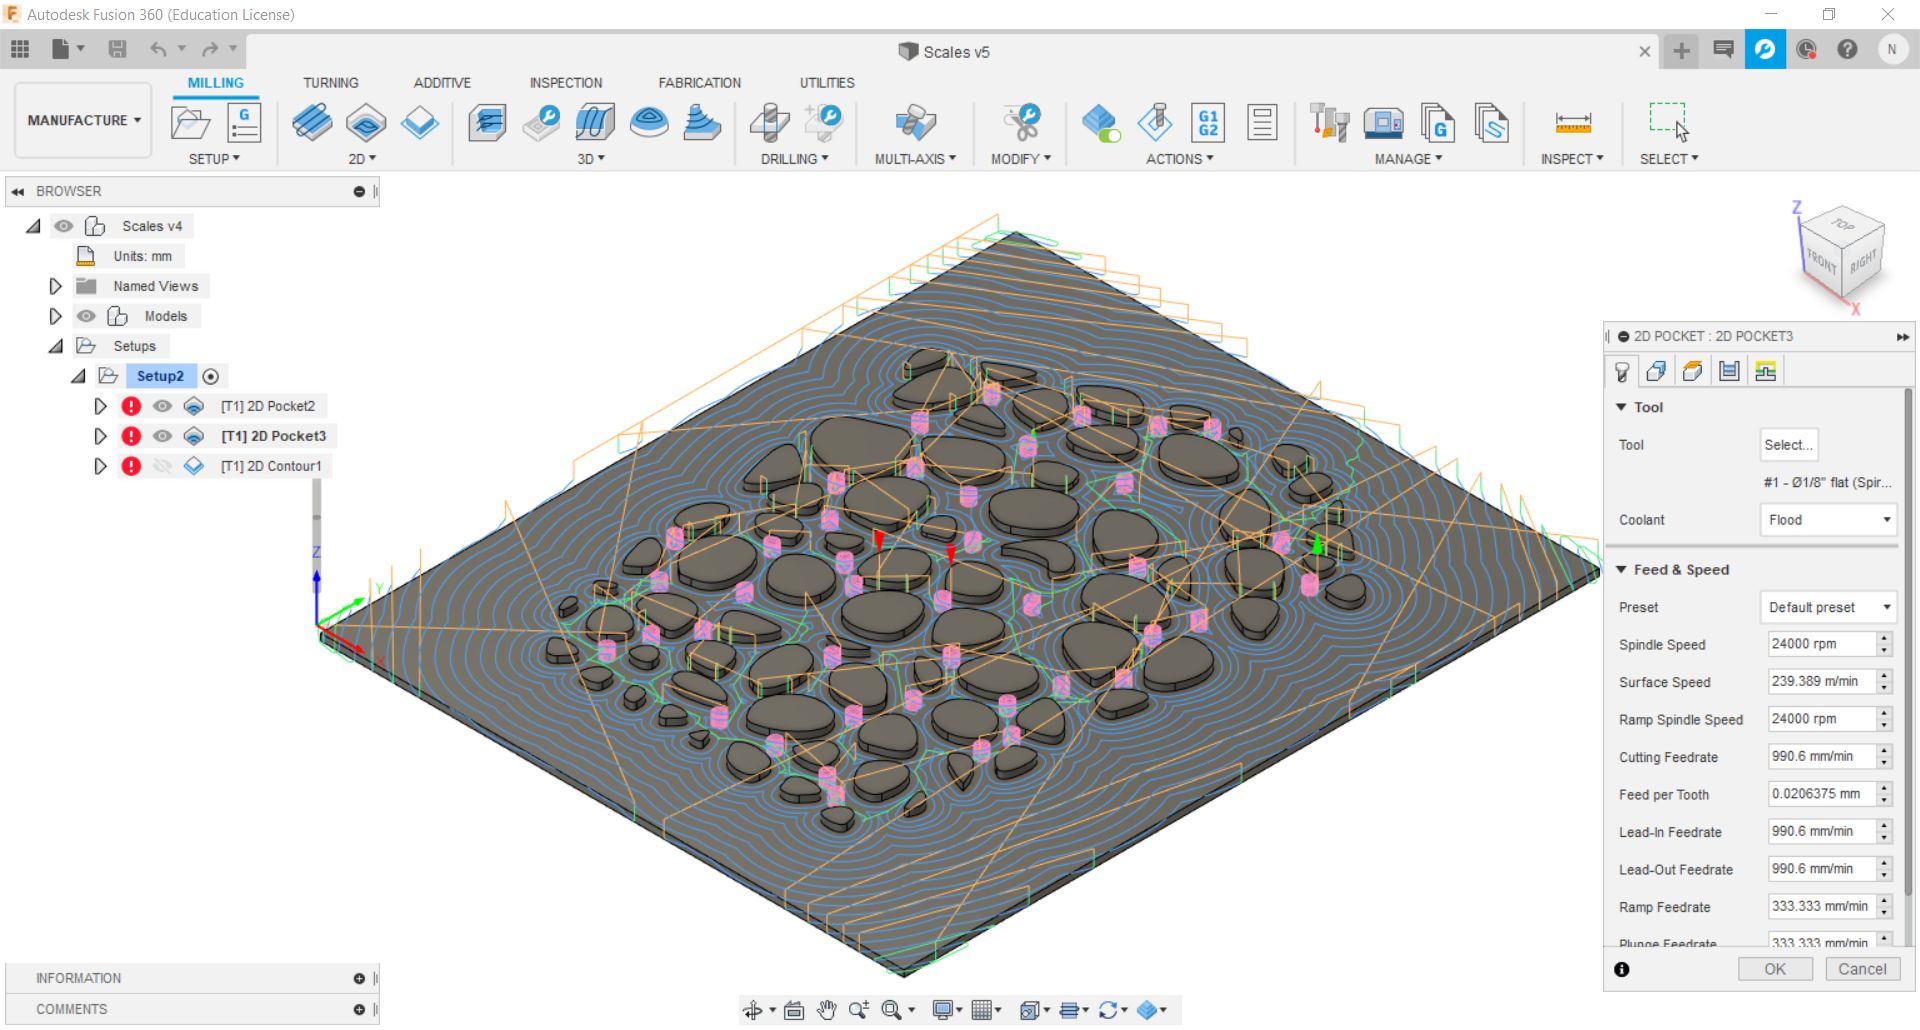
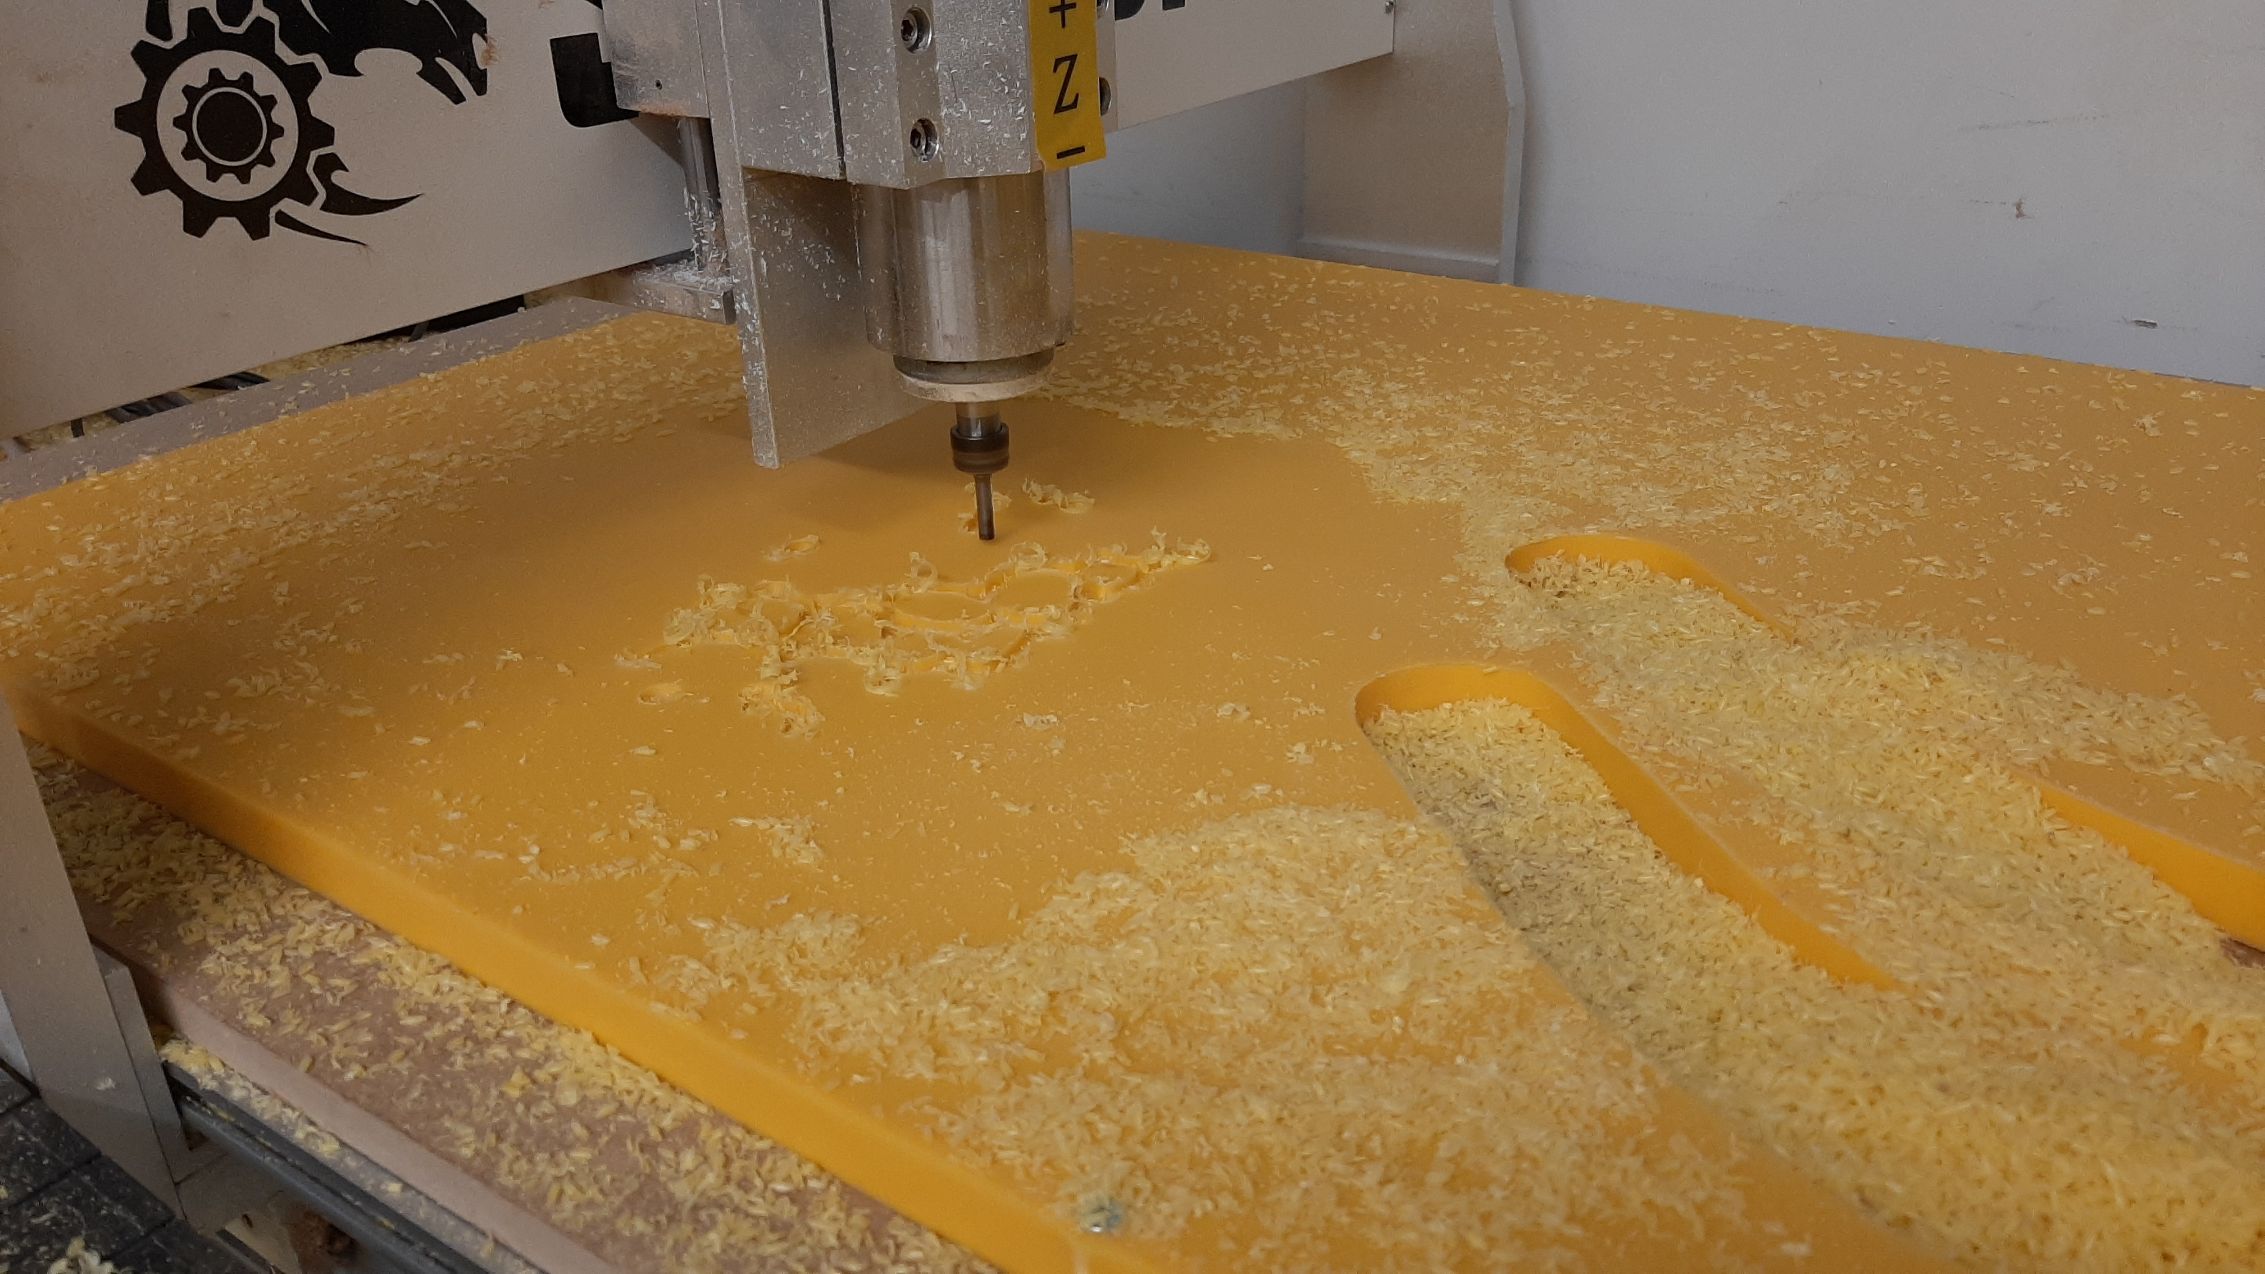
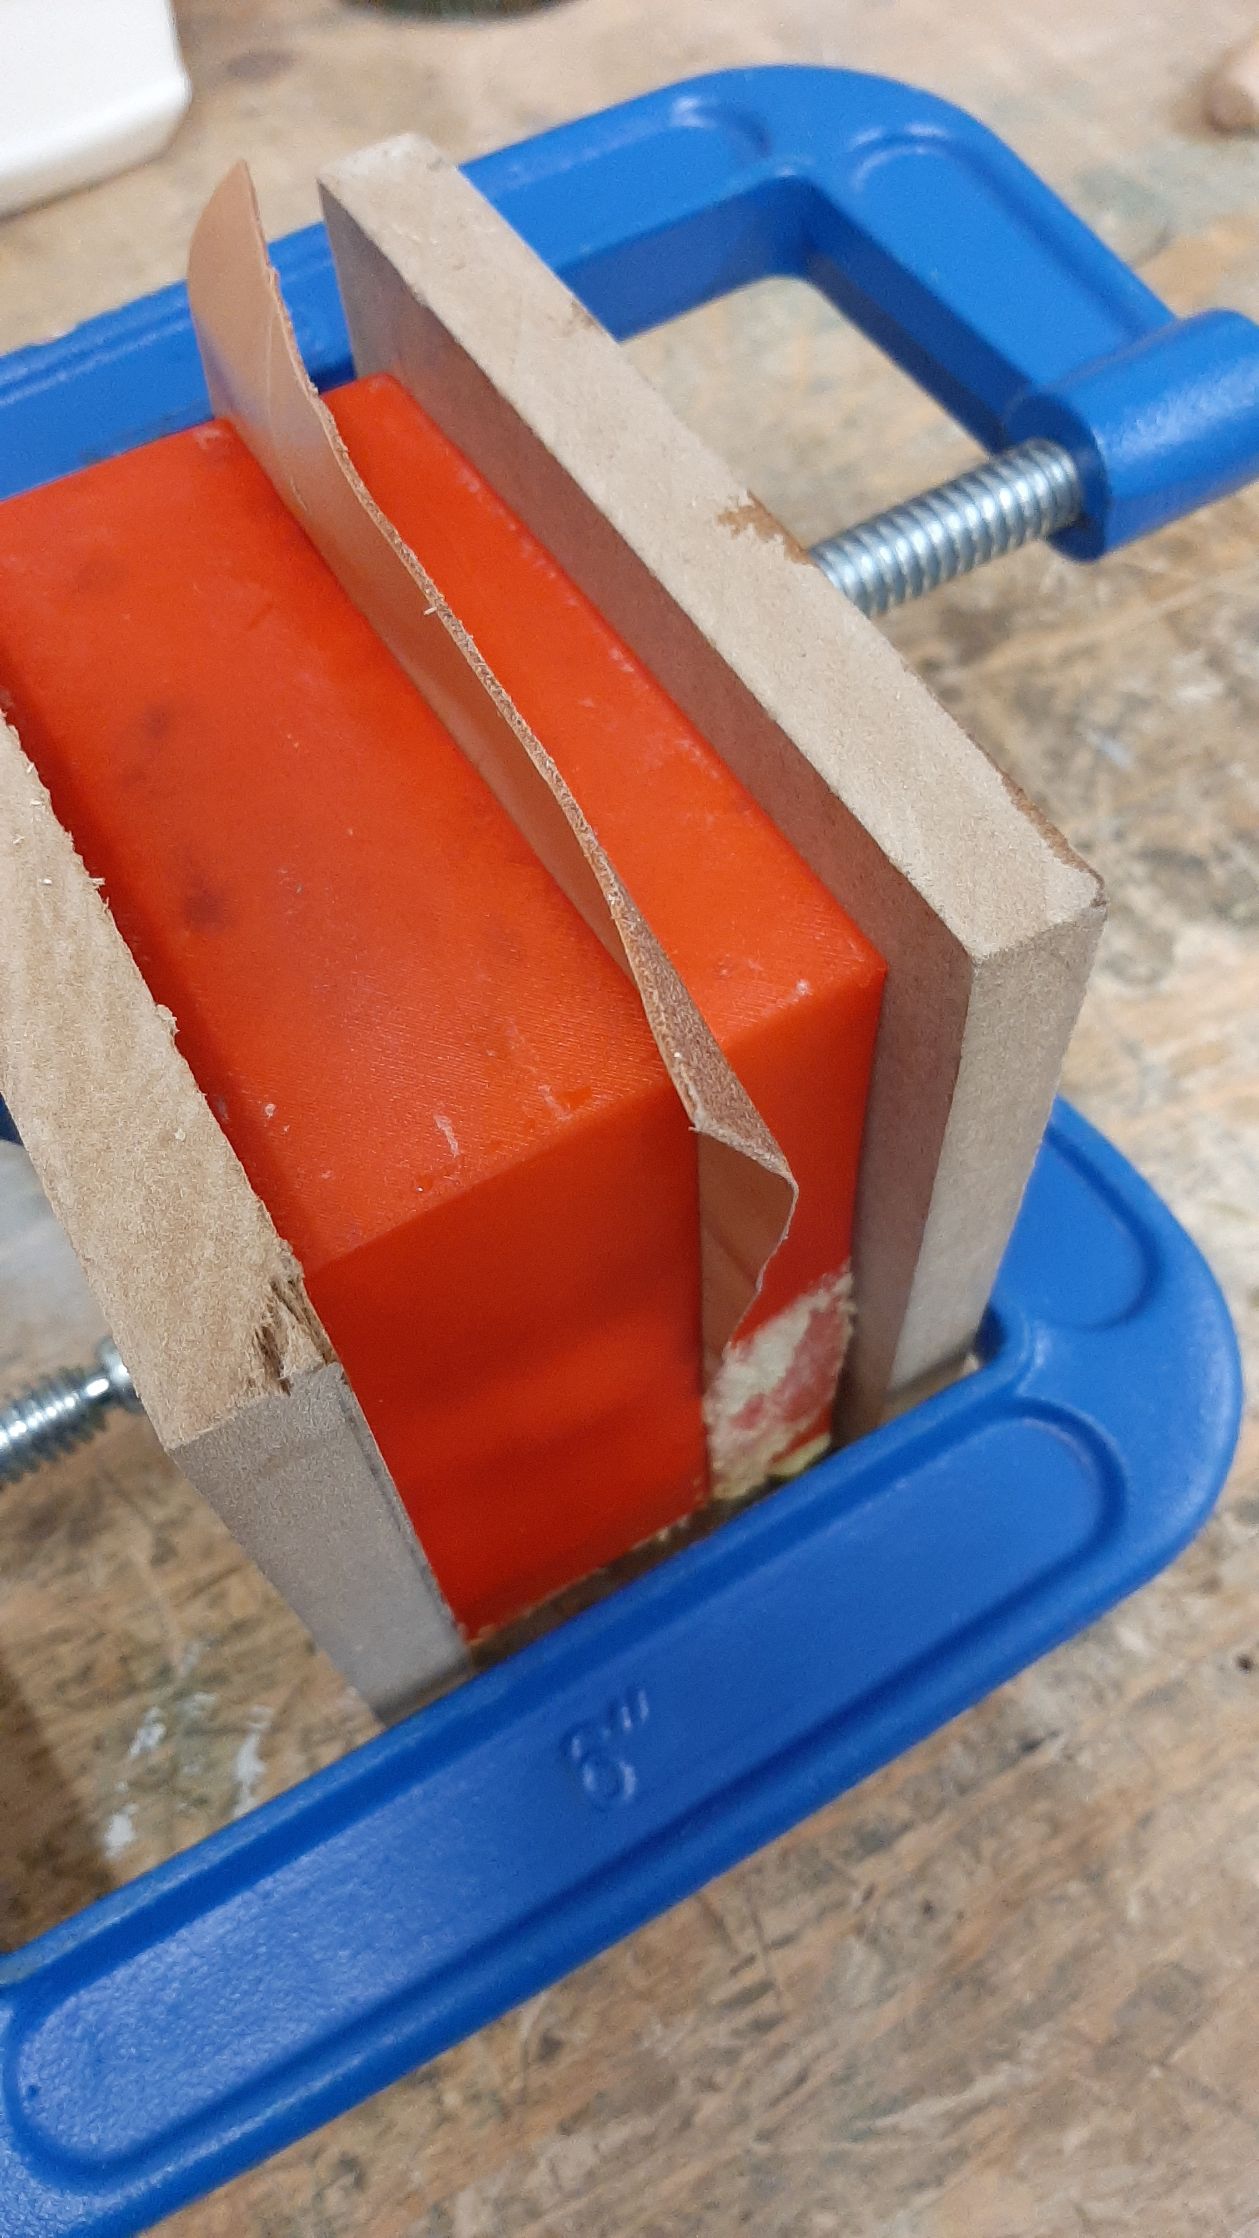
My first mistake was with the drill bit. The one I had in hand (that I used to set up my cut) was identical to the one on the machine, so I touthg I would save time and letf it on the machine. BUT! The one I mesured was in imperial, and the one on the machine was in metric system. Result; I did my set up for a 6,125mm bit, and instead used a 6mm bit. The wierd results on the sides actually represent the time it took me to realise my mistake. I then ran to the machine, stopped it, then changed the bit for the rest of the job. I cutted out the extra parts after, but it was still much visible (even on the leather)
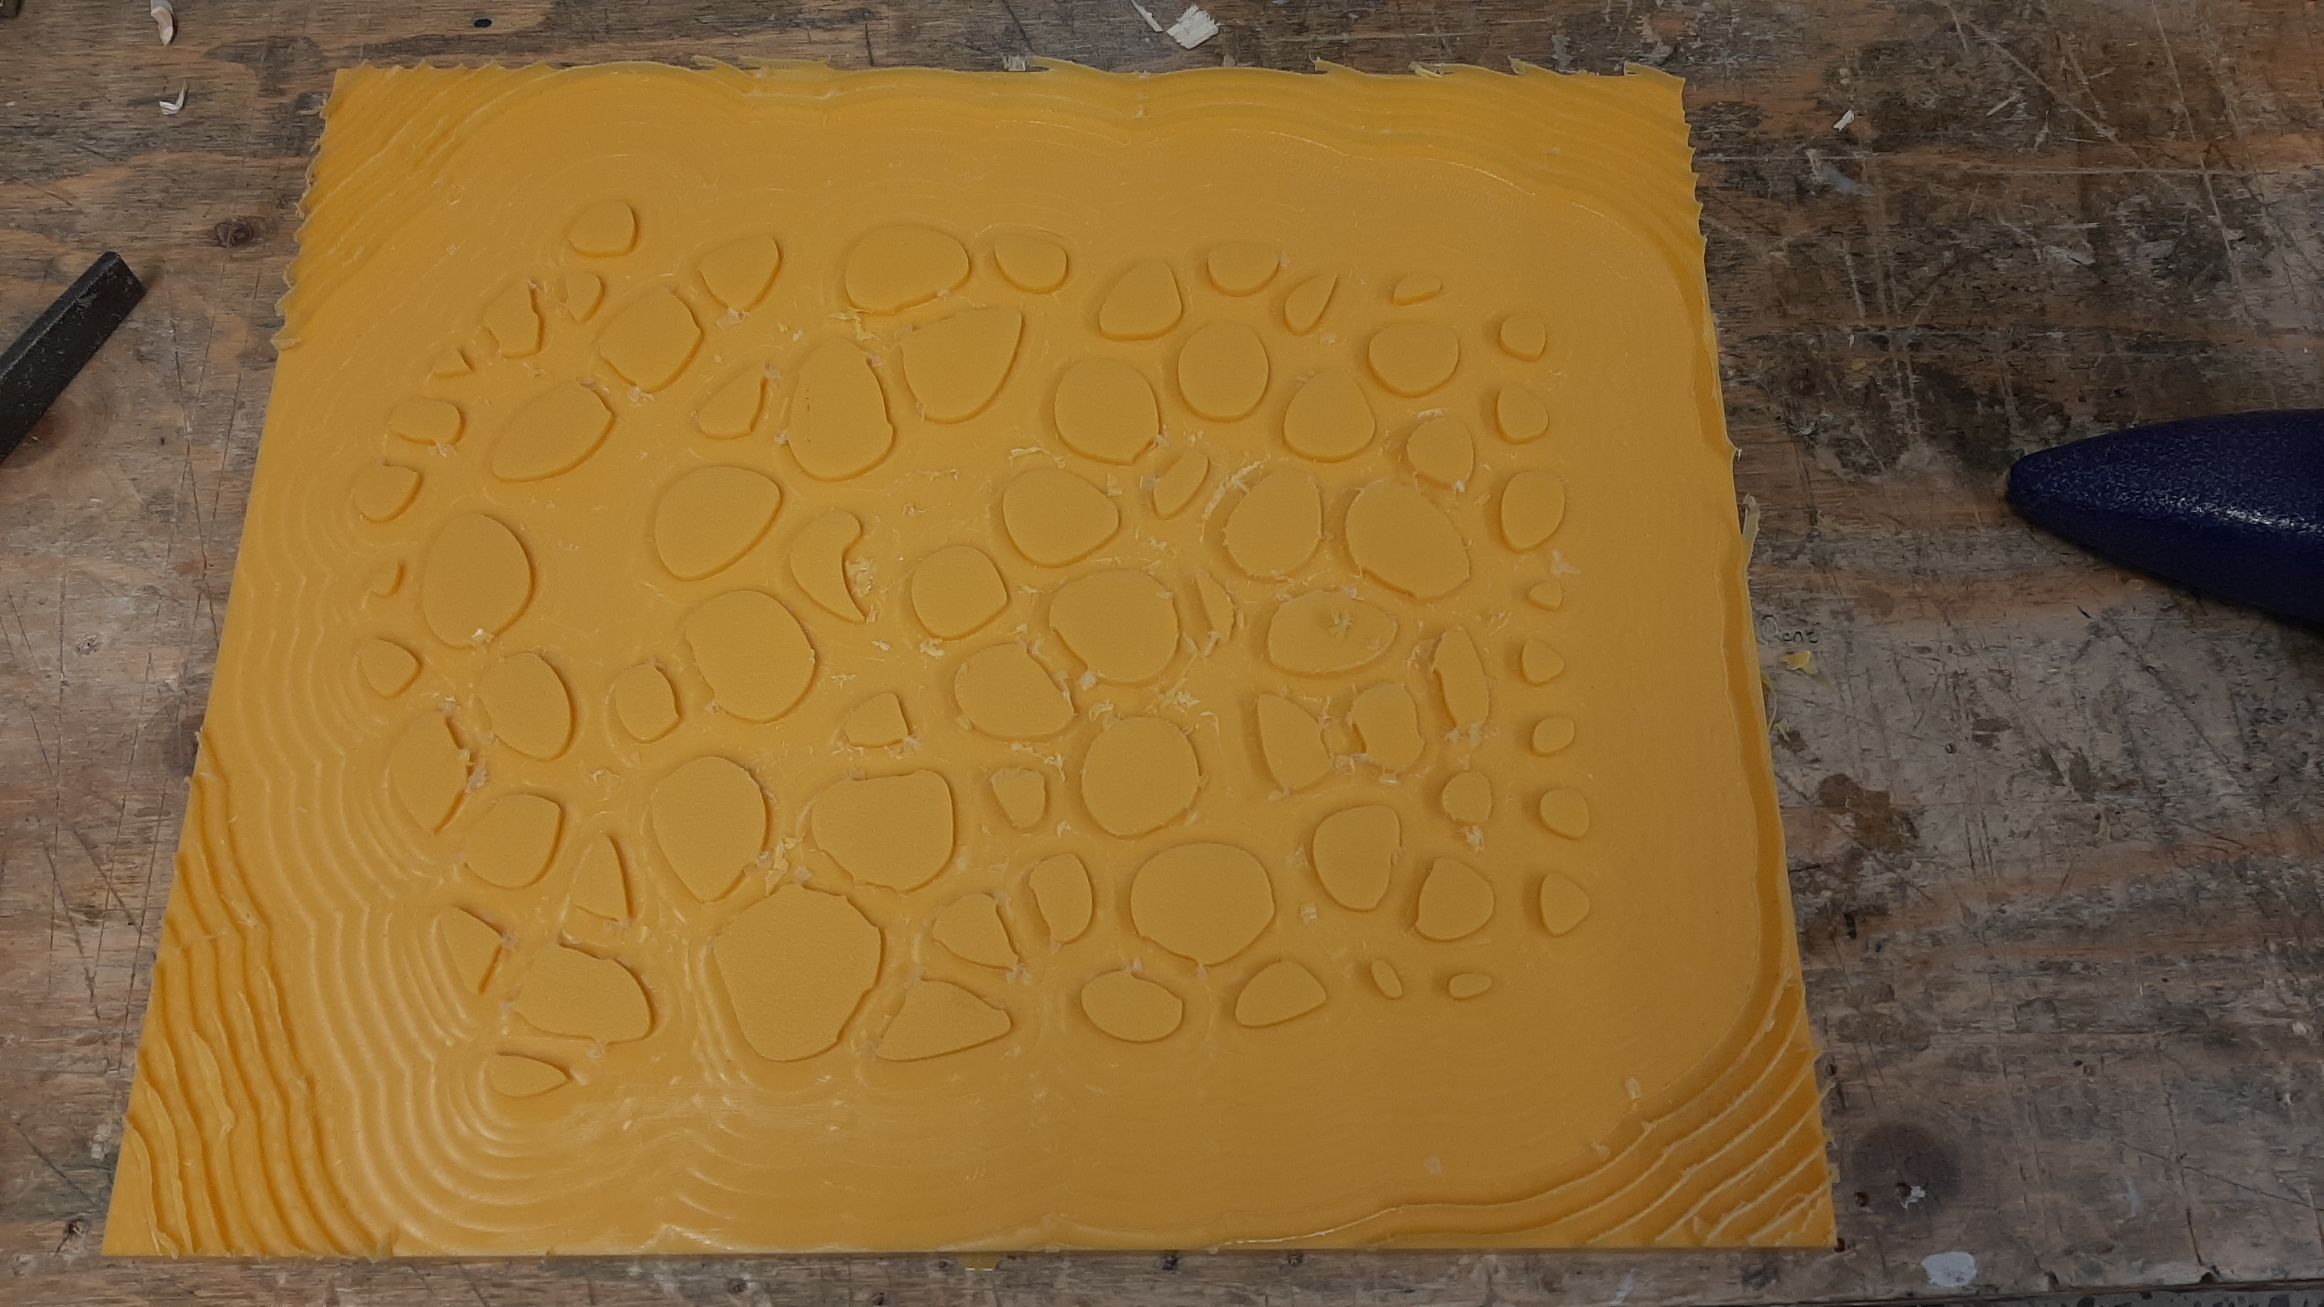
My second mistakes was with the files. My cut was in 3 different codes. one for the rough job, one for the detailed work, and one for the final cut, to get my shape out. Somehow, I mannaged to put all 3 in one folder, so the CNC did all 3 jobs as one, without ever stopping for me to change the bit for a 1/8in. It gave me weird looking shapes everywhere there was supposed to be a detailed job.
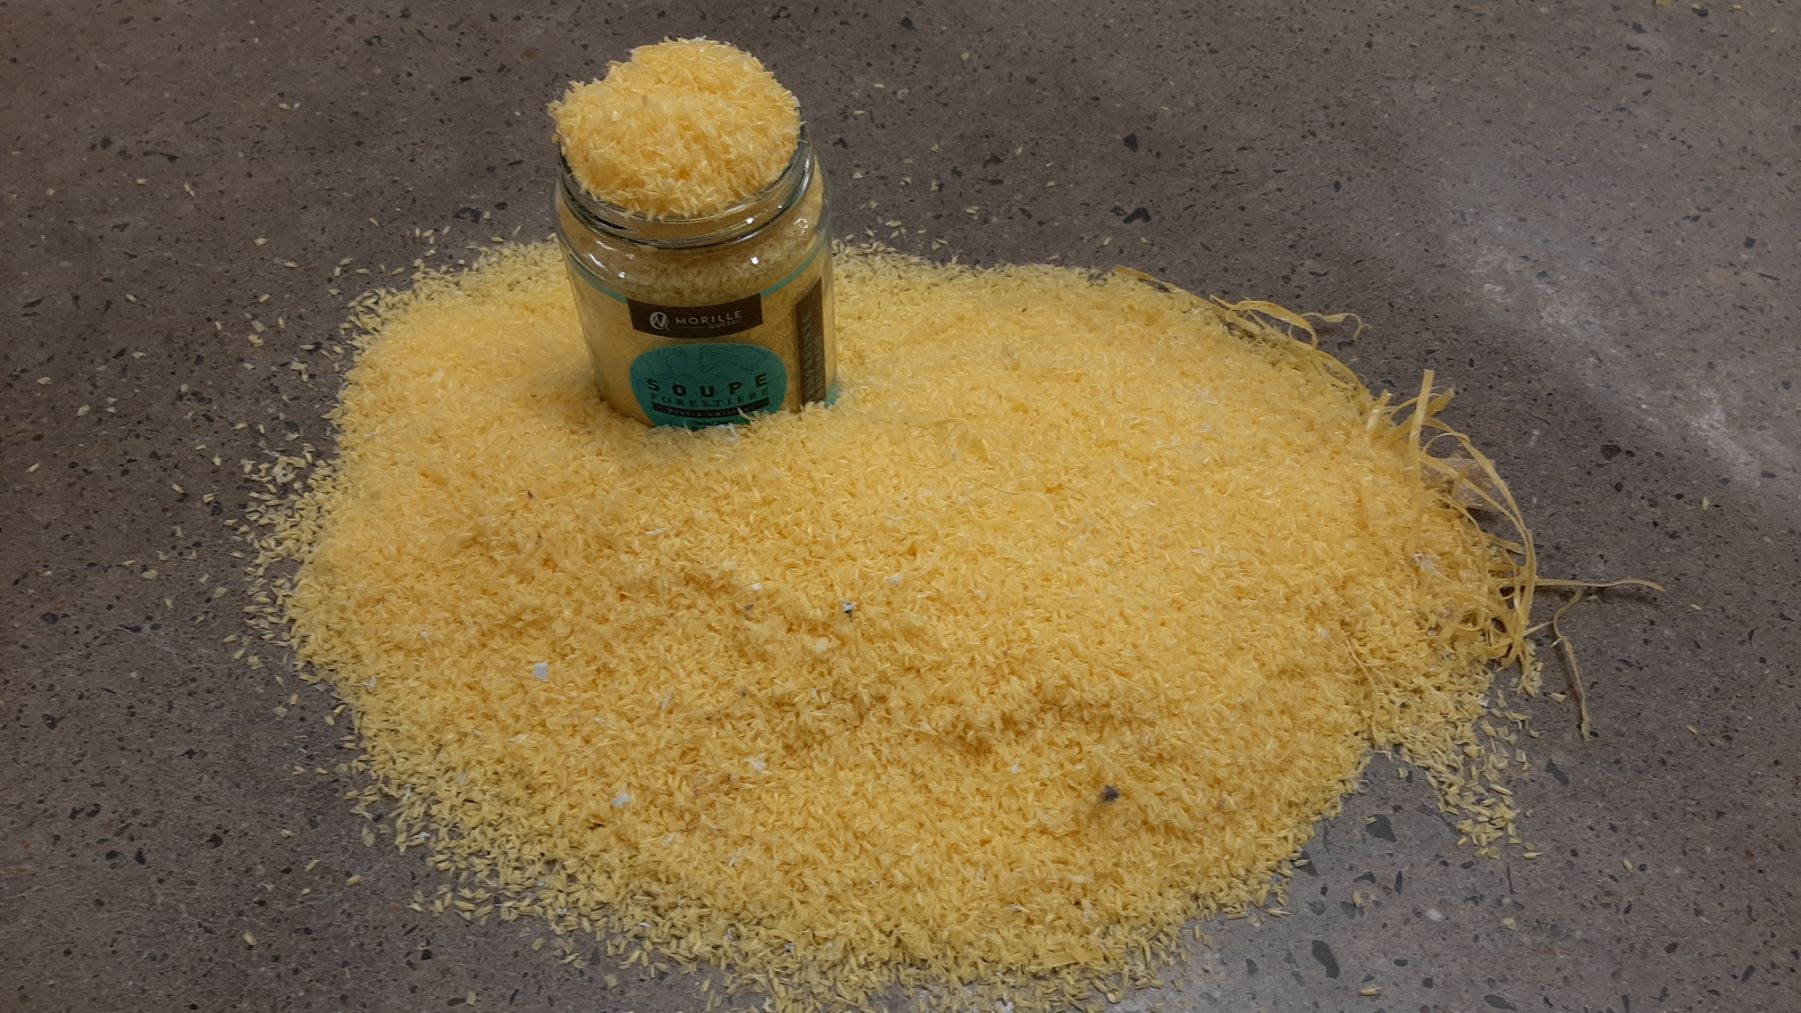
I kept some of the scraps for a future project... but there was A LOT of it! Not so enviromental friendly...
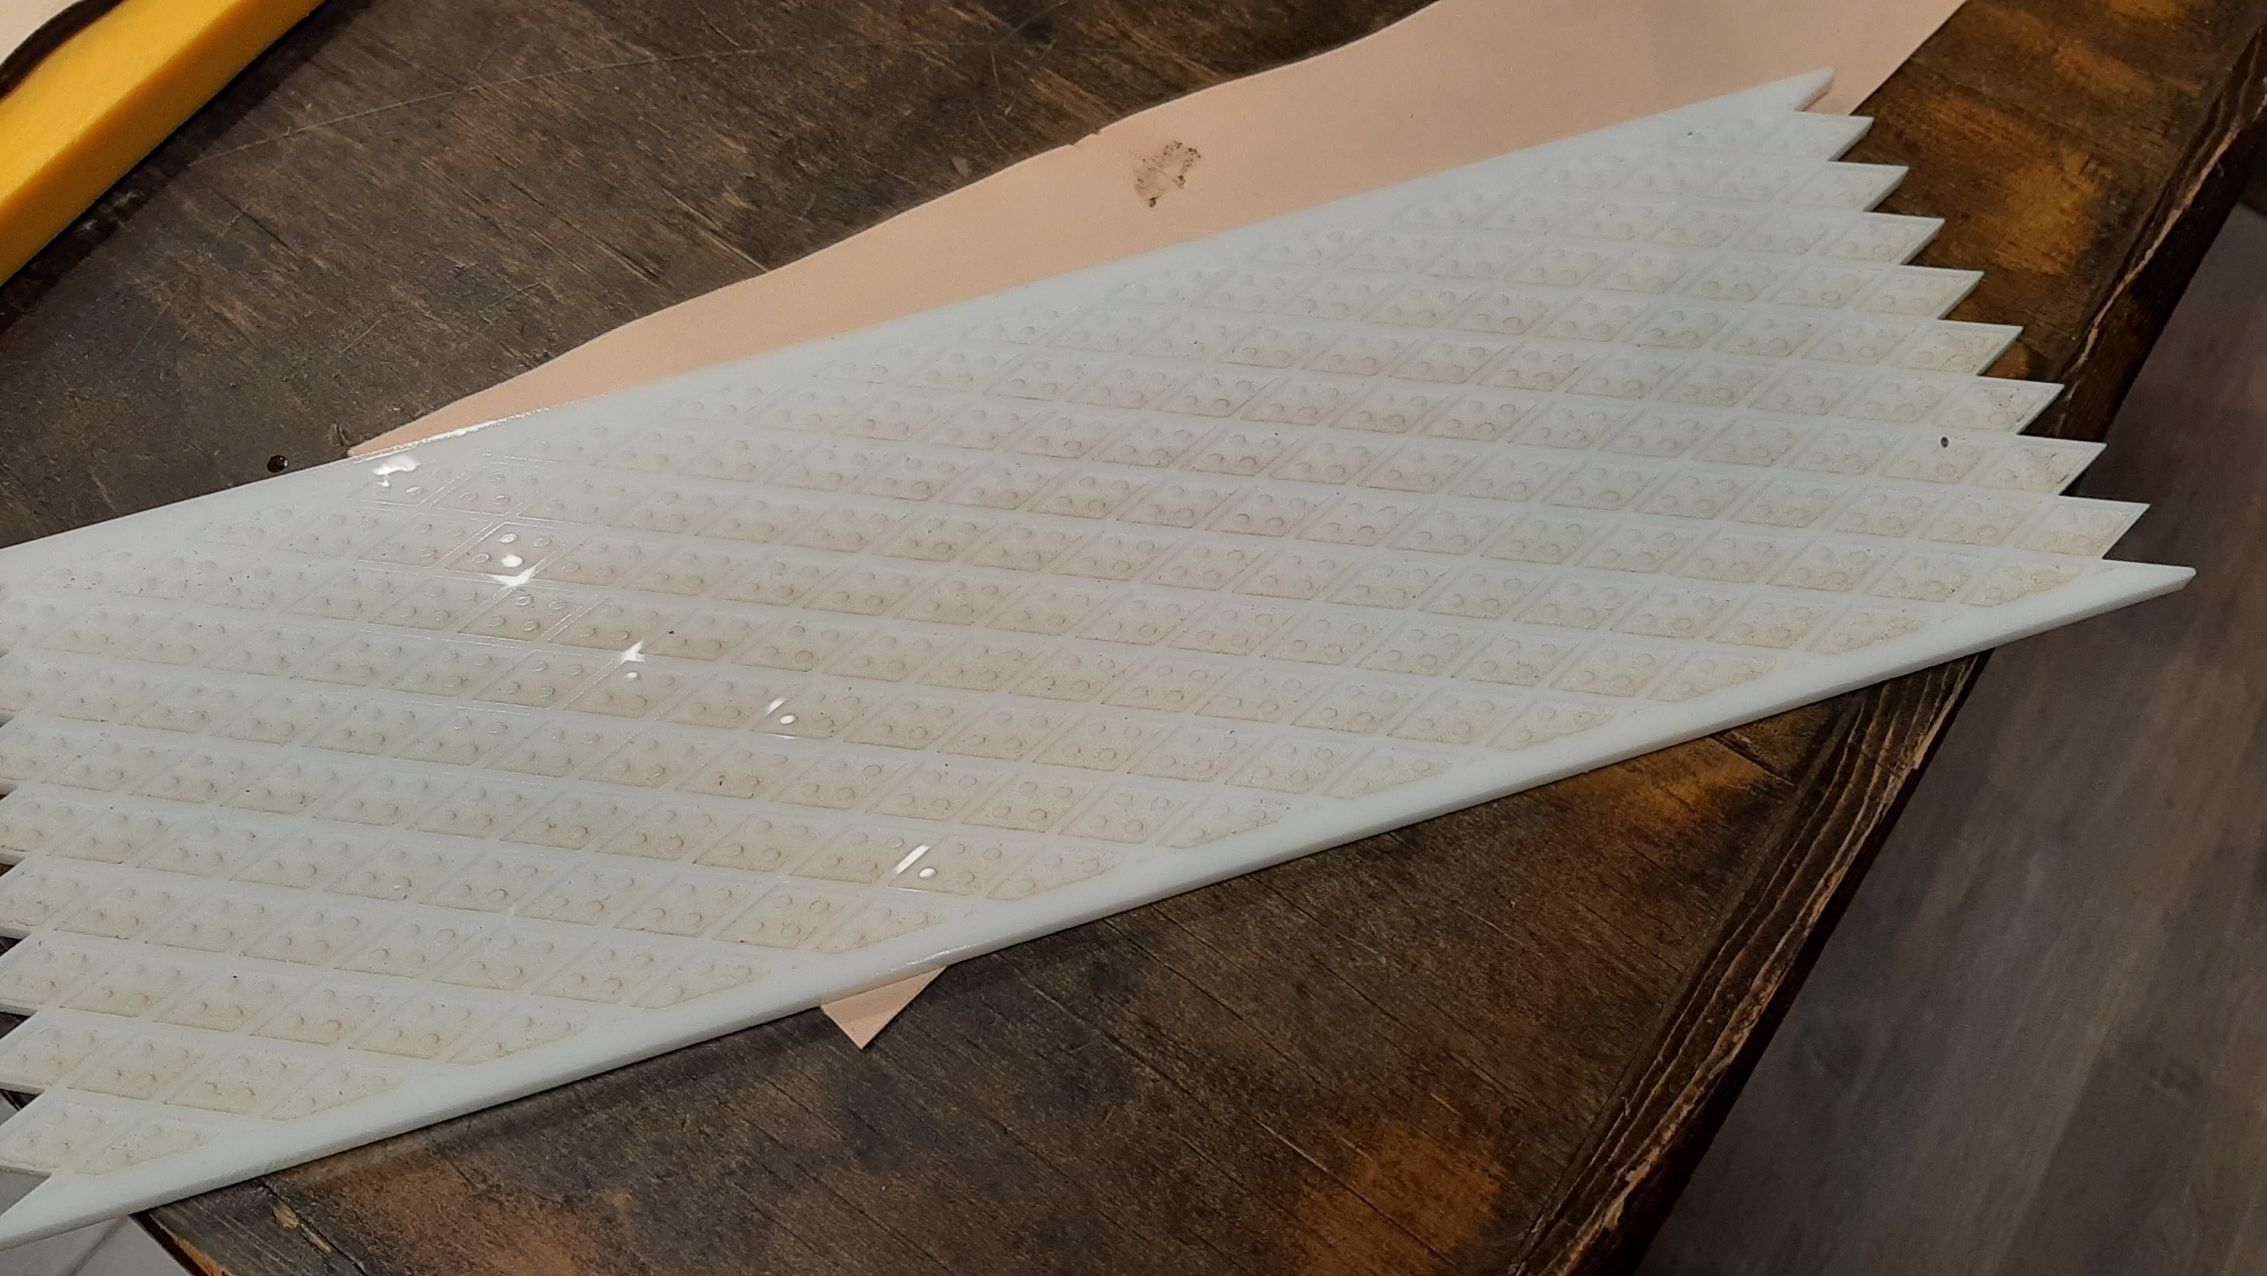
To do the negative of my pattern, I exported the drawing of my 3d shape from fusion 360. It's MUCH more simple to do that from Fusion than Rhino! the file was even pretty clean. I used Adobe Illustator to do the rest of the modifications. I used the brushes tool to make an offset of about 2mm around my original shapes (illustator is not exacly the best software to mesure distance). This offset was to leave enough place so the leather would be bend and would fit in the cracks intead of just cutting it.
Artisans d'azure
With this done, I returned where I did my fashion design internship. They are specialized in LARP and medieval costumes, they use leather on a daily basis to do helmets, armor, scabbards, bags, etc.
A lot changed since my internship, and it was wonderful to see all the inovative ways they do their standard products. Before, for the helmets, they nailed the leather on wodden molds, then timmed the parts with the holes on them. They had to assemble together parts that were not necessarily standard, then mesure them to fit the dimensions of their standards sizes.
Now they save a lot of time by making their patterns according to the dimensions of their standards sizes, then sew them together with a Walking foot, and finaly put the "cuir bouilli" on the mold, 3D printed according to their needs.
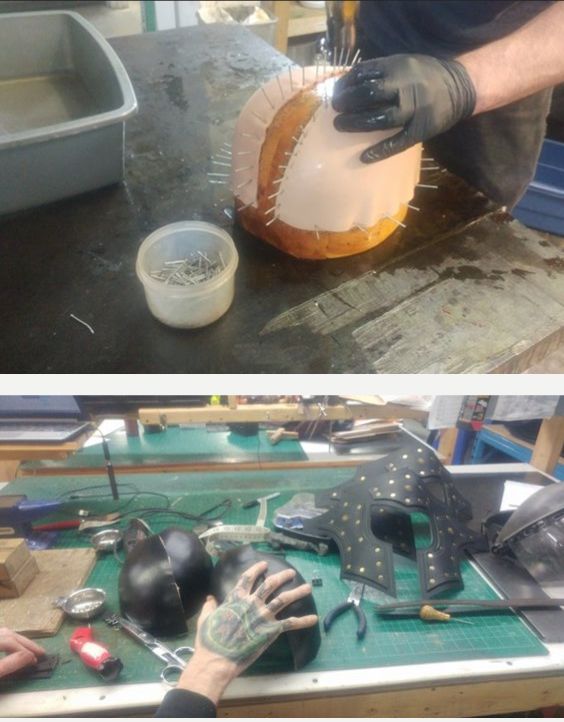
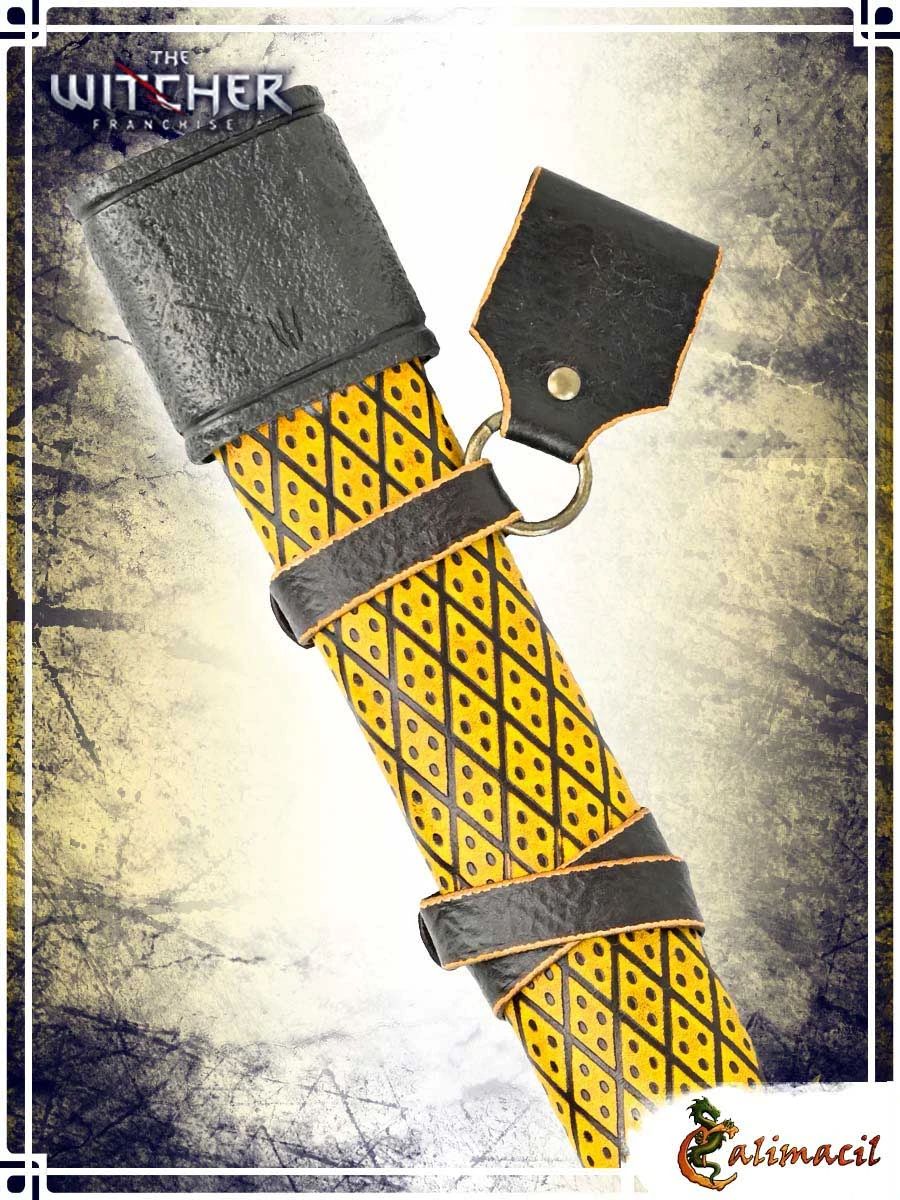
They also explored some way of using 3D printed patterns with their pressure machine to make any kind of embossed regular patterns. For more details: https://en.artisansdazure.com/collections/scabbards/products/ciris-sword-scabbard-the-witcher.
Max spent some time with me, shared some expertise, and some of his woories about my project. Since my gaps between the positive and negative sides of my mold were not that big, he recommended me 2-3oz leather. Thicker leather would probably have cutted, cracked or not embossed as much. We left the leather in tap water until it was completely soft, like fabric. The time depends on the thickness, because we want the water to reach the middle of the leather.
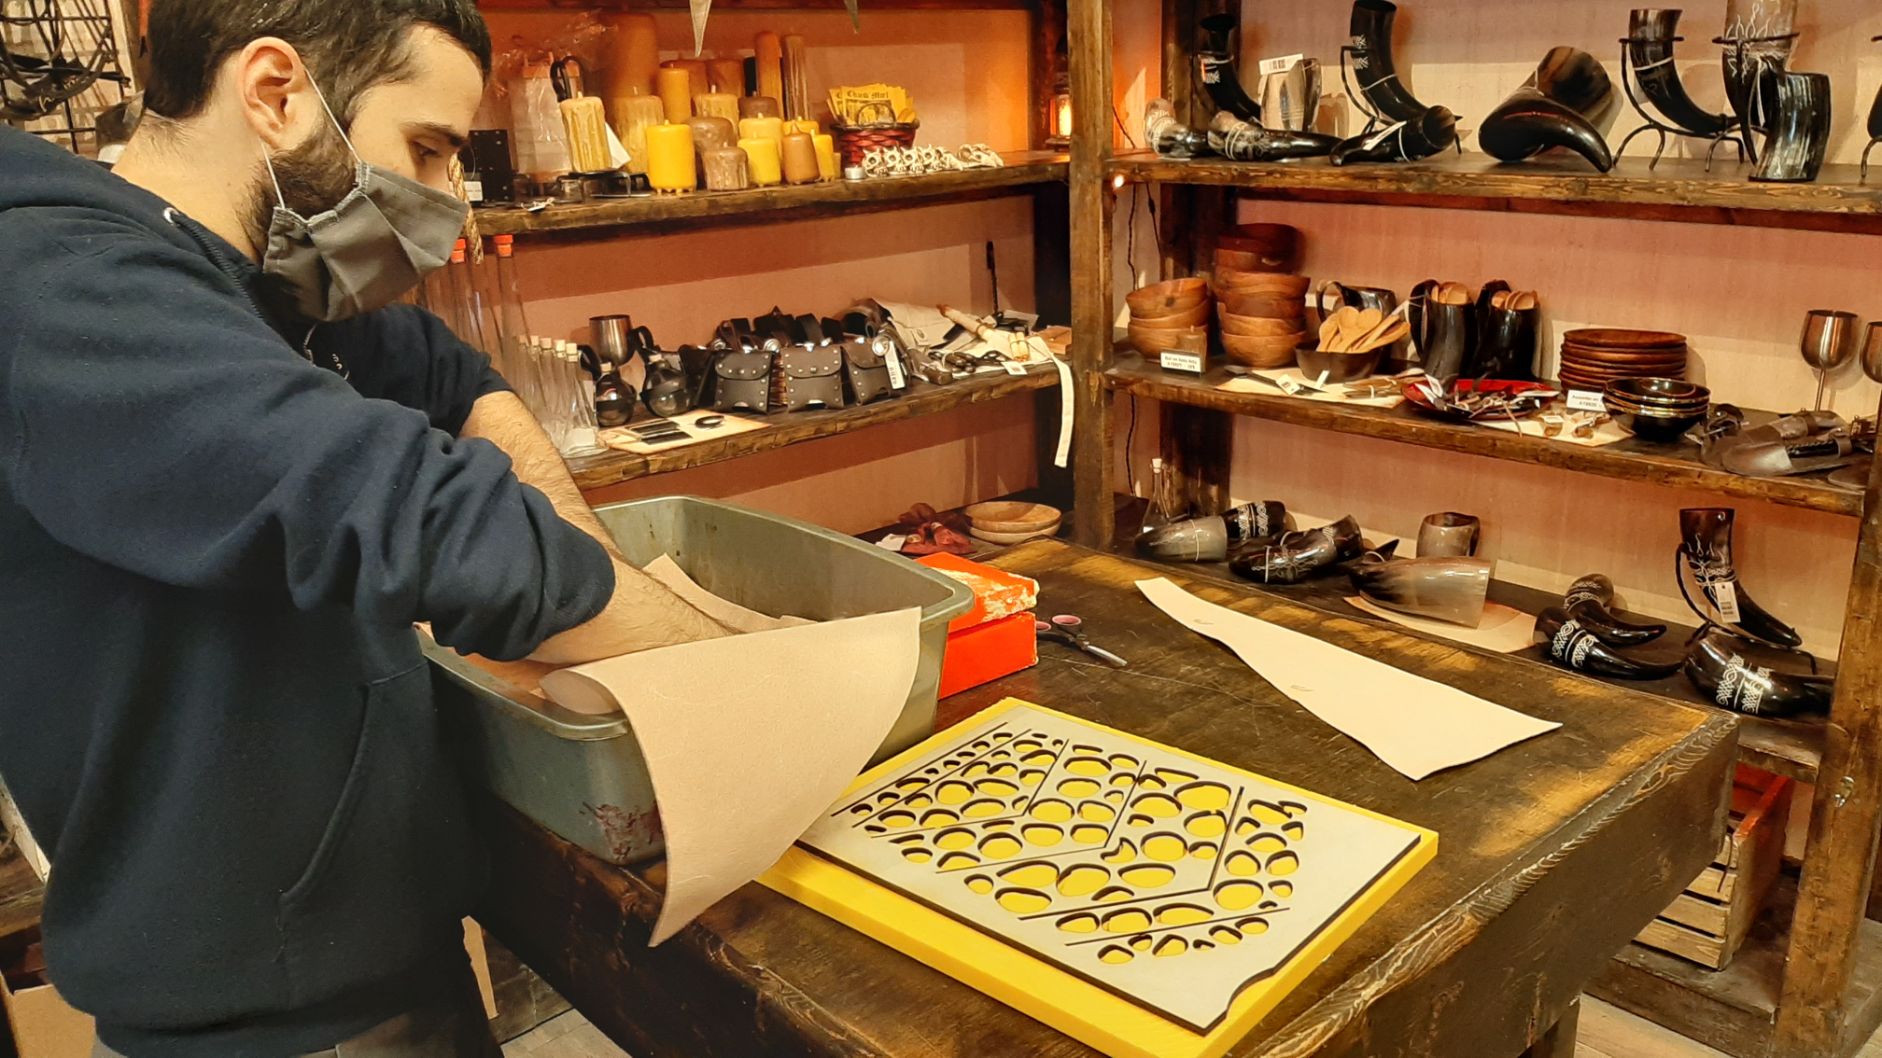
Because of covid, I was not allowed to be in the workshop, but I was allowed to record everything from a distance.
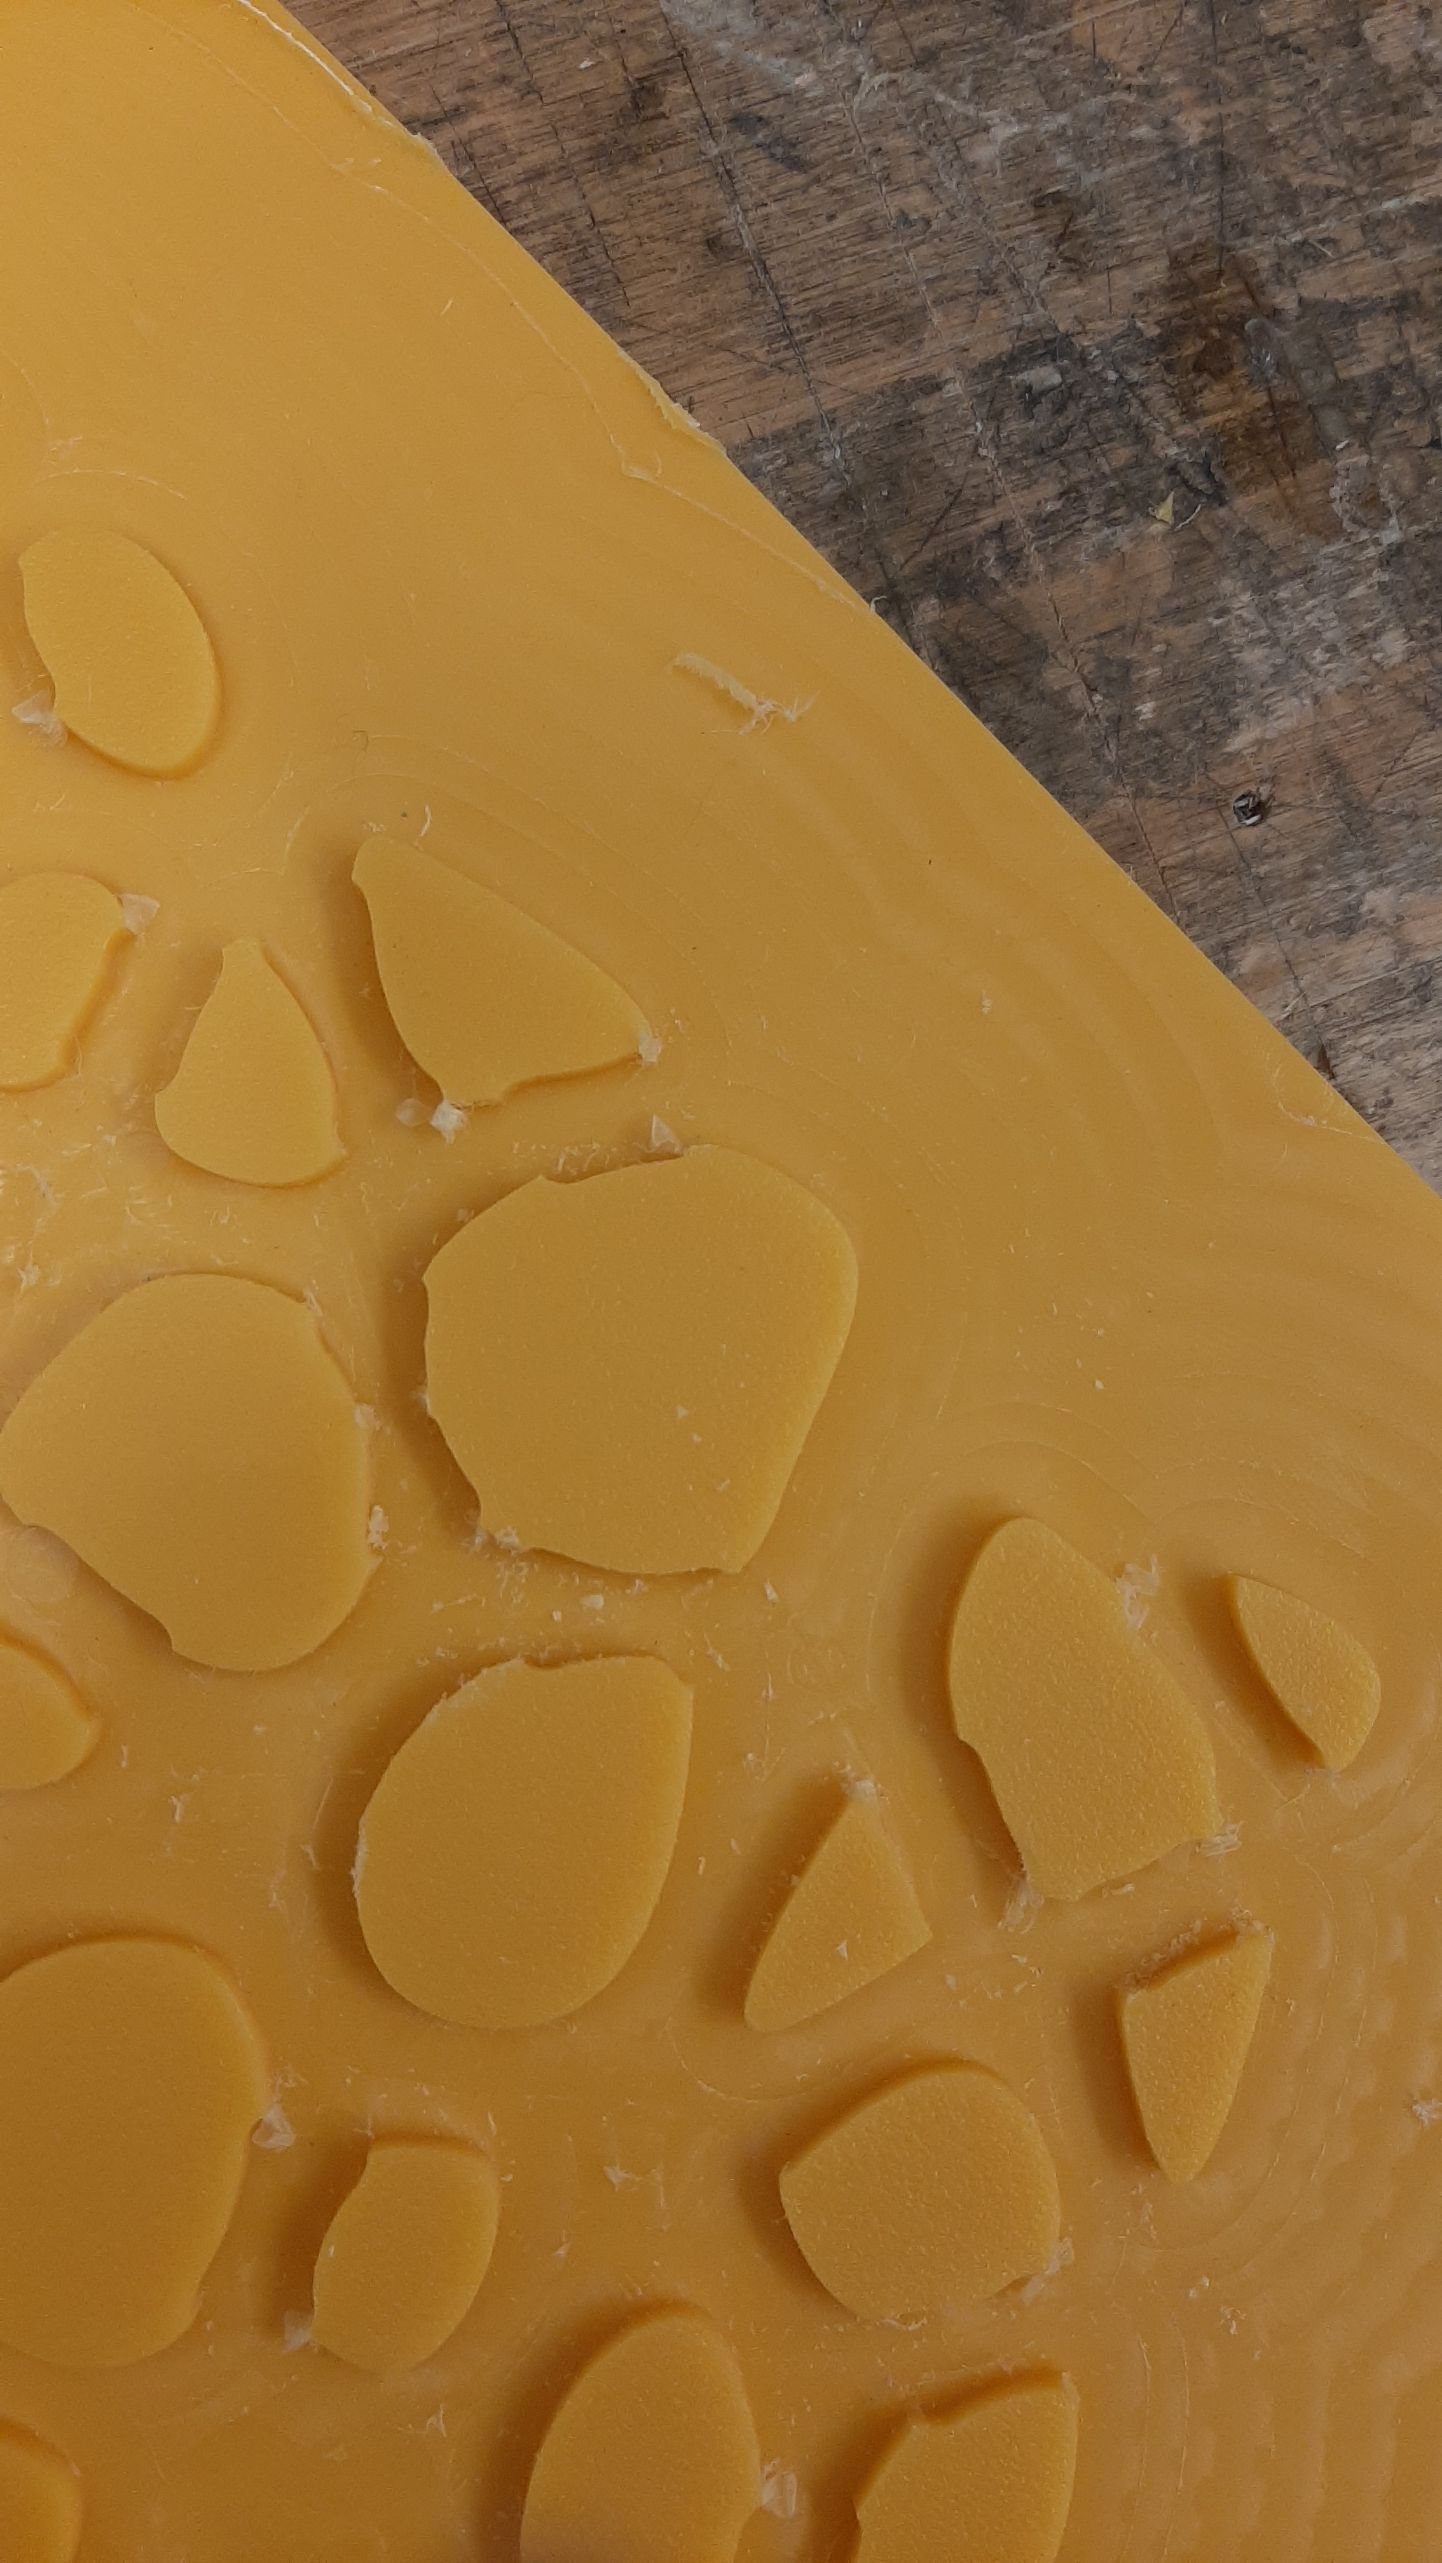
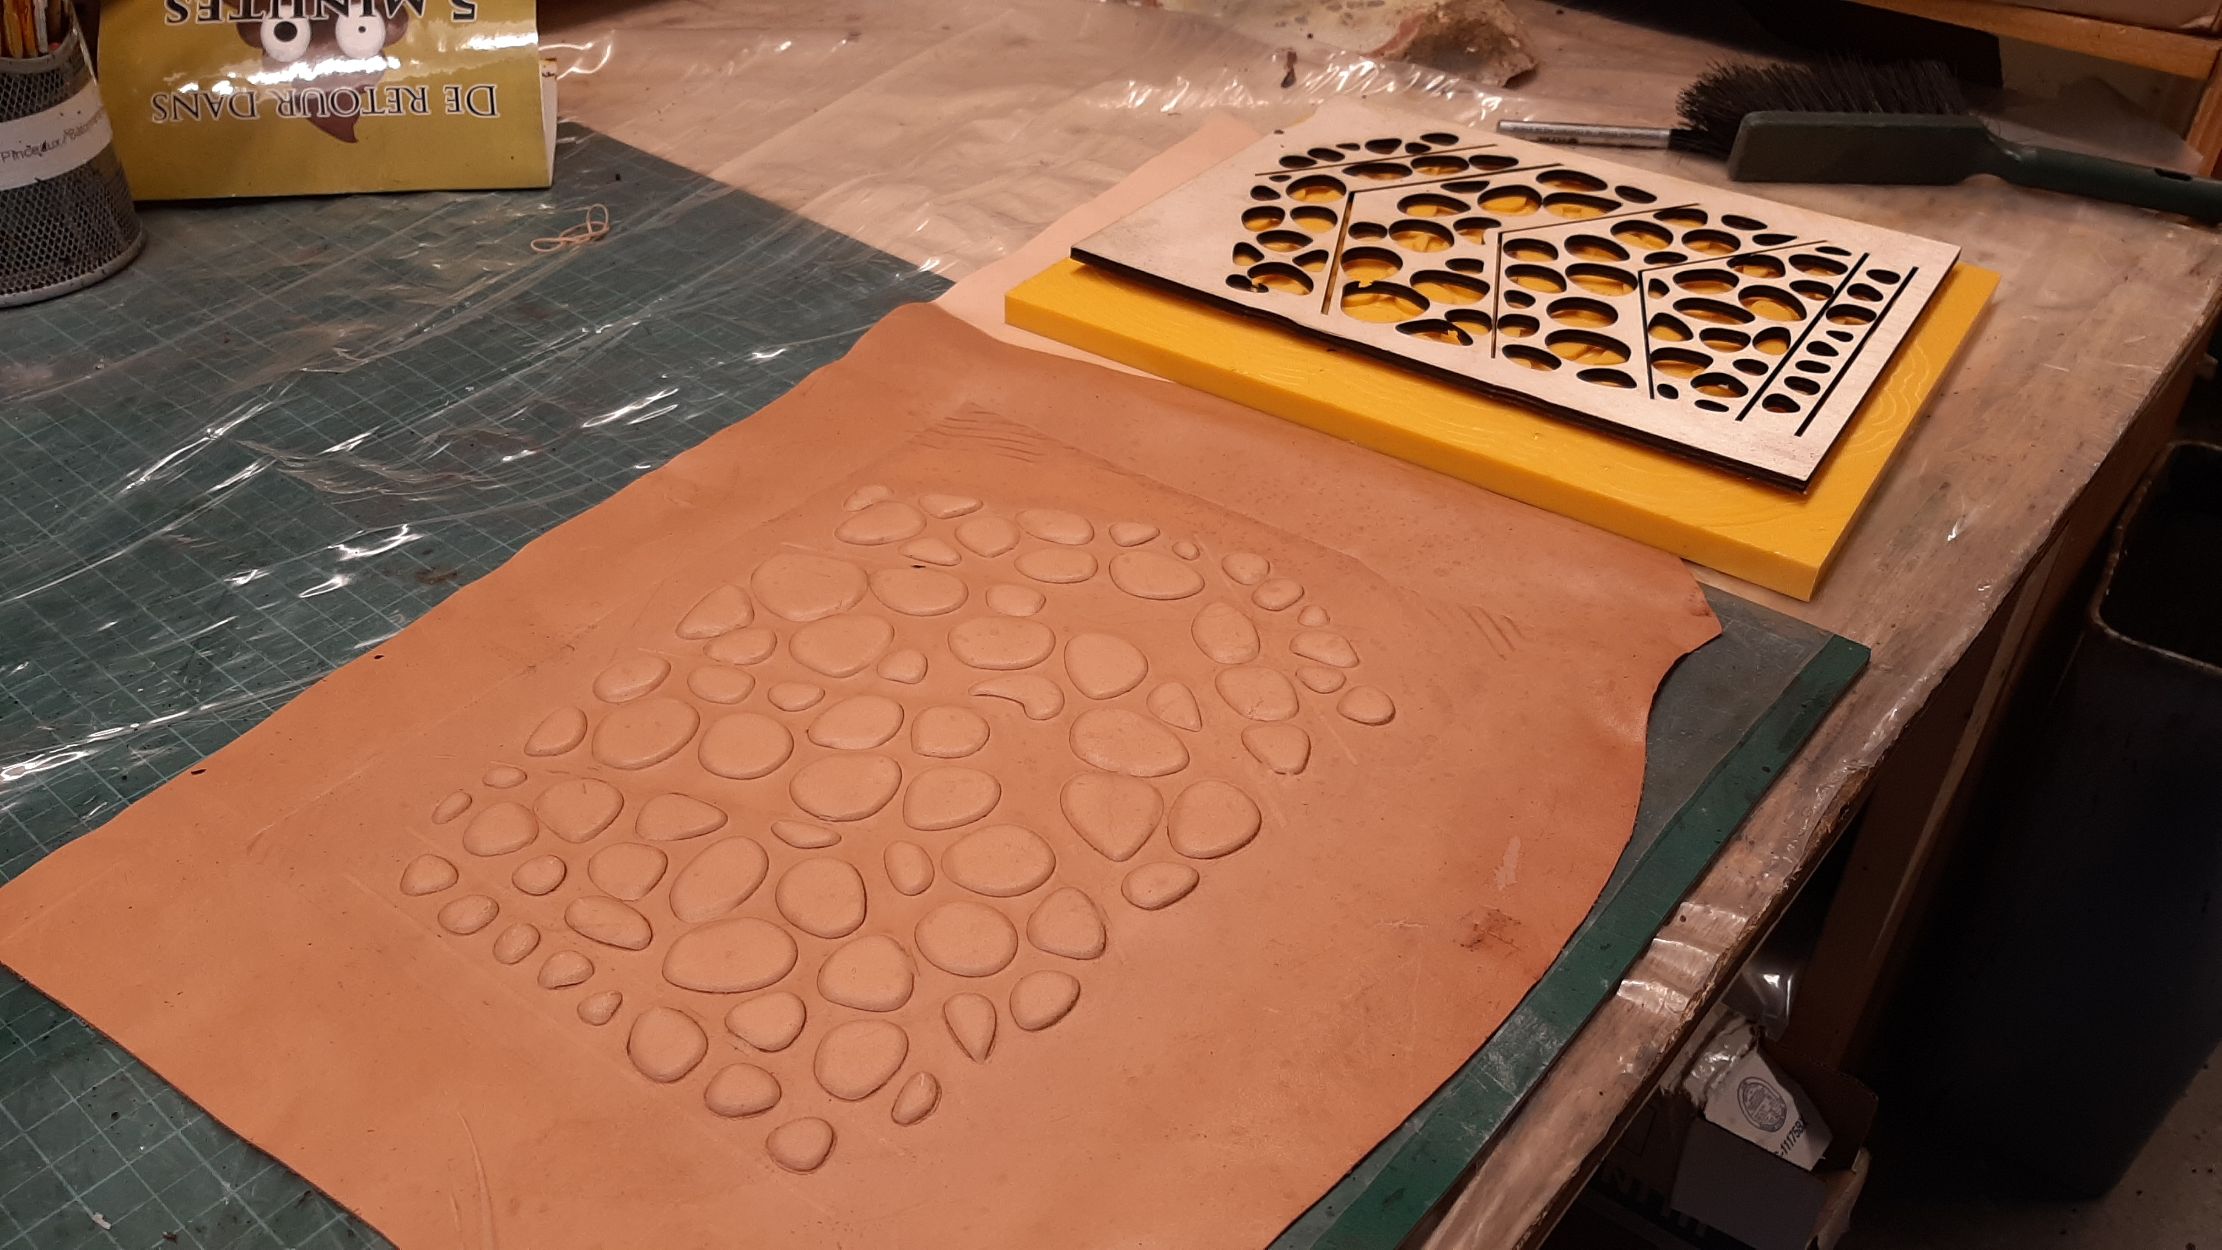
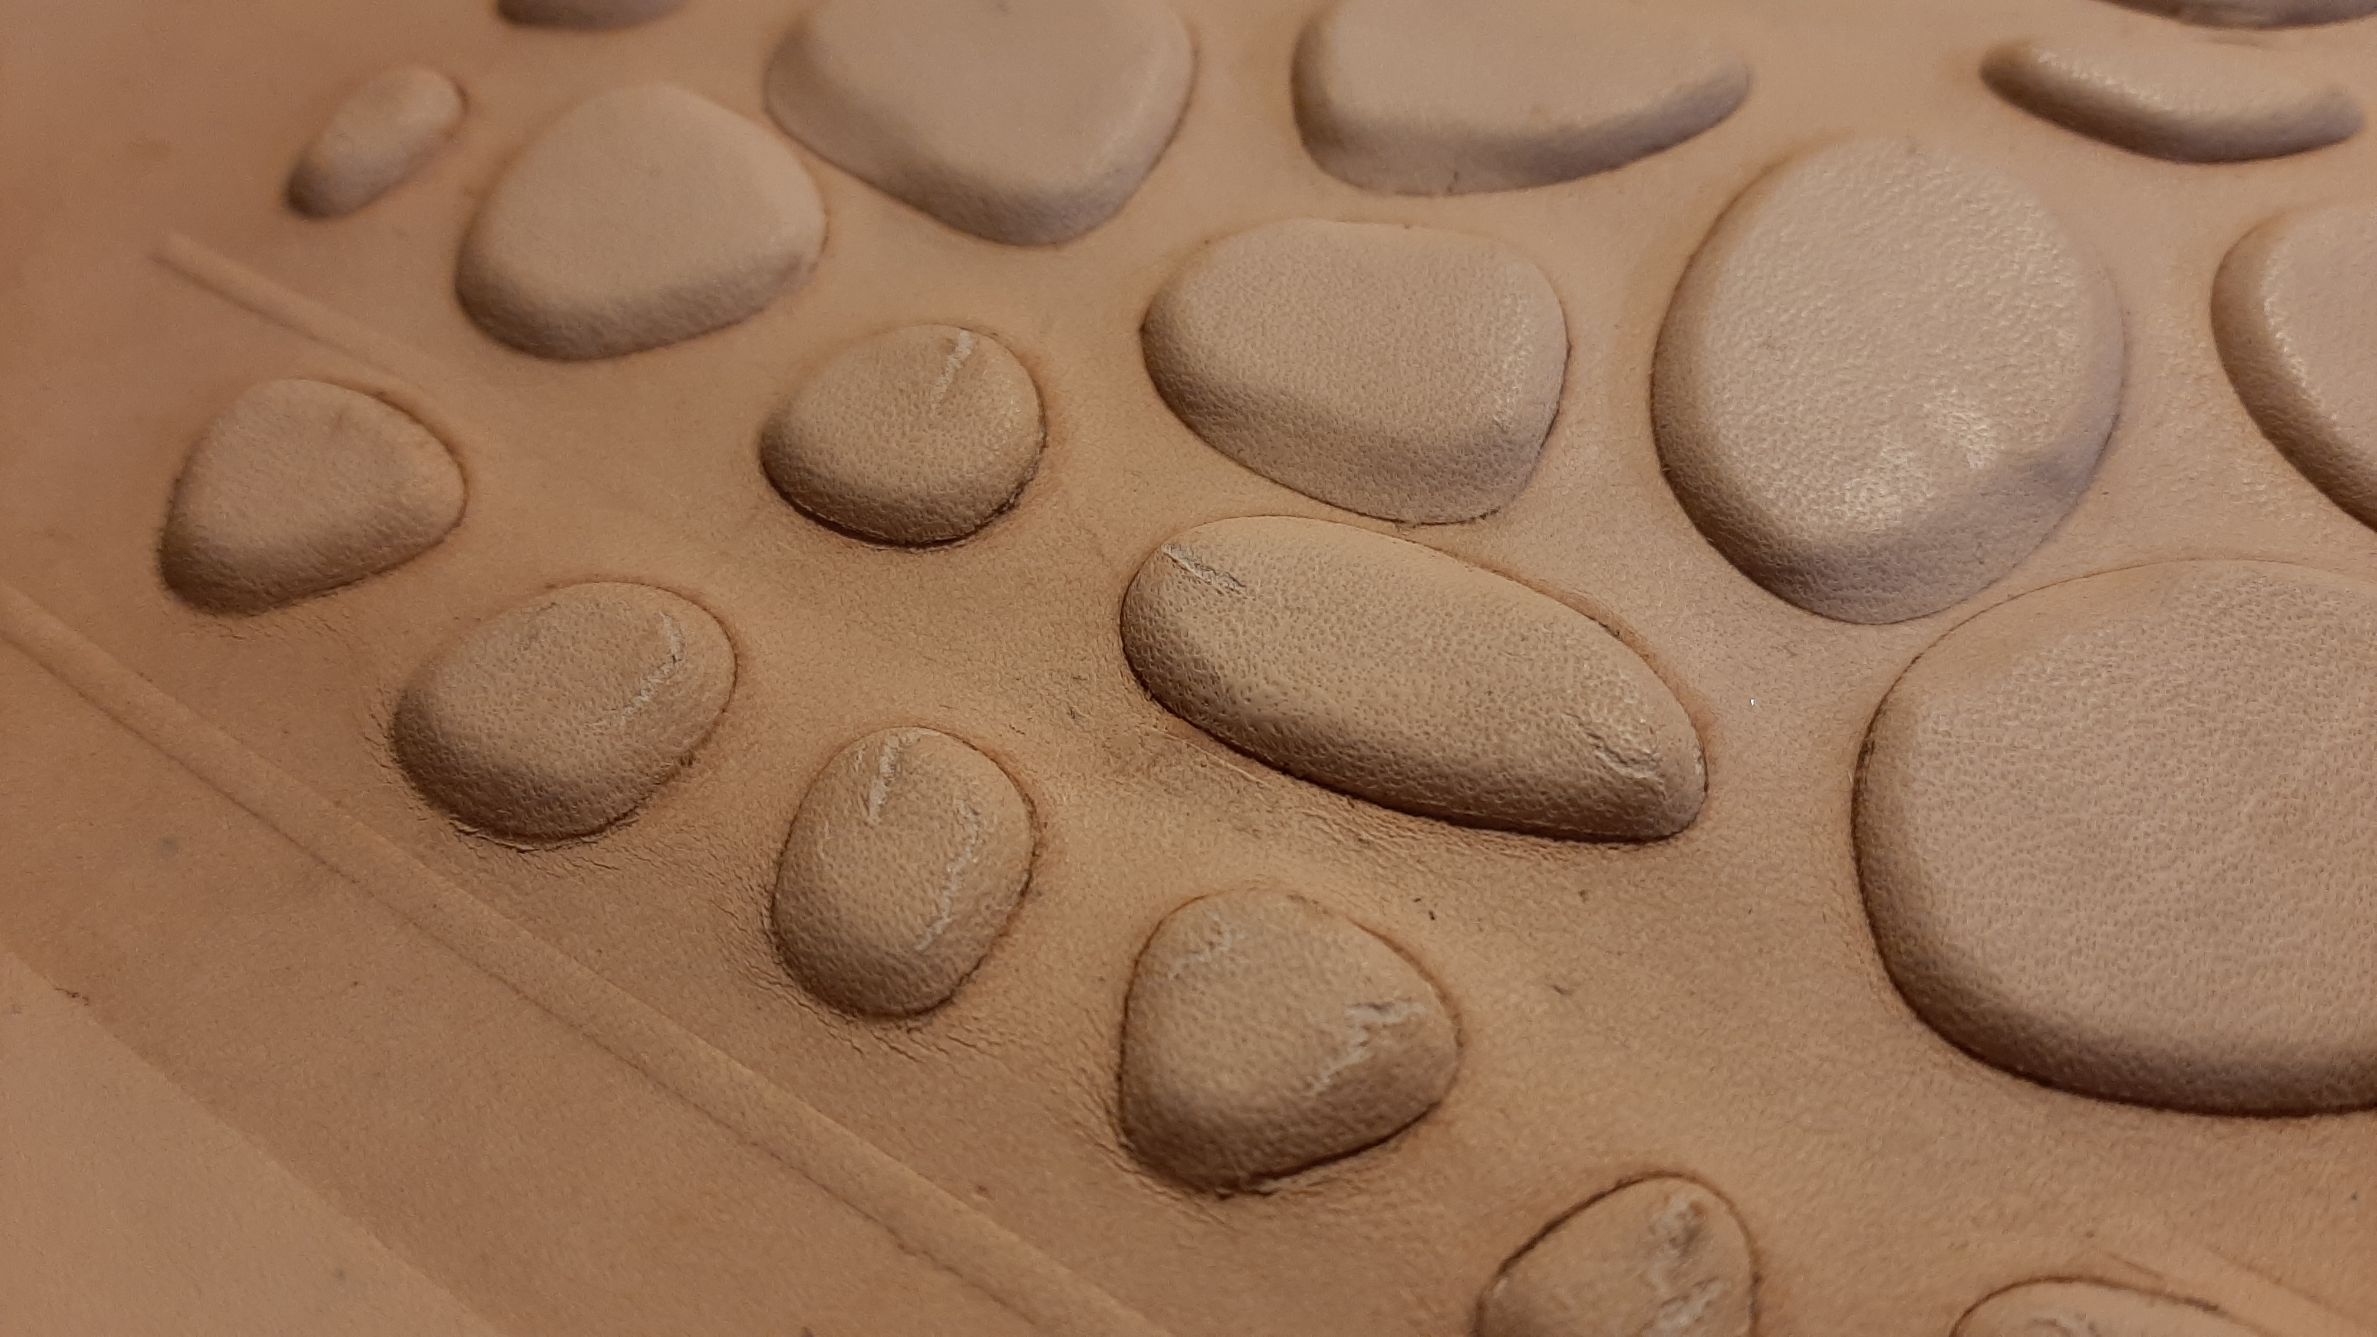
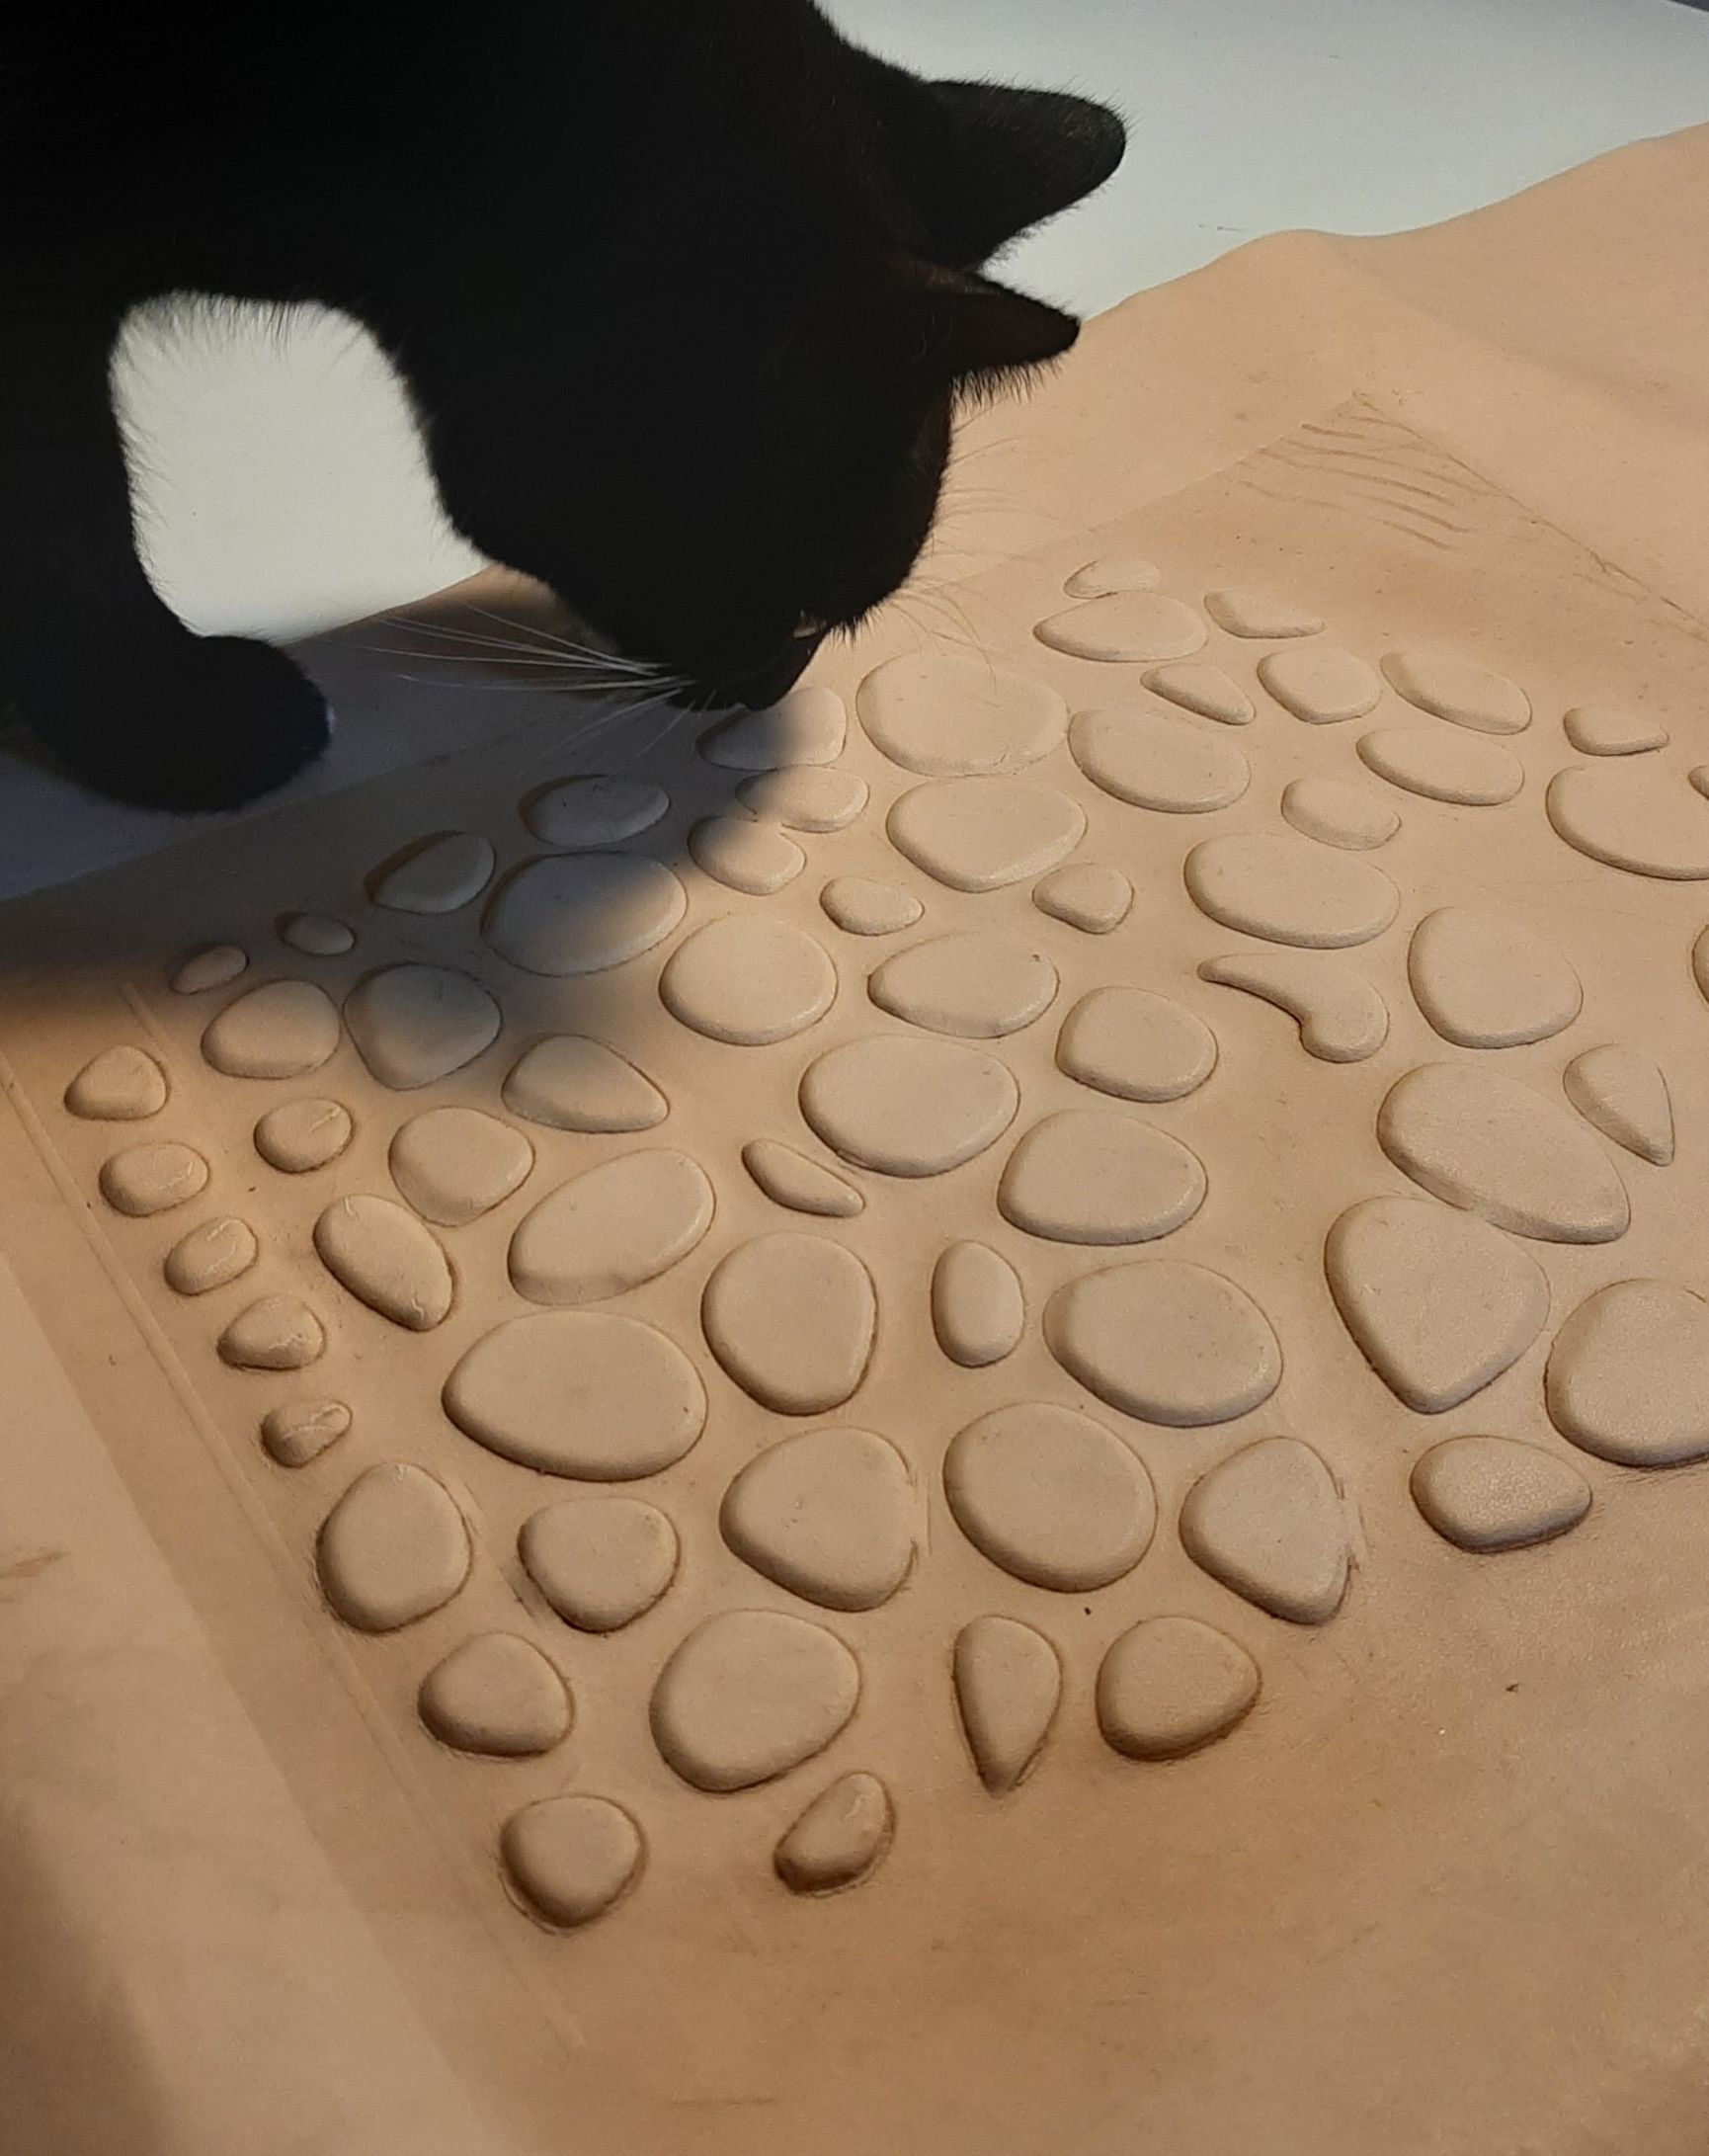
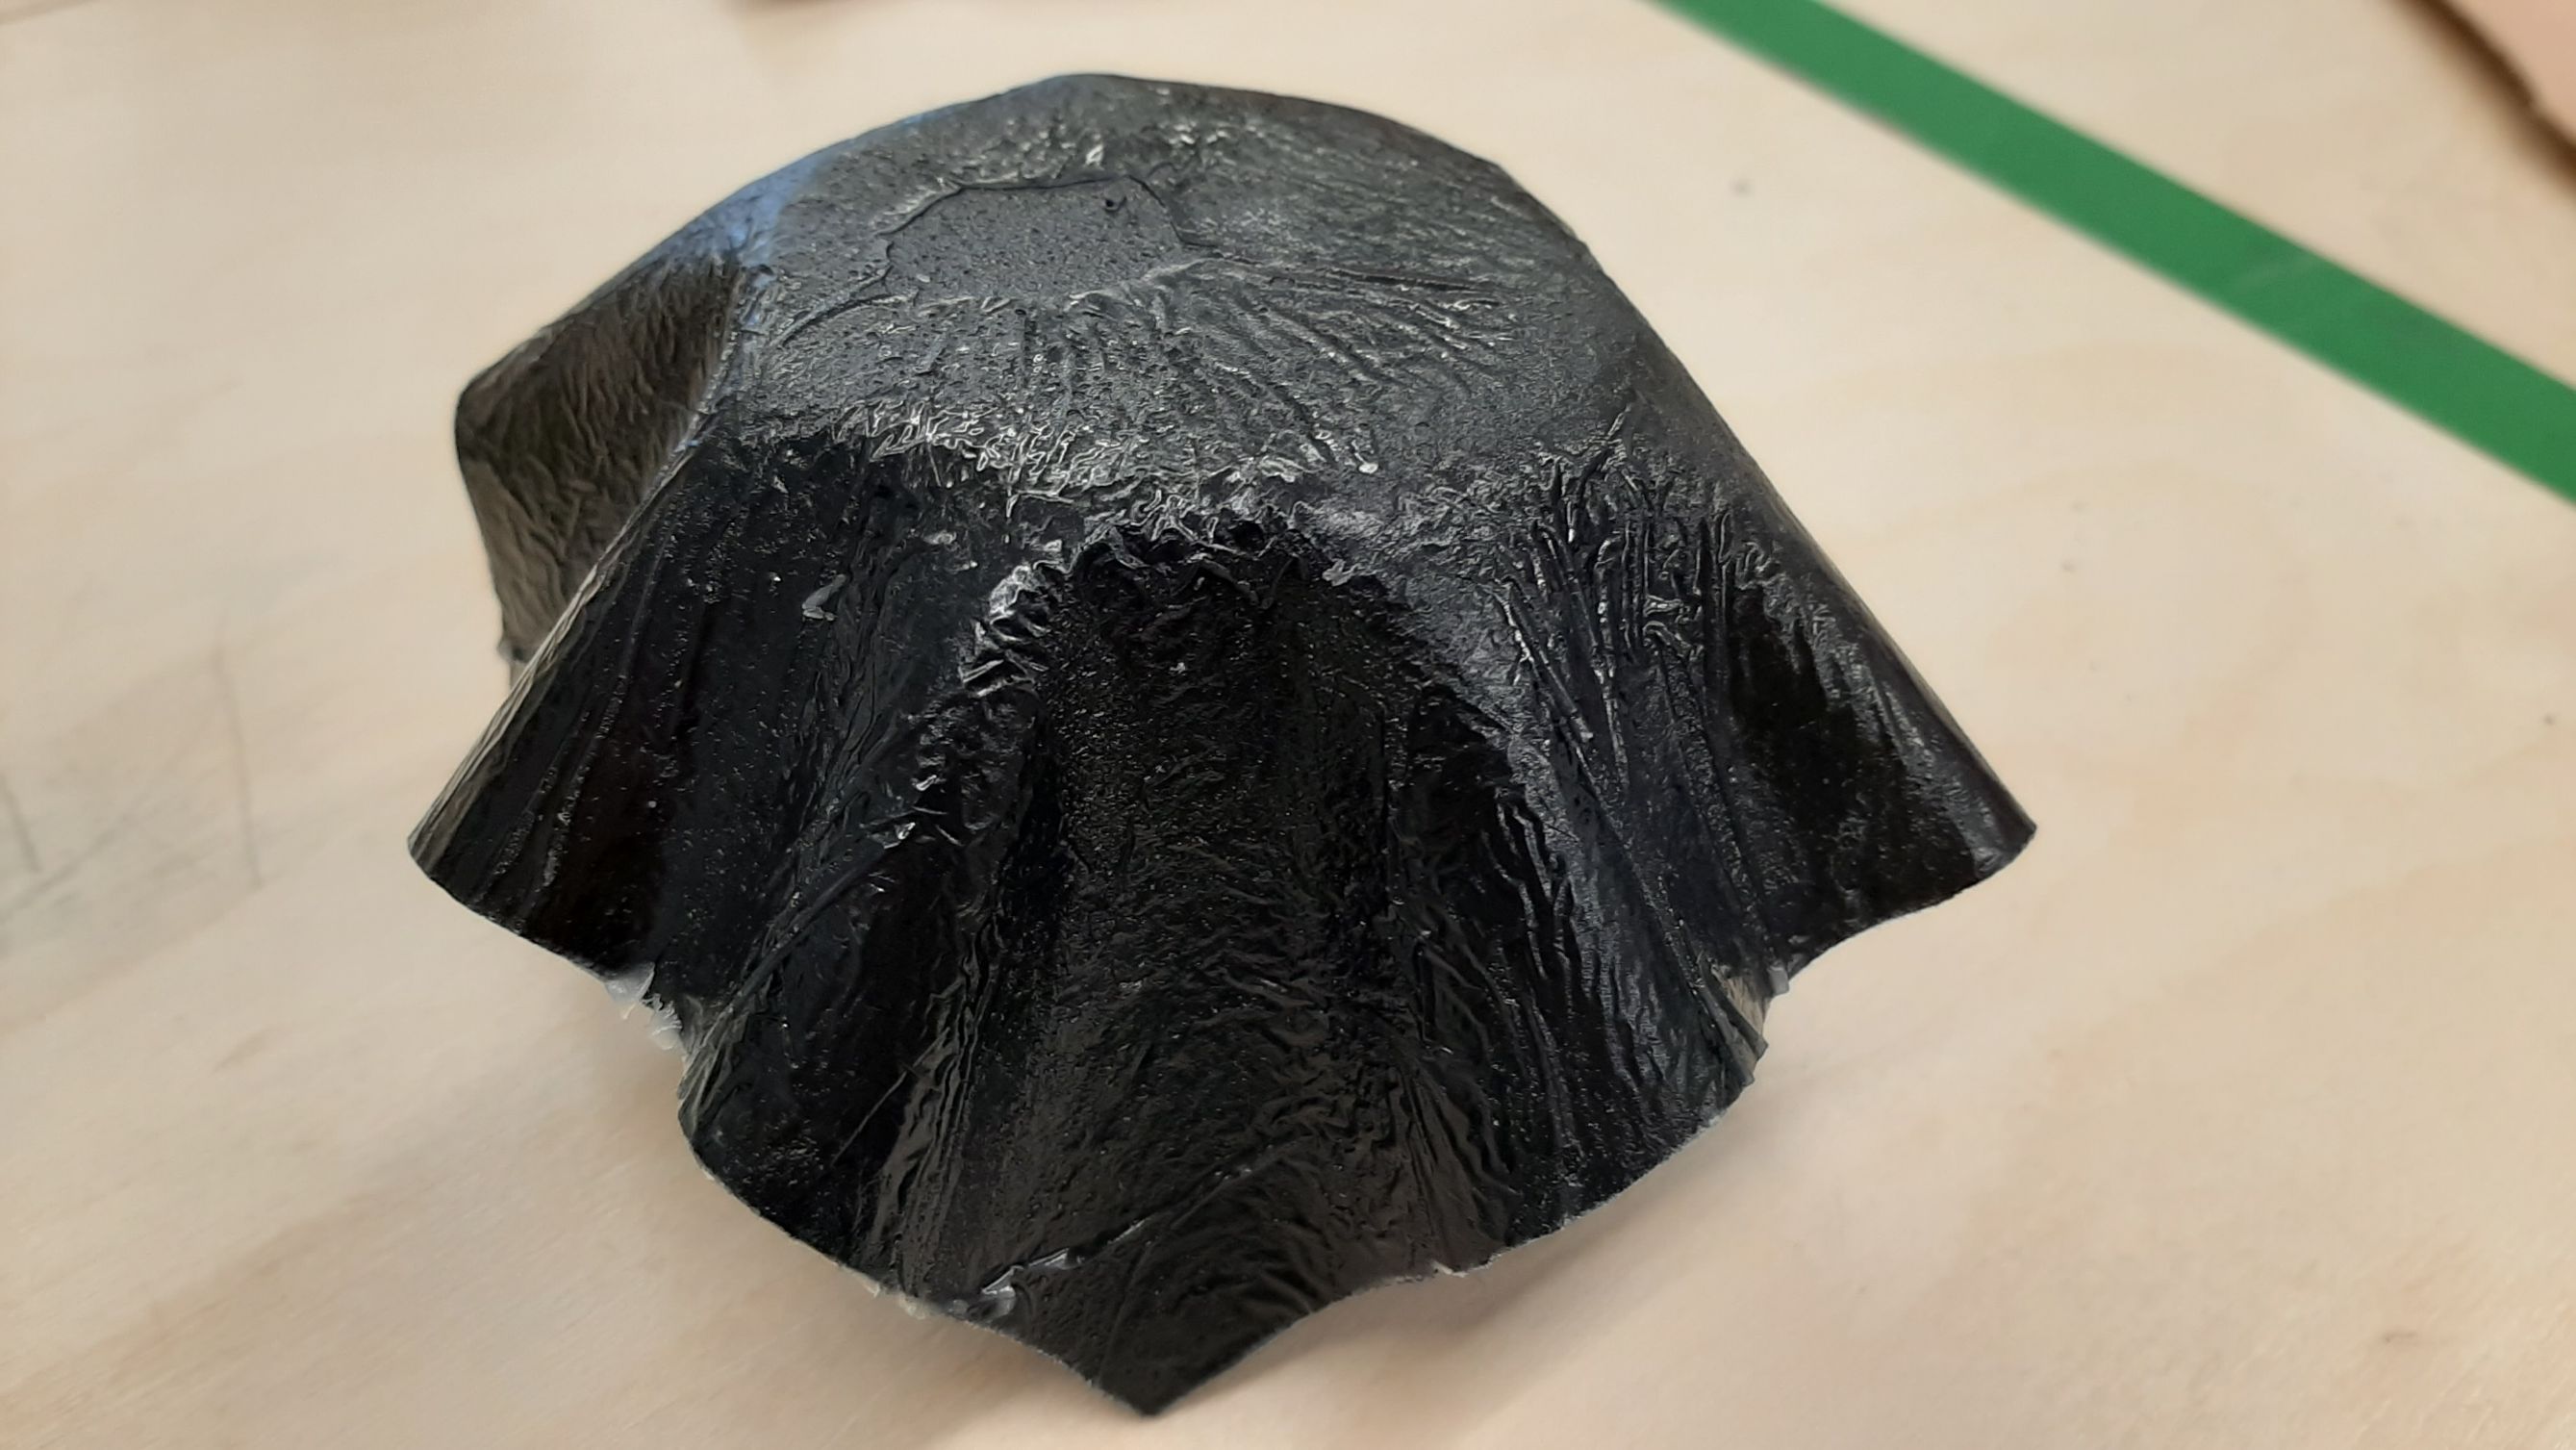
The result was impressive, but not perfect. The shap 90 degree angle of my shapes created a big tension on the leather, making it crack. Some scales had the outline cutted.
Max recommended me to round the edges on both parts of my mold to avoid those problems.
The other thing is that everything printed out, especially the mistakes I made using the cnc :(.
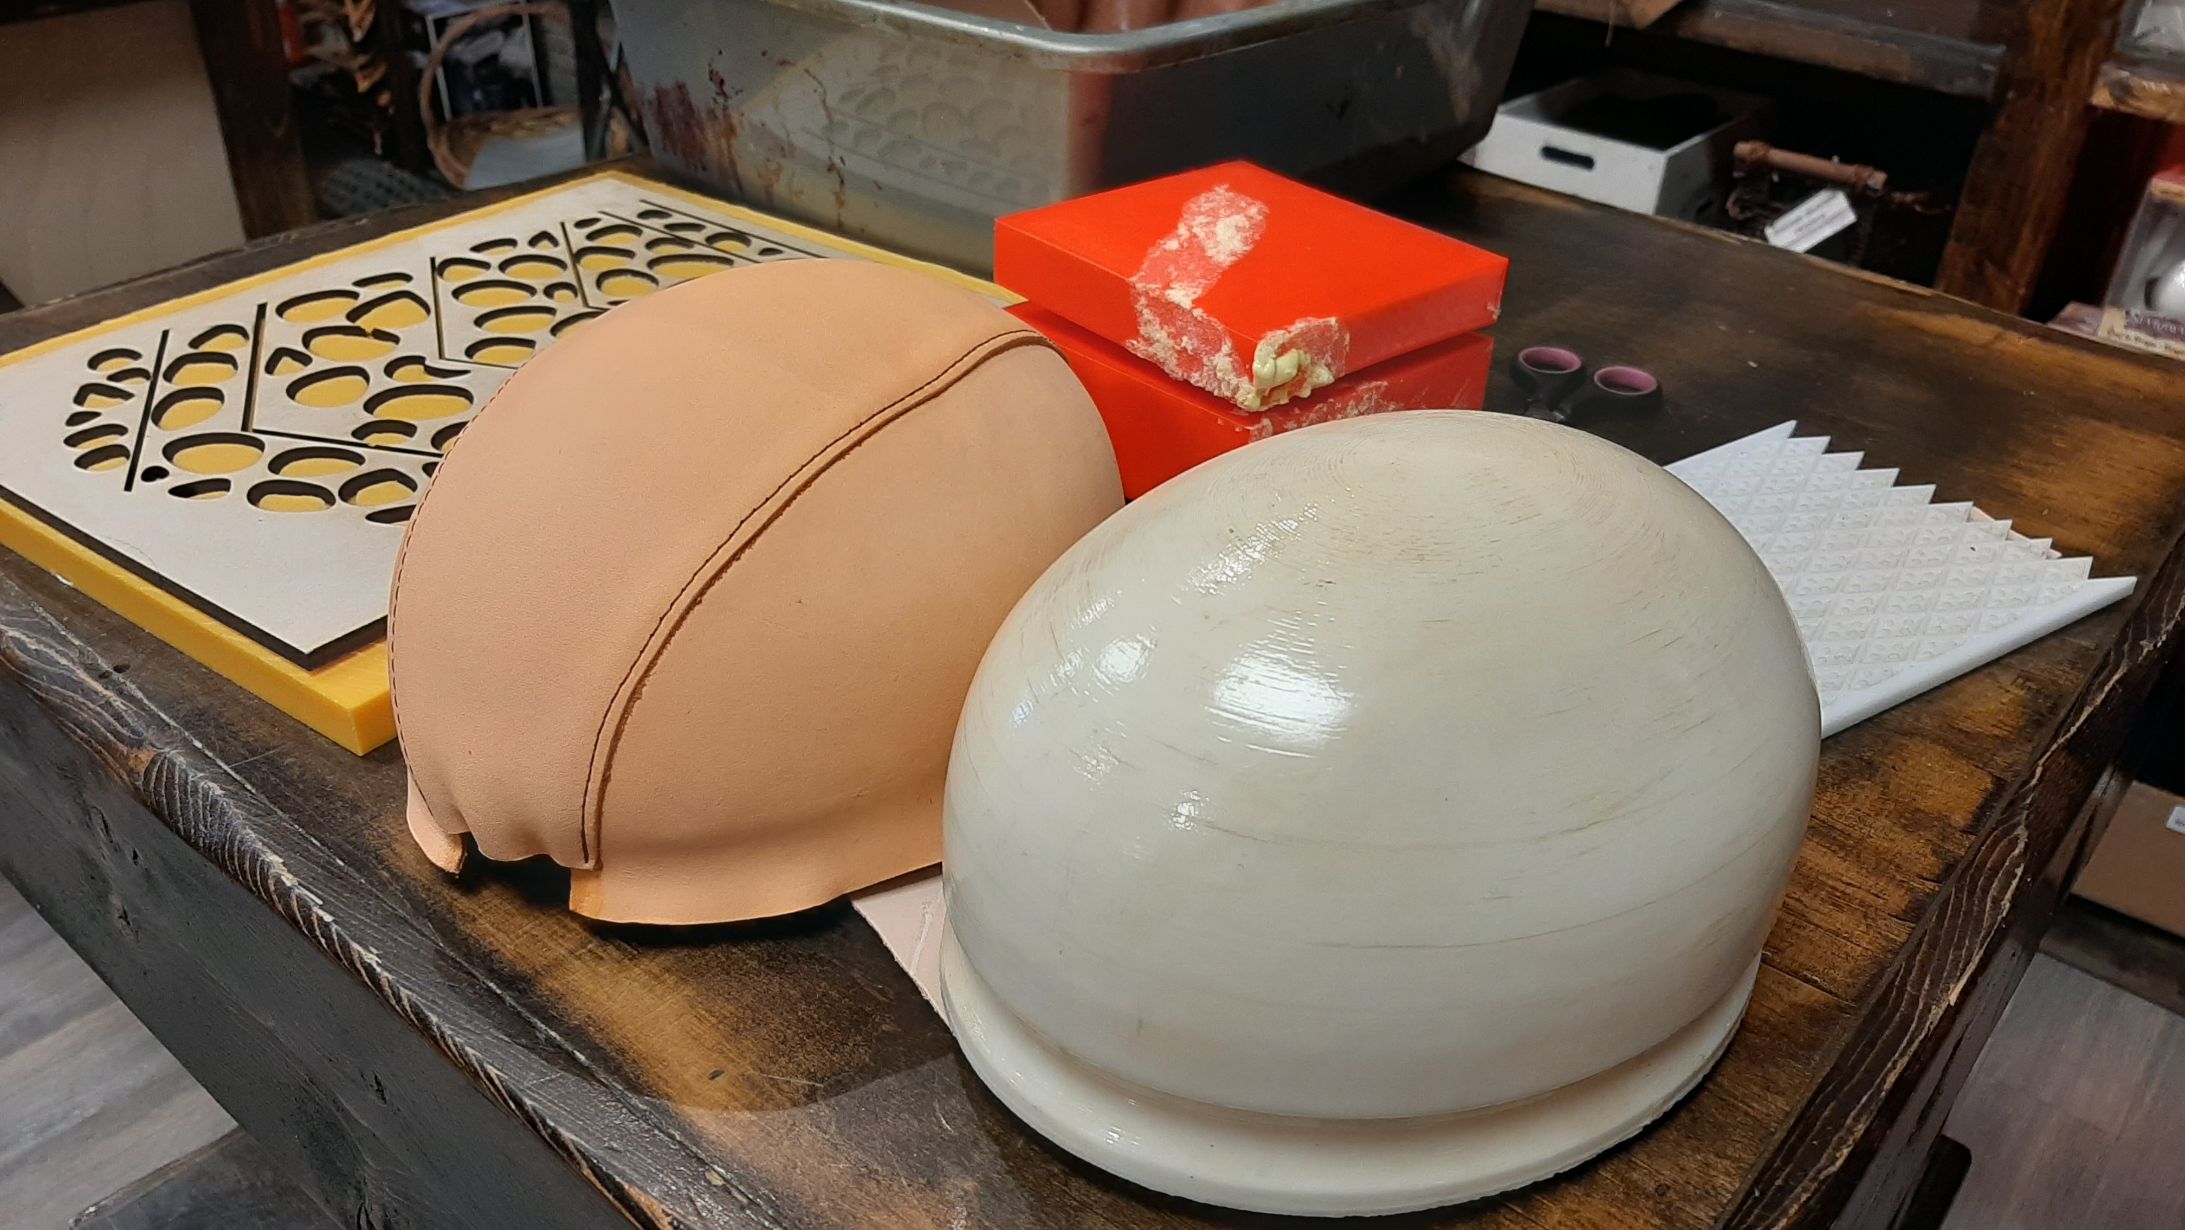
3D Printed Molds
Using a 3D flower pot that I found in thingiverse and that I cutted using Rhino, I created a positive and negative mold. To manage the thickness of the leather, I trimmed the positive one about 2mm smaller. I printed only the outlines of my shapes, and filled them with expanding foam for windows and doors. It is supposed to be the one variety that expands less, so my shape wouldn't break apart as the stuffing expands.
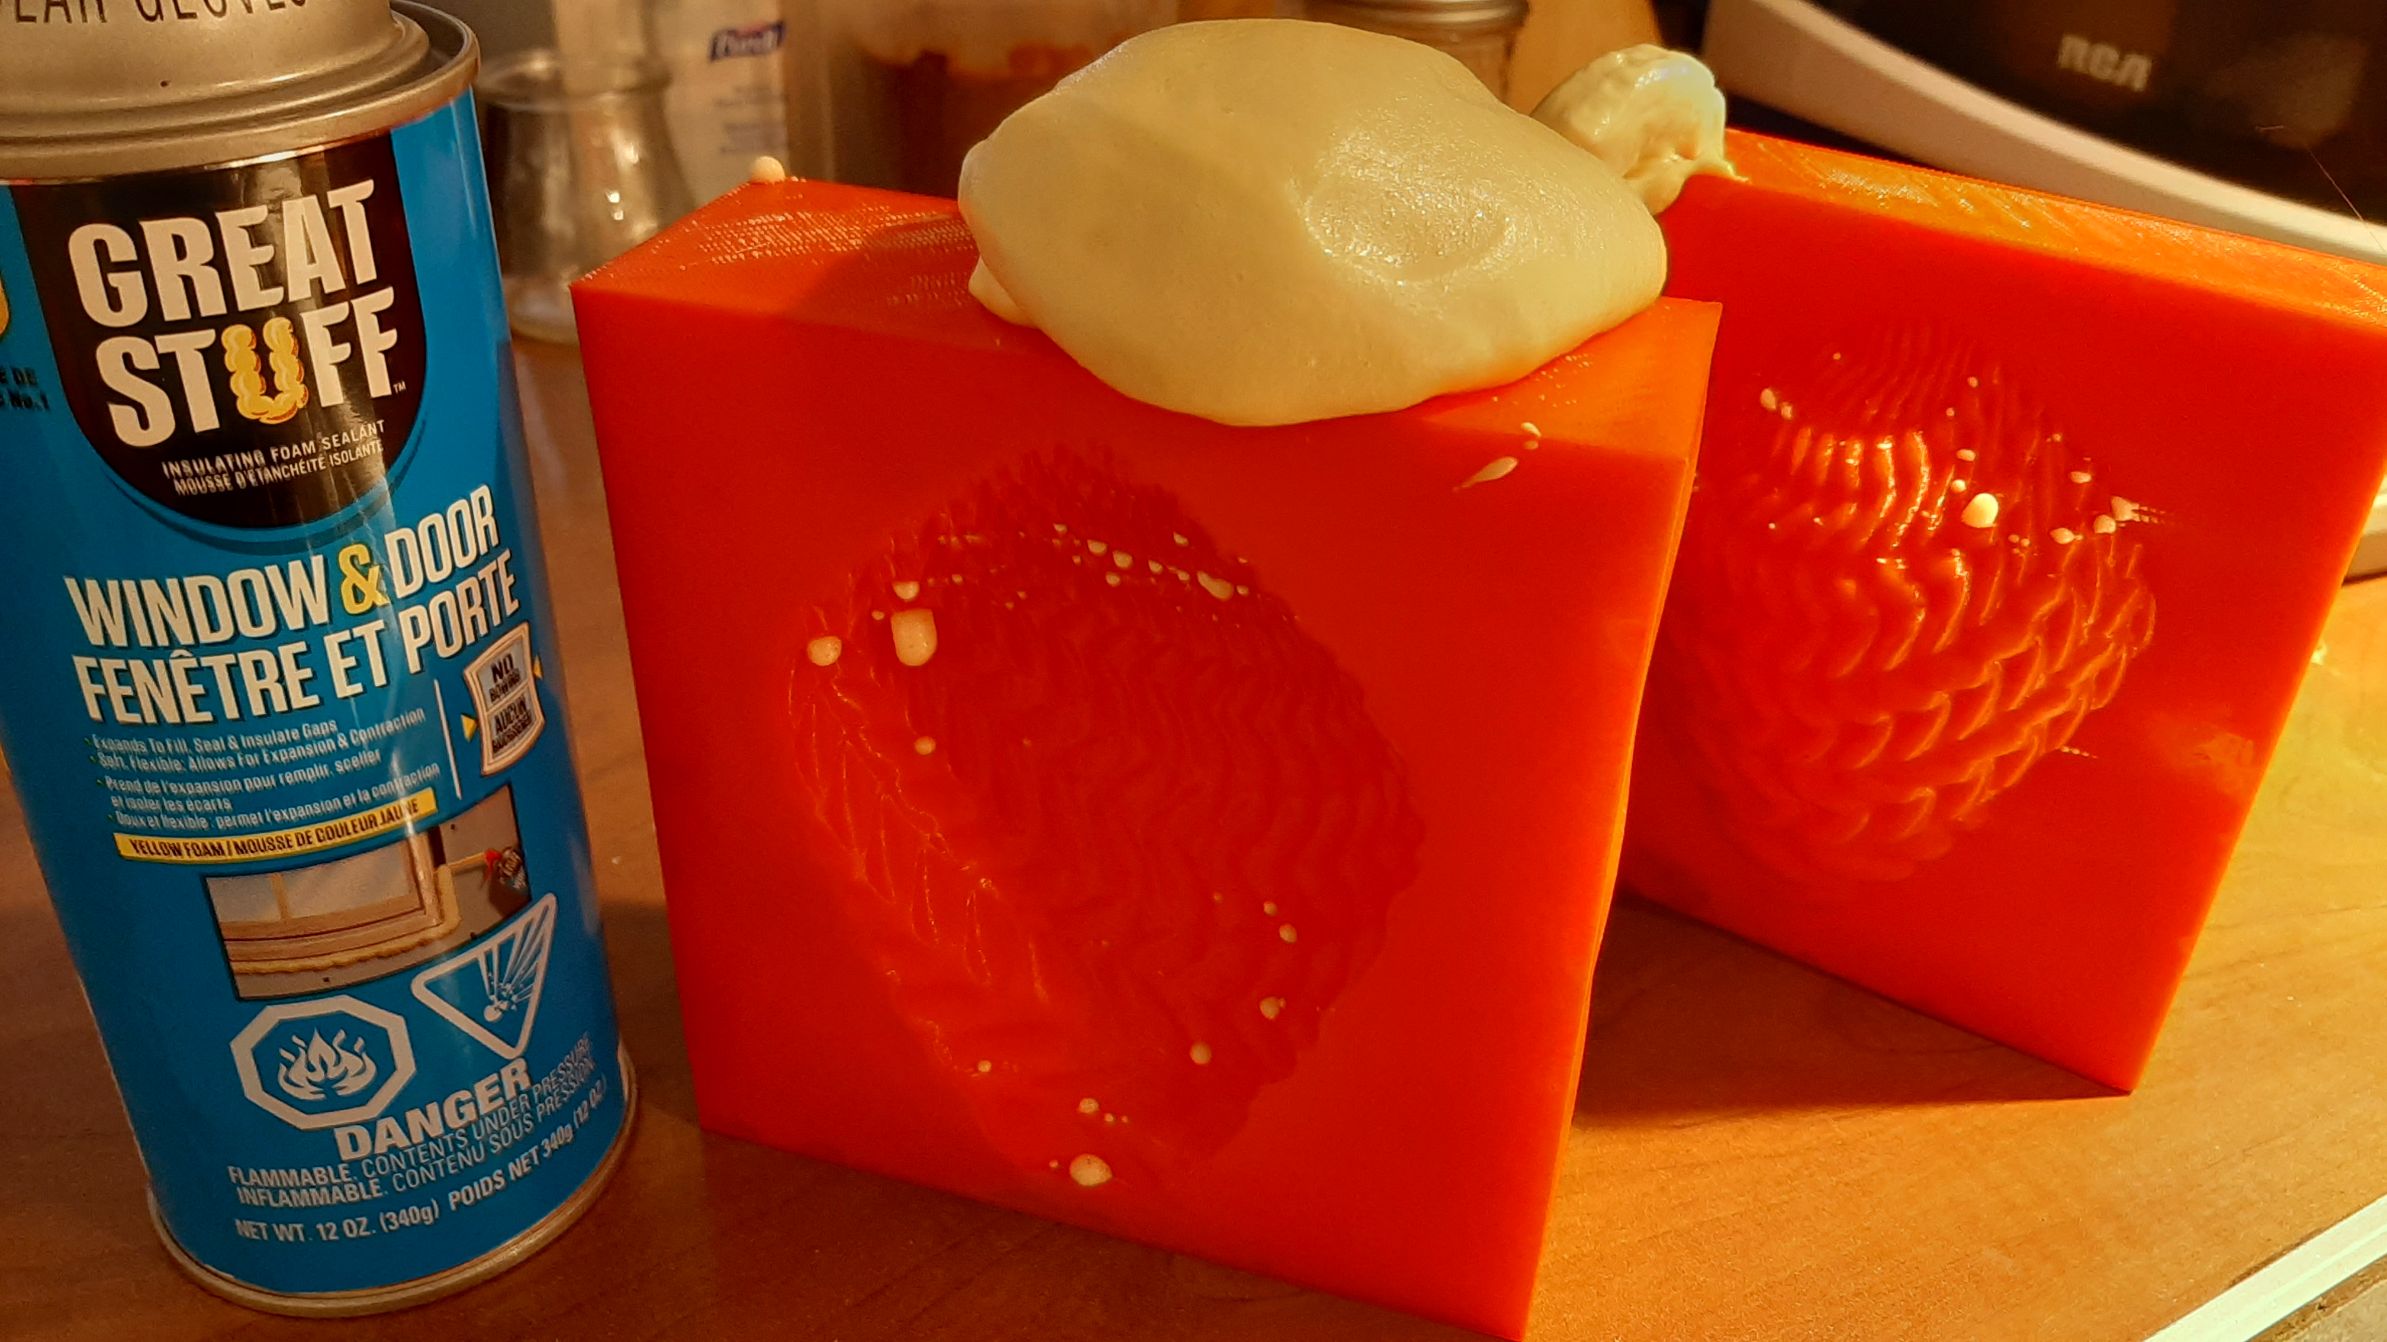
My shape was considerably more solid, but still not enough for the clicker at the artisans d'asure, so I pressed my leather with some tools at the lab. I letf the leather in water until it was completely wet, squized it in then waited about 3 or 4 hours before unmolding it carefully. As long as it's not completely dry, the shape will still be soft, but it would never dry if I would have left it between two layers of plastic.
The result was not like I expected, to I tried with 2 deifferent leathers; on the left, it's 2-3 oz leather, and on the right it's 5-6 oz leather. When the results came out exacly the same in the end, I understood that the mold was the problem.
I was thinking about the space the leather would need in the mold, but actually, when I made the positive smaller, I created some space everywhere, even on the top, where I needed my leather to be pressed down to get the pattern.
I learned this; to make a positive and negative mold for leather, you need to reduce the size of one to make space for the leather, BUT ONLY IN X AND Y AXIS. It is much more complicated to do than what it sounds. You also need guides!
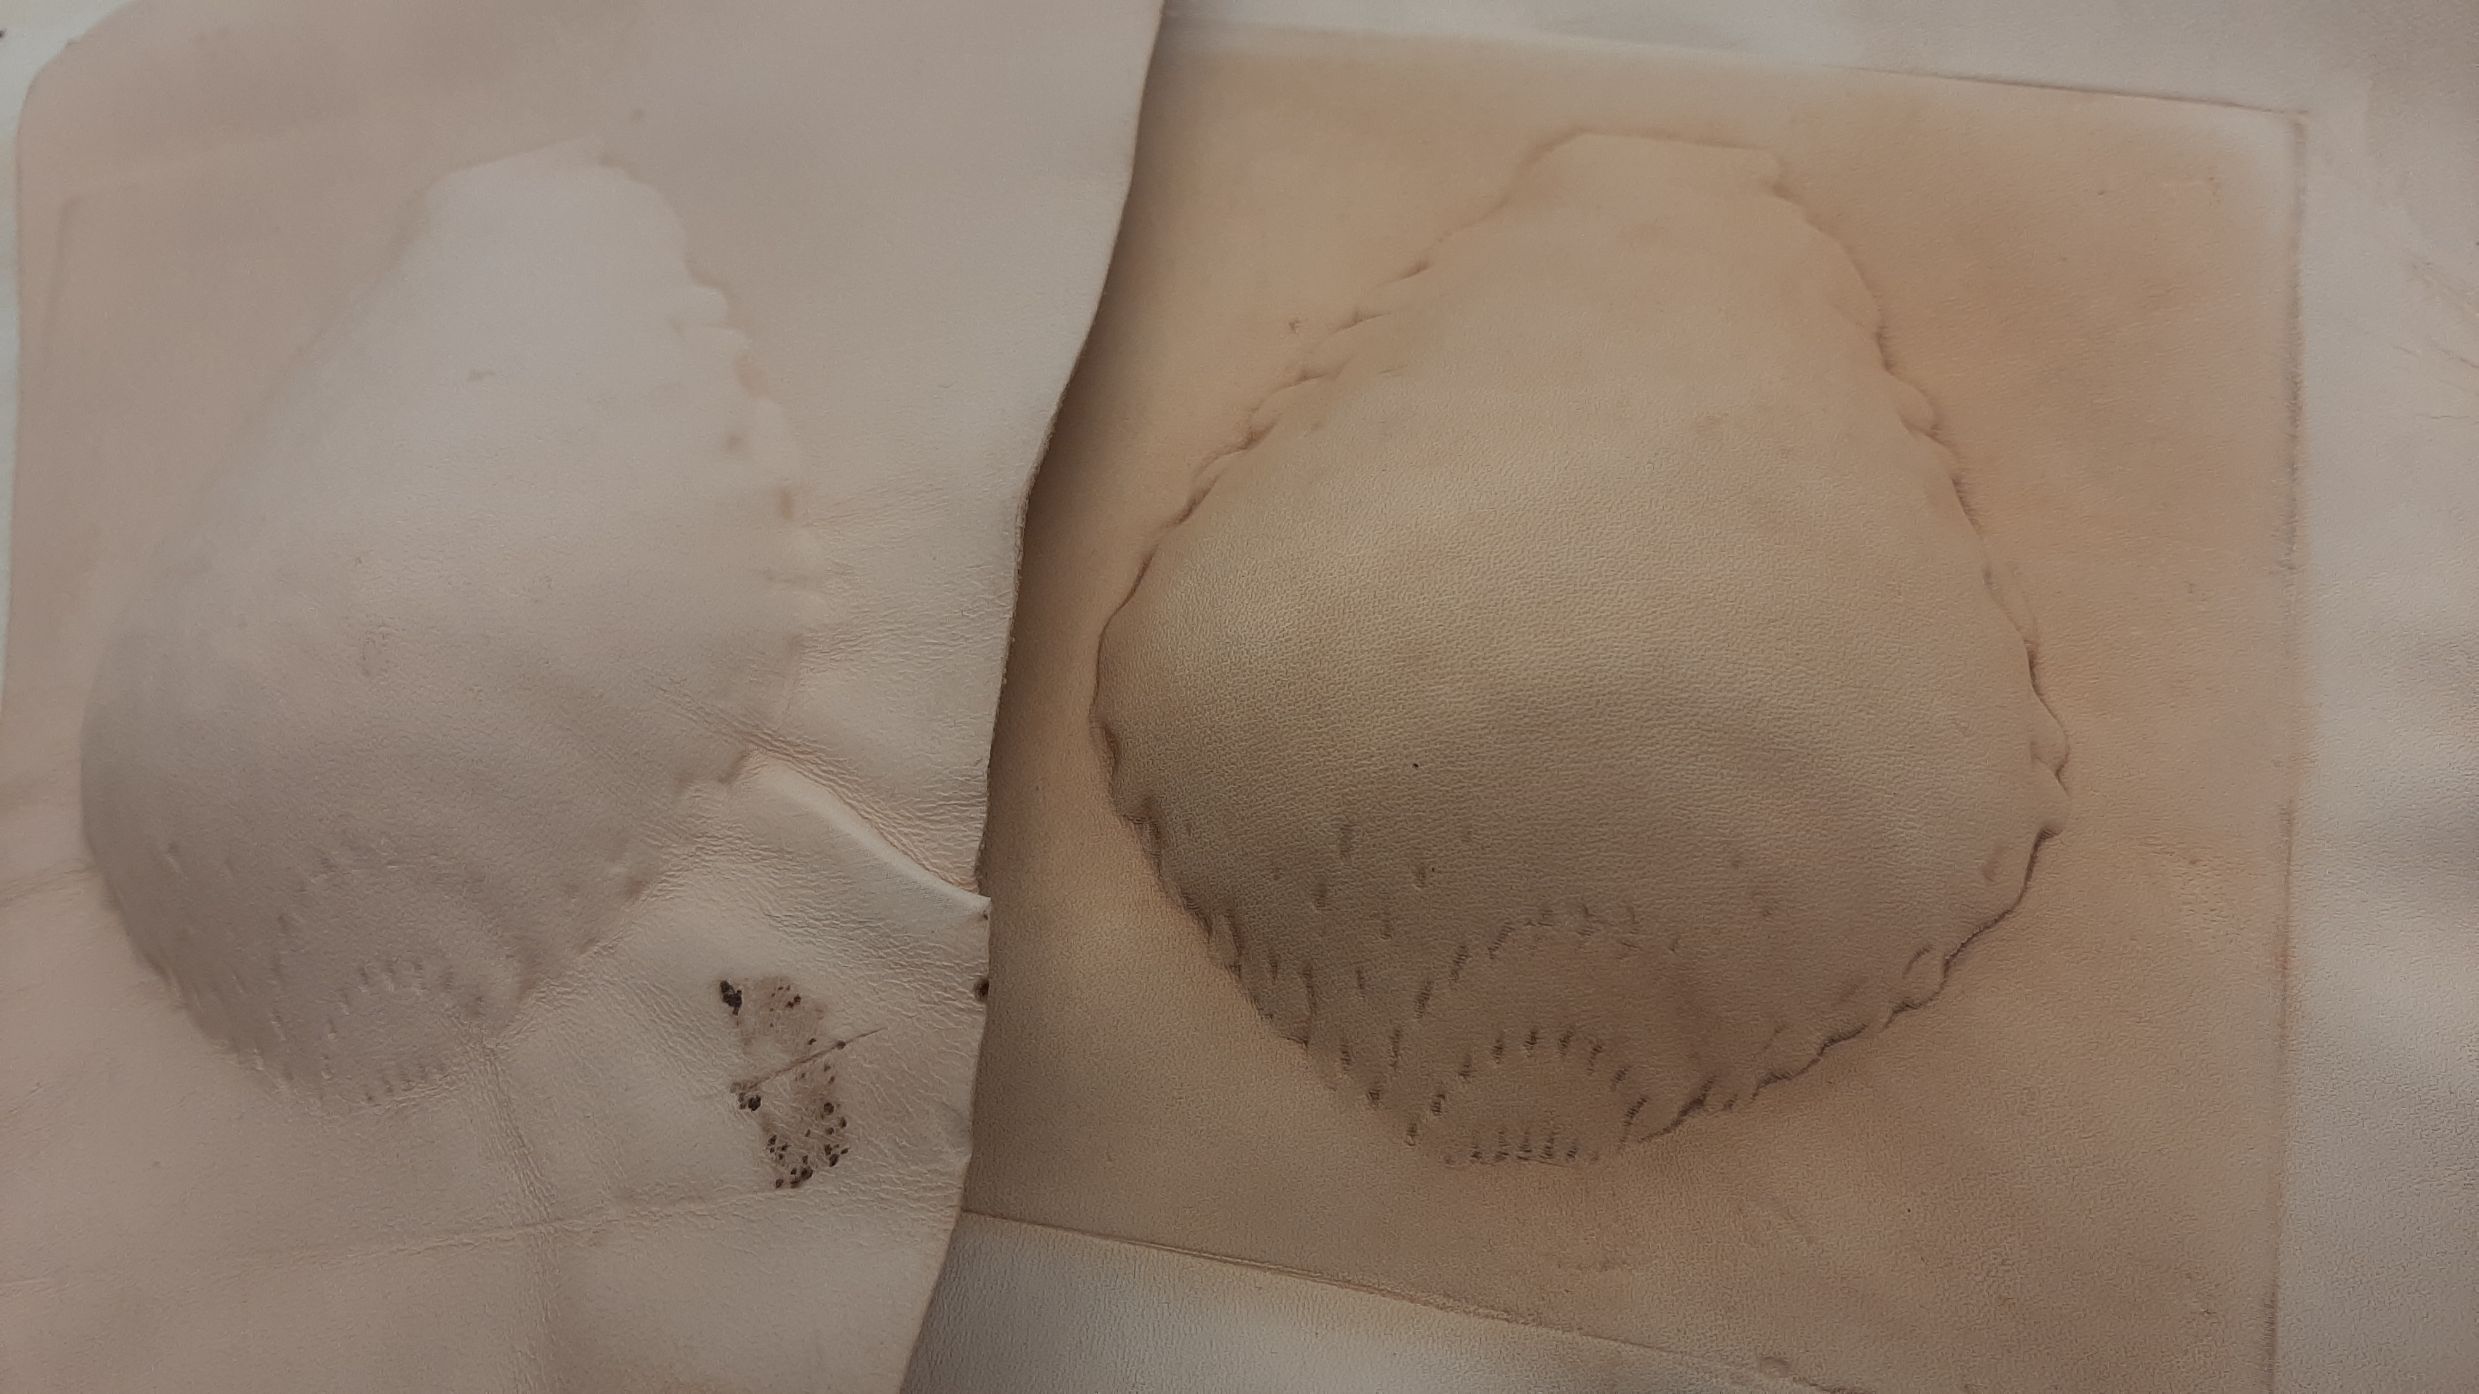
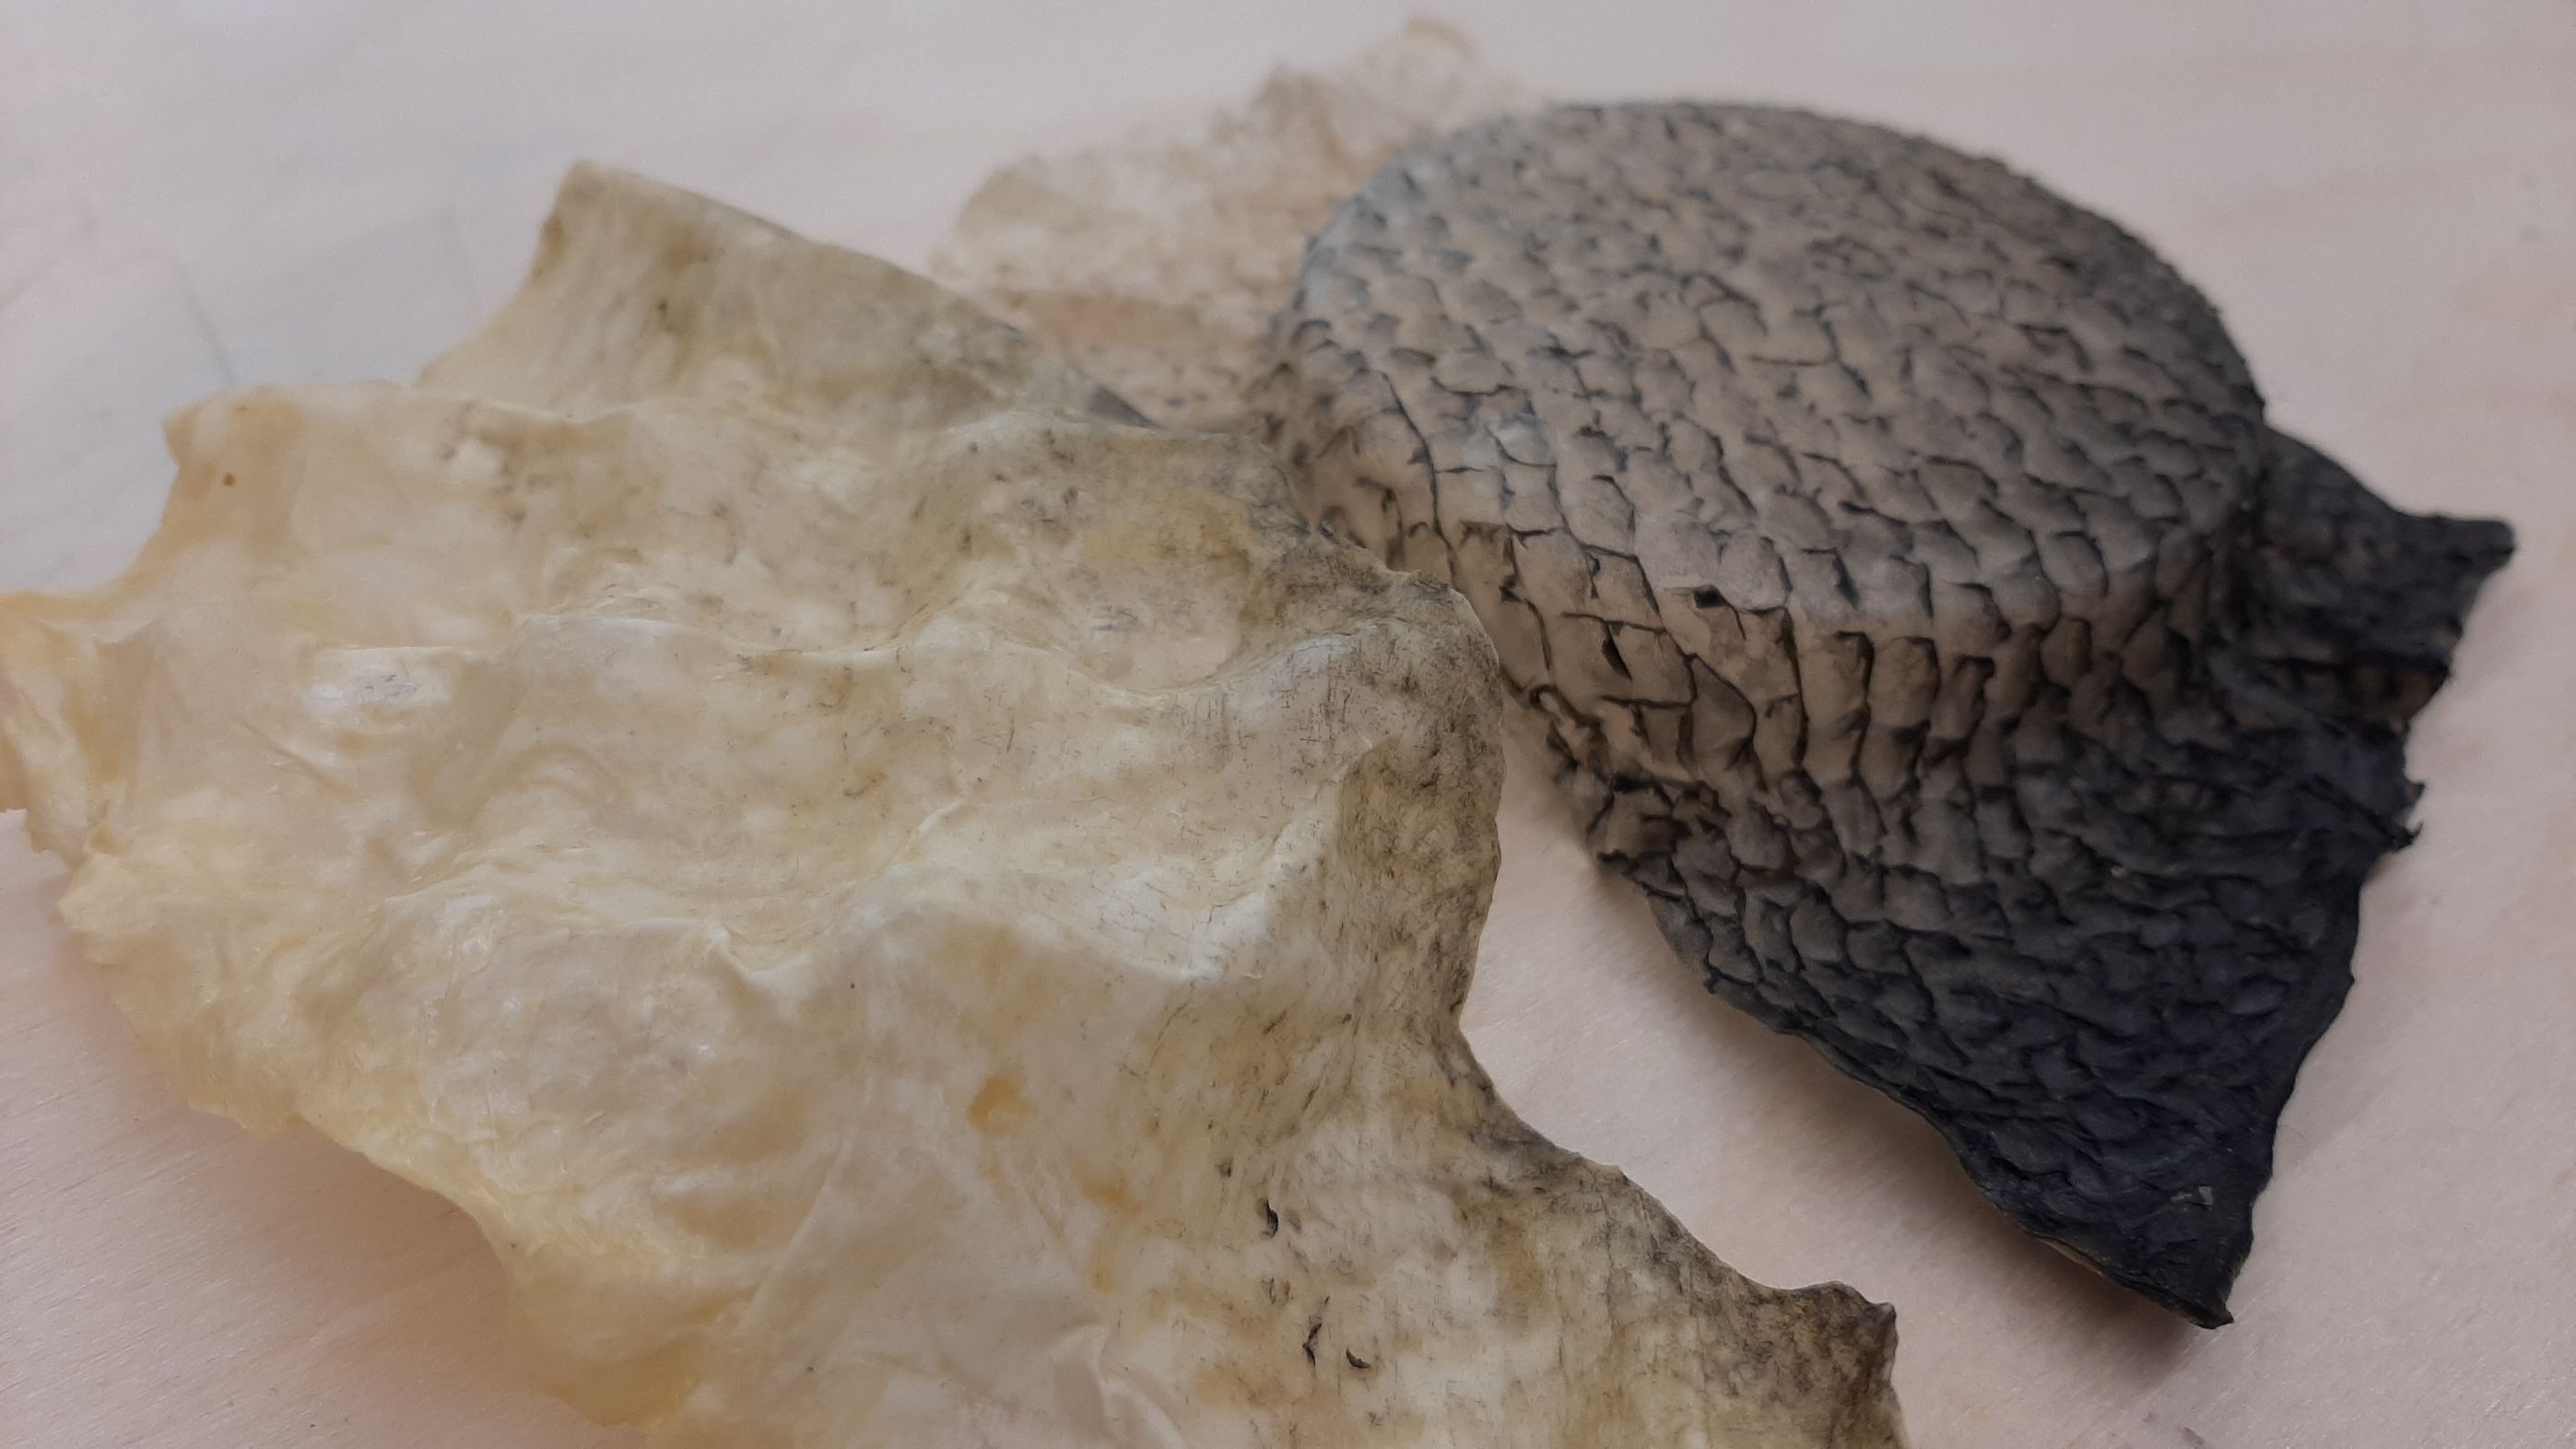
Fish Leather Molds
For those of you who wonder, molding also works very well with fish leather! But it also is a much more delicate material when wet, so I couldn't do it with my mold, with it's shap edges. I did the same steps, left the skins in cold water until they were super soft and delicate, then let them to dry on the molds. It has a paper-like texture when dryed, and you have to be carful not to "break" the leather or massage it like we previously did. It's still pretty stiff.
Epoxy Resin
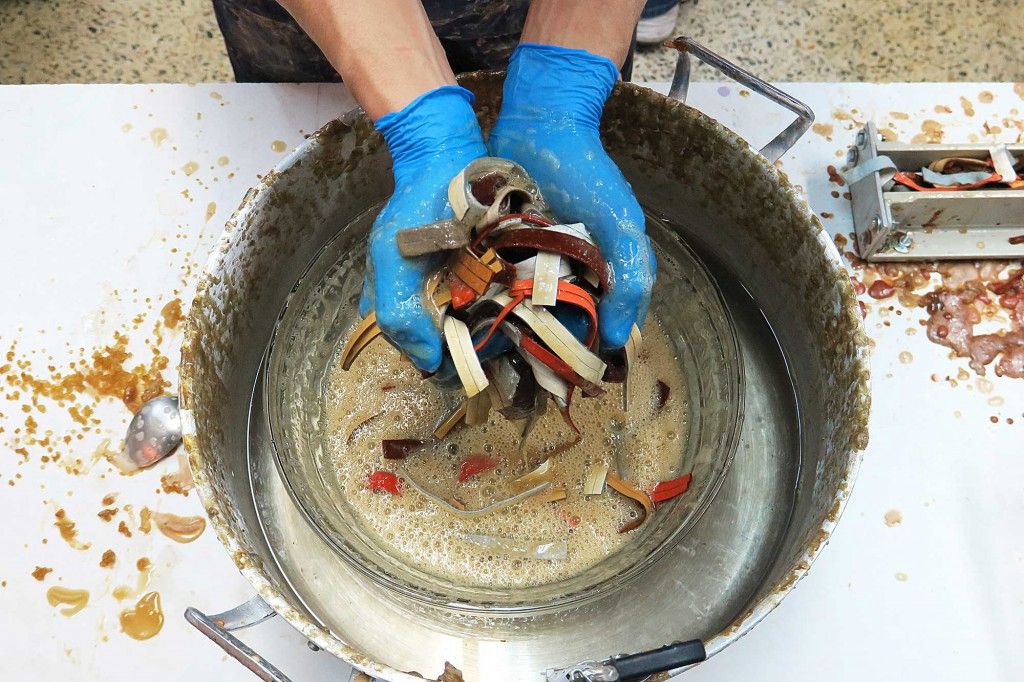
Here I created shapes out of garbage! :D
I first went to the neigbor builing, where they cut patterns for most of the designers here in montreal. It's called Coupe 3P. I hoped to have a lot of colorful scraps of fabric, but that day they only had orders of white or black. I brought back a large garbage bag. Then to shread the scraps; I tried with the paper shreader, but it was made to automatically stop when in detected too much resitance. I spent most of the day unjamming the machine, and shreded them by hand. Good old scissors.
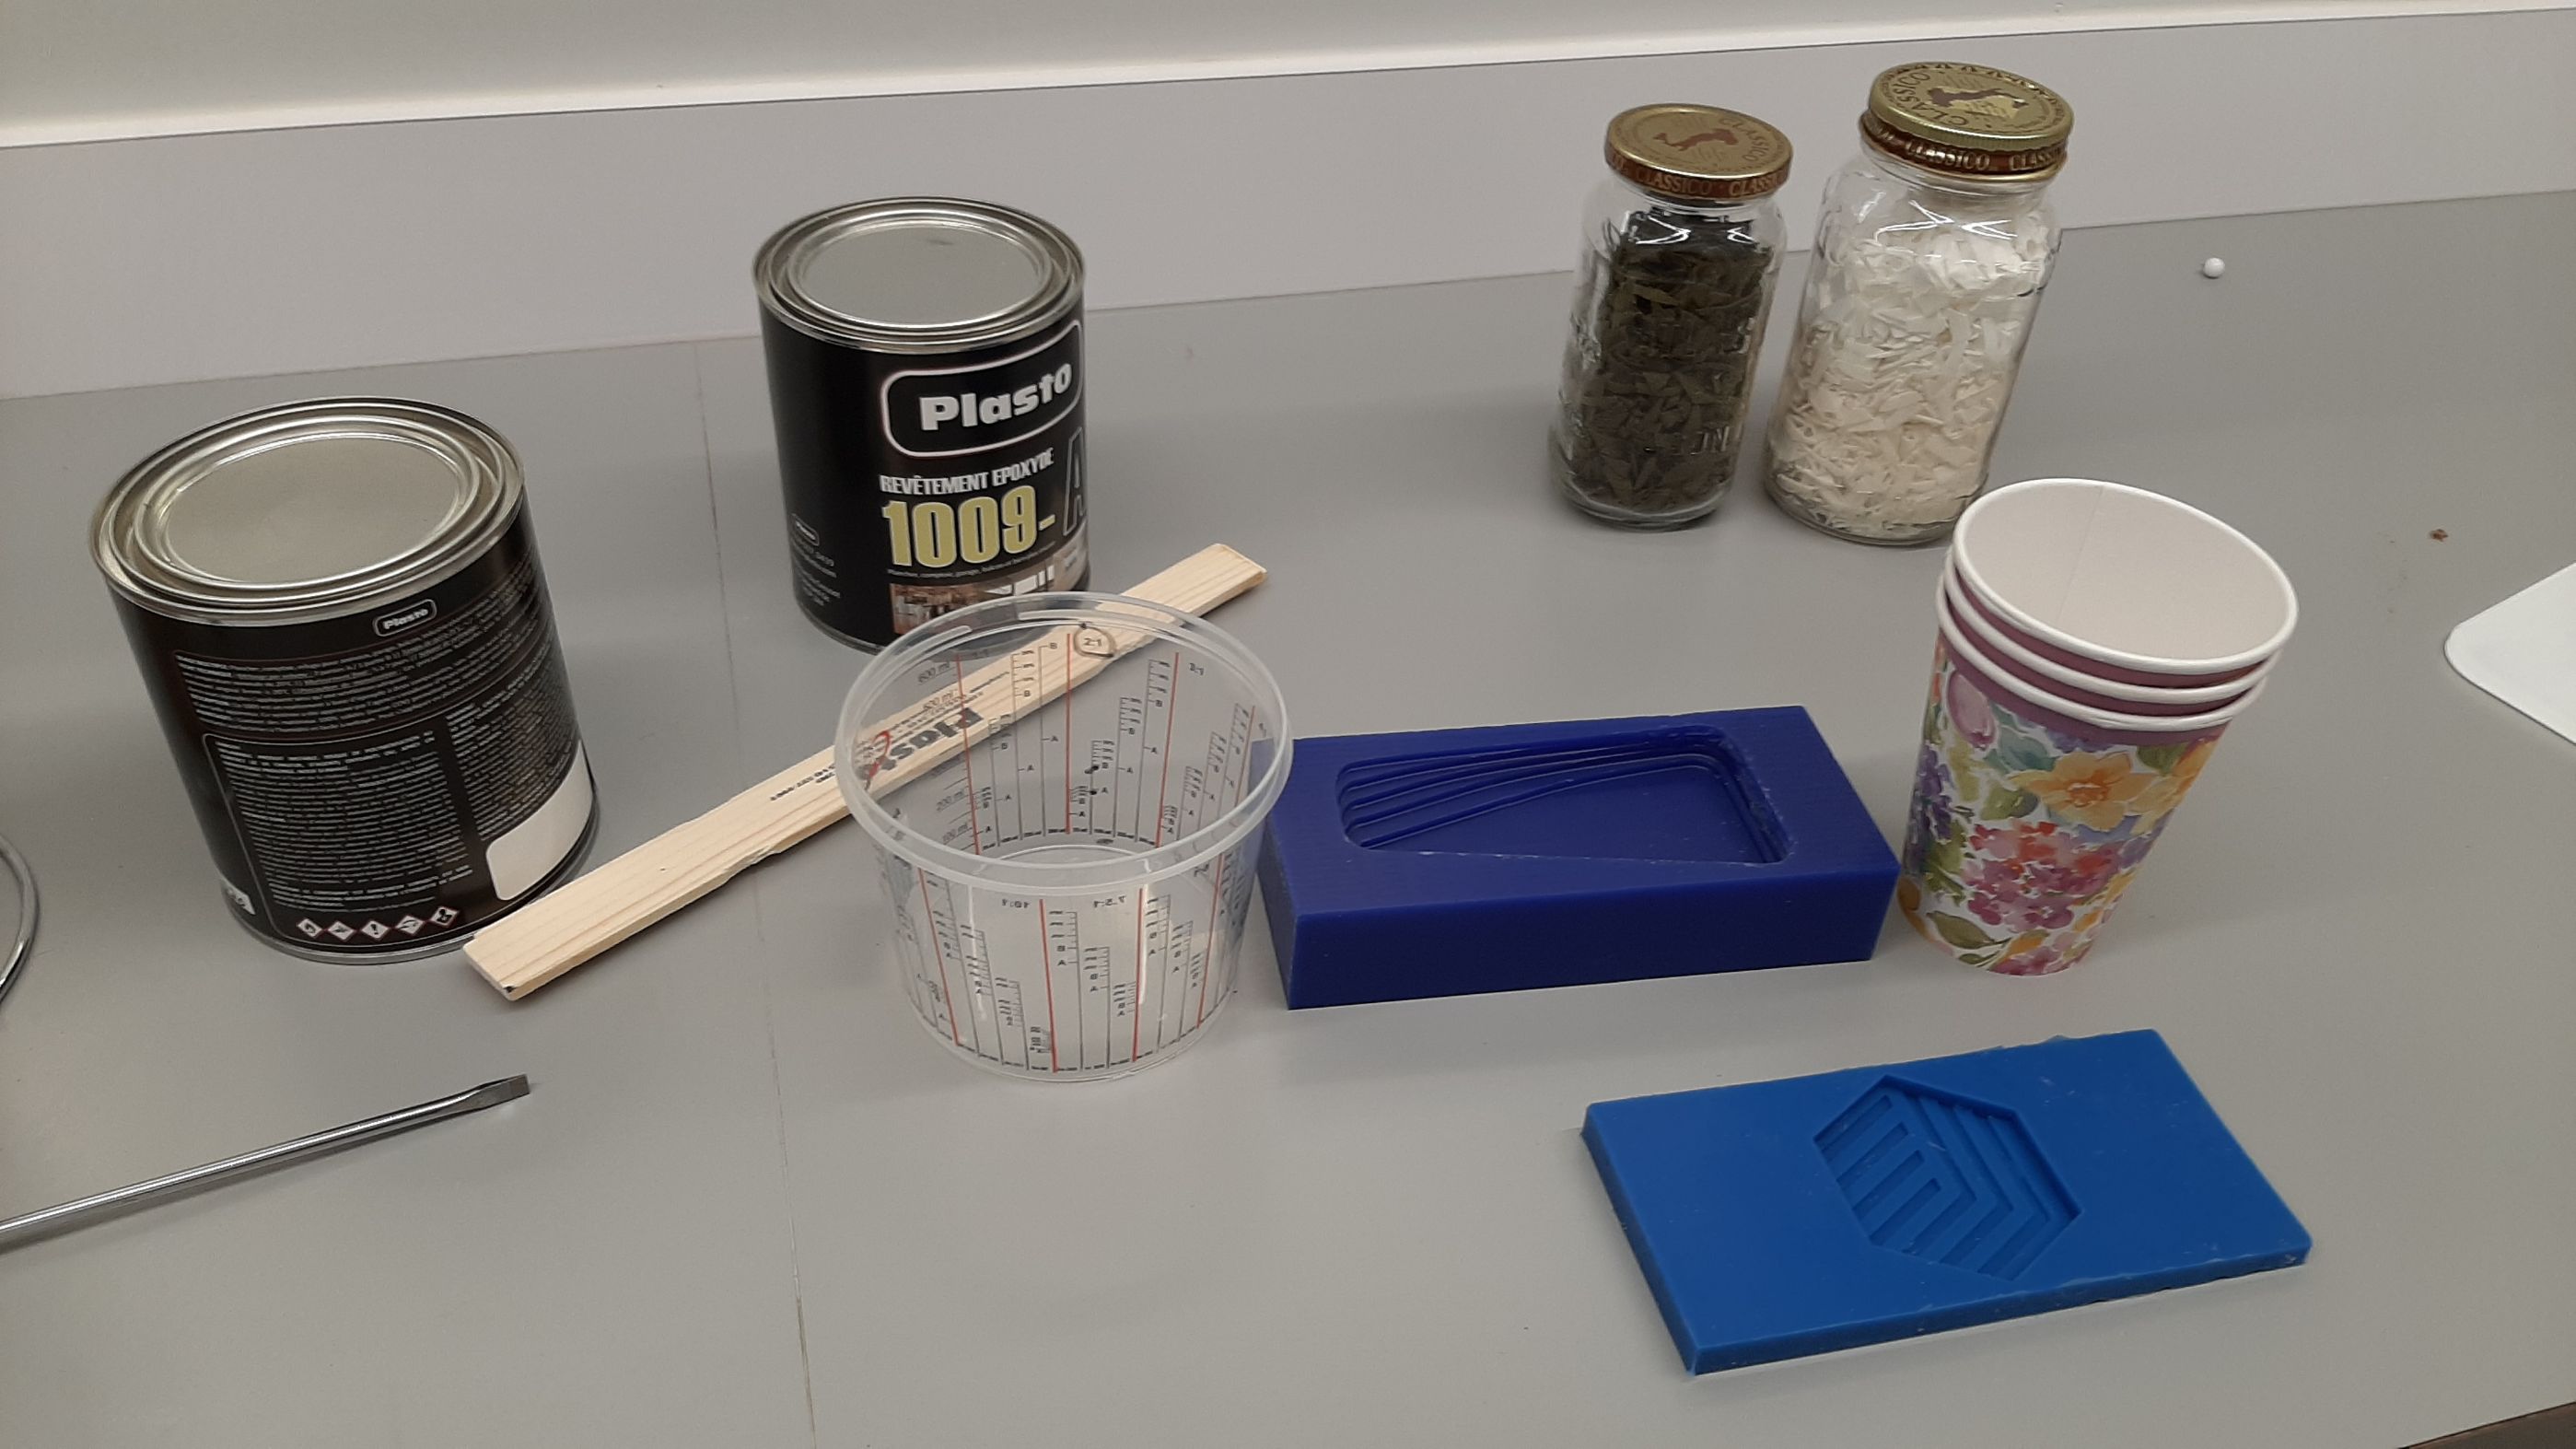
The Resin Epoxy I used was odorless, but not so enviromental friendly.
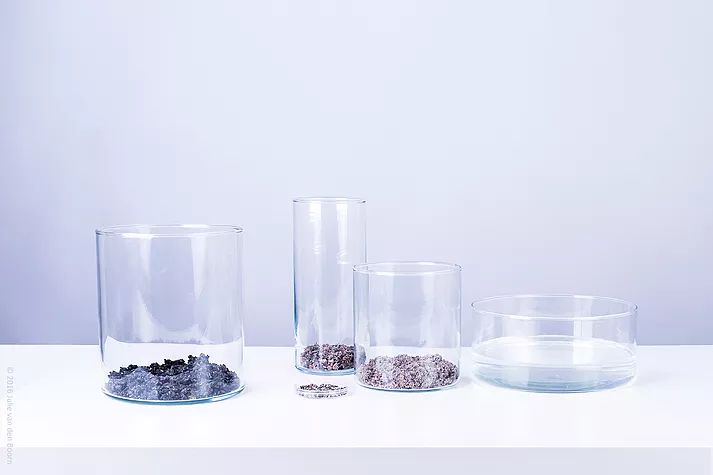
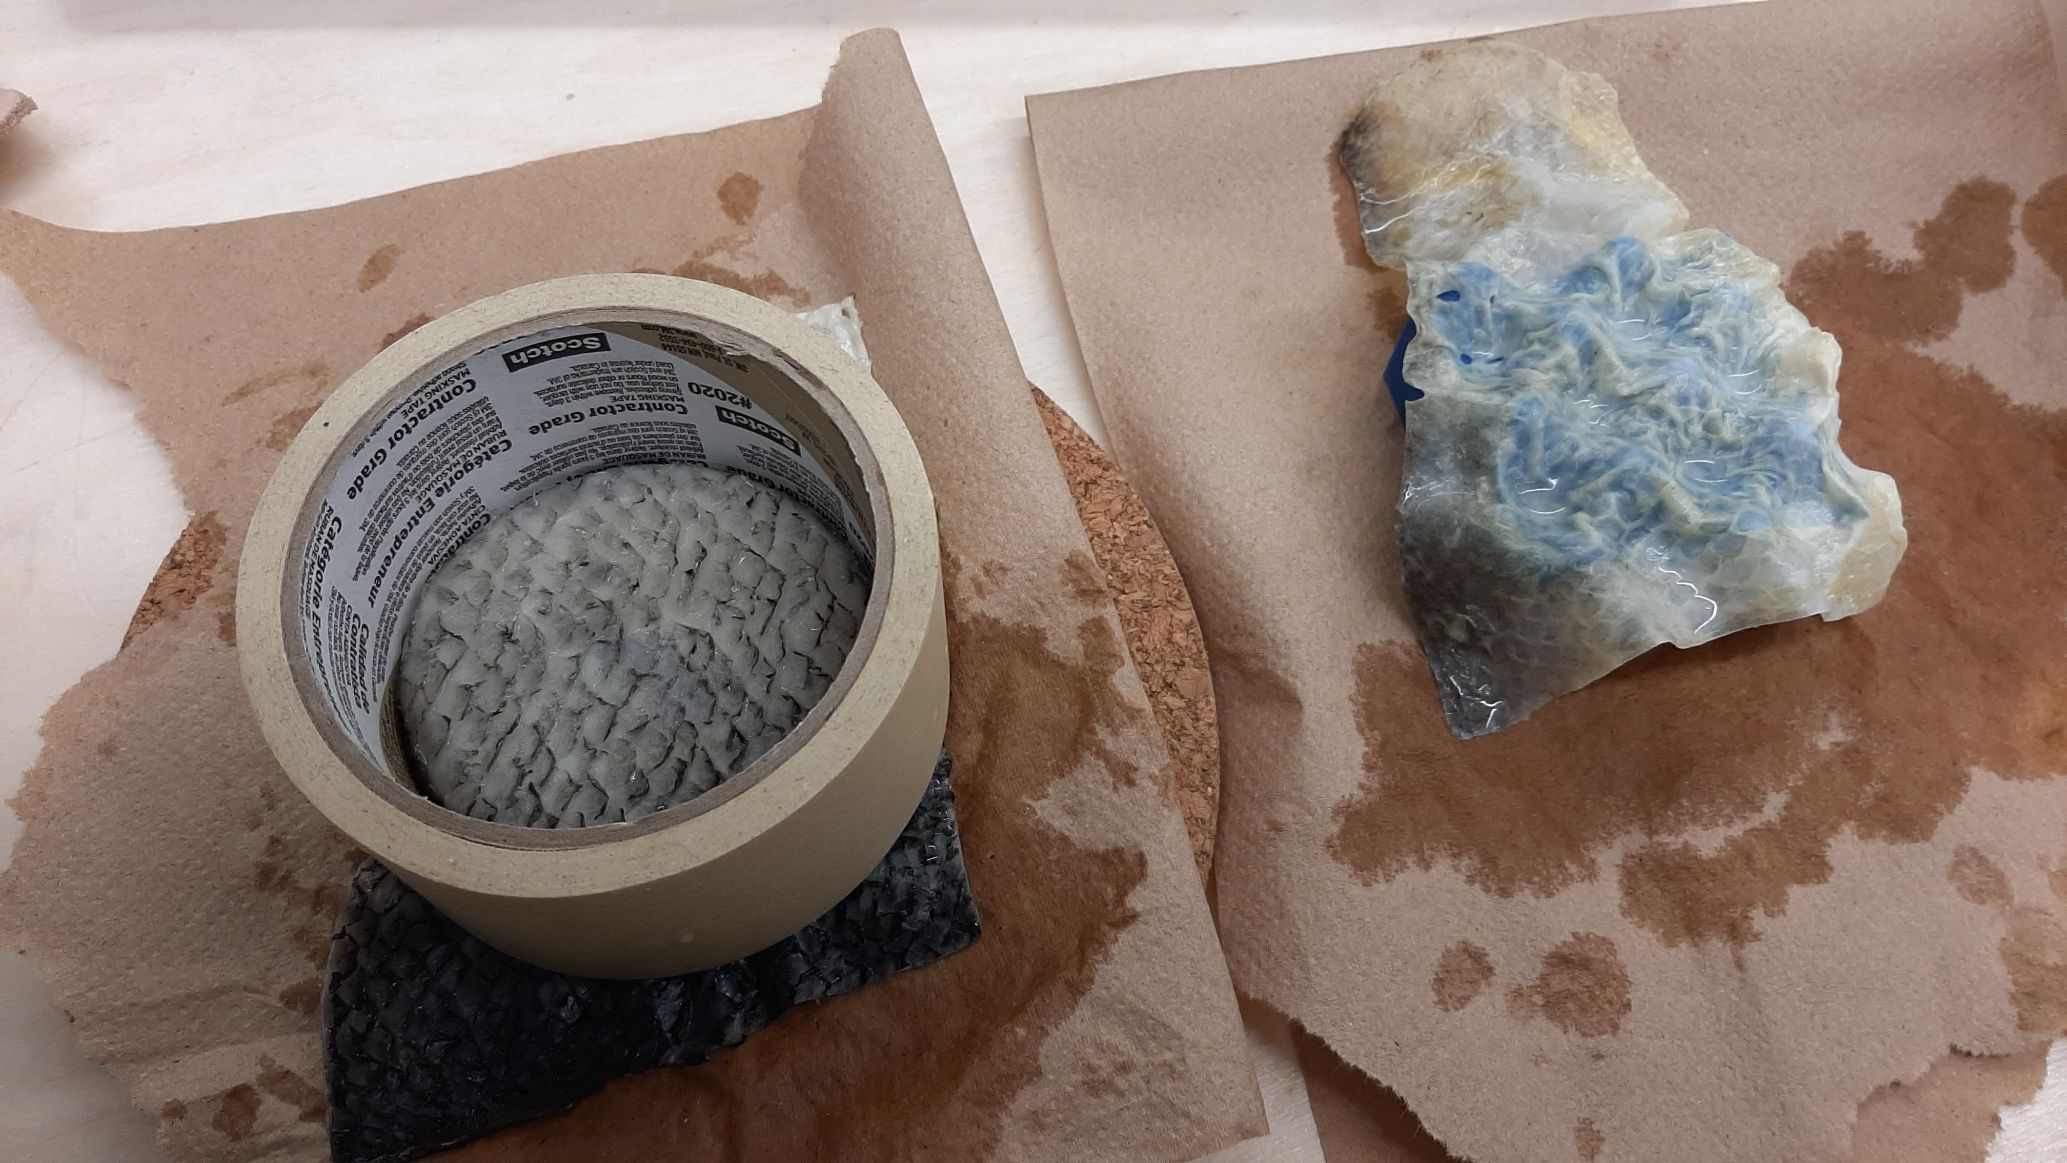
I mixed my epoxy, and pressurised it to get rid of the bubbles. I then mixed the epoxy with the scraps, made sure it was well mixed before pressurising the mix again. I casted it in molds the lab already had, that I oiled so the epoxy wouldn't stick.

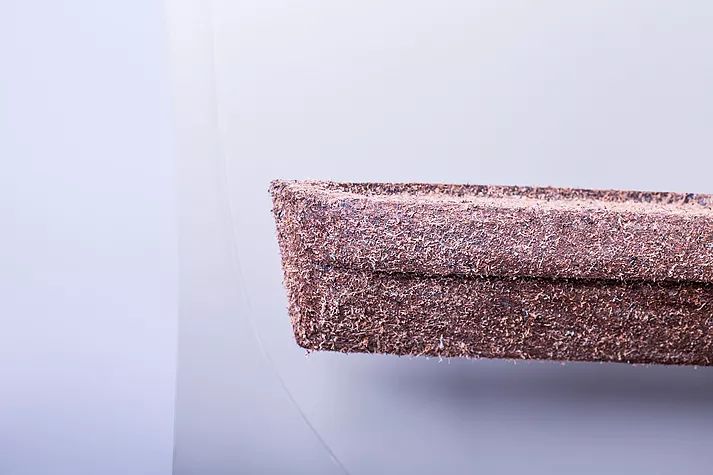
the molds were not as soft as they looked like; the results were not as clear and as transparent as I hoped. Exept some air bubbles that got stuck underneath the fabric, there wasn't any problems.
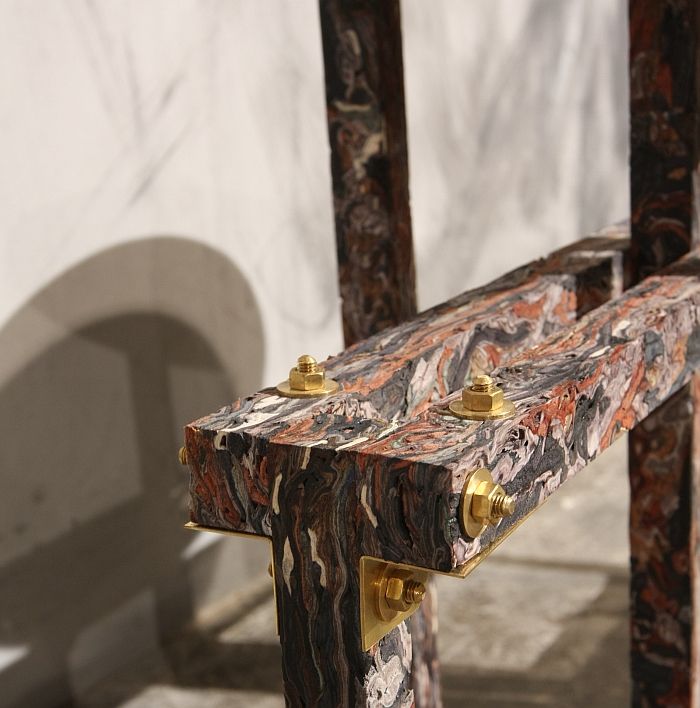
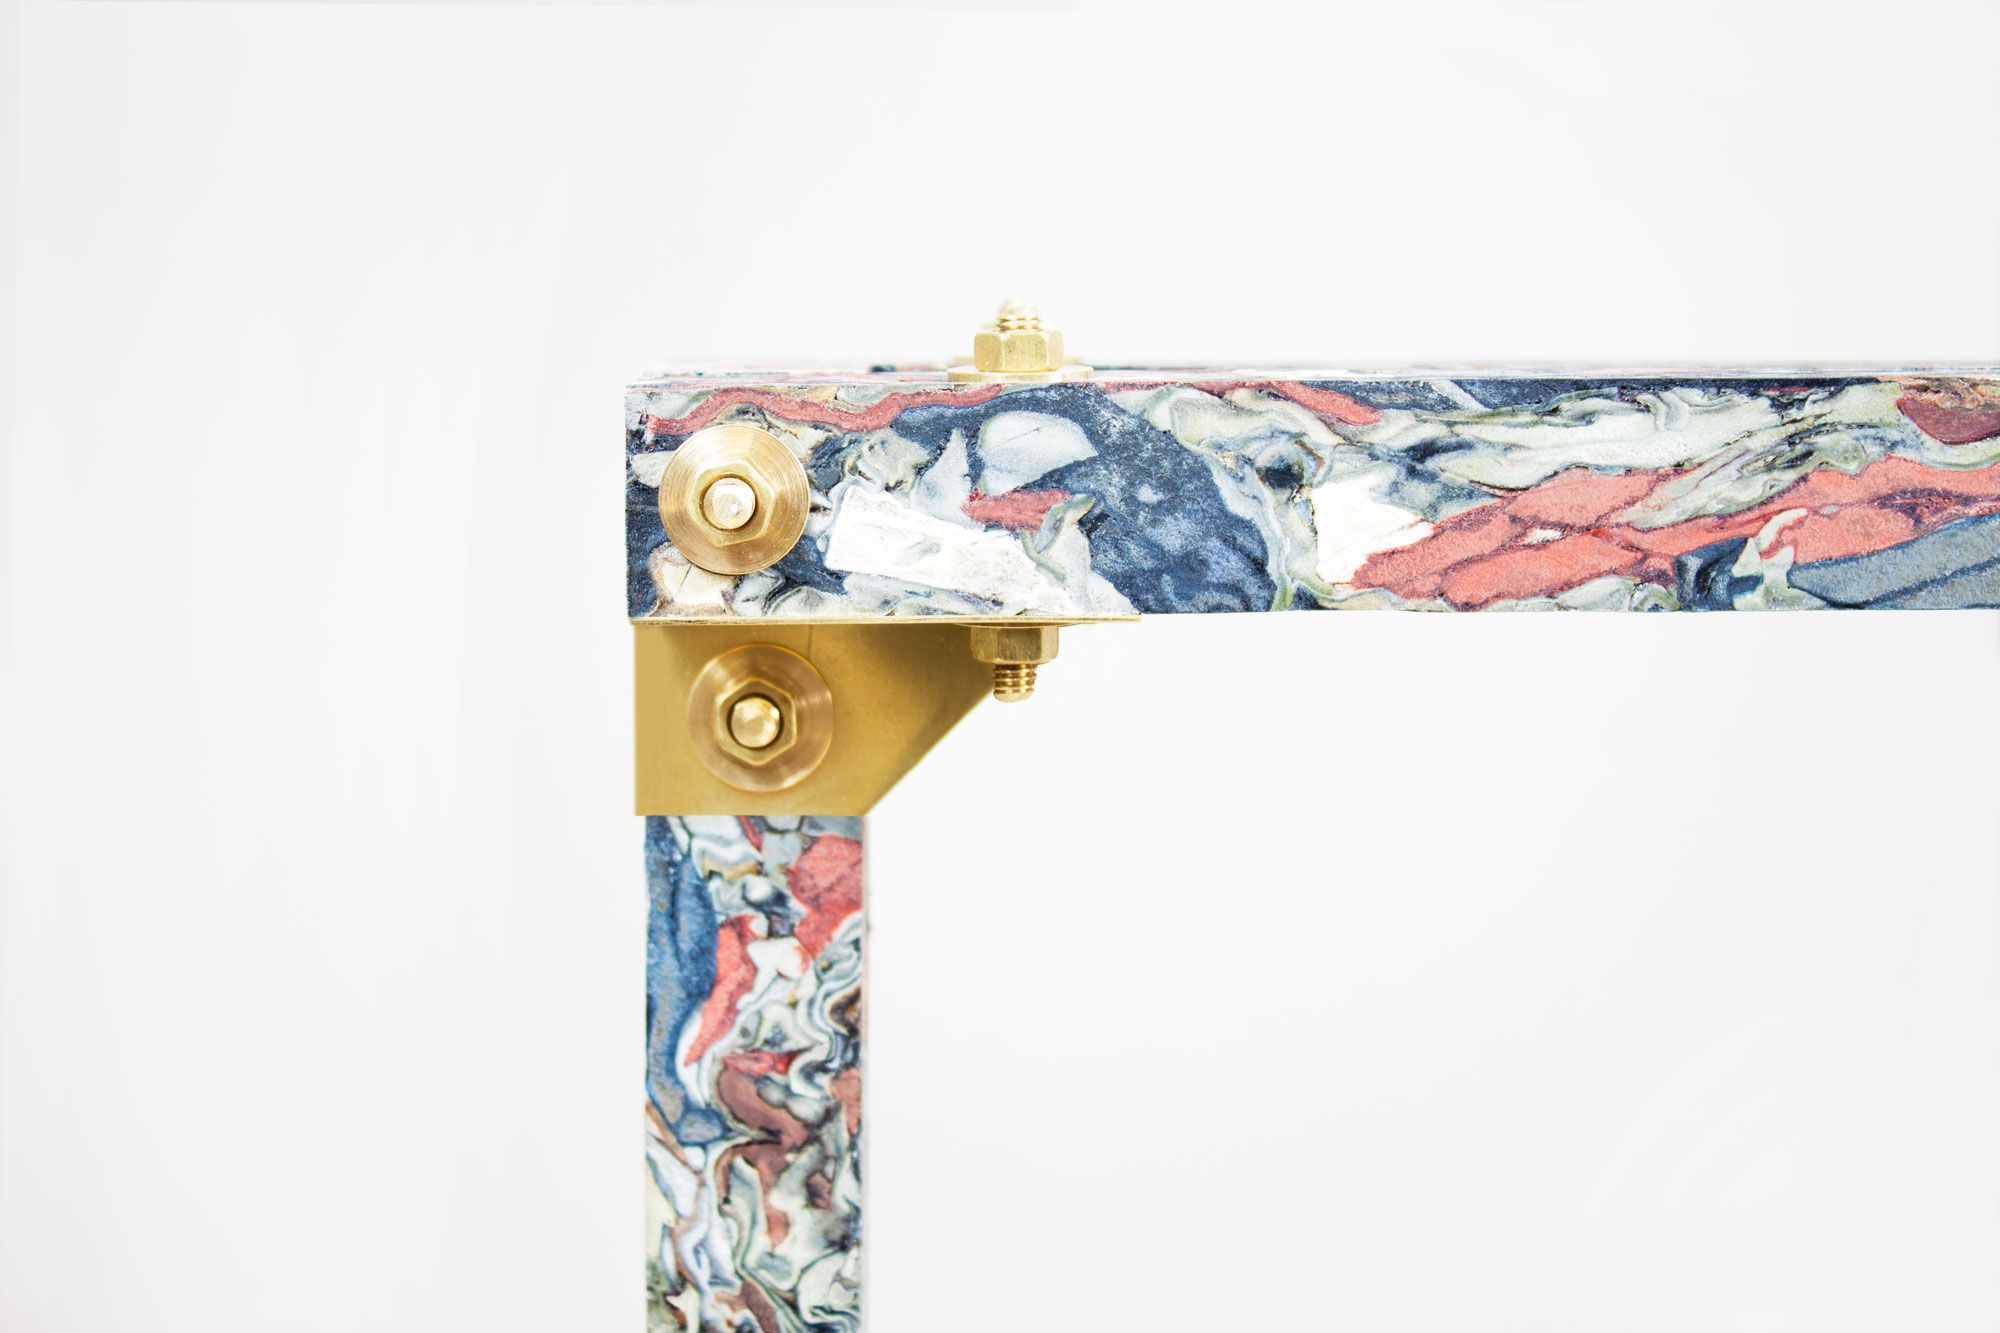
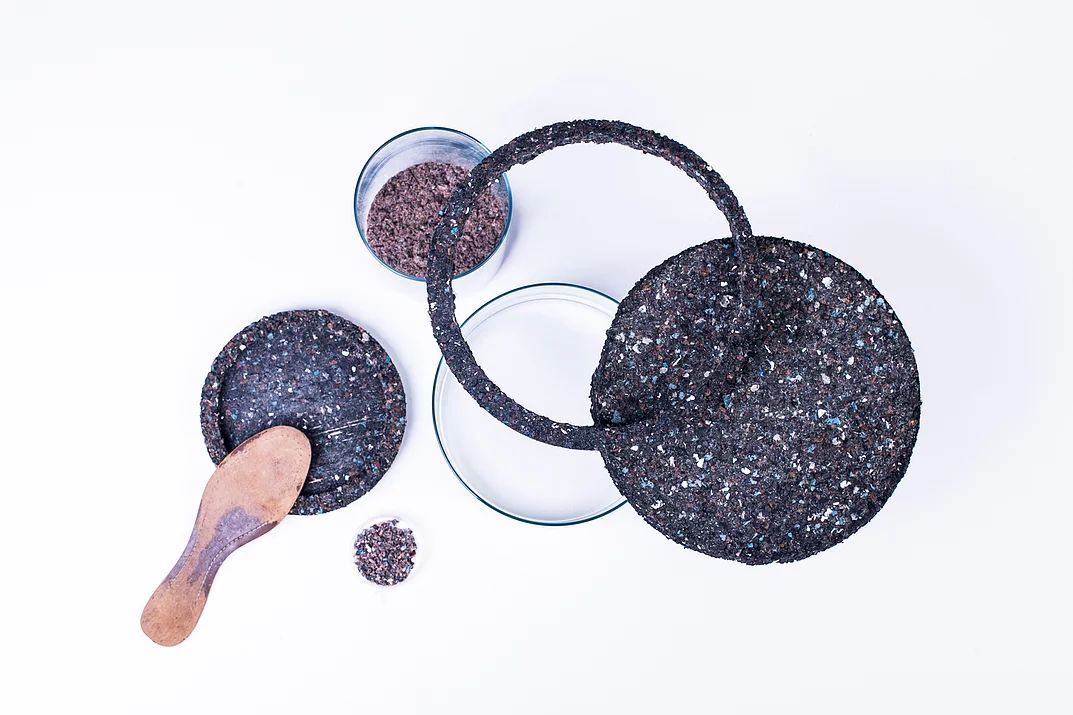
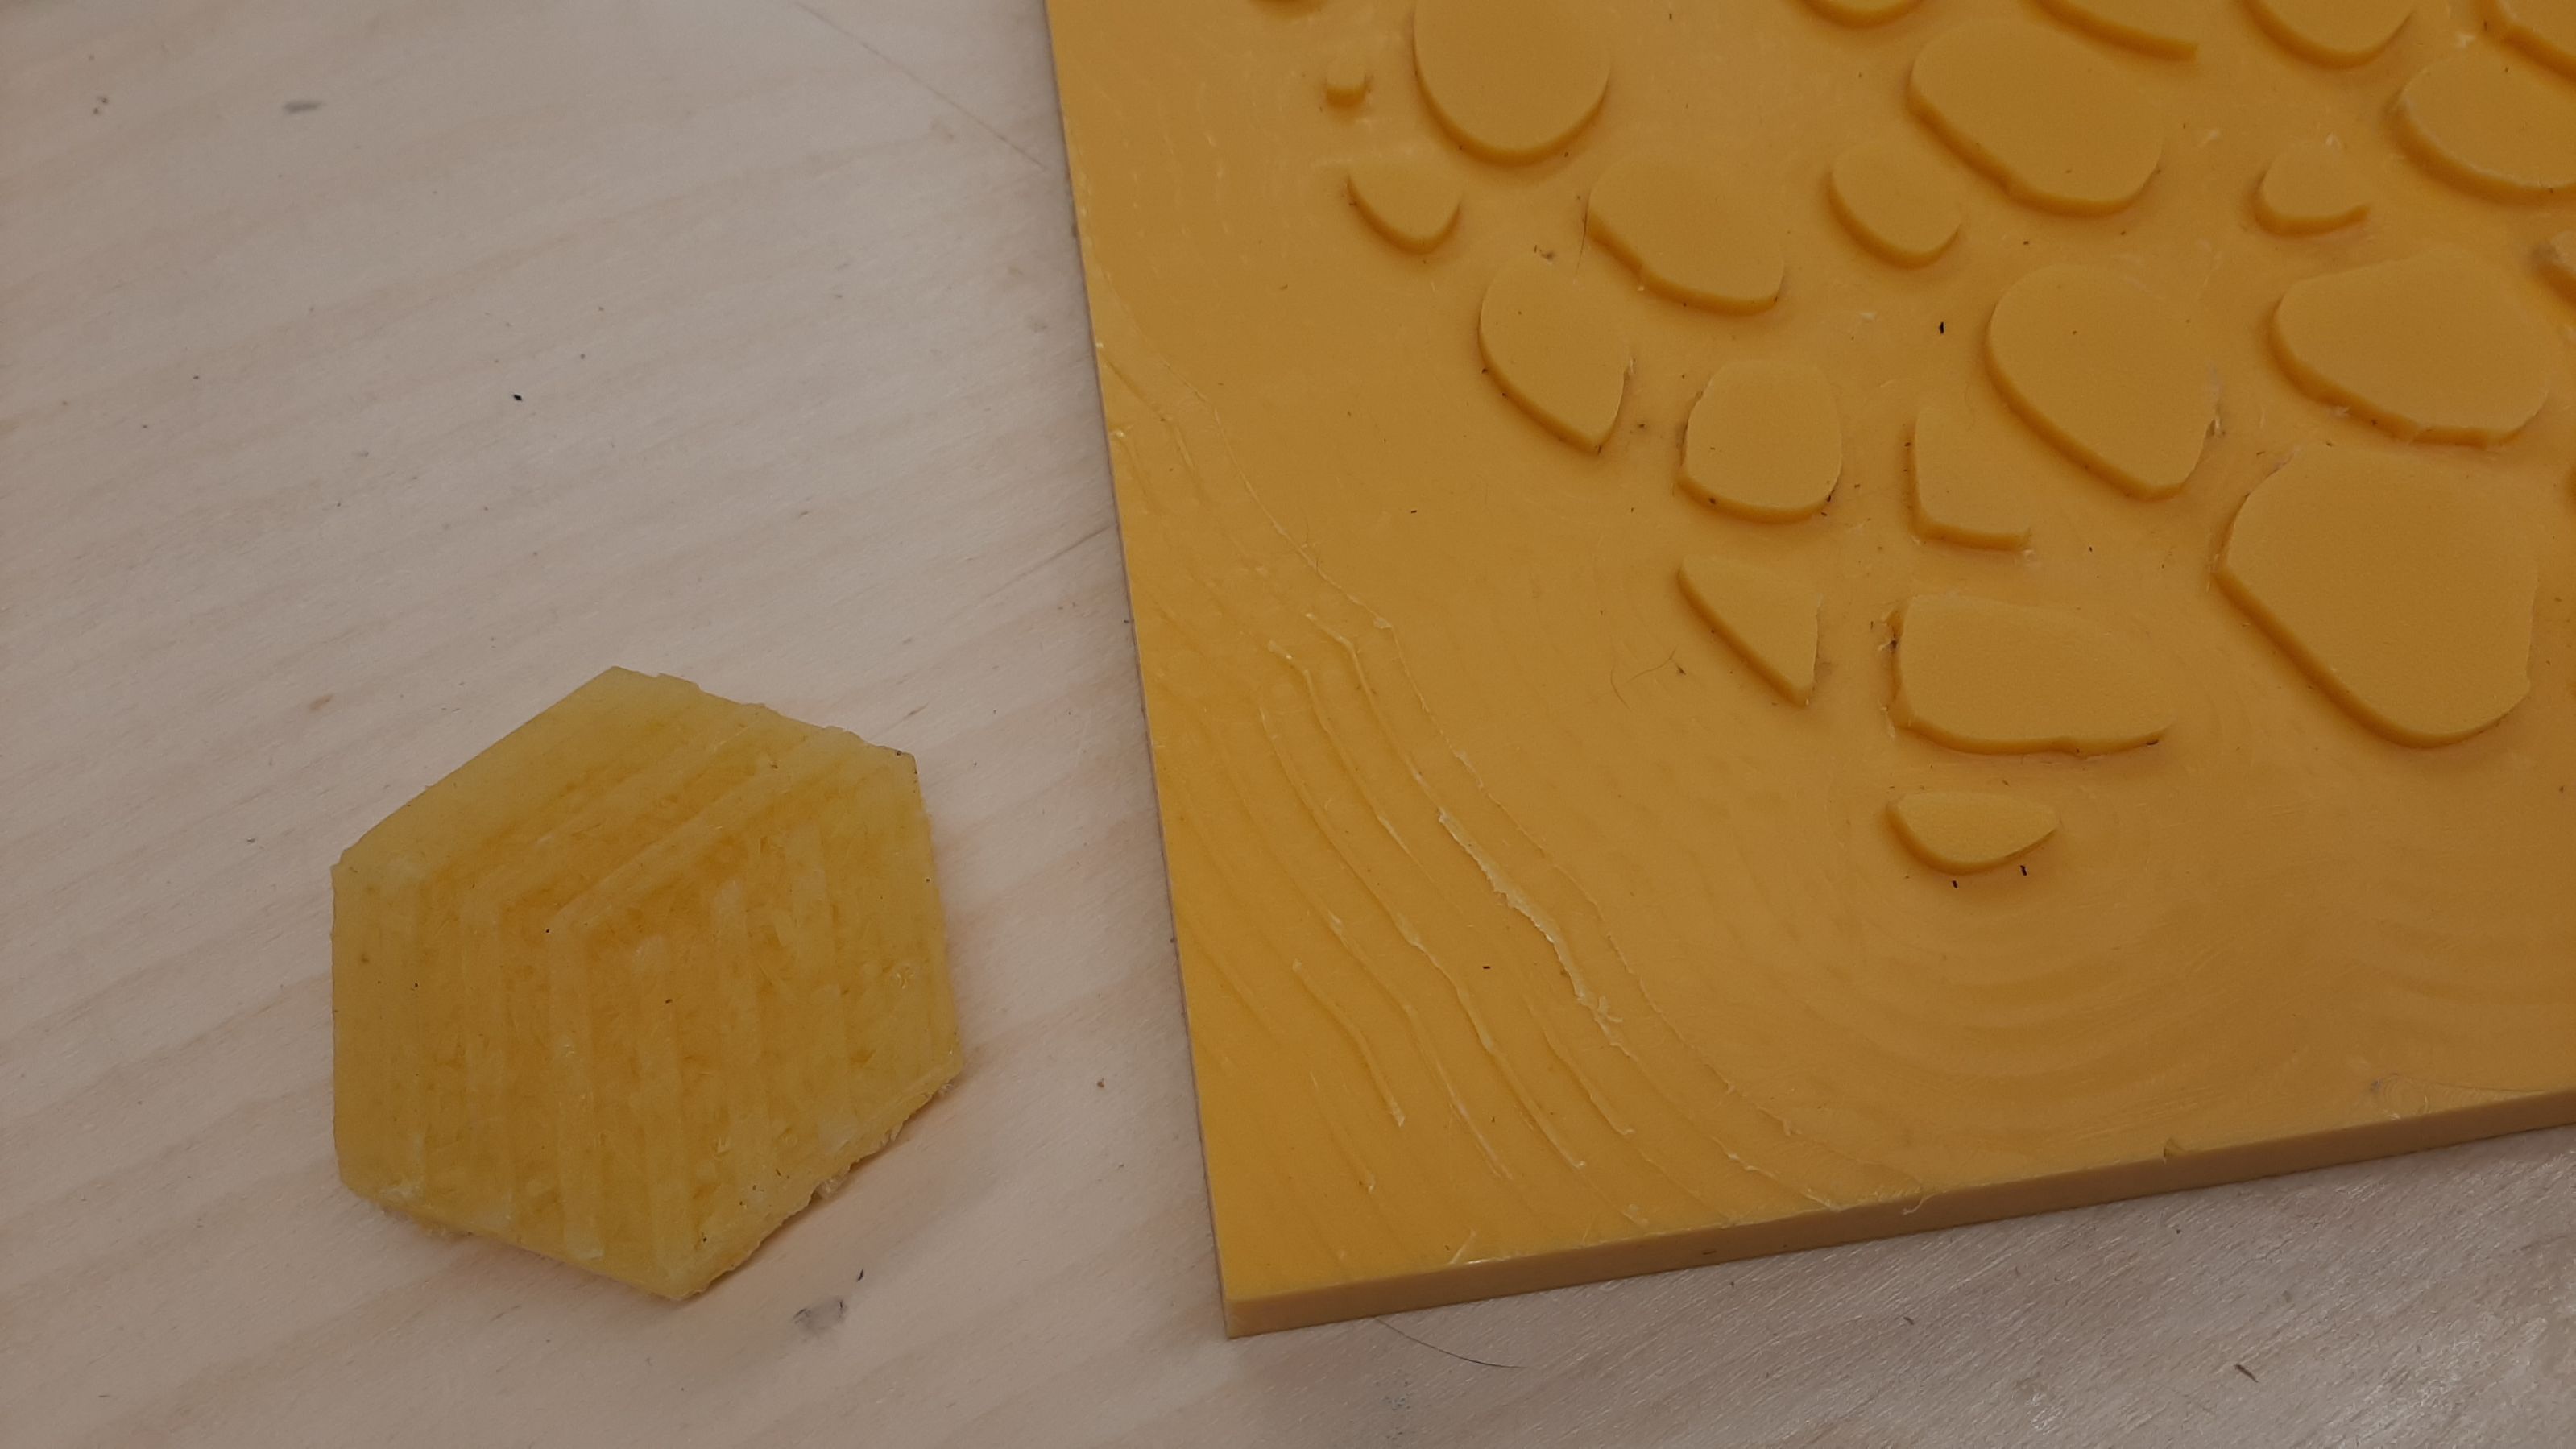
The green and white sample is made of fabric scraps, and the yellow one is filled withs scarps of the CNC.
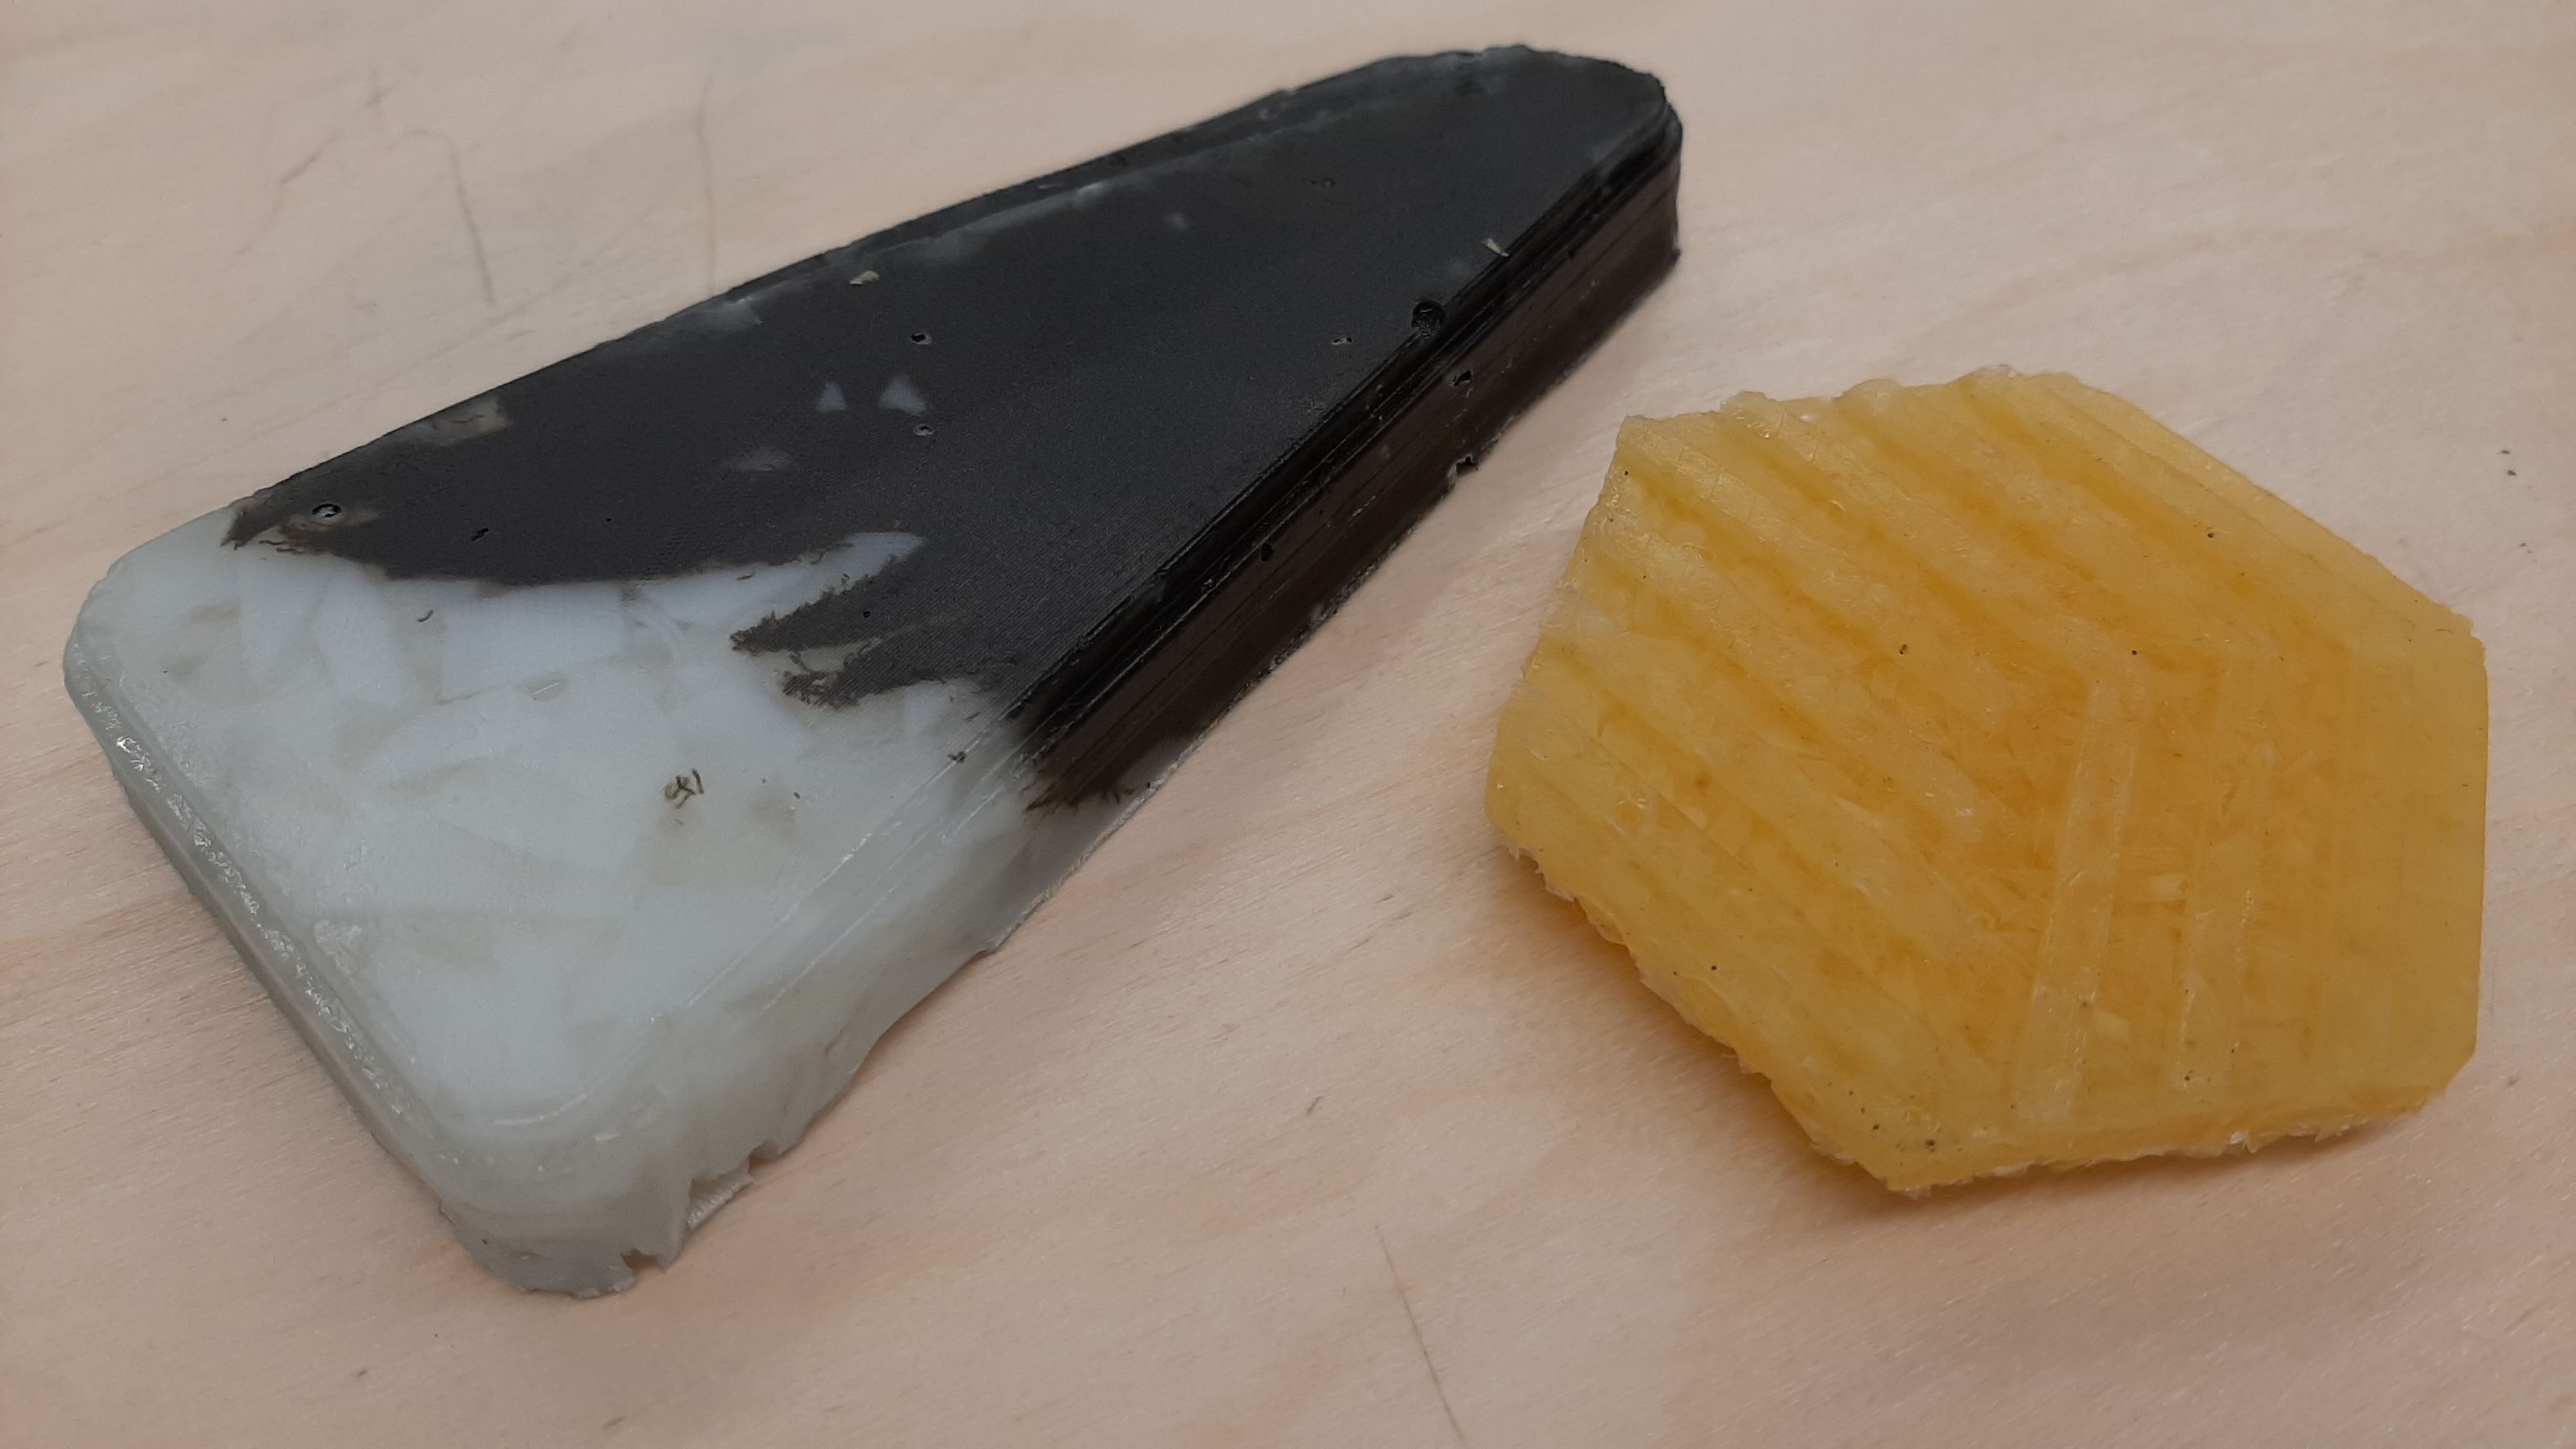
Casting epoxy on fabric did not go that well. First, I casted it between two layers of plastic wrap, but it left wrinkles and irregularities everywhere. If I had to do it again, maybe casting it on a flat surface and then shaping it would avoid these problems.
In the future, I want to test it on the cnc, using my new made material instead of the HDPE. This could be a wonderful alternative to recycle mixed materials and things like fabric that is hard to recycle. Also new mix of colors could be nice!