5. E-Textiles and Wearables I
what have I done
These are the two final sensors that I have come up this week. Below I will explain a bit of the theory learned to get there and after the step by step to replicate my sensors.
fortune teller - digital switch

posture alert - analog sensor
a bit of science never hurts
This was an intensive week to remember/learn a lot of eletronic concepts and also how to apply them into textile. Here a summary of my notes on the week.
- Matter is made of many atoms, in one atom there is a nucleus and the electrons are the little dudes floating around the nucleus. If an atom has more negative than positive (or the opposite) is not a stable atom
- Static electricity : two objects with different electric charge in touch
- Dynamic electricity : electrons moving continuously on a physical path - THIS IS THE ONE WE ARE INTERESTED IN
- Electrons flow : current (how much energy you are transporting), measured in AMPERES (A) - mA = *0,001
- POWER SUPPLY / BATTERY (always oriented) : something need to start the electron movement and this is usually the power supply or the battery
- Battery : inside a battery there are chemicals reactions that makes one side positive and the other one negative
- Negative : is called ground -
- Positive : power or VCC +
- Voltage is the unity of measure of the battery
- THE MULTIMETER : Measuring the voltage, current and resistance
- You can use the multimeter also to know which side is positive or negative of your circuit (if the result is showing positive it means that the black cable is on the negative side)

-
SHORT CIRCUIT - make sure the loop is always going from positive to negative and it's closed
- The electrons can not be flowing free in the circuit as they want - so you can attach a RESISTANCE to the circuit
-
RESISTOR
- They can have legs THT (through hole technology)
- Surface mounted tech (SMT OR SMD) no legs
- No orientation
- Resistance is measured in OHMS = Ω omega symbol
OHM’S LAW : V = I x R
nope, not this one
- LED can be THT or SMD
- Longer leg is the +, shorter is the -
- To make one LED turns on you need 20 mA and a voltage of ~3V (so those slim little batteries works just fine)
- If you have a circuit that has higher voltage than what the led needs, you need a resistor
- Good practice for cables RED FOR POSITIVE AND BLACK FOR NEGATIVE
- BREADBOAD - is a physical support for making temporary circuits and prototyping - dont require soldering
- ARDUINO
- This is a programable microcontroller, together with the multimeter our best friend for the week - learn more and download the program here
- GENUINO UNO - is the simple and most used version of arduino
- Although Arduino is very smart, like most of us it can’t work with things in parallel, so will repeat continuously the code you wrote. To change it you need to override the code.
 I never thought I would look at this picture and desire such a thing, but in case you share the feeling you can buy this Arduino starter kit here
- SENSORS : DIGITAL X ANALOG
- DIGITAL - only two positions are possible 1 x 0 / high x low / on x off (a SWITCH is usually a digital sensor)

- ANALOG - all values between the min and max are possible GND or VCC
- DIGITAL - only two positions are possible 1 x 0 / high x low / on x off (a SWITCH is usually a digital sensor)
- Before conecting anything to your circuit you need to test if the switch works by setting up the multimeter in continuity mode ("wifi" like sign) and test if there is a sound or not
building circuits
Before diving in our week's assingment we built a series of circuits with Emma:
LED + Resistor simple circuit with battery

LED + Resistor simple circuit with battery on Arduino

2 LED circuit with battery on Arduino


Connecting Arduino to the computer and playing with the LED, blink and fade programs

Circuit with digital sensor/switch and LED

Circuit with analog sensor - measuring the resistance (monital serial)

Circuit with analog sensor and LED - calibration code

Circuit with fabric piece as an analog sensor

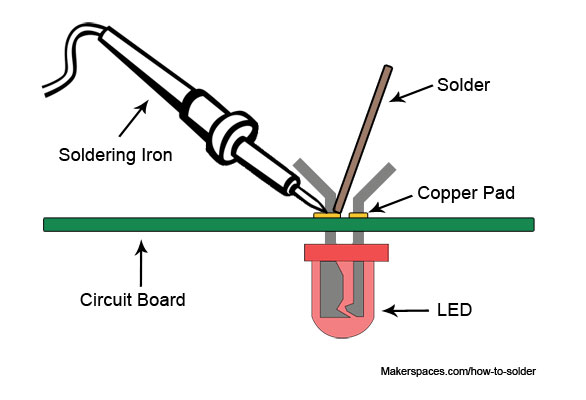
We also had a little workshop on how to use the soldering iron connecting different parts, specially when working with LED. Here is Bela on her first try:

deliverable
digital switch
We had the chance to see/touch many e-textile samples from the E-textile Summercamp. While exploring them I liked the idea of doing some sort of game. So playing a bit with paper I remember this game from my childhood, apparently in english is called Fortune Teller Paper but it has also many other names. Was also funny to realize that for everyone I showed in the lab, they immediately recognized the game, no matter they nationality (so far Brazil, Italy, Portugal, Netherlans, Australia and Aruba were tested).

process
The first step of the process was to do an easy prototye (fail-fast mentality here). So I just got some different fabrics that were available and tried to see which one could be foldable but also maintaining the soft material look and feel. I came up with this sort of nylon tafeta (black side) bonded with a nice soft fabric, swede like (white side). I cutted and made the shape so I could start experimenting on where would I place the circuit and if it was feasible.
First prototype was done with copper tape and some conductive threads, by checking with multimeter and then also with arduino, it seemed that I had something possible. From this step on, I went back to paper and got my schematics done, best tip here is USE DIFFERENT COLORS FOR DIFFERENT STUFF (tks Emma). From the schematics, was more a matter of trying to fit everything and ensuring that the traces were not touching when folding the fabric.
schematic and first prototype
prototype test with multimeter and arduino
From this moment, I made the exact measurements I would like to have my final switch (20x20cm) and made the traces drawing in Rhino so I could laser cut the copper fabric in the exact shape needed. The laser cut settings for the copper tafeta was Power 20 Speed 100.

After laser cutting, I applied the heat'n bond paper glue. Actually I realized this was better to be done before laser cutting, but if you do it fast enough it also works. Here is the technique I used!

I also laser cutted the main fabric in a perfect square and iron it when folded, to help keeping the fold in place. Then I did the embroidery with conductive threads.

Applying the copper traces using an iron. Was important to put some non-conductive fabric in between traces avoiding short-circuit

After that, I solderd the led mini lights into a sort of thicker thread and sewed on the position that would allow me to connect everything right in the back

This was the final look of the game, so far I only have one "surprise" on the heart position. So as the person opens that choice the LED light turns on, because the opposite sides are the switch.
The back looks like this. I made a little pocket to accomodate the battery. I have still place to do othe 3 LED lights on the other side.

analog sensor
For the analog sensor I choose the option of a bend sensor, by exploring the human body joints, I had an idea to use the sensor as some sort of ortopedic helper. As I work most of the day in front of a computer is very common that I'm not sitting straight and later have back pain as a result of bad posture. Therefore the goal of this sensor is to be attached to someone's back and by have the resistance varies as the column bends.
I followed Lisa's demo, using a neoprene fabric, with conductive thread and a sheet of Velostat in between.
- 1 - two sides of neoprene and the velostat cutted thinner than the neoprene. For aesthetic reasons I wanted the thread to show on the other side, but you can choose to keep it hidden inside the neoprene as well.
- 2 - place the velostat on top of the diagonal threads
- 3 - make the sandwich (make sure that the diagonal sides and making a X as they face eachother)

Testing the prototype with Arduino. Since the variation of resistance is not so big, the calibration moment is very important, I suggest to change it for a longer time period.