3. Circular fashion
Hacking the fashion industry
I really loved reading aubout the future of manufacturing
"design global, produce on demande & locally"
"consumers as creators"
- The future of manufacturing
- Is apparel manufacturing coming home?
- The EU furniture market situation and a possibke furniture products initiative
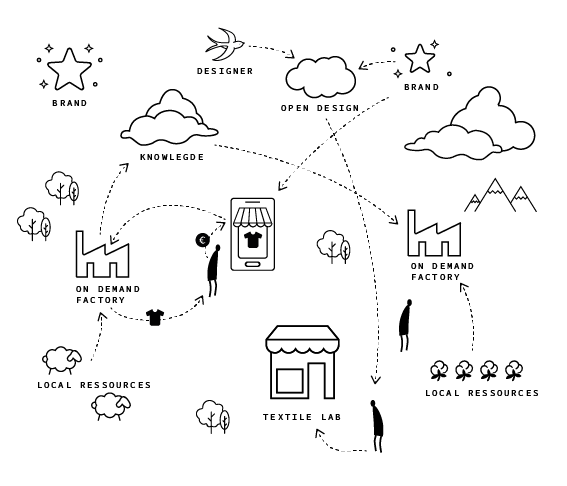
I'm very interested to imagine the possibility of this micro factories - on demand & locally. What would be their business model.
I've started a sketch to figure it out... to be completed - if anyone have ideas, you're welcome !
Modular
Pattern 1
Process
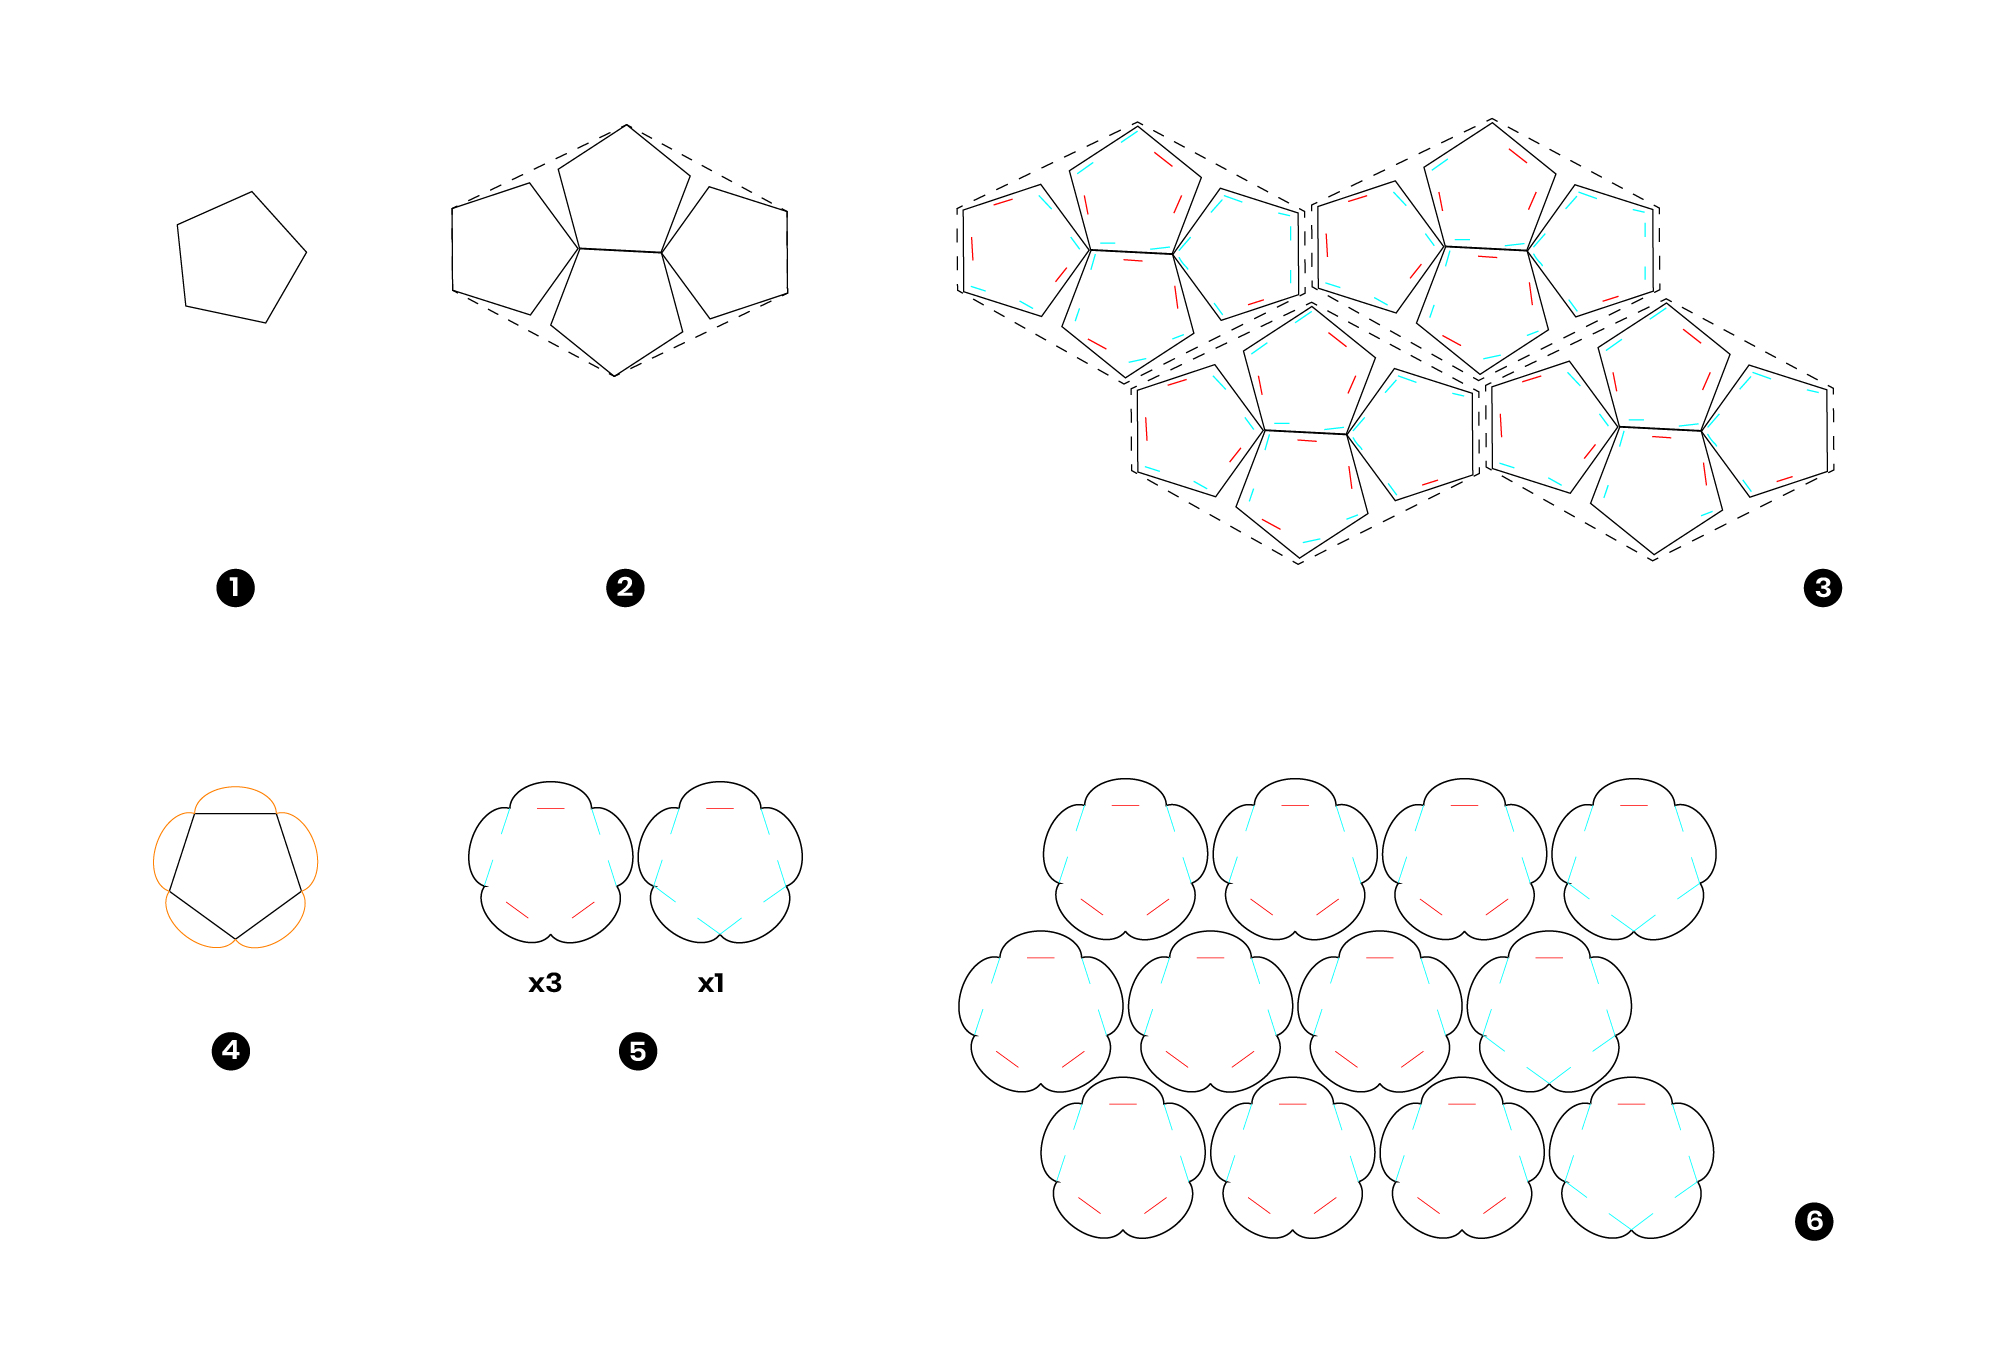
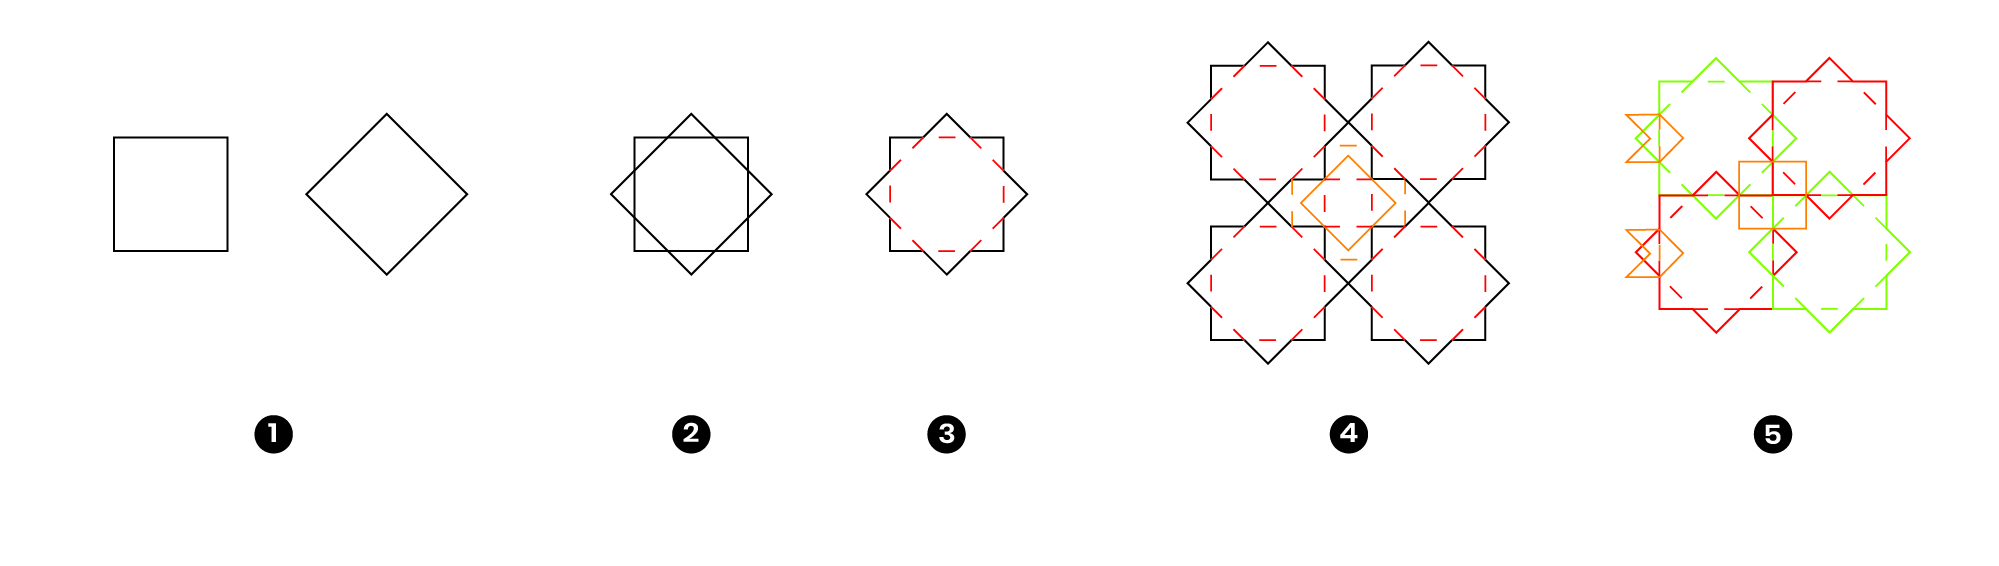 1. On Illustrator, I start with a square, duplicate and rotate
2. I superpose them
3. I create the inside cuts, and the outline shape
4. I juxtapose them to see and fill the left over material, and draw complemantary shapes inside.
5. It's a representation of the piece's assembly, we have the 4 main pieces, a smaller square which hold the 4, and very small piece for decorating the edges.
1. On Illustrator, I start with a square, duplicate and rotate
2. I superpose them
3. I create the inside cuts, and the outline shape
4. I juxtapose them to see and fill the left over material, and draw complemantary shapes inside.
5. It's a representation of the piece's assembly, we have the 4 main pieces, a smaller square which hold the 4, and very small piece for decorating the edges.
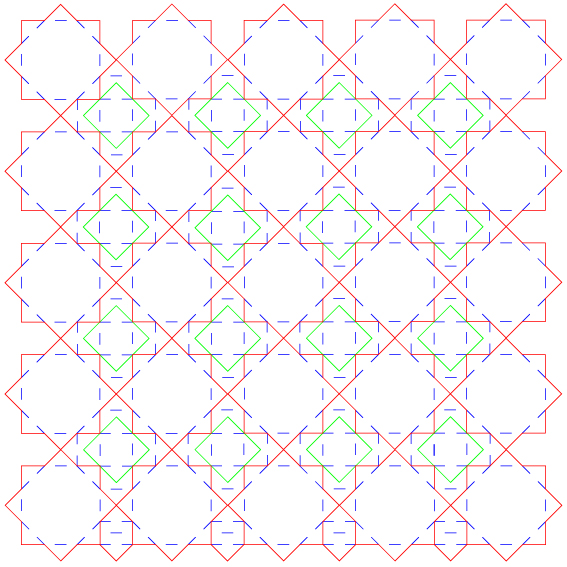
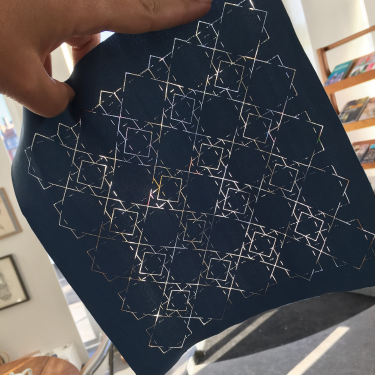
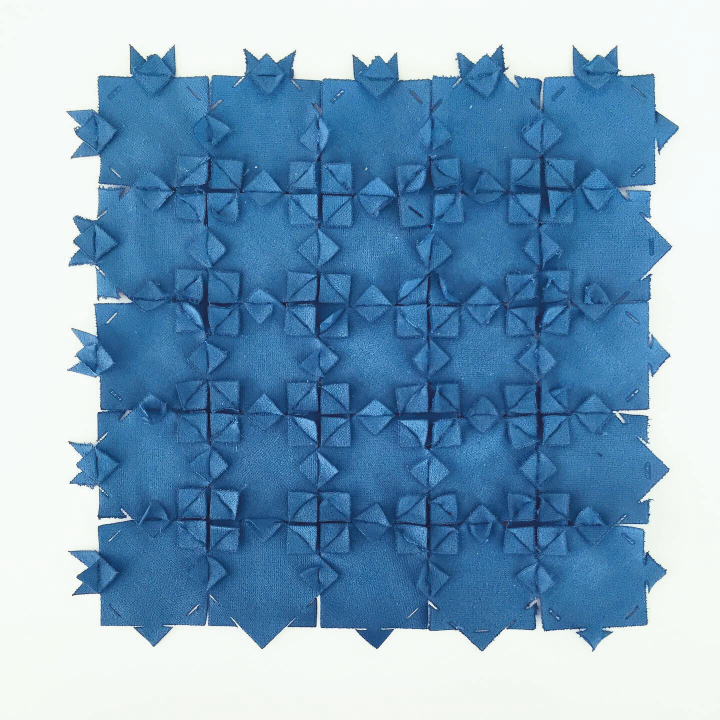
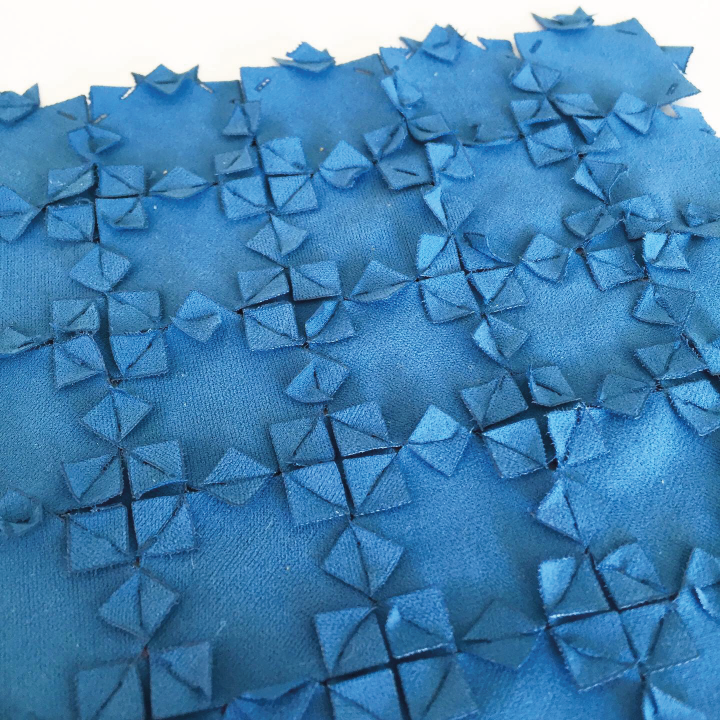
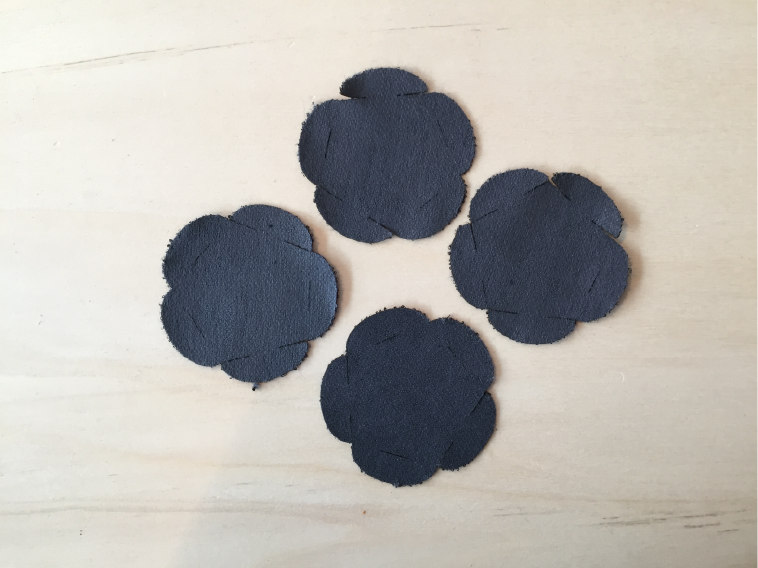
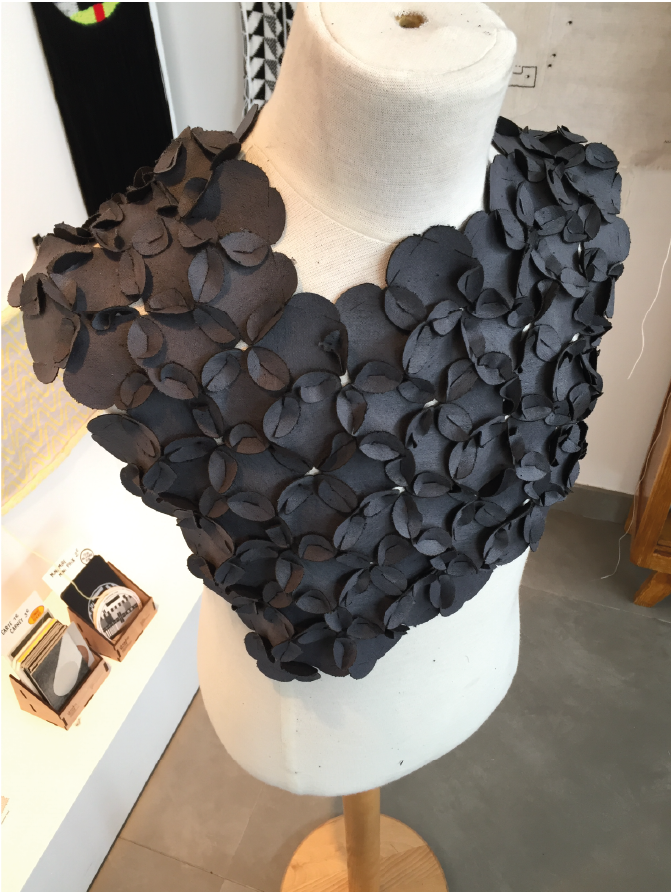
This is the final pattern, draw to fit in a 200x200mm square.
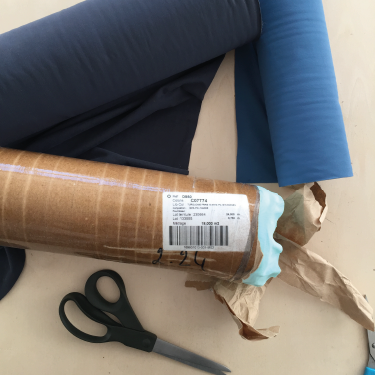
I choose to use second hand fabrics form a ressourcerie "Frich Market", it's 100% polyamide with a velvet side.
This is the machine I'd just receveid, I have explain the step by step below.
All the pieces stay attach, very easy to collect form the machine and easy to tear pieces appart by hand.
WARNING!!! Same fabric, different color = same settings not working! If the color is lighter, the laser doesn't work. Need to adjust the setting, down the speed.
Pattern 2

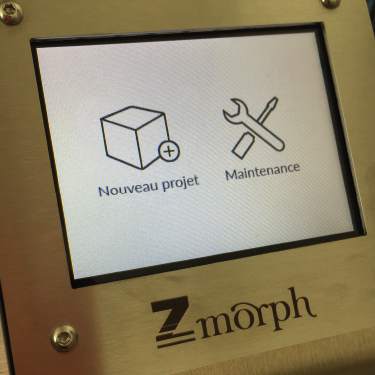
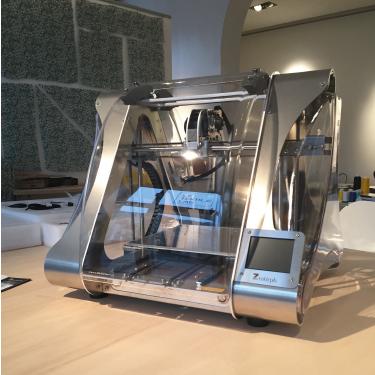
Zmorph3D
I recently bought a 4 in 1 printer. It prints, mills, cuts, engraves. Working area: up to 250 x 235 mm. Compatible with: Voxelizer, Simplify3D, Cura, Slic3r. I started to use Voxelizer.
Step by step Lasercut
Open Voxelizer :
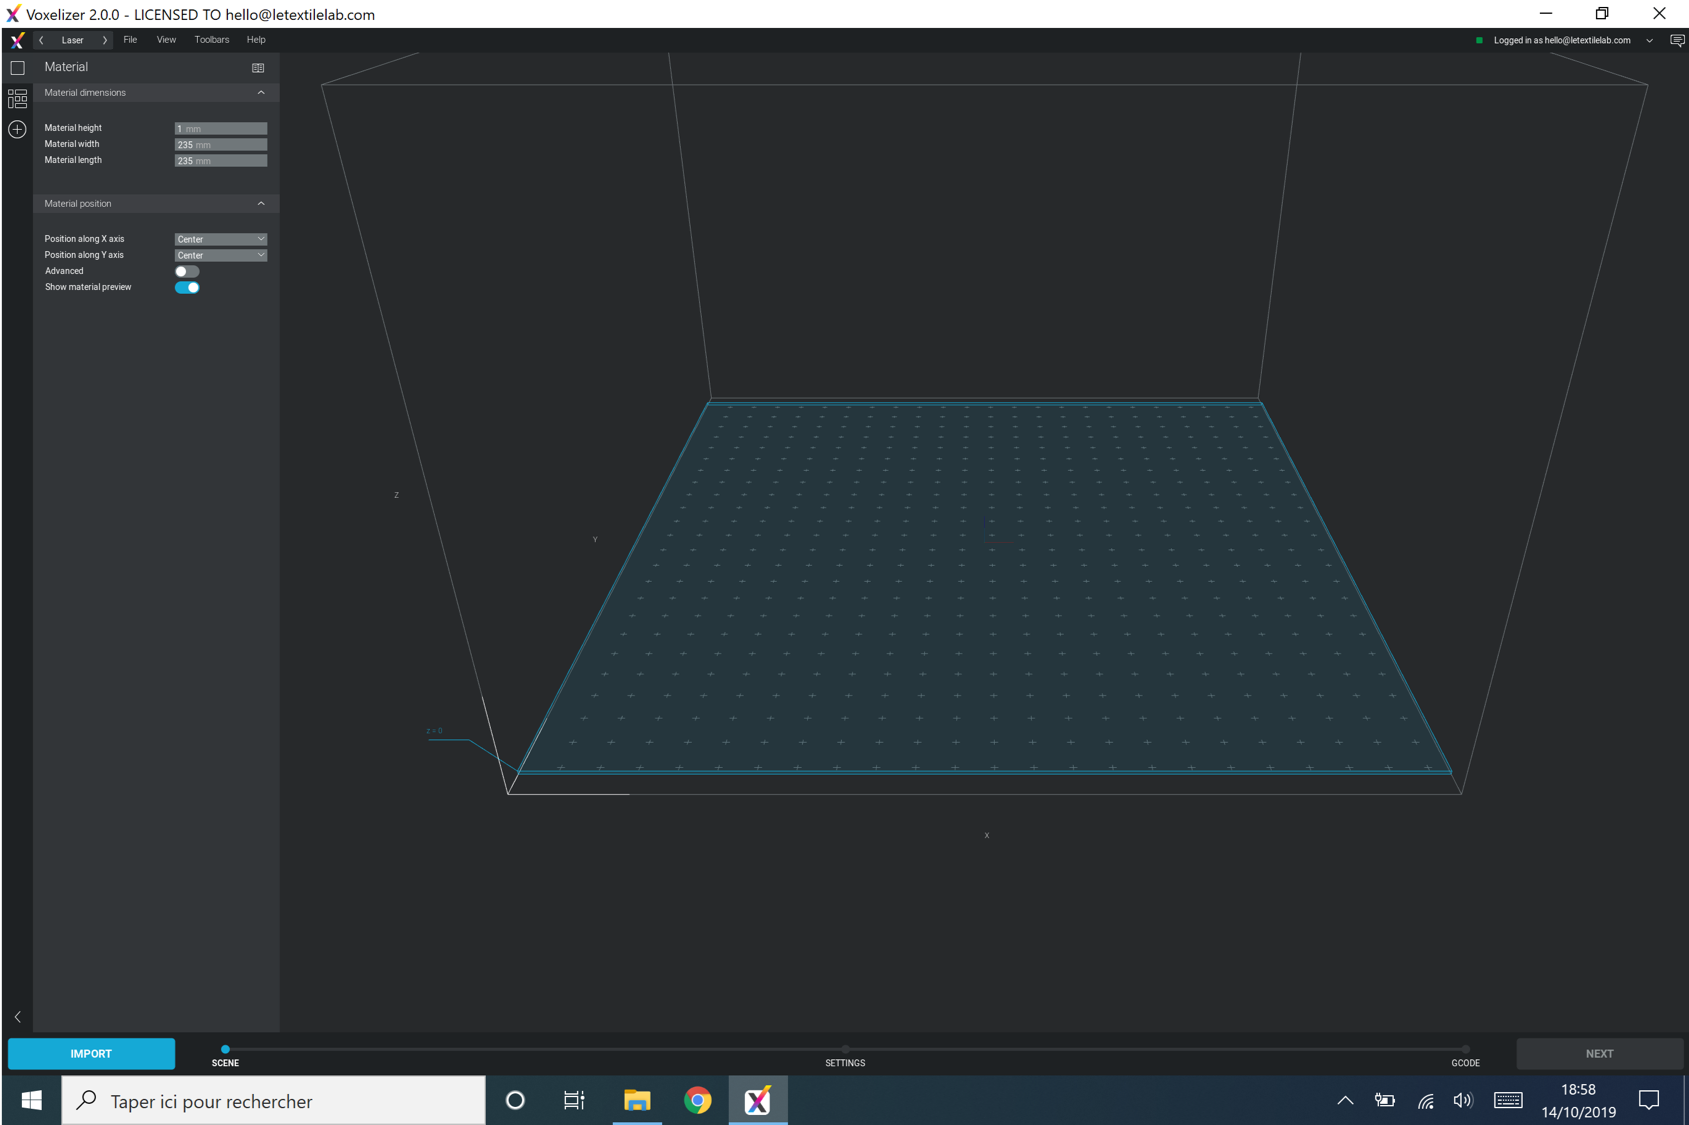 1. Setup the material dimensions, here : height = 1mm, width = 235mm, lenght = 235mm
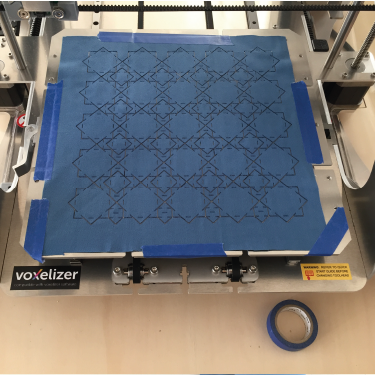
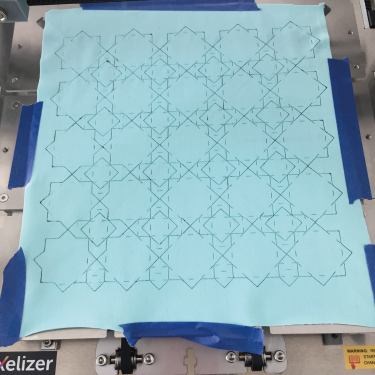
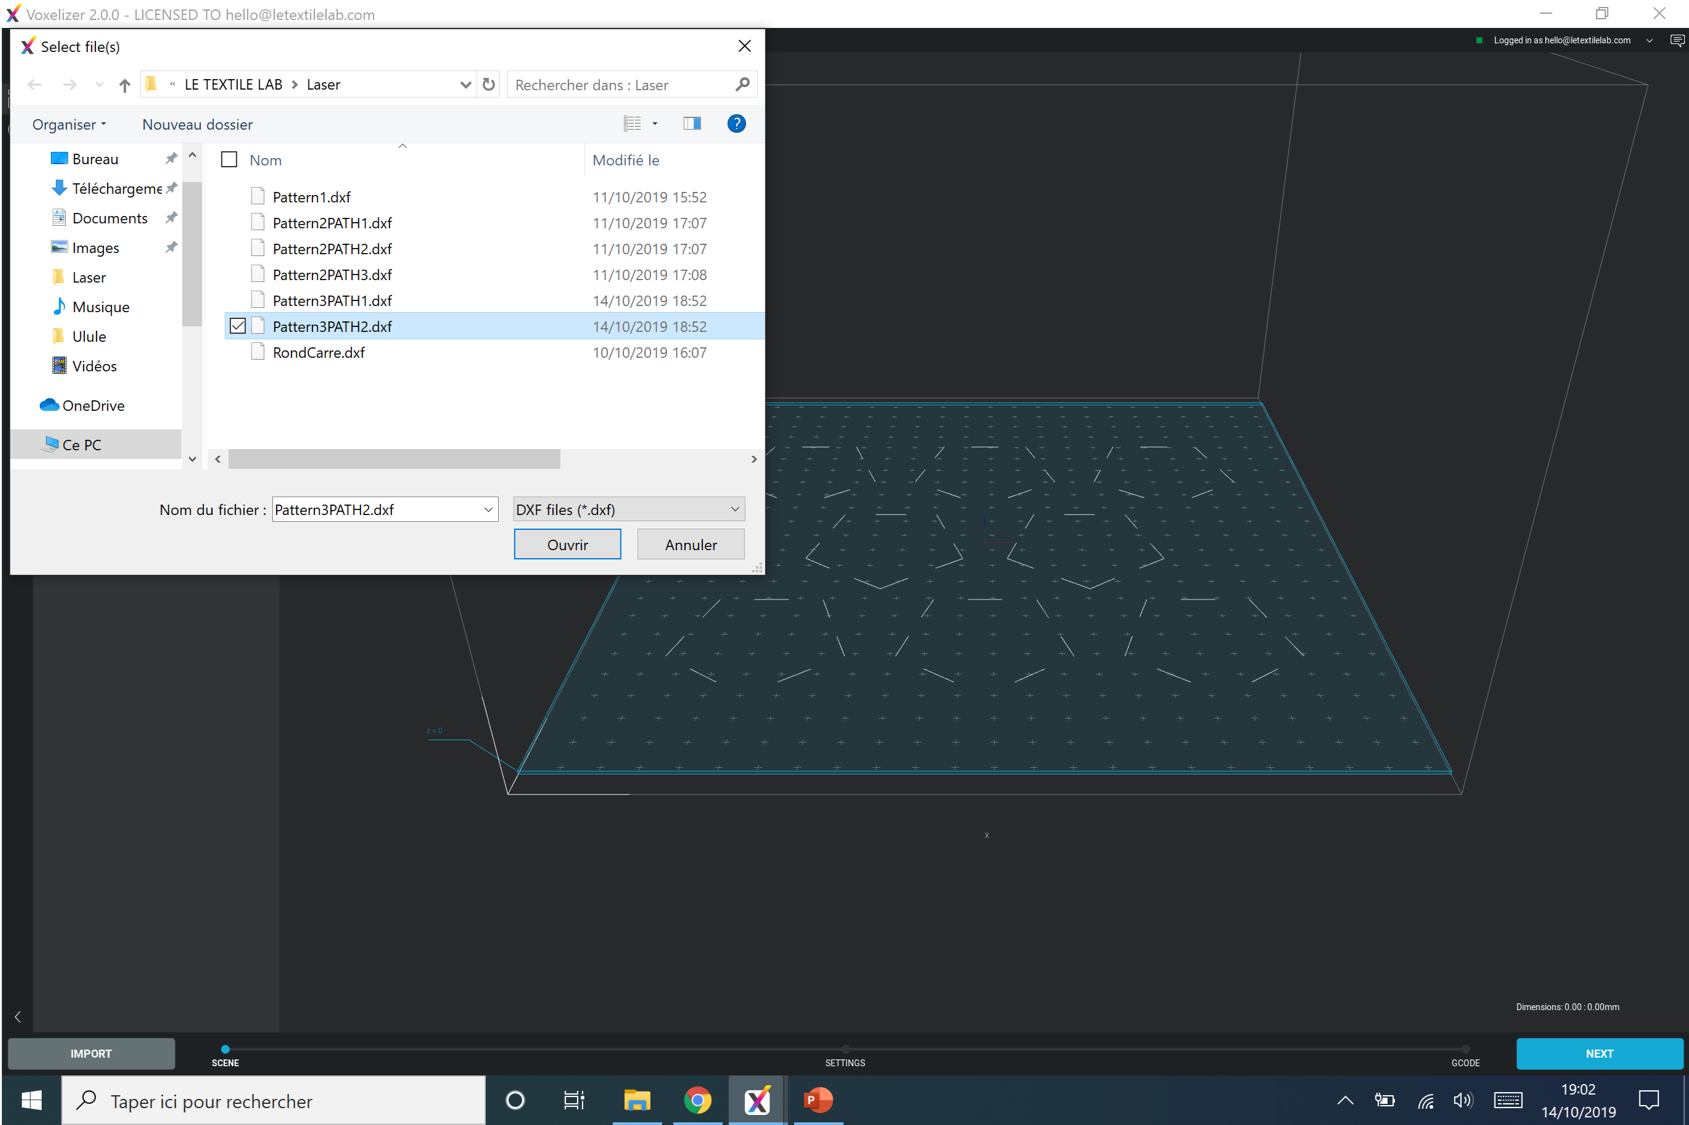
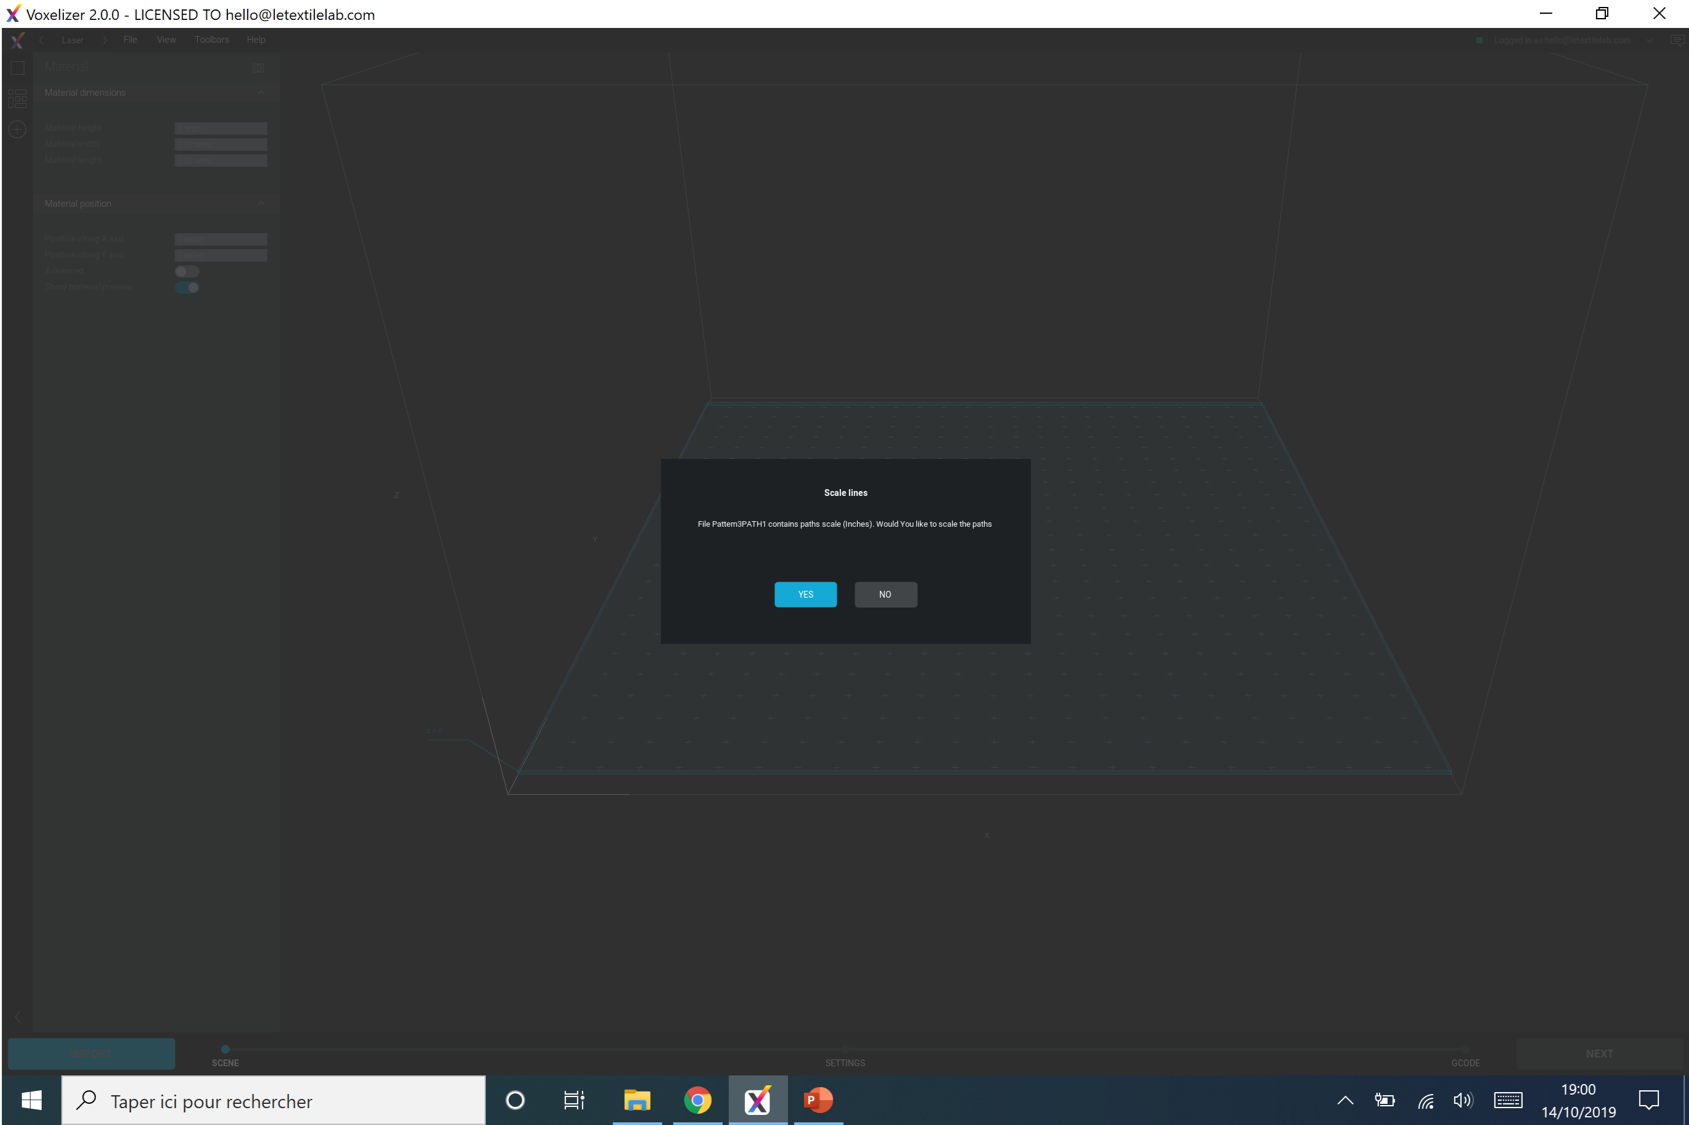 2. Click import, choose your file.dfx, click "No" to scale the paths. Here I made 2 differents paths.dfx, one with small inside cuts, one with the final outline.
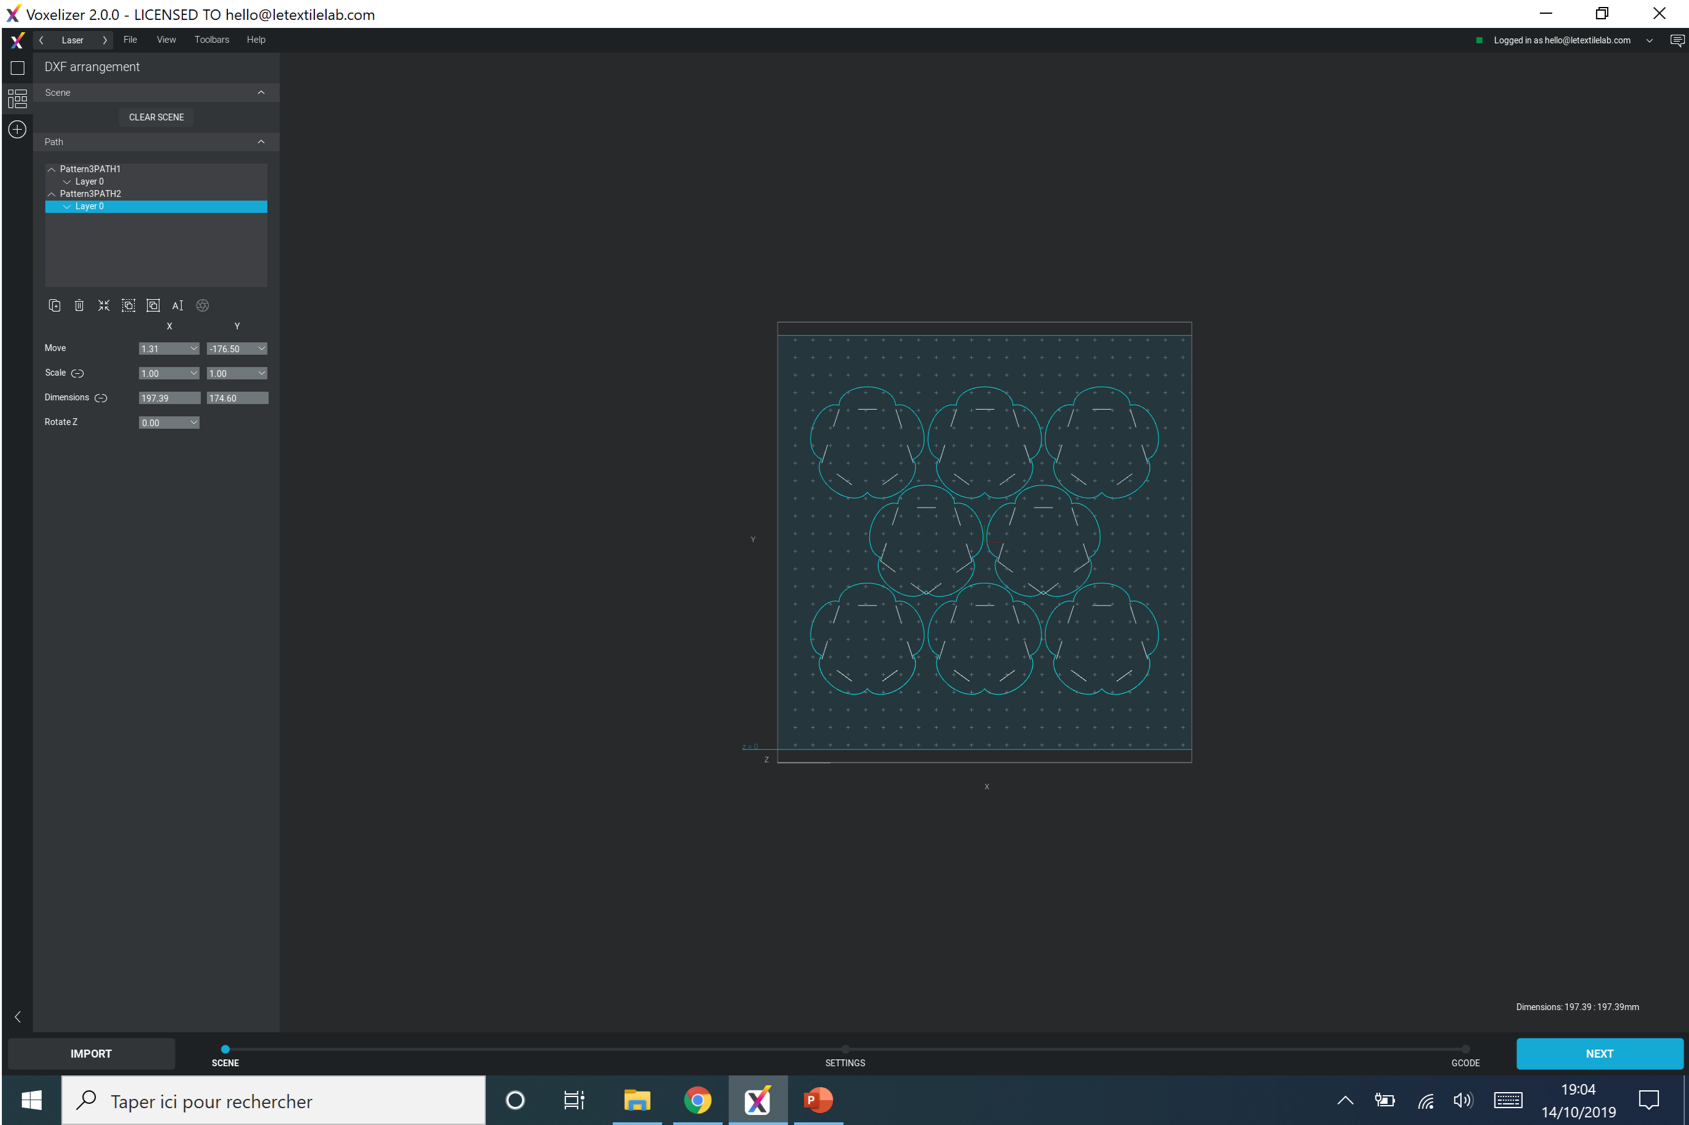
 3. Center the path on the material > "3rd icon"
 4. Import the 2nd path (the outline cut) and center it on the material > "3rd icon"
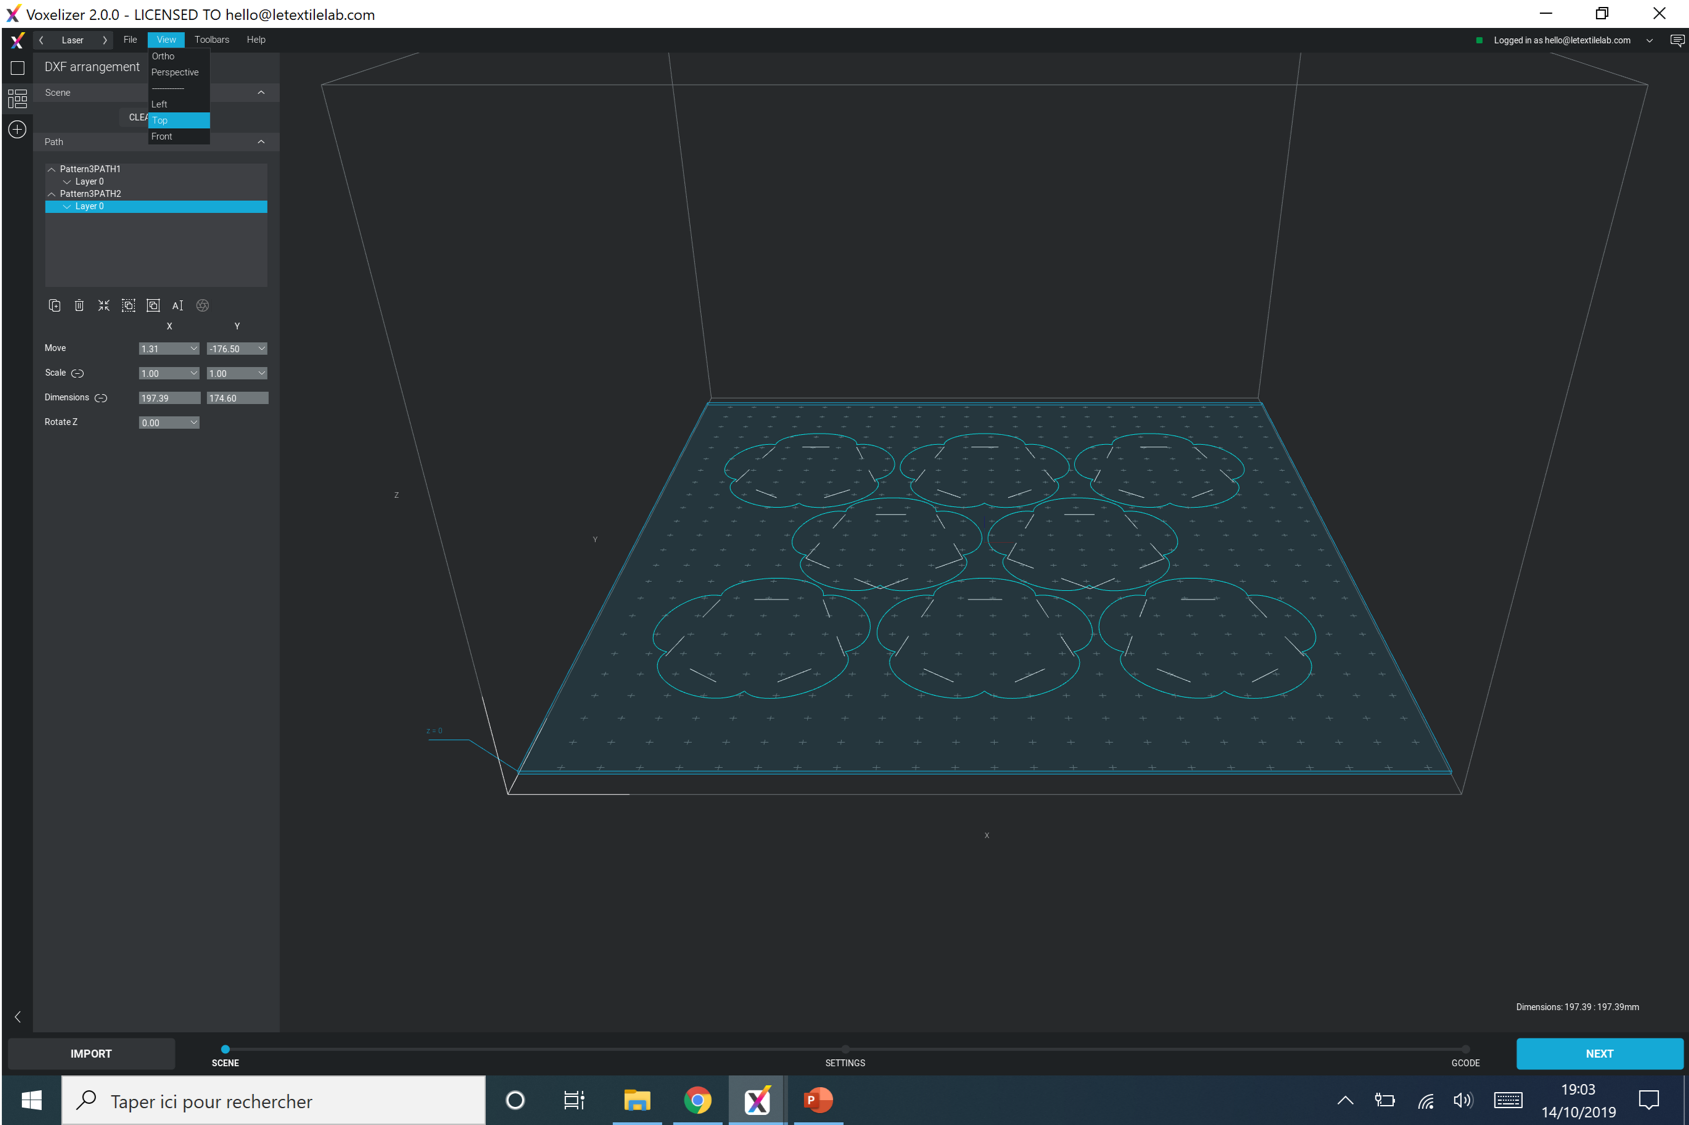
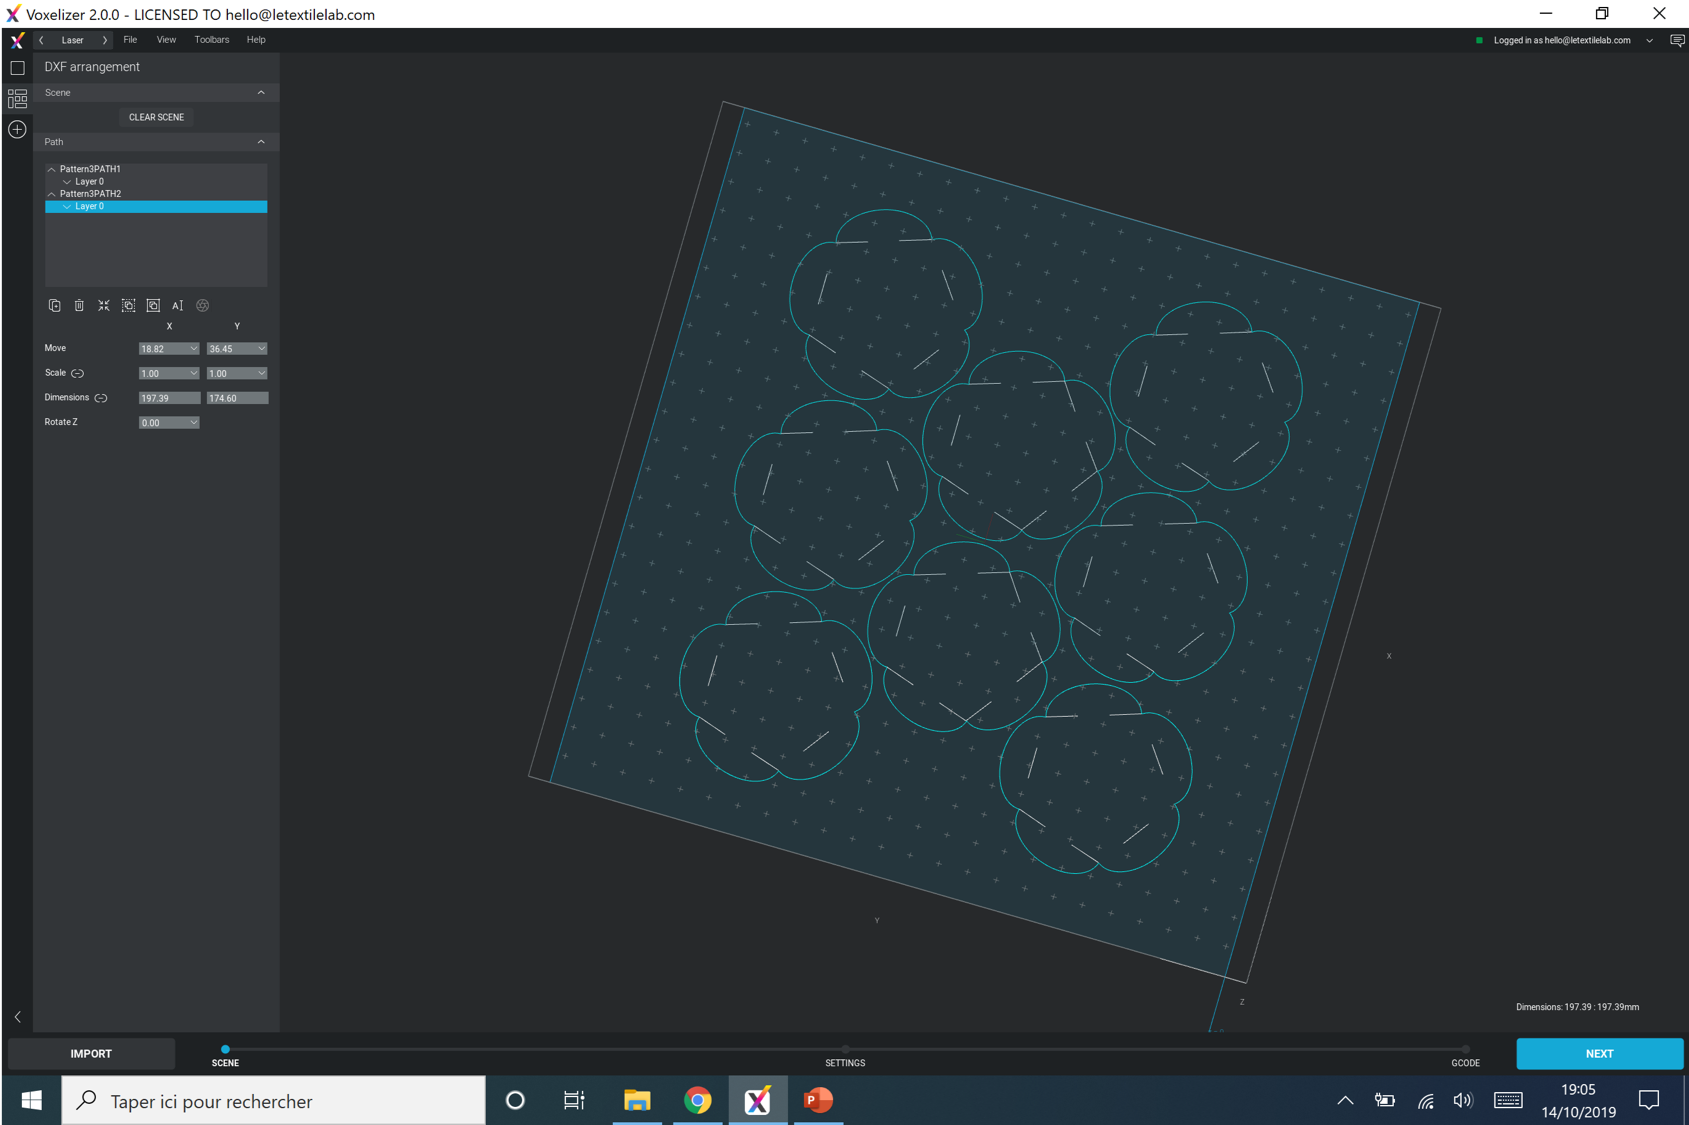
 5. Change the view to adjust the superposition
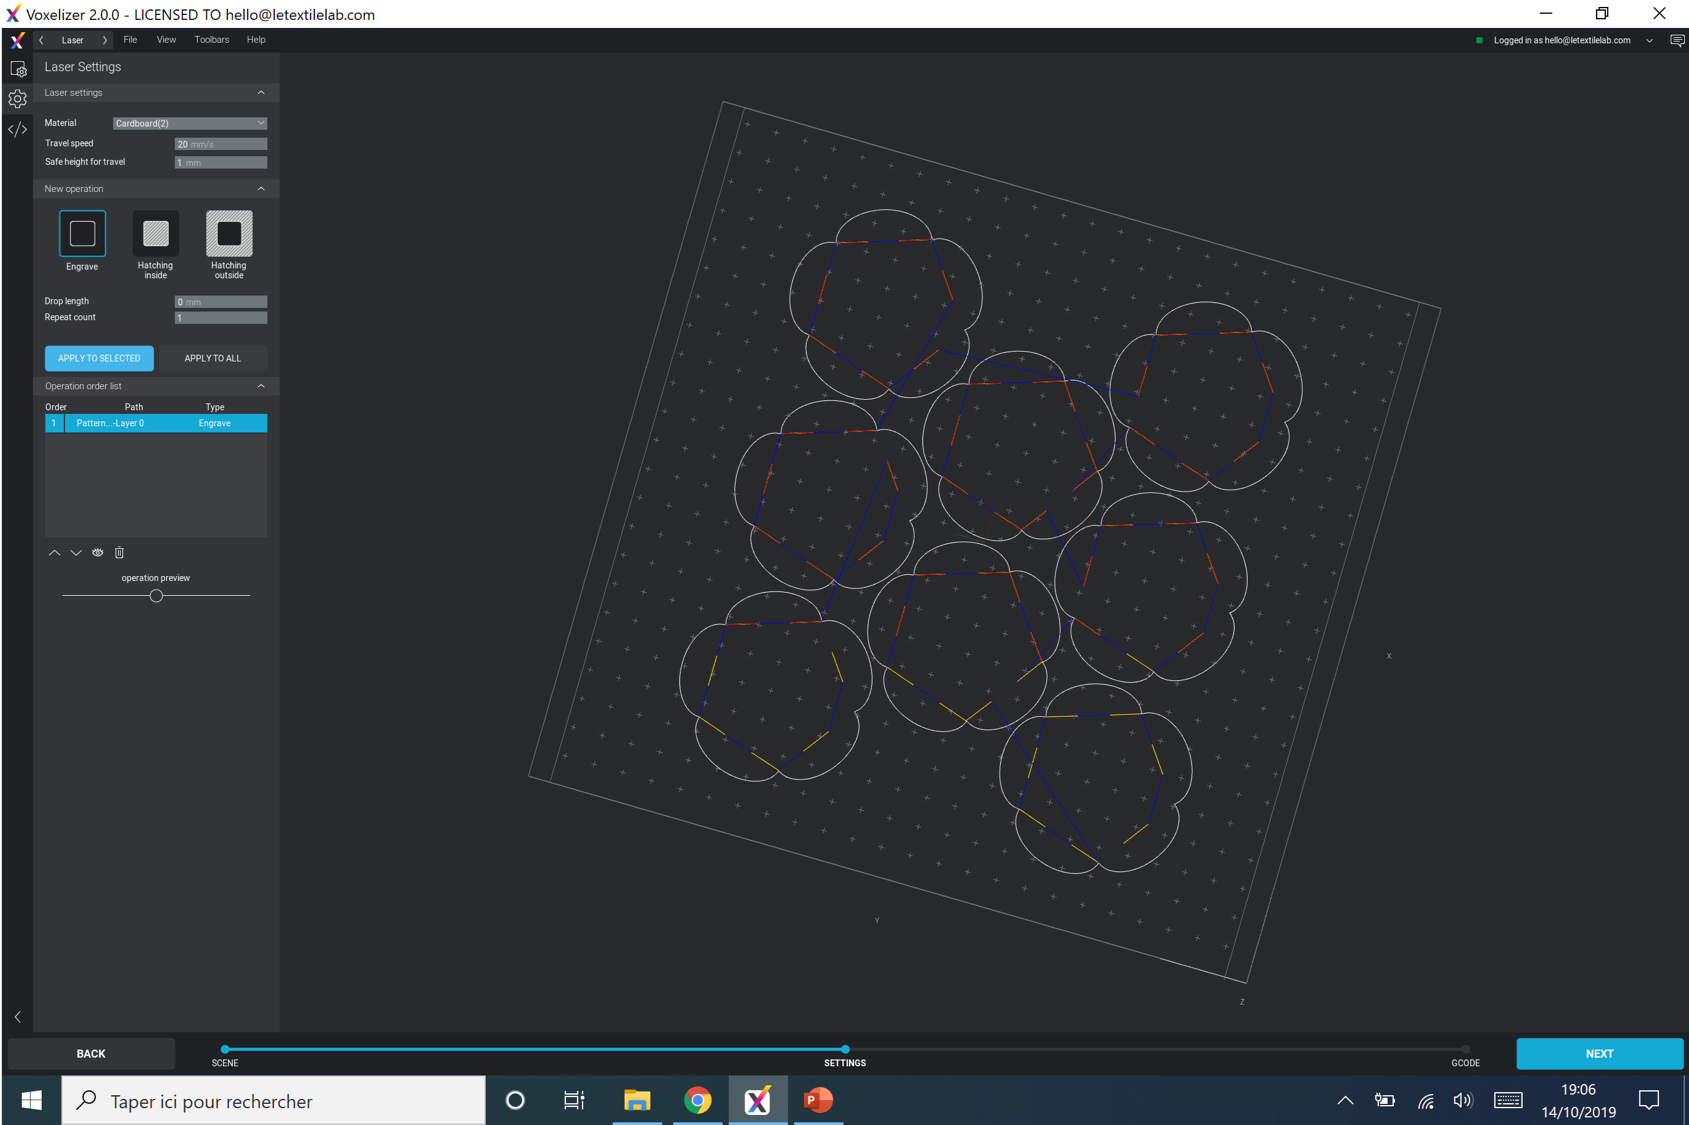 6. Click next to set up the cut/engrave.
7. I first made a test with the laser setting for cardboard, it works on my fabric.
8. Select the first path, click on "engrave", click on "apply to selected"
6. Click next to set up the cut/engrave.
7. I first made a test with the laser setting for cardboard, it works on my fabric.
8. Select the first path, click on "engrave", click on "apply to selected"
 9. Do the same with the 2nd path
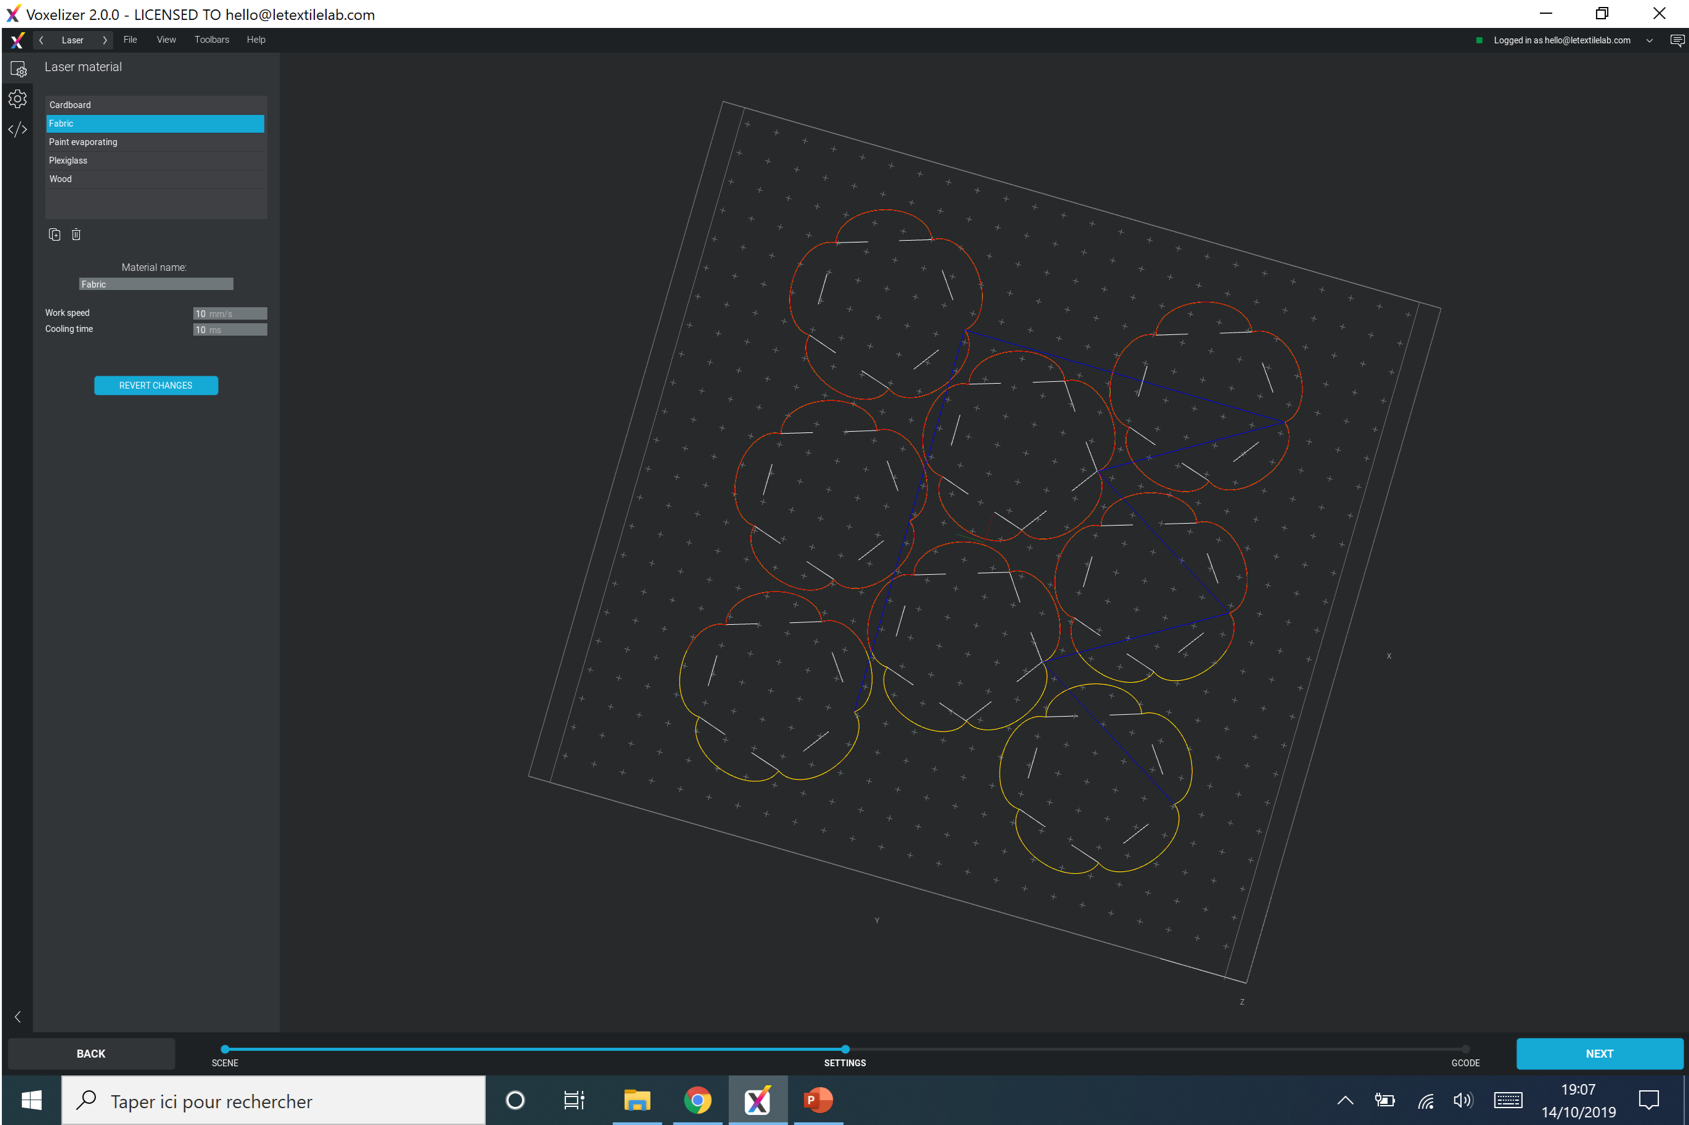 10. I save the new setting and material. Working speed : 10mm/s & cooling time : 10ms
11. Click on Next to gnerate the gcode
10. I save the new setting and material. Working speed : 10mm/s & cooling time : 10ms
11. Click on Next to gnerate the gcode
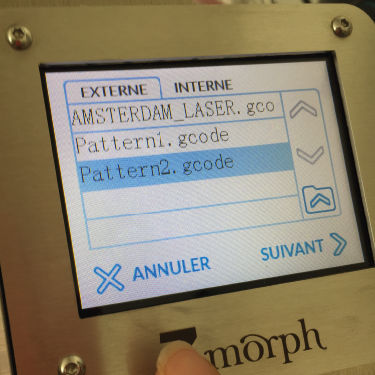
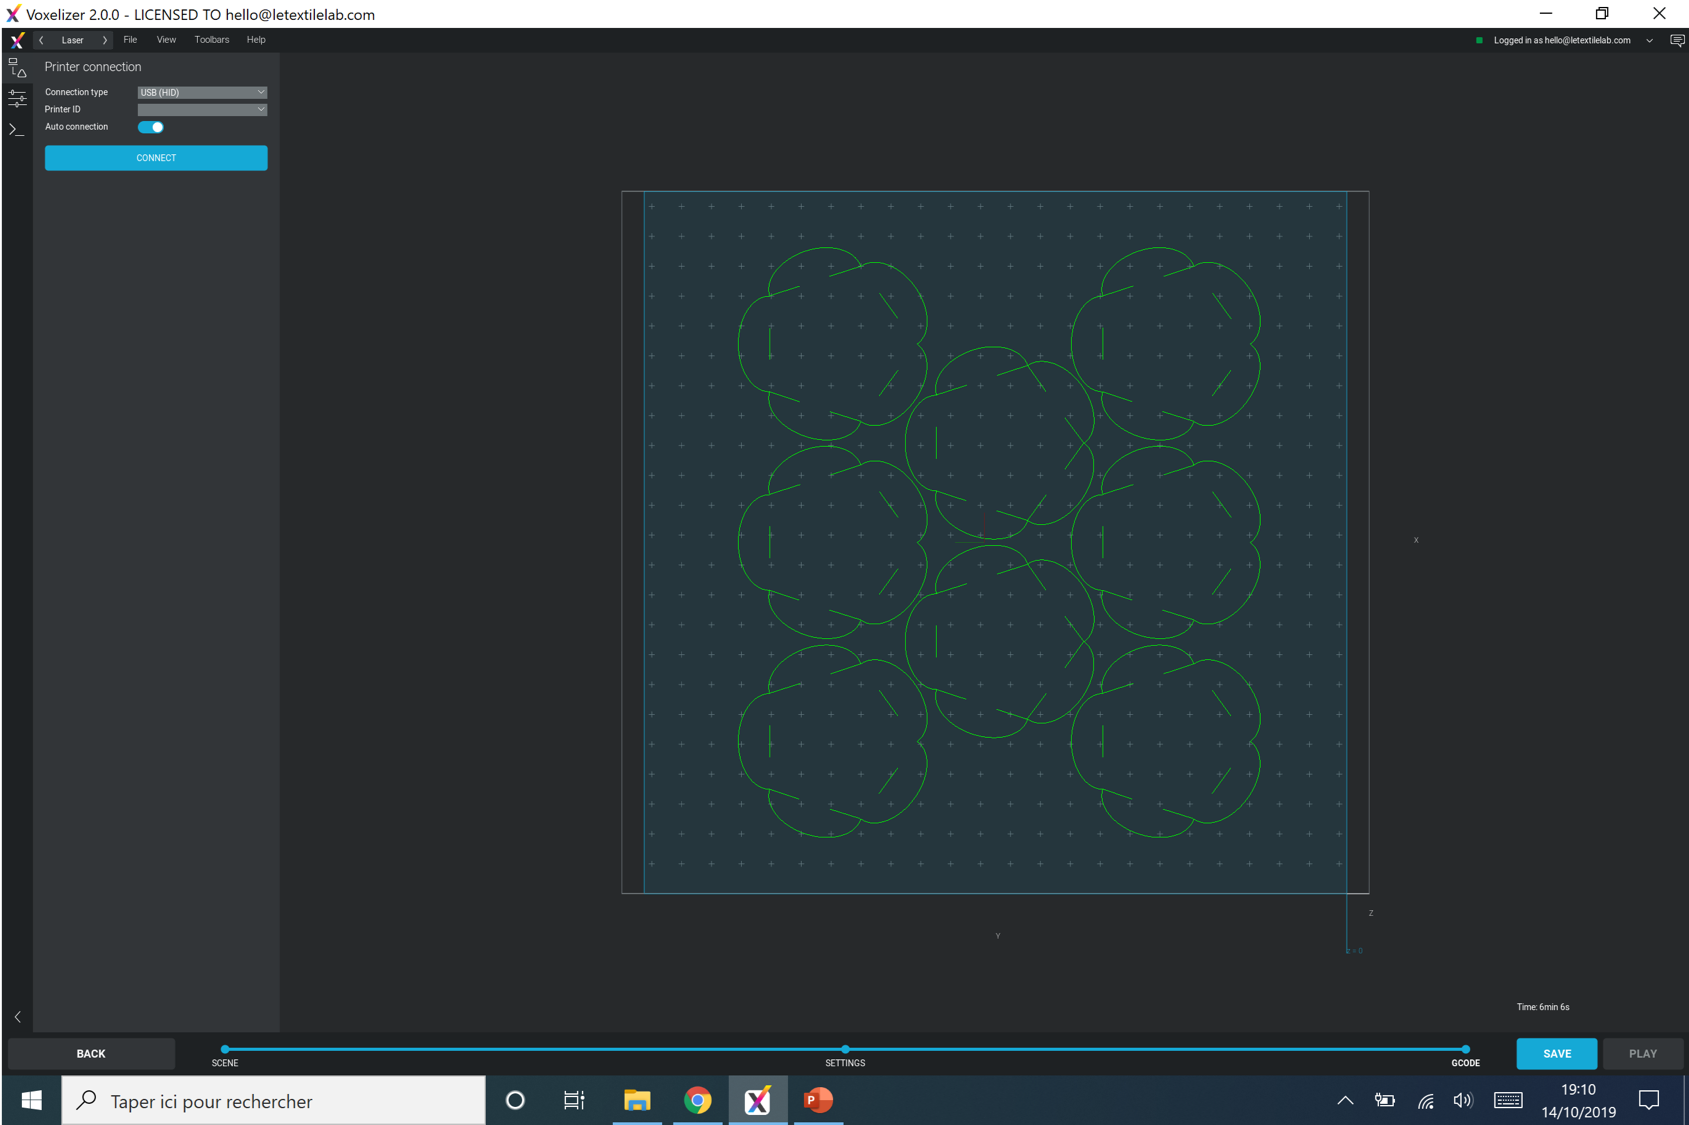 12. Save the gcode on the SD card.