2. Digital bodies
ART AND BODY
The observation of the humain body took off with scientific research of anatomy. Many artists put anatomy in the center of their works, thanks to live models for exemple. At the origin, sculptors and draughtsmen like Michel-Ange or De Vinci attended dissection sessions or consulted scientific book to represent realistic bodies. Indeed there is a real affinity between anatomy, art and fashion.
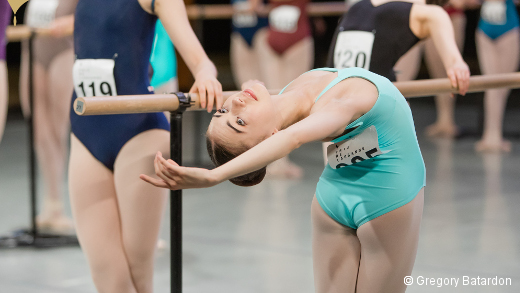
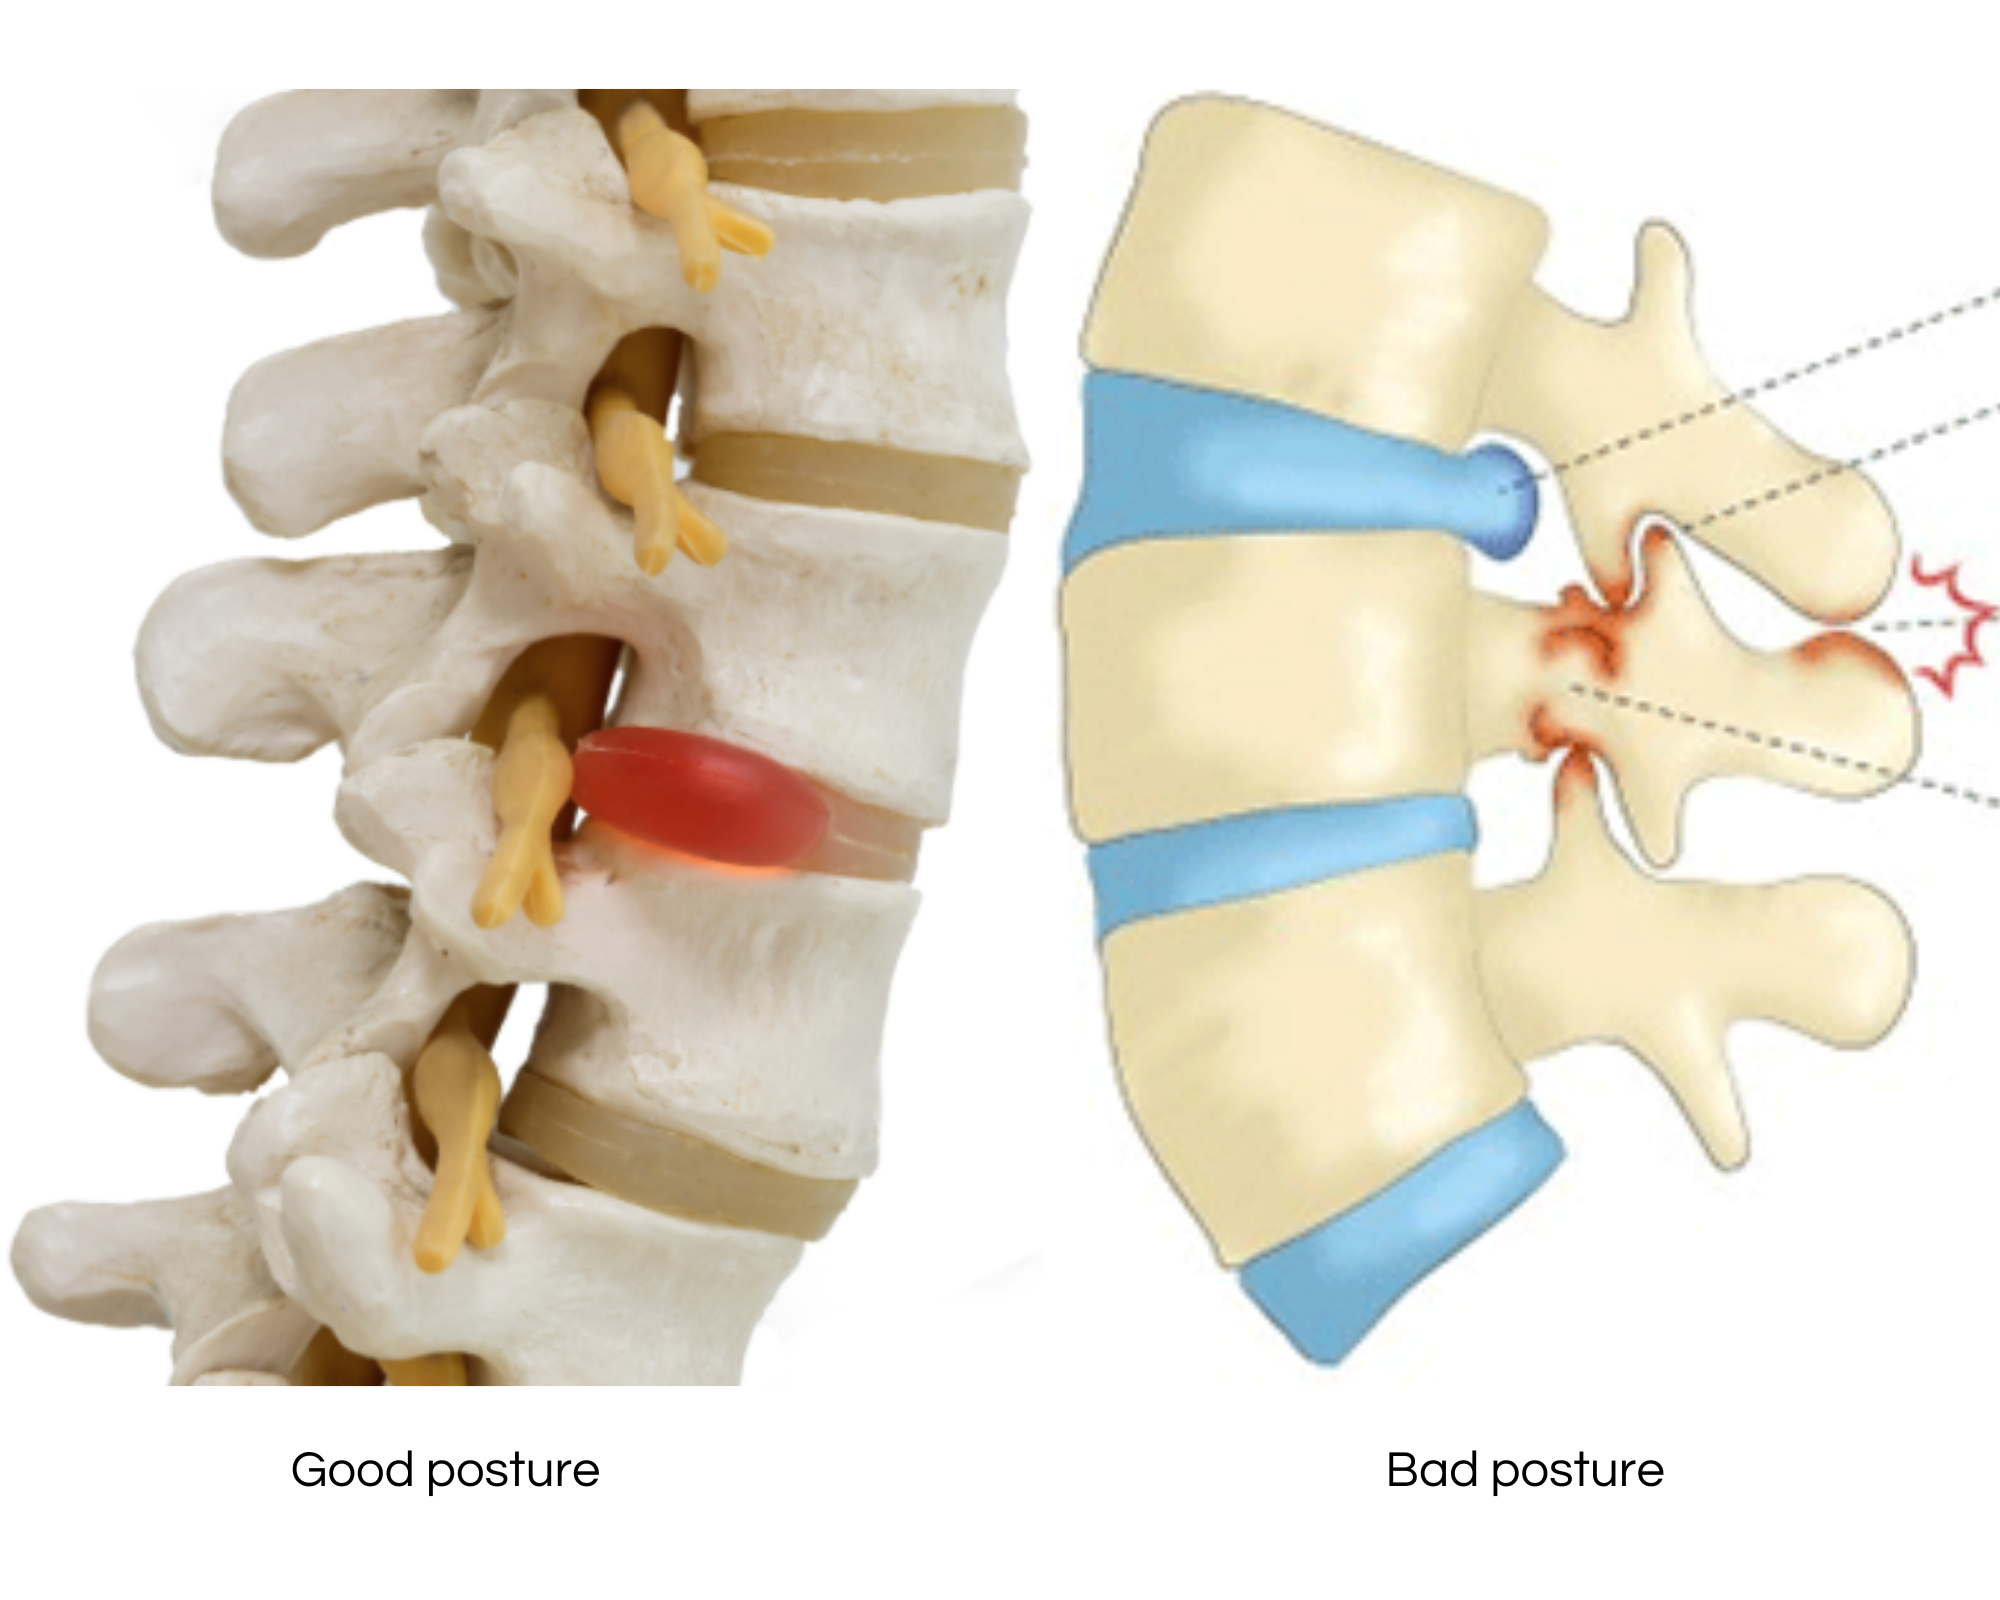
About me, the anatomy lessons was really important in my dance cursus. Know bones placement, where the muscles or tendons are attached can be very useful to change our vision of a movement. This can allow to go further and improve yourself without injury.
To illustrate this, I will give you an exemple of anatomy lesson which helped me to improve myself.
When the back arched, vertebrae collide with each other, that why we are limit at this point, but if you stretch yourself to grow up, vertebrae move a few millimeters away each other, that delay the collision and allow to go further in the arche.
In addition to being very useful in the drawing and movement field, it is also in fashion. The anatomy study is closely linked with fashion because a clothes constitue for me some kind of second skin. It must be able to protect us from cold or external element, furthermore, it must be adapted to every morphology, and for this, a mensuration body study is essential
Anthropometry
The scientific study of the measurements and proportions of the human body.
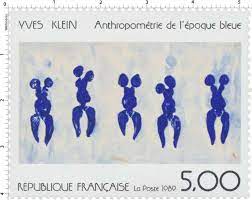
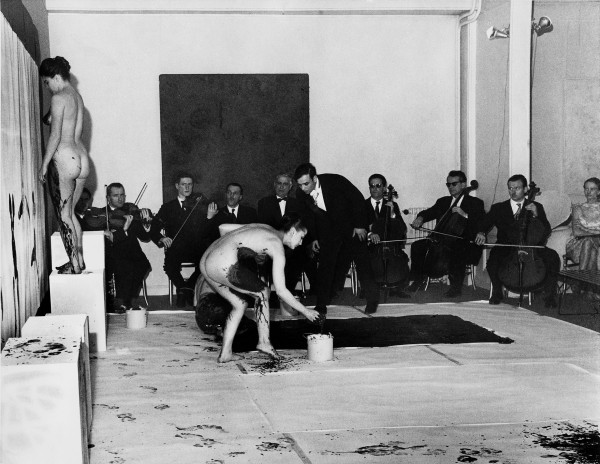
This study is the source of scientific research, but it also inspires many artist like Yves Klein, who painted « Anthropométrie de l’époque bleue». This is prints of naked women’s bodies, with blue paint on a white canvas.
Indeed, women’s bodies was the inspiration of many artist.
Throught time, we can see the evolution of women’s bodies. In part thanks to the natural human evolution, but also because of social norms. This norms concerning the appearance of their bodies can be a lot of pressure and can be hard to bear for some women. Indeed, studies show us that 95% of eating disorder are women’s. That why I was inspiring about this topic in my week project. Furthermore, as a former dancer, eating disorder was really common in this field so I feel very concerned by this psychological disorder
Inspirations
On the first day of the week, we saw several different artists who’s studying human body. For some, their game is to distord bodies, others is to create abstract or hyper-realistic version of it. This is some pictures who inspired me for my week project
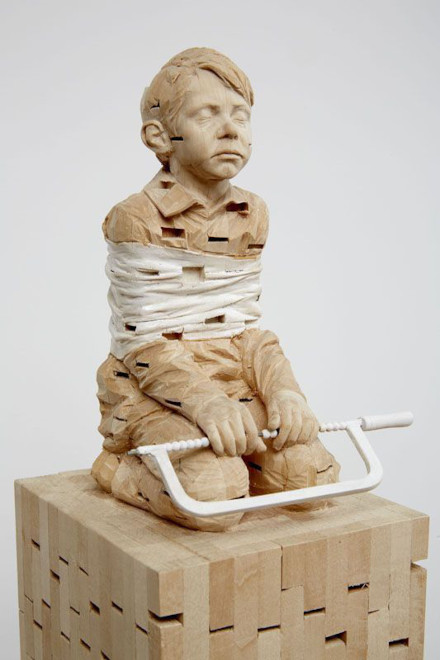
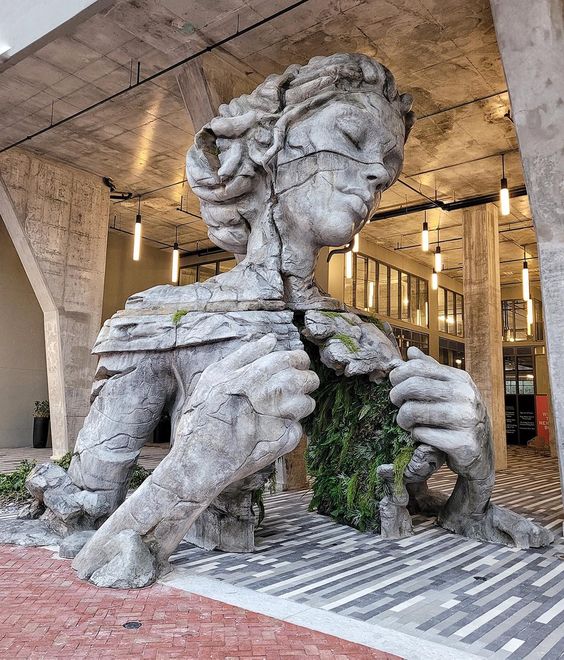 Daniel Popper
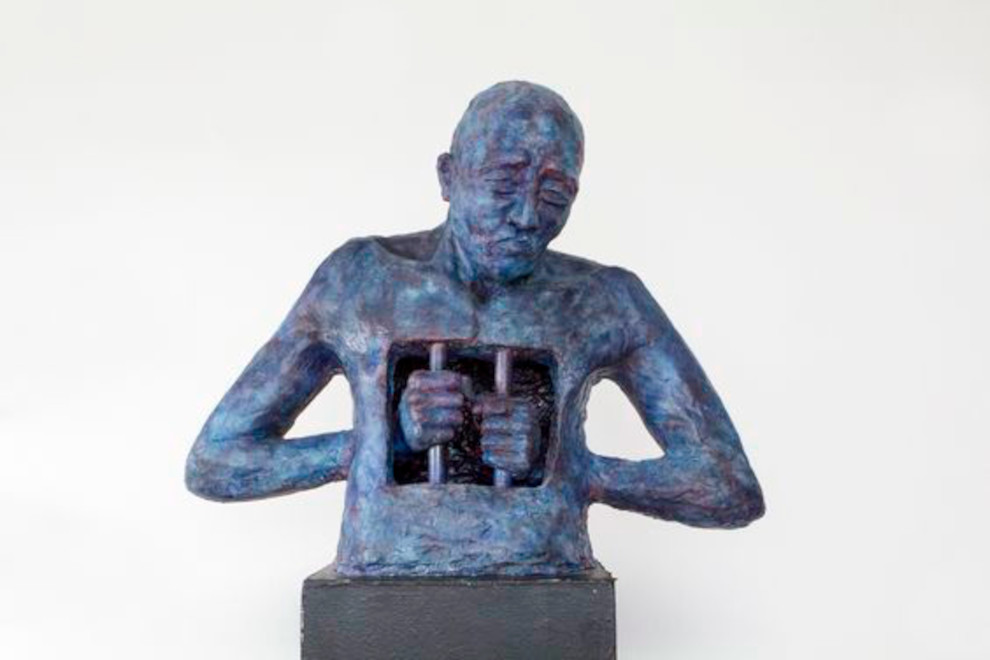
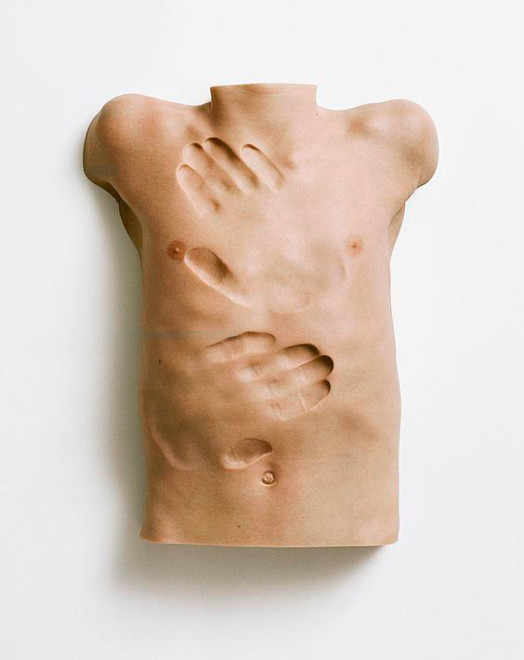 Ander Krisar
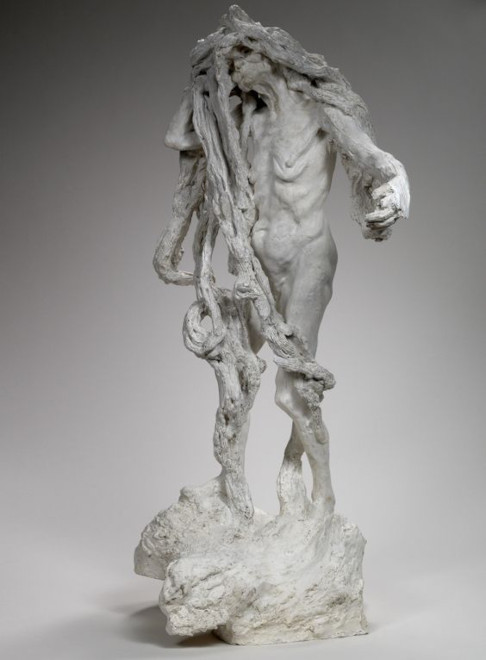 Camille Claudel
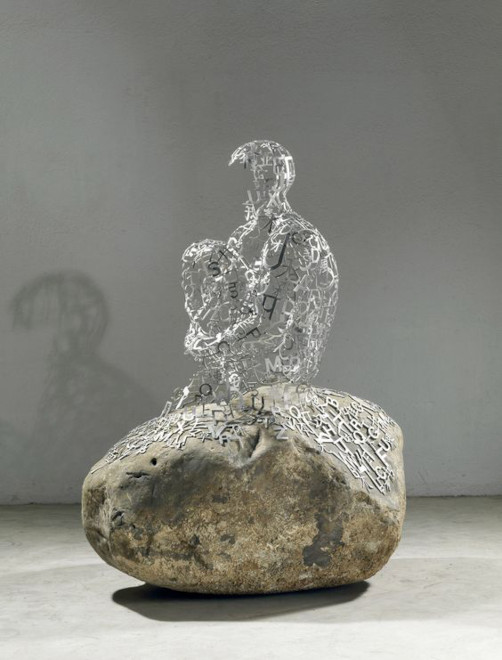 Jaume Plensa
 Gerard Demetz
 saks Afridi
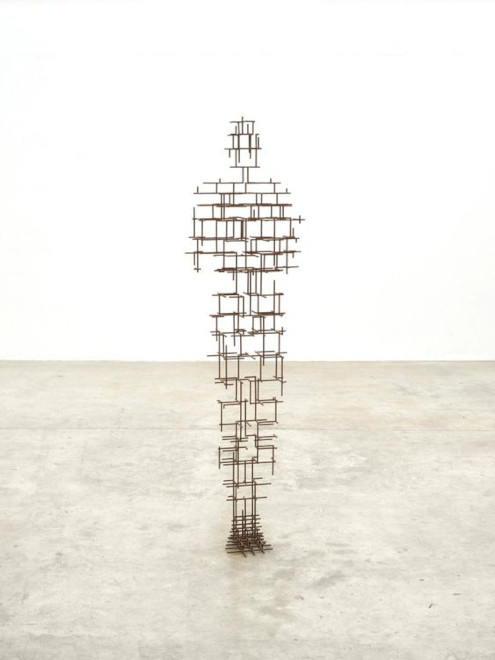 Antony Gormley
PROCESS
Make Human discovery
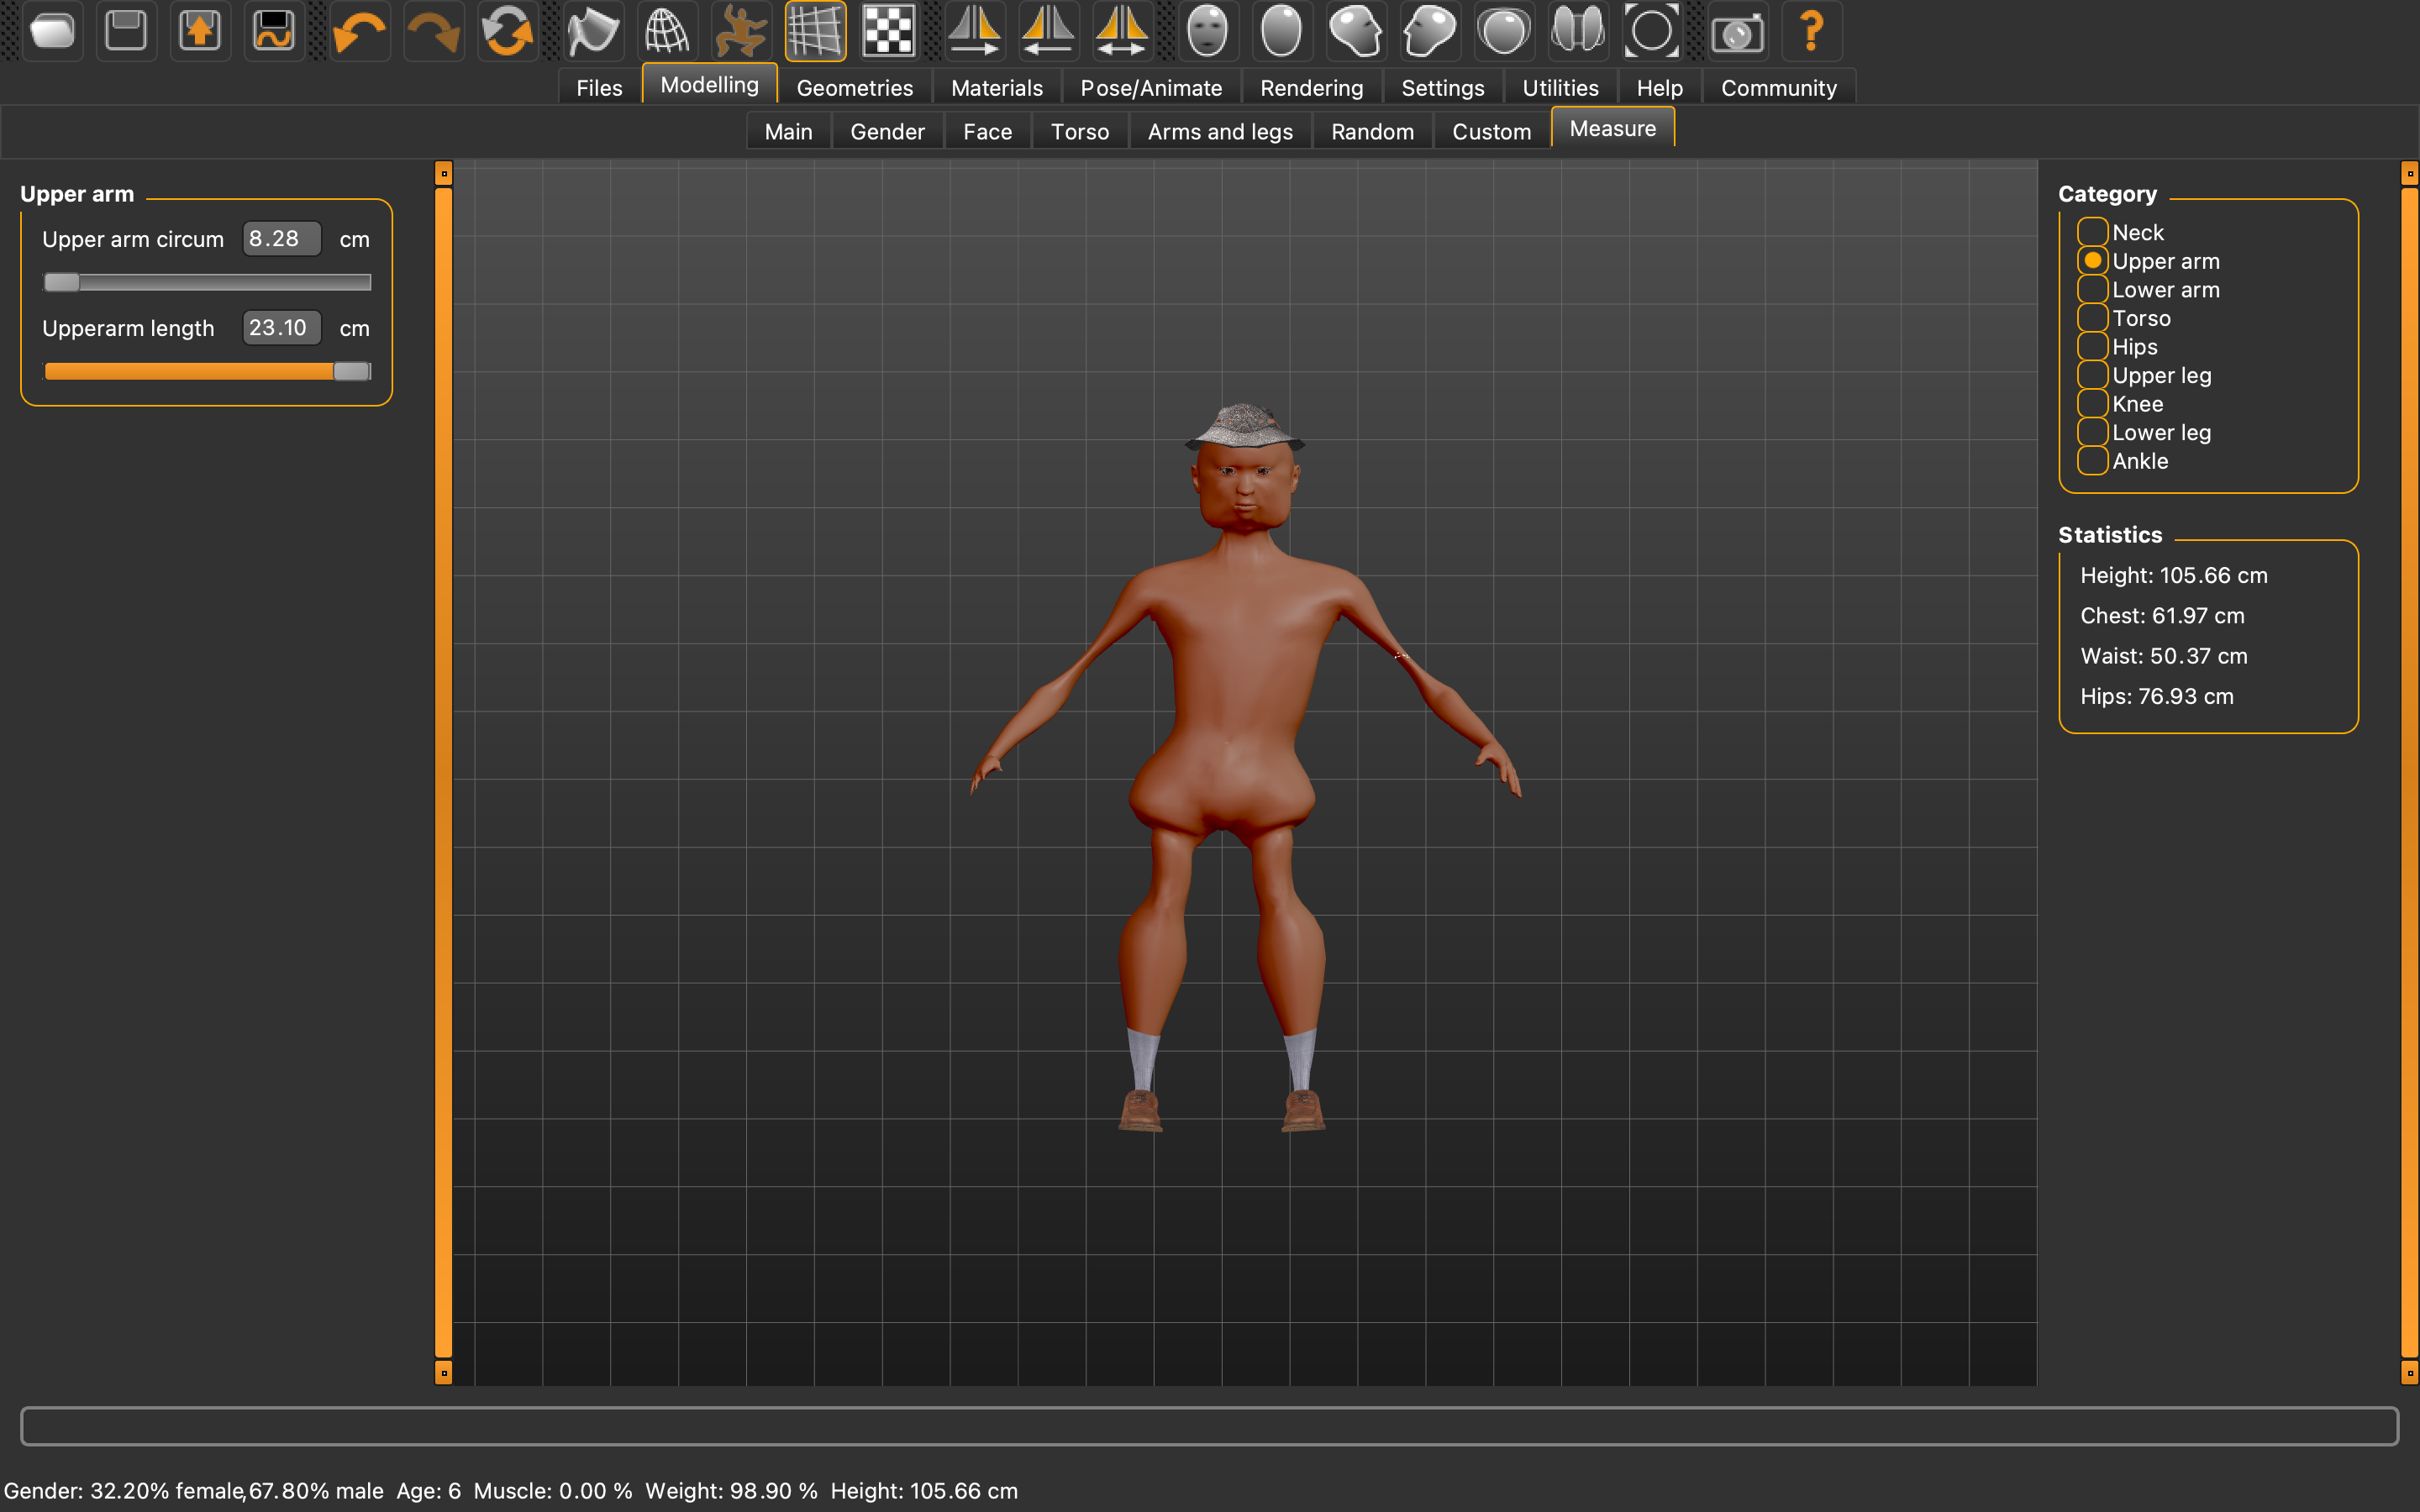
This software is used to create 3D animation characters. I did not choose to create an avatar on this software for this project, but I did some tests to learn how to use it. I preferred to do a 3d scan of myself to adopt the position I wanted. However I enjoyed experimenting this software, it is very intuitive , rather simple used, offers a lot of possibility. It’s a bit like playing sims… but more fun.
SCAN 3D
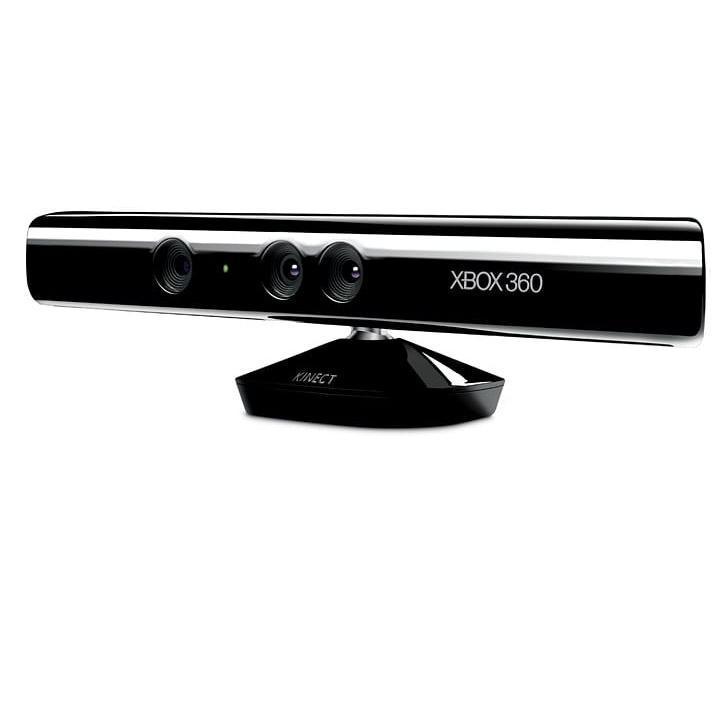
We discussed different tools to do 3D scan, with phone application like Magic Weaver, Polycam, Widar, Photogrammetry or with the lab kinect. I choosed the last option.
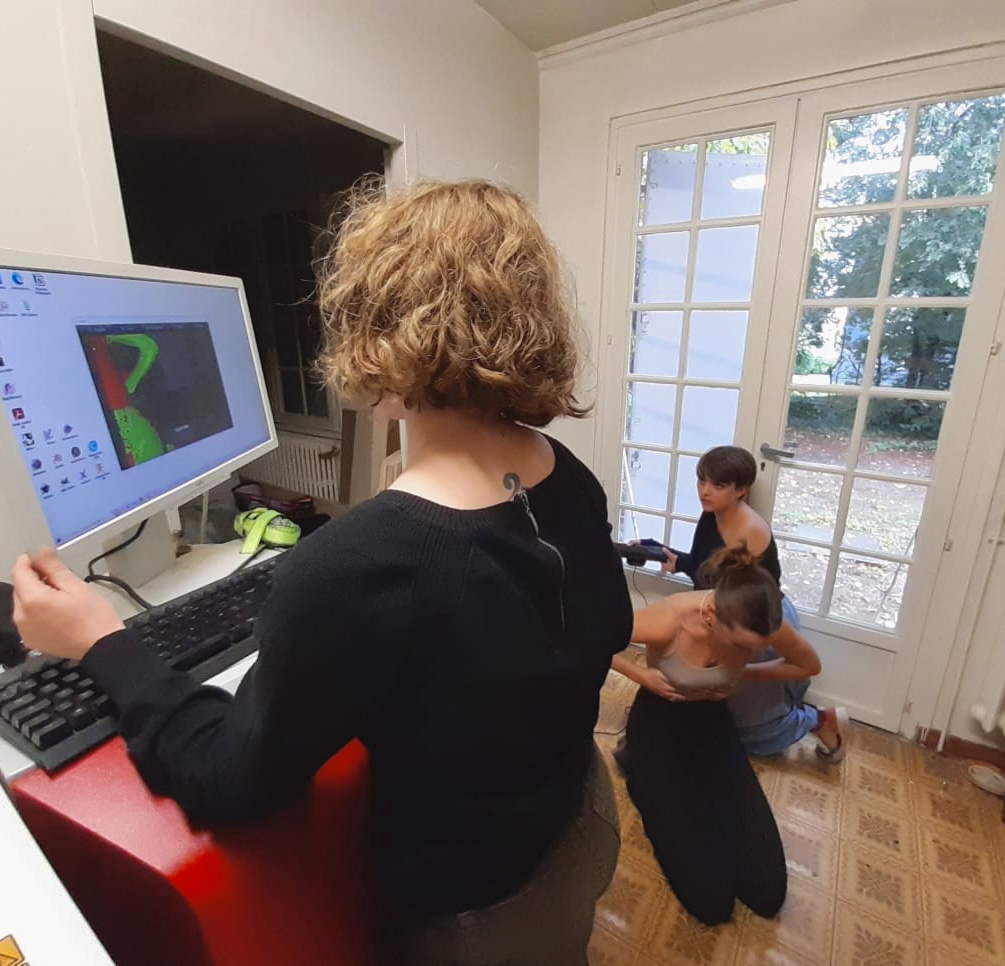
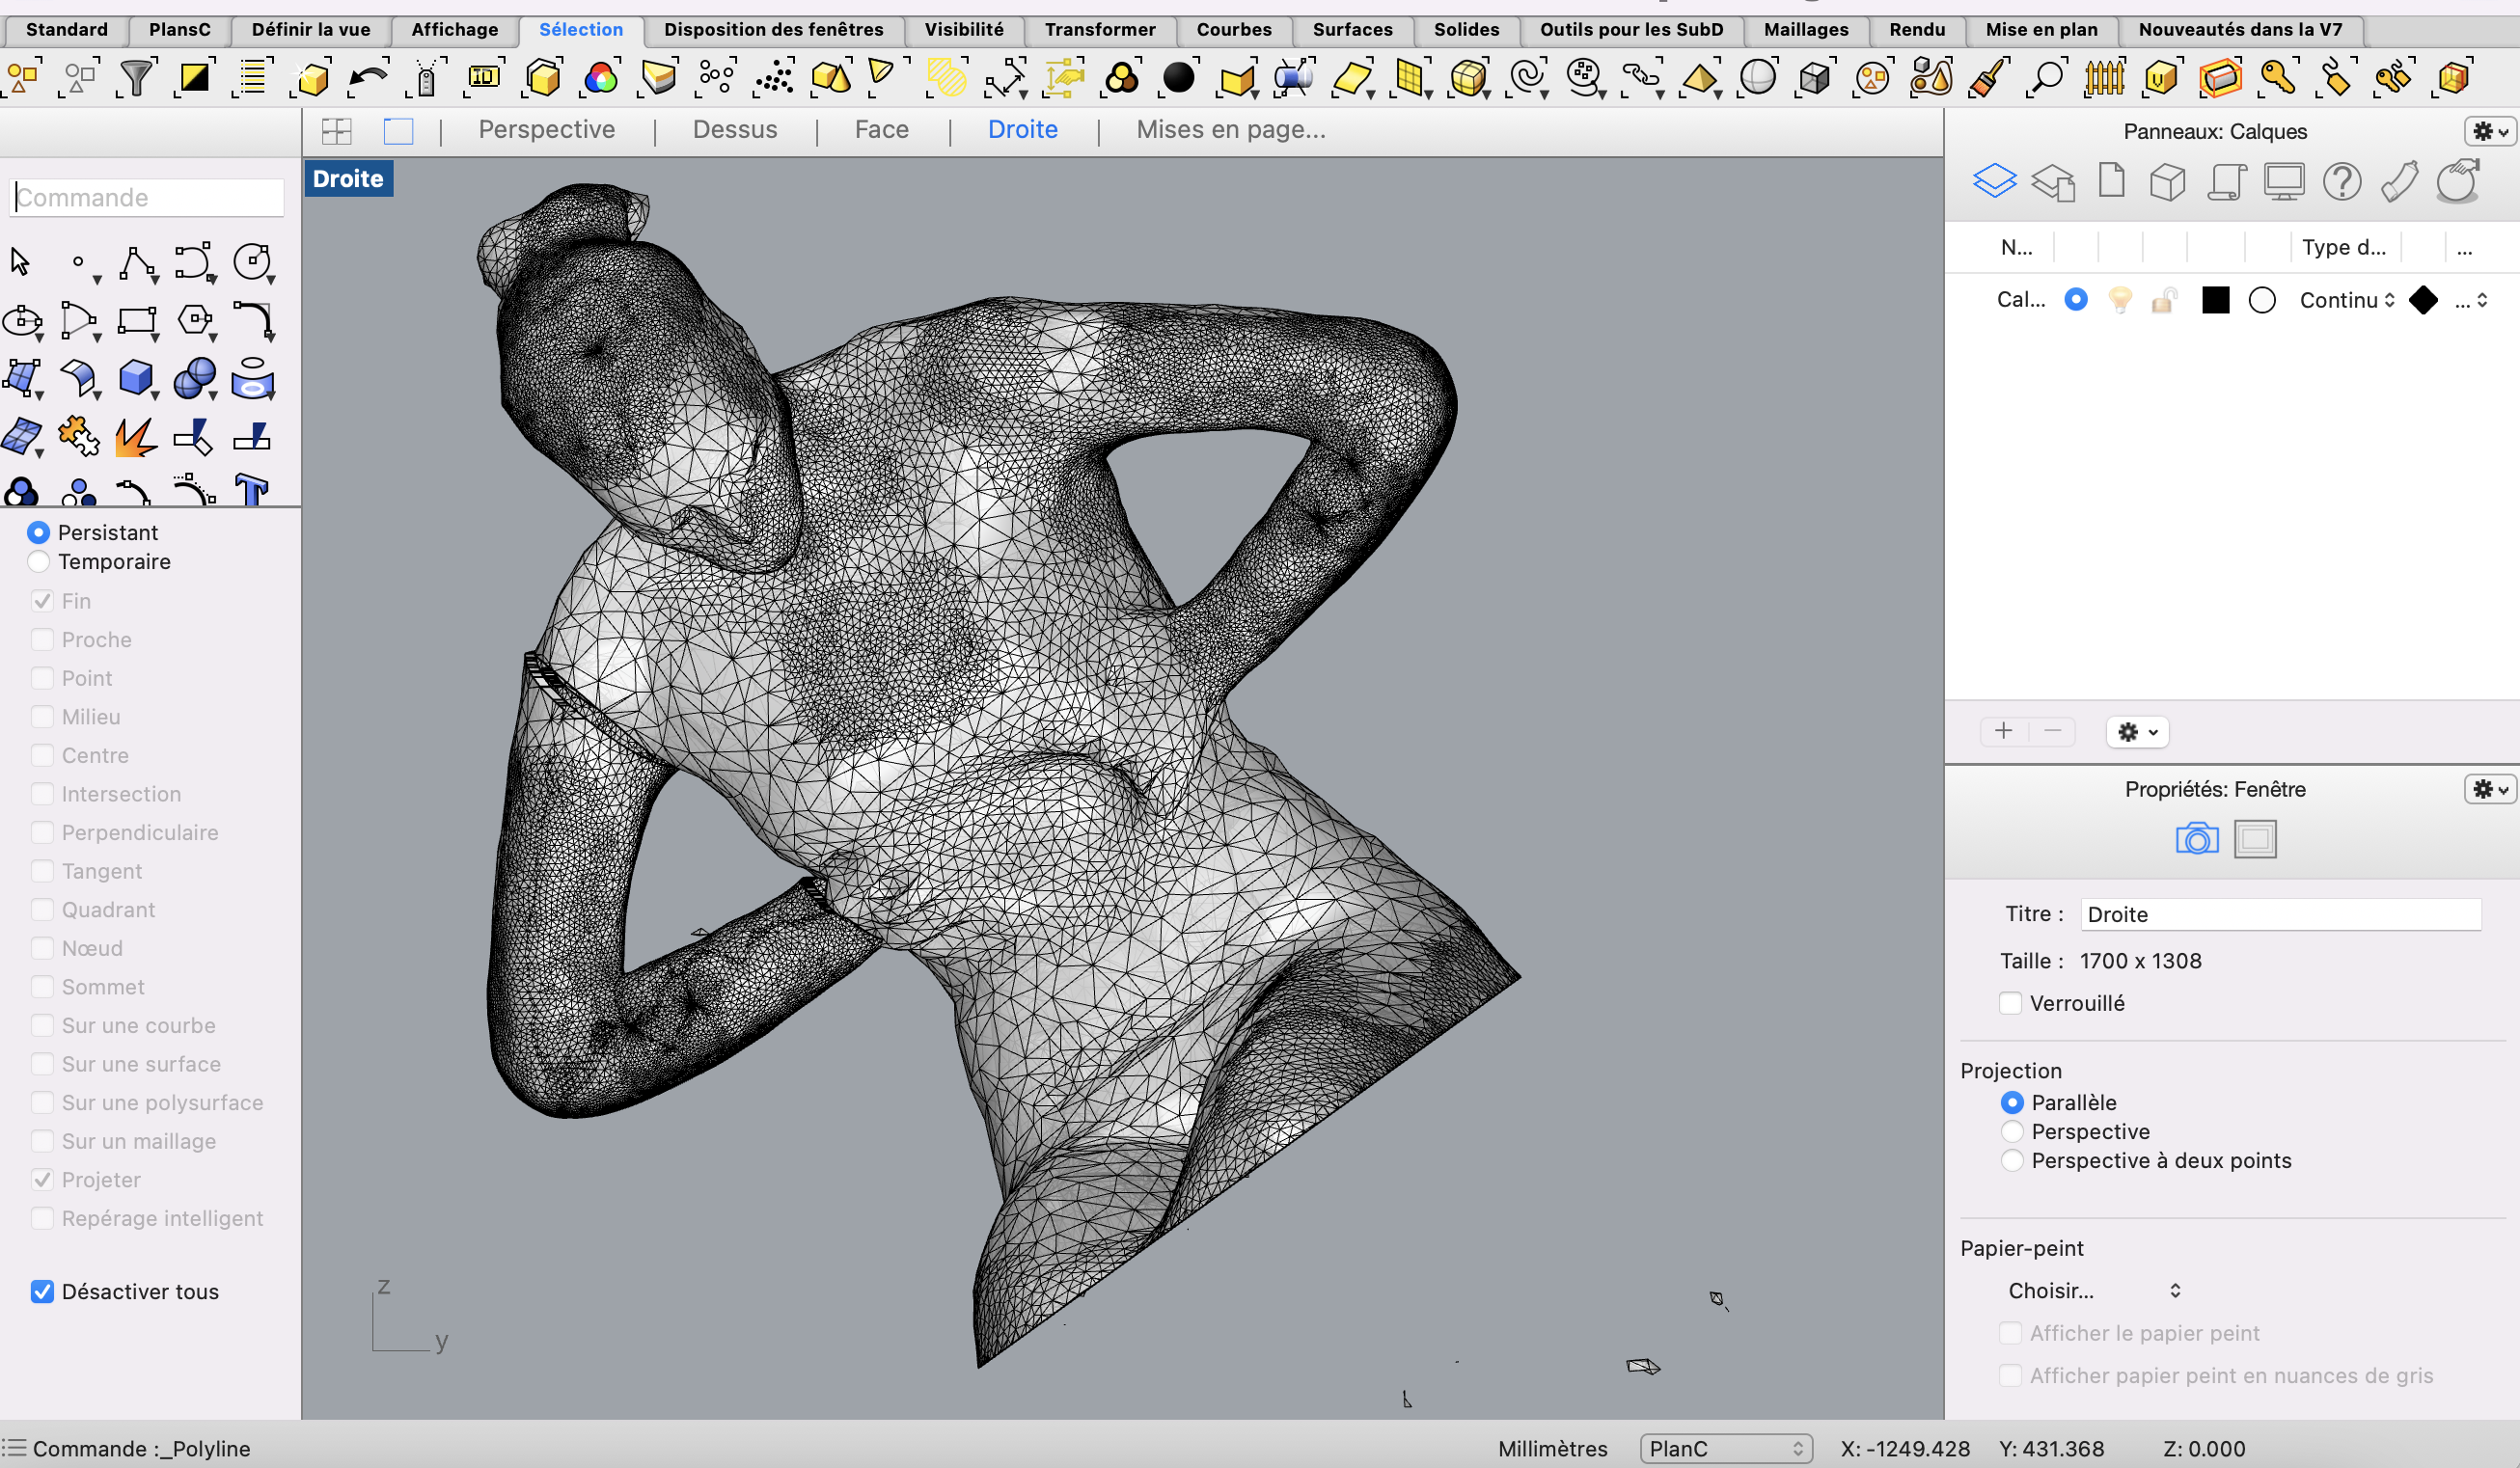
I was inspiring by Daniel Popper sculpture, this is a sculpture of a woman with a hole in her chest. I decided to made a hole below ribs.
So I sat down, my hands was gripping my ribs and my head down, and I watched my belly. During this time, a person was turning aurout of me with the Skanect. We had some difficulties to scan every part of the body, specially with arms and the head. Indeed it is necessary to remain very stable to keep the right distance with the skanect and you have to go slowly during all the recording. Not to mentioning the fact that I had no more blood in my arms, that I held my breath to the maximum and that I took in the belly to be able to grasp my ribs with my hands.
Rhino 3D et MeshMixer
After the 3d scan, I had to repair small errors on software because I did not want to repeat the scan, anyway, my arms couldn’t take it.
To do this, I used Meshmixer to fill the holes of the head and the right arm.
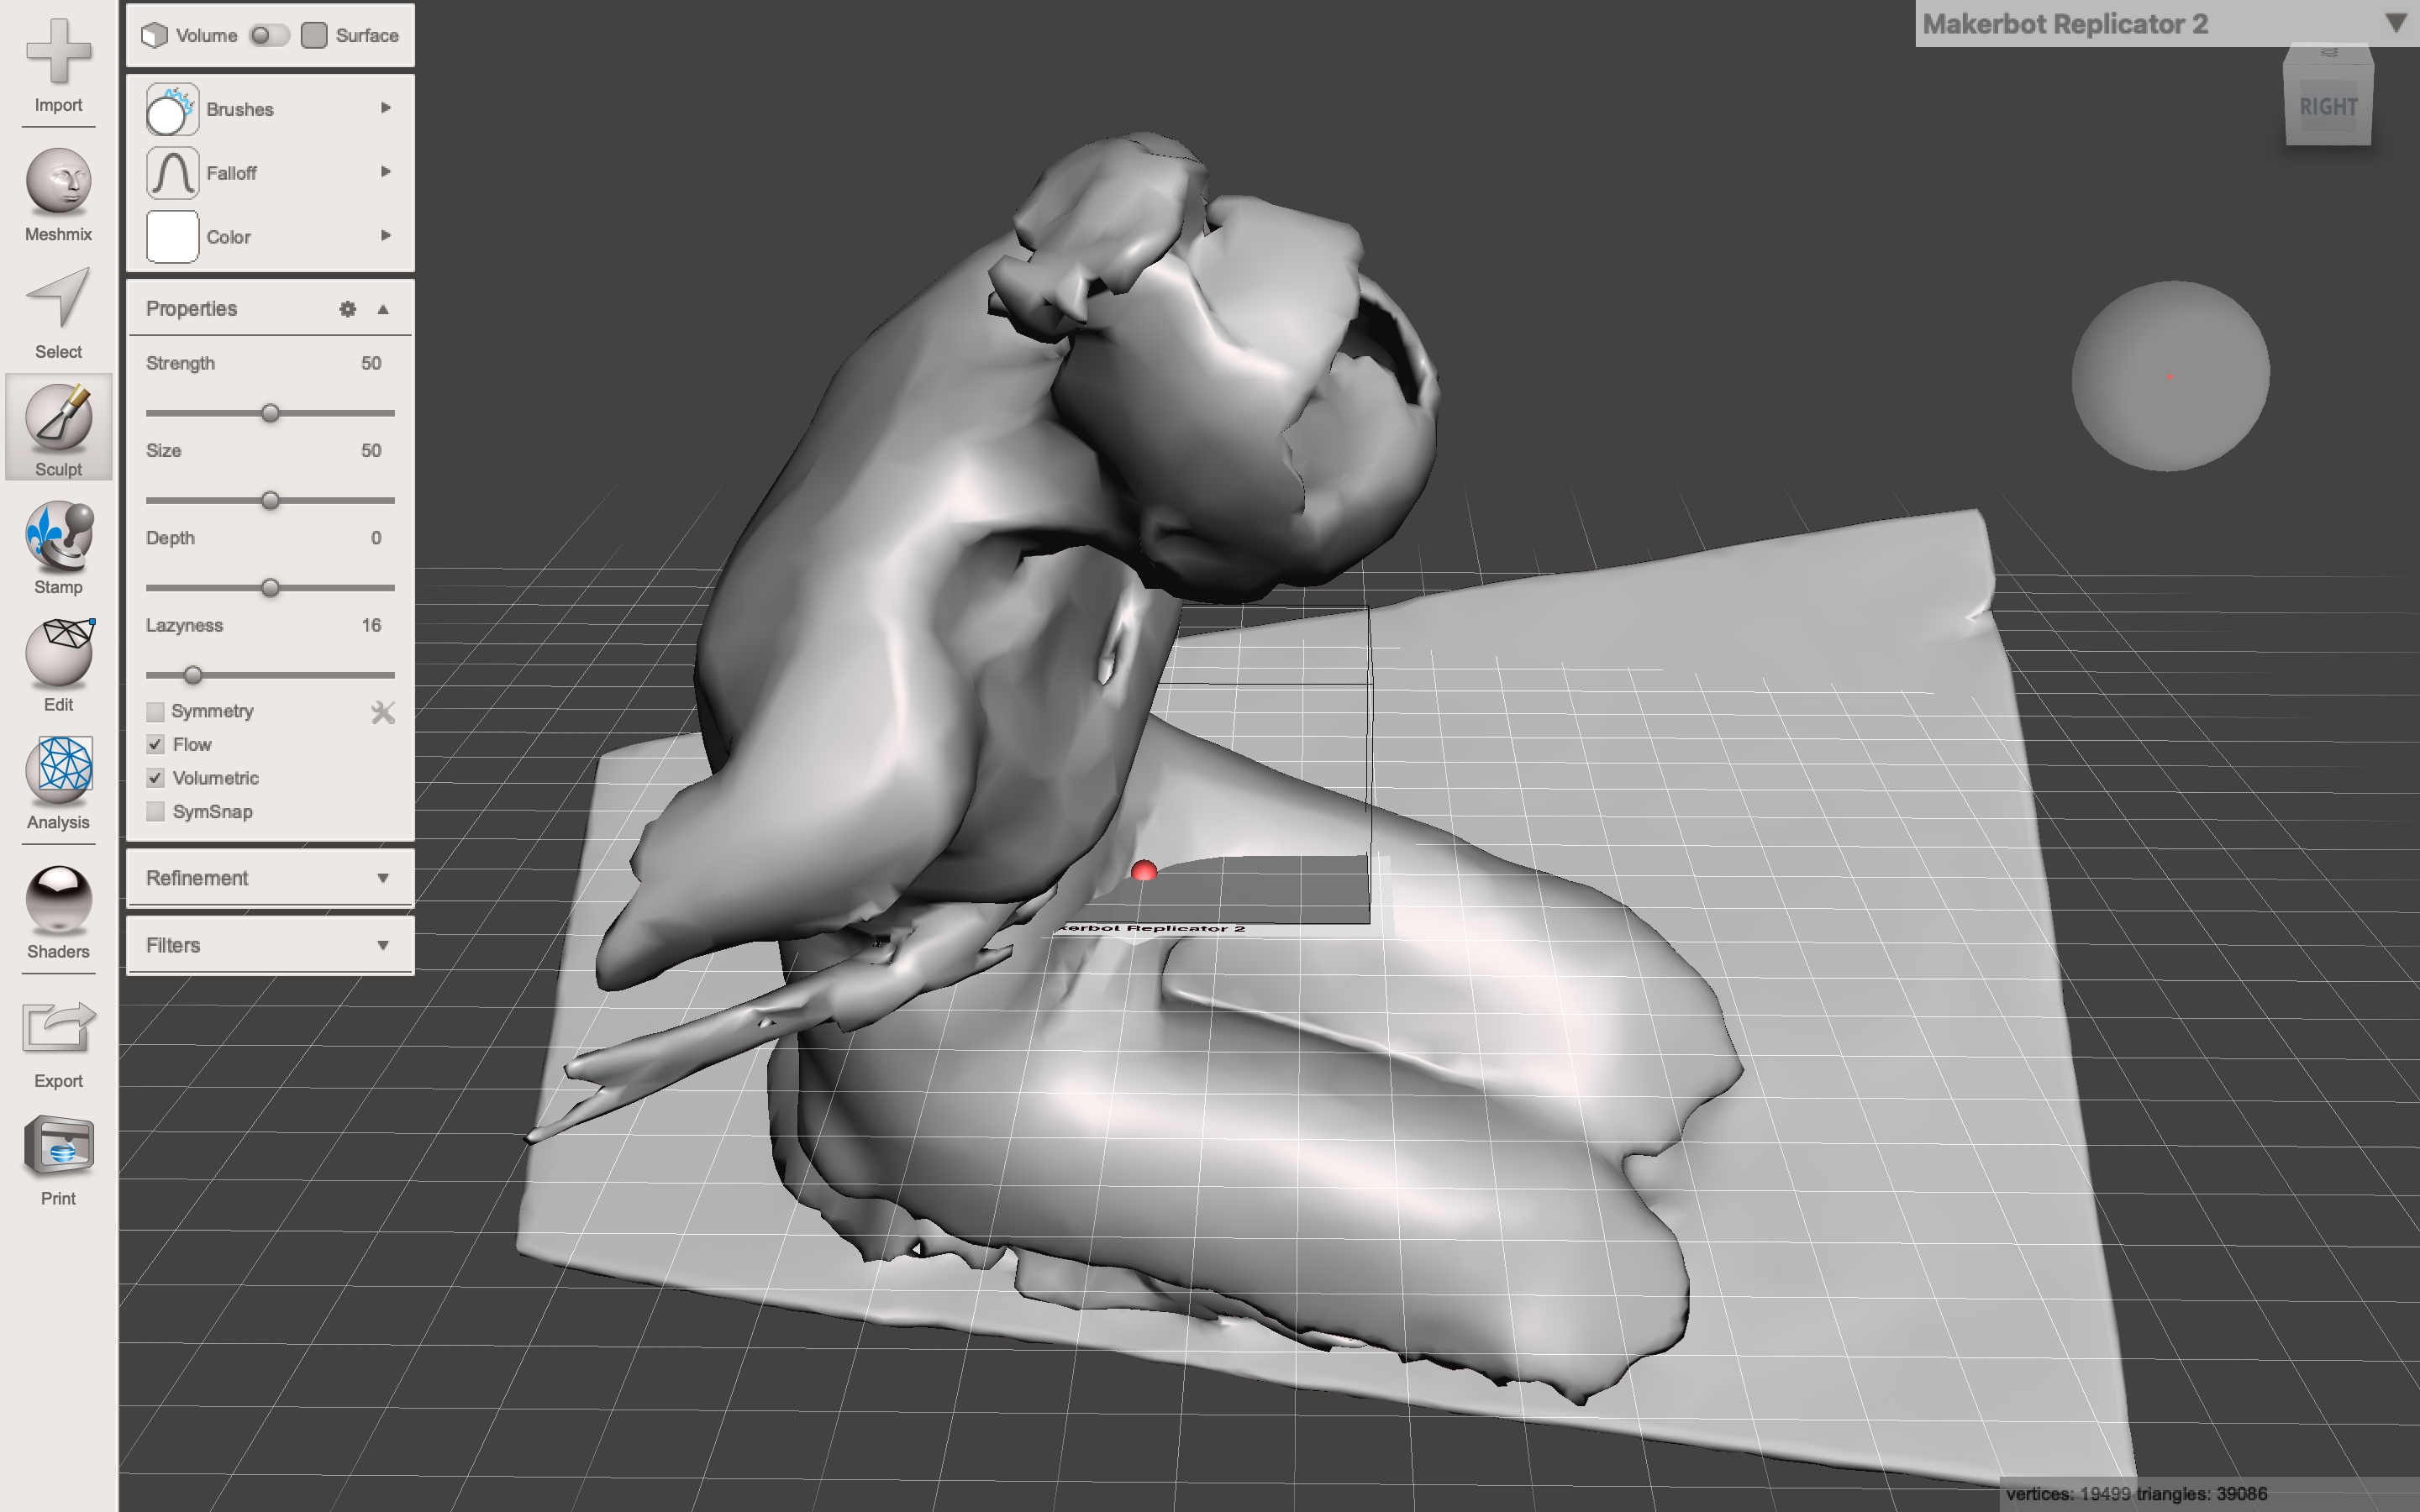
Then I used Rhino3d to create a left arm thanks to the right. I duplicated the right arm, reversed and joined it with the other side.
The next step was the hole in the belly. I started to create a curve on rhino to made an aleatory form, then I uses the Meshtrim command to cut the inner part. I quickly realized that it was not going to work because contours of the holes must be full for the rest of the process, so after **approximately 50 tests, I found a solution. I turned the curve into a flat surface and stretched it to make a 3-dimensional form that would pierce the body in the belly. To finish I decided this 2 elements with the BooleanSplit on Rhino 3d.
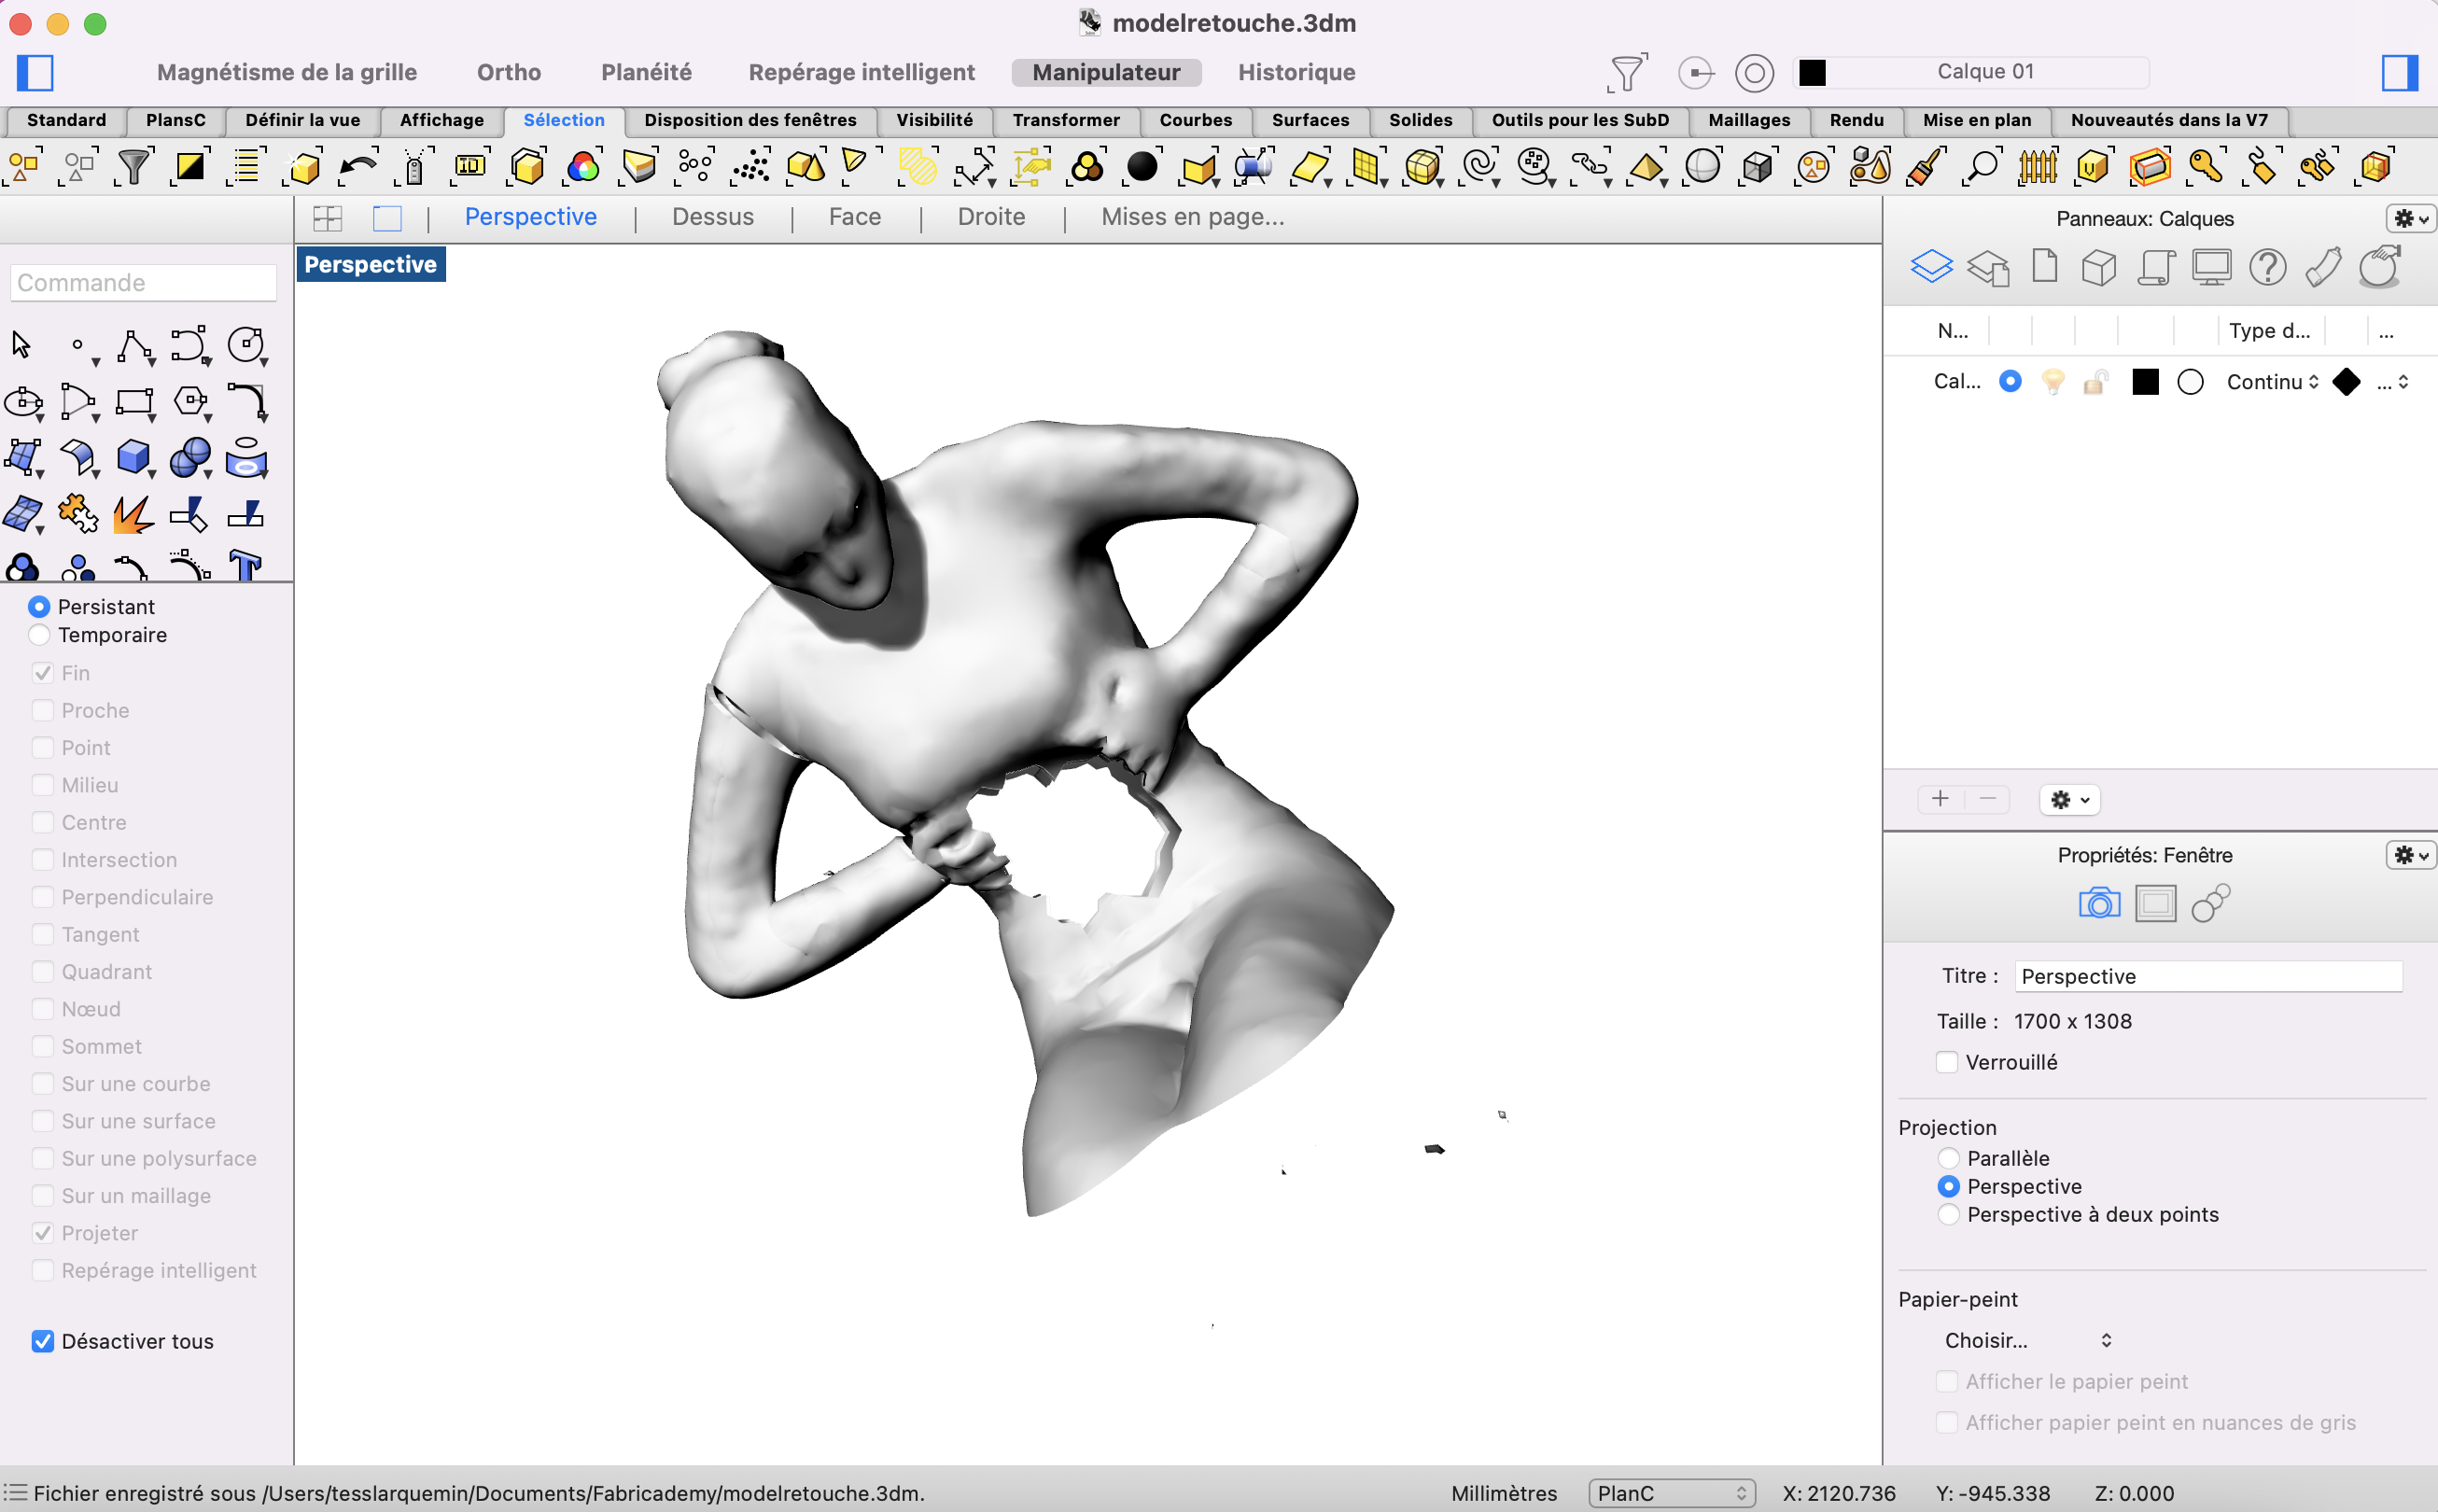
At this point my model is finish and the hole is right.
Slicer
The next step is to place slices with slicer software. There are different kinds of construction techniques: curves, interlocked slices, stacked slices, and more. I tried all of this techniques and I finally choose the radial slices. Indeed the radial slices allow me to have rays starting from a central *point which I put above the hole at the heart level.
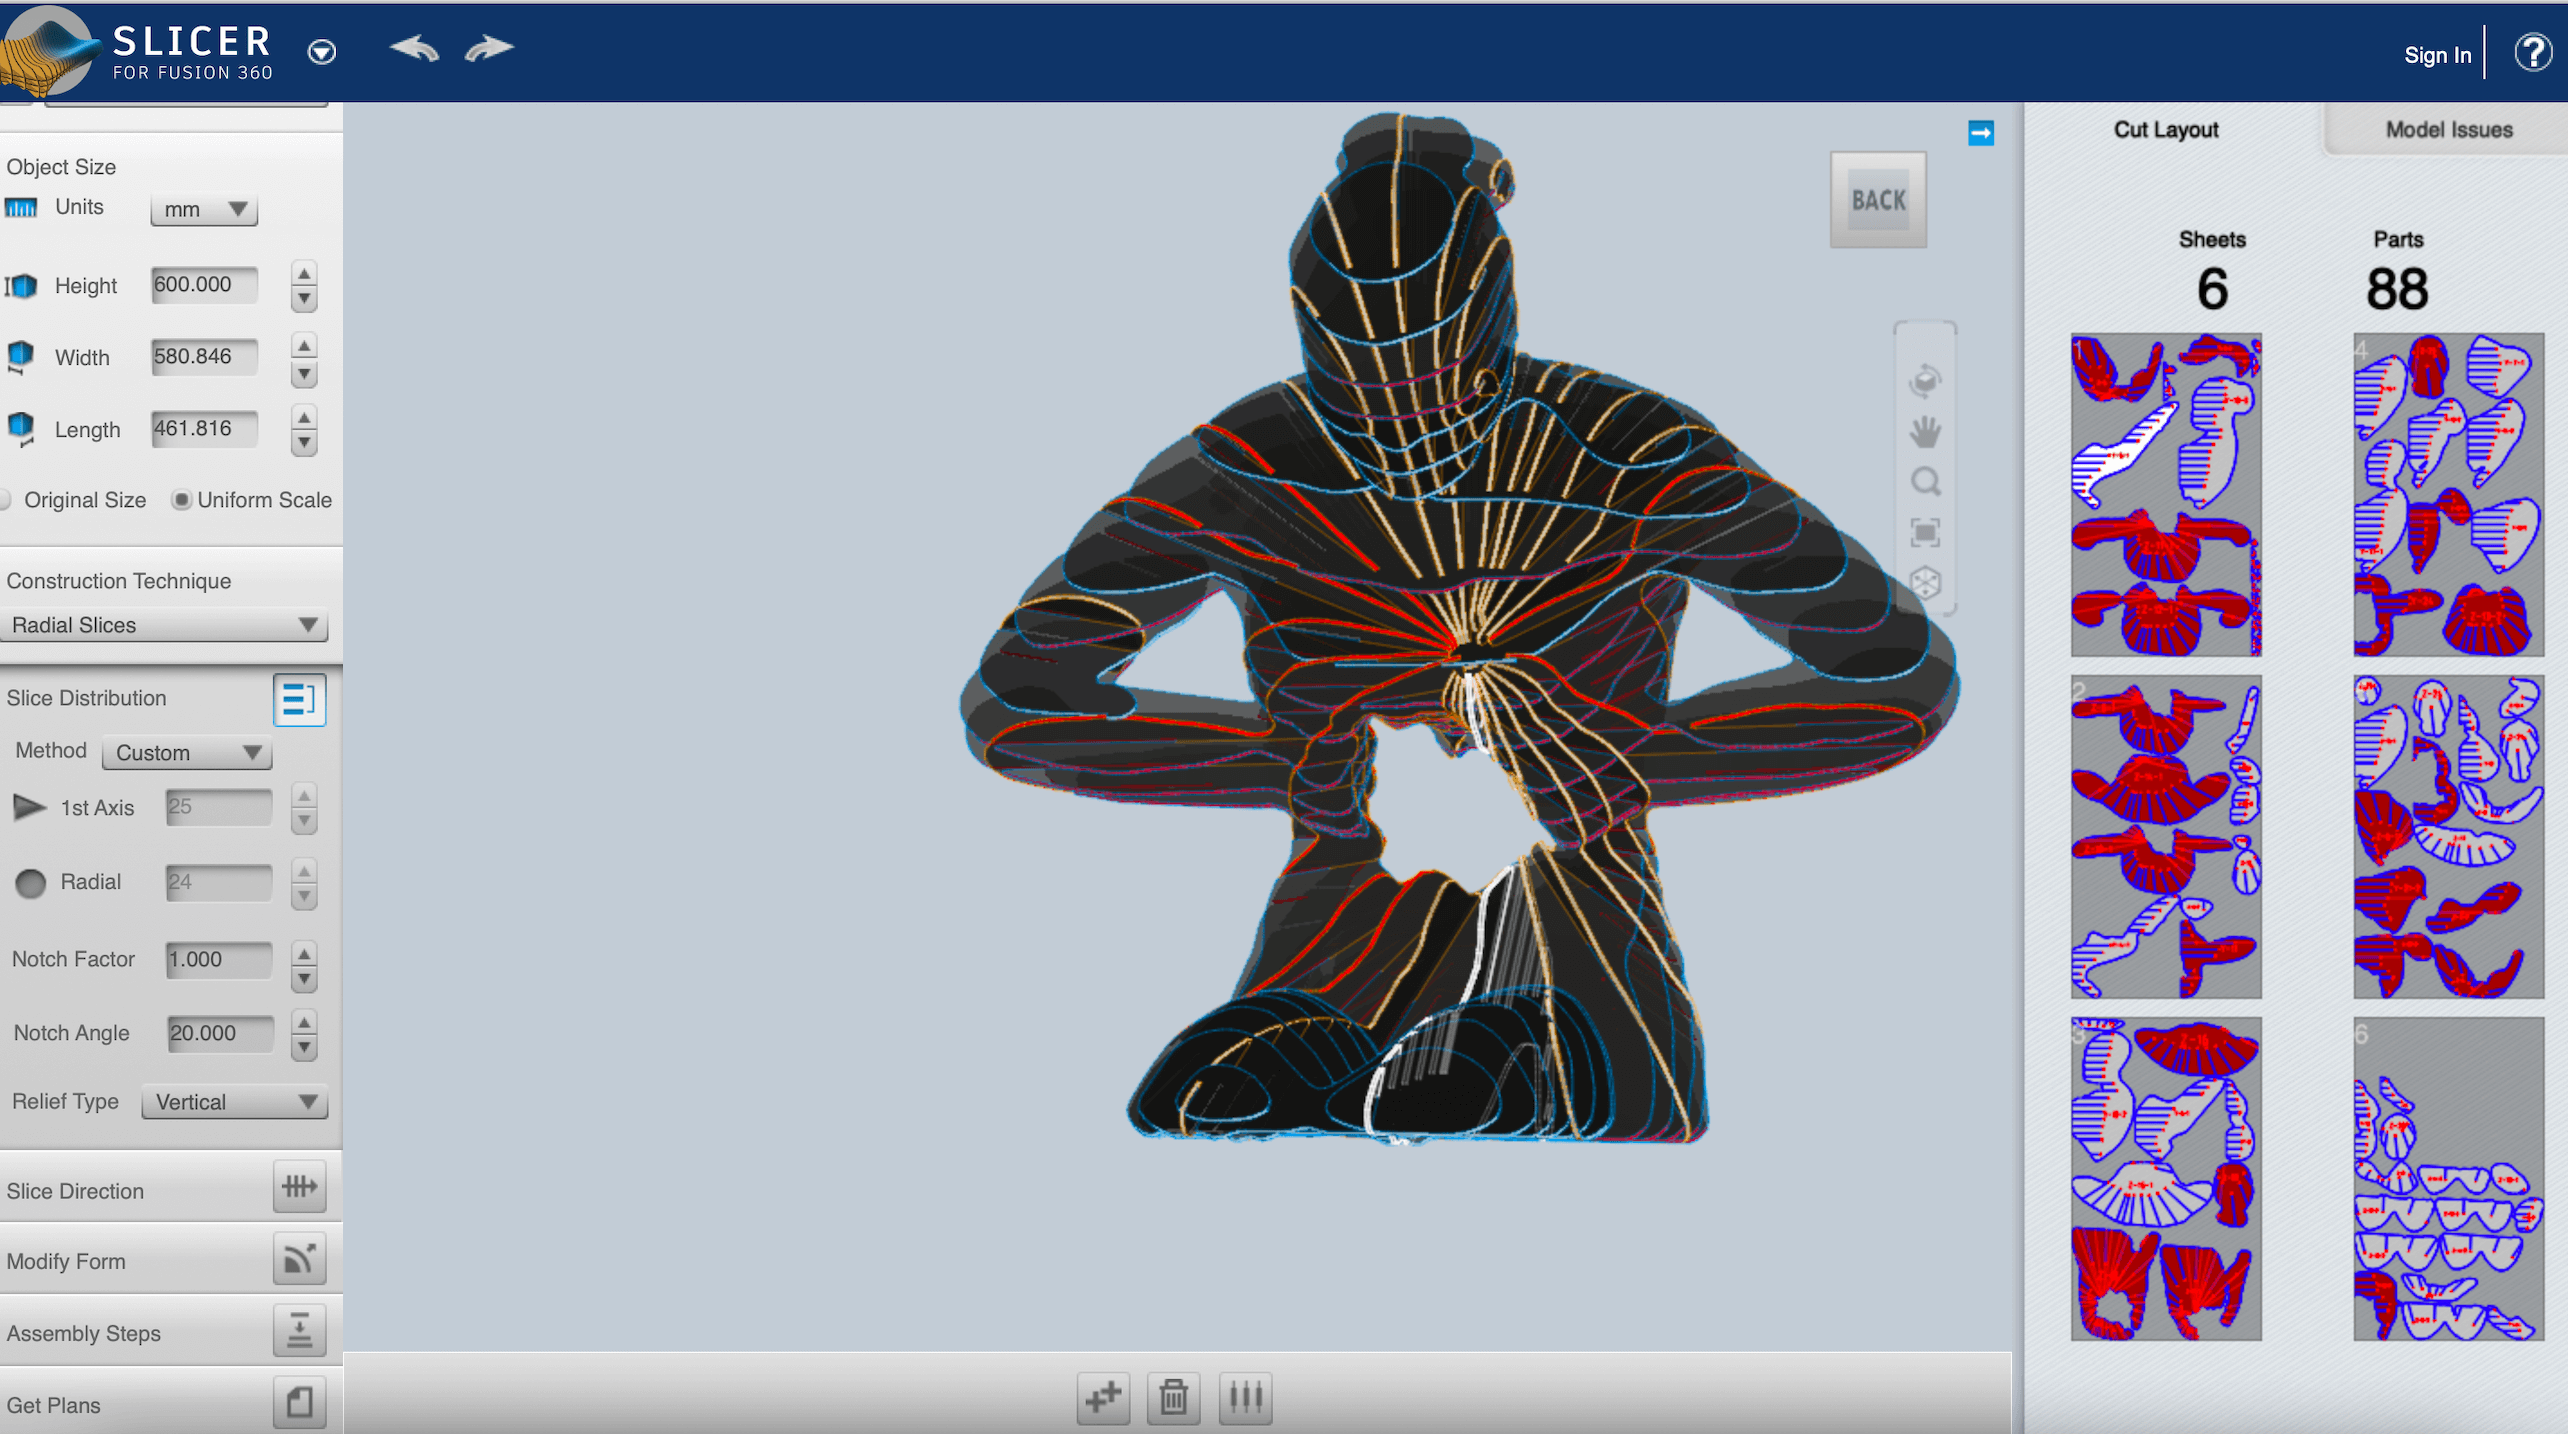
I also had to make some manufacturing parameters modification to adapt the boards to the material I wanted to use. I changed the thickness, the height and the width of the boards. I had problems with some of **these slices which was coloured red. It warns us a problem or a difficulty of construction. I tried to change some of this slices but I couldn’t change every of them. It’s okay, let’s just keep going. (Unfortunately you will see in the last step that it wasn’t a good idea to just keep going…)
To finish, I did a little Tetris with Inskape to optimize the space and avoid waste.
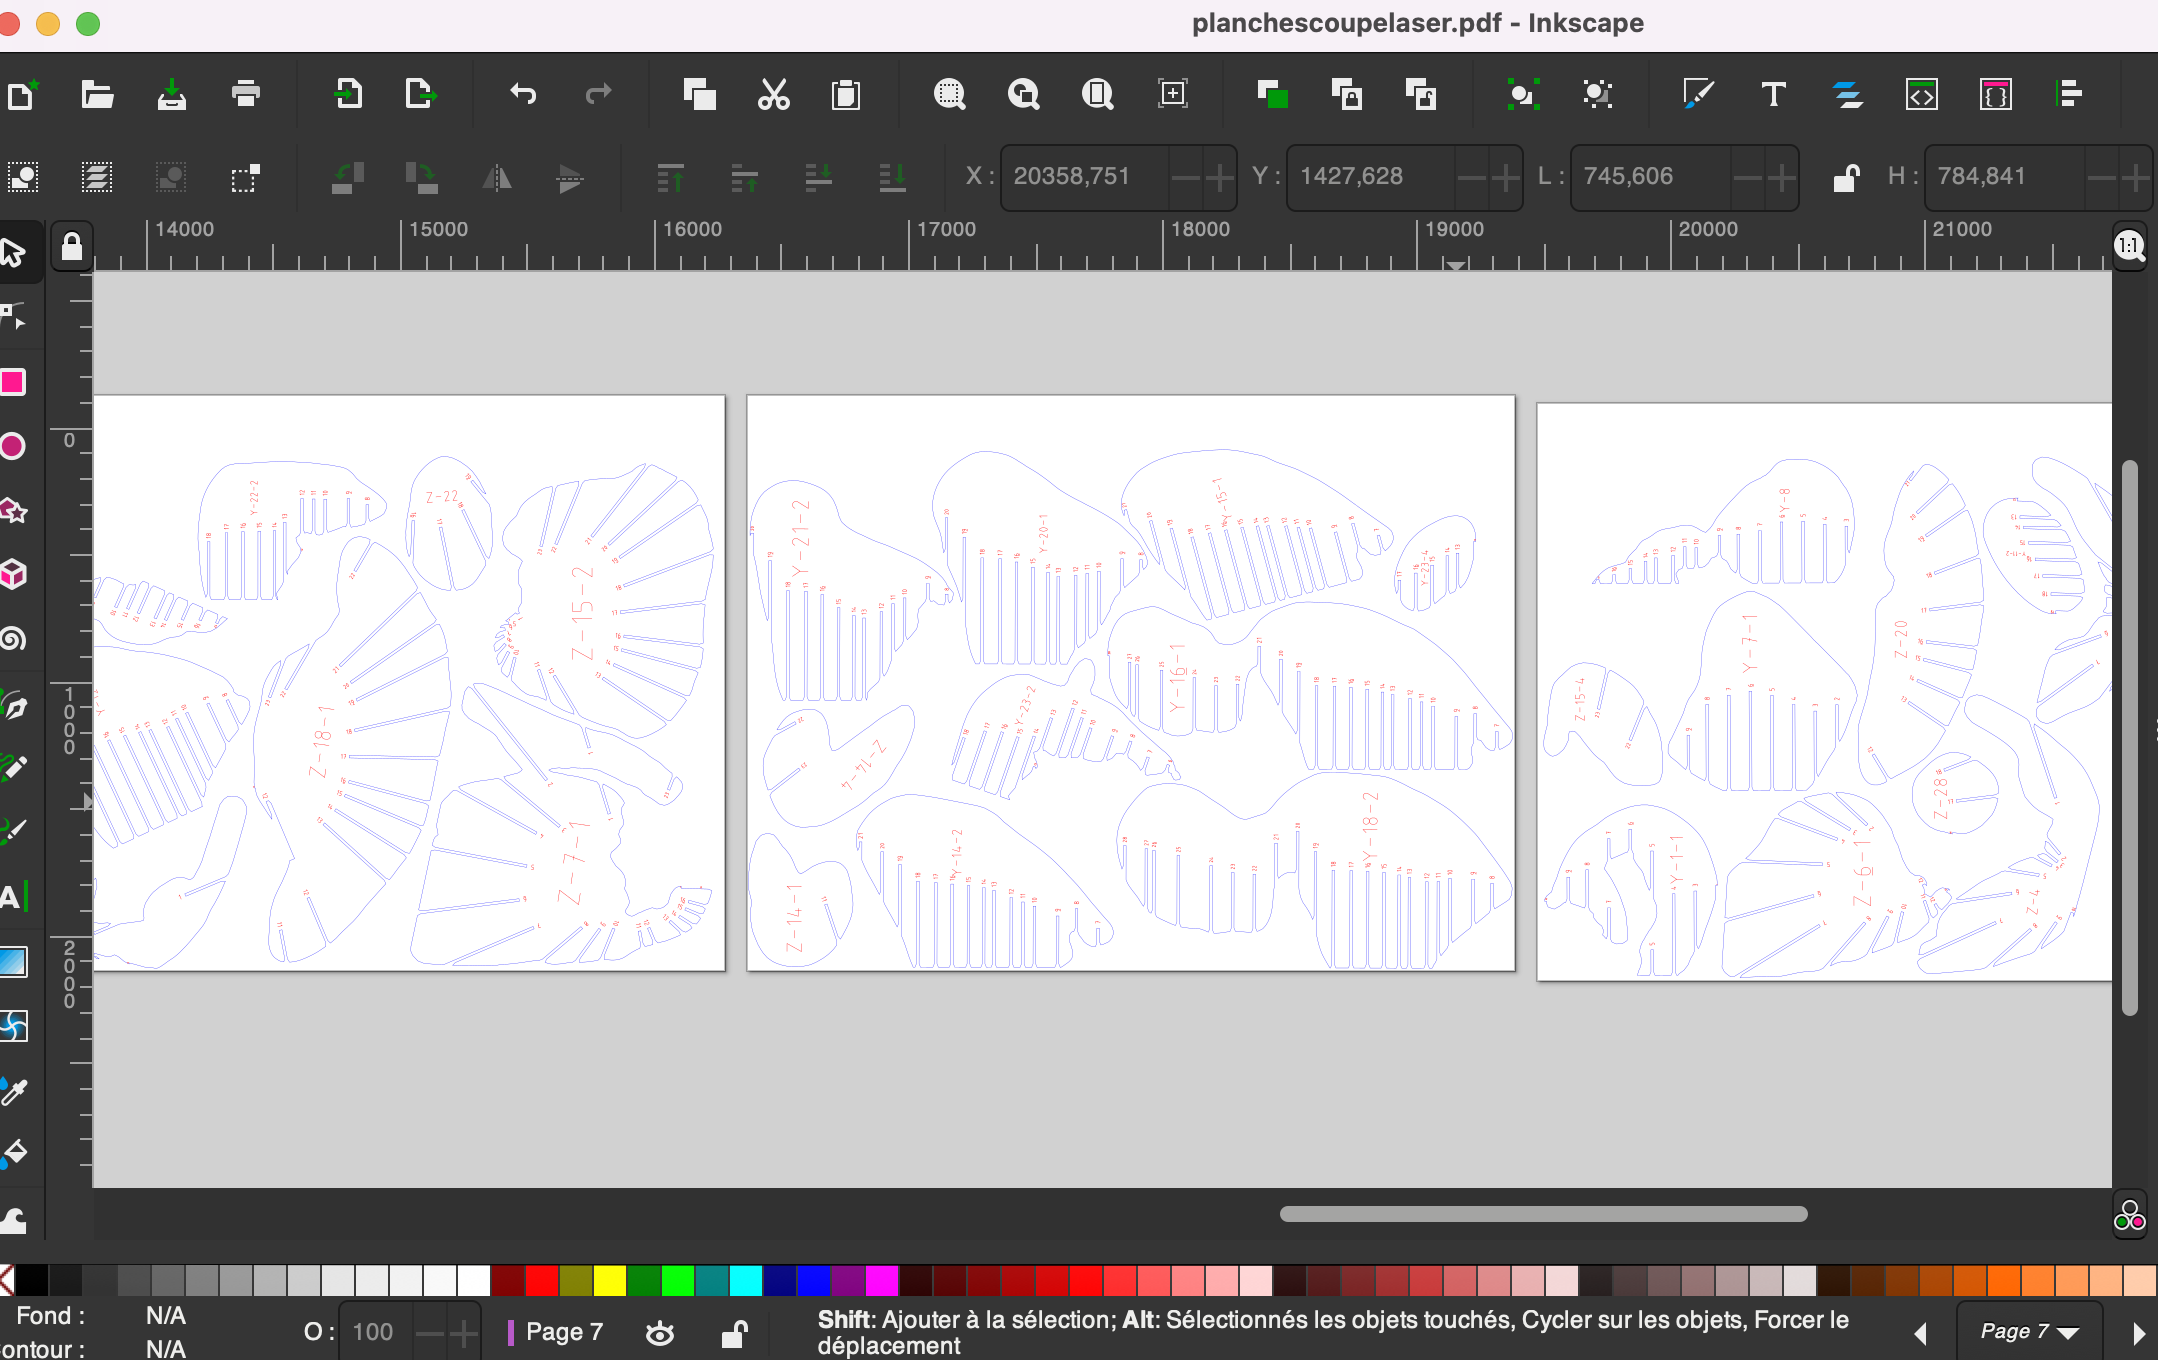
Découpe laser
Now it’s time to cut. There are still some adjustments to be made before cutting. You have to choose the material, here I use a 3 mm thick, 600 mm wide and 800mm long cardboard. It is important to adapt the power and speed of the laser with the material used. Then I check the adjustments I did with a little part of the cardboard. The cutting is good, the indications are visible, all that remains is to check if the notches fit properly.
After this last test, It’s time to cut for real. I put on the play button. I start the impression, it remains only to wait.
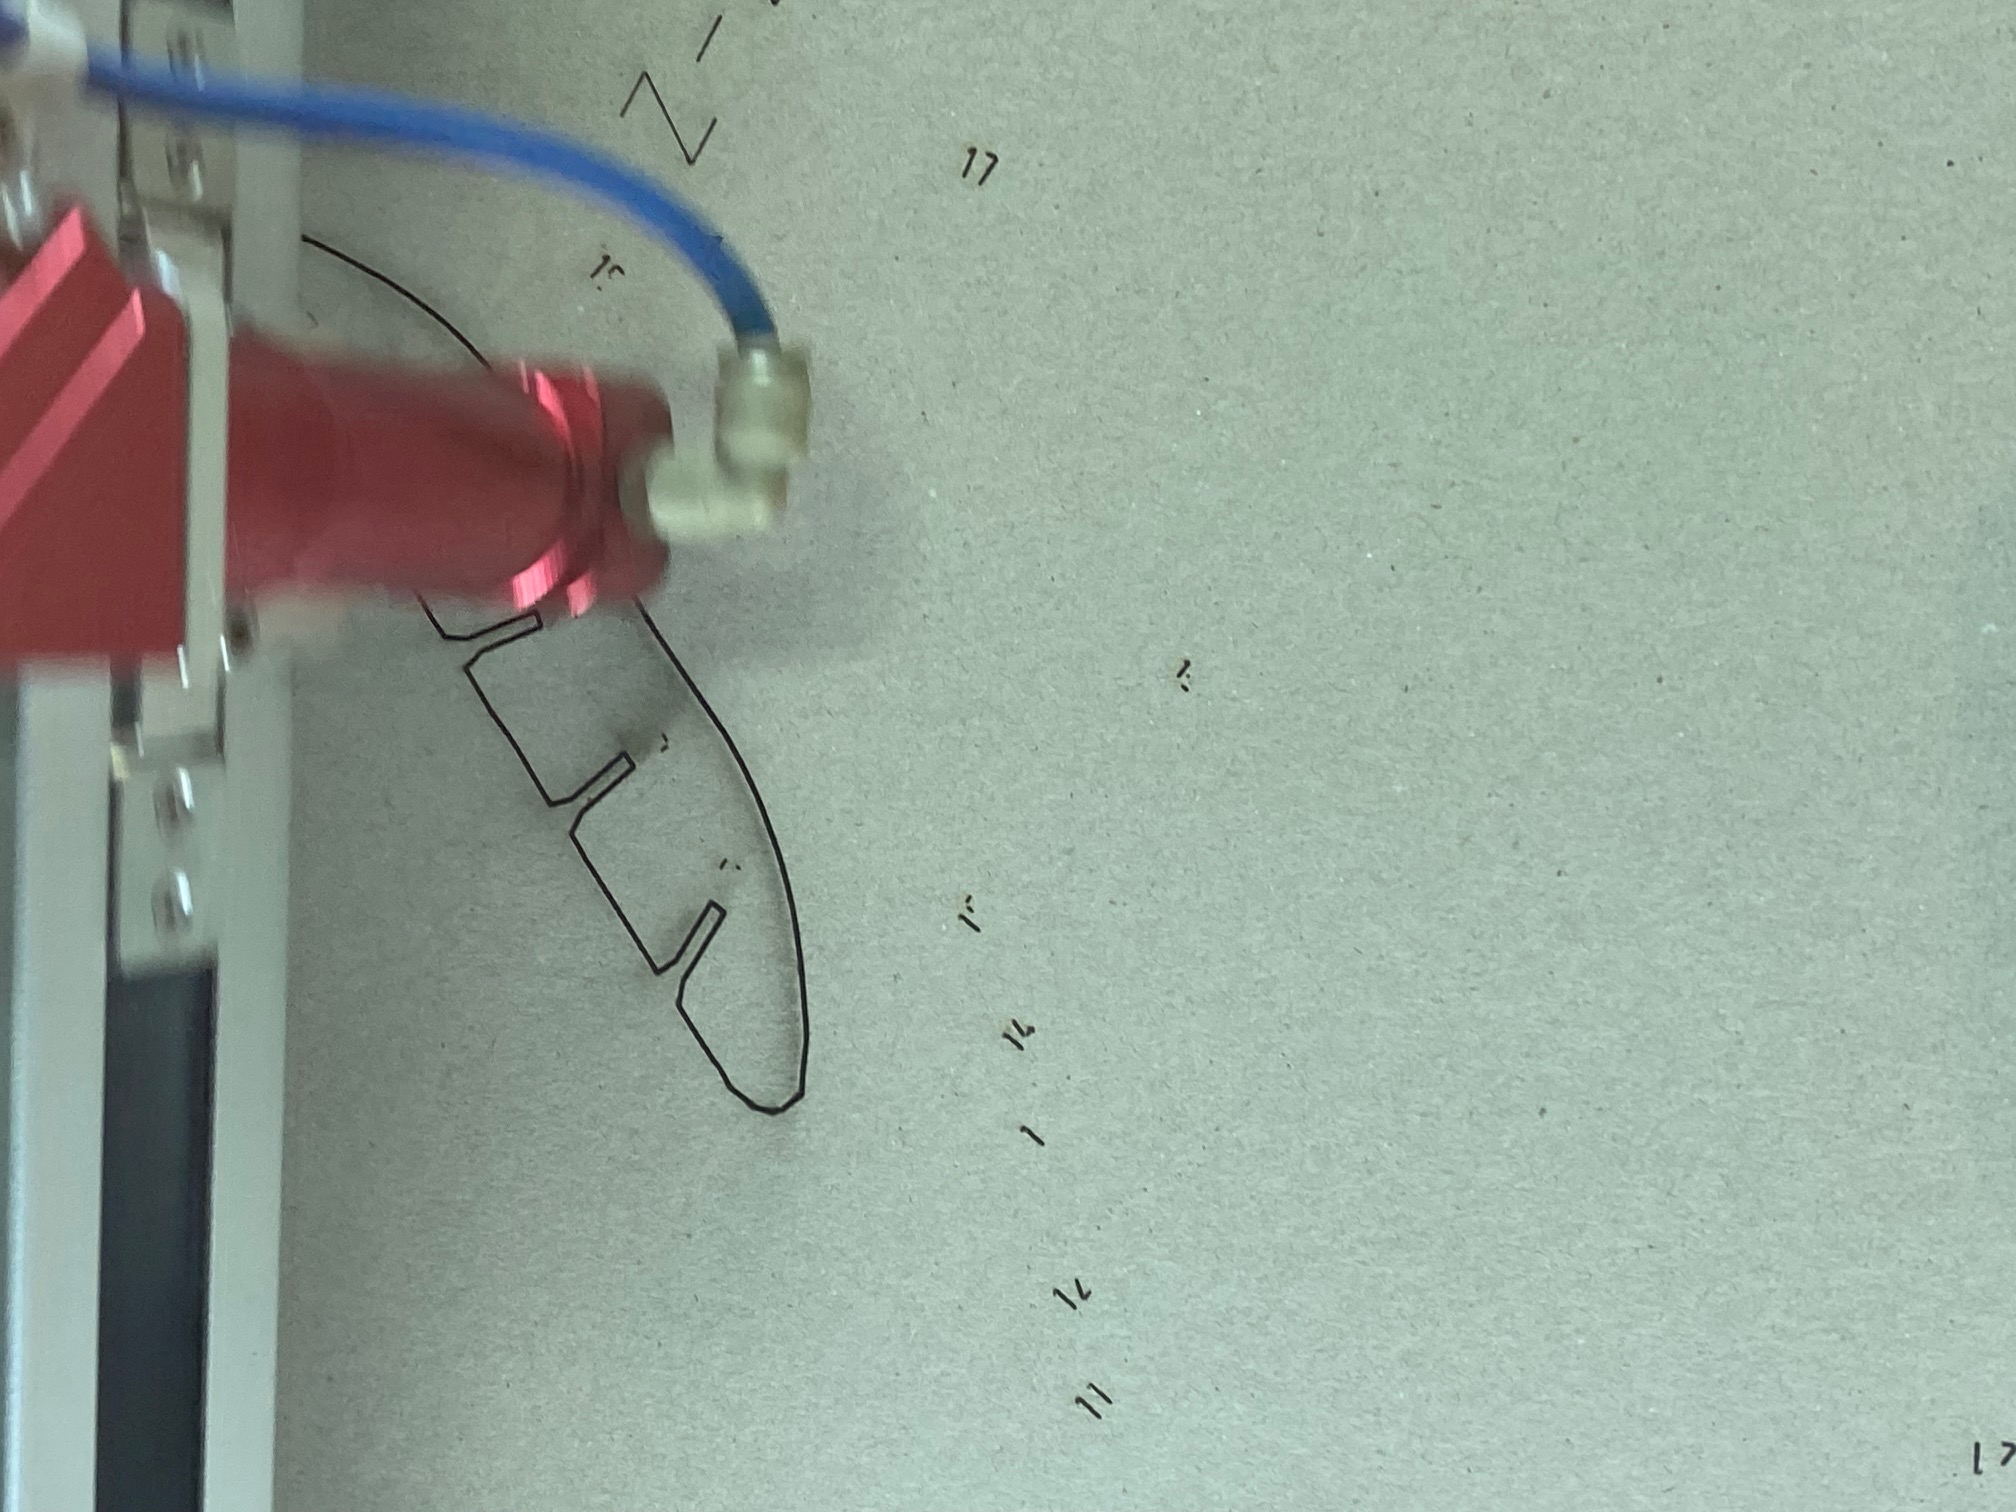
Cutting setting - Power = 95 - Speed 3.50
Marking setting - Power = 70 - Speed = 25
Final Assembly
I started to follow the mounting sequence of Slicer. Unfortunately I quickly had difficulties to build my structure, so I undid it to try another method. After sorting my pieces, I took the biggest piece in the Z-axis which I inserted all the Y-axis pieces in the notches. Everything was fine at this point, but after things got complicated, I had to put all the rest of the Z-axis pieces but I never succeed to fit pieces in the notches. After several hours, nothing worked. Because of my impatience, I pushed to hard and I broke 2 pieces. I was discouraged and frustrated to not be able to build my final structure. Finally, I was too tired to continue so I decided to went home and continue another day, when I’m not on the verge of a nervous breakdown.
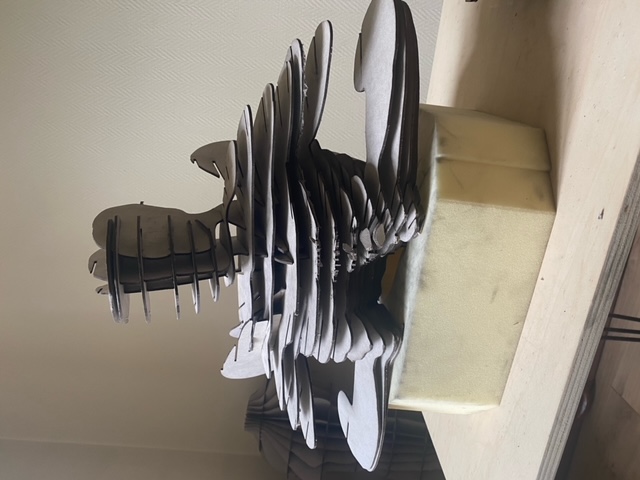
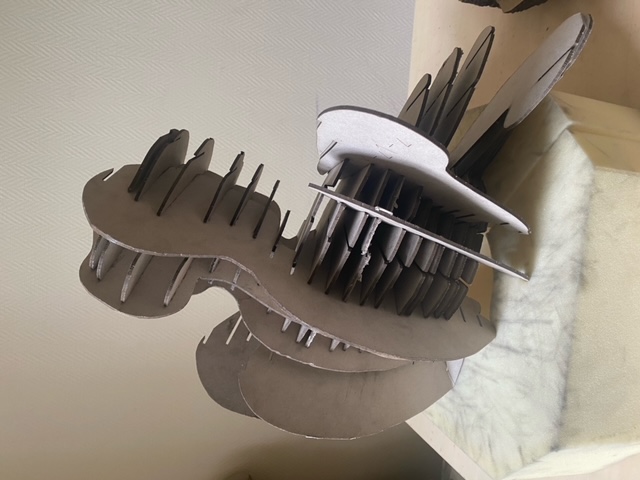
At this point I had 2 options, cut again in another material and another slices technique construction, or stop it. Unfortunately I did'nt have enough time to cut it again so...I choosed the third option. Indeed I decided to do a 3D print of my structure because I was very frustrated to can't see the result of my project.