13. Skin Electronics
References & Inspiration
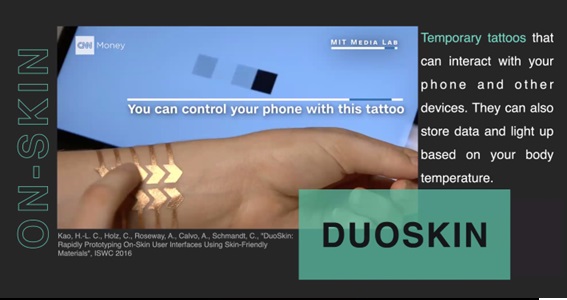
Week 13!! I cant believe that we are at this point! Time has passed incredibly fast and now we are in our last week with an amazing subject! Skin electronics :D In the lecture of Katya, I was really inspired by all the possible instruments and ideas that you can create with technology and imagination! And all placed in the surface of the human body!!
Assignment: Biotech and the skin
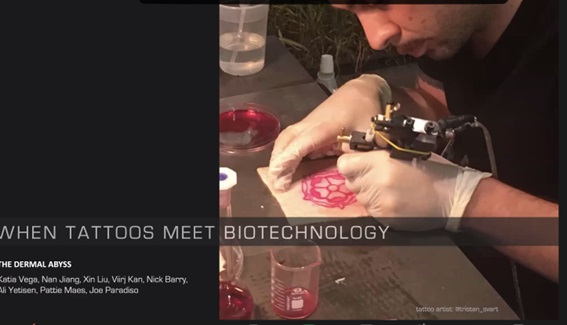
I was reaaaaaallly touched by this. For me, it would be incredible to have a tattoo that reacts with different levels of glucose, ph, or any other signal for preventive reasons. Imagine a tattoo that changes of color when it detects that something is not going well inside your body? This would be an incredible way to threat diseases that we cannot detect on time and will help many people. Another application is that there are many cheap cosmetics that cause allergy or sickness to the person that is using it because of its components.
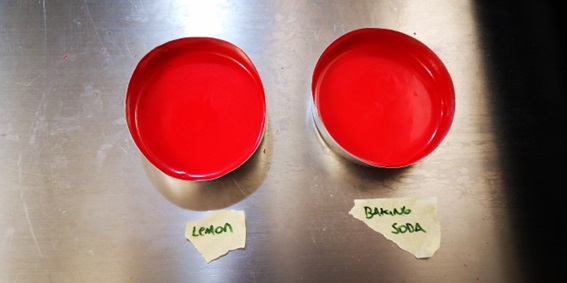
For this reason, I worked in the proof of concept to create a wearable biosensor that reacts in direct contact with a homemade lipstick. Usually the pH of the skin is between the range of 5 and 7. In my experiment, I thought about two different cases: One lipstick very acid and another lipstick very basic so both interact with the chromogenic biosensor changing the pH and therefore changing color.
Materials
- 300 gr Red cabbage
- 1 Orange
- 1 Needle
- 30 gr Coconul oil
- 10 gr Red crayon
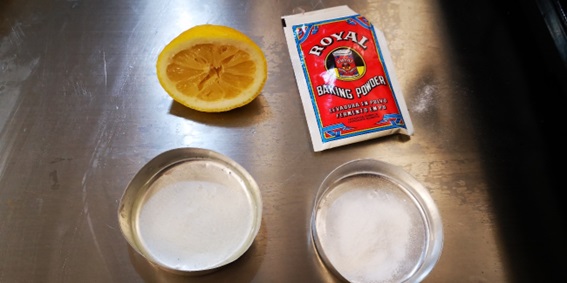
- half Lemon (acid reagent component pH 9)
- 1 pinch of Baking soda (basic reagent component pH 9)
Preparation of Ink - chromogenic biosensor: anthocyanin based red cabbage extract
Cut the red cabbage and add to a large bowl
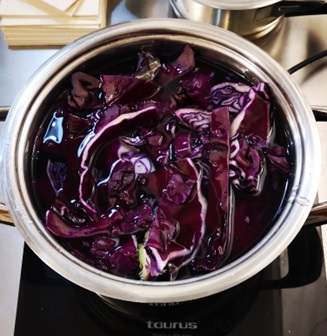
Cover with water and bring to a boil
Reduce heat and leave to simmer for 1 hour until it is coloured
Remove from heat
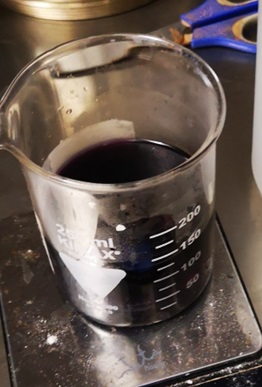
Put the cabbage water back on the heat and simmer until it is reduced
Strain through a filter
Preparation lipstick
Add the coconut oil and crayon in a bowl
Put it on medium heat until melt and mix

Then I prepared the 2 different lipsticks – acid and basic mixing the coconut + crayon mix in two different recipients
Let cool
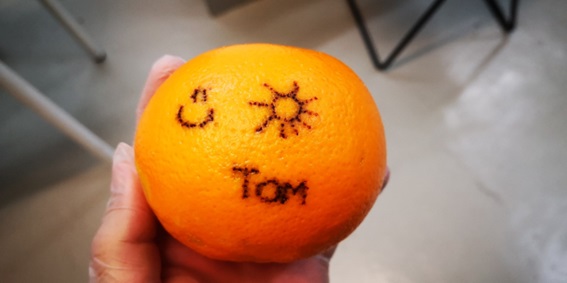
Hand Poke tattoo technique
As I did not had available the tattoo gun usually used for tattooing, I decided to learn the hand poke tattoo technique.
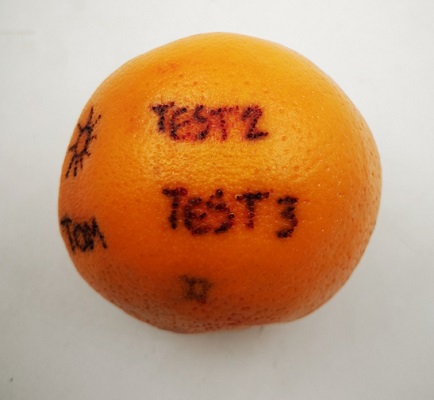
For this purpose, I used a sweing and embroidery machine needle. And the technique; and the theory consisted of smearing the needle with the ink and impregnating it into the orange stitch by stitch until the desired shape was obtained.
Test and results
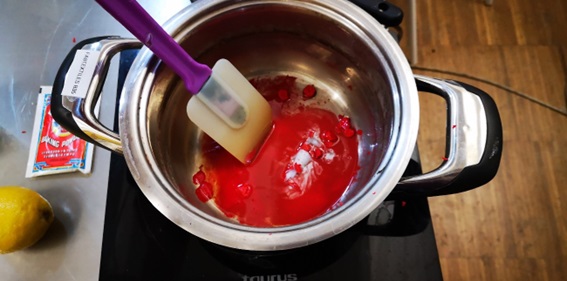
Finally I decided to test how the biosensor would react with the different lipsticks and below are the results.
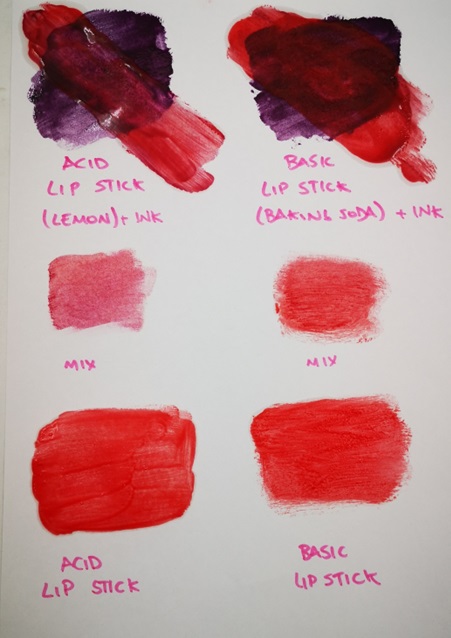
It can be seen that with the acid lipstick I got a highlighted change of color but I did not have any notable change with the basic lipstick. After firther research I understood that probably I used a lot of baking powder and this is why it did not react well. Also, the components linked to the coconut oil and the crayon could change the pH of my lipstick and it did not react as I expected.
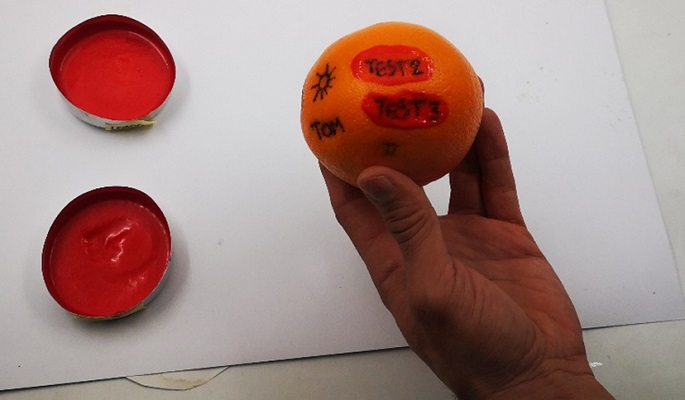
Then I tested in the orange and the results were the same as obtained in the paper
In any case, I felt very comfortable by testing this biosensor and I think that as a proof of concept it can be really useful when a proper reagent ink could be inyected in the skin and reacts towards different values or chemicals as a preventive device.
Further developments
I think it could be explored to make the ink react to the change of the PH in a more noticeable way - Probably using diferent acid/basic components or try to make the chemical reaction in a different substrate (i.e pork skin)
Also, next time for bio balm it can be made it with soy wax or a transparent wax instead of crayon, as the crayon may affect the change of the color of the material.
LED BIO TATTOOOOO!!!!
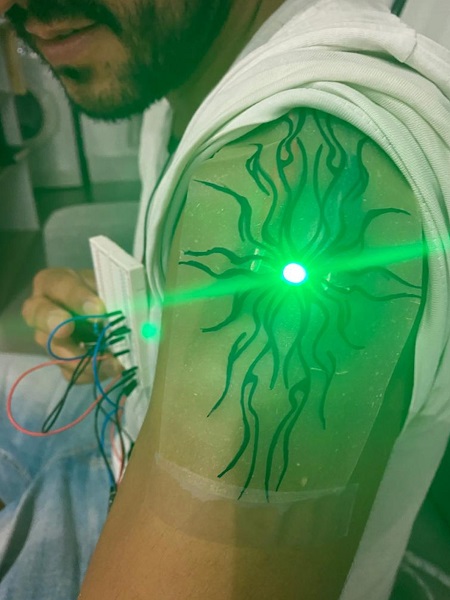
So I was on holidays, I already had the graduation ceremony in June, received my diplomas, and then I felt I needed to do add complementary information to my Week 13 Project :)
So I decided to transform this Bio tattoo idea into a LED Bio tattoo!! The concept will be the same, a tattoo that you can wear and then with the exposure of extreme light. For this purpose, I planed the schematic using a photoluminescence sensor in the circuit and the PLC ESP32:
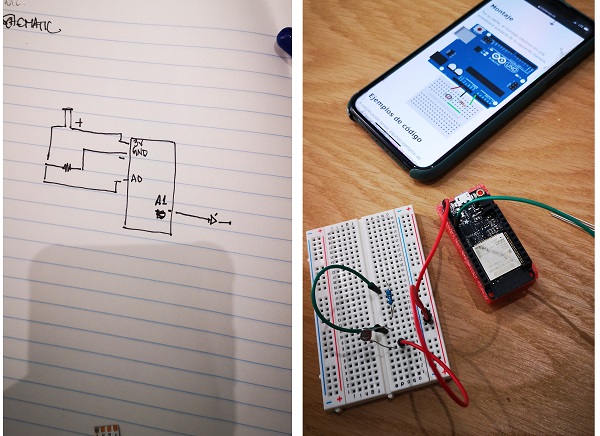
Then, with Arduino, I programmed the code so that it turned on and off the LED depending on the values that the sensor vas receiving.
// Pin donde se conectan los leds
int pinLed1 = 13;
int pinLed2 = 3;
int pinLed3 = 4;
// Pin analogico de entrada para el LDR
int pinLDR = A0;
// Variable donde se almacena el valor del LDR
int valorLDR = 0;
void setup()
{
  // Configuramos como salidas los pines donde se conectan los led
  pinMode(pinLed1, OUTPUT);
  pinMode(pinLed2, OUTPUT);
  pinMode(pinLed3, OUTPUT);

  //  Configurar el puerto serial
  Serial.begin(115200);
}
void loop()
{
  // Apagar todos los leds siempre que se inicia el ciclo
  digitalWrite(pinLed1, LOW);
  digitalWrite(pinLed2, LOW);
  digitalWrite(pinLed3, LOW);
  // Guardamos el valor leido del ADC en una variable
  // El valor leido por el ADC (voltaje) aumenta de manera directamente proporcional
  // con respecto a la luz percibida por el LDR
  valorLDR= analogRead(pinLDR);

  // Devolver el valor leido a nuestro monitor serial en el IDE de Arduino
  Serial.println(valorLDR);

  // Encender los leds apropiados de acuerdo al valor de ADC
  if(valorLDR > 2000)
  {
    digitalWrite(pinLed1, HIGH);
  }
  if(valorLDR < 2000)
  {
    digitalWrite(pinLed1, LOW);
  }

  // Esperar unos milisegundos antes de actualizar
  delay(200);
}
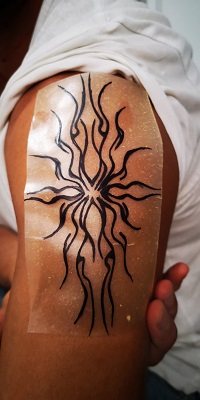
After the circuit was working and it was calibrated, I proceeded to mount it on a BIO skin made of gelatin that I had available (the recipe can be followed on the week 6 project). I drew a tattoo with black permanent marker (as a prototype – further development can use the thermo-chromatic ink) and then proceeded to mount the circuit on the BIO SKIN
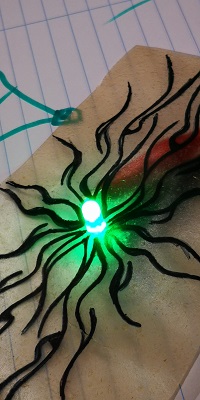
The result is fascinating, and I couldn’t be more satisfied and proud of the result. I think that now I have completed my assignment and now I can complete the program.
A HUUUUUUUUUGE thank you to Ana Correa who had been always supportive and in this particular case was available to work with me and help me complete my unexpected desire to work with electronics in my assignment.
Thank you!!!!
Thank you Ana, Petra, Josep and Victor for your valuable support this week! :)
See you in my final project!