Process
Index
- Materials and Methodology
- Performance test of Cinamon Gelatin samples– Interaction with Sweat
- Degradation Process
- Spray Concept
- Multilayered Material
- Spray Gun for Body Spray
- Final Testing
- Final Project
- Storytelling
- Jury's Feedback
1. Materials and Methodology
Comparison of Materials obtained
| Image | Item | Description |
|---|---|---|
 |
BioSlime (Cellulose CMC Based) | Sticky, fragile, very thin, transparent, requires oven for drying |
 |
Microcellulose film (Cellulose CMC based) | Sticky, fragile, very thin, transparent, requires oven for drying |
 |
Soft Sponge (Cellulose CMC based) | soft, spongy, non-flexible, humid, requires oven for drying |
 |
Gelatin | flexible, Resistent, Flexible, transparent, Good Smell |
 |
Gelatin BioInk | Resistent, Flexible, transparent, Good Smell |
 |
Gelatin SunCream | Resistent, Flexible, Good Smell |
Items and descriptions
| Image | Item | Description |
|---|---|---|
 |
Beaker | Recipient used to mix Biomaterials |
 |
Bowls | Recipient used to mix Biomaterials |
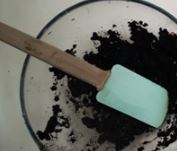 |
Pastry spatula | Tool used to mix Biomaterials |
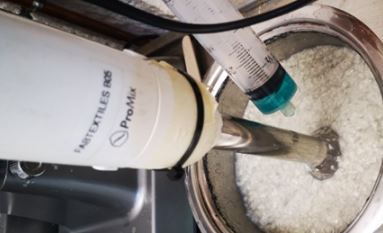 |
Mixer | Tool used to grind mixes |
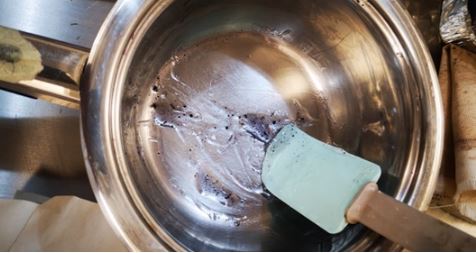 |
Pot | Recipient used to mix and "cook" Biomaterials |
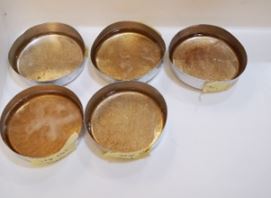 |
Aluminium Moulds | Recipient used to cast Biomaterials to dry |
 |
Glass moulds | Recipient used to cast Biomaterials to dry |
 |
Wooden Mould with Baking paper | Recipient used to cast Biomaterials to dry |
 |
Wooden Mould with Plastic surface | Recipient used to spray Biomaterials to dry |
 |
Large Casting mould | 1.5 x 1.5m Wooden frame with glass surface for casting Biomaterials |
 |
Sticky tape | Tool used to stick bioplastics to the body |
 |
Fit bit | Tool used to measure calories while experimenting the melting of Bioplastics |
 |
Spray gun | Tool used to spray bioplastics |
 |
DIY Spray gun | Tool used to spray bioplastics |
Other materials: - Oven: to dry bioplastics - Stove: to heat the mixes and Bioplastics
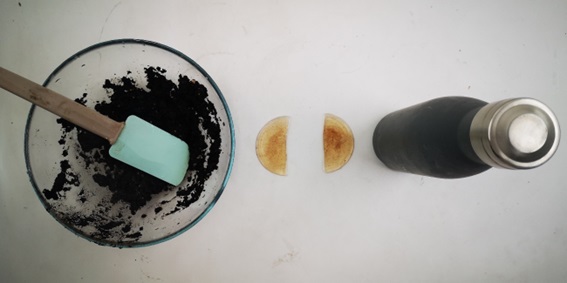
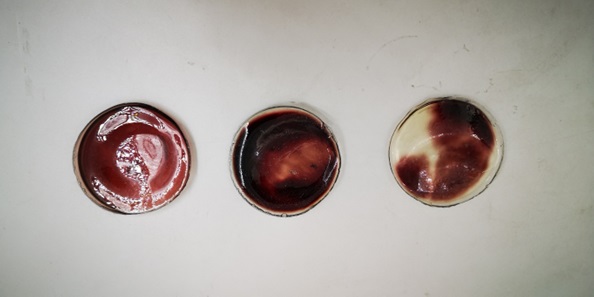
Cinamon Gelatin (Collagen based):
Taking into consideration the biodegradable condition, for the first batch of material testing I started with Gelatins and cellulose based materials.
Ingredients:
- 120 ml of water
- 24 gr of gelatin
- 15 - 24 ml of glycerol
- Pinch of Cinnamon
Process:
This process was inspired in the Lecture of Week 6 - Bioplastics
Add a pinch of cinnamon to avoid mould
I prepared 5 different mould to test flexibility and thickness:
- Rate of 3/5 glycerol and gelatin – 2mm thickness
- Rate of 1/1 glycerol and gelatin – 5mm thickness
- Rate of 3/5 glycerol and gelatin – 2mm thickness
- Rate of 1/1 glycerol and gelatin – 5mm thickness
- Rate of 1/1 glycerol and gelatin – 5mm thickness – for degradation testing
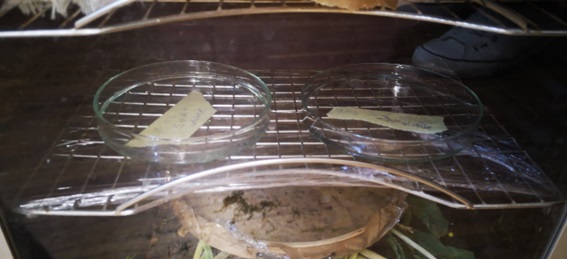
Once the different moulds were casted, the samples were left 24h for drying
Results:
Once the samples were dry, all of the samples were flexible and were easy removed from the mould.
The samples with more glycerin content were more flexible
Surfaces in contact with the mould were stickier than those exposed in the surface
Transparency of the samples is influenced by the thickness of the material
All of the sample shrinked around 1mm after the drying process
The fifth sample, was cut in half and was put in sea water and in soil so the degradation process can be observed (see below results of degradation as a consecuence of time)
BioSlime (Cellulose CMC Based):
This process was inspired in the Chemat Book
Ingredients:
- 75 ml of Water
- 0.4 gr of Carboxymethyl cellulose (CMC), high viscosity, 1% solution in water
- 90 ml Glycerol
- A pinch of cabagge pigment
Process:
To pre-prepare 900 ml of 1% CMC solution in water
- Add 9 g of CMC powder to 900 ml of cold water and mix using a hand blender.
- Let the mixture stand overnight. After complete dissolution, the mixture is a clear, viscous solution.
Method
- Measure the water and dry MCC powder into a bowl and mix well using a hand blender
- Add the 1% CMC solution and glycerol and mix well using a spoon (to avoid creating bubbles).
- Add the pinch of cabagge pigment
- Let the solution stand overnight.
- Pour the solution onto a non adherent mould (I used kitchen baking paper) and spread the mix evenly.
- Dry in an oven at 50 °C for one days until the sample is dry and touching leaves no fingerprints on its surface.
Results:
The slime obtained was extremely thin and it was uneven, probably it was not levelled correctly in the oven and it dried uneven
The removal process was difficult as the slime sticked and it was very fragile
Also, I identified that the drying process is a critical step in the manufacturing of this material.
The texture is veeeeery flexible and a little sticky
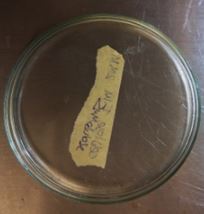
Microcellulose film (Cellulose CMC based):
This process was inspired in the Chemat Book
Ingredients:
- 200 ml of Water
- 1 gr of Carboxymethyl cellulose (CMC) powder
- 10 ml Glycerol
Process:
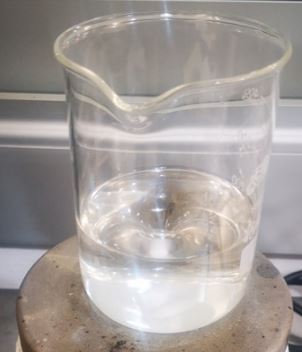
- Measure the CMC and water into a beaker and mix together using a spoon
- Place the magnet into the beaker and move the beaker onto a magnetic stirrer. Turn on the stirrer, making sure that the magnet rotates evenly without touching the sides. Continue mixing for 3 hours
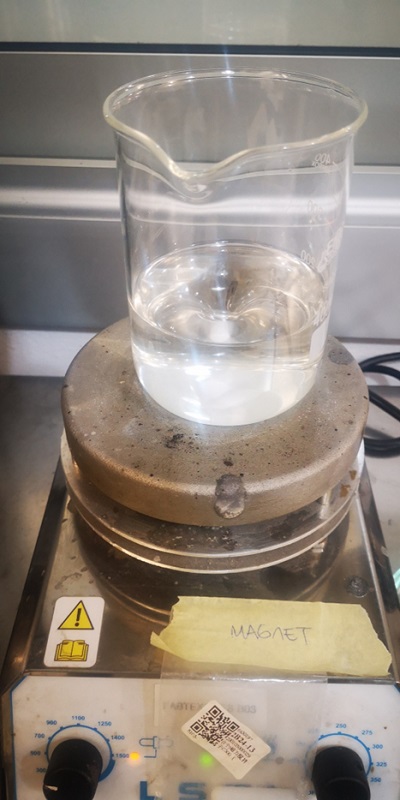
- Add the glycerol to the beaker. Mix for 1 hour
- Pour the mixture onto a petri dish as a 5 mm or thicker layer
- Dry in an oven at 30–40 °C for several days
Results:
The microcellulose film obtained was extremely thin and it could barely seen because no pigment was used.
The removal process was difficult as the slime sticked and it was very fragile
Also, I identified that the drying process is a critical step in the manufacturing of this material
The texture is veeeeery flexible and a extremely sticky
Soft Sponge (Cellulose CMC based):
This process was inspired in the Chemat Book
Ingredients for the pulp foam:
- 6gr Paper pulp (from pulp paper)
- 600ml of Water
- 6ml of Dishwashing liquid
Process for the pulp foam:
- Measure the water into a bowl.
- Shred the pulp or paper into small pieces and add them to the water. Let them soak for at least a few minutes

- Mix using a hand blender until the pulp is evenly dispersed
- Add dishwashing liquid and mix using the hand blender until the foam is even
- Spread onto a surface for drying mesh
- Dry overnight
Ingredient for the Soft Sponge:
- Pinch of mica powder
- Process for the Soft Sponge:
To pre-prepare 900 ml of 1% CMC solution in water - Add 9 g of CMC powder to 900 ml of cold water and mix using a hand blender. - Let the mixture stand overnight. After complete dissolution, the mixture is a clear, viscous solution.
Method
- Add the pulp to the water and let it soak for at least a few minutes
- Disperse the pulp fibres well using a hand blender
- Drain away 250 ml of water using filtration fabric
- Add MCC, CMC solution, glycerol, and dishwashing liquid, mica powder and mix using a hand blender until the foam is even
- Pour the foamed mixture into a non-stick mould

- Dry in an oven at 40–60 °C overnight
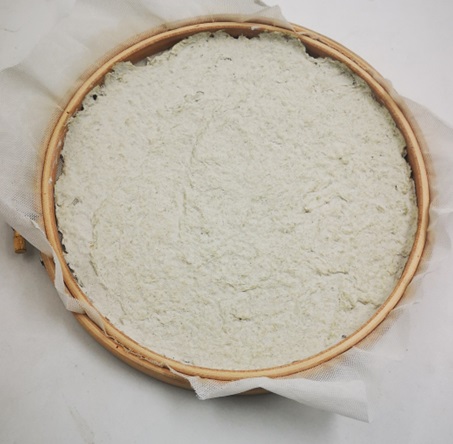
Results:
The foam is amazing! The colour was great and it is really soft and spongy. Also, it was easily removed from the mould
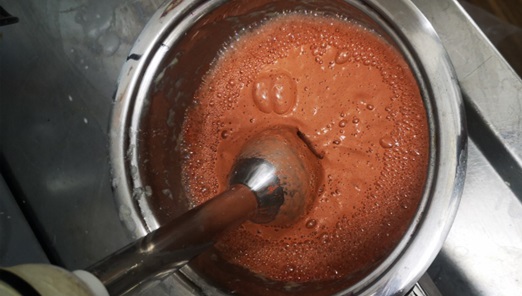
BioInk Gelatin (Collagen based):
Ingredients: - 120 ml of water - 24 gr of gelatin - 15 of glycerol - Pinch of purple cabagge ink (refer Week 13 of my assignments for details on how to prepare this ink)
Process:
Same process as the Cinamon gelatin mix (see above)
When the mix is casted in the moulds, I prepared 3 different samples:
- Adding few drops of ink into the gelatin mould without mixing
- Adding more drops of ink into the gelatin mould without mixing
- Adding few drops of ink into the gelatin mould mixing it
Results:
Test to be performed the First week of February :)
Carbon Active Gelatin (Collagen based):
Ingredients: - 120 ml of water - 24 gr of gelatin - 15 of glycerol - Pinch of active carbon powder
Process:
Same process as the Cinamon gelatin mix (see above). Replace cinnamon for carbon powder. This experiment is to evaluate the transparency of the gelatin
Results:
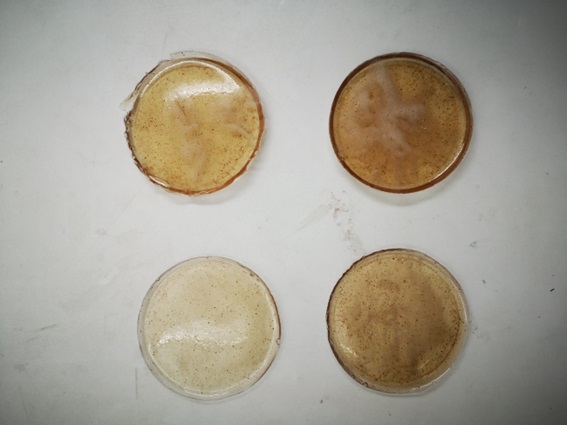
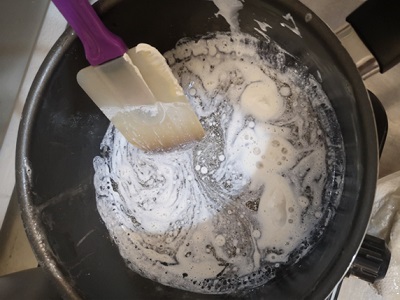
SunCream Gelatin (Collagen based):
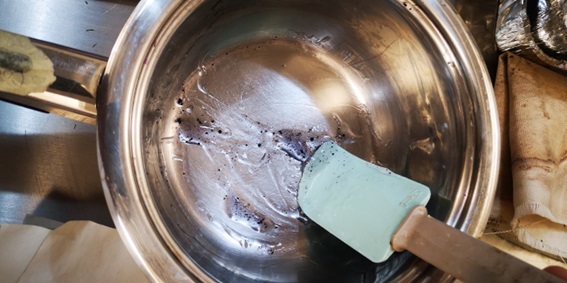
Ingredients for the natural Suncream: - 1 spoon of coconut oil - 1 spoon of bee wax - 1 spoon of sunflower oil - 5 teaspoon of Zinc Oxide – Each teaspoon add a Sun Protection Factor of 10
Process for the natural Suncream:
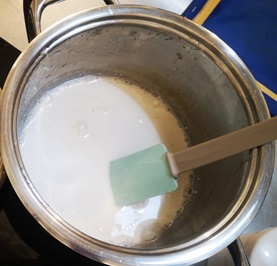
- Melt the beeswax and the coconut oil in a bain-marie.
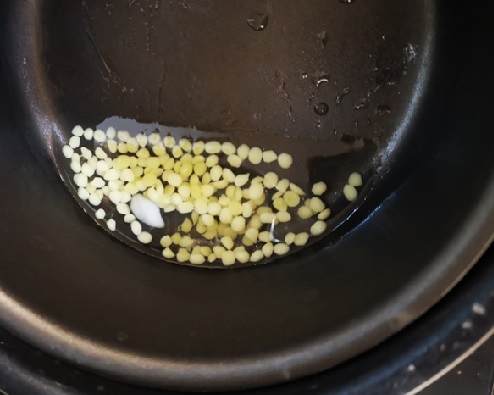
-
Remove the mix from the heat and add the sunflower oil and the zinc oxide
-
Mix the ingredients and let it rest until it hardens a little and is ready to use.
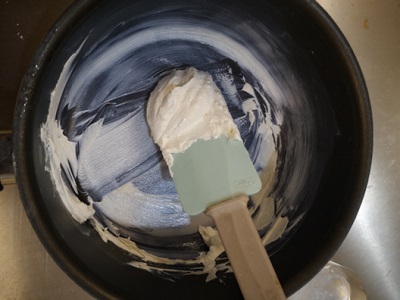
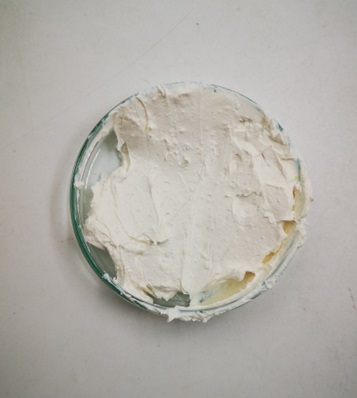
Ingredients for the gelatin: - 120 ml of water - 24 gr of gelatin - 15 ml of glycerol - A spoon of natural suncream (see above preparation process)
Process for the gelatin:
Same process as the Cinamon gelatin mix (see above).
Mix the suncream with the gelatin before casting and vert it in the mould.
Results:
It was expected that the gelatin and the sun cream will not mix as the gelatin is water based and the sun cream is oil based. However, this was kind of my intention, to obtain a two layered material so that the person can apply in one side the suncream and in the other it is in contact with the air.
However the results are great as after the drying process I obtained an homogeneous sample to be used
Mint Gelatin (Collagen based):
Ingredients: - 2400 ml of water with infused peppermint - 480 gr of gelatin - 300 ml of glycerol - Pinch of peppermint leaves
Process:
Boil water with the peppermint branches. Then use this water for the gelatin mix

Mix all the ingredients at the time avoiding boiling temperature of the water. In the case that bubbles or foam appear in the mix, try to remove them with a spoon. This will improve the quality of your biomaterial
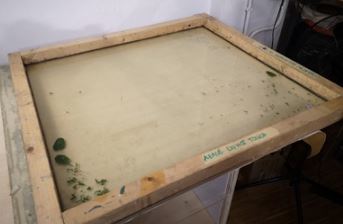
This mix was casted in a large mould of 745 cm x 850cm to obtain a large layer of 3mm thickness.
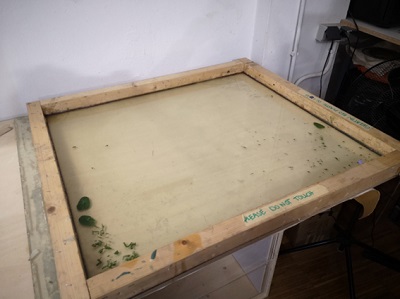
Results:
The gelatin material was different than those obtained in the previous experiments :(
This film was flexible but stiffer than those previous ones.
Due to the above, it was impossible to remove it from the mould without breaking it. It was very difficult and at the end it broke and I could not use it for the experiment I was planning to.
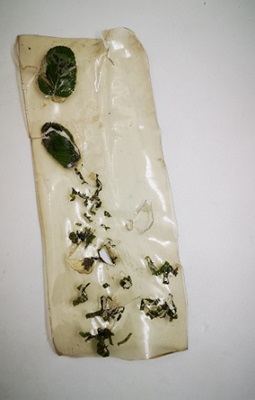
Also, I tryed to put some natural leaves embeded within the material to see the finishing, but due to the difficult proces to remove this material from the mould, these parts with leaves were very fragile and did not work as expected
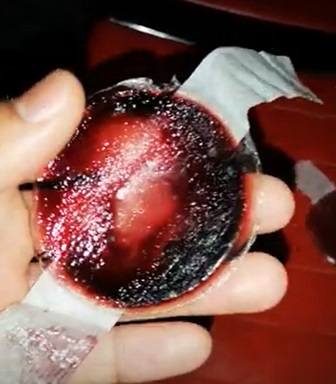
Performance test of Cinamon Gelatin samples– Interaction with Sweat:
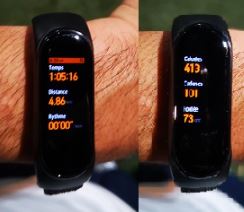
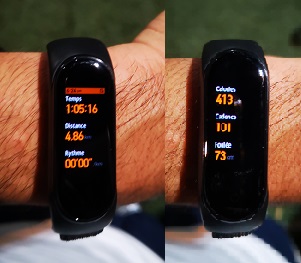
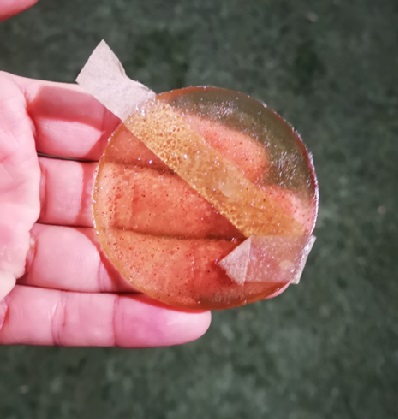
So there was me…Trying to test my first samples and the way I did it was in a football game. I tested the 2 samples of 2mm thickness to evaluate how these materials will interact with the human body in a normal situation of a football game.
I glued the two samples over my skin in the chest using micropore tape. Then I wore my football jersey on top of the materials. Parallel to this, I measured the time that I run together with the calories burnt using a Xiaomi fit band 4. At the beginning of the game I though that the samples were going to be lost in any moment for a non controlled movement. However, while I started to sweat, the gelatin started to melt creating a thin layer of gel and this prevented the samples to fall.
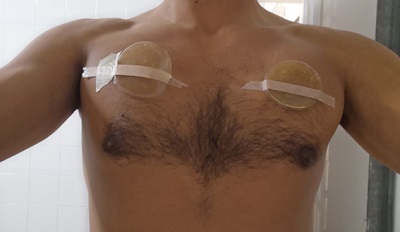
I played during 65 minutes, burning 413 calories and the result with my samples were that they melt a bit but they lasted – they did not melt completely.
The feeling of the samples was nice – same sensation as when you are sunburnt and you apply aloe vera gel. This feeling made me think: what if this gel felt as refreshing as the aloe vera or as an aftershave gel? Or what if this gel released sunblock for skin care? This led me to the next experiments :)
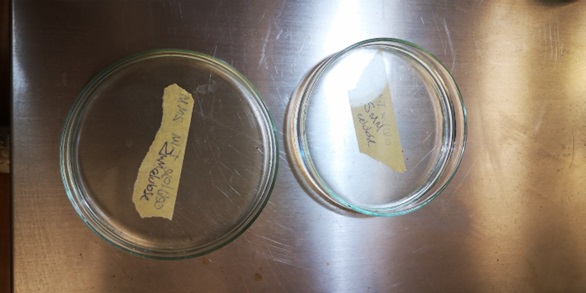
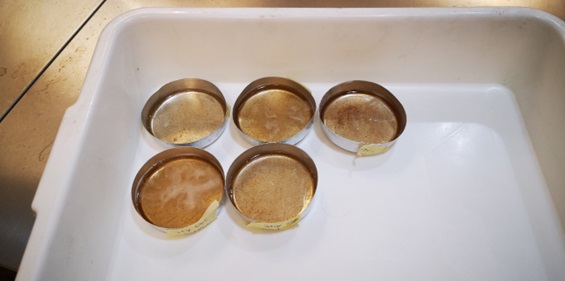
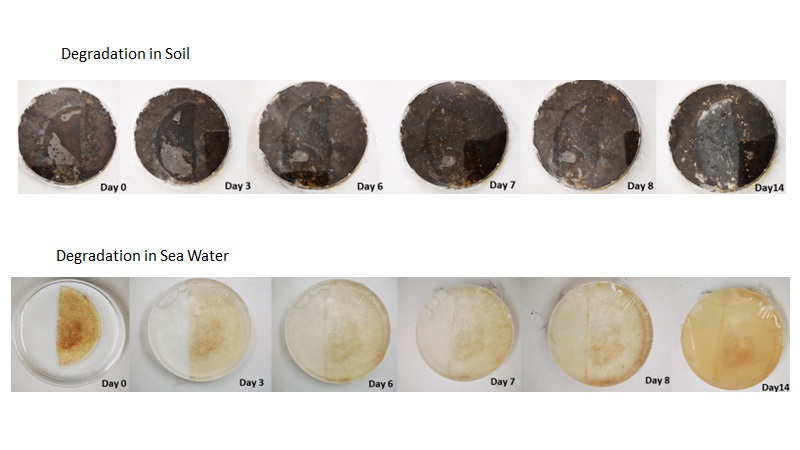
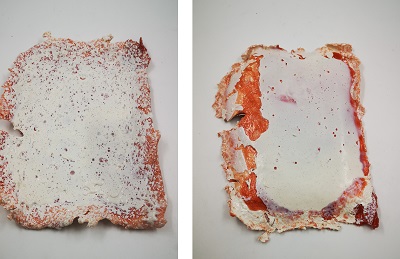
Degradation Process:
In order to assess the degradation process of my samples, I prepared two different environments for degradation: Soil and Sea water obtained from Barcelona Sea :)
I am taking pictures every 3 days and so far this is the result!!
I am extremely happy with my environmental friendly materials :)<3
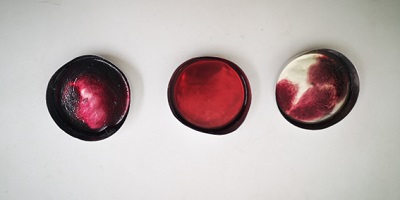
Performance test of BioInk Gelatin samples – Interaction with Sweat:
Samples were tested in the same procedure as described above.
The BioInk changed the color with the pH of the Sweat.
It was brighter so it confirms the interaction of the ink with the sweat. This may lead to potential applications for preventive care!
Performance test of SunCream Gelatin samples – Interaction with Sweat:
The produced samples were non homogeneous because of the water based gelatin and the oil based suncream
For this reason, I did not proceed with this samples as it will not have the desired effect upon the interaction with the sweat
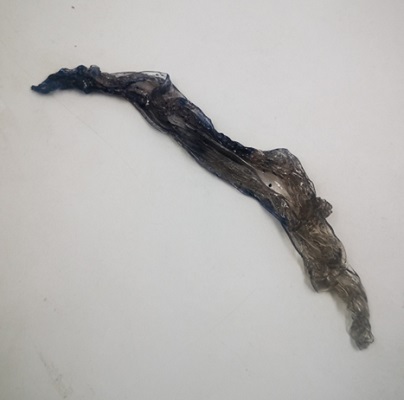
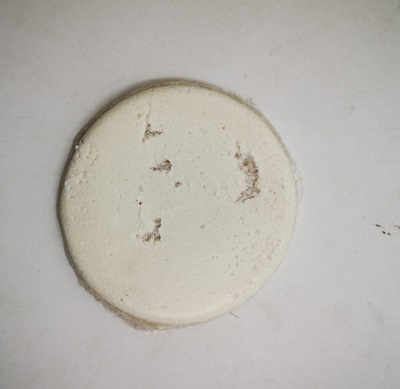
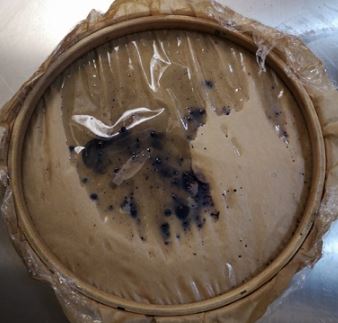
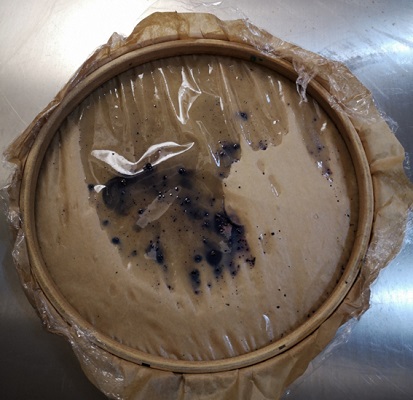
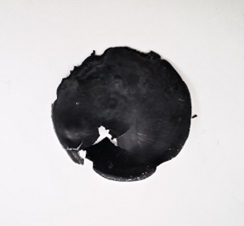
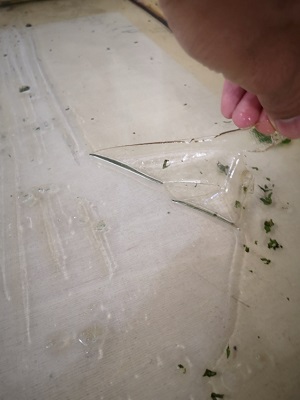
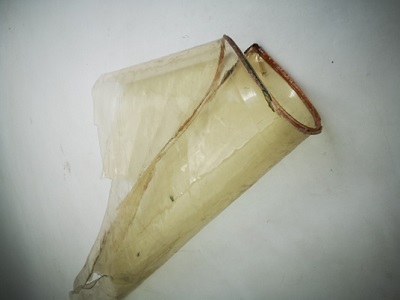
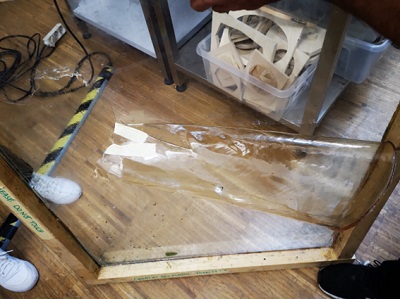
Performance test of Mint Gelatin samples – Interaction with Sweat:
On Saturday when I came to take the material to produce the sport garment, I did not obtain the results I was expecting.
Because of the drying process, the material was really adhered to the surface of the mould and it was imposible to take it. I tried with a bit of water, with a heat gun, slowly and after 2 hours (I swear it was 2 hours!) I could only obtain the following sample:
With the rest of the material revcored from the mould I will dissolve it , TAKING ADVANTAGE THAT THERE IS NO WASTE with these materials and reuse the gelatin for further experiments :)
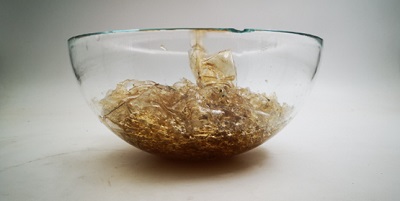
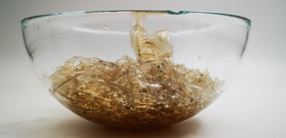
!!!!! However, this happened during a weekend and I left the “waste” material wet and in a closed environment. The result : mold!
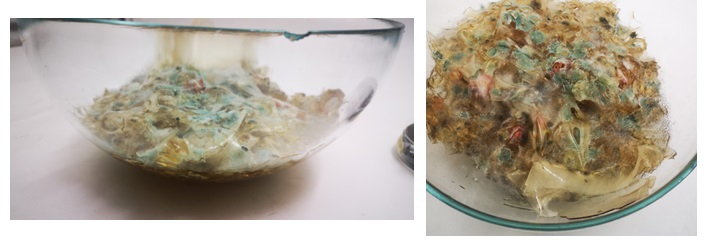
With this experience I learnt that the storage conditions are an important factor in the process, confirming that the drying process is crucial for Bioplastics
On the other hand, to take advantage of the material I obtained, I designed a garment that can be used for Yoga or running.

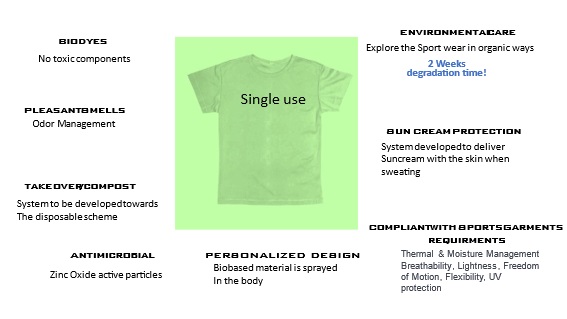
Spray Concept
After the failed attempt to produce cast materials, I thought about more efficient way to take advantage of the material if it is sprayed in the Skin. By spraying the material you obtain a personalized garment that every person can use on its skin, the Bioplastic will interact with the sweat, delivering the component embeded herein: sun cream, bioink, electrolytes, etc.
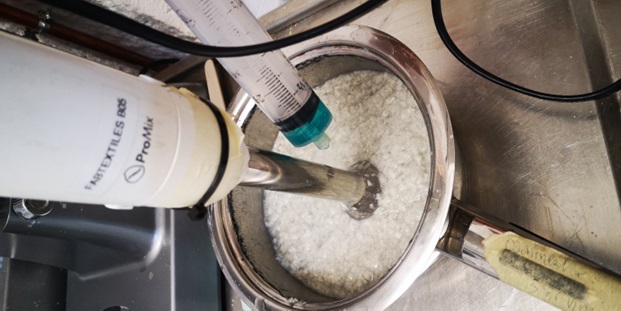
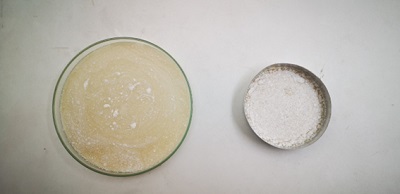
Manufacturing of a material that could be sprayed to create a material layer on the skin
The previous sample did not work as expected as the suncream and the gelatin are not mixed homogeneously. So I prepared another recipe with gelatin and ZnO powders: Ingredients:
Ingredients:
- 120 ml of water
- 24 gr of gelatin
- 15 - 24 ml of glycerol
- 5 teaspoon of Zinc Oxide – Each teaspoon add a Sun Protection Factor of 10
- Pinch of Cinnamon
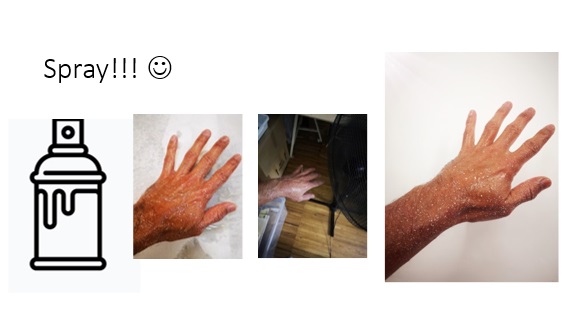
Drying proceess took like 1 minute with a fan. Once cooled down, the texture is smooth and it is not sticky.
For removal, I tryed to pull it out (which is feasible), but it nearly removed all the hair from my hands.
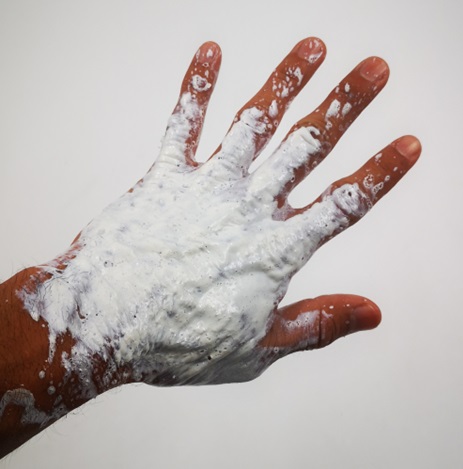
Therefore, I proceeded to wash my hands with warm water and the bioplastic was removed smoothly
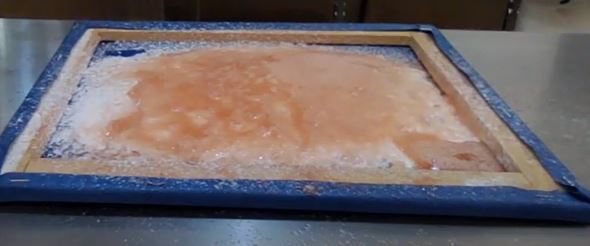
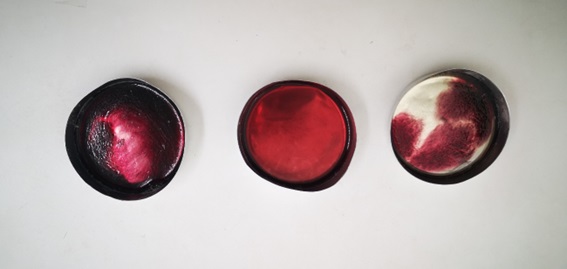
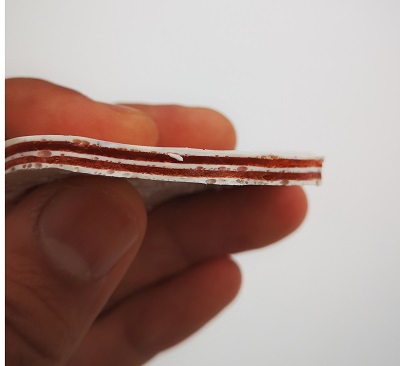
Multilayered Material
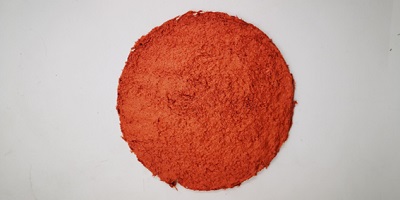
In order to test the spray method, I decided to create a multilayered material with different layers of the spray. In order to differentiate the different layers I decided to use Mica powder so that you can see red and white layers
I sprayed a mould with 5 layers: white, red, white, red, white layers and I waited 2-3 minutes for each layer to dry before spraying the next one. At the end you can see that you can define the thicknesss of the material by defining the number of layers you want to dress on
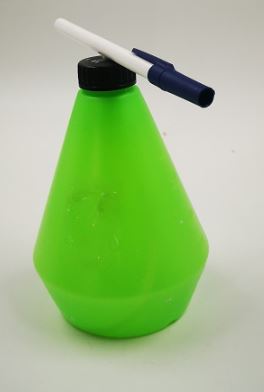
Spray Gun for Body Spray
To make your own your DIY Spray gun you need the following materials:
Materials:
- 10cm of 3mm Plastic hose
- 1 reused plastic bottle with its cap
- 1 plastic pen
- 1 cutter
- Silicon / silicon gun
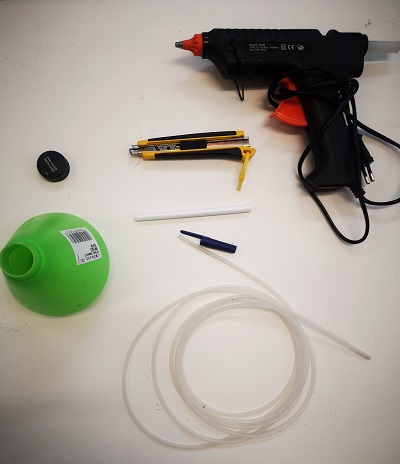
First, open a hole in the cap with the cutter and pass the hose thru it
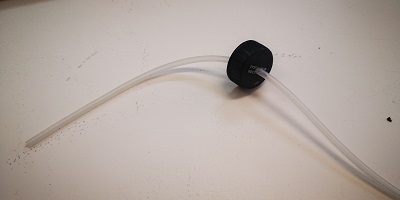
Then open another hole in the middle of the body of the pen and pass the other end of the hose thru it
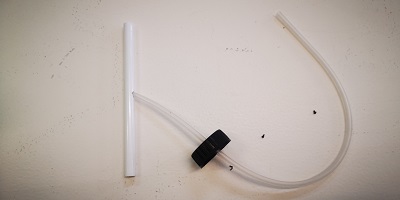
Finally, glue with silicone both ends (pen and bottle cap) and add the pen plastic cap to one end of the pen body– this will be the coupling to the air compressor.
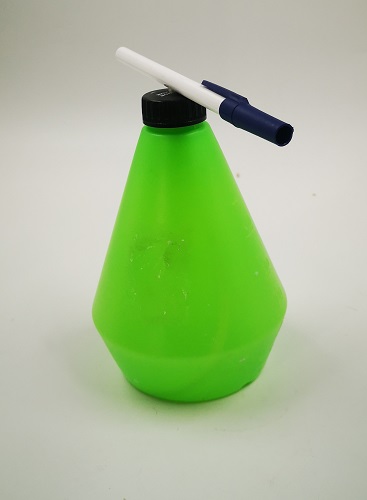
Once the silicone is dry, you can pour your liquid into the bottle, connect your spray gun to the air compressor and your spray gun is ready to use.

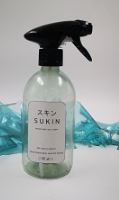
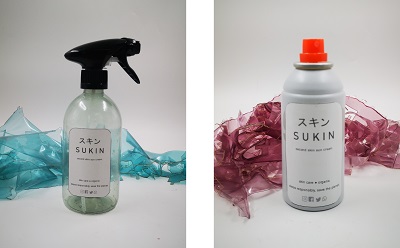
Label
Now that the spray gun is ready, I designed two different presentation of the product for Sukin: Manually sprayed and aerosol sprayed (conceptual design that will be used in the video preparation)
Final testing
I am really excited! My final project is complete and it is ready to be used! I sprayed the material on my body and waited until dry.
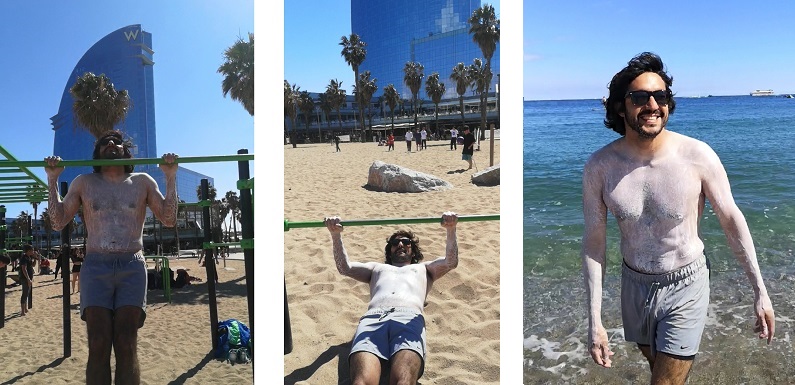
At this point I noticed that due to the vertical position of the body, the wet material drips and it should be more adherent to the body, therefore the application shall be with the compressor for a better finishing of the material over the skin
In any case, I decided to go to the beach and have some fun and prove that it effectively worked!
After this final test, I concluded that the material:
-
Effectively protects from the sun and bad smells due to its ZnO components
-
It is breathable as there is a thin layer on the body and when it is in contact with the sweat you feel a gel sensation and the material does not melt at all
-
After being in contact with the water, it doesn’t fade away instantly so it can be used in case of rain without inconvenience - waterproof for a short time
-
After its single use, Sukin was effectively removed and washed in the sea without any pollution to the environment :)
-
People stared at me all the time wondering what I was wearing
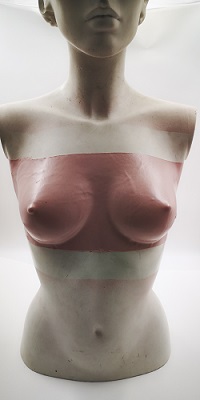
Final Project!
Because the manikin is white, I added mica powder to the mix to get this pink tone and now Sukin is ready to be sprayed in the body!!
Storytelling of my Project and Brain Storming for Video Production
My sketches for the story telling session tell a story about my concept and lead to the final outcome in
Jury's Feedback
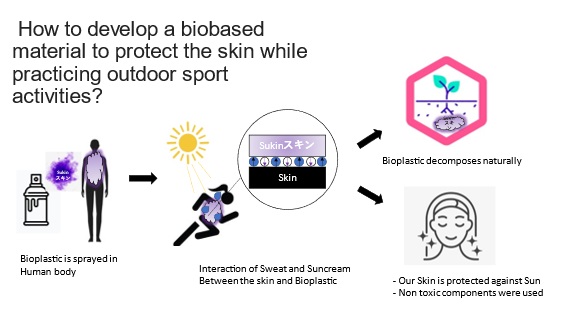
The argument in the problematic that approaches your project mentioning the toxic fibers and the negative impact on the body skin and environment is very clear. After this I recommend changing the sentence "opportunity to create a second skin" in your speech. Because the biomaterial you are creating must be the conclusion of your research or the reflection of an hypothesis. For example you can open the discussion of a new opportunity by asking a marking question > How to develop a biobased material to protect the skin while practicing outdoor sport activities, interconnected through the interaction of the human natural fluids (this is an example). And defining a frame of limitations or the properties of the material depending on the specific interaction with the skin and the body like: antimicrobial, humidity regulator, transpirable, degradation timing, and other technical aspects of the material to achieve. ( which I don't know)
Then comes the exploration of chemistry, studies of sensations, emotions, feelings, body movement mentioned. How the material feels on the body. How is the degradation of the material controlled? How is the usability explanation of the product? Is gelatin achieving the project needs? As they said how about exploring other techniques such as spray can and adding fibers in gelatine, what are the variations of the concept, and finally how the project connects with the awareness of sustainability through a new material innovation.
References
- A second life for fruit and vegetable waste: a review on bioplastic films and coatings for potential food protection applications.
- Sustainable practices in slow and fast fashion stores: What does the customer perceive?
- Intensification of yam-starch based biodegradable bioplastic film with bentonite for food packaging application
- https://class.textile-academy.org/2020/tasneem.hussain/projects/1.%20Project%20Overview%20/
- http://www.eldylazaro.com/
- https://www.iaacblog.com/programs/biocatalytic-cell/
- https://www.biobabes.co.uk/bio-lum-sac
- http://fabacademy.org/2020/labs/kamakura/students/toshiki-tsuchiyama/projects/lightingaccesories/