2. Digital Bodies
For the week 02, we explored the Digital Bodies theme, and we became familiar with 3D scanning and rapid prototyping tools such as laser cutting and 3D printing.
References & Inspiration
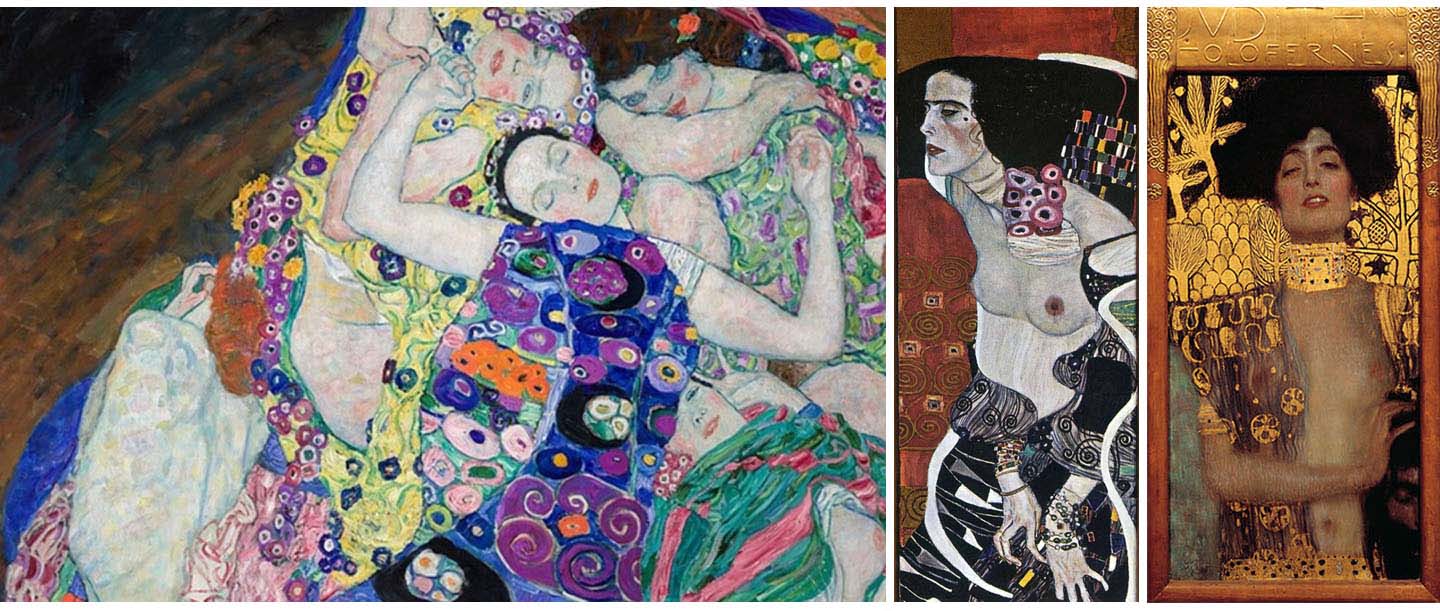
- I was inspired by the painter Klimt for this subject about bodies. This led me to choose to work on a bust as the next step in my explorations. I am also interested in faces referring to the work of Klimt, and am keeping this in mind for more advanced 3D scan experiments.
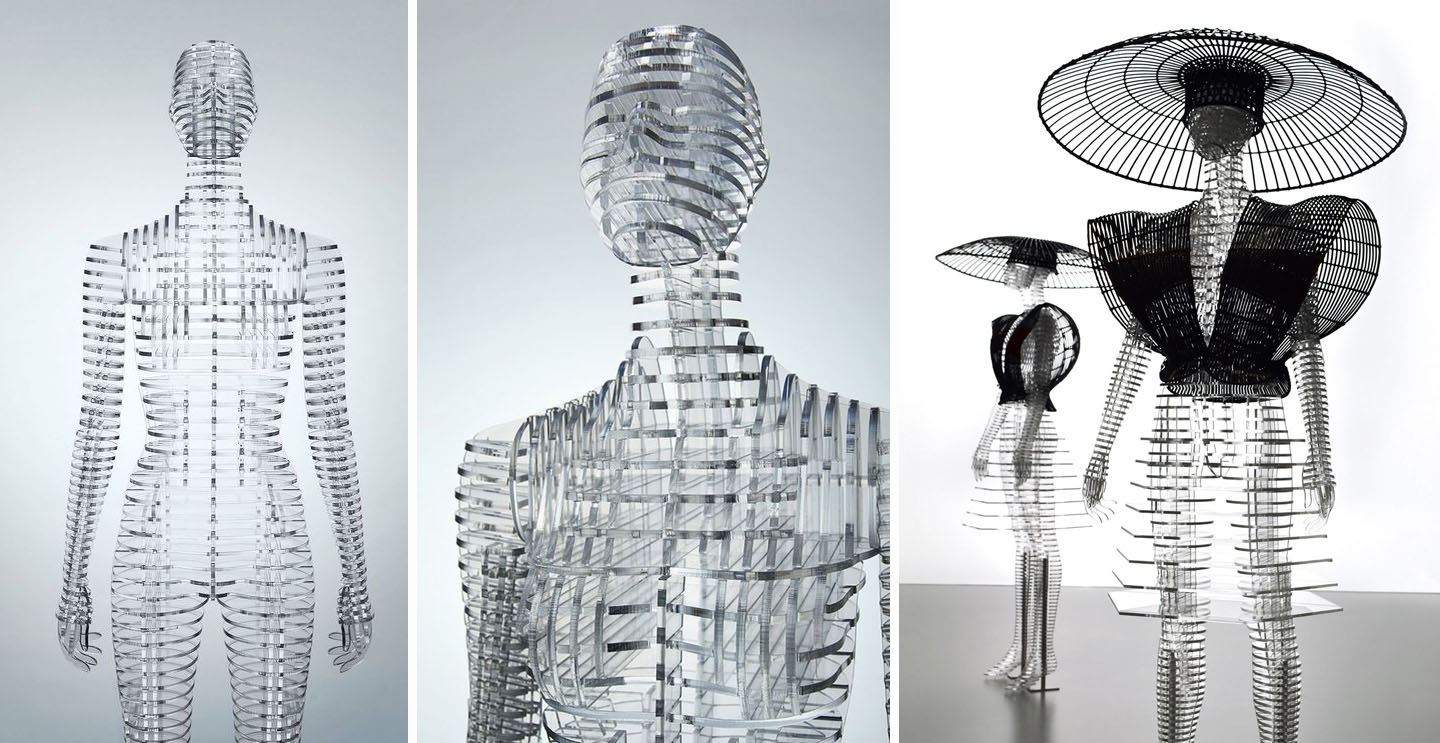
- I found later other inspirations from the Japanese Artist Tokujin Yoshioka and his collaboration with Issey Miyake a long time ago, called Grid Body. These two creators are big sources of inspiration for projects that are including transparency, sensitivity and materials like glass.
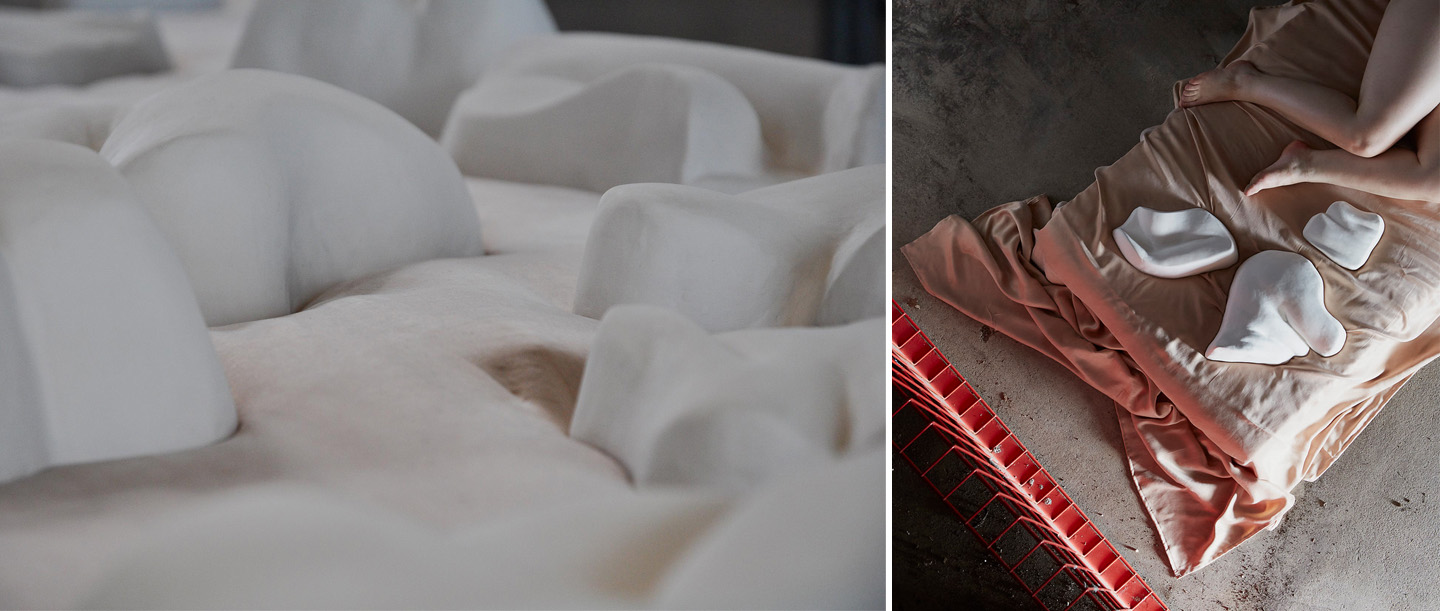
- Mariko Juna van Veen was presenting her graduation project too at the Dutch Design Week, called Lay Me Down.
She is describing it like that :
"One of the most striking aspects of the body is its curves. While many people may see them as signs of attractiveness, they can also be appreciated as abstract shapes that have their own inherent beauty. From the graceful sweep of a woman's hip to the natural folds and creases that form with movement, the body is full of both subtle and intriguing details. Each curve tells a unique tale, a testament to the diversity and individuality that make us who we are."
I found it very relevant & inspiring.
Research & Ideation
The 3D scanner we had for the week in our lab didn't work at that time. So we used the application KIRI Engine to do self modelling tests. It is working by taking a series of images of an object that we have to rotate slowly around with our devices camera.
Tip
For the free version of Kiri : 70 pictures is the maximum for 1 scan and we can do as many scans tests as we like, but only export 3 per week.
-
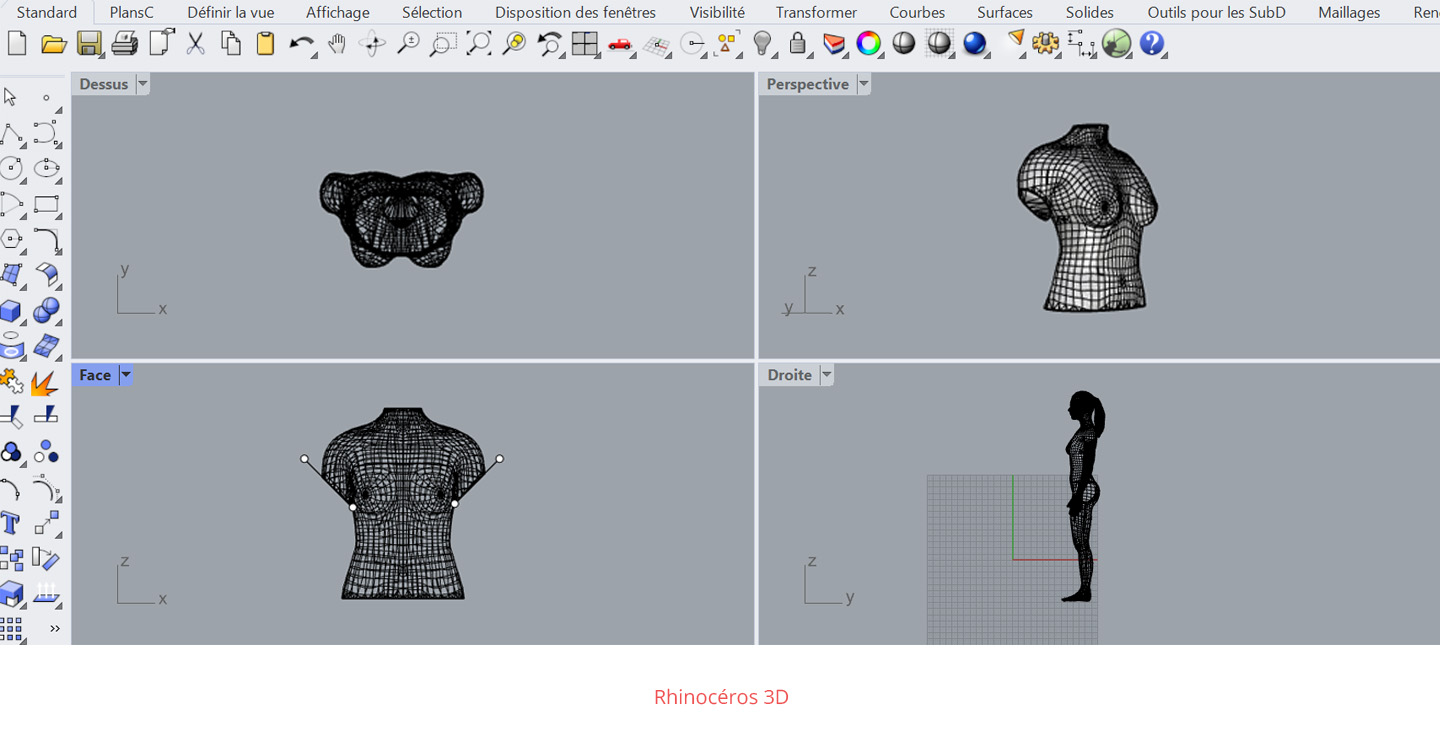
I have managed to clean the 3D a bit on Rhinoceros 3D, but haven't succeed in repairing it completely, and closing it up everywhere, to be able to 3D print it properly. We re-tried it later with some models and it was still a bit difficult to get a clean 3D in the end. Maybe the paying version of Kiri is offering better results with more pictures by scan.
-
I have switched to the MakeHuman tool, to be able to do slicing explorations on Fusion 360 and some laser cutting tests in the lab. I used a silhouette I had drawn with my measurements for sewing previously, to implement it virtually.
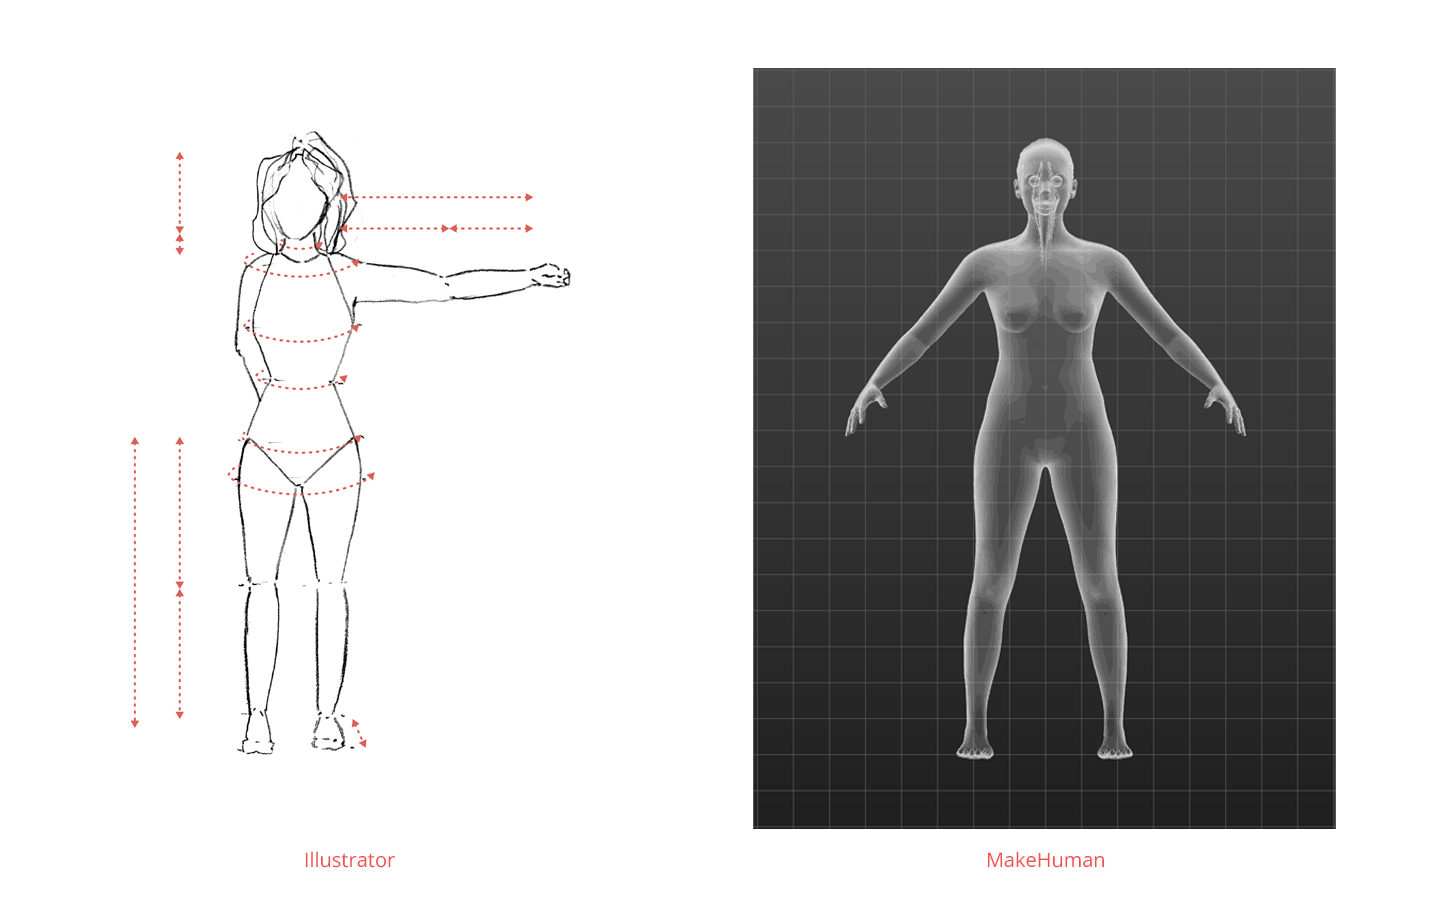

MakeHuman customisation tools is strange and wrong -racist and sexist- as explained by Stéphanie.
Process and workflow
- To start my prototype, I have exported the OBJ model I had defined on Makehuman and used the MeshTrim tool on Rhino to limit my 3D to the part I was interested in (in this case, the bust).
- Then I exported it in STEP format to work on it in Fusion360's Slicer. This tool allowed me to slice a 3D shape into a structure of 2D elements. These 2D elements are defined according to the parameters of a laser cutter : e.g the dimensions maximum of cutting, thickness of the material, level of tolerance required to cut notches, etc.
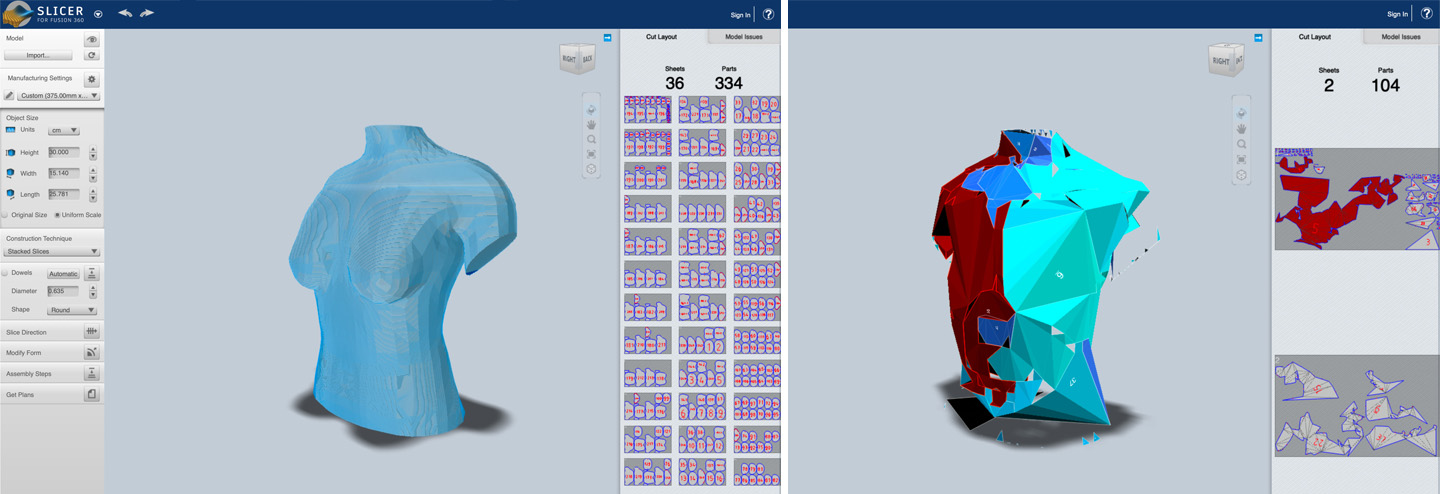
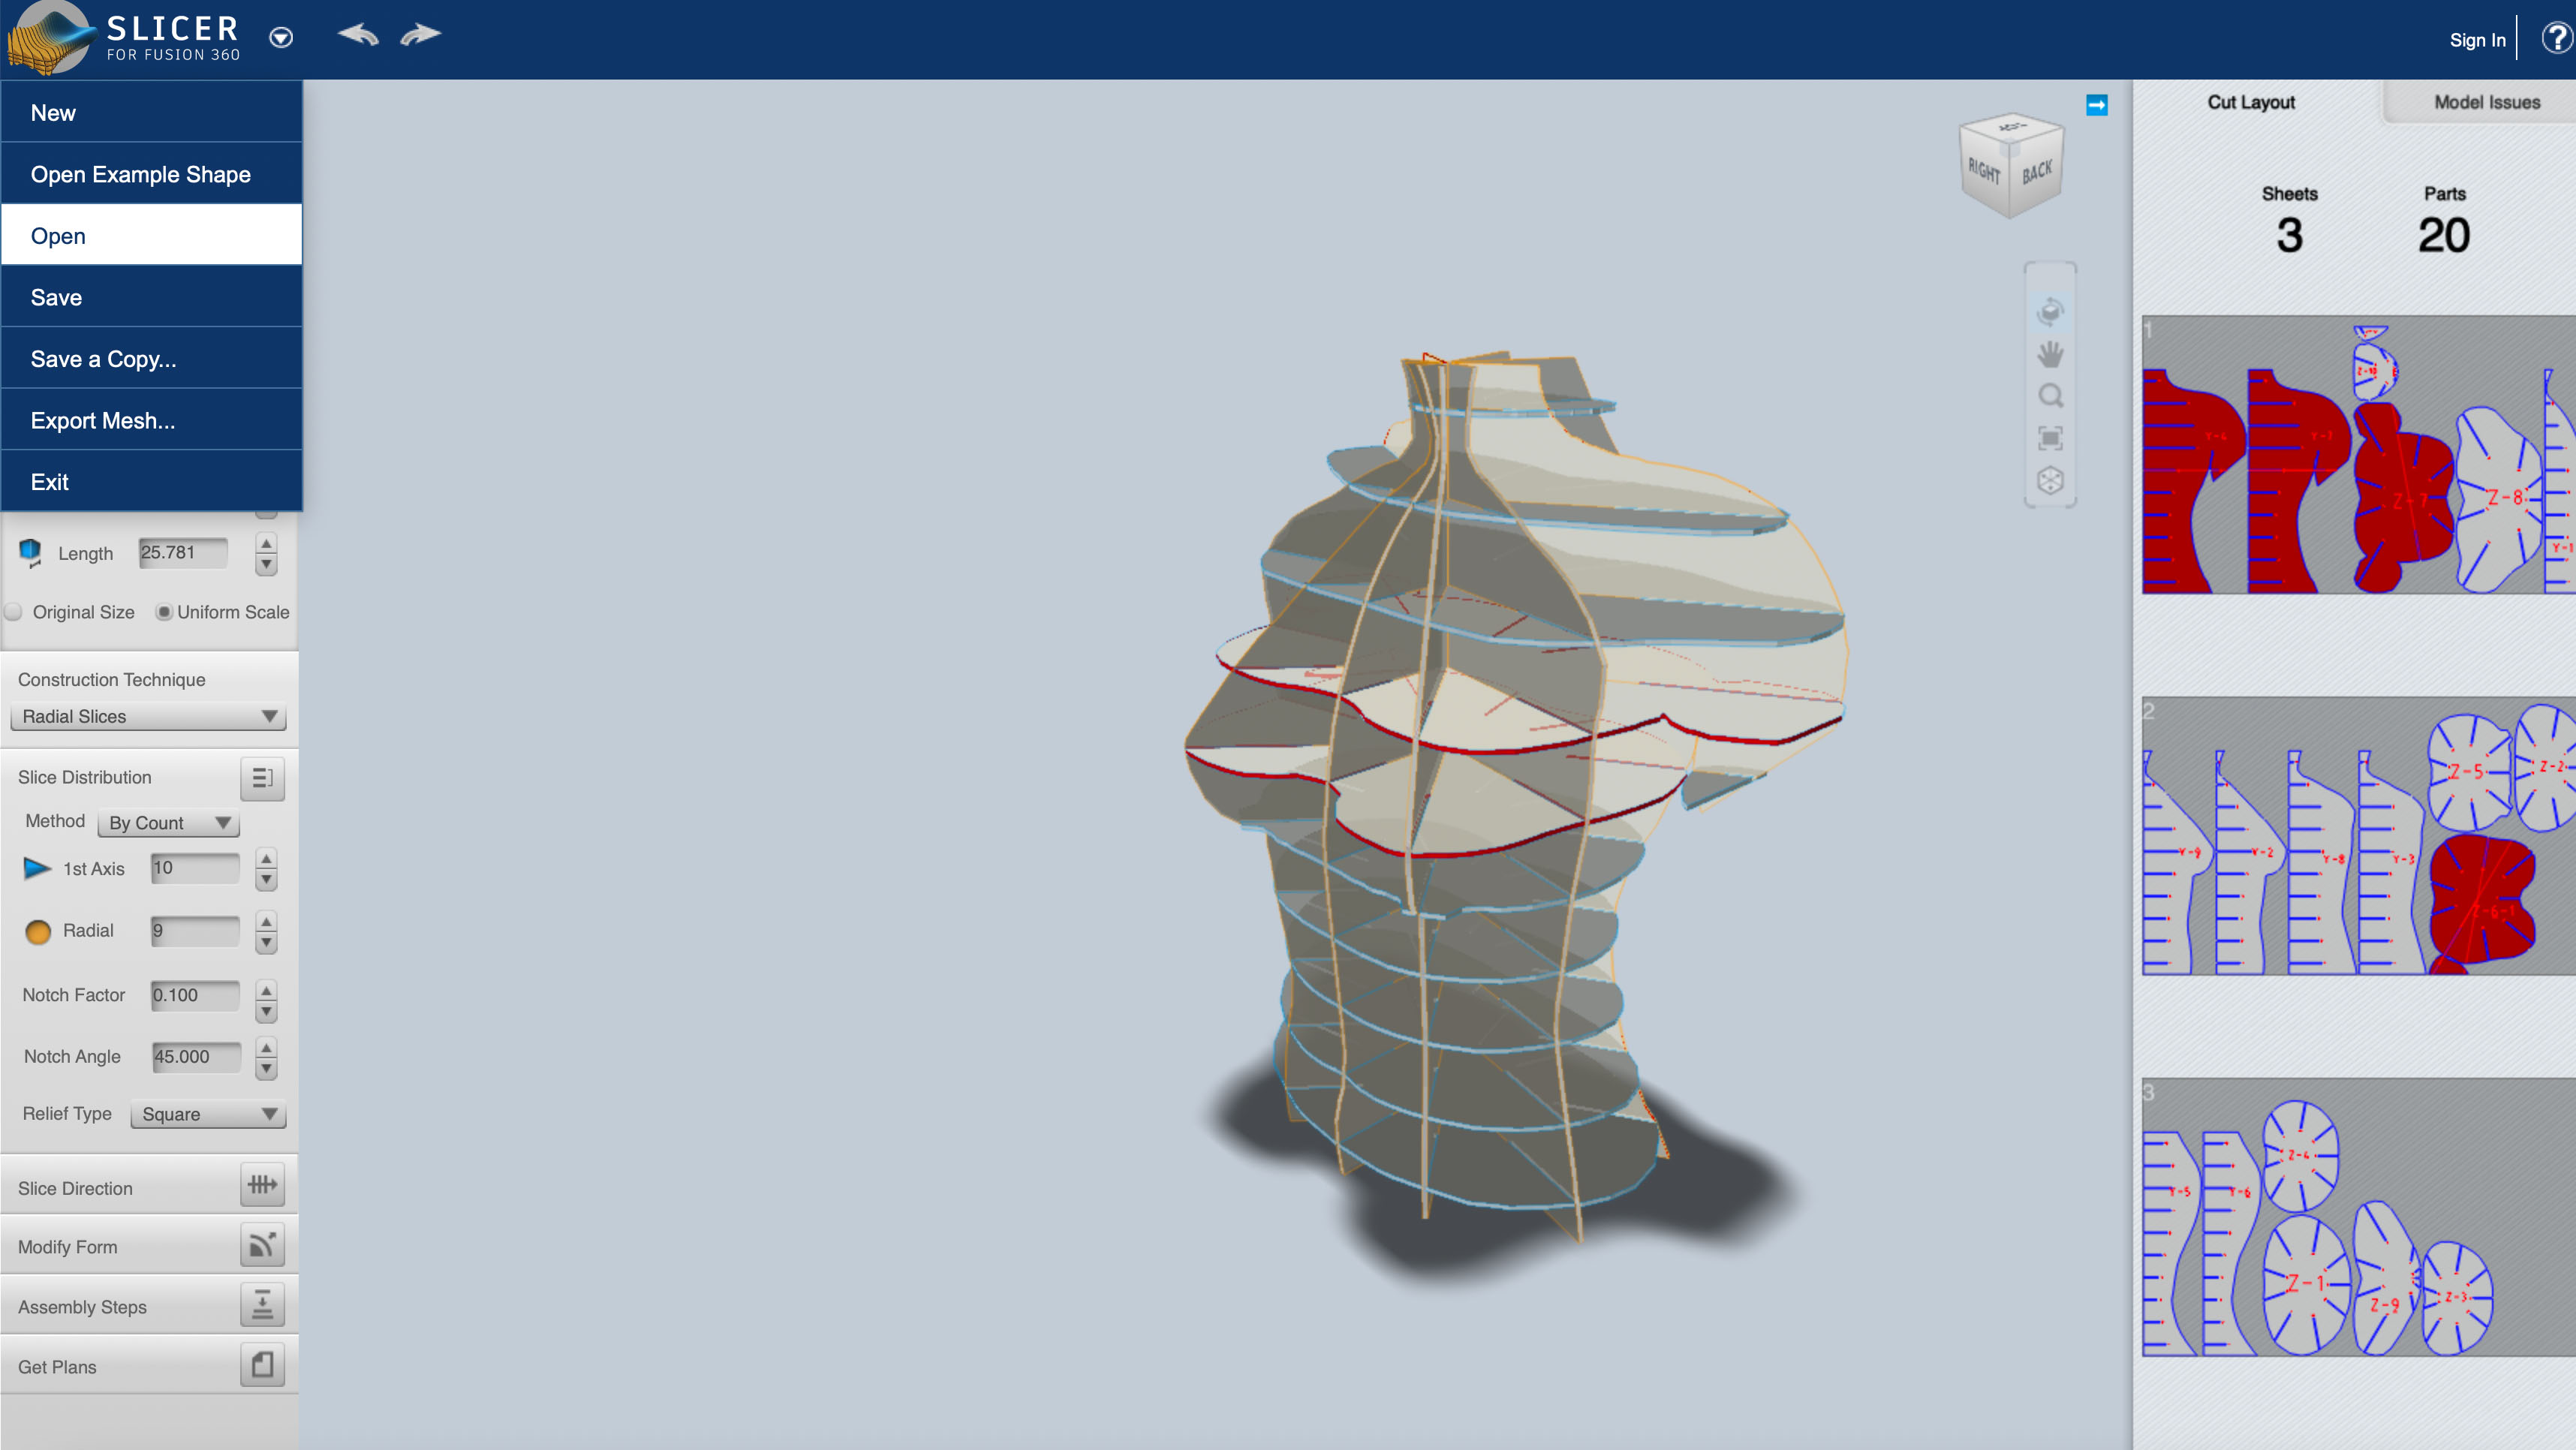


- After slicing, I exported the cutting plan in SVG format, and imported it on Studio Flux. It is the online software related to Green Fabric laser cutter machine. I select my parameters of cutting and engraving, and attribute it to each outlines by Hexa Codes in my plans. Hexa is a web colors system. When I started cutting projects on Studio Beambox, some parameters where already existing in the software for some materials (e.g thin wood, cardboard or fabric). It is still good to do small tests and a matrix of parameters to see what would be the best cutting/engraving option before using a lot of material by cutting final pieces.

3D Models
Fabrication files
Used with these parameters on a StudioBeamBox laser cutter :
-
Power : 20 % - Speed : 16mm/s
-
To cut my model in 1,5mm thick wooden cardboard.