7. Computational Couture
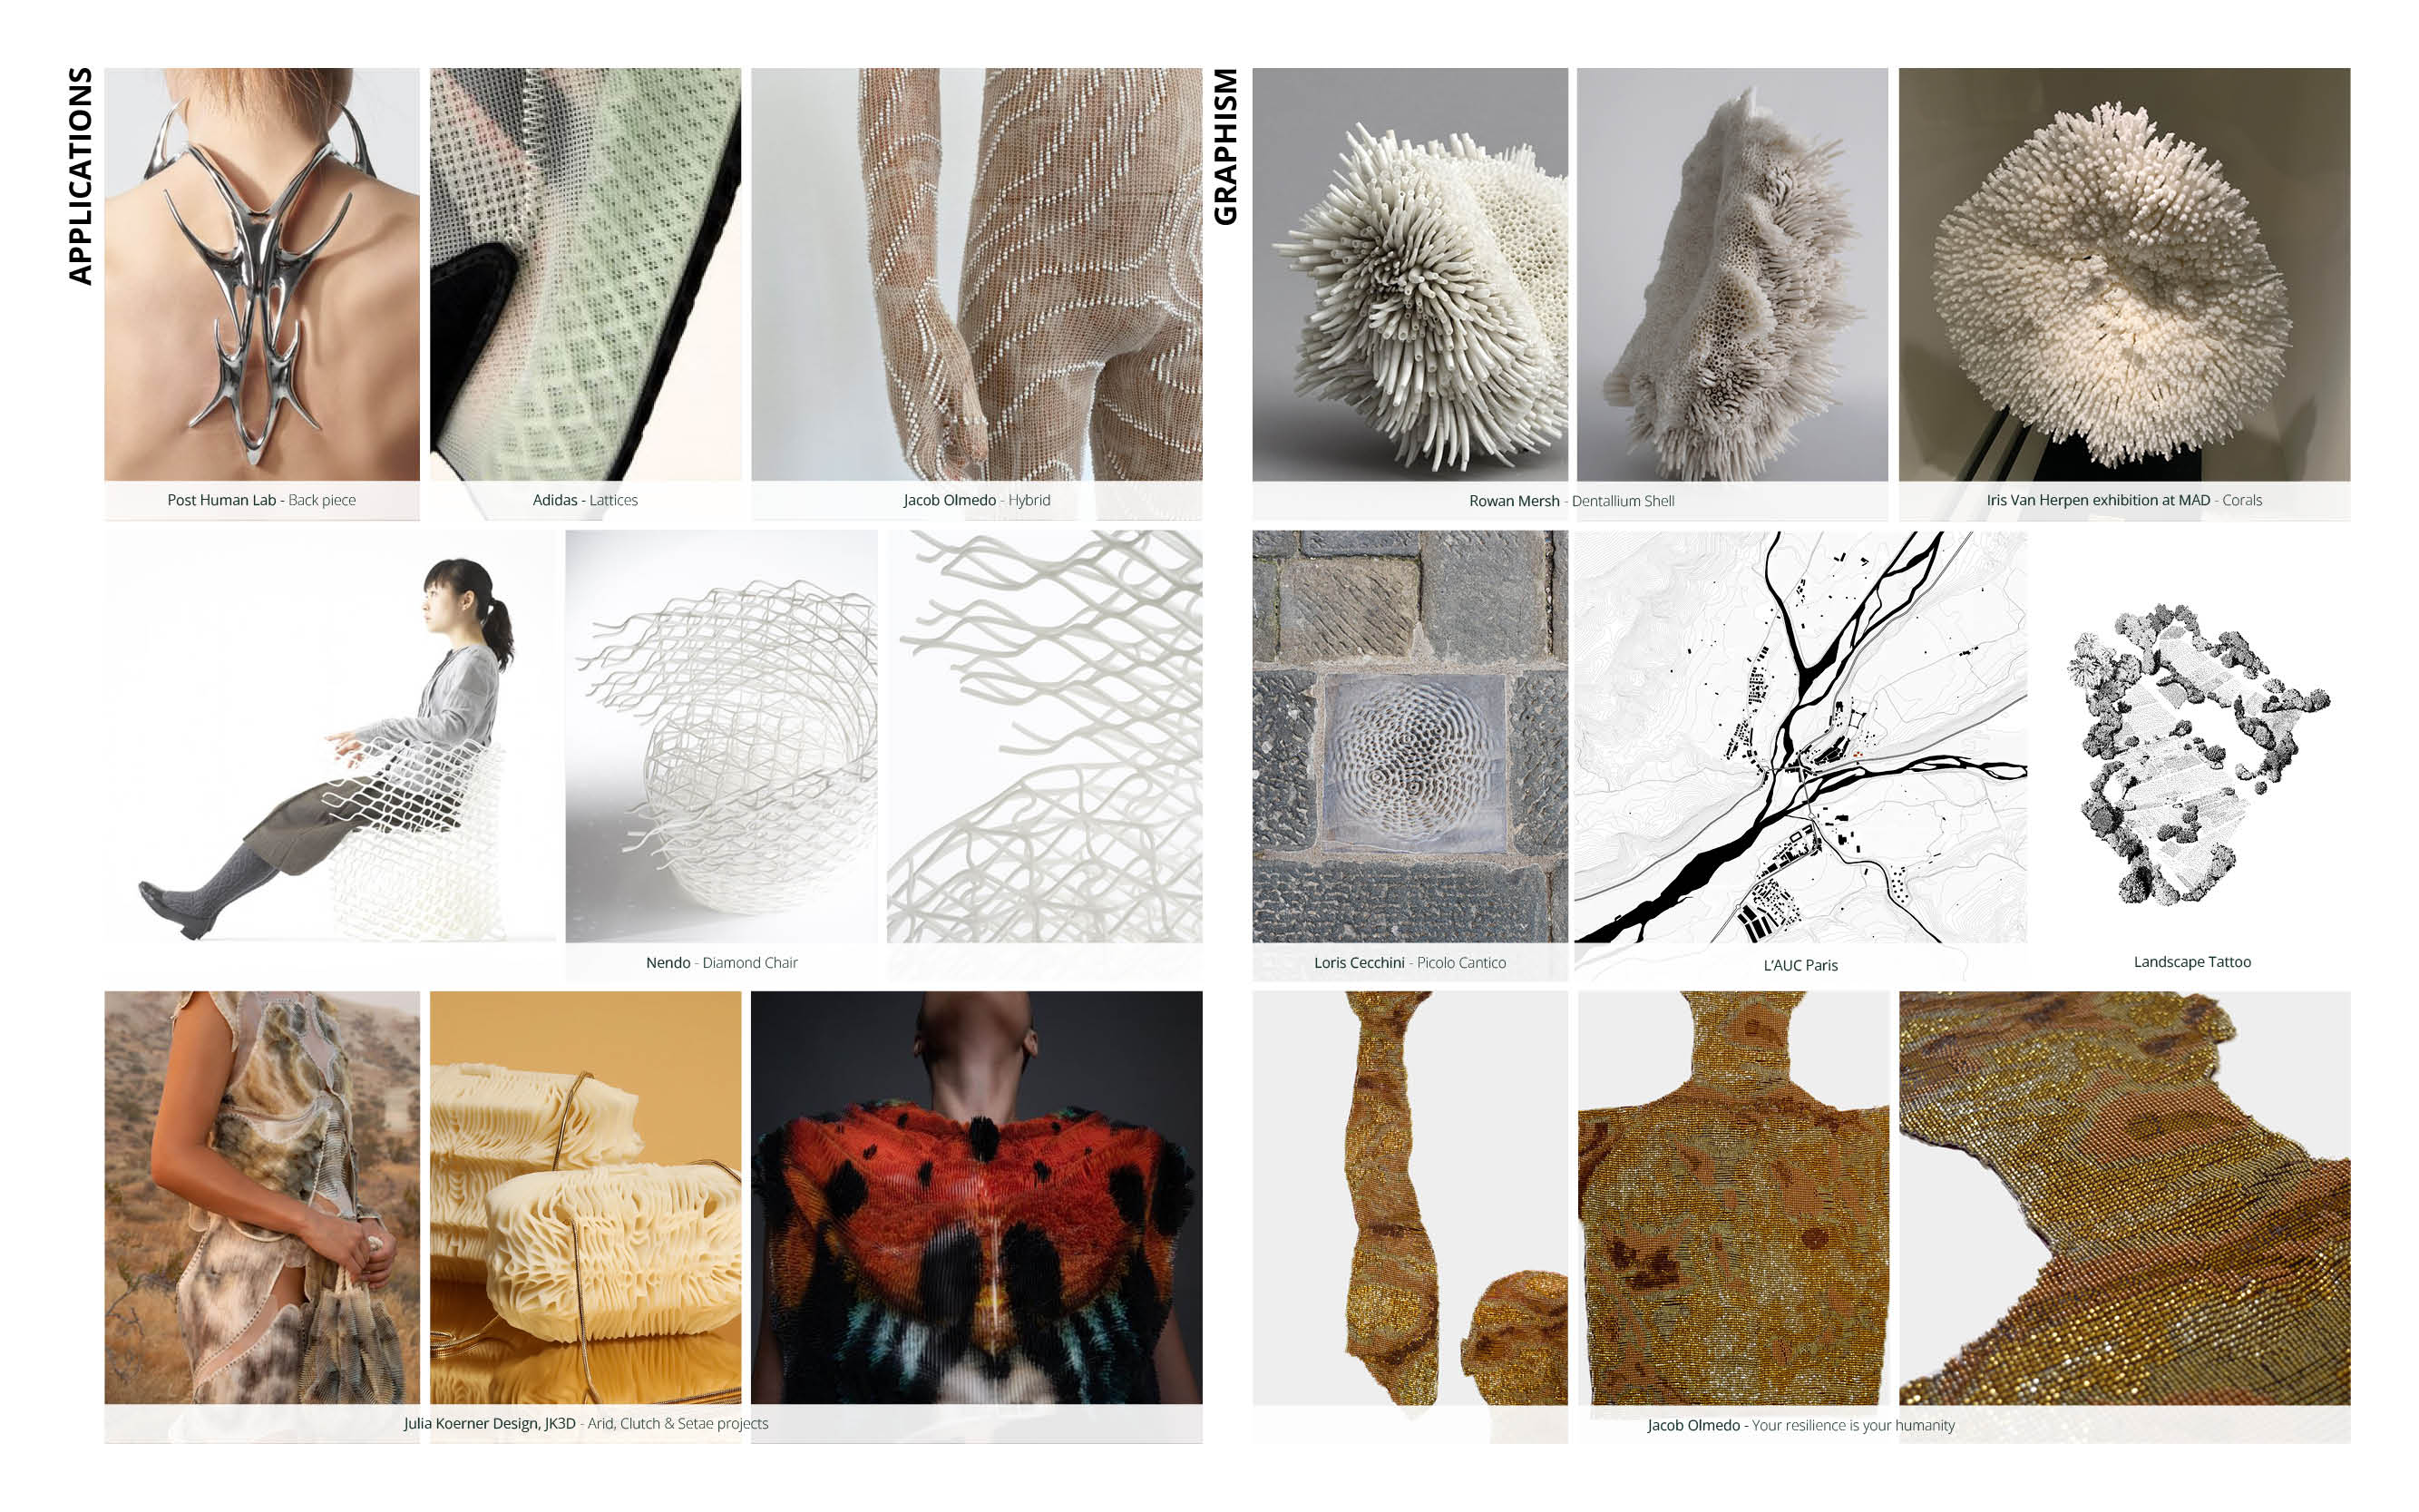
References & Inspiration
Week 07 was dedicated to Computational Couture theme. It started with a lecture of Julia Koerner, Textile Designer and Architect who found the JK3D studio. She explained her evolution and the process that she has been working on for years to develop 3D clothing and accessories with Architecture softwares. The dialogue she creates between natural and digital elements in her aesthetical vocabulary is inspiring.
get inspired!
These references are available in a open Miro board with other weeks inspirations : INSPIRATIONS
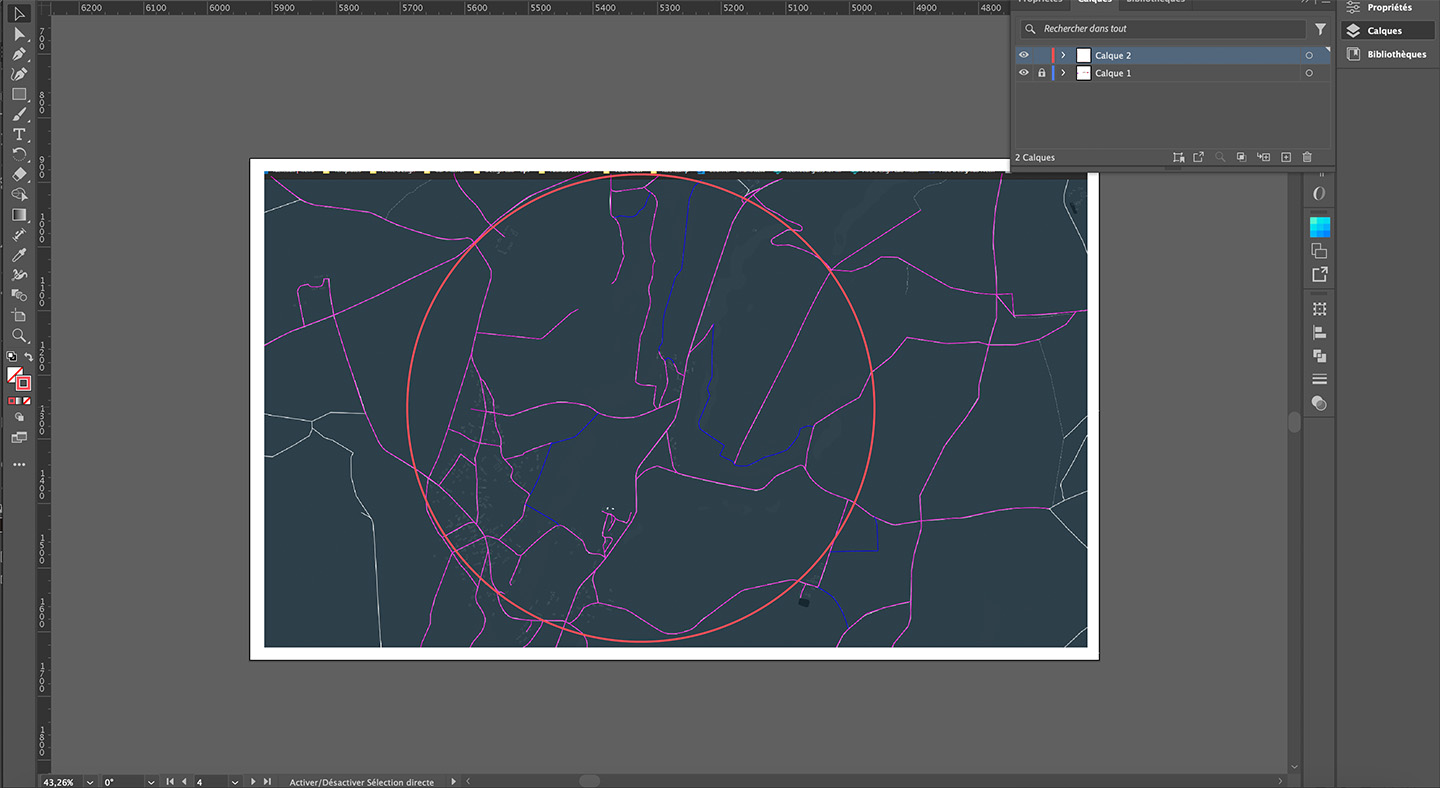
Maps are a visual subject that has always interested me during my studies in Space Design in Nantes. I started to redraw some lines of places that were dear to me at the time of the Covid and the closing of the borders.
From Illustrator to 3D printing
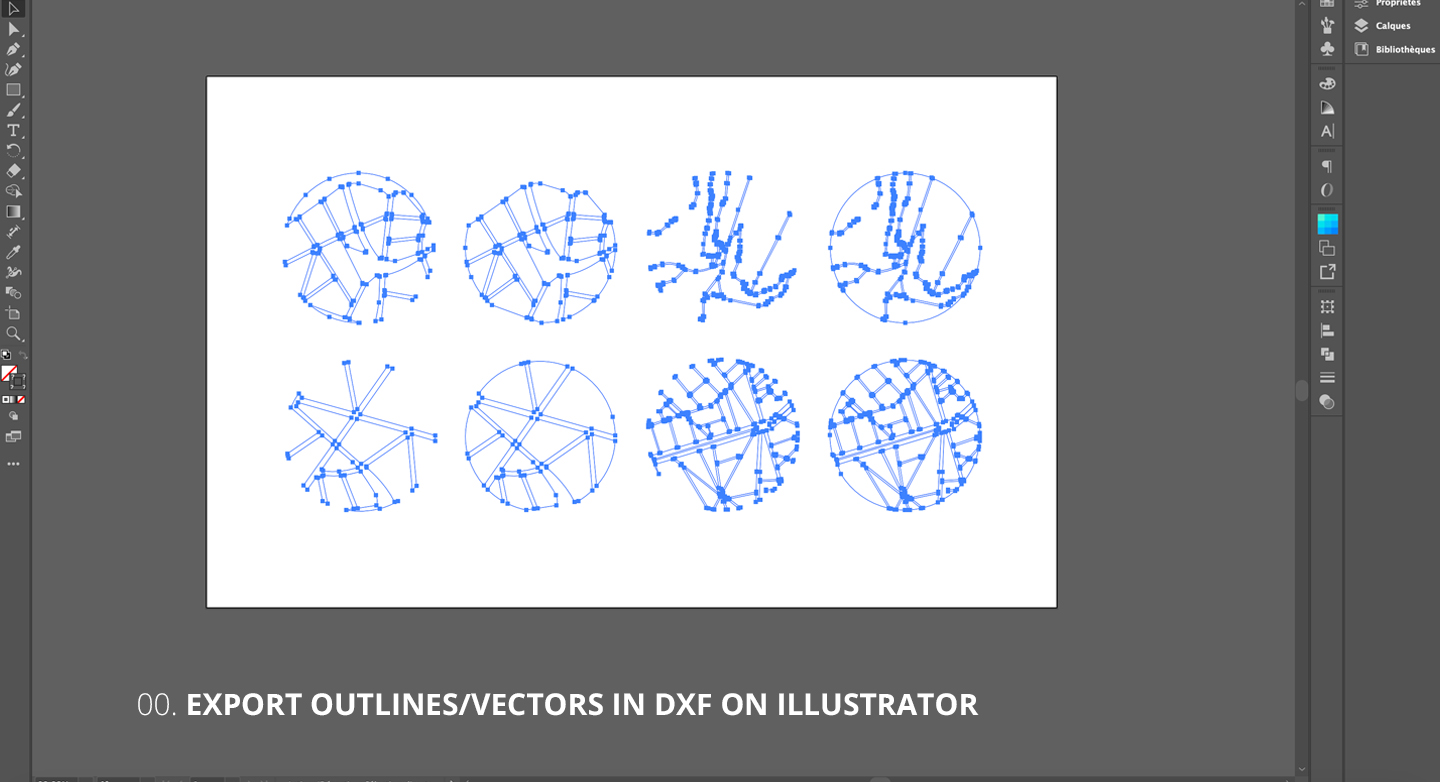
- I used Google maps screenshots and the 2D software Illustrator to draw vectors on the maps.
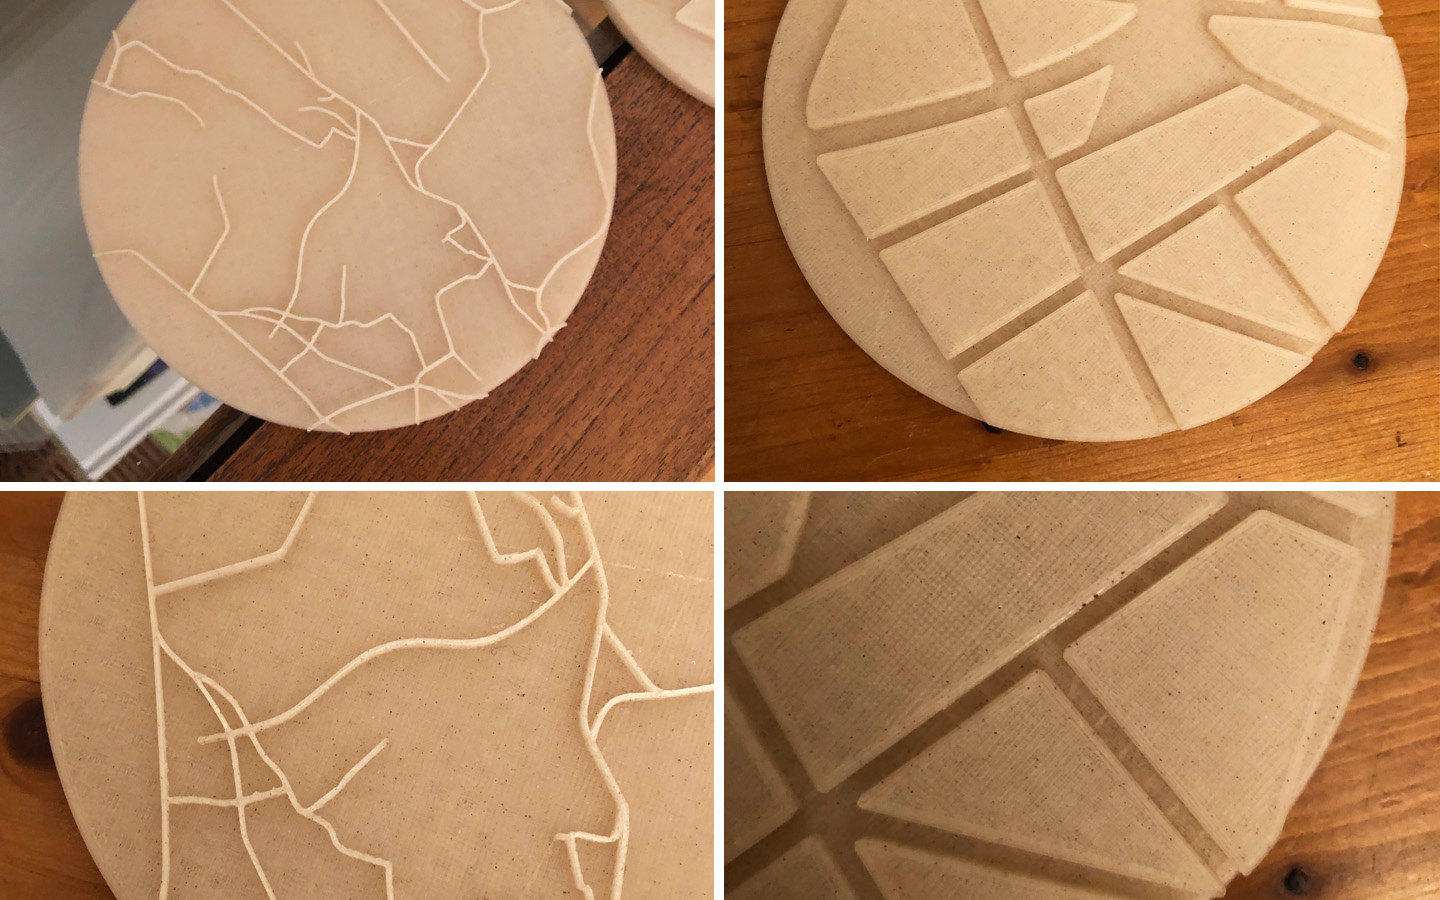
I then developed them in volumes with Rhinoceros 3D, sliced them with Cura and printed them in 3D with an Ultimaker printer. It was my first iteration in 3D printing using bio-filaments made with mussels wastes from Francofil, in 2021.
Tip
Ultimaker are more expensive machines developed with more functions. They are quite reliable and used in professional workshops.
Here is a video of industrial lines using these machines to produce tools, jigs & fixtures :
Prusa machines seems very great and reliable too, more affordable & suitable for use in a workshop open to the public. It is easier to understand, with less functionalities.
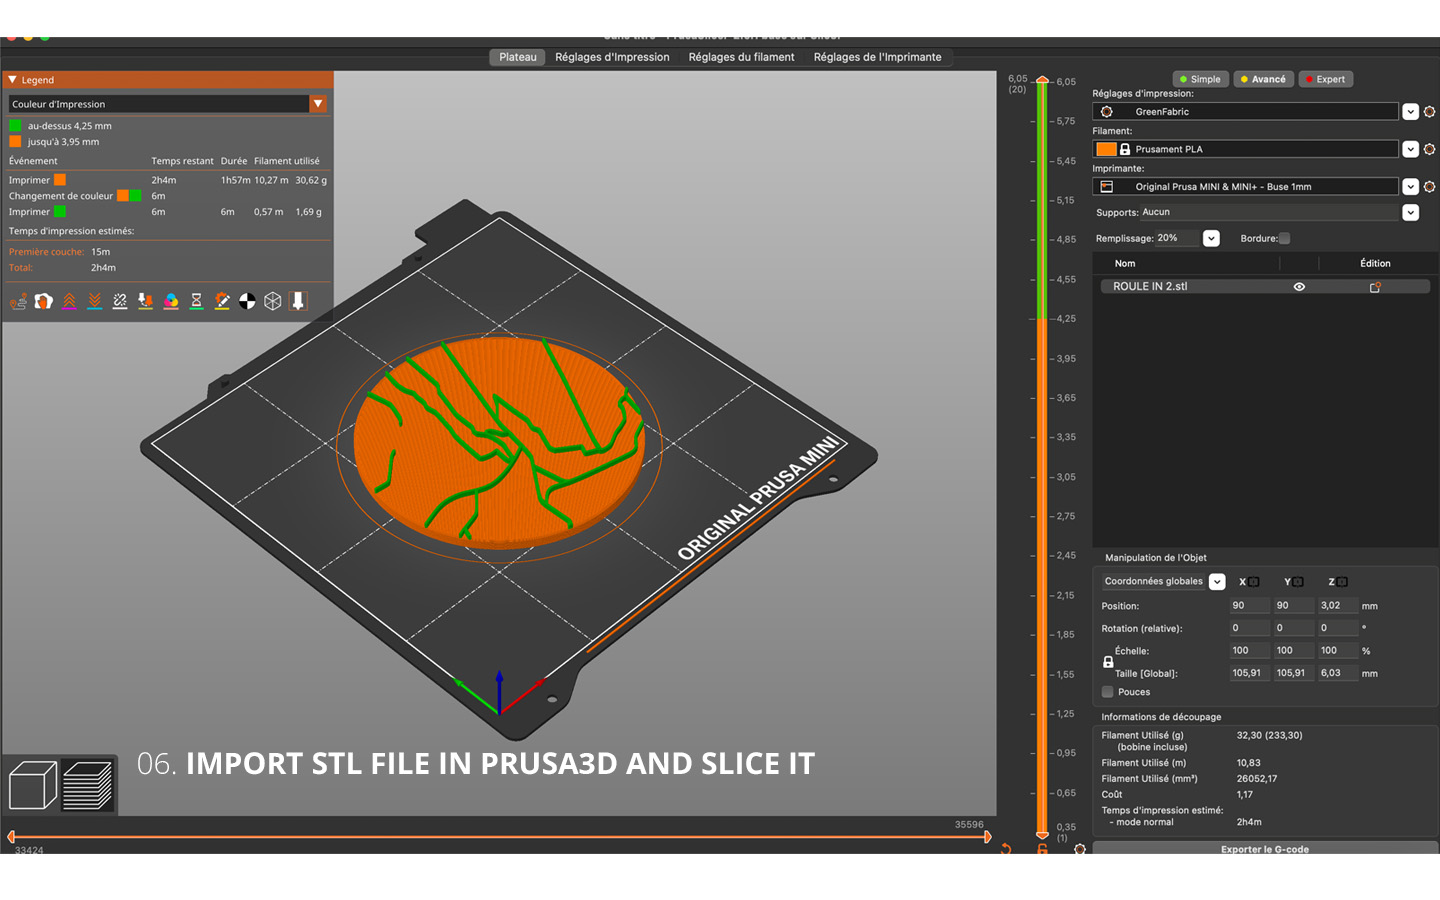
- Here is an overview of my process, using PrusaSlicer instead of Cura, as we have access to a Prusa Mini machine at Green Fabric, and not an Ultimaker.
- It is better to follow an introduction before using any machine in a lab, for example to learn on how to change a nozzle and printing filament properly. The steps are indicated in the machine menus, and also detailed online.
Tip
For bio-sourced filaments, it is better to use a large nozzle to prevent it from clogging up with fragments of recycled material. I used 0.8mm or 1mm nozzles instead of the standard one wich is 0.4mm. It is providing more "rough" printings but also helping to save time on printing, wich is usually taking hours.
Some online shops providing filaments : Francofil ; Makershop ; Ariane Plast.
3D printing on textile
Tip
The platform Protolabs Networks is a source of information & trendforecasting on 3D printing. They have developed guides to help designers/engineers with their projects from their conception. And the book The 3D Printing Handbook, wich is including posters.
& online newspaper 3Dnatives.
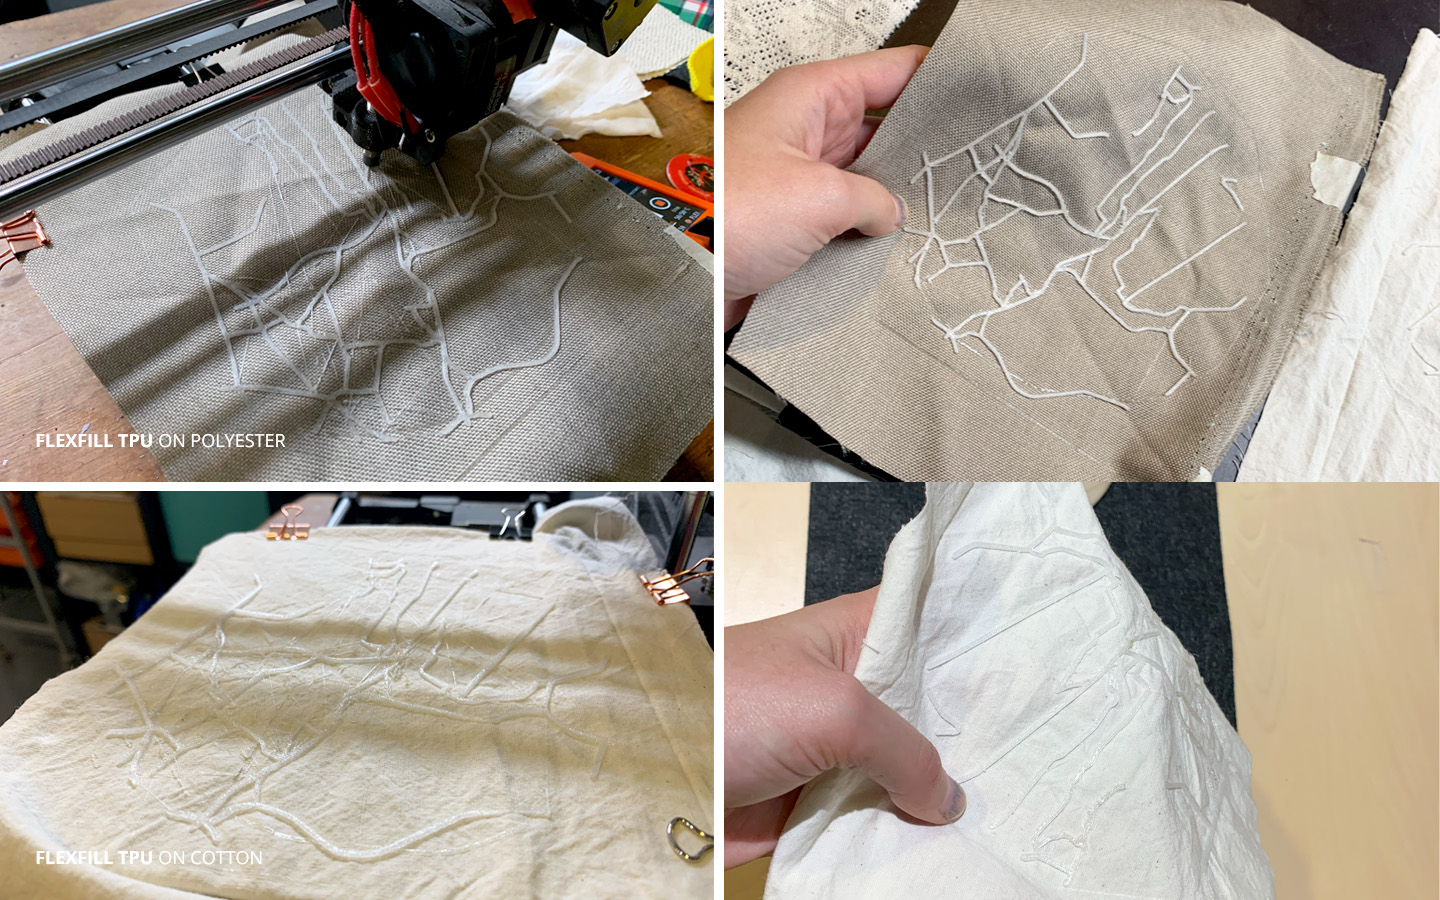
- I started explorations of FDM printing on textile by re-using a linear 3D map on different fabrics. One challenge was to fix the textile properly on the Prusa plate. If it moves, it can drag the nozzle, delay the print, or cause the nozzle and fabric to heat up and become damaged. I use magnets, clips, paper tape depending on the fabric.
I started with Wheat PLA filament from Francofil, and it was interesting to use some flexible TPU filament too to shape the textile with.
Modeling with Grasshopper
- Before week 07, I had a small experience with Rhinoceros 3D but never used the Grasshopper tool. I found this tutorial in French :
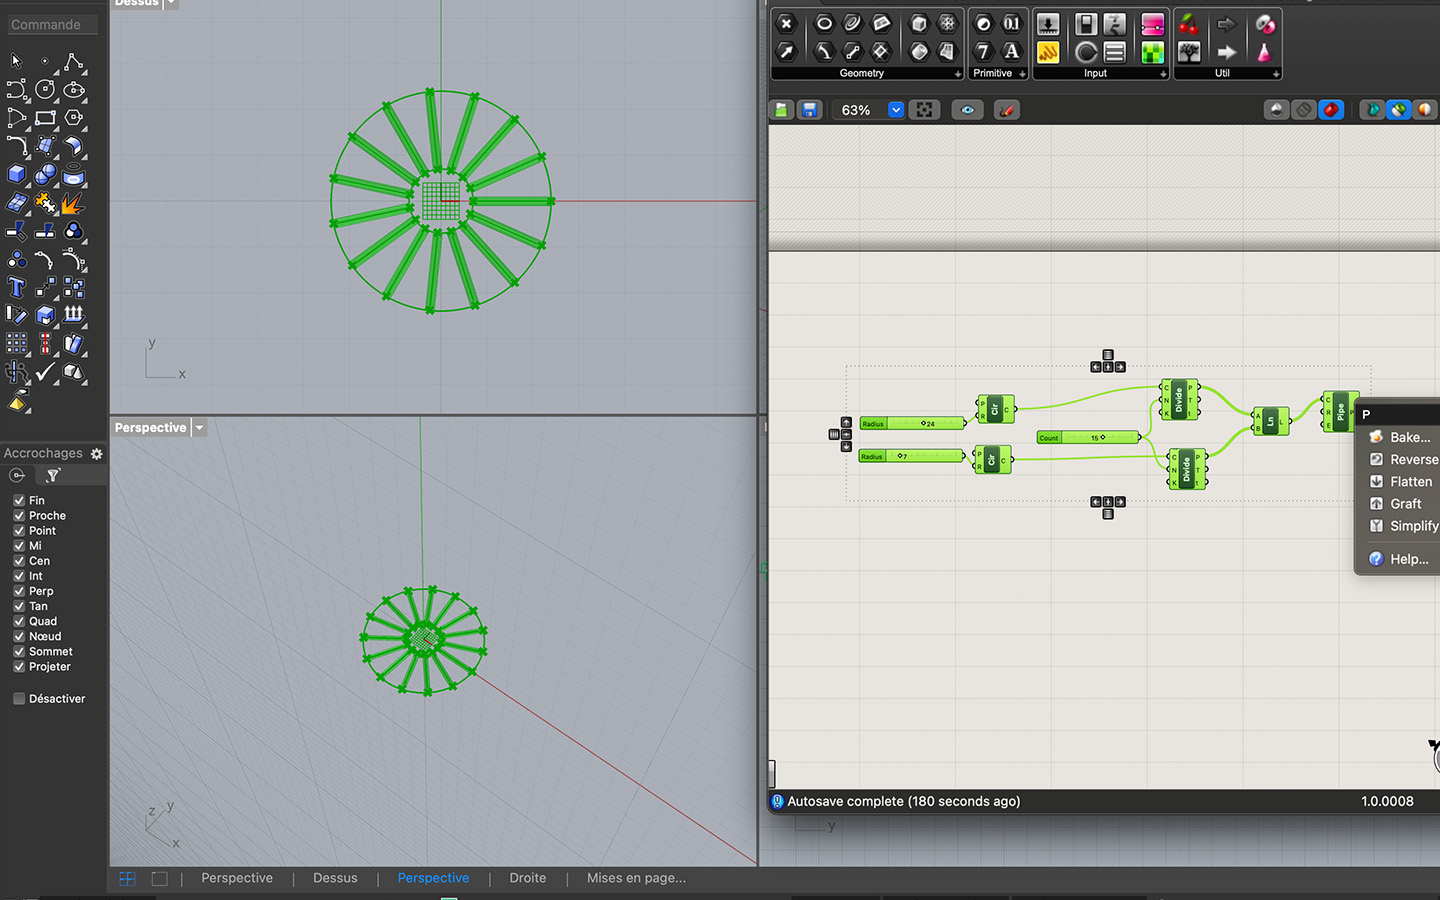
Wich was quite clear and simple to get started with this scary modeling tool. I am not familiar with it but I understood step by step the logic of theses parametric boxes thanks to this tuto. The idea of using a geometry (circles here) as "subjects" and attributes as "verbs" in the modeling is more clear, as well as the "numbers boxes" to set a dimension or element density. And the final baking, to transform a parametric serie into a polysurface in Rhino.
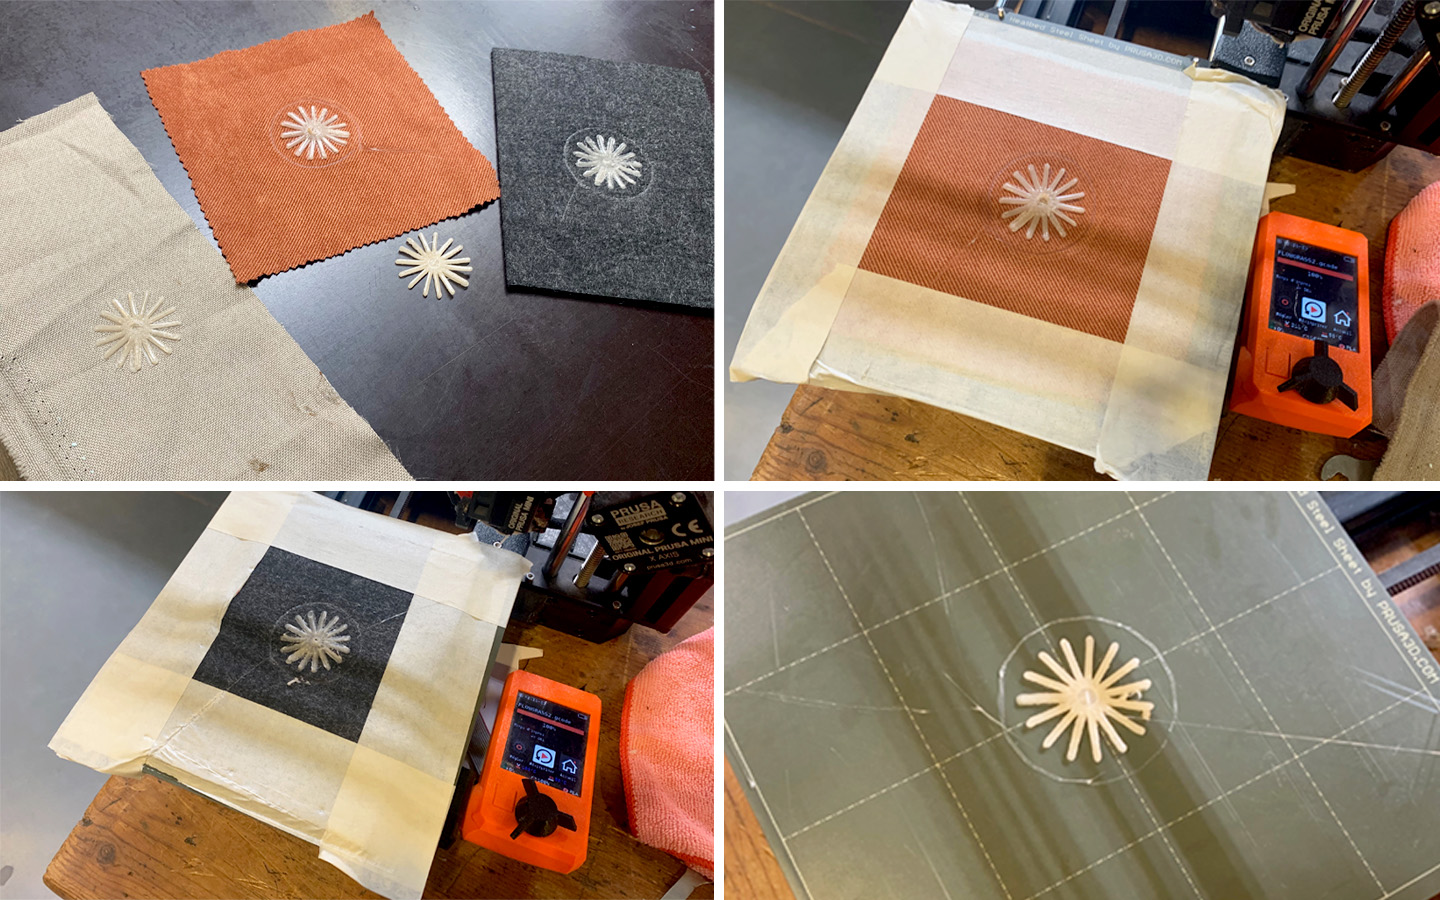
I defined a small flower with Grasshopper and then I printed it with Mussels PLA on different fabrics, with the Prusa mini.
get inspired!
Some more advanced tutorials explaining Lattices, Crystallon & Voronoi parameters of Grasshopper. And the platform Food4Rhino to get access to a library of parameters.
Tools
3D Models
Fabrication files
These G-CODES are dedicated to a 1mm nozzle and PLA filament, with 20% of printing density.