5. E-textiles
Research & Inspiration
I began my research looking at Stephanie Vilayphiou's page to better understand the assignment and get inspired.
Most of the projects were over my head, but it was helpful to compile a list of artists/designers/organizations/resources that I want to spend more time with and understand further:
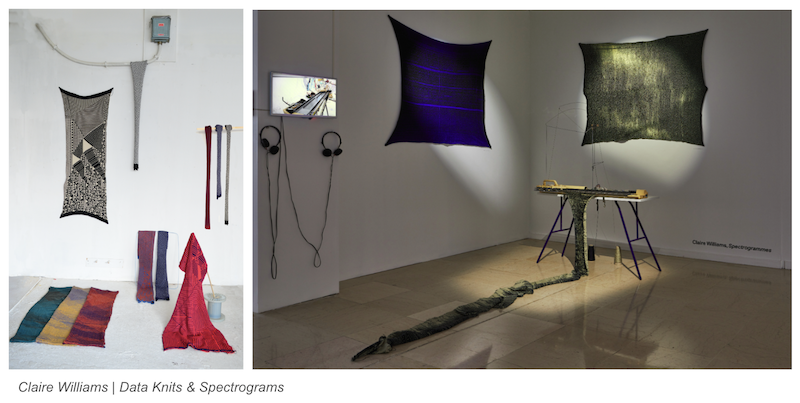
Claire Williams: Series of knit explorations that translate, generate, and encode data within a textile surface. * Data Knits * Data Knitting Workshops * Spectrograms
Unstable Design Lab: research lab housed within the ATLAS Institute at the University of Colorado Boulder. Exciting body of research around many of the skills covered in Fabricademy. So many inspiring projects, but here are a few related to this weeks topic
- Unfabricate "Unfabricate is a project that anticipate the future of e-waste compounding with textile waste. Shanel Wu leverages the quality of textiles as being adhesive-less to envision new methods for designing smart textiles for disassembly."
- Yarny Yarn Recipes: "A catalog of the various conductive and non-conductive yarns we hand-spun to bring a range of textures, aesthetics and overall 'yarniness' to our interactive textile prototypes"
- Knitting Access: Study on how knitted textile interfaces can fit meaningfully into the lives of people with disabilities as sensors and display.
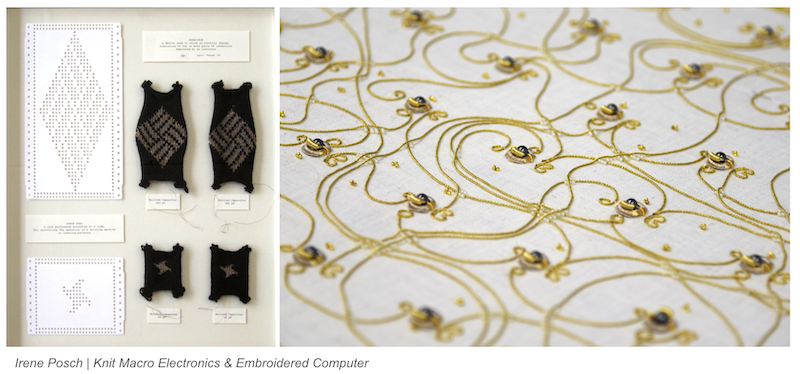
Irene Posch: researcher/artist exploring the integration of technological development into the fields of art and craft, and vice versa, and social, cultural, technical and aesthetic implications.
Knitting Technology : A Comprehensive Handbook and Practical Guide | D. J. Spencer
Resources & References
For this assignments, I reviewed Liza Stark's E-textile Lecture and Nuria Robles's Electronics in Textiles tutorial.
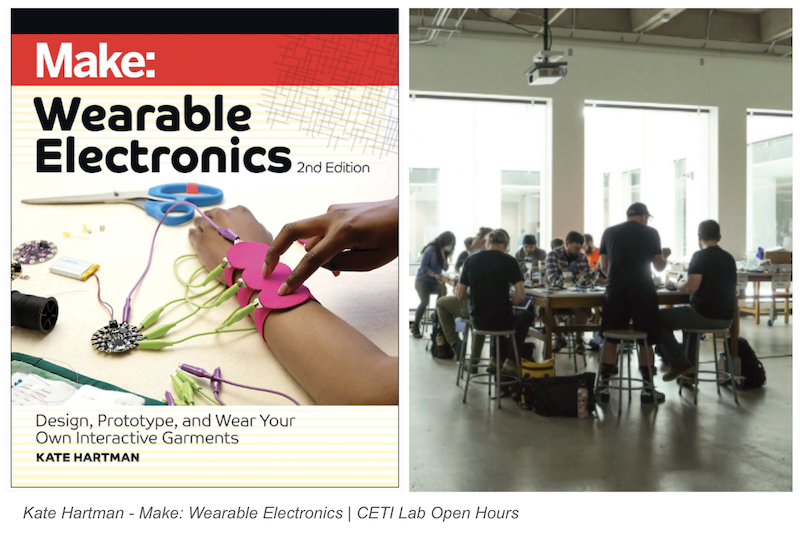
CETI Institute The CETI Community Technology Lab at is a resource at Portland State University providing access to cutting-edge technology, tools, support, and expertise to create, experiment, prototype, fabricate, innovate, with emerging technologies and media. I took advantage of their open lab hours and library to access information needed for this week's assignment.
The following were the most helpful resources for understanding the mechanics of the assignment and potential applications of incorporating electronics in to textiles:
Kate Hartman - Make: Wearable Electronics: Design, Prototype, and Wear Your Own Interactive Garments
Tools
- LED / LED Battery
- Alligator Clips / Conductive Thread /Adhesive Conductive Fabric
- Adafruit Circuit Playground
- Arduino IDE
Process and workflow
Building Circuts and Switches
I used Nuria Robles's Electronics in Textiles tutorial to create some initial switches and circuits using alligator clips. Below are videos creating the switch using the foil sandwich demonstrated in Wednesday's tutorial and a felt button using conductive fabric.
Programming the Microcontroller
I worked through the exercises Kate Hartman's book to learn how to to program the microcontroller. It does a nice job of explaining what the different elements of the code are for complete newbies.
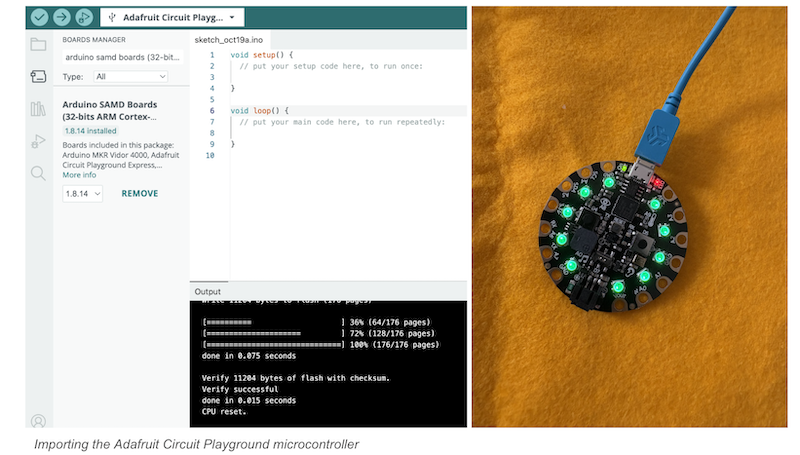
STEP 1: Ensuring the proper set up by checking USB Connection (make sure to acquire a data rather than charging cable) and the Board Type. The Flora controller from out shopping list was not an option on the list of Board types so I ended up using an Adifruit Circuit Playground given to me by the CETI Institute.
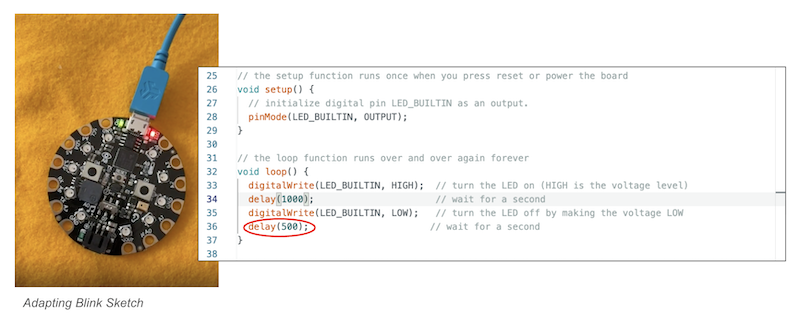
STEP 2: Blink Sketch I used the Blink option from the examples to upload my first sketch. From there I adjusted the numbers in the values in delay the to adjust the frequeny of the blinking. Below are the screenshots of the code and videos of the various value adjustments - 1000, 5000, and 500.
Here is the code used for the sketch:
Code for blinking LED
int LEDpin = A1; // initialize the variable
void setup() { pinMode(LEDpin, OUTPUT); // set the pin mode }
void loop () { digitalWrite (LEDpin, HIGH); // turn LED on delay(1000); digitalWrite(LEDpin, LOW); //turn LED off delay(1000) }
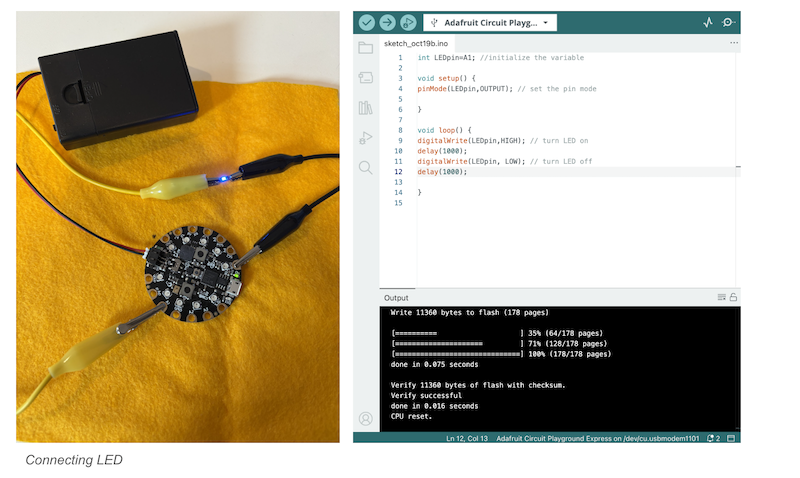
STEP 3: Connecting an LED Using alligator clips I was able to connect a sewable LED on to pin A1 using alligator clips. To do this I uploaded the code in the screentshot below. Once programmed I disconnected the microcontroller from the computer and connected it to the battery pack.
Digital Sensor
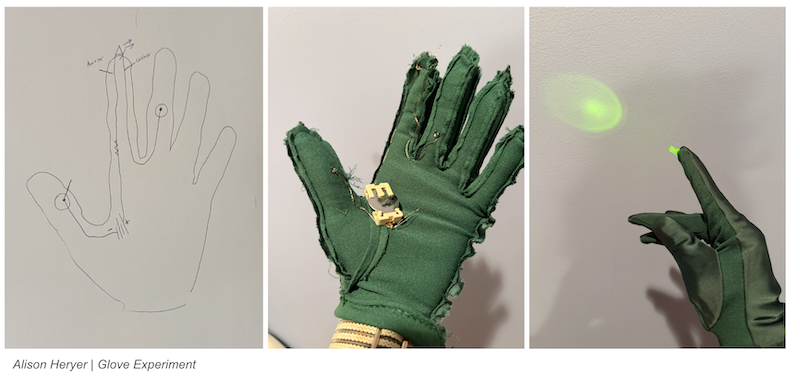
I was eager to integrate LED into an actual project. Continuing with my hand gesture explorations from Week 2: Digital Bodies I experimented with creating a circuit on a glove tha would activate a light at the time of the index finger. I used a combination of images from Kate Hartman's book and Irene Posch's Biking Gloves Tutorial to understand what needed to happen.
Analog Sketch
I used the following resources to create my analog sketch: Social Body Lab's "How to Make an E-Textile Analog Sensor"
I used this conversation with Google Gemeni to check the wiring and understand the code.
ASSEMBLY
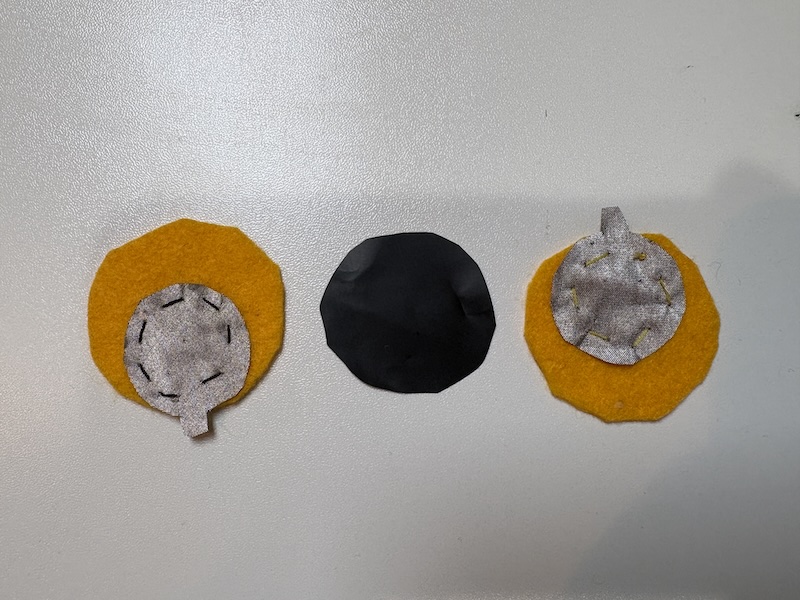
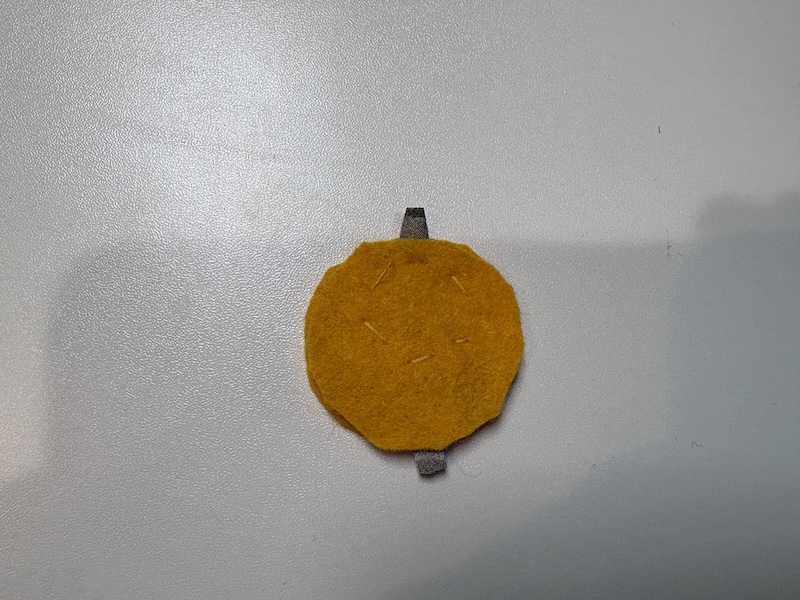
I created the button attaching two pieces of conductive fabric to felt circles, ensuring the tabs extended from the felt. I then sandwiched velostat the two sides of the button and stitched it together so that the tabs were on opposite sides. Below are images of the button:
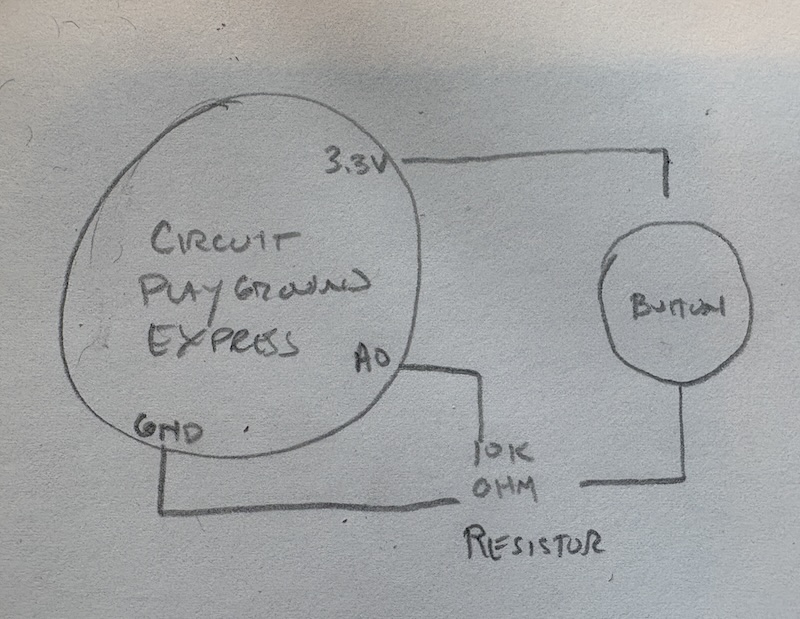
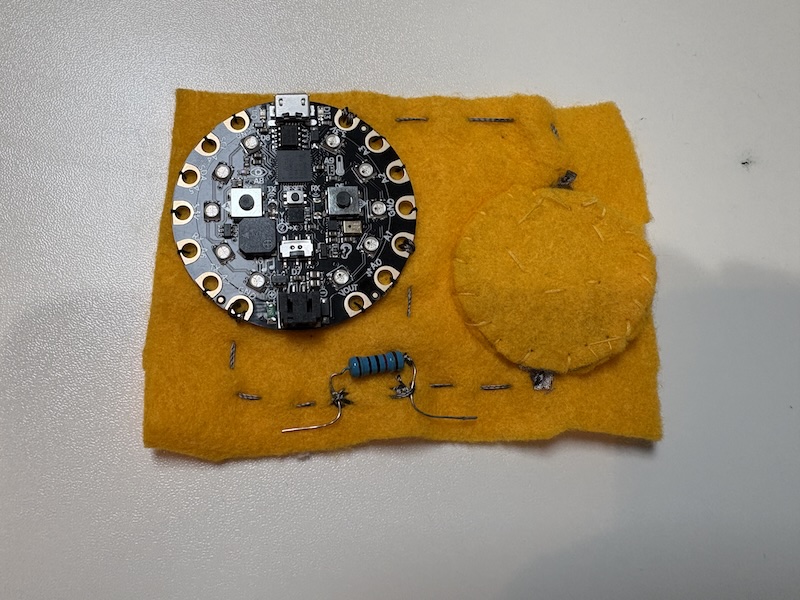
I stitched to button and the Adafruit Circult Playground a square of felt with regular thread. I then used conductive thread to connect one side of the button to the 3.3V pin and the other side of the button to a 10K ohm resistor. I then connected to resistor to the GND and A1 pins. Below are images of the sketch and the swatch:
PROGRAMMING
I used this conversation with Google Gemeni to check the wiring and understand the code.
CODE 1:
Below is the video of the first code I tried in Arduino and the data from the Serial Monitor. The sensor was working, but the light shift was subtle.
Here is the code used for the sketch:
Include Adafruit_CircuitPlayground.h
const int sensorPin = A1; // Your sensor is on A1 int sensorValue = 0; // Variable to store the raw data int brightness = 0; // Variable for light intensity
void setup() { CircuitPlayground.begin(); Serial.begin(9600); }
void loop() { // 1. Read the pressure sensor (0 to 1023) sensorValue = analogRead(sensorPin);
// 2. Map the sensor range to LED brightness (0 to 255) // You might need to adjust '400' and '900' based on your sensor's sensitivity brightness = map(sensorValue, 400, 900, 0, 255); brightness = constrain(brightness, 0, 255); // Keep it within bounds
// 3. Set all NeoPixels to a color (e.g., Blue) with the sensed brightness for (int i = 0; i < 10; i++) { CircuitPlayground.setPixelColor(i, 0, 0, brightness); // (Index, R, G, B) }
// Debugging: View your numbers in the Serial Plotter (Tools > Serial Plotter) Serial.print("Sensor: "); Serial.println(sensorValue);
delay(10); // Smooths out the reading slightly }
CODE #2:
I wanted the lights to be completely off when the sensor was not touched so I reset the low end to 700. After uploading the new code any the lights would not switch on until the serial monitor read above 700. As I squeezed the brightness scaled up as the and the value climbed toward 1000. Below are the videos of the second sketch and the serial monitor readings:
Here is the code used for the second sketch:
Include Adafruit_CircuitPlayground.h
const int sensorPin = A1; // Pin connected to your Velostat sandwich int sensorValue = 0; // Variable for the raw pressure data int brightness = 0; // Variable for the light intensity
void setup() { CircuitPlayground.begin(); Serial.begin(9600); // Allows you to see values in Serial Monitor/Plotter }
void loop() { // 1. Read the raw data from the sensor (600 - 1000 range) sensorValue = analogRead(sensorPin);
// 2. Map the sensor values to brightness // We use 720 so the lights stay OFF when the sensor is resting at 600-700. // 1000 is the peak brightness when you press hard. brightness = map(sensorValue, 720, 1000, 0, 255);
// 3. Keep the math within 0-255 limits to prevent flickering brightness = constrain(brightness, 0, 255);
// 4. Update all 10 NeoPixels // (index, Red, Green, Blue) - Currently set to Blue for (int i = 0; i < 10; i++) { CircuitPlayground.setPixelColor(i, 0, 0, brightness); }
// 5. Print to the Serial Monitor so you can check your work Serial.print("Raw Value: "); Serial.print(sensorValue); Serial.print(" | Brightness: "); Serial.println(brightness);
delay(10); // A tiny delay to keep the signal stable