BioFabricating Materials
1. research and inspiration
2. roots
We are in the process of growing biomaterials using roots. For this experiment, we used grass seeds that Erien had lying around. Strangely enough, the seeds were coated with a bright green colourant and what appeared to be chalk. Presumably, this is done to make your lawn look greener even before the seeds have had a chance to sprout.
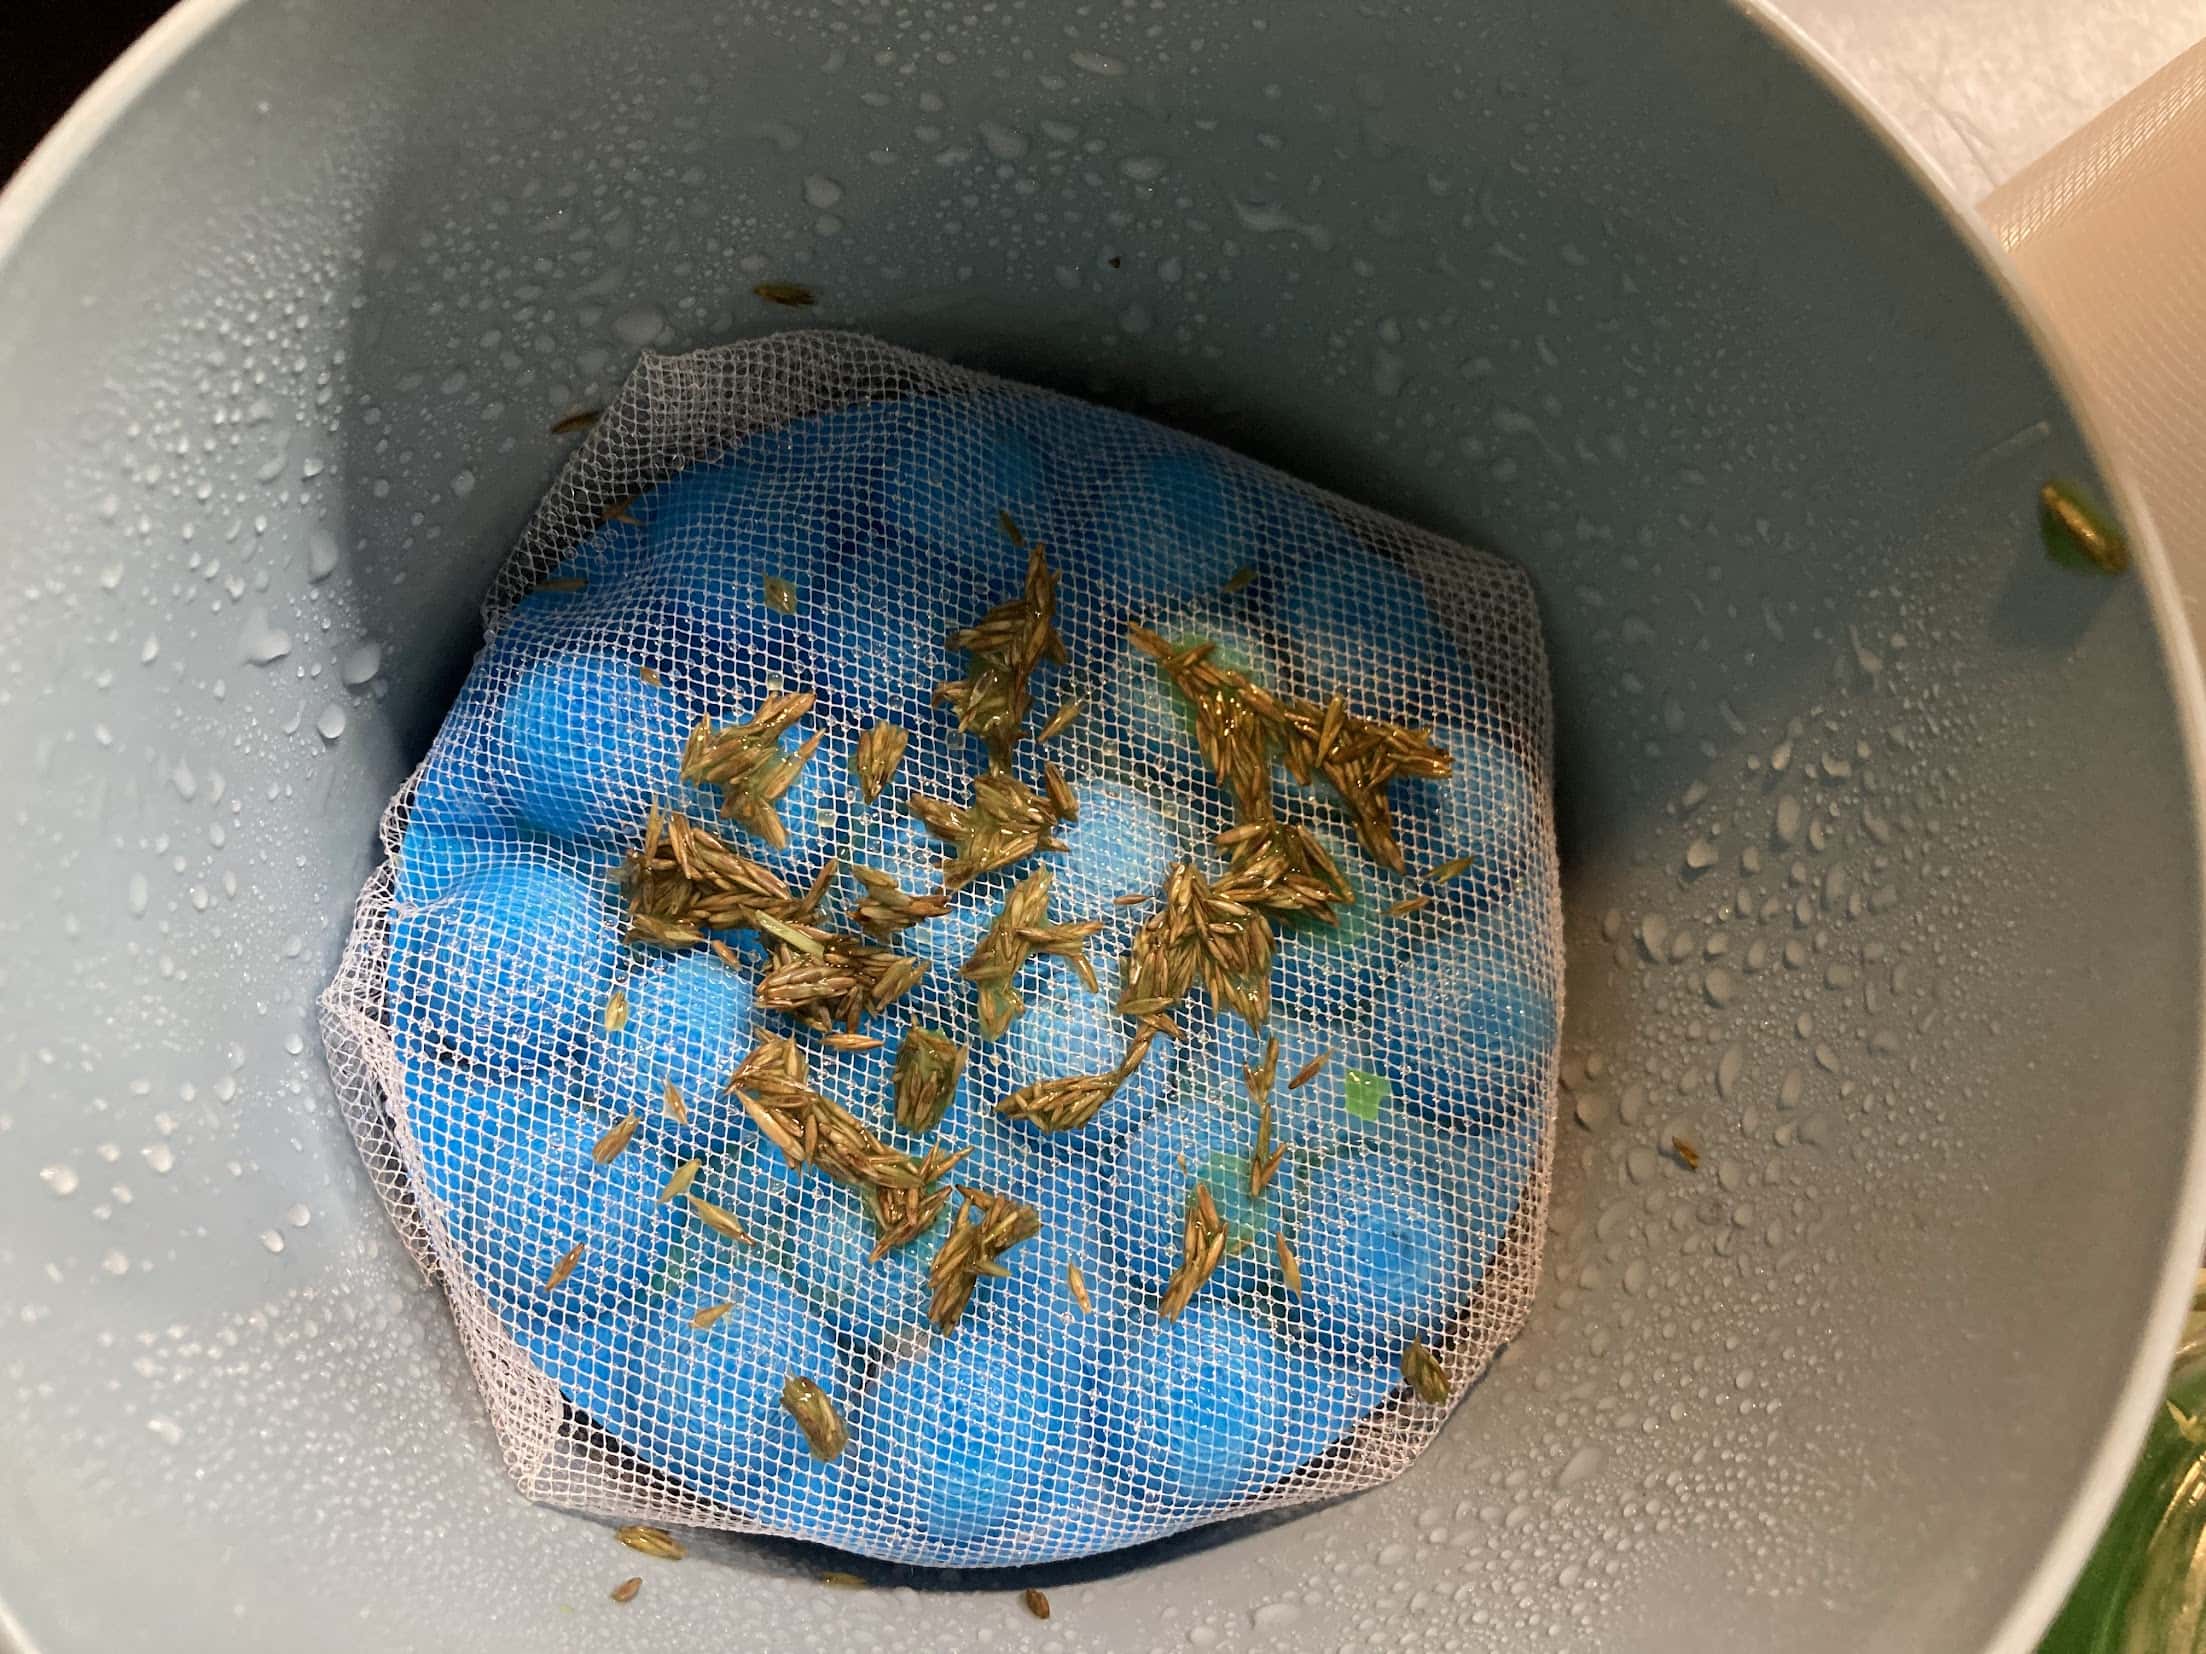
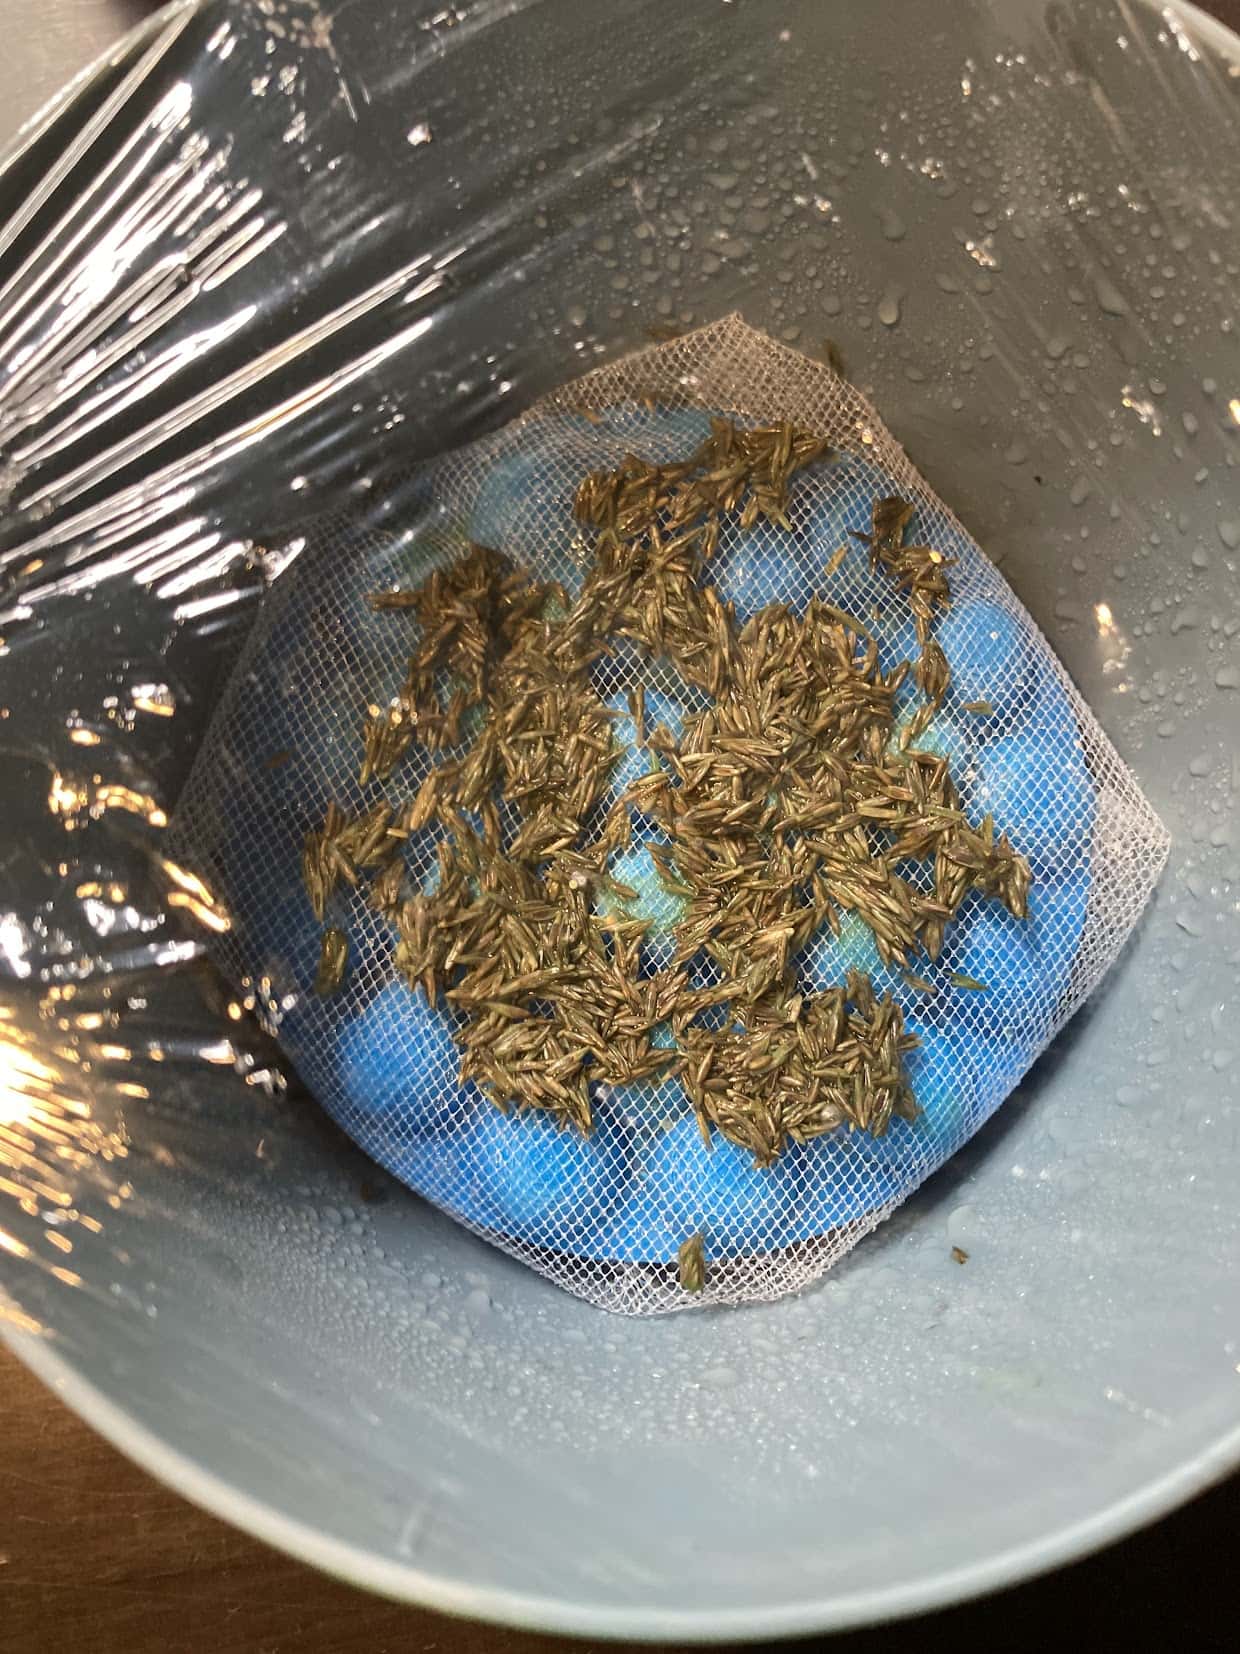
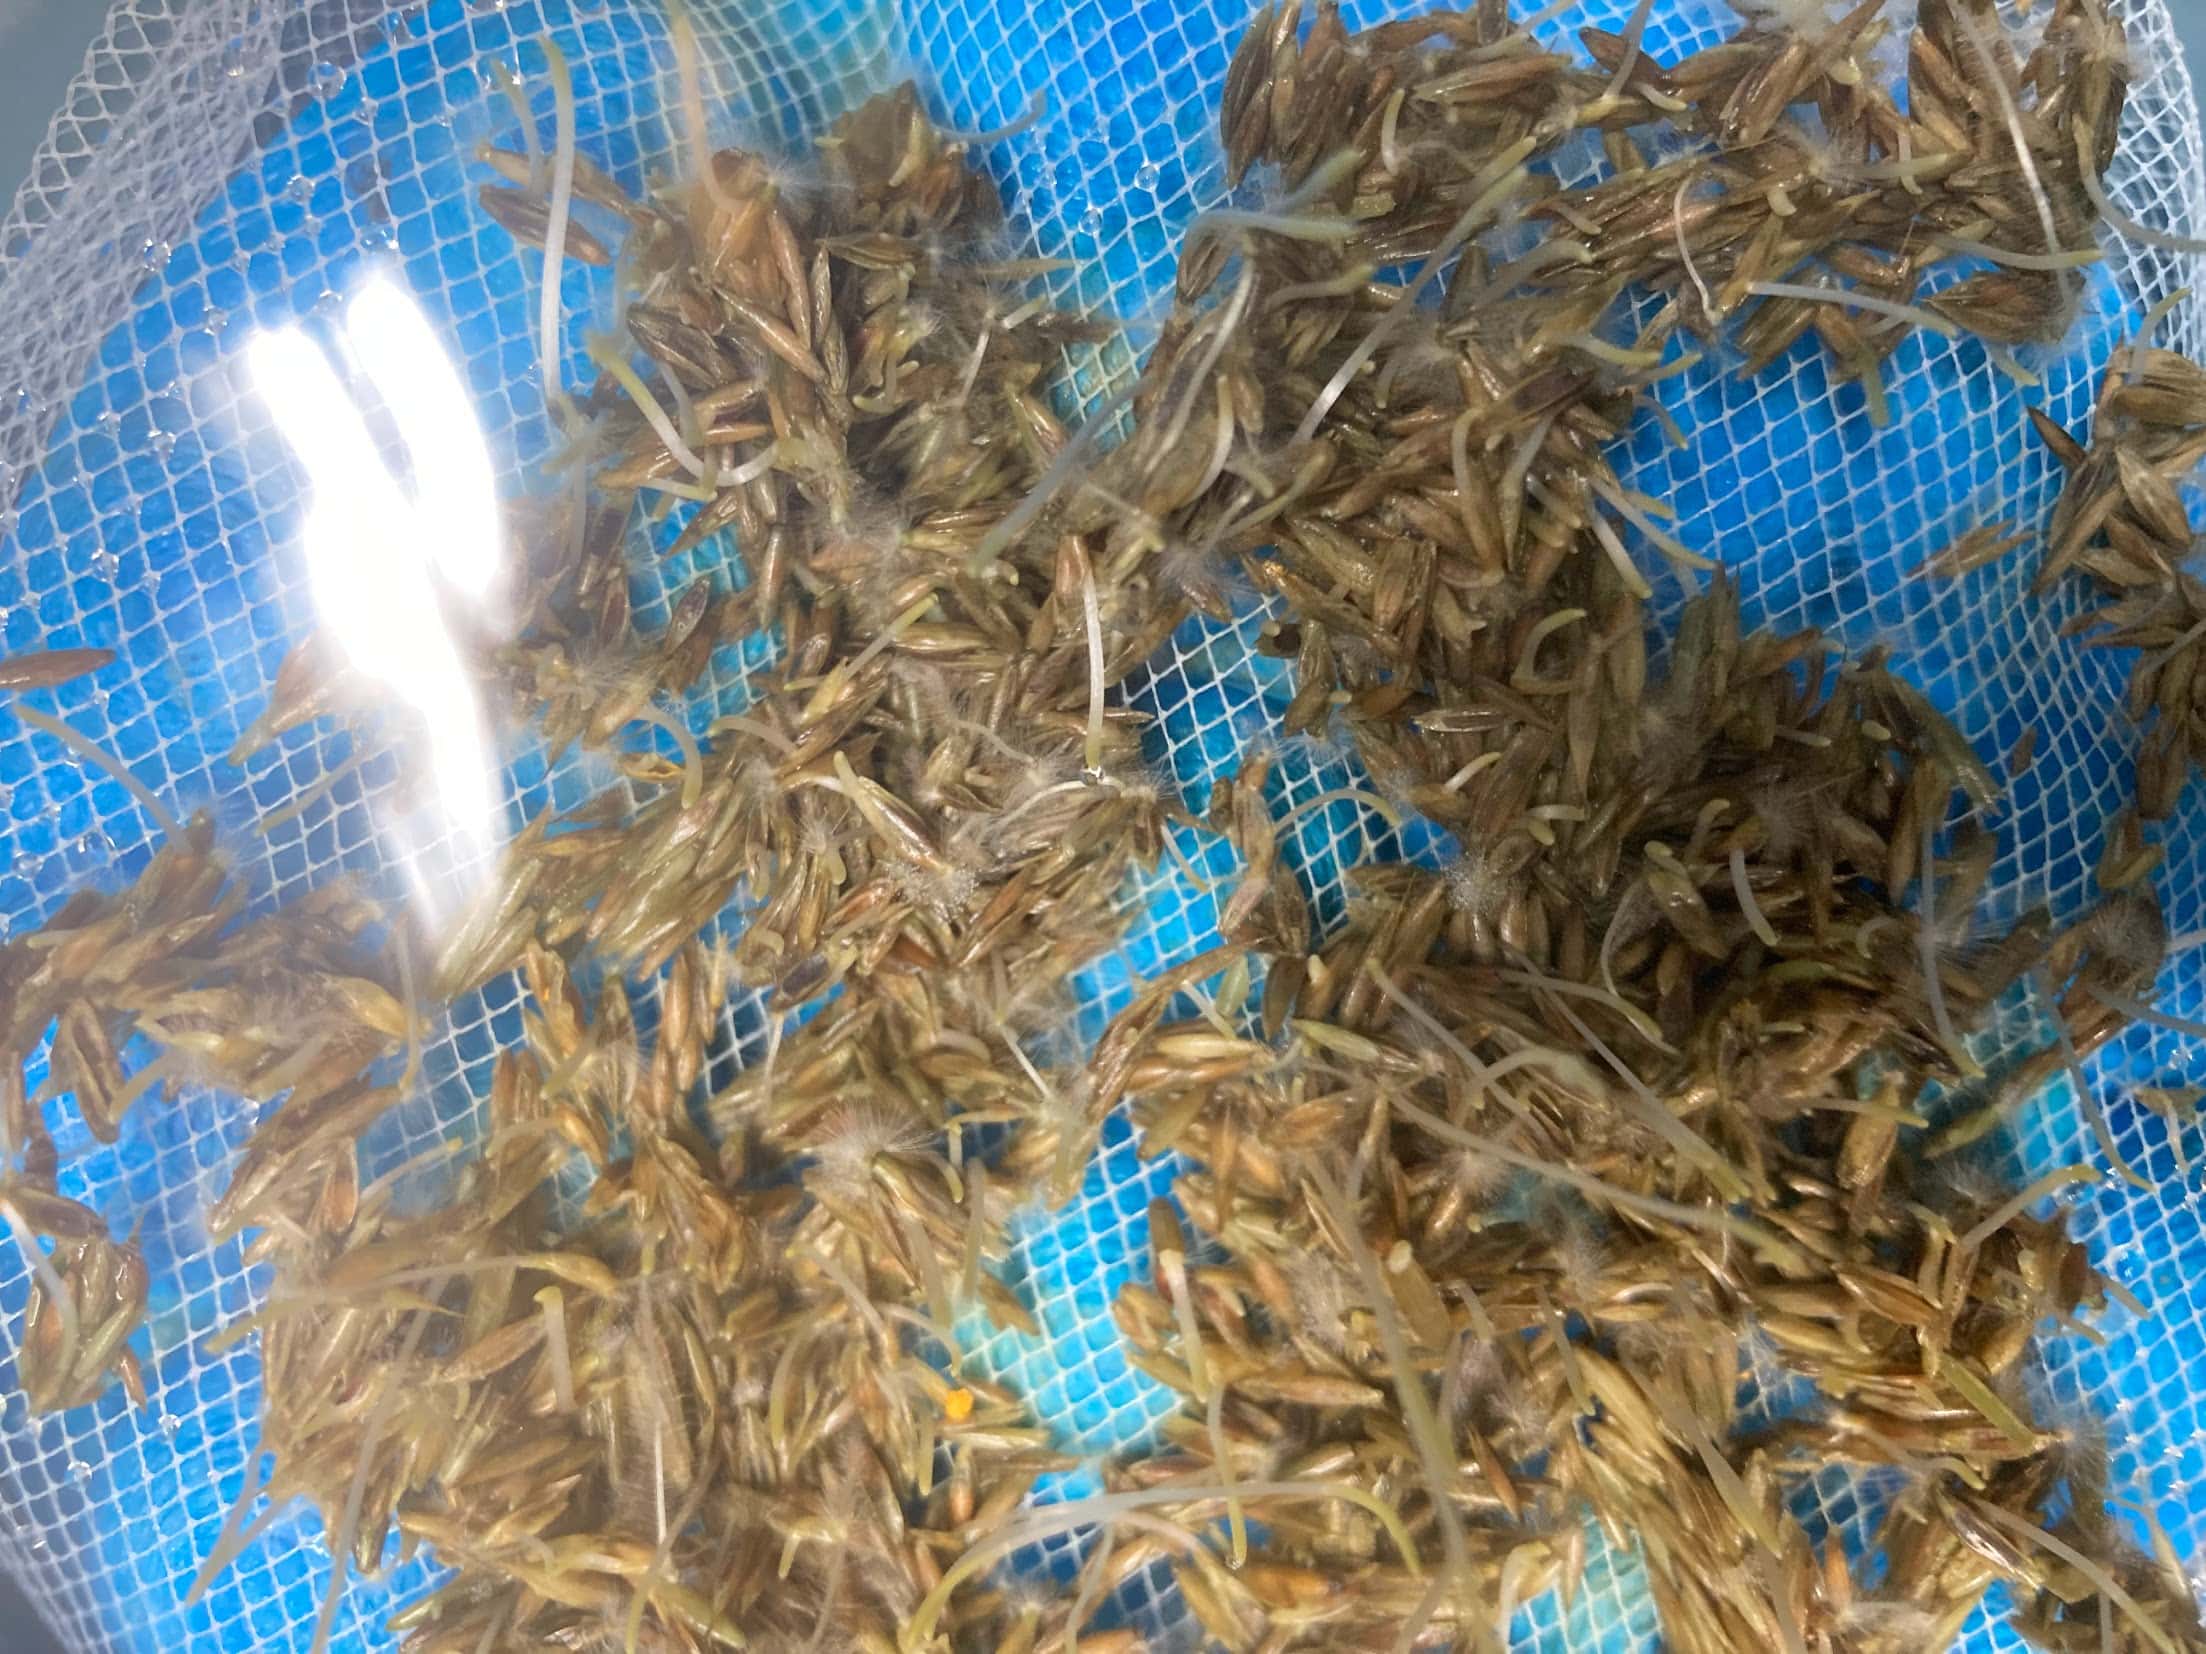
The idea behind this experiment is to use the natural growth of roots to create a material that can take on the shape of a mould. As the seeds germinate, their roots begin to grow and spread through the gauze, potentially forming an interconnected network that holds the material together. We followed this process:
- Soak the seeds overnight to help initiate germination.
- Place a piece of gauze over a shape that will serve as a mould for the roots to grow around and through.
- Spread the soaked seeds evenly over the gauze material. Spray them with water.
- Place the installation inside a plastic box with a lid. The lid should remain slightly open to allow oxygen to circulate, while keeping the environment sufficiently humid to prevent the seeds from drying out. Alternatively, you can cover it with some cellophane in which you add a few holes.
It has now been five days since we set up the installation. The seeds have started to sprout, and the first roots are becoming visible. However, they have not yet spread enough to make a sturdy biomaterial. We will update as soon as it is ready.
3. mycelium
We also experimented with growing a biomaterial using mycelium. Mycelium is the network of fine, thread-like structures (called hyphae) that forms the vegetative part of fungi. As it grows, it can spread through organic materials and bind them together, potentially creating a lightweight and relatively strong material.
We saw some samples from a few years ago at the lab. This time we used a different kind of mushroom which should become pink. For this experiment, we used commercially available straw sold as bedding for rabbits. The idea is to use the straw as a nutrient-rich substrate for the mycelium to grow through. We also wanted to make the resulting material less rough by grinding the straw into smaller pieces. We followed this process:
- Prepare the substrate: Grind the straw into smaller pieces. This should result in a finer material, while also making it easier for the mycelium to spread.
- Sterilise the substrate: Place the ground straw in a pressure cooker to sterilise it.
- Prepare a clean working environment: Clean all equipment and surfaces with soap and then alcohol. We also used Bunsen burners and ethanol to make a sterile bubble.
- Mix the ingredients: Combine the mycelium grains with the prepared straw and some flour, following this ratio: 50 g mycelium grains : 50 g straw : 3 g flour. The mycelium grains act as the starting culture, while the flour provides an additional source of nutrients to support growth.
- Fill the mould: Place the mixture into a mould, distributing it evenly so that the mycelium can grow throughout the material and eventually take on the shape of the mould.
At this point, there is not yet much visible growth. The mycelium needs time to spread through the straw and establish a network that can bind the different particles together. We will therefore leave the material to develop further and observe how it changes over time. An update will follow as soon as there is more visible growth and the material is ready.
4. gelatin sculpture
Following Claire Jouanchicot's biomaterials experiments, we wanted to try making a solid shape out of a piece of textile we found in the textile bins at the lab.
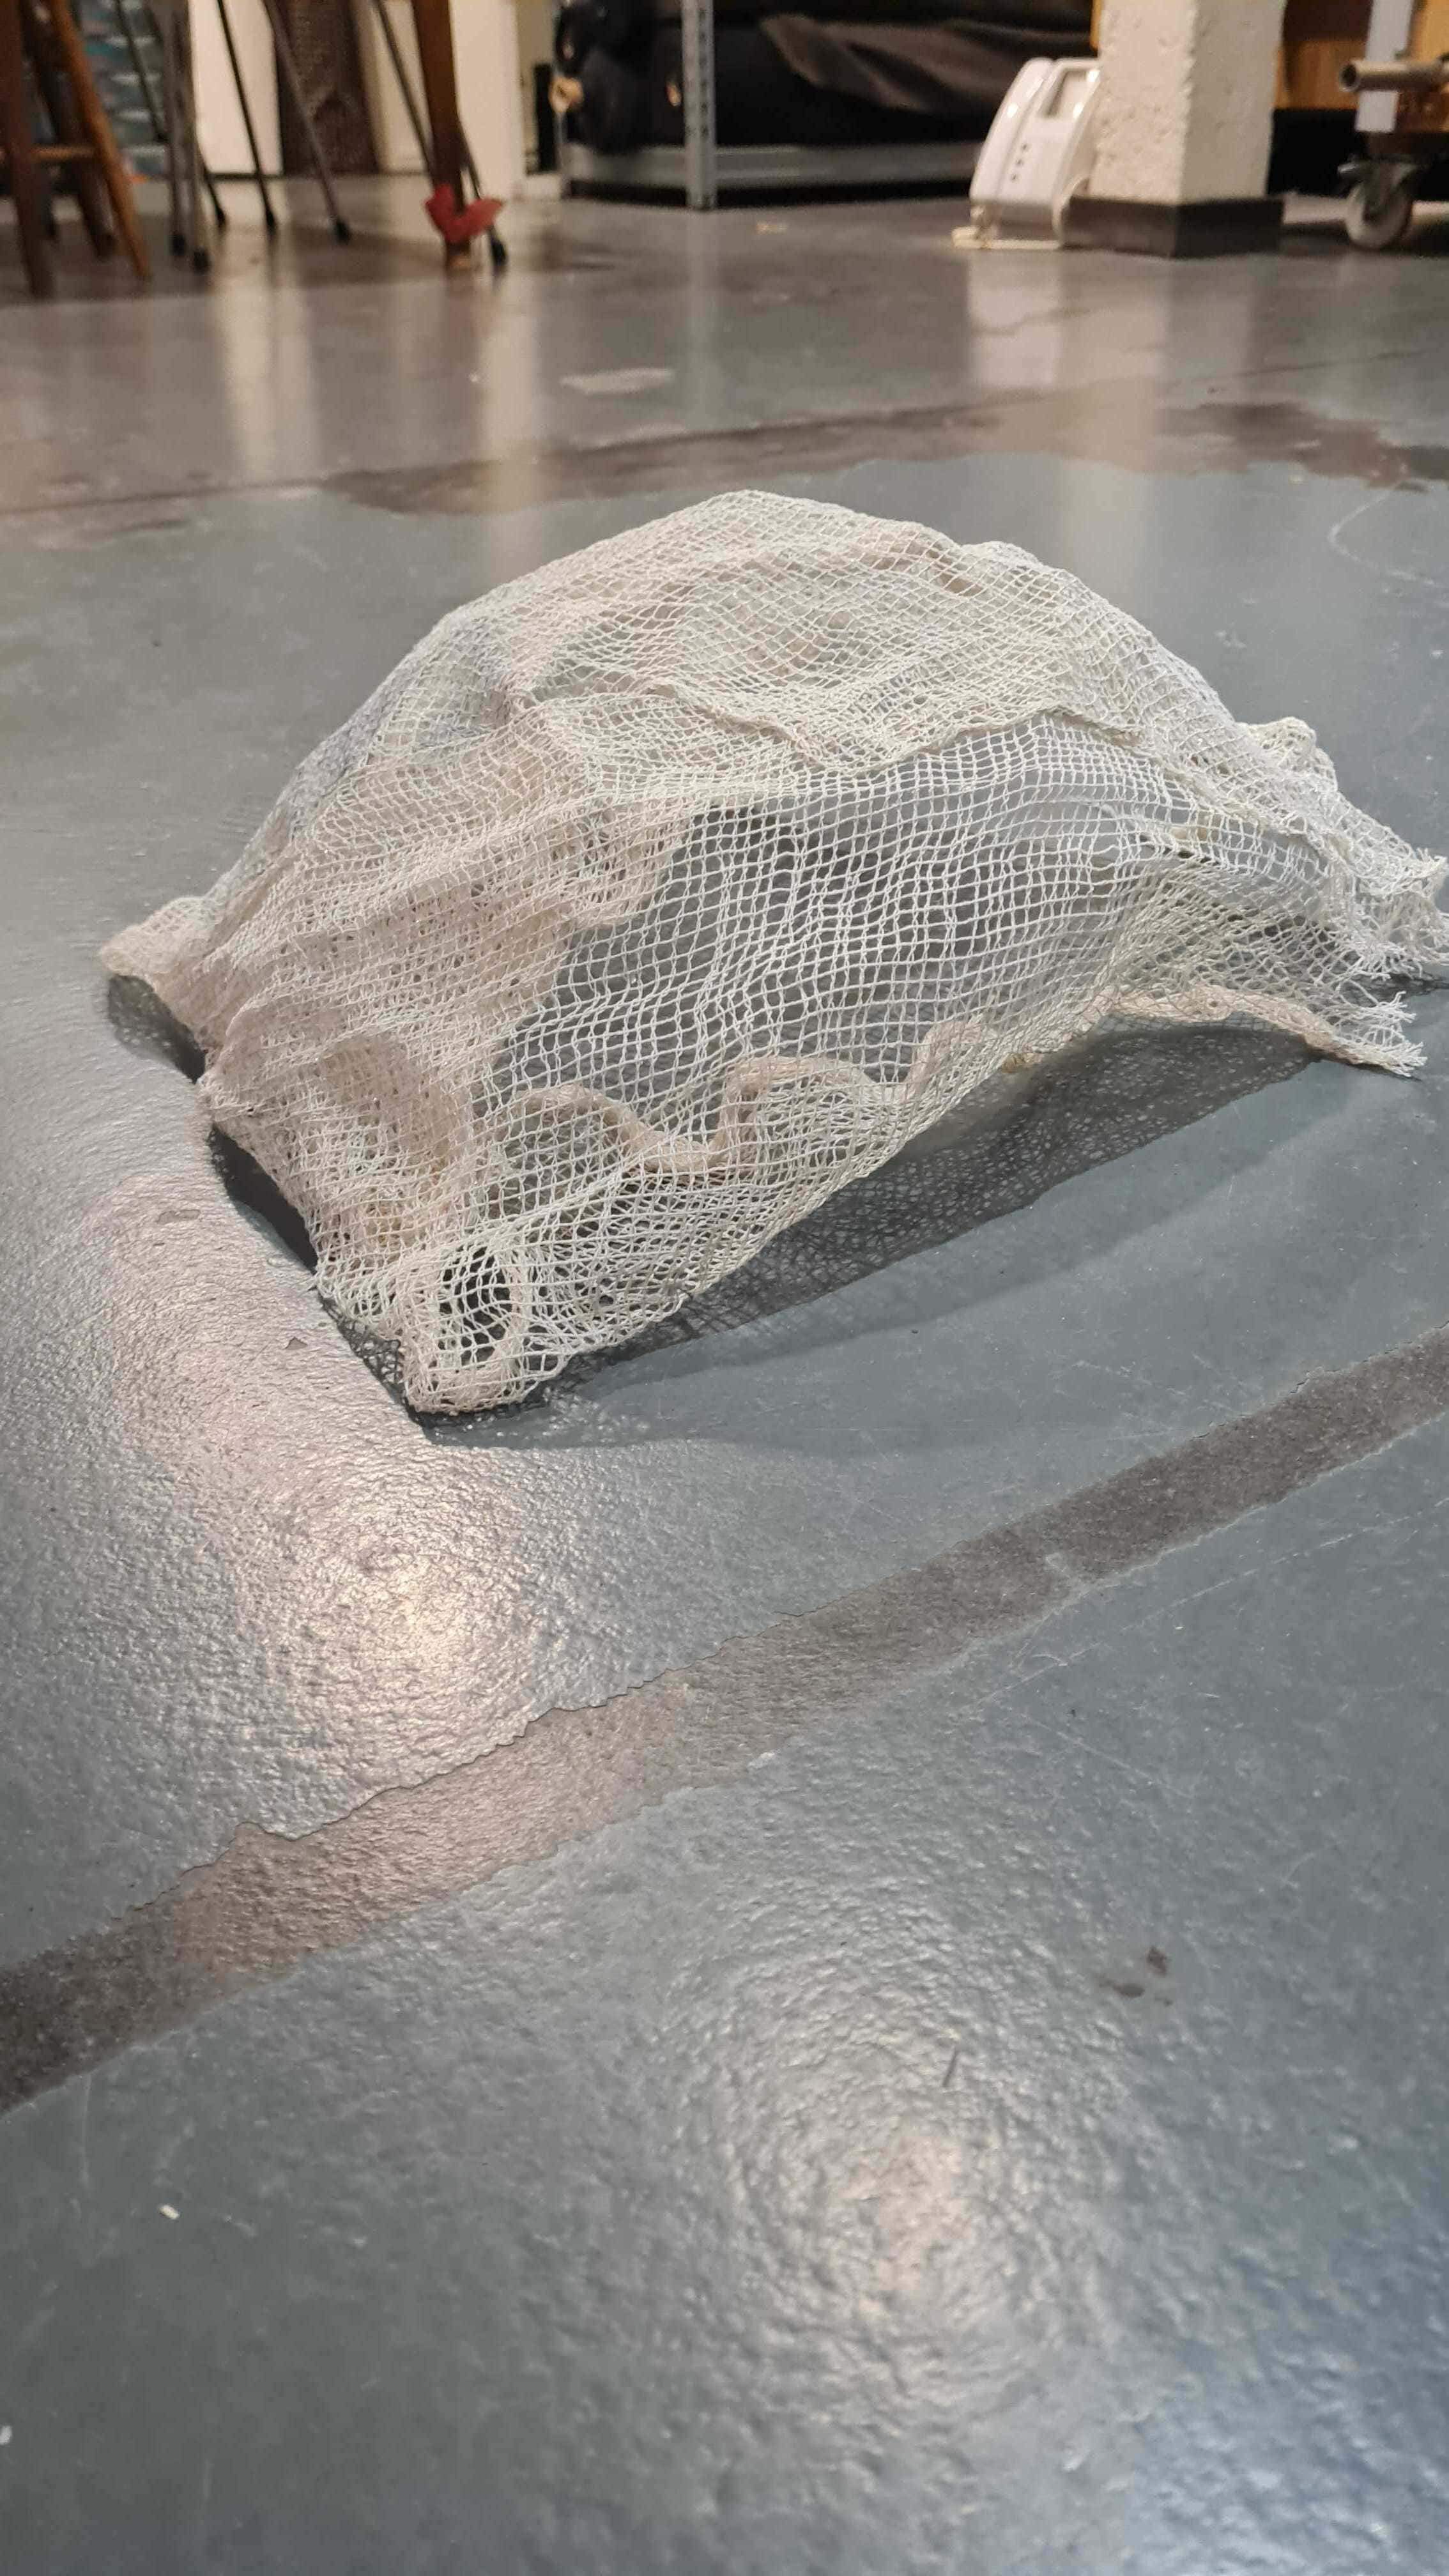
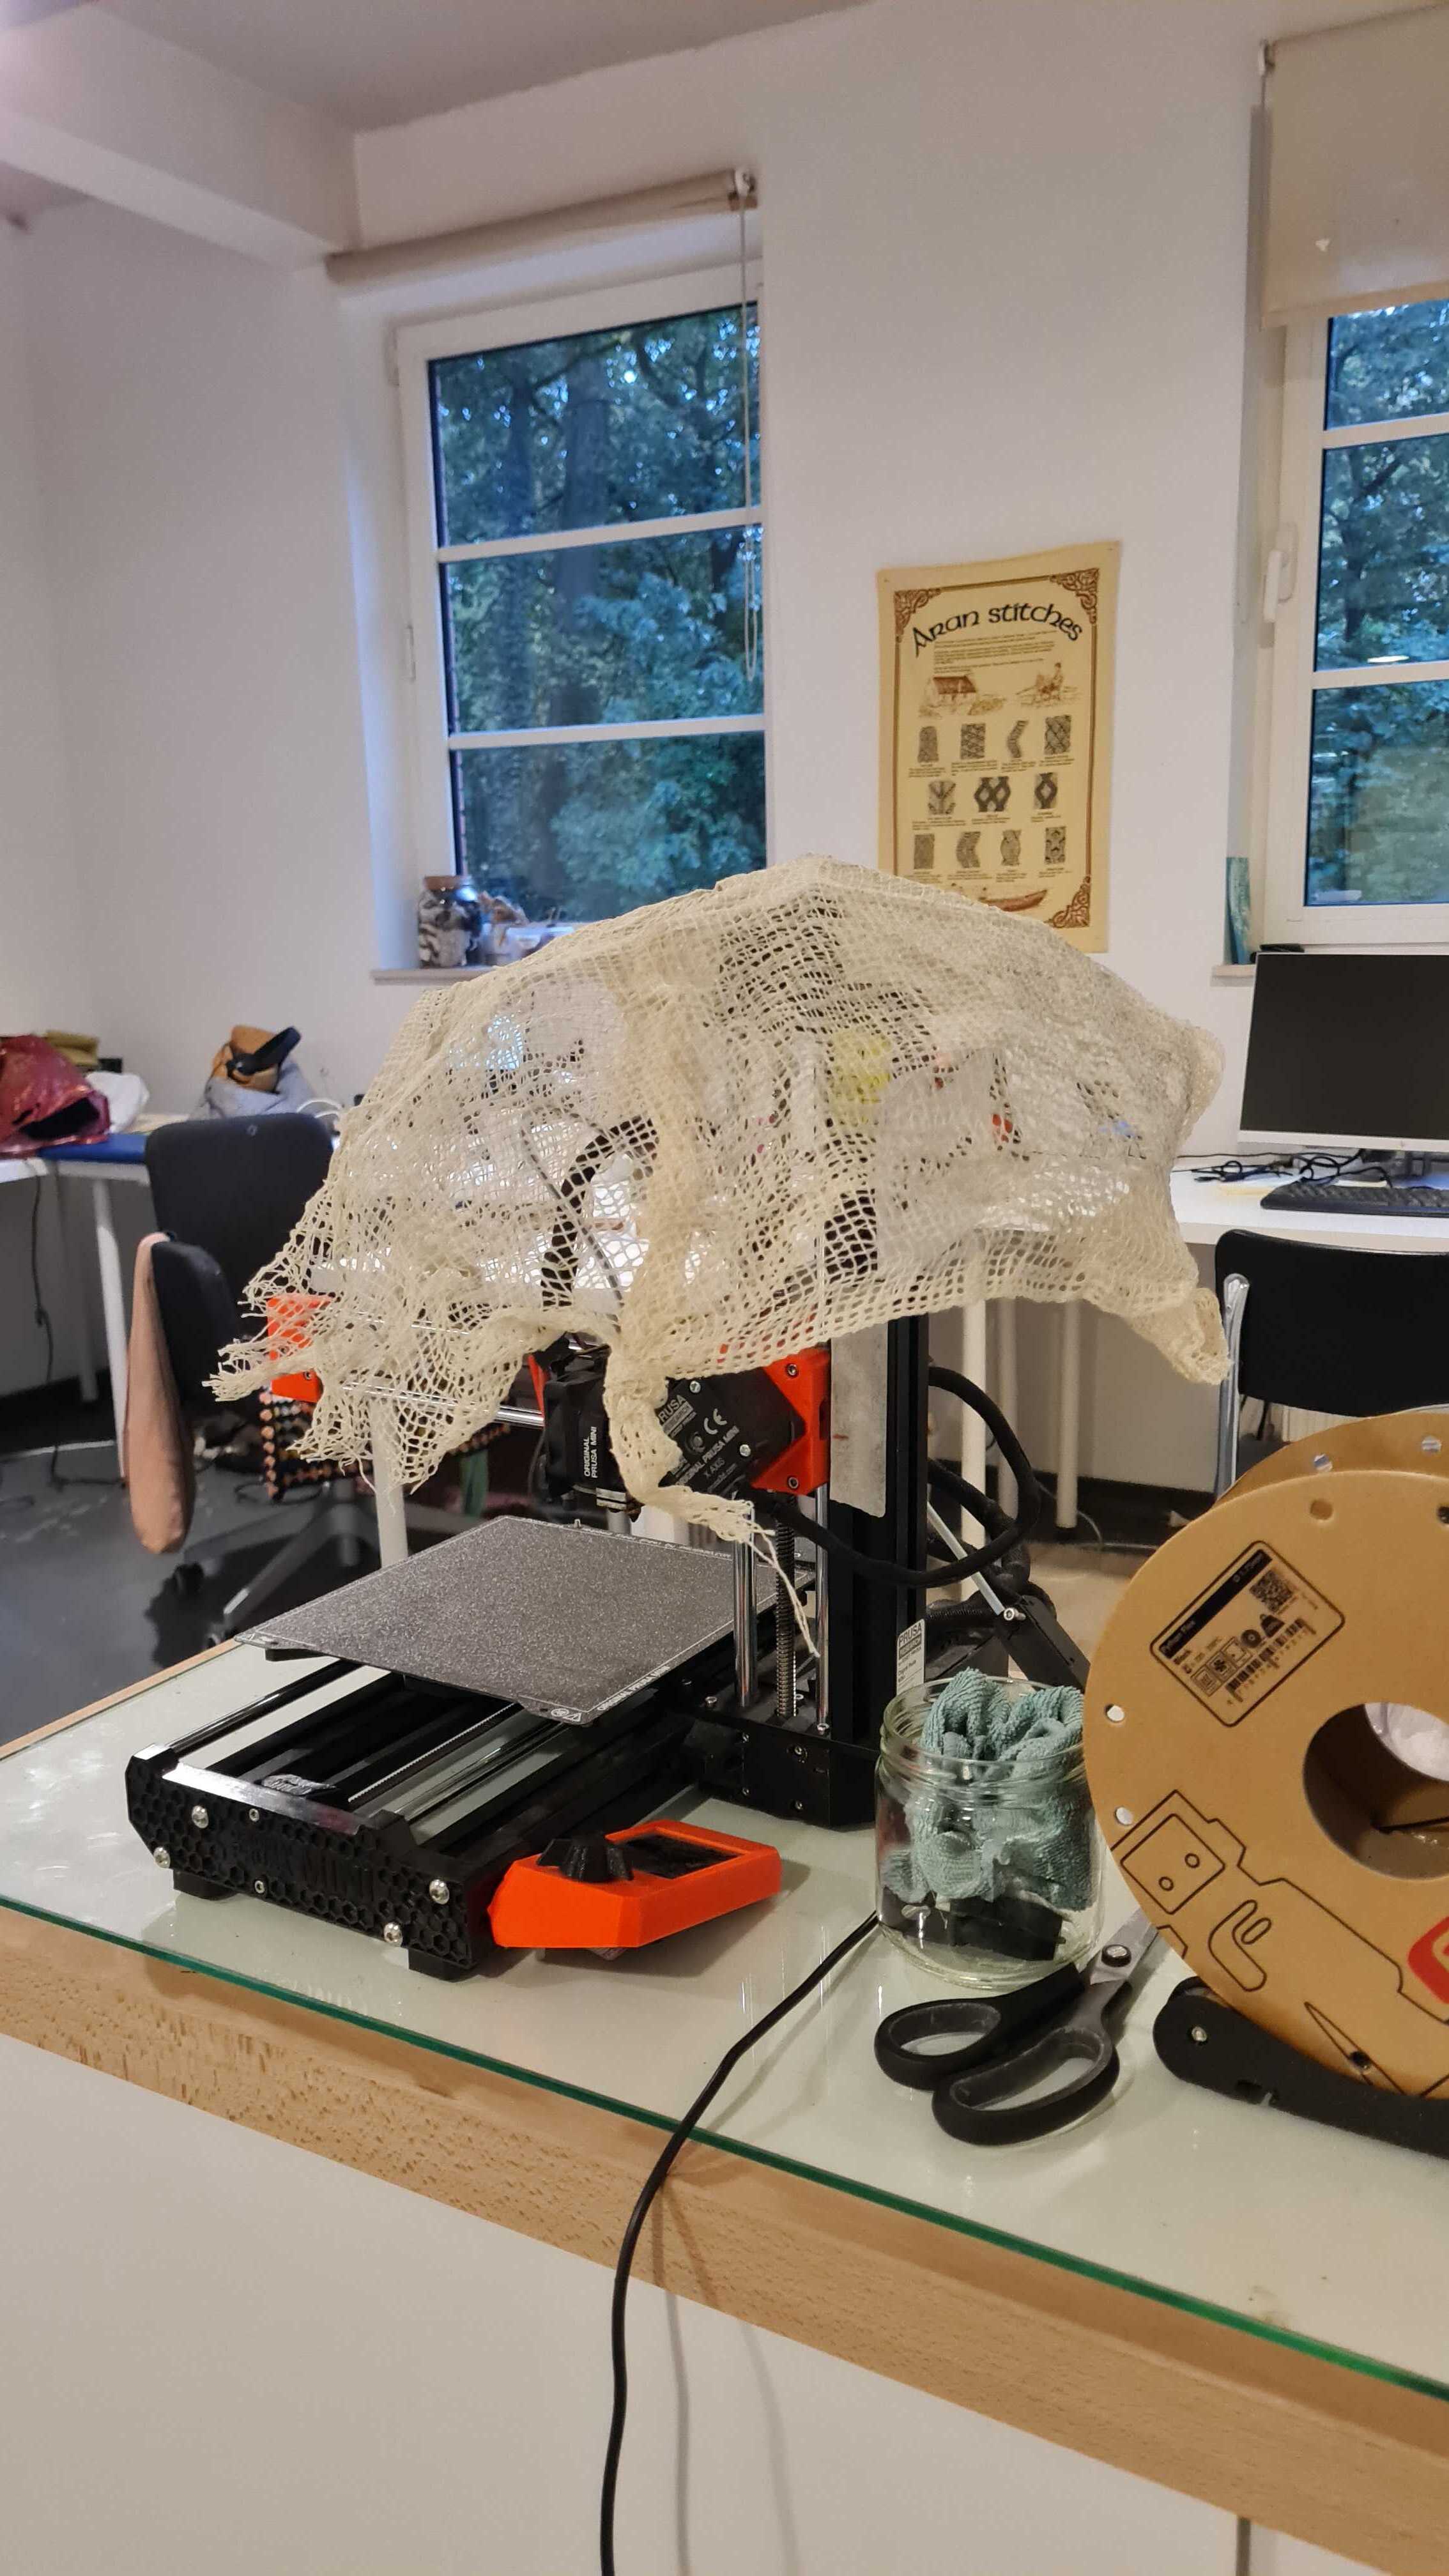
The idea was to use gelatin as a binding agent to stiffen the textile and potentially transform it into a more rigid, sculptural material. We were interested in seeing whether the gelatin could hold the textile together in a fixed shape. When looking at Claire's recipe, we suspected that there might be an issue with the proportions, as it seemed to contain a relatively large amount of glycerin. Glycerin is commonly added to gelatin-based biomaterials as a plasticiser, making the final material more flexible and less brittle. However, in our case, flexibility was not the goal. We wanted to achieve the opposite: a hard, rigid structure. We therefore decided to experiment with our own recipe:
- Prepare the gelatin mixture: Dissolve 9 g of gelatin in as little water as possible, aiming for a concentrated mixture that would result in a harder material once dried.
- Apply the mixture: Use a paintbrush to spread the gelatin solution over the textile, making sure to cover the material and allow the mixture to penetrate its fibres.
- Let it dry: Leave the textile to dry so that the gelatin can solidify and hopefully bind the fibres together into a rigid structure. Unfortunately, the final result was not strong enough to achieve the desired effect. Although the gelatin did interact with the textile, the resulting material did not become sufficiently rigid or self-supporting.
It would be interesting to continue experimenting with different gelatin-to-water ratios and perhaps apply several layers to the textile. We could also try contacting Claire to ask for clarification about her original recipe and whether she has any recommendations for achieving a harder final material.
1. Objective
weekly assignment
Check out the weekly assignment here or login to your NuEval progress and evaluation page.
2. References, research & inspiration
2.1 Quick how-tos
remove chapter 2.1 after use
Uploading images
-
Remember to credit/reference all your images to their authors. Open source helps us create change faster together, but we all deserve recognition for what we make, design, think, develop. Use the caption and reference system examples you see in the template.
-
Resize and optimize all your images. Images are optimised in size with resolution 72dpi, a good max width for full screen is 800px and passed through tinypng for final optimisation.
-
Remove tips when you don't need them anymore!
How-to use footnotes for references or fabrication files
-
Fabrication files are a necessary element for evaluation. You can add the fabrication files at the bottom of the page and link them as a footnote. This was your work stays organised and files will be all together at the bottom of the page. Footnotes are created using 1 (without spaces, as shown in Step 1 & 2, and referenced as you see at the bottom of this page) You can reference the fabrication files to multiple places on your page.
-
Referenced footnotes are important for crediting work of others, within your documentation.
-
If you are using footnotes for both, make sure to not mix them up, work with the numbering to keep things organised
How-to compress a PDF BEFORE uploading it:
Use a compressor when uploading a PDF, you can use online tools such as ilovepdf or smallpdf
How-to encode a VIDEO BEFORE uploading it:
Use a video encoder when uploading a video it needs to be well compressed, you can download tools such as Handbrake or online tools such as this Video Converter
How-to ZIP/compress a large Fabrication file:
To zip a file on Windows, right-click the file or folder, select "Show more options," choose "Send to," then "Compressed (zipped) folder." watch On a Mac, select the file or folder and choose "Compress" from the context menu. watch
get inspired!
Check out and research alumni pages to betetr understand how to document and get inspired
-
Comparison research - Aslı Aydın Aksan - TextileLab Amsterdam
-
Comparison research - Barbara Rakovska FabLab Bcn
-
Jute research - Julija Karas - FabLab Bcn
-
Polarisation in bioplastics Viviane Labelle - EchoFab
-
Local waste streams - Marieke van Eyndhoven
Add your fav alumni's pages as references
"Lorem ipsum dolor sit amet, consectetur adipiscing elit, sed do eiusmod tempor incididunt ut labore et dolore magna aliqua. Ut enim ad minim veniam, quis nostrud exercitation ullamco laboris nisi ut aliquip ex ea commodo consequat. Duis aute irure dolor in reprehenderit in voluptate velit esse cillum dolore eu fugiat nulla pariatur. Excepteur sint occaecat cupidatat non proident, sunt in culpa qui officia deserunt mollit anim id est laborum. Lorem ipsum dolor sit amet, consectetur adipiscing elit, sed do eiusmod tempor incididunt ut labore et dolore magna aliqua."
Caption for the left image
Caption for the right image
-
Download references Links to online reference files, PDF, booklets
-
or embed your own PDF as:
- Video references: Vimeo (only when not yours)
Sound Waves from George Gally (Radarboy) on Vimeo.
- Video references: Youtube (only when not yours)
3. Tools & Ingredients
or
* xxx gr
* xxx gr
* xxx gr
* xxx ml
* xxx gr
* xxx gr
* xxx gr
* xxx gr
* xxx ml
* xxx gr
* measure - measure - measure
* add, combine, mix..
* simmer, cook, boil, freeze, burn, crush...
* mix, smash, stack, overlay..
* cast, pour, press..
* dry, aereate, dehydrate..
* remove, peel, unmold..
* finishing touches
4. Process and workflow
"Lorem ipsum dolor sit amet, consectetur adipiscing elit, sed do eiusmod tempor incididunt ut labore et dolore magna aliqua. "
How-to use footnotes for fabrication files
Fabrication files are a necessary element for evaluation. You can add the fabrication files at the bottom of the page and link them as a footnote. This was your work stays organised and files will be all together at the bottom of the page. Footnotes are created using 1 (without spaces, as shown in Step 1 & 2, and referenced as you see at the bottom of this page) You can reference the fabrication files to multiple places on your page.
4.1 Step 1
This model 3 was obtained by.. Lorem ipsum dolor sit amet, consectetur adipiscing elit, sed do eiusmod tempor incididunt ut labore et dolore magna aliqua.
4.2 Step 2
The laser cut nesting 2 was created using.. Lorem ipsum dolor sit amet, consectetur adipiscing elit, sed do eiusmod tempor incididunt ut labore et dolore magna aliqua.
4.3 Step 3
...
5. Results
Results & documentation
- Don’t forget to document the outcome including:
- Upload the photos & files on oscircularfashion
- Final result
- Photos from different stages
- Videos of movement or interaction, show how a material moves, something was assembled or the interactive
- Include measurements or a reference object to give a sense of size
- Describe the (material) properties or what you made
- Comparison between attempts, if you did multiple experiments or generated multiple files before fabricating / deploying. You can use a table as shown in week 4
5.1 Documenting experiments in a table for comparison
example from the documentation of Loes Bogers TextileLab Amsterdam 2019-20
| Biofoam |
Gelatin foil |
Bioresin |
Biosilicone |
| Starch Rubber |
Biolinoleum |
Alginate net |
Alginate foil |
| Alginate string |
Agar foil |
Bio composite |
Reused PLA |
6. Weekly reflection & critical thinking
- What did I learn? What did I personally find interesting or surprised me?
- What would I do differently? If something "failed" do I know how else to tackle it now?"
- How does this connect to my final project or my learning trajectory?
- What are implications and possible applications, think also from the ethical or environmental aspect, how it could connect to your practice and project?
NuEval — final step
Go to NuEval and fill in the checklist, when not complete notify your instructor.
7. Recipe files, Booklet and References
-
Recipe: download my recipe booklet here ↩↩
-
Recipe: Mycelium recipe pdf ↩
-
Reference: Author; Title; Source; year ↩