Wearables
1. Objective & Inspirations
Giving New Life to the Audio Tutu
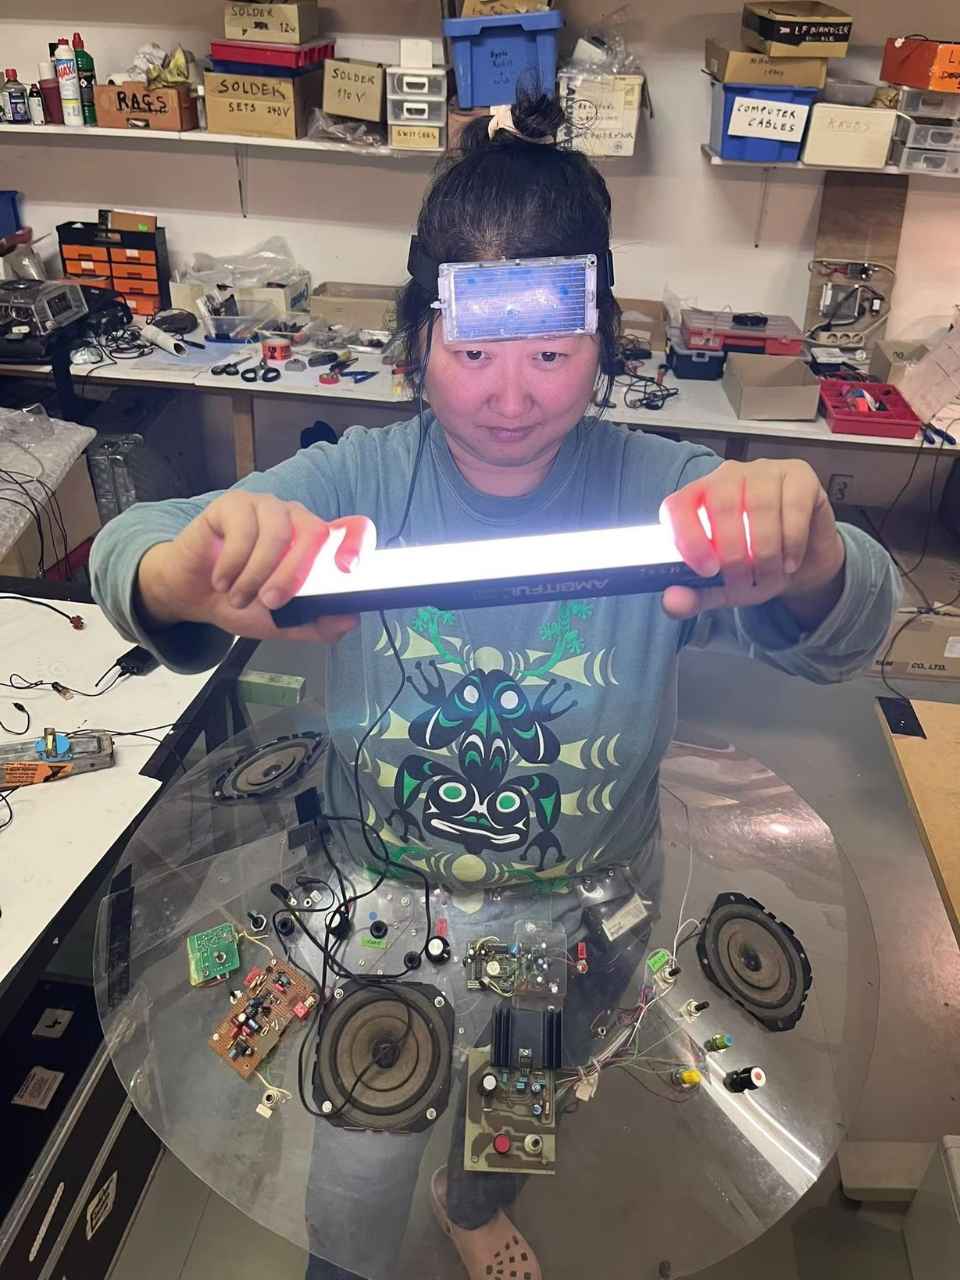
Benoît Maubrey is an artist known for transforming clothing, sculptures, and everyday objects into electroacoustic instruments. His work explores the relationship between sound, movement, public space, and human interaction, often integrating speakers, microphones, sensors, and electronic circuits into unconventional wearable structures.
He is the winner of this year's Fab City Award, and I am very fortunate to get to know him through the award this year as a jury. One of his artwork is the Audio Tutu - I had an immediate connection with it as ballet and electronics are both the dearest to my heart.
Benoit was trying to find new homes for the 38 Audio Tutus he had made and iterated on for the past 40 years. I responded and offered that I'd like to have them. We eventually agreed upon that I can have 3 of of "Gen 2".
I am facinated by this series artwork. And its late 80s aesthetics, and its philosophy for "moving freely" and "making noise".
One project that particularly fascinates me is his Audio Geishas, first performed in 1997 at the Intercommunication Center (ICC) in Tokyo.
In this project, traditional Japanese kimonos were transformed into interactive electroacoustic garments. The performers wore electronic circuits incorporating Casio Voiceman samplers, light sensors, microphones, radio receivers, and portable amplifiers. Rather than playing a conventional musical instrument, the dancers generated and manipulated sounds through their body movements and interactions with environmental lighting.
The light sensors embedded in the garments and held in the performers' hands replaced the samplers' original keyboard controls. As the dancers moved, changes in light exposure triggered sounds, effectively turning their bodies and garments into musical interfaces.
The garment is no longer simply something to wear, but becomes an instrument that responds to the performer's movements and surrounding environment.
So I traveled to suburb Berlin, met him at his studio in this 300 year old German Hof, to get acquainted to the Audio Tutus and his "very progressive wearable technology" that has became vintage by now.
The Audio Tutus were first debuted in 1989. I told him, that's also the year I was born.
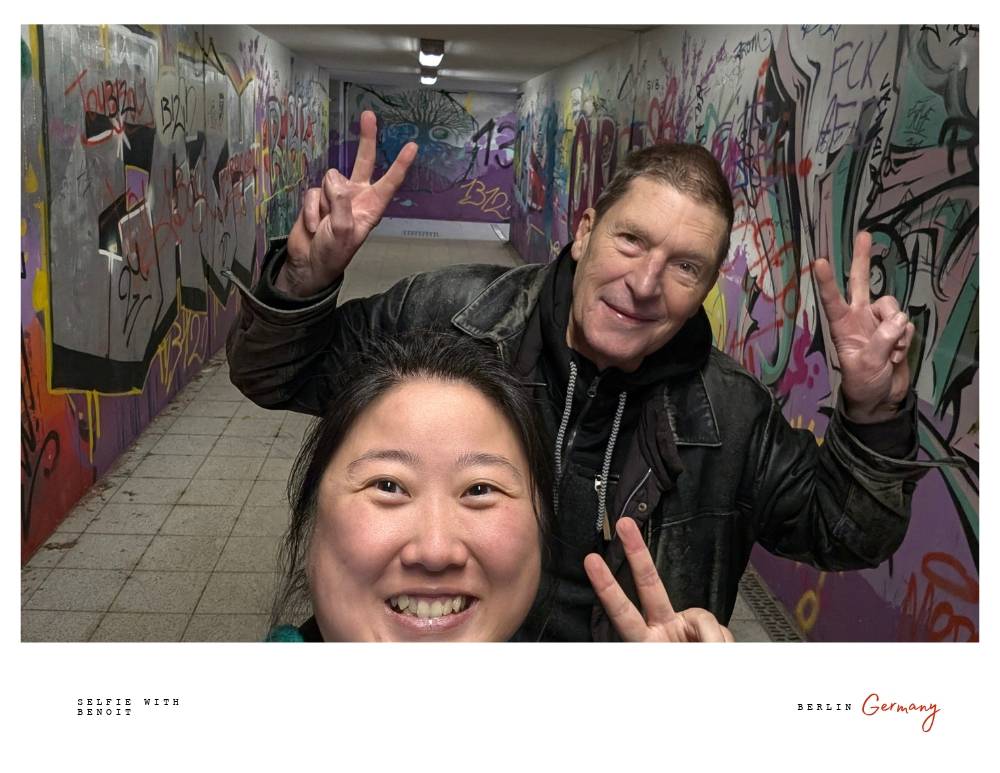
We spent time getting to know each other and exploring his pioneering wearable sound artworks. It was an amazing opportunity to hear the stories behind the Audio Tutus, the 70's/80's Berlin art scene. Understand the original technology, and reflect on how these once-futuristic creations might continue to evolve.
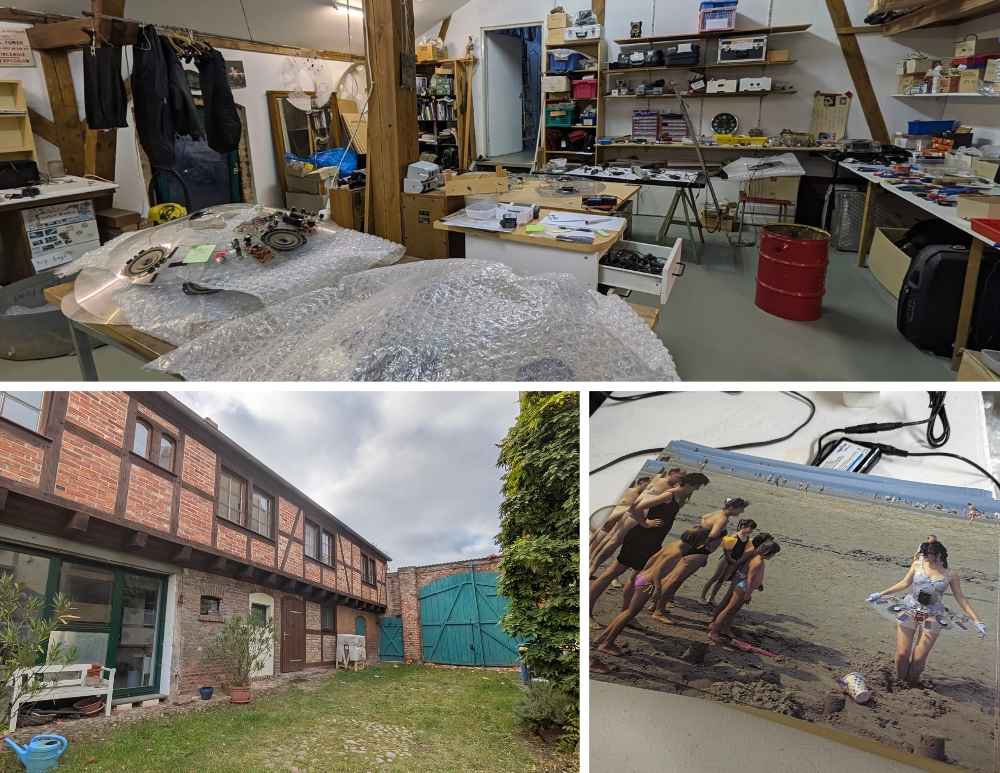
I talked about my admiration for my uncle as a ballet dancer who left China and went to US that led to my immigration life, my maker journey, and my "artist-wanna-be" desire. The Audio Tutu simply spoke to my soul.
This is not about preserving the Audio Tutu legacy. I want to use contemporary digital fabrication skills I'm learning, incorporating new wearable electronics and open-source hardware to explore new possibilities for its future.
What I Want to Accomplish This Week
For Fabricademy's Wearables Week, I want to begin developing a new interactive electronic layer for the Audio Tutu, drawing inspiration from Maubrey's pioneering experiments with wearable sound interfaces.
My objectives are:
Explore sound as an interactive input. Use a microphone sensor and a Seeed Studio XIAO microcontroller to detect environmental sounds and translate them into programmable responses.
Make sound visible through light. Experiment with addressable RGB LEDs to create flowing, pulsing, and sound-reactive lighting effects that illuminate the translucent ruffles.
In future weeks, I want to:
Investigate wearable integration. Explore how electronic components, sensors, actuators, and portable power systems can be integrated into this sculptural garment while maintaining its wearability and structural integrity. Experiment with materials and fabrication techniques. Investigate how polycarbonate, textile scaffolding, and light-diffusing materials can work together to create new visual effects.
My intention is not to replace or permanently alter the original artwork, but to explore a system that respects its existing design while opening new possibilities with modern components and techniques.
2. Using Micro-controller to drive programmable LEDs
Hardware Components
| Component | Description | Role in Project |
|---|---|---|
| Seeed Studio XIAO RP2040 | Compact microcontroller powered by the Raspberry Pi RP2040 chip. | Controls LED animations and processes sensor inputs. |
| XIAO Expansion Board | Expansion board with Grove connectors, OLED display, and accessible GPIO pins. | Simplifies prototyping, wiring, and connecting peripherals. |
| Grove WS2813 RGB LED Strip | 1-meter addressable RGB LED strip with 30 individually controllable LEDs. | Creates flowing light waves and dynamic visual effects across the Audio Tutu ruffles. |
Table — Main electronic components used for the Audio Tutu wearable lighting prototype.
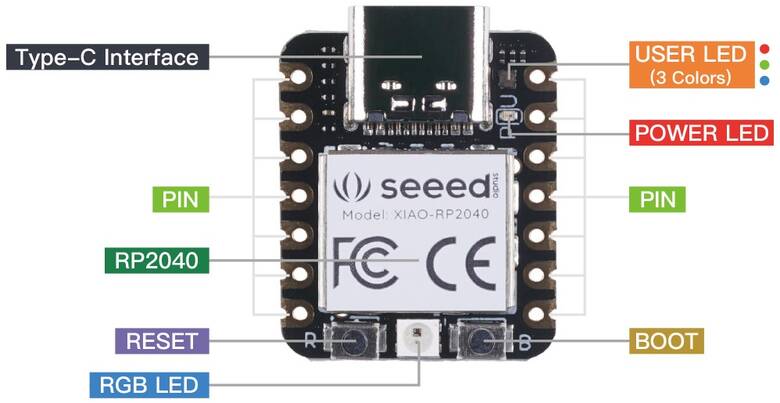
Since I was traveling and away from lab, I don't have FabriXIAO. But I always carry around a XIAO starter kit which came to be really handy.
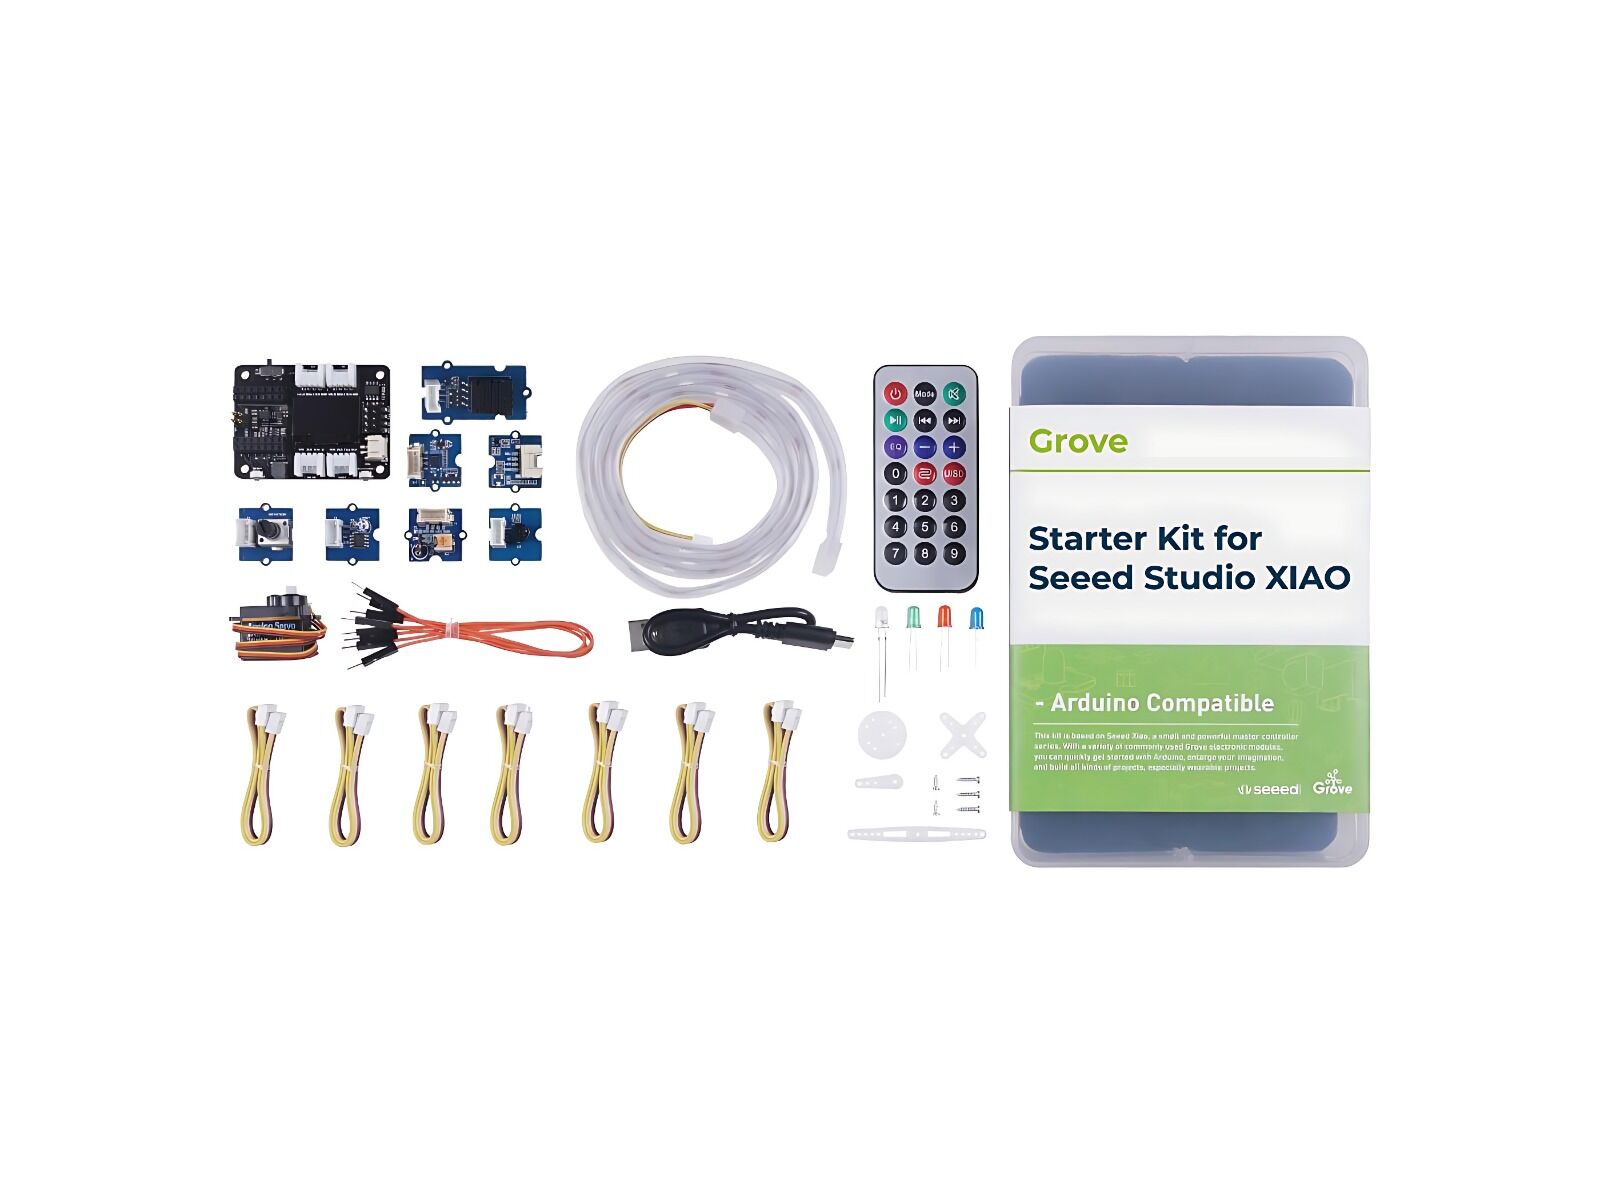
The XIAO I had in hand was the RP2040 version.
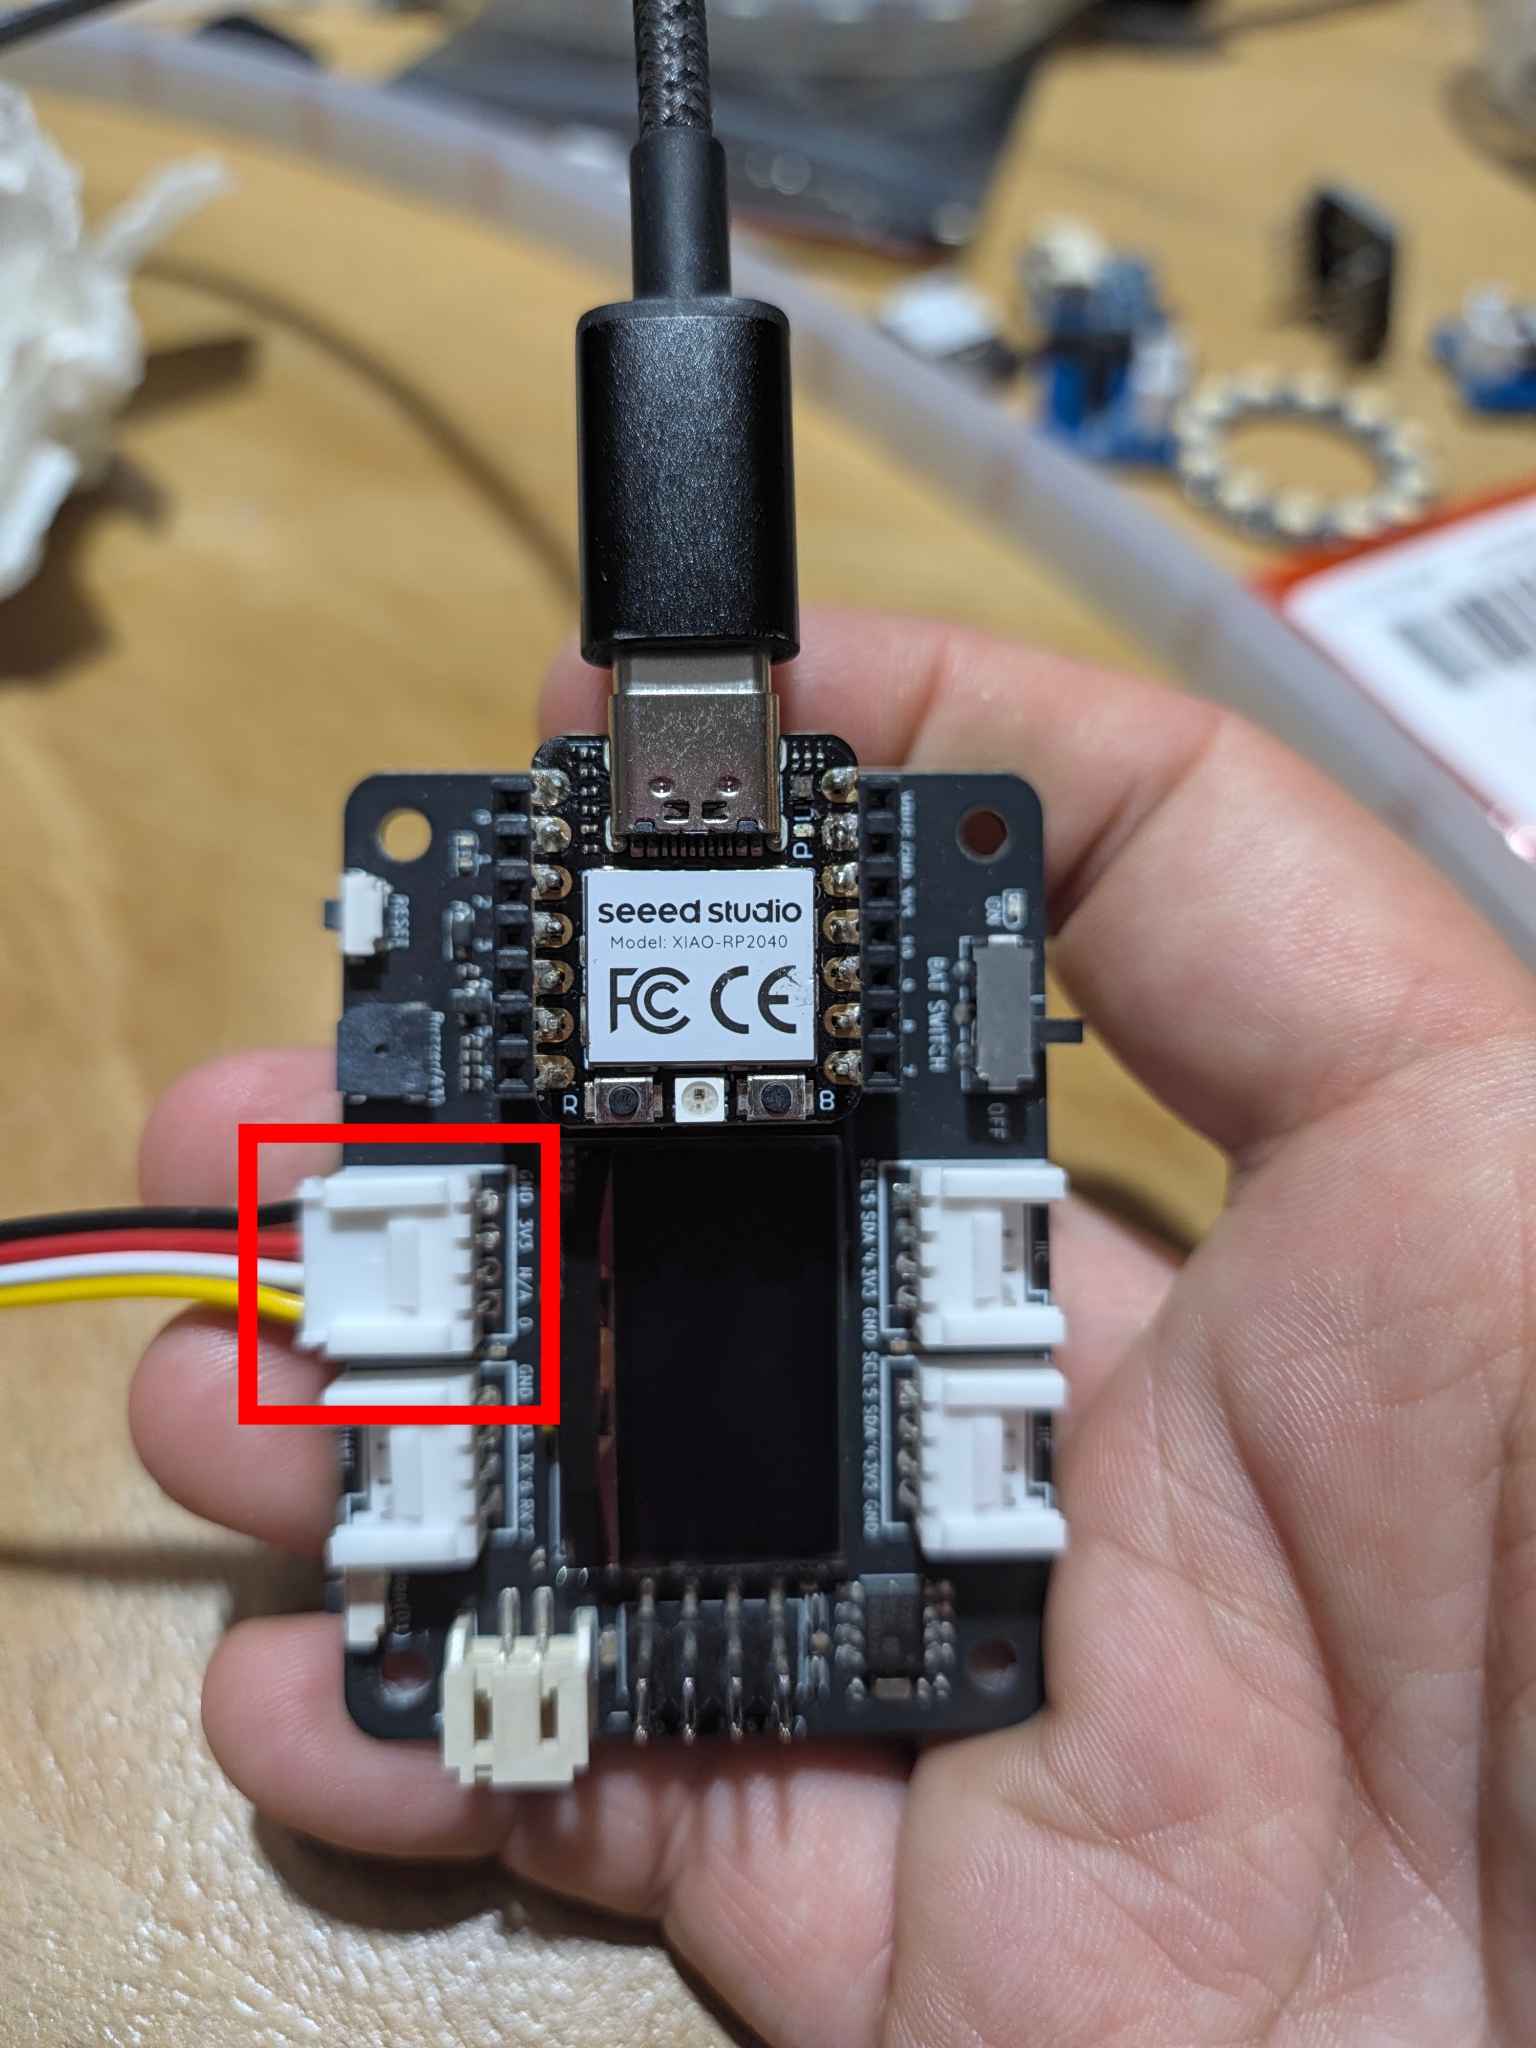
Connecting the XIAO RP2040 to the Expansion Board
The expansion board provides convenient Grove connectors, accessible GPIO pins, and a built-in OLED display, making it easier to prototype without soldering.
According to the pinout, the board provides four Grove connectors for connecting sensors and peripherals without soldering.
| Grove Connector | Function |
|---|---|
| A0/D0 | Analog/Digital — used for LED data |
| UART | Serial communication (TX/RX) |
| I²C | Sensors and displays (SDA/SCL) |
| I²C | Additional I²C devices (SDA/SCL) |
So I plugged the LED strip directly into the A0/D0 Grove connector, which maps to XIAO D0 (GPIO26), to send control signals to the WS2813 addressable RGB LED strip.
Software Setup
The next step is to install board packages in Arduino IDE. Seeed Studio has extensive getting-started guide and wiki for all the XIAO boards setup:
Step 1 — Install the RP2040 Board Package in Arduino IDE
Before programming the Seeed Studio XIAO RP2040, I needed to
configure Arduino IDE to recognize the RP2040 microcontroller.
On macOS, I opened Arduino IDE → Settings
(shortcut: ⌘ + ,) and added the following URL
under Additional Boards Manager URLs:
https://github.com/earlephilhower/arduino-pico/releases/download/global/package_rp2040_index.json
Next, I opened Boards Manager, searched for
rp2040, and installed
Raspberry Pi Pico/RP2040/RP2350 by Earle F. Philhower, III.
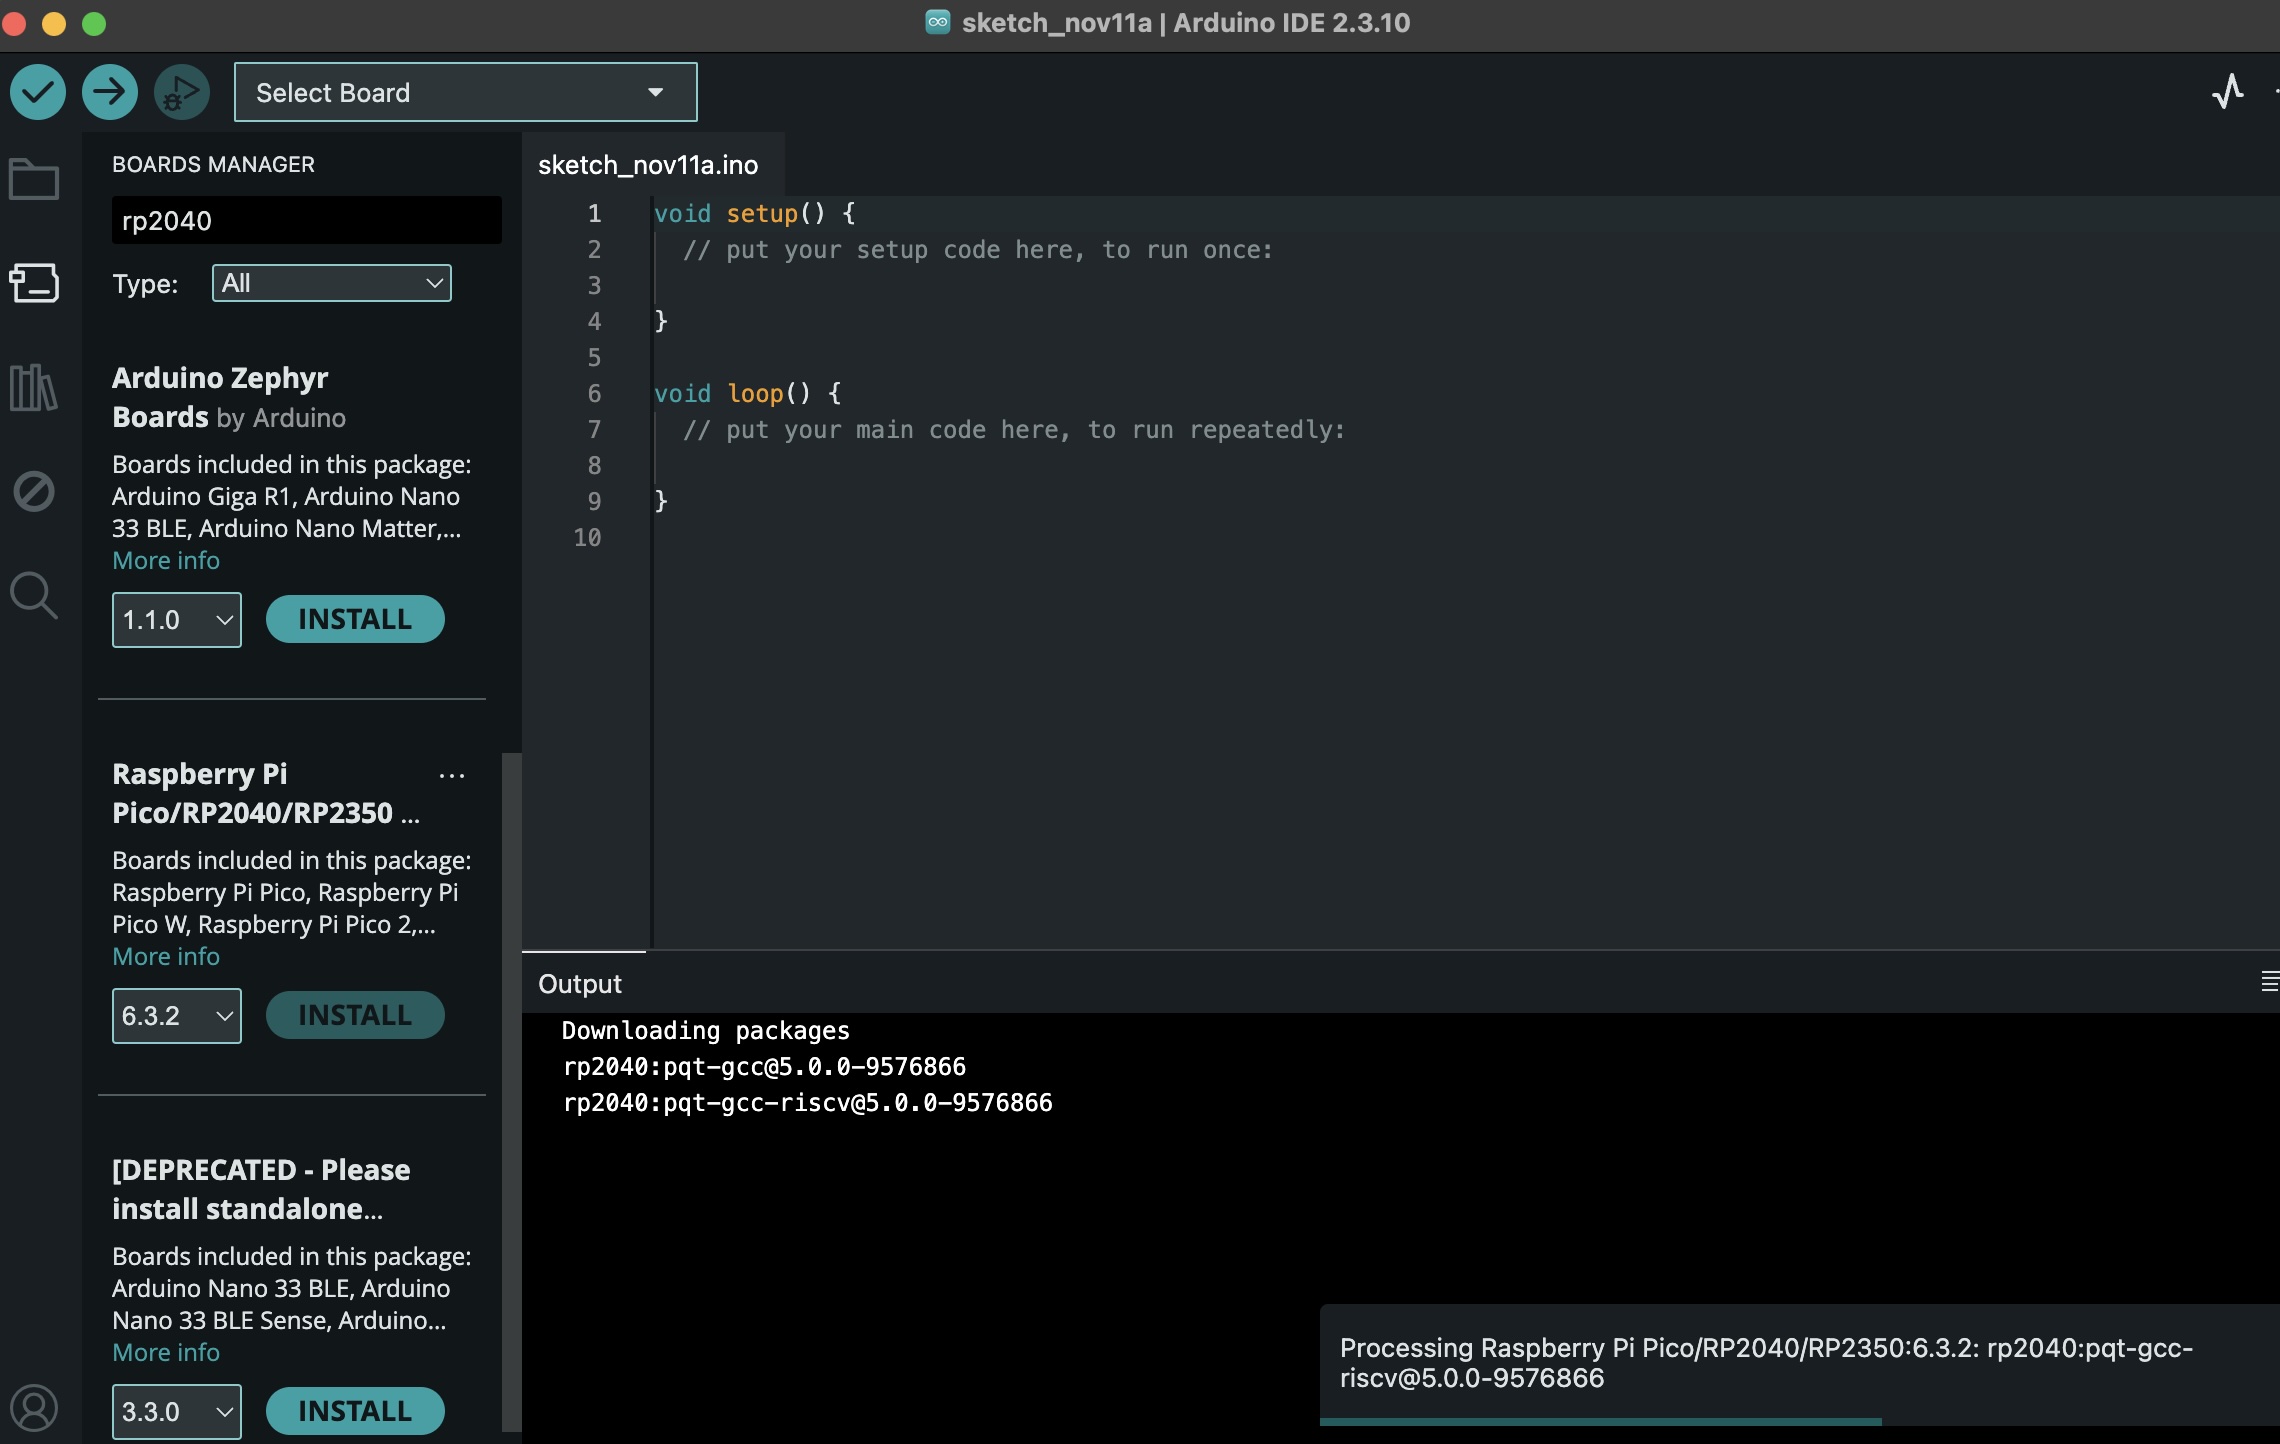
After installation, I selected Tools → Board → Raspberry Pi RP2040 Boards → Seeed XIAO RP2040, then selected the appropriate USB port under Tools → Port.
Step 2 — Install the Adafruit NeoPixel Library
After configuring the XIAO RP2040 board package, the next step was to install the Adafruit NeoPixel library in Arduino IDE. This library provides functions for controlling individually addressable RGB LEDs, allowing me to program the color, brightness, and animation of each LED on the WS2813 strip.
In Arduino IDE, I opened the Library Manager
from the left sidebar, searched for
Adafruit NeoPixel, and clicked
Install.
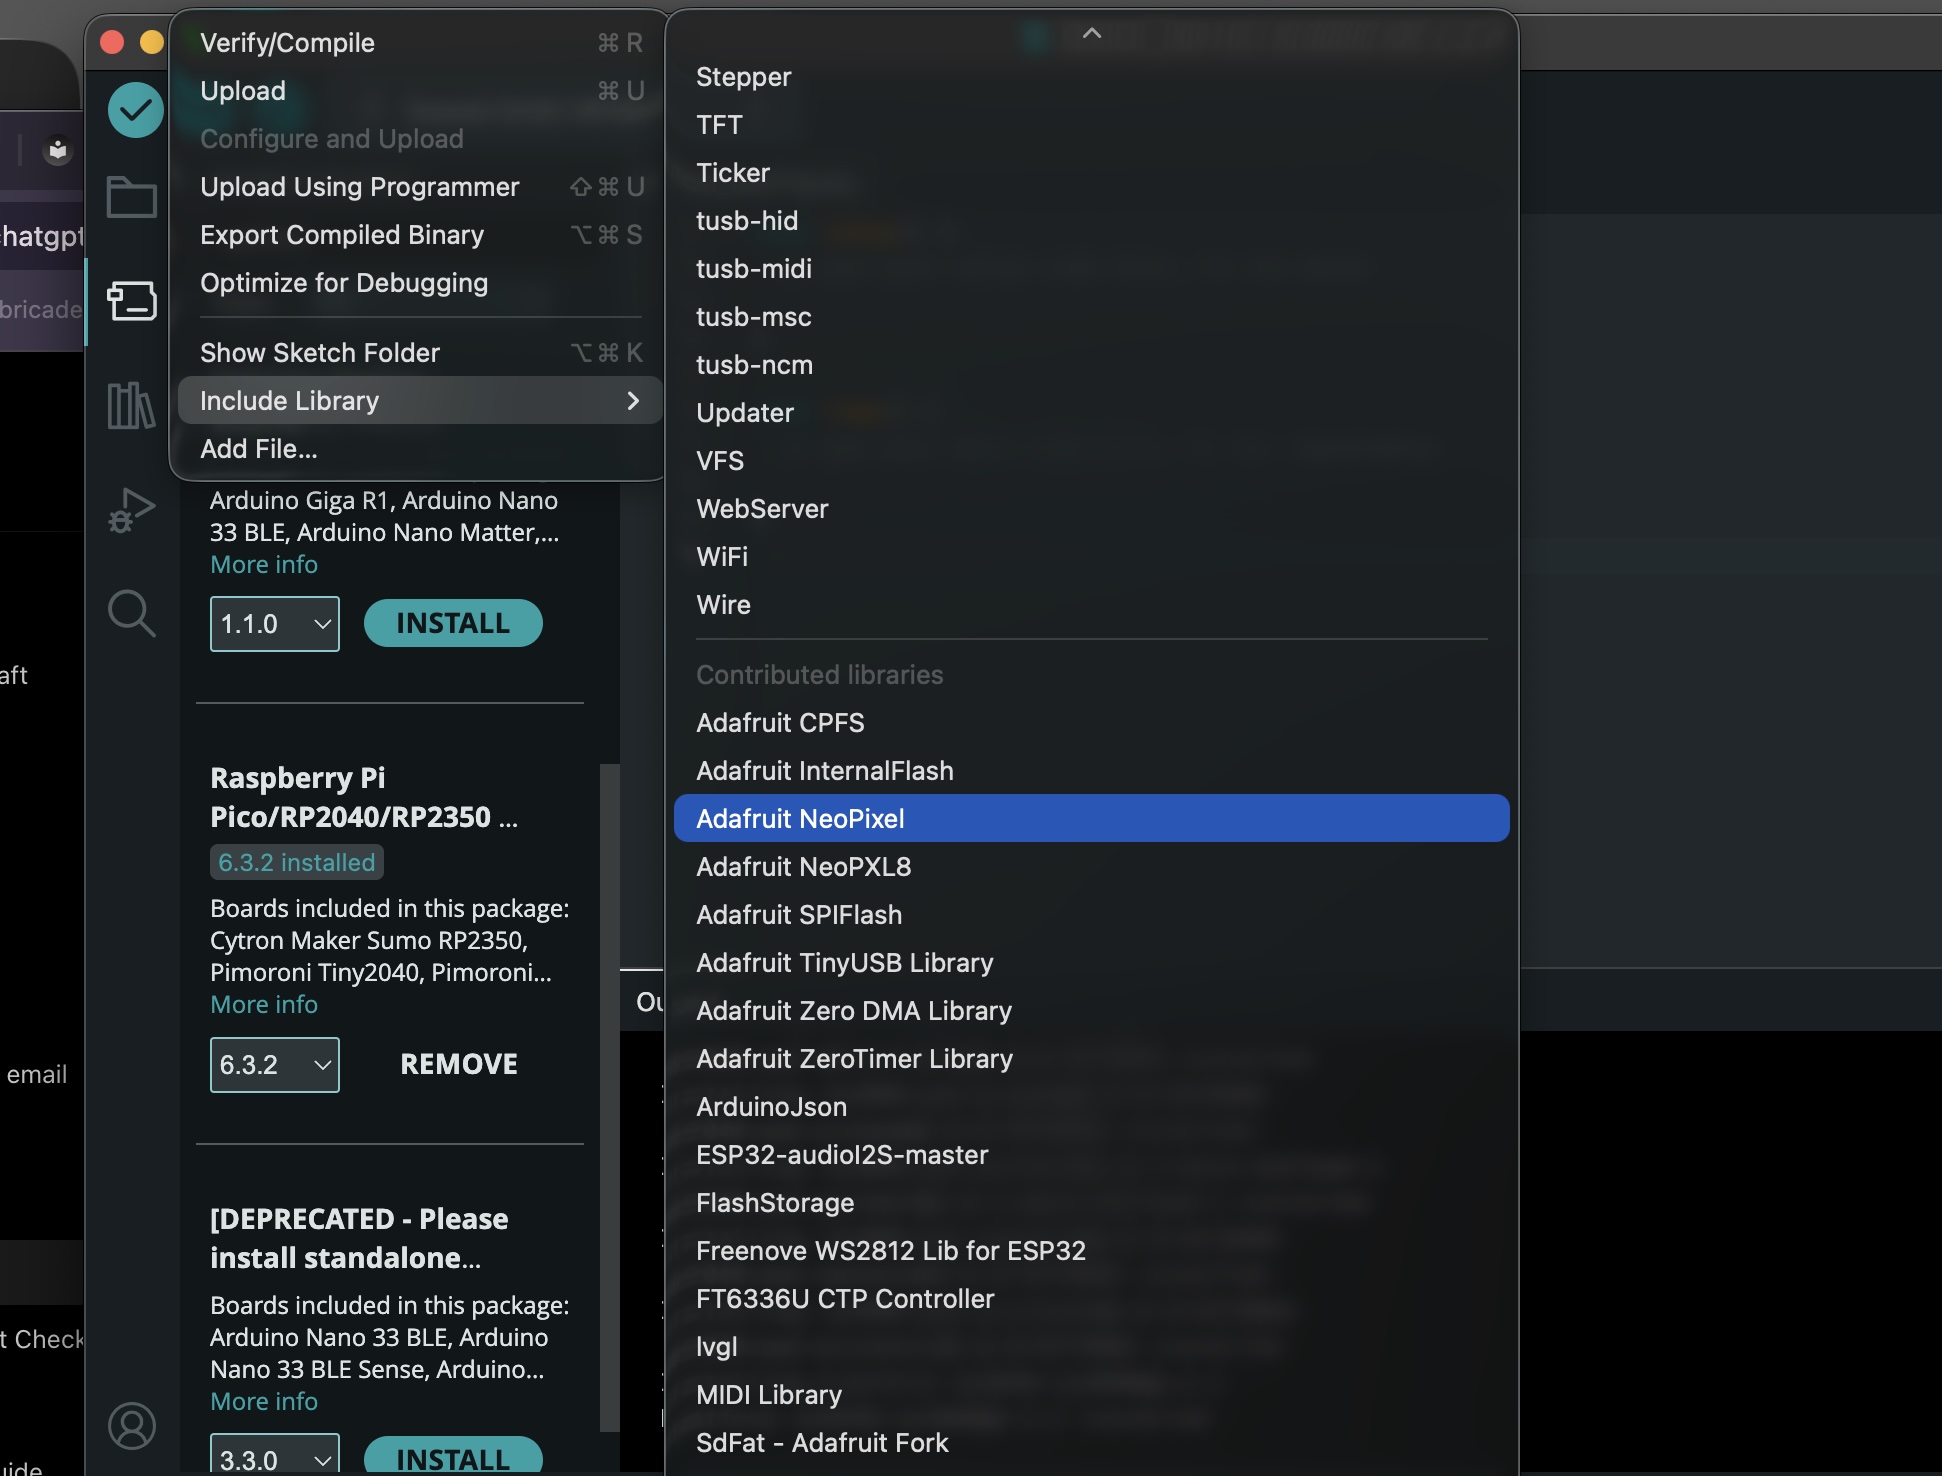
Once installed, I could include the library in my
Arduino sketch using #include <Adafruit_NeoPixel.h>.
This enabled me to address all 30 LEDs individually
and begin experimenting with programmable lighting
effects.
Step 3 — Coding Animation
The first effect I tried is a wave-like flowing light — colors travel along the 30 LEDs, creating a wave effect across.
I prompted chatGPT to create a "traveling light wave" and it gave me an interactive rendering of the effect and code.
Fig. — Interactive simulation of a traveling light wave across 30 individually addressable WS2813 RGB LEDs. Adjust the speed or pause the animation to examine the wave pattern.
The code:
#include <Adafruit_NeoPixel.h>
#include <math.h>

#define LED_PIN D0
#define LED_COUNT 30

Adafruit_NeoPixel strip(
  LED_COUNT,
  LED_PIN,
  NEO_GRB + NEO_KHZ800
);

// Animation parameters
float wavePosition = 0.0;
float waveSpeed = 0.12;
float waveWidth = 0.42;

void setup() {
  strip.begin();
  strip.setBrightness(60);
  strip.clear();
  strip.show();
}

void loop() {
  for (int i = 0; i < LED_COUNT; i++) {

    // Generate a traveling sine wave
    float wave =
      (sin(i * waveWidth - wavePosition) + 1.0) / 2.0;

    // Create a glowing pulse
    float intensity = pow(wave, 3);

    // Shift colors along the strip
    uint16_t hue =
      (uint16_t)(i * 1400 + wavePosition * 2500);

    uint32_t color = strip.ColorHSV(
      hue,
      255,
      (uint8_t)(intensity * 255)
    );

    strip.setPixelColor(
      i,
      strip.gamma32(color)
    );
  }

  strip.show();
  wavePosition += waveSpeed;
  delay(25);
}
The result:
3. Tools
4. Process and workflow
"Lorem ipsum dolor sit amet, consectetur adipiscing elit, sed do eiusmod tempor incididunt ut labore et dolore magna aliqua. "
How-to use footnotes for fabrication files
Fabrication files are a necessary element for evaluation. You can add the fabrication files at the bottom of the page and link them as a footnote. This was your work stays organised and files will be all together at the bottom of the page. Footnotes are created using 1 (without spaces, as shown in Step 1 & 2, and referenced as you see at the bottom of this page) You can reference the fabrication files to multiple places on your page.
4.1 Step 1
This model 3 was obtained by.. Lorem ipsum dolor sit amet, consectetur adipiscing elit, sed do eiusmod tempor incididunt ut labore et dolore magna aliqua.
4.2 Step 2
The laser cut nesting 2 was created using.. Lorem ipsum dolor sit amet, consectetur adipiscing elit, sed do eiusmod tempor incididunt ut labore et dolore magna aliqua.
4.3 Step 3
...
5. Results
Results & documentation
- Don’t forget to document the outcome including:
- Final result
- Photos from different stages
- Videos of movement or interaction, show how a material moves, something was assembled or the interaction
- Include measurements or a reference object to give a sense of scale
- Describe the (material) properties of what you made
- Comparison between attempts, if you did multiple experiments or generated multiple files before fabricating / deploying. You can use a table as shown in week 4
6. Weekly reflection & critical thinking
- What did I learn? What did I personally find interesting or surprised me?
- What would I do differently? If something "failed" do I know how else to tackle it now?"
- How does this connect to my final project or my learning trajectory?
- What are implications and possible applications, think also from the ethical or environmental aspect, how it could connect to your practice and project?
NuEval — final step
Go to NuEval and fill in the checklist, when not complete notify your instructor.
7. Fabrication files & References
-
File: 3d modelling of mannequin ↩
-
File: Laser cut sheets ↩
-
Reference: Author; Title; Source; year ↩