BioChromes
00 Assignment
- Research and document inspiration from artists, projects or processes working with natural or bacterial dyes, preferably considering local ingredients and resources.
- Produce at least one natural dye on fabric and experiment with colour modifiers.
- Produce at least one ink or one pigment from a natural colour source.
- Document the recipes, ingredients and complete process so that the experiments can be reproduced.
- Document changes, tests and unexpected results that occur during the experiments.
- Submit some of the resulting colour swatches to the analog material library of the lab, approximately 20 × 20 cm.
01 Inspiration & Research
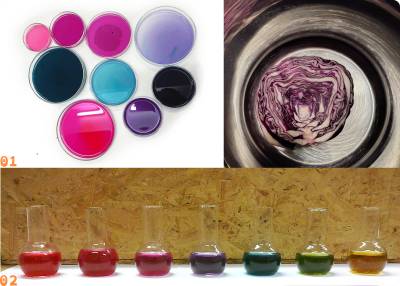
01 Natural Dyeing & pH Modification – Saskia Helinska
02 Red Cabbage pH Indicator – Epaenurk (CC BY-SA 3.0)
This is the first time I am intentionally working with natural dyes, so I do not have any previous experience with the topic.
However, I have accidentally dyed quite a few things with natural materials before. One example is my wooden kitchen worktop, which once got stained by fresh turmeric root. I also managed to dye our bathtub twice.
The first time was after our walnut harvest. I temporarily stored the unpeeled walnuts in the bathtub overnight, and the dark stains from the walnut husks remained visible for a very long time before slowly fading.
The second time happened with homemade slime for my children, which we had coloured using blueberries.
So even though I have never really worked with natural dyes intentionally, I have already experienced how surprisingly strong and persistent colours from plants and food can be.
This week, Julia and I will work very closely together. We decided to keep the scope small and focus only on what is really necessary for the assignment.
The idea is to avoid making the project more complicated than it needs to be and to see how well this approach works for us. Since we are both working on similar experiments, we can share parts of the research, preparation and testing while still documenting our own results.
Colors That Change
When we think about dyeing textiles, we usually think about choosing a color and trying to make it last. But what if we could change the color even after the material has been dyed?
Some natural pigments react to their environment, especially to changes in pH. This makes it possible to create different colors from a single dye.
A good example is red cabbage. Its pigments, called anthocyanins, change color depending on whether their environment is acidic, neutral or alkaline. This opens up interesting possibilities, not only for dyeing but also for creating patterns and experimenting with color directly on textiles.
This means that instead of mixing different dyes to create new colors, it is possible to modify a single dye chemically. In the process, I came across two exciting projects
Rain Palette – Dahea Sun (2014)
Dahea Sun developed textiles dyed with red cabbage that react to the pH of rainwater. The garments combine traditional textile techniques such as knitting, embroidery and crochet with natural dyes. Depending on the acidity of the rain, the fabric changes color, making environmental influences visible.
Cabbage Blues – Gerardo Sandoval Osio (2021)
Using red cabbage as a natural dye, Gerardo Sandoval Osio experiments with different shades of blue and purple on cotton and paper. He combines pH modification with traditional Shibori techniques and even transforms the leftover cabbage leaves into sculptural objects. The work highlights the unpredictable and temporary nature of plant-based colors.
02 First Ideas
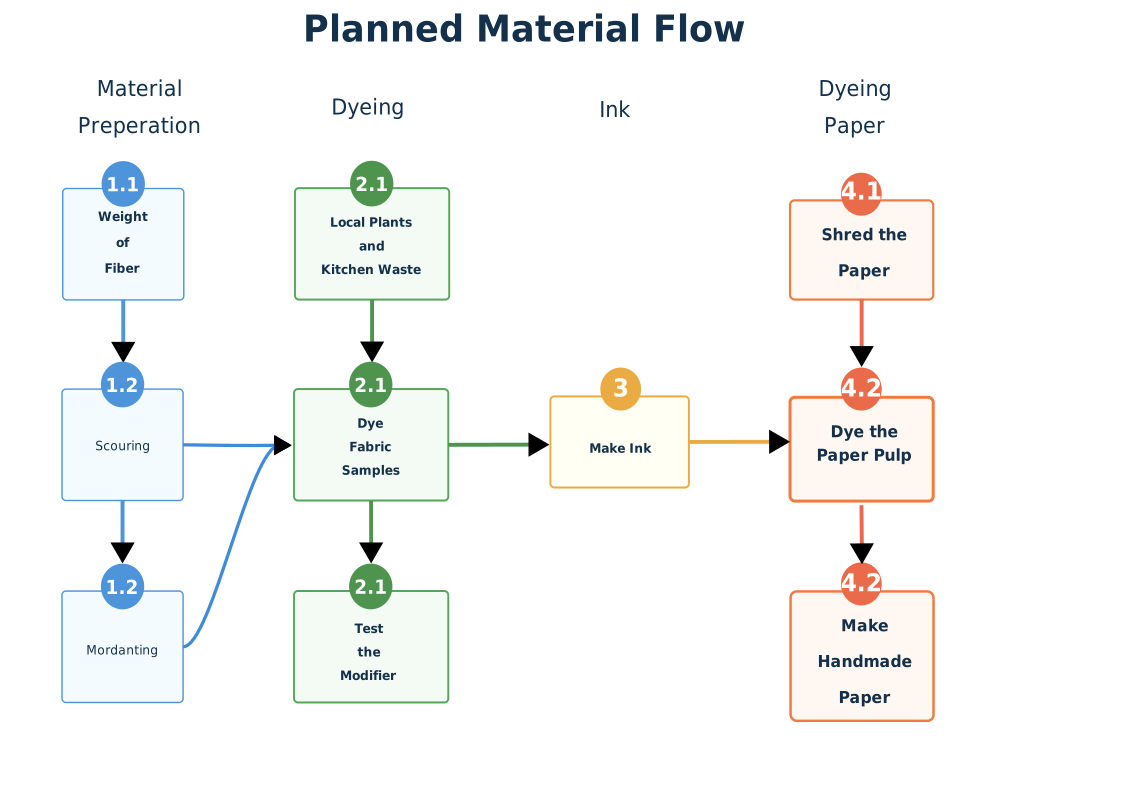
I started by thinking about the workflow I want to follow for this week.
First, I want to pretreat the different materials and create one dyed sample for each step so that I can compare the results.
Then I will extract my natural dye and use it to dye the prepared materials. Instead of discarding the remaining dye bath afterwards, I want to reuse it to make ink.
In the next step, I want to use this ink to colour recycled paper pulp and then make new handmade paper from it.
I added this final step because I am especially interested in testing how well a recycled material can be coloured and how the colour changes after going through several stages of reuse.
03 Material Preparation
Because we are working together a lot this week and I have to see how much time I can spend in the lab, Julia washed all of the materials for us.
For the dyeing experiments, we prepared a range of different fibers, yarns and fabrics.
Combed fibers:
- Alpaca wool
- Tencel
- Ramie
- Hemp
- Bleached linen
Yarns:
- 80% recycled linen / 20% linen
- 100% cotton
- 100% linen
- 100% wool
Fabrics:
- 100% wool
- 100% silk – woven Peace Silk
- 100% silk – Peace Silk jersey
- 100% cotton
- 100% linen
Keeping It Simple... More or Less At this point, it already became clear that we were not quite sticking to our plan of doing only the absolute minimum. But since washing and preparing two fabric samples takes almost the same amount of effort as preparing ten, we decided to make a few more samples at once.
Weight of Fiber
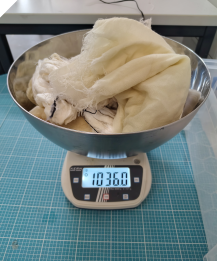
Before dyeing, we weighed all material samples. The weight of fiber (WOF) is used as the reference for calculating the amount of mordant, dye material and other additives.
Animal fibers: 460 g Plant fibers: 634 g
Scouring
For washing and preparing the materials, Julia followed this instruction: Flora & Farbe – Vorwaschen.
All fabrics were washed for 45 minutes at 80 °C. The temperature was increased and decreased slowly because wool and linen should not be exposed to sudden temperature changes.
- Animal fibers – 460 g: 1 tbsp mild detergent
- Plant fibers – 634 g: 1 tbsp mild detergent + 1 tbsp washing soda
Sorting the Materials
After washing, we divided the materials into different groups for the following treatments. The plant-based fibers were split into three equally sized batches, while the animal-based fibers were divided into two.
Sorting everything took us quite a while because one of the yarns had become badly tangled during washing, and some of the wool had already started to felt a little.
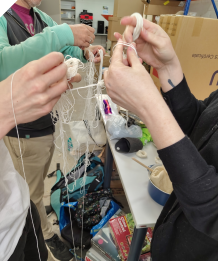
Luckily, two colleagues from the lab walked by while we were sorting the yarn and spontaneously decided to help us.
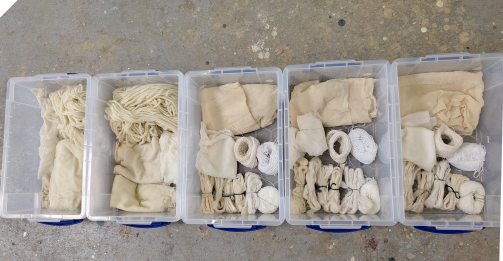
Washed only:
- Animal fibers: 230 g
- Plant fibers: 210 g
Total: 440 g
Alum mordanted:
- Animal fibers: 230 g
- Plant fibers: 210 g
Total: 440 g
Tannin mordanted, followed by alum: - Plant fibers: 210 g
Total: 210 g
Mordanting
First, we calculated the correct WOF (Weight of Fiber). Since some of the materials were still slightly wet after washing, the measured weight was not accurate enough to use directly.
Based on the calculated WOF, we calculated and weighed the required amount of alum and dissolved it in water.
Next, we placed all materials intended for alum mordanting into a large pot with water. We added the dissolved alum and slowly heated the bath so that the materials could warm up gradually.
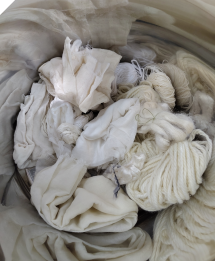
Alum mordanted:
- Alum: approx. 50 g (around 10%)
Tannin mordanted, followed by alum:
- Tannin: approx. 40 g (around 20%)
- Alum (Afterwards): approx. 20 g (around 10%)
04 Dye Preparation
I started my dyeing experiments with red cabbage
Red Raw Cabbage
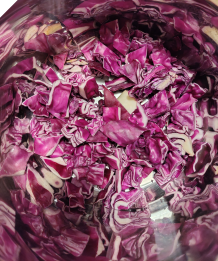
Red Cabbage Dye Recipe
For 50 g WOF:
-
100 g red cabbage
-
2 L water
Step 01
Cut the red cabbage into small pieces.
Step 02
Weigh out 100 g of red cabbage.
Step 03
Add the cabbage to 2 L of water and heat to 80°C for 1 hour.
Step 04
Strain out the cabbage. Make sure to place a container under the strainer because we want to keep the liquid, not the cabbage. I almost forgot that part!
pH ≈ 7 (neutral)
After dyeing with red cabbage, I realized how much fun it was and wanted to experiment a little more. So I collected some additional plant materials from our lab: mallow flowers, yellowwood, birch leaves, and sandalwood.
As you can see, my plan to keep things minimal didn't really work out. But at least we are now starting a small dye library, since we don't have one in our lab yet.
Mallow Flowers
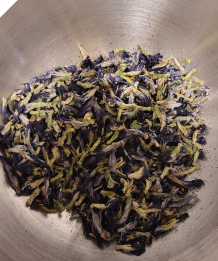
Mallow Flower Dye Recipe
For 25 g WOF:
-
50 g mallow flowers
-
1 L water
Step 01
Weigh out 50 g of mallow flowers.
Step 02
Add the flowers to 1 L of water and heat to 80°C for 1 hour.
Step 03
Strain out the flowers and collect the colored liquid for dyeing.
pH ≈ 7 (neutral) – Estimated, as the pH test strip was slightly stained blue by the dye.
Red Onion Skin
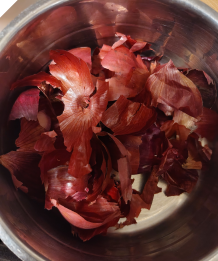
For 25 g WOF:
-
12.5 g yellow onion skins
-
2 L water
Step 01
Collect the dry outer skins of red onions.
Step 02
Weigh out 12.5 g of onion skins.
Step 03
Add the onion skins to 2 L of water and heat to 85–95°C for 1 hour.
Step 04
Remove the onion skins and collect the colored liquid.
pH ≈ 5
Yellowwood, Birch Leaves, and Sandalwood.
I used the Kremer Pigmente instructions from the store where we bought the materials.
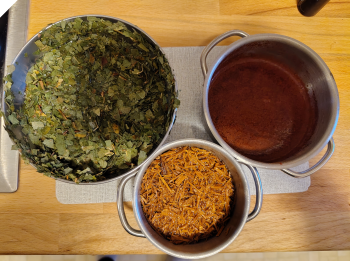
I used the same process for yellowwood, birch leaves, and sandalwood.
For 25 g WOF :
-
50 g dye material (yellowwood, birch leaves, or sandalwood)
-
2 L water
Step 01
Weigh out 50 g of the selected dye material.
Step 02
Soak the material in 2 L of water overnight.
Step 03
Following the manufacturer's instructions, heat the mixture to 75°C for 45 minutes.
Step 04
Strain out the plant material and keep the colored liquid for dyeing.
Yellowwood pH ≈ 8
Birch Leaves pH ≈ 6
Sandalwood pH ≈ 9
Turmeric
Finally, I also experimented with turmeric because I saw that it can create very beautiful color changes when modified afterwards.
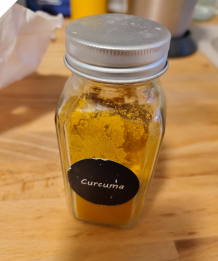
Turmeric Dye Recipe
For 25 g WOF:
12,5 g turmeric powder
2 L water
Step 01
Weigh out 12,5 g of turmeric powder.
Step 02
Add the turmeric powder to 1 L of water and stir well.
pH ≈ 7 (neutral)
05 Natural Dyeing
Red Cabbage, Onion Skins and Mallow Flowers
I used the same dyeing process for red cabbage, onion skins, and mallow flowers.
Step 01
Place the wet fabric in the dye bath and slowly heat to 80°C, as animal fibers do not like rapid temperature changes.
Step 02
Keep the dye bath at 80°C for 1 hour.
Step 03
Let the dye bath cool down slowly with the fabric still inside.
Step 04
Leave the fabric in the cold dye bath for another 8 hours.
Step 05
Remove the fabric from the dye bath and rinse it thoroughly with clean water until the water runs mostly clear
Here you can see my undyed fabric samples compared to the ones dyed with red cabbage.
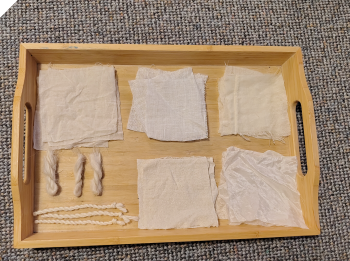
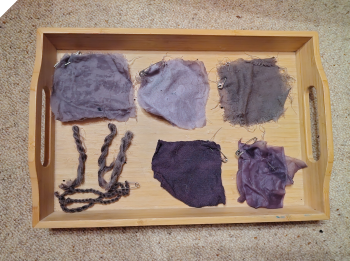
It is clearly visible that some materials absorbed the color much better than others.
Yellowwood, Birch Leaves and Sandalwood
I used the same dyeing process for yellowwood, birch leaves, and sandalwood.
Step 01
Place the wet fabric in the dye bath and slowly heat to 75°C, as animal fibers do not like rapid temperature changes.
Step 02
Once the dye bath reaches 75°C, turn off the heat and let it cool down slowly with the fabric still inside.
Step 03
Leave the fabric in the cold dye bath for another 8 hours.
Step 04
Remove the fabric from the dye bath and rinse it thoroughly with clean water until the water runs mostly clear
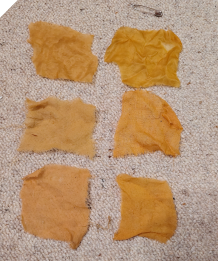
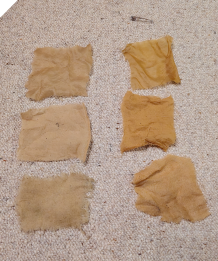
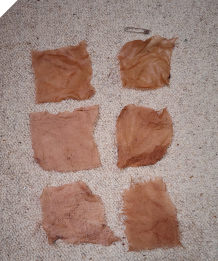
Here are the dyeing results in the following order: Yellowwood, Birch Leaves, and Sandalwood.
Materials (top to bottom): Silk, Cotton, Linen
Left: Unmordanted
Right: Mordanted with alum
| Dye source | Material | Result without mordant | Result with alum mordant |
|---|---|---|---|
| Yellowwood | Silk | Warm golden yellow | Stronger, brighter golden yellow |
| Yellowwood | Cotton | Muted ochre yellow | More saturated yellow-orange |
| Yellowwood | Linen | Light ochre yellow | Stronger golden yellow |
| Birch leaves | Silk | Pale beige-gold | Clearer golden yellow |
| Birch leaves | Cotton | Light beige | Warm ochre yellow |
| Birch leaves | Linen | Muted beige | Warm golden beige |
| Sandalwood | Silk | Light terracotta | Warm terracotta |
| Sandalwood | Cotton | Dusty salmon pink | Stronger reddish terracotta |
| Sandalwood | Linen | Muted dusty pink | Stronger reddish brown |
Turmeric
I used the following dyeing process for turmeric.
Step 01 Place the wet fabric in the dye bath and slowly heat it to 80°C.
Step 02 Keep the dye bath at 80°C for 1 hour.
Step 03 Let the dye bath cool down slowly with the fabric still inside.
Step 04 Remove the fabric from the dye bath and rinse it thoroughly with clean water until the water runs mostly clear.
pH Modification
Color Modifying
Red cabbage contains anthocyanins, natural pigments that react to changes in pH. By adding simple ingredients like lemon juice or baking soda, the color can change from pink to purple, blue or even green.
The downside is that these colors are not very stable and can change or fade when exposed to light, washing or changes in pH. But for experimenting, this makes red cabbage especially interesting.
I used lemon juice to lower the pH to 3 (acidic) and washing soda to raise it to 11 (alkaline).
Results
Materials (top to bottom):
- Wool
- Wool yarn
- Wool fabric
- Silk jersey
- Silk
- Cotton
- Linen
Dyeing conditions (left to right):
- Washing soda – pH 11
- Washing soda + mordant
- Unmodified dye – pH ≈ 7
- Unmodified dye + mordant
- Lemon juice – pH 3
- Lemon juice + mordant
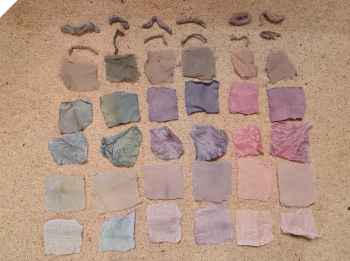
Red Cabbage: Material, Mordant and pH Comparison
| Material | Washing soda, pH ≈ 11, unmordanted | Washing soda, pH ≈ 11, mordanted | Unmodified, pH ≈ 7, unmordanted | Unmodified, pH ≈ 7, mordanted | Lemon juice, pH ≈ 3, unmordanted | Lemon juice, pH ≈ 3, mordanted |
|---|---|---|---|---|---|---|
| Wool fibre | Grey | Dark grey | Grey-Lila | Grey-brown | Muted pink-brown | Muted purple-brown |
| Wool yarn | Pale beige | Grey-green | Beige-grey | Grey | Beige-pink | Grey-beige |
| Wool fabric | Beige-grey | Green-blue | Lilac | Lilac | Pink | Pink-purpeln mjjjjjjjj nnnnnnnnnn |
| Silk jersey | Light blue-grey | Blue-green | Lilac | blue-purple | Pink | Purple |
| Woven silk | Light blue-grey | Turquoise-grey | Light lilac | Blue-purple | Pink | Mauve-pink |
| Cotton fabric | pale green-grey | Cream / very weak colour | Pale lilac | lilac-grey | pale pink | Pale dusty pink |
| Linen fabric | pale blue-grey | Light blue | pale lilac | Light lilac-grey | pale pink | Pale pink |
Here you can see my results with turmeric. I used silk jersey as the fabric.
The samples on the right are unmordanted, while the samples on the left are mordanted.
From top to bottom:
- Lemon
- Normal dye bath
- Washing soda
It is clearly visible that the lemon caused almost no color change compared to the normal sample. The washing soda, however, created a strong red tone and therefore a much more noticeable color change.
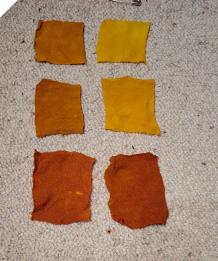
| Material | Mordanting | Modifier | Observed colour |
|---|---|---|---|
| Silk jersey | Unmordanted | Lemon juice | Bright yellow |
| Silk jersey | Mordanted | Lemon juice | Golden yellow / ochre |
| Silk jersey | Unmordanted | None | Strong yellow |
| Silk jersey | Mordanted | None | Golden yellow / orange |
| Silk jersey | Unmordanted | Washing soda | Strong orange-red |
| Silk jersey | Mordanted | Washing soda | Strong rust-red |
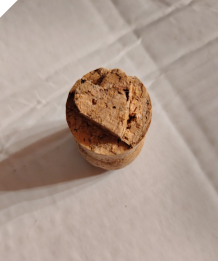
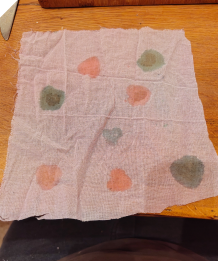
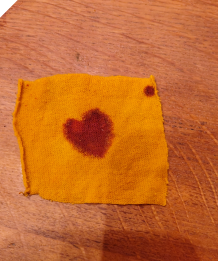
I also carved a small stamp from an old cork and dipped it into washing soda or citric acid to modify only selected areas of the dyed fabric.
This worked quite well and created visible local color changes. The liquid spread slightly into the surrounding fabric, so the edges of the stamped areas were not completely sharp, but the effect was still clearly visible.
06 Ink
Red Cabbage Ink
I used part of the leftover red cabbage dye bath to make a natural ink by simply reducing it.
After reducing the dye bath, I had about 30 ml of concentrated ink left.
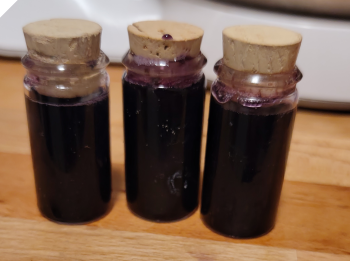
For the remaining dye bath, I decided to use it directly to color my paper pulp
07 Dyeing Paper Pulp
For some simple tests, and with my final project in mind, I wanted to see if I could use leftover dye to color paper pulp.
Preparing Waste Paper
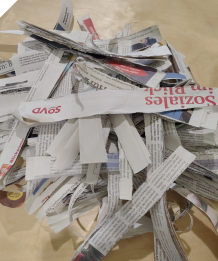
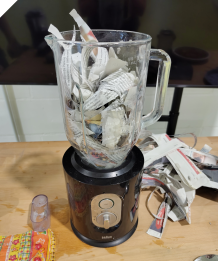
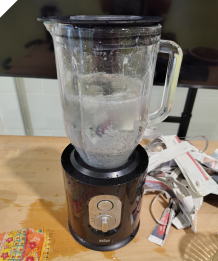
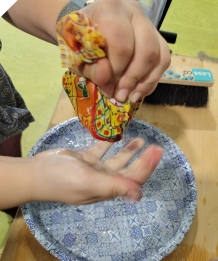
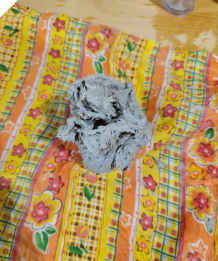
I tore up some old newspapers and blended them with water. To make the pulp easier to transport, I used a piece of fabric to squeeze out some of the water.
Dyeing the Pulp
Unfortunately, I did not have enough time to turn the dyed paper pulp into finished sheets, so for now I only have my dyed paper pulp balls.
If I want to continue working with them later, I can simply soak them in water again and process the pulp further.
The different samples also show differences in how well the colors were absorbed by the paper. Interestingly, the paper itself also influenced the pH value of the dye baths, which affected the final colors.
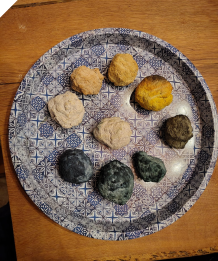
| Position | Dye used for the paper | Resulting colour |
|---|---|---|
| 12 o’clock | Yellowwood | Dark olive brown |
| 2 o’clock | Turmeric | Muted dark green |
| 3 o’clock | Red cabbage + soda | Very dark green |
| 5 o’clock | Red cabbage | Dark blue-grey |
| 6 o’clock | Flowers + soda | Pale beige |
| 7 o’clock | Flowers | Golden ochre |
| 10 o’clock | Birch leaves | Mustard yellow |
08 Color Library
Starting a Color Library
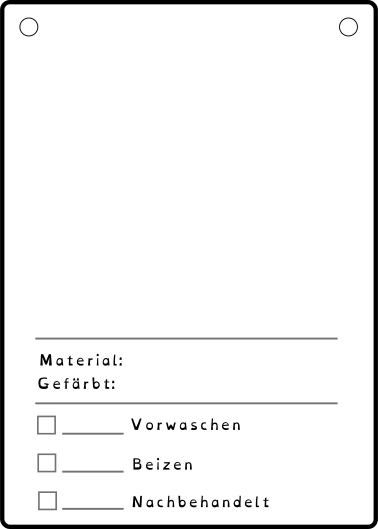
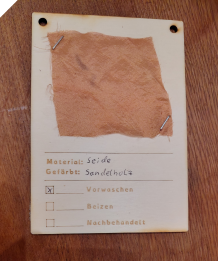
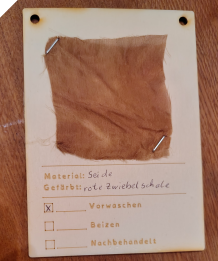
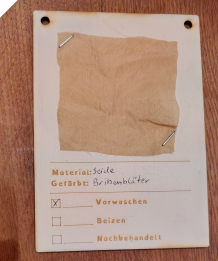
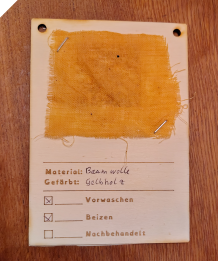
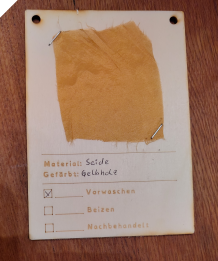
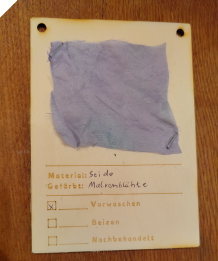
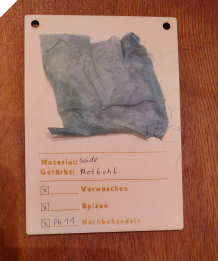
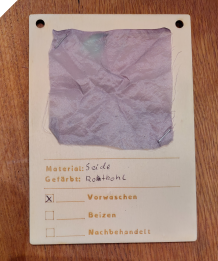
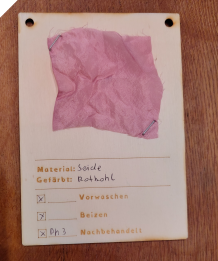
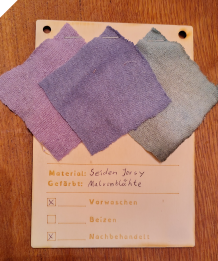
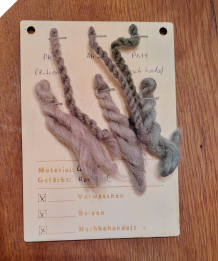
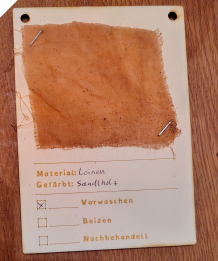
We do not have a color library in our FabLab yet, so we decided to start one as part of this week. We developed a simple general design that can be cut from wood. Each card will hold a sample of the dyed material together with the most important basic information, such as the material, dye source and preparation. A QR code will link to the digital documentation, where the full recipe and process can be found. The idea is to create a physical library that can grow over time and can be used as a quick reference for future dyeing experiments.
09 Reflection
This week, the documentation and all the photos became a bit overwhelming. I took way more pictures than I ended up uploading because I underestimated how much time documenting everything and preparing the images would take.
I had so much fun with my dyeing experiments that I ran out of time for the documentation.
So my plan for next week is to focus on the essentials first, document everything properly, and then see what I still have time for.
99 Waste of the Week – Kitchen Waste
This week showed me that kitchen waste can be a surprisingly useful resource for natural dyeing.
Things like onion skins, leftover red cabbage or other plant-based food waste can still be used to extract color instead of being thrown away immediately. The colors are not always as strong or predictable as synthetic dyes and some of them may fade or change over time, especially when exposed to light or changes in pH.
Still, I think this is exactly what makes these materials interesting. They are already available, cost almost nothing and can be used for experiments before they finally become waste.
Even the leftover dye baths can be reused again, for example to color paper pulp or to make a concentrated ink. This means that one material can be used several times before it is finally discarded.