State of the art, project management and documentation
1. Objective
I enjoy being a FabLab coordinator as it's a very versatile job that lets you meet lots of different and interesting people. Unfortunately, managing the team and development projects left me with hardly any time for creation. This is why I decided to take the Fabricademy course.
Furthermore, this course will introduce me to an important aspect of textiles that I am unfamiliar with: technological textiles. I am really looking forward to discovering e-textiles and robotic textiles!
2. References, research & inspiration
Several themes inspired me at the moment, even if I have no clue how I could make my inspirations get textiles. I don't know if I would prefer to explore one of these themes or mix them together. I haven't really narrowed down the themes that interest me. For me, inspiration should be plentiful.
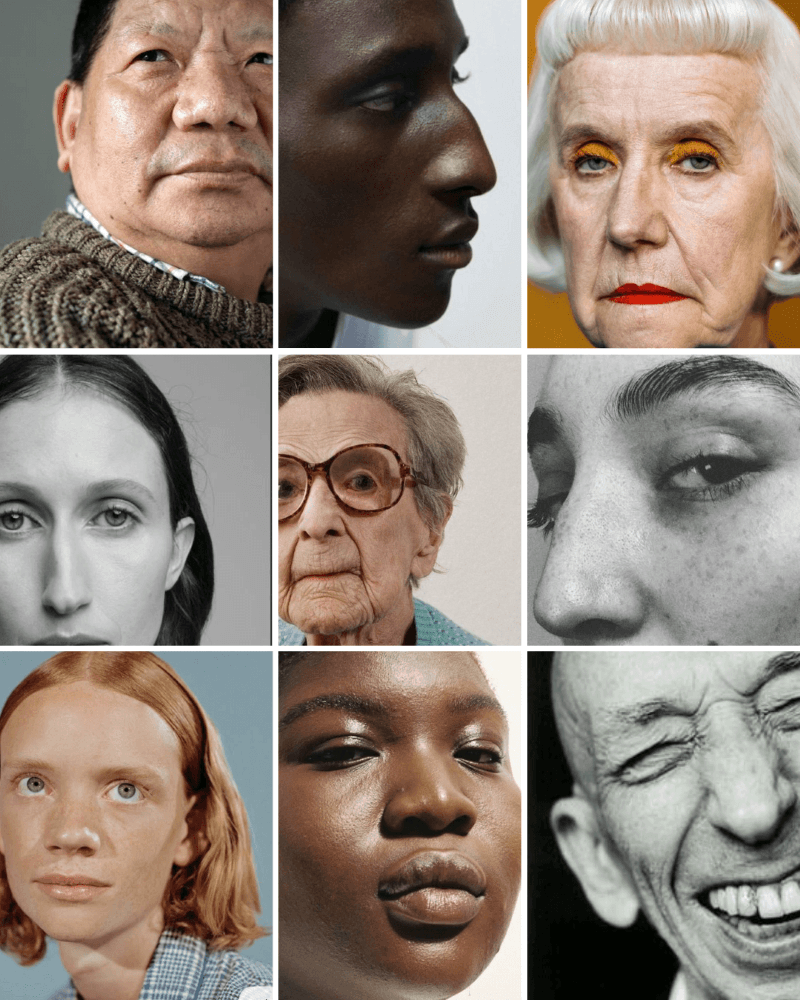
I am very inspired by portraits of people, especially those with atypical faces. They seem to have so much to tell just from their faces. You can sense their history, their soul and their life in their faces. As can be seen in my previous work, portraits and people inspire me, as I often create collages or manipulate portrait images.
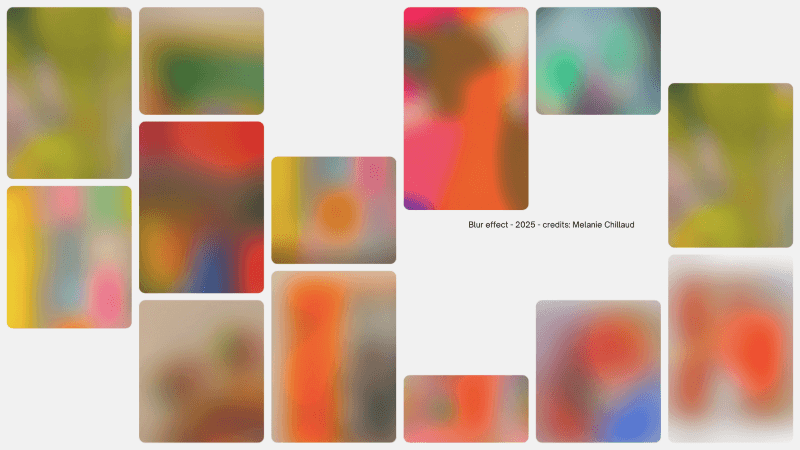
I am also inspired by all kinds of blur. Blurs due to errors when taking pictures (e.g. bugs on the phone or focusing errors), blurs that can be created using applications (which I sometimes use), and blurs that can be created using artistic or craft techniques (e.g. airbrushing, the moiré effect, silk screen printing or monotypes).
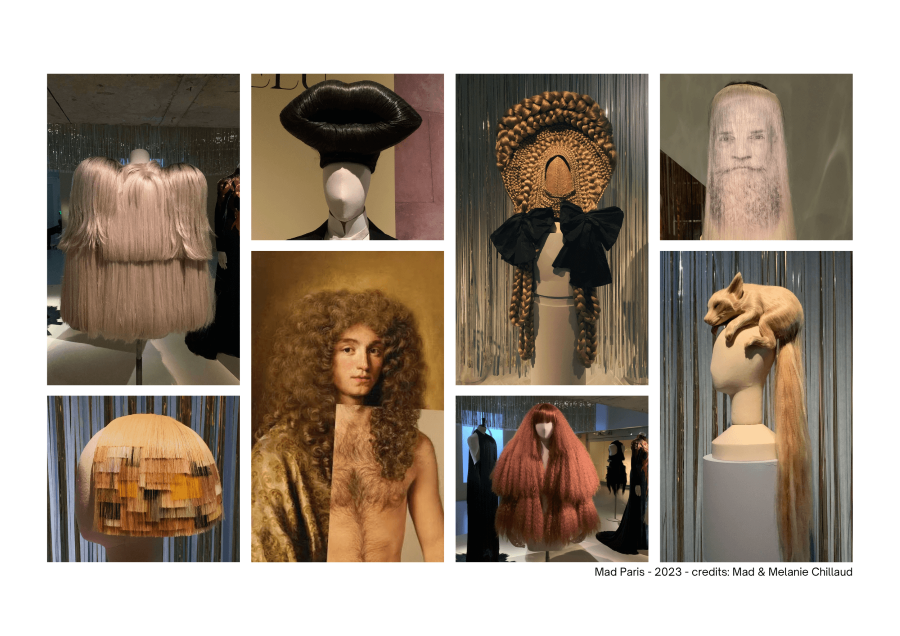
Finally, I would like to talk about a material that has inspired me for years, even though I have not yet used it in my work: hair. Perhaps it's because working with human materials for textiles seems kind of forbidden. Beautiful and forbidden at the same time. I had never thought about how I could use them in my work before, but I found a lot of inspiration in an exhibition at the MAD museum in Paris. The exhibition, held in 2023, was called "des cheveux et des poils". See below for the poster and some of the exhibited works.
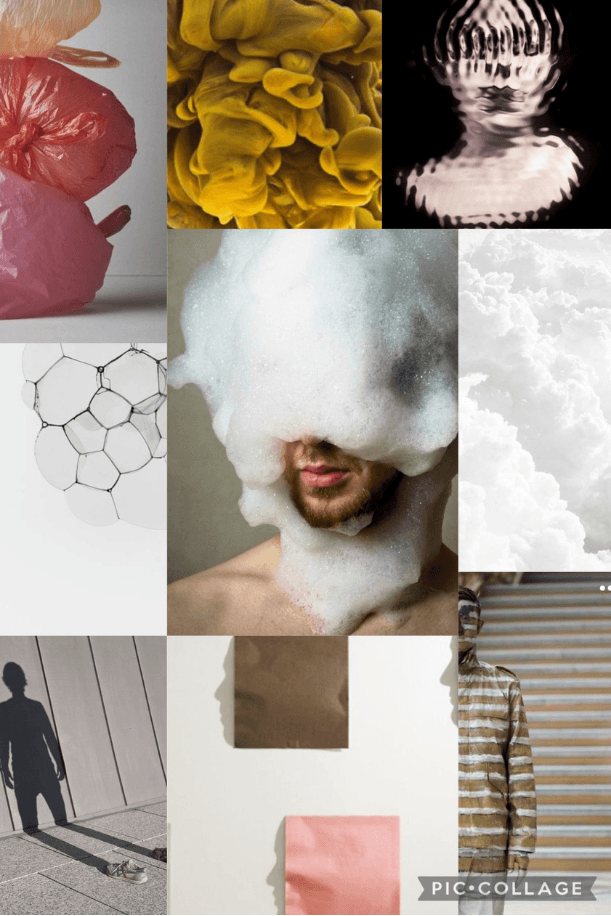
Finally, I would like to challenge myself by making the intangible tangible. Examples of intangible things or objects that interest me: wisps of smoke, clouds, fog, thoughts, shadows, light, air, speed, time, beauty, bubbles, foam, fire, the invisible
3. Tools
List of the tools I used for this first week
- Make collage - Canva
- Compress picture - TinyPNG
- Resize and/or crop images: Windows Photos
- Review English
4. Internet website - Principles
Classical internet website are coded in html, and structured with css. We could build a site directly in html but I would take ages to learn html language. To avoid that we will used markdown in GitLab, which is a language very easy to learn. Indeed, markdown is closed to our everyday language and its structure is quite similar to a word document. So we will write our code in markdown in Gitlab. However, to turn it into a website, we need a conversion tool to convert Markdown to HTML: zensical. Zensical and CSS files are then used to shape the website (fonts, colors, structure, etc.).
The project structure in GitLab is organized as follows:
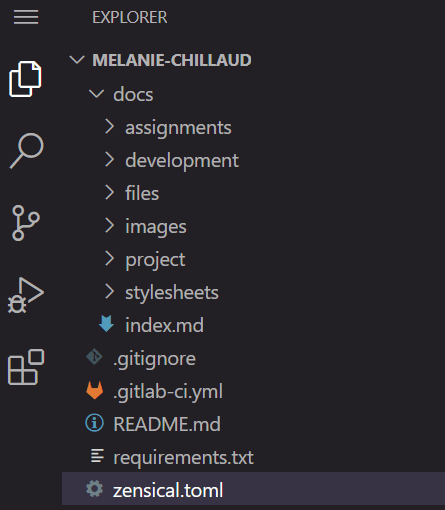
- Files and Images are the folders were files and images are loaded
- Assignments files is the folder were we write and structure the text in markdown
- Zensical.toml is the file were you can change fonts and colors
- Slylesheets (extra css) is the folder where additional style changes can be made
5. Process and workflow
I tried both methods: working online (directly on the website) and working locally (on my computer). The second method was quite complex to install, but it was worth it because, once installed, it is much quicker to make changes and see the results instantly. Additionally, it avoids the need for too many commits.
5.1 Work online
I go to my website: https://class.textile-academy.org/2027/melanie-chillaud. I click on 'Git repository' in the top right-hand corner.

Then I click the 'Connect with Fablab.io' button. We are now in the GitLab structure created for my website.
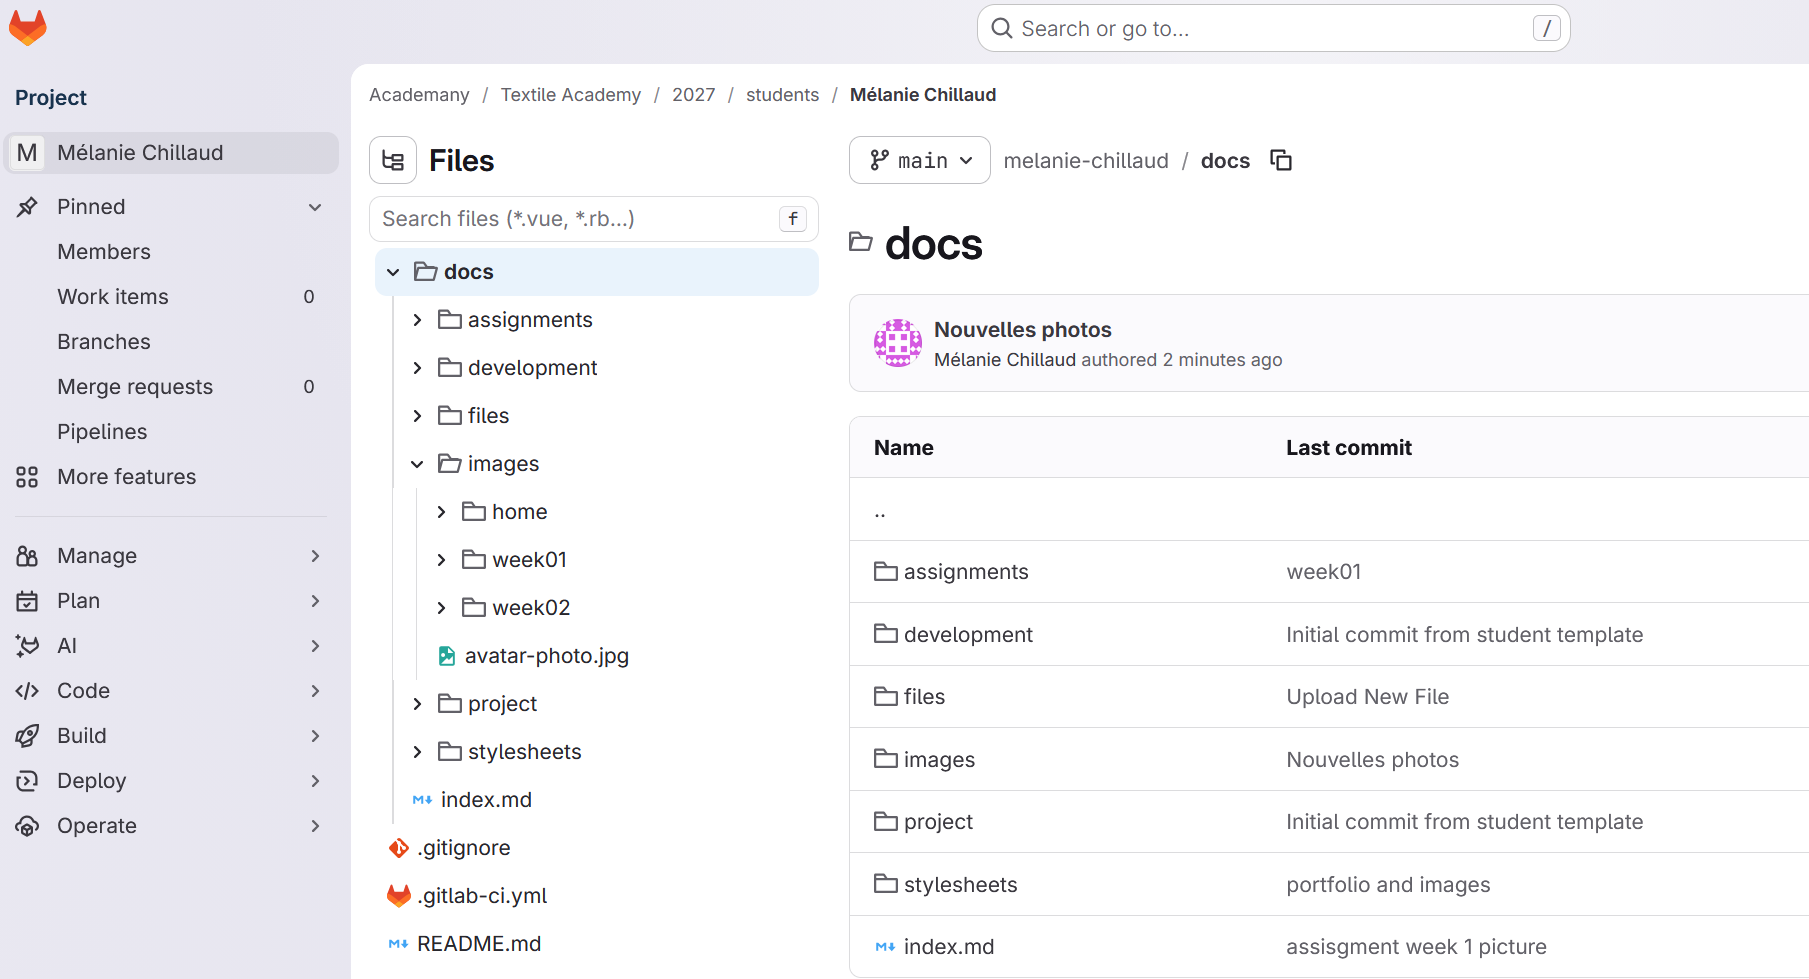
5.1.1 Load images and files
Go to Docs/Images
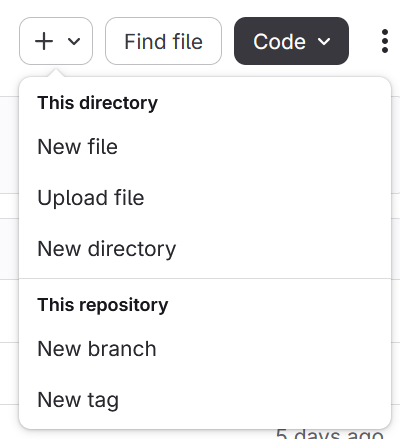
Click the + button in the top right corner and upload the file.
5.1.2 Change website content
Click on 'Code' in the top right corner and then select 'Web IDE'.
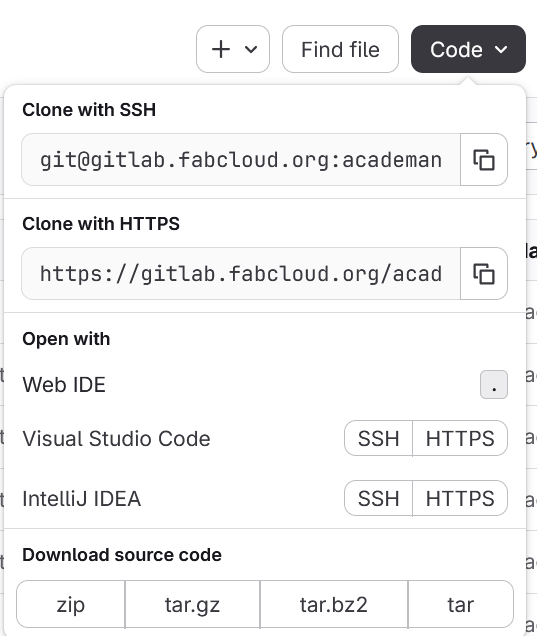
This is now the correct interface for making text, structure and style changes to my website.
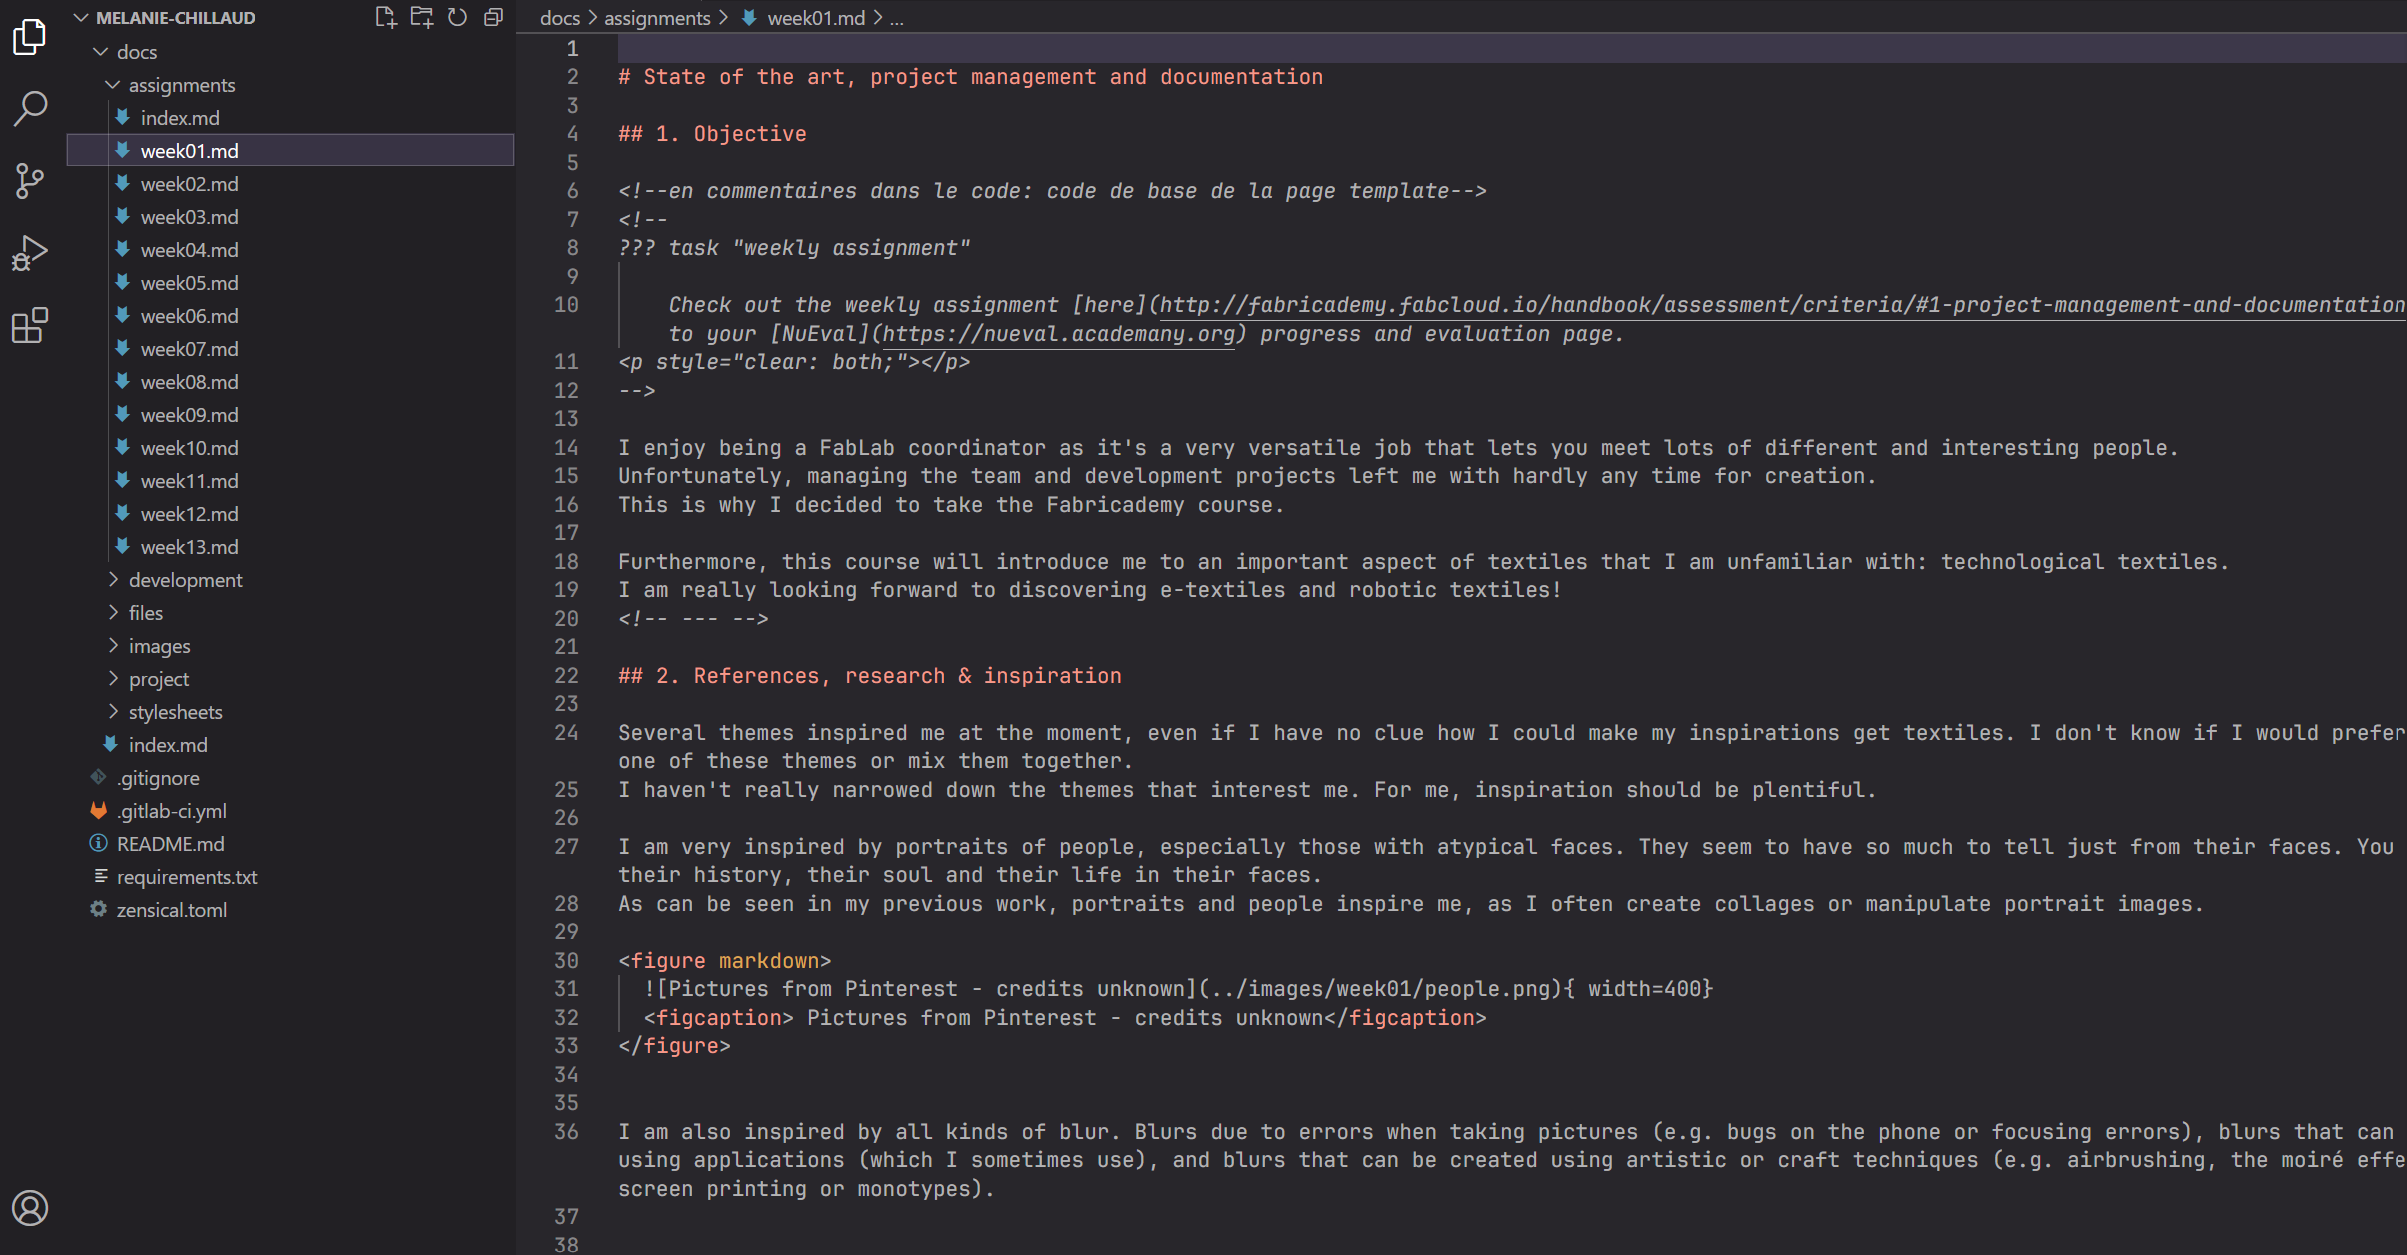
I already knew a little about markdown coding (actually only the basics), as we use GitLab in my FabLab to centralise information (from meeting notes to administrative tasks and tutorials). I supplemented my knowledge with the week 01 draft, which helped me position images on the page and add references. I also used this tutorial 1.
5.1.3 Style changes
In Zensical.toml file:
As explained earlier, the styling applied to a website is defined in CSS files.
However, Zensical already lets me modify some styling elements on my web pages without having to edit complex CSS code.
In this file, change the following items (use Control+F to find the relevant code line more quickly):
- Site name (My Name)
- Site description
- Colour
- Palette.primary: This will change the dominant color of my website (menu bar, foot section, buttons)
- Palette.Accent: will change the secondary color (hyperlinks, secondary buttons...). It is recommand to chose a color that contrast with the primary color.
- Font: go to the [project.theme.font] section
- Text: will change the website font
- Code: will change the code text included in my website
In stylesheets/extra css file:
We can experiment with the site's decoration here.
Some of the code is already in place, such as the md-header section at the top of my website.
In the md-header section, I can choose to change:
- md-default-fg-color: font color in the header
- background-color
- height
- position: fixed ou sticky
Now if I want to add more styles, I could go further with following ressources: 2 W3Schools CSS Examples 3 Coursera CSS Quick Reference
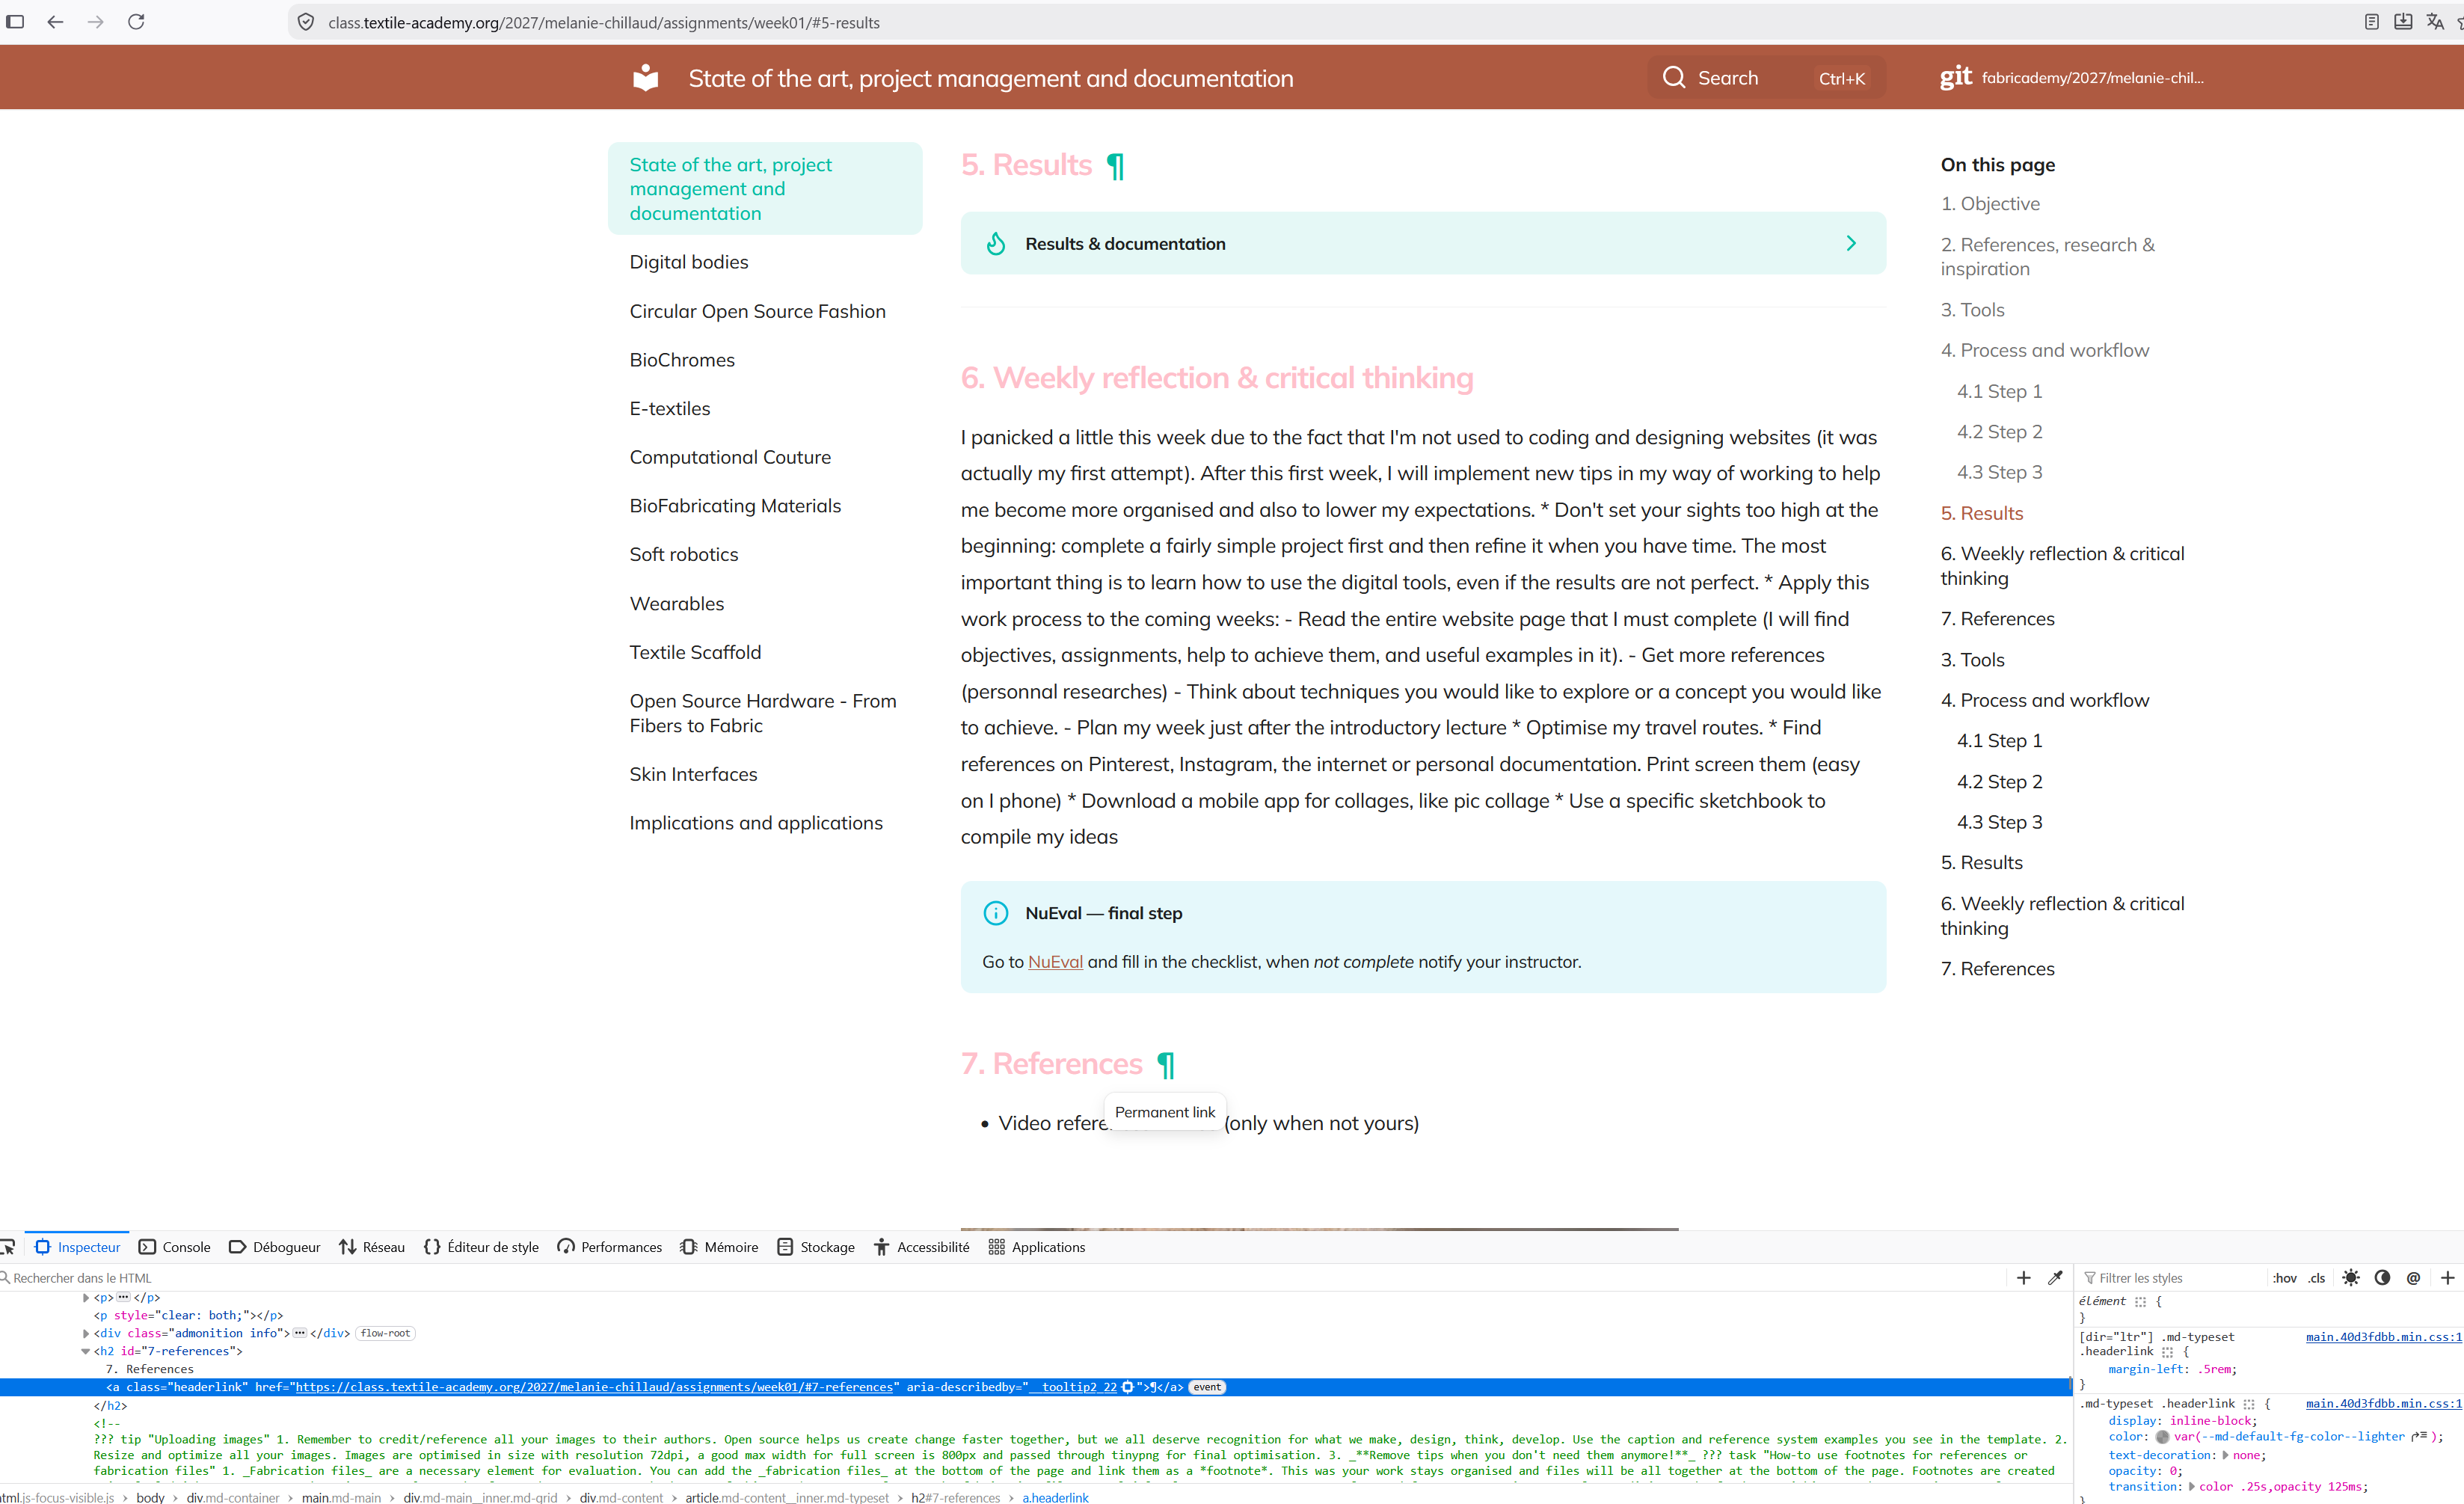
I can also user the inspection fonction on my website to find the css code.
Simply by clicking right/Inspection. Find the css section and copy the code to you extra.css file.
5.1.4 Additionnal tip - Image management
In order to ensure that our website loads as quickly as possible, it is crucial to pay close attention to image size. They can be very large and slow down the website.
Initially, I only managed this by compressing my images using the tinyPNG website, but Stephanie, our instructor, explained that compression alone was not enough.
A good process for images is:
- Use the correct resolution (72 dpi; more if the image needs to show specific details).
- Resize the image if needed (open in Windows Photo, select Resize, set to a maximum of 800 or 900 pixels, preview the results by showing at 100% scale, then save).
- Compress using TinyPNG.com, for example.
5.2 Work local
I tried to do it by myself, helping me with some pages describing the installation, but I did not achieve it. Thanks to stephanie, my instructor, we suceeded to do it.
5.2.1 Create SHH key
First you need a SHH key to protect your local site
On windows:
- open powershell in windows
- write ssh-keygen
- Enter a password
- open the PUBLIC SHH key stored in my windows folder
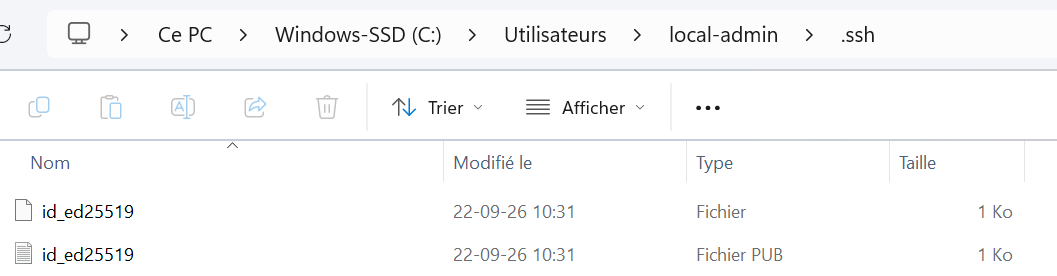
- Copy the text
Online:
- Go in my gitlab (online)
- Right click on my icon and edit profile
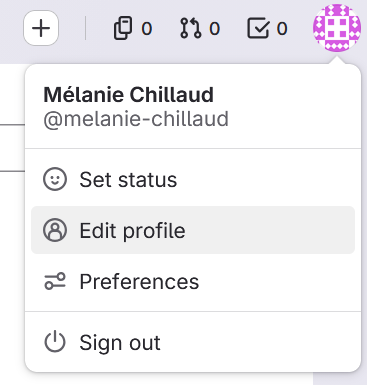
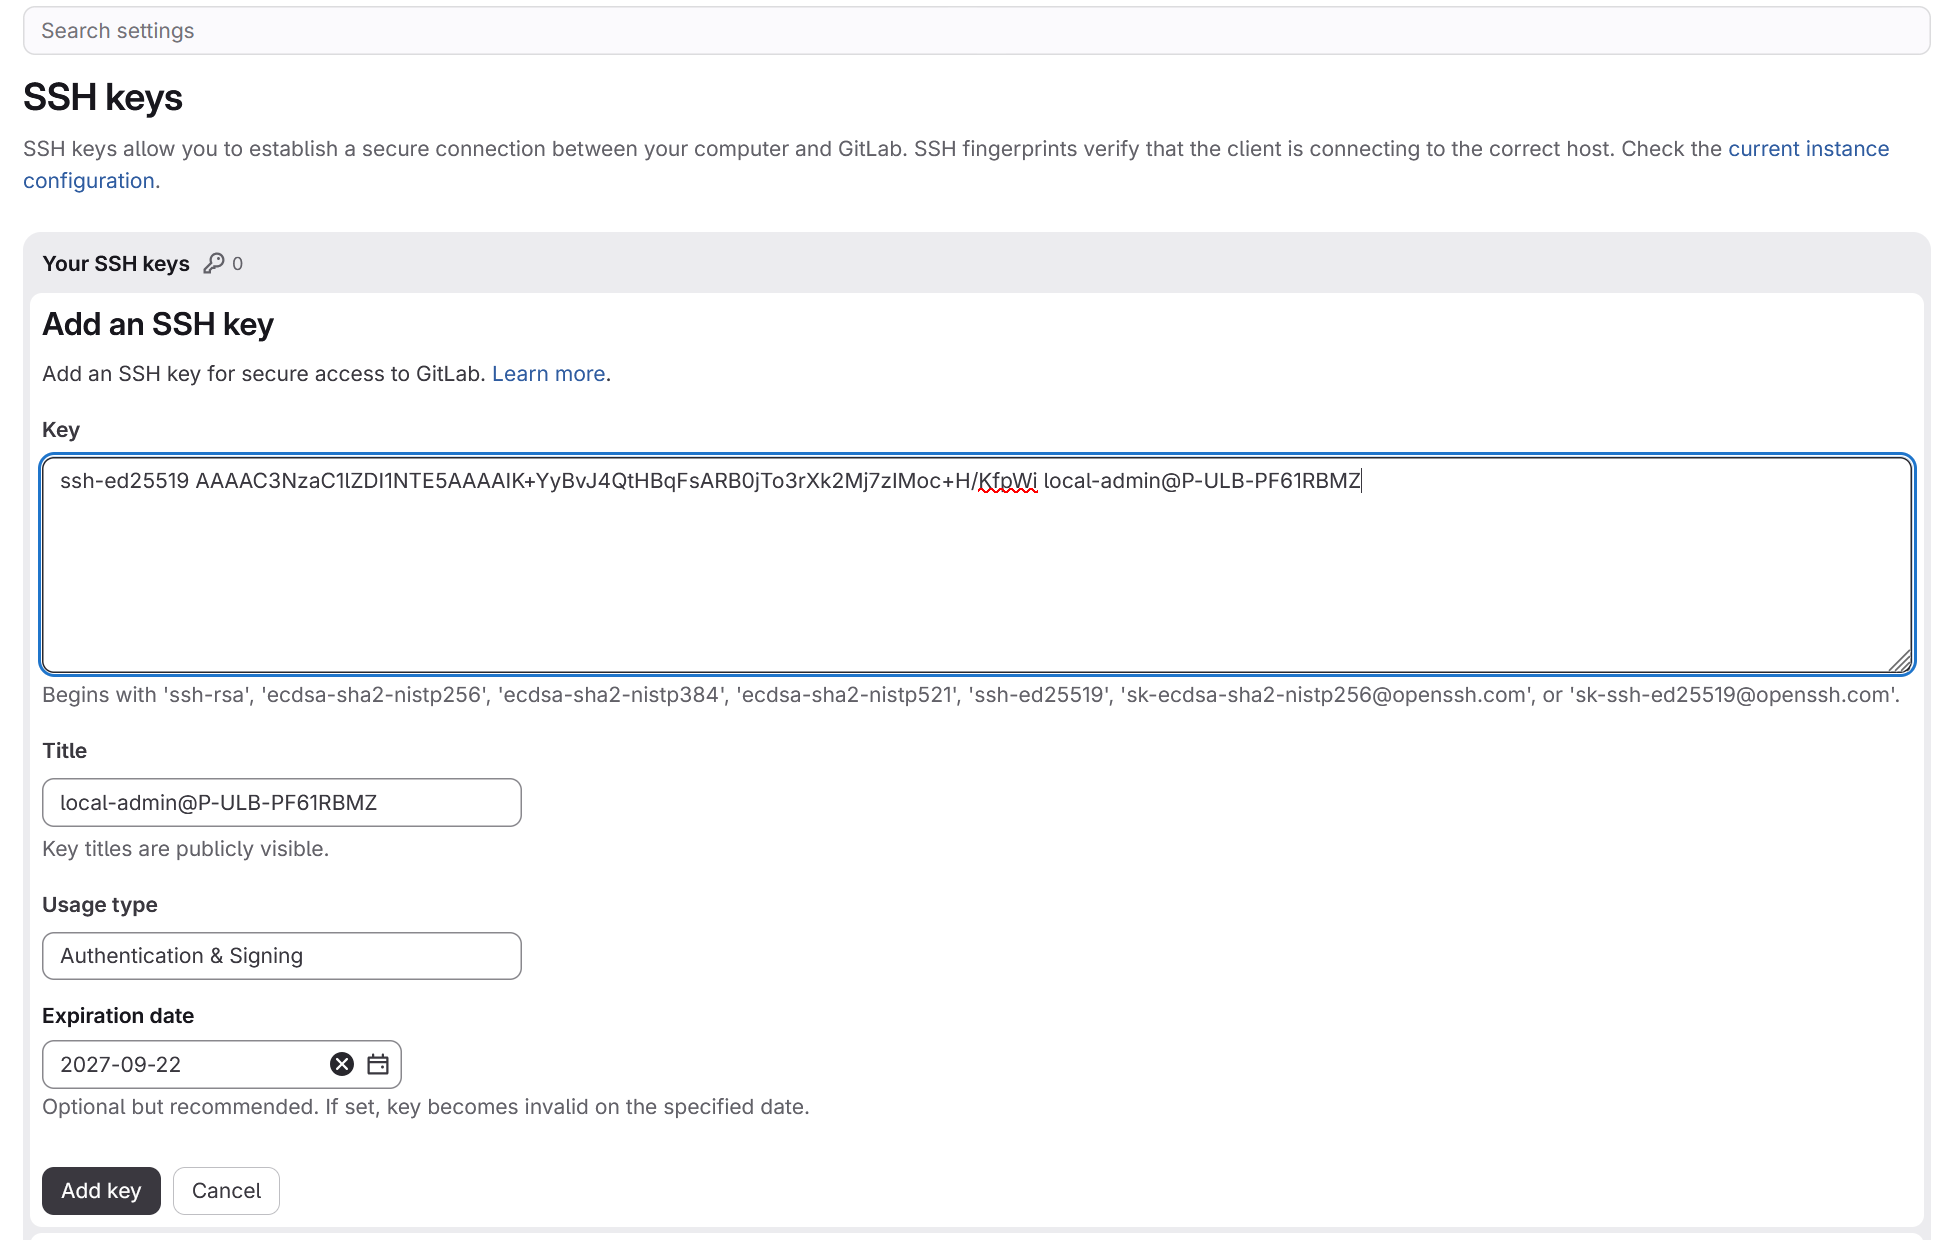
- Go to Access/SSH Keys - click on add a new key - paste the public shhkey
5.2.2 Software
Install several softwares on you computer:
- git
- Visual studio: terminal for coding
- Zensical (on marketplace.visualstudio.com)
- python: zensical will use python to transform markdown code into html code
5.2.3 Clone git repository in visual Studio
open visual studio. xxxx
5.2.4 Install Zensical in visual Studio
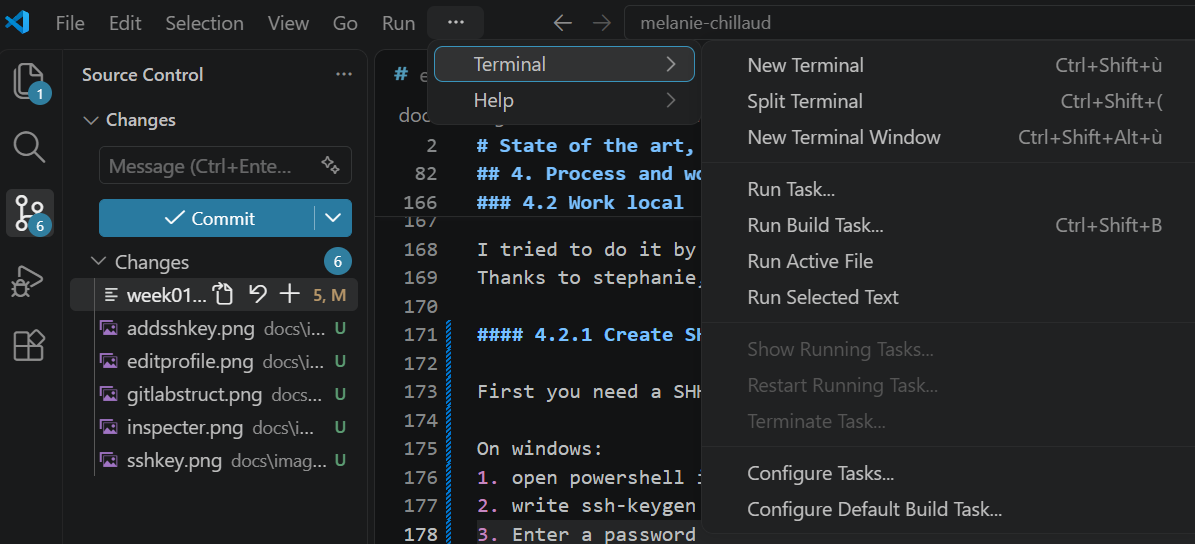
Open a terminal window in visual studio.
Write the code
python3 -m_venv .venv
pip install -r requirements
5.2.5 Activate the working session
Before each working session, code these 2 lines. Shh password will be requested during the operations:
.venv\scripts\activate
zensical serve
5.2.6 Work and save
This part become the easy one, as now we acquire the markdown basics. I worked with 2 windows opened: the Zensical text editor (where you make the changes), and the local website page (the results on your website). For this part I used a useful tips from Stephanie: divide my screen onto 2 Parts (command is Windows + left arrow) to have text editor on the left and web site results on the right.
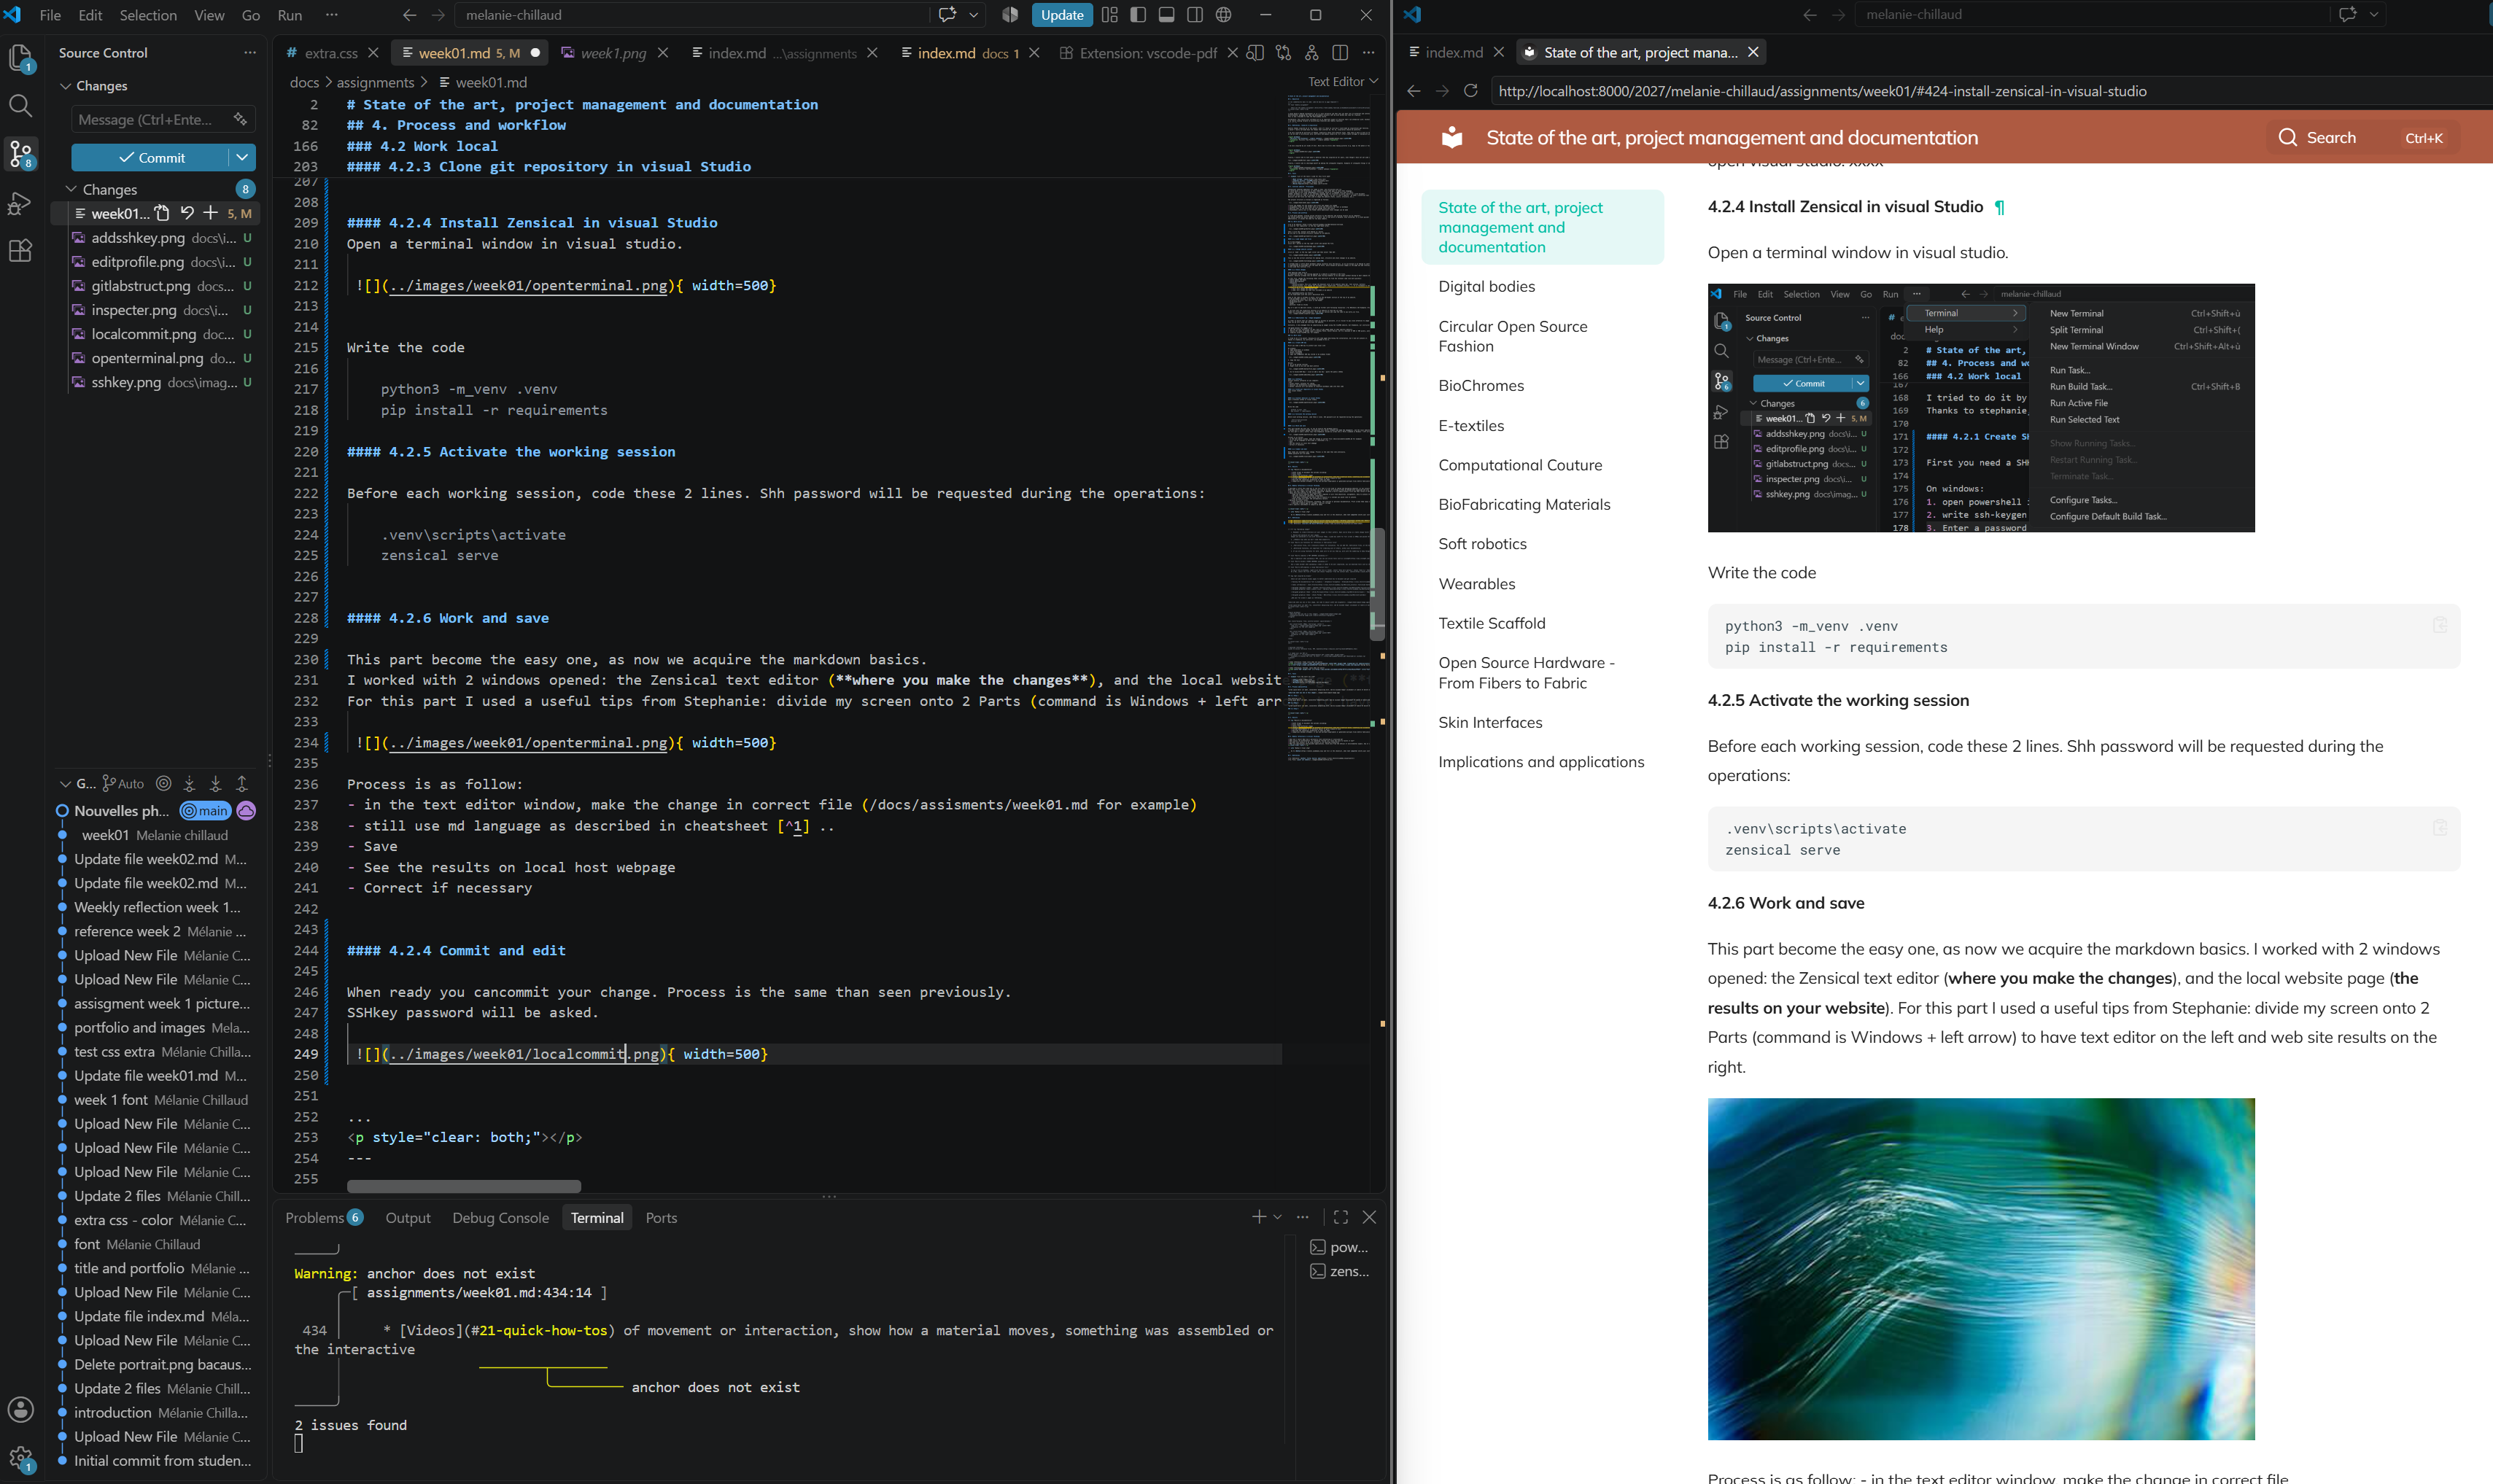
Process is as follow:
- in the text editor window, make the change in correct file (/docs/assisments/week01.md for example)
- still use md language as described in cheatsheet 1 ..
- Save
- See the results on local host webpage
- Correct if necessary
5.2.7 Commit and push
When ready you can commit your change. Process is the same than seen previously:
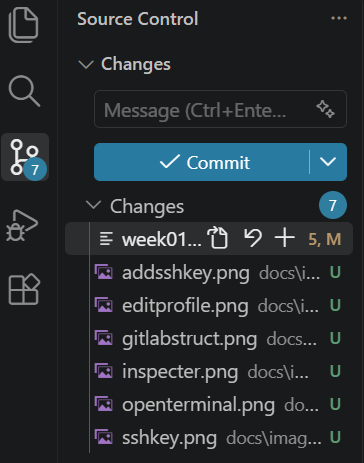
Then you synchronize:
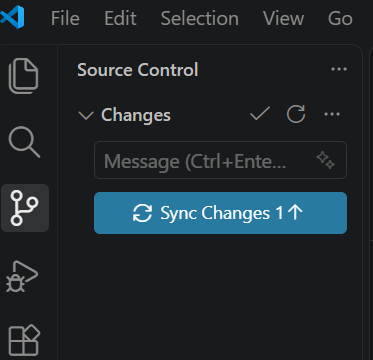
SSHkey password will be asked several time.
Then you will need to push your commited changes on the online website.
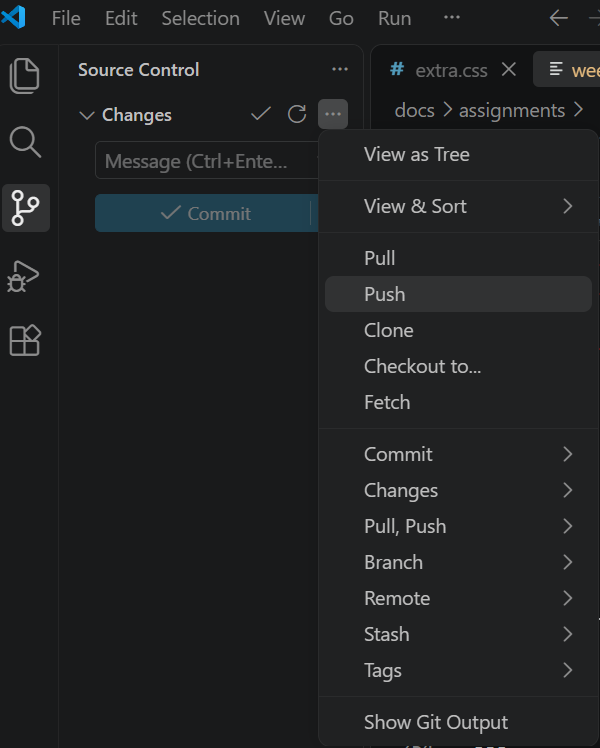
5.3 Work both online/offline
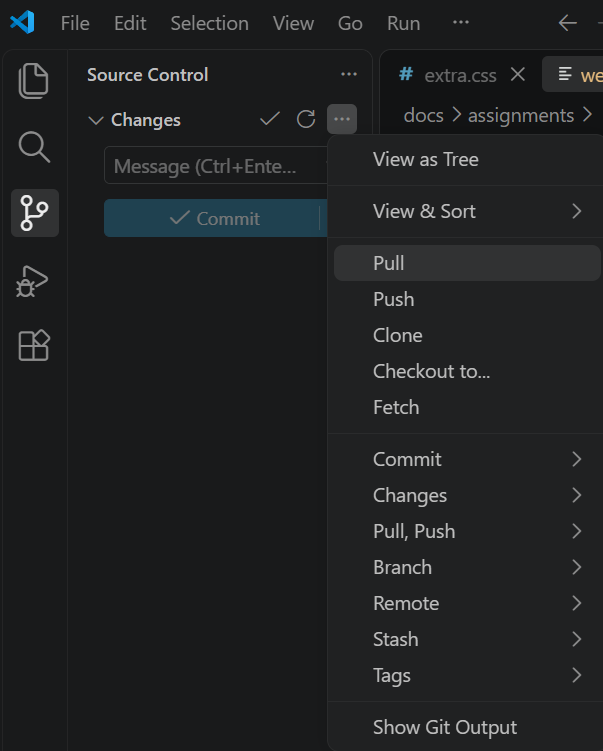
If you work and online and locally, don't forget to:
- push when you work locally to have you work online
- pull when you worked online and want to have these changes on your local version
 ...
...
6. Weekly reflection & critical thinking
I panicked a little this week due to the fact that I'm not used to coding and designing websites (it was actually my first attempt).
After this first week, I will implement new tips in my way of working to help me become more organised and also to lower my expectations.
- Don't set your sights too high at the beginning: complete a fairly simple project first and then refine it when you have time. The most important thing is to learn how to use the digital tools, even if the results are not perfect.
- Apply this work process to the coming weeks:
- Read the entire website page that I must complete (I will find objectives, assignments, help to achieve them, and useful examples in it).
- Get more references (personnal researches)
- Think about techniques you would like to explore or a concept you would like to achieve.
- Plan my week just after the introductory lecture
- Optimise my travel routes.
- Find references on Pinterest, Instagram, the internet or personal documentation. Print screen them (easy on I phone)
- Download a mobile app for collages, like pic collage
- Use a specific sketchbook to compile my ideas
6. References
-
Reference: Adam Pritchard; How to survive coding in markdown - Markdown cheatsheet; github.com; 2025 ↩↩
-
Reference: W3Schools CSS Examples ↩
-
Reference: Coursera CSS Quick Reference ↩