BioFabricating Materials
1. Objective
weekly assignment
- Include some inspiration: research on artists, projects, platforms that work with biomaterials, local ingedients and resources
- Produce at least samples from one crafted and one grown material - explore the different recipes and understand how to adjust them based on the ingredients (bioplastics/resins/extruded yarns/gathered&twisted fibers/non-woven matrix)
- Document your recipes, the ingredients and process and if there have been changes, document your unexpected discoveries
- Name your materials, classify them by typology and display them in a systematic order of samples
- Submit some of your swatches to the analog material library of your lab. (20cm x 20cm approx.)
2. References, research & inspiration
List of Artists Who Inspire Me
-
Precious waste Precious peels - Loumi Le Floc'h
-
From waste to interior design Samuel Tomatis
-
Turn pine needles into wool Andy Cosplay
-
All the possibilities of biomaterials daifein
-
Haute couture biomaterials Elissa Brunato
-
The Art of Capturing Nature OrphoseParis
-
From cardboard waste to leather Florian Delmotte
-
Fabricademy Alumni - Jute research - Julija Karas - FabLab Bcn
-
Fabricademy Alumni - Polarisation in bioplastics Viviane Labelle - EchoFab
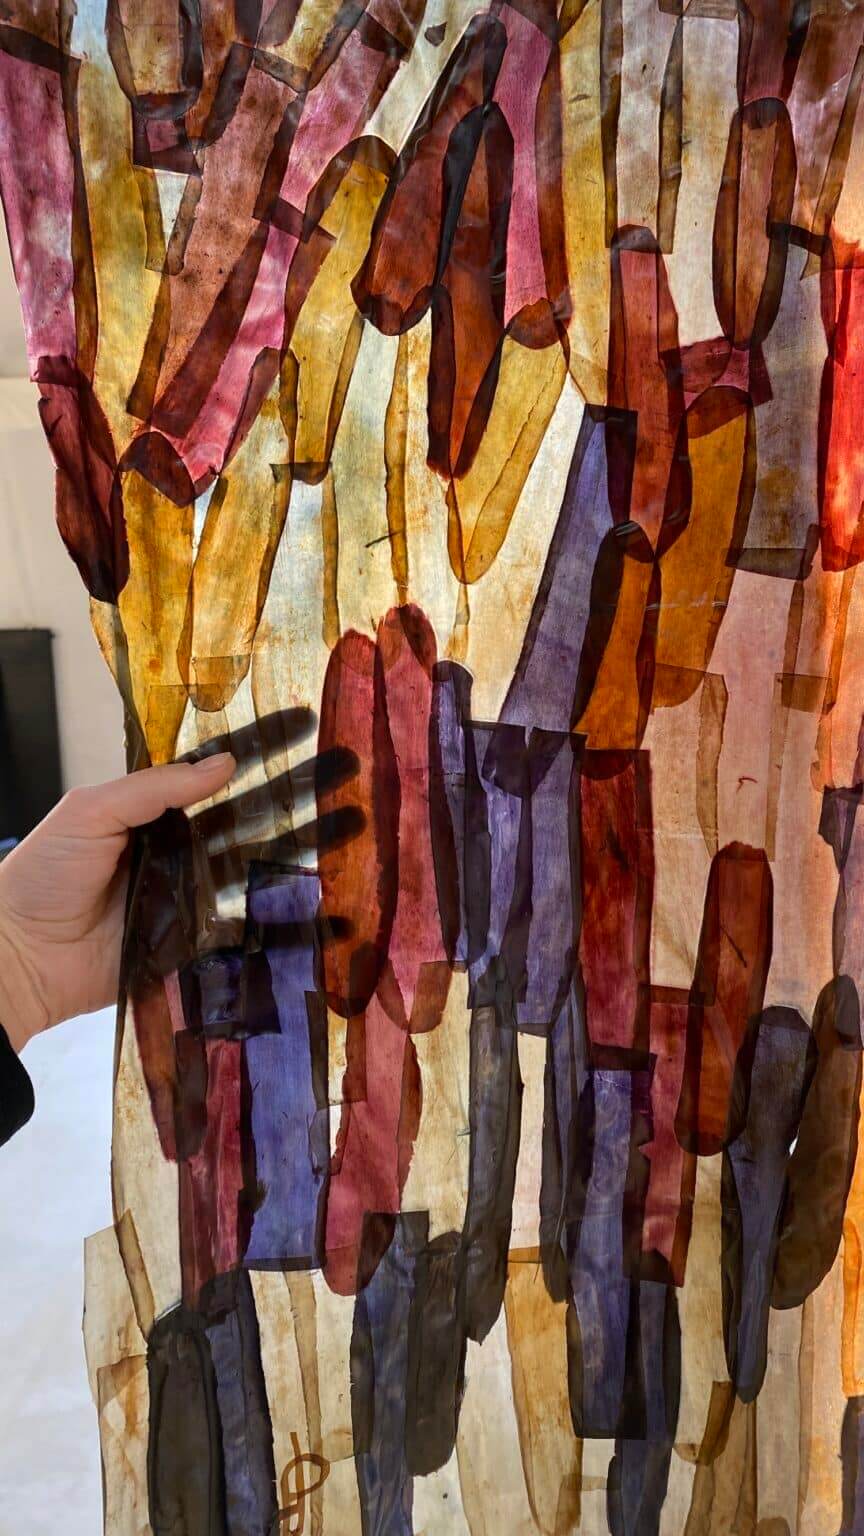
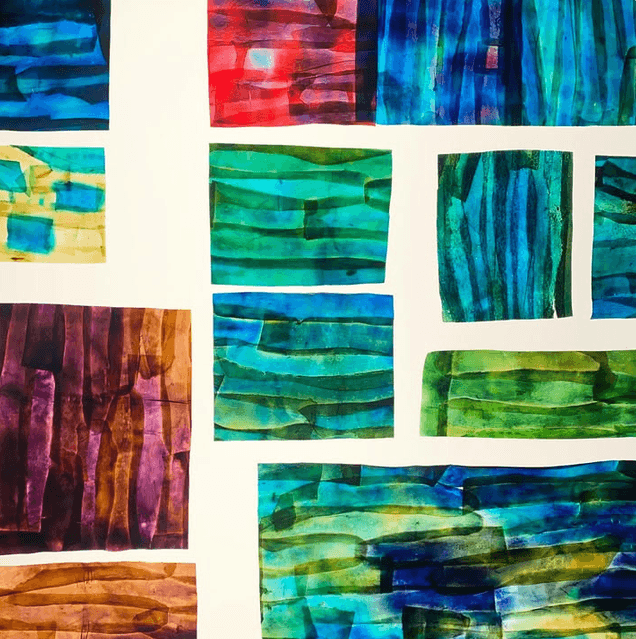
I don't really know much about the field of biomaterials. However, I regularly attend textile design jury sessions in Brussels, and two artists have particularly caught my attention with their work on upcycling organic waste: cardboard for Florian Delmotte and eggplant peels for Loumi Le Floc'h.
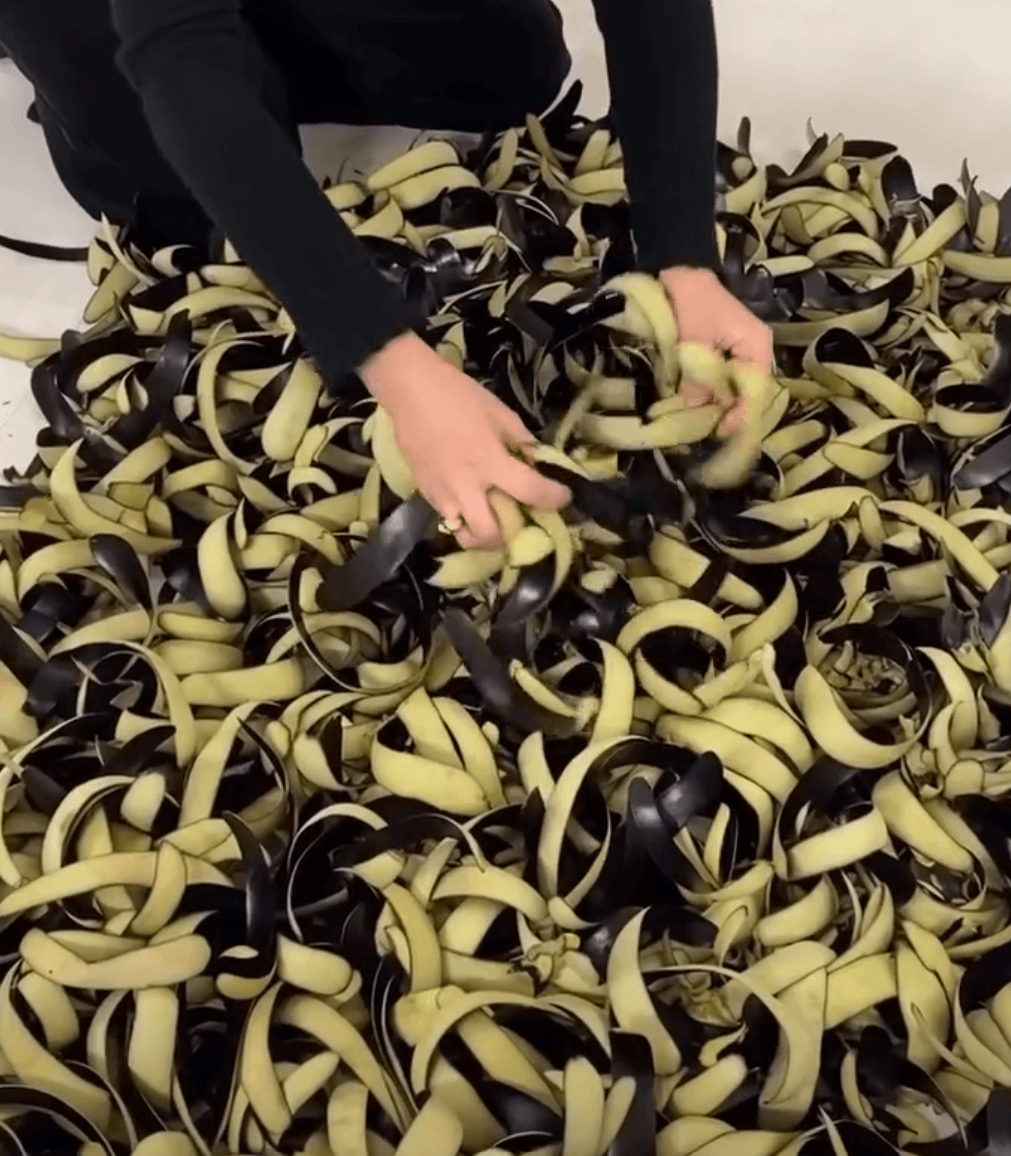
Loumi Le Floc'h works with eggplant peels
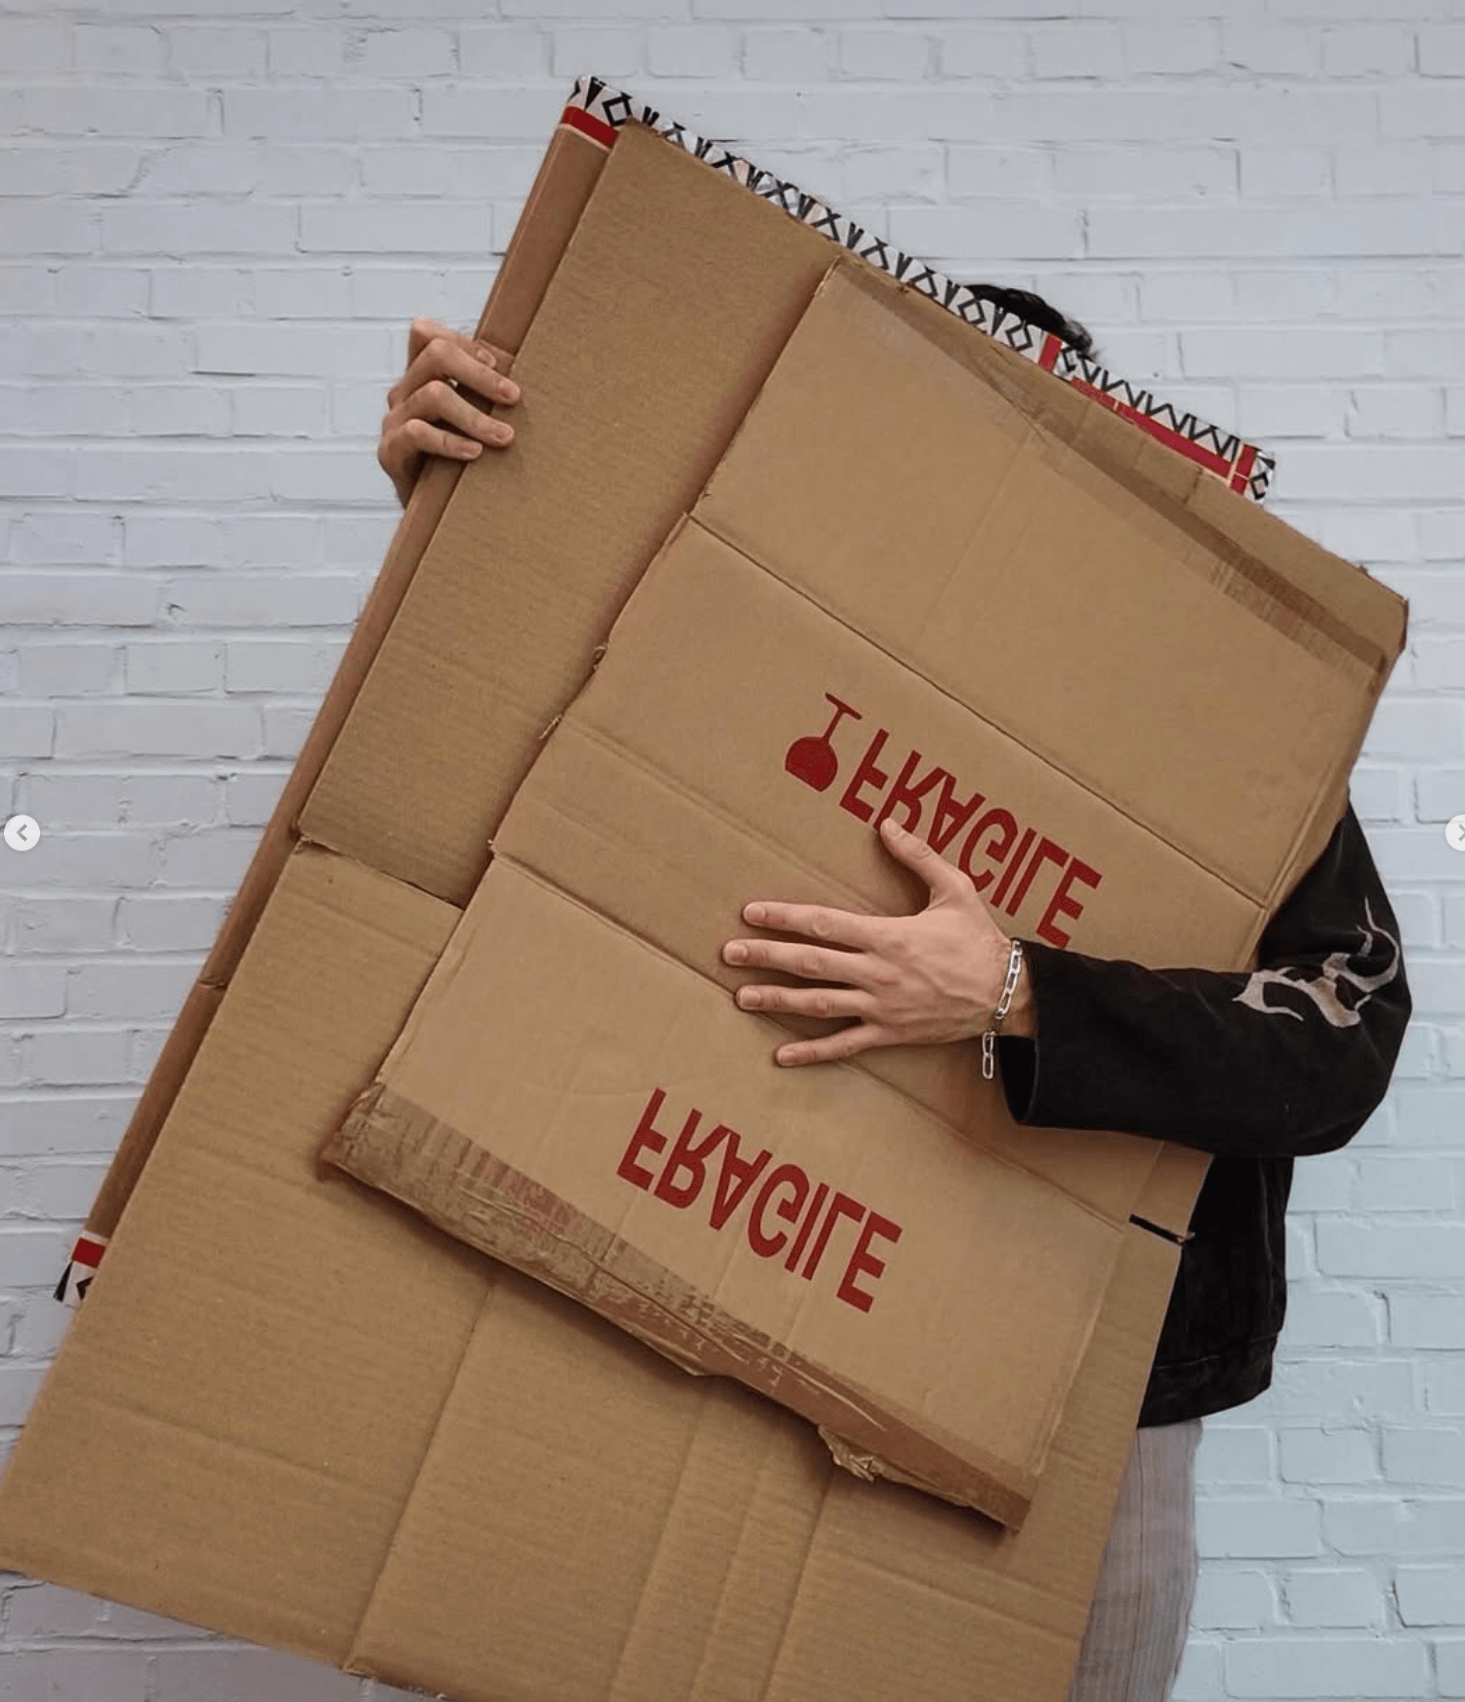
Florian Delmotte works with found cardboards
Their work and the results they achieve are very different, and yet one senses that there is something they have in common: a great deal of experimentation and a desire to elevate the material.
Their manufacturing secrets are well-kept, but I can still guess that they involve tanning and textile dyeing processes. It's interesting to see how these techniques are adapted from their usual applications. This leads to some very unusual results.
Loumi le Floc'h's material seems very fragile. She gets around this challenge by encasing it in an extremely sturdy material—as seen here with a glass door for the Wolf A restaurant in Antwerp.
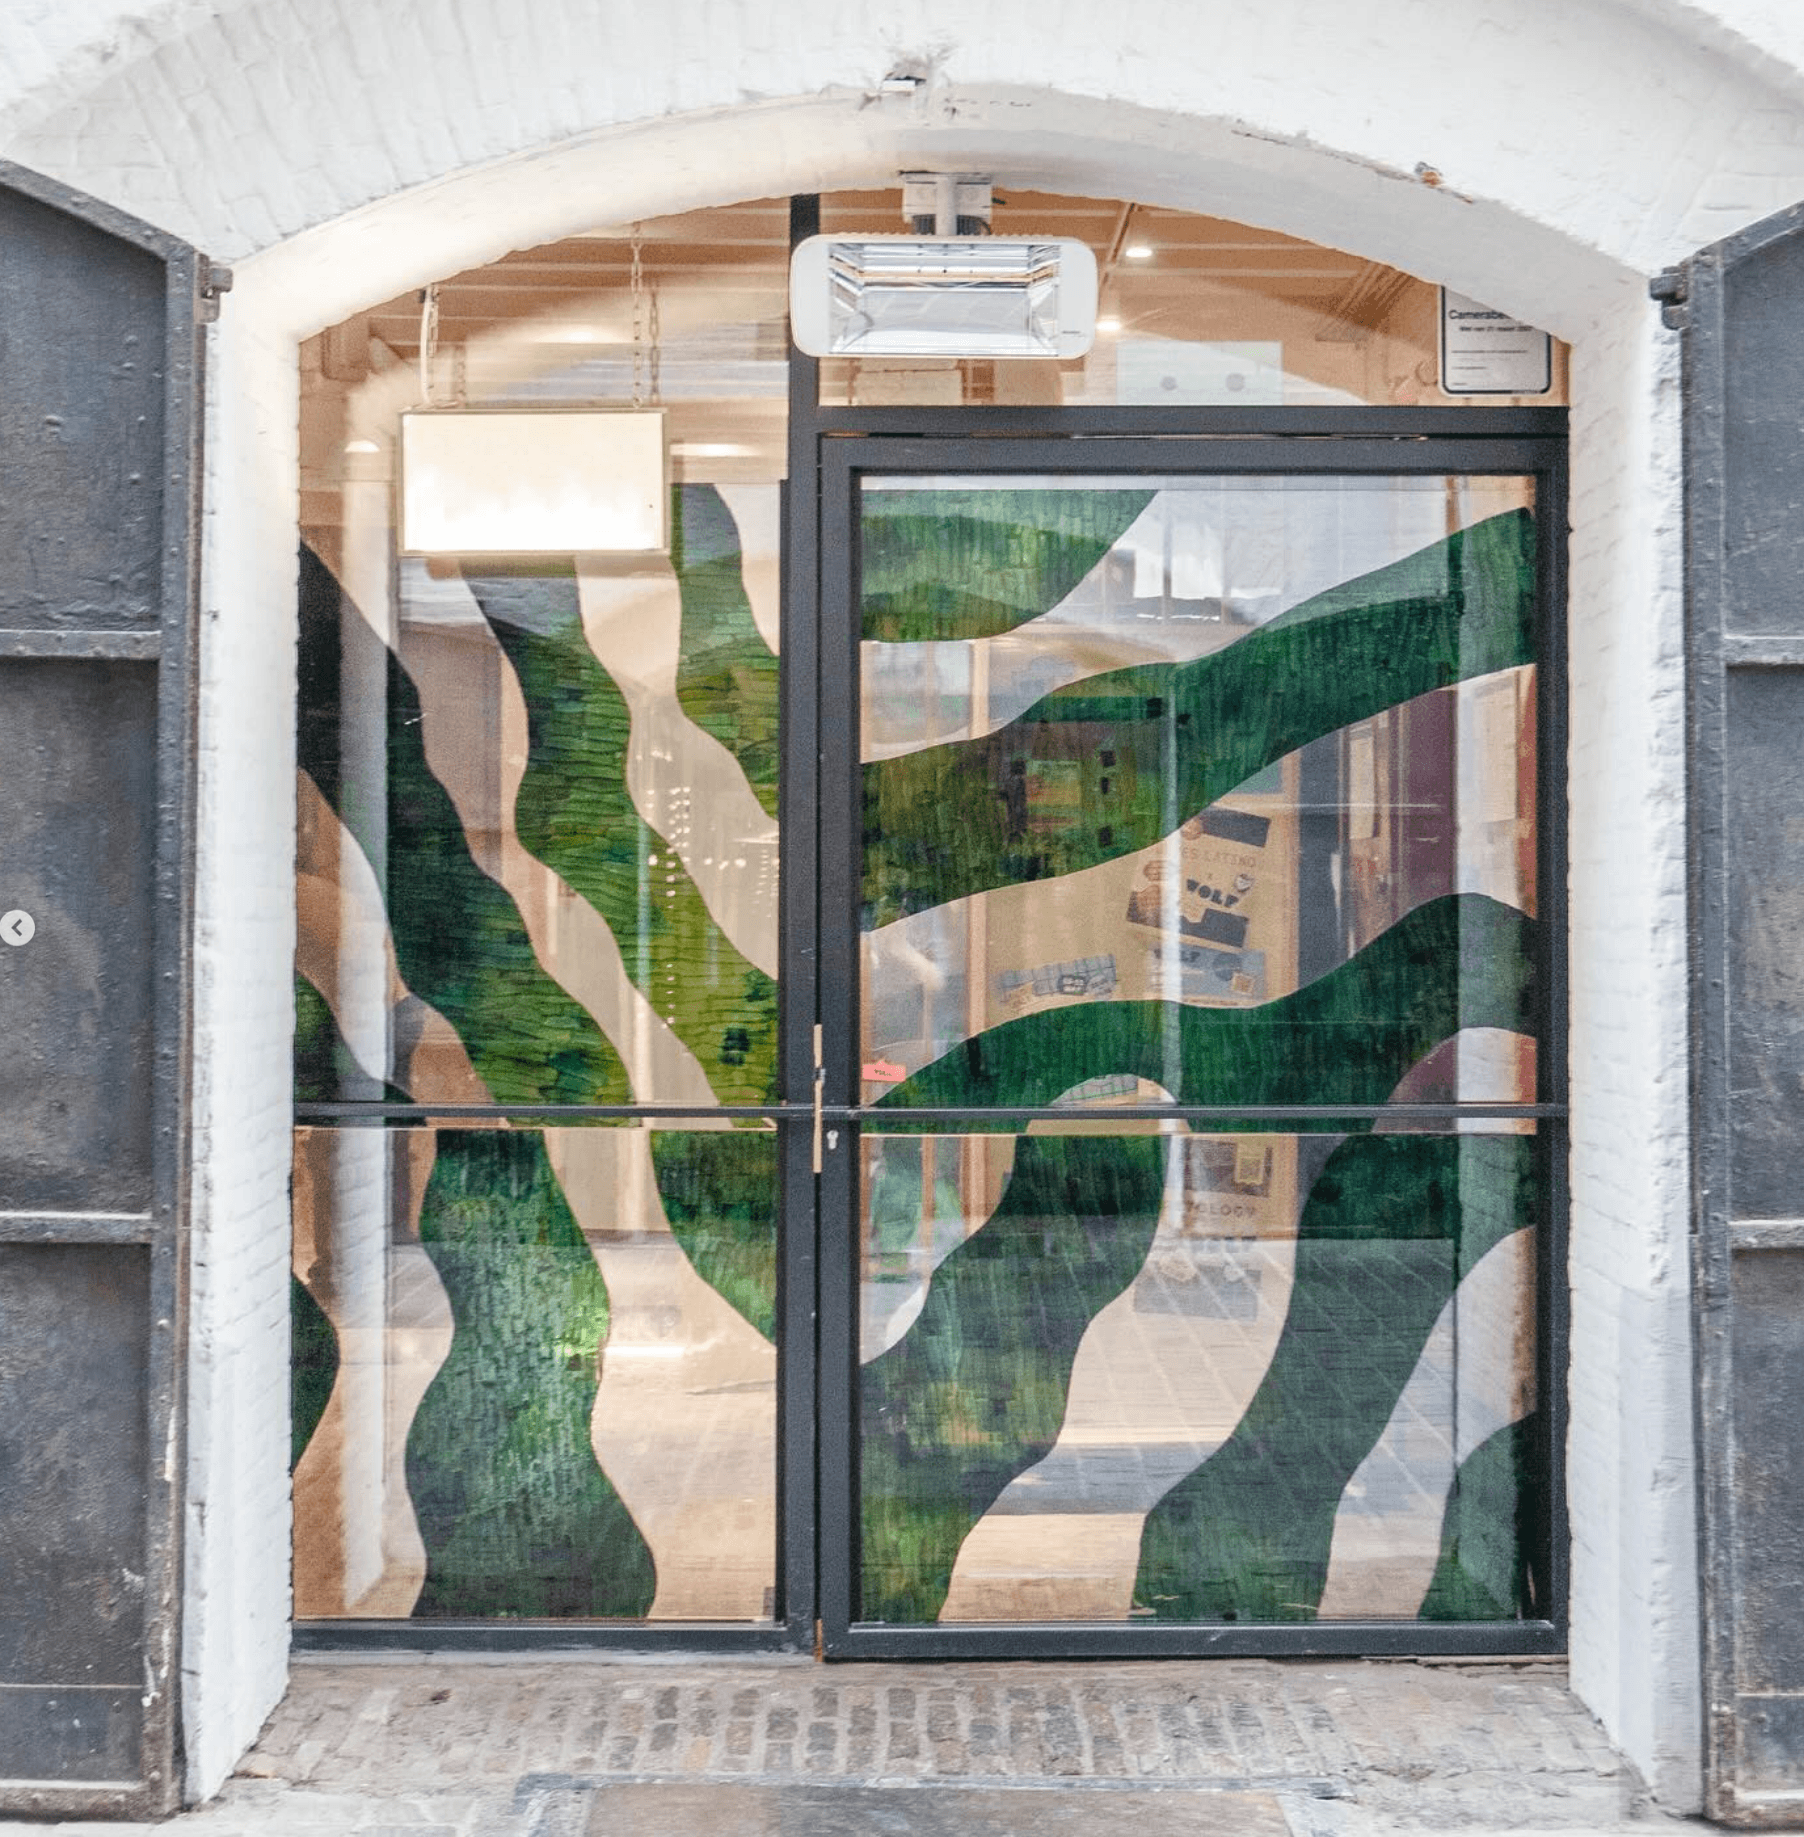
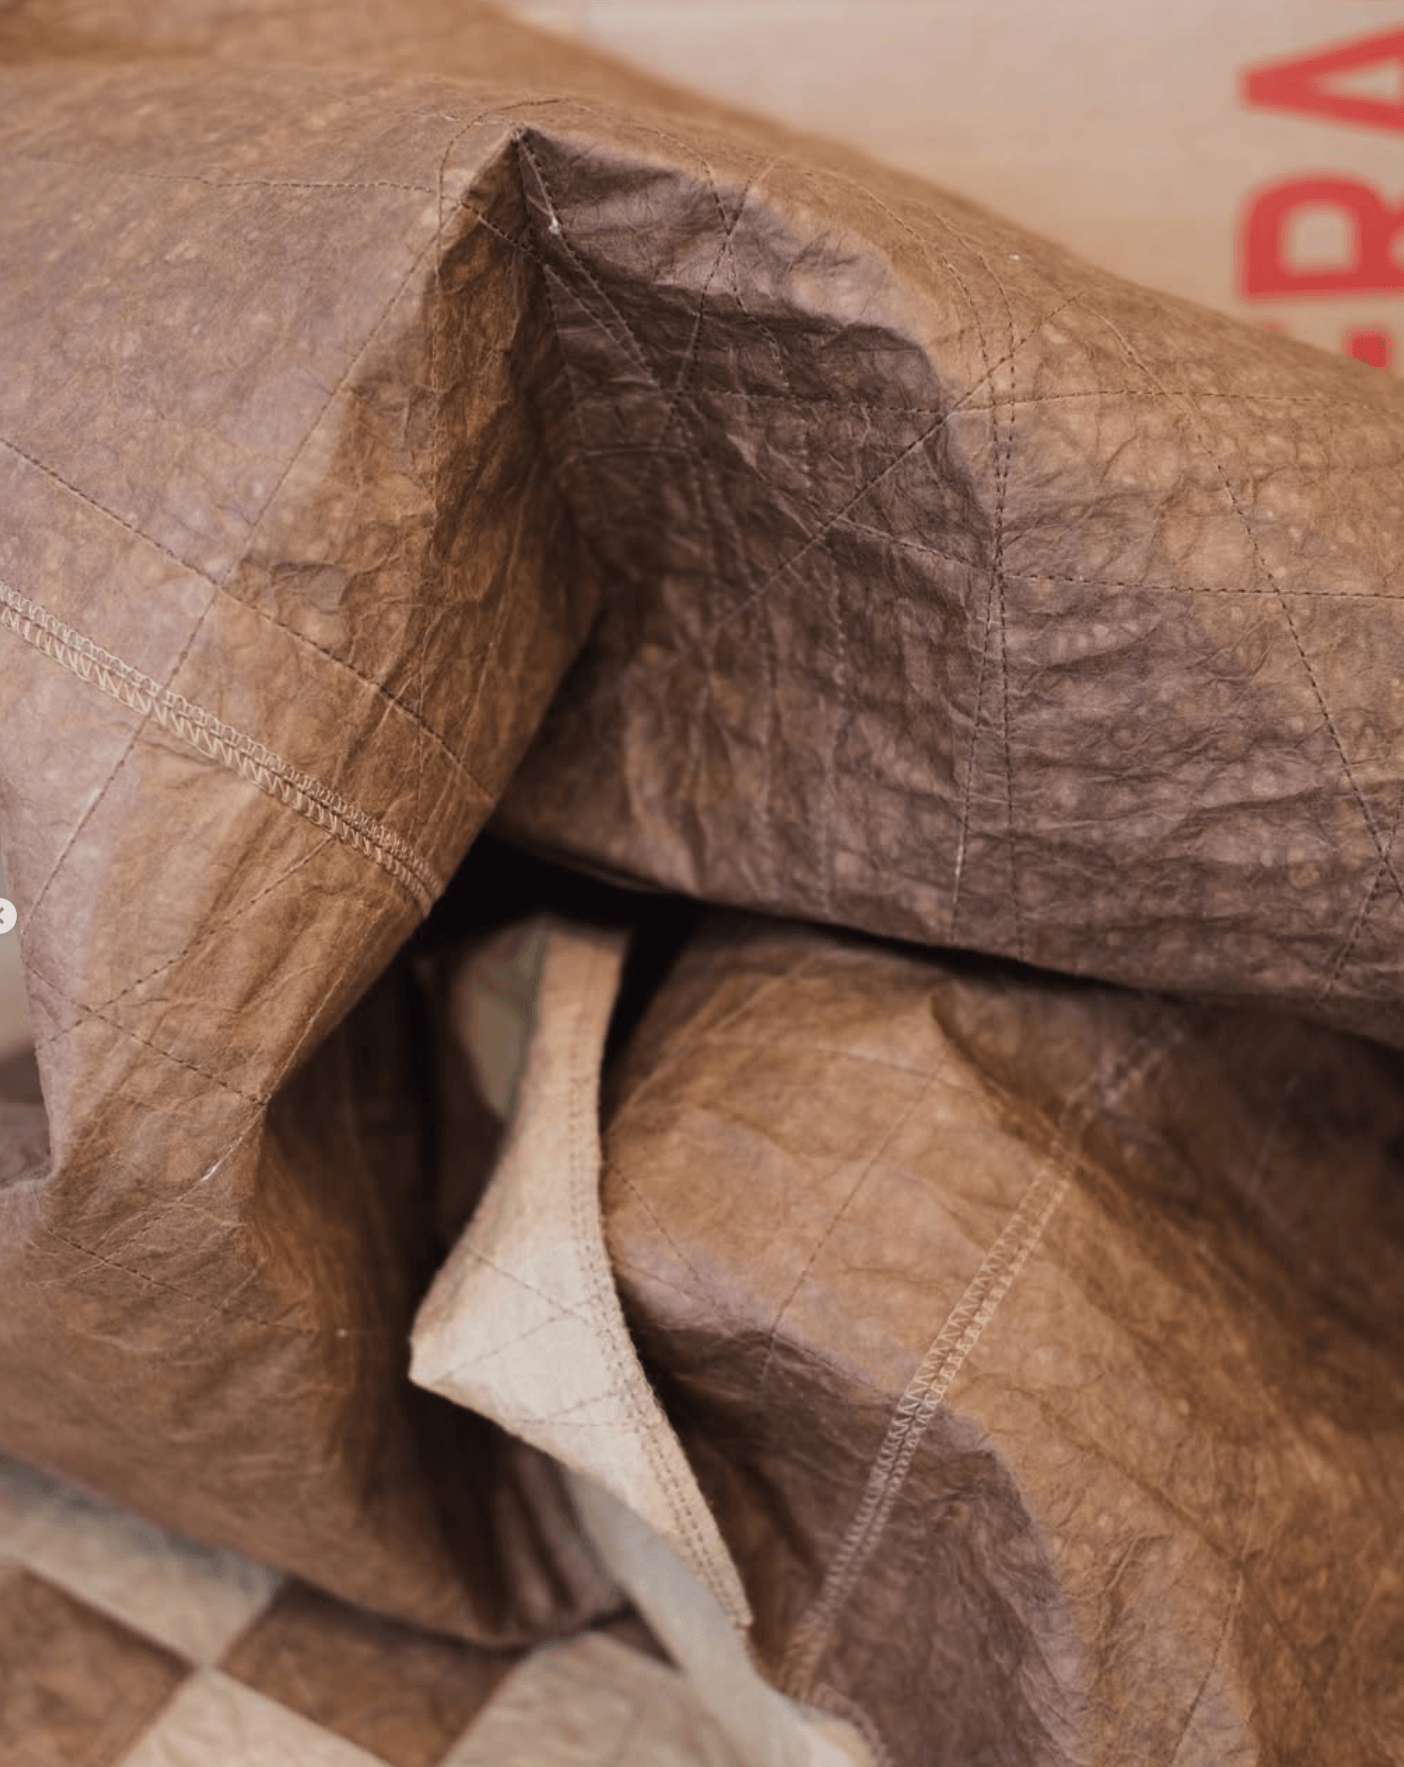
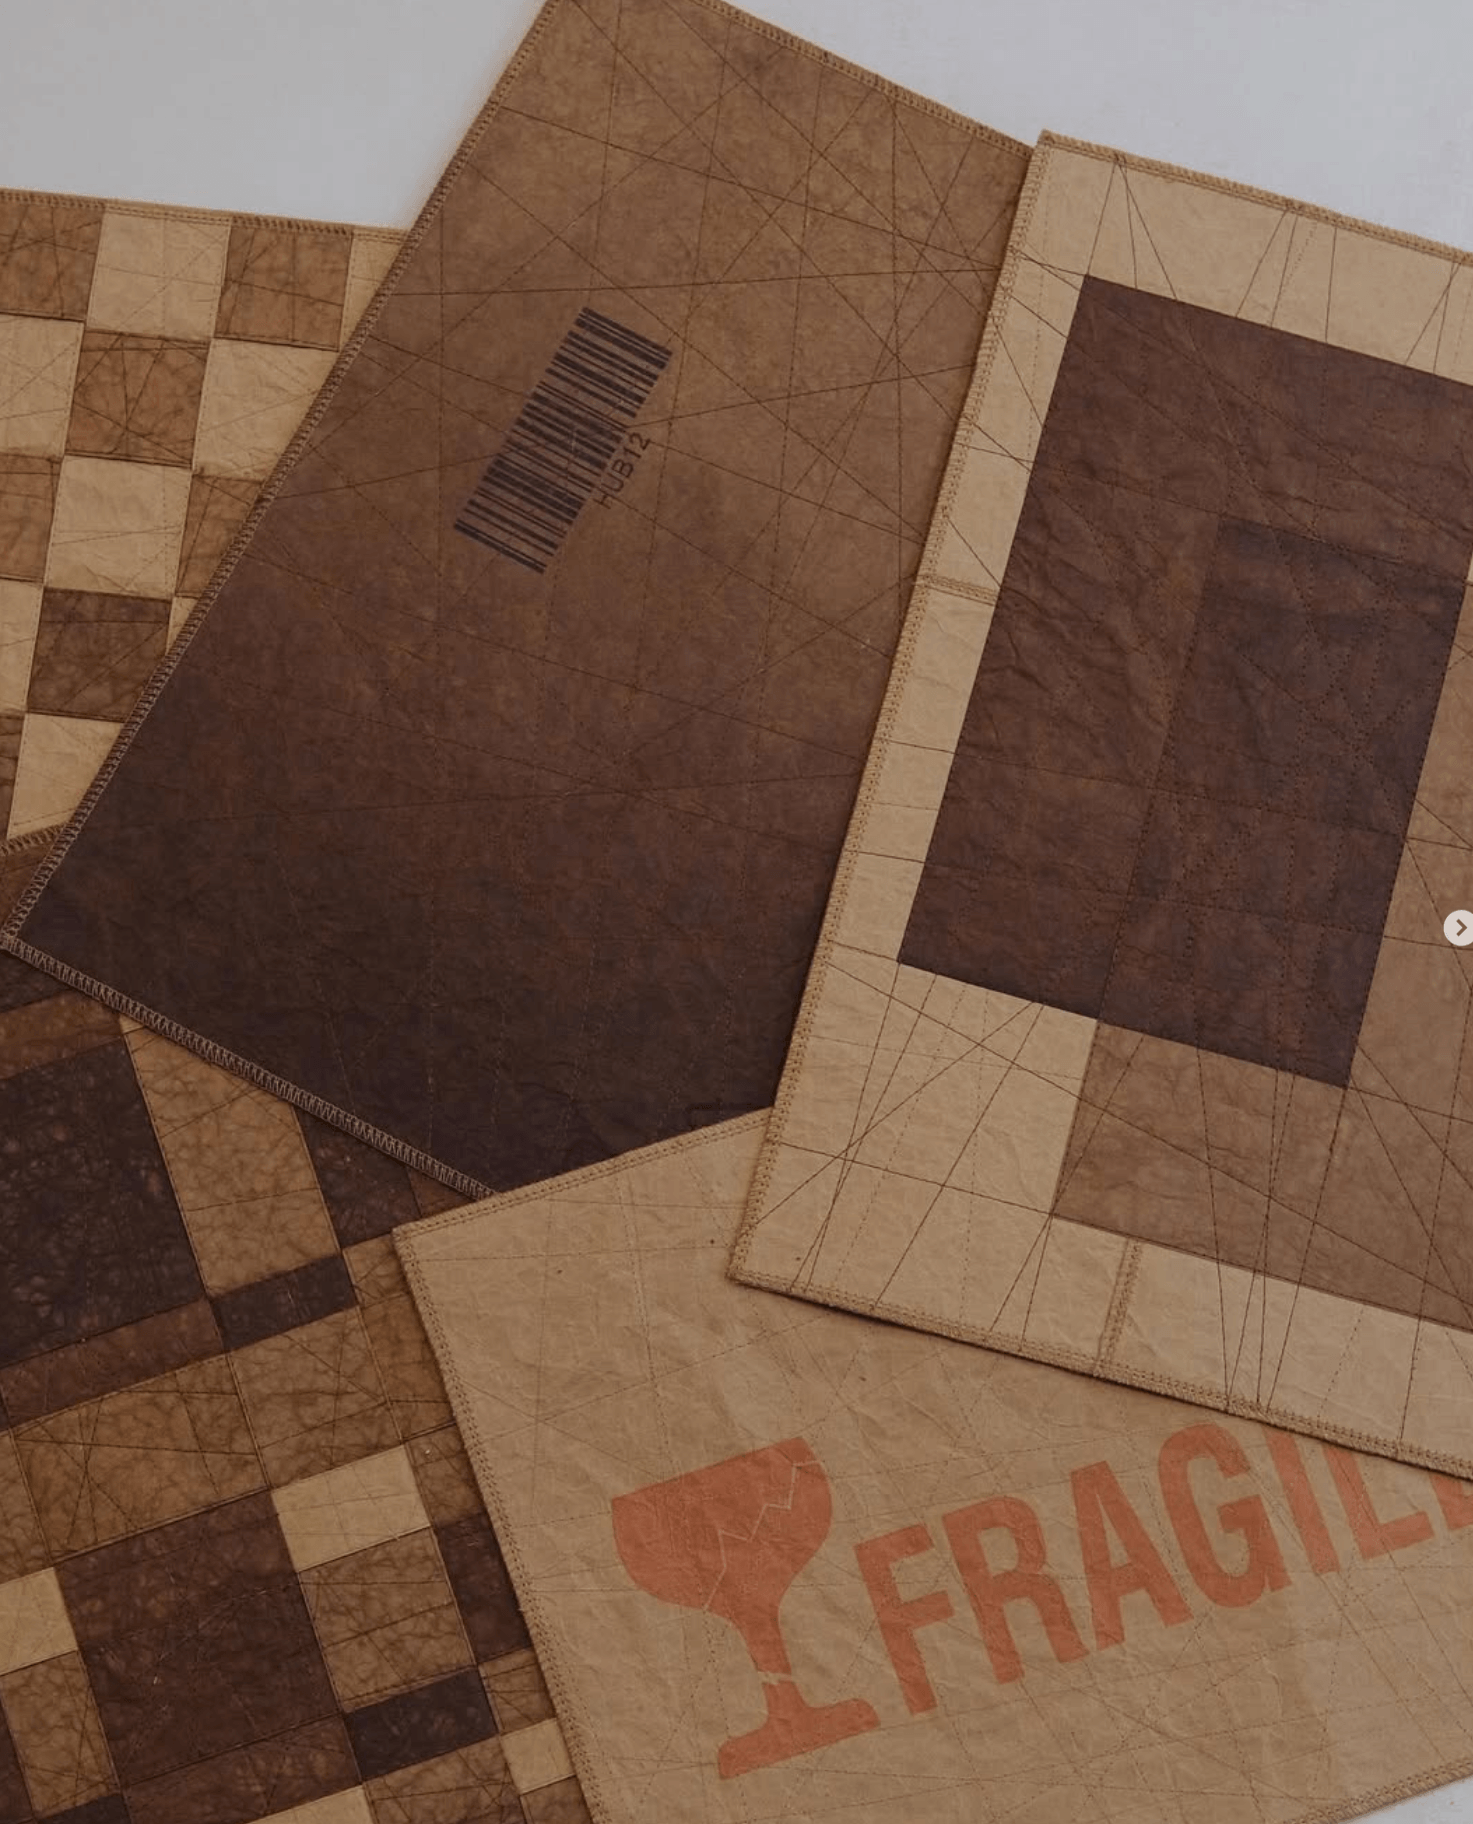
I became interested in other textile artists and designers who work with biomaterials.
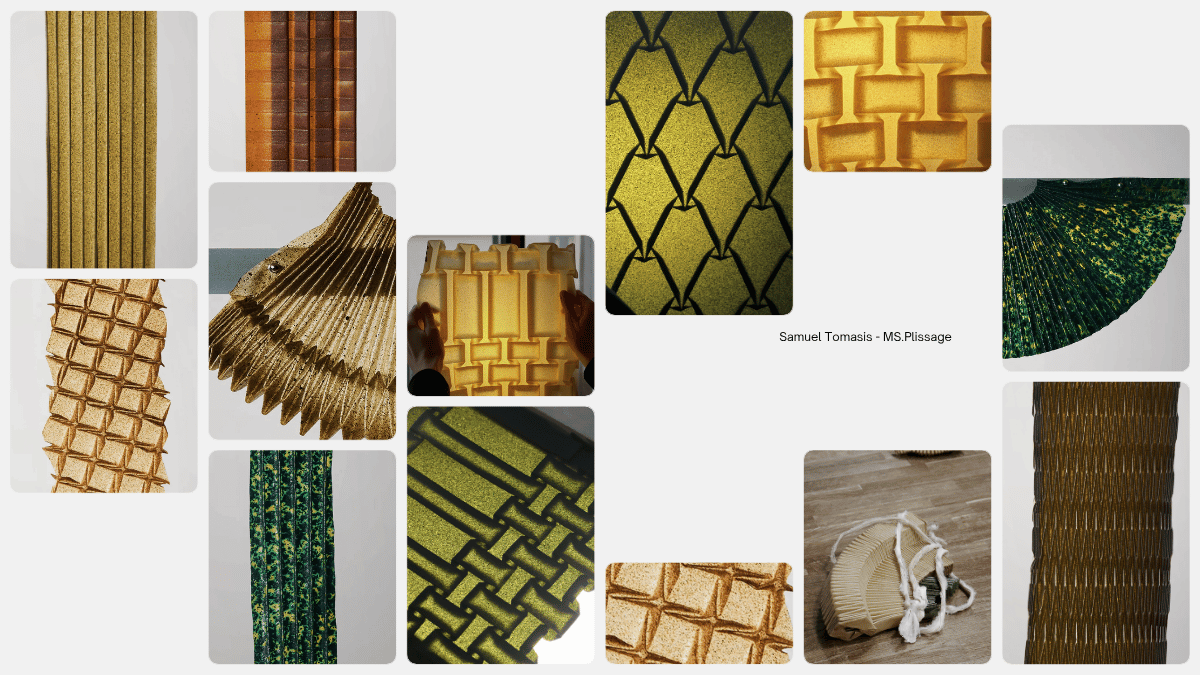
I was particularly intrigued by Samuel Tomasis’s work.
He goes beyond the material itself.
He creates it and then transforms it into something sublime. Here is a series of samples created using the pleating technique. I find this work very delicate. It also raises questions for me: traditionally, pleating is achieved using steam. I wonder if that was the case here or if it’s more of a mechanical pleating process.
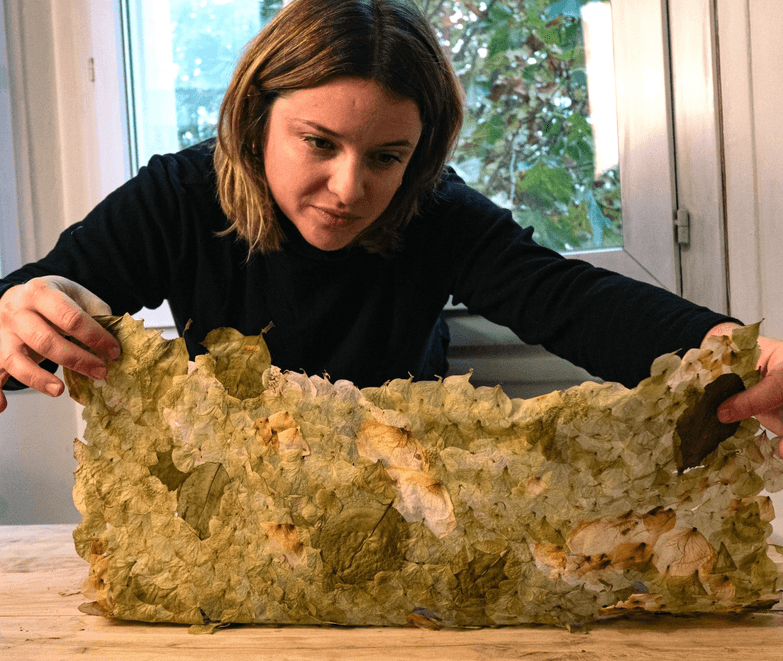
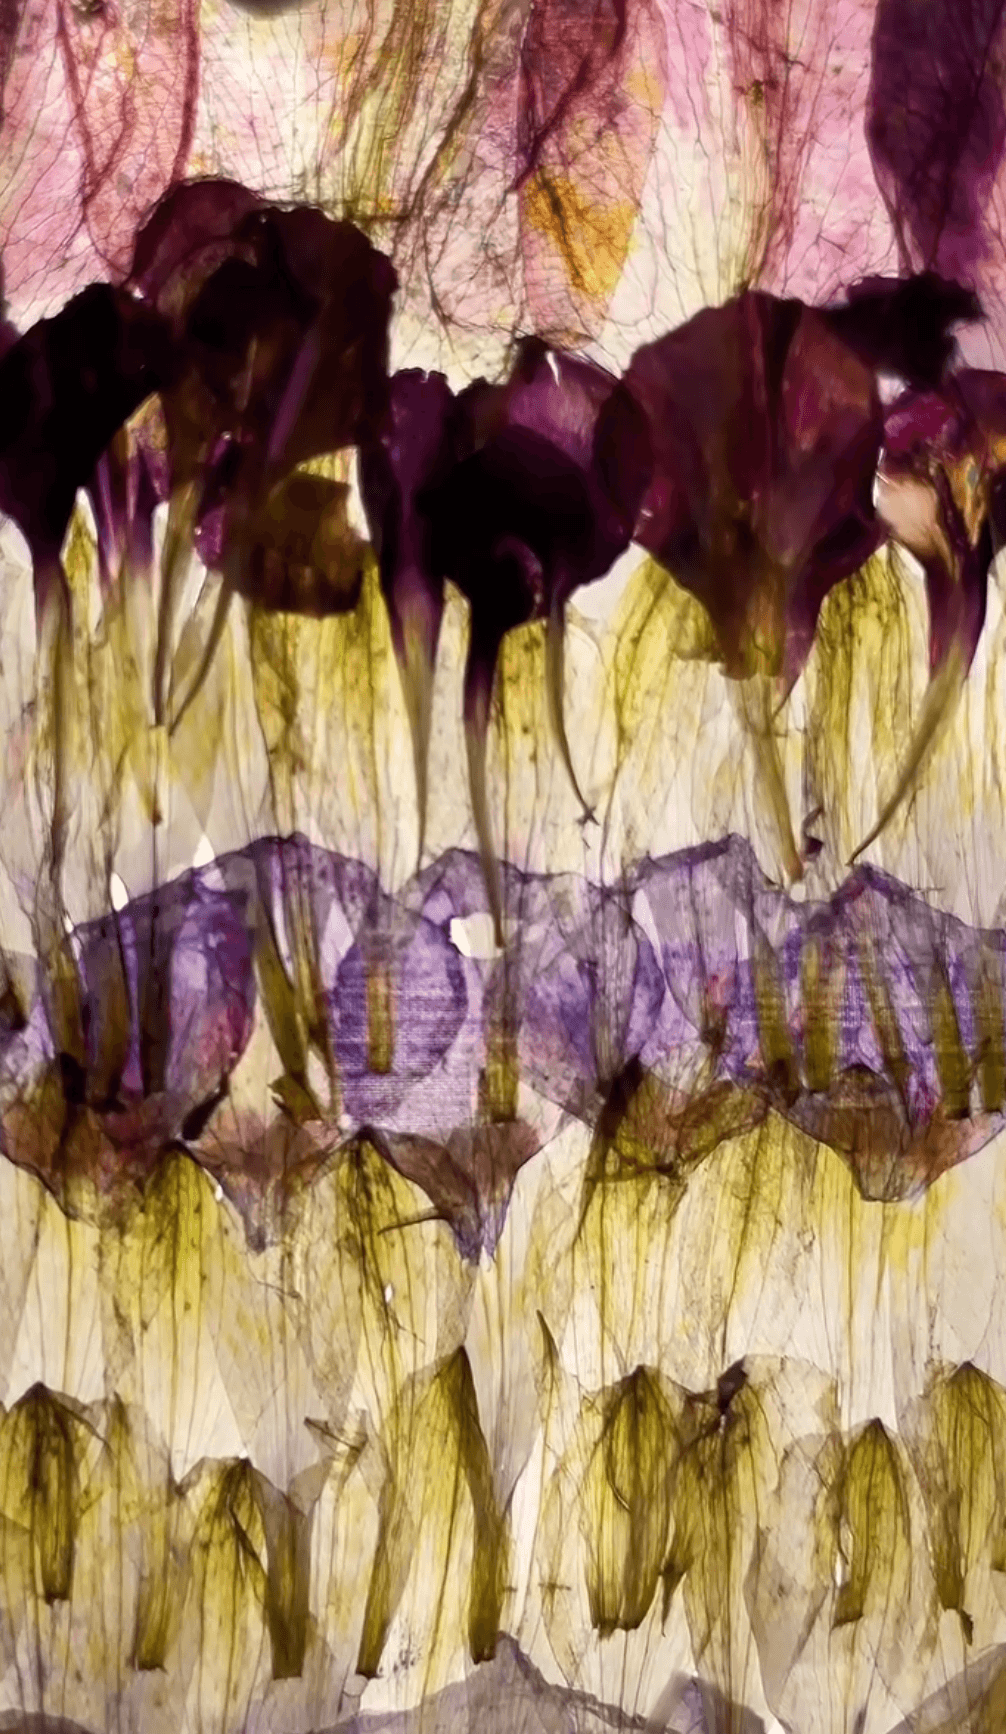
Finally, the last body of work that inspires me is that of a Parisian artist who works with flowers and plants under the name Orphose. Her materials are incredibly light and delicate. Her creations are full of poetry. They invite you to take your time and contemplate.
Orphose Paris
3. Tools & Ingredients
- Cecilia Raspanti presentation link for vimeo
- Green Fabric recipes
- pots, jars, spoons, plastic wrap, blender, colander, dish towels, scale
- Ingredients: water, gelatin, sodium carbonate, sodium alginate, glycerin, plant-based ingredients, fiber
4. Process and workflow
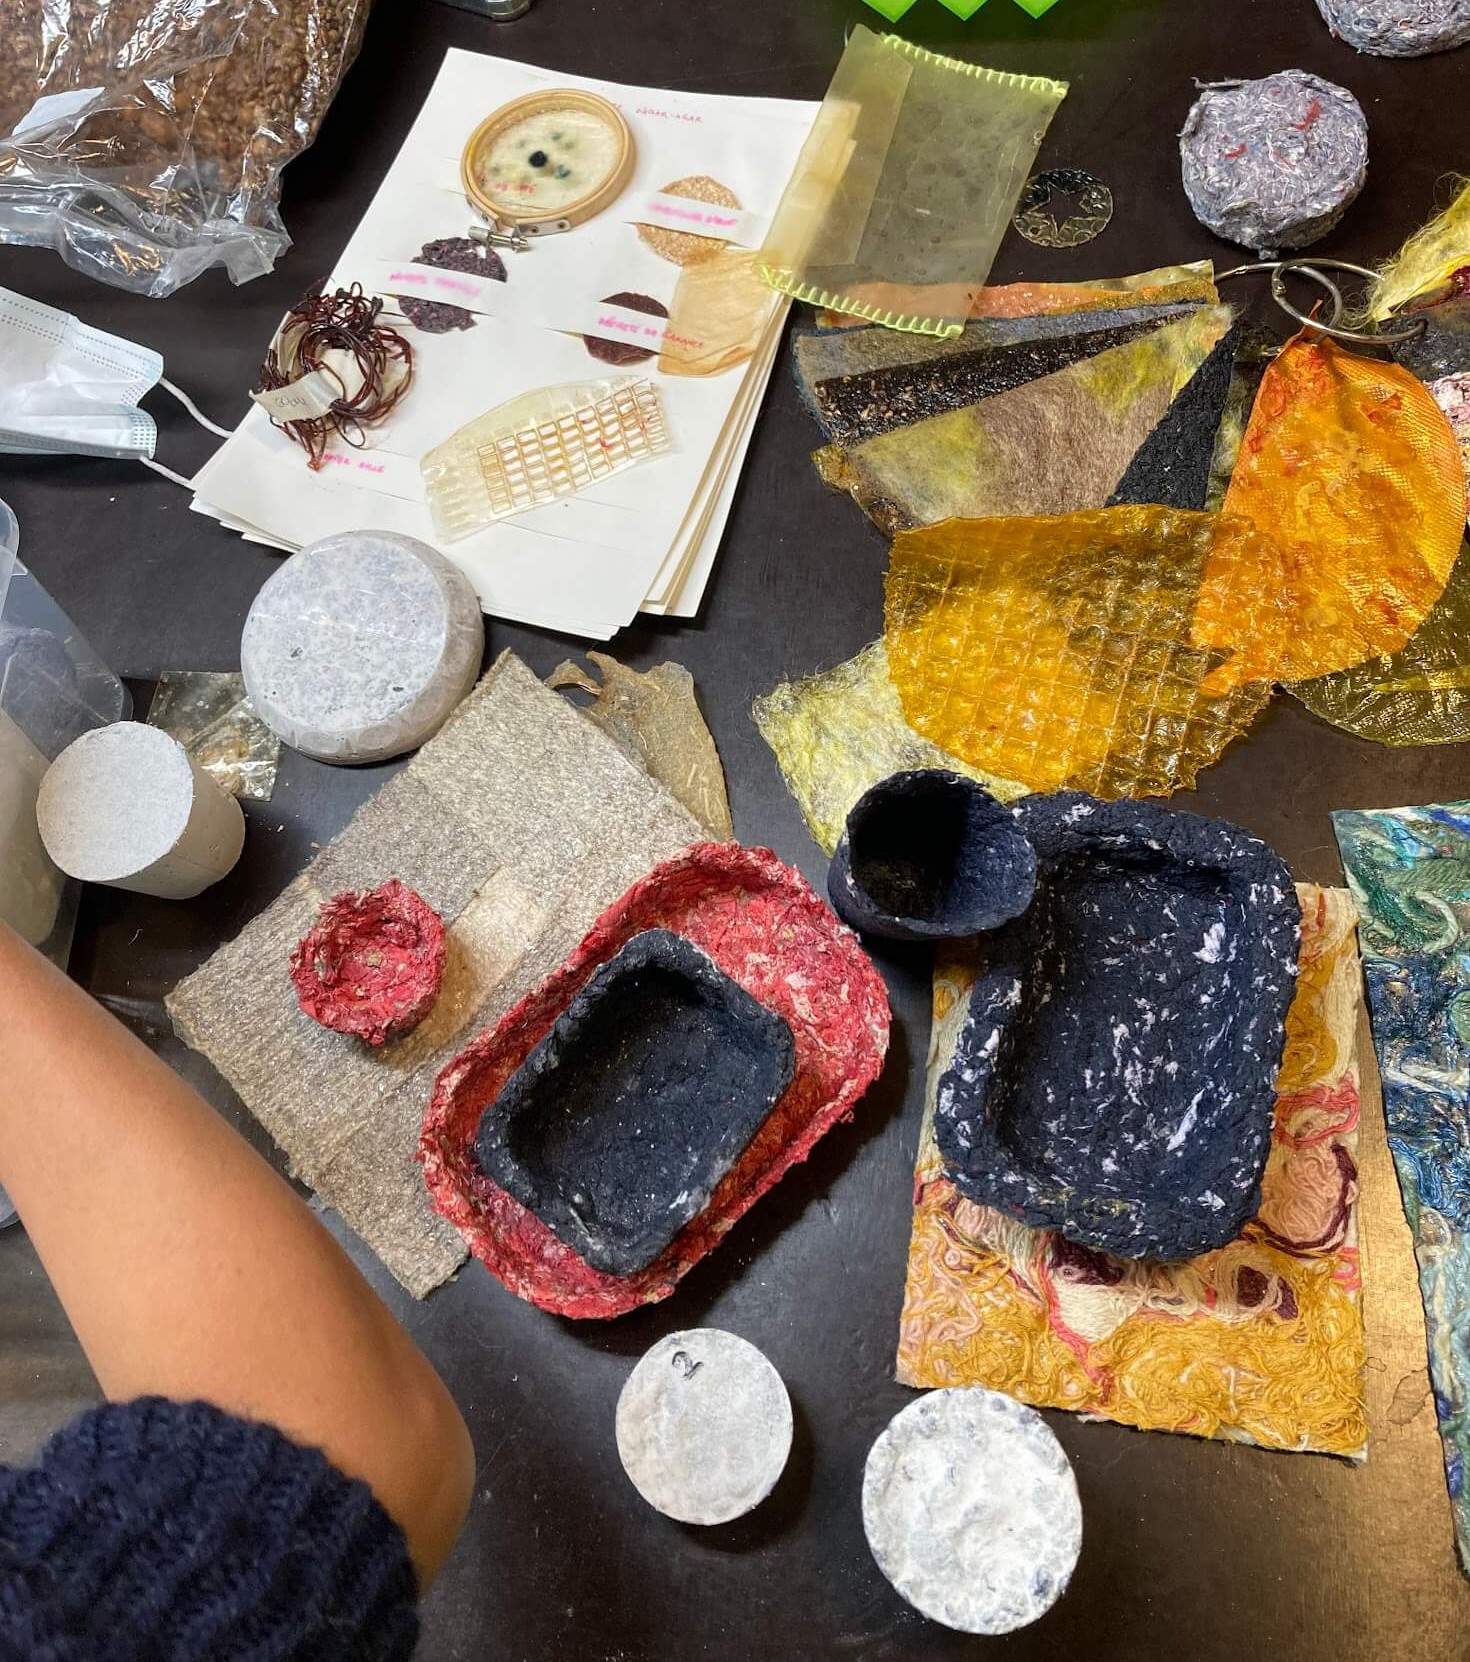
First, we looked at all the Green Fabric samples—and there are a lot of them. Based on what we saw, we decided together which recipes we were going to make.
4.1 Yarns
The creation of algae-based bio-yarn relies on a chemical principle called ionic cross-linking. When a liquid sodium alginate gel is extruded into a calcium chloride bath, calcium ions instantly replace sodium ions to bind the molecular chains tightly together. This rapid reaction transforms the liquid into a solid, water-insoluble filament, while additives like glycerin ensure the final dried yarn remains flexible.
* 250 g of Colored water solution
* 6 g of sodium alginate
* 10g g of glycerin
* 1L of water
* 100 g of calcium chloride
* tall container
* spoon
* sauce bottle (squeeze bottle)
* plastic sheet
* First, prepare a 10% sodium chloride solution
* Prepare the sodium alginate and glycerin solution separately
* Pour this second mixture into the sauce bottle
* Let it sit for 24 hours to remove any bubbles
* Extrude it into the sodium chloride solution.
* Try to maintain a constant pressure so that the thread formed has a uniform diameter
* unravel the yarn
* Untangle it
* let it dry flat on a plastic sheet or wrapped around a plastic bottle for several days
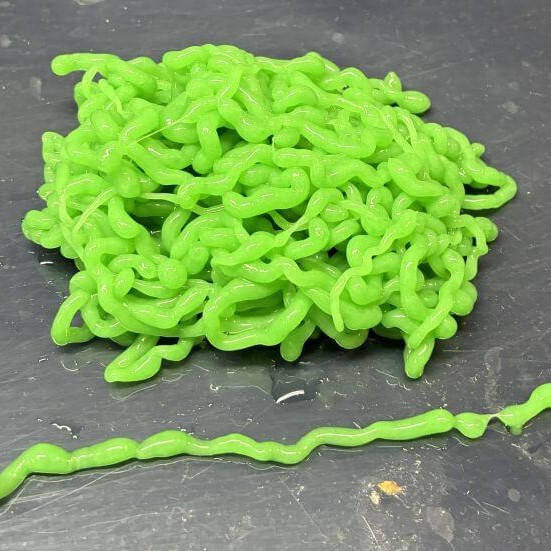
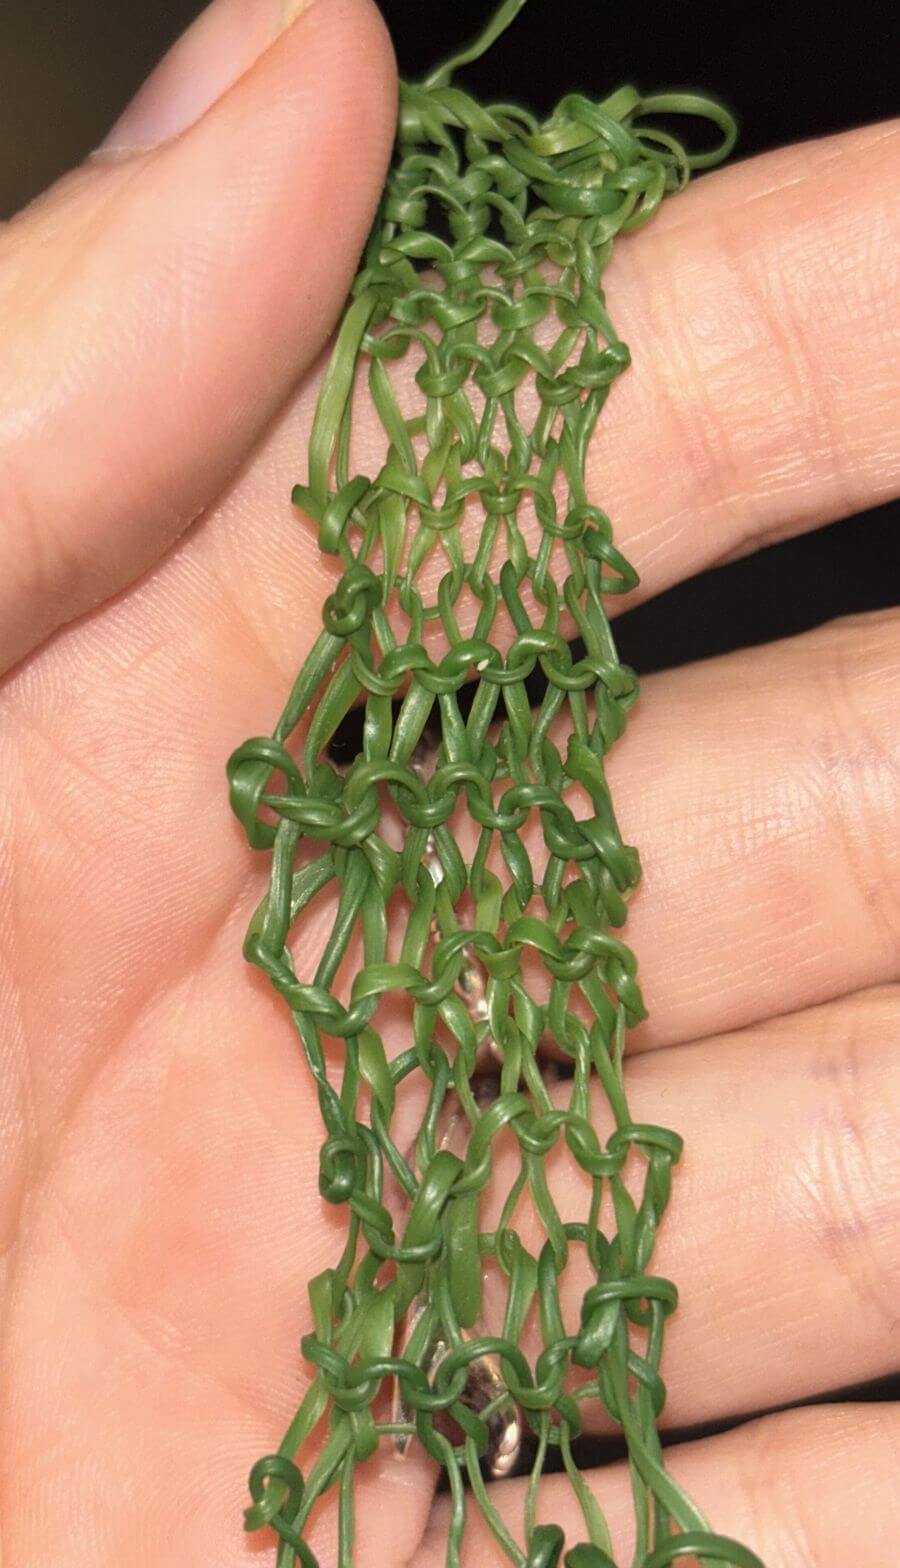
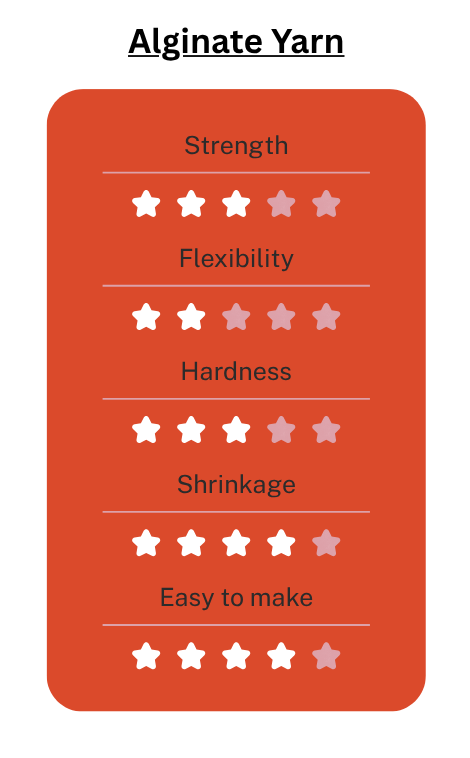
Here are some photos showing the steps involved, as well as what the yarn looks like when finished. The yarn clearly became much stronger as it dried. However, it isn't very flexible and is therefore difficult to work with. It tends to break and isn't flexible enough to be knitted or crocheted.
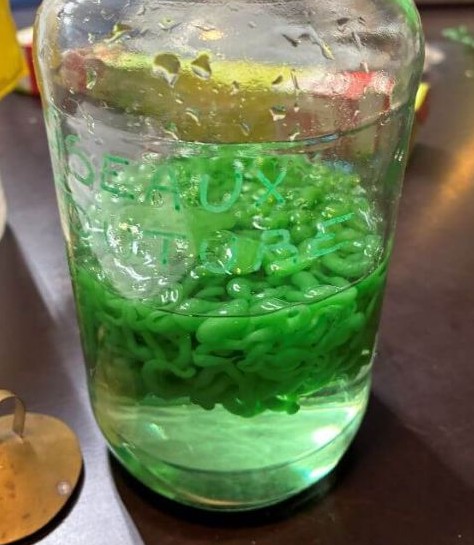 Yarn in curing solution |
 remove from water |
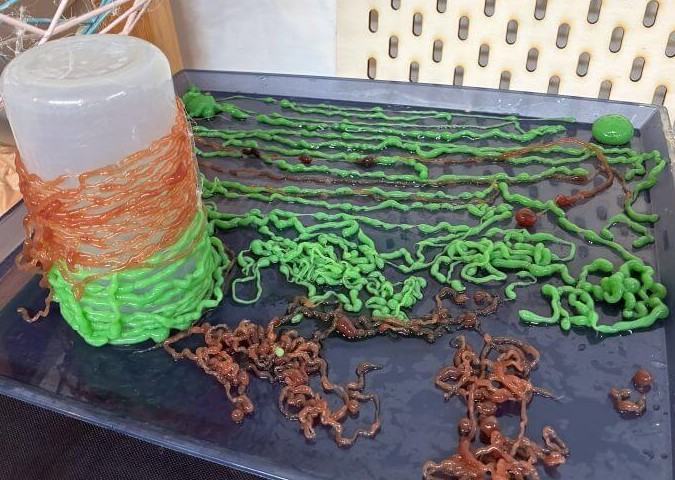 let it dry |
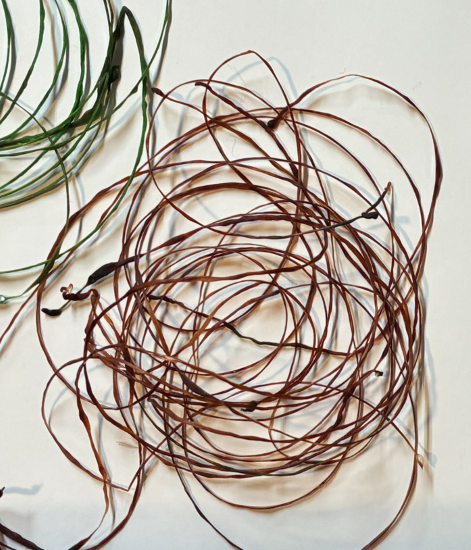 After few days |
Here some image of the process:
Here example of knitted sample with this yarn:
4.2 Paper Garlic
Apparently, garlic skins can be turned into paper. We gave it a try!
* Garlic peel
* Water
* 1 spoon of sodium carbonate
* Additive = glycerin
* sauce pan
* spoon
* tulle on an embroidery hoop
* Place the garlic peels in a saucepan with water
* Add a spoonful of sodium carbonate. Check that the pH is basic (water minus 10)
* Simmer over low heat for about 1 hour. The appearance of the peels should change
* Rinse with water
* Blend as finely as possible with a little water
* Add water
* Spread onto the tulle (paper-making process)
* Let it dry (in front of a fan, if possible)
* After drying, you can make the paper more flexible by applying glycerin with a brush or spray
Here are some photos showing the steps involved, as well as what the paper looks like when finished.
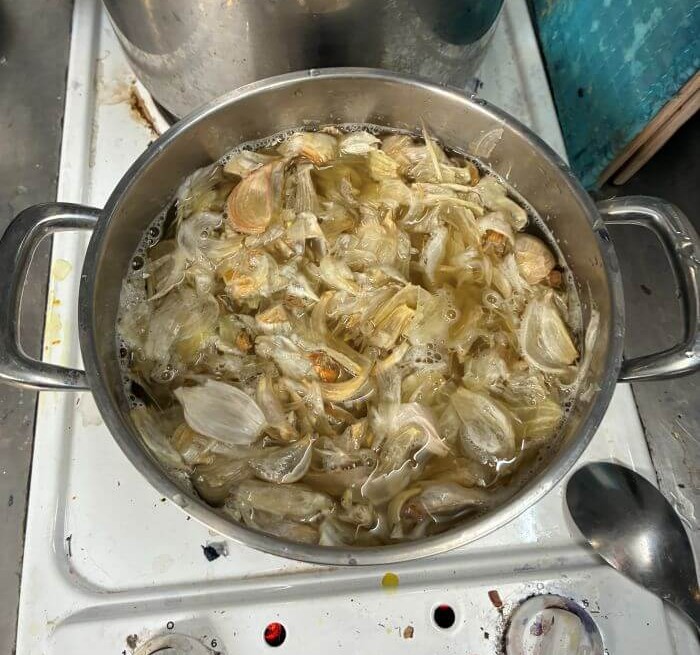 cook in a basic solution |
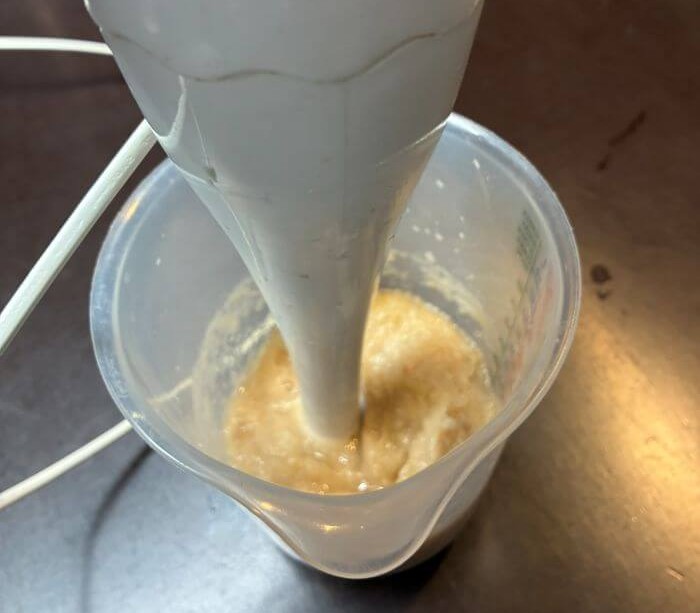 Mix |
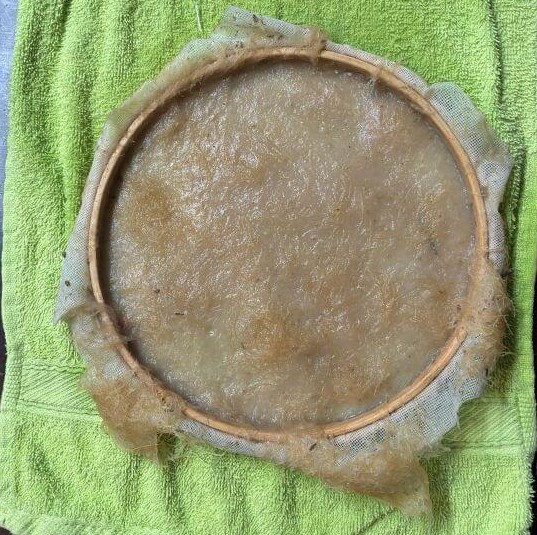 Process as paper |
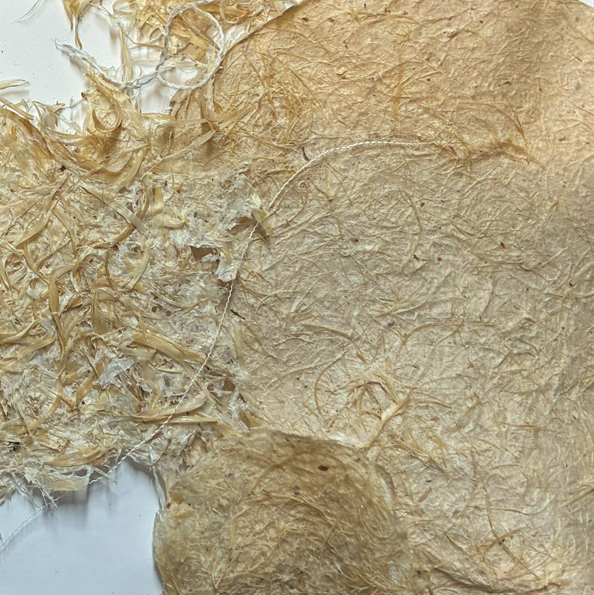 After few days |
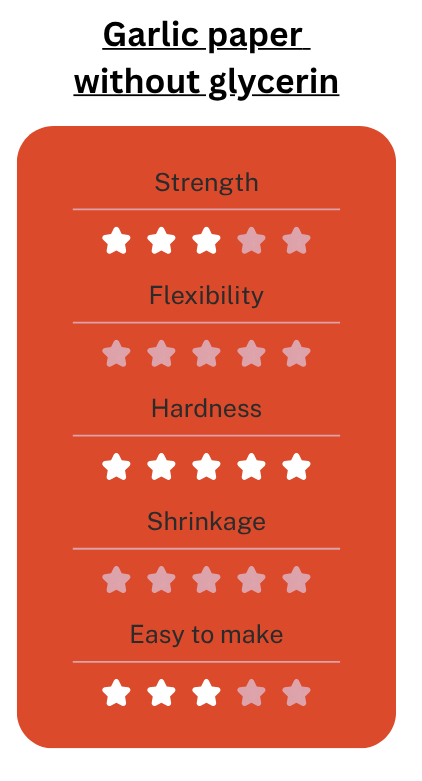
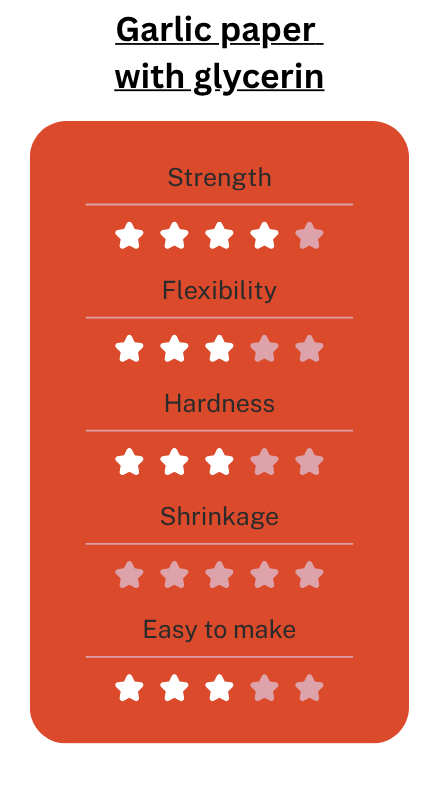
Peelings that aren't blended enough are coarse and result in paper that crumbles. Finely blended peelings produce beautiful paper that is strong but somewhat brittle. Adding glycerin helps make it more flexible.
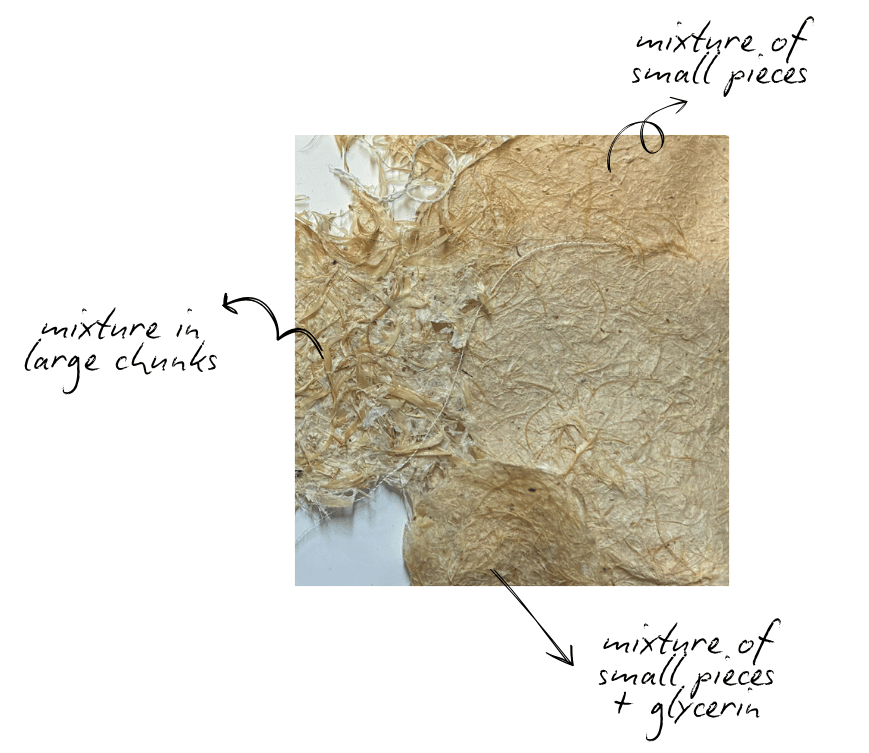
Here some image of manipulations:
4.3 Furs
4.3.1 Cat tail
We replicated the technique that Cecilia explained during her presentation.
* Cat tail
* Fabric
* wood glue
* brush
* scisors
* Take a cattail
* Cut a piece of fabric to the size of the cattail
* Apply wood glue to the fabric
* Wrap the fabric around the cattail
* Use a utility knife to slit open the cattail
* Lay it flat
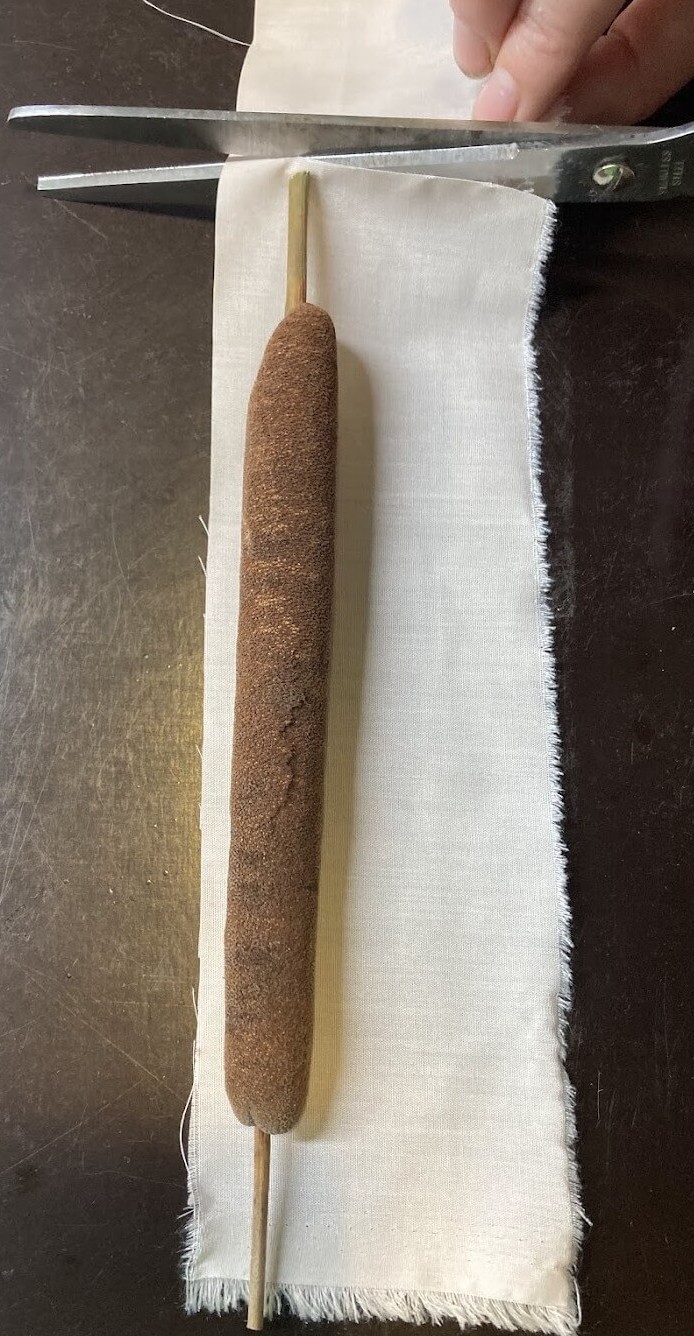 Cut a piece of fabric to the dimensions of the cat tail |
 slit open the cattail |
 Open |
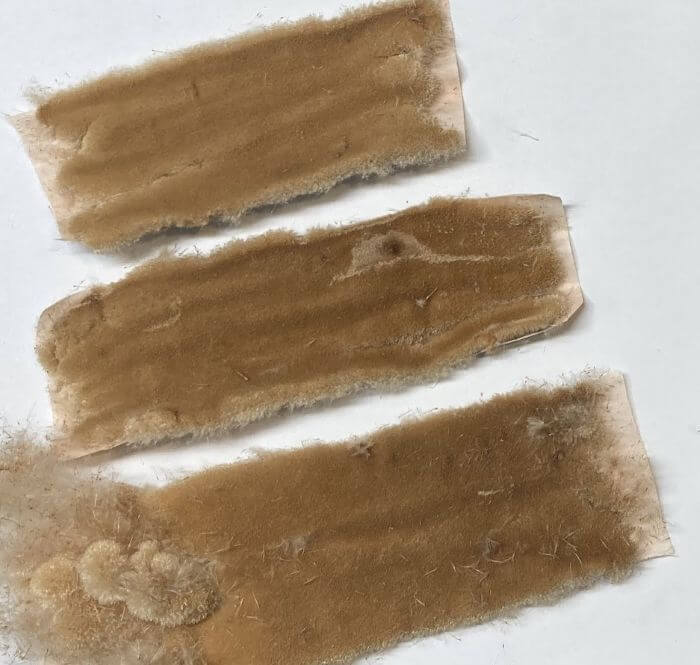 the result |
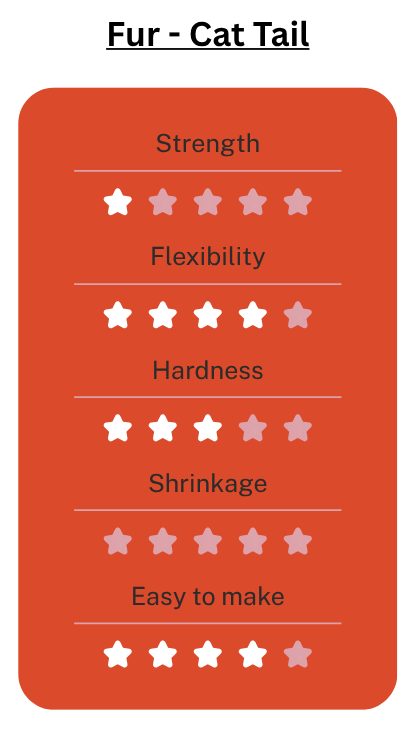
The technique is easy to do, and the result is incredible. It really looks like fur—and it’s incredibly soft, too. However, it’s fragile and tends to crumble when you touch it.
4.3.2 Clematis vitalba
I loved the idea of creating fur because we all need a little softness in our lives. I saw some Clematis vitalba at my neighbor’s house (I admit I didn’t know the name—I had to look it up on Google Lens). Its super fluffy appearance made me want to try Cécilia’s technique with these clematis flowers.
* Clematis vitalba flowers
* Fabric
* wood glue
* brush
* scisors
* Pick the flowers without taking too many
* Cut the flowers as short as possible (do not keep the stems).
* On a light cotton-like fabric, apply wood glue with a brush.
* Apply the flowers (fluffy side up).
* Let dry.
* Trim off the excess fabric.
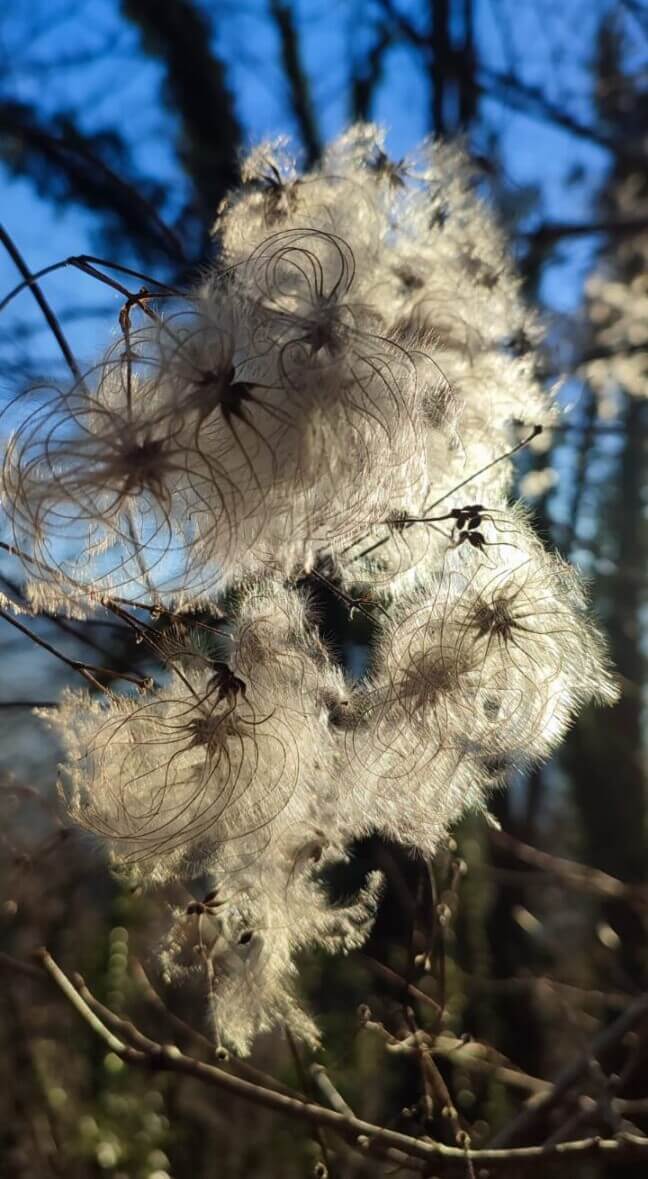 Pick some clematis flower |
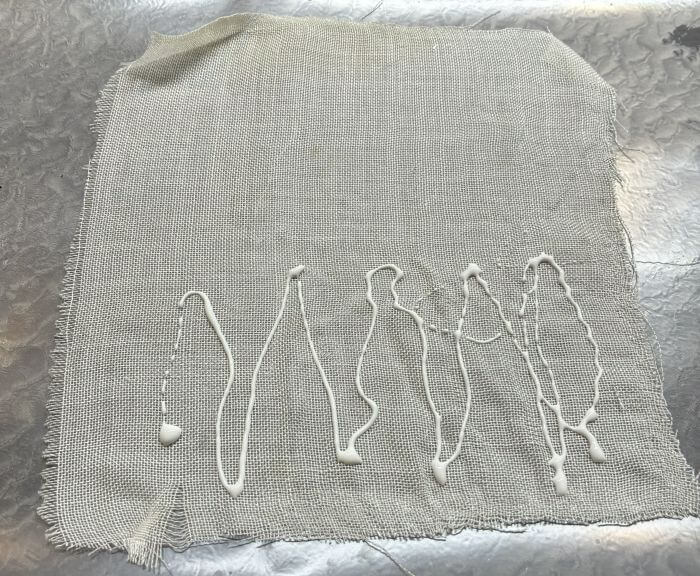 apply wood glue on the fabric |
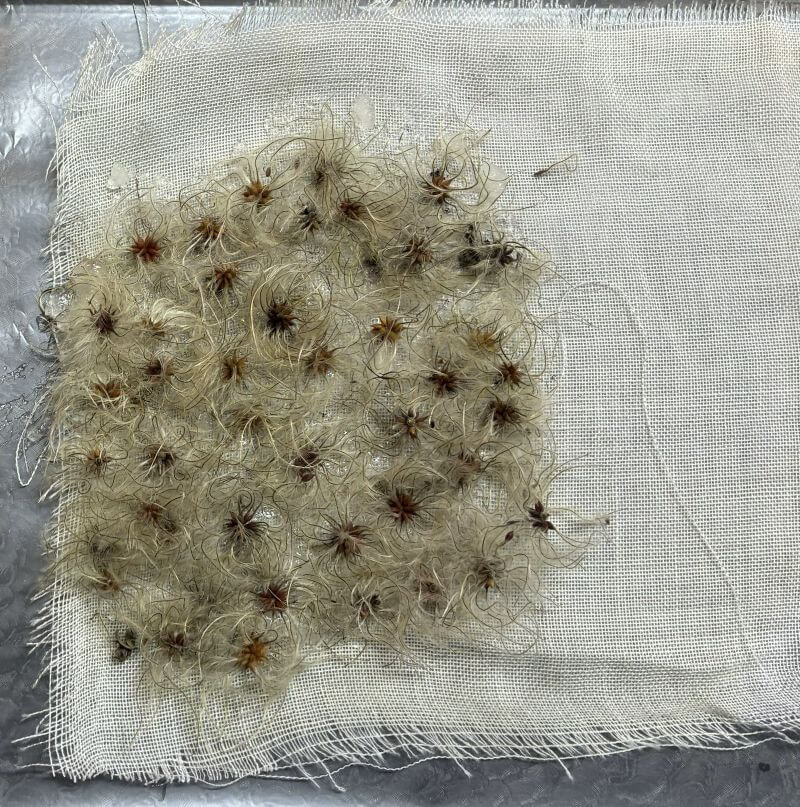 Put and press flower |
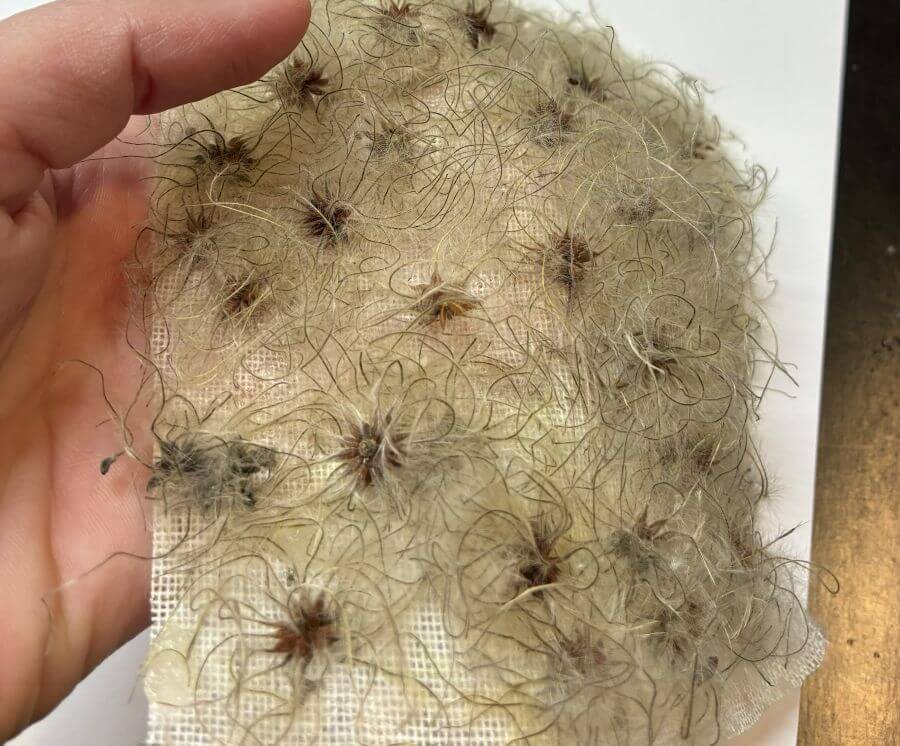 results after drying |
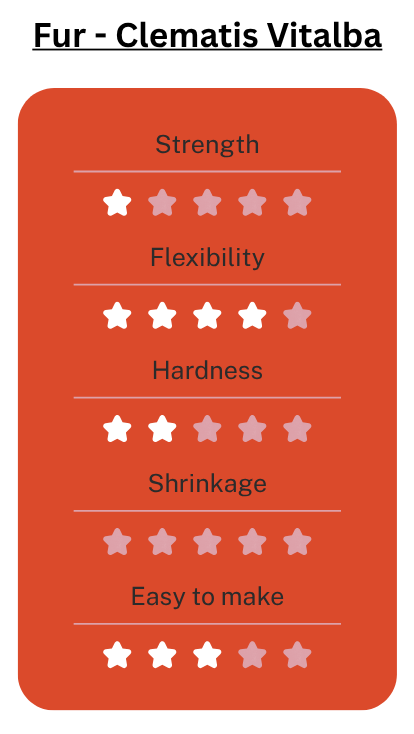
The result is beautiful—it's a success. However, the flowers are fragile and fall apart easily when handled.
...
4.4 Gelatin based bioplastics
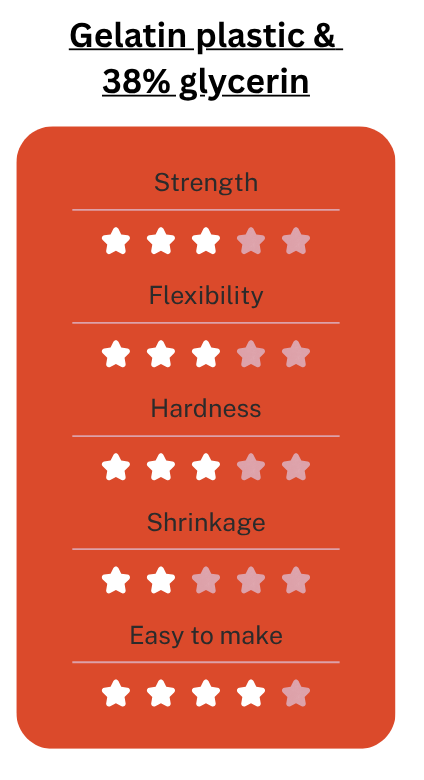
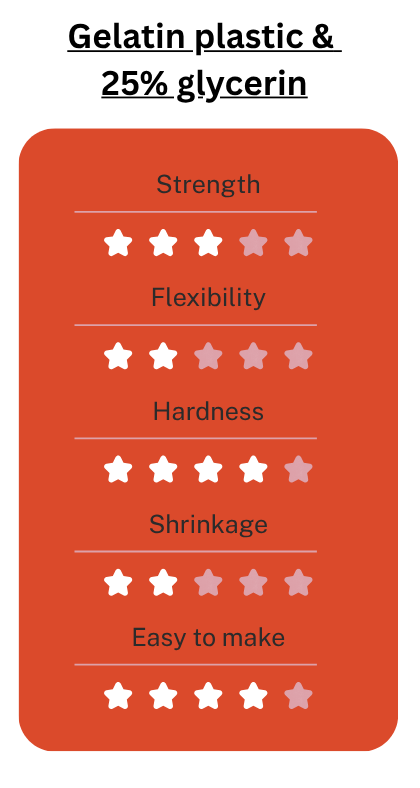
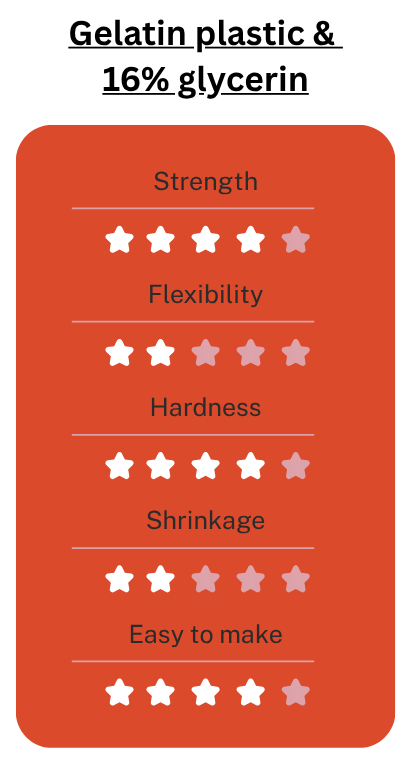
Bioplastics made from gelatin are well known and produce good results. The final product will be more or less flexible and more or less hard depending on the amount of glycerin added.
We tested four recipes with four different amounts of glycerin to better understand its impact.
We added food coloring and binders just for fun!
* 48g of gelatin
* 8g or 12g or 18g or 48g of glycerin
* 240ml of warm water
* food coloring
* differents binders: fibers, wool, pencil shavings, maple samara,
* sauce pan
* spoon
* embroidery hoops
* plastics foils
* Prepare the embroidery hoops by tucking a sheet of plastic into them. You can put objects or binders in there
* Mix the gelatin into the hot water. It must dissolve completely
* Add the desired amount of gelatin and stir
* Gently pour the mixture into the embroidery hoops (trying to avoid bubbles as much as possible)
* remove any bubbles
* let it dry, if possible under a fan
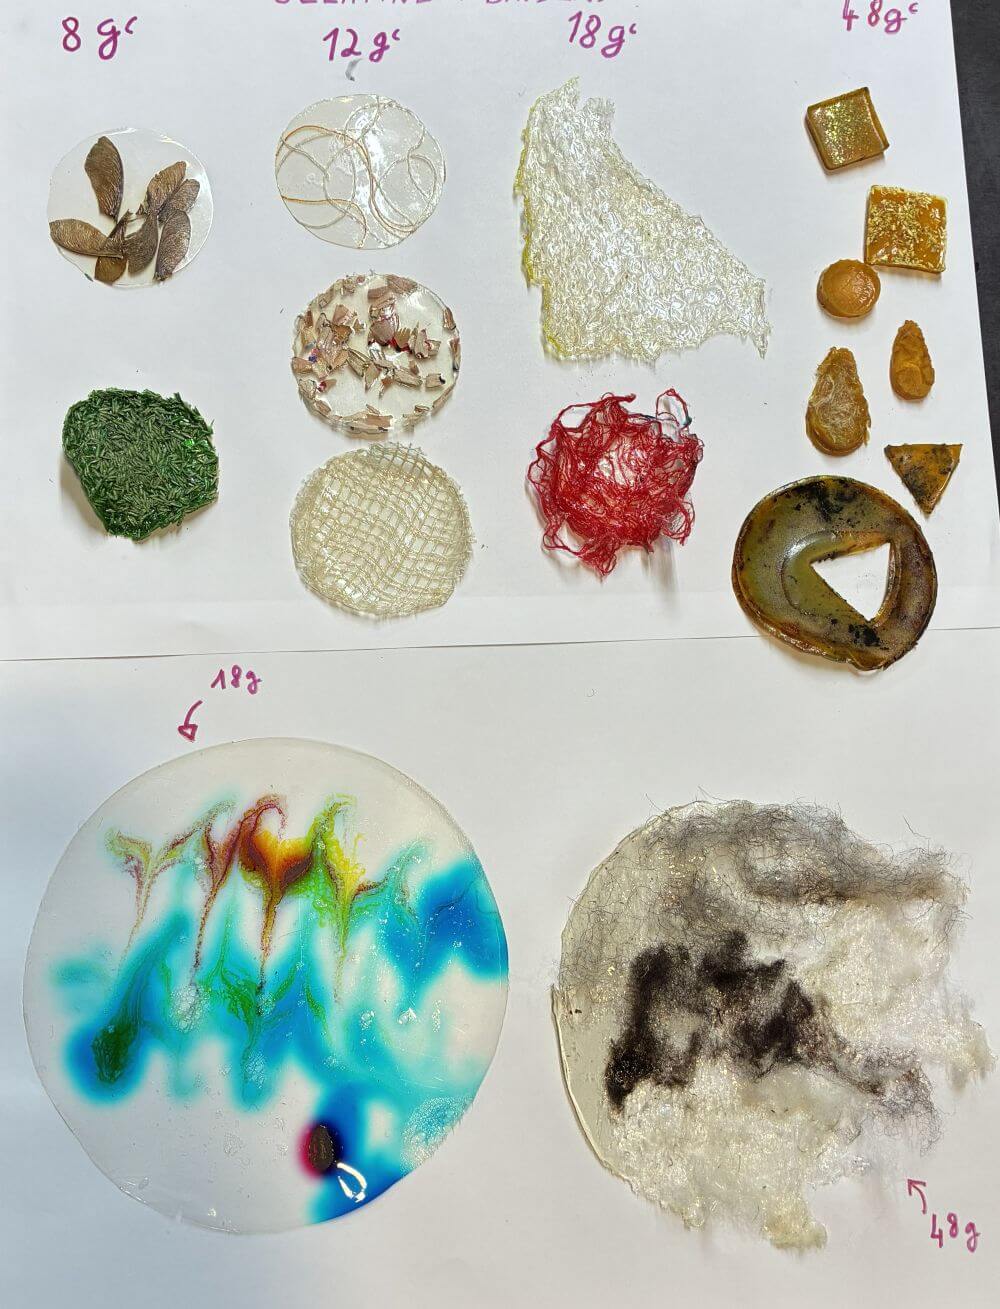
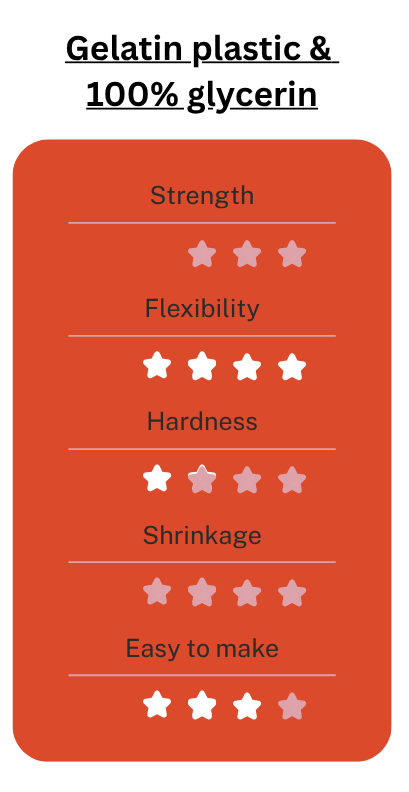
The results obviously vary greatly depending on the amount of glycerin added to the recipe: the more glycerin there is, the more flexible the material becomes. The samples with 48 g are even completely soft. It’s clear how important drying is: make sure to lay the embroidery frames flat and place them under a fan; otherwise, mold will form. The material must be completely dry; otherwise, it will stick.
4.5 Mycelium process
Sometimes pictures speak louder than words. Credits: Original music by Eartheater - Song title: If It's in Yin
5. Results
Here is a summary of the results obtained by Biomaterial. At this stage, only a few samples show promise for practical applications, primarily in accessories (bags, jewelry). At this stage, none of the samples would be suitable for making a garment.
 |
 |
 |
 |
 |
 |
 |
 |
 |
6. Weekly reflection & critical thinking
-
This week has been really frustrating for several reasons:
- Our grown materials didn't have enough time to grow enough to show results after a week. We won't be able to get results for another 5 to 10 days.
- There have been a lot of failures, and the most interesting samples are difficult to manipulate.
- There was a lot of shrinkage and warping during the drying process
- On the other hand, I loved the vegetal fur. The effect is incredible and very poetic.
- I don't know if I'd want to make this my final project, but I'd be interested in exploring flower and plant materials further. I wish I'd had the time to experiment with tanning techniques on this kind of material.
NuEval — final step
Go to NuEval and fill in the checklist, when not complete notify your instructor.