Digital bodies
1. Objective
weekly assignment
Check out the weekly assignment here or login to your NuEval progress and evaluation page.
2. References, research & inspiration
2.1 Inspirations
When I think about digital bodies, I always want to express my preference for artistic proposals and kind of weirdness. I enjoy creating discomfort. It's a way for me to encourage people to pause and reflect. Take a little step aside to think about what art is, what it is made for, and maybe for this second week assissment focused on body, ask yourself what your body means to you. What expectations do we have of it? How do we treat it, and why?
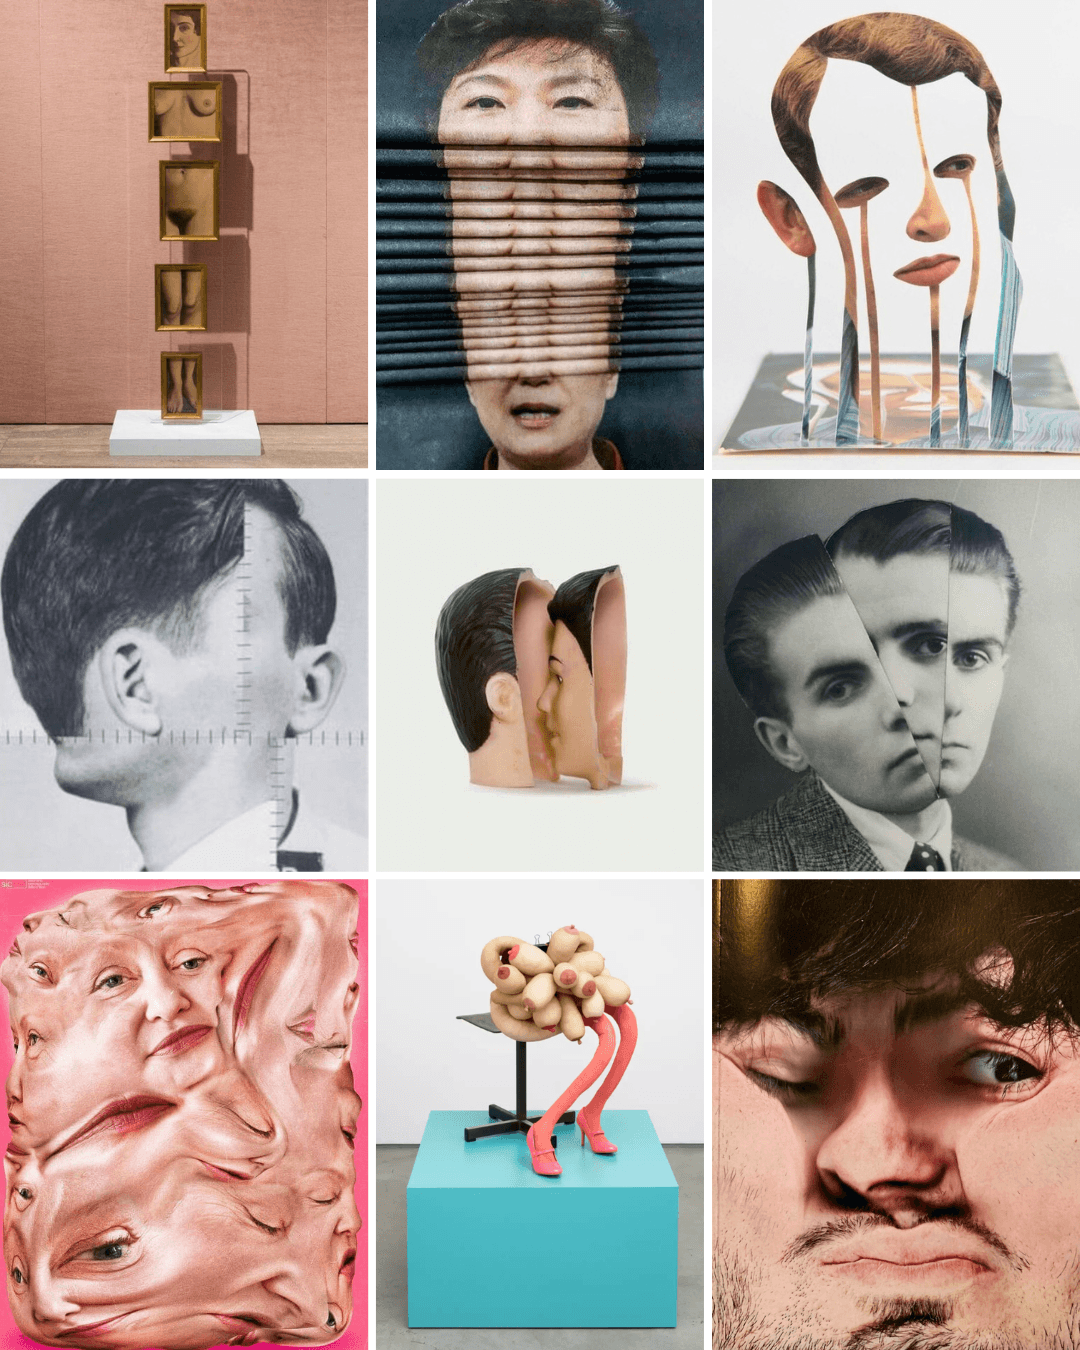
When I think about body weirdness, I immediately think of distortion, division, multiplication, deconstruction and recomposition. Make the body flat or, on the contrary, make it inflate. Body distortion can also be achieved by isolating parts of the body and downsizing or upsizing them.
Of course, other artists have investigated this method of representing bodies. Here are some examples I found in different artistic fields in different eras that particularly inspire me. We can see photographs, sculptures, collages and image editing.
2.1 My ideas - Sketches
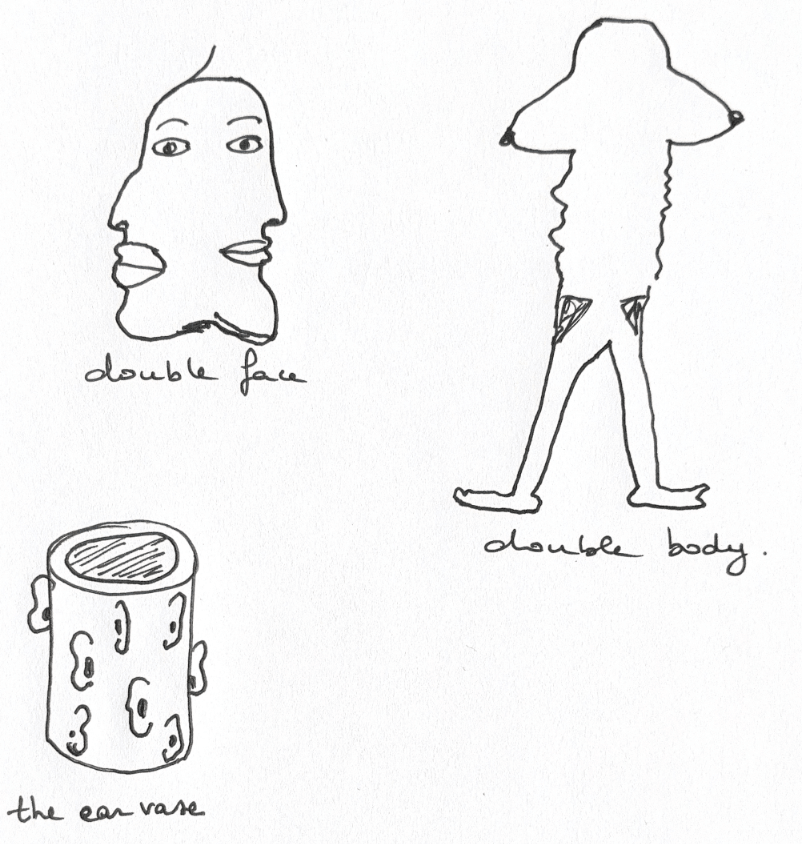
Based on these reflections about weirdness and its associated inspirations, two ideas emerged: 1. Multifaceted body The idea is to scan a body, multiply it and then merge the copies to create a single shape with multiple facets. Then, make it real by slicing and cutting.
- Unfold face I probably won't have time this week, but I'm interested in investigating the possibility of scanning (probably using a type of meshing photogrammetry). I want to see how I can unfold the scan file to create a 2D image and achieve an interesting distortion.
3. Tools
- 3d Model with MakeHuman
- Make human - assets for blender
- Blender cheatsheet - FR
- Blender video tutorial - FR
- Mesh repair with ...
4. Process and workflow
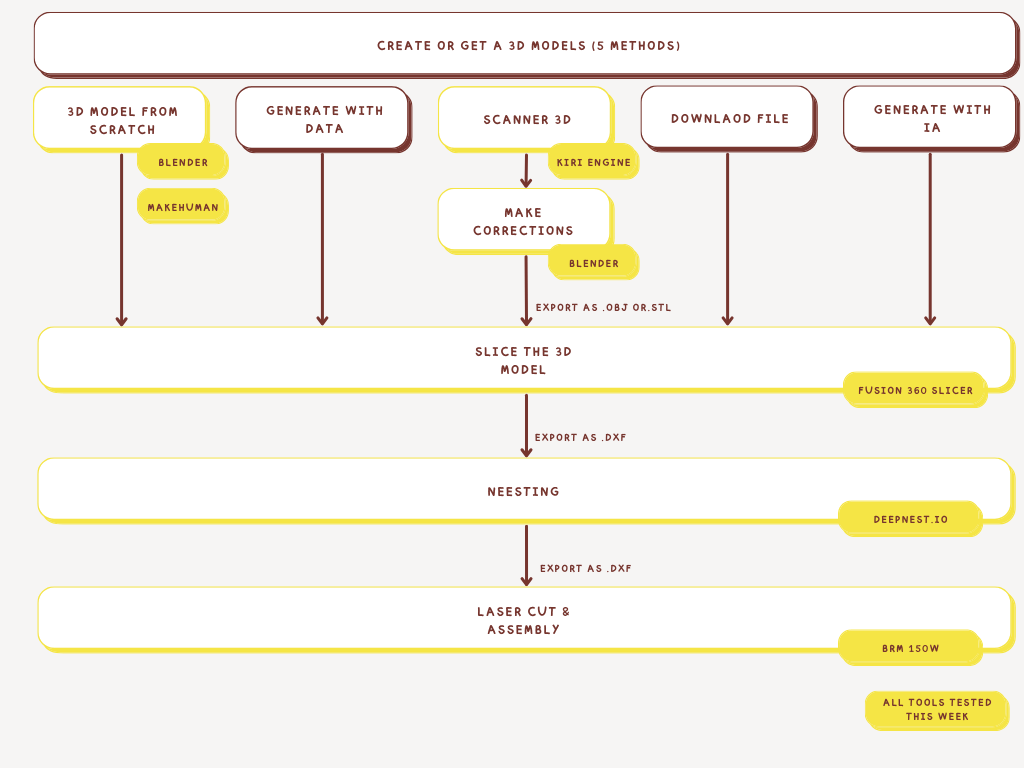
General workflow of this week is:

4.1 Create 3D model with in Blender
4.1.1 Basics
I first followed 2 Rico's tutorials (This year and last year) 3.
I allows me understanding basic use of blender:
- the window environnement
- the object / edit mode
- the important commands and their shortcuts: G (moving), S (scale), R (Rotate), X Y Z (selection of one specific axis), A (select all), E (Extrude),
- work on texture (material properties in object mode)
- Work on mesh:
- Edit mode/risht click/ subdivise
- Effect of proportionnal Editing (O)
- Bolean modification (First I must install this add-on in Edit mode/preferences/ad-ons). you see a bolean tab on the 3D viewer (if not, press N).
Here's a picture of my first exercise in blender. Not so bad!
4.1.2 Makehuman
Makehuman is a software you can use to create 3D model of Human bodies.
You can select the body you want to make choosing between the different options (gender, age, weight, height...).
you can add materiality addind the asset pack.
What you can make on makehuman, you can making it directly in blender.
For that you must download the asset pack and install MPFD in blender ad-ons.
Once done, you see a MPFD tab on the 3D viewer (if not, press N).
4.1.3 My model
Makehuman is a software you can use to create 3D model of Human bodies.
You can select the body you want to make choosing between the different options (gender, age, weight, height...).
you can add materiality addind the asset pack.
What you can make on makehuman, you can making it directly in blender.
For that you must download the asset pack and install MPFD in blender ad-ons.
Once done, you see a MPFD tab on the 3D viewer (if not, press N).
4.2 Create 3D model with 3D scanner
4.2.1 Raw scan
These models 1 were obtained by using an application on my Iphone: Kiri Engine.
I fisrt carrefully watch this tutorial on youtube but finnaly it was quite simple to operate.
Process is this one:
- click on + button / Photoscan
- Use if you want to work with pictures or video. You work taking picture AROUND the object of person you want to scan. The more pictures you take the more precise will be the results. take minimum 20 pictures.
- Define the quality (meshing and texture)
- Choose automatic masquage (will help to postprocess the result)
- Delete blured pictures
- Chose .OBJ as downloading format
- When ready export the file
The first model (the honey bottle) was obtained by rotating the object.
 The second model (my colleague Simon) I turned around him. I also took more pictures.
 The second results is really better so I will keep this seond way of working.
4.2.2 Postprocessing
I made 2 kind of postprecessings:
1. Directly in the Kiri Engine application
The Two steps done after taking the pictures (automatic masquage and delete blury pictures) are already parts of the postprocessing.
I can also remove some undesired part with Modify/Crop (Useful to delete the support of the scaned object for example).
2. On blender:
Import the .obj file. Remove undesared parts with lasso, or blolean operations, or Bisect.
4.3 Slicing
These models 1 were obtained by using an application on my Iphone: Kiri Engine. I fisrt carrefully watch
4.4 Nesting
Objective is the optimize the position of the shapes to cut in order to minimize material waste.
I used Deepnest.io website.
You can compred the before/after results.
4.4 Laser cutting
Even if this week I learned to use the Greenfabric laser cutter (FluxBeamBox Pro - 50W), I finally cutted my pieces in my own fablab on a BRM 150W.
I get used to it and can access it anytime.
Here the tutorial3 I follow to cut with the machine.
4.5 Assembling
xxxx
These models 1 were obtained by using an application on my Iphone: Kiri Engine. I fisrt carrefully watch
The laser cut nesting 2 was created using.. Lorem ipsum dolor sit amet, consectetur adipiscing elit, sed do eiusmod tempor incididunt ut labore et dolore magna aliqua.
...
5. Results
Results & documentation
- Don’t forget to document the outcome including:
- Final result
- Photos from different stages
- Videos of movement or interaction, show how a material moves, something was assembled or the interactive
- Include measurements or a reference object to give a sense of size
- Describe the (material) properties or what you made
- Comparison between attempts, if you did multiple experiments or generated multiple files before fabricating / deploying. You can use a table as shown in week 4
5.1 3D Models
upload DOWNLOADABLE 3d models of your files such as MakeHuman, Final 3d modelled body, 3D Scans, etc. Make sure to make them DOWNLOADABLE.
6. Weekly reflection & critical thinking
- What did I learn? What did I personally find interesting or surprised me?
- What would I do differently? If something "failed" do I know how else to tackle it now?"
- How does this connect to my final project or my learning trajectory?
- What are implications and possible applications, think also from the ethical or environmental aspect, how it could connect to your practice and project?
NuEval — final step
Go to NuEval and fill in the checklist, when not complete notify your instructor.
7. Fabrication files & References
-
File: 3d modelling of mannequin ↩↩↩
-
File: Laser cut sheets ↩
-
Reference: Author; Title; Source; year ↩↩