Circular Open Source Fashion: Coat as shelter
1. Objective
The starting point for me this week was reflecting on the meaning of circular. In my understanding, circularity comes from:
- Reducing waste as much as possible
- Utilizing non-synthetic materials
- Integrating the life-cycle in the design
- Emphasizing durability
- Frequency of use
The last two points are the most important to me. When buying or making garments, how long they last AND how much will I wear them.
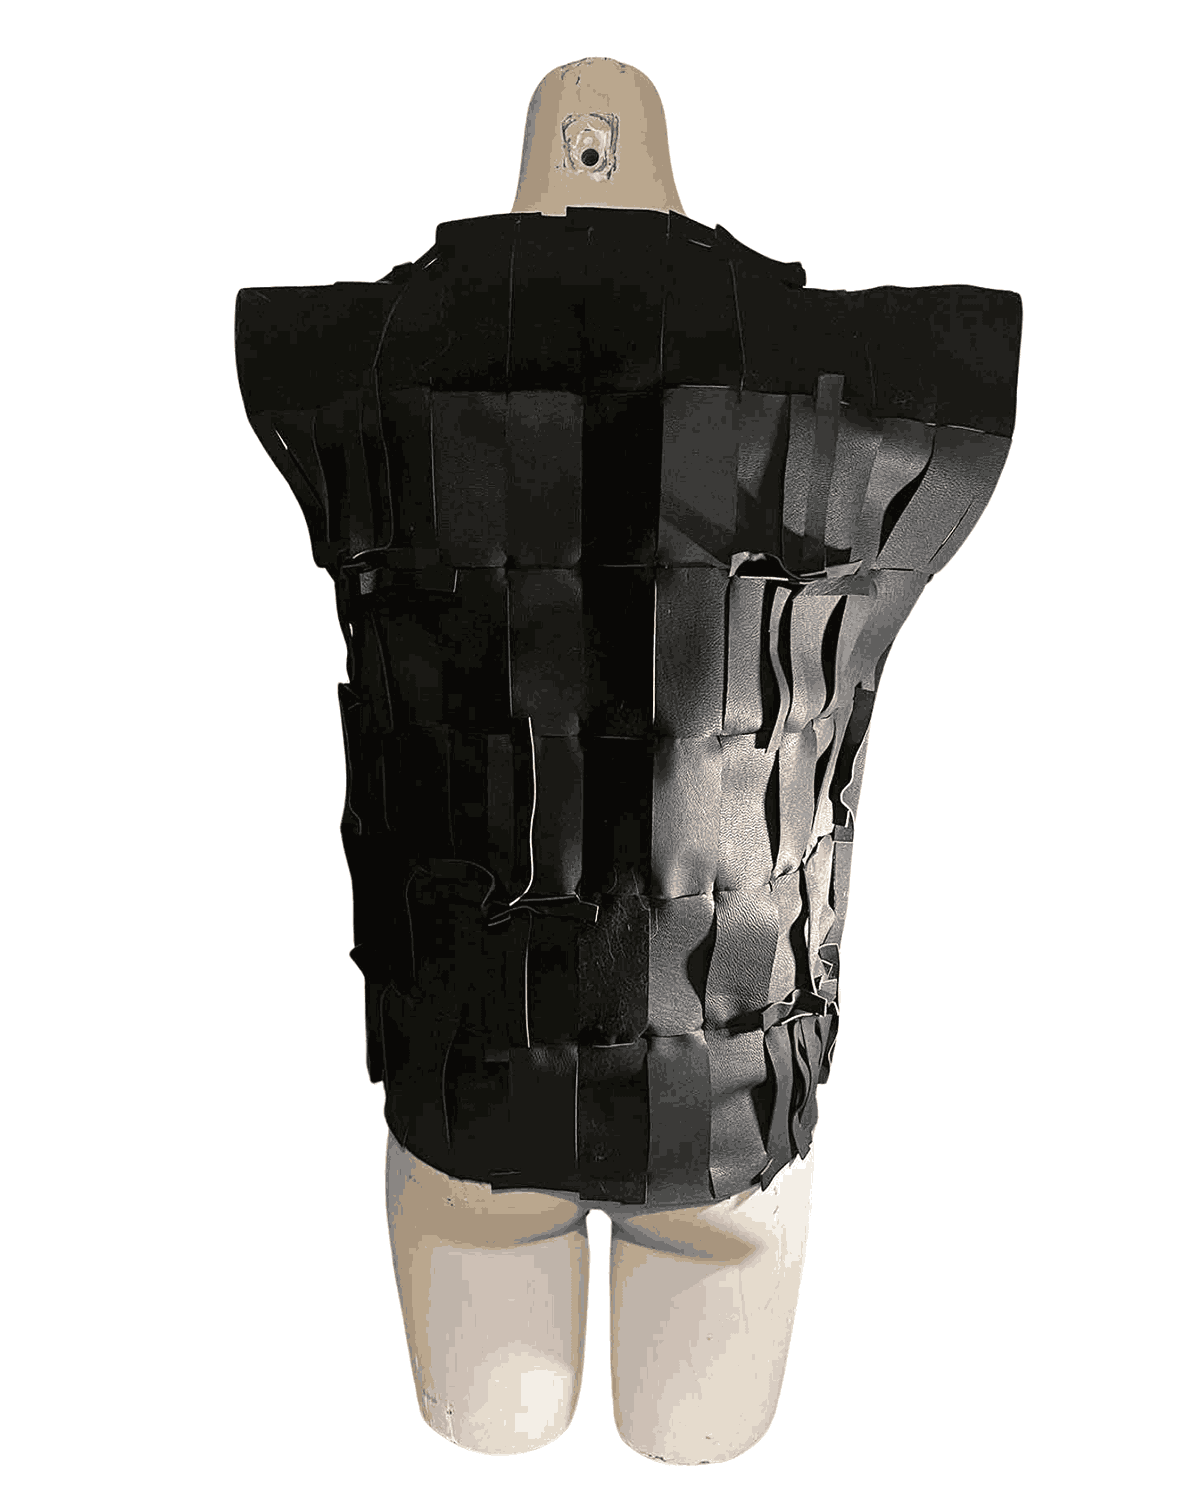
My personal objective this week was to make a winter jacket for myself, because I arrived in Jordan in the summer months, packed lightly, and didn't plan on staying for the fall or winter. I always wanted to make my own winter jacket and I thought this would be a perfect opportunity.
My choice of materials and design were informed by my personal preferences and asking myself the question:
What will be a garment that I will actually wear a lot?
This helped me move forward with the design. I needed something I could use on a frequent basis, that is not too flashy and that is classic enough without being ordinary.
In terms of procuring materials, I was comfortable making a choice I wouldn't ordinarily make (buy new material) because I knew it won't go to waste.
My technical objectives thie week were to:
- Find and iterate on a module that is as close to zero-waste as possible
- Experiment with laser cutting bio-materials
- Incorporate wool and start learning how to wet-felt
- Experiment with Grasshopper
- Experiment with Clo3d
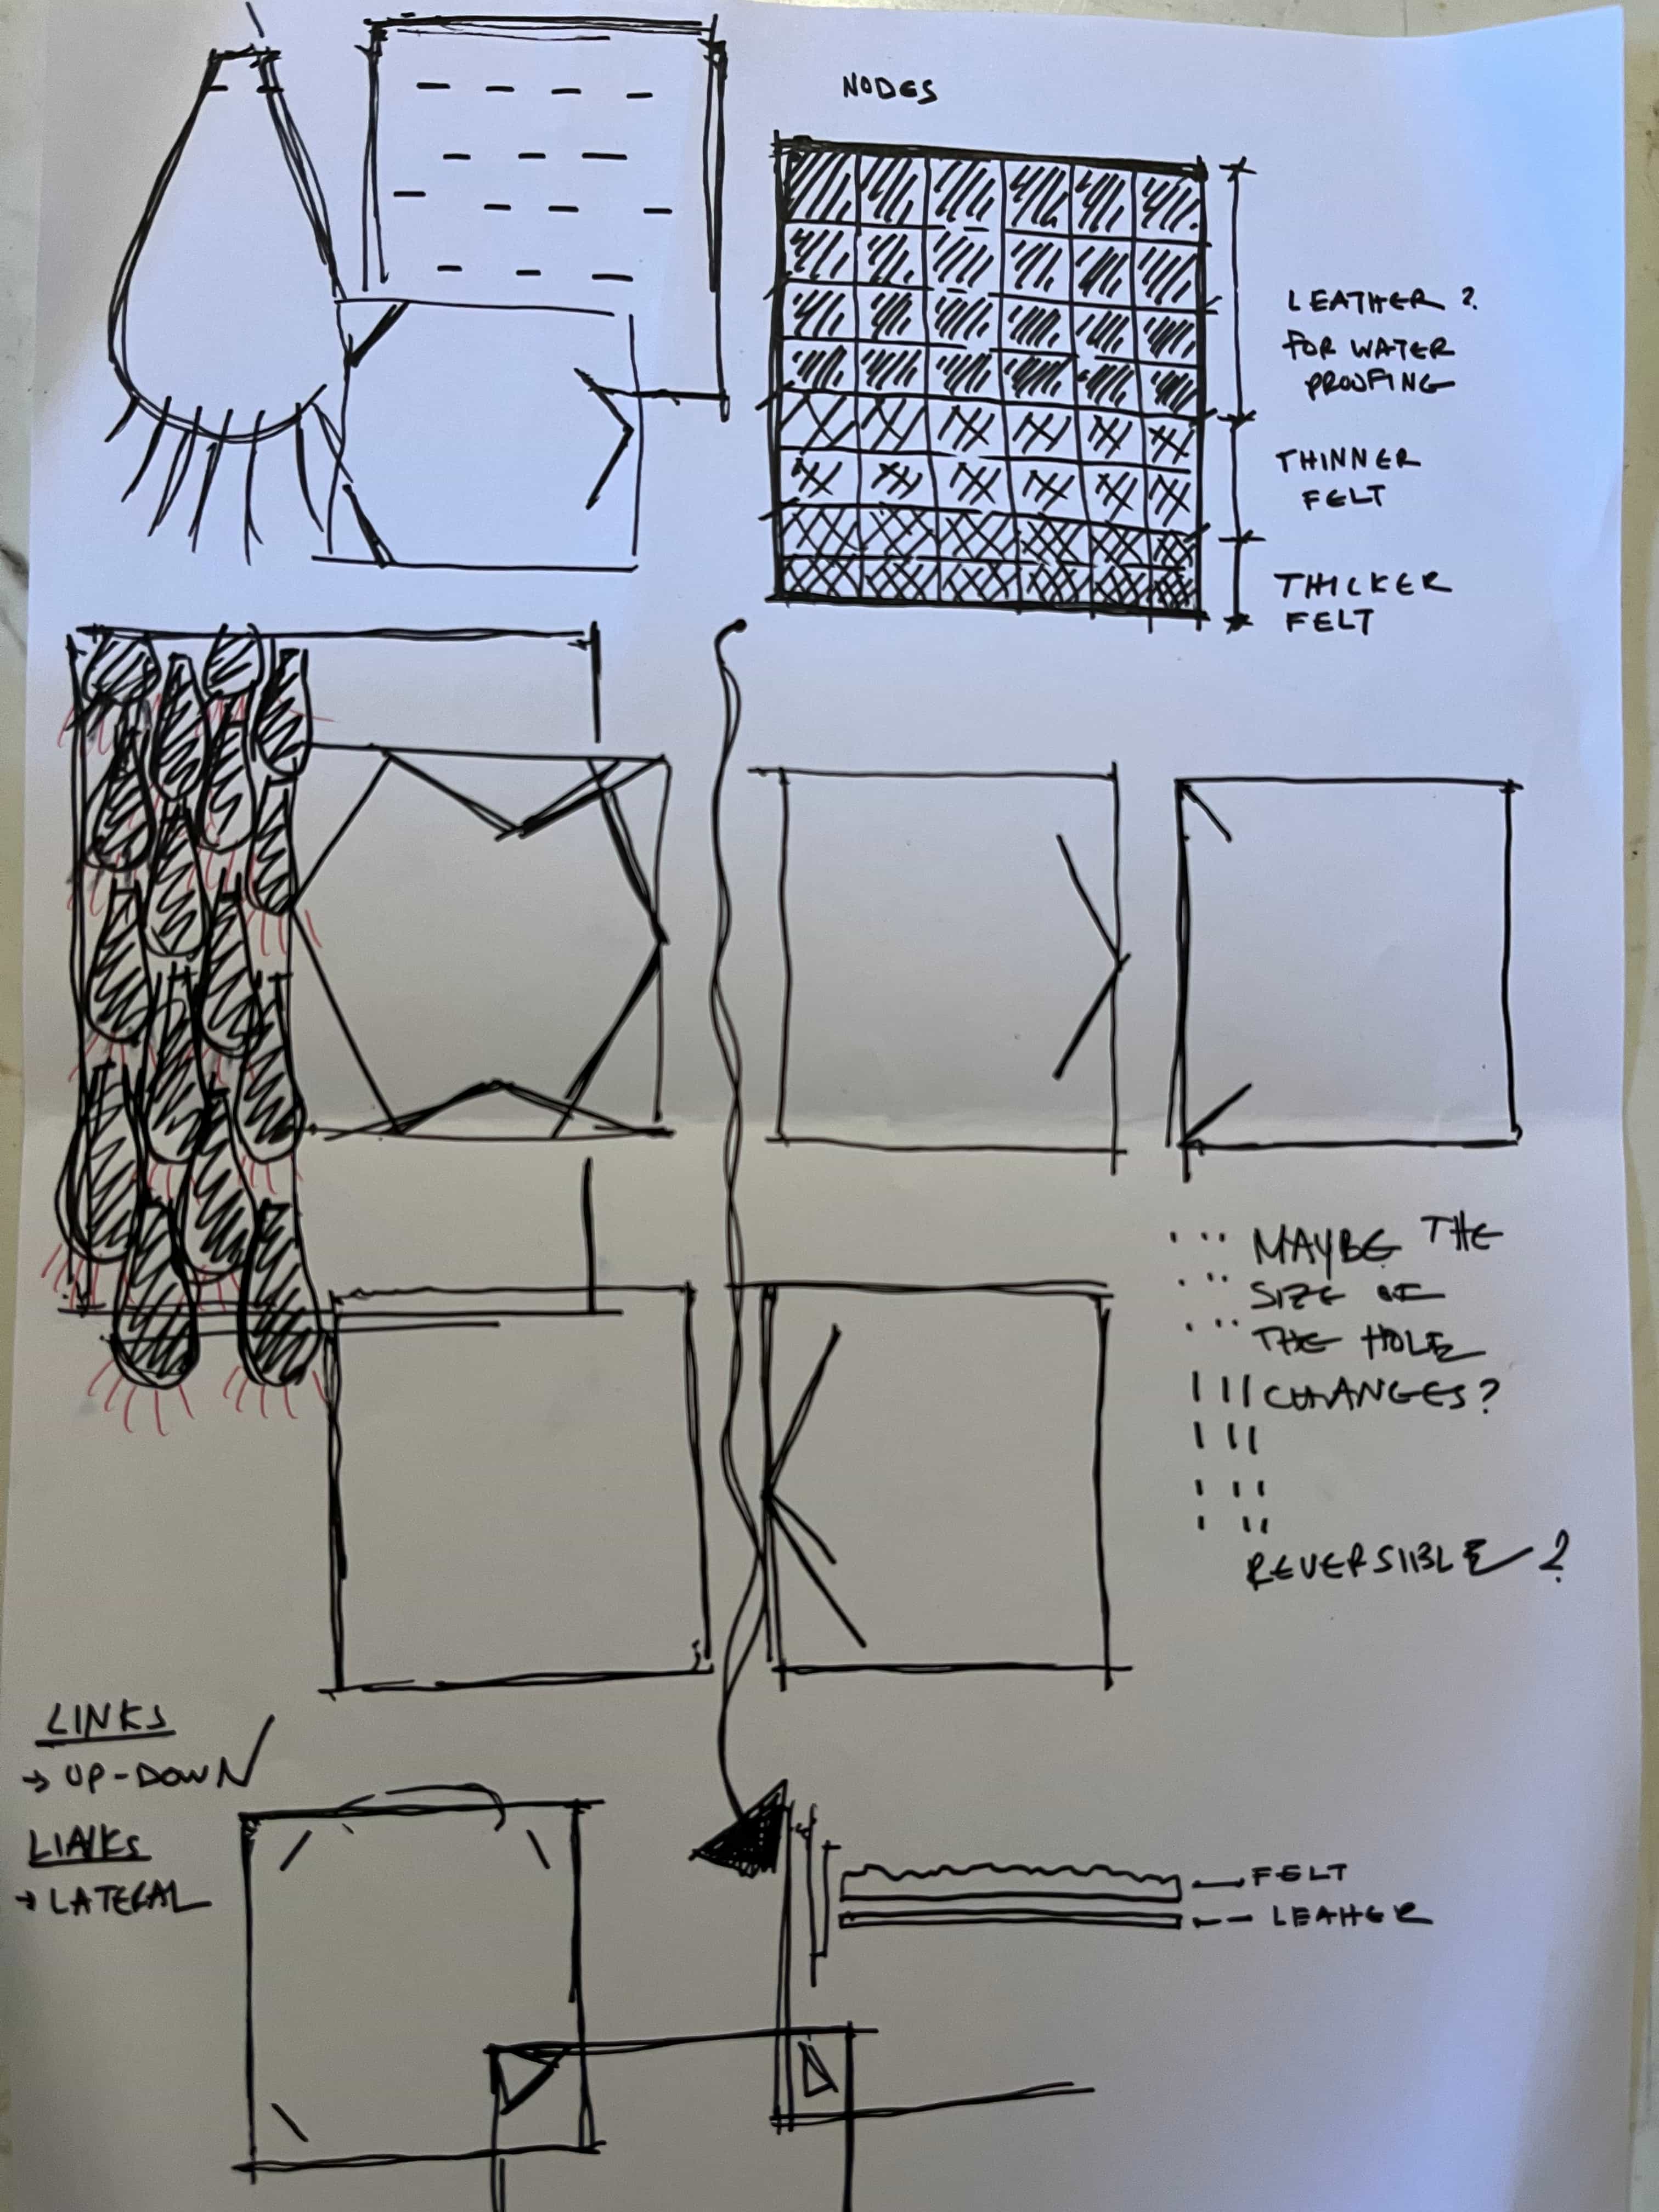
2. Ideation
3. References, research, & Inspiration
Inspiration

Research
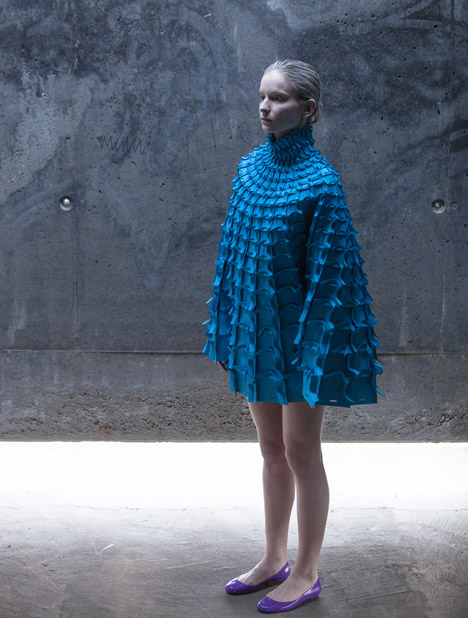
I saw the Matija Cop technique the "plug and feather" which is based on the architectural "groove and tongue" interlocking method.
Coming from an architecture background, I looked into other architecture joining systems that could be adapted to fashion like the following:
- Mortise and Tenon
- Dovetail Joints
- Finger box joints
- Lap joints
- Scarf Joints
- Japanese Joinery
I found that the groove and tongue joint is the most useable in fashion.
In the future, and outside of the time constraint I decided to stick to the tongue groove. In the future, I would like to look into more joinery systems and how they can be adapted.
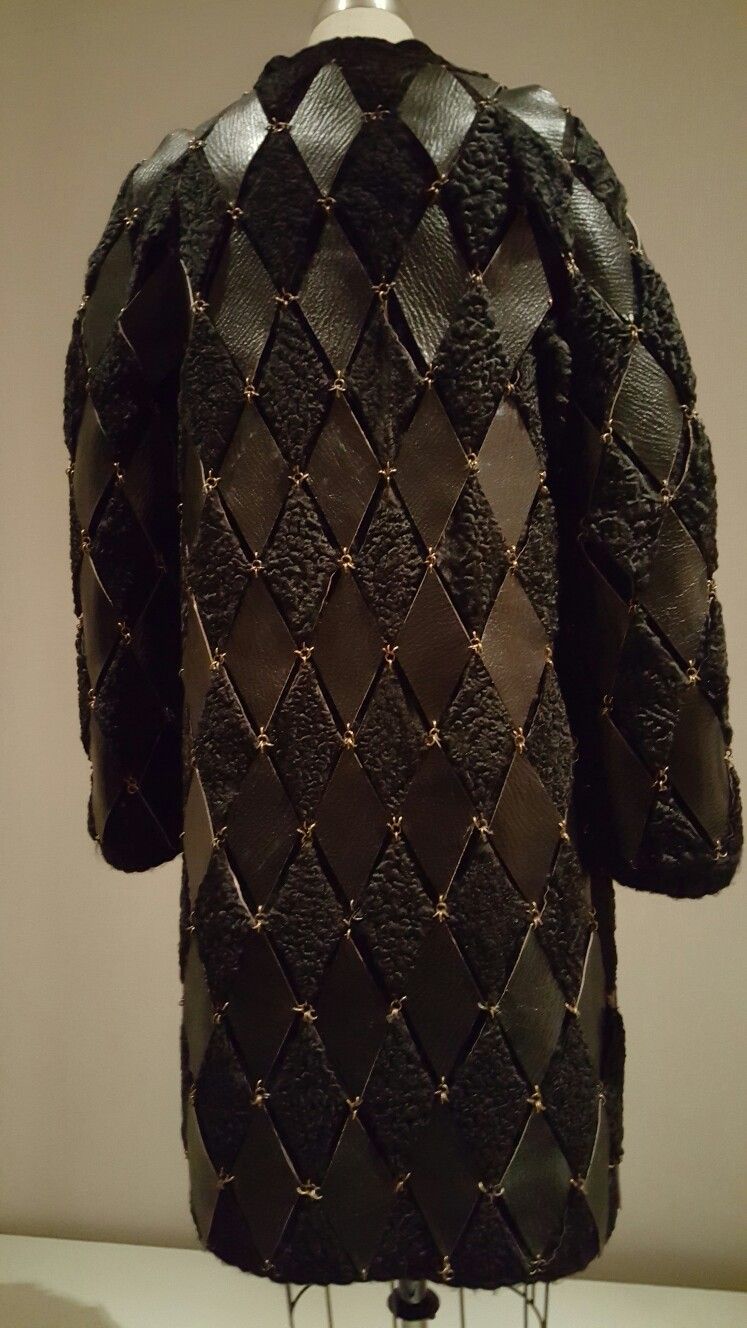
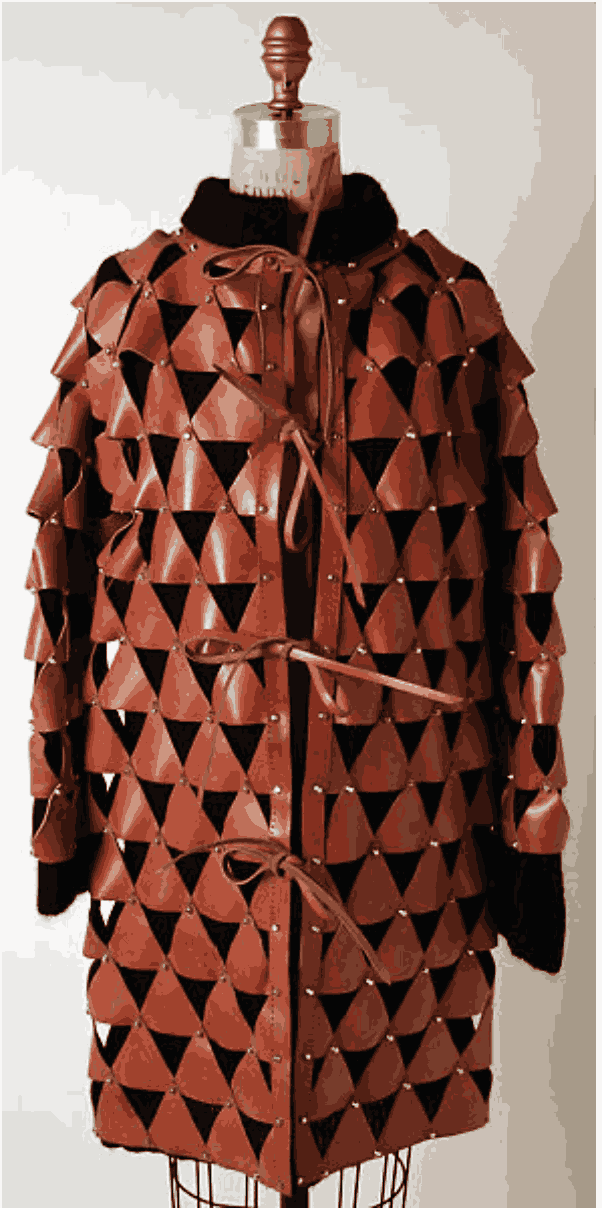
I also looked into other designers who adapted architectural construction techniques into fashion. Paco Rabanne's work relies on construction techniques a lot. His work is based on modularity, structural materials, and even structural systems like geodesic structures.
Brief History of the Bog Dress
Bog Dress Materials - Leather Wool
-Missing Part-
Bog Dress Patterns
I found a tutorial and patterns on differnt styles of the Bog Dress which I referred to.
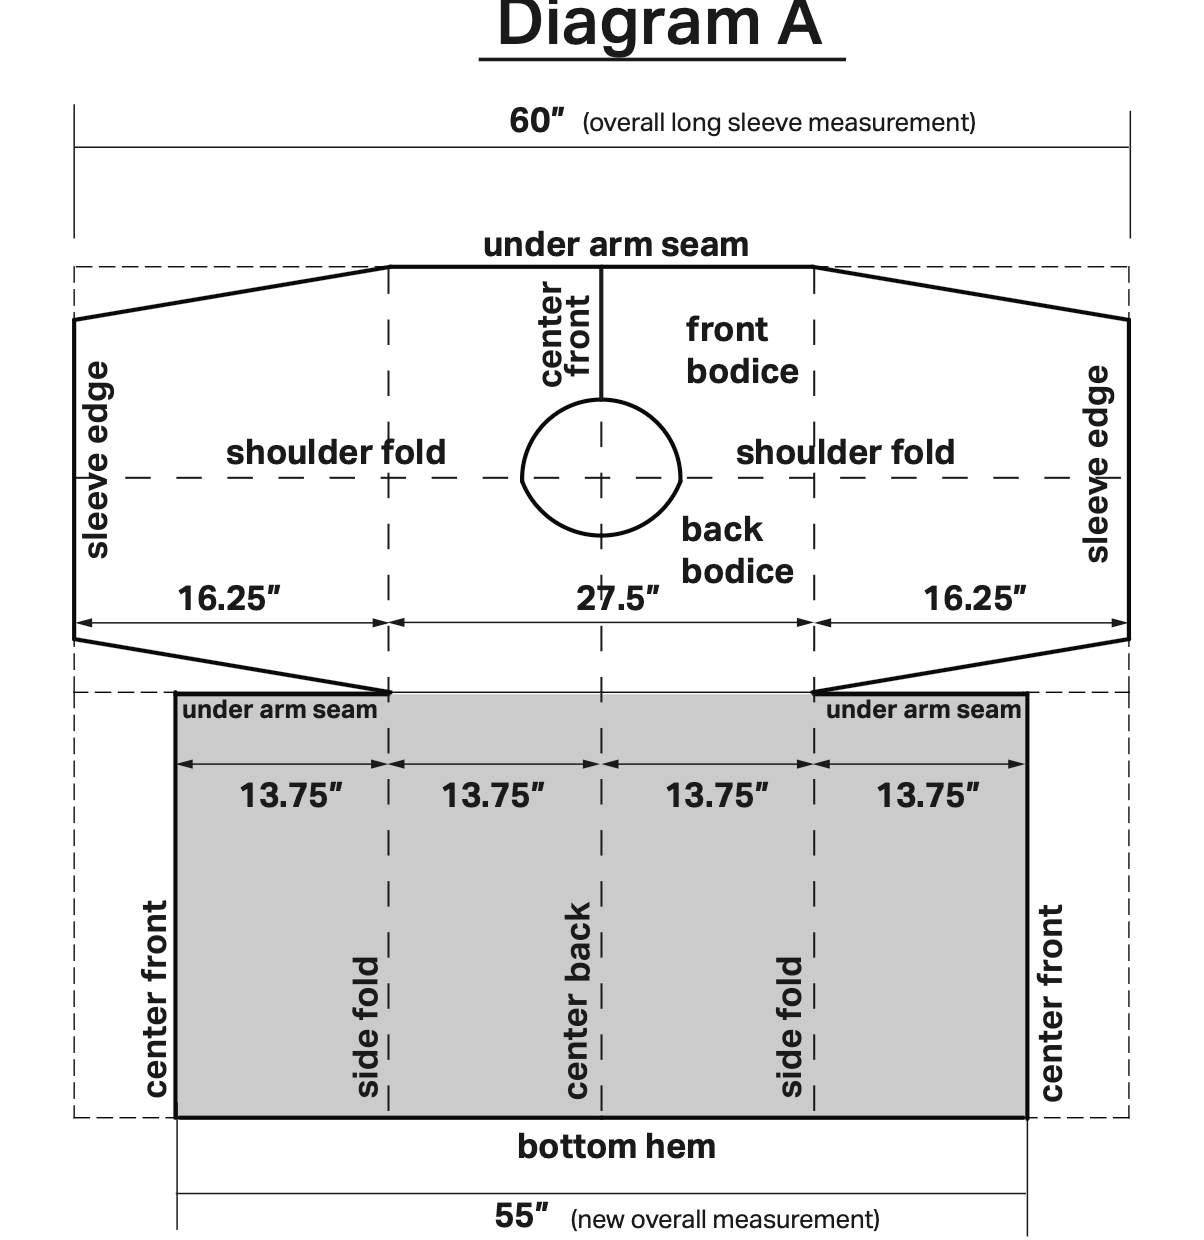 Bog Jacket Pattern by Cindy Bithell
4. Tools
- Rhino
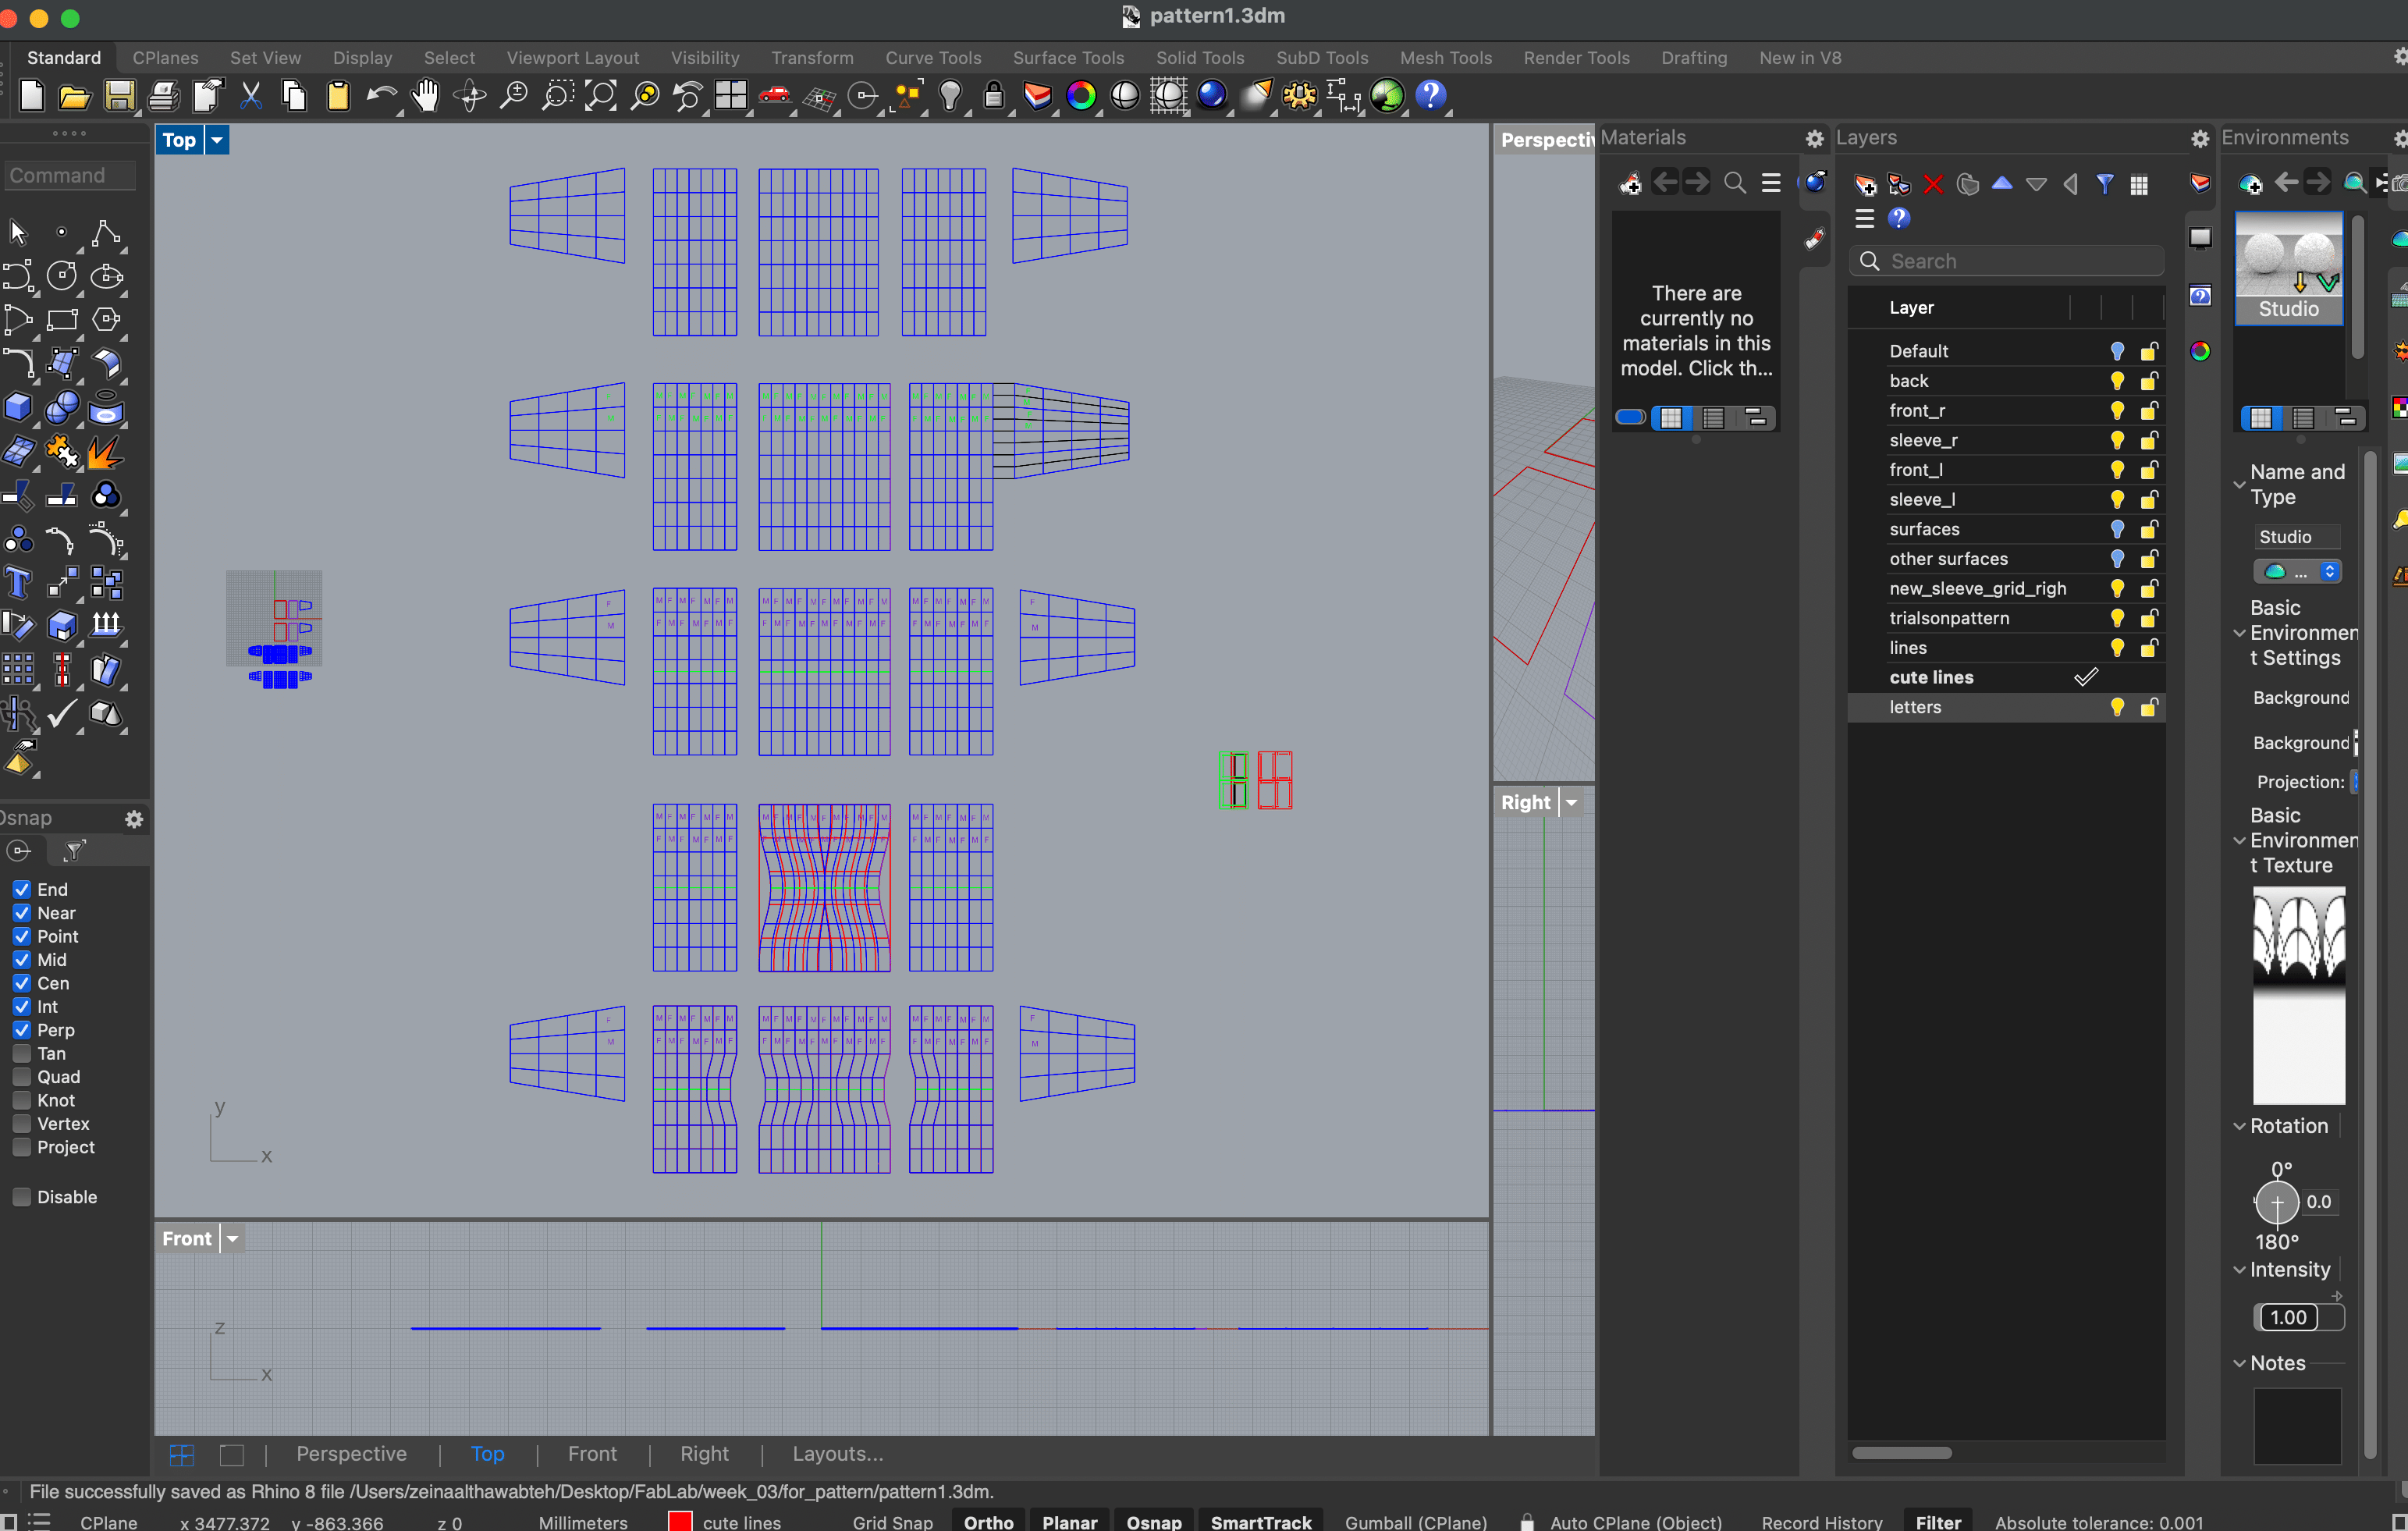
After taking my measurements, I adapted the pattern I found. Then I planned it out on Rhino:
- I drew out the separate parts (Back, Front R, Front L, and Sleeves)
- I experimented with measurments of the module and drew out the pattern to get a sense of what it looks like.
This was done using simple shape commands in Rhino.
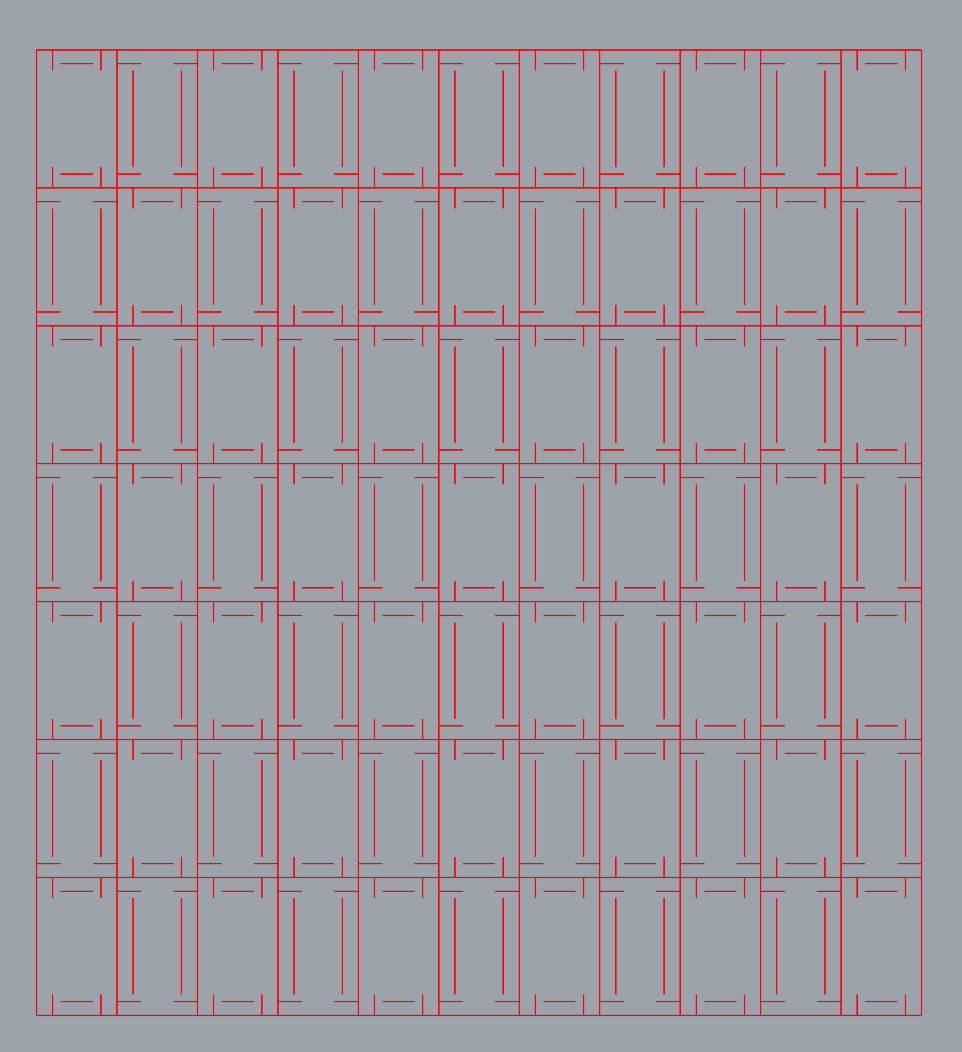
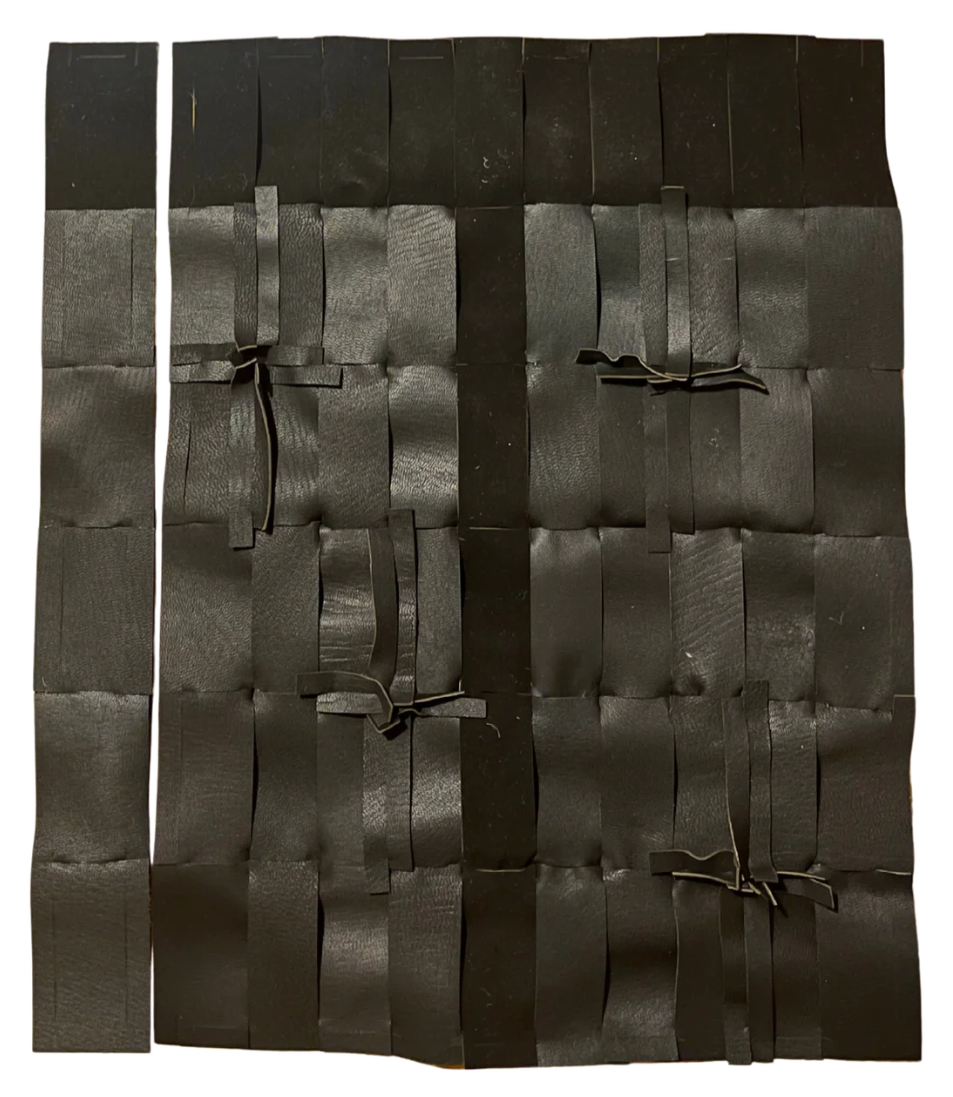
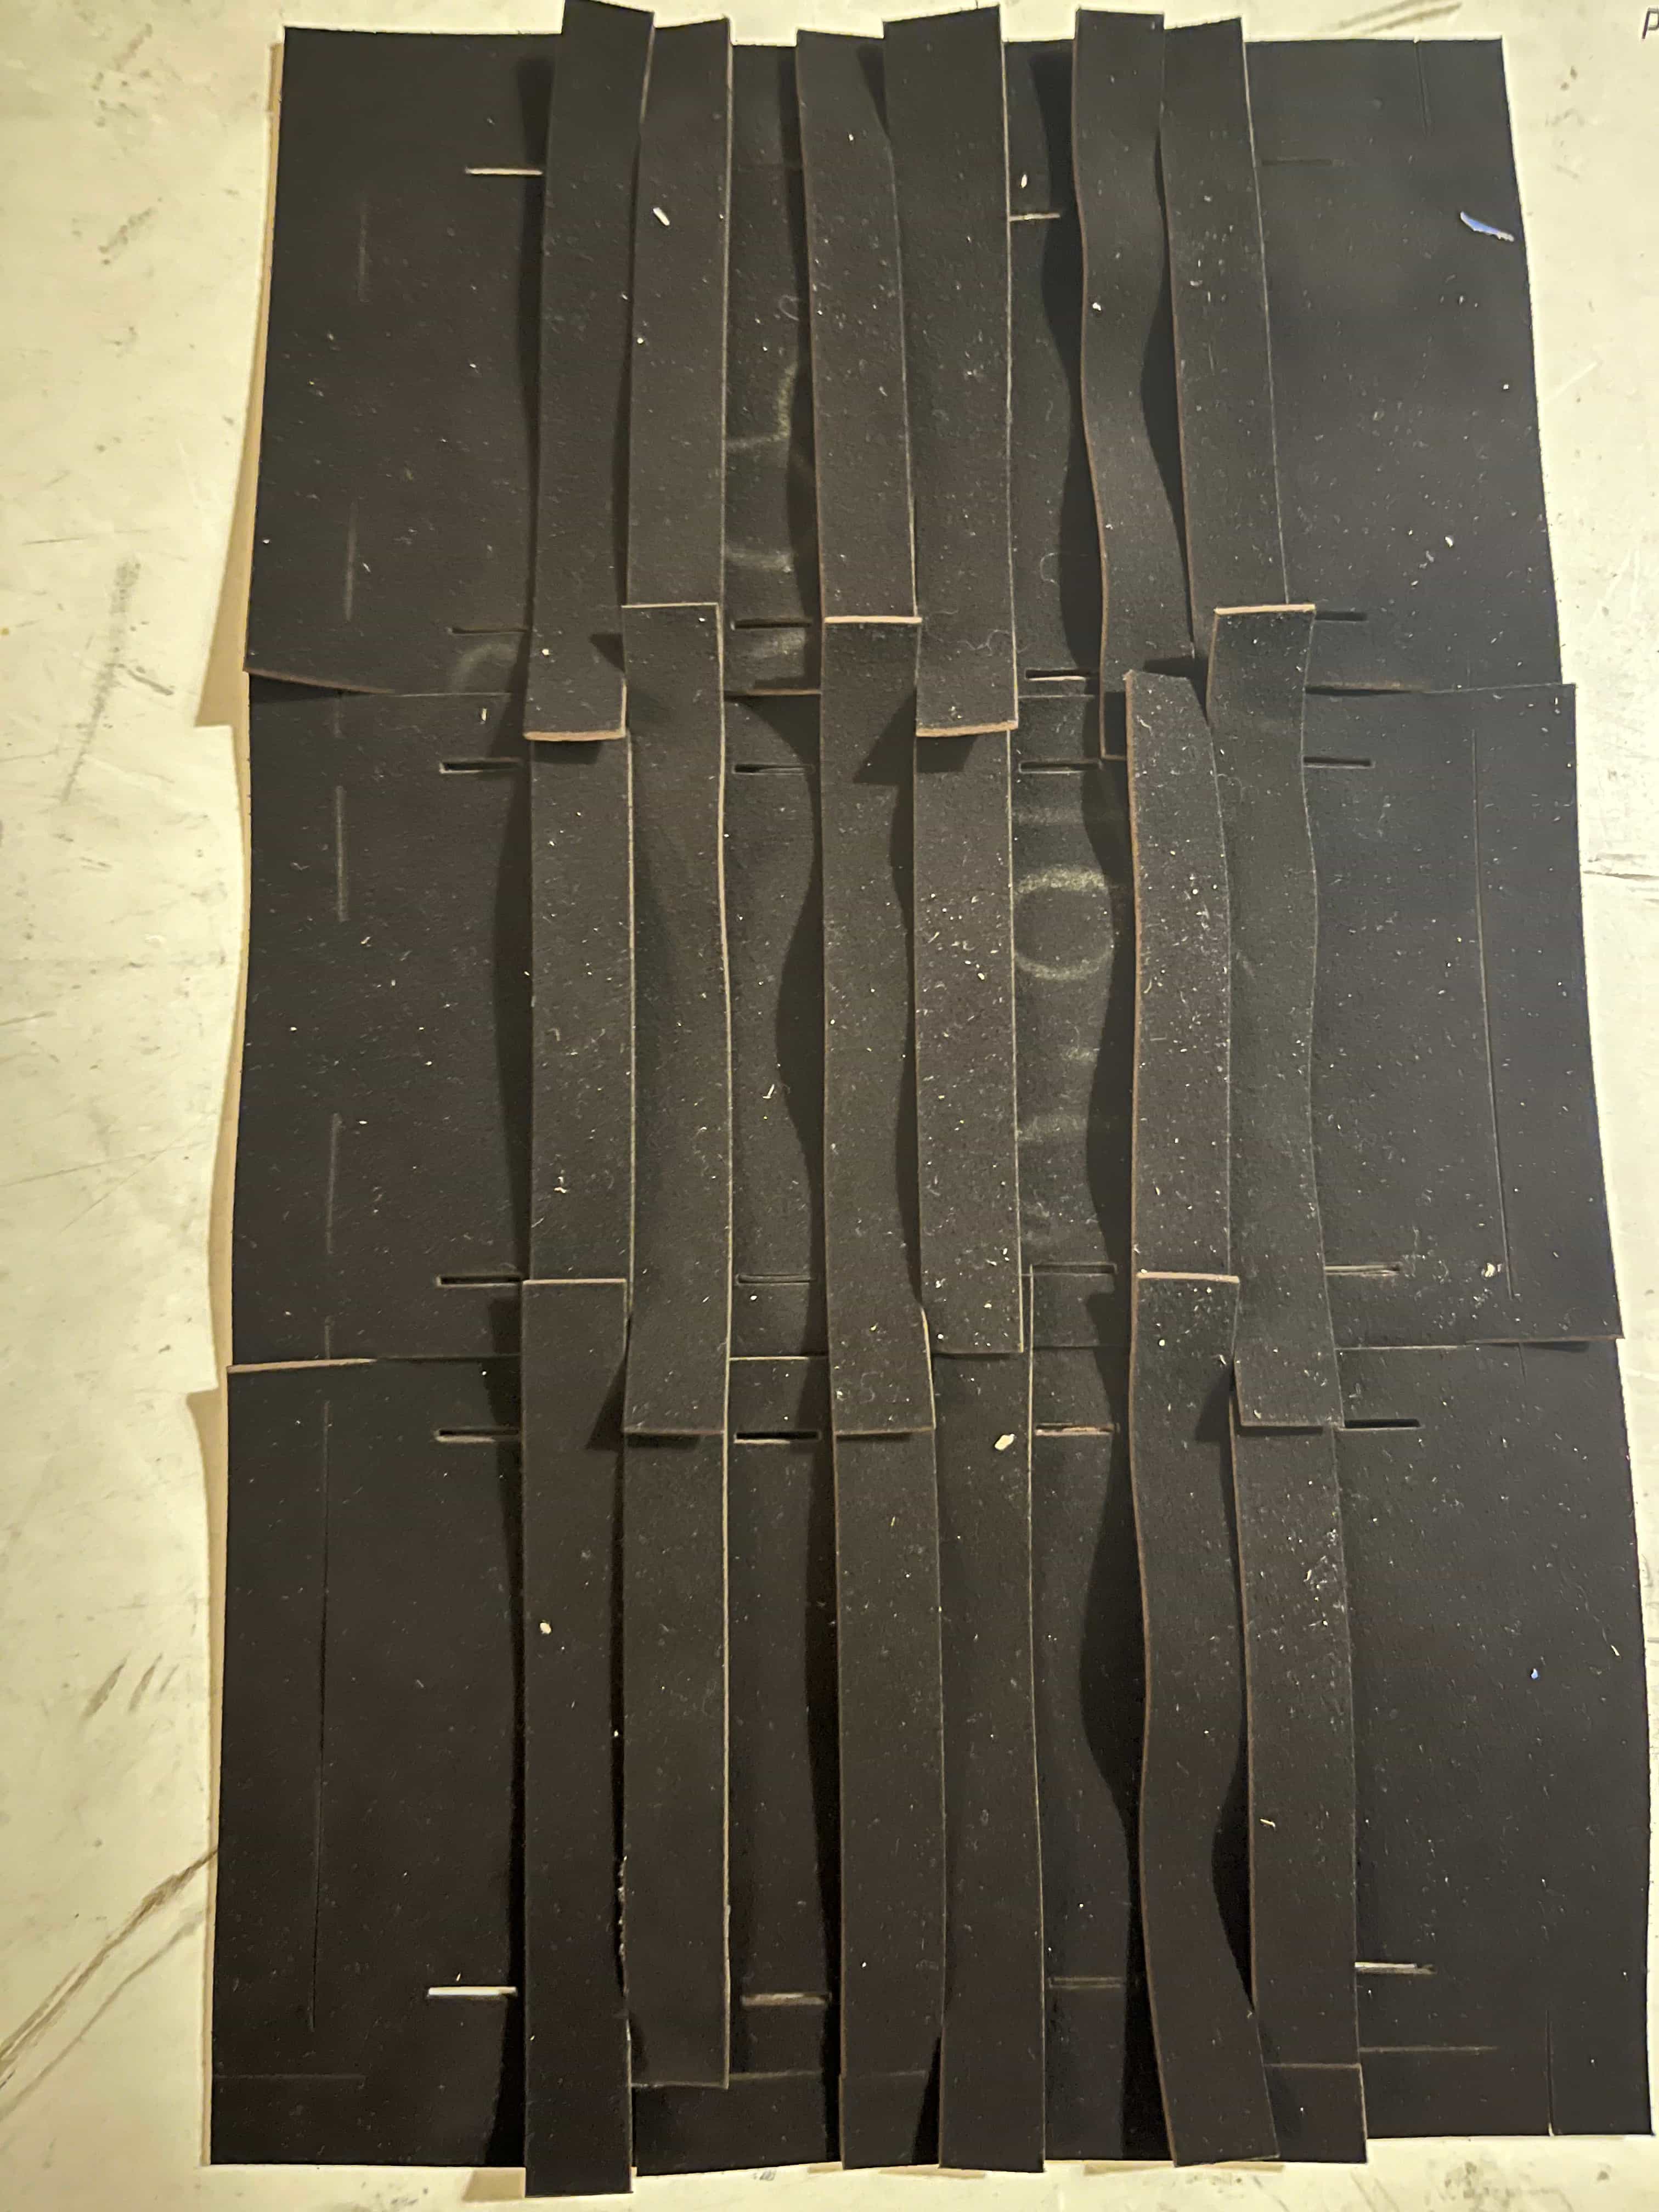
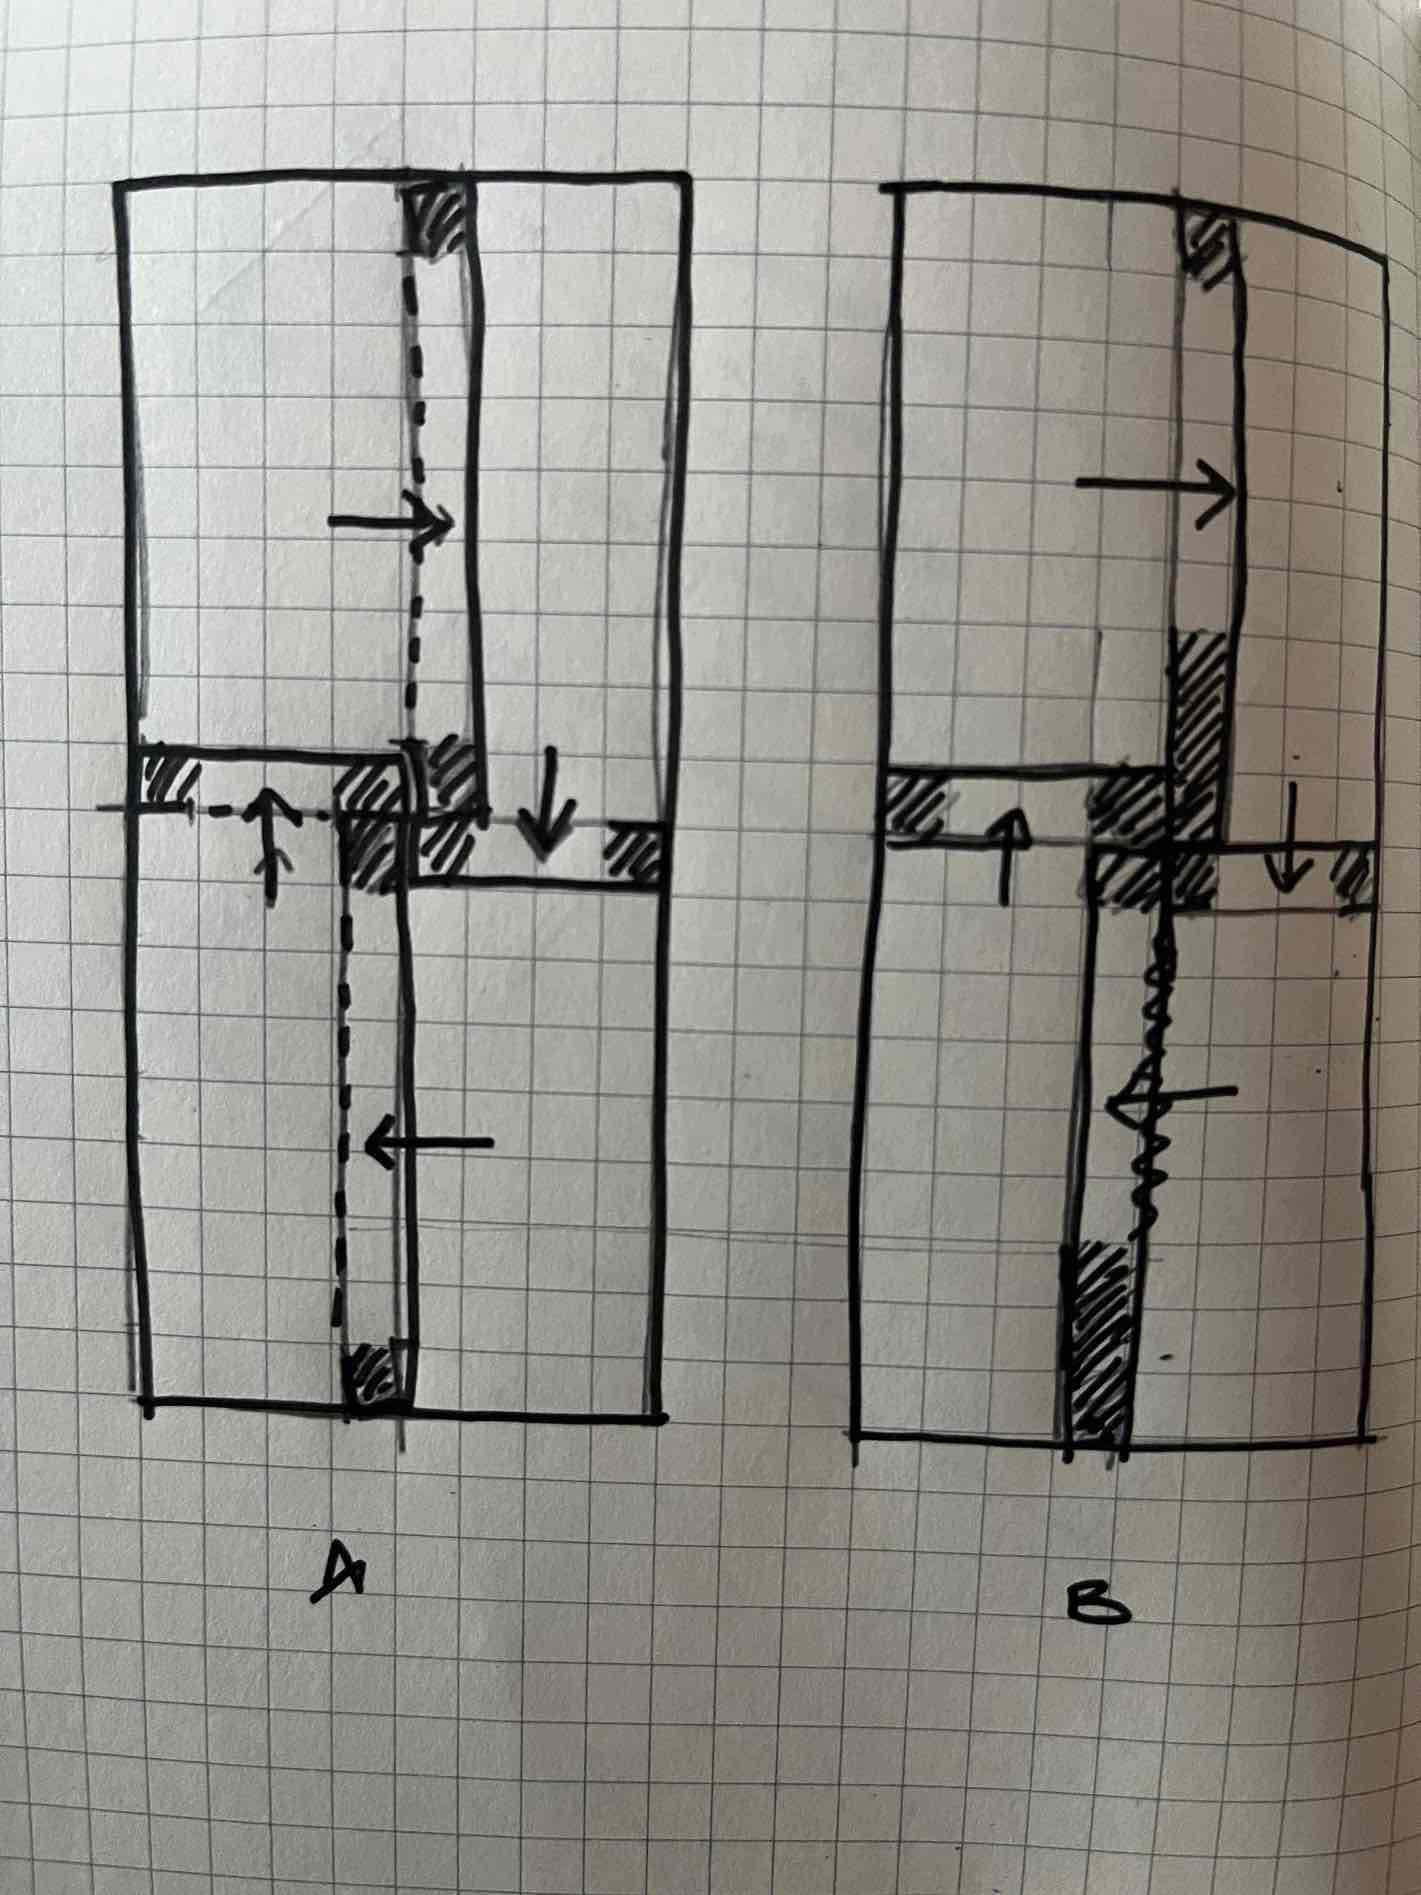
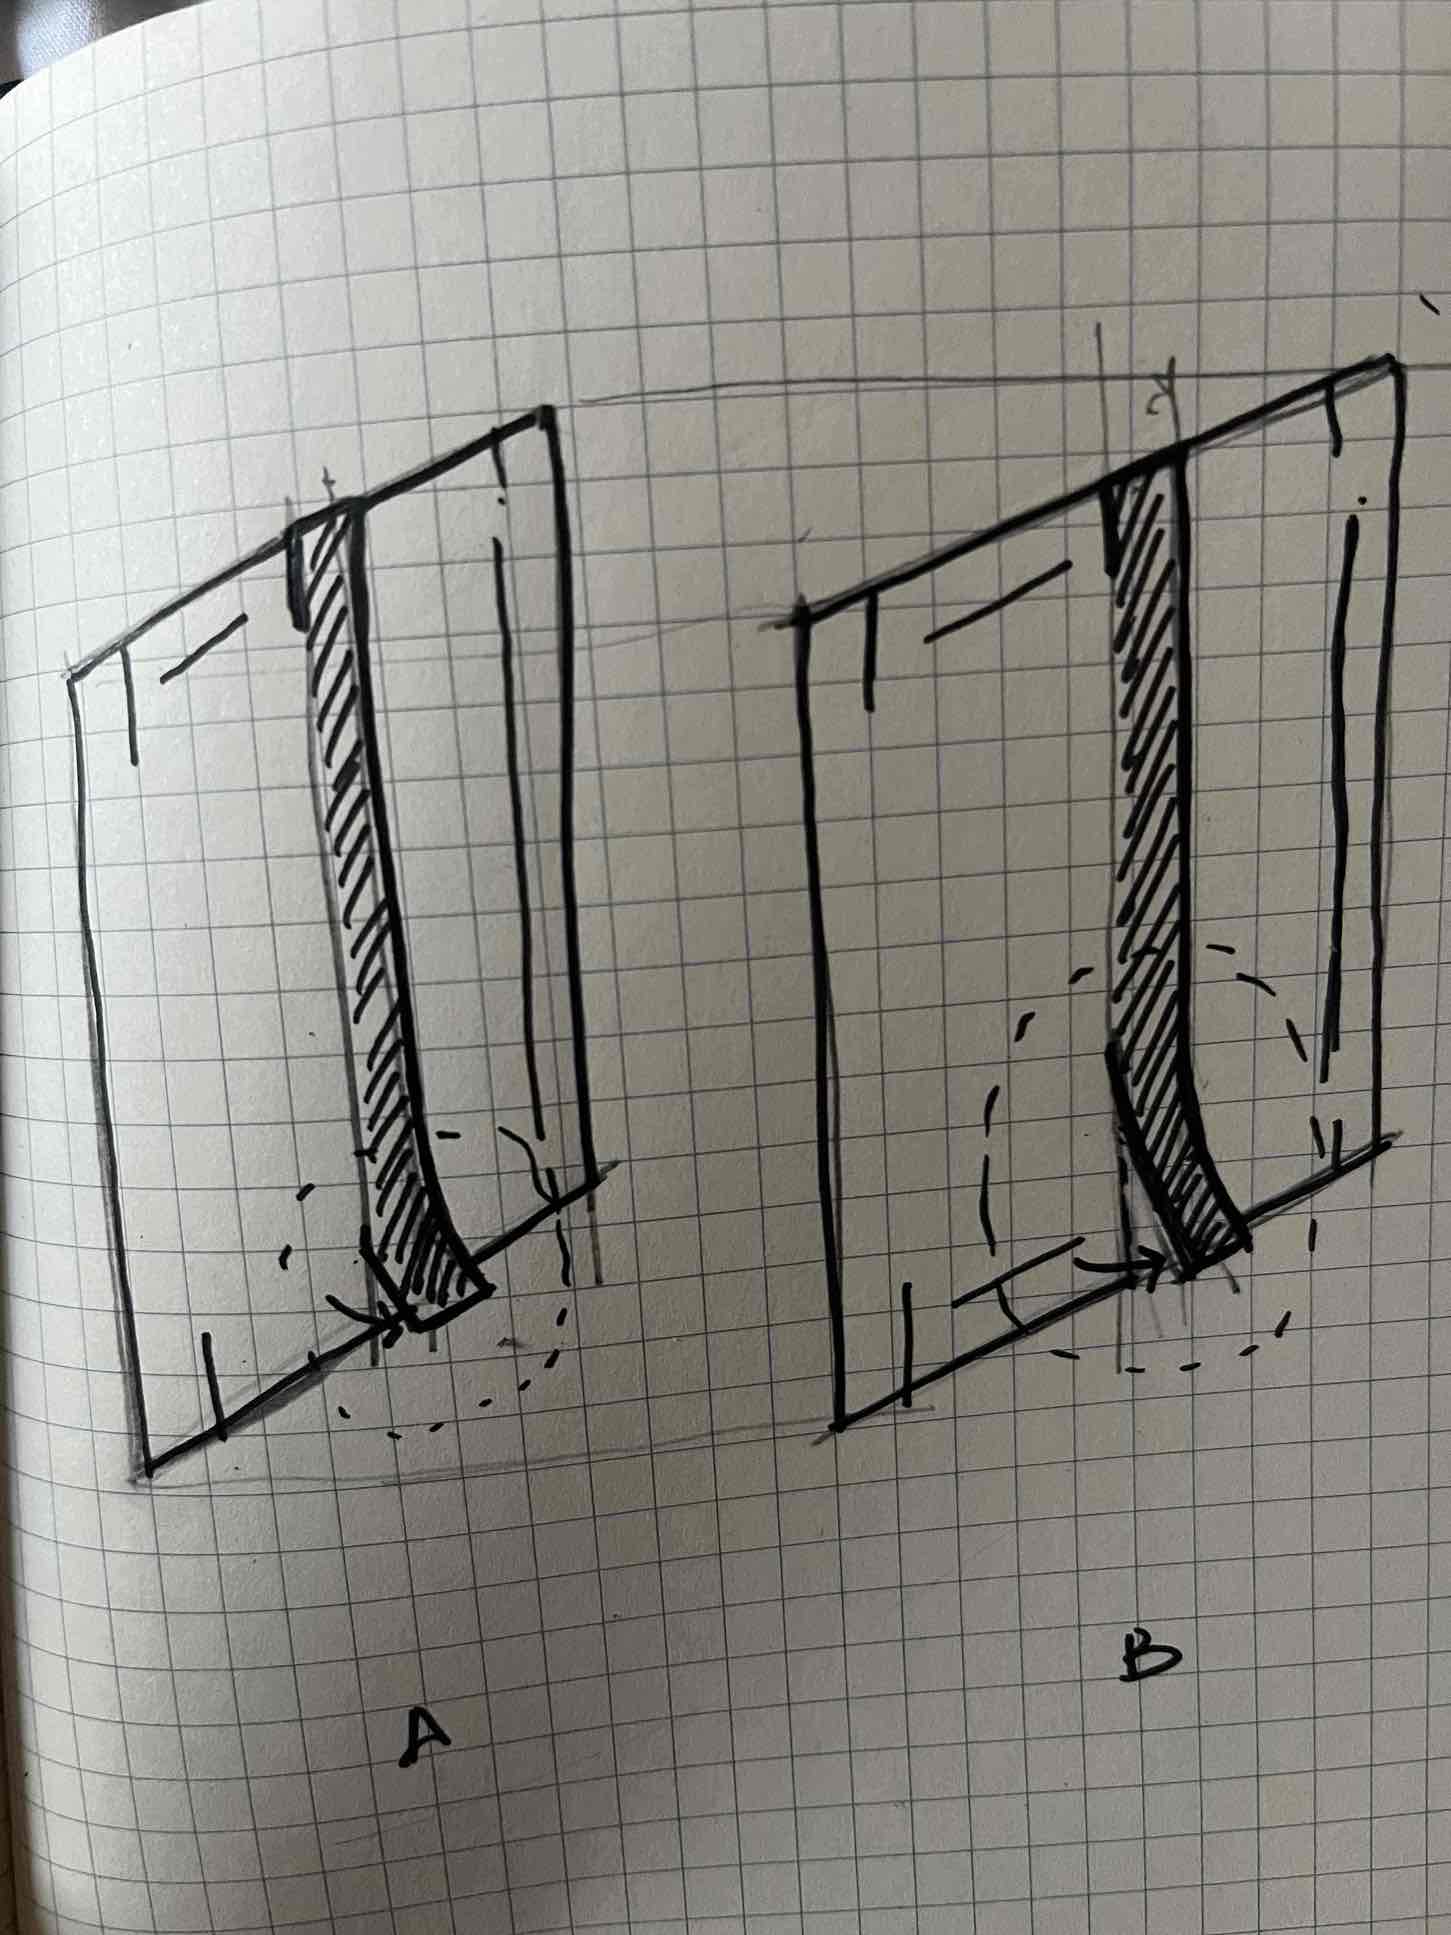
I also drew out the module that will create the patter. There are two different blocks each containing a grrove and tongue but on different ends so that the modules can be joined together.
- Grasshopper
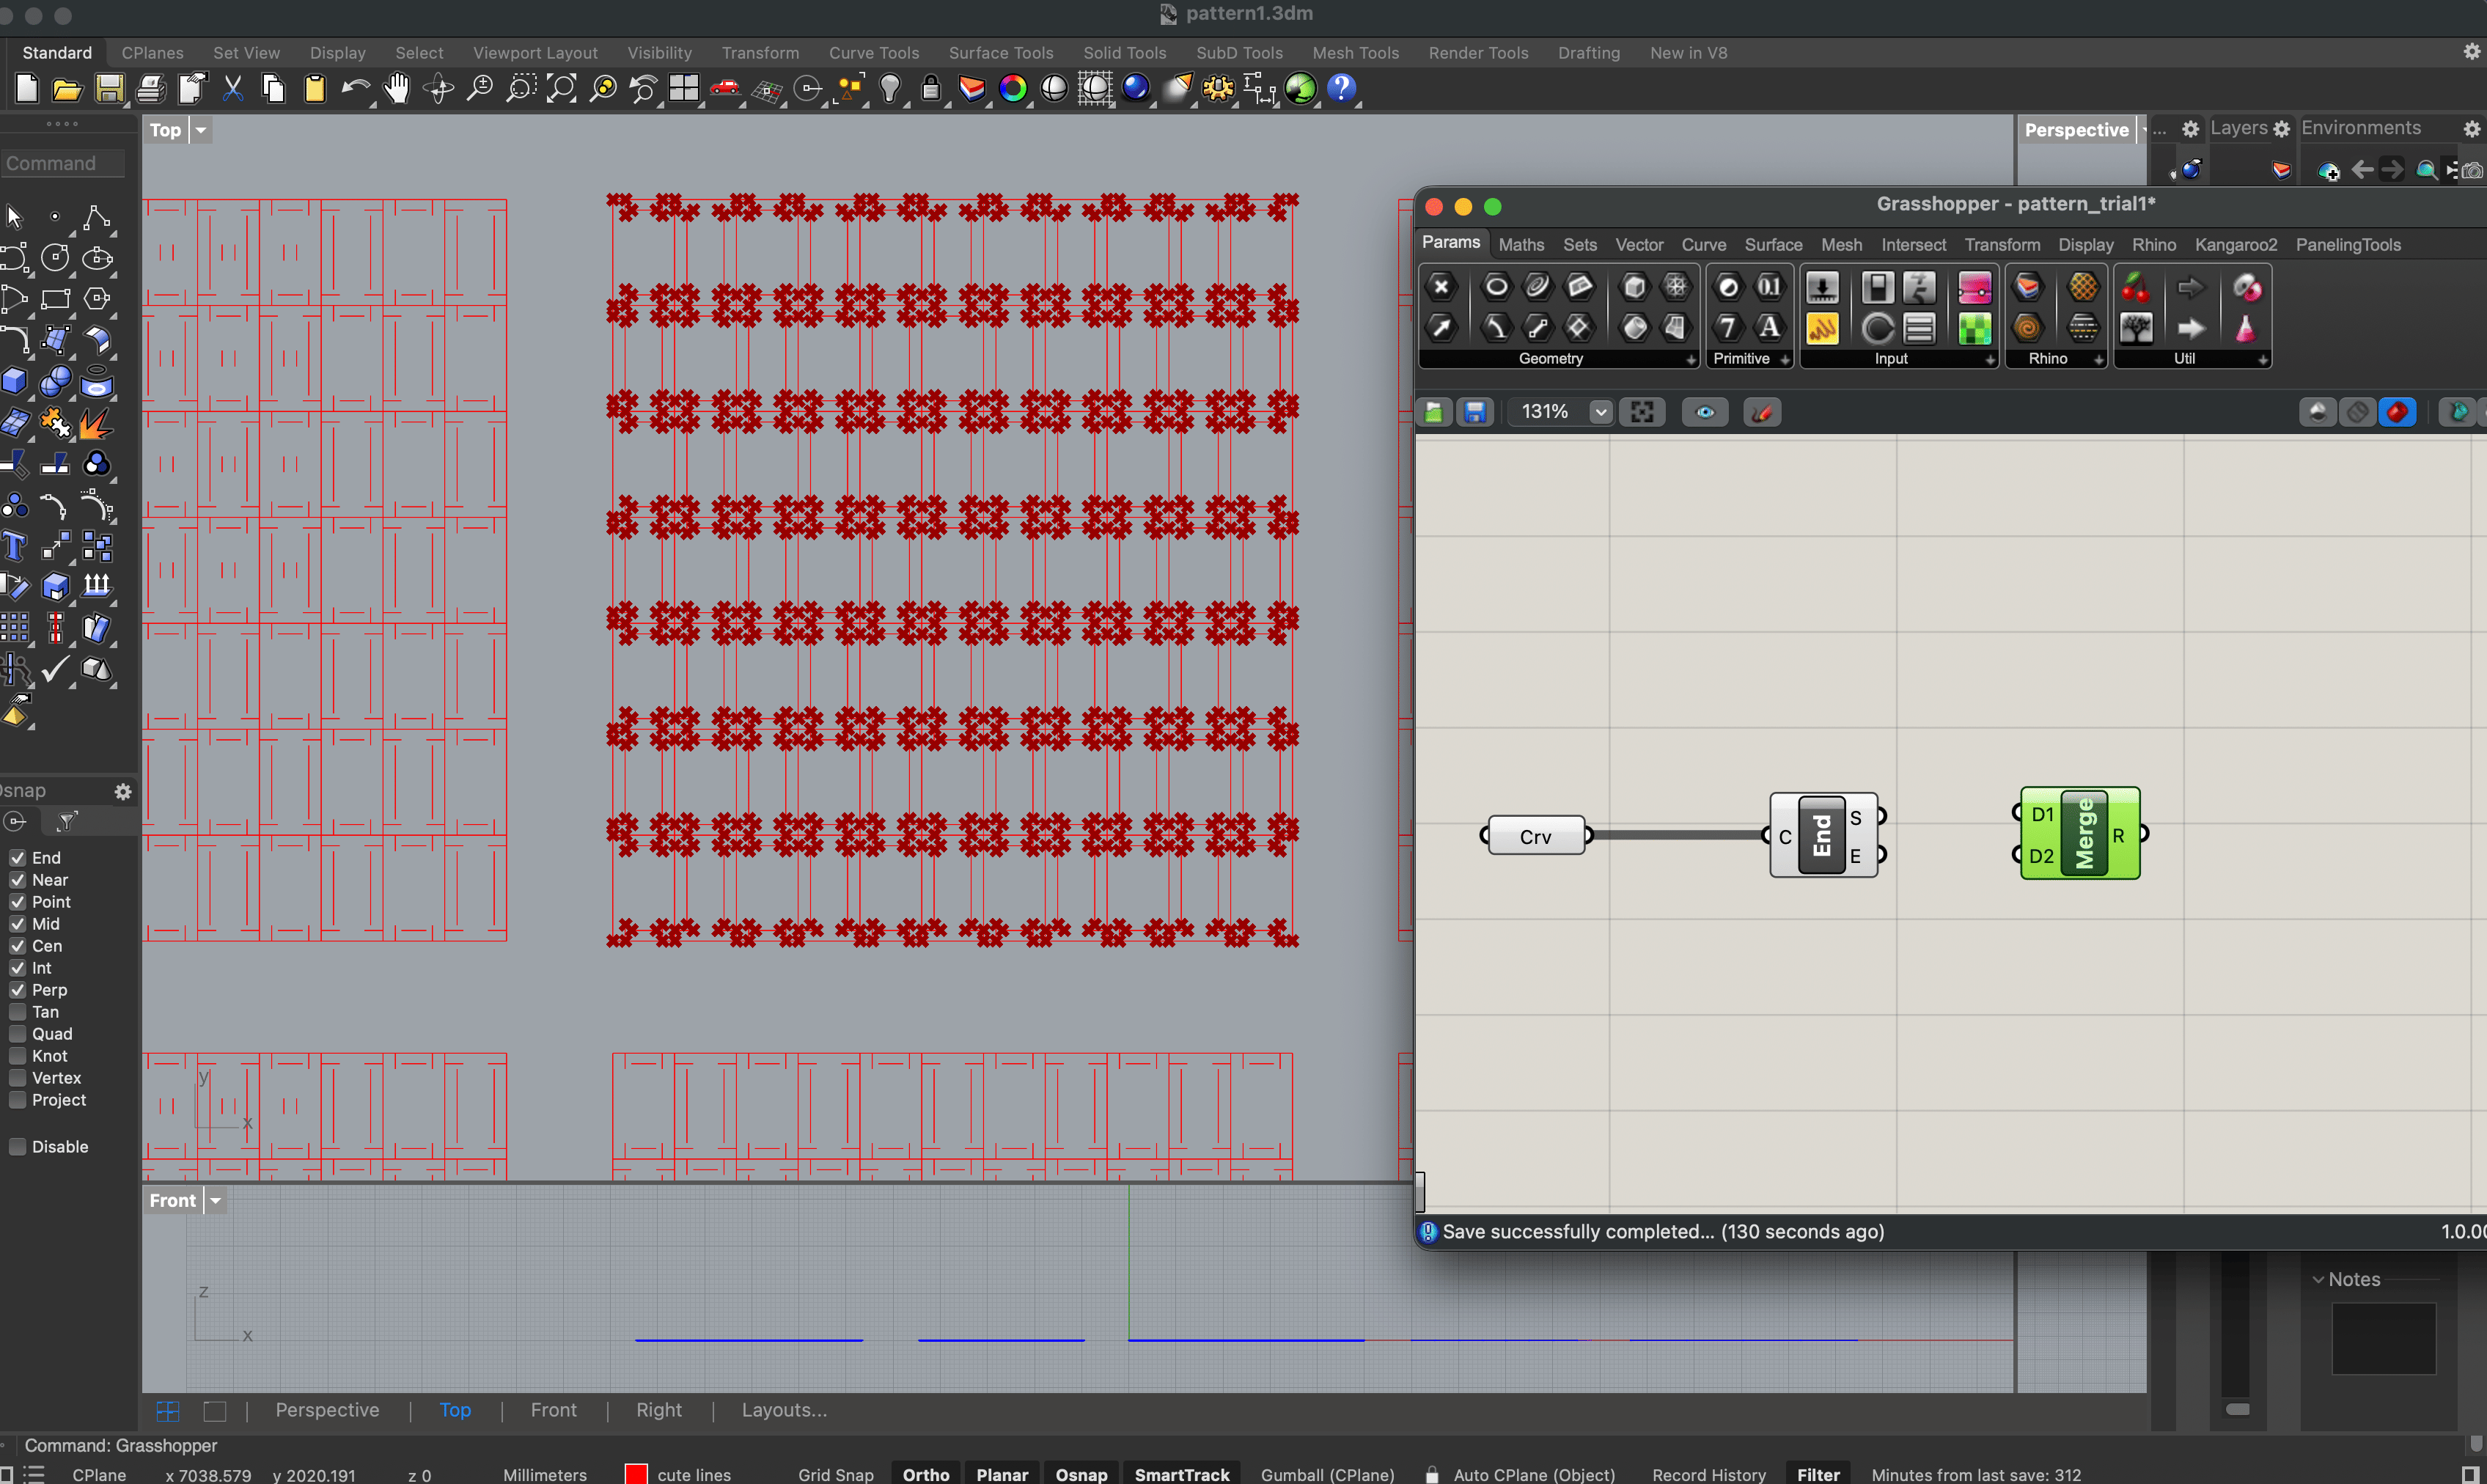
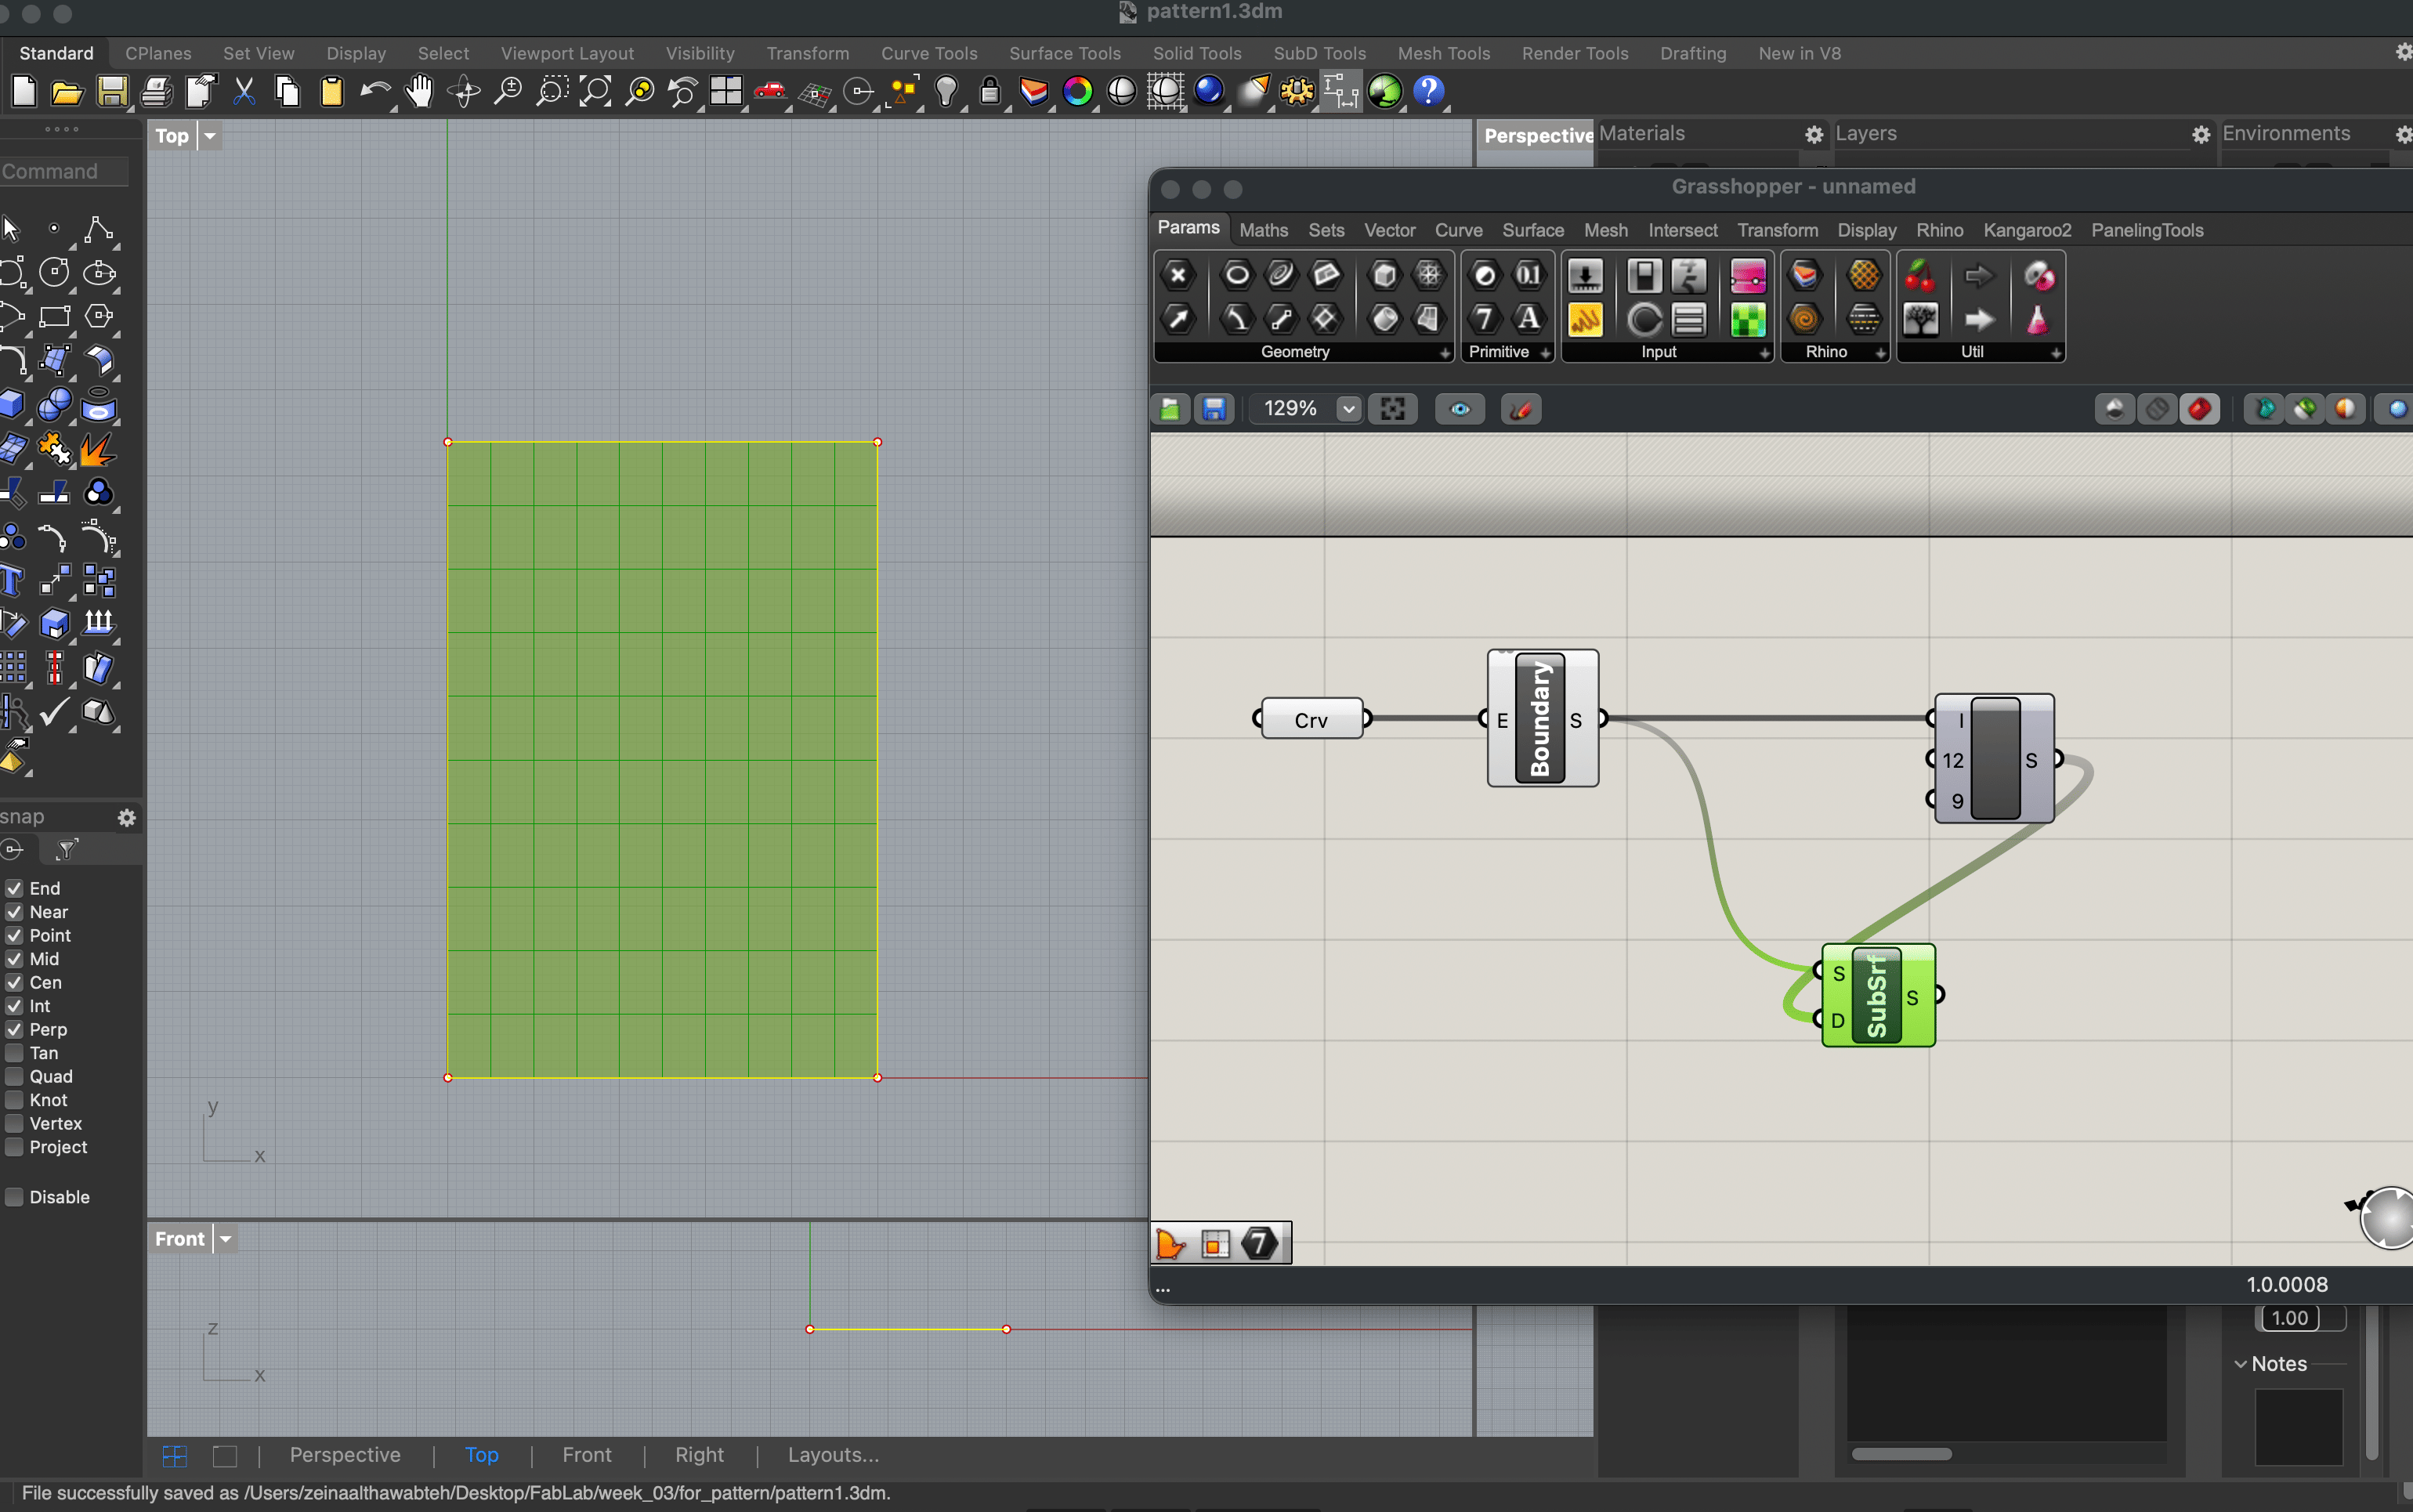
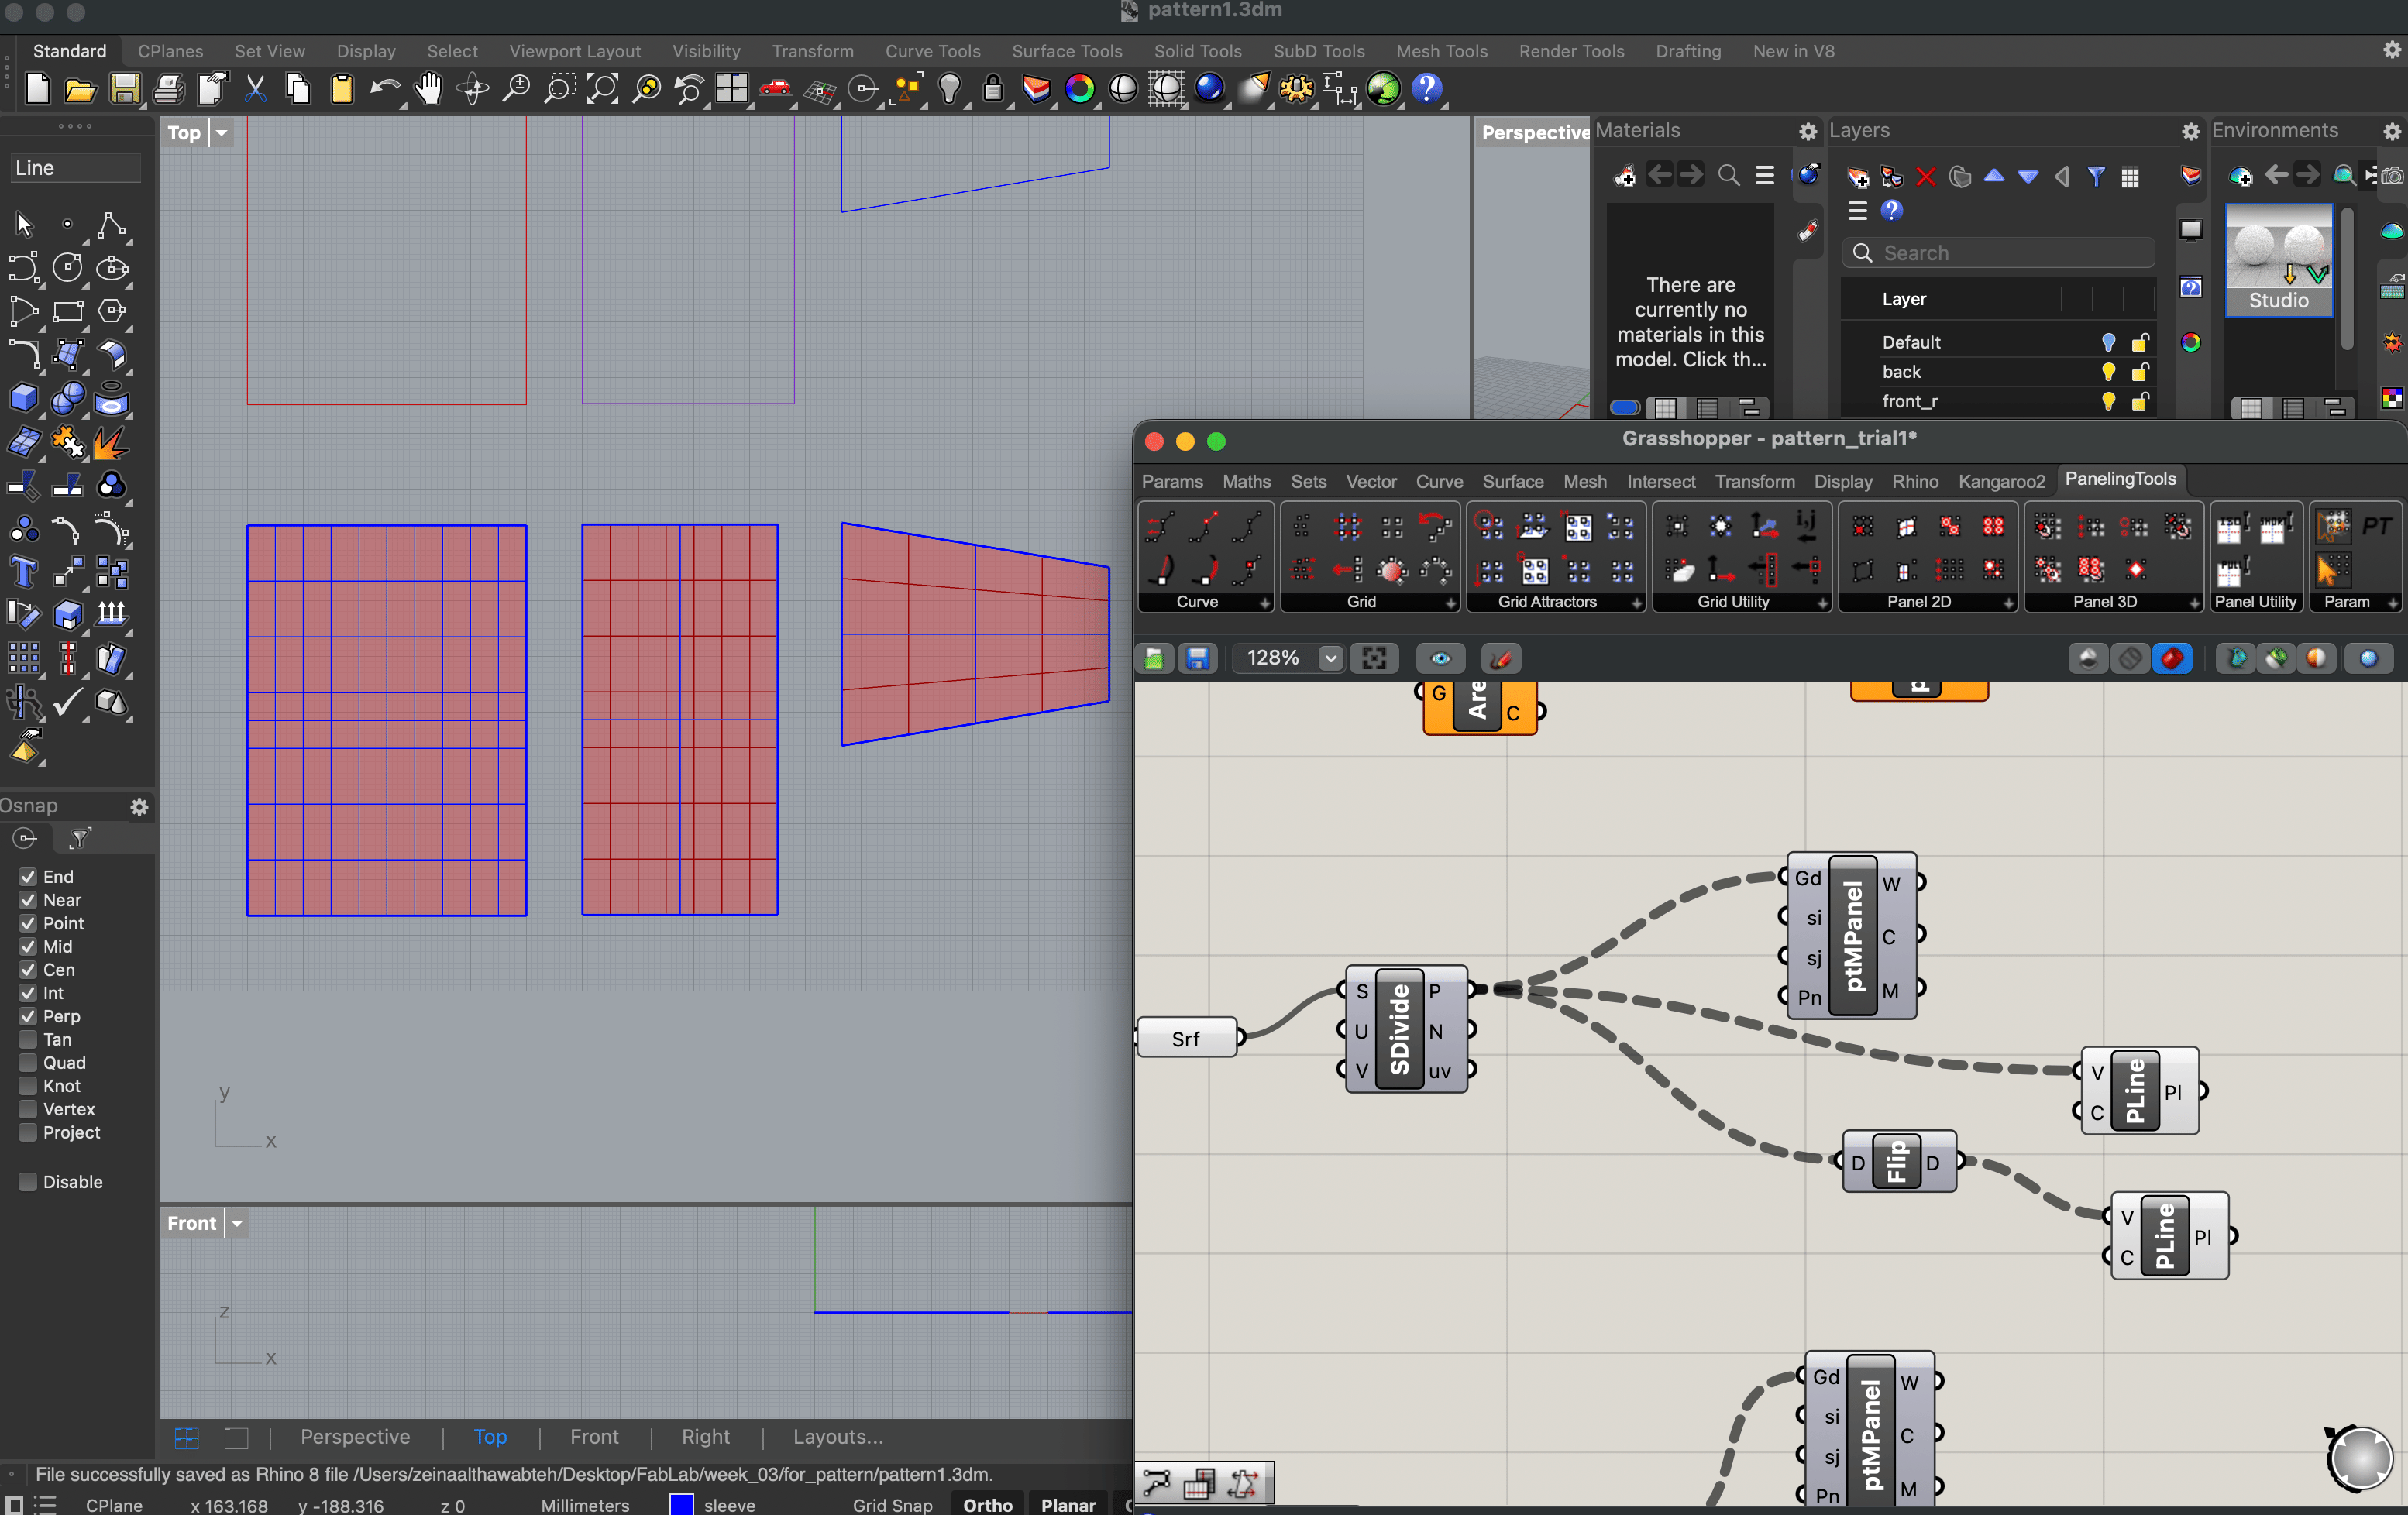
In Grasshopper I used subdivide as a tool to split the surface. This can be done by chanigng the integers of the U and V that correspond to the X and Y directions. In order to get the patterns as useable lines in rhino I used Polyline and then I clicked 'Bake'.
I wanted to sinch the waste but adpating the module into an non-orthogonal varrying patter but I ran out of time. This is a future objective, as I believe this tool is very useful in modular work. This would also be important for the sleeve work.
- Laser cutter
During the use of the laser cutter, I chose textile > leather in the material options. The laser cutter
5. Process and Workflow
Module
In Cop's work, the unit size varies in each design. For the most part the 'tongues' are visibly outward.
Since I am working to construct a jacket, that I wear daily, I wanted to draw on the sculptural quality of the Cop's work but within a less dramatic design. In addition, I wanted to use a more slender unit. In addition, I wanted to see how the module is adapted to leather, a less stiff material than the EVA used by Cop and to use a non-synthetic material.
In Cop's work, the direction of the tongue is uniform. I also wanted to see what happens when there is more variation with position of the tongue.
Building on Cop's work and also drawing from architecture, I wanted to recreate the Insulated Masonary Block System, where the insulation is built into the unit.
 Insulated Masonry System Block
Jacket pattern
Since I am dealing with the limitations of a 900 x 600 mm laser cutter bed, I couldn't apply the same exact pattern of the bog jacket. So I used the same concept of simple rectangular shapes, but I adapted it to digital fabrication by changing the pattern so that it fits into multiple panels.
1. Planning the module and the grid
2. Prototypes
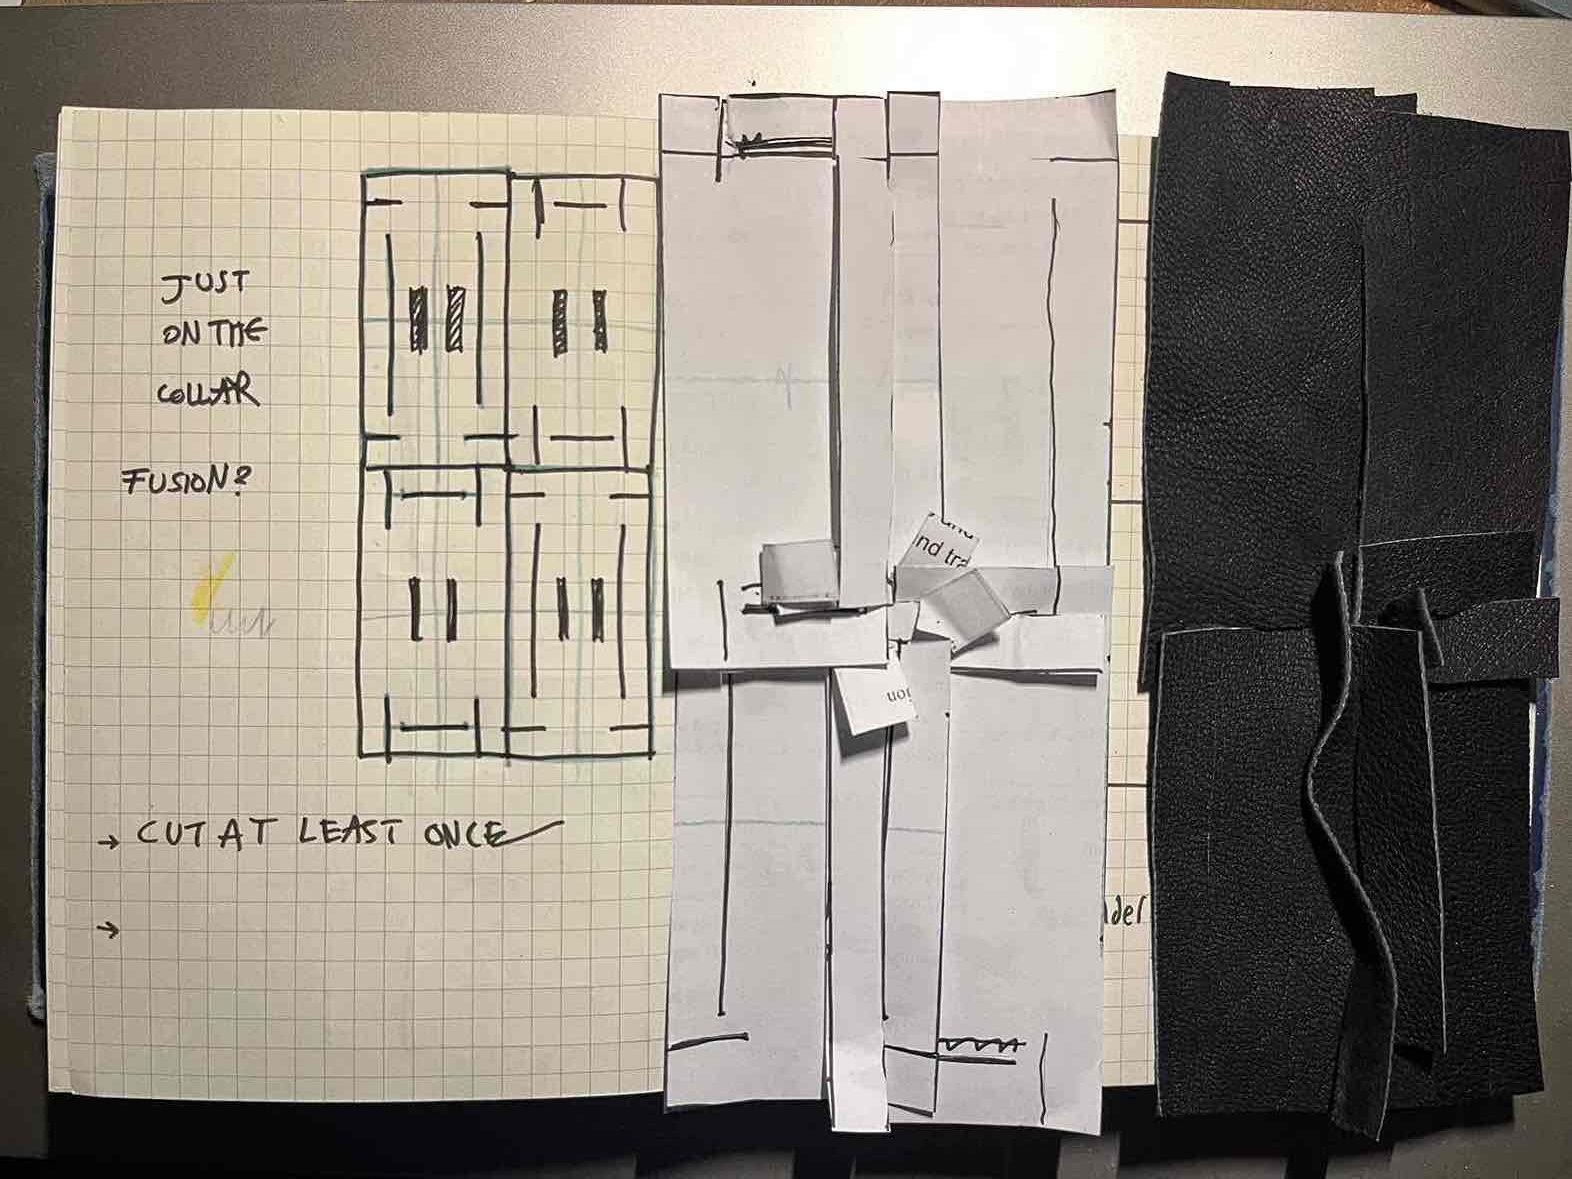
3. Eperimentation
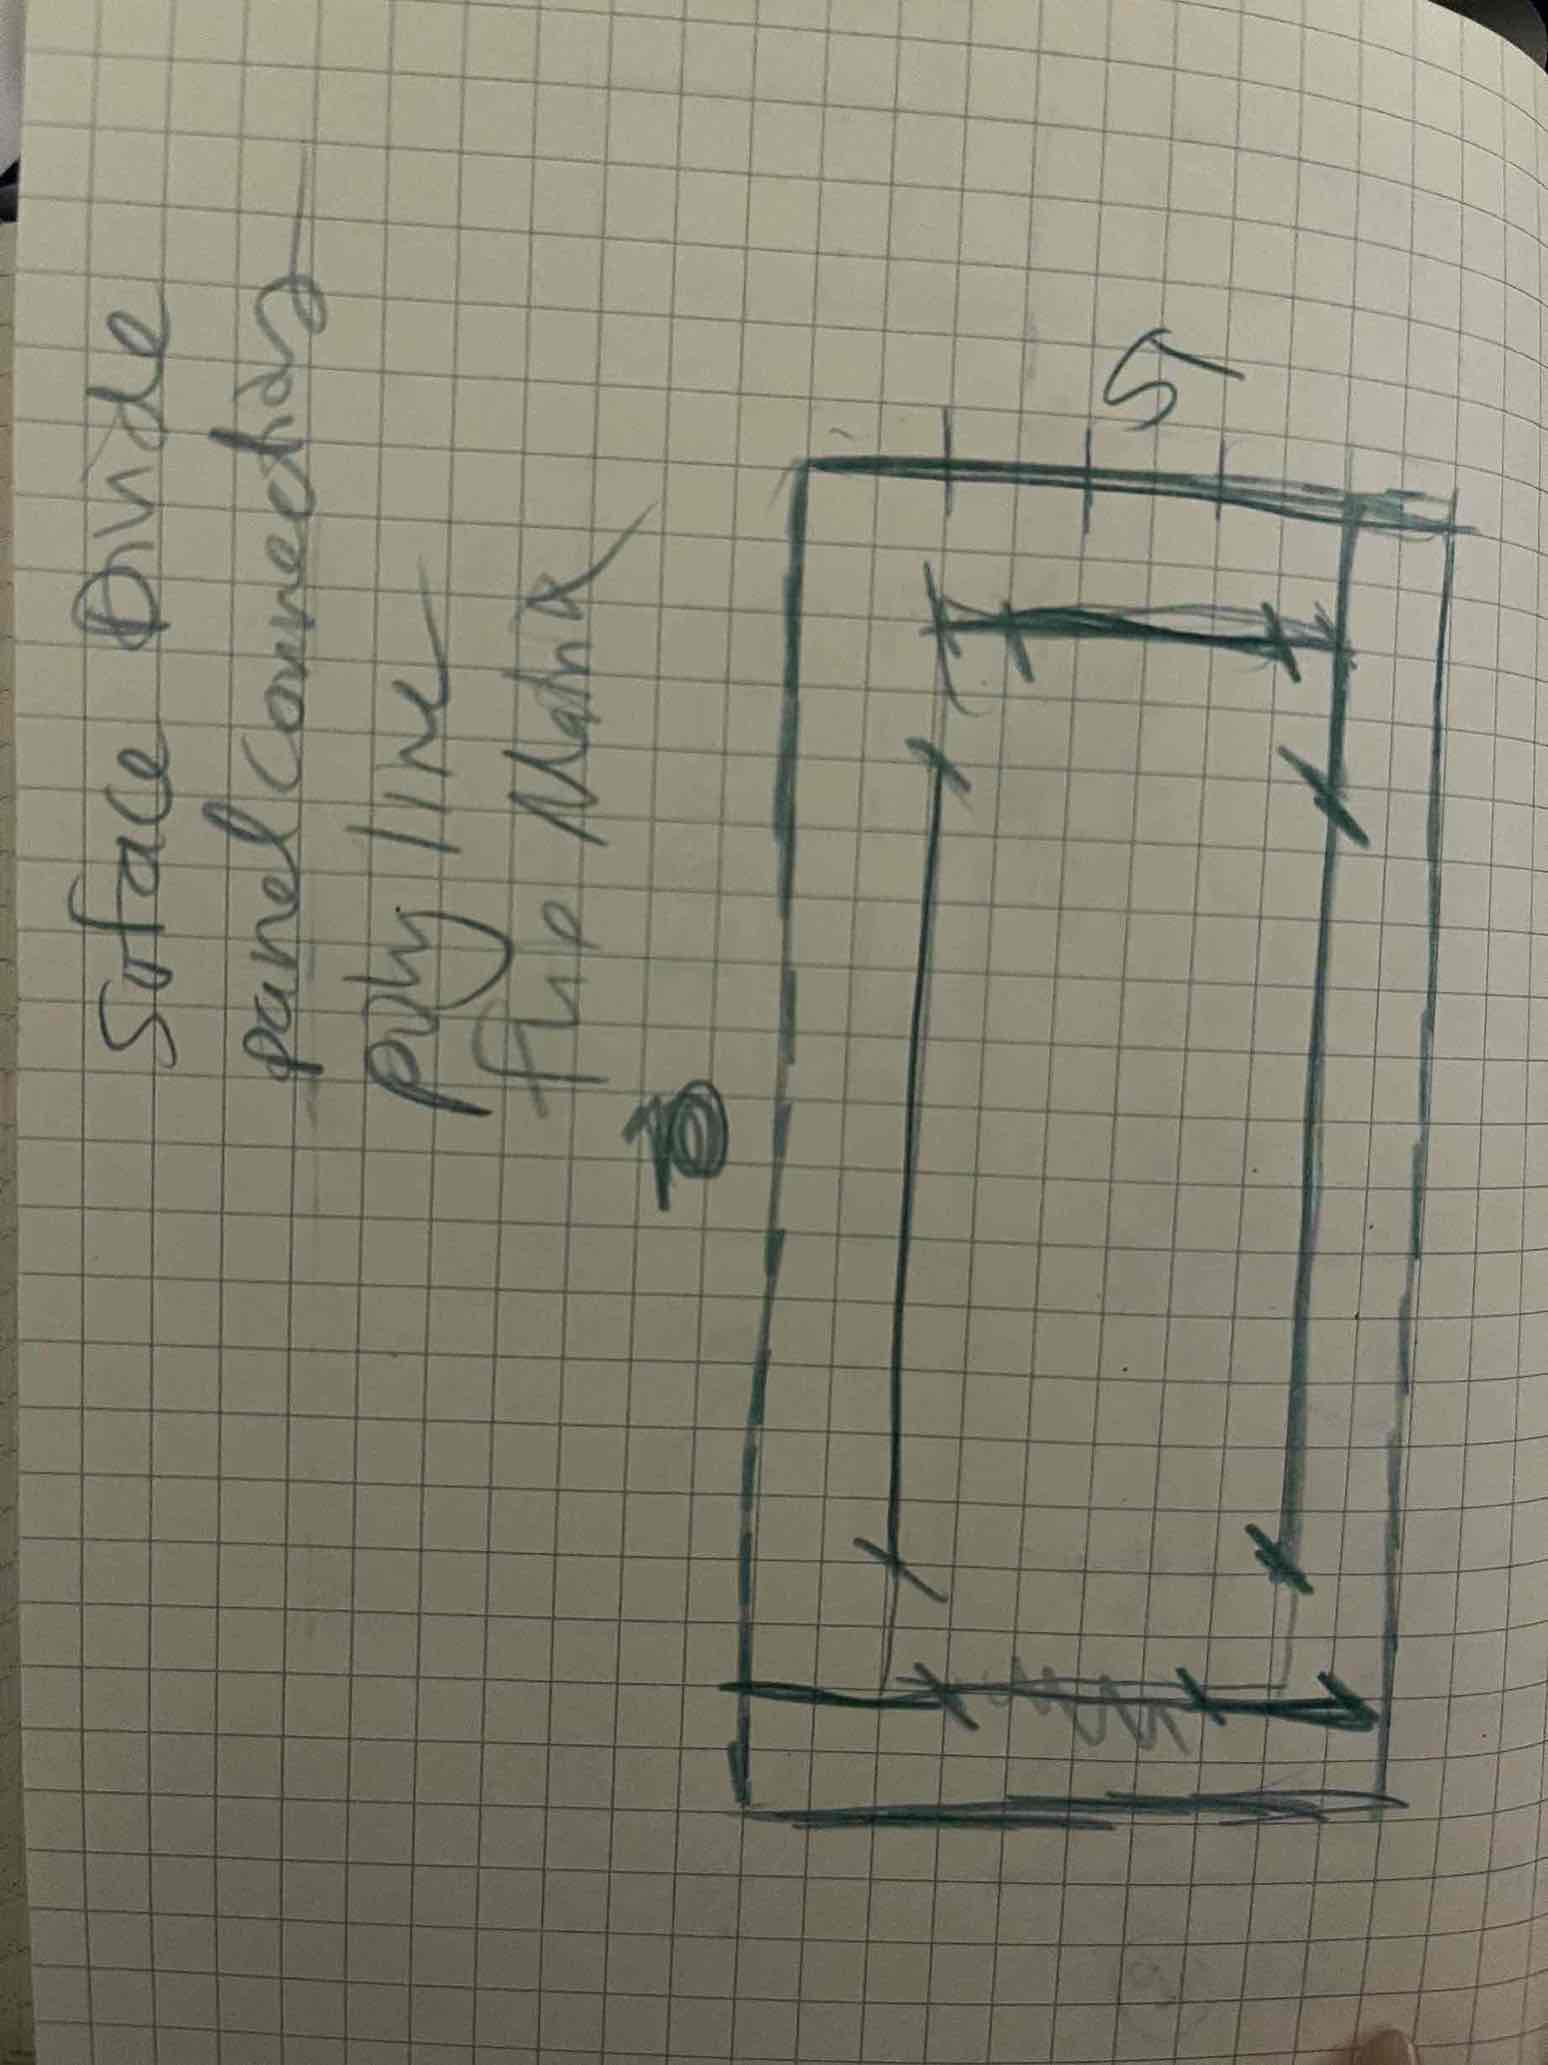
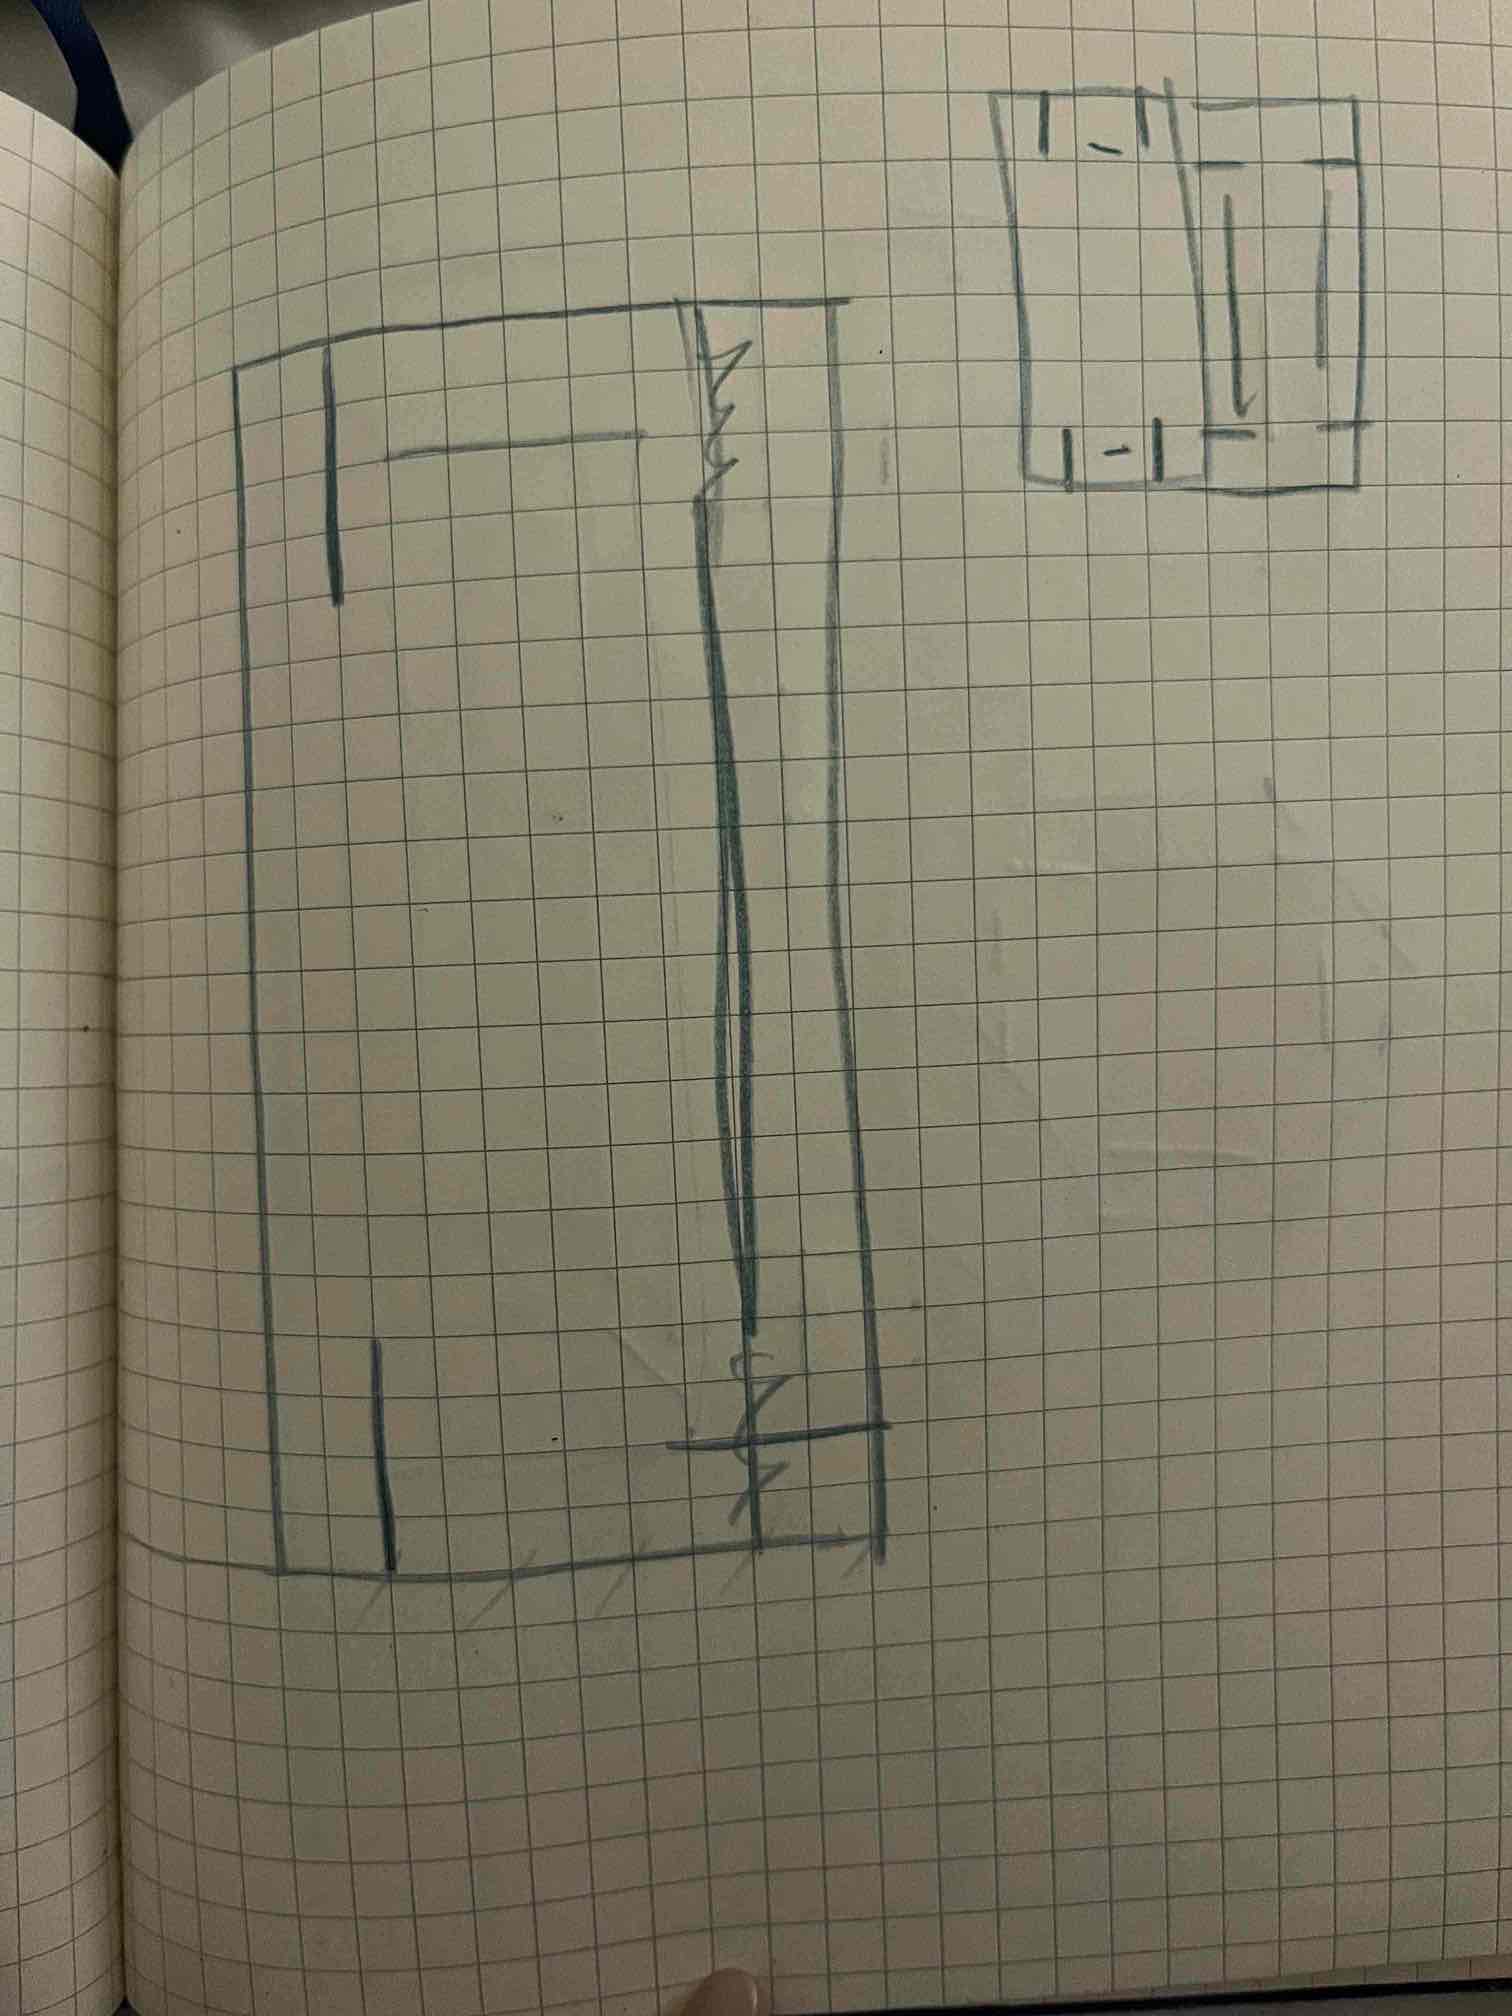
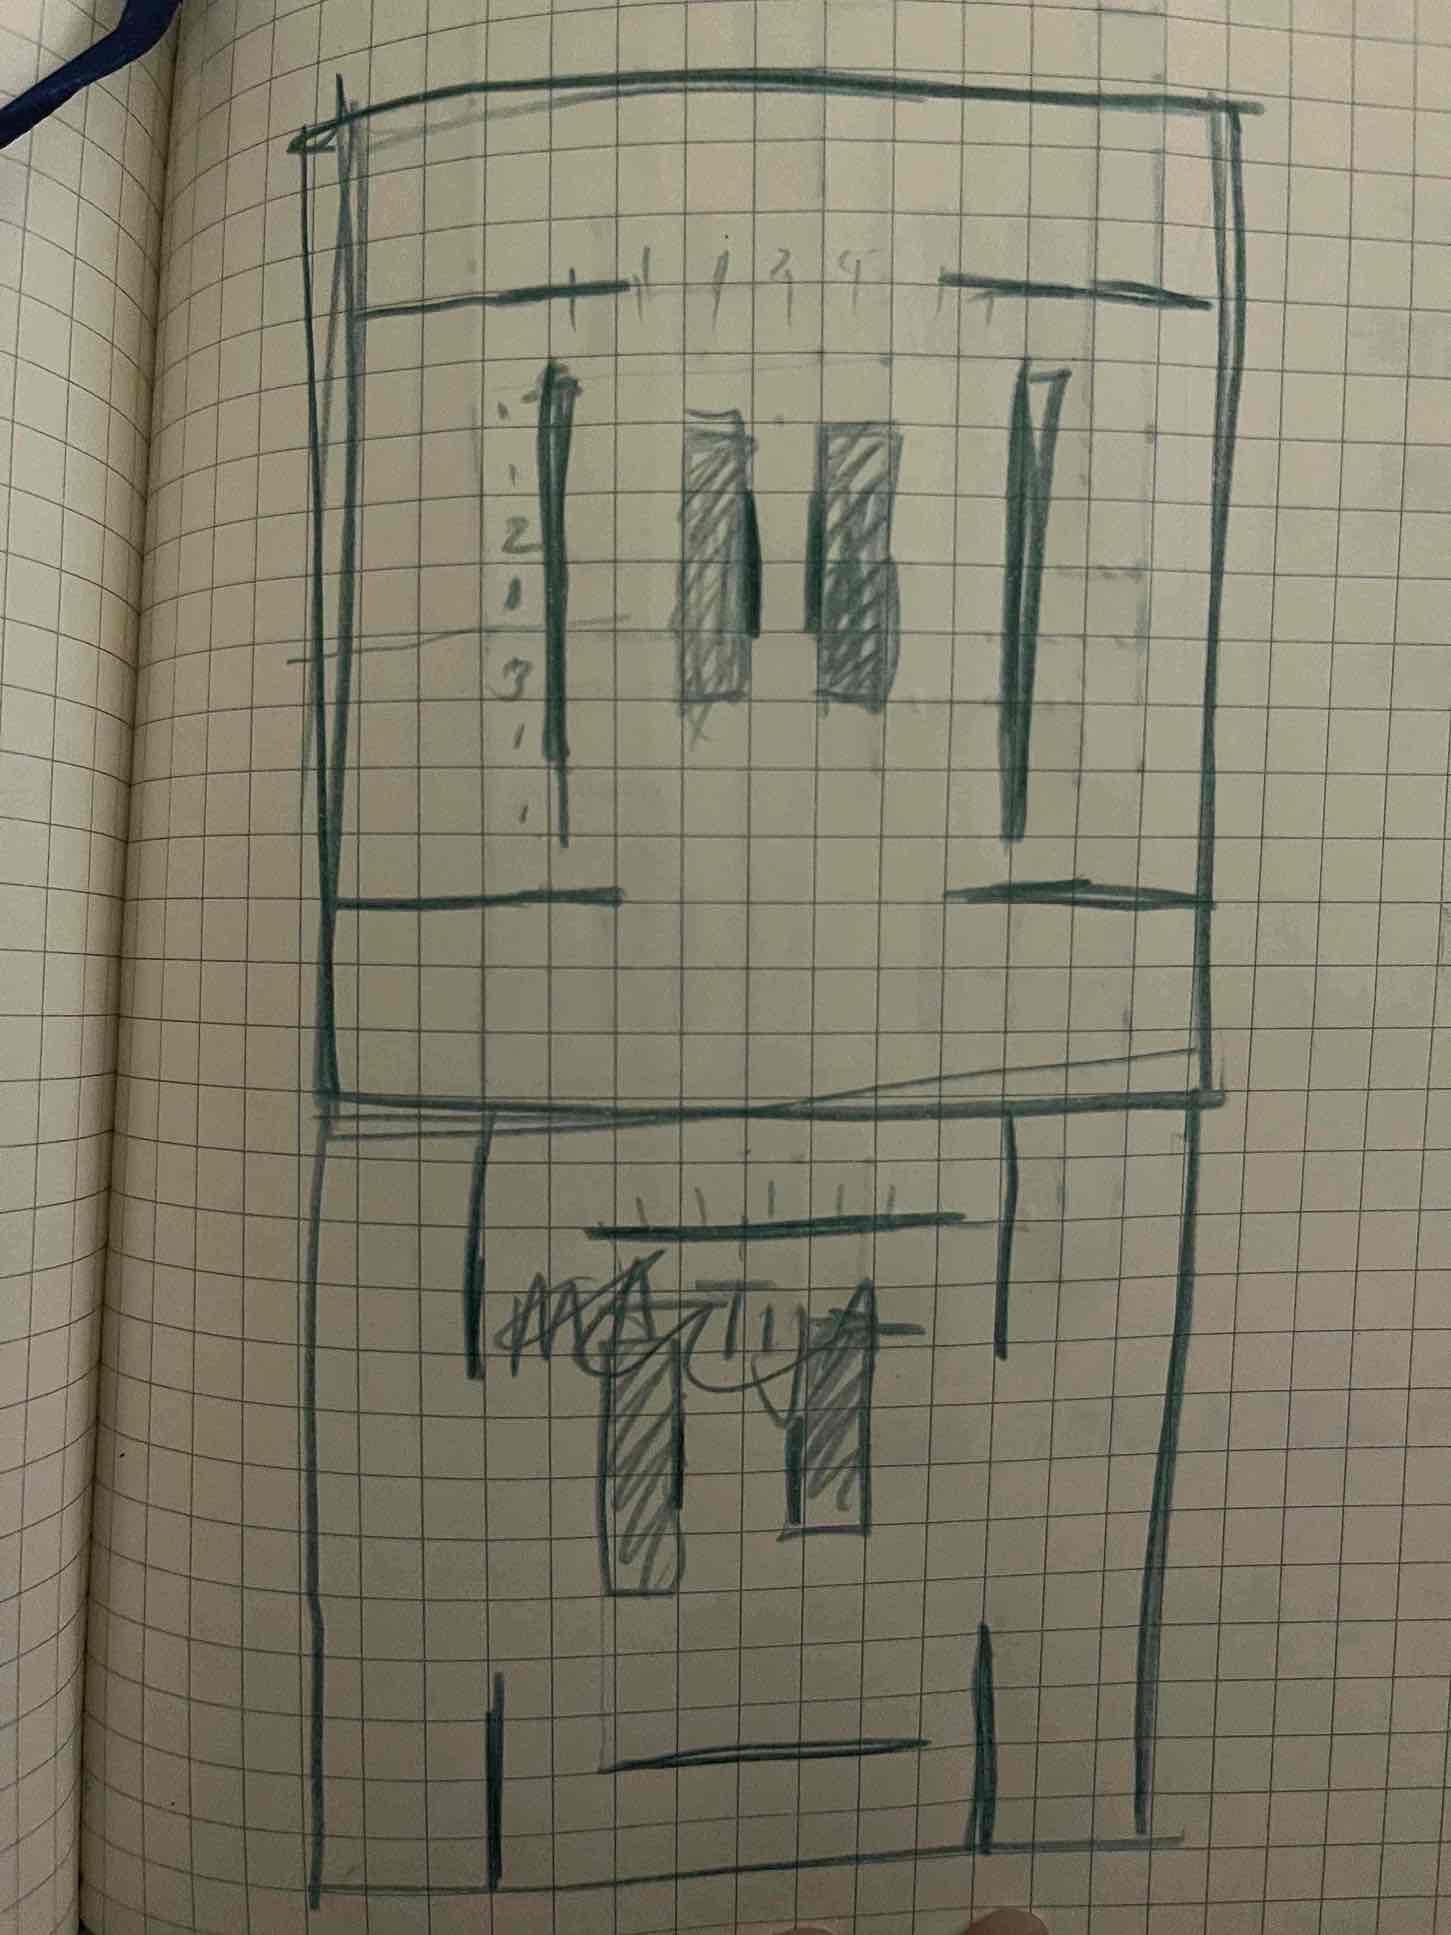
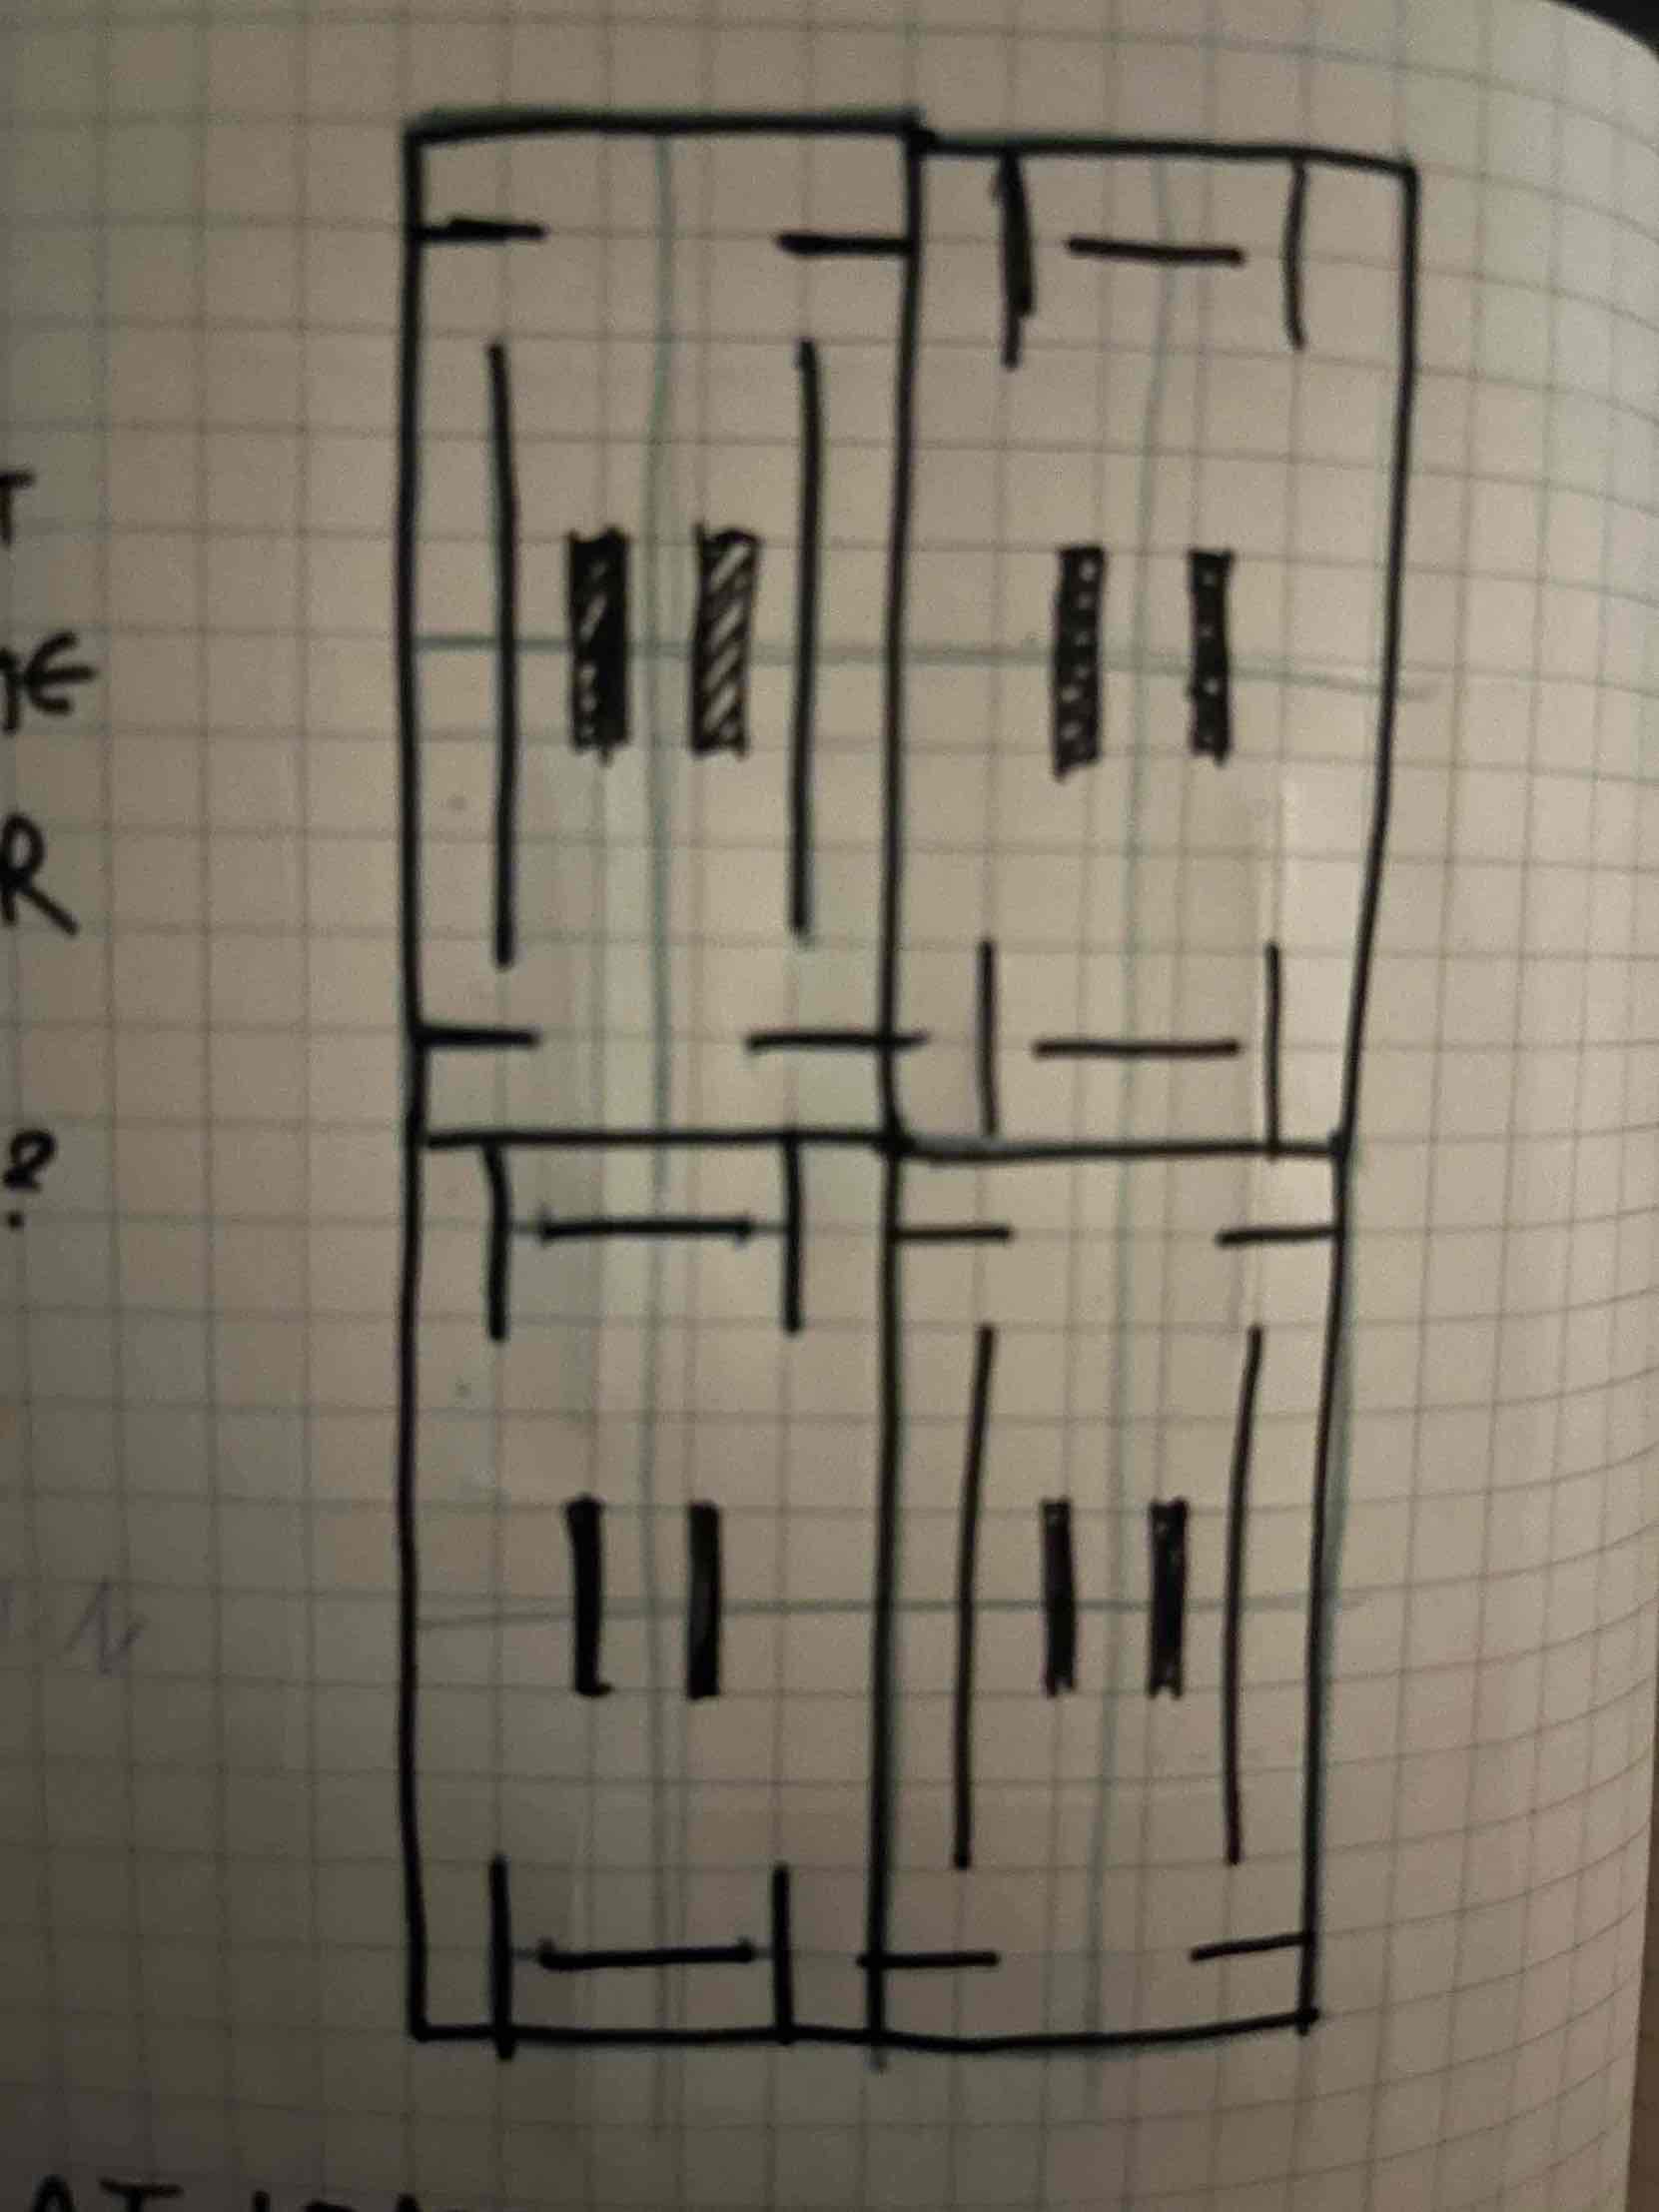
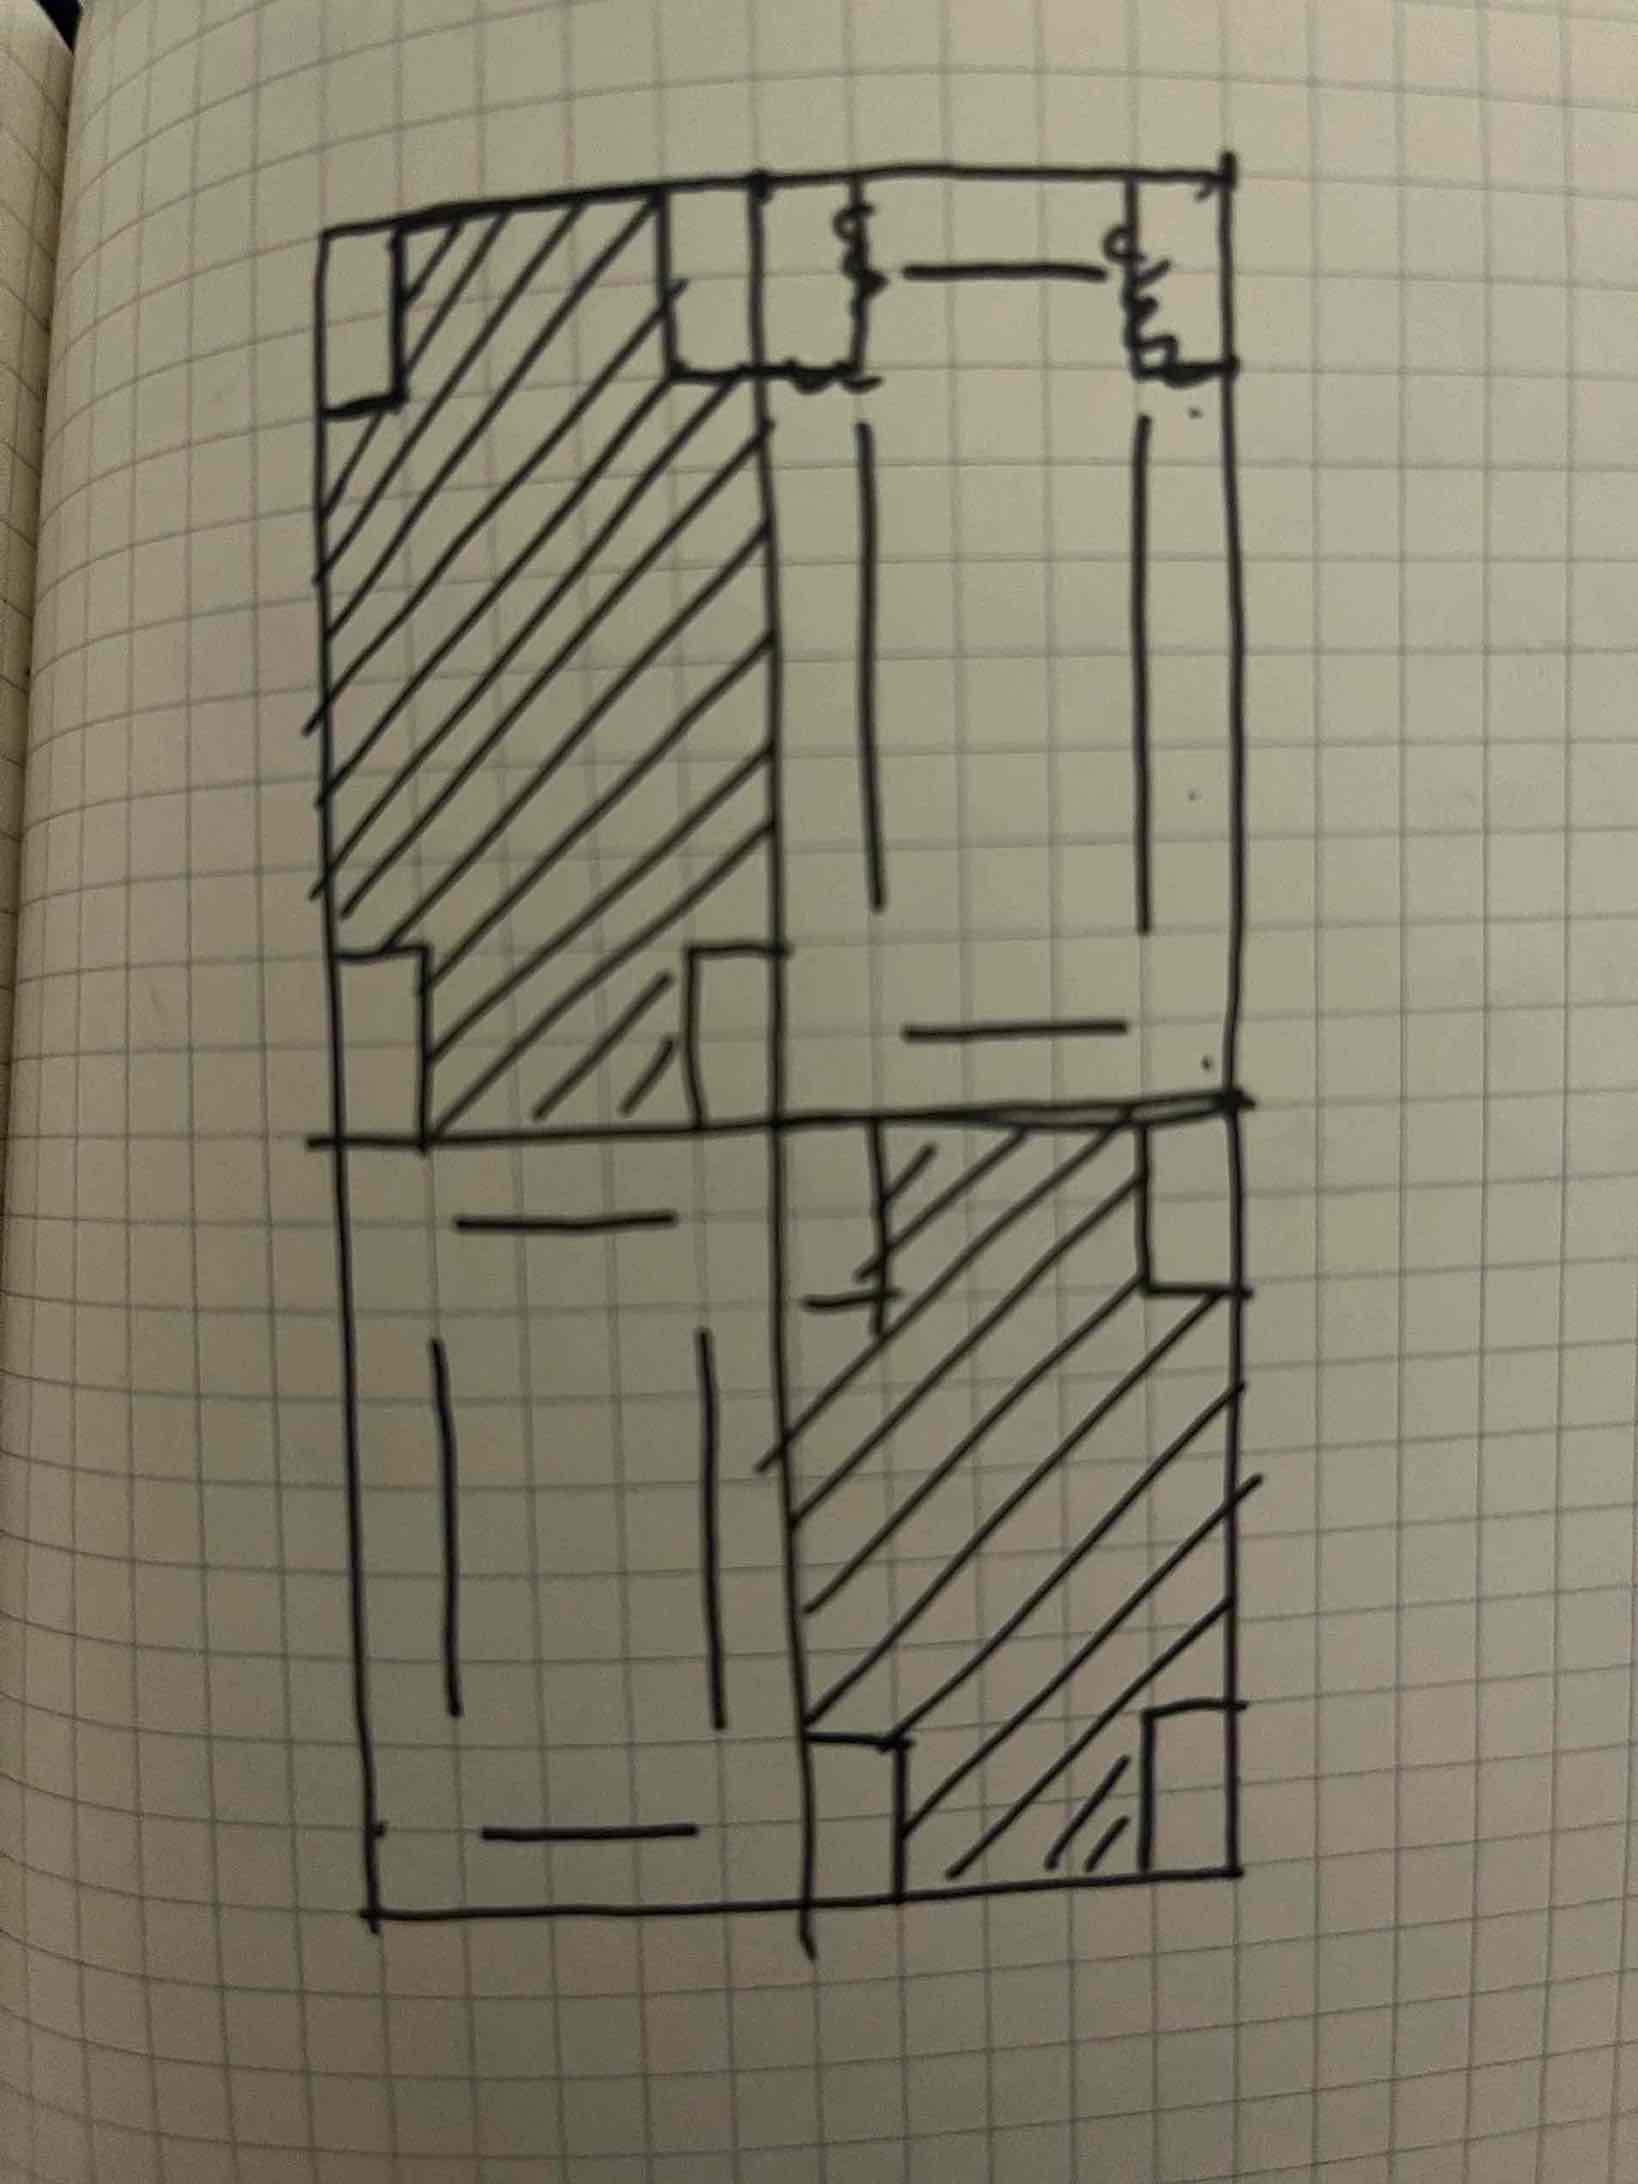
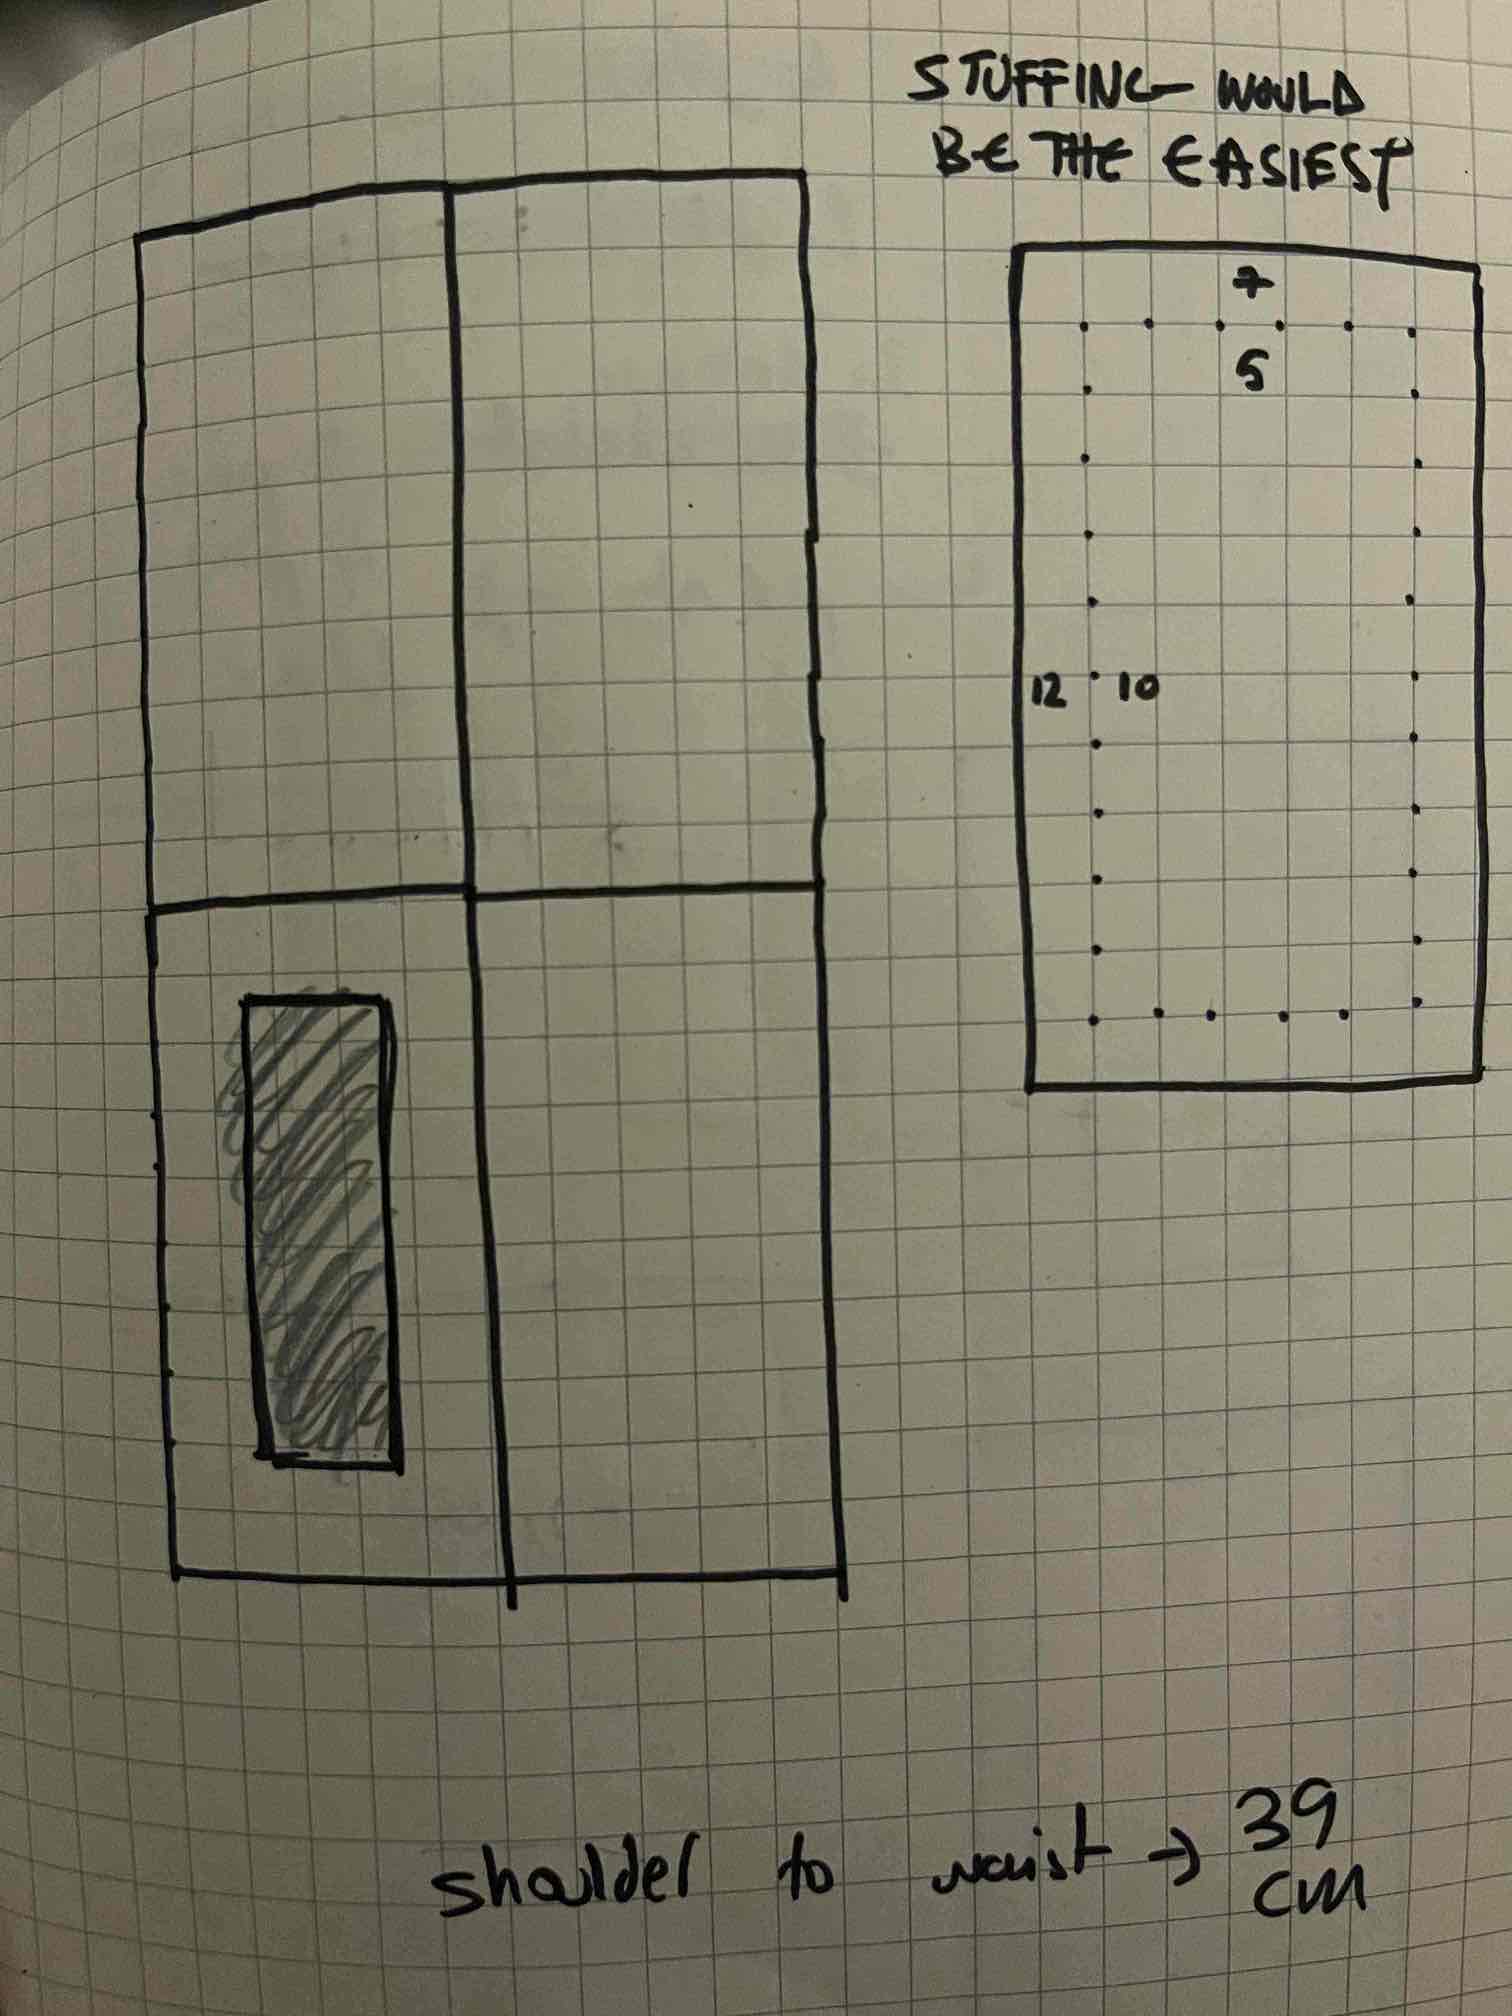
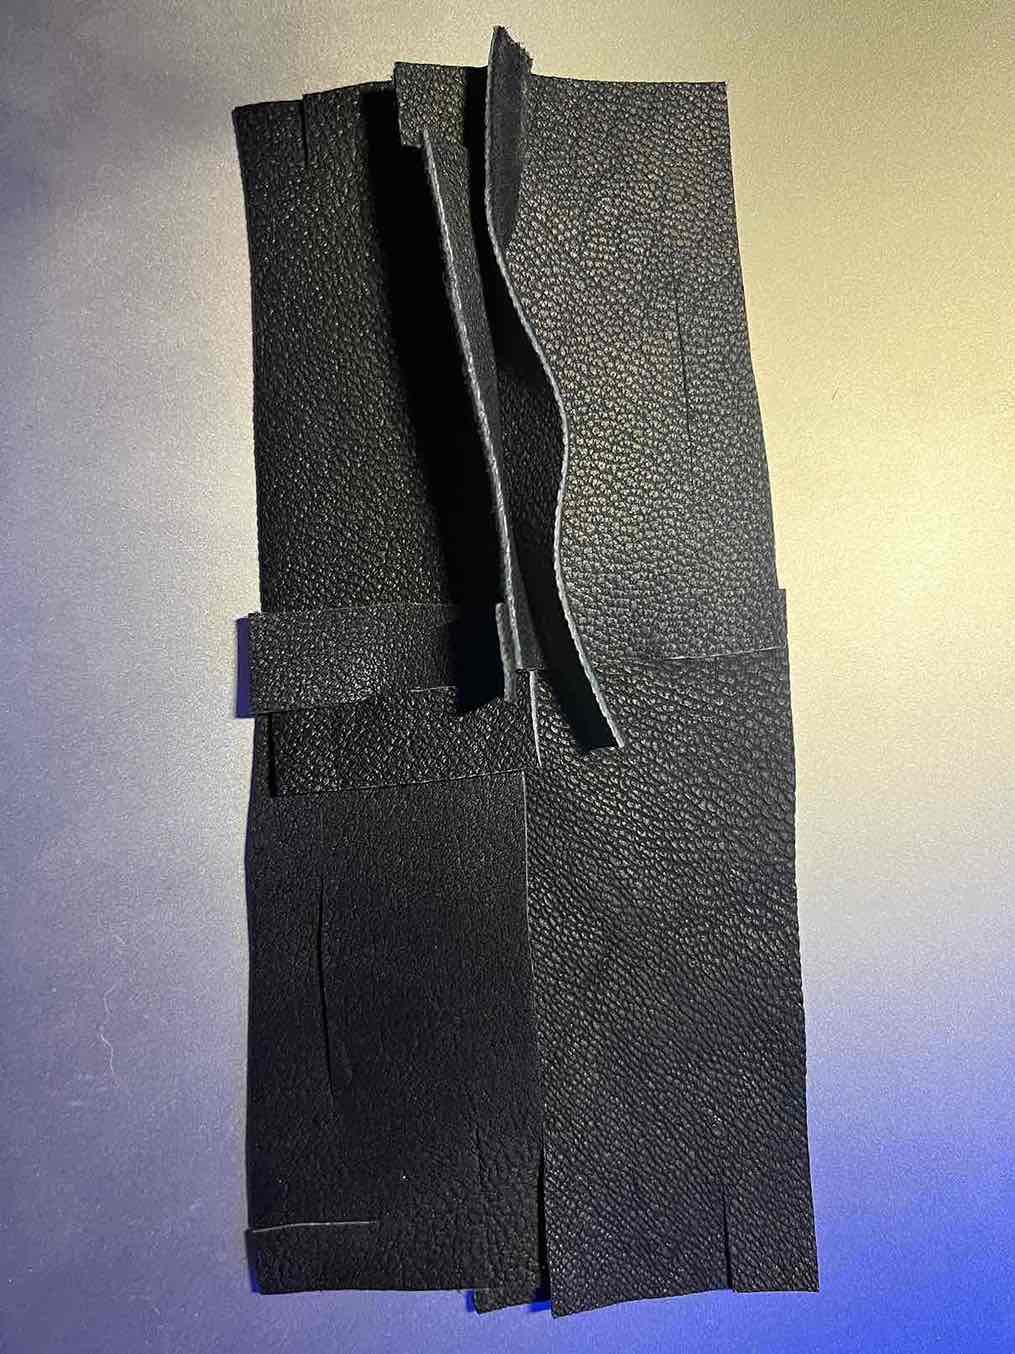
I thought about different ways to join and arrange the leather and wool. The second iteration produces a lot of waste in cutting so I avoided developing it. The third stuffing method also produces a lot of leather waste and the surface of the coat would be checkered which is not my aesthetic direction.
4. Materials
Leather and its challenges
Once I made the decision to use leather, I looked for a way to source used or reclaimed leather. Heading to the local fleamarket was one option. Asking friends and famikly for leather they don't wear anymore was another. Unfortunately, both options did not work out. Due to the time constraint, I found a leather wholesaler through an almnus of FabLab.
The leather collection was limited. I wanted to find a malleable leather that would allow for movement since I plan to wear the jacket. Lamb leather seemed like a good choice. The thicknesses of the hydes vary between 1.3 - 1.7 mm. Some are softer than others.
5. Prep for laser cutting
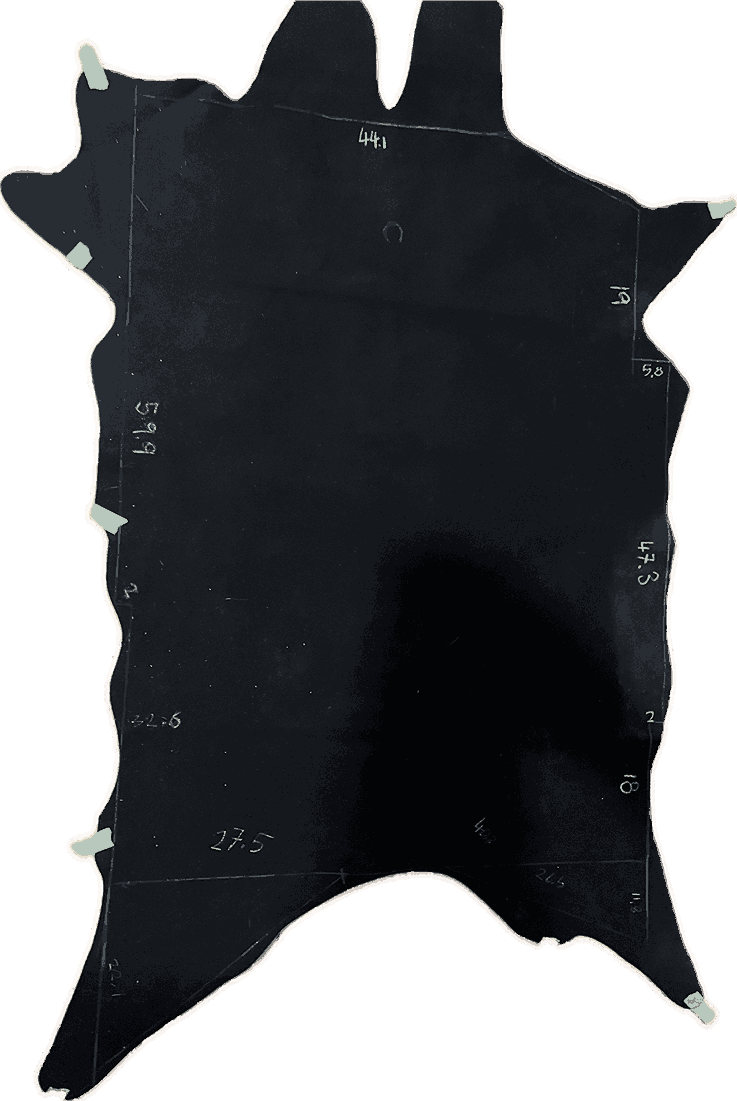
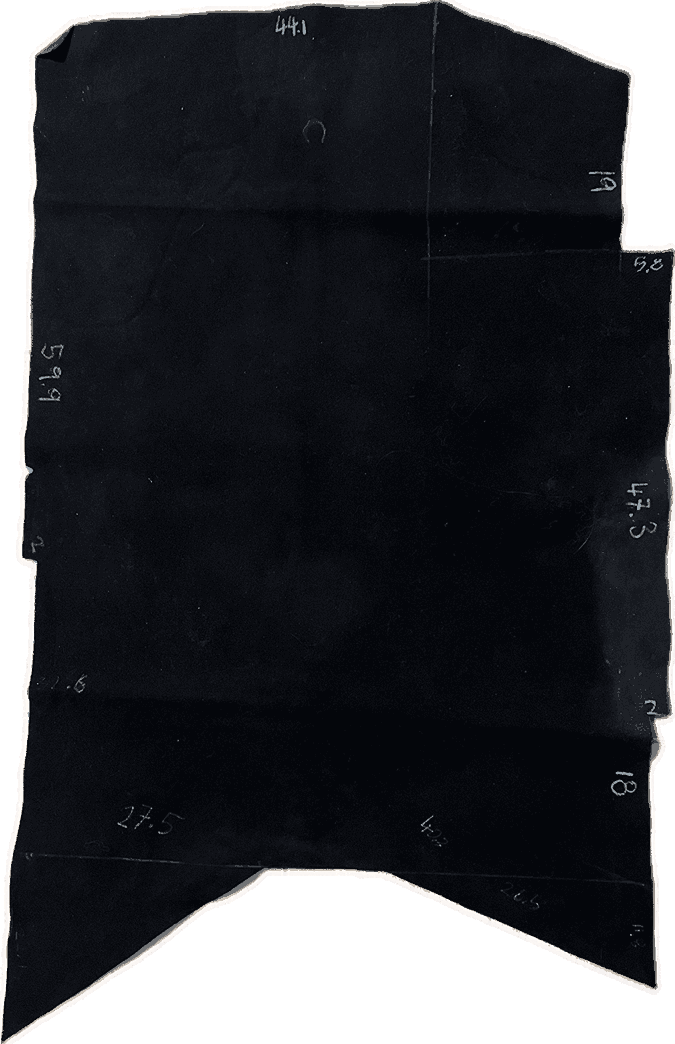
Fabrication Files:
6. Wool Cleaning and felting
I washed a new batch of camel wool. The process includes shaking for get rid of dirt, dust, and loosely attached twigs. Then, the wool is rinsed a few times until the water is somewhat clear. After that, the wool is soaked in water with laurel soap overnight. Finally, the cleaned wool is dried in the sun. I will add this process in more detail in my final project. This is a process I repeat whenever I have a new batch
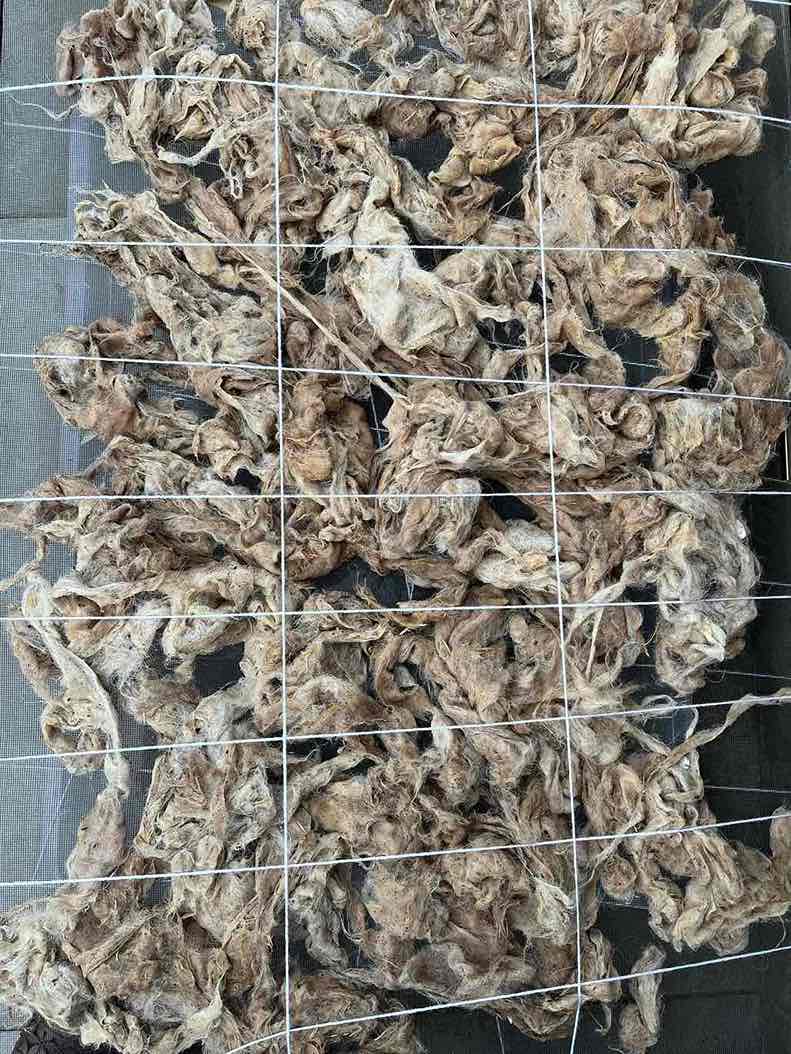 Camel wool drying in the sun on a makeshift surface and tied down with wool strings
Felting
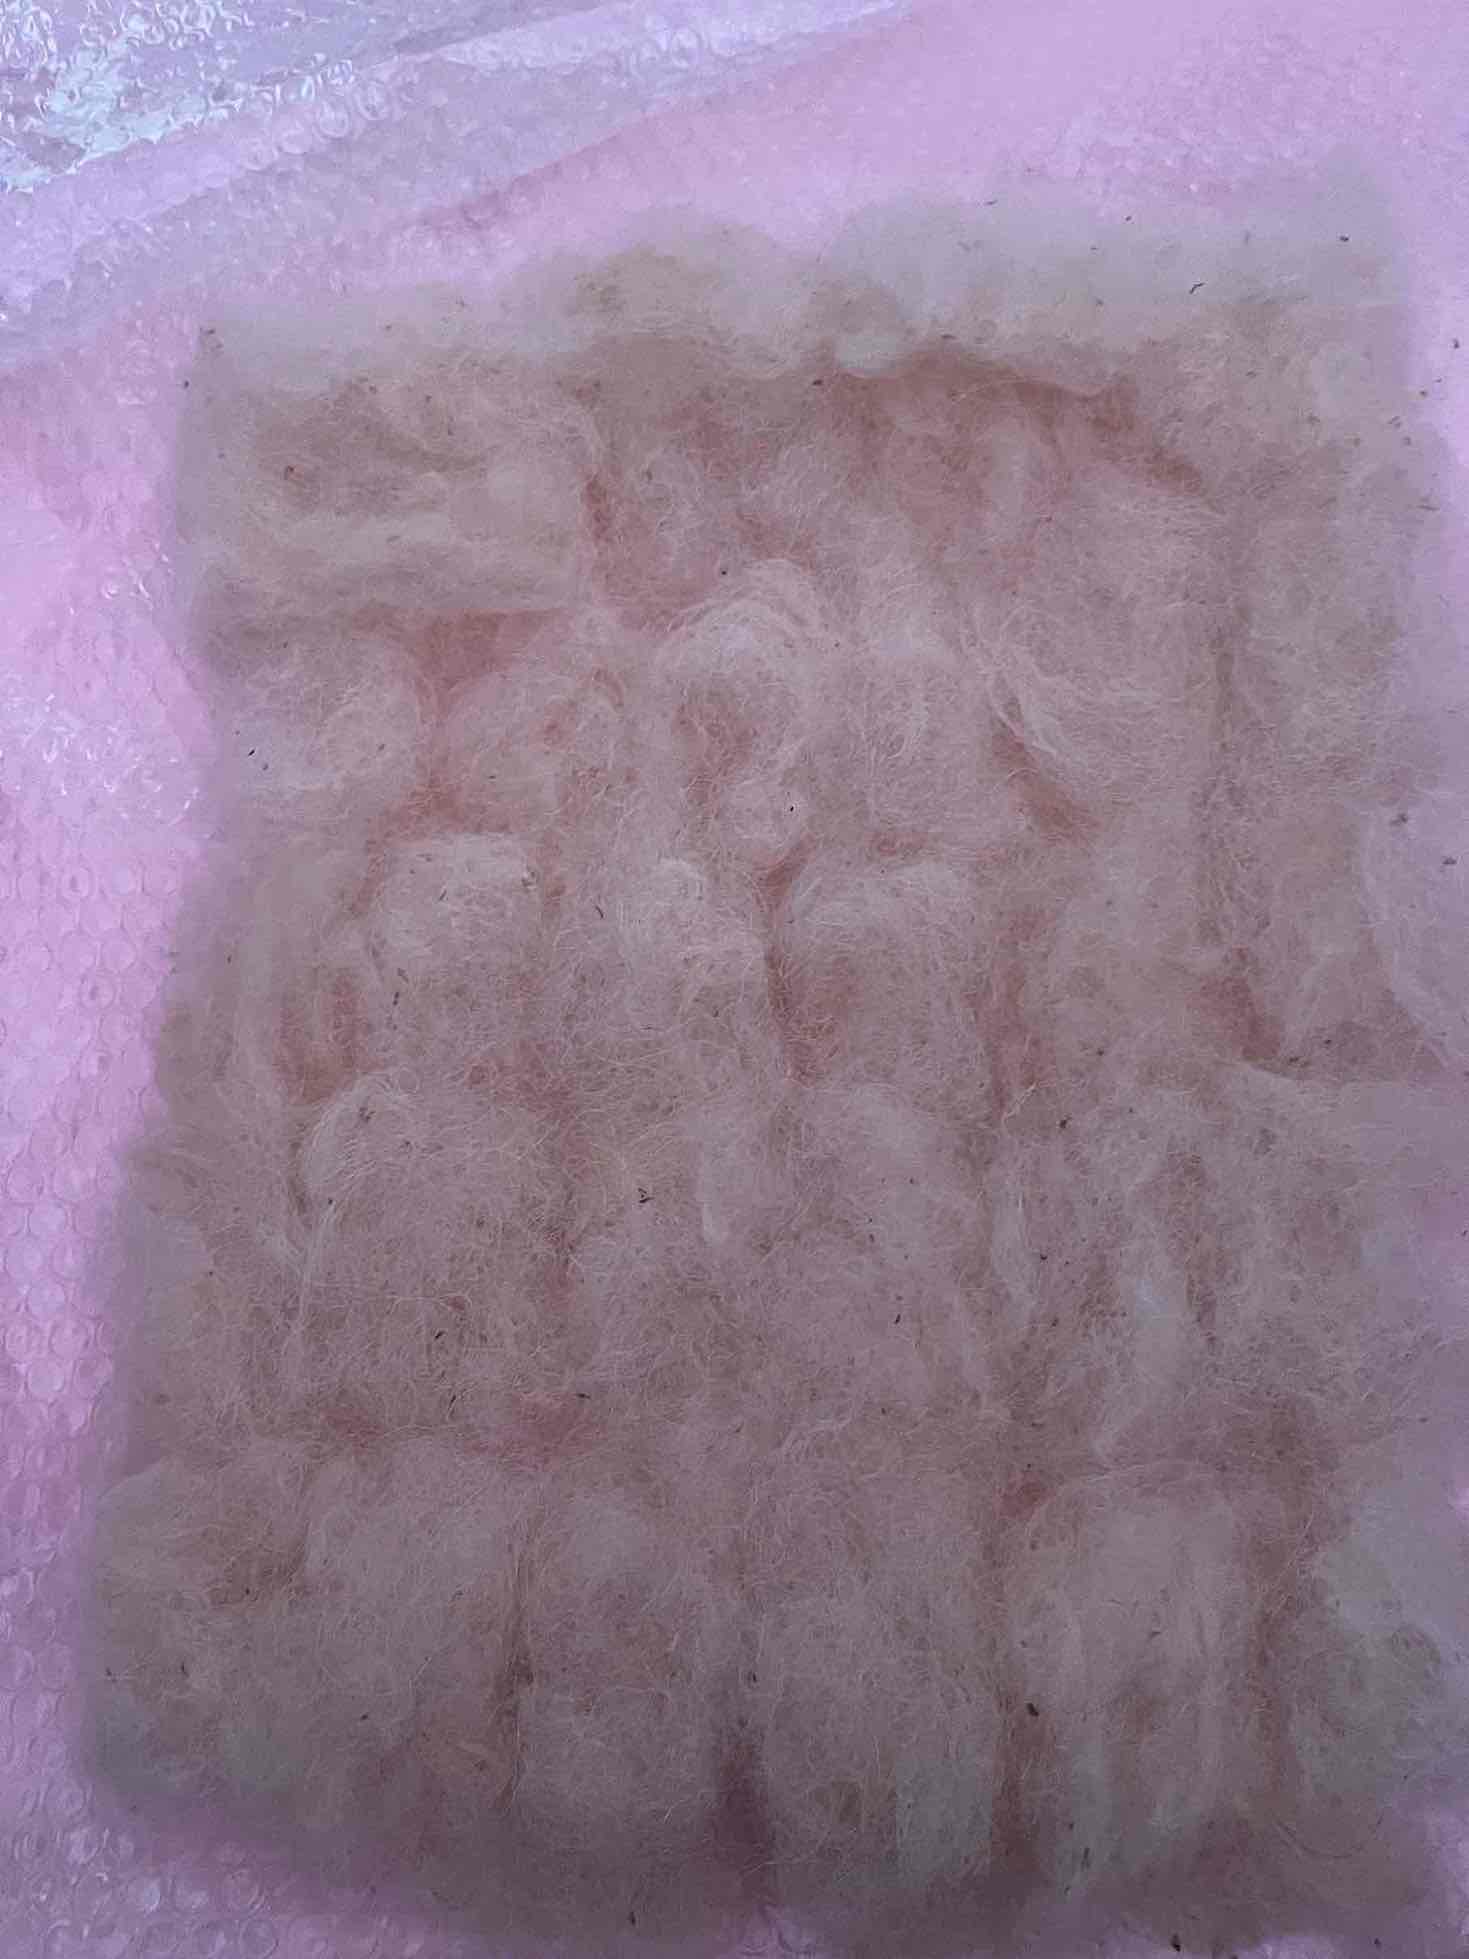
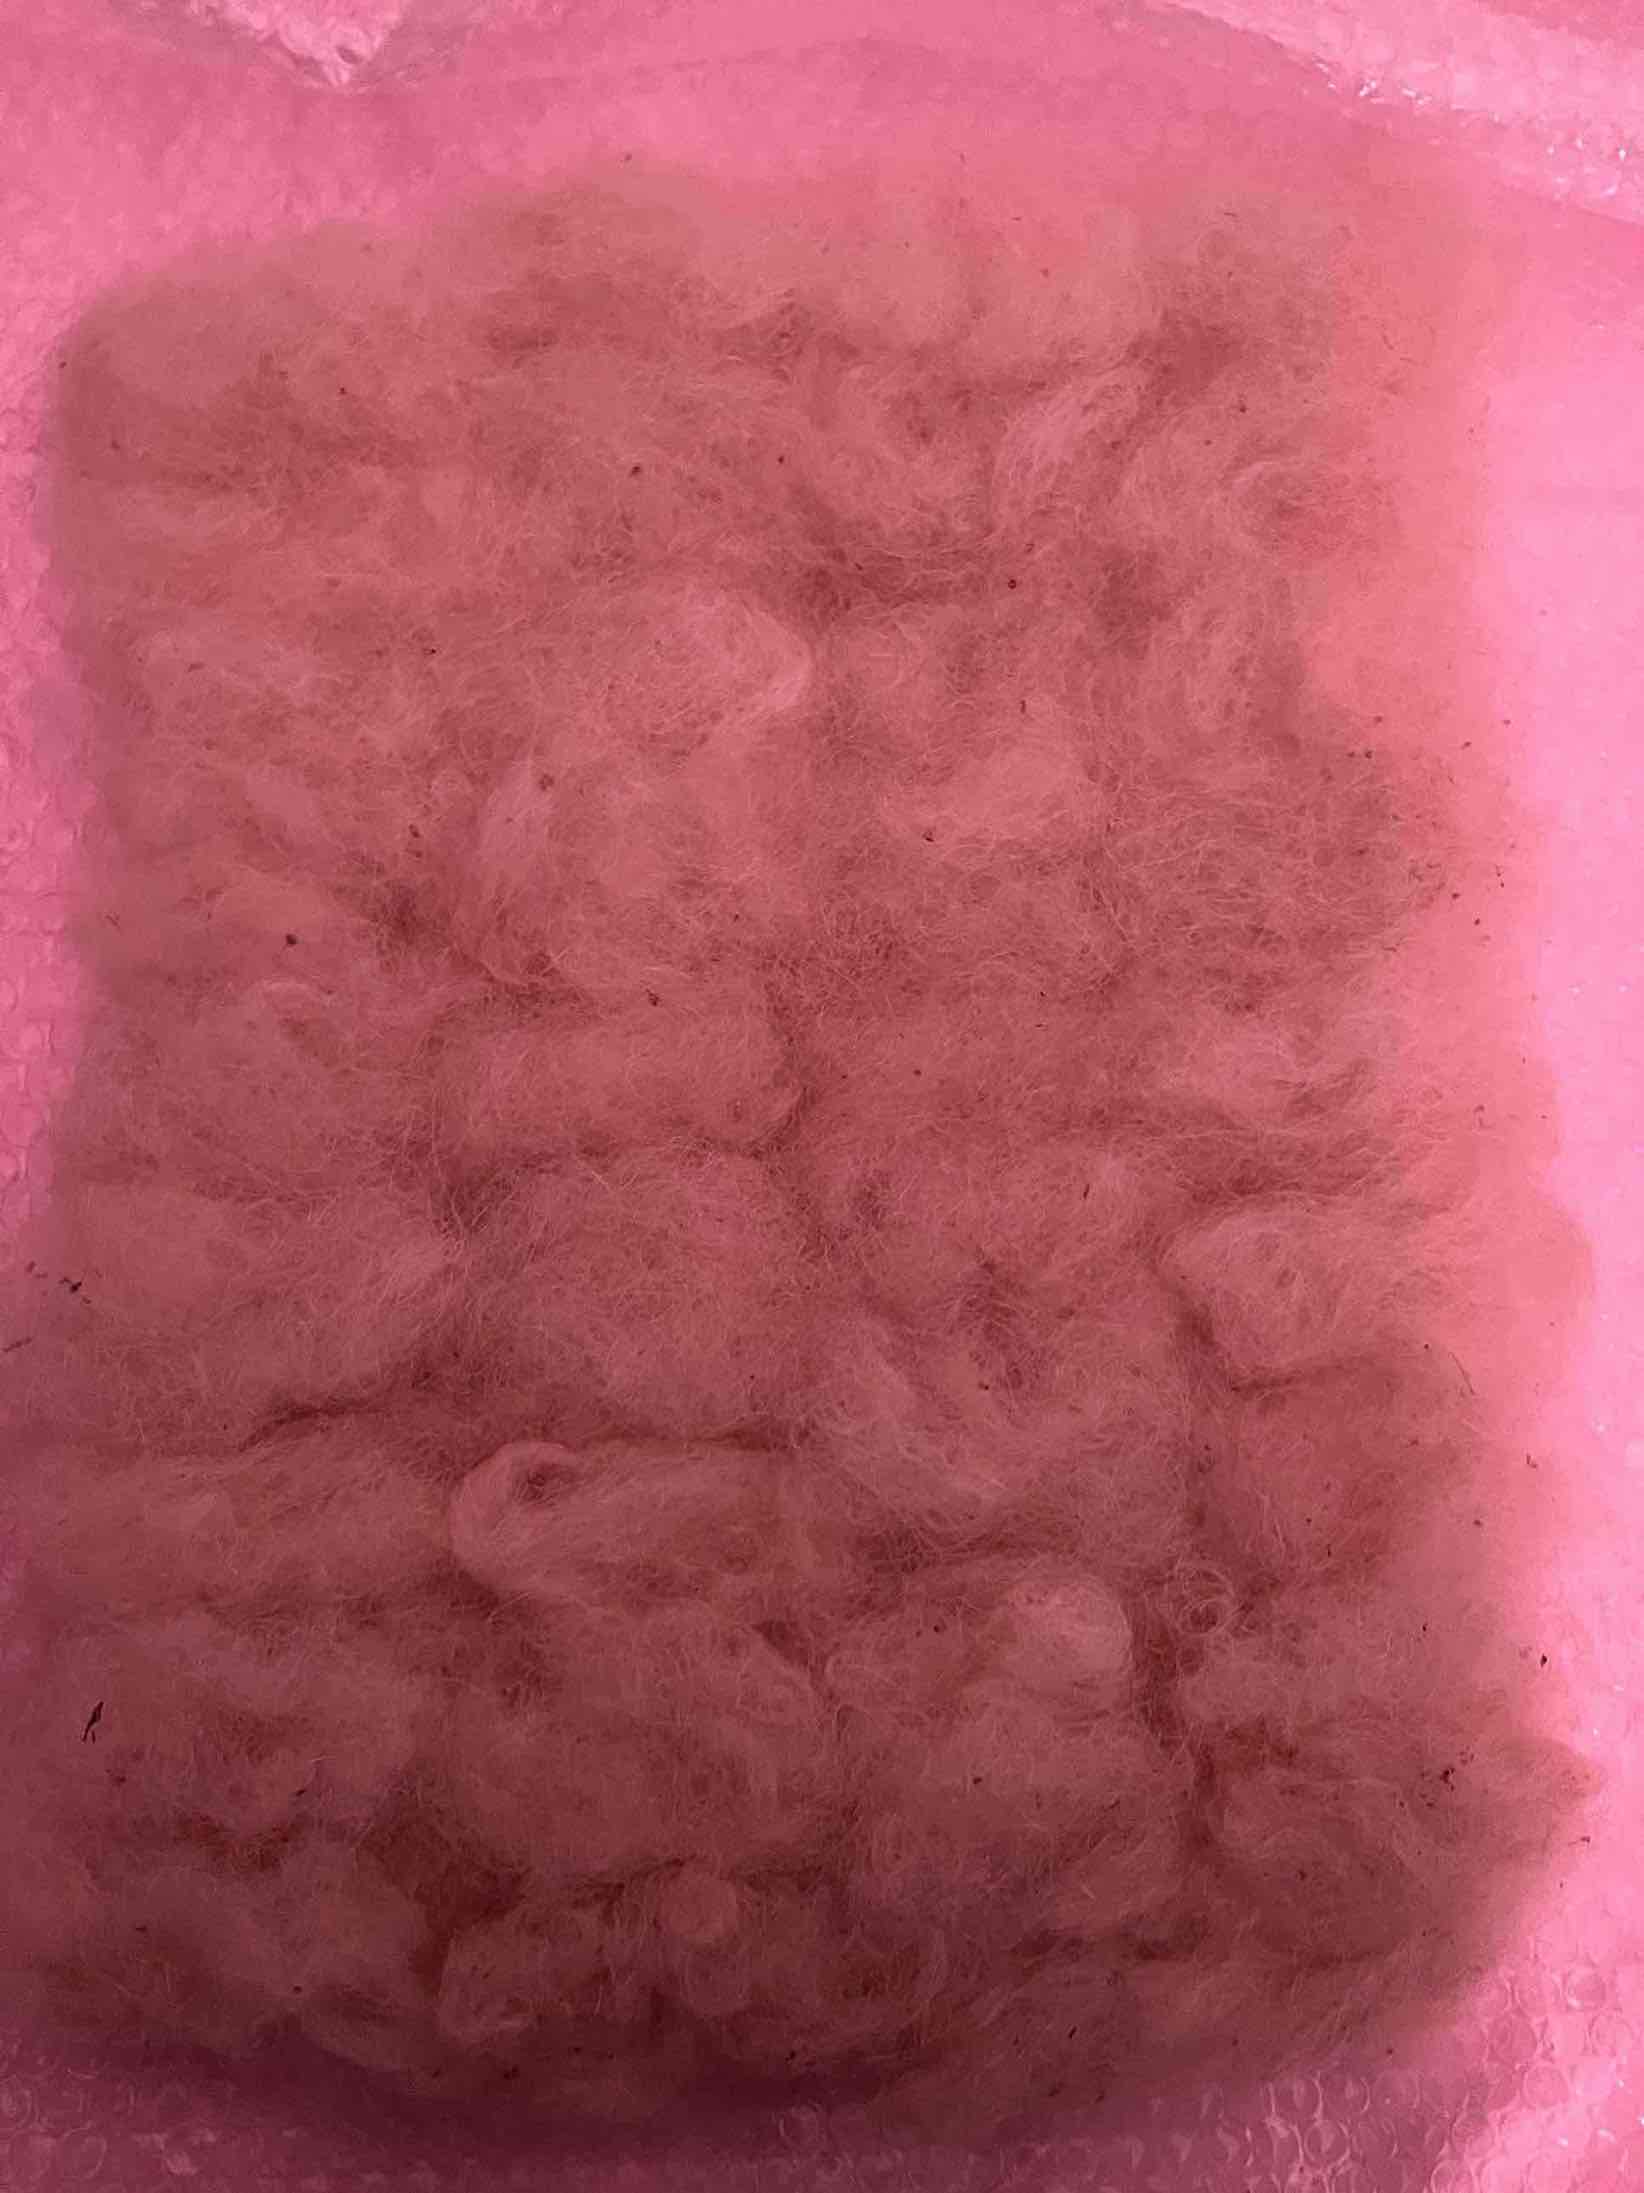
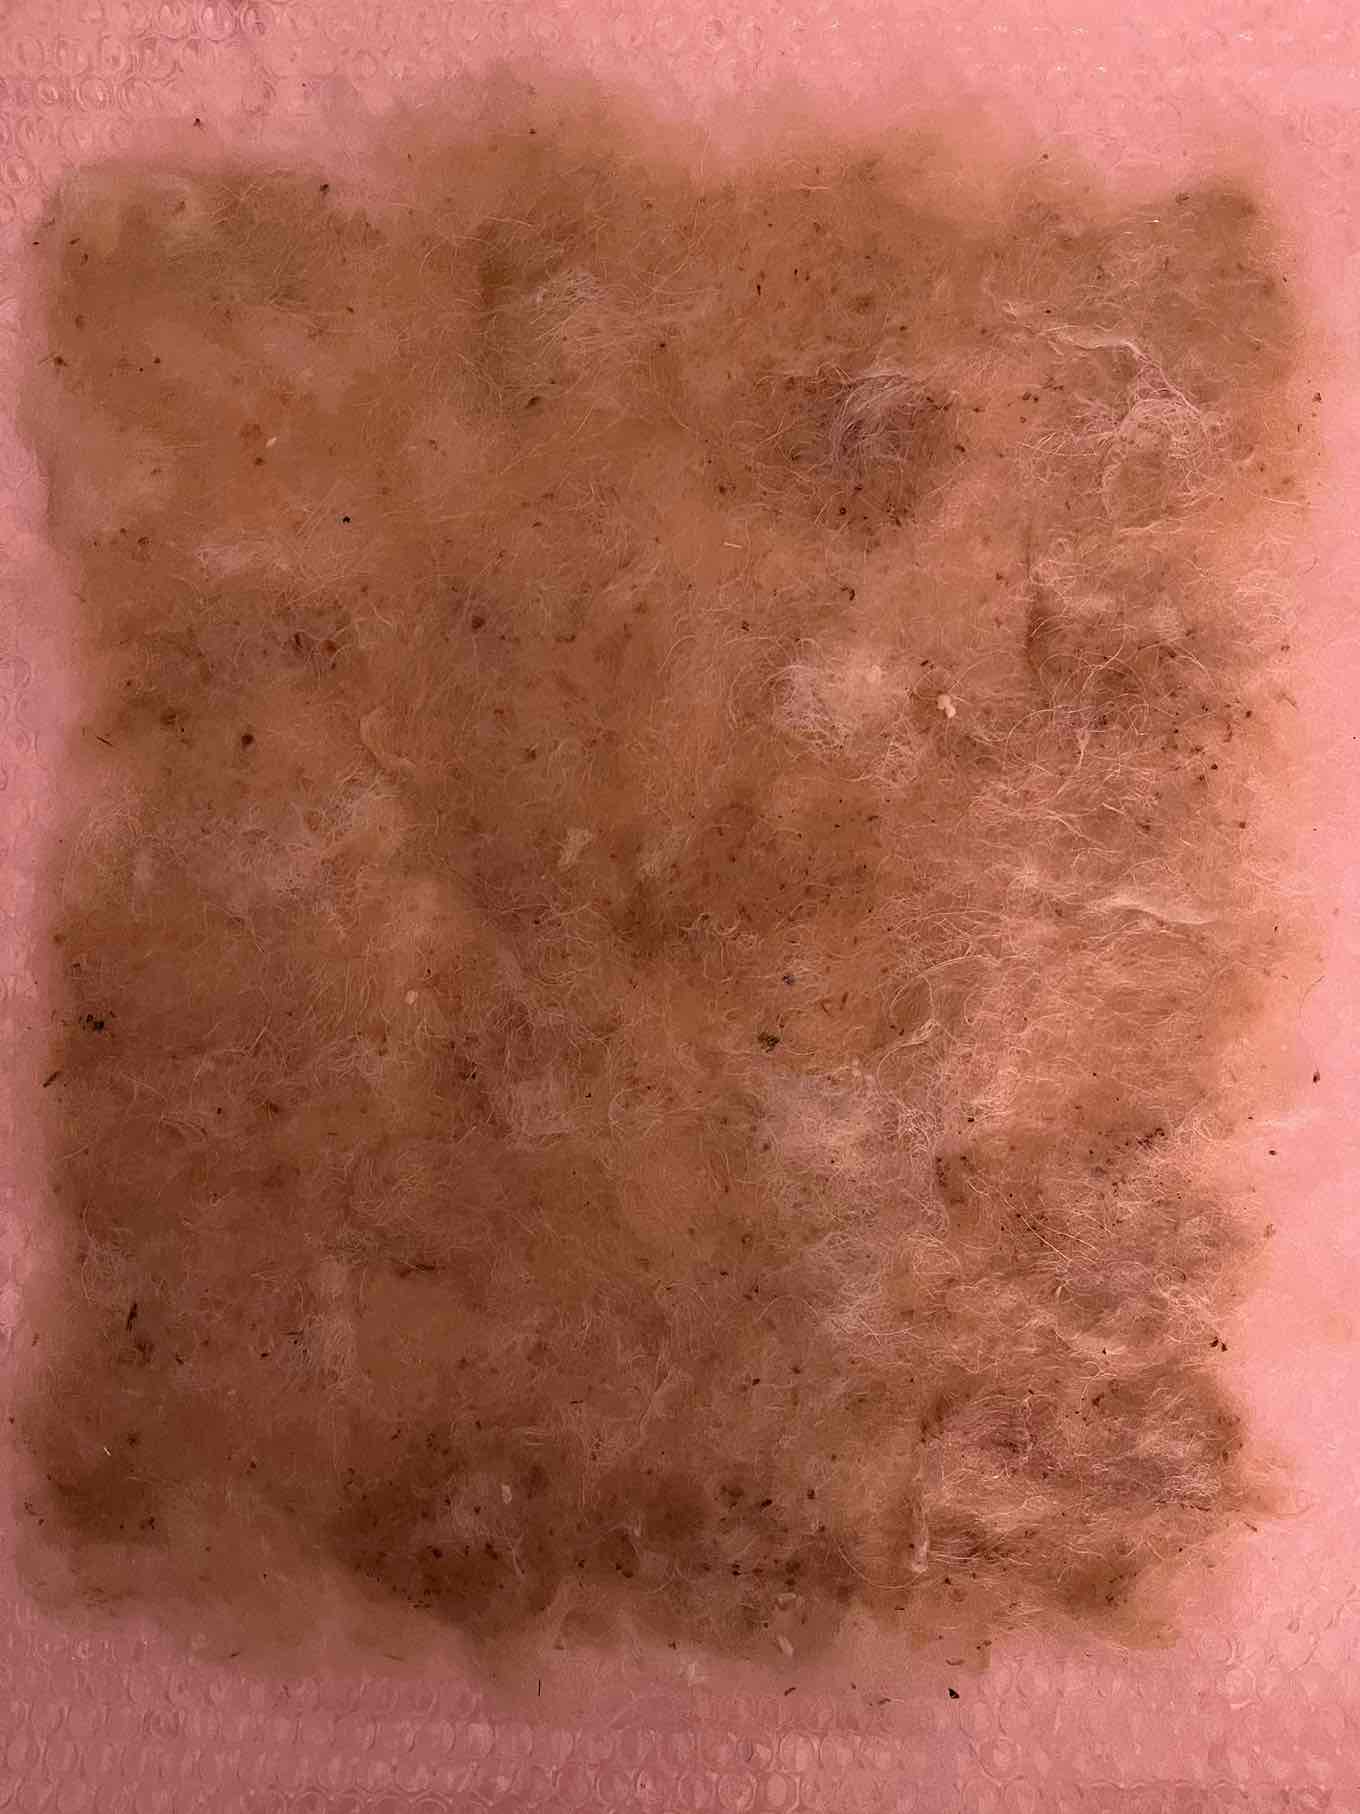
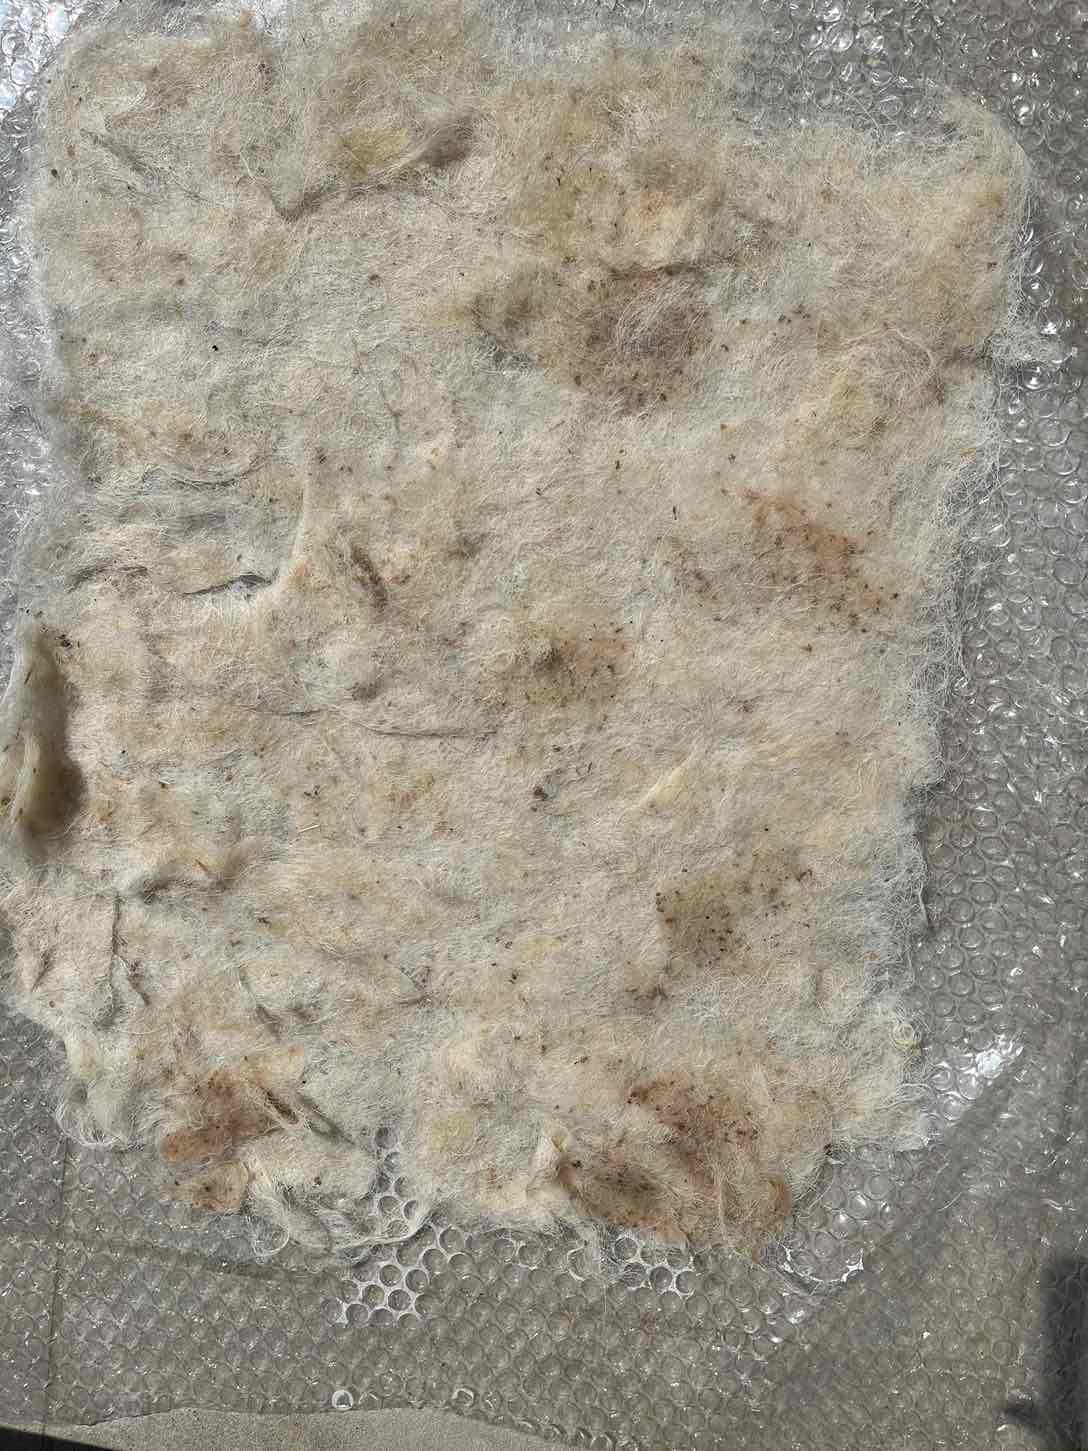
I used relatively thick batches of wool to create a felting grid because I wanted a 'fluffy' effect. The final photo shows the result. It is not a perfect felt. The bottom left shows a relatively useable part, where the wool is a consistent surface. The upper right part is clumpy and didn't blend together well. The reasons for this, apart from the fact that this is my first attempt, are as follows:
- The wool batches were larger than what is recommended
- I poured the water too quickly when I started, rather than slow dampening
- It needed more time to be pressed and rolles.
I will detail the wet-felting process in the future when the result is pbetter. For now what I learned is that, like every part of working with wool, it takes a lot of patience.
- Felt module
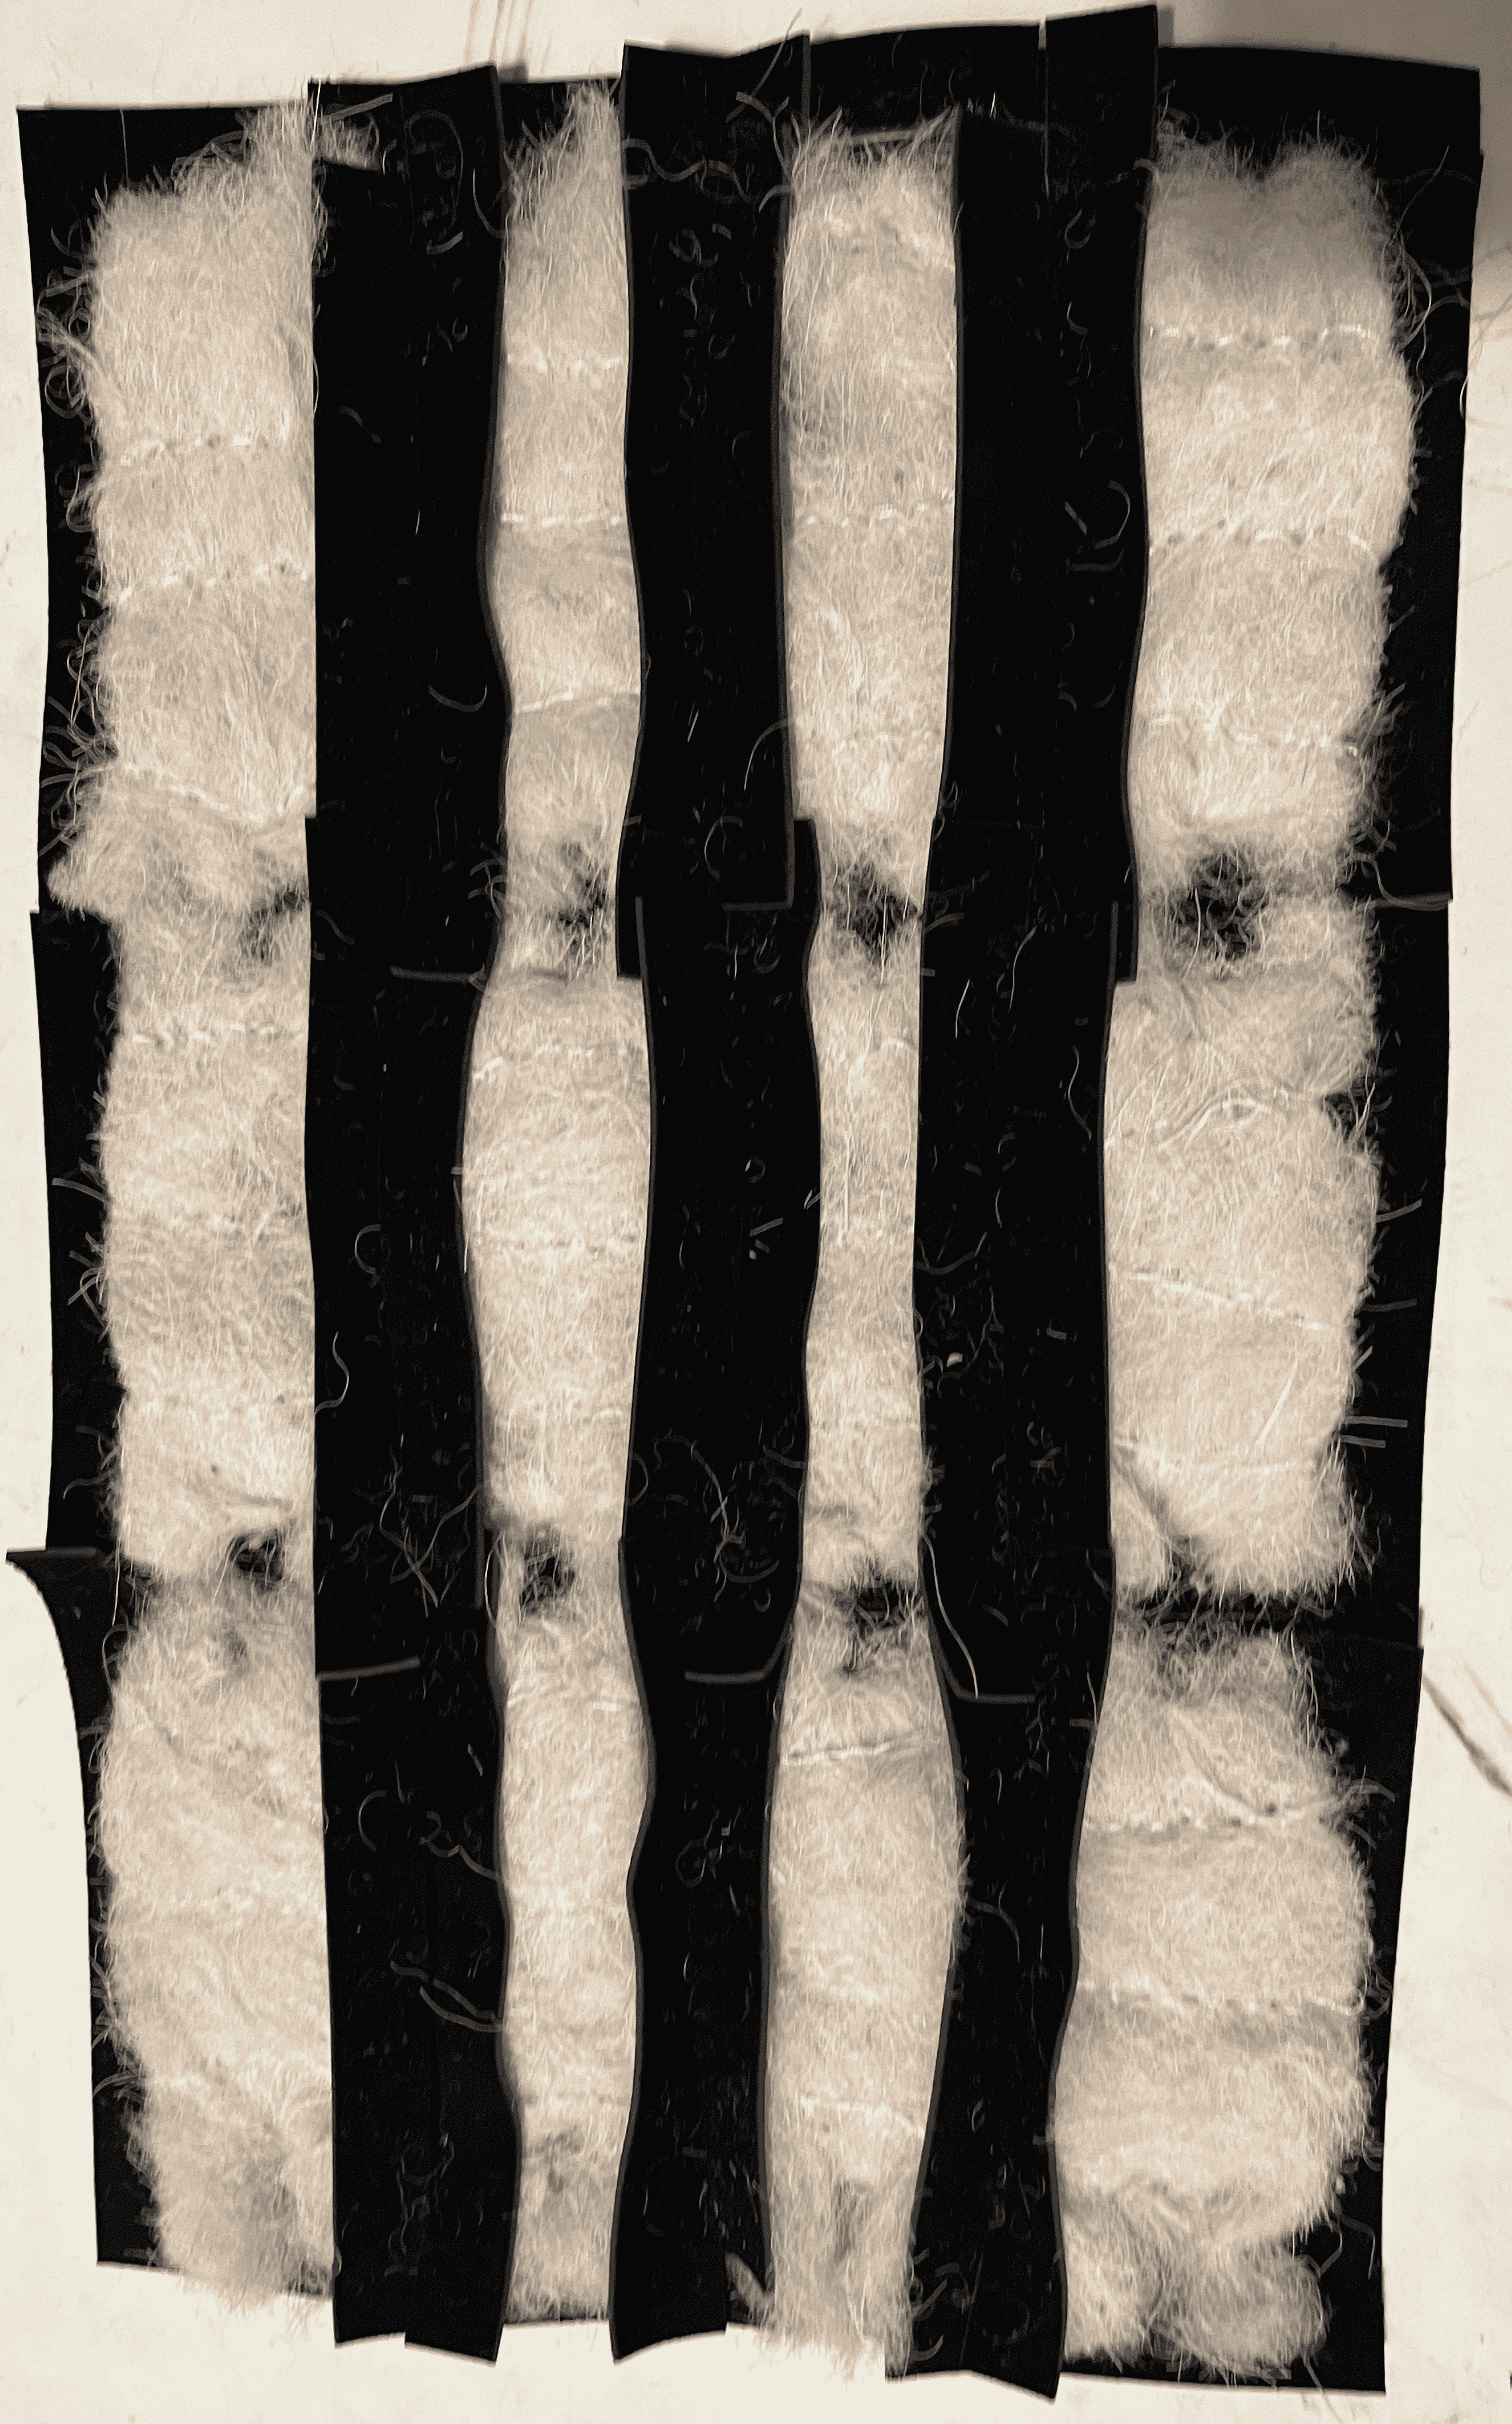
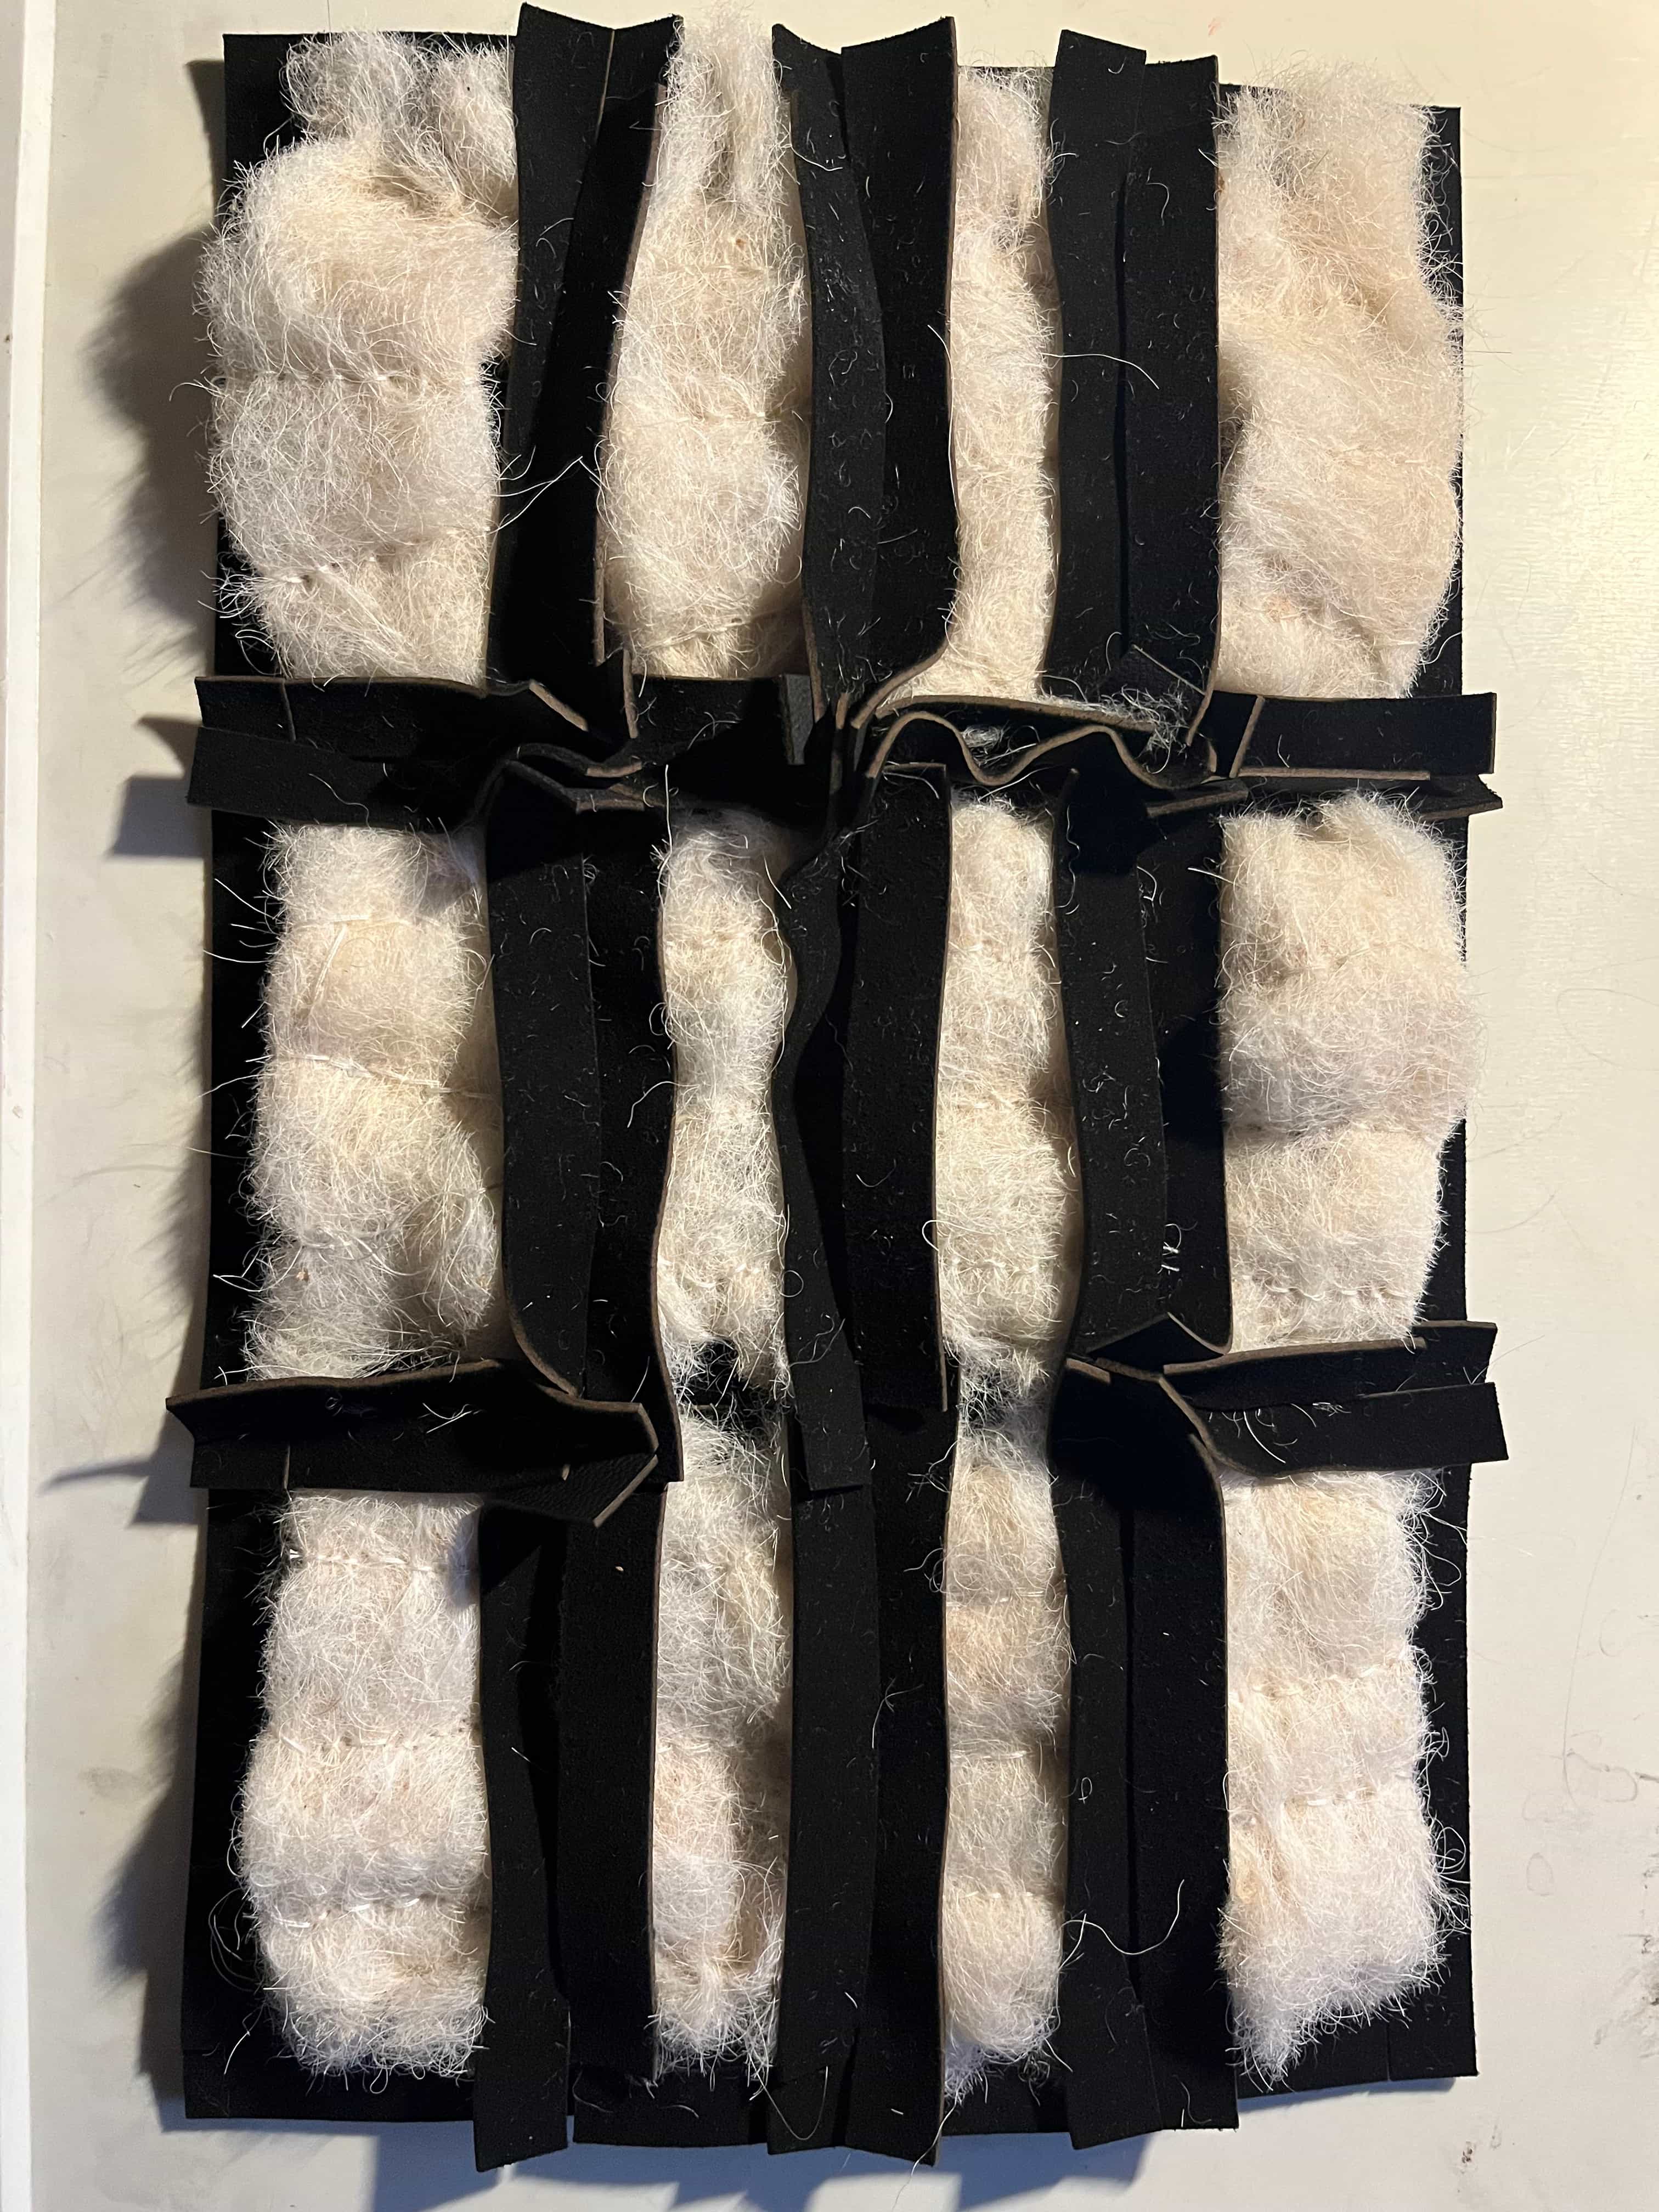
I wanted to make a module that allows for aan outer layer and inner wool layer for warmth. I Used the joint detail of the prototype to create a space that holds the wool.
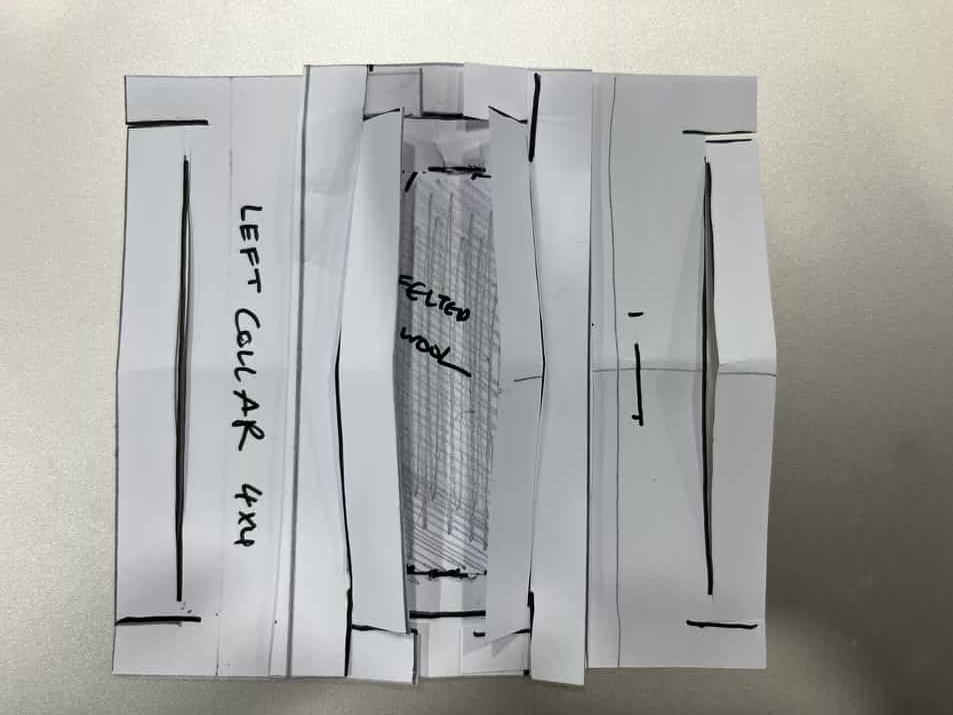 Wool in the leather module
I also made slits where the felt module can be attached to the leather module.
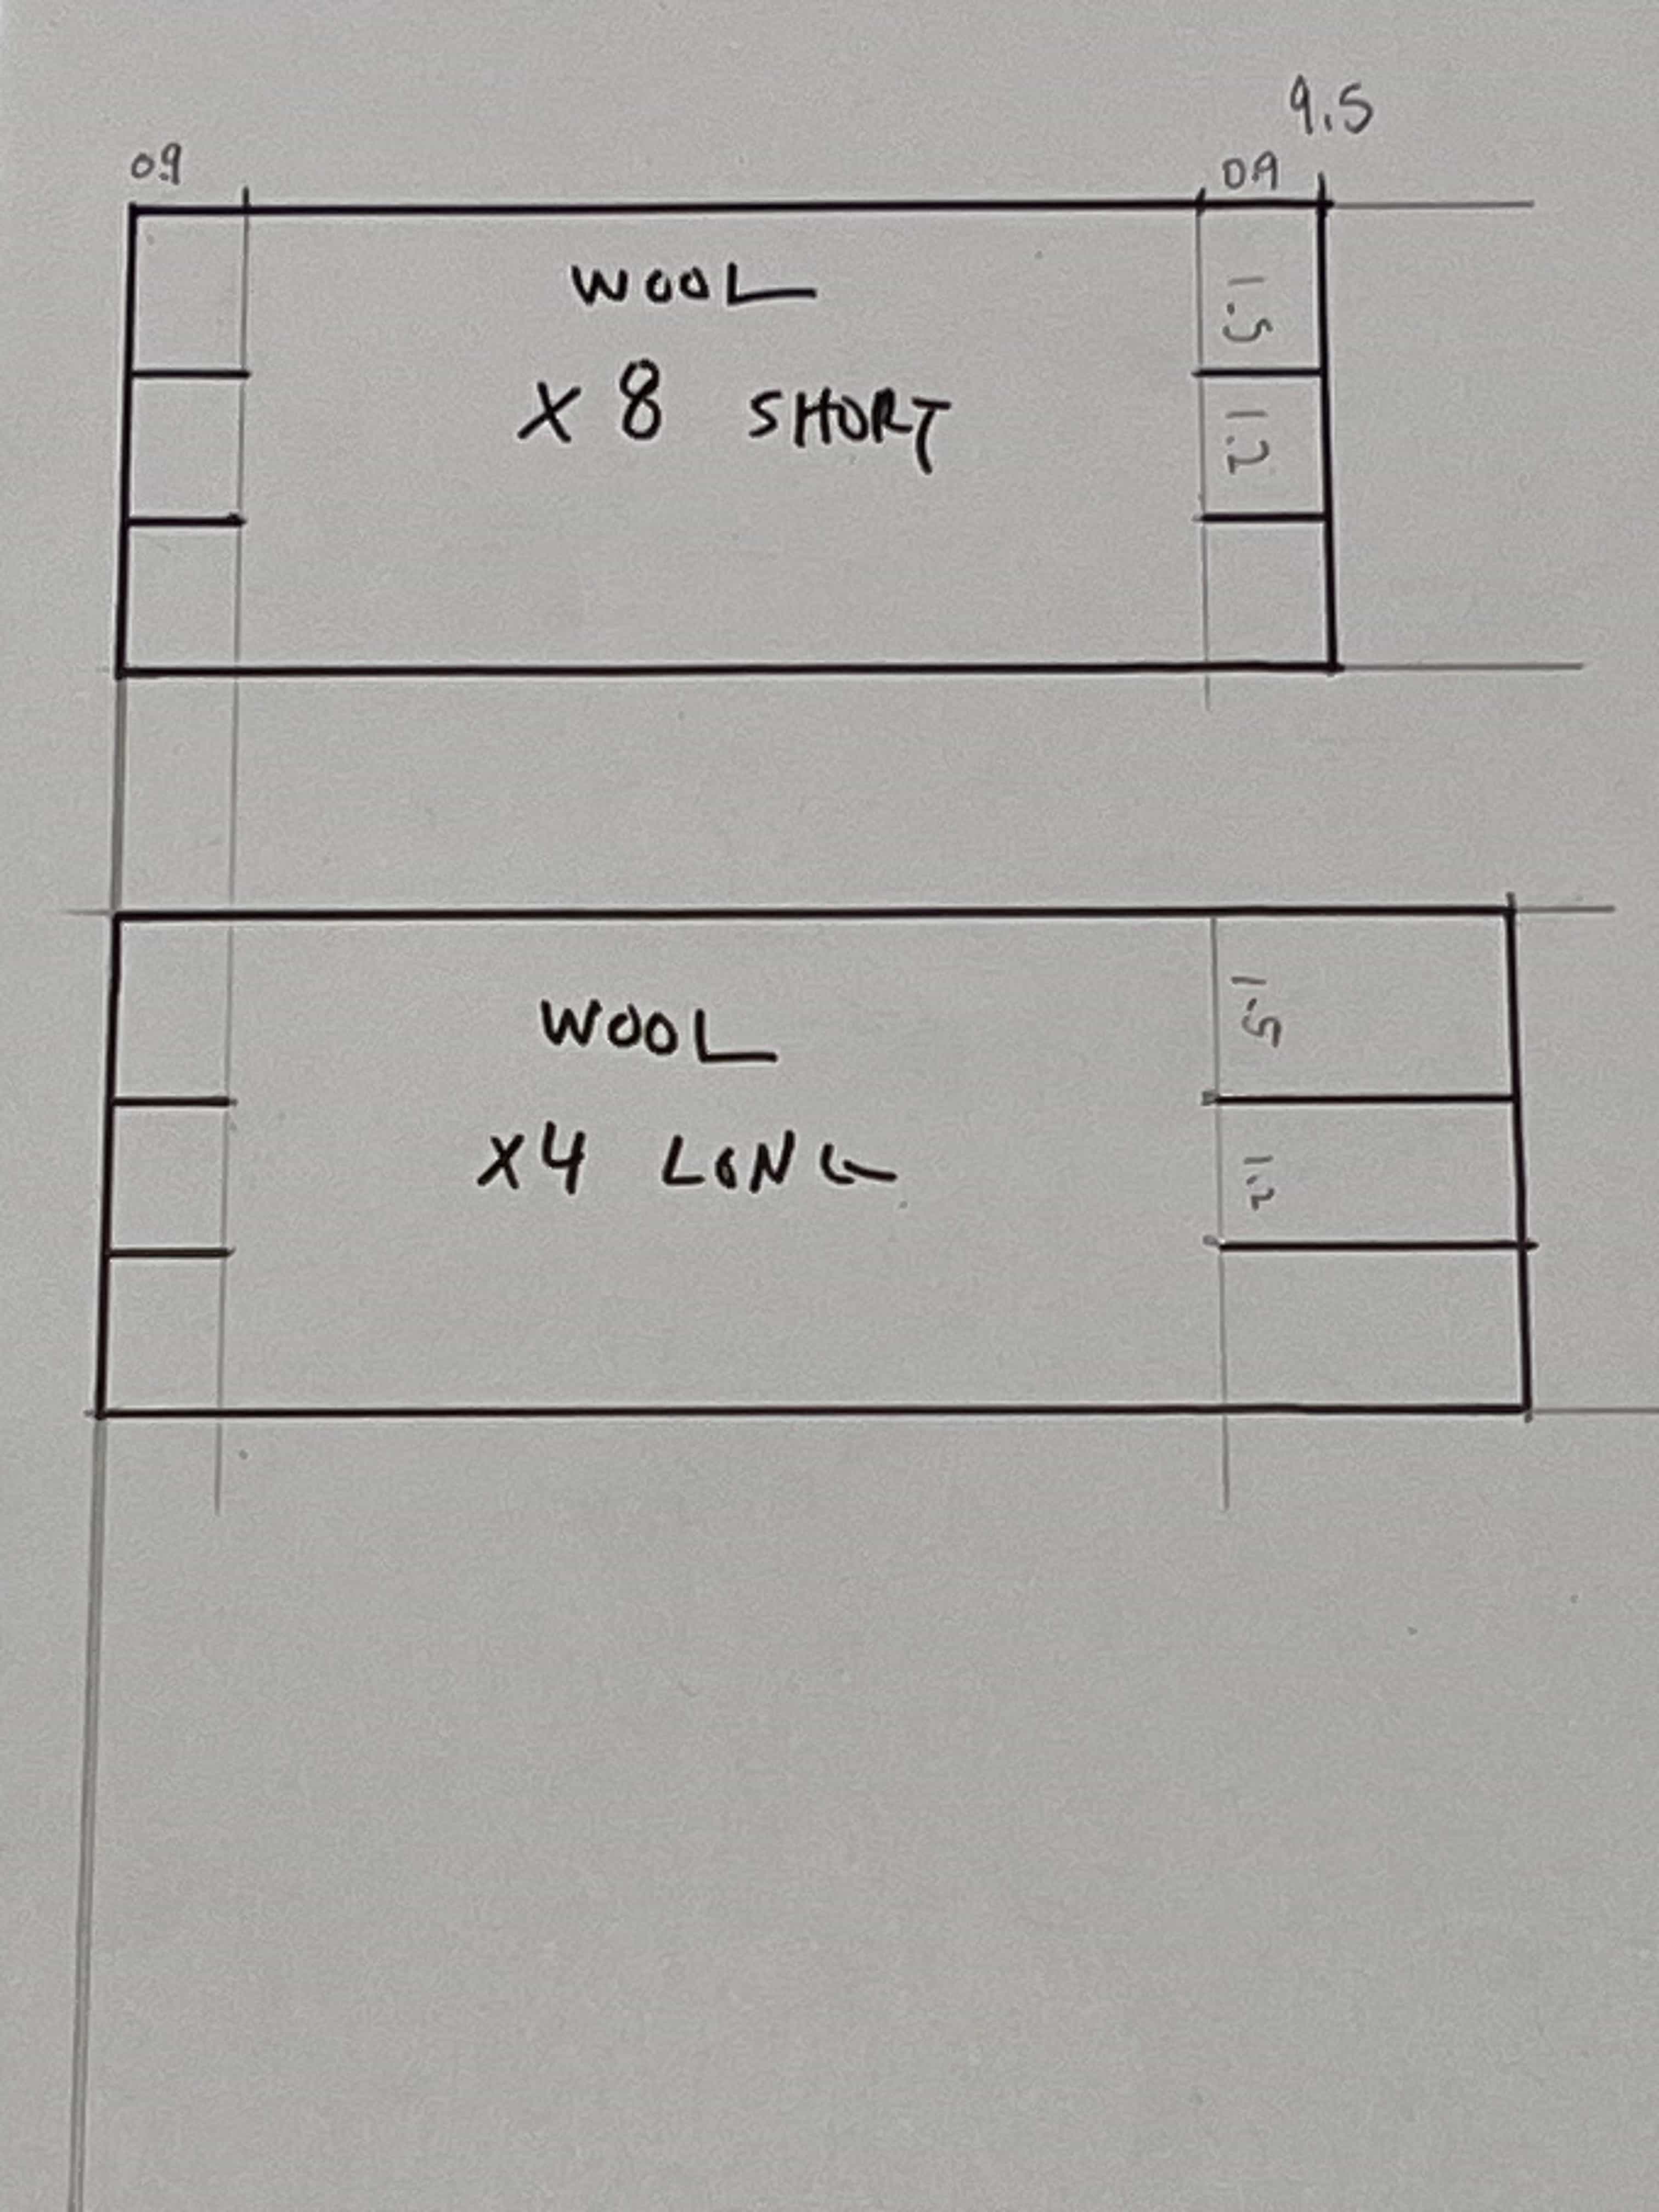
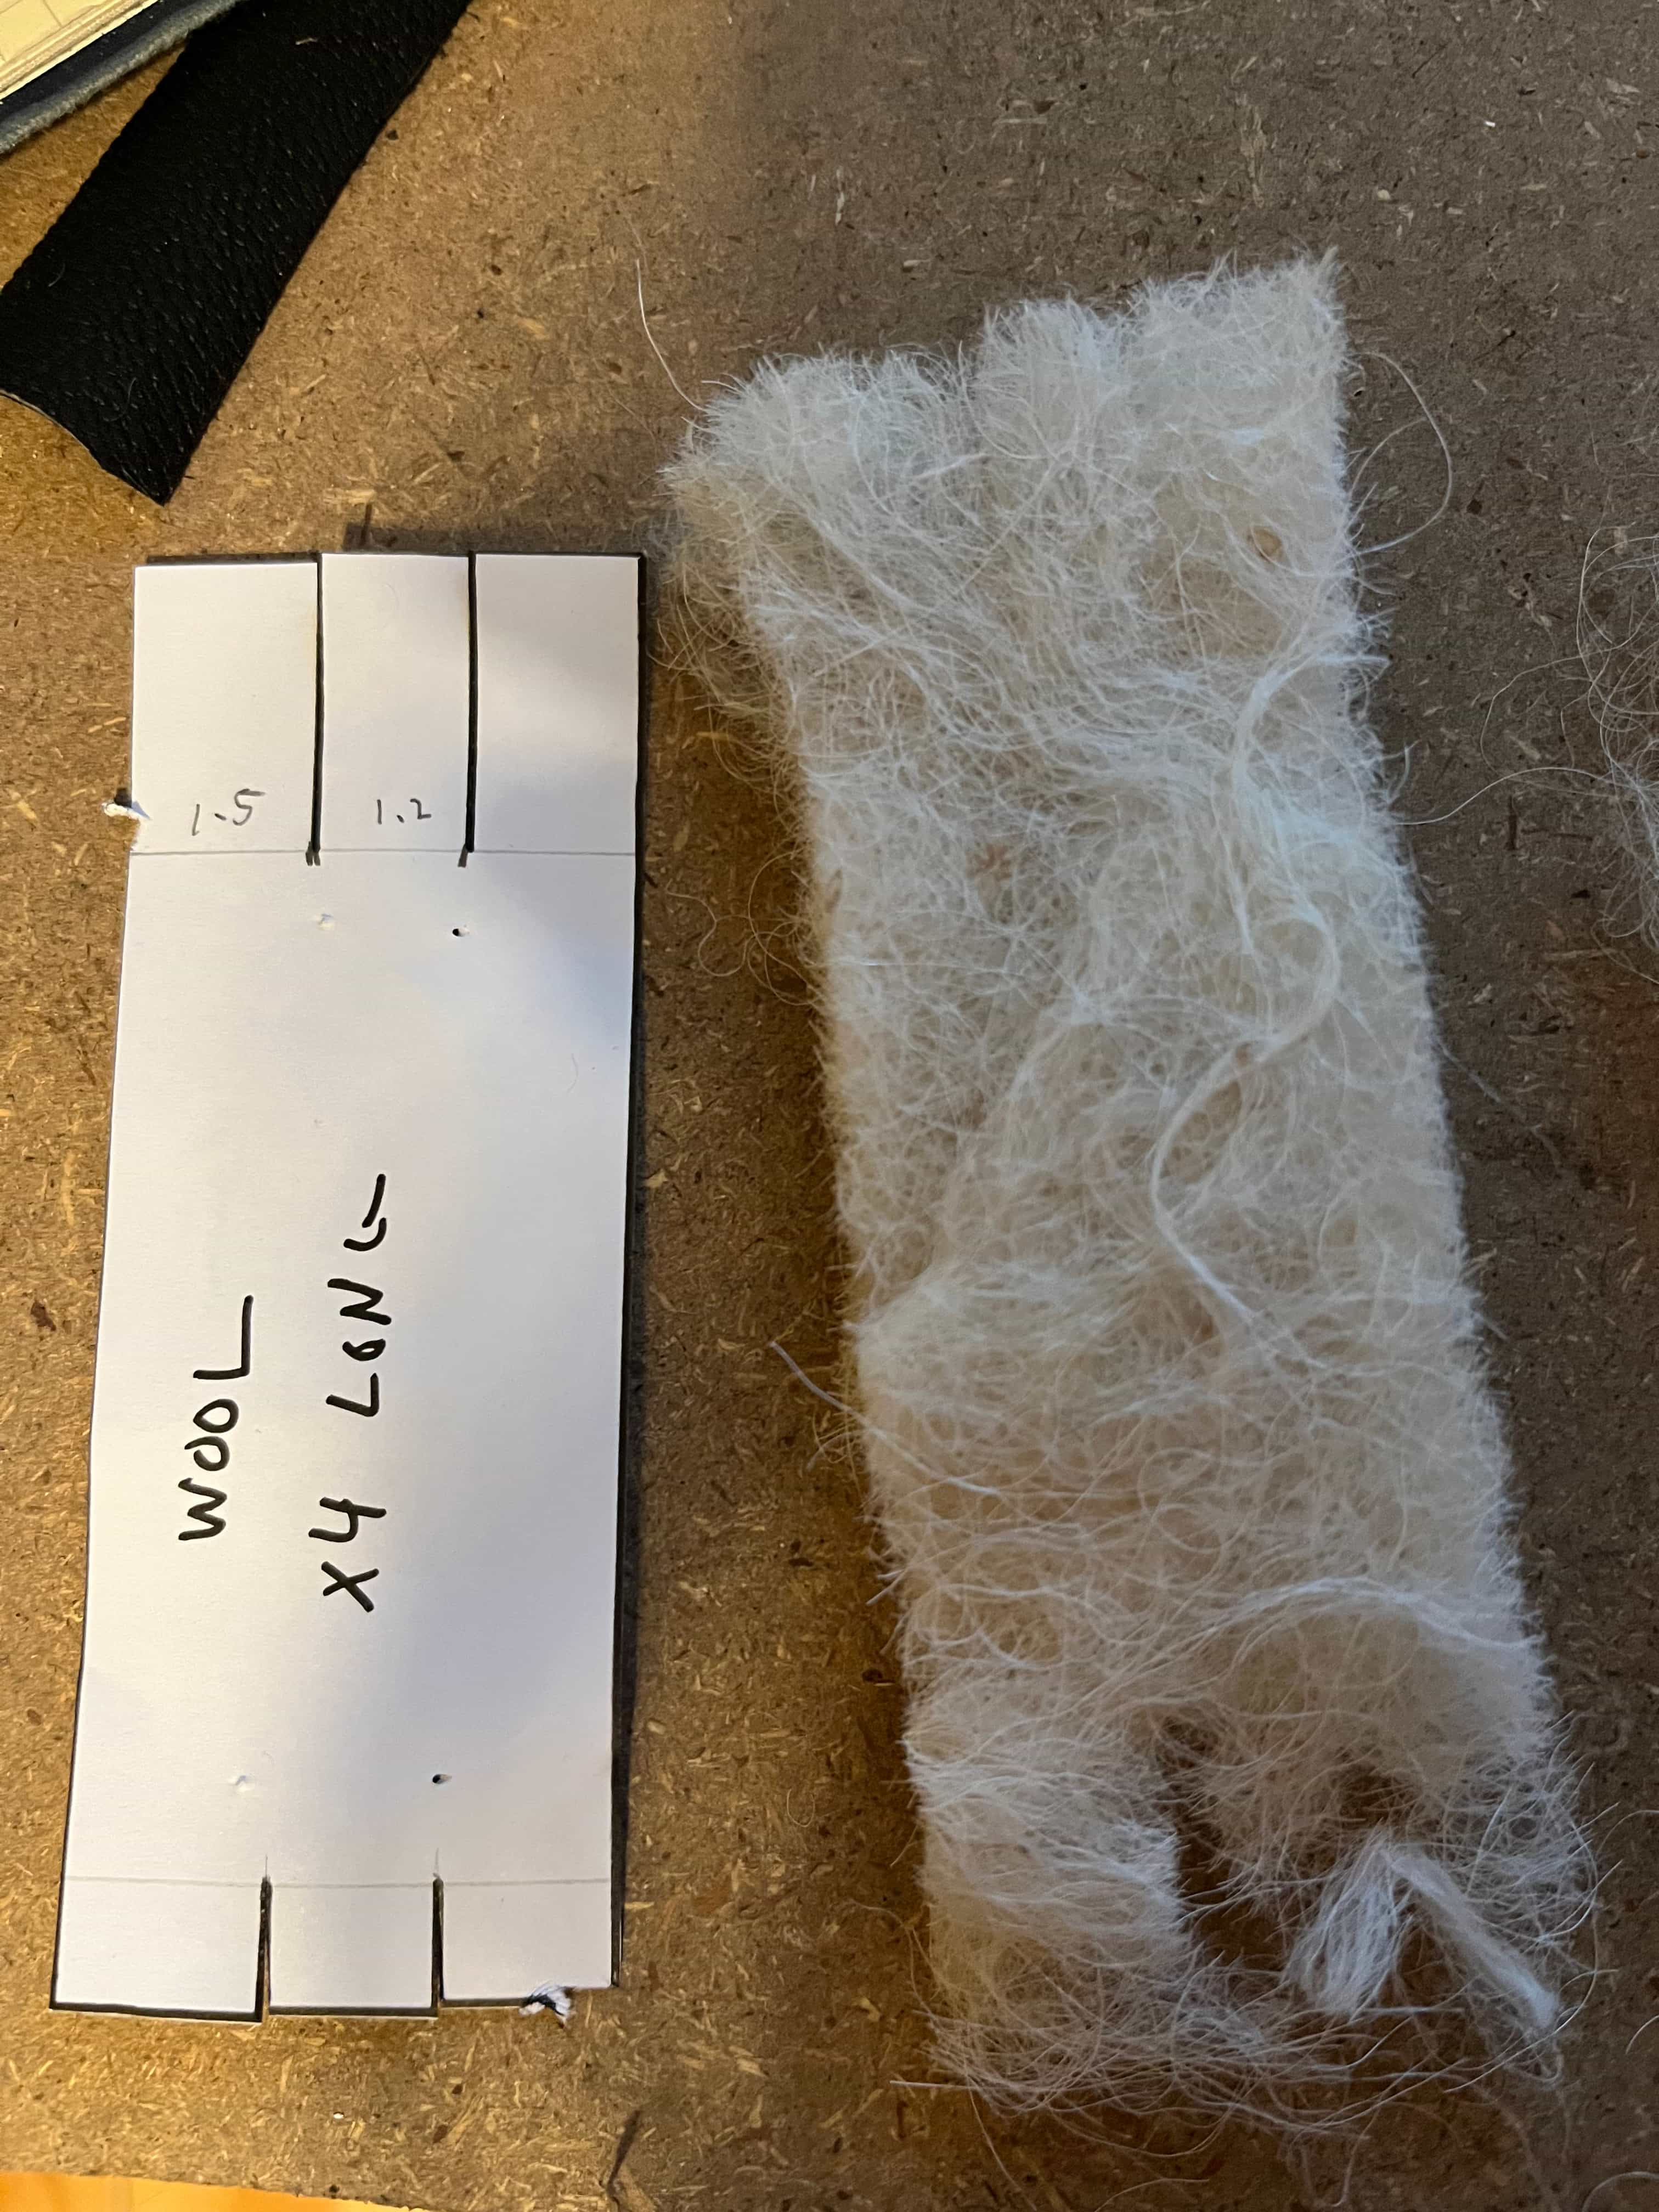
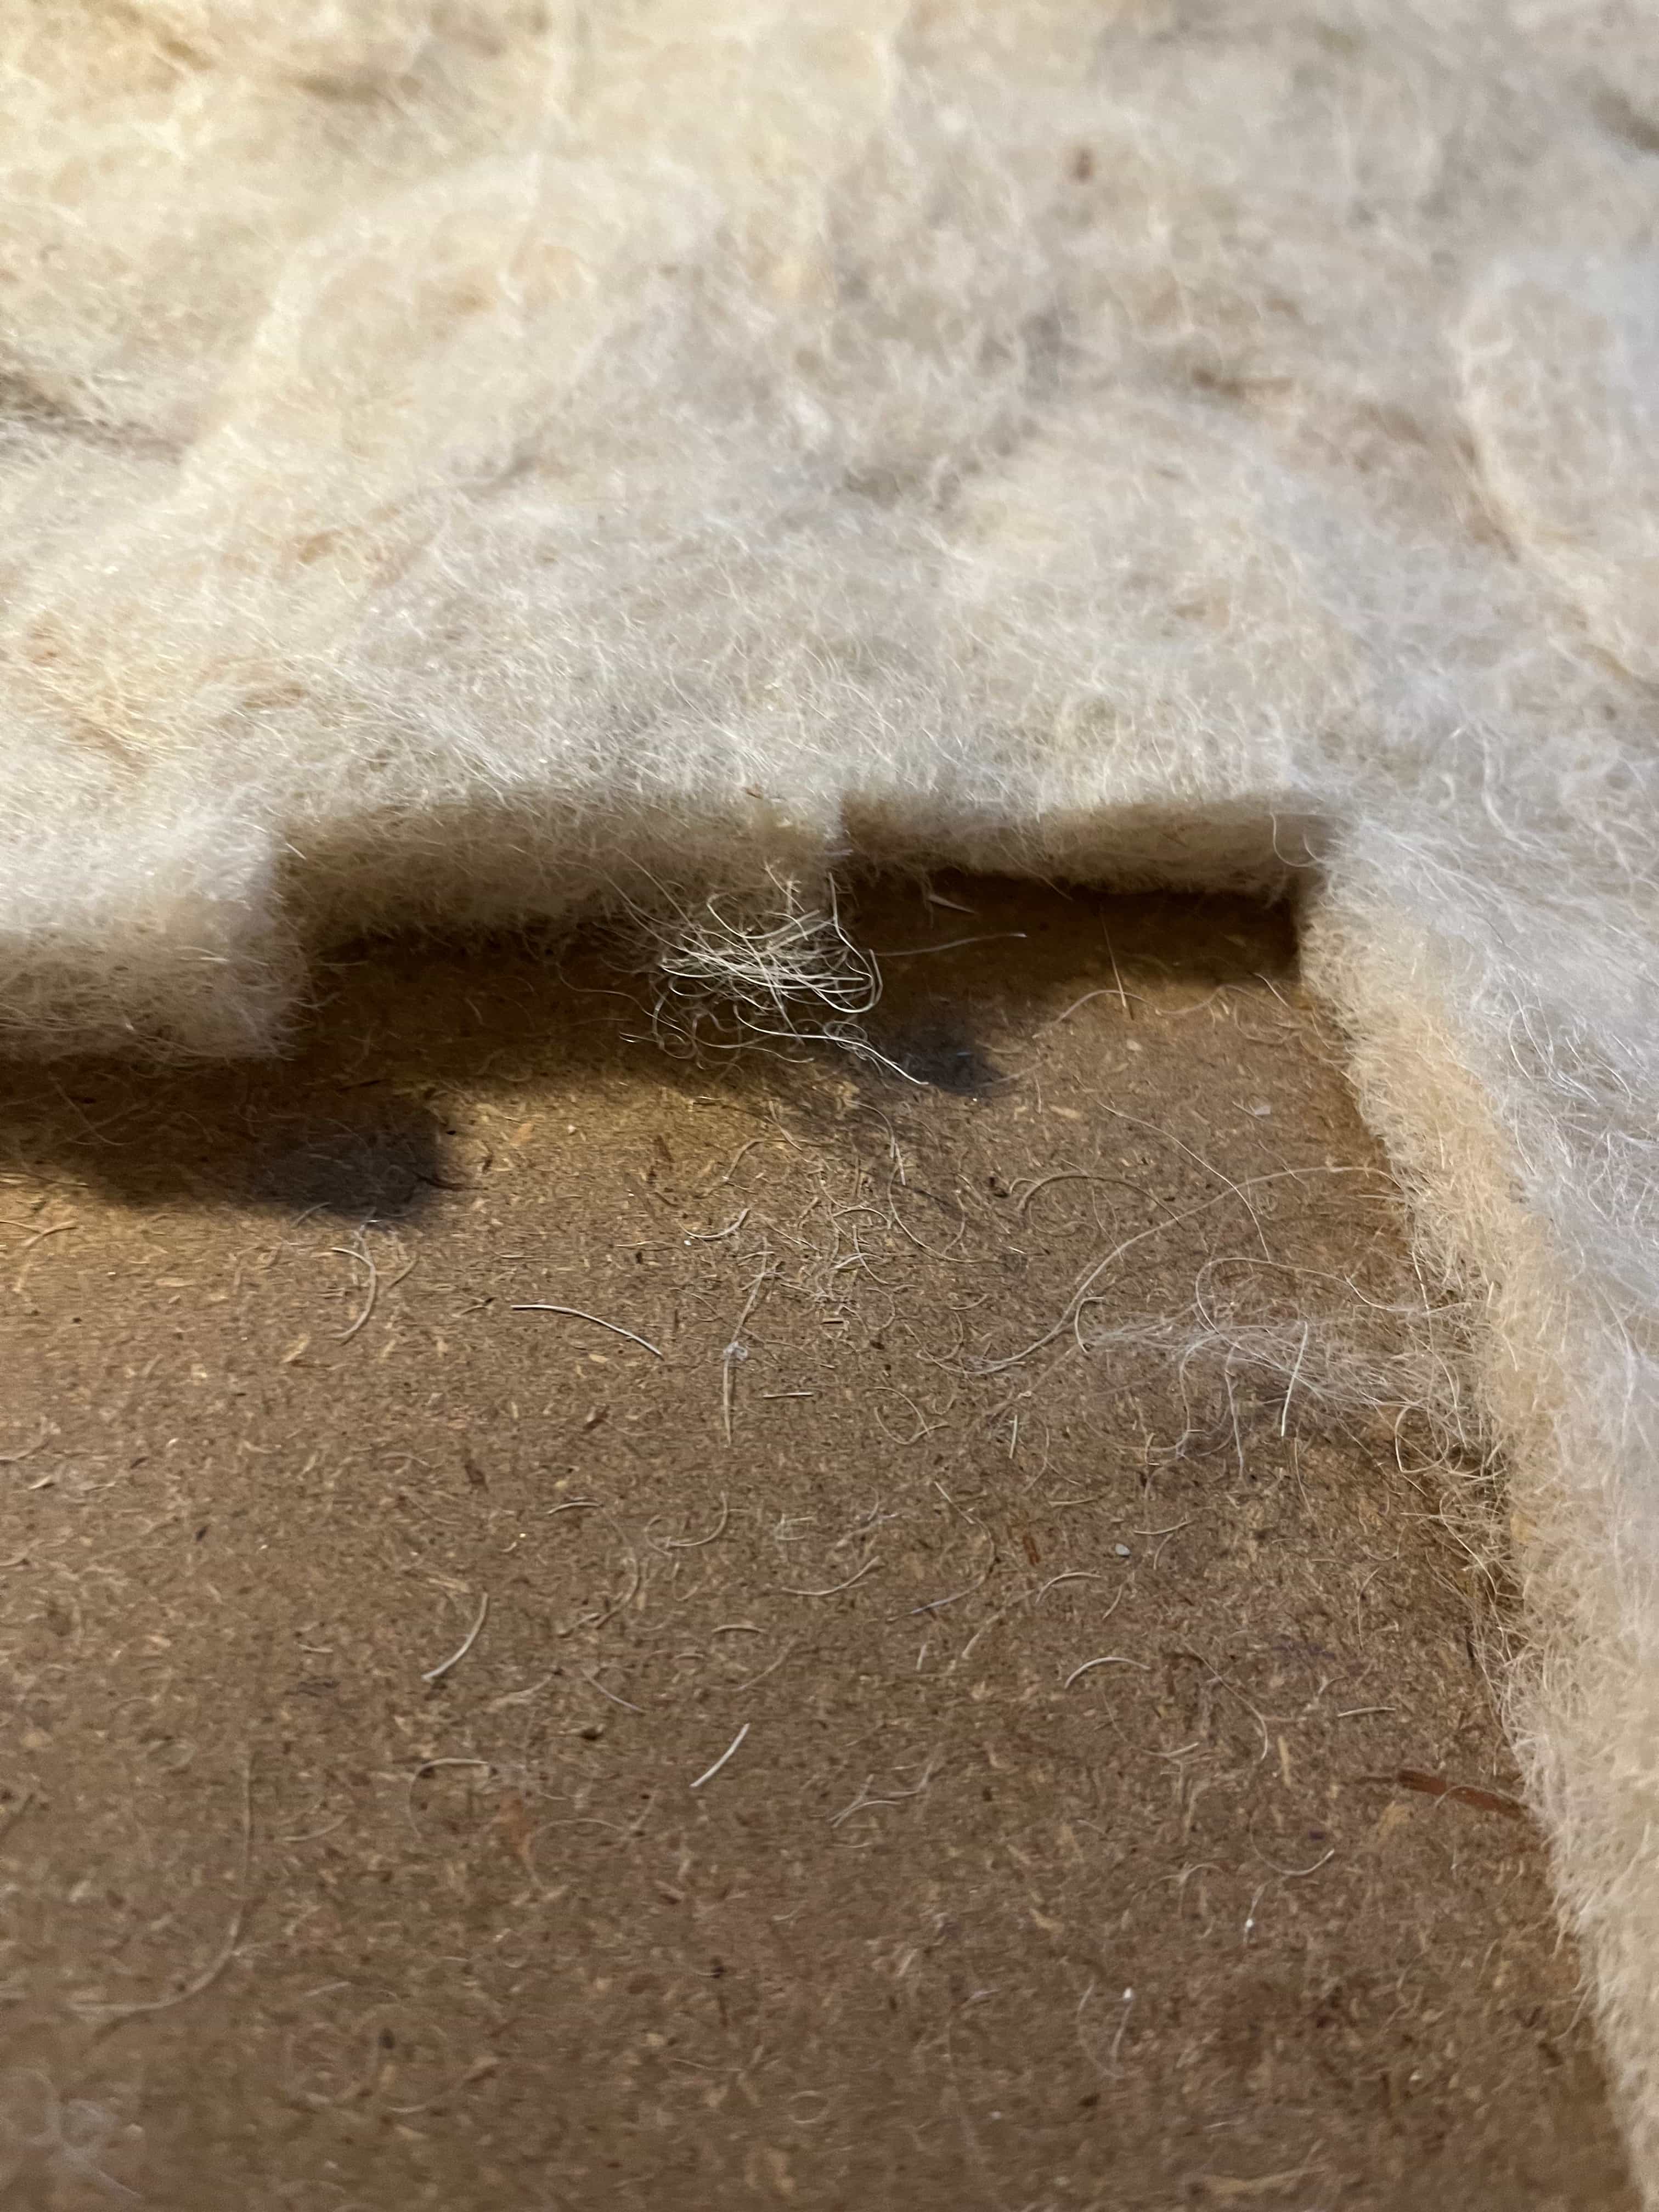
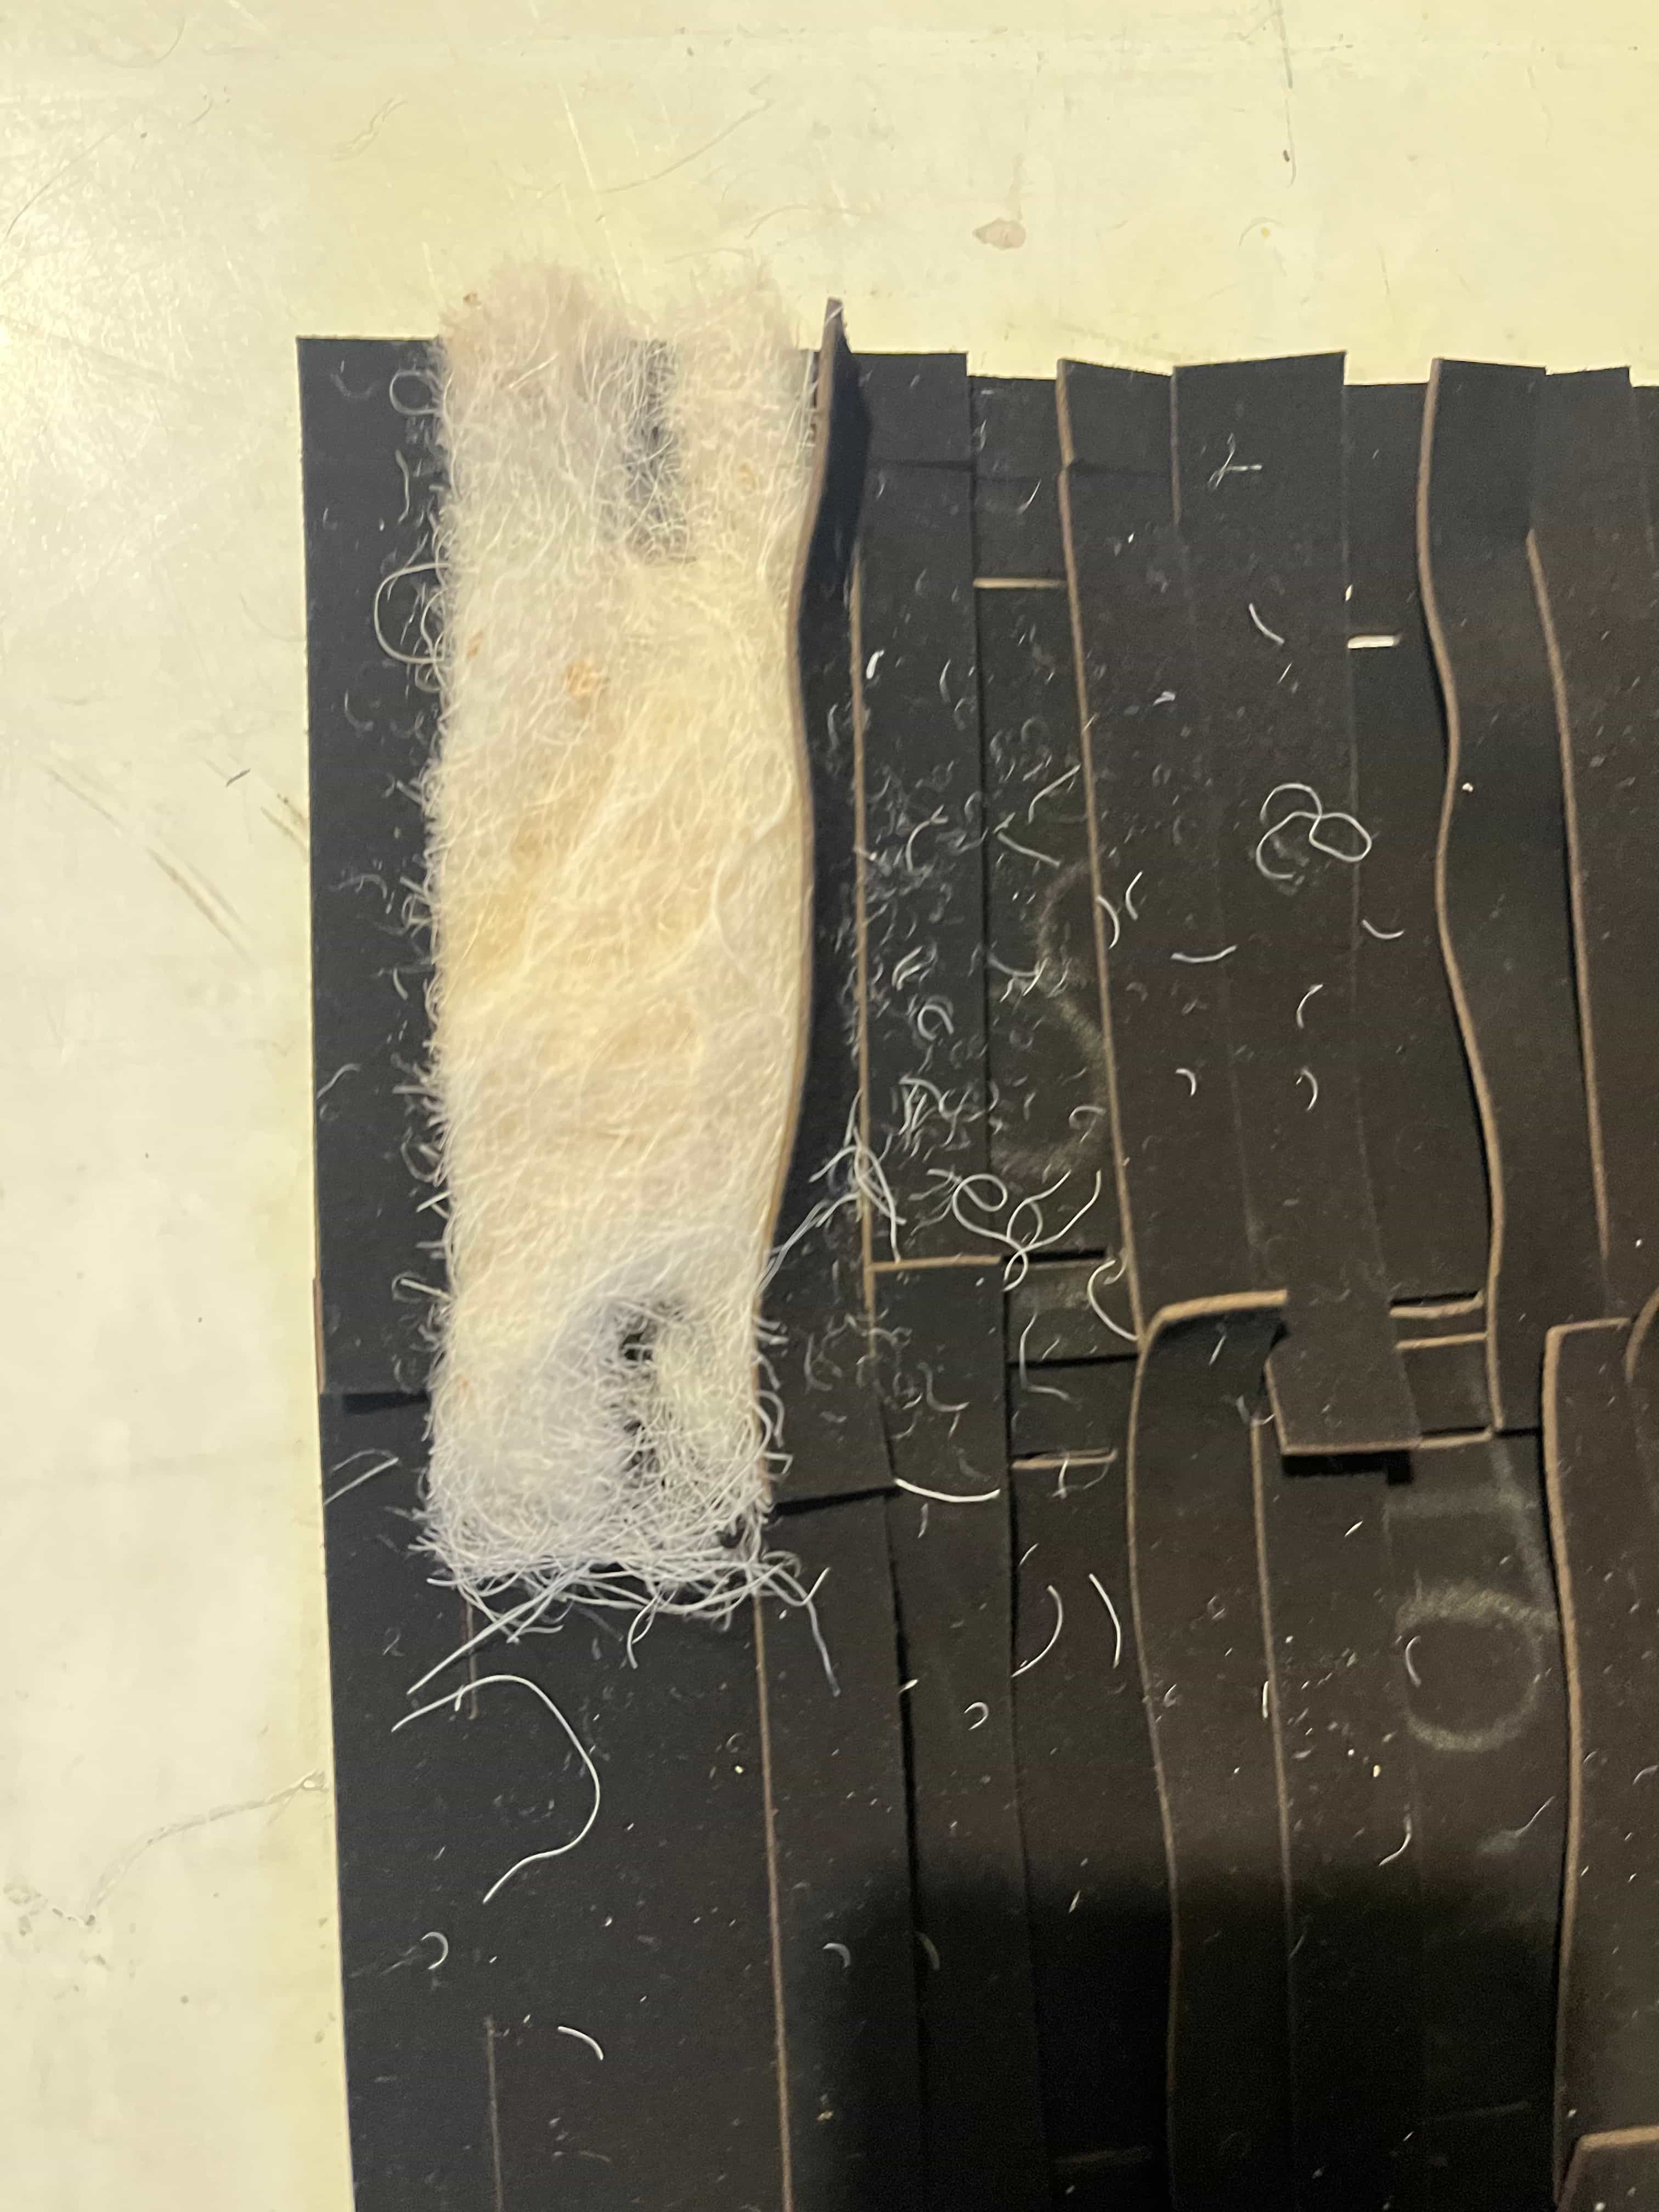
My first camel wool felt experiment was less than ideal but I wanted to use it anyway. Ideally, I would have a well-felted wool panel and be able to laser cut it.
After some warnings about the laser cutter and bio materials, I cut a few modules manually.
- Assembly
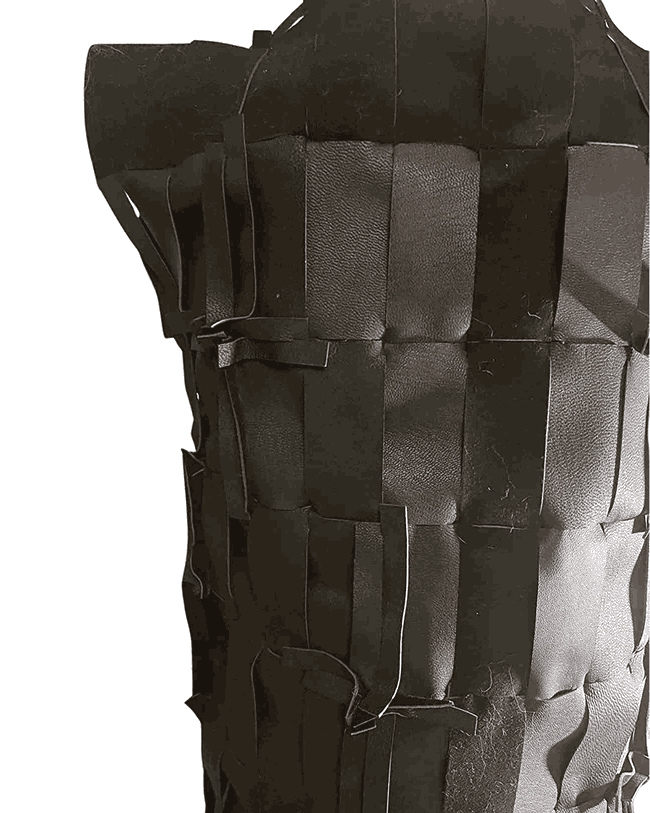
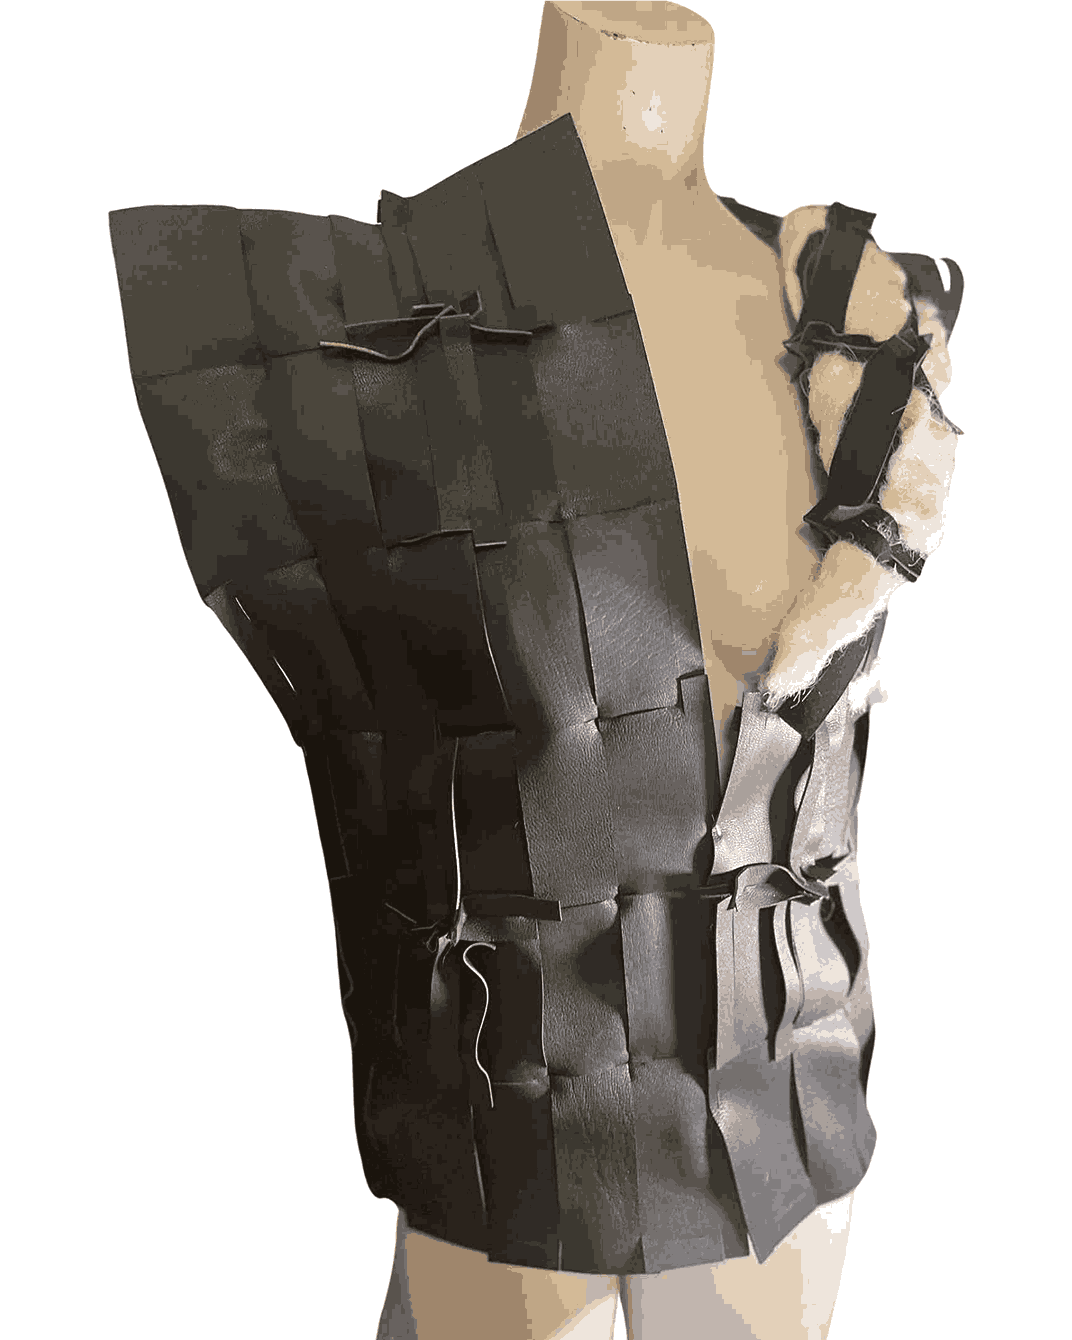
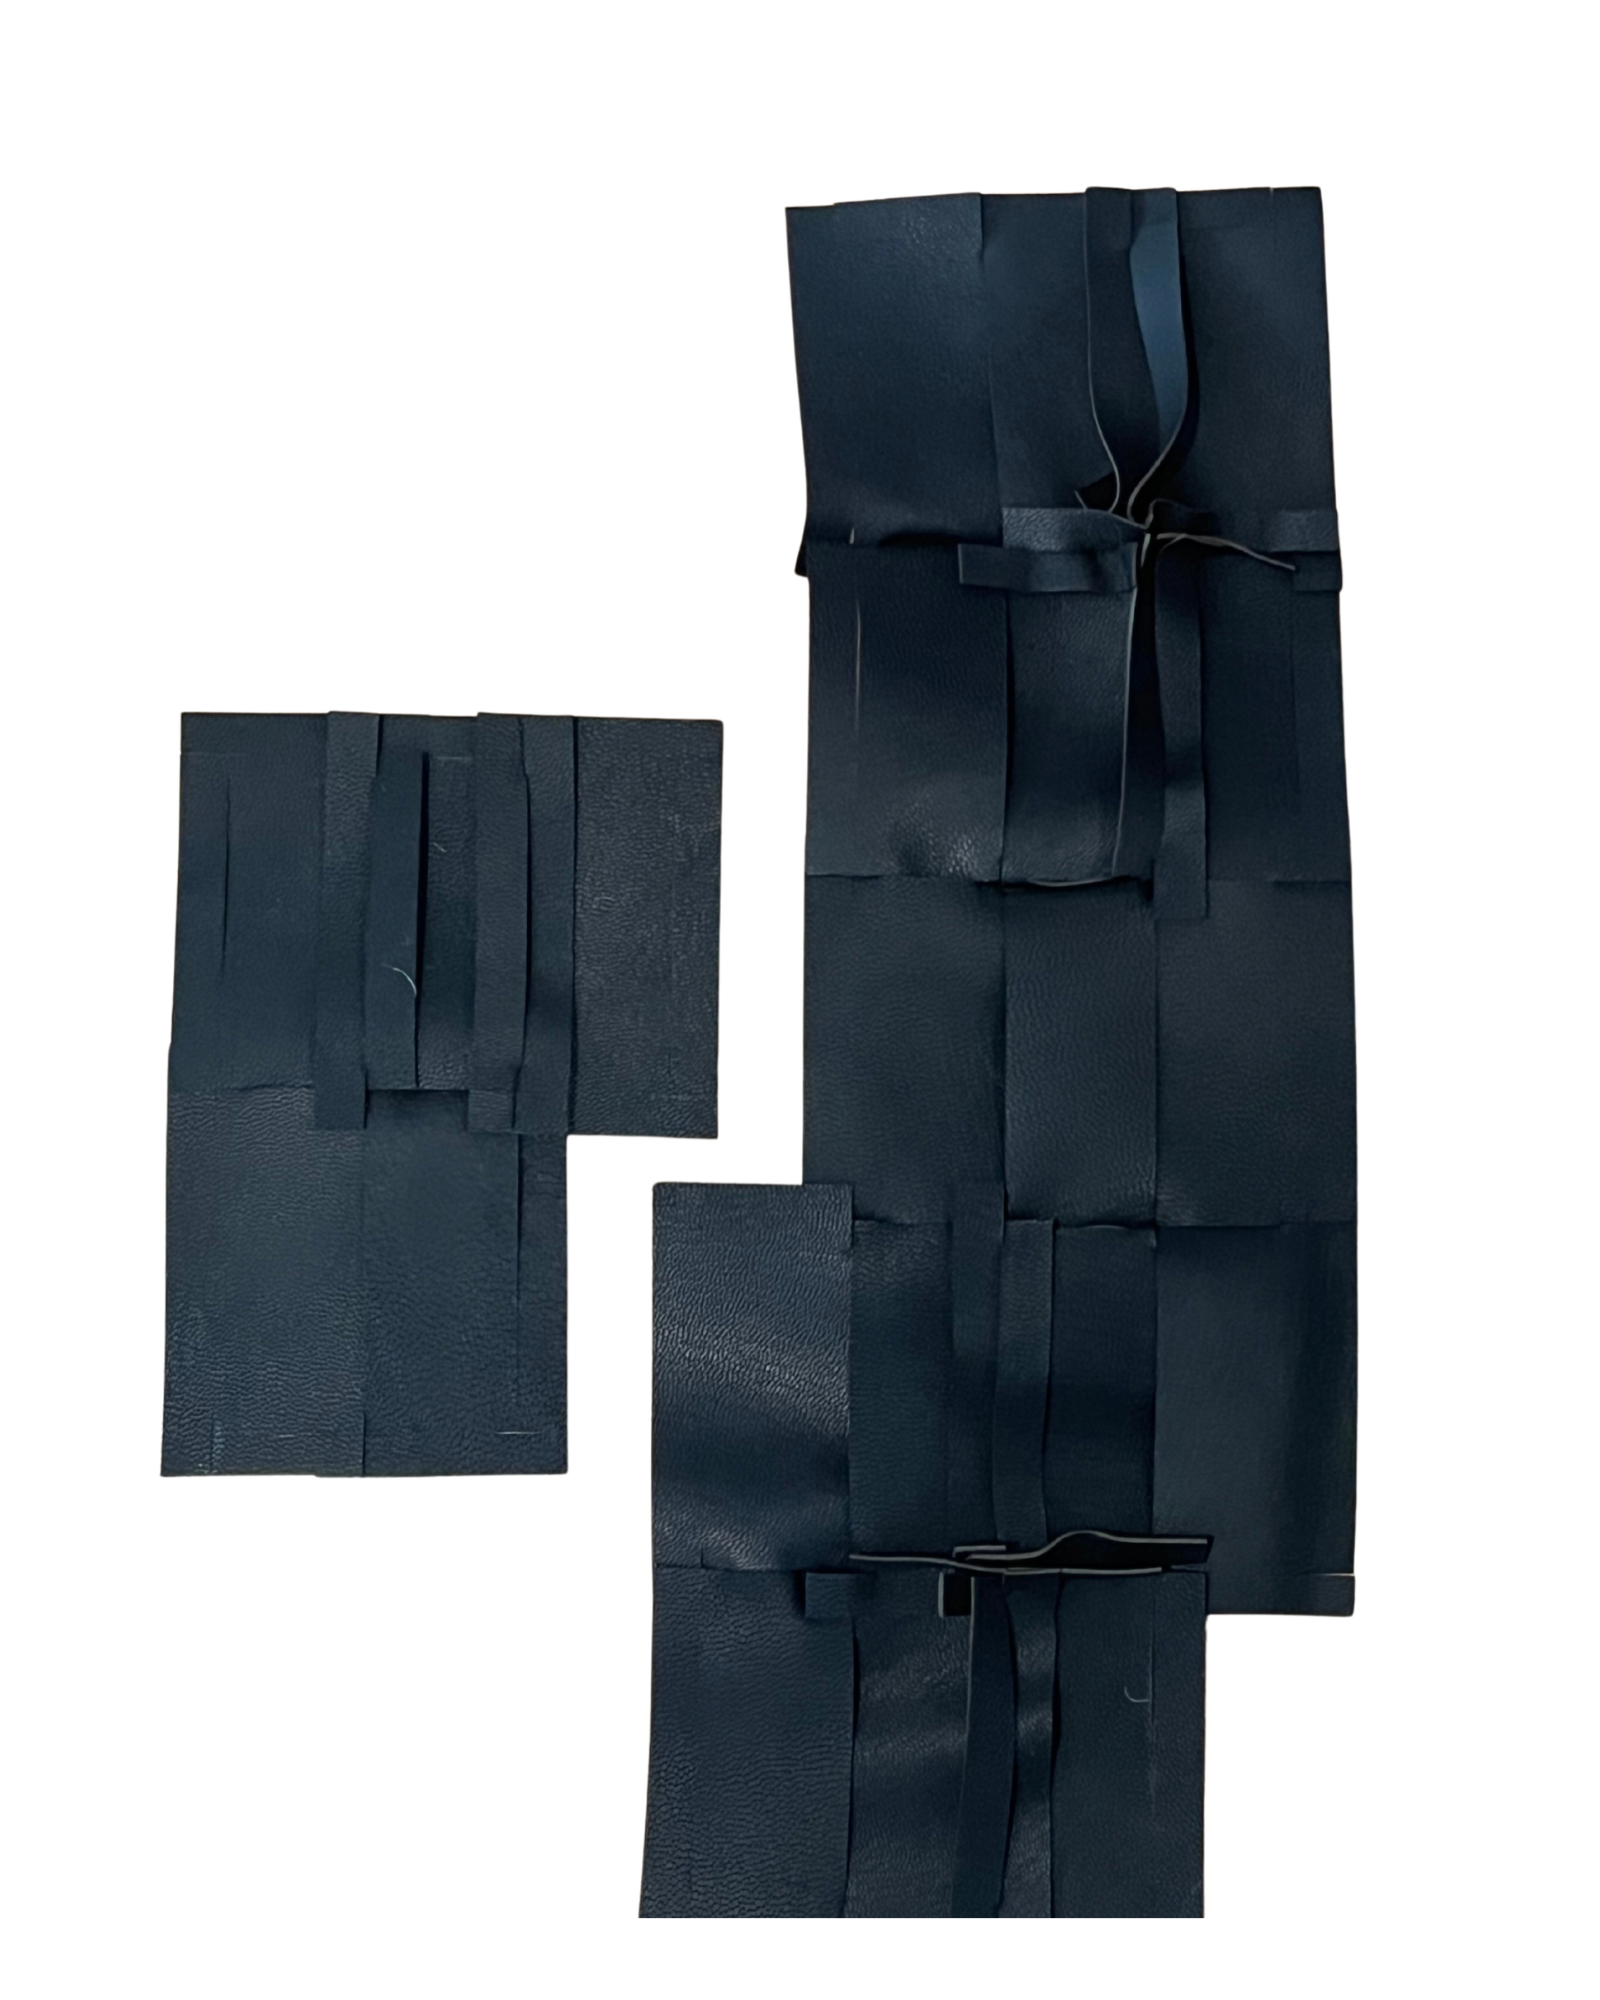 Interlocking module with sporadic cross detail
- Scraps
I have a low of scraps, which I will keep for future projects.
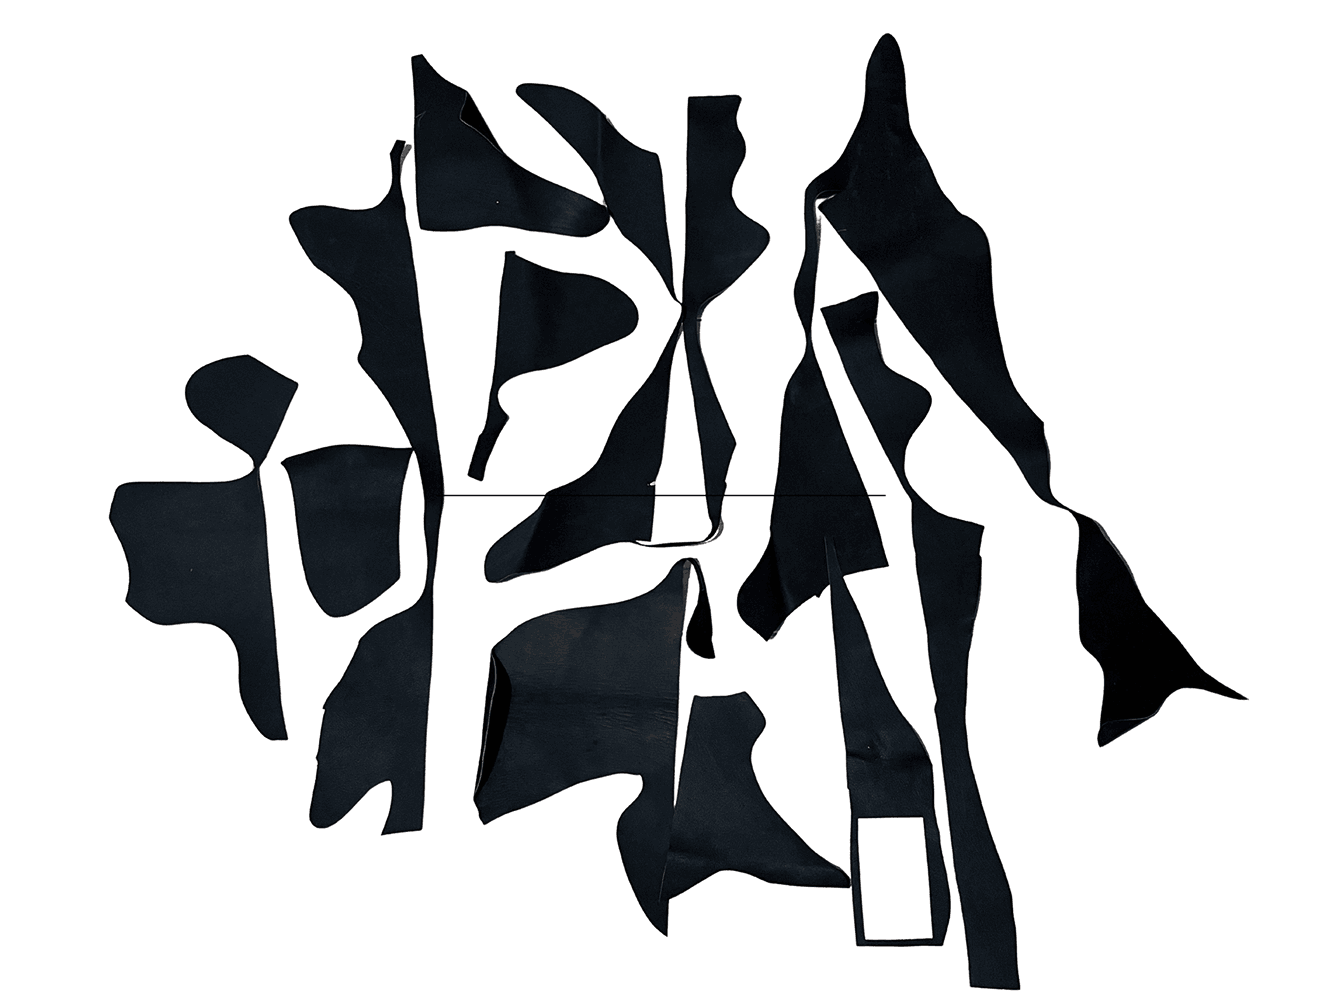 Left over leather
6. Results: A work in progress
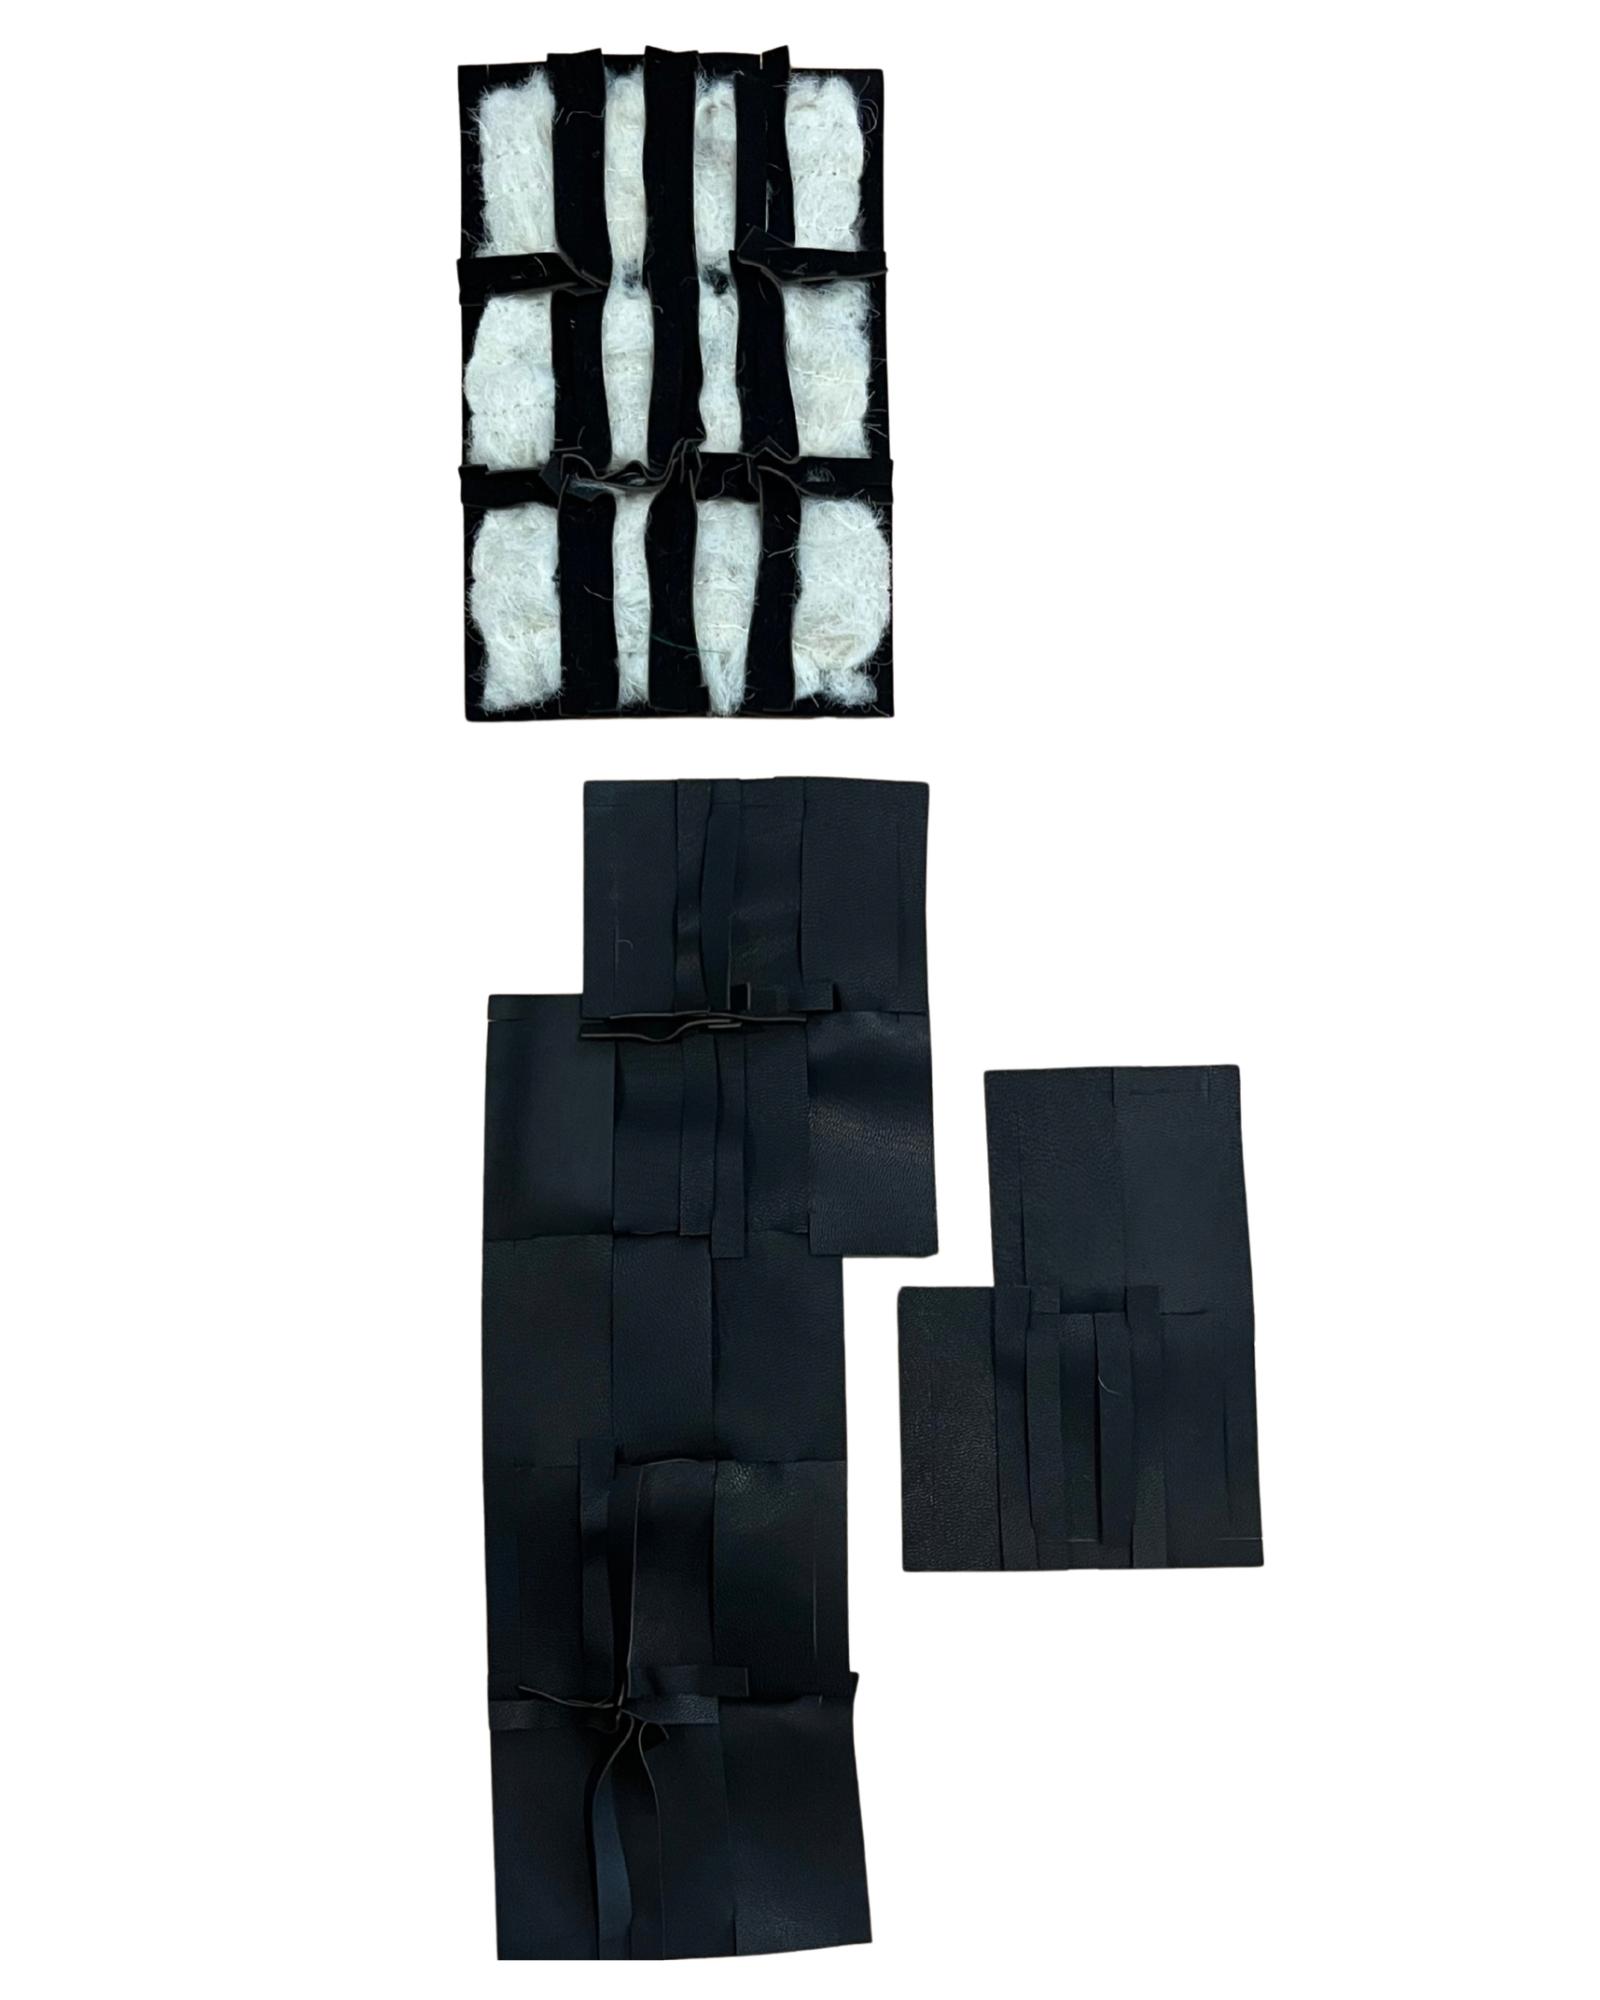 Interlocked module with wool for Front L
Lessons learned
- The leather panels have different thicknesses so that creates a challenge, not only in laser cutting them because you would need to pay attention to the settings, but also when joining them.
- Leather smells awful when laser cut.
7. Weekly Reflection
Too many ideas, too litte time
My current obsession is camel wool, and I have challenged myself to experiment with it and incorporate it in my designs and work every week. This is rewarding, but this week cleaning, carding, and felting took a lot of time. I also had to travel outside the city to get some more camel wool, and it was time-consuming. The lesson I learned is not to try to do too much. I still want to incorporate learning about camel wool in the process.
Leather regrets
Leather is a fascinating material. This week, I wish I used reclaimed leather or leather scraps. Unfortunately with the time-crunch I wasn't able to find a local source, or go digging in the local flea market.
Also, treated leather is not biodegradable. I hope the jacket is durable enough and can be recycled in the future to make all sorts of garments and objects.