6. Biofabricating
This year the main subject for the student of the master in human development and sustainable development is about plastic pollution. It's also why I decided to do the Fabricademy, to create my own material from raw or natural componant or using ingredient not coming from fossil fuel.
I am really interested by bio plastic and any of kind of material that you can grow.
I will start by the one I know the most,the Kombucha then I will try different bioplastic and maybe finish by mycelliun
Kombucha
In 2016 I went to the "Fab Festival" it was the 1st time where instead of bringing back some new electronic board or idea, I brought back some mycellium,bacteria and also a scoby to produce my own Kombucha.
Sabrina Maroc & Charleine Mata from OPEN BIOFABRICS were running a workshop named "Grow your SCOBY" based on the recipe from Suzanne Lee
Scoby : short for symbiotic culture of bacteria and yeast
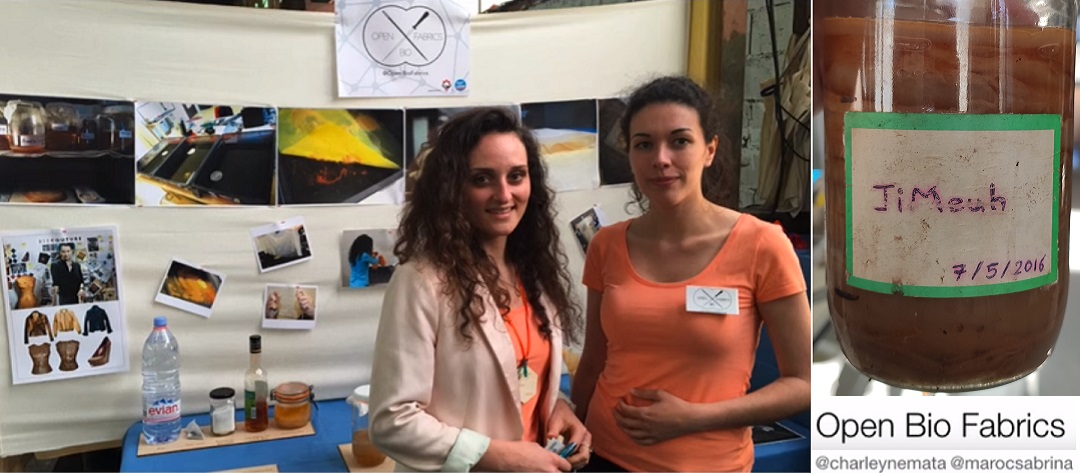
The funny thing was that all participants went back home with a scoby which have been named in order to create like a genealogic tree. Mine was named JiMeuh and I can tell you that it already have plenty of children.
I invite you to check their youtube channel it's full of interesting videos about Kombucha/Scoby They also have github site where you can find the recipe from Suzanne Lee which I used to grow my own material. The "problem" with the kombucha is that when you dry it, it loses 90% of its thickness, which means if the material at the surface under your growing recipient is about 5mm, the dried material will have the thickness of a papersheet. So if you want to create like a leather, will have to let it grow up to about 3 cm at least.
also the biggest difficulty is to get ride of the bubbles without sinking the material into the bath. Basically the spitted cellulose always aggregate at the top layer of the liquid, so if there is bubbles it will go at the bottom of the bubble and it will compromise the continuity of the layer.
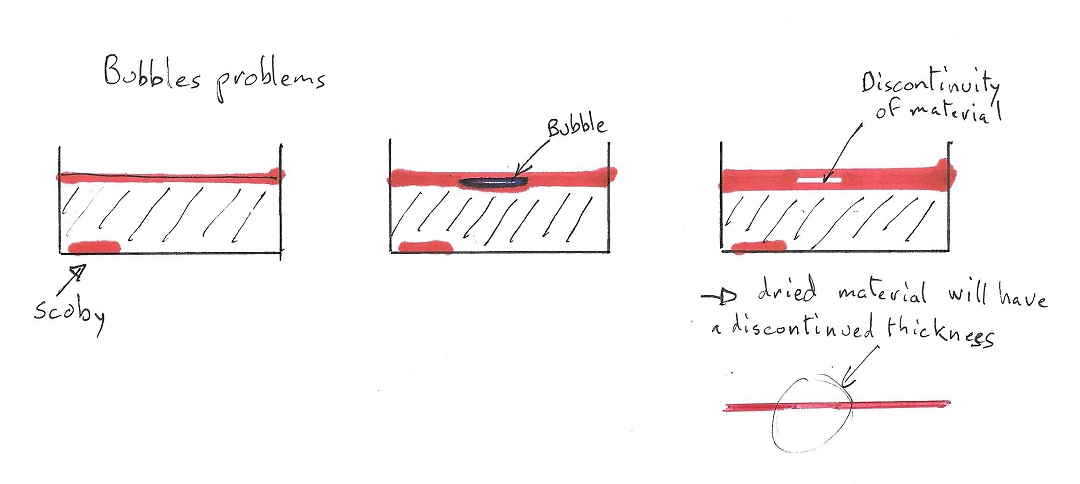
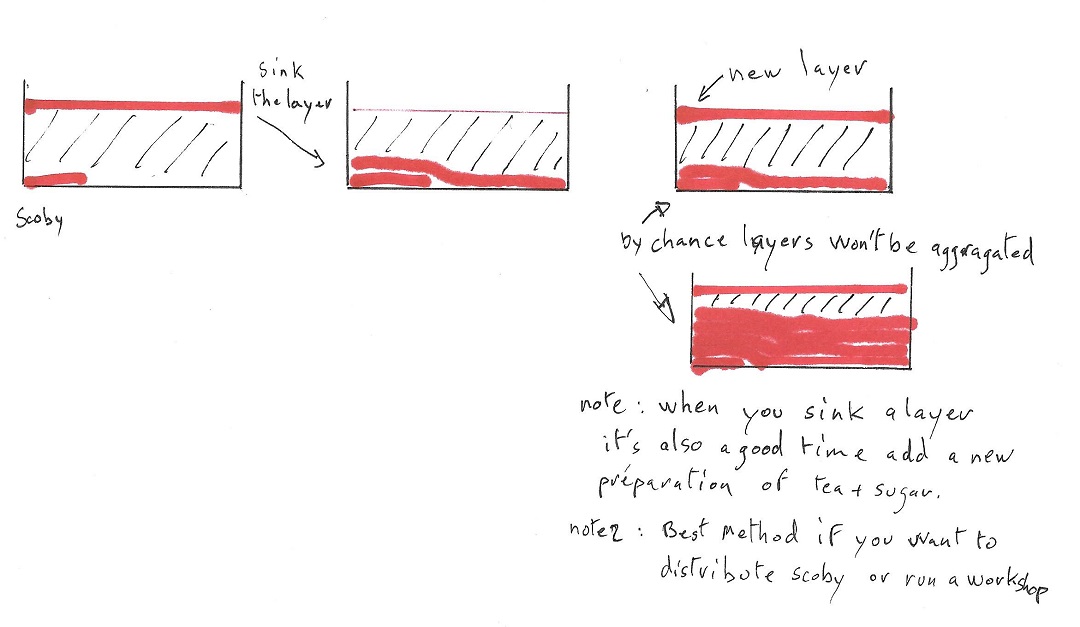
But sometime I use this "problem" to produce multiple sheet of material without getting them out by sinking the whole sheet at the bottom of the recipient when it has reach the wanted thickness. Then a new layer start to grow at the surface, and so on...
In my fablab I recovered in the garbage a wine cellar type fridge that no longer works but that I use as an incubator. For the kombucha I have 2 tanks: one to grow up to 5mm and one to generate "leather"
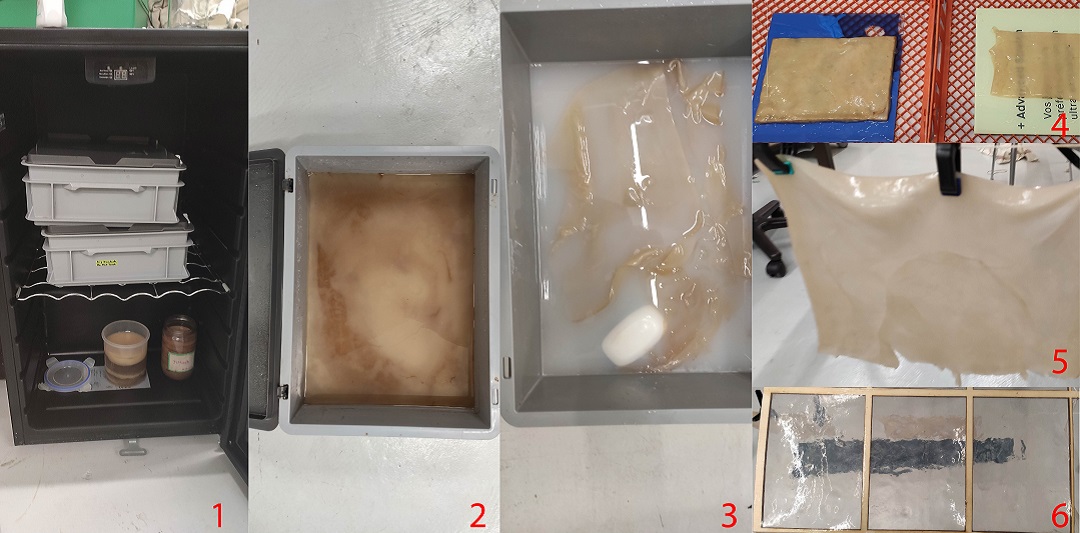
- 1 My incubator : It allow me to have a safe envirronement to grow the kombucha (temperature, no fly, No smell in the rest of the lab)
- 2 The growing box
- 3 Clean Up under soapy water
- 4 Over 1cm I dry them on a plate (acrilc or wood / outside it will be slow in winter)
- 5 4mm of thickness
- 6 1mm or less
samples
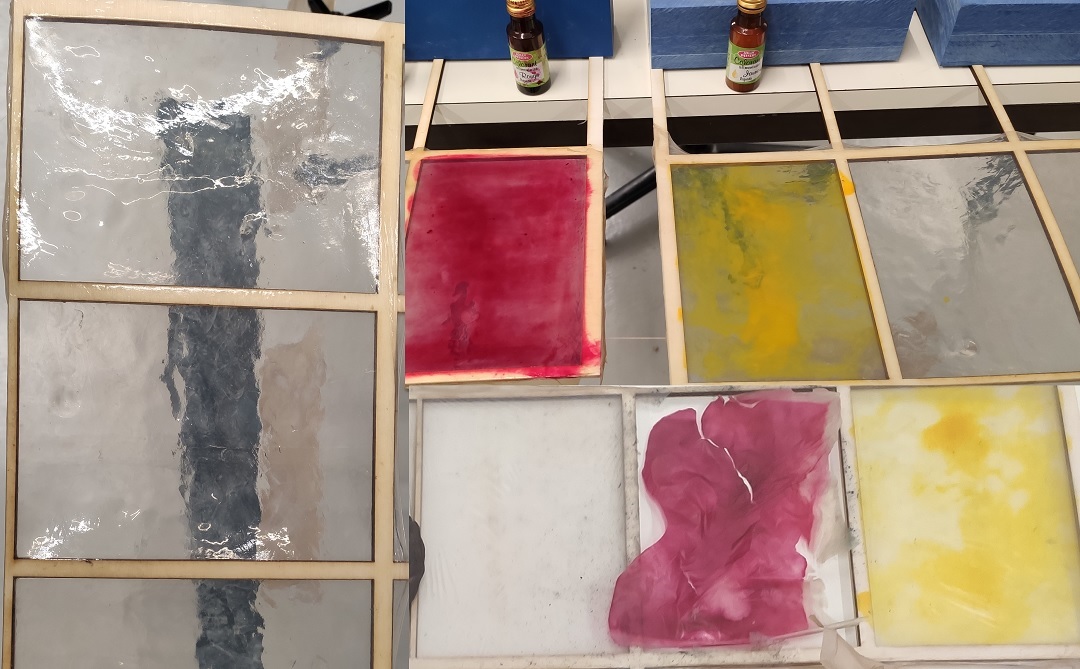
The very Thin layer can't be used because there are too fragile so I use it just to show that it really simple to apply color. Here I used food color and at the bottom right you can see result and fagility after drying
when the layer of kombuchea is about 4 mm you can produce like a paper sheet (on the right) but it dry fast and it s not so flexible. when you let it grow up to 8mm it become an interesting material (on the left) which keep its flexibility and has a thickness which permit to use it as textile Also for long term flexibility I use glicerine on it or before it dry you can also shape it over a support.
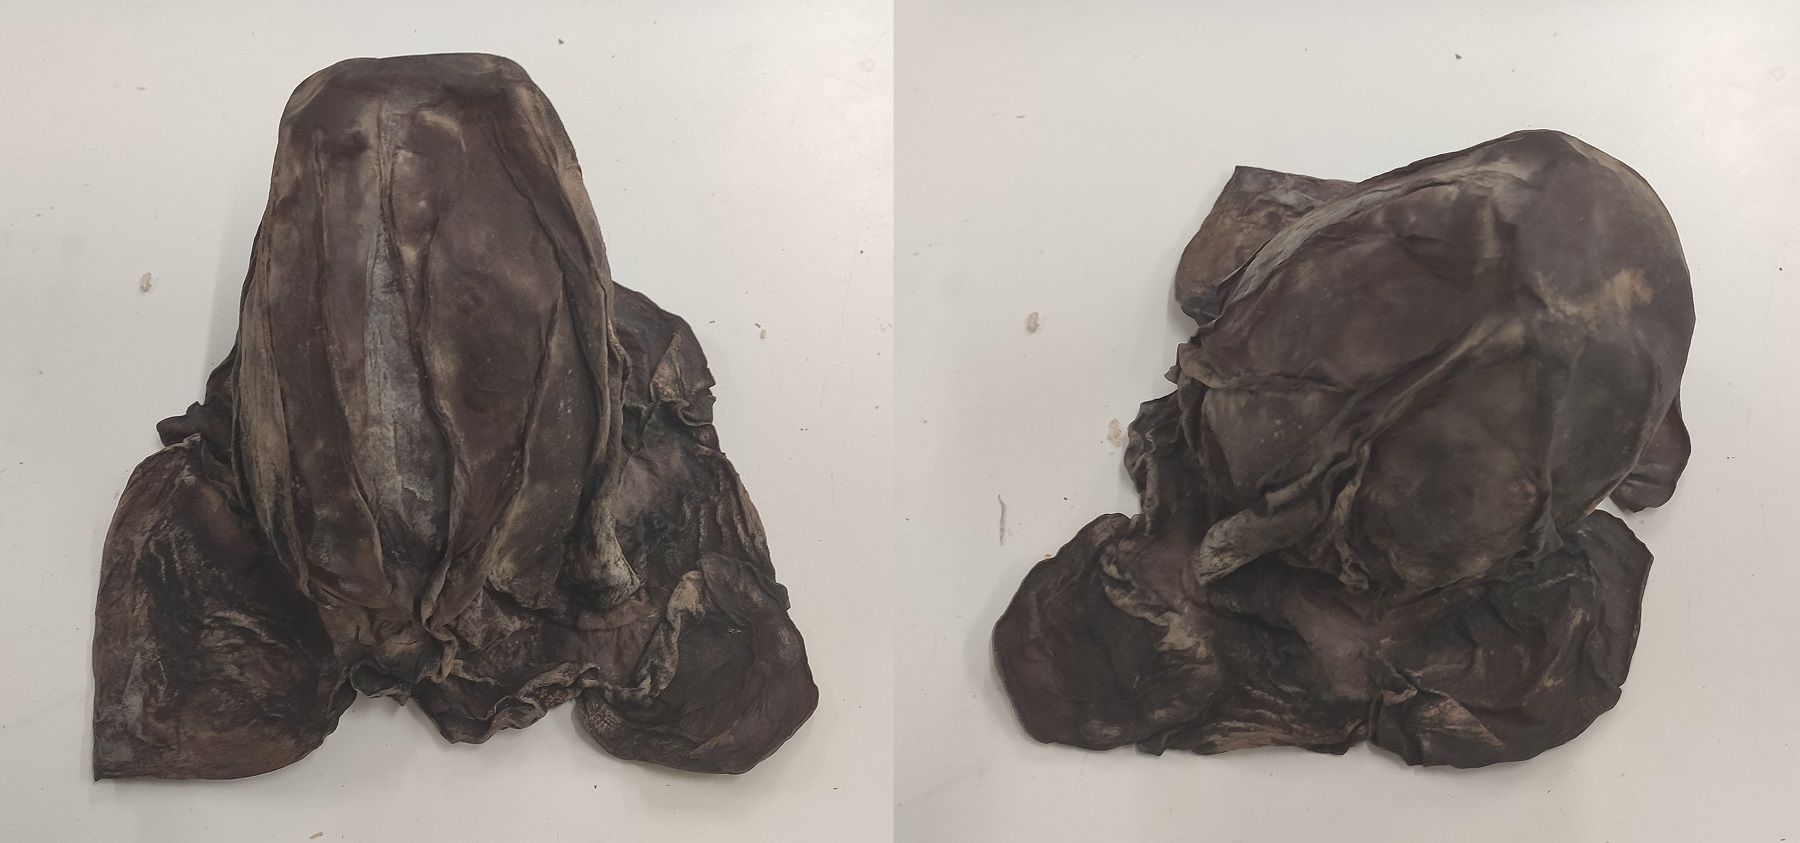
In 2017 I grew a kombucha up to 15mm I let it dry then I shaped it around a ballon to create an ALIEN EGG
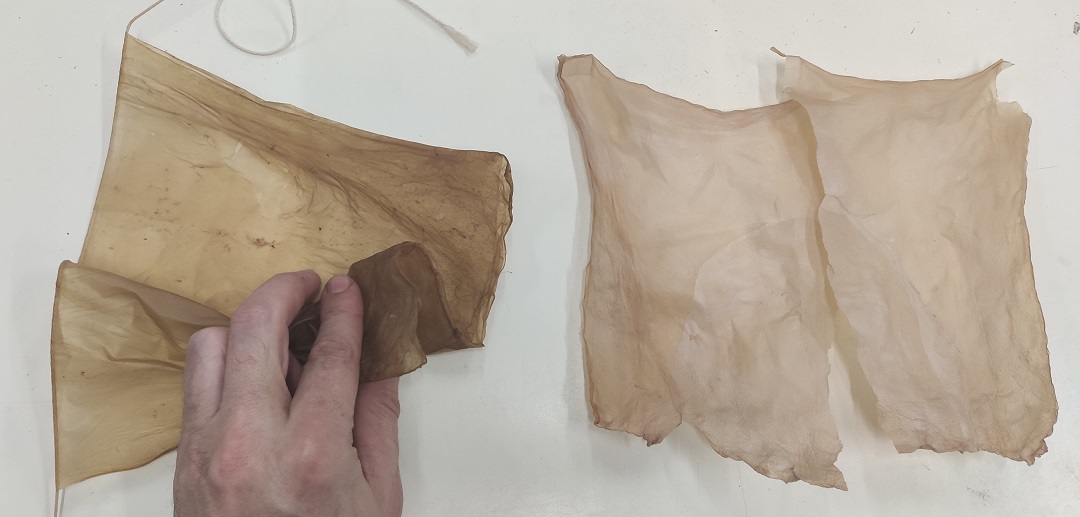
I really like Kombucha but it has 2 drawbacks: it doesn't smell good, and it's far from waterproof.
In 2017 I also made one large leather strap (1.5 M x * 3 cm and 4 cm thick that I had grown in a PVC gutter) with which I was able to tow my car.
One of my project is to create a circular tank with rods which would pierce the surface 2 cm from the periphery in order to create Jumbe skins with preformed holes offering great resistance
Mycellium
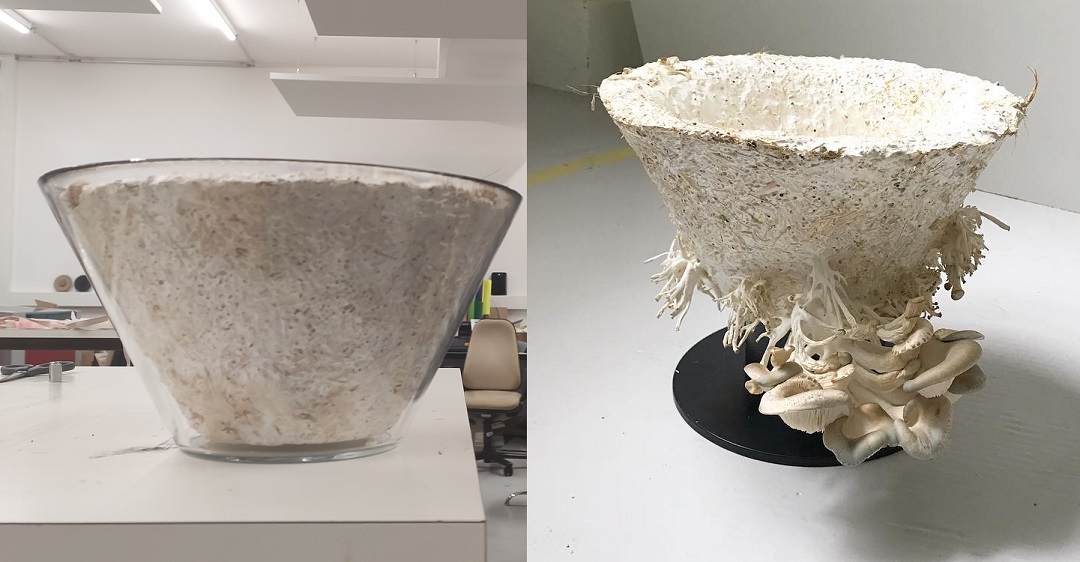
 Images from dezeen.com
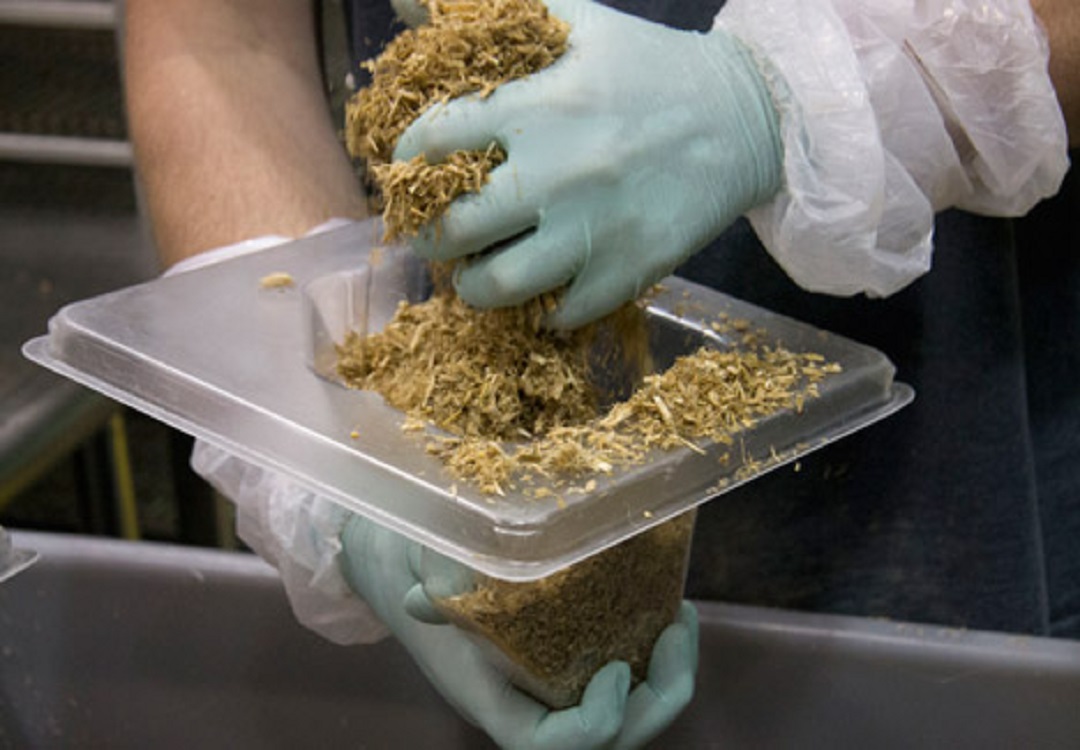
The process is really simple, the only thing you have to take care is to to sterilize everything during the process :your hands, the mold, all the material you will use.
you can order a kit which can be shipped from every and grow you own form:
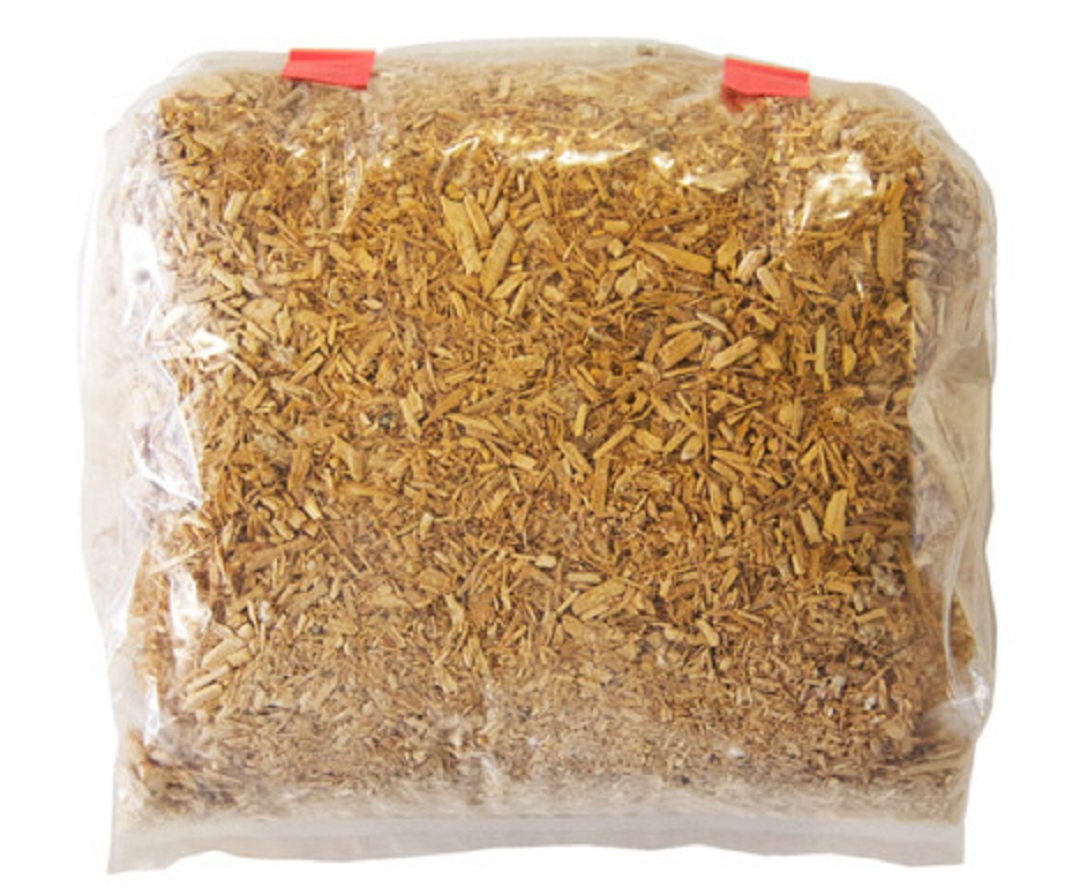
The kit comes as a small bag of Mushroom Materials, which have been dried so they don't need refrigeration. This dehydration process also means that the product can be packaged and internationally shipped.
- Open the Bag, Add water and Flour, mix it well, close the bag but let the air enter trough a filter on bag.
- wait for 5 Days : the bag become white (mycelium is growing)
- sterilize your mold, fill it with the materia, press it a little bit , cover it with plastic wrap, punch some small hole, and put it in the dark
-
Wait for 5 ot 6 Days , removeit carefully from the mold, let it dry one or two days.
-
preheat oven to ~100°C then Bake it for 30 Min Note : you can bypass the oven and let the mushroom grow outside the mycellium shape but I think that it will be more fragile
Please find Hereby the best Guide I found from ecovativedesign
### Mannequin Project
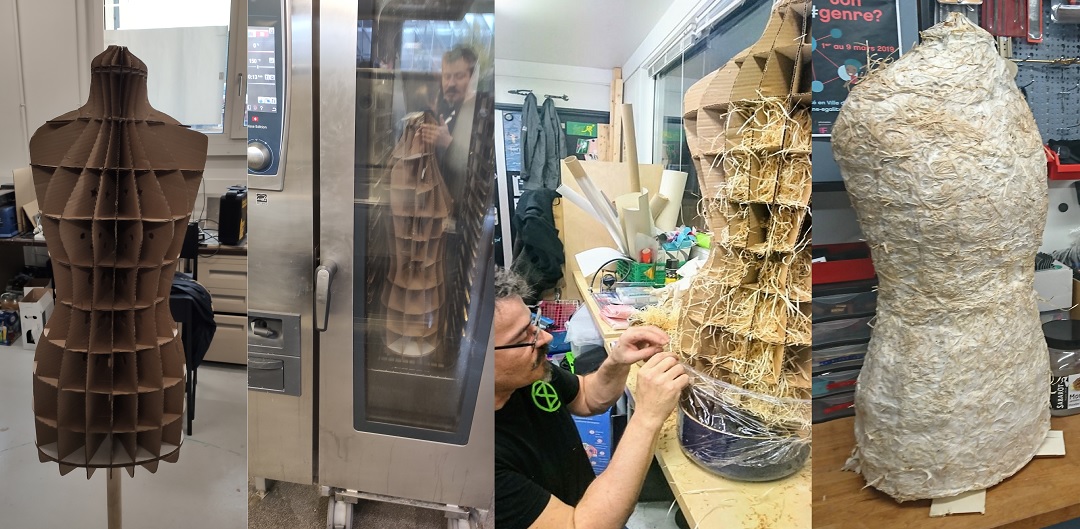
Starting from the carboard mannequin made in "2. Digital bodies" , I sterilize it in a big Oven at 150°C for 15min, then put it in a big Black Trash Bag which was also sterilized with alcohol. Then I bring it to On'lfait to fill it with straw, flour, mycelium mixed with water, starting from the bottom and surrounding as you go with food cellophane. Then I put it back in gig dark plastic bag for a week. Last picture on the right is the result after 2 weeks.
Bioplastic
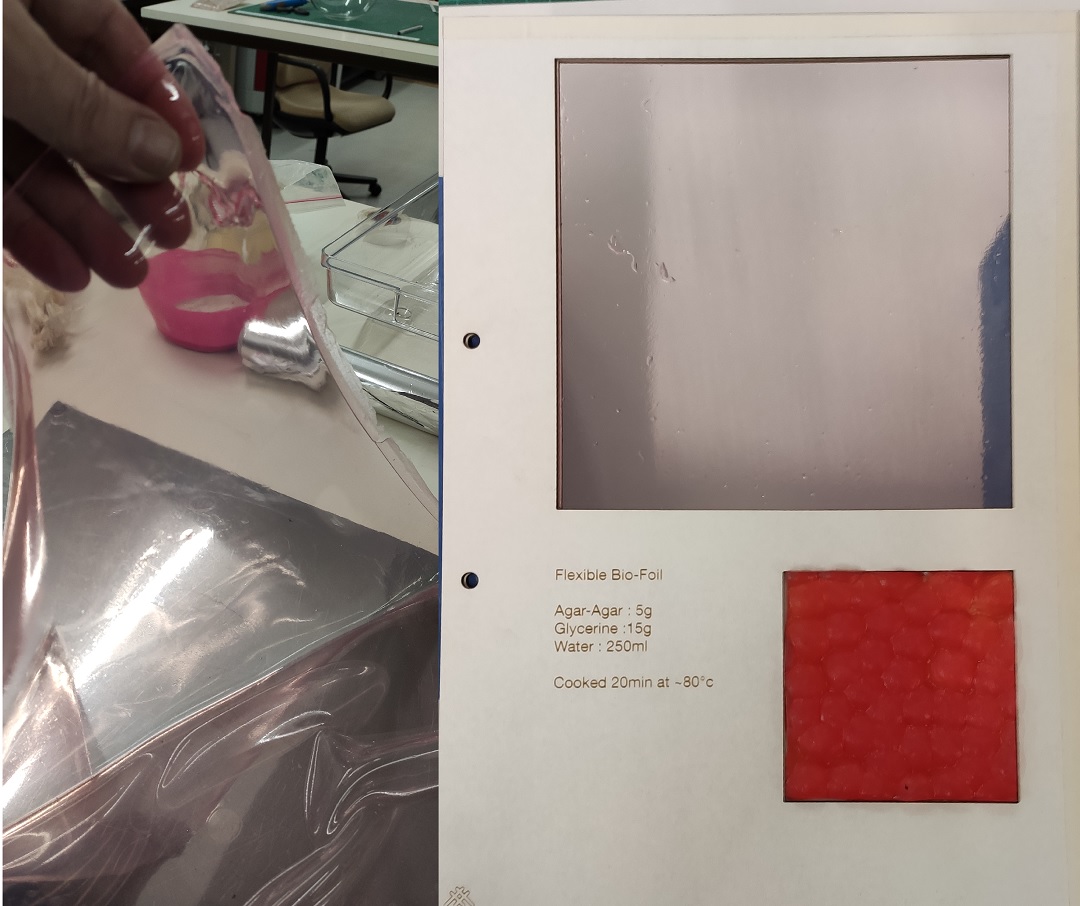
Flexible Bio-Foil
Agar-Agar : 5g Glycerine :15g Water: 250ml Food color red cooked 20min at 80°C
after 20min the drop on the thermometer start to gelified, so I spread the liquid on a metal sheet. 10 min after it's already done
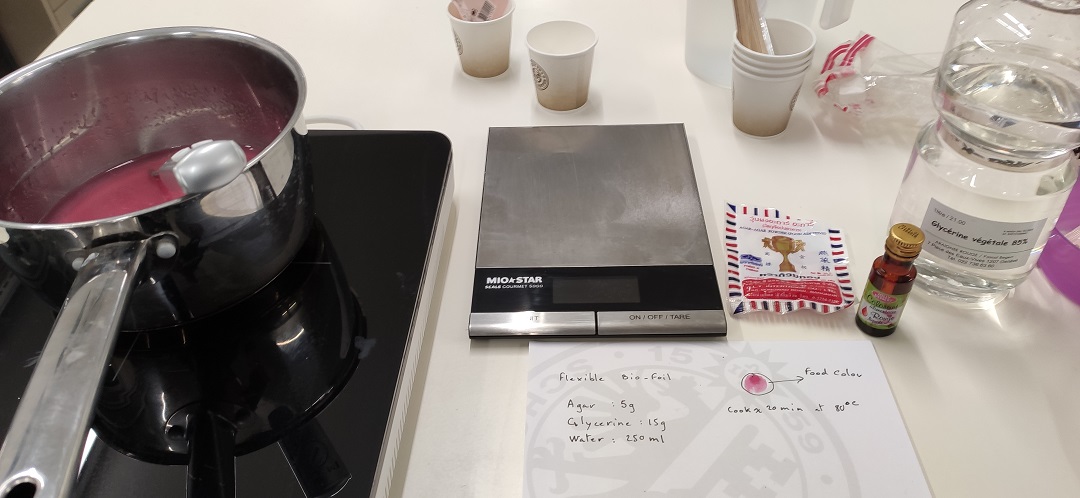
After 20 min the drop on the tip of the thermometer begins to freeze, it is time to spread it
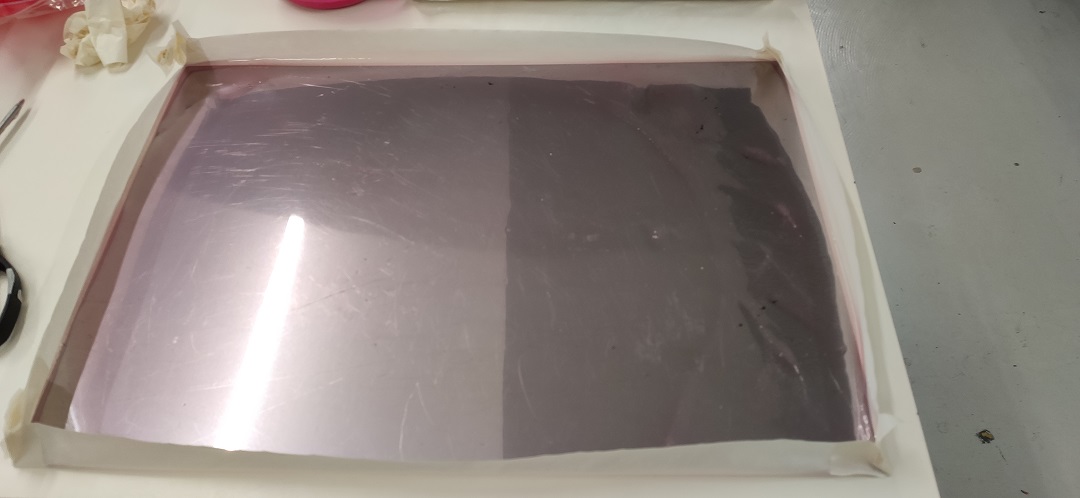
then Only 10 min later it was possible to remove it and put it in my folder.
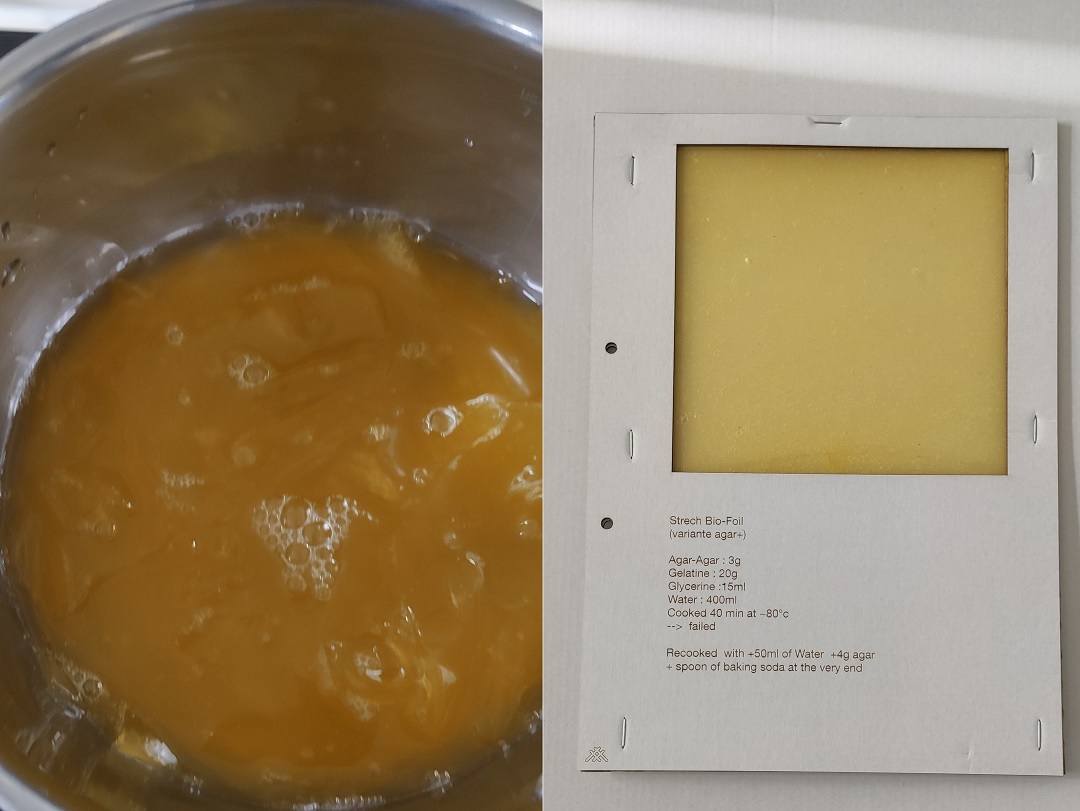
Stretch Bio Foil
Agar Agar 4g Gelatine 20g Glycerine 15ml Water 400ml food color yellow Cooked 45min at 80°C
Note: It smels bad due to the gelatine coming from animal 2nd lot of bubles at the surface, I want to get rid of them before spread on metal sheet
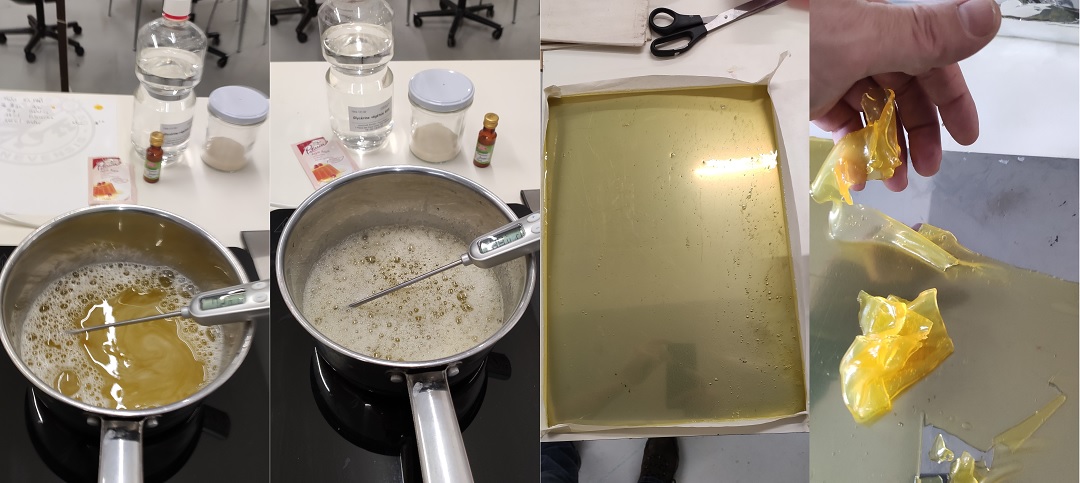
I cooked it for 45~50 min and spread it on the metal sheet but even the day after it was too fragile so i decided to re cooked it , using 50ml of water and additional 4g of Agar agar
As I do not follow the original recipe I decided to also add at the last minute a spoon of baking soda to make a lot of bubbles. interesting but when I spread the new mix on my metal sheet almost all the bubbles desappeared.
But this after 1 hour I was able to remove from the metal sheet without breaking it
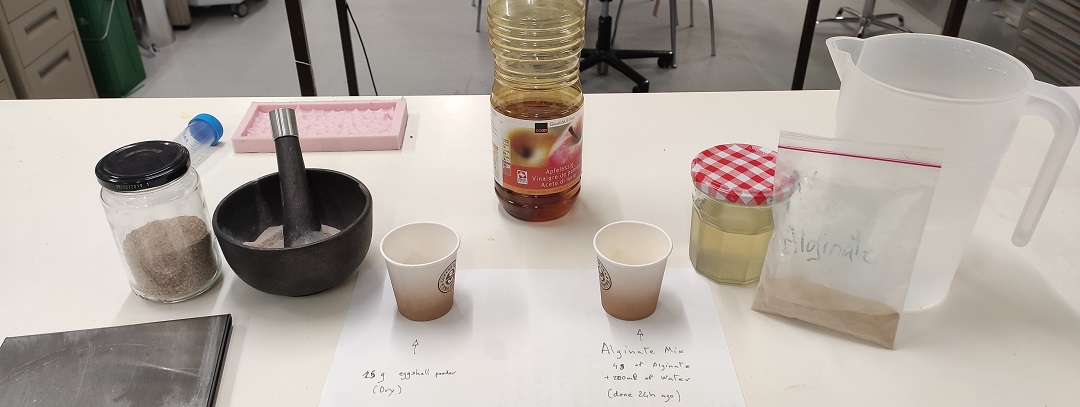
Eggshell Composite Eg01
Recipe from materiom.org/
Created By: María José Besoain, Alejandro Weiss, LABVA
Alginate 4g Vinegar 5-10ml EggShell 15g Water 200ml
-
Boil the eggshells 5 minutes to clean them and put them in oven 15min to dry them
-
The day before mix the 4 g of Alginate with the 200ml of water leave the solution for 24h
-
Mix the eggshell powder with 20g of the previous mix, stir gently they mix completely avoiding the incorporation of bubbles
Rem: in the recipe they said to mix 20g of the solution with 15g of eggshell but it was really too liquid so I almost double the quantity of egg shell to obtain like a liquid plaster. avoiding bubbles was almost impossible.
So Put the mix in a flexible plate and I used a sprayer to deposit the vinegar as a mist, and left coagulated for 15 min
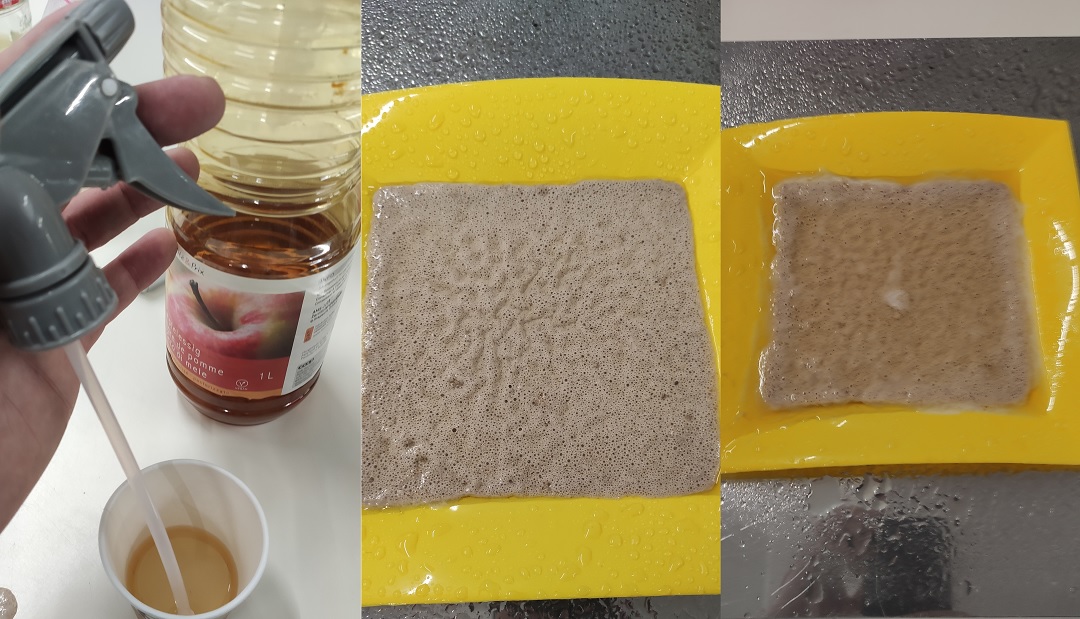
After 15min it was coagulated at the surface but not enough apparently and the mixture fell appart when I tried.
so I decided to respect exactly the recipe but instead of mold I used a flat surface.
It was not a success but I need collecte some egg to try again with a really thin powder because the part which works fine was with thin powder and the with like sand was not working so well.
Also I want to try with another acid because vinagar is just a pain about the smell.
Mushroom Leather
I impatient to receive the spores at Onl`fait to grow then to leather
hopefully beginning of February