8. Computational couture
This week is dedicated to parametric design, it could be done with opensource software like OpenScad but honestly I hate coding so it will be more practical for me to use Rhino6 and Grasshopper.
So this week I spent most of my time watching tutorial on Grasshopper Plug-in which is now included in Rhino 6.
inspiration

Nervous System is a generative design studio that works at the intersection of science, art, and technology. Designers Jessica Rosenkrantz and Jesse Louis-Rosenberg create using a novel process that employs computer simulation to generate designs and digital fabrication to realize products. Drawing inspiration from natural phenomena, they write computer programs based on processes and patterns found in nature and use those programs to create unique and affordable art, jewelry, and housewares.
Founded in 2007, Nervous System has pioneered the application of new technologies including 3D printing, webGL, and generative systems. Nervous System releases online design applications that enable customers to co-create products in an effort to make design more accessible. These tools allow for endless design variation and customization.
Here the first realisation I saw from them
Kinematics from Nervous System on Vimeo.
Don't hesitate to visit their website but also their VimeoPage
Useful links
- parametric3d.com tutorials on Rhino&Grasshopper
- Food4Rhino Plug-in for Rhino&Grasshopper
- JH jhorikawa GrasshopperHowtos + many samples + fast&slow videos
- G-Codes
- SilkWorm you can also find it on food4rhino from rhino&grasshopper_geomety to GCode
fixing textile on build plate
It was not easy to fix the textile on the *D Printer BuildPlate, but I found a solution using hair Spray and the hot press
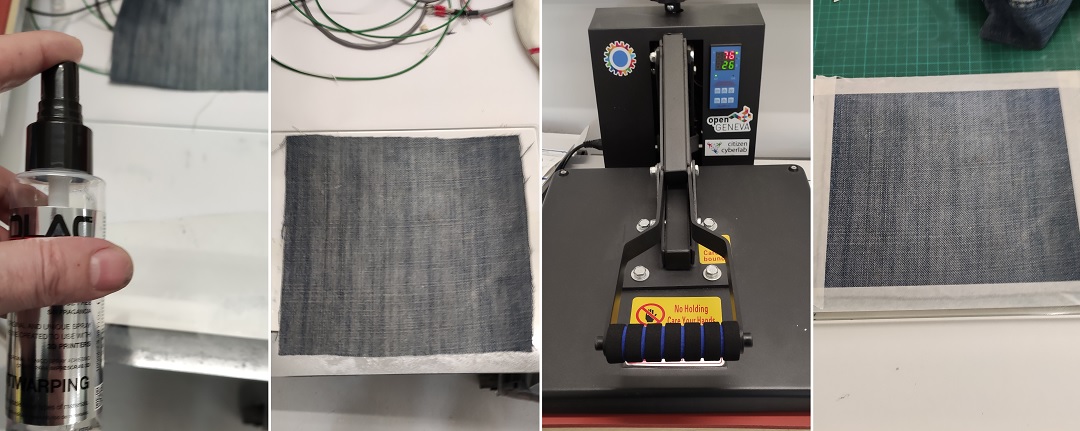
- Using the hotpress I Iron the textile
- I spread hairspray on the class
- put the textile onthe class and press it
Test Print and setup buildPlate
I create a simple shape under Rhino to be able to set the level of the build plate during the 1st print to adjust.
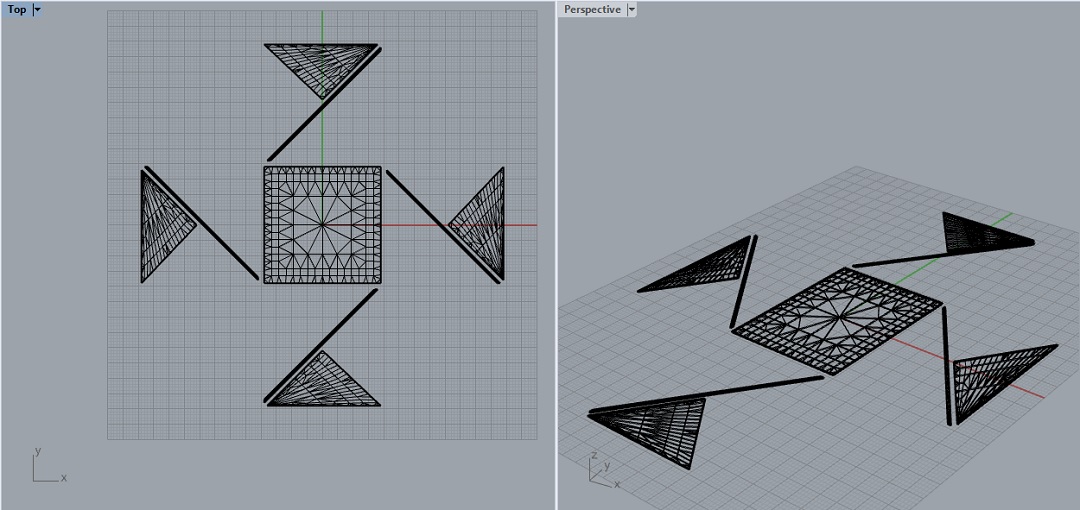
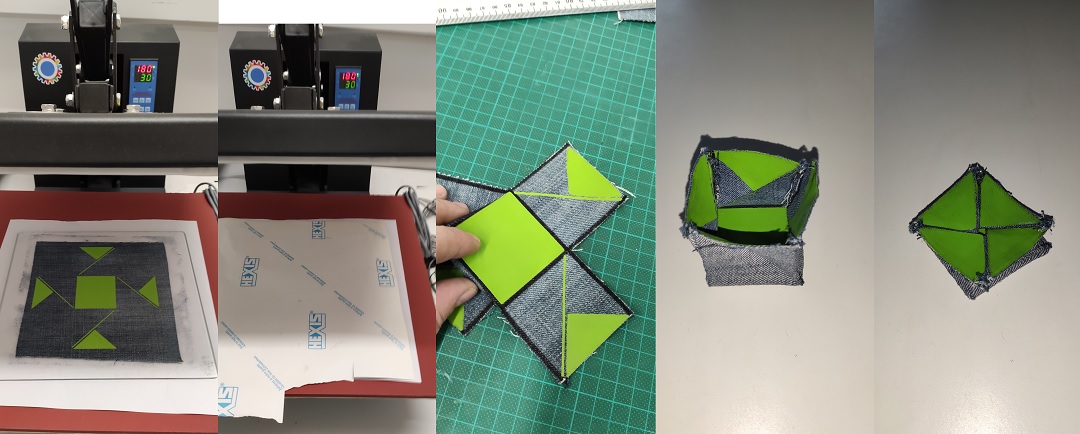
For the fun I tried to print a foldable wallet, I exproted it into an .stl file and onpen it into the slicer problam Cura
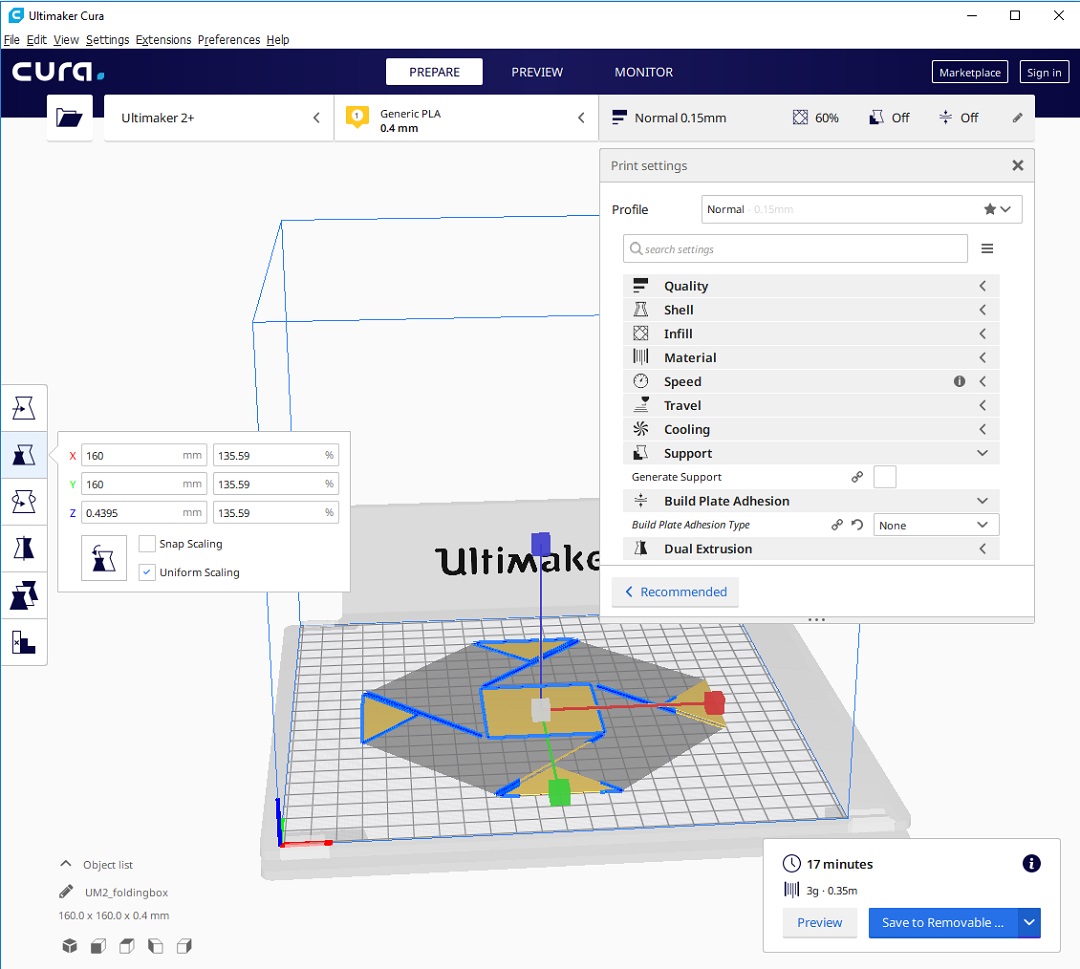
then I saved the gcode on the CD Card and setup the buildplate
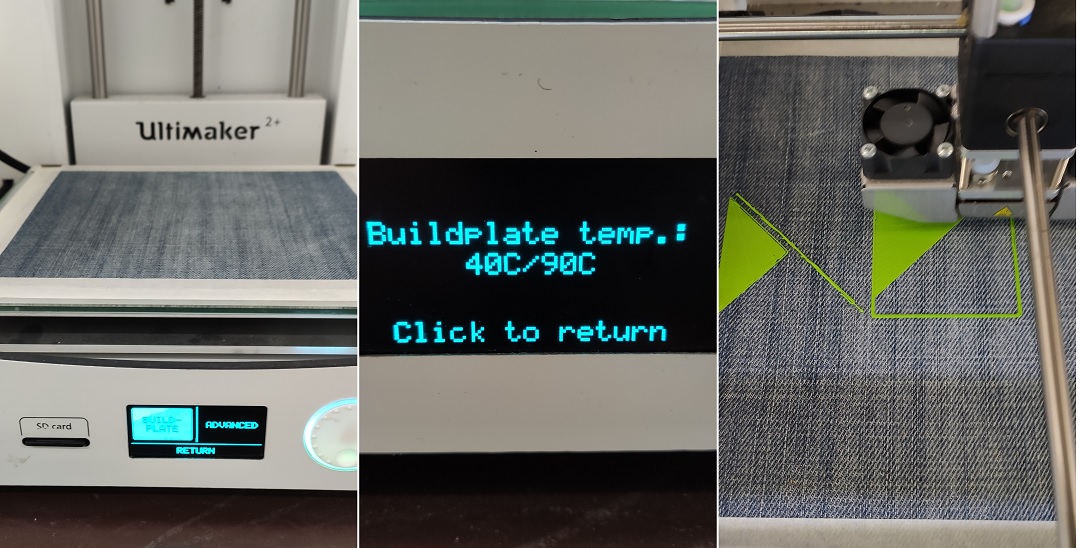
I followed the instruction for the build plate but without any pressure on the textile, then I will adjust during the printing. I also increased the buildPlate Temp from 60° to 90° to ensure better adhesion.
During the print I have to level up the buildplate a little bit on the left but mainly on the Right as the first layer was not merged/sticked with the coton.
The design was made with only 2 layer to print which will taxe less then 10 min to print, allowing many try.
The print has failed completly on the right as the head stick together the whole PLA coming without sticking it on the coton.
At the second try it was working fine
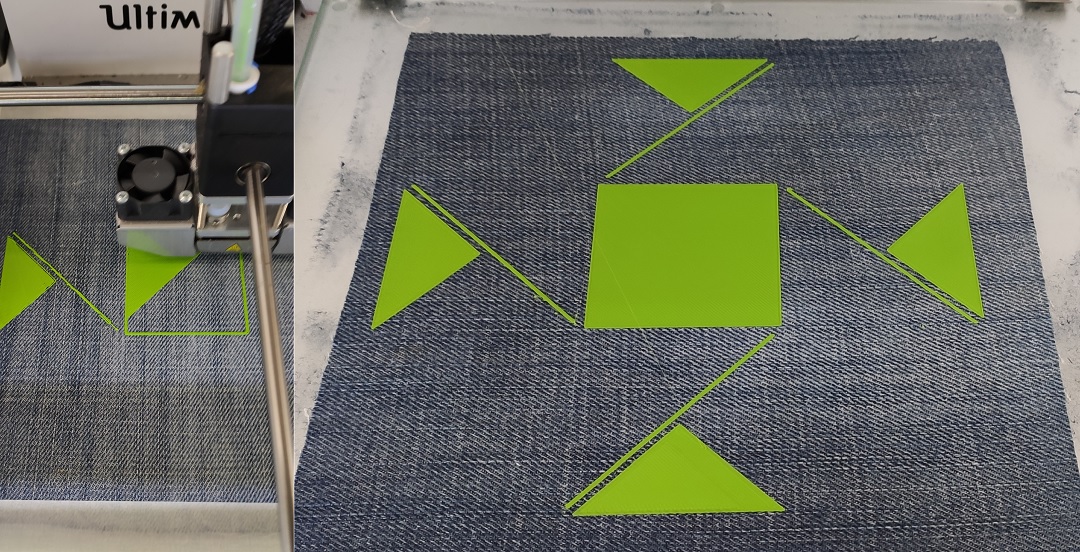
but to ensure a full adhesion and because it was only 2 layers i decided to merge it using the hotPress. Then I cut and sew the box the plastic helping for folding the shape
Now try different shape
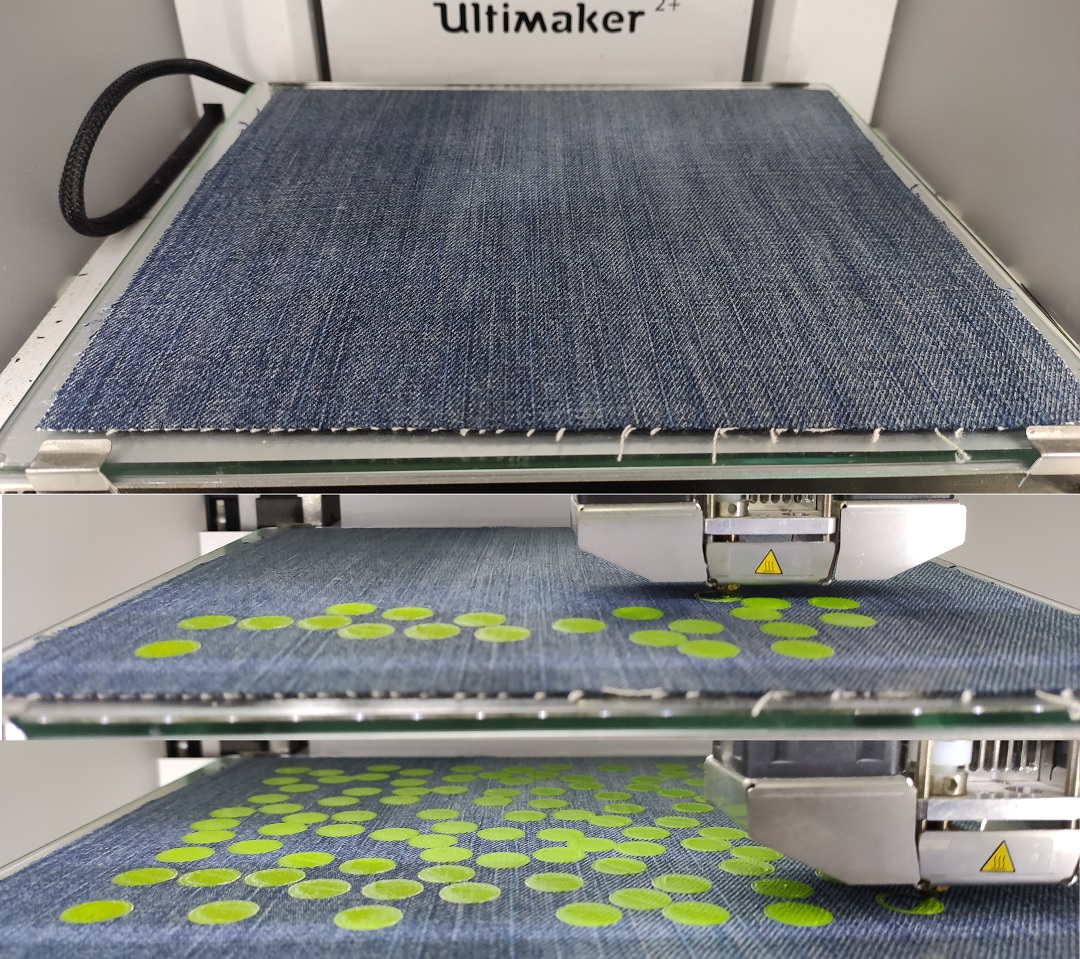
Bubbles on coton
Using RhinoGrasshopper I design a square pieces where I put randomly 100 hemispheres
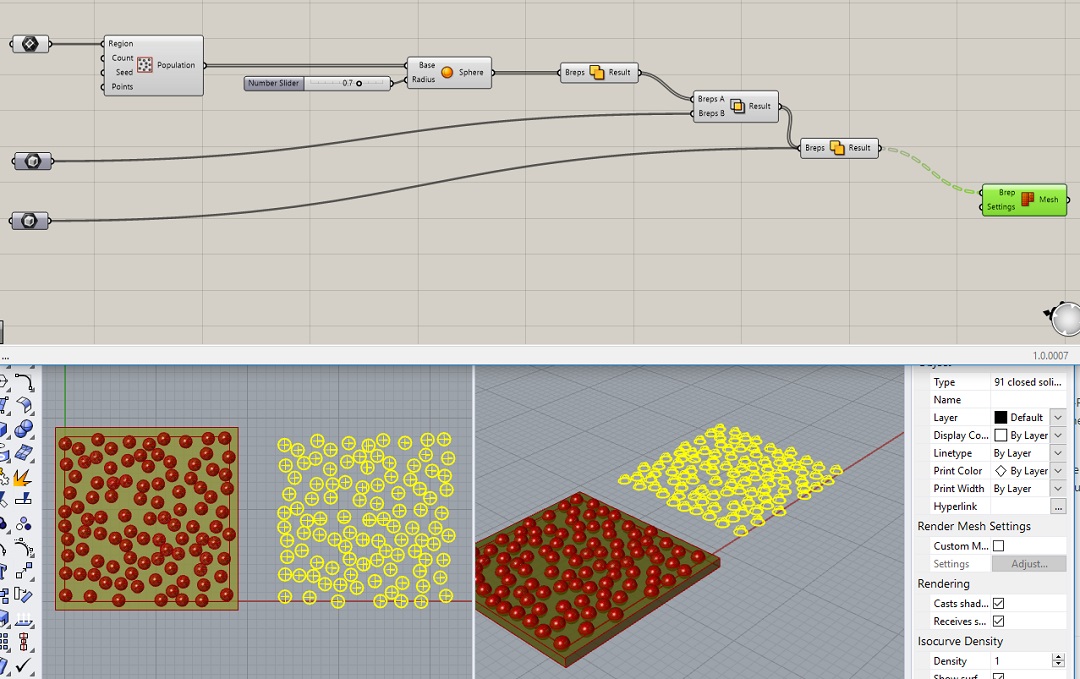
Then using right clic "Bake" on the last function I selected the result and exported it as an .stl File which opened with Cura to be able to set up the 3D print:
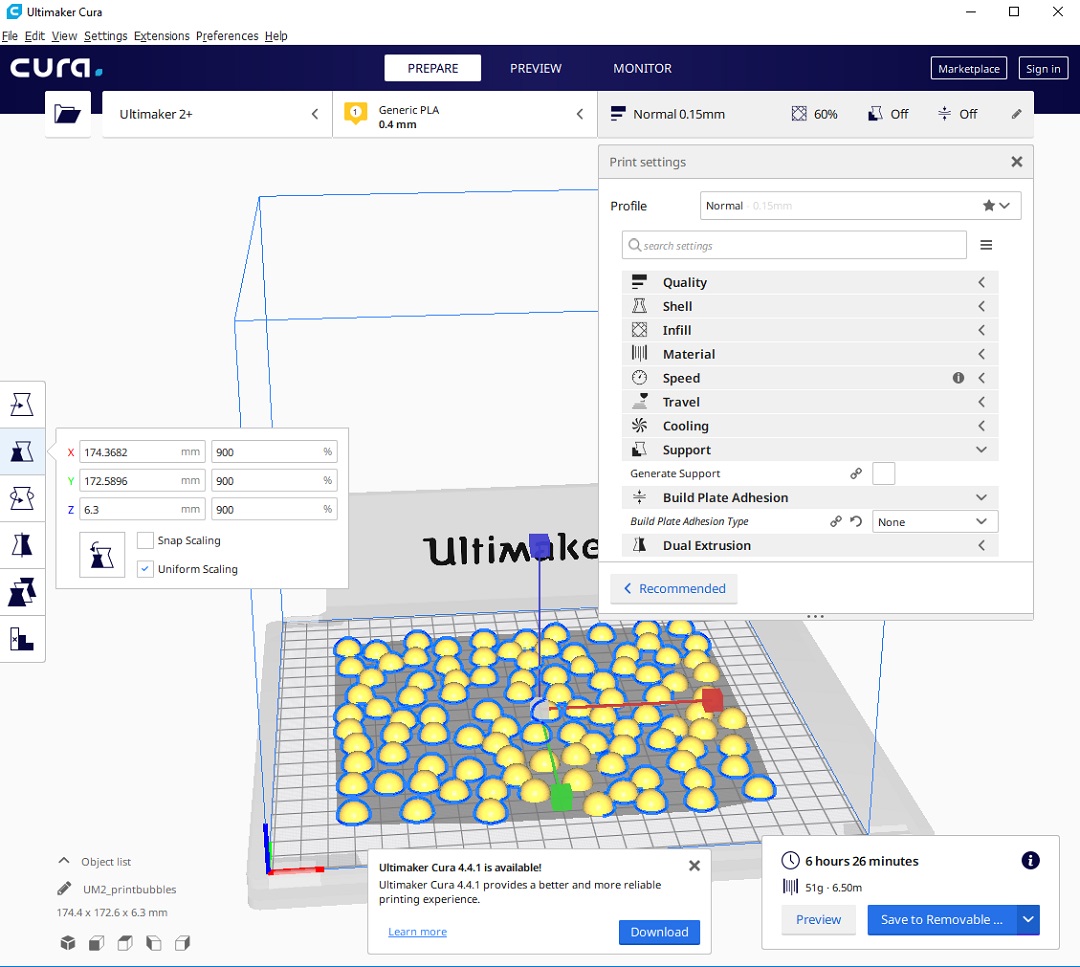
Using the previous technic I fixed a new sheet of coton on the buildplate, start the print and tune it to increase the buildplate temp to 90°C then I was watching the 1st layer print to ensure about the adhesion:
Result 6 hours later :
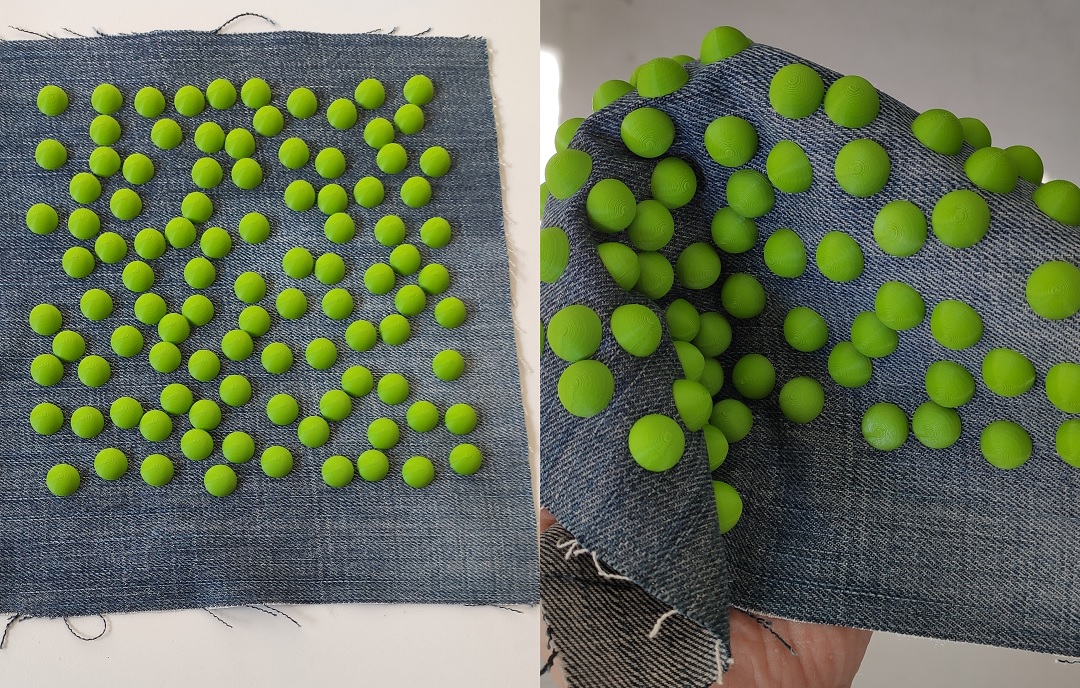
I Like it
Binding structure
The idea is to print lines on textile which allow bending in one direction but not perpendicular